

Canon Pro900 Mark II Service Manual
CONTINUOUS INK SUPPLY SYSTEM INSTALLATION INSTRUCTION FOR
Canon Pro9000 / Mark II printer
Caution:
Always keep the ink reservoirs on the same level as the printer.
To ensure that the ink does not fill the air chamber when refilling your unit, it is imperative that the air filter is
replaced with the travel plug and that both the travel plug and refill plug are not removed at the same time.
Do not remove your old cartridge until you have the CIS system primed and ready to install (to prevent the drying of
heads). In addition, make sure you are getting perfect nozzle checks before installing the CIS system. The CIS system
won’t be able to work properly if the nozzles are previously clogged.
Most people get a perfect nozzle check the first time after installing the continuous Ink Supply system; others may need
to run two or three cleaning cycles and let the printer sit for a while before they get the perfect results.
Installation Procedures
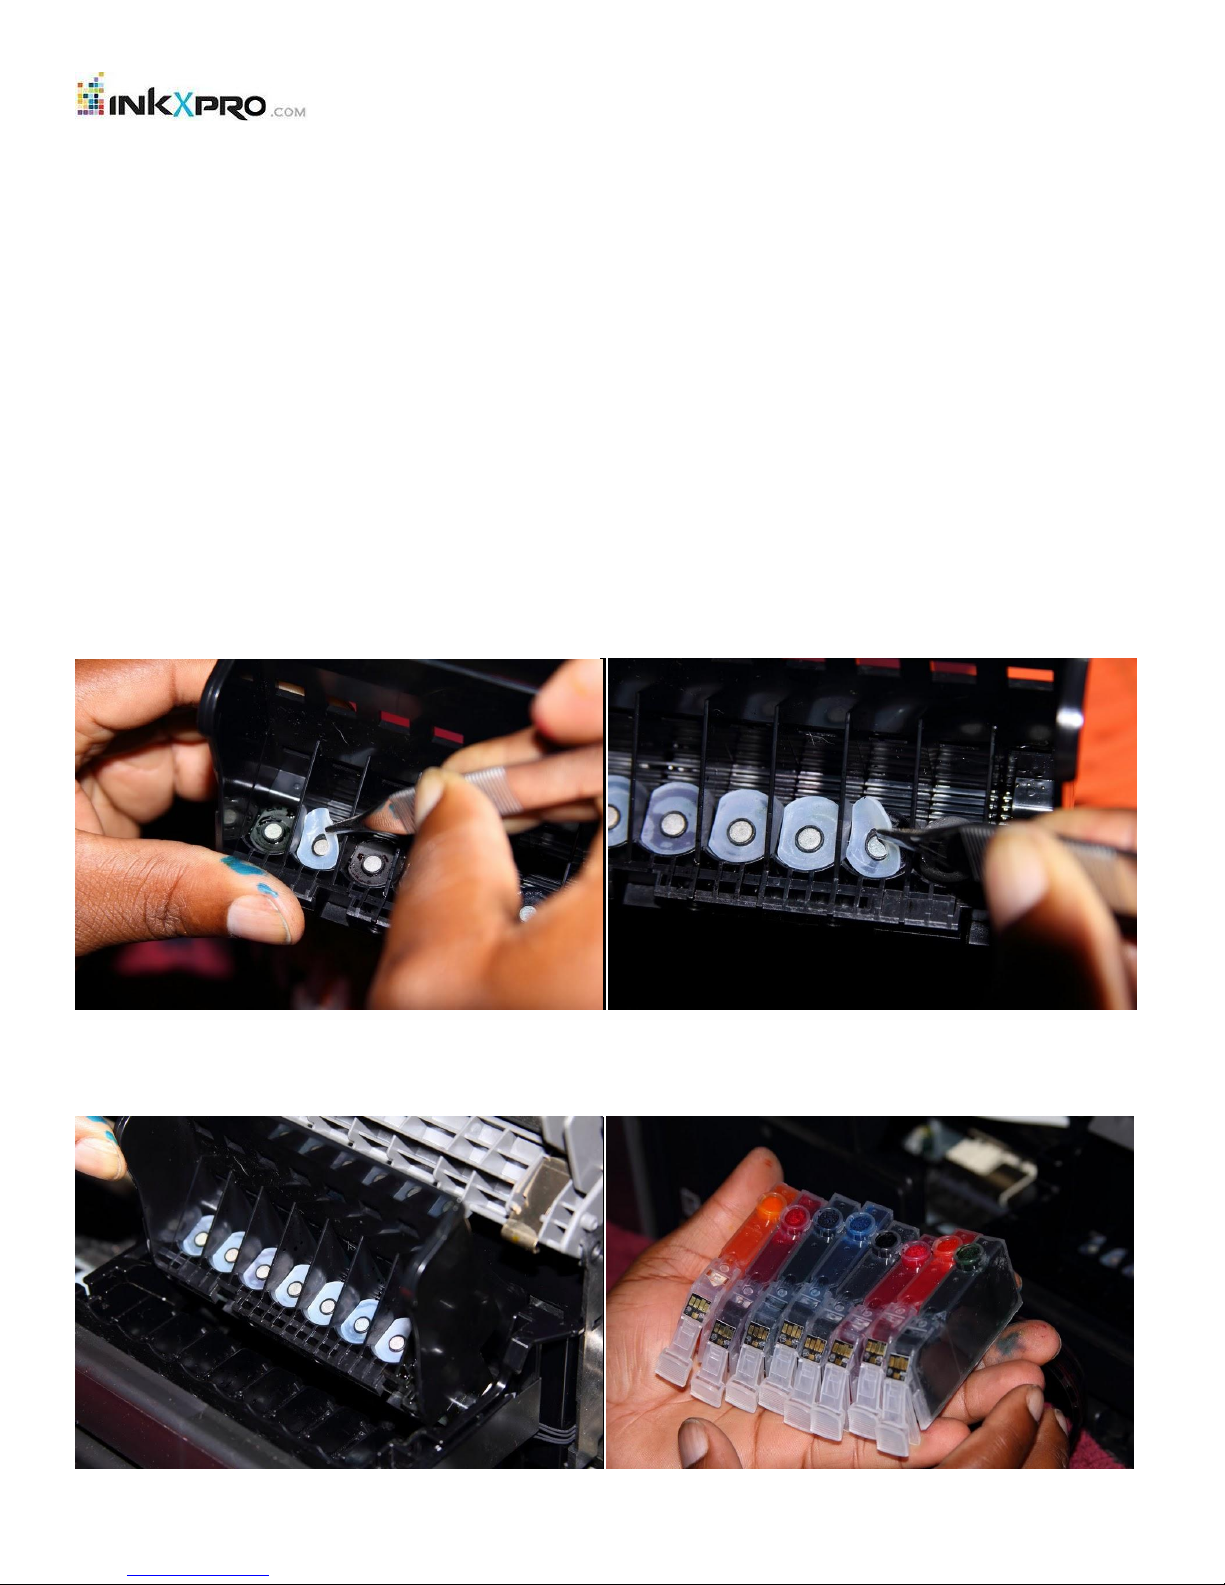
1. Switch the printer off, open the lid, the take out the print head.
2. Install the silicon seals to the printer head; this will close the air gap between the cartridge and print head.
3. Put the print head back to printer.
4. Take the cartridges, keeping the cartridges higher than the ink tank, and then remove all the orange caps from the
cartridges. (Get some paper towel ready in case of leaking)
Place down each cartridge according to the color. Make sure every cartridge in the correct position by press down the
cartridge until you hear the “click” sound for each cartridge.
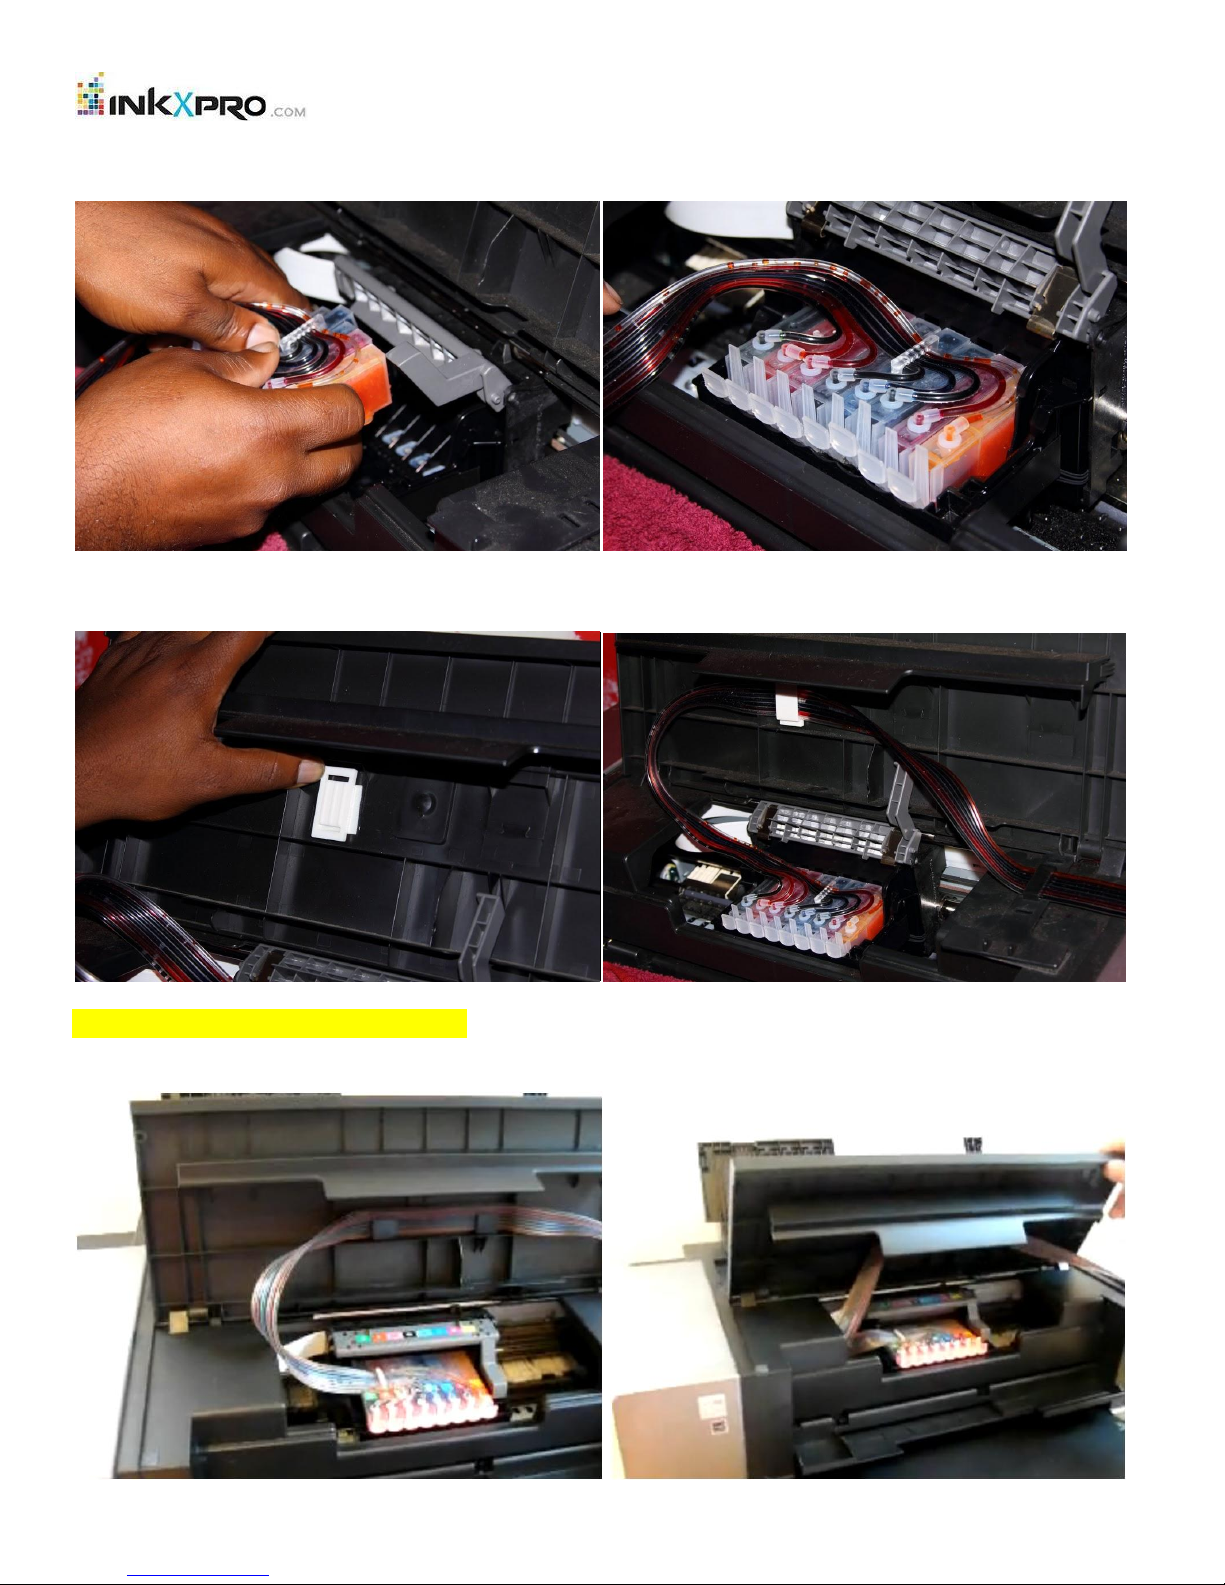
You can attach one clip in the center of the link, then arrange the tube, please make sure the tubes are not twisted, you
need to leave the lid open after you install the ciss
Here is another way to setup the tubes.
Attach 2 clips on the center of the printer lid and attach the ink tubes on it, please make sure the tubes are not twisted.
The tubes should be placed underneath the printer plastic cover
 Loading...