

Page 1
A basic guide to the
Océ Variolink
3
2
1
7
6
5 4
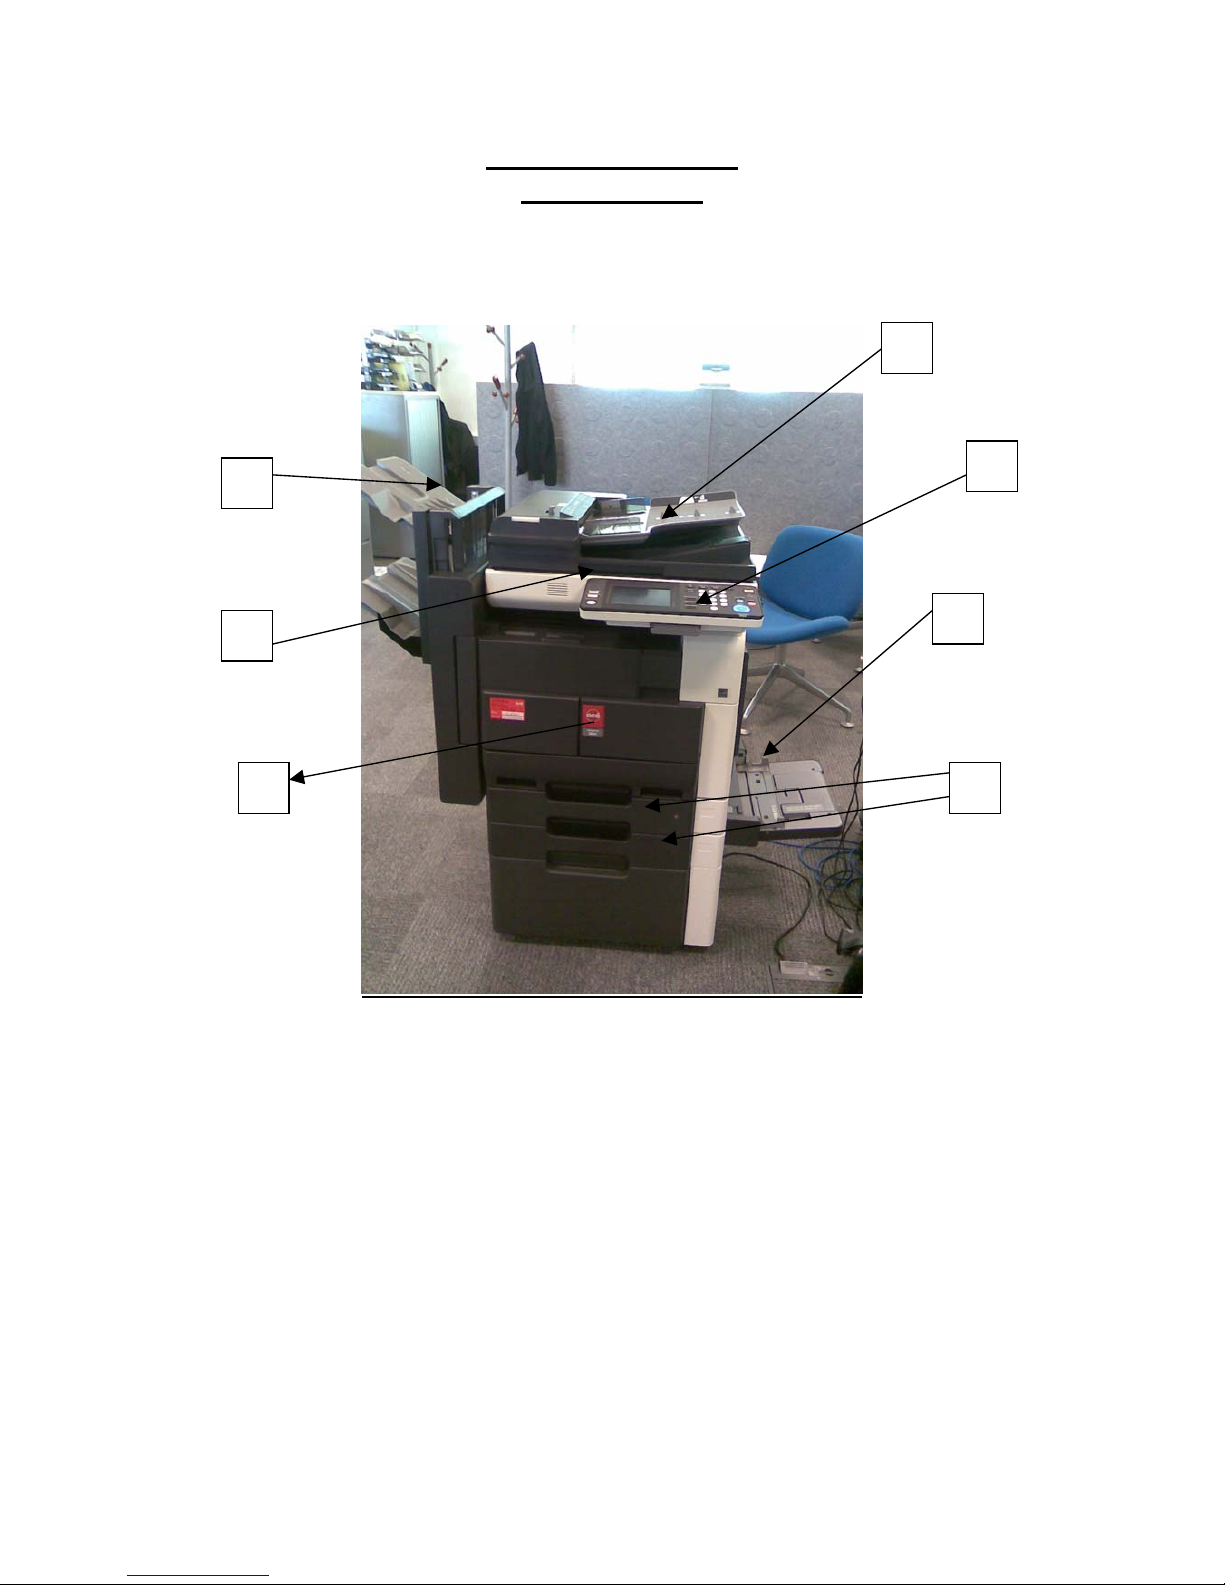
1 – Automatic Document Feeder (ADF)
2 – Controller Panel
3 – Bypass Tray
4 – Paper Trays
5 – Front Panel (Toner entry)
6 – Top Lid Handle
7 – Finishing Trays
Page 2

Control Panel Explained
2
1
1 – Reset button
2 – Copying Functions screen
7
6
5
4
3
3 – Stop button
4 – Start button
5 – Cancel button
6 – Number Keypad
7 – Finisher trays
1 – Pressing the reset button will cancel any functions selected and
revert the machine back to its default settings.
2 – The Copy screen selects the screen, displaying all the
photocopying functions.
3 – Pressing the Stop button will stop a started job.
4 – Pressing start will start a copy job.
5 – The cancel button clears any number or screen keypad entry.
6 – The keypad is used to enter the number of copies required.
7 – The Fax/Scan screen selects the screen displaying scanning and
faxing options (if configured).
Page 3
Main Screen Explained
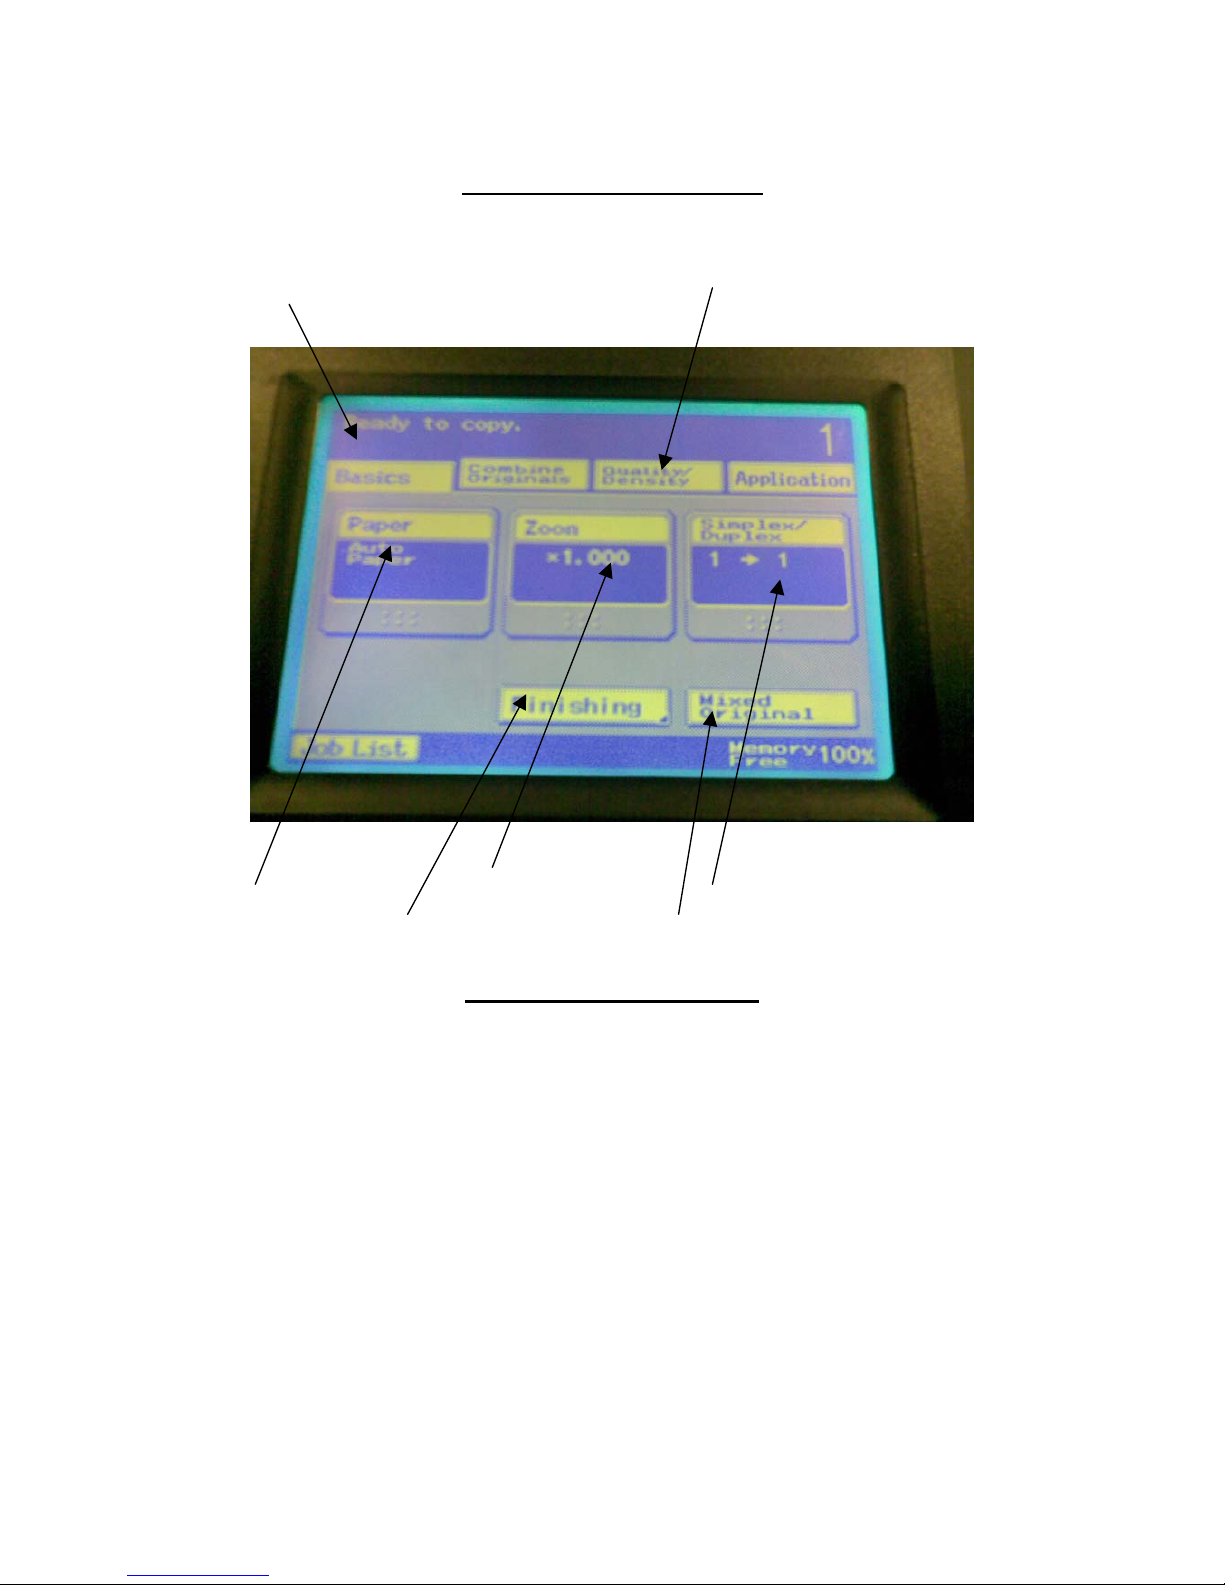
Basic Screen Quality Densit
y
Paper screen Zoom Screen Simplex / Duplex Screen
Finishing Screen Mixed Original button
Mixed Original Explained
The mixed Original button allows a user to put different paper sizes
together in the document feeder (e.g. A4 and A3). Normally the
sensors on the Automatic Document Feeder would only recognise the
largest paper size and assume that each sheet is the same size.
By selecting the Mixed Original button, it will search for different
sizes and then select the correct paper to copy the document on. E.g.
the machine will know to select A4 from the tray with A4 paper in it,
and A3 from the tray with A3 in it.
Page 4
Paper Screen
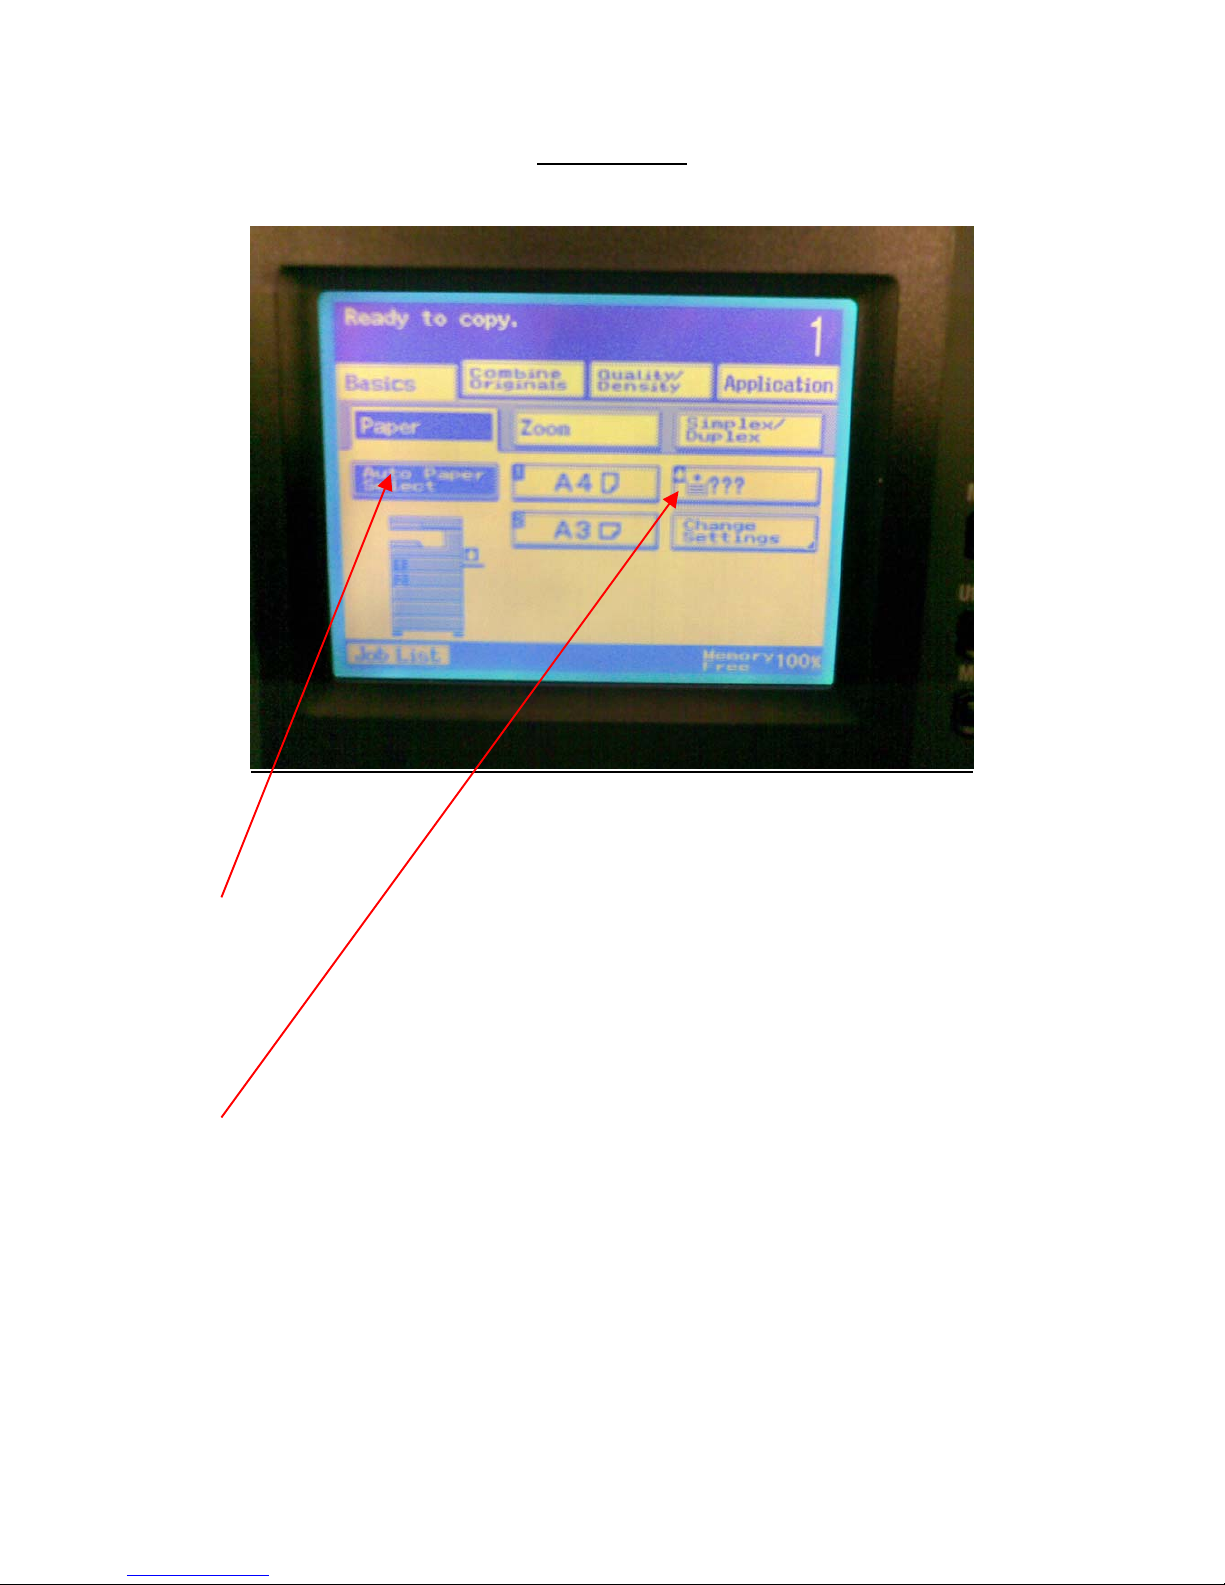
The paper screen allows you to view what paper sizes are set in each
tray e.g. A4, A3.
The machine is normally set to Auto Paper Select. This means that if
you put an A4 (e.g.) onto the glass or the document feeder, the
matching will automatically select A4 from the matching paper size.
If you would like to select a specific tray e.g. Tray 1, select the tray in
this screen.
If you would like to select the Bypass tray, select the tray with the
small hand on the top left corner.
Page 5
Zoom screen explained
1
4
5
3
2
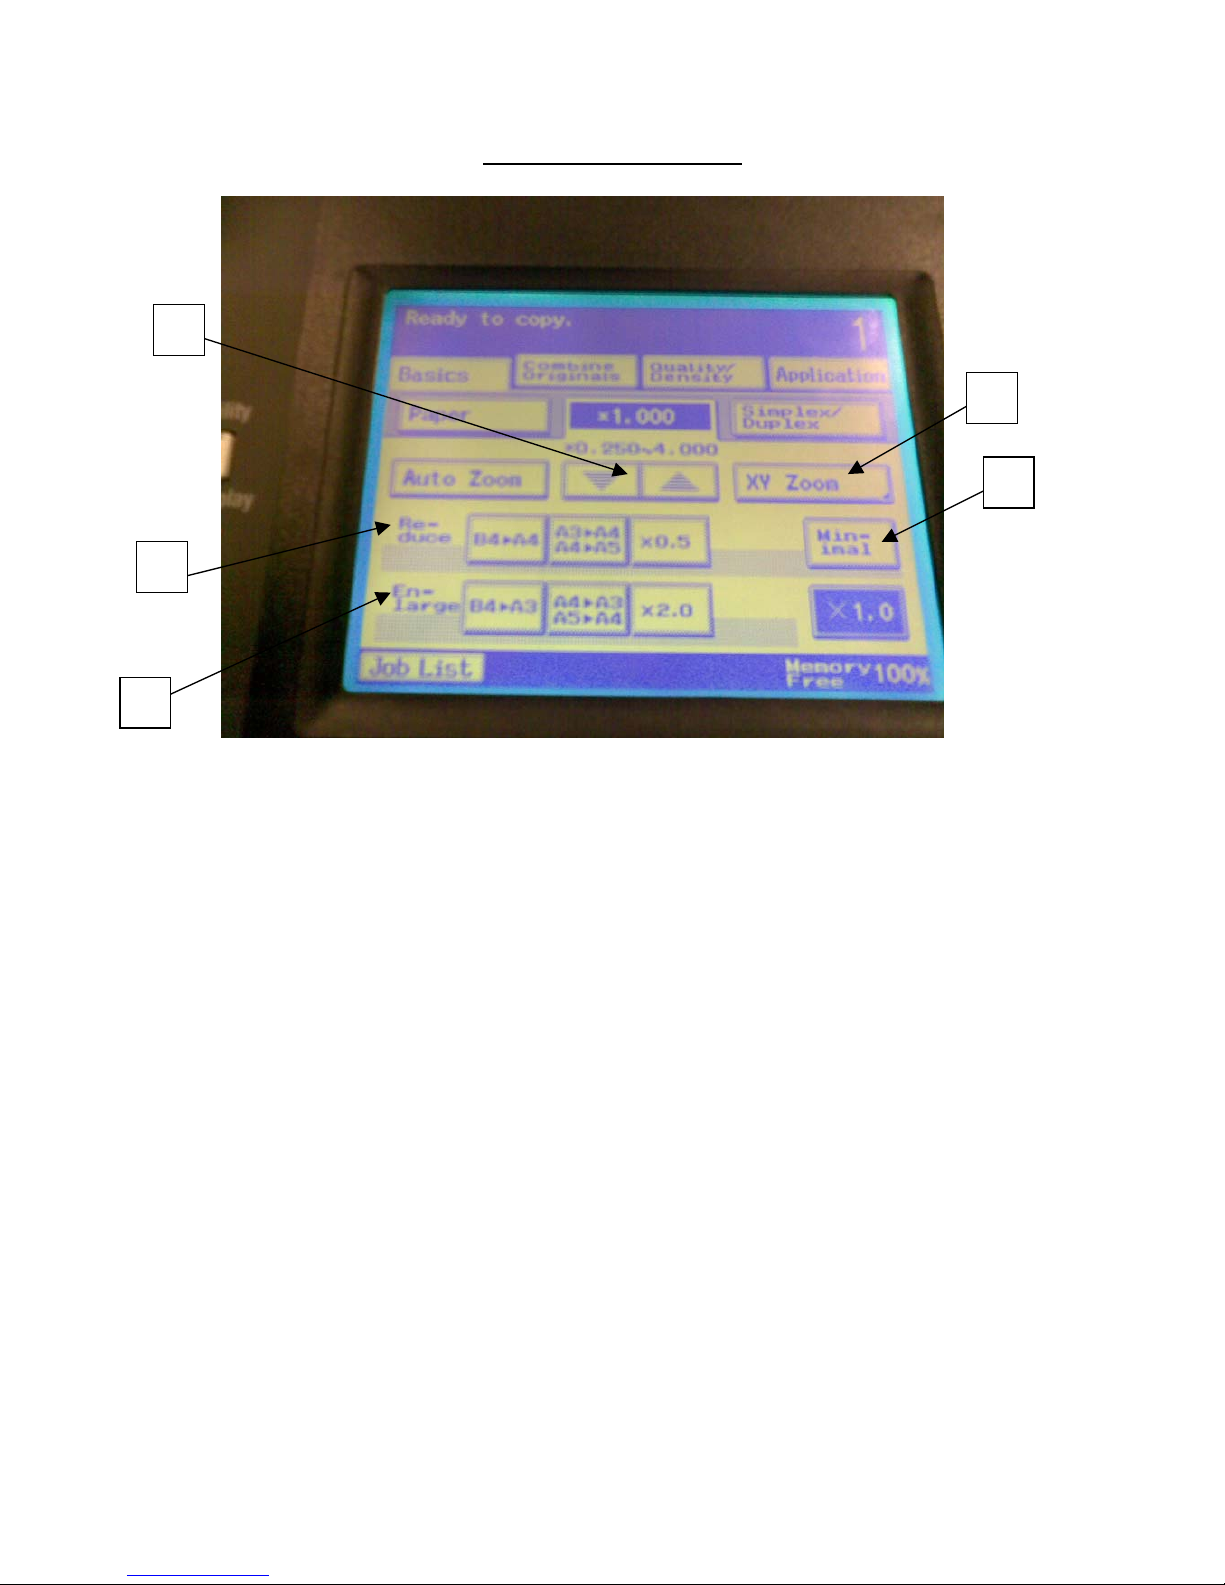
1 – Up and Down arrows
2 – Reduction conversions
3 – Enlargement conversions
4 – X Y Zoom
5 – Minimal
1 – These keys are used to enter a specific percentage to enlarge or
reduce the document in size.
2 & 3– Reduction / Enlargement conversions are a shortcut from
changing the original size to another standard size e.g. A4 to enlarge
to A3 (A4>A3). Simply put your original into the document feeder /
onto the glass. The machine will automatically detect the size, then
go into the Zoon screen and select the conversion required.
4 – XY Zoom allows you to change the proportions of your document
by entering a width and a length percentage.
5 – Minimal will simply reduce your document to 93% giving a wider
border.
Page 6
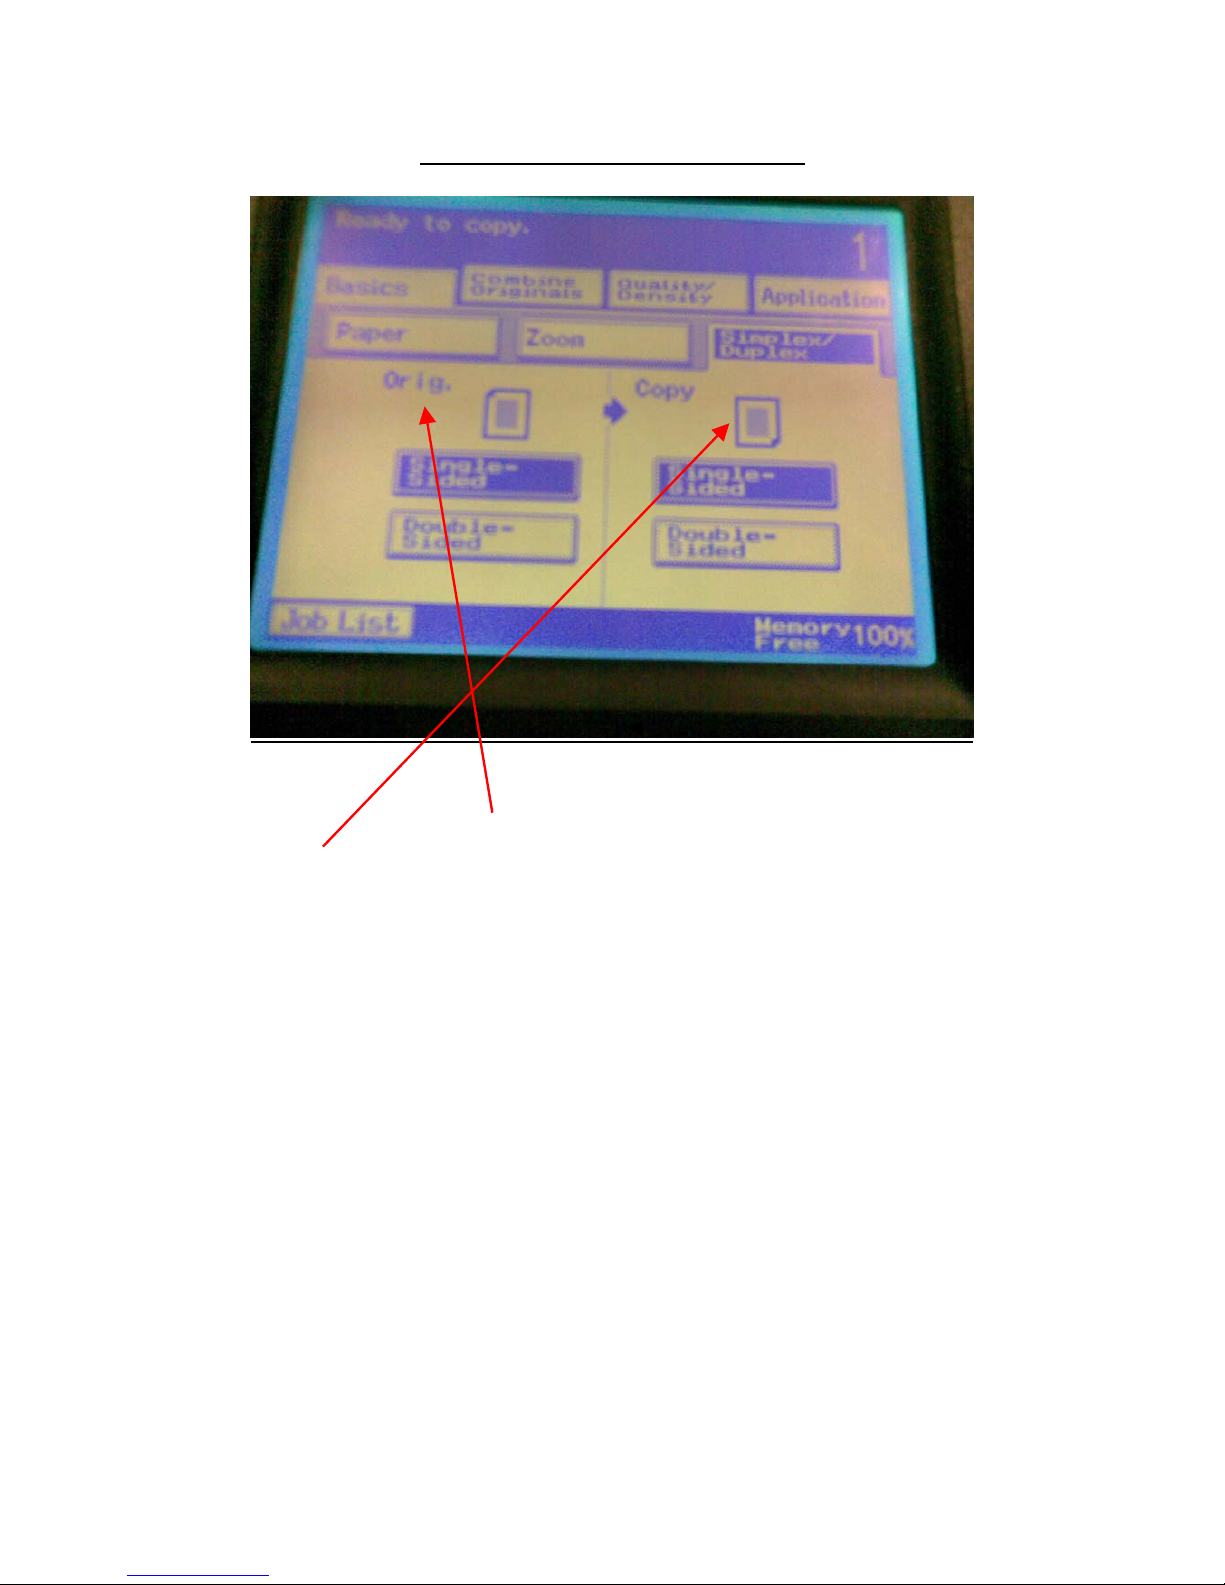
Simplex / Duplex screen explained
To create, split, or simply copy a double sided document just select
the layout of your original, then select the layout of how you’d like
your copy to come out.
Single-sided means that your original document only has one sided printed onto it.
Double-sided means that your original has both sides of the paper have been printed on.
Page 7
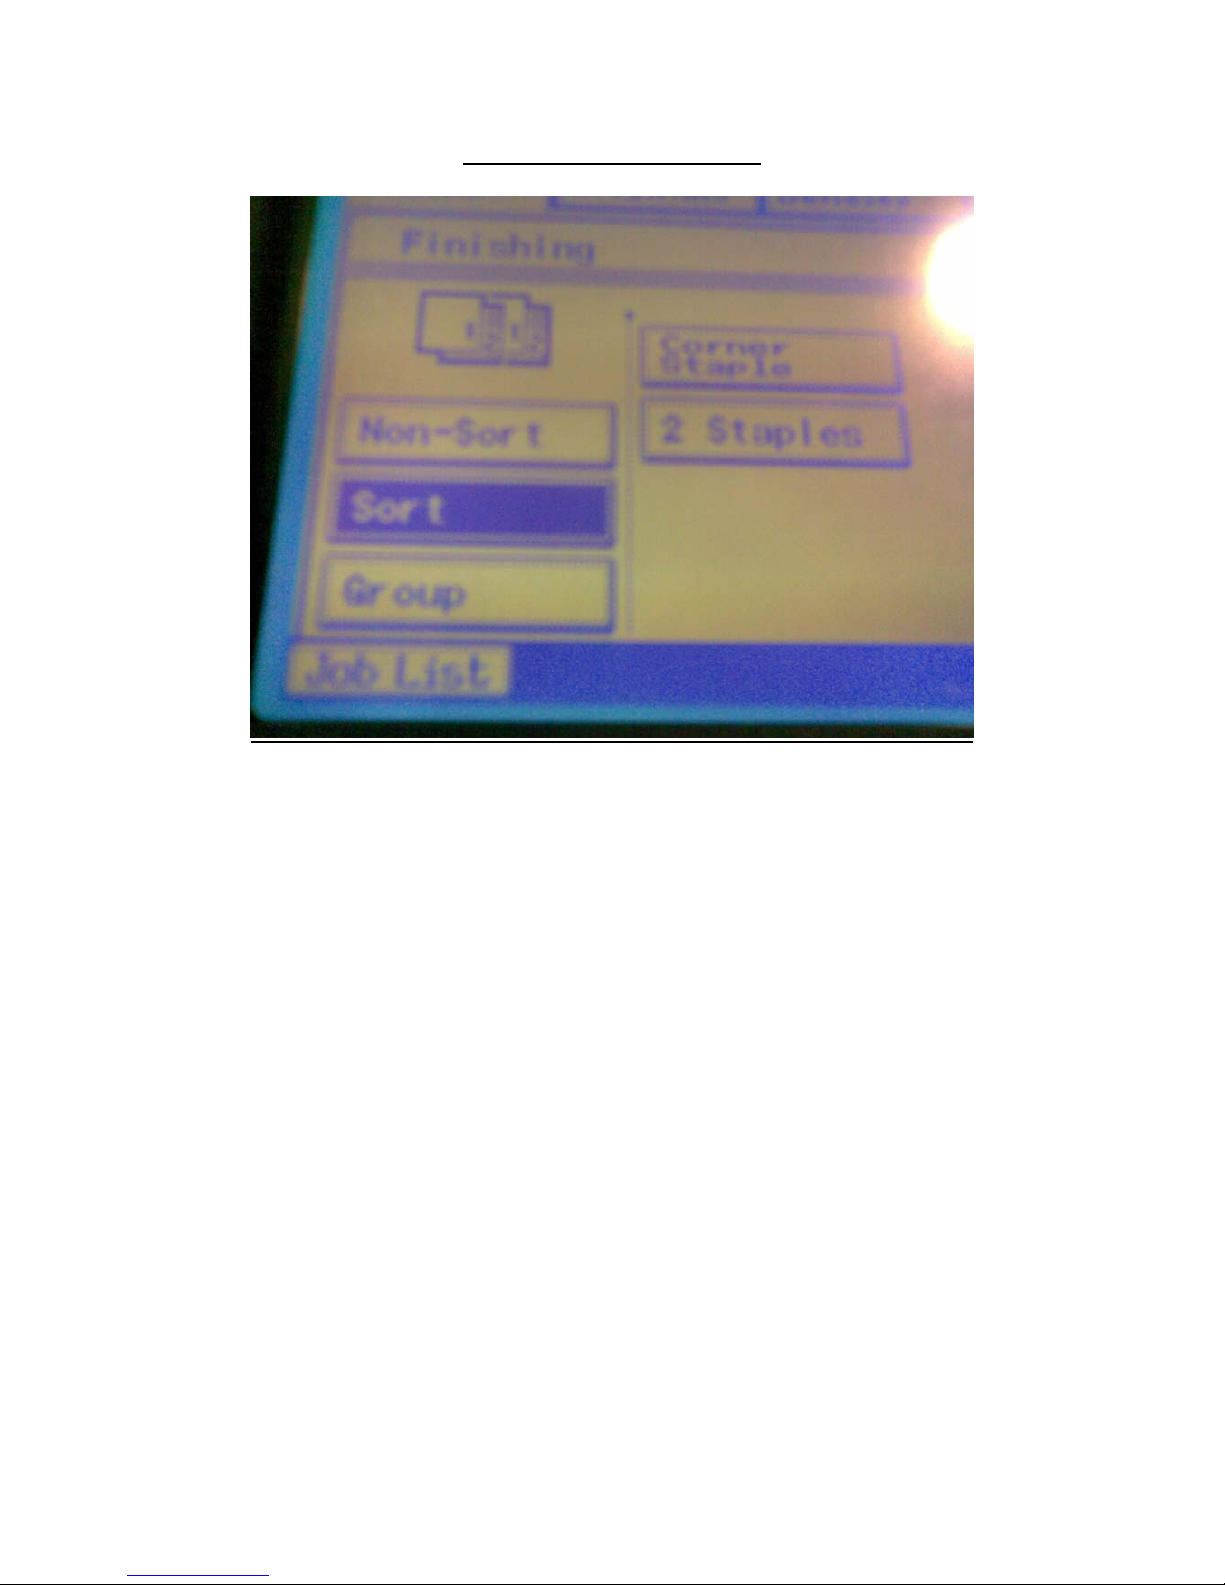
Finishing screen explained
Sort will sort your document by its multiples e.g. if 10 sets of a 5 page
document were copied, the Sort function would output pages
1-10 five times.
Group will group the pages in your document, e.g. if 10 sets of a 5
page document were copied, the Group function would output page 1
five times, page 2 five times and so on.
Page 8
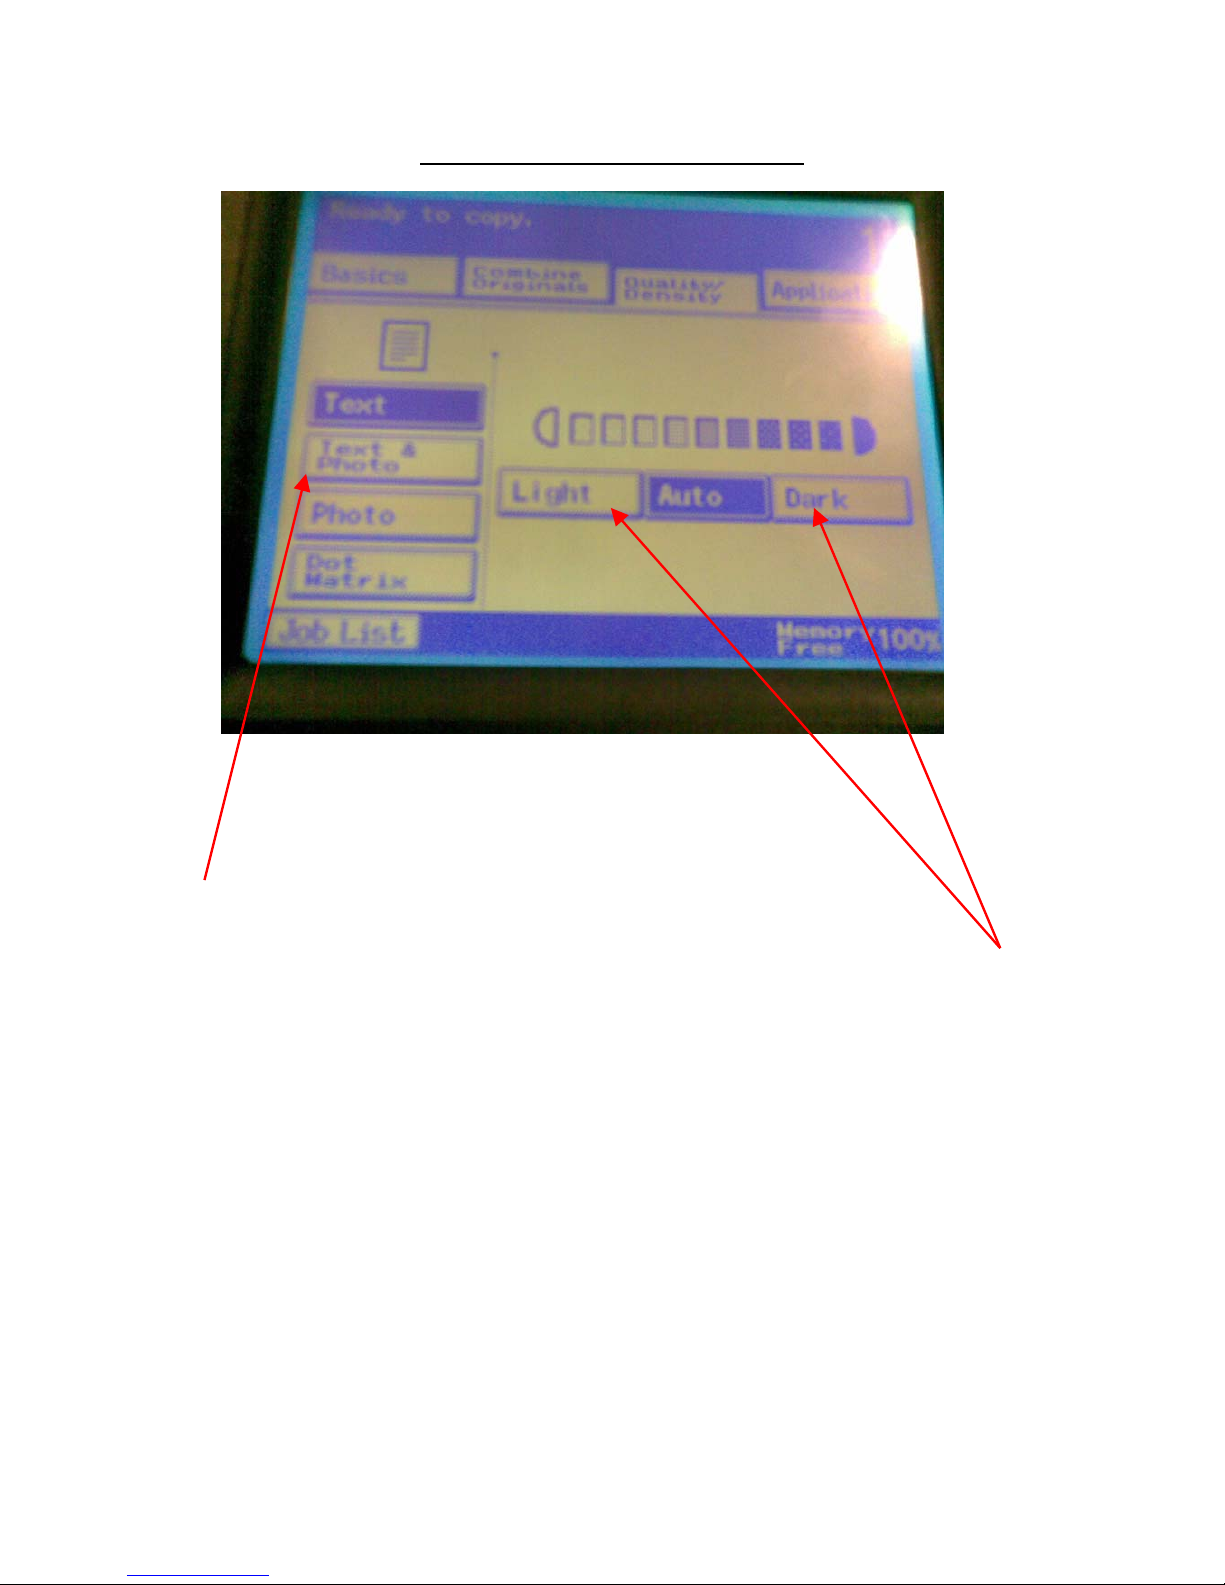
Quality / Density screen explained
There are 2 elements to the Quality / Density screen.
The left side allows the user to tell the machine what type of
document is being copied, e.g. Text, Text & Photo, Photo and Dox
Matrix.
The right side allows the user to increase the lightness and darkness
of the document. This can be done by pressing the relevant button.
 Loading...