

Canon imagePRESS C700, imagePRESS Server G100 Update Manual
imagePRESS C700 &
imagePRESS Server G100
January 2017 Update Guide
January 17, 2017

Performing the January 2017 FedEx Office C700 Update
Please review this entire document before you go onsite.
Important Notes:
Prior to installing the New Clone Image and Paper Catalog upgrade the imagePRESS
C700 Firmware to V36.01.02 by performing the following steps.
1) Download the Firmware using the link below
http://downloads.canon.com/bisg2016/syssoft/USB_iPRC800_iPRC700_iPRC60_v36.01.02.zip
2) Extract the contents of the file and copy the entire iPRC800 Directory to the root of
a USB Drive
3) Follow the instructions in the Service Manual to upgrade the Firmware of the
imagePRESS C700
The paper catalog in this document (FXO_C700_PaperCatalog_11_14_2016.zip)
can only be used with this clone image. This clone image uses new color output
profiles and the paper catalog has been modified for the use of these output
profiles. Do not use this catalog with any other clone images.
Before you begin, please make sure you have the following items:
USB Drive (Minimum 8 GB) – not provided
Fiery USB Setup tool for System Software
(FieryUSBSetupTool_v2.0.21.zip) – Available from support.cusa.canon.com -
the FXO Portal
Fiery Clone Tool v2.3 for FXO
(FCTe-2.3.iso.zip) – Available from support.cusa.canon.com - the FXO Portal
FXO G100 Clone Image
(Canon_Bath_L30B_201701041753.zip) - provided
Updated paper catalog
(FXO_C700_PaperCatalog_11_14_2016.z
ip) - provided
Print a Fiery Configuration page as you will need to reconfigure some of
the settings when have completed the new clone image
**It is strongly recommended that you prepare the USB drive before going on site
to do the installation.
**After the installation has been completed please make sure that the Fiery has
the correct Subnet mask and DNS addresses as indicated on page 14 of this
document. These addresses may be new and not appear on the original
configuration page.
2 imagePRESS C700 & imagePRESS Server G100 January 2017 Update Guide

**After all processes outlined in this document have been completed; a COM Test
must be performed to ensure the engine is communicating with the UGW.
January 17, 2017
Unregister all Custom Media from Auto Adjust Gradation and
Auto Correct Color Tone.
Note: This process is done at the C700
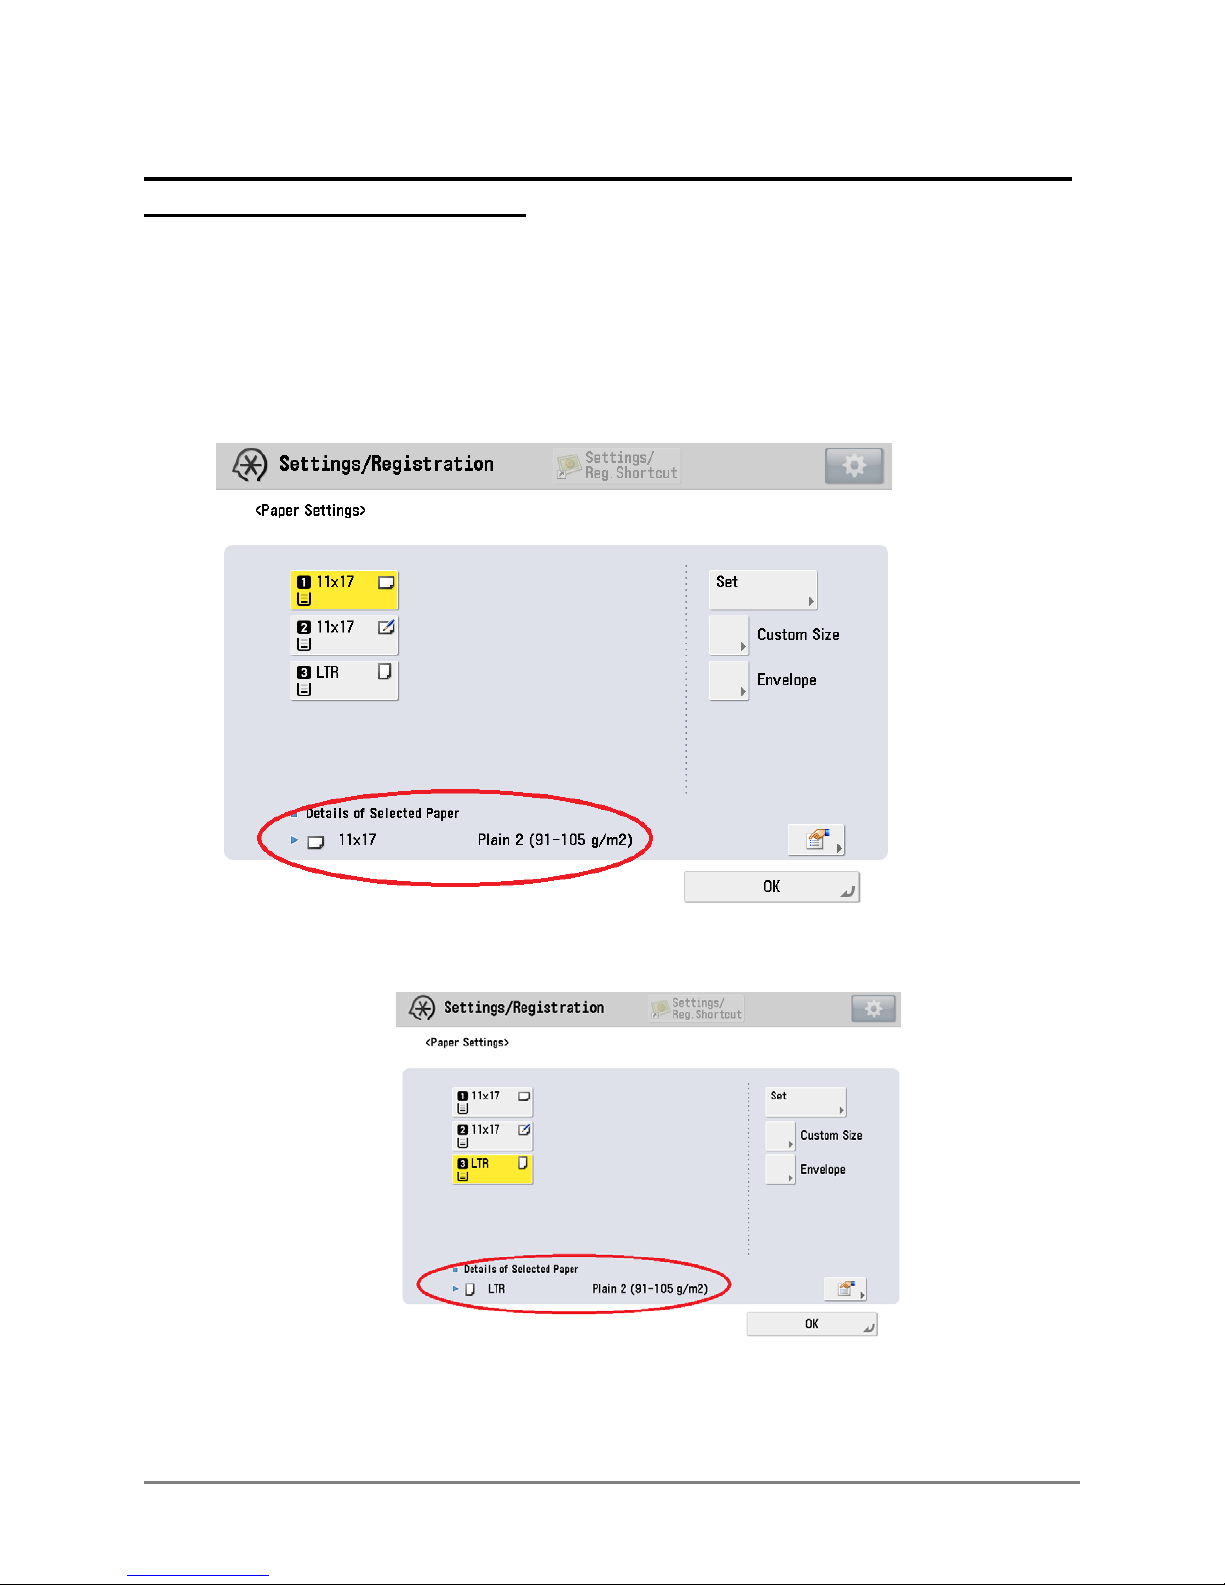
1. Assign Plain Media to the Drawers
Select Settings/Registration Login as System Manager
Select Preferences Paper Settings Paper Settings
Register 11 x 17 Plain 2 to any Drawer from the standard Media list
Register 8 ½ x 11 Plain 2 to any other Drawer
4 imagePRESS C700 & imagePRESS Server G100 January 2017 Update Guide
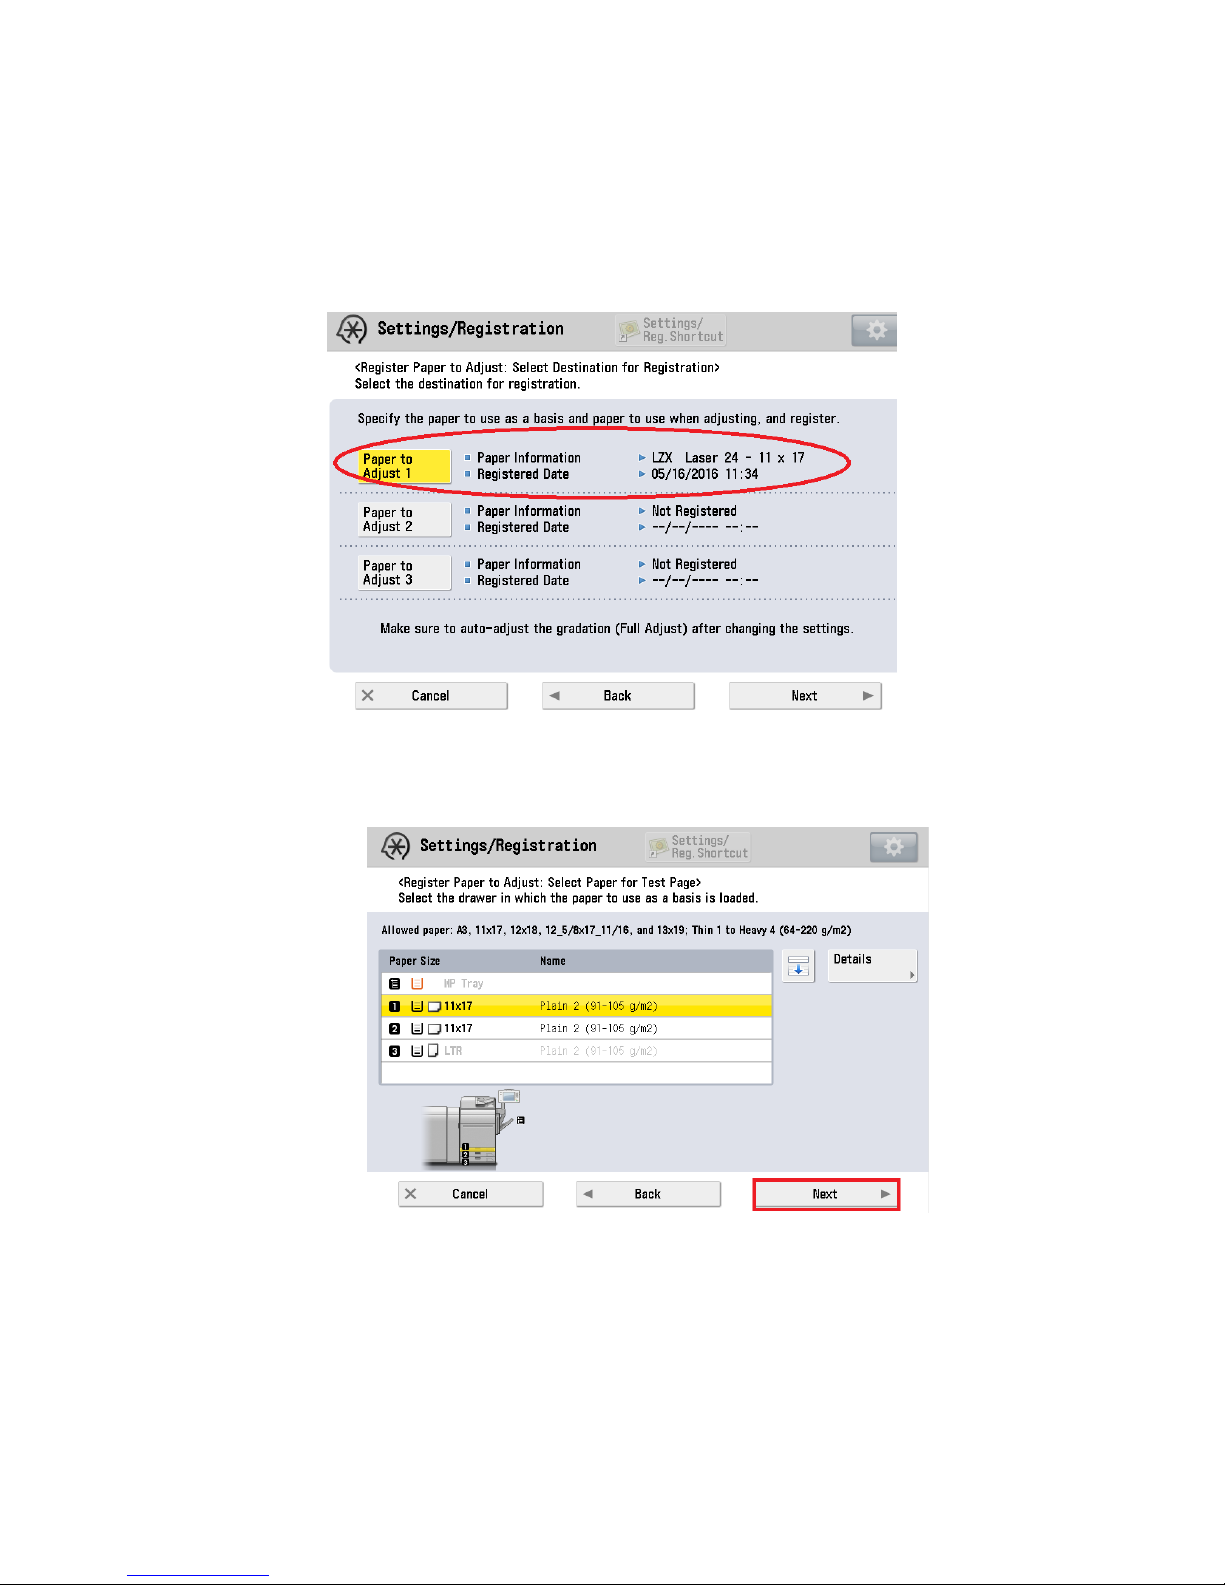
2. Unregister LZX Laser 24 - 11 x 17 for Auto Gradation
Settings/Registration Adjustment/Maintenance Adjust Image Quality
Auto Adjust Gradation
Register Paper to Adjust (LZX Lazer 24 – 11 x 17)
Next
Standard
Select Drawer with 11 x 17 Plain 2
Next
Start Printing
Select Drawer with 11 x 17 Plain 2
Next
Start Printing
OK
January 17, 2017
Note: Please confirm that there are no other custom Media registered for Auto
Gradation
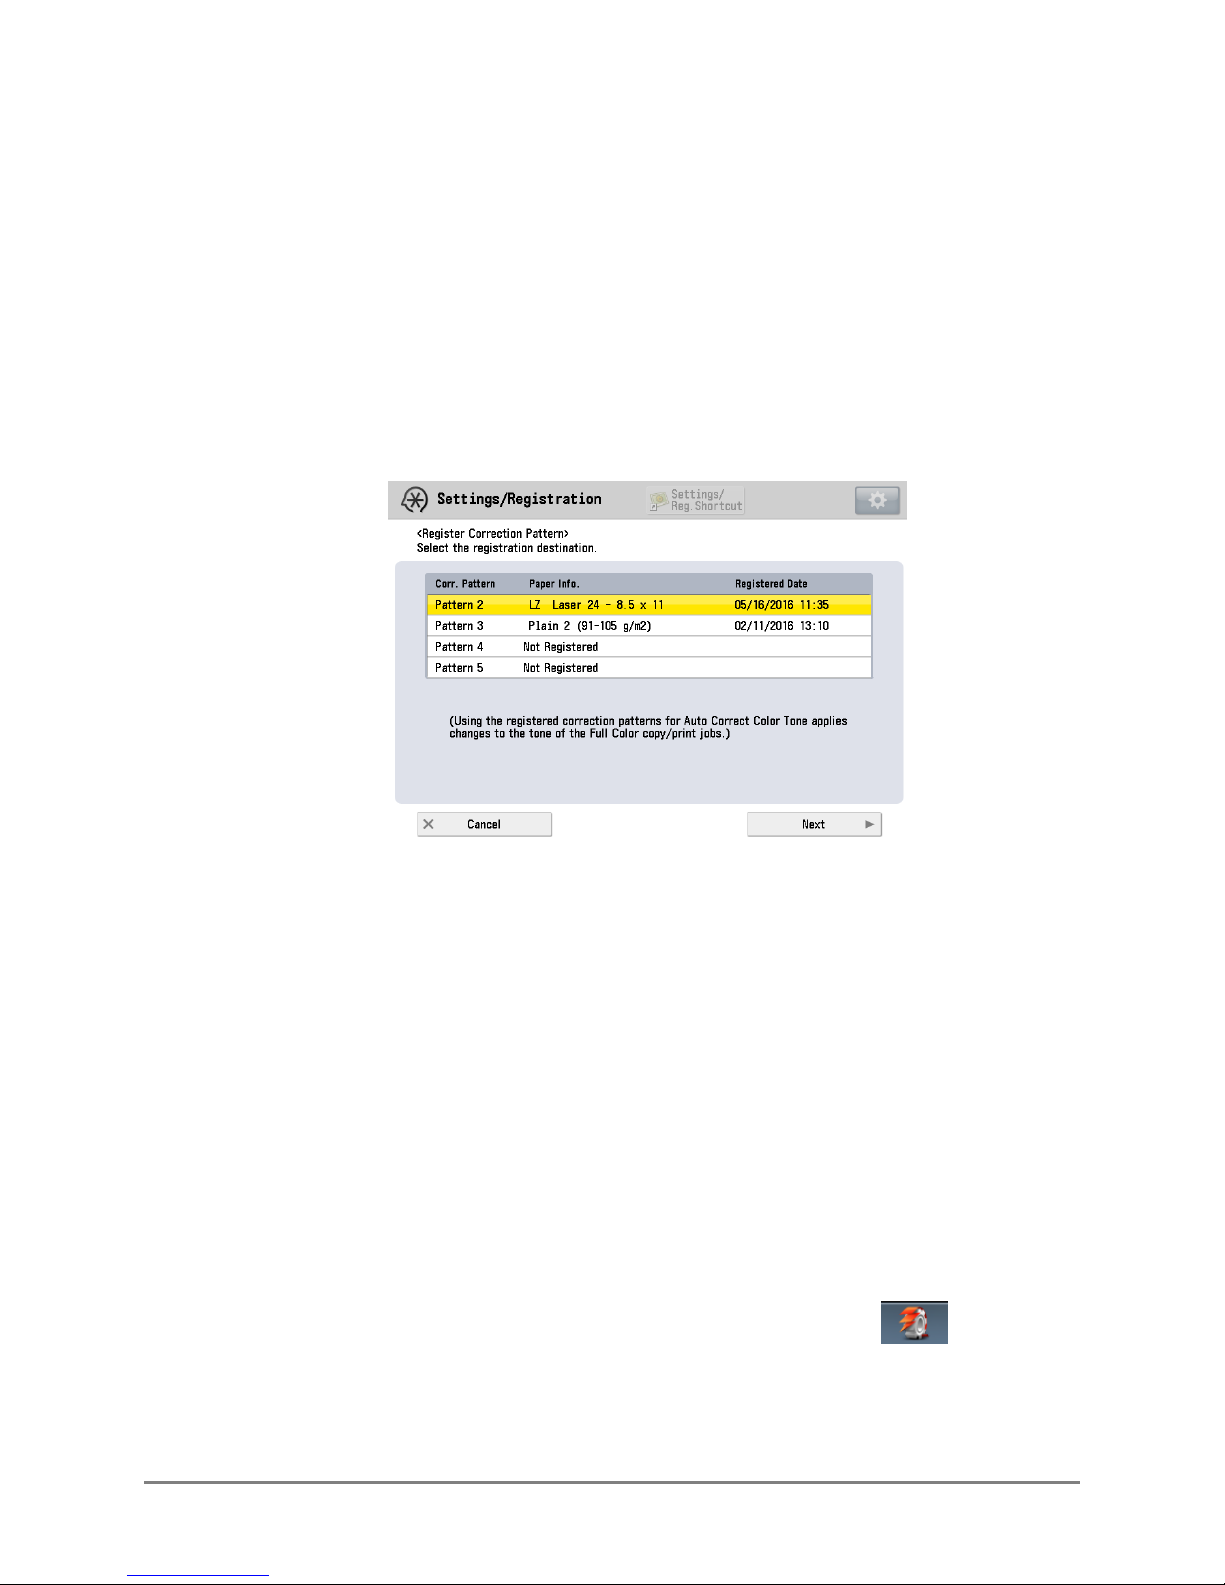
3. Unregister Custom Media for Auto Correct Color Tone
Settings/Registration Adjustment/Maintenance Adjust Image Quality
Auto Correct Color Tone Settings
Register Correction Pattern
Yes
Choose the Pattern with the Custom Media
Next
Standard Type from the drop down menu
Plain 2
Next
Choose a drawer with plain 2
Ok
Start Printing
Place the page on the scanner
Start Scanning
Close
Note: Please confirm that there are no other custom Media’s are registered for Auto
Correct Color Tone
4. Launch Command Workstation by clicking the icon in the taskbar or by
clicking the Windows Start button and selecting Fiery Command Workstation.
6 imagePRESS C700 & imagePRESS Server G100 January 2017 Update Guide
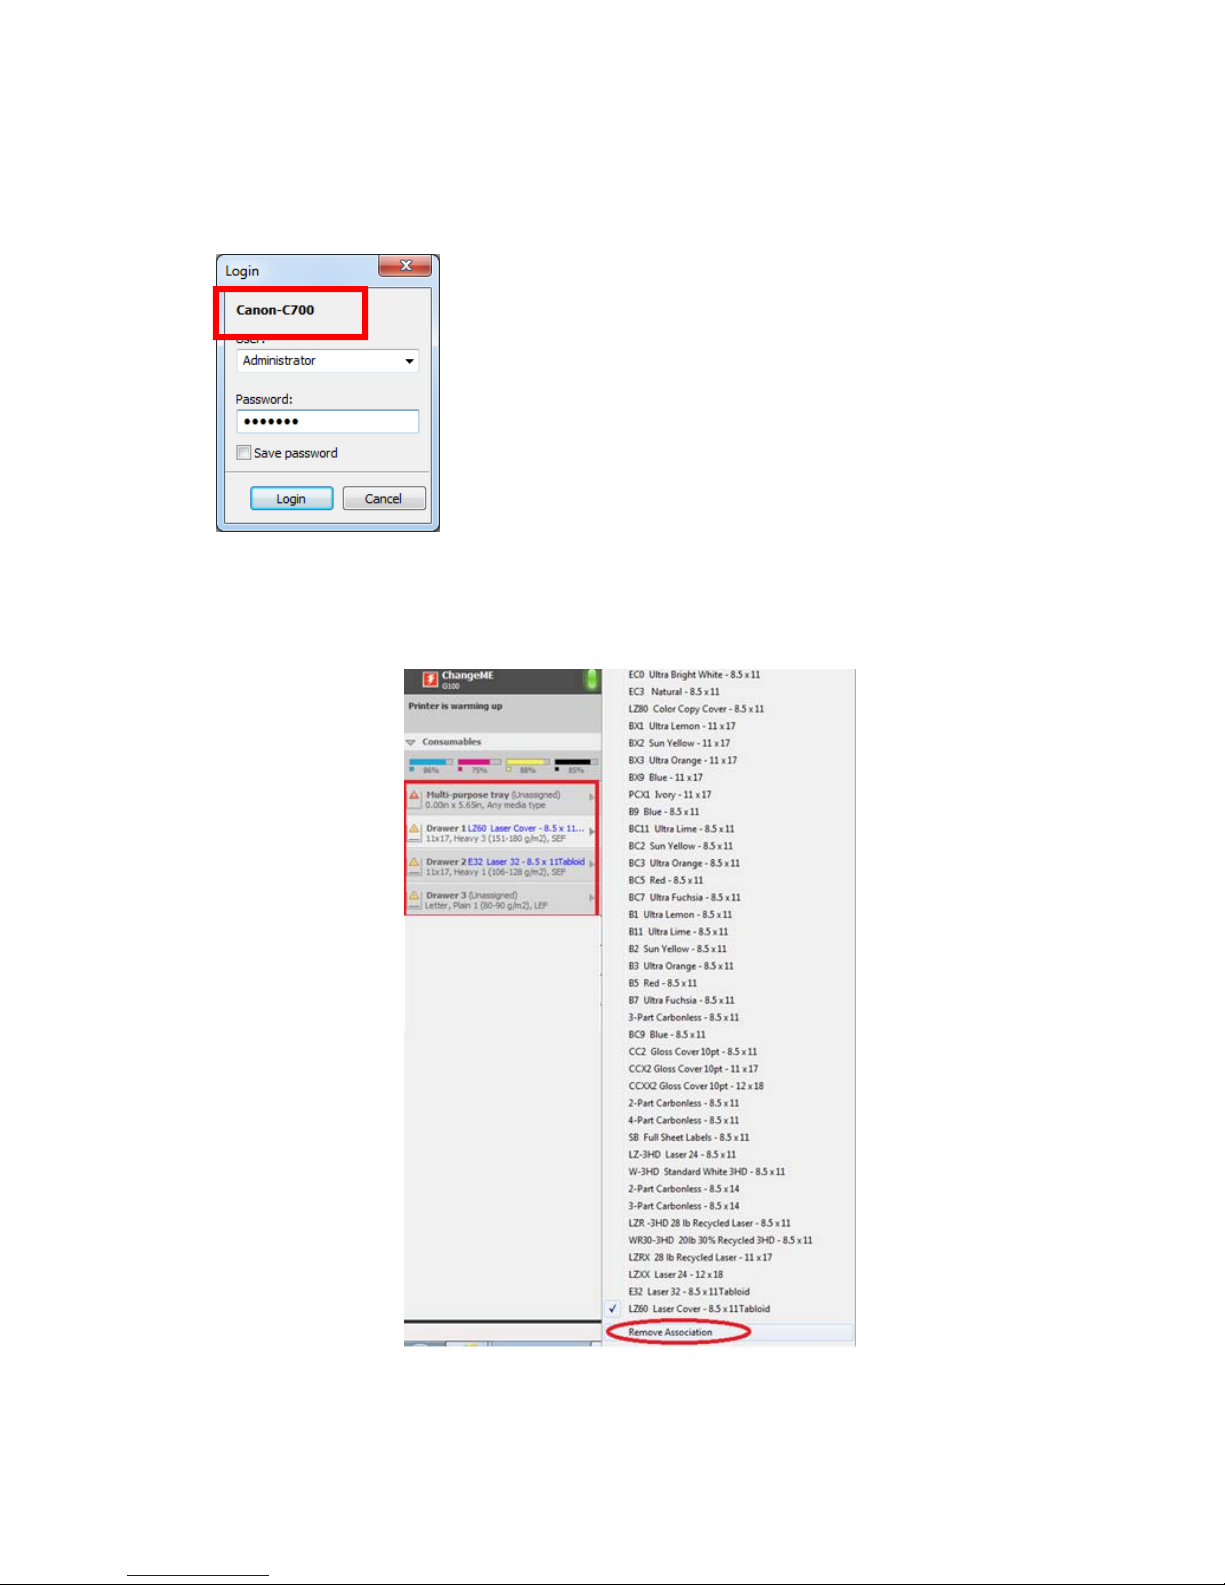
5. Log into the C700 by select Administrator from the User drop down list and enter
Fiery.1 as the password (the password is case-sensitive and includes a period in
between the word Fiery and the number 1). Click Login.
6. Un-assign all media in all of the drawers by clicking on each Drawer and selecting
Remove Association as indicated in the image.
January 17, 2017
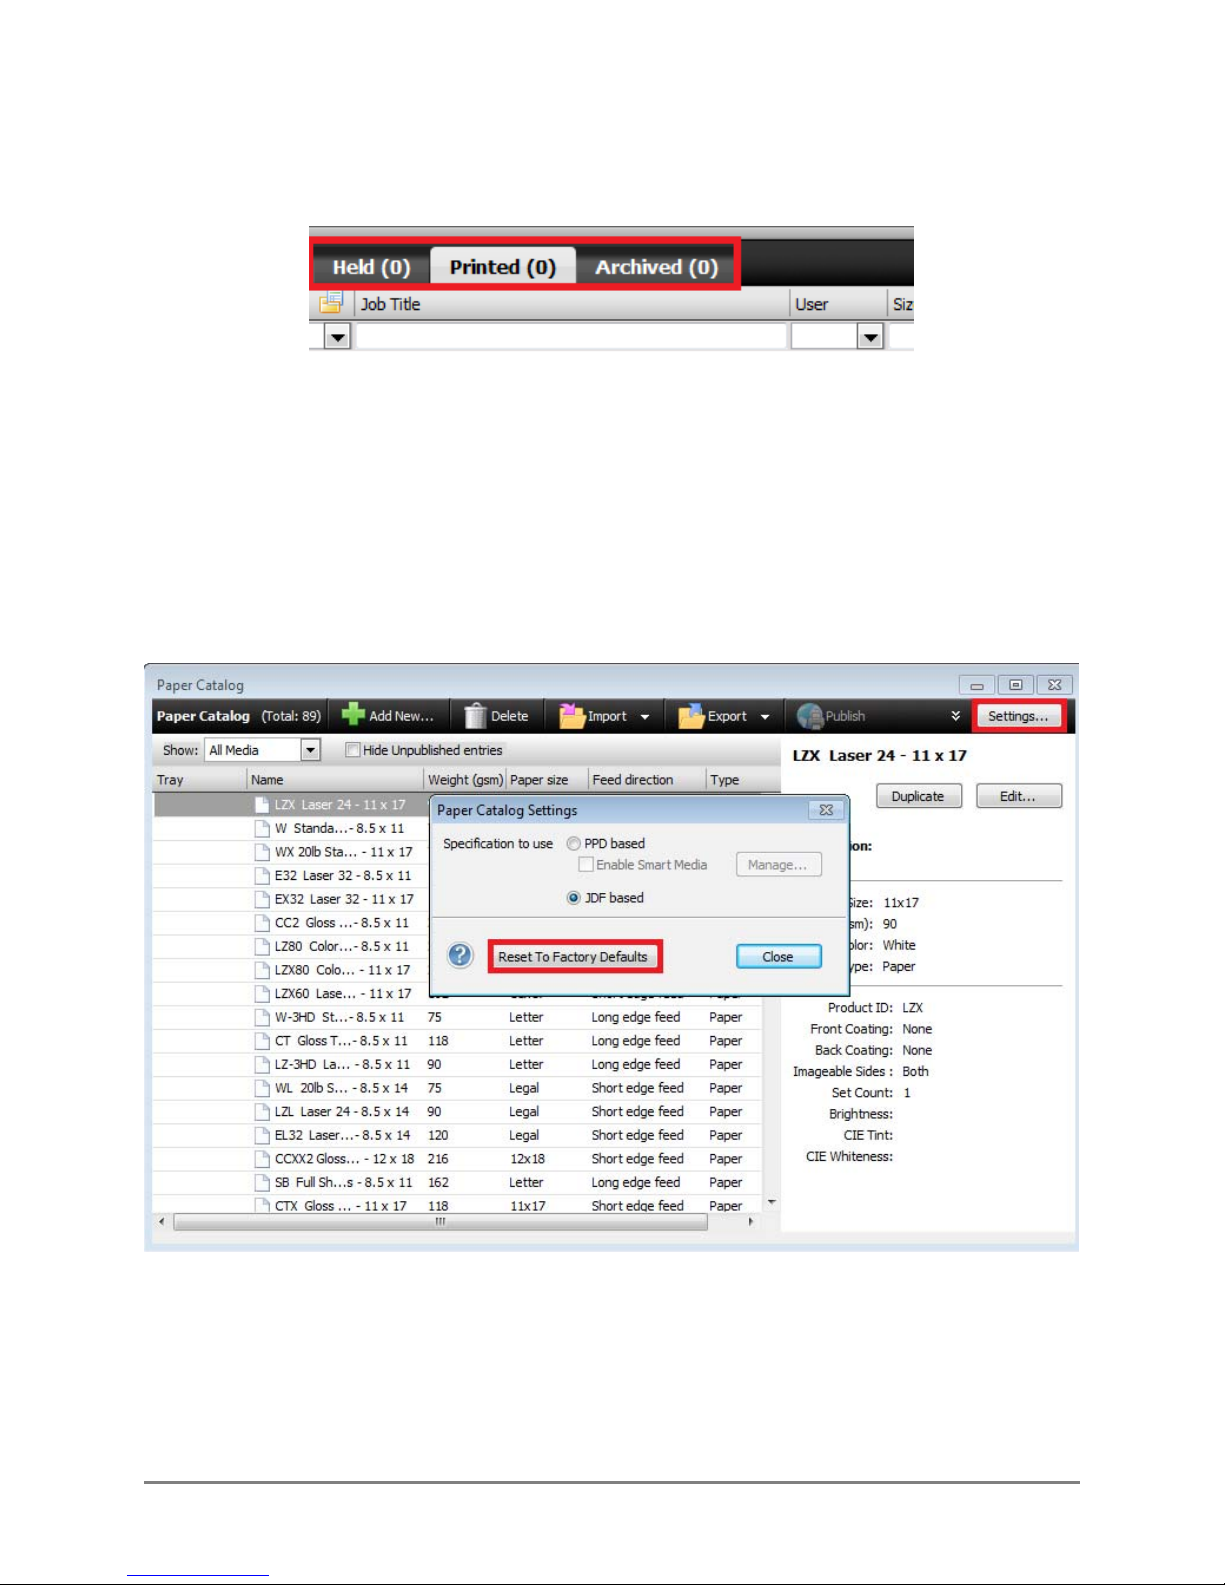
7. Once all of the Drawers are Unassigned then proceed to Delete all Jobs in Held,
Printed and Archived Queues.
8. Delete the Paper Catalog
Select the Settings button to the right
Select Reset To Factory Defaults
Then Close
Please ensure if all of the custom media has been deleted from the Engine and the
Fiery. If not then see step 9 and 10 below:
8 imagePRESS C700 & imagePRESS Server G100 January 2017 Update Guide
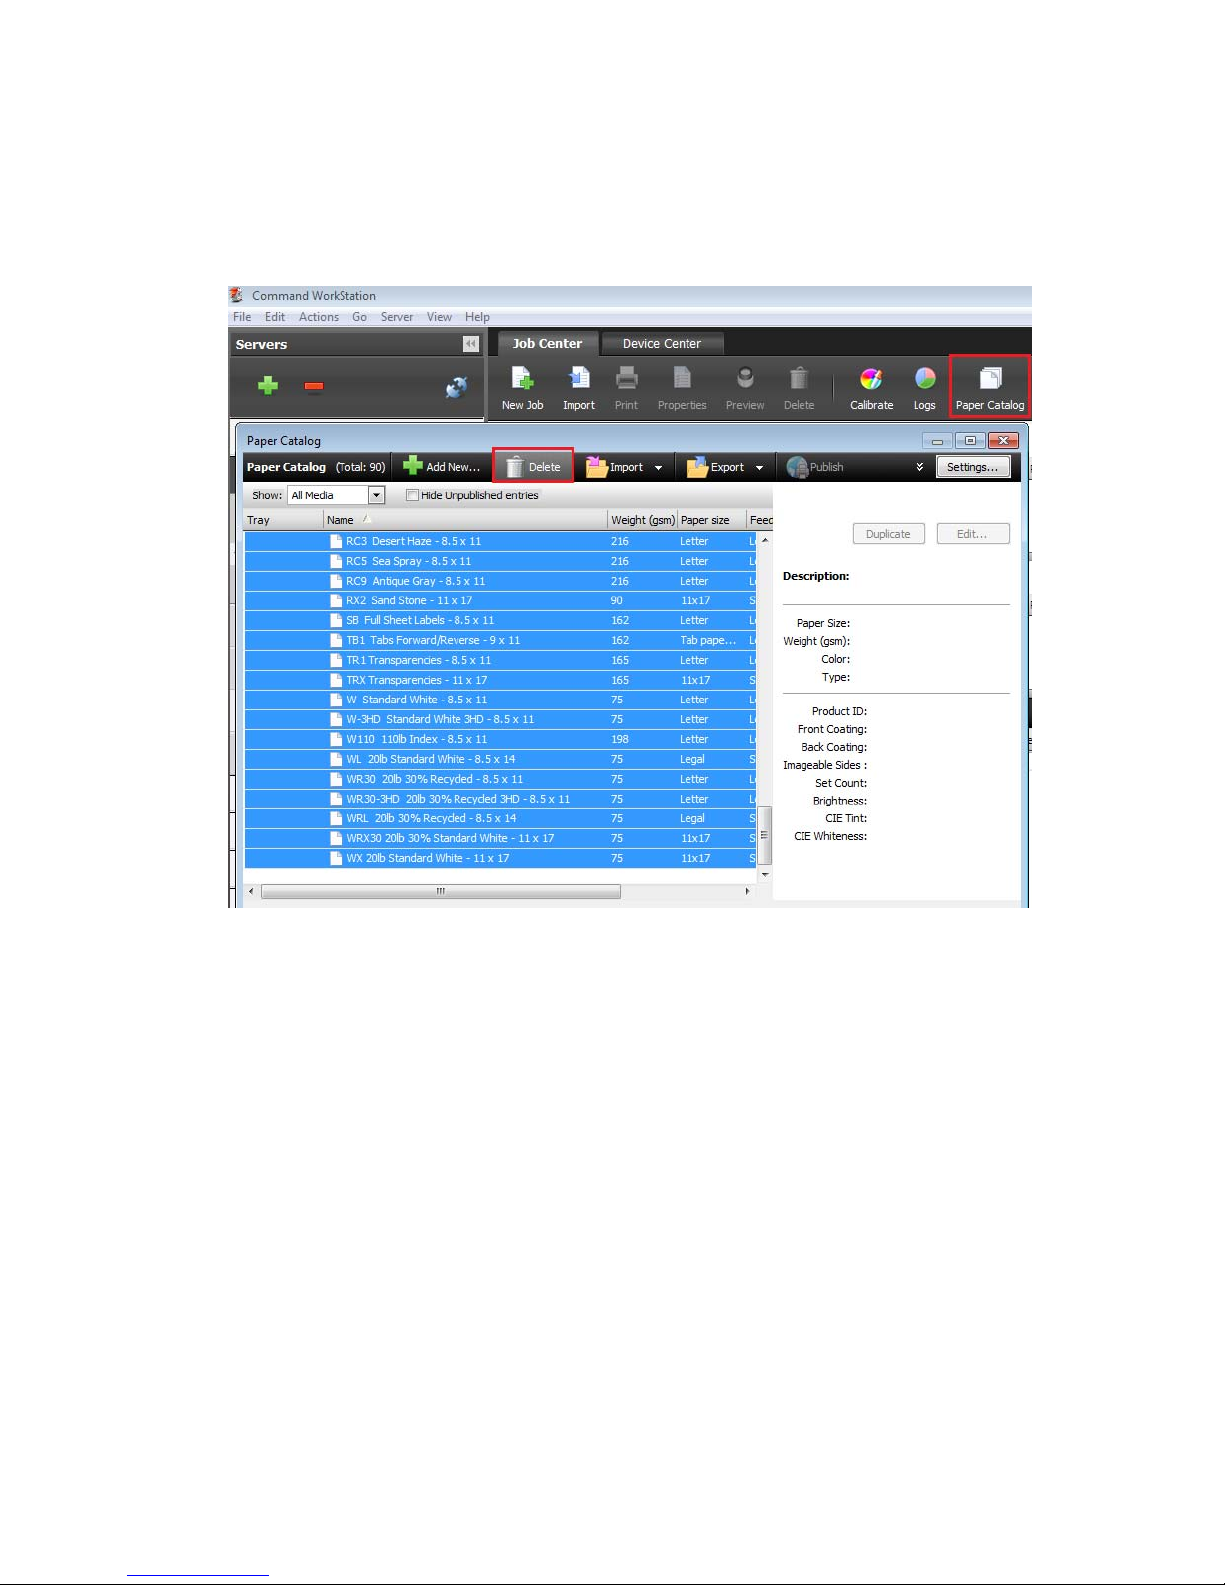
9. Optional step if Step 8 did not remove all of the Custom media
From Job Center open the Paper Catalog
Highlight all of the Media
Delete
Note: In the event there is a locked media it cannot be deleted. This media will be
deleted in step 9.
January 17, 2017
 Loading...