

Canon imageFORMULA P-215 Scan-tini Personal Document Scanner Reference Manual
Reference Guide
Guide de référence
Guía de referencia
CANON ELECTRONICS INC.
1248, SHIMOKAGEMORI, CHICHIBU-SHI, SAITA MA 369-1892, JAPAN
CANON U.S.A. INC.
ONE CANON PLAZA, LAKE SUCCESS, N.Y. 11042, U.S.A.
CANON CANADA INC.
6390 DIXIE ROAD, MISSISSAUGA, ONTARIO L5T 1P7, CANADA
CANON EUROPA N.V.
BOVENKERKERWEG 59-61, P.O.BOX 2262, 1180 EG AMSTELVEEN, THE NETHERLANDS
CANON LATIN AMERICA, INC.
703 WATERFORD WAY, SUITE 400 MI AMI, FLORIDA 33126, U.S.A.
CANON AUSTRALIA PTY. LTD.
1 THOMAS HOLT DRIVE, NORTH RYDE, SYDNEY. N.S.W, 2113. AUSTRALIA
CANON SINGAPORE PTE. LTD.
1 HARBOUR FRONT AVENUE #04-01, KEPPEL BAY TOWER, SINGAPORE 098632
CANON HONGKONG COMPANY LTD.
19TH FLOOR, THE METROPOLIS TOWER, 10 METROPOLIS DRIVE, HUNGHOM, KOWLOON, HONG KONG.
CANON KOREA BUSINESS SOLUTIONS INC.
168-12 SAMSEONG-DONG, GANGNAM-GU, SEOUL, KOREA
PUB. CE-IM-867 xxxxxxx © CANON ELECTRONICS INC. 2011 PRINTED IN JAPAN
IMPRIMÉ AU JAPON
00x-Cover1-4.fm Page 1 Friday, August 12, 2011 5:01 PM
Reference Guide
• Please read this manual before operating this scanner.
• After you finish reading this manual, store it in a safe place
for future reference.
0-00-P-215_RG_EN.book Page 1 Wednesday, August 24, 2011 11:45 AM
2
Table of Contents
Important Safety Instructions ............................................................... 3
Installation Location ....................................................................... 3
AC Adapter (Sold Separately)........................................................ 3
Moving the Scanner ....................................................................... 4
Handling ......................................................................................... 4
Disposal ......................................................................................... 5
Checking the Accessories.................................................................... 6
Scanning with CaptureOnTouch Lite ................................................... 9
Connecting the Scanner to the Computer ...................................... 9
Turning ON the Scanner ................................................................ 9
Starting CaptureOnTouch Lite ..................................................... 10
Placing Documents ...................................................................... 11
Configuring the Scanning Method................................................ 11
Scanning Documents ................................................................... 13
After Scanning ............................................................................. 14
Common Problems and Solutions ..................................................... 15
Disclaimers
The information in this document is subject to change without
notice.
CANON ELECTRONICS INC. MAKES NO WARRANTY OF ANY
KIND WITH REGARD TO THIS MATERIAL, EITHER EXPRESS OR
IMPLIED, EXPECT AS PROVIDED HEREIN, INCLUDING
WITHOUT LIMITATION, THEREOF, WARRANTIES AS TO
MARKETABILITY, MERCHANTABILITY, FITNESS FOR A
PARTICULAR PURPOSE OF USE OR NON-INFRINGEMENT.
CANON ELECTRONICS INC. SHALL NOT BE LIABLE FOR ANY
DIRECT, INCIDENTAL, OR CONSEQUENTIAL DAMAGES OF
ANY NATURE, OR LOSSES OR EXPENSES RESULTING FROM
THE USE OF THIS MATERIAL.
CANON ELECTRONICS INC. IS NOT LIABLE FOR THE
STORAGE AND HANDLING OF DOCUMENTS SCANNED WITH
THIS PRODUCT, OR THE STORAGE AND HANDLING OF
RESULTING SCANNED IMAGE DATA.
IF YOU INTEND TO DISCARD THE ORIGINALS OF SCANNED
DOCUMENTS, YOU THE CUSTOMER ARE RESPONSIBLE FOR
INSPECTING THE SCANNED IMAGES AND VERIFYING THAT
DATA IS INTACT.
THE MAXIMUM LIABILITY OF CANON ELECTRONICS INC.
UNDER THIS WARRANTY IS LIMITED TO THE PURCHASE
PRICE OF THE PRODUCT COVERED BY THE WARRANTY.
0-00-P-215_RG_EN.book Page 2 Wednesday, August 24, 2011 11:45 AM
3
Important Safety Instructions
To ensure the safe operation of this scanner, be sure to read the safety
warnings and precautions described below.
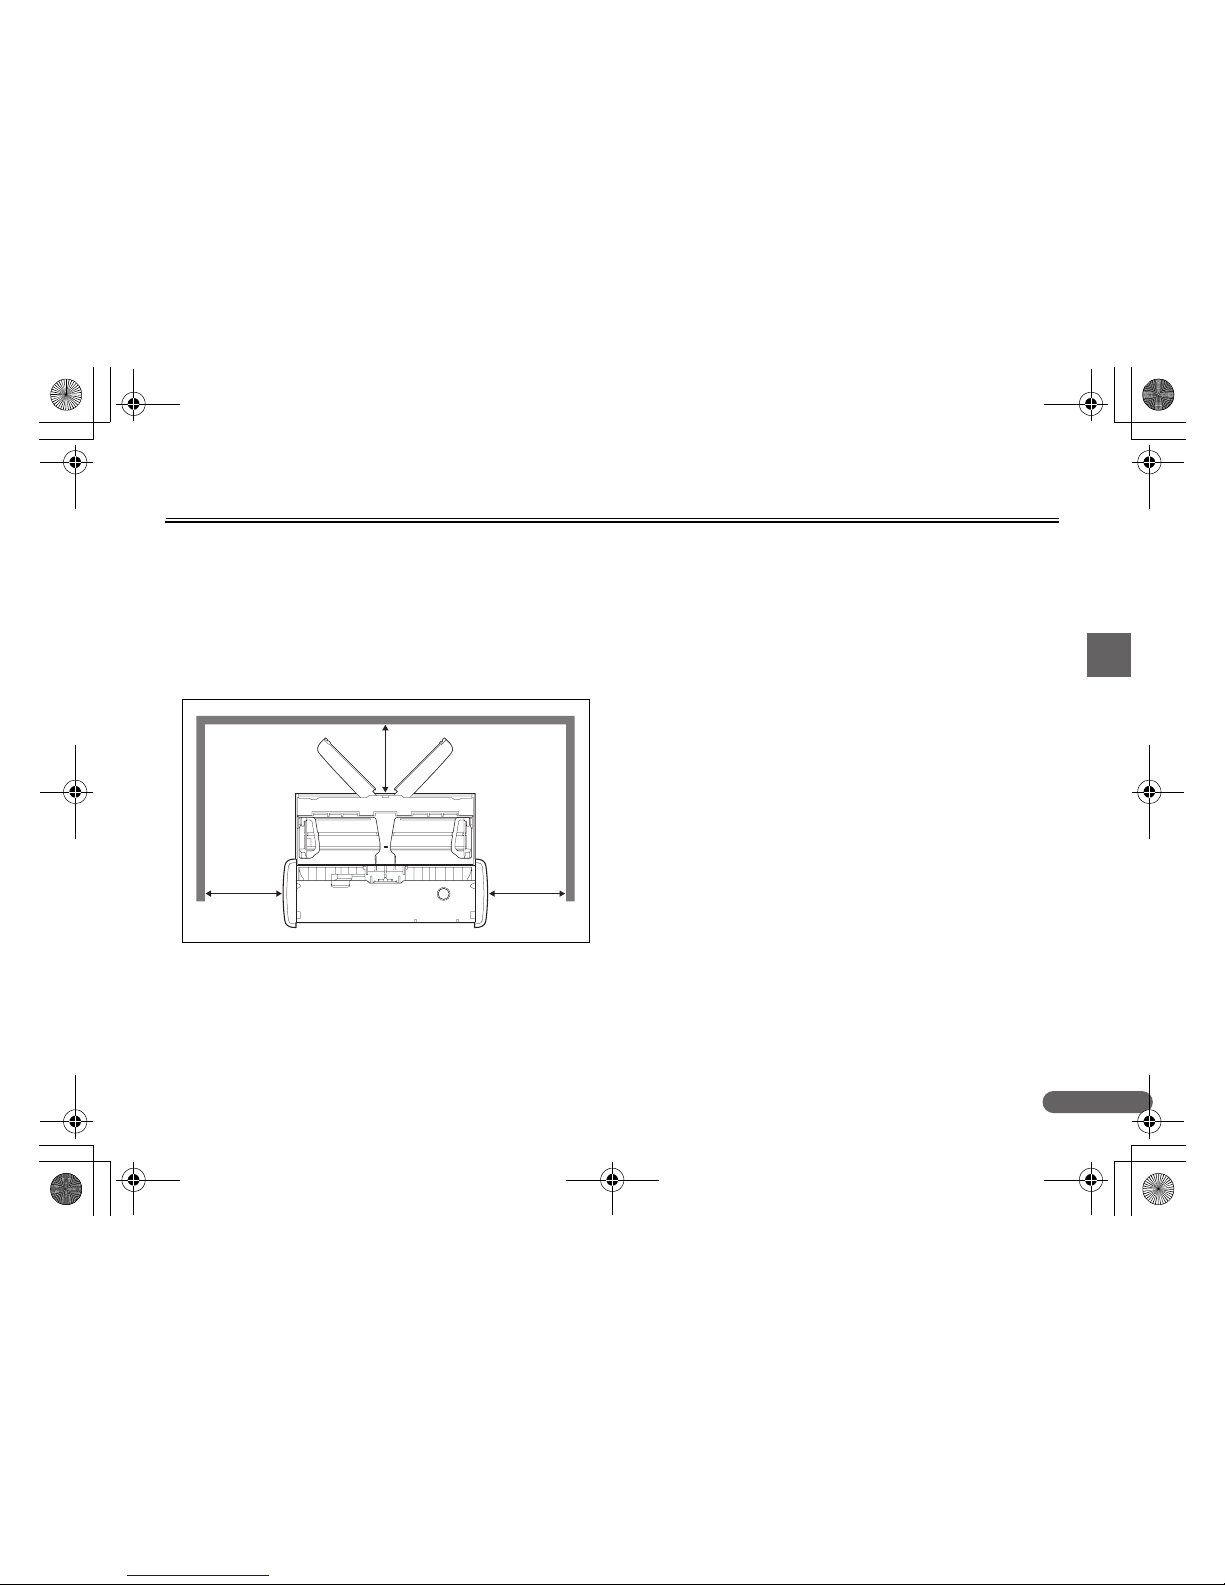
Installation Location
The performance of this scanner is affected by the environment in
which it is installed. Make sure that the location where the scanner is
installed meets the following environmental requirements.
● Provide adequate space around the scanner for operation,
maintenance, and ventilation.
● Provide adequate space in front of the scanner, as scanned
documents are ejected from the front.
● Avoid installing the machine in direct sunlight. If this is unavoidable,
use curtains to shade the scanner.
● Avoid locations where a considerable amount of dust accumulates.
● Avoid warm or humid locations, such as in the vicinity of a water
faucet, water heater, or humidifier. Avoid locations where ammonia
gas is emitted. Avoid locations near volatile or flammable materials,
such as alcohol or paint thinner.
● Avoid locations that are subject to vibration.
● Avoid exposing the scanner to rapid changes in temperature. If the
room in which the scanner is installed is cold but rapidly heated,
water droplets (condensation) may form inside the scanner. This
may result in a noticeable degradation in scanning quality. The
following conditions are recommended for optimal scanning quality:
● Room temperature: 10°C to 32.5°C (50°F to 90.5°F)
● Humidity: 25% to 80% RH
● Avoid installing the scanner near equipment that generates a
magnetic field (e.g. speakers, televisions, or radios.)
AC Adapter (Sold Separately)
● Do not use AC adapters other than the one specified (sold
separately) for this scanner. Do not use the AC adapter designed for
this scanner with any other device.
● If you want to enable high-speed scanning with a USB 2.0
connection using only one USB cable, purchase an AC adapter
(sold separately).
● If you have any questions regarding the power supply, contact your
local authorized Canon dealer or service representative for further
information.
0-00-P-215_RG_EN.book Page 3 Wednesday, August 24, 2011 11:45 AM
4
Moving the Scanner
● When moving the scanner, always hold it with both hands to avoid
dropping it.
● Make sure to disconnect any USB cables and AC adapters (sold
separately) when moving the scanner. If the scanner is carried with
these items connect ed, the plugs and connectors may be damaged
or cause the scanner to fall and result in personal injury or damage
to the scanner.
Handling
WARNING
Note the following precautions whenever using the scanner. Failure to
do so may result in a fire or electric shock.
■ Never place alcohol, benzene, paint thinner, or other flammable
substances near the scanner.
■ Do not cut, damage, or modify the USB cable or power supply USB
cable. Do not place heavy objects on the cable, and do not pull or
excessively bend the cable.
■ Never connect the USB cable or power supply USB cable when your
hands are wet.
■ Do not knot or coil th e USB cable or power supply USB cable, as this
may result in a fire or electric shock. When connecting the cable,
make sure that the power plug is securely and completely inserted
into the power connector.
■ Use only the USB cable or power supply USB cable supplied with
the scanner.
■ Do not attempt to dismantle the scanner or modify it in any way, as
this is dangerous and may result in a fire or electric shock.
■ Do not use flammable aerosol spray products near the scanner.
■ When cleaning the scanner, turn the scanner OFF and disconnect
the USB cable or power supply USB cable.
■ Clean the scanner using a slightly dampened cloth that has been
well wrung out. Never use alcohol, benzene, paint thinner, or any
other flammable substance.
■ If the scanner makes strange noises, or gives off smoke, heat, or
strange odors, or the scanner does not function or other
abnormalities occur when you use the scann er, immediately turn the
scanner OFF, and disconnect the USB cable or power supply USB
cable. Then, contact your local authorized Canon dealer or service
representative for further information.
■ Do not drop the scanner, or subject it to impact or strong shock.
Should the scanner ever become damaged, immediately close the
feed tray, turn the scanner OFF, and disconnect the USB cable or
power supply USB cable. Then, contact your local authorized Canon
dealer or service representative for further information.
■ Before moving the scanner, make sure to close the feed tray, turn
the scanner OFF, and disconnect the USB cable or power supply
USB cable.
CAUTION
■ Do not install the scanner on a surface that is unstable, tilted, or
subject to excessive vibrations. Doing so may cause the scanner to
fall, resulting in personal injury or damage to the scanner.
■ Never place small objects, such as staples, paper clips, or jewelry
on the scanner. These items may fall into the scanner and cause a
fire or electric shock. If such objects ever fall inside the scanner,
immediately close the feed tray, turn the scanner OFF, and
disconnect the USB cable or power supply USB cable. Then,
contact your local authorized Canon dealer or service
representative to have the unit serviced.
■ Do not lo cate the scanner in a humid o r dusty location. Doing so may
result in a fire or electric shock.
■ Do not place objects on top of the scanner. Such objects may tip or
fall over, resulting in personal injury.
0-00-P-215_RG_EN.book Page 4 Wednesday, August 24, 2011 11:45 AM

5
■ When disconnecting the USB cable, grasp it firmly by its connector.
Do not pull directly on the USB cable, as this may damage or expose
the cable’s internal wiring, resulting in a fire or electric shock.
■ Leave sufficient space around the USB cable or power supply USB
cable so that it can be disconnected easily. If objects are placed
around the USB cable or power supply USB cable, you will be
unable to disconnect it in an emergency.
■ Do not allow water or flammable substances (alcohol, benzene,
paint thinner, etc.) to spill inside the scanner, as this may result in a
fire or electric shock.
■ If you will not be using the scanner for an extended period of time,
such as during consecutive holidays, disconnect the USB cable or
power supply USB cable for safety.
■ Do not wear loose clothing or jewelry that may get caught in the
scanner while you are using it. This may result in personal injury. Be
extra careful of neckties and long hair. If anything becomes caught
in the scanner, immediately disconnect the power to stop the
scanner.
■ Be careful when placing paper in the scanner and when removing
jammed paper. It is possible to cut your hand on the edge of a sheet
of paper.
Disposal
When disposing of this scanner, be sure to follow all local ordinances
and laws or consult with the retailer who sold you the scanner.
0-00-P-215_RG_EN.book Page 5 Wednesday, August 24, 2011 11:45 AM
6
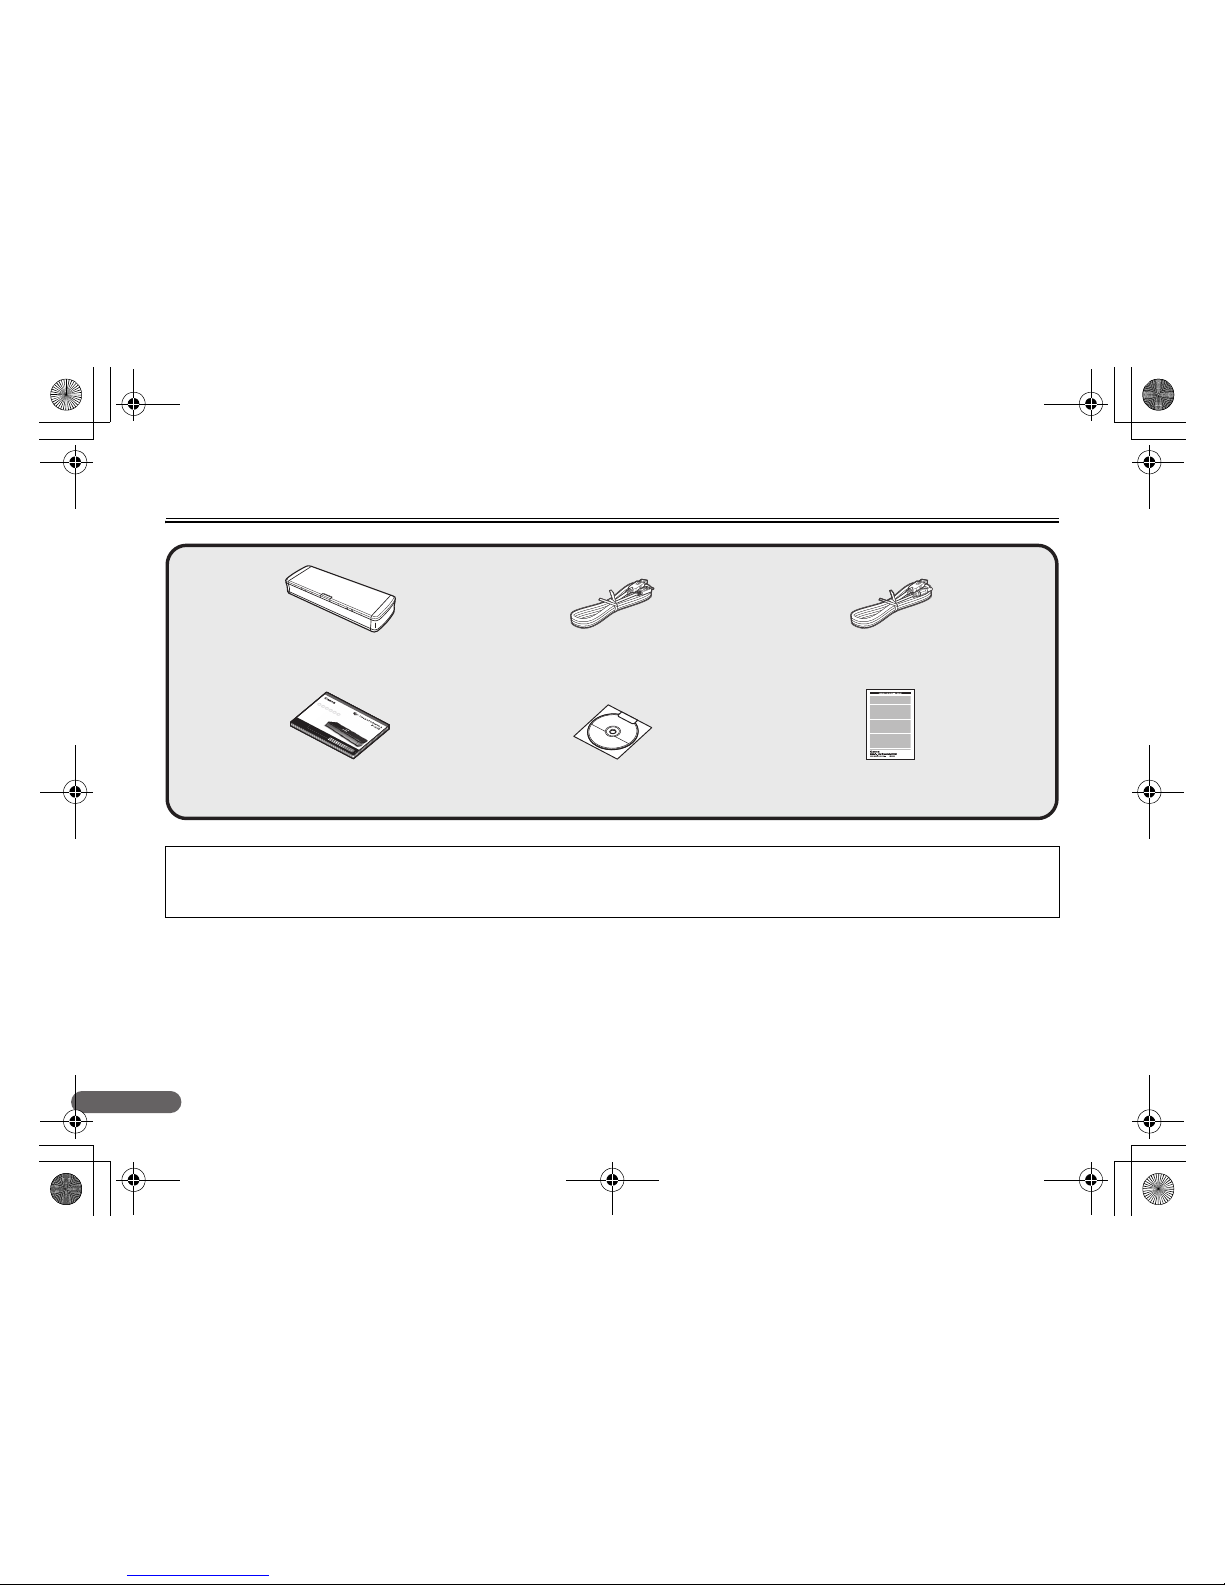
Checking the Accessories
About this Manual
This manual describes how to scan using the scanner's built-in
software, CaptureOnTouch Lite.
For details on using the other software supplied with this scanner
(CaptureOnTouch, scanner driver, other bundled software), refer to the
User Manual stored on the supplied Setup disc.
USB Cable
The supplied USB cable is designed specifically for this scanner. Do
not use it with any other device.
If you connect this scan ner to a computer using a USB cable other tha n
the one supplied, proper functioning is not guaranteed. Always use the
supplied cable.
Scanner Power Supply USB Cable
Reference Guide Setup Disc
(DVD-ROM)
USB Cable
USB 3.0 Type A/USB 2.0 Micro B
(Length: 1.8 m)
Warranty Card
(U.S.A. and Canada only)
• Items included in this manual are subject to change without notice.
• You must keep the machine’s packaging and packing materials for storing or transporting the machine.
• The shape of the power plug varies by country and region.
0-00-P-215_RG_EN.book Page 6 Wednesday, August 24, 2011 11:45 AM

7
Power Supply
This scanner is powered via the supplied USB cables.
(The USB connector to which the scanner is connected on your
computer must be one capable of supplying 500 mA of power.)
Using One USB Cable
Using the USB cable allows you to scan using power from the
computer’s bus. When connected to a USB port that supports US B 3.0,
the scanner operates on 900 mA bus power and is capable of highspeed scanning.
Using Both USB Cables
The combined use of the USB cable and the power supply USB cable,
allows you to scan at a high speed even when connected to a USB 2.0
port.
When using the AC adapter (sold separately)
Using the AC adapter, you can obtain better scanning speed than
when using the USB cable by itself.
When not using the scanner
Close the scanner’s Document Feed Tray or disconnect th e USB cable.
Notes on Using USB Hubs
This scanner cannot be used when it is connected to the computer
via a bus-powered USB hub. Self-powered USB hubs are
compatible, but operation is not guaranteed.
To power outlet
0-00-P-215_RG_EN.book Page 7 Wednesday, August 24, 2011 11:45 AM
8
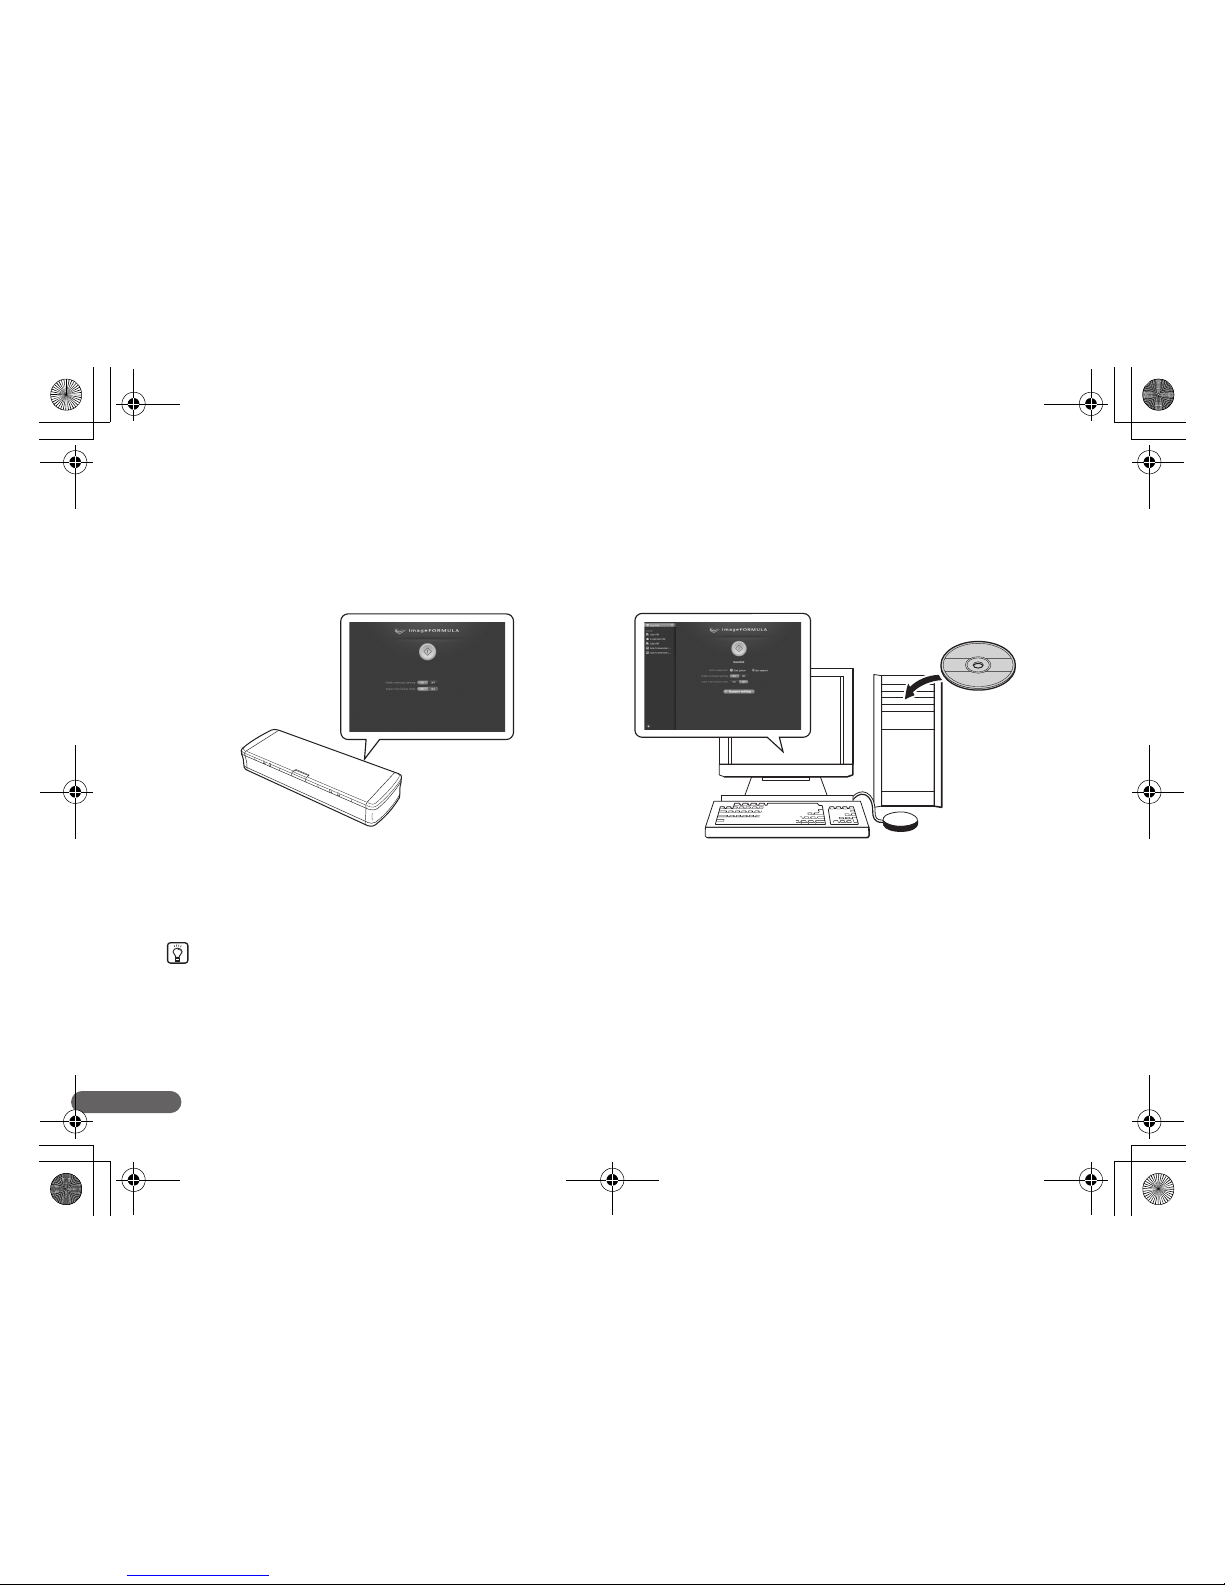
Using the Scanner
Setting the Auto Start switch on the rear of the scanner allows you to use the scanner in the following two ways.
When Using the Scanner with the Auto Start Switch Set to
ON
Scanning with the Scanner Internal Software
CaptureOnTouch Lite is preinstalled on this scanner. Therefore, you
can scan from a computer that does not have a scanner driver
installed. Scanned images can be stored in any location on the
computer connected to the scanner.
(See “Scanning with CaptureOnTouch Lite” on p. 9)
When Using the Scanner with the Auto Start Switch Set to
OFF
Installing the Supplied Software and Scanning
By installing the scanner driver stored on the software setup disc, you
can use applications such as the supplied CaptureOnTouch.
Refer to the User Guide for details.
Hint
Software installation is not necessary for using the internal scanner software, CaptureOnTouch Lite.
CaptureOnTouch Lite CaptureOnTouch
Setup Disc
(DVD-ROM)
0-00-P-215_RG_EN.book Page 8 Wednesday, August 24, 2011 11:45 AM
9
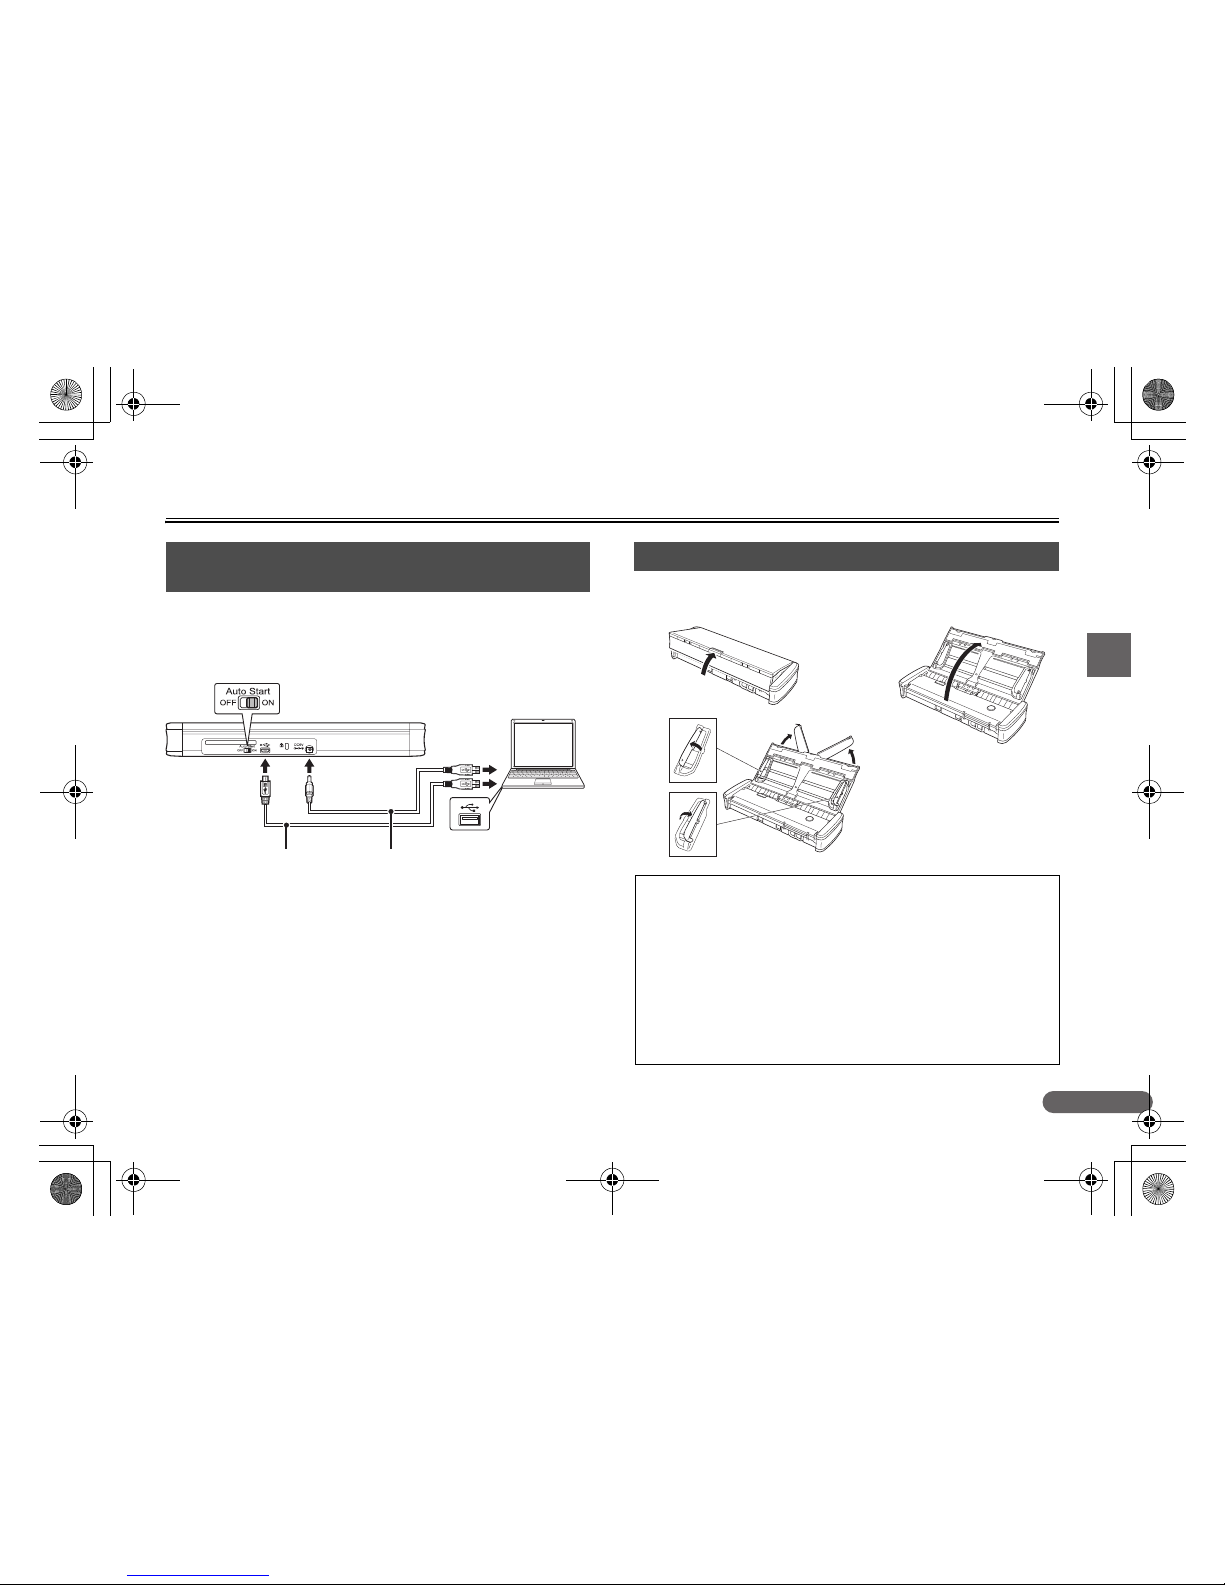
Scanning with CaptureOnTouch Lite
A Turn ON the computer.
B Set the Auto Start switch on the scanner to ON.
C Connect the scanner to the computer using the supplied USB
cable. (Connect the power supply USB cable, if necessary.)
Notes on Connecting the Scanner
• When operating the scanner via applications such as CaptureOnTouch
(supplied), make sure to set the Auto Start switch to OFF.
• If the scanner is not connected in the order above, the computer may not
start up.
• Make sure to set the Auto Start switch to ON before connecting the
scanner to the computer. If the Auto Start switch is set to ON after the
scanner is connected to the computer, malfunctions may occur.
The scanner automatically turns ON or OFF, respectively, when the
feed tray is opened or closed.
1. Connecting the Scanner to the
Computer
USB Cable
Set to ON.
Power Supply USB Cable
(Used only for higher speed scanning.)
USB
2. Turning ON the Scanner
• The Power button may blink slowly when the USB cable is
connected and the feed tray is opened. When this occurs, wait
for the power indicator to stop blinking and light steadily before
using the scanner.
• Do not close the feed tray before the main screen of
CaptureOnTouch Lite appears.
• If you are using Windows XP, a message requesting that you
restart your computer may appear when you turn ON the
scanner. You can continue normal use even if you click [No] and
do not restart the computer.
AB
C
0-00-P-215_RG_EN.book Page 9 Wednesday, August 24, 2011 11:45 AM
10
Windows
When the scanner turns ON, the computer recognizes the scanner as
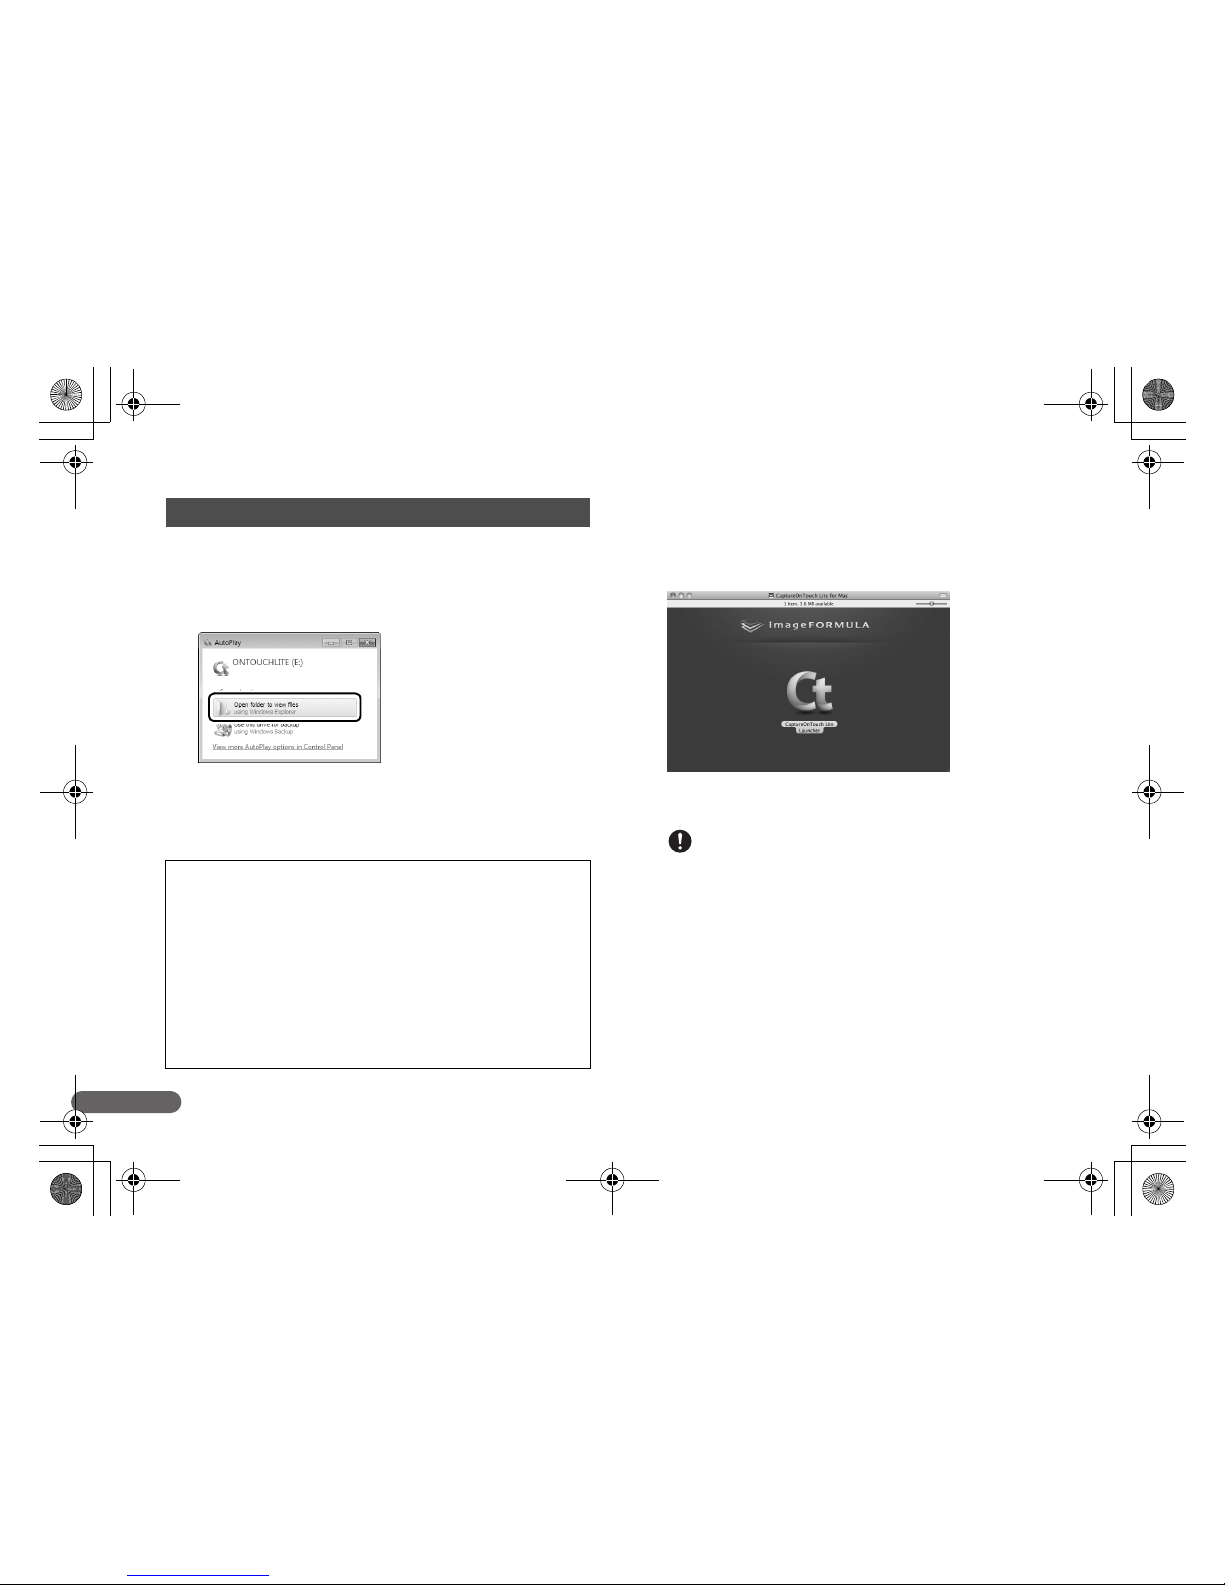
a storage device, and the [AutoPlay] screen appears.
A Click [Open folder to view files].
The [ONTOUCHLITE] folder opens.
B Double-click [ONTOUCHL.exe].
When you click [CaptureOnTouch Lite], CaptureOnTouch Lite
starts and the main screen appears.
Mac OS X
When the scanner turns ON, the computer recognizes the scanner as
a storage device, and the [ONTOUCHLITE] folder and
[CaptureOnTouch Lite for Mac] folder appear on the desktop then the
[CaptureOnTouch Lite for Mac] folder opens.
A Double-click the [CaptureOnTouch Lite Launcher] icon.
CaptureOnTouch Lite starts and the main screen appears.
IMPORTANT
To run CaptureOnTouch Lite, both the [CaptureOnTouch Lite for Mac]
folder and the [ONTOUCHLITE] folder must be mounted.
3. Starting CaptureOnTouch Lite
Notes on [AutoPlay]
• The [AutoPlay] screen may not appear in some operating
environments. In such cases, open the [ONTOUCHLITE] drive in
Windows Explorer, for example, and start the application directly
by double-clicking ONTOUCHL.exe.
Depending on your operating system, the drive name may not be
[ONTOUCHLITE]. Open the drive on which ONTOUCHL.exe is
located, and start the application directly.
• Depending on your operating system, [CaptureOnTouch Lite]
may appear in the [AutoPlay] screen. In such cases, double-click
[CaptureOnTouch Lite] to start CaptureOnTouch Lite.
0-00-P-215_RG_EN.book Page 10 Wednesday, August 24, 2011 11:45 AM
11
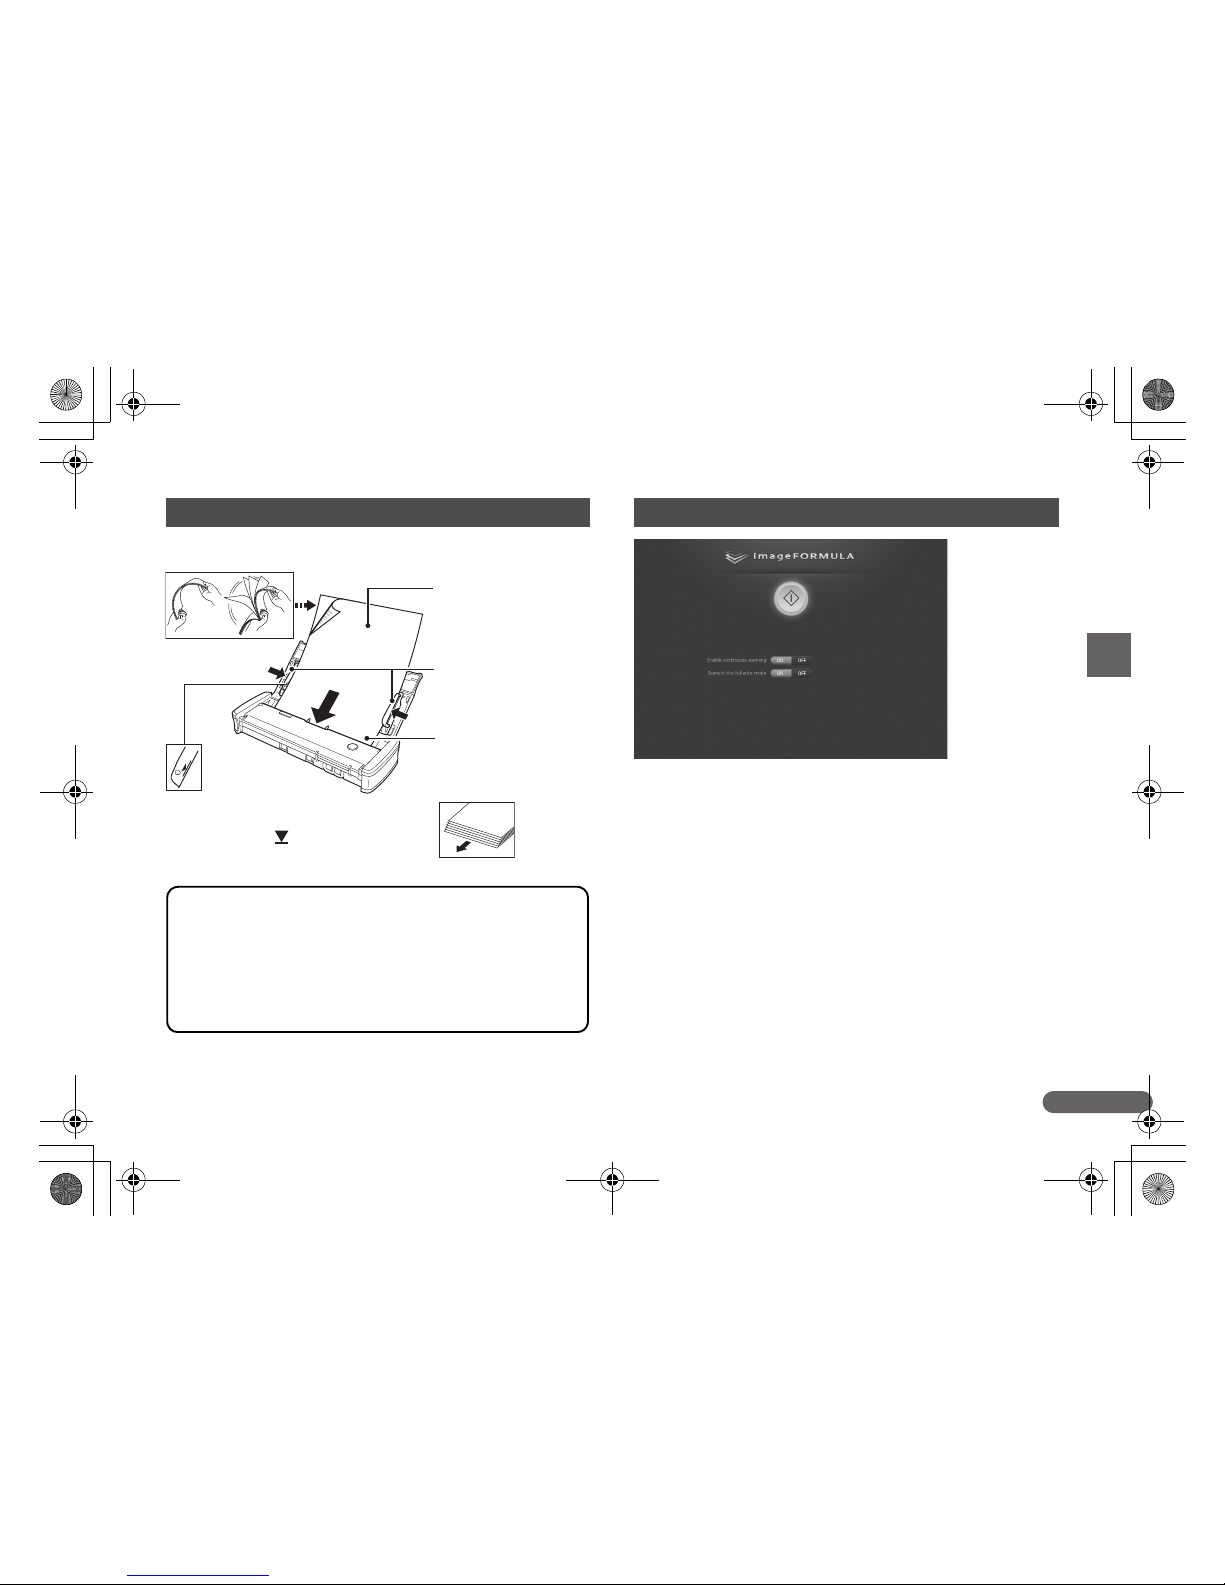
A If you want to scan a multi-page document in batches, click [ON] for
[Enable continuous scanning]. This manual describes scanning
operations with this set to [OFF]. For details on operations with this
set to [ON], refer to the User Manual stored on the supplied Setup
disc.
B If you want to configure scanning conditions, click [OFF] for [Scans
in the full auto mode]. (See p. 12)
4. Placing Documents
Scannable Documents
Width: 50.8 mm to 216 mm (2" to 8.5")
Length: 70 mm to 356 mm (2.756" to 14")
Thickness: 52 to 1 28 g/m
2
(14 to 34 lb bond ) 0.06 mm to 0.1 5 mm
(0.0024" to 0.0059")
Depending on the document, scanning m ay result in a paper jam
or malfunction. For details, refer to the User Manual.
Press the document beneath the tabs.
You can place up to 20 sheets at one time.
Do not go past the mark on the document
guides.
Fan the pages before placing them.
Place the scanning side of
the documents face down
into the scanner.
Adjust the document
guides to the edges of the
documents.
Place the top of the
documents pointing down.
(with page edges slightly
askew)
5. Configuring the Scanning Method
0-00-P-215_RG_EN.book Page 11 Wednesday, August 24, 2011 11:45 AM
12
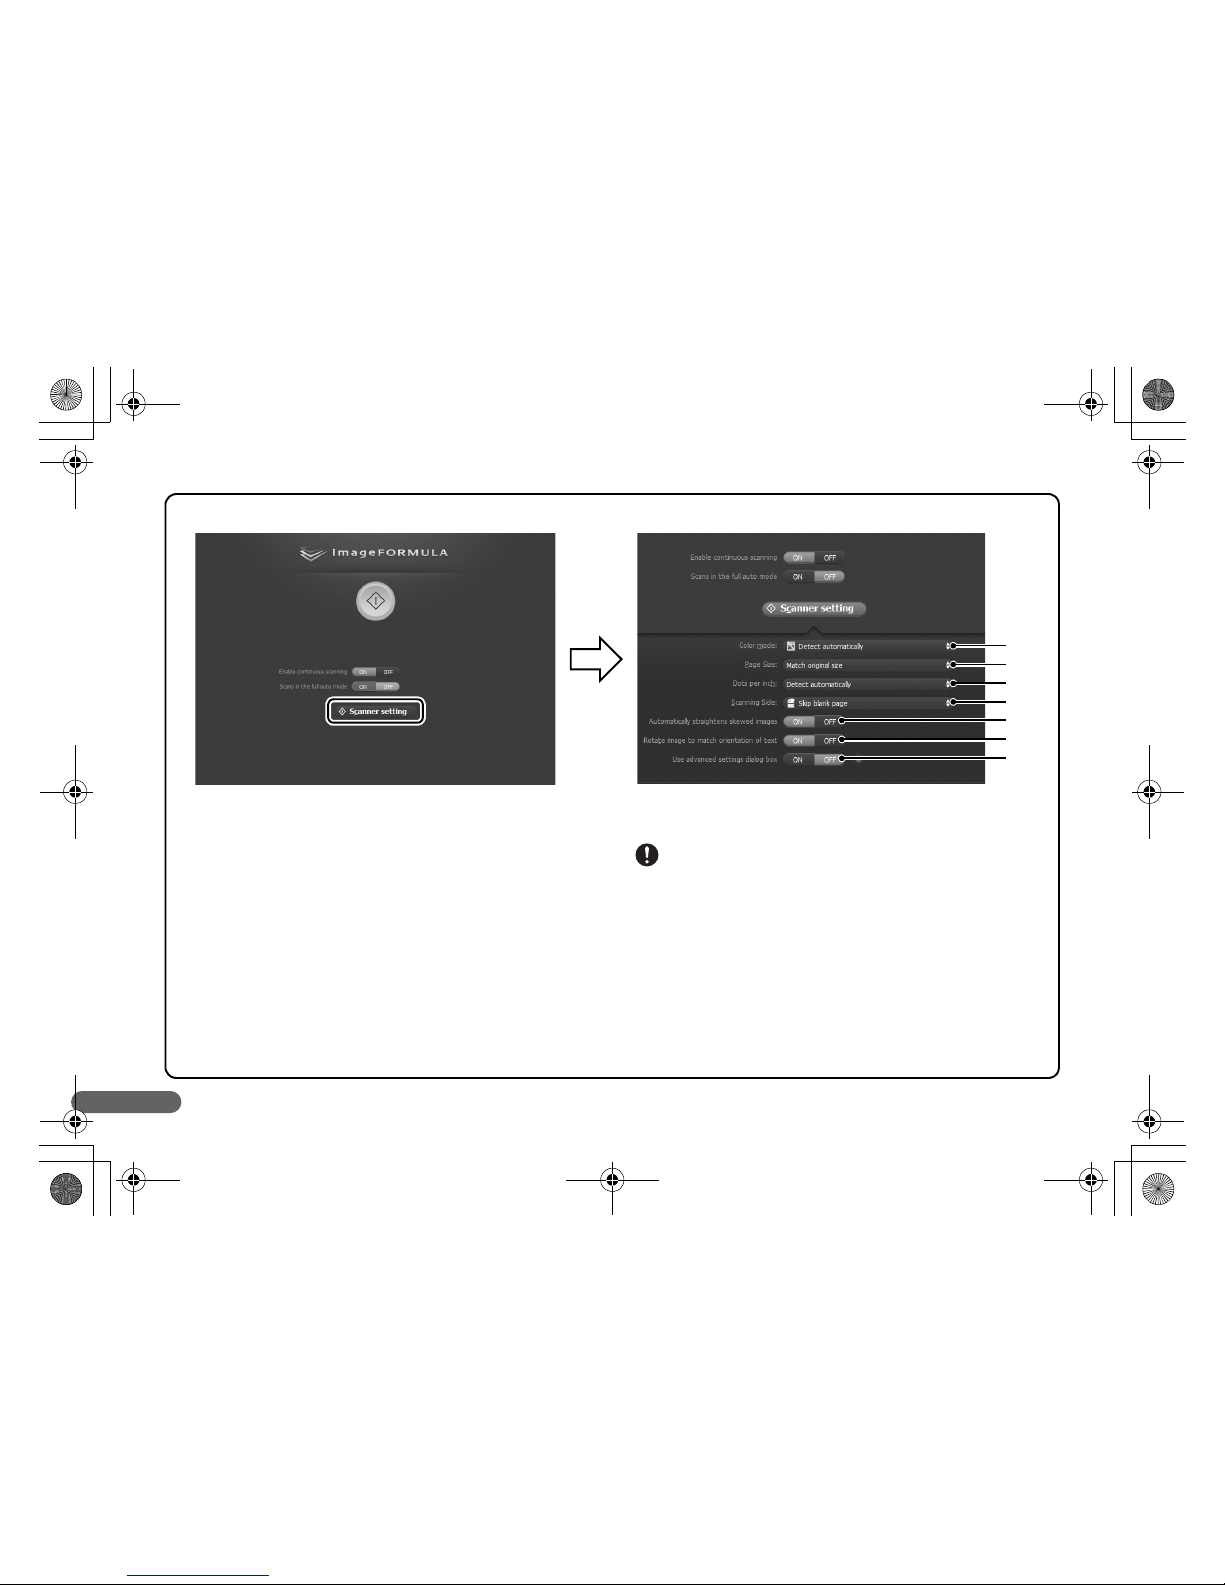
Configuring the Scanner Settings
When you click [OFF] for [Scans in the full auto mode], the [Scanner setting] button appears. Click the [Scanner setting] button to display scan
condition settings, and configure the color mode, resolution, and other basic scanning conditions.
A Specify the scanning mode (24 bit color, grayscale, black and
white). If you select [Detect automatically], the scanner
automatically detects the color mode.
B Specify the page size of the document.
C Specify the scanning resolution.
D Specify the scanning side of the document (simplex or duplex). If
you select [Skip blank page], blank pages within the document
will not be scanned.
E Detects slants in scanned images and straightens them.
F Detects the orientation of text in scanned images, and rotates the
images to correct the text orientation.
G Specify detailed scanning conditions. Refer to the User Guide for
details.
IMPORTANT
If you configure scanning conditions that require a large amount of the
computer’s memory, scanning may be disabled. If an error message
appears due to insufficient memory while scanning is in progress, exit the
application and try scanning again using different scanning condition
settings.
A
B
C
D
E
F
G
0-00-P-215_RG_EN.book Page 12 Wednesday, August 24, 2011 11:45 AM
13
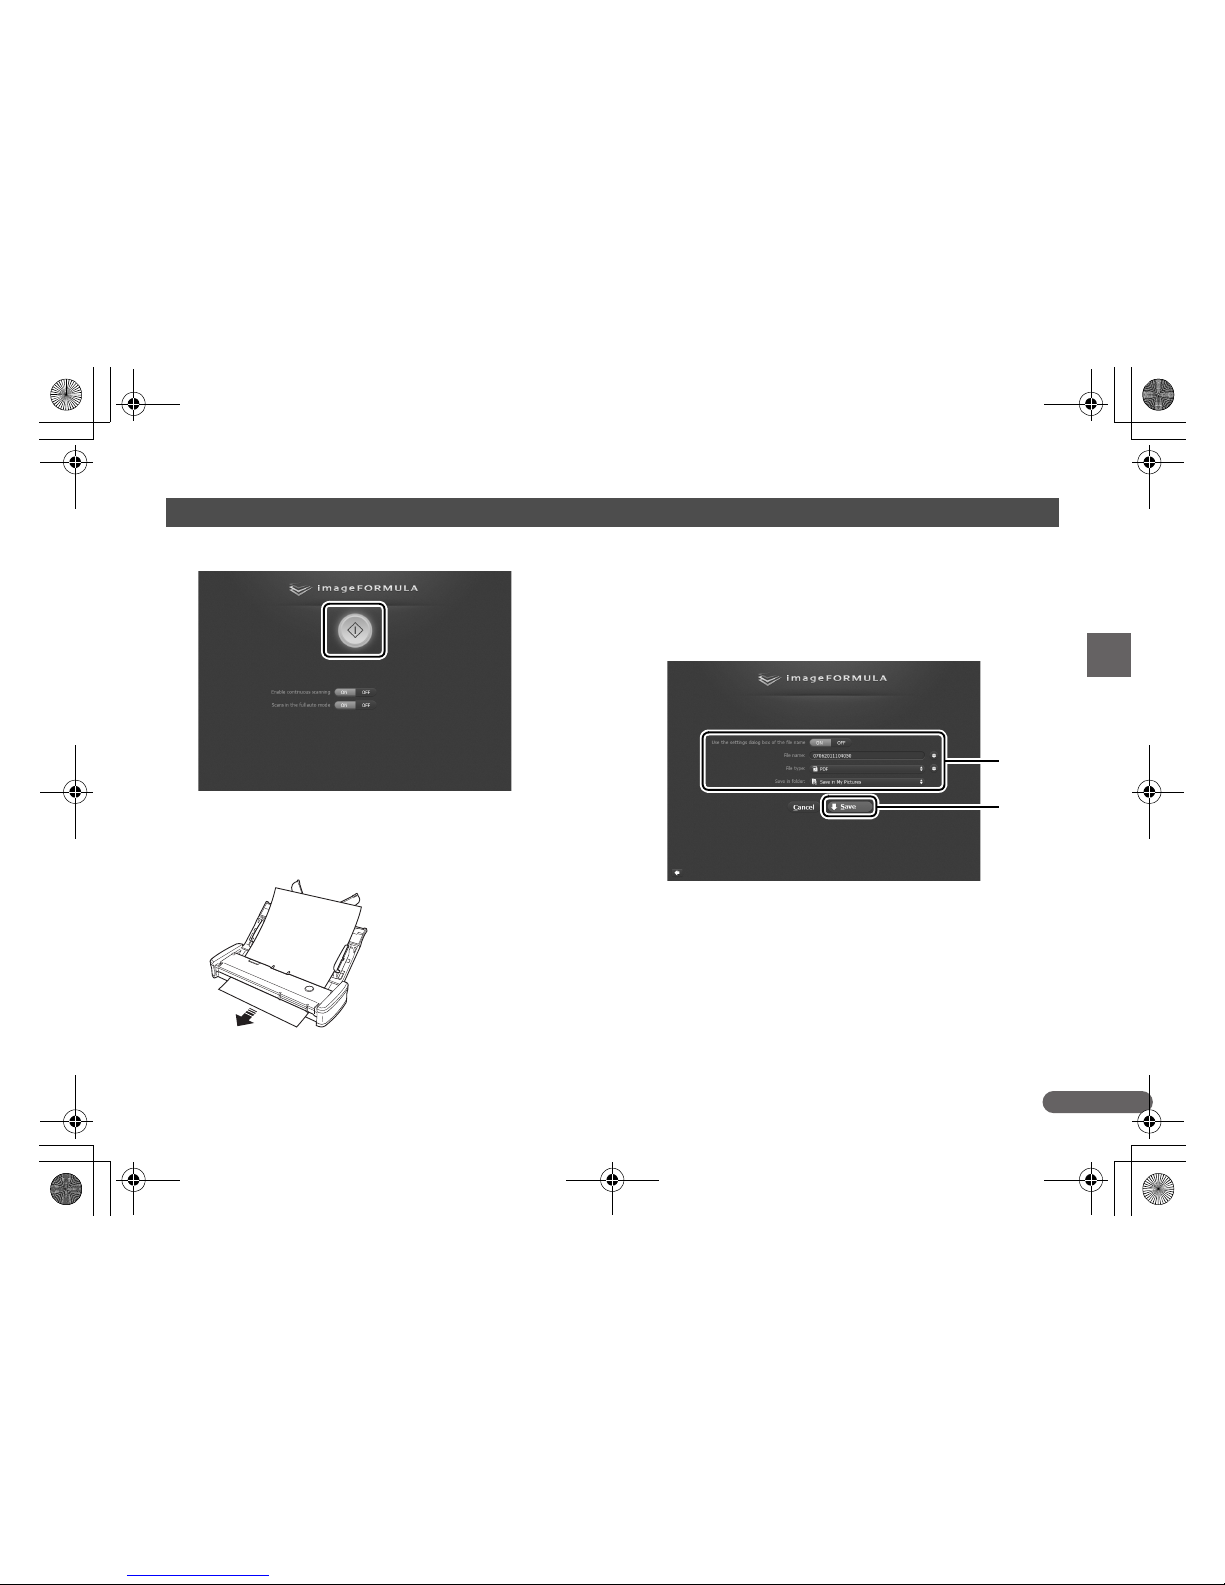
A Click [Start] or press the start button on the scanner.
• The documents are scanned and ejected when scanning is
finished.
• The scanned document is ejected from the front. Do not place
any objects in front of the scanner.
• If double-feeding occurs, reduce the number of pages that you
load into the scanner at one time.
• Depending on paper quality, you may hear unusual noises
while scanning some documents, but this does not indicate a
malfunction.
B Save the scanned images.
A Specify the name, format, and save destination for the file.
B Click [Save] to save the scanned images.
6. Scanning Documents
A
B
0-00-P-215_RG_EN.book Page 13 Wednesday, August 24, 2011 11:45 AM

14
A Exit CaptureOnTouch Lite.
Click the CaptureOnTouch Lite icon on the taskbar or the menu
bar, and click [Exit] in the menu that appears.
B (For Mac OS X only) Drag and drop the [ONTOUCHLITE]
folder and [CaptureOnTouch Lite for Mac] folder onto the
[Trash] icon.
C Close the feed tray.
D Disconnect the USB cable.
After Scanning
Windows
Mac OS X
0-00-P-215_RG_EN.book Page 14 Wednesday, August 24, 2011 11:45 AM

15
Common Problems and Solutions
This section provides recommended solutions to common problems.
If you have a problem that is not solved by the following, contact your local authorized Canon dealer.
Problem 1 The scanner does not turn ON.
Solutions (1) The scanner remains OFF while the feed tray is closed. When you open the feed tray, the scanner turns ON automatically.
(2) If the scanner is connected to the computer via a USB hub, try removing the hub and connecting directly to the computer.
Problem 2 The scanner is not recognized.
Solutions (1) Confirm that the scanner is properly connected to the computer with a USB cable.
(2) Confirm that the scanner is turned on. See the previous “Problem 1” if the scanner does not turn on.
(3) The computer’s USB interface may not support the scanner. The scanner cannot be guaranteed to work with all USB interfaces.
(4) Confirm that the supplied USB cable is used to connect the scanner to the computer. The scanner cannot be guaranteed to work
with all available USB cables.
(5) If the scanner is connected to the computer via a USB hub, try removing the hub and connecting directly to the computer.
(6) When the Auto Start switch on the scanner is set to ON, you can only scan with the built-in application, CaptureOnTouch Lite. In
this case, scanning from applications on the computer is disabled.
(7) When the scanner is operated with Windows and if “?”, “!”, or “x” icons appear for the scanner in Device Manager, delete the
scanner in Device Manager and reinstall the scanner driver.
Problem 3 CaptureOnTouch Lite does not start.
Solutions (1) If the Auto Start switch on the scanner is set to OFF, the built-in application, CaptureOnTouch Lite, does not start. Close the feed
tray to turn OFF the scanner, and set the Auto Start switch to ON.
(2) If access to USB devices is blocked by security software, you may not be able to use CaptureOnTouch Lite.
Problem 4 Documents feed askew (scanned images are slanted).
Solutions (1) Align the document guides to fit the documents as closely as possible, and load the documents so that they feed straightly.
(2) Enable [Automatically straightens skewed images] (or [Deskew]) in the scanner driver settings.
(3) If many pages have been scanned since the last roller cleaning, clean the rollers and separation pad. If documents still feed
askew, roller replacement or other maintenance may be needed. For details on roller cleaning and replacement procedures, refer
to the User Manual.
(4) Confirm that the separation pad is attached securely.
(5) Perfectly straight scanning may not be possible for the document due to the structural design of the scanner.
0-00-P-215_RG_EN.book Page 15 Wednesday, August 24, 2011 11:45 AM

16
Problem 5 If white lines or streaks appear in scanned images.
Solutions Clean both sides of the scanner glass, and the rollers. If a sticky substance such as glue or correction fluid is found, carefully wipe
with just enough pressure to clean the area where the lines appear. If the problem cannot be solved by cleaning, the internal glass
may be scratched. Contact your local authorized Canon dealer.
Problem 6 Documents jam (or double-feed).
Solutions (1) If the feed roller and the separation pad have been installed correctly, clean them if necessary.
(2) Proper scanning may not be possible when document pages stick together due to static electricity. Fan the documents before
you load them.
Problem 7 Memory becomes insufficient and scanning stops.
Solutions If you configure scanning conditions that use a large amount of the computer’s memory, scanning may stop because of insufficient
memory. Although this depends on the computer’s memory size, the possibility of insufficient memory increases if any of the following
scanning conditions overlap.
• [Color Mode] is set to [24-bit Color]
• A large page size (e.g. Legal) is specified as the [Page Size]. Alternatively, the page size is set to [Scanner’s Maximum].
• A high resolution (600dpi etc.) is specified for [Dots per inch].
If an error message appears due to insufficient memory while scanning is in progress, exit the application, change the scanning
conditions (e.g. reduce the resolution or page size) and then try scanning again.
Problem 8 The scanner makes unusual noise while feeding documents.
Solutions The paper quality of some documents can result in unusual noises, but this does not indicate a malfunction.
0-00-P-215_RG_EN.book Page 16 Wednesday, August 24, 2011 11:45 AM
 Loading...