

Page 1
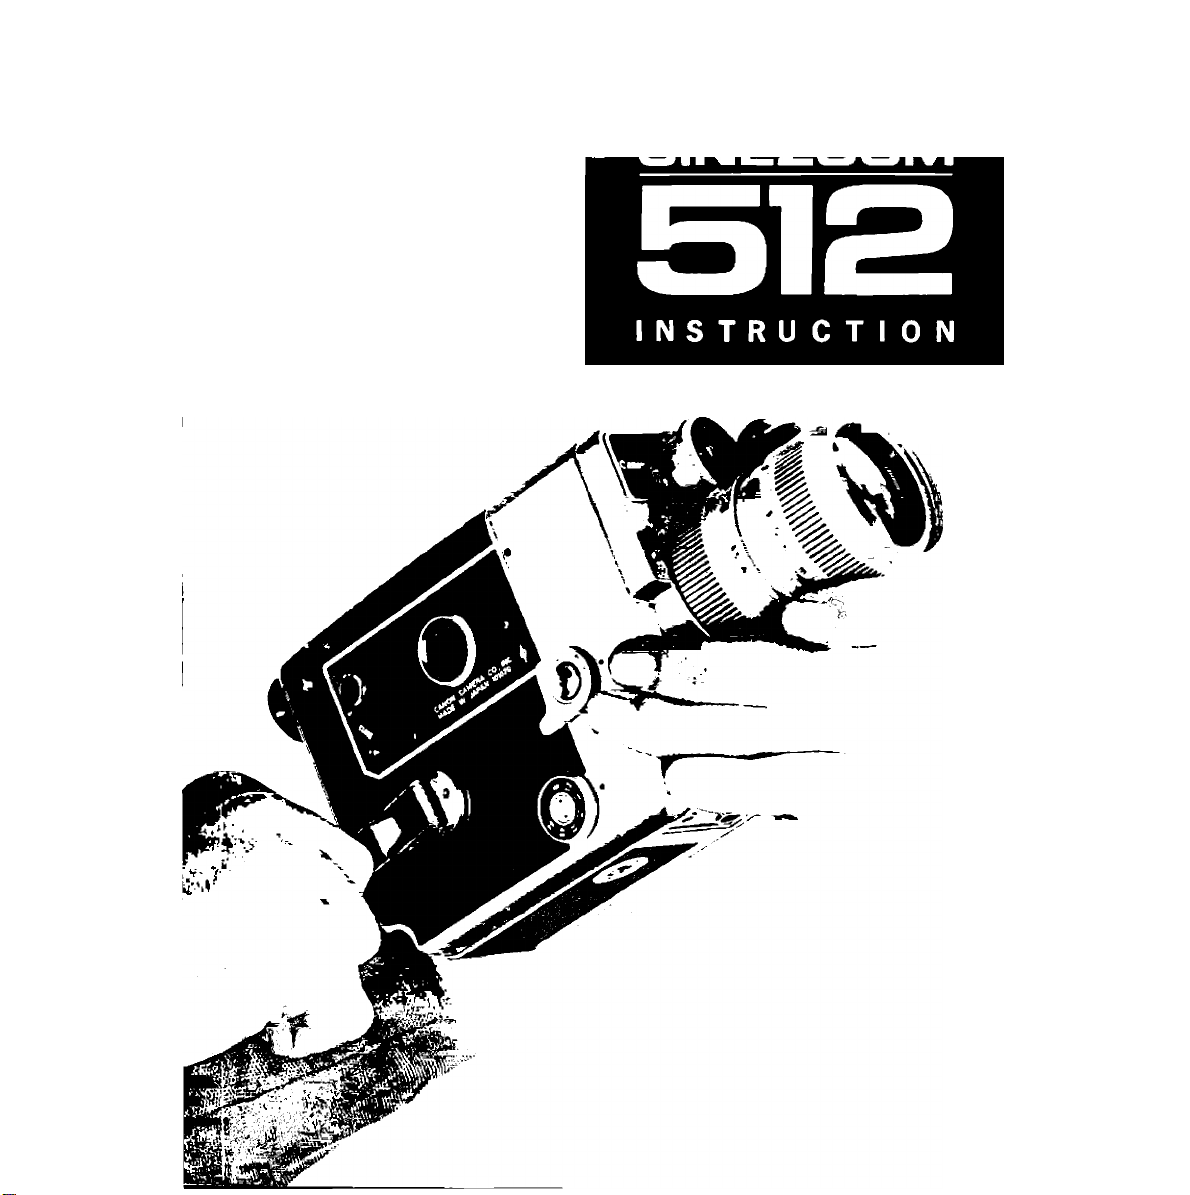
Canon
English Edition
Page 2
You have selected a fine camera, and we are proud we can offer it to you.
The Canon Cine Zoom 512 is another addition to the family of Canon
cameras which have contributed greatly to Japan’s spectacular advance in
the field of photography. At the same time, Canon is always striving to
add to your “joy of living”.
Canon products, reflecting the latest designs and exacting demands of the
modern public, are the outcome of a unique and original manufacturing
process which has been developed over many years of experience.
We have no doubt that the superior quality of the Canon products—not to
mention their reasonable prices—will give users the fullest satisfaction. It
is our sincere hope that your Canon will make family and friendly gettogethers, recreational outings, etc., much more meaningful and memorable.
Page 3
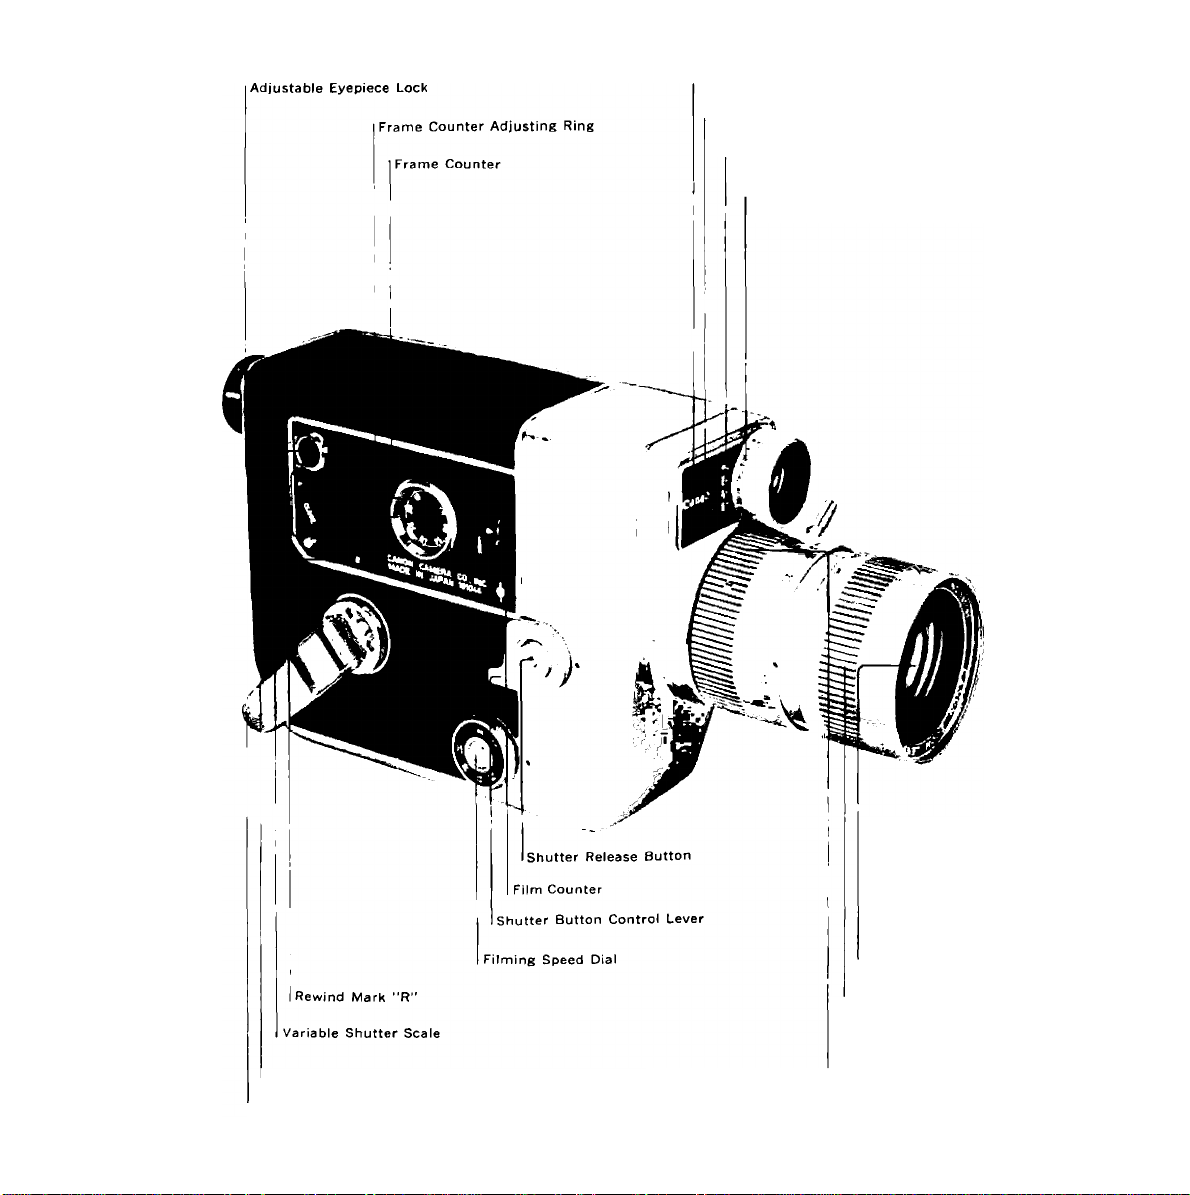
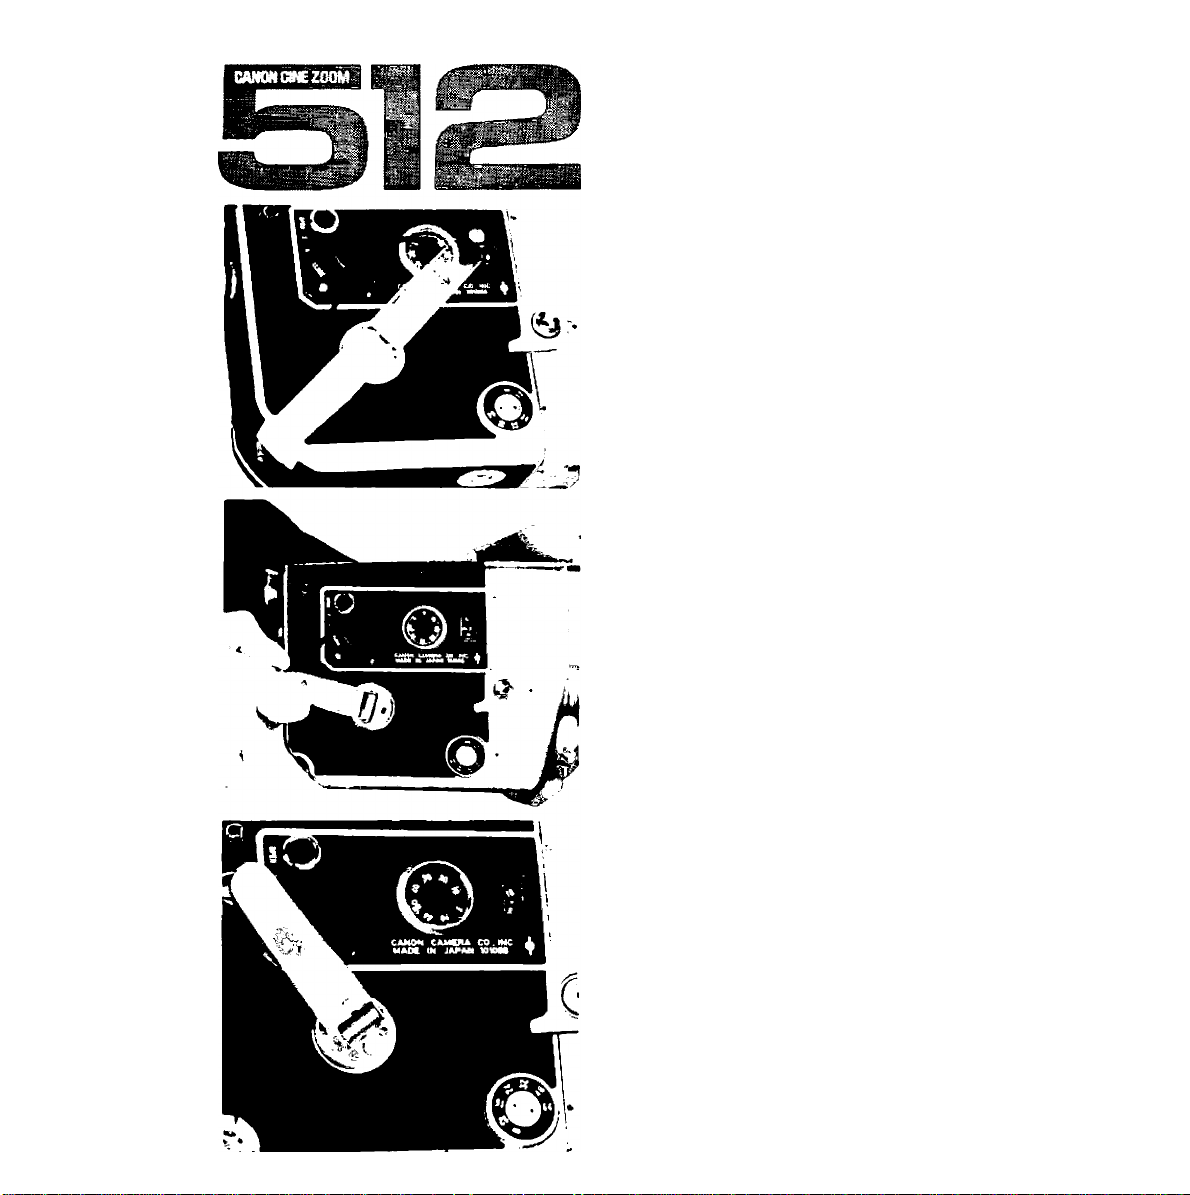
Illuminating Window
Exposure Adjustment Mark
Film Speed Index
Film Speed Setting Dial
Variable Shutter Adjusting Lever (Rewind Set Lever)
Spring Motor Winding Crank
Zoom Lens
Focusing Ring
Zooming Ring
Page 4

CANON CINE ZOOM 512 SPECIFICATIONS
Lens: Canon zoom lens 8.5 to 42.5mm,
FI.2. 17element in 12 components
(including 6 new type giass). Magnifica
tion ratio of 5. Spectra Ccating of
amber and magenta. Inner diameter
of 48mm, outer diameter of 50mm.
Exposure meter: Built-in matching nee
dle type super high sensitive CdS
meter. Operate aperture inside the
finder. Matching the needie to the
exposure meter needle will produce the
proper exposure. Warning mark also
included.
Range of exposure meter: Can be coupled
to any range for all films between ASA
10~320, and within the range of FI.2,
8 frames/sec. to F 22, 64 frames/sec.
Exposure meter battery: Use one 1.3V
mercury battery (National M-P, Toshiba
TH-MP, Mallory RM-1, etc.)
Filming speed : 8, 12, 16, 24, 32, 48, 64
frames per second and single frame.
Spring motor: Cranking to full charge
will enable film to run for 4m (13 ft.).
Only two full windings of the powerful
spring motor will enable one side of
the film of 7.5m to be completely
exposed.
Variable shutter control: Variable shutter
control has been built in, which enables
the camera to obtain consecutively
an angle from 165° to 0°. There is a
scale of four stages, from OPEN, 2, 4
and CLOSE, with an angle of 165°,
82.5°, 41.25°, and 0°, respectively. By
adjusting the exposure time, it is pos
sible to obtain fade-ins, fade-outs and
overlaps.
Automatic rewinding mechanism :
An automatic rewinding mechanism
worked by spring motor. Includes safe
ty lock.
Film counter: When the film is loaded,
the counter is automatically reset.
Coupled to the film advance.
Frame counter: Frame counter is capable
of making zero adjustment. One revo
lution : 80 frames (1 ft.). Coupled to
film counter and able to register single
frames.
Viewfinder: Single lens reflex type show
ing unreversed correct images. Builtin split image rangefinder and meter
window. Viewing is always bright.
Capable of adjusting visibility.
Safety devices: Equipped with shutter
button safety lock, automatic film
advance safety device and safety de
vice for mercury battery switch.
Tele Converter: Converter with a tele
scopic zoom lens of 14~70mm for the
Canon Cine Zoom 512.
Power grip: Operates electric motor
zooming and shutter release with
trigger.
Size, Weight : 210 X 114 X 53mm. l,700gr.
Page 5

SHOOTING 8MM MOVIES AND
FILMS
The film inside the 8mm cine camera
is actually 16mm, or double the width,
with the length being 7.5 meters.
One half of the entire length is expos
ed during each run After both sides
are exposed and developed, split into
two strips and sliced into 8mm width,
the film is ready for showing.
The developing, splitting and splicing
of the film are all handled by the Film
Company.
When the exposed film is sent to the
film manufacturer, it will be processed
and returned to you on a roll which can
be inserted into the projector immedi
ately.
A reversal development converts the
8mm roll, whether black and white or
color, into a positive picture film.
Accordingly, because of its narrow lat
itude compared with the ordinary film,
it is essential that special attention
should be paid to exposure.
One 8mm roll of film, 15 meters in
length, has a running time of four
minutes. In terms of volume, it is
equivalent to a 16mm film which is
30 meters in length.
■ n
¿A
in
Page 6
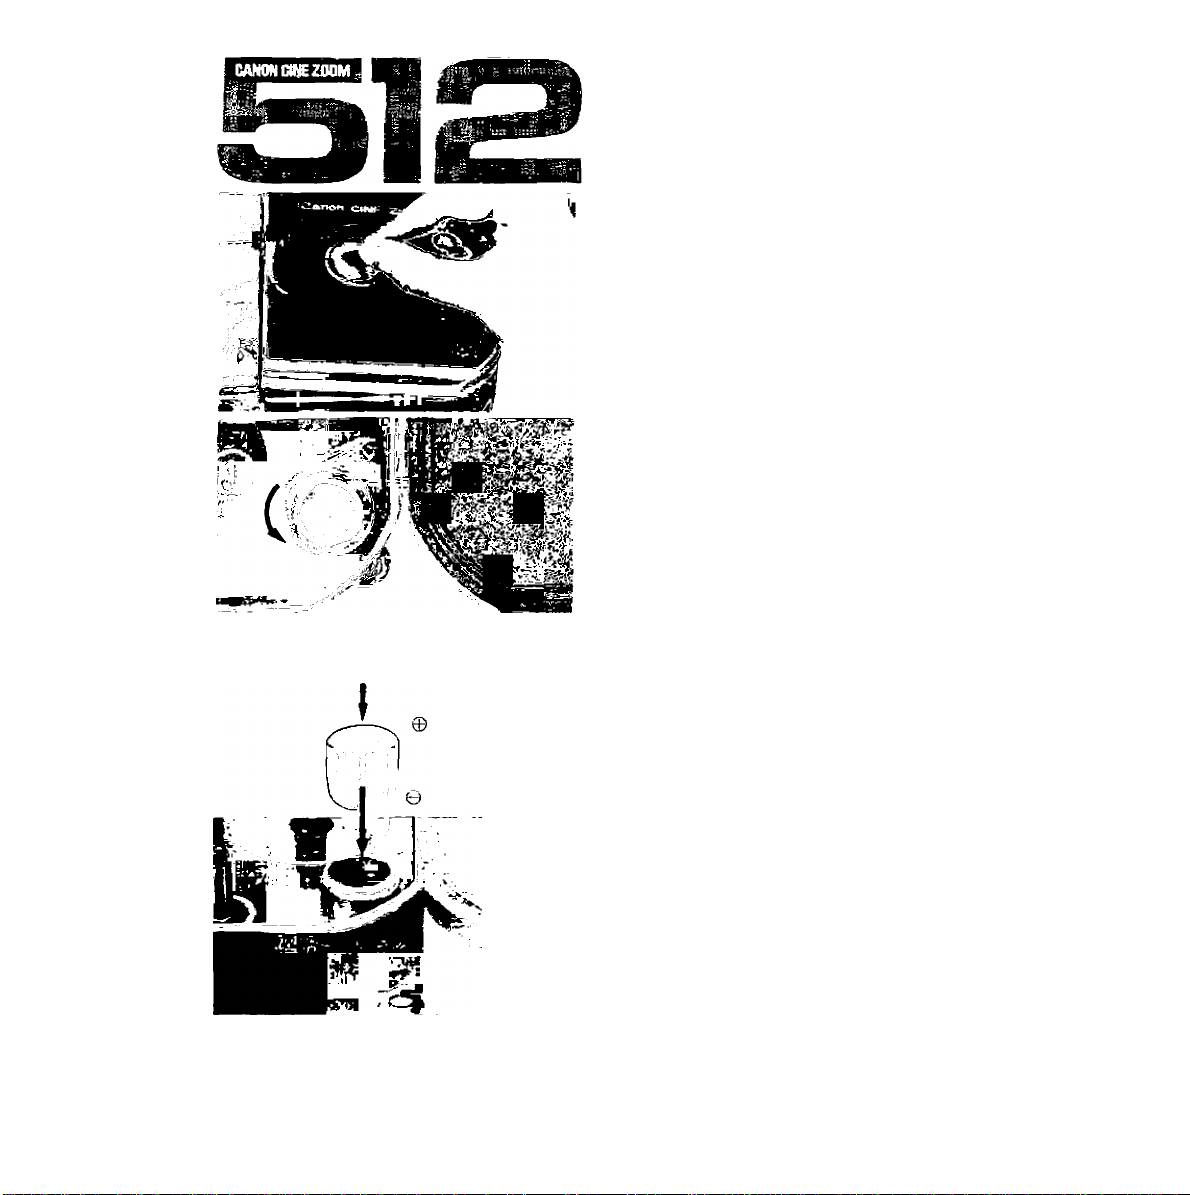
HOW то LOAD THE MERCURY
BATTERY
Before using the camera, take the mercury
battery out of the envelope and load it
into the camera. If you forget to do this,
the meter will not function.
For CdS, mercury batteries M-P made by
National and TH-MP made by Toshiba are
used, which are equivalent to the Mallory
RM-1. Ordinarily the battery lasts for
about two years.
* The mercury battery chamber is inside
the film compartment.
Open the side cover by turning the side
cover lock of the camera to the left.
To unscrew the mercury battery chamber
cover, turn it to the left.
Mercury battery
Place the center point of contact of the
battery face downwards and insert.
• Before insertion, thoroughly wipe the
mercury battery.
Exert a little pressure on the cover when
screwing it in by turning it clockwise.
• The meter will not function properly
if the battery is incorrectly inserted.
Close the side cover.
The switch is ON when the white dot of
the circuit switch is turned to the oppo
site side of the orange mark, and the nee
dle inside the finder starts to fluctuate.
Page 7
OFF
REPLACEMENT OF MERCURY
BATTERY
When the circuit switch has not been
turned to the orange mark position, the
circuit is disconnected and the meter is
not functioning. When the switch is turn
ed on, the electric current will activate the
meter needle. When the camera is in this
condition, turn it towards the bright sky.
If the needle inside the finder fails to
move, it is necessary to repiace the
mercury battery.
Do not soil with perspiration or finger
prints
Before loading the mercury battery, wipe
it thoroughly with a dry cloth. Perspira
tion and fingerprints can cause corrosion.
If an unclean battery is inserted, there is
a danger that the connecting part of the
camera may be damaged. Exercise the
greatest care.
If you do not plan to use the camera for
a long time, remove the mercury battery
and store it in a dry place.
Page 8
HELPFUL FACTS
This camera is classed among the finest
8mm cameras, capable of the highest
performance. Equipped with the variable
shutter control and rewinding system, it
is able to display the highest cinemato
graphic standards attainable with the
16mm cameras.
Thus, the key to achieving these superb
results is the knowledge of how to get the
most out of each functional part of the
Please read Instruction Manual carefully.
camera. Above all, it is necessary to be
fully acquainted with your camera.
Before actually taking the pictures, it is
important that you should know how to
handle the camera and how the various
parts of the camera function. Make your
own tests. By doing this, you will not only
be able to avoid careless failures and mis
haps, but achieve the finest results.
Page 9

PROCEDURES AND INDEX
^ 3
Wind the crank.
2
Load the film.
Set the film speed.
Page 11
33
22
Set the filming speed at 16. 12
Set the variable shutter
adjusting lever to OPEN.
16
Page 10

Look into the finder. Page 25
Focus correctly, and decide
on composition.
8
Determine the lens aperture. 23
Press the shutter button. 24
10
Whenever necessary,
operate the zoom.
27
26
Page 11
WINDING
Winding crankTcharges the spring which
powers the advance of the film. After
pulling out the crank to its winding posi
tion, keep winding in the direction of the
arrow until It stops.
• By one full winding of the powerful
spring, it is possible to run the film 4
meters (13 feet). Thus, to entirely expose
one side of the film, 7.5 meters long,
only two full windings are required.
AFTER USING THE CRANK
When the crank is folded, it can be
freely turned either to the left or right.
Return to its original position when not
Page 12

The film stops An advance of
for exposure. the exposed
frame
places.
takes
FILMING SPEED AND SHUTTER
The 8mm shutter is closely connected
with the film advance.
The exposure is made from the rotation
of the semicircular leaf which has a given
angle. When the leaf is rotating, expo
sure of one frame and film advance are
coupled, moving synchronously. In other
words, when the open section of the leaf
is at the aperture section, the film stops
for exposure. The principle of this process
is that when the aperture section is block
ed by the rotating leaf, an advance of the
exposed frame takes place.
The term 16 frames denote that in one
second, 15 frames are exposed and ad
vanced, while 32 frames would mean that
the speed will be doubled. Hence, the ex
posure time is determined by the open
angle of this leaf and the rotating speed
and is regulated by the filming speed.
Frame speed 8 12 16 24 32 48 64
Exposure (sec.) 1/18 1/26 1/35 1/50 1/70 l/lOO 1/140
VARIABLE SHUTTER CONTROL
ADJUSTING THE 8mm CAMERA FILM
SPEED
Putting aside the 8mm at this point, let
us consider the film speed adjustment of
the ordinary camera. For a fast moving
object, a fast shutter speed is selected.
In a dark room, the slow shutter is properly
adjusted and set in open position. For an
ordinary camera, shutter and diaphragm
are freely adjusted together.
However, in the case of the 8mm camera
the filming speed cannot be changed at will.
The reason is that the standard speed is
fixed at 16 frames. Because under normal
conditions, the shooting of the film is done
on the basis of 16 frames and projected
at the speed of 16 frames, change of speed
should be made only when you intend to
take special types of movies such as trick
shots. In other words, the exposure ad
justment is not done by changing shutter
speed, but is done by adjusting the
diaphragm.
EXPOSURE ADJUSTMENT WITH THE
VARIABLE SHUTTER CONTROL
Instead of relying only on the diaphragm,
the variable shutter control enables the
change of exposure to be made with the
shutter. As explained earlier, the exposure
time is determined by the open angle of
the shutter. By changing the degree of
this angle, the exposure time is reduced.
Although the ordinary 8mm camera has the
shutter opening angle fixed at around 150°,
in the case of the Canon Cine Zoom 512
the angle may be changed to any of the
four stages between 155° to 0°. It is pos
sible, therefore, to freely make exposure
adjustments. In addition, fade-in and fadeout may be easily carried out.
Page 13

ADJUSTING FILMING SPEED
The filming speed dial adjusts the number
of film frames advanced during a period
of one second, and in the case of the 8mm
movies, the standard speed is 16 frames.
Turn the diai, and set the red dot to the
required fiiming speed.
• Intermediate speeds on the dial may be
used. The change in speed in such a
case may be regarded as consecutive.
I The dial cannot be turned between
and 8.
• Avoid slipping resulting from high film
ing speed; in particular, the 64 filming
speed.
64
FILMING SPEED AND PICTURE EFFECTS
The 8mm movie is taken and projected at
a standard filming speed of 16 frames.
Hence, if speeds other than 16 are used,
the effects of the picture wili vary when
the film is projected.
HIGH FILMING SPEED
When the film is taken at a high filming
speed of between 24 to 64, slow motion
effects will result during the projection.
For example, as 64 frames represent a
fourfold increase in the standard speed of
frames, this means that the projection
will take four times ionger. By decreas
ing the speed of motion, it reduces the
blur of rapid movement and is especially
helpful in showing any motion analytically.
The time of exposure being rapid, it also
prevents blurring when panning and can
be conveniently utilized to control expo
sure when taking pictures of the clear sky.
13
Page 14
LOW FiLMtNG SPEED
Under 12 frames, the effects are propor
tionately opposite to high filming speed.
By reducing the number of frames, the
sense of speed is heightened. Serving to
accentuate the motion of the object, it
can make movements humorous and far
away objects appear to be nearer. In addi
tion, in case it is too dark when the film
ing speed is 16—and the aperture is fully
open—it may be used to compensate the
inadequacy of light and under exposure.
• When it is used to control exposure,
refrain from shooting objects that have
normal movements.
High filming speed for moving reflections
on water.
High filming speed for detailed analysis
of a golf shot.
Page 15

Low fi lm ing sp ee d fo r th e se tti ng su n.
Low filming speed to exaggerate the speed
of a vehicle at a given moment.
Low filming speed for exposure control
High filming speed for a dynamic shot.
Low filming speed to accelerate the speed
of a distant object.
Page 16

CANmCiNEZOm ■
Variable shutter adjusting lever
Rewind mark R
Rewind release button
Re-adjust to the same dial
CANON CAMERA CO
MADE IN JAPAN 1011
ADJUSTMENT OF VARIABLE
SHUTTER CONTROL
By sliding the variable shutter adjusting
lever, it is possible to change the open
angle of the shutter leaves at four stages
from OPEN to CLOSE.
By doing so, besides being able to adjust
the exposure, operation of the fade-out
and fade-in may be executed very effec
tively.
• Sliding of the lever may be carried out
smoothly to adjust the full opening and
full closure.
• Each stage of the scale is at a position
which halves the open angle, thus the
open angle degree of each shutter scale
is as follows :
OPEN 2 4 CLOSE
165° 82.5°, 41.25° 0
(Completely opened) (Completely closed)
• Although each point of the scale has a
click stop, the intermediate points of
the scale also changes consecutively.
• By sliding the lever beyond CLOSE, it
will stop opposite the rewind release but
ton. The shutter will not function, (see
section on fade).
VARIABLE SHUTTER CONTROL AND
FILMING SPEED
Changing the variable shutter adjusting
lever will relatively affect the filming
speed and exposure time as follows:
165° 0 1/18 1/26 1/35 1/50 1/70 1/100 1/140
82.5° 2 1/36 1/52 1/70 1/100 1/140 1/200 1/280
41.25° 4 1/72 1/104 1/140 1/200 1/280 1/400 1/560
8 12 16 24 32 48 64
ADJUSTMENT OF THE VARIABLE SHUT
TER ADJUSTING LEVER AND FILM
SENSITIVITY
Setting of the lever will change the expo
sure according to the dial. As a result, it
is necessary to change the setting of the
film sensitivity to compensate the expo
sure factor. To do this, adjust the film
sensitivity to the exposure factor mark
which is the same as the open angle index
being used. By doing this, the meter will
function properly. For example, when the
shutter opening angle is set at 2, and the
speed of the film being used is ASA 25, set
the scale of 25 at the 2x index mark.
Page 17

Prevents a moving object from appearing
blurred.
EFFECTIVENESS OF THE VARIABLE
SHUTTER CONTROL
Since a fast exposure time may be at
tained even at the same filming speed,
this greatly contributes to the effective
ness of the picture.
Since a shutter speed of 1/140 sec. can
be attained even with a 16 filming setting,
not only can the exposure be adjusted, but
it helps to prevent a moving object from
appearing blurred as well as blur caused by
moving the camera.
High filming speed may be used to film a
moving object at slow speed, and get a
sharp picture.
It can be used to great advantage when
panning a scene in which the change from
light to dark is very pronounced.
During properly exposed panning, by moving
the lever, it is possible to take exposed
scenes of dark to bright places continuously.
Use of fading technique
to page 19).
is possible (refer
1 7
Page 18

ADJUSTMENT OF VARIABLE
SHUTTER CONTROL
Since the variable shutter adjusting lever
can make continuous adjustments from fully
open to totally closed, fade-out and fade-in
operations can be easily undertaken during
the shooting. Moreover, by utilizing the rew/inding mechanism it is possible to get the
overlap.
Page 19

Page 20

HOW TO USE THE TRIGGER GRIP
While holding the grip, operate the shutter
release and electric zooming. For electric
zooming, load two batteries.
Zooming
switch
ATTACHING ONTO THE CAMERA BODY
1. Turn the lock lever in the direction of the
arrow.
2. Fit the 3 contact sections, and tighten
with the tripod screw.
Shutter
operating pin
Zooming operating pin
battery
iLock lever
HOW TO LOAD THE BATTERY
Unscrew the cover at the bottom of the
grip, and insert the battery, being careful
not to mistake the + and —.
STORAGE AND USE
Hold the grip with the right hand. When
the trigger is pulled, the shutter is reieased
and when the zooming switch is turned on,
zooming is performed electrically.
• With a new battery.
• When the camera is not used for about
six months, aiways remove the battery.
• When using the grip, check the electric
voitage.
• Operation is possible even when the Tele
Converter is attached.
• Zooming time from wide angle to tele
scopic is about five seconds.
• Since the iock lever is a safety device for
shutter and zooming, when the camera
is not in use, aiways turn it in the direc
tion of the arrow.
Page 21

Lever stop position
I
Move lever to R position \while
the rewind release button is pressed.
CUfON CAMVfU С6.1ИС X
UADC IN JAPAN T
FILM REWIND MECHANISM AND
COUNTER
By operating the spring motor, it is possible
to rewind the film and use it for double
exposure. The exact amount of rewinding
can be ascertained from the coupled film
counter and frame counter.
When the variable shutter adjusting lever
is moved from CLOSE to the red dot mark,
the shutter will cease to function.
While pushing the rewind release button,
set the variable shutter adjusting lever ac
curately, so it will be at R position.
Pressing of shutter button
will start operation.
Frame counter adjustinig ring
By turning the movable dial, it can
be set to the start position
I . .
When the shutter button is pressed, the
film starts winding in reverse and the film
counter and frame counter also rotate in
reverse.
CONFIRMING WITH FRAME COUNTER
One rotation of the film counter equals
80 frames (one foot), enabling calculation of
even a single frame.
The indication is given by the rotating
mark inside the dial. For regular rotation
it is reverse calculation, for reverse rotation,
it is regular calculation.
Thus, before shooting, set it to zero and
fade-out. Read the frame number, and
rewind to 0 position.
By fading-in, the overlap can be made pre
cisely and completely.
Generally in fade technique, rarely does it
go over 80 frames.
21
Page 22

CANON dPigOM^
ADJUSTMENT OF COUPLED
METER AND LENS APERTURE
The Canon Cine Zoom 512 meter is compieteiy coupied to the fiiming speed dial.
The adjustment of the aperture is made by
adjusting the matching needle to the meter
needle inside the finder. By making foliow
ing preparations, the coupling operation of
the meter is carried out.
1. Set the film sensitivity.
2. Set the filming speed diai.
3. Turn the switch to ON.
ADJUSTMENT OF THE FILM SENSITIVITY
After loading the film, always turn the ad
justing diai of the meter, and set the speed
of the film being used. If this is not done,
the meter wili not give the correct exposure.
• For example when an ASA 25 film is used,
adjust the scale of 25 to the index.
• For biack and white as weli as coior fiims,
the method of adjustment is the same.
• The speeds of the fiim that can be used
are :
ASA 10 16 25 40 80 160*^°°’ 320
DiN 11 13 15 17 20
23
(24, 25)
26
EXPOSURE FACTOR MARK AND FILM
SPEED SETTING DIAL
Indicator adjust the indicator
Turn the dial and
The numbers 2, 4, 8 under the fiim speed
scaie is a scaie for compensating the expofsure factor. By adjusting the fiim speed to
these marks, as shown on the scaie, the
exposure wili be twofoid, fourfold, eightfold.
METHOD OF USE
('When a filter is attached to the lens, or the
shutter angle is changed, multiply the expo
sure by two in order to get the proper
aperture. For example, when a fourfold ND
filter is used, or when the shutter angle is
4, turn the speed dial and adjust the speed
to be used to the scale of 4.
22
Page 23

ADJUSTING THE APERTURE
Inside the finder, there is a meter window,
as well as a meter needle, matching needle,
aperture scale and warning mark.
1. While looking at the object through the
finder, rotate the aperture adjusting
ring.
2. Overlap the matching needle onto the
needle inside the exposure meter win
dow. By doing this, you are assured of
the correct exposure.
Under exposure
warning mark
Exposure meter
Aperture scale
16
1 1
8
5.6
c
4
2.8
2
1.2.
window
Over exposure
warning mark
Meter needle
Matching needle
Aperture setting ring
• When the needle is at the bottom of the
window, correct exposure is not attainable.
• When the needle is at the top, either
adjust the variable shutter adjusting lever
or use the ND filter.
• The aperture may be freely set and used
without regard to meter.
23
Page 24

Turn the lever to "L” while
pressing the shutter button.
SHUTTER RELEASE BUTTON
Pressing the shutter button will advance
the film as the pictures are being taken.
At this time, the lever should be at the R
position. Depending on the position of the
shutter button control lever, it will work in
the following three ways:
1. Safety lock
If the lever is at the L position, the
shutter button is locked, preventing
any unintentional release of film. Con
venient when traveling.
2. Running lock
Place the lever at R position and press
the shutter button. Then turn the lever
to L position. The shutter is now in a
depressed state, enabling pictures to
be taken even after the finger is
removed,
3. Single frame photography
Turn the lever to 1 position. Then by
pressing the shutter button, it is possible
to take a single frame picture. Single
frame photography is particularly suit
able for illustrating plant growth, for
trick photography, animated cartoons,
etc.
• In the case of single frame photography,
use the 12 filming speed, with exposure
time around 1,25 sec Aperture coupled
to the exposure meter.
RELEASE SOCKET
The release may be attached to the shut
ter button. Recommended for single frame
photography and when using the tripod.
24
Page 25

FOCUSING AND ZOOMING
Both focusing and zooming are done while
looking through the viewfinder.
Page 26

Adjustable eyepiece Lock
ADJUSTING THE VISIBILITY
Look through the finder, face the camera
towards the bright light, then while rotating
the eyepiece, make line, needle and number
appear clear within the field-of view.
After adjusting the visibility, tighten the
adjustable eyepiece lock clockwise.
ZOOMING
The picture seen through the viewfinder eye
piece will not only change in magnification
but the scope of vision will also change
when the zooming ring is rotated. What is
seen in the viewfinder is the same as that
which will appear on the film. At the maximun magnification, the focal length of the
lens is 42.5mm, at the minimum, 8.5mm.
Zooming will give your pictures varying
effects.
Magnification of Viewfinder
Focal Length Magnification
8.5mm
0.5
Focusing ring
26
[Focal Length scale
index
loistance scale
'Zooming ring
Zooming lever
13mm
20mm
42.5mm
0.75
1.15
2.5
Page 27

FOCUSING
Focusing can be attained when the distance
is correctly measured. By turning the focus
ing ring, the image in the center of the
viewfinder will separate into left and right.
When the top and bottom are perfectly
aligned, then the camera is in focus.
The longer the focal length of the lens, the
more accurately the aligned image can be
distinguished. As focusing does not change
by zooming, even when using small magni
fication, focus with the maximum magnifi
cation and then return to minimum magni
fication. To adjust the focus with the eye,
obtain the distance and then adjust this
distance mark to the distance scale of the
focusing ring.
Page 28

In focus Out of focus
Page 29

V
53X
FADE-OUT AND FADE-IN
FADE-OUT (F. O.)
By gently pushing the variable shutter ad
justing lever continuously, the shutter can
be closed at the CLOSE position. When this
is done, the bright picture gradually darkens
and finally fades out. This is known as
"fade-out”
• If the lever is turned beyond CLOSE, it
is possible (up to the red dot) to run the
film with a totally closed aperture.
FADE-IN (F. I.)
By shooting the film while progressively
returning the totally closed lever, the dark
picture gradually becomes brighter. This is
known as "fade-in.”
• The fading technique is used in movies
when there is a change of scene. Generally
speaking, the fade-in operation is used at
the beginning of a movie and the fade-out
at the end. The technique of fading may
also be used to show the elapse of time
or a sudden change in scene. However, it
should not be used indiscriminately.
• For a quickly changing scene, with the
filming speed at 16, a fade of 1~1.5 sec.
would be adequate, or about 2-~3 sec. in
the case of a slow moving scene.
Fade-out
Fade-in
1 9
Page 30

OVERLAP
Overalp
OVERLAP (O. L.)
The technique of overlapping a scene by
combining the fade-out and fade-in to have
a smooth transition of scene is known as
the "overlap" For 8mm movies, this tech
nique is regarded as difficult to master.
First, operate the fade-out.
Next, rewind only the film footage which
has been faded out. (see section on re-wind-
ing)
Then, fade-in in the next scene over this
section, in other words, double expose. This
procedure will first make the scene darker
and then progressively brighten the scene
which follows.
• Be sure to accurately calculate the time
of fade-in and fade-out and the number
of frames affected. Good effects cannot
be obtained if the timing is wrong.
• It is essential that the lever be moved
evenly and smoothly
• As for the time of the overlap, a period
of under five seconds is considered as
appropriate.
20
Page 31

CANON CINE200M
HOW TO HOLD THE CAMERA
If the camera is not stable during the shoot
ing, the picture that is projected will be
dancing and full of defects. This is espe
cially true when taking long distance shots
and when zooming. To get the best results,
the use of the tripod is recommended.
Page 32

BASIC HOLDS
Hold the bottom of the body with the right
hand, and with the thumb press the shutter
release button.
With the left hand, adjust the zooming lever
and aperture.
Hold the grip with the right hand, and pull
the trigger with the forefinger.
With the left hand adjust the aperture,
focus and manipulate the zoom lever.
• It is advisable to use a lens hood when
taking pictures against the light.
Page 33

LOADING THE FILM
For the 8mm camera, the double width, or
16mm film, is used. This is exposed one
side at a time. Unlike the ordinary camera
which exposes a strip of film once, two
separate exposures are required, one half of
the strip at a time. When one half of the
strip is exposed, the film is turned over so
that the other half of the strip may be ex
posed. Since the loading is easy to learn,
there is a tendency to be careless, which
often results in slipping and entry of light.
Such cases are not rare. Therefore, it is
important to become fully acquainted with
the correct method of loading.
AVOID DIRECT SUNLIGHT
The film is wound around a spool. In order to
avoid stray light, a leader section of 3 feet
at both ends of the reel has been provided.
Against any direct strong light, there is
always the danger of light infiltrating. It
is, therefore, desirable that the loading and
reloading be carried out quickiy in the shade,
if need be, in the shade of your own body.
Follow the procedures outlined below;
Raise the winding crank, and wind the spring.
Turn the side cover lock and open the cover.
33
Page 34

jSide cover
holder I ! Isuppiy spool
I
Pressure I spindle
plate knob iMercury battery
I chamber
Ipressure plate Ipilm take-up spool
spindle
Open the film e^te
Remove the empty spool. The white line
illustrates the path of advance of the film.
Pull the pressure plate out in preparation
to insert the film.
• At this time, the film counter will return
to the S start mark.
Have the spool and film ready. Face (1)
surface up.
Counter towards S
Pull out the film about 25cm, being careful
that the film does not slacken.
Insert the film spool into the supply spool
spindle and place the film into the film gate.
8
After the film has been sufficiently insert
ed, return the pressure plate to its original
position to keep the film secure.
Page 35

Bend the end of the film and insert it into
the slit of the take-up spool.
• If the film is not long enough, press the
shutter button and extract. Do not pull
out the film.
Face the emulsion side of the film on the
inside, and tightly wind it four or five times.
Insert the take-up spool into the take-up
spindle.
• It is best if the inserted film has a little
extra length at the film gate opening.
• After the film has been loaded, there will
be four notches on the supply spool and
three notches on the take-up spool.
• The spool and film must be fully inserted.
4 notches
3 notches
35
Page 36

12
Press the shutter button a moment and
check the film advance. An advance of
about 3~4cm is sufficient.
• The shutter button cannot be pressed
unless the safety lock is at R position.
13
After checking the film advance, close the
cover, and press the knob while turning.
• Unless the pressure plate has been com
pletely returned, the side cover cannot
be closed.
14
Press the shutter button, and run the film
until the film counter advances from S to
0.
• Shooting is to begin from 0 position.
15
Fully charge the winding crank.
FILM COUNTER
As the pictures are being taken, the film
counter dial as well as the frame counter
revolve to show the amount of exposed film.
The entire length of film to be exposed is
divided into ten sections with 25 as the
maximum. (A mark or numeral denotes 2.5
feet.) The distance between S to 0 at the
beginning and 25 to F at the end represents
the leader section. The filming speed dial
is used for fading technique and single-frame
photography. No attention need be paid to
it during ordinary photography.
Page 37

FILM RELOADING OPERATION
When one side of the 7.5 strip of film has
been completely exposed, reverse the film
and use the remaining half.
1. After the film counter indicates 25 for
the first half of the film, stop taking
pictures.
2. Then press the shutter button and ad
vance the film leader until the film count
er moves from 25 to F.
3. Open the side cover and remove both
spools. Reverse the spools so that the
figure ©will appear on top.
4. The same procedure applies as that fol
lowed when the spool was first inserted.
The spools are interchanged, the supply
spool being inserted into the shaft of the
take-up spool and vice versa.
• When making the reloading, be especially
careful of any sagging of the film.
FILM UNLOADING
When the counter has advanced to 25 after
reloading, advance the film until it reaches
F, and then unload.
The film has now been exposed on both
sides. Prevent the film from loosening and
place it in the empty container which orig
inally contained the film and then send it to
the film company for developing.
• Loading and unloading of the film must
be done in the shade.
CLEANING THE APERTURE SECTION
It is very important to keep the camera
clean when loading the film. The aperture
section where the film passes, that is, the
section held by the pressure plate, easily
gathers film fragments and dust. If this
is not cleaned out, scratches and blots will
appear on the film. The camera can be
kept free of dirty elements by using the
blower on the open pressure plate each time
the film is loaded. Anything solid should
be gently removed with a toothpick or the
like. Do not use any metallic or other hard
objects.
Page 38

¡Cap
HOW TO USE THE CONVERTER
The tele-converter for the Canon Cine Zoom
512 is an attachment for the zoom shoot
ing lens. In this case, the magnification
conversion, or range focal length is from
14mm to 70mm, making possible photo
graphy in a wide range, from standard to
teiephotography.
Photographic range
Lens Zooming Magnification Zooming
speed ratio conversion range
F 1.2 5 Continuous 14~70mm
LENS COMPOSITION
This converter is of the afocal system,
composed of three components, five eiements, and is opticaliy designed for the ex
clusive use of the Cine Zoom.
Distance scaie
ft.
m. 20 10 7 5
Size Overail length 80mm
Weight 420 grams
Coating Spectra Coating of purple
Filter size 72mm
Cap size 80mm
Hood Buiit-in type
50 30 20 15
Maximum diameter SOmm^i
12410
3
38
Infinity mark
laligning window
Lens barrel
iBack cover
Distance ring
tightening screw
METHOD OF ATTACHING
1
Remove the back cover of the Converter
and place it over the camera lens.
Rotate the lens barrel and screw the Con
verter into the front panei of the lens.
Loosen the tightening screw of the Con
verter’s distance ring.
Page 39

Page 40

Turn the distance ring of the Converter so
that the infinity mark of the lens appears
in the oo window.
Fasten with the tightening screw.
Pull out the built-in hood.
Zooming and focusing are carried out in the
ordinary manner.
• CONVERTER STANDARD REFLECTING
PAINT
The grey paint on the slanting section of
the Converter produces the same result
as the standard reflecting plate of the
meter. Although the CdS light window
can be blocked with the use of the lens,
the appropriate amount of light can be
imparted.
40
Page 41

CANON CHE ZOOM
IMPORTANT POINTS TO REMEMBER
When the eye is off the viewfinder during
the filming, for titling or single-frame photo
graphy, as well as panning photography with
the use of the tripod, always remember to
bar the entry of any strong light into the
eyepiece when the shutter is pressed.
When a very strong light hits the eyepiece,
there are cases of the viewfinder’s light
reflecting section being pierced and a
"ghost" reflection will appear on the film.
CLEANING THE FILM GATE
When taking pictures, fully charge the
spring motor.
Avoid failures during the take. Make it a
habit to always keep the motor in full charge
condition. During long takes, the spring
motor may become fully exhausted. In such
a case, it will stop while the shutter is open
and the last frame may be wastefully
exposed.
STORING THE CAMERA
Keep the camera away from dampness, heat,
and dust. When storing, do not place the
camera near naphthalene or camphor. While
it is not necessary to oil any part of the
camera, a periodic overhaul and cleaning
will prolong its life.
SAFETY LOCK
When storing the camera in the case, turn
the safety lock of the shutter to L. If there
is a grip, also lock the safety lock lever of
the grip.
41
Page 42

FIELD-OF-VIEW OF 48mm CLOSE-UP LENS 450
48mm Close-up lens 450
Focal length
Distance scale
8.5mm 42.5mm
1
03 1.2m oo 1 1.2m
ACCESSORIES
48mm CLOSE-UP LENS 450
The close-up lens are designed for titling,
reproduction of documents, photographing
of plants and insects, etc.
^ 450: Attach the close-up lens,
and when the distance scale
is adjusted to °o, the dis
tance from the tip of the
lens to the subject is 450
mm.
Leather Case
C-8 Power Grip
C-8 Tele-Converter with Case
C-8 Spool
Lens Hood T-50-2
Canon Release
Distance from film plane
to subject
Fieldofview
42
560 mm 440 mm 560 mm 440 mm
243x .177 X 50x 36x
182 mm 133 mm 3Smm 27mm
Page 43

CANON FILTER EXPOSURE FACTOR
Type
SL SY
39.3CI 44.2C
SY
50.2C 56.2C 55C
FILTER
The 48mm filter for the camera itself and
the 72mm filter for the Converter are avail
able. When using the filter, pay regard to
the exposure factors.
HOW TO MAKE ADJUSTMENTS
When the filter factor is 2, 4, 8, adjust
the film speed setting dial to the expo
sure factor mark of 2, 4, 8, respectively.
Generally, the film speed is divided by
the filter factor, and the value becomes
the speed for the filter. The film speed
setting dial is set accordingly.
ND
SO
MG
Color Color
SR
Conversion AlConversion B| X 4 X 8
60.2C
Skylight
ND
Exposure ^ i 1 , 1
Factor
1 1
Y1 Y3
UV
1.5
1
1
01 Gl
2 3 3 6
Rl
CCA ' CCB
1
2 3 1 4
WyLIGHT ND4
ND8
8
48mm Filter
Y,, Ya, Ob Gb R,
UV, ND4, ND8, CCA, CCB
72mm Filter (for Converter)
Ya, Ri
UV, CCA, CCB
43
Page 44

TITLING SET
TITLING SET
Especially suitable for titling, close-ups,
reproduction and single-frame photography.
Construction; Shaft, arm, metal attach
ments, case.
MICROSCOPE ATTACHMENT A
Attachment designed for microscopic pho
tography which may be jointly used without
any difficulty with the titling set.
44
Page 45

CANON AUTO PROJECTOR 8 Z
Canon Auto Projector 8 Z appeared on the
stage of the world market as a good com
panion of reputed Canon Emm cine cameras.
Canon Auto Projector 8 Z with the incredible
outstanding features has changed the entire
concept of an 8mm projector into new one!
Namely, the three main features are its
perfect auto loading device, its amaz
ingly sharp zoom lens of FI.5 with focal
length of 15mm to 25mm, and its
surprising compactness of the unique
vertical structure.
Auto Projector 8 Z (100V~240V) with Lens
15~25mm F 1.5, Lamp (21 5V, 150W), Reel
& Cord in Carrying Case
Reverse projection, single frame projection,
high-speed rewinding, and tape recorder
type talkie projection possible.
45
Page 46

Page 47

Aperture Setting Ring
Tripod socket
I
G^non CfNB ZOOM SIS
I Side Cover Opening Key
0 lii
•mmJ
Zooming Lever
Trigger Coupling Socket
(for film drive)
Power Zooming Socket
Exposure Meter Switch
Adjustable Eyepiece
Side Cover
Page 48

 Loading...