

Canon Cat Reference Manual
The
Canon Cat
Reference
Guide
Note: You
do
not have to read this manual
in order to use the Cat. Use
the How-to
Guide, especially
the blue-edged tutorial
pages,
to
get
acquainted
with
your
Cat.
Consult
this manual
for
more information
about a
particular
feature
or command
you
are
interested in.
Manual by
David Alzofon,
David Caulkins,
Jef Raskin,
Dr.Jalnes Winter
Canon Cat
Cat by Jef Raskin,
Dr.
James
Winter, Terry Holmes, Minoru
Taoyama, Jonathan Sand, John
Bumgamer, Paul Baker, Jim
Straus, Dave Bolton, Charlie Springer, Scott
Kim, Ralph
Voorhees, Richard Krause, Kouji Fukunaga, Kazuhiro
Nakamura,
Naohisa
Suzuki, Shigeru
Ishida, Susumu Takase
Copyright @
1987
by Canon
Inc. All rights rcserved.
Portions of this manual copyright @1987 by
Information Appli-
ance
Inc.
and ale
reproduced
by
permission.
Inforrnation Appliance, Calculation-in-Context,
and the com-
mand
names
LEAP,
LEAP AGAIN, DISK,
and SEND
arc trade-
marks of Information Appliance Inc.
Patents
Pending.
Canon Cat
is
a trademark of Canon
Inc.
Be sureto
read
and
follow therecommendations rnSetting
Up
and
Starting Up
nthe How-to
Guidc
regarding safety and environ-
mental
limitations in using the Cat. Also read and follow the
rec-
ommendations
for safeguarding
your
informationinAppend* C,
pagel25
of this manual.
This manual written on Canon
Cats
Manual design and
production:
Suzanne West and Cate Lush
Table
of Contents
Introduction
Basic Functions
Cursor
and
Highlight
Typing
Page
Numbering
Marking the Beginning of a Document
Titling Your Documents
The Ruler
I,eaping
Highlighting Text
Moving
Text
Erasing
Text
Using the Disk Drive
Printing YourDocument
Using the uNDOKey
Using the
HGLAINKey
Advanced
Functions
Customizing the Appearance of Paragraphs
l. Setting Margins and Indents
2.
Setting Tabs
3.
Setting Line
Spacing
4.
Styling the
Paragraphs
Customizing the
Appearance
of Words[-etters
l.
Capitalizing Wordsflrtten
2. Underlining WordsA-etrcn
3. Making Boldface Wordsfl-etters
Copying Text
Checking and
Correcting
Your
Spelling
Protecting Your Documents Against
Changes
Leaping Within a Specified Area
Changing the Keyboard Setting
ltl
I
2
5
9
10
l1
12
t4
19
22
23
25
34
37
38
39
40
4l
43
6
47
50
50
50
5l
52
53
56
58
60
Other
Useful
Features
Using
the Cat Over
the Telephone
1. Dialing and
Hanging Up
2. Holding a Cat Conversation
3. Receiving
Text
Calculating
With
the Cat
Putting Text
in
Alphabetical/I.{umerical
Order
Teaching the Cat to
R€,peat Your Commands
Changing
Document
Formats
Stopping
an Operation
Already in Progress
Appendix
A: Keyboard Chaxts
Appendix
B: Specifications
Appendix
C: Information Safeguards
Appendix
D: FCC Regulations
Glossary
Index
6
62
62
65
“
7。
85
9
%
1
3
114
120
125
127
128
147
Introduction
The Reference
Guide is notan instruction manual,
and
you
don't have
to read it in order to use the
Cat. You'll learn
the
Cat faster
if
you
just
plunge
in
and try it. After setting
up
your
equipment according
to
the instructions
in the first
part
of thel/aw+o
Guide,there are two
ways you
mightgo:
If
you've
already had word
processing
experience,
you
might want
to approach it through the
Quick
Reference
Card. Just try out the features.
If
you
want step-by-step instruction,
do the tutorial in
the
How-to
Guide.
The hour
or two
you
spend
on
the
tutorial
will
pay
big
dividends, since the habits
you
form
early on
will influence the way
you
use the Cat for a long
time to
come.
The
rest of the How-to
Guide answers
practical questions
such as "How
do
I
print
a document?" The Reference
Guide
ishke
anencyclopedia. It describes
every feature of
the Cat in detail. When
you
want to know
exactly
how
a
specific function
works and everything
that
it
can do, look
here.
Four Things
About
the Cat
You
Must Know
To
understand,the Reference
Guide,
you
must
be
familiar
with typing
and erasing, leaping, highlighting,
and com-
mands. If
you
are not familiar with
these,
read
about them
in
the
H
ow
-
t o G uide. Above all,
0ry them out.
It'
s essential
to unders[and these
functions in order to use the
Cat.
T\e
Quick
Reference
Card,
Howio
Guide,Tutorial,
and
Reference
Guide are all constructed alike,
with
parallel
sections
on typing, leaping, highlighting, and
commands.
You will find the same
commands discussed in
the same
order here and in
the How-to Guide.
IVhat's in
the Reference
Guide?
The
same things
you'll
find in
the
How-to
Guide,butin
greater
detail.

Basic Functions
The
Cursor and the Highlight
Typing
Page
Numbering
Marking
the Beginning
of a
Document
Titling Your Documents
The Ruler
kaping
Highlighting Text
Moving
Text
Erasing Text
Using
the Disk Drive
Printing Your Document
Using the LJNDO
Key
Using the E)GLAIN
Key
2
5
9
l0
ll
t2
t4
19
22
23
25
34
37
38
The
Cursor
and the
Highlight
Tlte cursor
is
the
blinking object on
the screen.
It
usually
appears
to the
right
of a
solid, unblinking
rectangle called
the highlight.
The
cursor
and the
highlightkeep track ofyourplace
on the
screen. Like a
pencil
and eraser, each
has a specialized
purpose which never changes.
What
They Do
The cursor shows
where the next character
you
type
will
appear.
The
highlight shows
what will be erased if
you
press
[ERASE].
This is always true,
so we call itthe
Fundamental Cursor
Rule.
Changes
in
the
Cursor's
Appearance
The
cursor
has three distinct
appearances:
narrow,wide,
and extended.
In
addition
it may blink
slowly or
quickly.
Narrow Cursor
The
cursor
is narrow
when the cursor and
the highlight
both
rest on the same character,
and both are
blinking.
The
cursor becomes
narrow whenever
you
move
it
by
leaping,
creeping, or scrolling.
When the cursor
is narrow, the
Fundamental Cursor
Rule
still applies:
You can either
type or erase
at this location.
Ifyou type, the character
at the cursor
will be
pushed
ahead
of the
new characters.
If
you
erase, the cursor
will remove
the characters
to its
right. The character
you
are on will
disappear
fi rst.
(See
Erasin
g
T e xt,
page
23, for more infor-
mation.)

Making
a correction: In
(
I
)
you
have
jwt
moved
the cursor to the
"s"
in
"stencil"
by leaping or
creeping, so the
cursor
is nnrrow on
"s"
. In
(2)
you press
[ERASE]
t]rice
and "st" disappears
(ifyoupressed
leetsel
again
"e"
would disap-
pear
).
In
(3)
you
make
the correction by typing
"red
p"
;
"encil"
moves
ahead.
The
cursor is now
wide because
you
have
been typing.
I
Wide
Cursor
Typing
or inserting
text by using a cornmand
always
makes the cursor wide.
The cursor is wide
when the
highlight is
on one character, and the
blinking cursor is
one
character
position
forward
from it. If the
cursor is wide and
you press
[ERASE],
the cursor
and
highlight
move
back-
ward
together, erasing
each
highlighted
character
as they
go.
This
closely resembles backspacing
on a typewriter.
Extended
Cursor
The
cursor
is
extended when
two or more characters
are
highlighted.
Extended cursor
and extended
highlight
mean the
same thing. Pressing both
LEAP keys after
a
leap
causes
the
highlight
to
extend, covering all
characters
between the
beginning and the
end of the leap.
Extending
the highlight
allows
you
to show
the Cat some
text
you
want
to affect. For example,
pressing
[ERASE]
erases
all the text in the extended highlight.
Commands
generally
affect only the
text
in
the extended highlight.
The highlight
is now
extended. The
next step
is to
press
[ERASE]
,o
make the
highlighted
text
vanish.
hank llllll
・
When the
Cursor and Highlight
Separate
To move
text from
place
to
place,
you
highlight it,
then
leap
to the new location. During
the leap, the
cursor
temporarily
separates from
the highlighted
text. The
highlighted
text leaps to the new
position
of the cursor
as
soon as
you
release
the LEAP key . See MovingText,page
22, for more information.
Cursor
Blink Rate
In addition to
the cursor
shape, the cursor
blink
rate
also
indicates the
state of the
text:
-
Safely
recorded
or clean
text. The cr.;rsor
blinks faster,
about
three
times
per
second
when the text
has been
recorded on
a disk or
just
played
back from a disk
(see
Using
the
Disk Drive,page25,
for more information).
-
C
lnnged
text
The cursor blinks slower,
about once
per
second
when the text
has been changed
and the changes
have
not
yet
been
recorded.
In this state the text
is called
dirry.
Moving the
cursor, extending
the
highlight,
printing
text,
or
using
IEXPLAIN]
do not
make the text dirty.
Typing
Typing on the Cat
is like typing on
a
typewriter. You can
begin typing as soon as
you
see the blinking
cursor. What
you
type is always
inserted; text is never
destroyed by
typing, as it can be in some
word
processors.
Space
is made
for the.new text by
pushing
the old text
forward. Line
endings and
page
endings adjust automatically.
I{ord Wrap
Word wrap
automatically
ends the line
for
you
when
you
come to the
right margin while typing. A word
is
a
sequence of
printing
characters
plus
one or two following
spaces.
If
a
word runs into the right margin, word
wrap
moves the
whole word to the indent of the
following line.
If there is text ahead of the cursor,
line
and
page
endings
adjust automatically.
When
you
erase characters, the text unwraps.
Unwrapping
is the exact reverse of wrapping.
Line and
page
endings
adjust automatically.
Character Set
For each type of Cat
keyboard there is a
particular
set of
characters
which can be both typed and
printed.
Some
characters
-
automatic
page
breaks,
for example
-
al'e
not real characters in the same
sense
as
a character
you
have typed,
though they are displayed on the screen.
International
Keyboard
Set
Your keyboard has been set up to correspond
to the
conventions
of the country
where
you
bought
your
Cat.
Intemally, every Cat has all the
keyboard layouts used in
other countries. See Screen 2 : Machine S etup,
page
97, for
information on activating these
keyboard layouts. Appen-
dixA,
page
I14, has complete charts
for
all Cat
keyboards.
Permanent Space
P
ermanent
space is the uppercase character on
[TAB]
. A
permanent
space is typed between two
words
that
should
always appear
on the same line, such as "Canon
Inc." Word
wrap treats
words linked
by
permanent
spaces
as a single
word. A
permanent
space
looks the
same as an
ordinary
space on the screen or
when
printed.
If
you
leap to a
p€rmanent
space
(leap
to
[SHIFT]-[TABI),
the cursor
will
find only
permanent
spaces.
A leap
to an
ordinary
space finds either a
permanent
or a
regular
space.
Return Character
Pressing
[RETURN]
puts
a
return
character
in the text,
forcing the next character
in
sequence to appear
at the
indent of the next
line.
A
return
character also
marks the
end of a
paragraph.
This is
important for
the
paragraph
commands described
in
Customizing
the Appearance of
Paragraphs,
page
40.
A retum does not appear
in
the
printout.
Its whole
purpose
is to cause the
printer
to start a
new line. A return is visible
on the screen only
when highlighted, appearing as a small
hook-shaped arrow.
Tab Character
hessing
[TAB]
inserts
a
tab character into the text. A tab
character is a space
holder
of
variable width. It extends
from the
position
the cursor
held when
you pressed
[TAB]
forward to the
nearest tab stop. Inserting text to the left of
the tab character shortens
it.
A
tab character
is visible only when highlighted,
when it
appears as a dark
ribbon
containing
a right-pointing arrow.
A tab character is not visible in
the
printout
except as blank
space between characters.
A tab character may be compressed to the
width of one
character space
(one
mark on the ruler).
If insertions to the
left of a tab character force it beyond the tab
stop that
anchors its right side,
it
moves to the
next
tab
stop
(since
it is flexible, its
length may
change
when this happens).
The restofthe textforward from the tab characteris
pushed
ahead and words wrap as required.
Accented Characters
Accent characters can only be applied
to alphabetic char-
acters and spaces.
Punctuation cannot be accented.
Certain
print
wheels
provide
characters with
accents al-
ready in
place.
The
Cat uses such characters ifpossible;
otherwise it
prints
the
accent character,
then
prints
the
character to be
accented at the same location
bv overstrik-
ing.
When
you
type an accent, it
appears as a bare
accent
character
on the screen
(bare
means
"all by itself'). The
next
character
you
type will
appear at the same location,
under the accent character,
providing
you
do not type
another accent. If
you
type two accents in a row,
the text
will contain
two bare accent
characters. The second
accent
will appear
over the third
character
you
type,
providing
the
third
character
is
not an accent.
If
the cursor is narrow and
positioned
on
a bare accent
character,
and
you
type a characterother
than an accent,
the
accent
and character will combine
to form an
accented
character. This is slightly unusual
for the
cursor,
which
usually
pushes
the
character under the n:urow
cursor
forward when
you
type.
If
you
type
an accent character and move
the cursor away
from
it. the bare
accent character remains
alone
in
the text.
Adding
Text in
Boldface
or Underlined
Areas
When
you
type in the middle
of an underlined
or boldfaced
part
ofthe text, the characters
you
type take on
the style of
the surrounding characters.
Forexample, if
you
type in the
middle
of aboldface word, whatyou
type will
alsobe bold.
The
cursor must have
bold or underlined
characters on
both sides of it for newly
typed characters
to take on the
bold
or underline appearance. If
bold or underlined
text
is
only
on one side of the
cursor, the newly typed
text
will
be
plain.
A
dotted underline
appears undercharacters resulting
from
calculations.
If
you
type in the middle
of text with a
dotted
underline,
the newly typed
text
will
also be underlined.
This ensures
that any change
you
make in the middle
of a
mathematical
expression will
automatically be included
in
further
calculations.
Typing in
the middle of capitalized
text is not automati-
cally capitalized, unless
you
have
pressed
[LOCK].
The LOCK
Key
Pressing
[LOCK]
makes
the Cat behave
as
if
[SHIFT]
were
being held
down. A light in the
[LOCK]
keycap comes
on
when the keyboard
is locked. Note
that when
[LOCK]
is
engaged,
you
can
type only the uppercase
symbols on the
numeral
kevs.
ILOCKI
is nrmed
off
by
pressing
and
releasing either
[SHIFT].
When
ILoCK]
is
released the
light in the
keycap
goes
off.
[LocK]
and
its keycap
light
temporarily
swirch off
during
leaping. Since
leaping
is sensitive
to
capital
letters in
patt€rns,
[LOCK]
would make
leaping appear
to be out
of
order if
it were
left on during
the leap. When
you
release
the LEAP
key,
[LOCK]
is turned
on again.
The Cat also
ignores
[LOCK]
while
you
press
[USE
FRONT].
This
is
because
certain commands
behave
differently
when
[SHIFT]
is
pressed,
and using
[LOCK]
is like
holding
down
[SHIFT].
Page
Numbering
The Catnumbers andends
pages
automatically
while
you
are typing. Page numbering andpage endings
are updated
when
text
is erased
or
inserted. You
can also
force
a
page
to end
with
[PAGE].
The
uppercase character on
[PAGE]
-
called a document character
-
is
used to begin and end
documents.
[DOCUMENT]
begins a new
page
and restarts
page
numbering on succeeding
pages.
You
can adjust
page
numbering
and
page
length
using
[SETUP].
Only
page
numbers that
print
are displayed on the screen.
For
example, if the Cat is set so that
"1"
does not
print
at
the bottom of
page
l, then that
page
break will be
unnum-
bered on the screen. Page 2 is normally the first
page
number
to
print,
but this can be adjusted with
[SETUP].
Page
numbers are
positioned
slightly above the
page
break,
showing that ttrey
refer
to the text above.
Automatic Page Breaks
The
Cat automatically marks the text where enough lines
accumulate
to fill
a
paper page
(top
and bottom margins
taken
into
account). Automatic
page
brcaks are
displayed
as a single horizontal dotted line the full width of
the
screen. Ttrc automatic
page
break is a marker, not a true
character;
you
cannot type
it
or erase
it.
You can, however,
leap to it by holding
a LEAP key and
pressing
[PAGE].
The
cursorlands on the
first
character of the
page
following
the
automatic
page
break, rather
than on
the break itself. An
automatic
page
break can only be used in a single-charac-
ter leap
pattem.
Page Characters
Typing a
page
character by
pressing
[PAGE]
causes
the
page you
arc typing to end, and a new
page
to begin.
Page
numbers are automatically kept in order. Page
characters
are ordinary characters like
letters,
numerals, and
punctua-
tion.
They
can be typed and erased, and can be
part
of a
multi-character leap
pattem.
A
page
character is shown by a full-width
horizontal line
on the screen. The
page
number appears
slightly above the
line, showing that it refers to the text
above.
VT鵬
∥
:∥
eginning
Documents
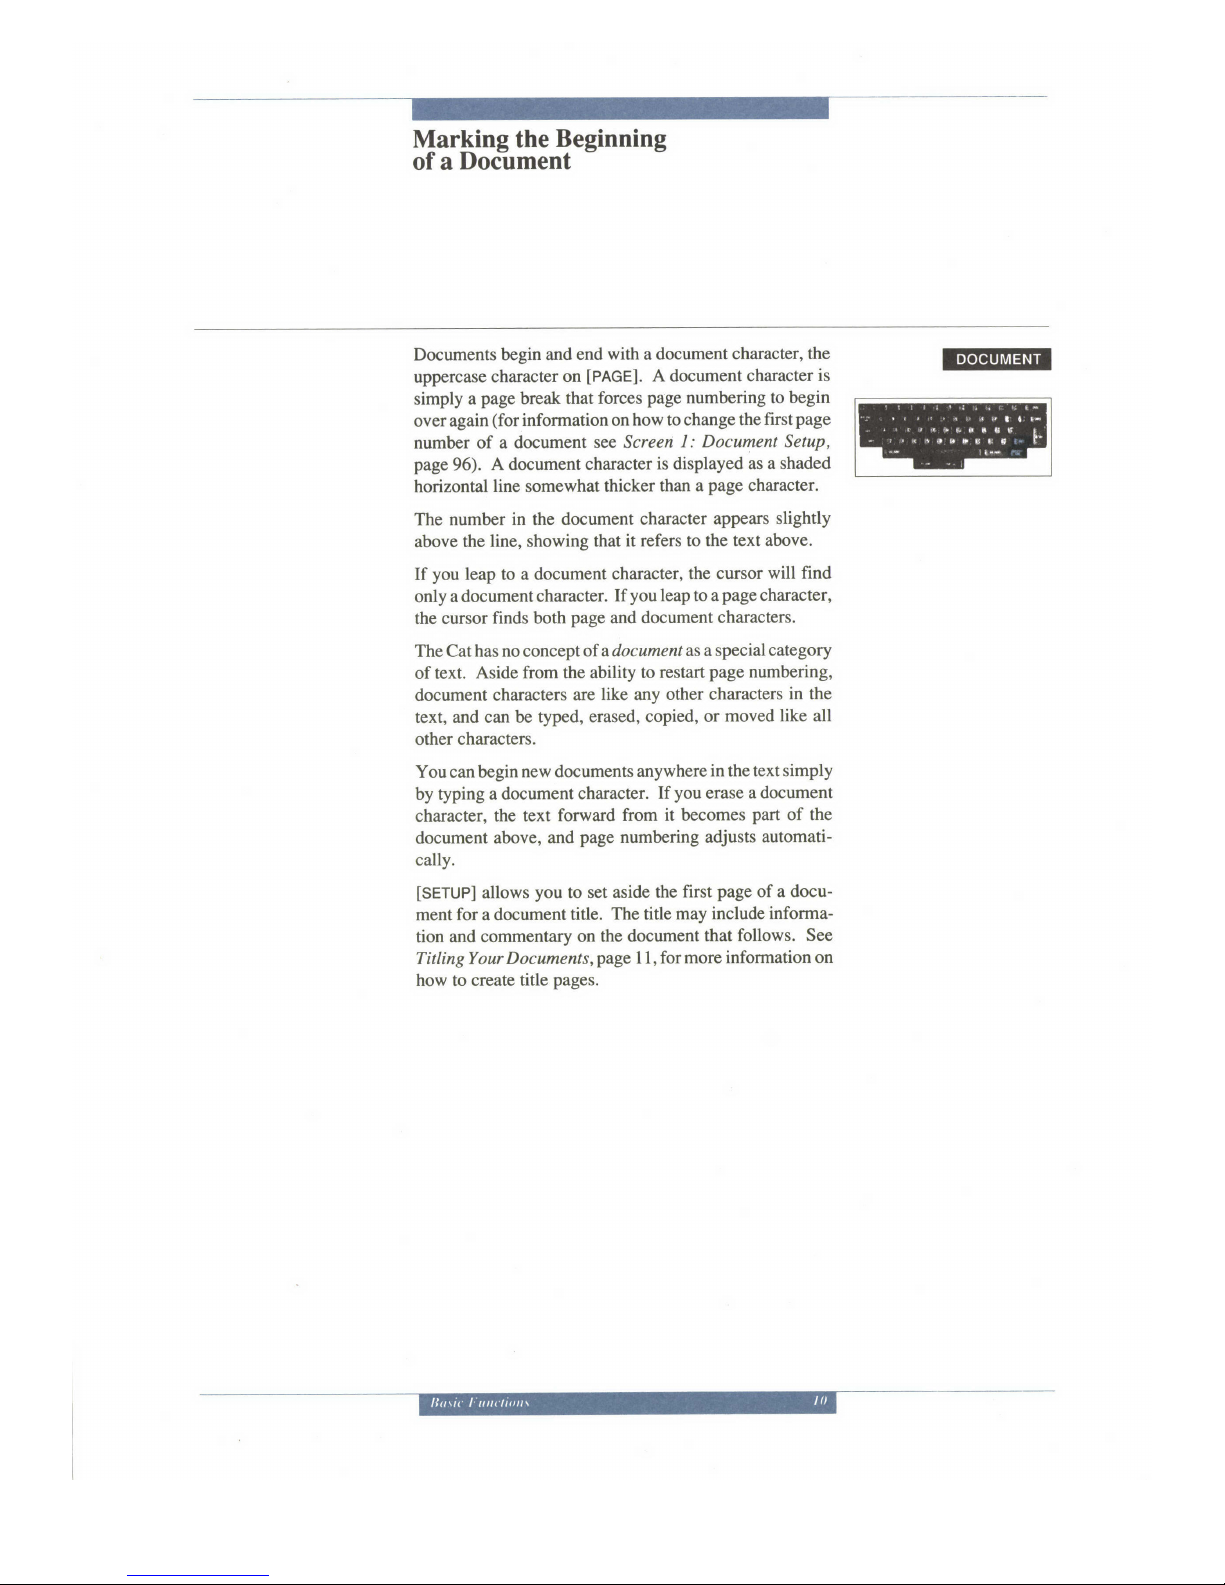
begin and
end with a document
character, the
uppercase
character on
[PAGE].
A document
character
is
simply a
page
break
that forces
page
numbering to hgin
over again
(for
information
on how to change
the
first
page
number of
a document
see Screen
l: Document Setup,
page
96).
A document
character
is
displayed
as a
shaded
horizontal
line
somewhat
thicker than
a
page
character.
The number in the document
character
appears slightly
above
the line, showing
that it refers
to the text above.
If
you
leap to a document
character,
the cursor
will find
only a
document character.
If
you
leap to a
page
character,
the
cursor finds both
page
and document
characters.
The Cat has no concept
of a document
as a special category
of text.
Aside from the ability
to restart
page
numbering,
document characters are
like any
other characters
in the
text,
and can be typed,
erased, copied,
or moved
like all
other
characters.
You canbegin
new documents
anywhere
in
thetextsimply
by typing a document
character.
If
you
erase
a document
character,
the
text forward
from it becomes
part
of the
document
above,
and
page
numbering adjusts
automati-
cally.
[SETUP]
allows
you
to set
aside the fust
page
of a docu-
ment for a document
title.
The title may
include informa-
tion and commentary
on the document
that follows. See
TitlingYour
Documents,page
I 1, formore
information on
how
to
create title
pages.
Titling
Your
Documents
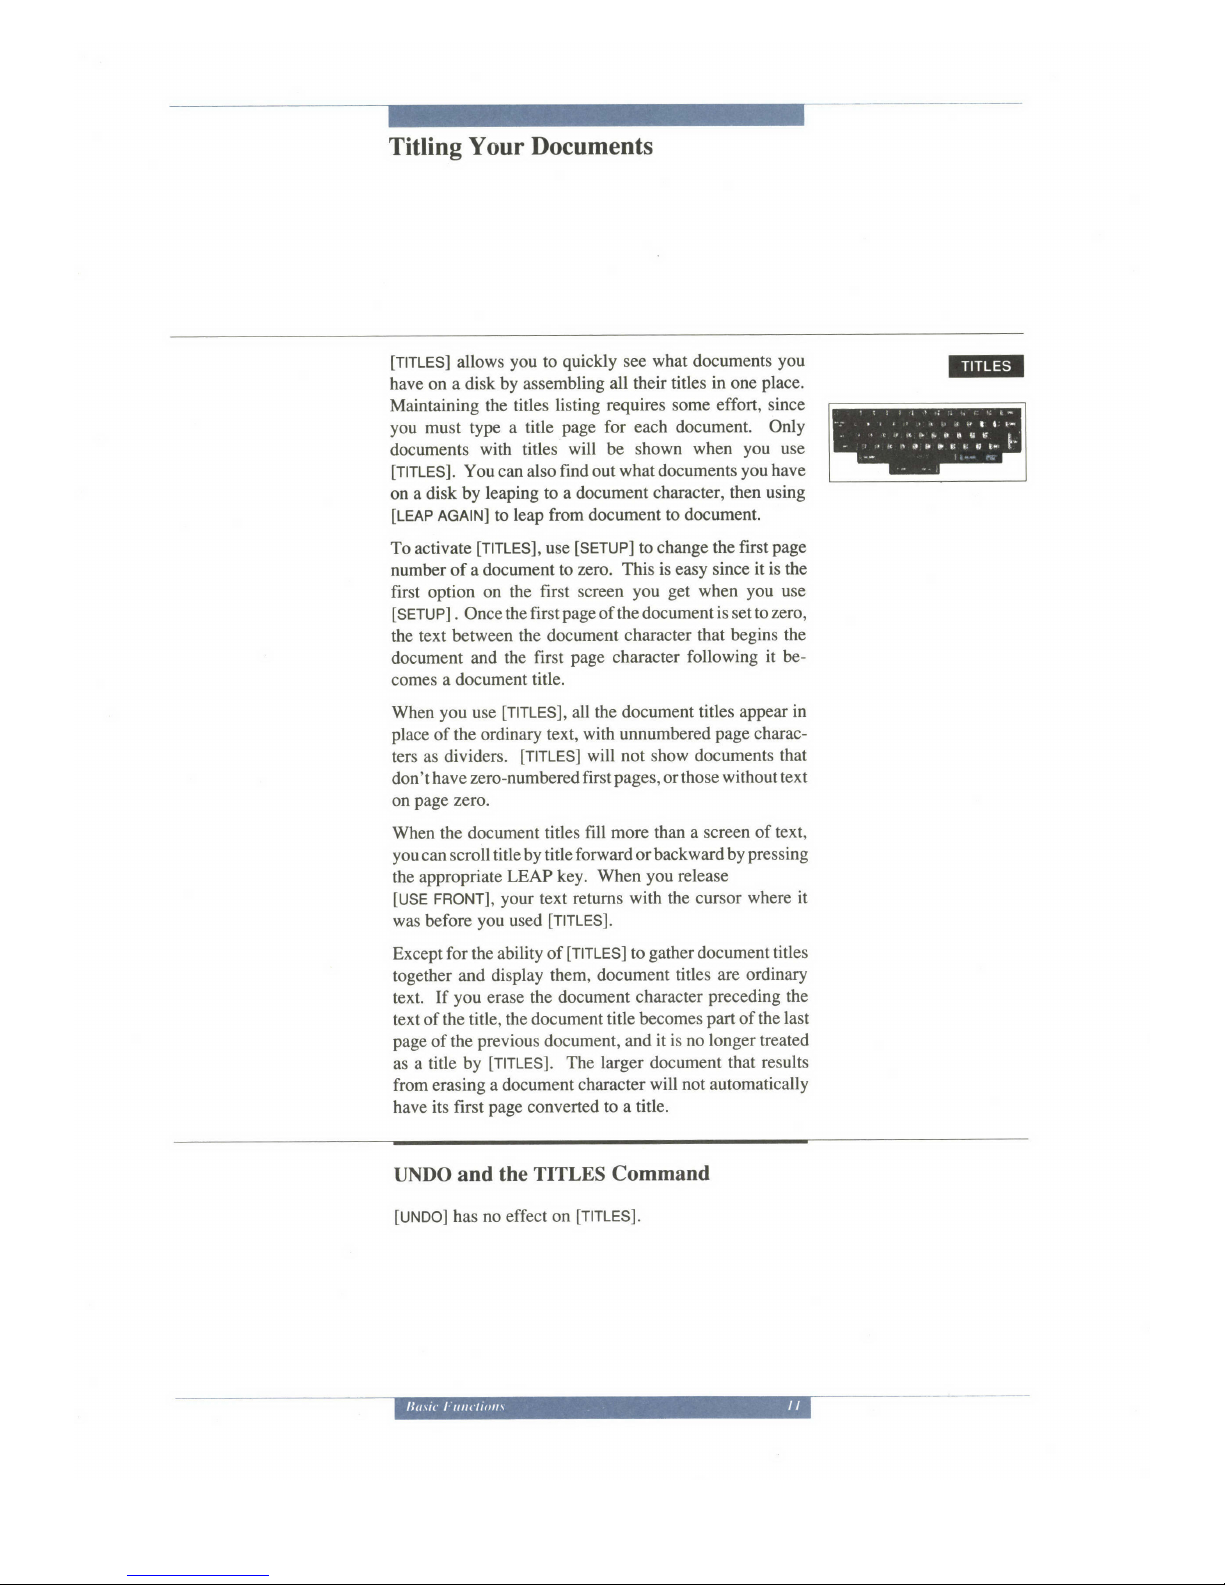
[TITLES]
allows
you
to
quickly
see what documents
you
have on a disk by assembling
all
their titles
in
one
place.
Maintaining the
titles listing
requires some effort,
since
you
must type a
title
page
for
each document.
Only
documents
with
titles
will be
shown when
you
use
[TITLES].
You
can also
find out
what documents
you
have
on
a disk by
leaping to a document
character, then using
[LEAP
AGAINI to
leap from document
to document.
To activate
[TITLES],
use
[SETUP]
to change the first
page
number of
a document to
zero. This
is easy since it is the
first option
on the
first screen
you
get
when
you
use
[SETU
P] . Once the first
page
of the document
is set to zero,
the text between
the document
character that
begins the
document and
the first
page
character
following it be-
comes
a document title.
When
you
use
[TITLES],
all
the document titles
appear in
place
of the ordinary
text,
with unnumbered
page
charac-
ters as dividers.
[TITLES]
will not show documents
that
don'thave
zero-numberedfirstpages,
orthose
without text
on
page
zero.
When the
document titles
fill more than a
screen of text,
youcan
scroll
title by title
forward orbackward
by
pressing
the
appropriate
LEAP key. When
you
release
IUSE
FRoNT],
your
text retums
with
the
cursor
where it
was before
you
used
[TITLES].
Except
for the ability of
[TITLES]
to
gather
document titles
together
and display
them, document
titles are ordinary
text.
If
you
erase the
document character
preceding
the
text
of the title, the document
title becomes
part
of the
last
page
of the
previous
document,
and
it is no longer treated
as a title
by
[TITLES].
The larger document
that results
from erasing a document
character
will not automatically
have
its first
page
converted
to a title.
UNDO and the TITLES Command
[UNDO]has nO effect on[TITLES].
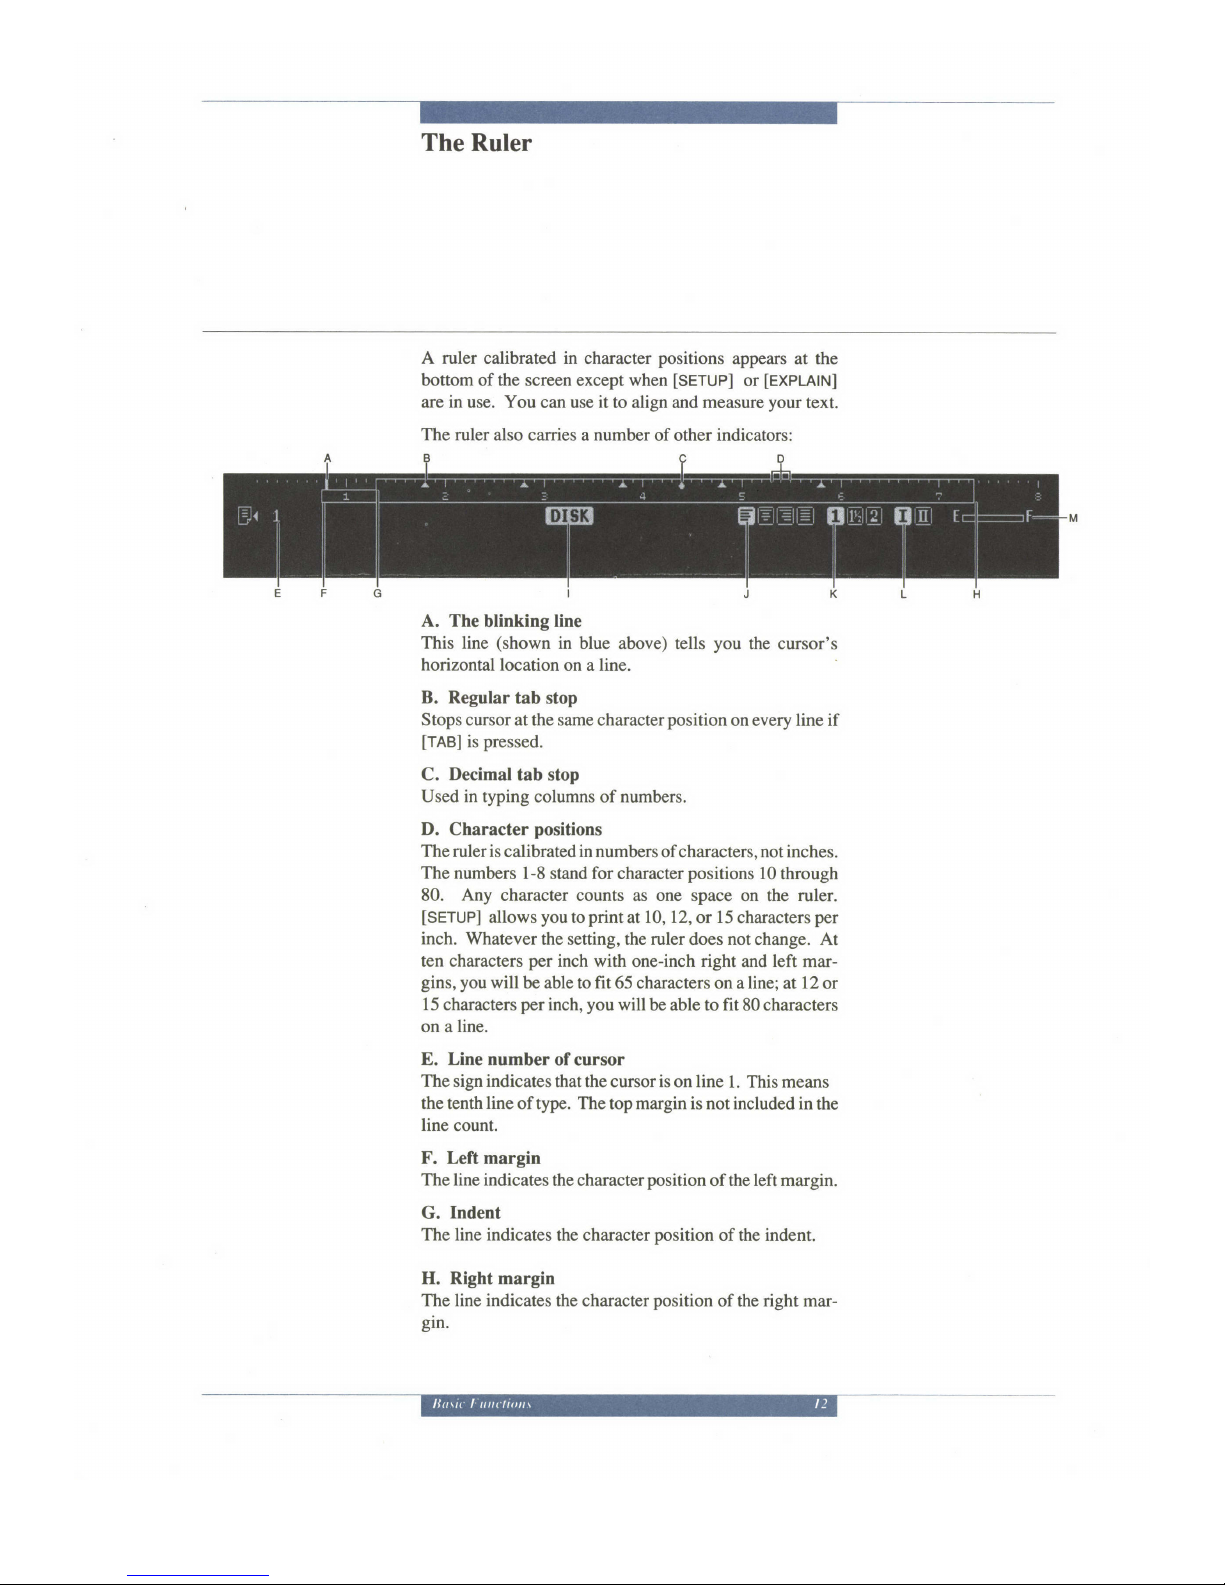
The Ruler
A ruler calibrated in character positions appears at the
bottom ofthc screen except when[SETUP]or[EXPLAIN]
are in useo You can use itto align and measure yourtext.
■ e ruler also caries a number of other indicators:
A. The
blinking
line
This line
(shown
in
blue above) tells
you
the cursor's
horizontal location on a line.
B. Regular tab
stop
Stops cursor at the same
character
position
on every line if
ITABI
is
pressed.
C. Decimal
tab
stop
Used in typing columns
of
numbers.
D. Character
positions
The ruleris calibrated in numbers
of characters, not inches.
The numbers
l-8 stand for character
positions
l0
through
80. Any character counts
as
one
space on the ruler.
ISETUP]
allows
you
to
print
at
10, I 2,
or
15
characters
per
inch.
Whatever the setting, the ruler
does
not
change. At
ten characters
per
inch with
one-inch
right
and
left
mar-
gins,
you
will
be able to fit 65 characters on a line;
at
12
or
l5 characters
per
inch,
you
will be able to fit 80 characters
on a
line.
E. Line number of
cursor
The
sign
indicates
that the cursor is on line
1. This means
the tenth
line
of type. The top margin is not included in
the
line count.
F. Left margin
The line
indicates
the character
position
of
the left margin.
G.
Indent
The
line
indicates
the character
position
of the indent.
H. Right margin
The line indicates
the character
position
of the right mar-
gin.
I. DISK sign
Some
commands, such as
[DISK],
take time to complete.
A
sign
here lets
you know that the Cat is doing something.
J.
Paragraph style signs
The four signs represent four
paragraph
styles:
l,eft Flush,
Centered, Right
Flush, and Justified.
The lighted sign
indicates the style
of the
paragraph the
cursor
is in.
K. Line spacing signs
Single,
l-U2, or double-spaced
text. Spacing
shown
applies to the
paragraph
the cursor
is in.
L. Keyboard VII signs
[KB
ll]
selects
the right-hand set of symbols
on four-symbol
keys.
M. Memory
gauge
Shows the amount
of text
you've typed. E means empry
-
you
haven't typed
any text and there
is lots of room. As
you
add text the
white bar lengthens to shows
how much
space has been used.
The numbers on the
ruler
are for
character
positions I
to 80.
The numbers
I
to 8 signify
character
positions
10,20,30,
40,
50,
60, 70, 80.
The
ruler
shows the features of
the
paragraph
containing
the blinking cursor.
For example,
if the cursor
is in
a
paragraph
with a five-character
indent and double-spaced
lines. these values will be shown
in the
ruler.
Leaping
The
Cat's
su1sq1- ths blinking
object on
your
screen
-
is
capable of
moving
anywhere in the text almost instantly.
The
term leap descibes this new and astonishingly fast
mode
of travel.
@@
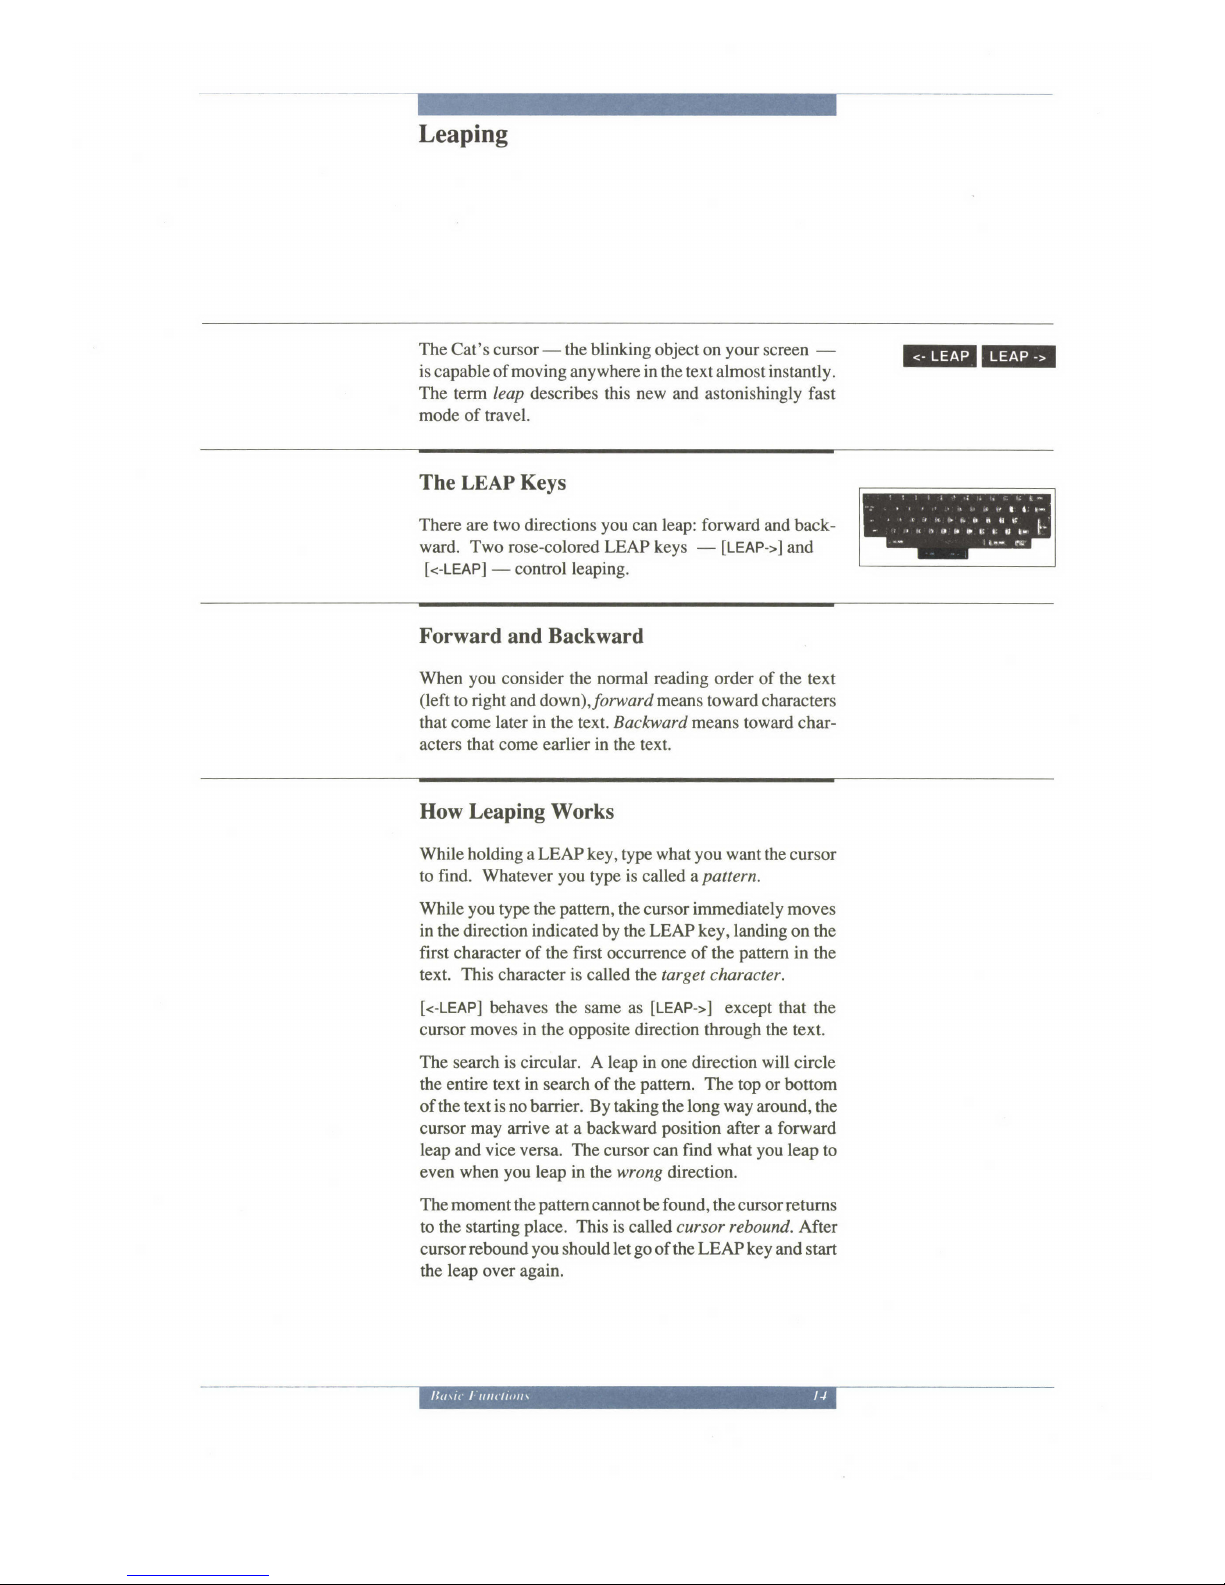
The LEAP Keys
There are two directions
you
can leap: forward and
back-
ward. Two
rose-colored LEAP keys
-
[LEAP->]
and
[<-LEAP]
-
control leaping.
Forward and Backward
When
you
consider
the
normal reading
order of the text
(left
to
right
and down),forwardmeans toward characters
that come
later in
the text. Bach,tardmeans toward char-
acters that come earlier
in
the text.
How Leaping Works
While holding a LEAP key, type what
you
want the cursor
to
find.
Whatever
you
type is called a
pattern.
While
you
type the
pattern,
the cursor immediately moves
in
the direction
indicated
by the LEAP key, landing on the
frst character of the first occurrence of the
pattern
in the
text.
This
character
is
called the target character.
[<-LEAP]
behaves the same as
[LEAP->]
except that the
cursor
moves
in the opposite direction through the text.
The
search is circular. A leap
in
one direction
will
circle
the entire text in search
of the
pattern.
The top
or bottom
of the text
is no
barrier. By taking the
long way
around, the
cursor
may
arive at a backward
position
after a
forward
leap
and
vice versa.
The cursor can find what
you
leap to
even
when
you
leap rn
the wrong direction.
The moment
the
pattem
cannot be
found,
the cursor
retums
to the starting
place.
This
is called cursor
rebound.
Nter
cursor rebound
you
should let
go
ofthe
LEAP key
and start
the
leap
over
again.
There
are two leap modes:
local leap and
global
leap. ln
local
leap the
cursor
will
not leap outside
of the documents
you
select with
[LOCAL
LEAP]. In
global
leap
the cursor
can
leap to any
character anywhere in
the text. The
Cat
automatically
comes on
in
global
leap. It will
only be in
local leap if
you
use
[LOCAL
LEAP]. A LOCAL
sign in the
ruler lets
you
know when
local leap is
on.
After
a successful leap
the cursor is narrow
and
positioned
on the target character.
Upper
and
Lowercase
Characters
in Leaping
Characters
in a
pattem
may
include
lowercase,
uppercase,
and accented
characters.
Patterns
and text match
as fol-
lows:
-
Lowercase
characters in the leap
pattern
match
both
upper and lowercase
characters in the
text.
For
example,
if
you
leap
to me,the cursor will ftnd
me, Me, mE,
or ME.
-
Uppercase
characters match
only uppercase characters.
The
pattern
A.BC matches
only ABC in the text, not
ADc or
abc.
-
Plain
characters match both
plain
and accented
charac-
ters. The
pattern
a will match
a, A, and d.
Special Leap Features
Scrolling
By holding
[SHIFT]
and,
while
holding it,
pressing
a
LEAP
key,
you
can
make
the text scroll one line
at a time in the
direction indicated
by the LEAP key. After
one use
of
[SHIFT]-[LEAP],
you
can use
[LEAP
AGAIN]
to make scroll-
ing autorepeat.
The
cursor stays on the same character in
the text, while the
text moves
up or down the screen. When
the cursor hits the
top or the bottom line
of the screen, it moves
to the margin
and remains
there while the
text continues to scroll by
underneath
it line-by-line. When
the cursor reaches
the
beginning or the
end of the entire text
(or
either end of the
local leap region)
scrolling stops. If
you
attempt to scroll
further in
the same direction, nothing
happens.
If
you
start scrolling when
the
highlight
is extended,
the
highlight
collapses when the cursor moves
to the
leftrnost
column
after
hitting
the top or bottom line
of the screen.
[UNDO]
retums
the cursor and the
screen to the way they
were
before
you
began scrolling.
Leaping to automatic
page
breaks
If
you
leap to a
page
character, the cursor
will also leap to
automatic
page
breaks.
The
cursor
lands on the first
character
following the automatic
page
break.
If
the
pattern
contains
more than one character,
automatic
page
breaks
will not be
found. For example, if
you
leap to
[PAGEI[a]
the cursor
will find the first
page
character
followed by an "a" or an
"A", but it will
not find an
automatic
page
break followed by
an "a".
Leaping
to the
beginning or the
end of the text
kaping
to
a
pattern
of several consecutive
page
characters
causes the
cursor to
leap
to the
first or last document
character
in
the
entire text.
The leap occurs the instant the
pattern
exceeds
the
number
ofconsecutive
page
c[aracters
that can
be found anywhere
in the text.
For
example,
if
there are
no more than two consecutive
page
or document
characters anywhere
in
the text,
the
cursor
will leap to the
beginning
or the end of the text
the moment
you press
IPAGEI
the third time
while holding a LEAP
key.
Use
[<-LEAP]
to
leap
to the
beginning of the text; use
[LEAP->]
to leap to the end.
In local leap
mode
the
cursor
will land at the first or
last
document
character
in
the
local
leap region.
Accent characters
in leaping
A leap
pattem
may contain
a bare accent character
(an
accent character that stands
alone), or characters
modified
by accents.
As
you
typ€
a
pattem
containing
an accent,
type the accent
first,
then
the character
which it accents.
The two
join
together
in the leap
pattem.
Thus typing "-"
and
"n" in succession
while leaping causes
you
to leap to
an i.
The instant
you
type
the accent the cursor
leaps
to
the
first example of
the
accent
in the text,
whether it is a bare
accent or it
modifies a character.
When
you
type the next
character
in
the
pattem,
the cursor moves
to the first
accented example ofthis
character, unless
it already stands
on such
a character. A bare accent
can occur only at the end
of a
paffern
or in a single-character
pattern.
A bare accent
matches a bare accent or an accented
character
in the text.
Leaping
and
LEARN
Iraping is not circular during
the learning or
re-enacting
phase
s of
[LEARN].
If
the cursor
encounters either the
first
or
last document characters
in the text during a
leap, it will
rebound to its starting
point;
learning or re-enacting
will
stop. If local leap is on, the
LEARN command stops and
the cursor rebounds when
it encounters either end of
the
local leap region.
UNDO and
Leap
[UNDO]
returns the cursor and
the screen to the
way they
were before the
leap
began.

Cursor Rebound
When the Pattern
is
Not
Found
The
Cat does not treat a failed leap
as an error. The cursor
simply returns
to its starting
point
the instant there is no
match between the leap
pattern
and the text. After
the
cursor rebounds
you
can
let
go
and start the leap
over, or
you
can erase some or
all of the
pattern
(see
Erasing
and
Correcting
the Leap Pattern
below).
Because the most common error in leaping
is repeatedly
pressing
the same key to leap from
example to example
of
the same thing, the Cat beeps when
the leap
pattern
consists ofthree or more identical
characters that
cannot be
found in the text.
Erasing
and Correcting the Leap Pattern
If
you press
[ERASEI
during a
leap,
it erases the last
character
you
typed in
the leap
pattem.
The
cursor back-
tracks, behaving
as
ifit
had
leaped
only as far
as
indicated
by the shortened
pattern.
When
you
erase
all characters
from a
pattern,
the cursor returns to its
starting
place.
You
can type a
corrected or entirely new
pattern
after
erasing
part
or all
of a
pattem.
Pattern
Memory
The last
pattem
used in
a
leap remains
in the Cat's memory
until
you
leap to
something new. This means
you
can let
go
of a LEAP key,
then
later
use
[LEAP
AGAIN] to leap
to
the next example of what
you
just
leaped
to.
[LEAP
AGATN]
is
described below.
The LEAP AGAIN
Command
[LEAP
AGAIN]
causes the cursor
to
leap
again
-
in the
direction indicated by
the
LEAP
key
-
to the nearest
occurrence of the last
pattern
used
in
a
leap.
You use the
command repeatedly
to
find
all
instances
of a
pattem
in the
text. The cursor
circles the entire text, crossing the
boundary between the
top and bottom of the text, and
finally
returns to the
exact spot it started from. Like
leaping,
[LEAP
AGATN]
can
go
forward or backward. To
leap
again, hold a LEAP key and
press
[USE
FRONT],
or
hold
[USE
FRONT]
and
press
a LEAP key. The first
method
is most
convenient and most often
used.
If
you press
and
hold
[USE
FRONT]
and the LEAP key
together,
[LEAP
AGAIN]
autorepeats,
causing
the cursor
to
skitter rapidly through
the text.
UNDO and
LEAP AGAIN
IUNDO]
returns the cursor and
the screen to the
way they
were before the
leap began.
Creeping
Creeping
moves the cursor
character-by-character
in
the
direction
indicated by the
LEAP key.
It is similar to
conventional
left-right
cursor control.
To creep,
press
and
release
either
LEAP key; the cursor
moves when
you
release
the key.
You
can
tap the LEAP
key repeatedly to
make the cursor
crawl smoothly
character-by-character
in
one
direction, but
it is much better
to leap than creep.
Creeping
is for short
moves only.
If the cursor
is wide, the
first creep
makes it narrow.
The
next creep
moves the cursor
one character
in the direction
indicated by the
LEAP key. Creeping
can also be used to
adjust
the area
covered by the
extended
highlight
(see
Adjusting the
Highlight by Creeping,
page
21, for more
information).
Creeping
does not autorepeat.
UNDO and
Creeping
[UNDO]
returns
the cursor to
where it was before
you
began
creeping.
Highlighting
Text
There is always
at
least
one highlighted character.
After
typing, it is
the character
you
just
typed,
usually
just
to the
left of the blinking
cursor. After leaping, it is
the character
on which
the cursor
is
positioned
(the
first or target
character
you
leaped
to).
If
you press
both LEAP keys
after a leap,
the
highlight
extends to cover
all the text from
the
location
of the
highlight
at the beginning ofthe leap
to the
present
cursor
position.
Creeping can be used to
adjust the size of the extended
highlight
as described below.
Hightighting
Recently Typed
Text
Ifyou
start typing after a leap,
a creep, or even when
the
highlight
is extended
(causing
the extended highlight
to
unhighlight),
everything
you
type
can be highlighted
by
pressing
both LEAP keys.
A
practical
example illustrates how
this can be useful.
Suppose
you
receive a
phone
call in
the
middle
of typing
a
repon:
-
Press
both
LEAP
keys. This extends
the
highlight,
and
when
you
begin typing it will mark
the beginning of a new
highlighted
area.
-
Begin
typing
your
notes. The instant you
begin to
type,
the
extended highlight becomes normal-sized
and
your
typing
appears.
-
Press
both LEAP keys when
you
finish typing. The
highlight
will extend
to cover the notes
you
have
just
typed.
-
Use
[PRINT]
to
print your
notes. As soon as the highlight
collapses to normal,
press
both LEAP keys to rehighlight
your
notes, and
press
[ERASE]
to erase them.
You
now have a
printed
copy of
your
notes, and
your
text
looks
the same as it did before
you
began typing the notes.
UNDO
and
Highlighting
[UNDO]
leaves the
text and
cursor as they
were before
you
extended
the highlight.
Automatic
Highlighting
Some
commands
-
[COPY],
[SEND],
[BOLD], [CAPS],
and
[UNDERLINE]
-
allow
you
to skip the
step of
pressing
both
LEAP keys
in order to
extend the
highlight. Simply
using
the command
after a
leap
(or
after
typing
as described
above
in Highlighting
Recently
Typed
Text,
page
20)
causes
the
highlight to
extend and
the command
to be
carried
out.
Unhighlighting
If the
highlight
is
extended
and
you
press
and
release
[LEAP->I,
the
highlight collapses
to the size
ofone charac-
ter, resting on
the
last
character
of
the formerly
highlighted
text.
This
is called unhighlighting
forward,
since the
highlight
collapses to
its forward
end.
The cursor
does
not change
position
when
you
unhighlight
forward.
It remains
one character
to the
right of the
highlight.
Thus the cursor
is left
wrde after unhighlighting
forward
(se,eWide
Cursor,
page
3).
If the
highlight
is
extended
and
you
press
and release
[<-LEAP],
the
highlight
collapses
to the size ofone
charac-
ter,
resting on
the first character
of
the formerly
high-
lighted text.
At the same
time, the cursor
leaps backward
and lands
on the same character.
This is called
unhigh'
lighting bachuard.
Unhighlighting
backward changes
the
cursor
from wide to
narrow
(seeNarrow
Cursor,page2).
UNDO
and
Unhighlighting
Using
[UNDO]
restores
the
highlight to the
way
it was
before
you
unhighlighted.
In
other
words, it rehighlights
the
text.
Rehighlighting
After unhighlighting,
you
can rehighlight,
or
bring back
the
extended
highlight, by
pressing
both
LEAP
keys again.
The Cat
rememben the area
you
highlighted
until
you
begin
typing
or leap after
unhighlighting.
Adjusting the
Highlight
by Creeping
If
you
creep a certain
distance,
the area covered
by the
extended
highlight
will be
made larger or
smaller by the
distance
you
creep
when
you
press
both
LEAP keys to
rehighlight.
This
is most useful
when
you
want the
highlight to
include a hard-to-reach
character.
Leap to an
easy-to-reach character
nearby, creep over
to the hard-to-
reach character,
and
press
both
LBAP
keys.
You can also
highlight, unhighlight,
creep,
and rehighlight
to
adjust either
end ofthe extended
highlight.
Moving
Text
If the highlight is extended and you leap somewhere
outside the extended highlight,the highlighted textinoves
to the new location ofthe cursor as soon as you release the
LEAP key.The textremains highlighted in case you want
to move it again.To completc the move,unhighlight the
text.
Only the cursor moves du五 ng the leap.The highlighted
tcxt stays where itis until you release the LEAP key.
IfyoupresstheoppositeLEAPkeydu五 ng the leap,the Cat
ignores it.
A leap inside the extended highlight itself docs not result
in textrnovement.The instant you release the LEAP key,
the highlight collapses with the highlight and cursor posi―
tioned on the target character.■
he cursor win be narrow.
If you rehighlight,the new highlight will extend from the
target charactcr to the forward end of the previous high―
light.
UNDO and
Moving
Using
[UNDO]
moves the highlighted text
and
the cursor
back to their former locations. Repeatedly
pressing
[UNDO]
moves the text back and forth between the two
locations.
Erasing Text
There
are three ways to erase text:
-backward
erase: character-bv-character
when the cur-
sor is wide
-forward
erase:
character-bv-character when the
cursor
is
narrow
-a
lot oftext
all at once:
pressing
[ERASE]
when
the
highlight is extended.
Backward
Erase
Backward
erase resembles backspacing
on a typewriter,
except the text is erased
as the cursor moves backward.
If the cursor is wide
and
you
press
[ERASE],
the character
in the highlight
disappears and the
cursor and highlight
move
one character backward. The
text to the right of the
cursor moves
backward
to
fill
the space vacated by the
erased
character. Holding down
[ERASE]
engages autore-
peat.
The
cursor moves rapidly to
the
left,
erasing as it
goes.
The
text forward from the cursor
unwraps as needed.
Forward
Erase
Forward
erase is automatically
available after leaping or
creeping. In forward erase, the
cursor stands still while the
characters to its
right move toward it and
are erased as they
enter the highlight.
If the
cursor
is
narrow when
you press
[ERASE],
the
character
in
the highlight
disappears, and the text to
the
right
of
the
cursor moves to the left to fill in
the space. The
cursor itself
does not move or change. Holding
down
[ERASE]
engages autorepeat,
causing the text forward
from
the cursor to march steadily
to the left as it is
consumed by the stationary niurow
cursor.
Words
forward
from
the cursor unwrap
as
necessary. The
text on the
backward
side of the cursor does not change.
You
can change from forward erase to backward
erase by
typing any character. This changes the
cursor to
wide,
and
forward erase
changes to backward erase. You
can type
any
character,
since it will be erased when
you press
IERASEI.
Erase
Turnaround
Forward erase
or backward
erase
change direction
when
the
cursor
reaches
either end
of the
text. This
is
called
erase turnaround.
Backward
erase switches
to
forward erase
when
you
erase
the
last character
separating
the
cursor
from the
initial
documentcharacter,
or,
iflocal
leap is on, the
lastcharacter
separating
the
cursor
from the beginning
of the
local
leap
region.
Forward erase
switches
to backward
erase
when
you
erase
the
last character
separating
the cursor
from the final
document
character,
or,
iflocal leap
is
on,
the last character
separating
the cursor
from
the end of the
local
leap region.
Erasing
Highlighted
Text
If
you press
[ERASE]
when the highlight
is extended,
all the
text
contained
in the extended
highlight
vanishes.
The
cursor
is left
wide, with the
normal-sized
highlight
resting
on the
first character
that
preceded
the extended
highlight.
UNDO
and
Erasing
IUNDO]
restores all erased
characters
to the
screen.
Ifthe
highlight
was extended
before erasing,
it will be extended
after
you
undo the
erase.
The screen
will look exactly
as it
did before
you
pressed
[ERASE].
You cannot
undo the
erasure once
you've pressed
a
key
other
than
[UNDO]
after
erasing.
 Loading...