

Page 1

User's Guide
Read this guide first.
Please read this guide before operating this product.
After you finish reading this guide, store it in a safe place for future reference.
Guide de I'utilisateur
Veuillez d'abord lire ce guide.
Lisez ce guide avant d'utiliser ce produit.
Après avoir pris connaissance de son contenu,
conservez-le dans un endroit sûr pour pouvoir le consulter en cas de besoin.
Anwenderhandbuch
Bitte lesen Sie dieses Handbuch zuerst.
Bitte lesen Sie dieses Handbuch, bevor Sie mit dem Produkt arbeiten.
Nachdem Sie das Handbuch gelesen haben, bewahren Sie es
zum Nachschlagen an einem sicheren Ort auf.
Guida per l'utente
Leggere questa guida.
Leggere questa guida prima di iniziare ad utilizzare
il prodotto. Terminata la lettura, conservare la guida
in un luogo sicuro per eventuali consultazioni.
Guía de usuario
Lea esta guía primero.
Por favor, lea esta guía antes de usar este producto.
Después de leer esta guía, guárdela en un lugar
seguro para posteriores consultas.
Page 2

Page 3

imageRUNNER ADVANCE
C2230i/C2225i/C2220i/C2220L
User's Guide
Page 4
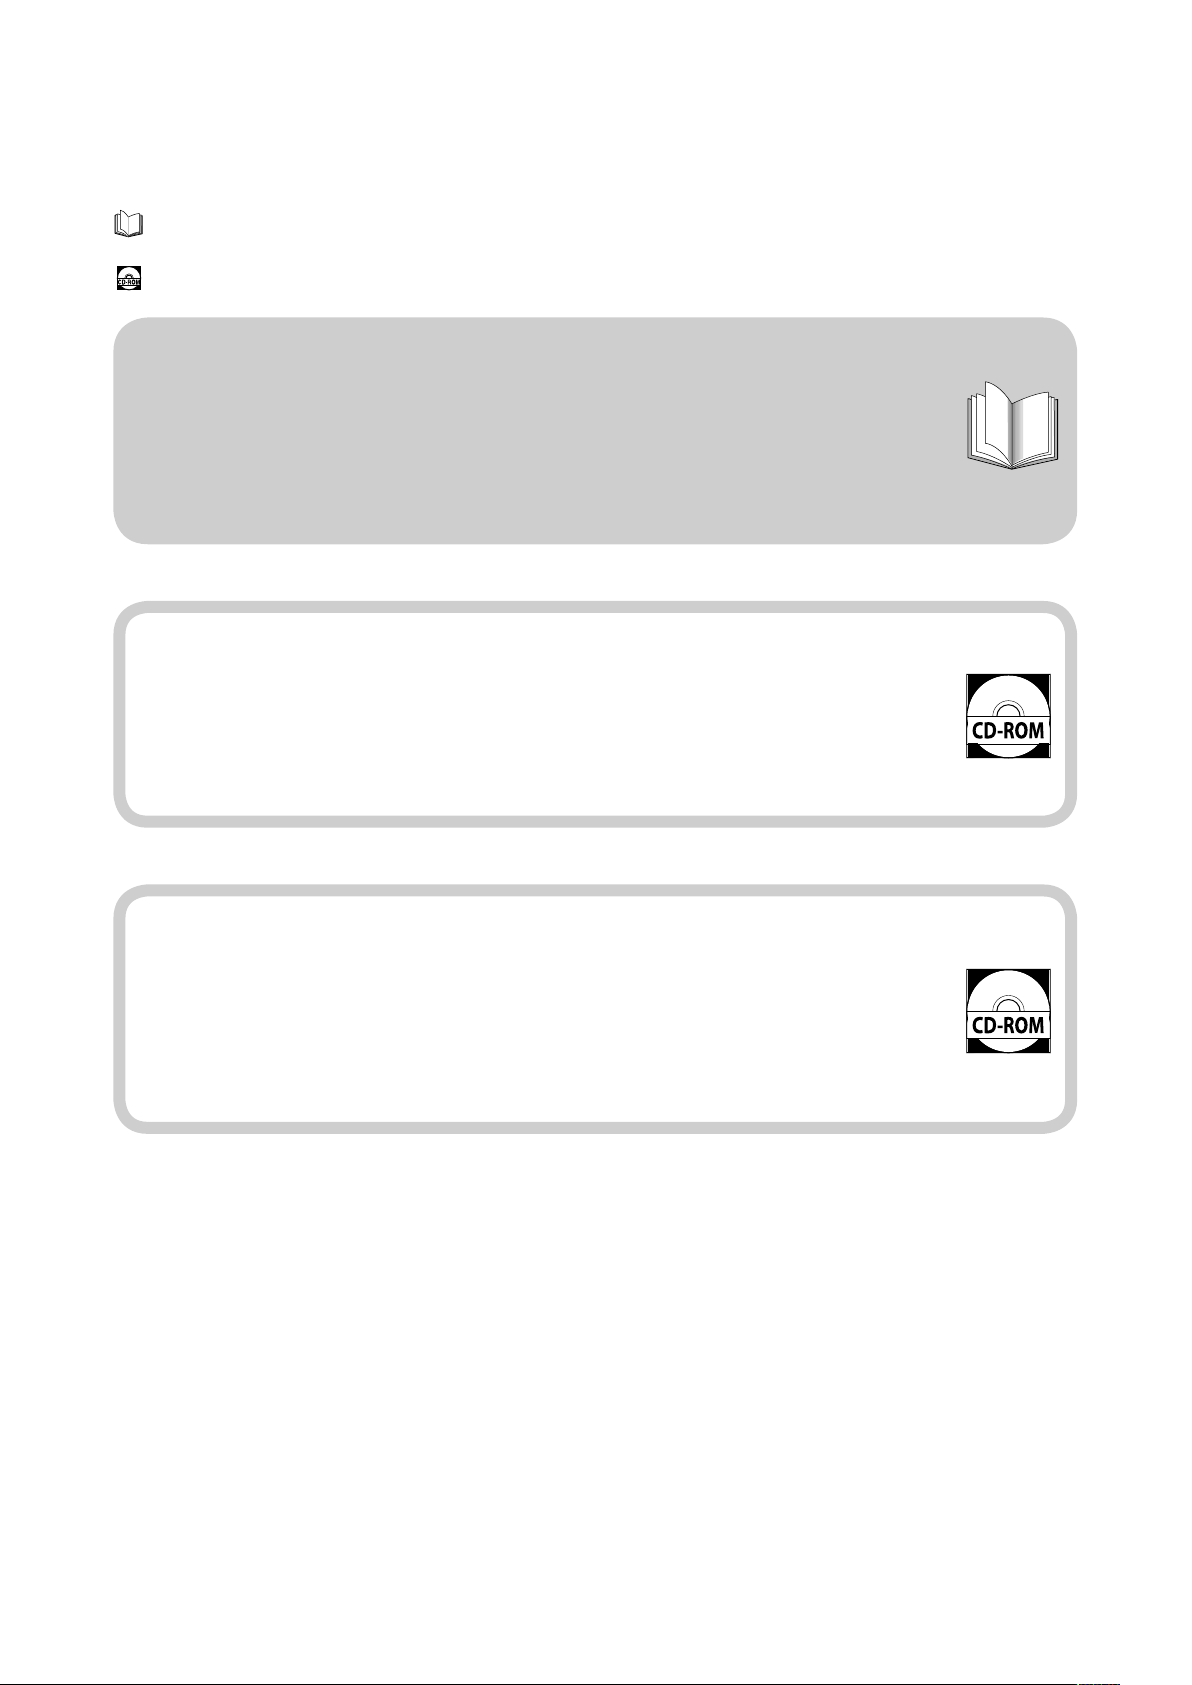
Manuals for the Machine
The manuals for this machine are divided as follows. Please refer to them for detailed information.
Guides with this symbol are printed manuals.
Guides with this symbol are included on the accompanying CD-ROM.
User's Guide (This Manual)
• Describes the precautions for using the machine.
• Provides an overview of functions, basic operations, and required settings before using
functions.
• Describes the maintenance and troubleshooting procedures for the machine.
• Includes the specications of the machine.
• Includes answers to frequently asked questions.
e-Manual
HTML manual
• Describes all the functions of the machine. Also provided with a search function that is useful for
nding and checking information.
• Includes "Practical Workows," which introduces ows of practical operations using functions of the
machine.
Driver Installation Guide
• Provides instructions on installing the printer, fax, and other drivers.
- Printer Driver Installation Guide
- Mac Printer Driver Installation Guide
- Fax Driver Installation Guide
- Network ScanGear Installation Guide
• Included on the same CD-ROM as each driver.
To view the manual in PDF format, Adobe Reader/Adobe Acrobat Reader is required. If Adobe Reader/Adobe Acrobat Reader
is not installed on your system, please download it from the Adobe Systems Incorporated website.
Page 5

Contents
1 Preface
How to Use This Manual . . . . . . . . . . . . . . . . . . . . . . . . . . . . . . . . . . . . . . . . . . . . . . . . . . . . . . . . . . . . . . . . . . . . . . . . . . . . . . .6
Symbols Used in This Manual. . . . . . . . . . . . . . . . . . . . . . . . . . . . . . . . . . . . . . . . . . . . . . . . . . . . . . . . . . . . . . . . . . . . . . . . . . . . . . . . . . . . . . . . . 6
Keys and Buttons Used in This Manual . . . . . . . . . . . . . . . . . . . . . . . . . . . . . . . . . . . . . . . . . . . . . . . . . . . . . . . . . . . . . . . . . . . . . . . . . . . . . . . . 6
Illustrations Used in This Manual. . . . . . . . . . . . . . . . . . . . . . . . . . . . . . . . . . . . . . . . . . . . . . . . . . . . . . . . . . . . . . . . . . . . . . . . . . . . . . . . . . . . . . 6
Abbreviations Used in This Manual . . . . . . . . . . . . . . . . . . . . . . . . . . . . . . . . . . . . . . . . . . . . . . . . . . . . . . . . . . . . . . . . . . . . . . . . . . . . . . . . . . .6
Trademarks . . . . . . . . . . . . . . . . . . . . . . . . . . . . . . . . . . . . . . . . . . . . . . . . . . . . . . . . . . . . . . . . . . . . . . . . . . . . . . . . . . . . . . . . . . . . . . . . . . . . . . . . . . 7
How to Use This Manual (e-Manual) . . . . . . . . . . . . . . . . . . . . . . . . . . . . . . . . . . . . . . . . . . . . . . . . . . . . . . . . . . . . . . . . . . . .8
How to Install the e-Manual . . . . . . . . . . . . . . . . . . . . . . . . . . . . . . . . . . . . . . . . . . . . . . . . . . . . . . . . . . . . . . . . . . . . . . . . . . . . . . . . . . . . . . . . . .8
Top Page of the e-Manual . . . . . . . . . . . . . . . . . . . . . . . . . . . . . . . . . . . . . . . . . . . . . . . . . . . . . . . . . . . . . . . . . . . . . . . . . . . . . . . . . . . . . . . . . . . .9
Legal Notices . . . . . . . . . . . . . . . . . . . . . . . . . . . . . . . . . . . . . . . . . . . . . . . . . . . . . . . . . . . . . . . . . . . . . . . . . . . . . . . . . . . . . . . 10
Product Name . . . . . . . . . . . . . . . . . . . . . . . . . . . . . . . . . . . . . . . . . . . . . . . . . . . . . . . . . . . . . . . . . . . . . . . . . . . . . . . . . . . . . . . . . . . . . . . . . . . . . .10
EMC requirements of EC Directive . . . . . . . . . . . . . . . . . . . . . . . . . . . . . . . . . . . . . . . . . . . . . . . . . . . . . . . . . . . . . . . . . . . . . . . . . . . . . . . . . . .10
Laser Safety. . . . . . . . . . . . . . . . . . . . . . . . . . . . . . . . . . . . . . . . . . . . . . . . . . . . . . . . . . . . . . . . . . . . . . . . . . . . . . . . . . . . . . . . . . . . . . . . . . . . . . . . .10
Additional Information . . . . . . . . . . . . . . . . . . . . . . . . . . . . . . . . . . . . . . . . . . . . . . . . . . . . . . . . . . . . . . . . . . . . . . . . . . . . . . . . . . . . . . . . . . . . . .10
International ENERGY STAR Program. . . . . . . . . . . . . . . . . . . . . . . . . . . . . . . . . . . . . . . . . . . . . . . . . . . . . . . . . . . . . . . . . . . . . . . . . . . . . . . . .10
IPv6 Ready Logo . . . . . . . . . . . . . . . . . . . . . . . . . . . . . . . . . . . . . . . . . . . . . . . . . . . . . . . . . . . . . . . . . . . . . . . . . . . . . . . . . . . . . . . . . . . . . . . . . . . .10
WEEE Directive. . . . . . . . . . . . . . . . . . . . . . . . . . . . . . . . . . . . . . . . . . . . . . . . . . . . . . . . . . . . . . . . . . . . . . . . . . . . . . . . . . . . . . . . . . . . . . . . . . . . . . 11
R & TTE Directive . . . . . . . . . . . . . . . . . . . . . . . . . . . . . . . . . . . . . . . . . . . . . . . . . . . . . . . . . . . . . . . . . . . . . . . . . . . . . . . . . . . . . . . . . . . . . . . . . . . .11
Information Security Standard (IEEE 2600) . . . . . . . . . . . . . . . . . . . . . . . . . . . . . . . . . . . . . . . . . . . . . . . . . . . . . . . . . . . . . . . . . . . . . . . . . . .11
Copyright. . . . . . . . . . . . . . . . . . . . . . . . . . . . . . . . . . . . . . . . . . . . . . . . . . . . . . . . . . . . . . . . . . . . . . . . . . . . . . . . . . . . . . . . . . . . . . . . . . . . . . . . . . . 11
Third Party Software . . . . . . . . . . . . . . . . . . . . . . . . . . . . . . . . . . . . . . . . . . . . . . . . . . . . . . . . . . . . . . . . . . . . . . . . . . . . . . . . . . . . . . . . . . . . . . . .11
The Software Subjected to the Other Conditions . . . . . . . . . . . . . . . . . . . . . . . . . . . . . . . . . . . . . . . . . . . . . . . . . . . . . . . . . . . . . . . . . . . . .12
Disclaimers . . . . . . . . . . . . . . . . . . . . . . . . . . . . . . . . . . . . . . . . . . . . . . . . . . . . . . . . . . . . . . . . . . . . . . . . . . . . . . . . . . . . . . . . . . . . . . . . . . . . . . . . .12
Legal Limitations on the Usage of Your Product and the Use of Images. . . . . . . . . . . . . . . . . . . . . . . . . . . . . . . . . . . . . . . . . . . . . . . .12
Super G3. . . . . . . . . . . . . . . . . . . . . . . . . . . . . . . . . . . . . . . . . . . . . . . . . . . . . . . . . . . . . . . . . . . . . . . . . . . . . . . . . . . . . . . . . . . . . . . . . . . . . . . . . . . .12
Important Safety Instructions . . . . . . . . . . . . . . . . . . . . . . . . . . . . . . . . . . . . . . . . . . . . . . . . . . . . . . . . . . . . . . . . . . . . . . . . 13
Installation. . . . . . . . . . . . . . . . . . . . . . . . . . . . . . . . . . . . . . . . . . . . . . . . . . . . . . . . . . . . . . . . . . . . . . . . . . . . . . . . . . . . . . . . . . . . . . . . . . . . . . . . . .13
Power Supply . . . . . . . . . . . . . . . . . . . . . . . . . . . . . . . . . . . . . . . . . . . . . . . . . . . . . . . . . . . . . . . . . . . . . . . . . . . . . . . . . . . . . . . . . . . . . . . . . . . . . . .13
Handling. . . . . . . . . . . . . . . . . . . . . . . . . . . . . . . . . . . . . . . . . . . . . . . . . . . . . . . . . . . . . . . . . . . . . . . . . . . . . . . . . . . . . . . . . . . . . . . . . . . . . . . . . . . .14
Maintenance and Inspections . . . . . . . . . . . . . . . . . . . . . . . . . . . . . . . . . . . . . . . . . . . . . . . . . . . . . . . . . . . . . . . . . . . . . . . . . . . . . . . . . . . . . . .15
Consumables . . . . . . . . . . . . . . . . . . . . . . . . . . . . . . . . . . . . . . . . . . . . . . . . . . . . . . . . . . . . . . . . . . . . . . . . . . . . . . . . . . . . . . . . . . . . . . . . . . . . . . . 16
Other Warnings . . . . . . . . . . . . . . . . . . . . . . . . . . . . . . . . . . . . . . . . . . . . . . . . . . . . . . . . . . . . . . . . . . . . . . . . . . . . . . . . . . . . . . . . . . . . . . . . . . . . .16
Installation Location and Handling . . . . . . . . . . . . . . . . . . . . . . . . . . . . . . . . . . . . . . . . . . . . . . . . . . . . . . . . . . . . . . . . . . . 17
Installation Precautions . . . . . . . . . . . . . . . . . . . . . . . . . . . . . . . . . . . . . . . . . . . . . . . . . . . . . . . . . . . . . . . . . . . . . . . . . . . . . . . . . . . . . . . . . . . . .17
Avoid Installing the Machine in the Following Locations . . . . . . . . . . . . . . . . . . . . . . . . . . . . . . . . . . . . . . . . . . . . . . . . . . . . . . . . . . . .17
Select a Safe Power Supply . . . . . . . . . . . . . . . . . . . . . . . . . . . . . . . . . . . . . . . . . . . . . . . . . . . . . . . . . . . . . . . . . . . . . . . . . . . . . . . . . . . . . . . .18
Moving the Machine . . . . . . . . . . . . . . . . . . . . . . . . . . . . . . . . . . . . . . . . . . . . . . . . . . . . . . . . . . . . . . . . . . . . . . . . . . . . . . . . . . . . . . . . . . . . . .18
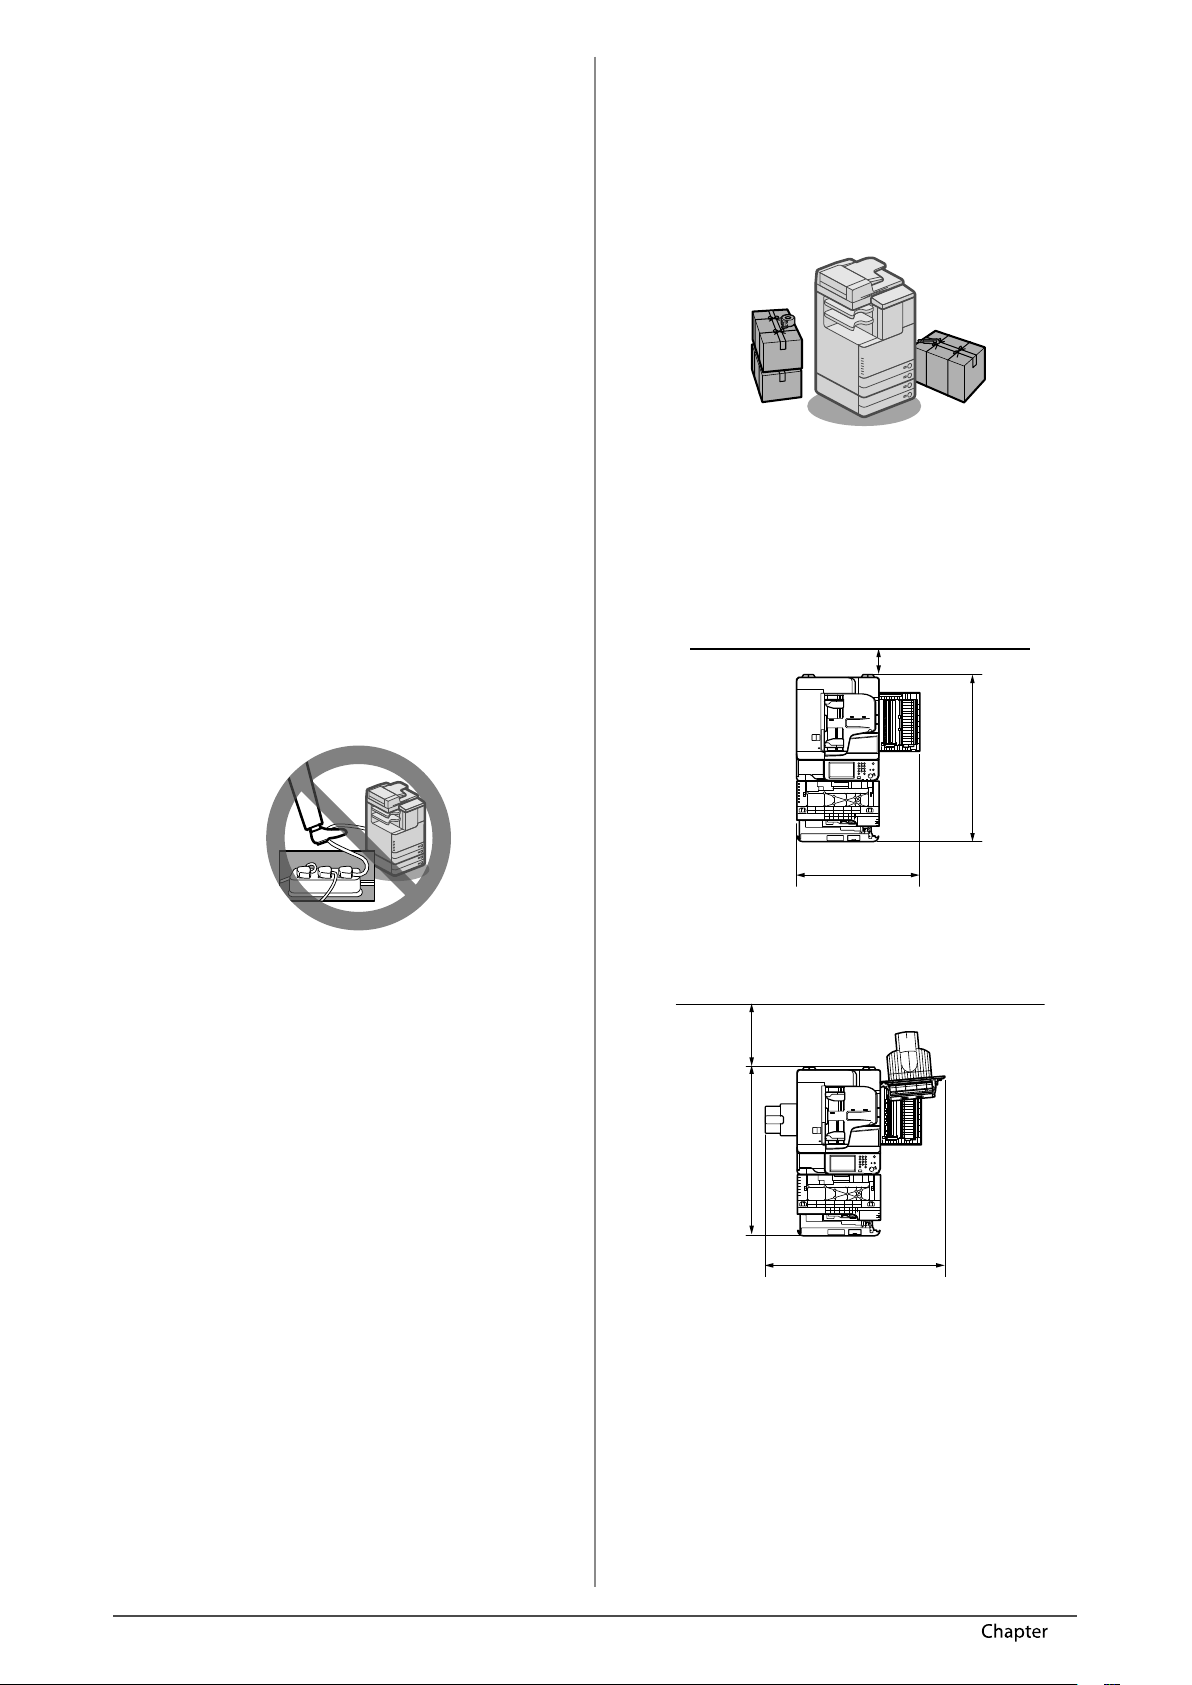
Provide Adequate Installation Space . . . . . . . . . . . . . . . . . . . . . . . . . . . . . . . . . . . . . . . . . . . . . . . . . . . . . . . . . . . . . . . . . . . . . . . . . . . . . . .18
Handling Precautions . . . . . . . . . . . . . . . . . . . . . . . . . . . . . . . . . . . . . . . . . . . . . . . . . . . . . . . . . . . . . . . . . . . . . . . . . . . . . . . . . . . . . . . . . . . . . . .19
Backing Up/Exporting Data . . . . . . . . . . . . . . . . . . . . . . . . . . . . . . . . . . . . . . . . . . . . . . . . . . . . . . . . . . . . . . . . . . . . . . . . . . 21
2 Flow of Basic Operations
What This Machine Can Do. . . . . . . . . . . . . . . . . . . . . . . . . . . . . . . . . . . . . . . . . . . . . . . . . . . . . . . . . . . . . . . . . . . . . . . . . . . 24
Revolutionary Documentation Work with an Evolving Multitasking Machine . . . . . . . . . . . . . . . . . . . . . . . . . . . . . . . . . . . . . . . . . .24
Flow of Settings for Using the Desired Functions . . . . . . . . . . . . . . . . . . . . . . . . . . . . . . . . . . . . . . . . . . . . . . . . . . . . . . 26
Logging In as an Administrator . . . . . . . . . . . . . . . . . . . . . . . . . . . . . . . . . . . . . . . . . . . . . . . . . . . . . . . . . . . . . . . . . . . . . . . . . . . . . . . . . . . . . .26
Network/USB Connection . . . . . . . . . . . . . . . . . . . . . . . . . . . . . . . . . . . . . . . . . . . . . . . . . . . . . . . . . . . . . . . . . . . . . . . . . . . . . . . . . . . . . . . . . . . 27
Scan and Store/Access Stored Files. . . . . . . . . . . . . . . . . . . . . . . . . . . . . . . . . . . . . . . . . . . . . . . . . . . . . . . . . . . . . . . . . . . . . . . . . . . . . . . . . . .28
Sending Faxes/Printing. . . . . . . . . . . . . . . . . . . . . . . . . . . . . . . . . . . . . . . . . . . . . . . . . . . . . . . . . . . . . . . . . . . . . . . . . . . . . . . . . . . . . . . . . . . . . .29
Sending/Receiving Remote Fax. . . . . . . . . . . . . . . . . . . . . . . . . . . . . . . . . . . . . . . . . . . . . . . . . . . . . . . . . . . . . . . . . . . . . . . . . . . . . . . . . . . . . . 29
Scan and Send/Remote Scan . . . . . . . . . . . . . . . . . . . . . . . . . . . . . . . . . . . . . . . . . . . . . . . . . . . . . . . . . . . . . . . . . . . . . . . . . . . . . . . . . . . . . . . .30
Remote UI/MEAP. . . . . . . . . . . . . . . . . . . . . . . . . . . . . . . . . . . . . . . . . . . . . . . . . . . . . . . . . . . . . . . . . . . . . . . . . . . . . . . . . . . . . . . . . . . . . . . . . . . .31
Parts and Their Functions . . . . . . . . . . . . . . . . . . . . . . . . . . . . . . . . . . . . . . . . . . . . . . . . . . . . . . . . . . . . . . . . . . . . . . . . . . . . 32
External View . . . . . . . . . . . . . . . . . . . . . . . . . . . . . . . . . . . . . . . . . . . . . . . . . . . . . . . . . . . . . . . . . . . . . . . . . . . . . . . . . . . . . . . . . . . . . . . . . . . . . . . 32
Internal View. . . . . . . . . . . . . . . . . . . . . . . . . . . . . . . . . . . . . . . . . . . . . . . . . . . . . . . . . . . . . . . . . . . . . . . . . . . . . . . . . . . . . . . . . . . . . . . . . . . . . . . .34
Control Panel and Touch Panel Display. . . . . . . . . . . . . . . . . . . . . . . . . . . . . . . . . . . . . . . . . . . . . . . . . . . . . . . . . . . . . . . . . . . . . . . . . . . . . . .35
Useful Functions of the Main Menu Screen and Touch Panel Display . . . . . . . . . . . . . . . . . . . . . . . . . . . . . . . . . . . . . . . . . . . . . . . . . . 37
Main Power and Energy Saver Key. . . . . . . . . . . . . . . . . . . . . . . . . . . . . . . . . . . . . . . . . . . . . . . . . . . . . . . . . . . . . . . . . . . . 38
How to Make a Copy. . . . . . . . . . . . . . . . . . . . . . . . . . . . . . . . . . . . . . . . . . . . . . . . . . . . . . . . . . . . . . . . . . . . . . . . . . . . . . . . . 39
Sending a Fax . . . . . . . . . . . . . . . . . . . . . . . . . . . . . . . . . . . . . . . . . . . . . . . . . . . . . . . . . . . . . . . . . . . . . . . . . . . . . . . . . . . . . . . 40
Sending Scanned Data (E-Mail/I-Fax/File Servers) . . . . . . . . . . . . . . . . . . . . . . . . . . . . . . . . . . . . . . . . . . . . . . . . . . . . . 41
Storing Scanned Data . . . . . . . . . . . . . . . . . . . . . . . . . . . . . . . . . . . . . . . . . . . . . . . . . . . . . . . . . . . . . . . . . . . . . . . . . . . . . . . 42
Accessing Stored Files . . . . . . . . . . . . . . . . . . . . . . . . . . . . . . . . . . . . . . . . . . . . . . . . . . . . . . . . . . . . . . . . . . . . . . . . . . . . . . . 44
Operating the Machine from a Computer (Remote UI) . . . . . . . . . . . . . . . . . . . . . . . . . . . . . . . . . . . . . . . . . . . . . . . . . 45
Printing from a Computer. . . . . . . . . . . . . . . . . . . . . . . . . . . . . . . . . . . . . . . . . . . . . . . . . . . . . . . . . . . . . . . . . . . . . . . . . . . . 46
3
Page 6

3 Routine Maintenance
Loading Paper . . . . . . . . . . . . . . . . . . . . . . . . . . . . . . . . . . . . . . . . . . . . . . . . . . . . . . . . . . . . . . . . . . . . . . . . . . . . . . . . . . . . . . 48
Loading Paper into a Paper Drawer . . . . . . . . . . . . . . . . . . . . . . . . . . . . . . . . . . . . . . . . . . . . . . . . . . . . . . . . . . . . . . . . . . . . . . . . . . . . . . . . . .48
Adjusting a Paper Drawer to Hold a Dierent Paper Size . . . . . . . . . . . . . . . . . . . . . . . . . . . . . . . . . . . . . . . . . . . . . . . . . . . . . . . . . . . . . .49
Replacing the Stamp Ink Cartridge (Color Image Reader Unit-G1) (Optional). . . . . . . . . . . . . . . . . . . . . . . . . . . . 51
Replacing the Toner Cartridge/Waste Toner Container. . . . . . . . . . . . . . . . . . . . . . . . . . . . . . . . . . . . . . . . . . . . . . . . . 52
Replacing the Toner Cartridge . . . . . . . . . . . . . . . . . . . . . . . . . . . . . . . . . . . . . . . . . . . . . . . . . . . . . . . . . . . . . . . . . . . . . . . . . . . . . . . . . . . . . . .52
Replacing the Waste Toner Container . . . . . . . . . . . . . . . . . . . . . . . . . . . . . . . . . . . . . . . . . . . . . . . . . . . . . . . . . . . . . . . . . . . . . . . . . . . . . . . .53
Routine Cleaning. . . . . . . . . . . . . . . . . . . . . . . . . . . . . . . . . . . . . . . . . . . . . . . . . . . . . . . . . . . . . . . . . . . . . . . . . . . . . . . . . . . . 55
Cleaning the Platen Glass and Underside of the Feeder/Platen Cover. . . . . . . . . . . . . . . . . . . . . . . . . . . . . . . . . . . . . . . . . . . . . . . . . .55
Manual Feeder Cleaning. . . . . . . . . . . . . . . . . . . . . . . . . . . . . . . . . . . . . . . . . . . . . . . . . . . . . . . . . . . . . . . . . . . . . . . . . . . . . . . . . . . . . . . . . . . . .55
Consumables . . . . . . . . . . . . . . . . . . . . . . . . . . . . . . . . . . . . . . . . . . . . . . . . . . . . . . . . . . . . . . . . . . . . . . . . . . . . . . . . . . . . . . . 57
When an Error Message/Error Code Is Displayed . . . . . . . . . . . . . . . . . . . . . . . . . . . . . . . . . . . . . . . . . . . . . . . . . . . . . . 59
When an Error Message Is Displayed . . . . . . . . . . . . . . . . . . . . . . . . . . . . . . . . . . . . . . . . . . . . . . . . . . . . . . . . . . . . . . . . . . . . . . . . . . . . . . . . .59
When an Error Code Is Displayed . . . . . . . . . . . . . . . . . . . . . . . . . . . . . . . . . . . . . . . . . . . . . . . . . . . . . . . . . . . . . . . . . . . . . . . . . . . . . . . . . . . .59
Service Call Message . . . . . . . . . . . . . . . . . . . . . . . . . . . . . . . . . . . . . . . . . . . . . . . . . . . . . . . . . . . . . . . . . . . . . . . . . . . . . . . . 60
Contacting Your Local Authorized Canon Dealer . . . . . . . . . . . . . . . . . . . . . . . . . . . . . . . . . . . . . . . . . . . . . . . . . . . . . . . . . . . . . . . . . . . . .60
Setting the Limited Functions Mode from the Service Call Message Screen. . . . . . . . . . . . . . . . . . . . . . . . . . . . . . . . . . . . . . . . . . . . 61
Location of Staple/Paper Jams . . . . . . . . . . . . . . . . . . . . . . . . . . . . . . . . . . . . . . . . . . . . . . . . . . . . . . . . . . . . . . . . . . . . . . . 62
Locations of Paper Jams. . . . . . . . . . . . . . . . . . . . . . . . . . . . . . . . . . . . . . . . . . . . . . . . . . . . . . . . . . . . . . . . . . . . . . . . . . . . . . . . . . . . . . . . . . . . .62
Locations of Staple Jams . . . . . . . . . . . . . . . . . . . . . . . . . . . . . . . . . . . . . . . . . . . . . . . . . . . . . . . . . . . . . . . . . . . . . . . . . . . . . . . . . . . . . . . . . . . .64
4 Appendix
Specications . . . . . . . . . . . . . . . . . . . . . . . . . . . . . . . . . . . . . . . . . . . . . . . . . . . . . . . . . . . . . . . . . . . . . . . . . . . . . . . . . . . . . . . 66
Main Unit . . . . . . . . . . . . . . . . . . . . . . . . . . . . . . . . . . . . . . . . . . . . . . . . . . . . . . . . . . . . . . . . . . . . . . . . . . . . . . . . . . . . . . . . . . . . . . . . . . . . . . . . . . .66
Color Image Reader Unit-G1 . . . . . . . . . . . . . . . . . . . . . . . . . . . . . . . . . . . . . . . . . . . . . . . . . . . . . . . . . . . . . . . . . . . . . . . . . . . . . . . . . . . . . . . . .67
Color Image Reader Unit-G2 . . . . . . . . . . . . . . . . . . . . . . . . . . . . . . . . . . . . . . . . . . . . . . . . . . . . . . . . . . . . . . . . . . . . . . . . . . . . . . . . . . . . . . . . .68
Cassette Feeding Unit-AF1 . . . . . . . . . . . . . . . . . . . . . . . . . . . . . . . . . . . . . . . . . . . . . . . . . . . . . . . . . . . . . . . . . . . . . . . . . . . . . . . . . . . . . . . . . .68
Envelope Feeder Attachment-D1 . . . . . . . . . . . . . . . . . . . . . . . . . . . . . . . . . . . . . . . . . . . . . . . . . . . . . . . . . . . . . . . . . . . . . . . . . . . . . . . . . . . .68
Staple Finisher-M1 . . . . . . . . . . . . . . . . . . . . . . . . . . . . . . . . . . . . . . . . . . . . . . . . . . . . . . . . . . . . . . . . . . . . . . . . . . . . . . . . . . . . . . . . . . . . . . . . . . 69
Booklet Finisher-M1 . . . . . . . . . . . . . . . . . . . . . . . . . . . . . . . . . . . . . . . . . . . . . . . . . . . . . . . . . . . . . . . . . . . . . . . . . . . . . . . . . . . . . . . . . . . . . . . . .70
Inner Finisher-F1 . . . . . . . . . . . . . . . . . . . . . . . . . . . . . . . . . . . . . . . . . . . . . . . . . . . . . . . . . . . . . . . . . . . . . . . . . . . . . . . . . . . . . . . . . . . . . . . . . . . .71
Inner Finisher Additional Tray-A1 . . . . . . . . . . . . . . . . . . . . . . . . . . . . . . . . . . . . . . . . . . . . . . . . . . . . . . . . . . . . . . . . . . . . . . . . . . . . . . . . . . . .72
Inner 2Way Tray-F1. . . . . . . . . . . . . . . . . . . . . . . . . . . . . . . . . . . . . . . . . . . . . . . . . . . . . . . . . . . . . . . . . . . . . . . . . . . . . . . . . . . . . . . . . . . . . . . . . .72
Copy Tray-J1 . . . . . . . . . . . . . . . . . . . . . . . . . . . . . . . . . . . . . . . . . . . . . . . . . . . . . . . . . . . . . . . . . . . . . . . . . . . . . . . . . . . . . . . . . . . . . . . . . . . . . . . .73
Copy Card Reader-F1. . . . . . . . . . . . . . . . . . . . . . . . . . . . . . . . . . . . . . . . . . . . . . . . . . . . . . . . . . . . . . . . . . . . . . . . . . . . . . . . . . . . . . . . . . . . . . . .73
Super G3 FAX Board-AH2 . . . . . . . . . . . . . . . . . . . . . . . . . . . . . . . . . . . . . . . . . . . . . . . . . . . . . . . . . . . . . . . . . . . . . . . . . . . . . . . . . . . . . . . . . . . .73
Send Function . . . . . . . . . . . . . . . . . . . . . . . . . . . . . . . . . . . . . . . . . . . . . . . . . . . . . . . . . . . . . . . . . . . . . . . . . . . . . . . . . . . . . . . . . . . . . . . . . . . . . .74
Network Environment. . . . . . . . . . . . . . . . . . . . . . . . . . . . . . . . . . . . . . . . . . . . . . . . . . . . . . . . . . . . . . . . . . . . . . . . . . . . . . . . . . . . . . . . . . . . . . . 75
Printer Settings . . . . . . . . . . . . . . . . . . . . . . . . . . . . . . . . . . . . . . . . . . . . . . . . . . . . . . . . . . . . . . . . . . . . . . . . . . . . . . . . . . . . . . . . . . . . . . . . . . . . .75
Frequently Asked Questions . . . . . . . . . . . . . . . . . . . . . . . . . . . . . . . . . . . . . . . . . . . . . . . . . . . . . . . . . . . . . . . . . . . . . . . . . 76
4
Page 7

Preface
Thank you for purchasing the Canon imageRUNNER ADVANCE C2230i/
C2225i/C2220i/C2220L. Please read this manual thoroughly before
operating the machine to familiarize yourself with its capabilities, and to
make the most of its many functions.
For information on the detailed settings for the functions described in this
manual, see the e-Manual. After reading this manual, store it in a safe place
for future reference.
■■ How to Use This Manual . . . . . . . . . . . . . . . . . . . . . . . . . . . . . . . . . . . . . . . . . . . . . . . . . . . . . . . . . . . . . . . . . . . . . . . . . . . .6
Symbols Used in This Manual. . . . . . . . . . . . . . . . . . . . . . . . . . . . . . . . . . . . . . . . . . . . . . . . . . . . . . . . . . . . . . . . . . . . . . . . . . . . . . . . . . . . . . . . . 6
Keys and Buttons Used in This Manual . . . . . . . . . . . . . . . . . . . . . . . . . . . . . . . . . . . . . . . . . . . . . . . . . . . . . . . . . . . . . . . . . . . . . . . . . . . . . . . . 6
Illustrations Used in This Manual. . . . . . . . . . . . . . . . . . . . . . . . . . . . . . . . . . . . . . . . . . . . . . . . . . . . . . . . . . . . . . . . . . . . . . . . . . . . . . . . . . . . . . 6
Abbreviations Used in This Manual . . . . . . . . . . . . . . . . . . . . . . . . . . . . . . . . . . . . . . . . . . . . . . . . . . . . . . . . . . . . . . . . . . . . . . . . . . . . . . . . . . .6
Trademarks . . . . . . . . . . . . . . . . . . . . . . . . . . . . . . . . . . . . . . . . . . . . . . . . . . . . . . . . . . . . . . . . . . . . . . . . . . . . . . . . . . . . . . . . . . . . . . . . . . . . . . . . . . 7
■■ How to Use This Manual (e-Manual) . . . . . . . . . . . . . . . . . . . . . . . . . . . . . . . . . . . . . . . . . . . . . . . . . . . . . . . . . . . . . . . . .8
How to Install the e-Manual . . . . . . . . . . . . . . . . . . . . . . . . . . . . . . . . . . . . . . . . . . . . . . . . . . . . . . . . . . . . . . . . . . . . . . . . . . . . . . . . . . . . . . . . . .8
Top Page of the e-Manual . . . . . . . . . . . . . . . . . . . . . . . . . . . . . . . . . . . . . . . . . . . . . . . . . . . . . . . . . . . . . . . . . . . . . . . . . . . . . . . . . . . . . . . . . . . .9
■■ Legal Notices. . . . . . . . . . . . . . . . . . . . . . . . . . . . . . . . . . . . . . . . . . . . . . . . . . . . . . . . . . . . . . . . . . . . . . . . . . . . . . . . . . . . . 10
Product Name . . . . . . . . . . . . . . . . . . . . . . . . . . . . . . . . . . . . . . . . . . . . . . . . . . . . . . . . . . . . . . . . . . . . . . . . . . . . . . . . . . . . . . . . . . . . . . . . . . . . . .10
EMC requirements of EC Directive . . . . . . . . . . . . . . . . . . . . . . . . . . . . . . . . . . . . . . . . . . . . . . . . . . . . . . . . . . . . . . . . . . . . . . . . . . . . . . . . . . .10
Laser Safety. . . . . . . . . . . . . . . . . . . . . . . . . . . . . . . . . . . . . . . . . . . . . . . . . . . . . . . . . . . . . . . . . . . . . . . . . . . . . . . . . . . . . . . . . . . . . . . . . . . . . . . . .10
Additional Information . . . . . . . . . . . . . . . . . . . . . . . . . . . . . . . . . . . . . . . . . . . . . . . . . . . . . . . . . . . . . . . . . . . . . . . . . . . . . . . . . . . . . . . . . . . . . .10
International ENERGY STAR Program. . . . . . . . . . . . . . . . . . . . . . . . . . . . . . . . . . . . . . . . . . . . . . . . . . . . . . . . . . . . . . . . . . . . . . . . . . . . . . . . .10
IPv6 Ready Logo . . . . . . . . . . . . . . . . . . . . . . . . . . . . . . . . . . . . . . . . . . . . . . . . . . . . . . . . . . . . . . . . . . . . . . . . . . . . . . . . . . . . . . . . . . . . . . . . . . . .10
WEEE Directive. . . . . . . . . . . . . . . . . . . . . . . . . . . . . . . . . . . . . . . . . . . . . . . . . . . . . . . . . . . . . . . . . . . . . . . . . . . . . . . . . . . . . . . . . . . . . . . . . . . . . . 11
R & TTE Directive . . . . . . . . . . . . . . . . . . . . . . . . . . . . . . . . . . . . . . . . . . . . . . . . . . . . . . . . . . . . . . . . . . . . . . . . . . . . . . . . . . . . . . . . . . . . . . . . . . . .11
Information Security Standard (IEEE 2600) . . . . . . . . . . . . . . . . . . . . . . . . . . . . . . . . . . . . . . . . . . . . . . . . . . . . . . . . . . . . . . . . . . . . . . . . . . .11
Copyright. . . . . . . . . . . . . . . . . . . . . . . . . . . . . . . . . . . . . . . . . . . . . . . . . . . . . . . . . . . . . . . . . . . . . . . . . . . . . . . . . . . . . . . . . . . . . . . . . . . . . . . . . . . 11
Third Party Software . . . . . . . . . . . . . . . . . . . . . . . . . . . . . . . . . . . . . . . . . . . . . . . . . . . . . . . . . . . . . . . . . . . . . . . . . . . . . . . . . . . . . . . . . . . . . . . .11
The Software Subjected to the Other Conditions . . . . . . . . . . . . . . . . . . . . . . . . . . . . . . . . . . . . . . . . . . . . . . . . . . . . . . . . . . . . . . . . . . . . .12
Disclaimers . . . . . . . . . . . . . . . . . . . . . . . . . . . . . . . . . . . . . . . . . . . . . . . . . . . . . . . . . . . . . . . . . . . . . . . . . . . . . . . . . . . . . . . . . . . . . . . . . . . . . . . . .12
Legal Limitations on the Usage of Your Product and the Use of Images. . . . . . . . . . . . . . . . . . . . . . . . . . . . . . . . . . . . . . . . . . . . . . . .12
Super G3. . . . . . . . . . . . . . . . . . . . . . . . . . . . . . . . . . . . . . . . . . . . . . . . . . . . . . . . . . . . . . . . . . . . . . . . . . . . . . . . . . . . . . . . . . . . . . . . . . . . . . . . . . . .12
■■ Important Safety Instructions . . . . . . . . . . . . . . . . . . . . . . . . . . . . . . . . . . . . . . . . . . . . . . . . . . . . . . . . . . . . . . . . . . . . . 13
Installation. . . . . . . . . . . . . . . . . . . . . . . . . . . . . . . . . . . . . . . . . . . . . . . . . . . . . . . . . . . . . . . . . . . . . . . . . . . . . . . . . . . . . . . . . . . . . . . . . . . . . . . . . .13
Power Supply . . . . . . . . . . . . . . . . . . . . . . . . . . . . . . . . . . . . . . . . . . . . . . . . . . . . . . . . . . . . . . . . . . . . . . . . . . . . . . . . . . . . . . . . . . . . . . . . . . . . . . .13
Handling. . . . . . . . . . . . . . . . . . . . . . . . . . . . . . . . . . . . . . . . . . . . . . . . . . . . . . . . . . . . . . . . . . . . . . . . . . . . . . . . . . . . . . . . . . . . . . . . . . . . . . . . . . . .14
Maintenance and Inspections . . . . . . . . . . . . . . . . . . . . . . . . . . . . . . . . . . . . . . . . . . . . . . . . . . . . . . . . . . . . . . . . . . . . . . . . . . . . . . . . . . . . . . .15
Consumables . . . . . . . . . . . . . . . . . . . . . . . . . . . . . . . . . . . . . . . . . . . . . . . . . . . . . . . . . . . . . . . . . . . . . . . . . . . . . . . . . . . . . . . . . . . . . . . . . . . . . . . 16
Other Warnings . . . . . . . . . . . . . . . . . . . . . . . . . . . . . . . . . . . . . . . . . . . . . . . . . . . . . . . . . . . . . . . . . . . . . . . . . . . . . . . . . . . . . . . . . . . . . . . . . . . . .16
■■ Installation Location and Handling . . . . . . . . . . . . . . . . . . . . . . . . . . . . . . . . . . . . . . . . . . . . . . . . . . . . . . . . . . . . . . . . 17
Installation Precautions . . . . . . . . . . . . . . . . . . . . . . . . . . . . . . . . . . . . . . . . . . . . . . . . . . . . . . . . . . . . . . . . . . . . . . . . . . . . . . . . . . . . . . . . . . . . .17
Avoid Installing the Machine in the Following Locations . . . . . . . . . . . . . . . . . . . . . . . . . . . . . . . . . . . . . . . . . . . . . . . . . . . . . . . . . . . .17
Select a Safe Power Supply . . . . . . . . . . . . . . . . . . . . . . . . . . . . . . . . . . . . . . . . . . . . . . . . . . . . . . . . . . . . . . . . . . . . . . . . . . . . . . . . . . . . . . . .18
Moving the Machine . . . . . . . . . . . . . . . . . . . . . . . . . . . . . . . . . . . . . . . . . . . . . . . . . . . . . . . . . . . . . . . . . . . . . . . . . . . . . . . . . . . . . . . . . . . . . .18
Provide Adequate Installation Space . . . . . . . . . . . . . . . . . . . . . . . . . . . . . . . . . . . . . . . . . . . . . . . . . . . . . . . . . . . . . . . . . . . . . . . . . . . . . . .18
Handling Precautions . . . . . . . . . . . . . . . . . . . . . . . . . . . . . . . . . . . . . . . . . . . . . . . . . . . . . . . . . . . . . . . . . . . . . . . . . . . . . . . . . . . . . . . . . . . . . . .19
■■ Backing Up/Exporting Data . . . . . . . . . . . . . . . . . . . . . . . . . . . . . . . . . . . . . . . . . . . . . . . . . . . . . . . . . . . . . . . . . . . . . . . 21
1
5
Page 8

How to Use This Manual
Symbols Used in This Manual
The following symbols are used in this manual to explain
procedures, restrictions, handling precautions, and
instructions that should be observed for safety.
Indicates a warning concerning operations that may lead
to death or injury to persons if not performed correctly.
To use the machine safely, always pay attention to these
warnings.
Indicates a caution concerning operations that may lead
to injury to persons if not performed correctly. To use the
machine safely, always pay attention to these cautions.
IMPORTANT
Indicates operational requirements and restrictions. Be
sure to read these items carefully to operate the machine
correctly, and avoid damage to the machine or property.
NOTE
Indicates a clarication of an operation, or contains
additional explanations for a procedure.
Reading these notes is highly recommended.
Indicates an operation that must not be performed. Read
these items carefully, and make sure not to perform the
described operations.
Keys and Buttons Used in This Manual
The following symbols and key/button names are a
few examples of how keys and buttons to be clicked or
pressed are expressed in this manual:
• Touch Panel Display Keys: [Key Name]
Example: [Cancel]
[Close]
• Control Panel Keys: Key Icon
Example:
• Buttons on Computer Operation Screens: [Button
Name]
Example: [OK]
[Add]
Illustrations Used in This Manual
Illustrations used in this manual are those displayed when
the imageRUNNER ADVANCE C2220L has the following
optional equipment attached to it:
• Color Image Reader Unit-G1
• Inner Finisher-F1
• Inner Finisher Additional Tray-A1
• Cassette Feeding Unit-AF1
• 3 Way Unit-C1
• Copy Tray-J1
Abbreviations Used in This Manual
In this manual, product names and model names are
abbreviated as follows:
• Microsoft Windows 2000 operating system:
Windows 2000
• Microsoft Windows Server 2003 operating system:
Windows Server 2003
• Microsoft Windows Server 2003 R2 operating system:
Windows Server 2003 R2
• Microsoft Windows XP operating system:
Windows XP
• Microsoft Windows Vista operating system:
Windows Vista
• Microsoft Windows Server 2008 operating system:
Windows Server 2008
• Microsoft Windows Server 2008 R2 operating system:
Windows Server 2008 R2
• Microsoft Windows 7 operating system:
Windows 7
• Microsoft Windows operating system:
Windows
• Microsoft Internet Explorer:
Internet Explorer
• Microsoft Windows Internet Explorer:
Internet Explorer
• Novell NetWare:
NetWare
• Apple Macintosh:
Macintosh
• Apple Mac:
Mac
6 Preface 1
Page 9

Trademarks
MEAP and the MEAP logo are trademarks of Canon Inc.
This product contains the Universal Font Scaling
Technology or UFST® under license from Monotype
Imaging, Inc. UFST® is a trademark of Monotype Imaging,
Inc. registered in the United States Patent and Trademark
Oce and may be registered in certain jurisdictions.
Apple, AppleTalk, EtherTalk, LocalTalk, Mac, Macintosh,
Mac OS, and Safari are trademarks of Apple Inc.,
registered in the U.S. and other countries.
Microsoft, Windows, Windows Vista, Windows Server,
Internet Explorer, Excel and PowerPoint are either
registered trademarks or trademarks of Microsoft
Corporation in the United States and/or other countries.
Adobe, PostScript, and the PostScript logo are either
registered trademarks or trademarks of Adobe Systems
Incorporated in the United States and/or other countries.
Copyright © 2007 -08 Adobe Systems Incorporated. All
rights reserved.
Protected by U.S. Patents 5,737,599; 5,781,785; 5,819,301;
5,929,866; 5,943,063; 6,073,148; 6,515,763; 6,639,593;
6,754,382; 7,046,403; 7,213,269; 7,242,415; Patents
pending in the U.S. and other countries.
All instances of the name PostScript in the text are
references to the PostScript language as dened by
Adobe Systems Incorporated unless otherwise stated.
The name PostScript also is used as a product trademark
for Adobe Systems' implementation of the PostScript
language interpreter.
Except as otherwise stated, any reference to a "PostScript
printing device," "PostScript display device,"or similar
item refers to a printing device, display device or item
(respectively) that contains PostScript technology created
or licensed by Adobe Systems Incorporated and not to
devices or items that purport to be merely compatible
with the PostScript language.
Adobe, the Adobe logo, PostScript, the PostScript logo,
and PostScript 3 are either registered trademarks or
trademarks of Adobe Systems Incorporated in the United
States and/or other countries.
Linux is a registered trademark of Linus Torvalds.
Microsoft and Windows are either registered trademarks
or trademarks of Microsoft Corporation in the United
States and/or other countries.
The PDF logo is a trademark or registered trademark of
Adobe Systems Incorporated in the United States and
other countries.
Copyright © 2008 Adobe Systems Incorporated. All rights
reserved.
Protected by U.S. Patents 6,185,684; 6,205,549; 7,213,269;
7,272,628; 7,278,168; Patents pending in the U.S. and
other countries.
All instances of the name PostScript in the text are
references to the PostScript language as dened by
Adobe Systems Incorporated unless otherwise stated.
The name PostScript also is used as a product trademark
for Adobe Systems' implementation of the PostScript
language interpreter.
Except as otherwise stated, any reference to a "PostScript
printing device," "PostScript display device,"or similar
item refers to a printing device, display device or item
(respectively) that contains PostScript technology created
or licensed by Adobe Systems Incorporated and not to
devices or items that purport to be merely compatible
with the PostScript language.
Adobe, the Adobe logo, PostScript, the PostScript Logo,
and PostScript 3 are either registered trademarks or
trademarks of Adobe Systems Incorporated in the United
States and/or other countries.
All other trademarks are the property of their respective
owners.
Other product and company names herein may be the
trademarks of their respective owners.
English
All other trademarks are the property of their respective
owners.
7Preface1
Page 10

How to Use This Manual (e-Manual)
How to Install the e-Manual
■● Follow the procedure below to install the e-Manual.
■❏ Windows
1. Insert the e-Manual CD-ROM into your computer.
2. Select the language for the e-Manual.
3. Select [Install].
If you select [Display Manuals], the e-Manual is displayed without installation.
4. Read the License Agreement, and then click [Yes].
The e-Manual is saved in the [Documents]
[index. html] le is double-clicked, the e-Manual is displayed.
* The folder name diers depending on the OS you are using. For Windows Vista/7, the folder name is [Documents]. For Windows
2000/XP, the folder name is [My Documents].
■❏ Macintosh
1. Insert the e-Manual CD-ROM into your computer.
2. Drag-and-drop the [iRADV_C2230i_Manual_uk] or [iRADV_C2220L_Manual_uk] folder to the location you want to save it.
3. Double-click [index.html] le in the [iRADV_C2230i_Manual_uk] or [iRADV_C2220L_Manual_uk] folder, and the e-Manual is
displayed.
• Depending on the operating system you are using, a security protection message may appear. In this case, allow the
content to be displayed.
■● If the e-Manual (CD-ROM) Does Not Start
The CD-ROM auto run function may be disabled. In this case, perform the following procedure.
■❏ Windows 7
1. Click [Start] on the task bar → click [Computer].
2. Double-click the e-Manual icon.
3. Double-click [Maninst.exe].
*
folder on your computer. If the shortcut icon is created on the Desktop or if the
■❏ Windows XP/Vista
1. Click [Start] on the taskbar → click [My Computer].
2. Double-click the e-Manual icon.
3. Double-click [Maninst.exe].
■❏ Windows 2000
1. Double-click [My Computer] on the desktop.
2. Double-click the e-Manual icon.
3. Double-click [Maninst.exe].
8 Preface 1
Page 11
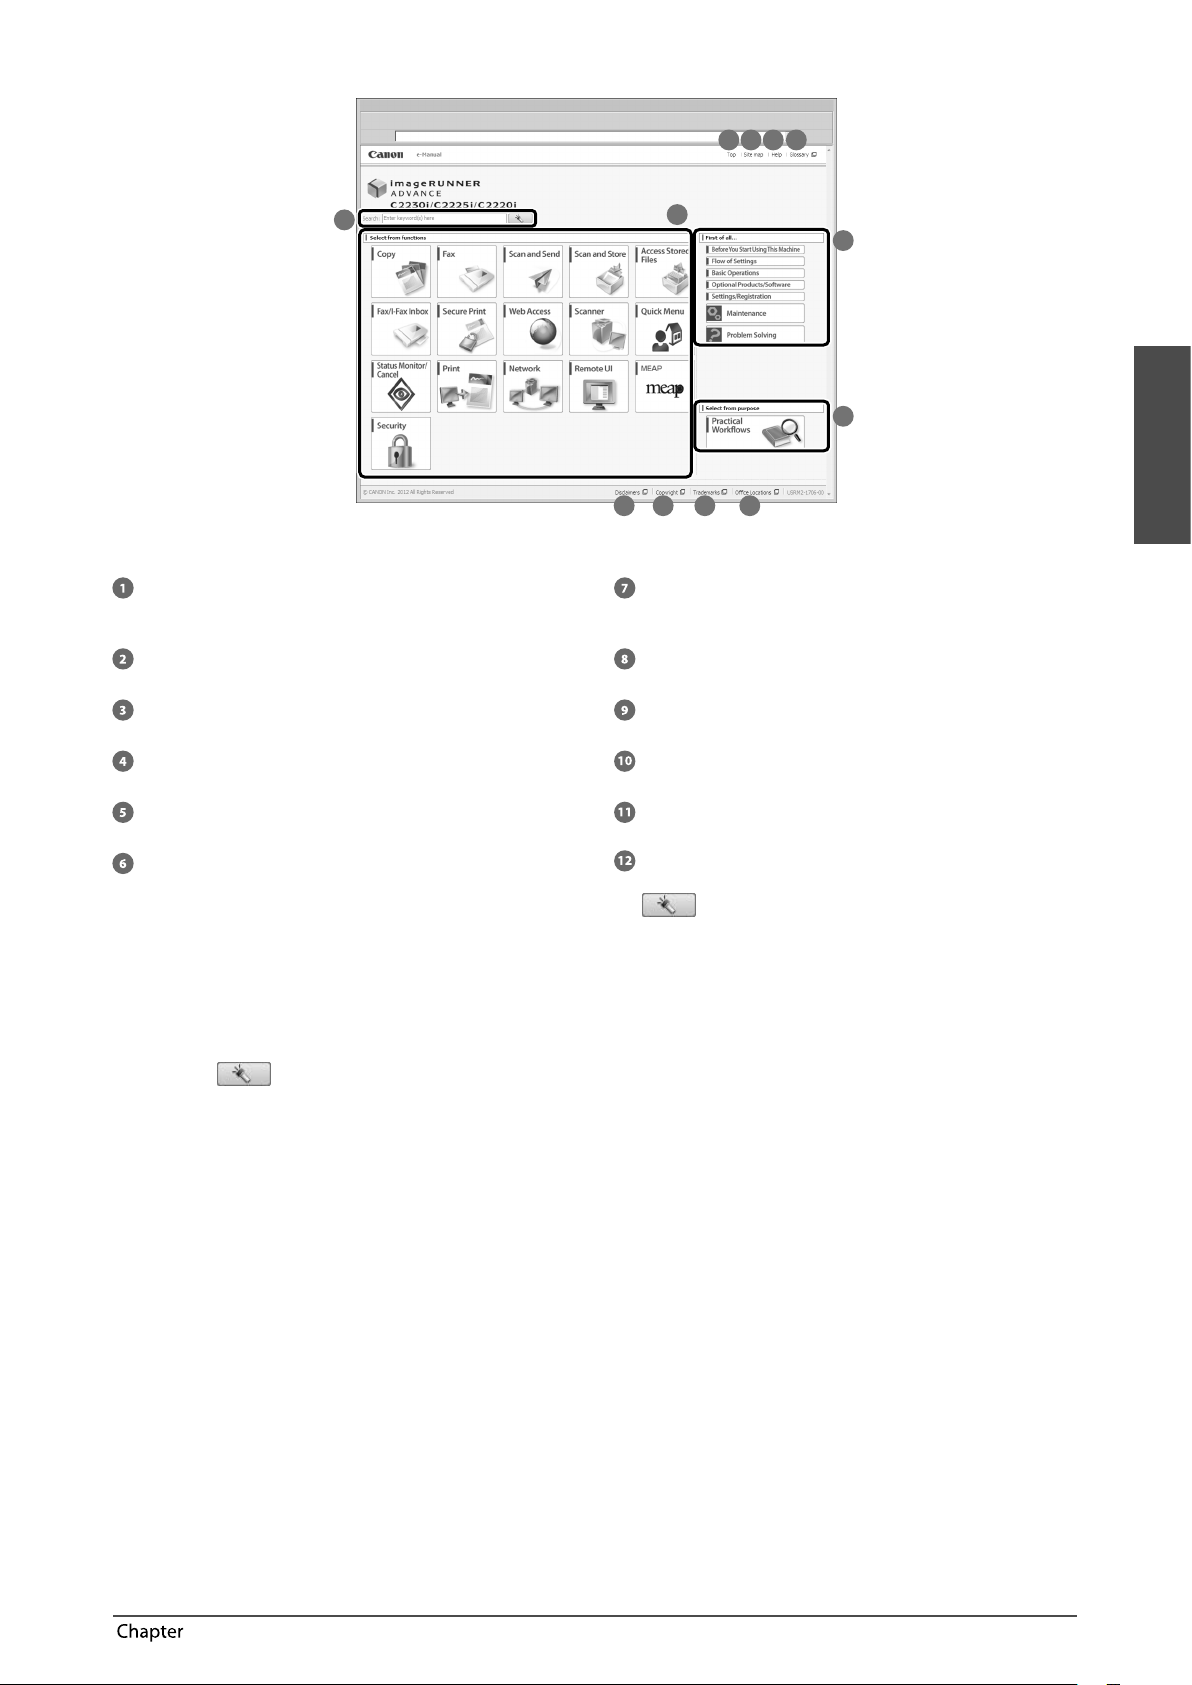
Top Page of the e-Manual
12
213 4 5
6
7
English
891011
Select from functions
The instructions of each function and operation method
are described.
[Top]
The top page of the e-Manual is displayed.
[Site map]
The site map of the e-Manual is displayed.
[Help]
The usage of the e-Manual is displayed.
[Glossary]
The glossary is displayed.
First of all…
This section describes the required information to use the
machine, and the information of optional product and
software.
Select from purpose
This section includes the introduction of functions of the
machine for each purpose.
[Oce Locations]
Inquiries for the machine are displayed.
[Trademarks]
The trademarks are displayed.
[Copyright]
The information of copyrights is displayed.
[Disclaimers]
The disclaimers are displayed.
Enter keyword(s) here
Enter a key word in the search dialog box, and press
. The search results page is displayed.
■● Performing a Search
Enter a keyword in the entry eld which is located at the top of the "Top page" or on the search area in the "Topic page," and
then click
to display the search results.
■● Printing a Topic Page
• On a topic page, you can print by category or by topic.
• Depending on the settings of the Web browser, the background colour and images of the topic page may not be printed
9Preface1
Page 12
Legal Notices
Product Name
Safety regulations require the product's name to be
registered. In some regions where this product is sold,
the following name(s) in parenthesis may be registered
instead.
• imageRUNNER ADVANCE C2230i/C2225i/C2220i/
C2220L (F163100)
EMC requirements of EC Directive
This equipment conforms with the essential EMC
requirements of EC Directive. We declare that this product
conforms with the EMC requirements of EC Directive at
nominal mains input 230 V, 50 Hz although the rated
input of the product is 220 to 240 V, 50/60 Hz. Use of
shielded cable is necessary to comply with the technical
EMC requirements of EC Directive.
Laser Safety
This Product is certied as a Class 1 laser product under
IEC60825-1:2007 and EN60825-1:2007. This means that
the product does not produce hazardous laser radiation.
Since radiation emitted inside the product is completely
conned within protective housings and external covers,
the laser beam cannot escape from the machine during
any phase of user operation.
Do not remove protective housings or external covers,
except as directed by the equipment's manual.
Additional Information
When servicing or adjusting the optical system of
the product, be careful not to place screwdrivers or
other shiny objects in the path of the laser beam. Also,
accessories such as watches and rings should be removed
before working on the product.
The reected beam, even though visible or invisible, can
permanently damage your eyes.
The label shown below is attached to the paper drawer's
right cover and toner supply port cover.
Use of controls, adjustments, or performance of
procedures other than those specied in the manuals
for this machine may result in hazardous radiation
exposure.
International ENERGY STAR Program
As an ENERGY STAR® Partner,
Canon Inc. has determined
that this machine meets the
international ENERGY STAR
Program for energy eciency.
The International ENERGY
STAR Oce Equipment
Program is an international
program that promotes energy
saving through the use of
computers and other oce
equipment. The program
backs the development and
dissemination of products
with functions that eectively
reduce energy consumption.
It is an open system in which
business proprietors can
participate voluntarily. The
targeted products are oce
equipment, such as computers,
displays, printers, facsimiles,
and copiers. The standards
and logos are uniform among
participating nations.
IPv6 Ready Logo
The protocol stack included
in this machine has obtained
the IPv6 Ready Logo Phase-2
established by the IPv6 Forum.
This Product has been classied under IEC60825-1:2007
and EN60825-1:2007, which conform to the following
classes;
CLASS 1 LASER PRODUCT
LASER KLASSE 1
APPAREIL Á LASER DE CLASSE 1
APPARECCHIO LASER DI CLASSE 1
PRODUCTO LÁSER DE CLASE 1
APARELHO A LASER DE CLASSE 1
LUOKAN 1 LASER-TUOTE
LASERPRODUKT KLASS 1
10 Preface 1
Page 13
WEEE Directive
European Union (and EEA) only.
These symbols indicate that this product is not to be
disposed of with your household waste, according to
the WEEE Directive (2002/96/EC), the Battery Directive
(2006/66/EC) and/or your national laws implementing
those Directives.
If a chemical symbol is printed beneath the symbol shown
above, in accordance with the Directive, this indicates
that a heavy metal (Hg = Mercury, Cd = Cadmium, Pb
= Lead) is present in this battery or accumulator at a
concentration above an applicable threshold specied in
the Battery Directive.
This product should be handed over to a designated
collection point, e.g., on an authorized one-for-one basis
when you buy a new similar product or to an authorized
collection site for recycling waste electrical and electronic
equipment (EEE) and batteries and accumulators.
Improper handling of this type of waste could have
a possible impact on the environment and human
health due to potentially hazardous substances that are
generally associated with EEE.
Your cooperation in the correct disposal of this product
will contribute to the eective usage of natural resources.
For more information about the recycling of this product,
please contact your local city oce, waste authority,
approved scheme or your household waste disposal
service or visit www.canon-europe.com/environment.
(EEA: Norway, Iceland and Liechtenstein)
R & TTE Directive
This equipment (F163100) conforms
with the essential requirements of EC
Directive 1999/5/EC and is usable in
EU. (Only for models with facsimile
functionality.)
(For Europe Only)
Canon Inc./Canon Europa N. V.
Information Security Standard (IEEE 2600)
This machine is compliant with IEEE Std 2600™ - 2008
(hereinafter referred to as IEEE 2600), a global information
security standard for multifunction peripherals and
printers, and is able to achieve the security requirements
dened in IEEE 2600.*
For information on how this machine meets the security
requirements dened in IEEE 2600, see e-Manual >
Security > IEEE 2600 Security Standard.
* IEEE 2600.1 CC Authentication has not been obtained for
this machine.
Copyright
Copyright 2012 by Canon Inc. All rights reserved.
No part of this publication may be reproduced or
transmitted in any form or by any means, electronic or
mechanical, including photocopying and recording, or by
any information storage or retrieval system without the
prior written permission of Canon Inc.
This product includes software and/or software modules
that are licensed by Canon Inc. or its licensors from third
parties. Use and distribution of this software and/or
software modules are subject to conditions (a) through
(c) below.
(a)
UFST: Copyright © 1989 - 1996, 1997, 2003, 2004, 2008, all
rights reserved, by Monotype Imaging Inc.
(b)
Copyright © Unpublished Work of Novell, Inc. All Rights
Reserved.
(c)
Portions of this software are copyright © 2007 The
FreeType Project (www.freetype.org). All rights reserved.
Third Party Software
This product includes third-party software modules.
Use and distribution of this software modules, including
any updates of such software modules (collectively, the
"SOFTWARE") are subject to conditions (1) through (9)
below.
(1) You agree that you will comply with any applicable
export control laws, restrictions or regulations of
the countries involved in the event that this product
including the SOFTWARE is shipped, transferred or
exported into any country.
(2) Rights holders of the SOFTWARE retain in all respects
the title, ownership and intellectual property rights in
and to the SOFTWARE. Except as expressly provided
herein, no license or right, expressed or implied, is
hereby conveyed or granted by rights holders of the
SOFTWARE to you for any intellectual property of
rights holders of the SOFTWARE.
(3) You may use the SOFTWARE solely for use with the
Canon product you purchased (the "PRODUCT").
(4) You may not assign, sublicense, market, distribute,
or transfer the SOFTWARE to any third party without
prior written consent of rights holders of the
SOFTWARE.
(5) Notwithstanding the foregoing, you may transfer the
SOFTWARE only when (a) you assign all of your rights
to the PRODUCT and all rights and obligations under
the conditions to transferee and (b) such transferee
agrees to be bound by all these conditions.
(6) You may not decompile, reverse engineer,
disassemble or otherwise reduce the code of the
SOFTWARE to human readable form.
(7) You may not modify, adapt, translate, rent, lease or
loan the SOFTWARE or create derivative works based
on the SOFTWARE.
(8) You are not entitled to remove or make separate
copies of the SOFTWARE from the PRODUCT.
(9) The human-readable portion (the source code) of the
SOFTWARE is not licensed to you.
Notwithstanding (1) through (9) above, in case the other
conditions accompany third-party software modules,
these software modules are subject to the other
conditions.
English
11Preface1
Page 14

The Software Subjected to the Other Conditions
Please refer to e-Manual on a CD-ROM bundled with
this product, for more detail and corresponding license
conditions.
If you need source code of certain Software, under
respective Licenses, used for this product, please send
email in English or Japanese at:
<oipossg@canon.co.jp>
Please refer to e-Manual on a CD-ROM bundled with
this product, for more detail and corresponding license
conditions.
Disclaimers
The information in this document is subject to change
without notice.
CANON INC. MAKES NO WARRANTY OF ANY KIND
WITH REGARD TO THIS MATERIAL, EITHER EXPRESS OR
IMPLIED, EXCEPT AS PROVIDED HEREIN, INCLUDING
WITHOUT LIMITATION, THEREOF, WARRANTIES AS TO
MARKETABILITY, MERCHANTABILITY, FITNESS FOR A
PARTICULAR PURPOSE OR USE, OR NON-INFRINGEMENT.
CANON INC. SHALL NOT BE LIABLE FOR ANY DIRECT,
INCIDENTAL, OR CONSEQUENTIAL DAMAGES OF ANY
NATURE, OR LOSSES OR EXPENSES RESULTING FROM THE
USE OF THIS MATERIAL.
Legal Limitations on the Usage of Your Product and the Use of Images
Using your product to scan, print or otherwise reproduce
certain documents, and the use of such images as
scanned, printed or otherwise reproduced by your
product, may be prohibited by law and may result in
criminal and/or civil liability. A non-exhaustive list of
these documents is set forth below. This list is intended to
be a guide only. If you are uncertain about the legality of
using your product to scan, print or otherwise reproduce
any particular document, and/or of the use of the images
scanned, printed or otherwise reproduced, you should
consult in advance with your legal advisor for guidance.
• Paper Money
• Travelers Checks
• Money Orders
• Food Stamps
• Certicates of Deposit
• Passports
• Postage Stamps (cancelled or uncancelled)
• Immigration Papers
• Identifying Badges or Insignias
• Internal Revenue Stamps (cancelled or uncancelled)
• Selective Service or Draft Papers
• Bonds or Other Certicates of Indebtedness
• Checks or Drafts Issued by Governmental Agencies
• Stock Certicates
• Motor Vehicle Licenses and Certicates of Title
• Copyrighted Works/Works of Art without Permission of
Copyright Owner
Super G3
Super G3 is a phrase used to
describe the new generation
of fax machines that use
ITU-T V.34 standard 33.6
Kbps* modems. Super G3
High Speed Fax machines
allow transmission times of
approximately 3 seconds* per
page which results in reduced
telephone line charges.
* Approximately 3 seconds
per page fax transmission
time based on CCITT/
ITU-T No.1 Chart, (JBIG,
Standard Mode) at 33.6
Kbps modem speed. The
Public Switched Telephone
Network (PSTN) currently
supports 28.8 Kbps
modem speeds or slower,
depending on telephone
line conditions.
NOTE
The fax function is available only if the FAX Board is
installed.
12 Preface 1
Page 15
Important Safety Instructions
Please read these "Important Safety Instructions"
thoroughly before operating the machine. As these
instructions are intended to prevent injury to the user
or other persons or destruction of property, always pay
attention to these instructions. Also, since it may result
in unexpected accidents or injuries, do not perform any
operation unless otherwise specied in the manual.
Improper operation or use of this machine could result
in personal injury and/or damage requiring extensive
repair that may not be covered under your Limited
Warranty.
Installation
• Do not install the machine in unstable locations,
such as unsteady platforms or inclined oors, or in
locations subject to excessive vibrations, as this may
cause the machine to fall or tip over, resulting in
personal injury.
• Do not remove the machine's leveling feet after
the machine has been installed, as this may cause
the machine to fall or tip over, resulting in personal
injury.
• Never block the ventilation slots and louvers on the
machine. These openings are provided for proper
ventilation of working parts inside the machine.
Blocking these openings can cause the machine to
overheat. Never place the machine on a soft surface,
such as a sofa or rug.
• Do not install the machine in the following
locations:
- A damp or dusty location
- A location near water faucets or water
- A location exposed to direct sunlight
- A location subject to high temperatures
- A location near open ames
• Do not install the machine near alcohol, paint
thinner, or other ammable substances. If
ammable substances come into contact with
electrical parts inside the machine, it may result in a
re or electrical shock.
• Do not place the following items on the machine. If
these items come into contact with a high-voltage
area inside the machine, it may result in a re or
electrical shock. If these items are dropped or
spilled inside the machine, immediately turn OFF
the main power switch, and disconnect the power
cord from the power outlet. Then, contact your local
authorized Canon dealer.
- Necklaces and other metal objects
- Cups, vases, owerpots, and other containers lled
with water or liquids
English
Power Supply
• Do not damage or modify the power cord. Also,
do not place heavy objects on the power cord, or
pull on or excessively bend it, as this could cause
electrical damage and result in a re or electrical
shock.
• Keep the power cord away from a heat source;
failure to do this may cause the power cord coating
to melt, resulting in a re or electrical shock.
• Do not connect or disconnect the power cord with
wet hands, as this may result in electrical shock.
• Do not connect the power cord to a multiplug power
strip, as this may cause a re or electrical shock.
• Do not bundle up or tie the power cord in a knot, as
this may result in a re or electrical shock.
• Insert the power plug completely into the power
outlet, as failure to do so may result in a re or
electrical shock.
• Do not use power cords other than the power cord
provided, as this may result in a re or electrical
shock.
• As a general rule, do not use extension cords. Using
an extension cord may result in a re or electrical
shock.
• Do not use power supplies with voltages other than
those specied herein, as this may result in a re or
electrical shock.
• Always grasp the power plug when disconnecting
the power cord. Pulling on the power cord may
expose or snap the core wire, or otherwise damage
the power cord. If the power cord is damaged, this
could cause current to leak, resulting in a re or
electrical shock.
13Preface1
Page 16
IMPORTANT
Leave sucient space around the power plug so that it
can be unplugged easily. If objects are placed around
the power plug, you will be unable to unplug it in an
emergency.
Handling
• Do not attempt to disassemble or modify the
machine. There are high-temperature and highvoltage components inside the machine which may
result in a re or electrical shock.
• If the machine makes strange noises, or gives o
smoke, heat, or strange smells, immediately turn
OFF the main power switch, and disconnect the
power cord from the power outlet. Then, contact
your local authorized Canon dealer. Continued use
of the machine in this condition may result in a re
or electrical shock.
• Do not use highly ammable sprays near the
machine. If gas from these sprays comes into
contact with the electrical components inside the
machine, it may result in a re or electrical shock.
• To avoid damage to the power cord and creating a
re hazard, always turn OFF the main power switch,
and unplug the interface cable when moving the
machine. Otherwise, the power cord or interface
cable may be damaged, resulting in a re or
electrical shock.
• Make sure that the power plug is rmly inserted
into the power outlet if the machine was moved. Do
not use the machine while the connection is loose,
as doing so may cause a re.
• Do not drop paper clips, staples, or other metal
objects inside the machine. Also, do not spill water,
liquids, or ammable substances (alcohol, benzene,
paint thinner, etc.) inside the machine. If these items
come into contact with a high-voltage area inside
the machine, it may result in a re or electrical
shock. If these items are dropped or spilled inside
the machine, immediately turn OFF the main power
switch, and disconnect the power cord from the
power outlet. Then, contact your local authorized
Canon dealer.
• Do not use this product for uses other than as a
colour digital multitasking machine.
• Do not place heavy objects on the machine, as they
may tip over or fall resulting in personal injury.
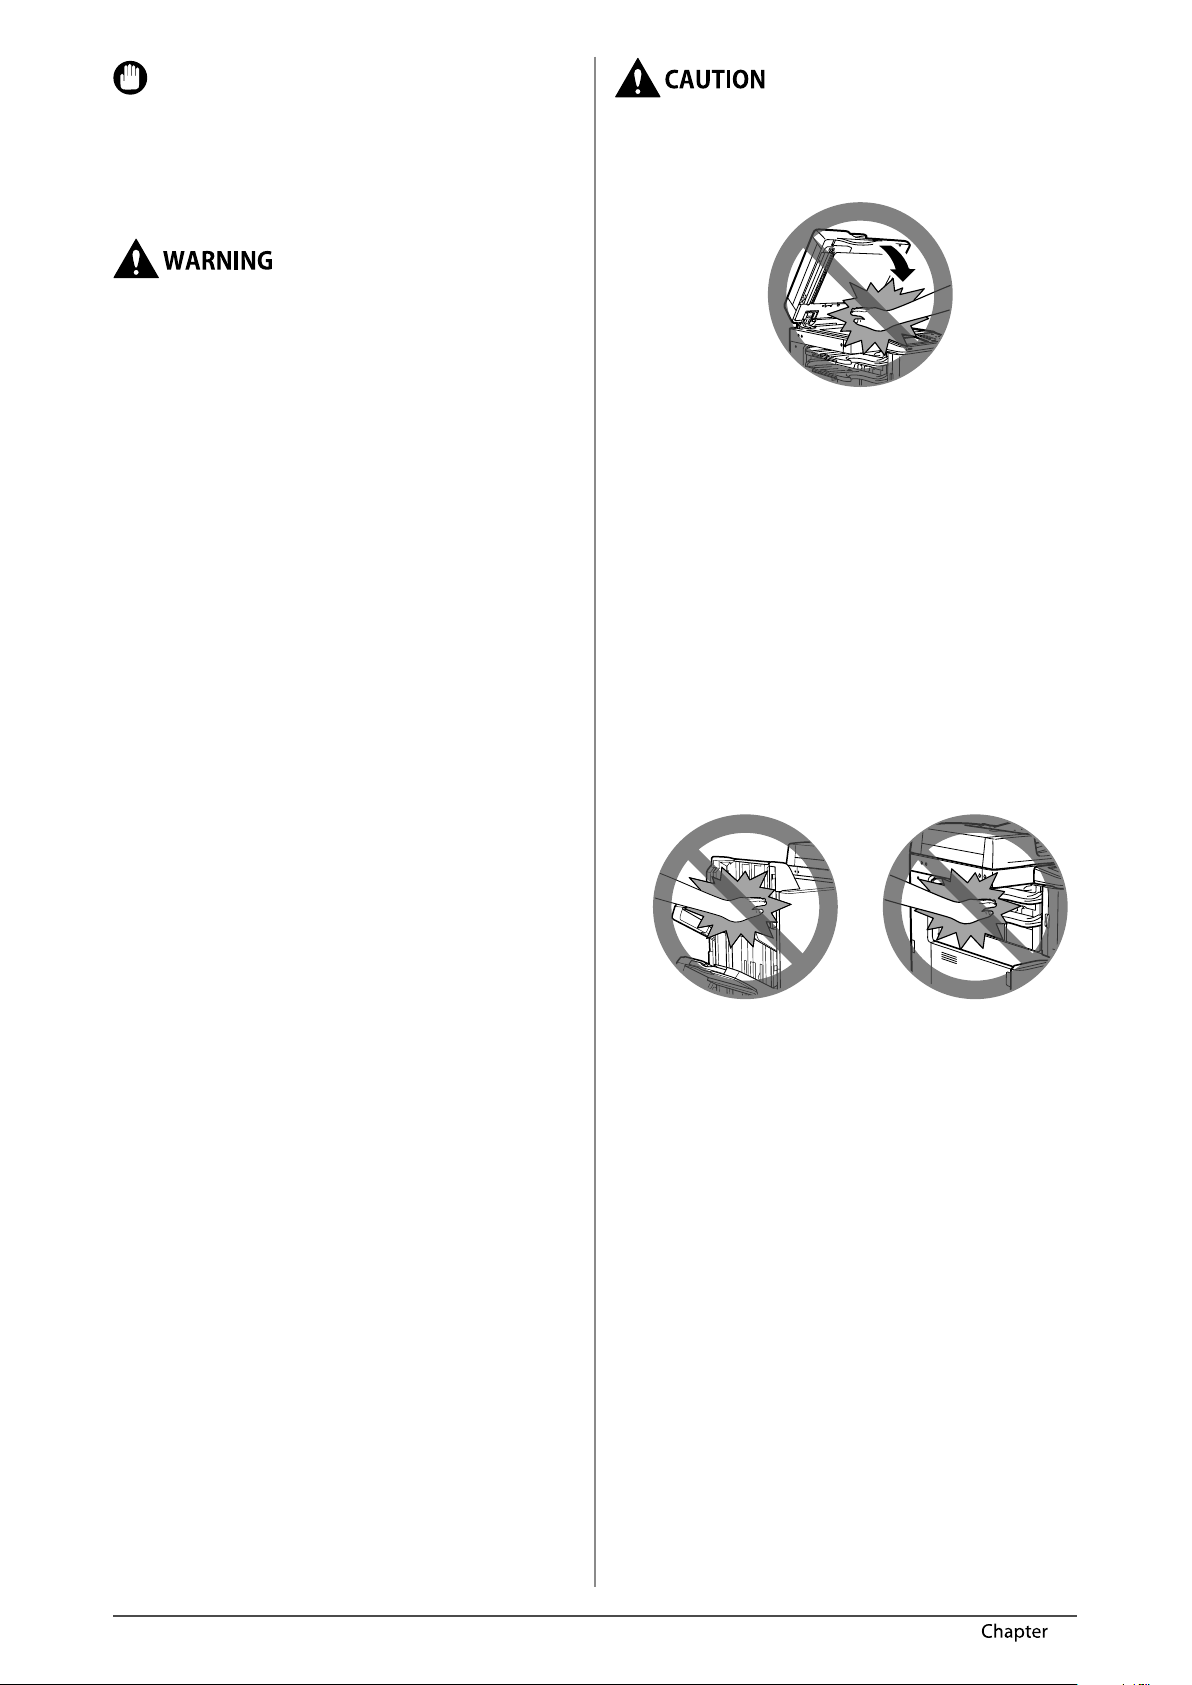
• Close the feeder/platen cover gently to avoid
catching your hands, as this may result in personal
injury.
• Do not press down hard on the feeder/platen cover
when using the platen glass to make copies of thick
books. Doing so may damage the platen glass and
result in personal injury.
• Do not touch the nisher while the machine is
printing, as this may result in personal injury.
• Paper that has just been output from the machine
may be hot. Be careful when removing or aligning
paper from the output tray. Touching paper right
after it is output may result in low-temperature
burns.
• Do not place your hands, hair, clothing, etc., near
the exit and feed rollers. Even if the machine is not
in operation, your hands, hair, or clothing may get
caught in the rollers, which may result in personal
injury or damage if the machine suddenly starts
printing.
• Do not place your hands in the part of the tray
where stapling is performed (near the rollers) when
a nisher is attached, as this may result in personal
injury.
Staple Finisher-M1/
Booklet Finisher-M1
Inner Finisher-F1
• Do not insert your hand into the machine while
the paper drawer is removed, as this may result in
personal injury.
14 Preface 1
Page 17

• The laser beam can be harmful to human bodies.
Since radiation emitted inside the product is
completely conned within protective housings and
external covers, the laser beam cannot escape from
the machine during any phase of user operation.
Read the following remarks and instructions for
safety.
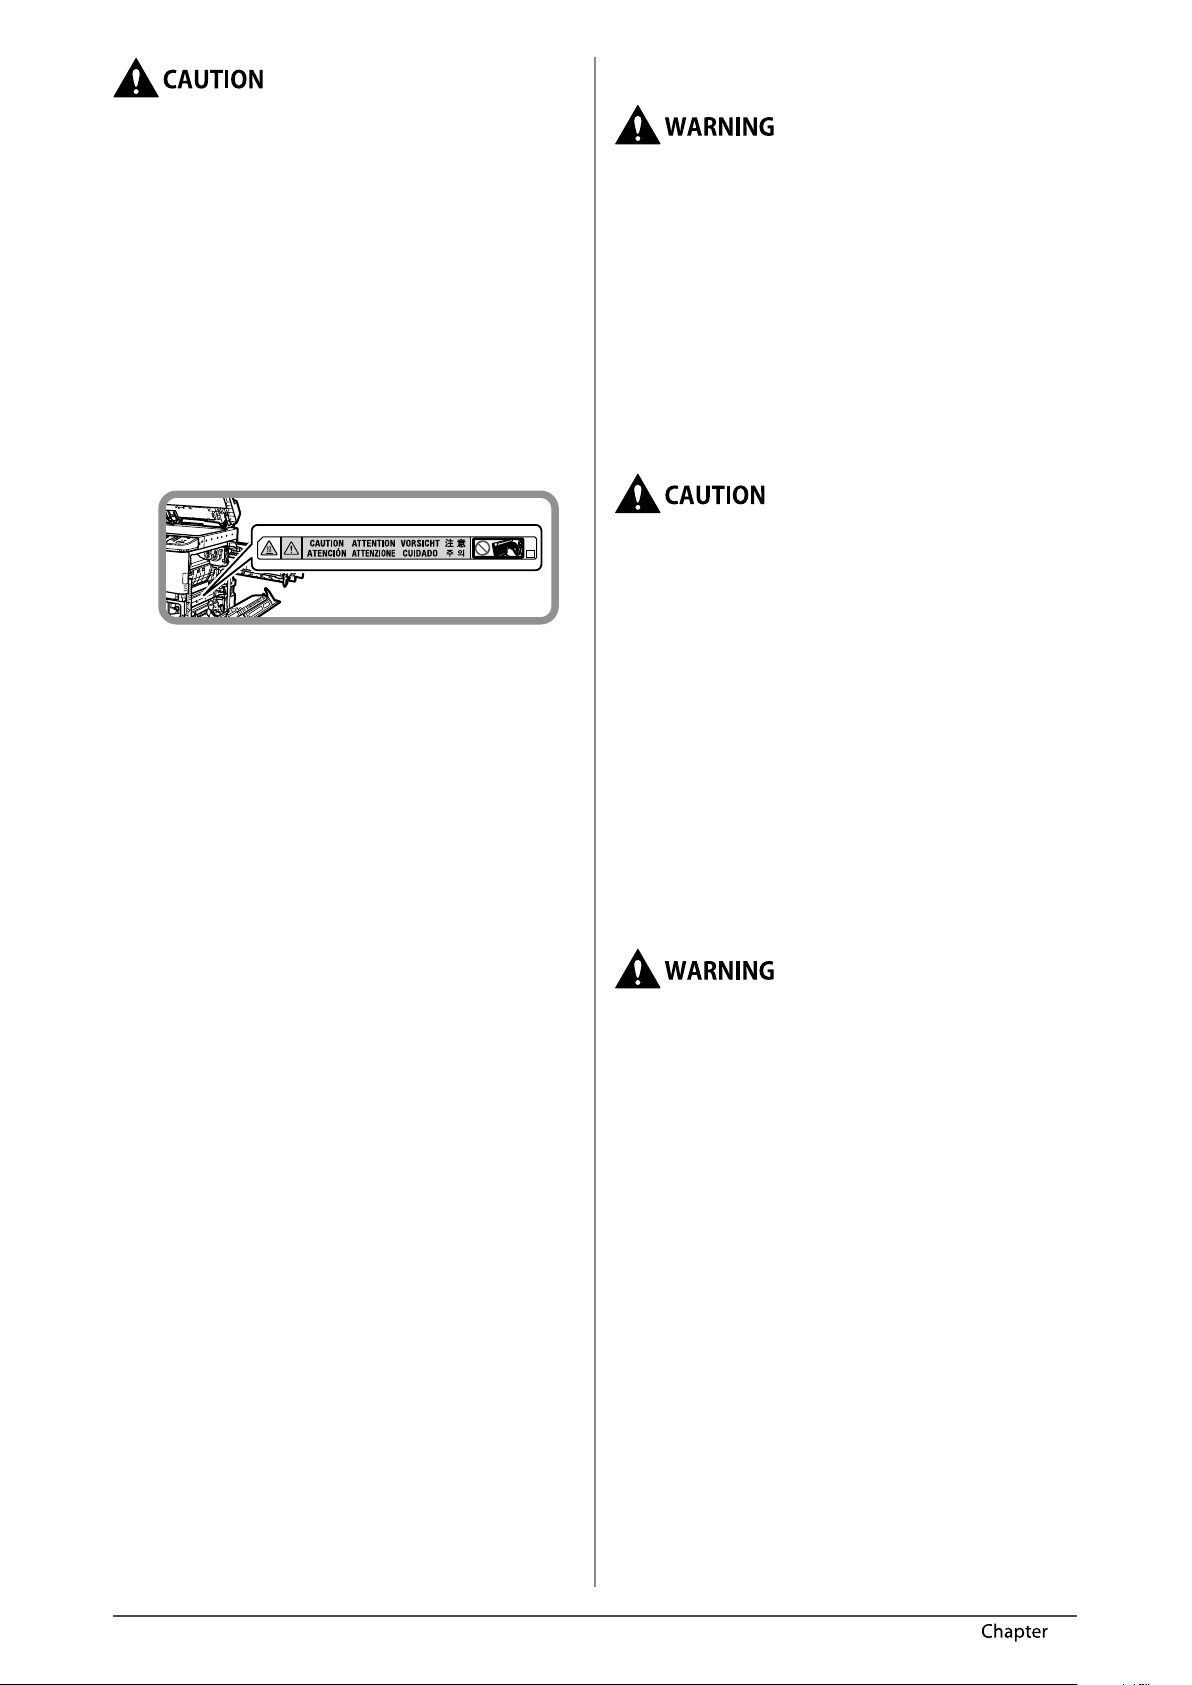
- Never open covers other than those instructed in
the manuals for this machine.
- Do not remove the following caution label which
is attached to the machine. If the label has been
removed, contact your local authorized Canon
dealer.
- If the laser beam escapes from the machine,
exposure may cause serious damage to your eyes.
- Controlling, adjusting, or operating the machine
in ways not mentioned in the manuals for this
machine may cause dangerous radiation to escape
from the machine.
IMPORTANT
Press for safety when the machine will not be used
for a long period of time, such as overnight. Also, turn
OFF the main power switch, and disconnect the power
cord for safety when the machine will not be used for
an extended period of time, such as during consecutive
holidays.
Maintenance and Inspections
• When cleaning the machine, rst turn OFF the main
power switch, then disconnect the power cord.
Failure to observe these steps may result in a re or
electrical shock.
• Disconnect the power cord from the power outlet
regularly, and clean the area around the base of
the power plug's metal pins and the power outlet
with a dry cloth to ensure that all dust and grime is
removed. If the power cord is connected for a long
period of time in a damp, dusty, or smoky location,
dust can build up around the power plug and
become damp. This may cause a short circuit and
result in a re.
• Clean the machine using a slightly dampened cloth
with a mild detergent mixed with water. Do not use
alcohol, benzene, paint thinner, or other ammable
substances. Check detergent for ammability prior
to use. If ammable substances come into contact
with a high-voltage area inside the machine, it may
result in a re or electrical shock.
• There are some areas inside the machine which are
subject to high-voltages. When removing jammed
paper or when inspecting the inside of the machine,
do not allow necklaces, bracelets, or other metal
objects to touch the inside of the machine, as this
may result in burns or electrical shock.
• Do not burn or throw used toner cartridges into
open ames, as this may cause the toner remaining
inside the cartridges to ignite, resulting in burns or
a re.
• Make sure that the power plug is rmly inserted
into the power outlet after cleaning the machine.
Do not use the machine while the connection is
loose, as doing so may cause a re.
• Check the power cord and power plug regularly. If
the following conditions occur, contact your local
authorized Canon dealer, as the condition may
cause a re:
- There are burn marks on the power plug.
- The blade on the power plug is deformed or
broken.
- The power goes OFF and ON when the power cord
is bent.
- There are cuts, cracks, or indentations on the
power cord.
- A part of the power cord becomes hot.
• Check the power cord and power plug regularly
to make sure that they are not handled in the
following manner, as this may result in a re or
electrical shock:
- The connection part of the power plug is loose.
- Stress is being applied to the power cord by a
heavy object or by axing it with staples.
- The power plug is loose.
- The power cord is tied in a bundle.
- The power cord protrudes into a walkway.
- The power cord is in front of a heater.
English
15Preface1
Page 18
• The xing unit and its surroundings inside the
machine may become hot during use. When
removing jammed paper or when inspecting the
inside of the machine, do not touch the xing unit
and its surroundings, as doing so may result in
burns or electrical shock.
• When removing jammed paper or when inspecting
the inside of the machine, do not expose yourself
to the heat emitted from the xing unit and its
surroundings for a prolonged period of time. Doing
so may result in low temperature burns, even
though you did not touch the xing unit and its
surroundings directly.
• If a paper jam occurs, follow the directions on the
touch panel display to remove any jammed paper
from inside the machine. Do not insert your ngers
into any parts not indicated on the touch panel
display, as doing so may result in personal injury or
burns.
• When removing jammed paper or replacing the
toner cartridge, take care not to allow the toner to
come into contact with your hands or clothing, as
this will dirty your hands or clothing. If they become
dirty, wash them immediately with cold water.
Washing them with warm water will set the toner,
and make it impossible to remove the toner stains.
• When removing paper which has become jammed
inside the machine, remove the jammed paper
gently to prevent the toner on the paper from
scattering and getting into your eyes or mouth. If
the toner gets into your eyes or mouth, wash them
immediately with cold water and immediately
consult a physician.
• When removing jammed originals or paper which
has become jammed inside the machine, take
care not to cut your hands or injure yourself on
the edges of the originals or paper. If you cannot
remove the paper, contact your local authorized
Canon dealer.
• When removing a used toner cartridge, remove
the cartridge carefully to prevent the toner from
scattering and getting into your eyes or mouth. If
the toner gets into your eyes or mouth, wash them
immediately with cold water and immediately
consult a physician.
• Do not dismantle the toner cartridge, as doing so
may cause toner to y out and enter your eyes or
mouth. If toner gets into your eyes or mouth, wash
them immediately with cold water and immediately
consult a physician.
• If toner escapes from the toner cartridge, make sure
not to ingest the toner or allow it to directly touch
your skin. If toner touches your skin, wash it away
with soap and water. If your skin still feels irritated
after washing it, or you ingest toner, consult a
doctor immediately.
Consumables
• Do not burn or throw used toner cartridges into
open ames, as this may cause the toner remaining
inside the cartridges to ignite, resulting in burns or
a re.
• Do not store toner cartridges or copy paper in
places exposed to open ames, as this may cause
the toner or paper to ignite, resulting in burns or a
re.
• If you accidentally spill or scatter toner, carefully
gather the toner particles together or wipe them
up with a soft, damp cloth in a way that prevents
inhalation. Never use a vacuum cleaner that does
not have safeguards against dust explosions
to clean up spilled toner. Doing so may cause a
malfunction in the vacuum cleaner, or result in a
dust explosion due to static discharge.
• Keep toner and other consumables out of the
reach of small children. If these items are ingested,
consult a physician immediately.
• Do not dismantle the toner cartridge, as doing so
may cause toner to y out and enter your eyes or
mouth.
• If toner gets into your eyes or mouth, wash them
immediately with cold water and immediately
consult a physician.
• If toner escapes from the toner cartridge, make sure
not to ingest the toner or allow it to directly touch
your skin. If toner touches your skin, wash it away
with soap and water. If your skin still feels irritated
after washing it, or you ingest toner, consult a
doctor immediately.
• When discarding used toner cartridges, put the
cartridges into a bag to prevent the toner remaining
inside the cartridges from scattering, and dispose of
them in a location away from open ames.
Other Warnings
For cardiac pacemaker users:
This product emits low level magnetic ux. If you use
a cardiac pacemaker and feel abnormalities, please
move away from the product and consult your doctor.
16 Preface 1
Page 19
Installation Location and Handling
This section describes precautions for installation
location and handling. We recommend that you read
this section prior to using this machine.
Installation Precautions
■■Avoid Installing the Machine in the
Following Locations
• Avoid locations subject to temperature and
humidity extremes, whether low or high.
For example, avoid installing the machine near water
faucets, hot water heaters, humidiers, air conditioners,
heaters, or stoves.
• Avoid installing the machine in direct sunlight.
If this is unavoidable, use curtains to shade the
machine. Be sure that the curtains do not block the
machine's ventilation slots or louvers, or interfere with
the electrical cord or power supply.
• Avoid locations where a considerable amount
of dust accumulates.
• Avoid locations where ammonia gas is emitted.
• Avoid locations near volatile or ammable
materials, such as alcohol or paint thinner.
• Avoid locations that are subject to vibration.
For example, avoid installing the machine on unstable
oors or stands.
• Avoid exposing the machine to rapid changes
in temperature.
If the room in which the machine is installed is cold
but rapidly heated, water droplets (condensation) may
form inside the machine. This may result in a noticeable
degradation in the quality of the copied image, the
inability to properly scan an original, or the copies
having no printed image at all.
English
• Avoid poorly ventilated locations.
This machine generates a slight amount of ozone
etc. during normal use. Although sensitivity to ozone
etc. may vary, this amount is not harmful. Ozone etc.
may be more noticeable during extended use or long
production runs, especially in poorly ventilated rooms.
It is recommended that the room be appropriately
ventilated, sucient to maintain a comfortable working
environment, in areas of machine operation.
• Avoid installing the machine near computers
or other precision electronic equipment.
Electrical interference and vibrations generated by
the machine during printing can adversely aect the
operation of such equipment.
• Avoid installing the machine near televisions,
radios, or similar electronic equipment.
The machine might interfere with sound and picture
signal reception.
Insert the power plug into a dedicated power outlet,
and maintain as much space as possible between the
machine and other electronic equipment.
17Preface1
Page 20
• Contact an authorized Canon dealer if
communication is unavailable.
Depending on your locale or your telephone
connection, you may be unable to perform data
communication. In this case, contact your local
authorized Canon dealer.
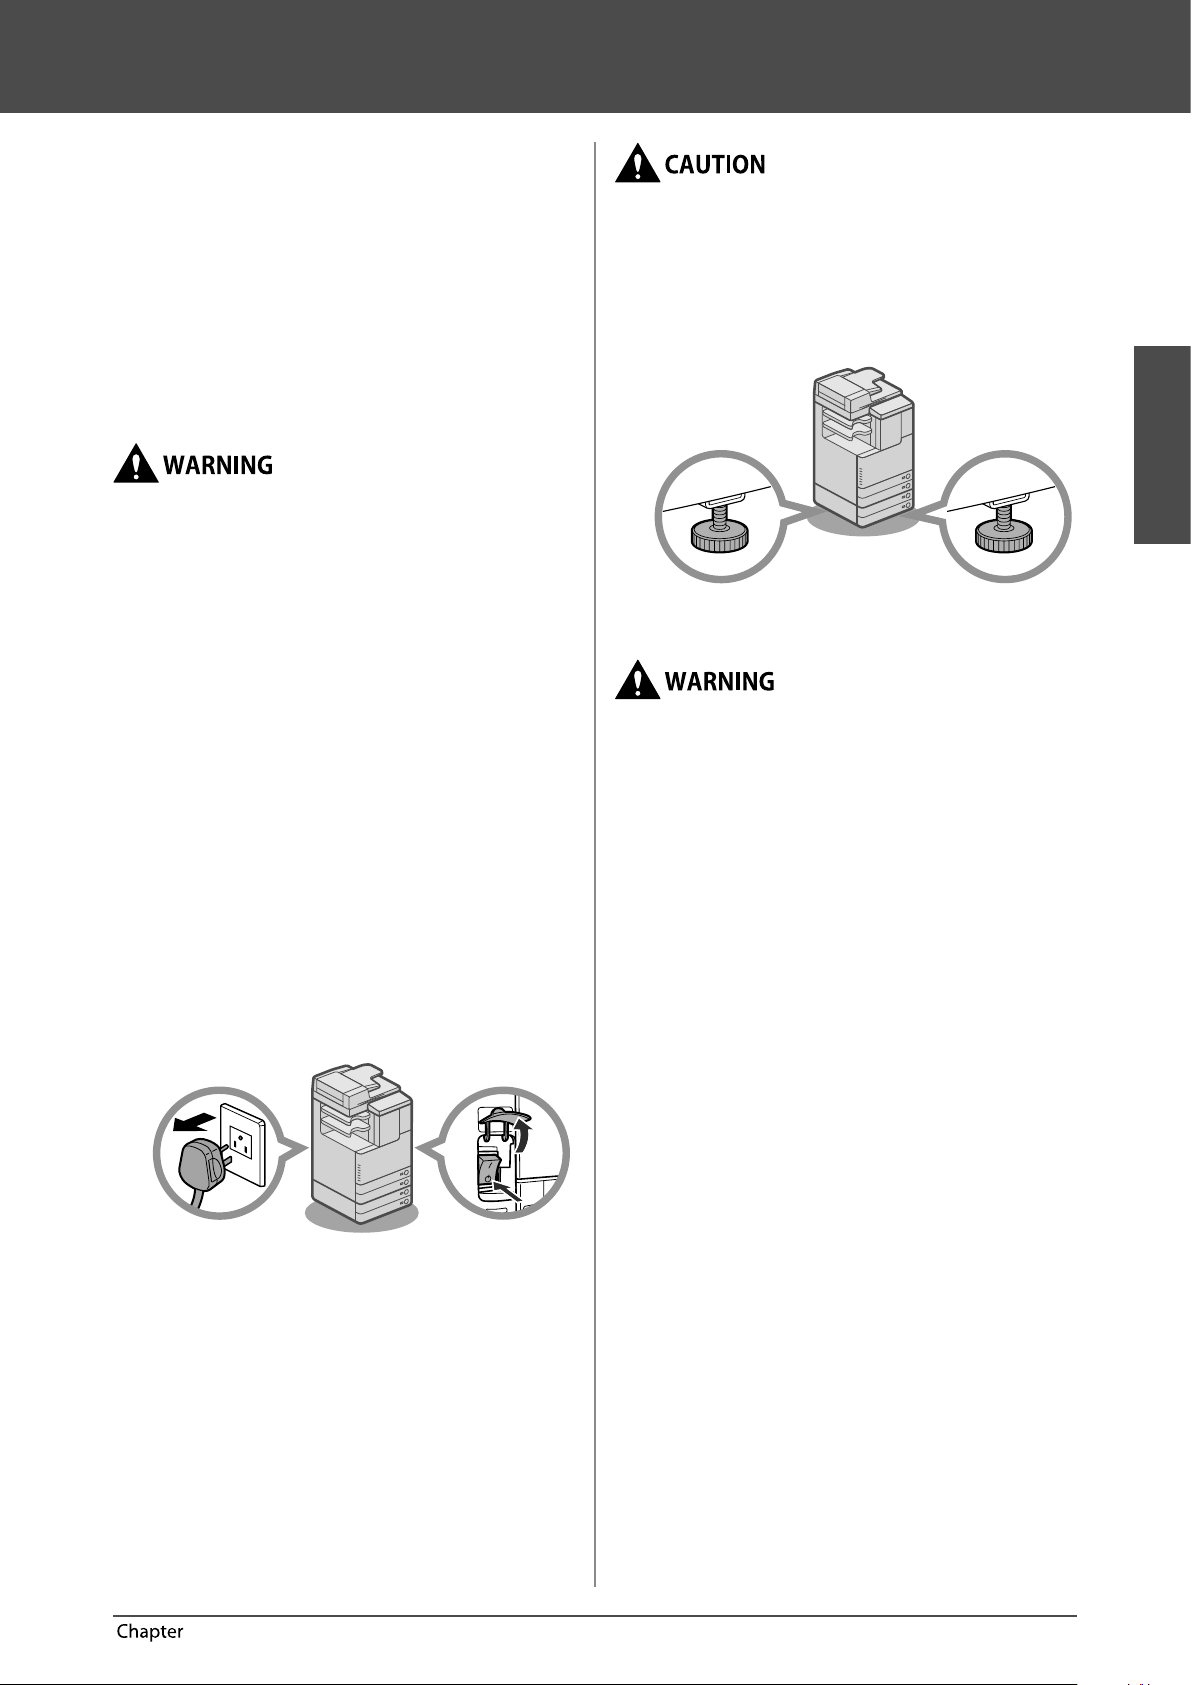
• Do not remove the machine's leveling feet.
Do not remove the machine's leveling feet after the
machine has been installed.
If you put weight on the front of the machine while
the drawers or units within the machine are pulled
out, the machine may fall forward. To prevent this from
happening, make sure that the machine's leveling feet
are in place.
■■Select a Safe Power Supply
• Plug the machine into a 220 - 240 V AC outlet.
• Make sure that the power supply for the
machine is safe, and has a steady voltage.
• Do not connect other electrical equipment to
the same power outlet to which the machine is
connected.
• Do not connect the power cord to a multiplug
power strip, as this may cause a re or
electrical shock.
• The power cord may become damaged if it is
stepped on, axed with staples, or if heavy
objects are placed on it. Continued use of a
damaged power cord can lead to an accident,
such as a re or electrical shock.
■■Moving the Machine
• If you intend to move the machine, even to a
location on the same oor of your building,
contact your local authorized Canon dealer
beforehand. Do not attempt to move the
machine yourself.
■■Provide Adequate Installation Space
Provide enough space on each side of the machine for
unrestricted operation.
The following measures are for the imageRUNNER
ADVANCE C2220L.
• When the Color Image Reader Unit-G1 is
attached:
100 mm or more
• The power cord should not be taut, as this
may lead to a loose connection and cause
overheating, which could result in a re.
• If excessive stress is applied to the connection
part of the power cord, it may damage the
power cord or the wires inside the machine
may disconnect. This could result in a re.
Avoid the following situations:
- Connecting and disconnecting the power cord
frequently.
- Tripping over the power cord.
- The power cord is bent near the connection part, and
continuous stress is being applied to the power outlet
or the connection part.
- Applying excessive force on the power plug.
1,109 mm
884 mm
If your machine is the imageRUNNER ADVANCE C2230i/C2225i/
C2220i, the machine's width will become 1,139 mm.
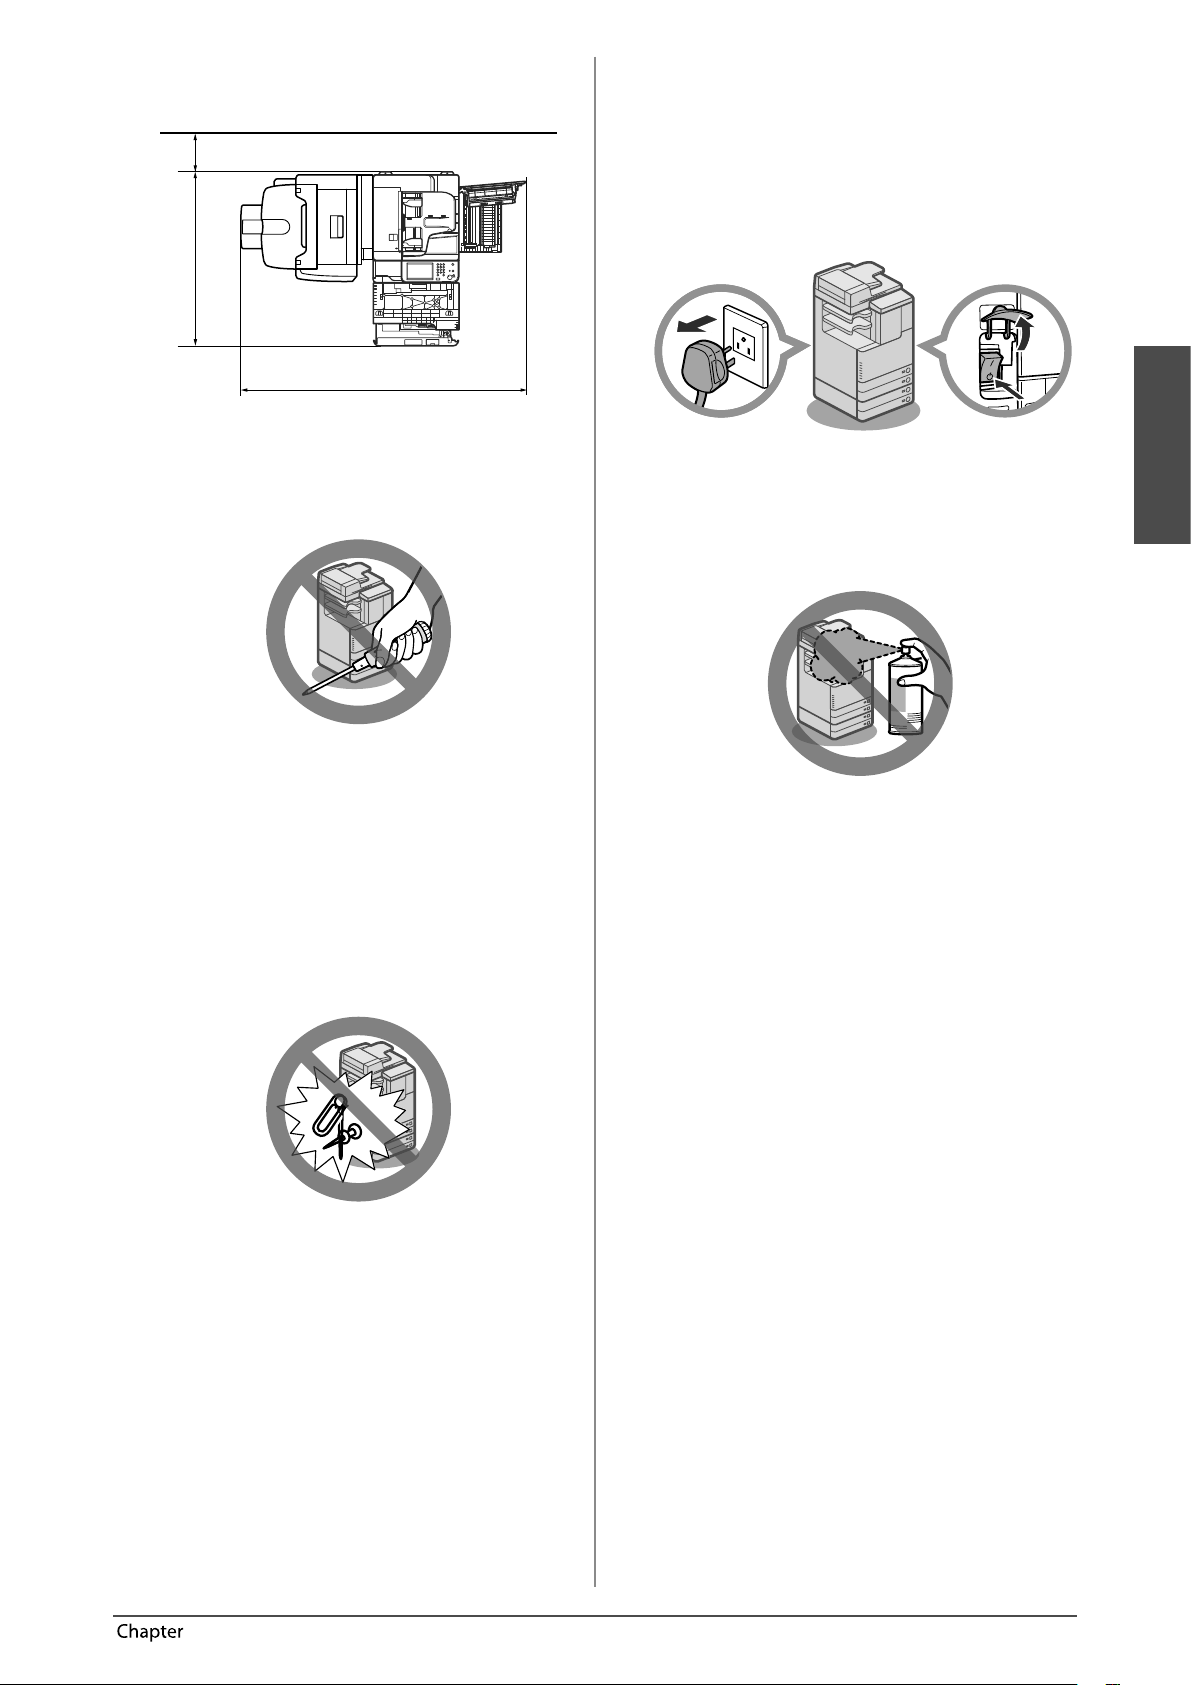
• When the Color Image Reader Unit-G1, Inner
Finisher-F1, 3 Way Unit-C1, and Copy Tray-J1
are attached:
250 mm or more
1,109 mm
1,224 mm
If your machine is the imageRUNNER ADVANCE C2230i/C2225i/
C2220i, the machine's width will become 1,139 mm.
18 Preface 1
Page 21
• When the Color Image Reader Unit-G1, Booklet
Finisher-M1, 3 Way Unit-C1, and Buer Pass
Unit-K1 are attached:
100 mm or more
1,109 mm
1,892 mm
If your machine is the imageRUNNER ADVANCE C2230i/C2225i/
C2220i, the machine's width will become 1,139 mm.
Handling Precautions
• Do not attempt to disassemble or modify the
machine.
• If there is smoke, or unusual noise,
immediately turn the main power switch OFF,
disconnect the power cord from the power
outlet, and then call your local authorized
Canon dealer. Using the machine in this state
may cause a re or electrical shock. Also, avoid
placing objects around the power plug so that
the machine can be disconnected whenever
necessary.
• Do not turn the main power switch OFF or
open the front covers while the machine is in
operation. This may result in paper jams.
• Do not use ammable sprays, such as spray
glue, near the machine. There is a danger of
ignition.
English
• Some parts inside the machine are subject
to high-voltages and temperatures. Take
adequate precautions when inspecting the
inside of the machine. Do not carry out any
inspections that are not described in the
manuals for this machine.
• Be careful not to spill liquid or drop any
foreign objects, such as paper clips or staples
inside the machine. If a foreign object comes
into contact with electrical parts inside the
machine, it might cause a short circuit and
result in a re or electrical shock.
• This machine generates a slight amount
of ozone etc. during normal use. Although
sensitivity to ozone etc. may vary, this
amount is not harmful. Ozone etc. may be
more noticeable during extended use or
long production runs, especially in poorly
ventilated rooms. It is recommended that the
room be appropriately ventilated, sucient to
maintain a comfortable working environment,
in areas of machine operation.
19Preface1
Page 22

• For safety reasons, press when it will not
be used for a long period of time, such as
overnight. As an added safety measure, turn
OFF the main power switch, and disconnect
the power cord when the machine will not be
used for an extended period of time, such as
during consecutive holidays.
• Use a modular cable that is shorter than 3
metres.
• Use a USB cable that is shorter than 3 metres.
20 Preface 1
Page 23
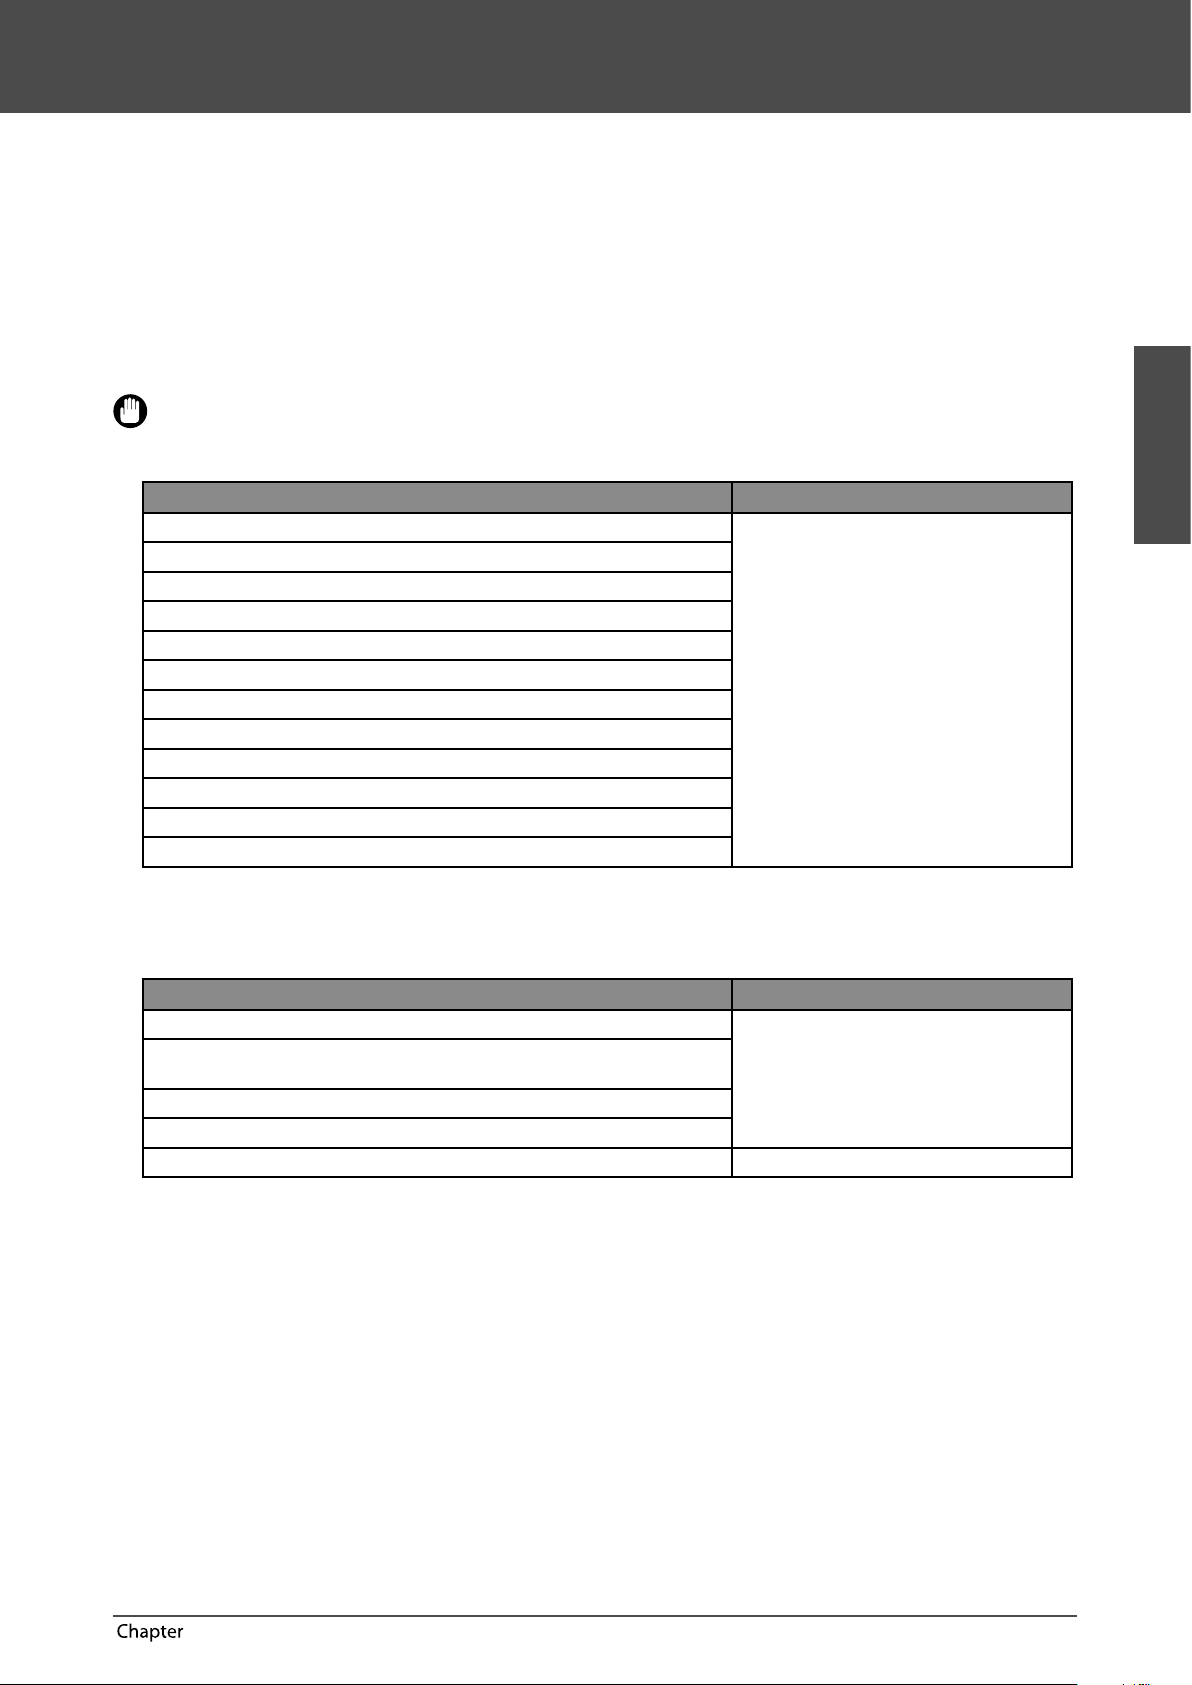
Backing Up/Exporting Data
Various data such as the received data, address book, and Settings/Registration settings are stored on the internal memory of the
machine.
A malfunction in the memory may cause these data to be lost. Please regularly back up/export your important data.
Please note that Canon will not be held responsible for any damages caused by the loss of data.
You can backup/export data in the following ways:
• Import/Export All
• Import/Export Individually
You can backup/export the following data:
■● Data You Can Import/Export All
You can save/load multiple items at once. In addition, you can exchange data with this machine and other machines which
support the Import/Export All function.
IMPORTANT
You cannot use the Import All function, depending on the recipient's machine model. For more information, contact your
local authorized Canon dealer.
Data References
Settings/Registration Basic Information
Paper Type Management Settings
Forwarding Settings
Box Settings
Department ID Management Settings
Main Menu Settings
Web Access Settings
Favorite Settings
Address Book
Quick Menu Settings
MEAP Application Setting Information
User Setting Information
*1 This function cannot be used with the imageRUNNER ADVANCE C2220L.
*1
■● Data You Can Import/Export Individually
You can save/load data individually. In addition, you can exchange data with this machine and other machines which do not
support the Import/Export All function.
Data References
Address Lists
Device Settings (Forwarding Settings, Address Book, Send Function Favorite
Settings)
Printer Settings
Paper Information
Web Access Favorites
*1 This function cannot be used with the imageRUNNER ADVANCE C2220L.
*1
e-Manual > Remote UI
e-Manual > Remote UI
e-Manual > Web Access
English
21Preface1
Page 24

■● Other Data You Can Import/Export
You can exchange data with this machine and other machines which do not support the Import/Export All function.
Data References
Quick Menu Information e-Manual > Quick Menu
License les for MEAP applications e-Manual > MEAP
Data saved from MEAP applications
Data Relating to MEAP
User authentication information registered
for the Local Device Authentication system
of SSO-H (Single Sign-On H)
* 1 You may be able to back up data stored by MEAP applications, depending on the application.
*1
Instruction manuals for each MEAP
application
e-Manual > MEAP
NOTE
• The passwords and PIN are backed up at the same time. However, some of the passwords may not be backed up,
depending on the type of the password.
• If your machine is not connected to a network, it is recommended that you print and store important information such as
the Address Book. (See e-Manual > Basic Operations.)
22 Preface 1
Page 25

Flow of Basic Operations
■■ What This Machine Can Do. . . . . . . . . . . . . . . . . . . . . . . . . . . . . . . . . . . . . . . . . . . . . . . . . . . . . . . . . . . . . . . . . . . . . . . . 24
Revolutionary Documentation Work with an Evolving Multitasking Machine . . . . . . . . . . . . . . . . . . . . . . . . . . . . . . . . . . . . . . . . . .24
■■ Flow of Settings for Using the Desired Functions . . . . . . . . . . . . . . . . . . . . . . . . . . . . . . . . . . . . . . . . . . . . . . . . . . . 26
Logging In as an Administrator . . . . . . . . . . . . . . . . . . . . . . . . . . . . . . . . . . . . . . . . . . . . . . . . . . . . . . . . . . . . . . . . . . . . . . . . . . . . . . . . . . . . . .26
Network/USB Connection . . . . . . . . . . . . . . . . . . . . . . . . . . . . . . . . . . . . . . . . . . . . . . . . . . . . . . . . . . . . . . . . . . . . . . . . . . . . . . . . . . . . . . . . . . . 27
Scan and Store/Access Stored Files. . . . . . . . . . . . . . . . . . . . . . . . . . . . . . . . . . . . . . . . . . . . . . . . . . . . . . . . . . . . . . . . . . . . . . . . . . . . . . . . . . .28
Sending Faxes/Printing. . . . . . . . . . . . . . . . . . . . . . . . . . . . . . . . . . . . . . . . . . . . . . . . . . . . . . . . . . . . . . . . . . . . . . . . . . . . . . . . . . . . . . . . . . . . . .29
Sending/Receiving Remote Fax. . . . . . . . . . . . . . . . . . . . . . . . . . . . . . . . . . . . . . . . . . . . . . . . . . . . . . . . . . . . . . . . . . . . . . . . . . . . . . . . . . . . . . 29
Scan and Send/Remote Scan . . . . . . . . . . . . . . . . . . . . . . . . . . . . . . . . . . . . . . . . . . . . . . . . . . . . . . . . . . . . . . . . . . . . . . . . . . . . . . . . . . . . . . . .30
Remote UI/MEAP. . . . . . . . . . . . . . . . . . . . . . . . . . . . . . . . . . . . . . . . . . . . . . . . . . . . . . . . . . . . . . . . . . . . . . . . . . . . . . . . . . . . . . . . . . . . . . . . . . . .31
■■ Parts and Their Functions . . . . . . . . . . . . . . . . . . . . . . . . . . . . . . . . . . . . . . . . . . . . . . . . . . . . . . . . . . . . . . . . . . . . . . . . . 32
External View . . . . . . . . . . . . . . . . . . . . . . . . . . . . . . . . . . . . . . . . . . . . . . . . . . . . . . . . . . . . . . . . . . . . . . . . . . . . . . . . . . . . . . . . . . . . . . . . . . . . . . . 32
Internal View. . . . . . . . . . . . . . . . . . . . . . . . . . . . . . . . . . . . . . . . . . . . . . . . . . . . . . . . . . . . . . . . . . . . . . . . . . . . . . . . . . . . . . . . . . . . . . . . . . . . . . . .34
Control Panel and Touch Panel Display. . . . . . . . . . . . . . . . . . . . . . . . . . . . . . . . . . . . . . . . . . . . . . . . . . . . . . . . . . . . . . . . . . . . . . . . . . . . . . .35
Useful Functions of the Main Menu Screen and Touch Panel Display . . . . . . . . . . . . . . . . . . . . . . . . . . . . . . . . . . . . . . . . . . . . . . . . . .37
■■ Main Power and Energy Saver Key. . . . . . . . . . . . . . . . . . . . . . . . . . . . . . . . . . . . . . . . . . . . . . . . . . . . . . . . . . . . . . . . . 38
2
■■ How to Make a Copy . . . . . . . . . . . . . . . . . . . . . . . . . . . . . . . . . . . . . . . . . . . . . . . . . . . . . . . . . . . . . . . . . . . . . . . . . . . . . . 39
■■ Sending a Fax . . . . . . . . . . . . . . . . . . . . . . . . . . . . . . . . . . . . . . . . . . . . . . . . . . . . . . . . . . . . . . . . . . . . . . . . . . . . . . . . . . . . 40
■■ Sending Scanned Data (E-Mail/I-Fax/File Servers) . . . . . . . . . . . . . . . . . . . . . . . . . . . . . . . . . . . . . . . . . . . . . . . . . . 41
■■ Storing Scanned Data . . . . . . . . . . . . . . . . . . . . . . . . . . . . . . . . . . . . . . . . . . . . . . . . . . . . . . . . . . . . . . . . . . . . . . . . . . . . 42
■■ Accessing Stored Files . . . . . . . . . . . . . . . . . . . . . . . . . . . . . . . . . . . . . . . . . . . . . . . . . . . . . . . . . . . . . . . . . . . . . . . . . . . . 44
■■ Operating the Machine from a Computer (Remote UI) . . . . . . . . . . . . . . . . . . . . . . . . . . . . . . . . . . . . . . . . . . . . . . 45
■■ Printing from a Computer. . . . . . . . . . . . . . . . . . . . . . . . . . . . . . . . . . . . . . . . . . . . . . . . . . . . . . . . . . . . . . . . . . . . . . . . . 46
23
Page 26
What This Machine Can Do
Revolutionary Documentation Work with an Evolving Multitasking Machine
Original
1
2
3
4
Copy/Print
1
2
3
4
Scan
Copy
Print
Machine
Remote
Fax
Client
Advanced
Space
MEAP
LAN
Remote
UI
Send Outside
the Company
Fax
Telephone Line
Fax
I-Fax
Internet
Send
E-Mail
LAN
Server
Machine
In-Company
Computer
The imageRUNNER ADVANCE C2230i/C2225i/C2220i/C2220L incorporates a rich array of input and output features that can
greatly enhance your eciency. Equipped with features that meet the needs of document work in a digitized oce, the
imageRUNNER ADVANCE C2230i/C2225i/C2220i/C2220L represents the ultimate in a colour digital multitasking machines.
■● To see the setting ows to use each functions, see the following pages.
•
Network/USB Connection (p. 27)
• Scan and Store/Access Stored Files (p. 28)
• Sending Faxes/Printing (p. 29)
• Sending/Receiving Remote Fax (p. 29)
• Scan and Send/Remote Scan (p. 30)
• Remote UI/MEAP (p. 31)
File Server
E-Mail
24 Flow of Basic Operations 2
Page 27

Copy
Fax
Remote
Fax
You can use various copy functions to suit your needs. For
more details, see the following references.
►“How to Make a Copy,” on p. 39
►e-Manual > Copy
Send
You can send documents scanned on the machine
via e-mail or I-fax. For more details, see the following
references.
►“Sending Scanned Data (E-Mail/I-Fax/File Servers),” on
p. 41
►e-Manual > Scan and Send
Network
You can use the Advanced Space (*) of another
imageRUNNER ADVANCE machine accessible on the
network to store scanned originals and print stored les.
For more details, see the following references.
* A storage location that can handle le formats that can
also be used on a computer.
►“Accessing Stored Files,” on p. 44
►e-Manual > Access Stored Files
You can send scanned documents by fax and receive fax
documents with this machine. For more details, see the
following references.
►“Sending a Fax,” on p. 40
►e-Manual > Fax
Scan
You can scan and store documents in memory media
connected to the USB port on the machine. For more
details, see the following references.
►“Storing Scanned Data ,” on p. 42
►e-Manual > Scan and Store
Remote
UI
You can access to the machine from your computer by
using a web browser. For more details, see the following
references.
►“Operating the Machine from a Computer (Remote
UI),” on p. 45
►e-Manual > Remote UI
English
Print
If you install a printer driver in your computer, you can
print documents from your computer. For more details,
see the following references.
►“Printing from a Computer,” on p. 46
►e-Manual > Print
For more information on the detailed procedure and other functions, see e-Manual.
MEAP
You can install MEAP applications which correspond to
the machine in order to expand the functions.
►e-Manual > MEAP
25Flow of Basic Operations2
Page 28
Flow of Settings for Using the Desired Functions
Logging In as an Administrator
To specify the settings, you must log in to the machine as
an administrator. There are two methods for logging in;
logging in from the touch panel display of the machine
and logging in from a computer using the Remote UI.
To log in as the administrator, enter the System Manager
ID and System PIN as follows:
• System Manager ID: 7654321
• System PIN: 7654321
IMPORTANT
The default setting for both the System Manager ID and
System PIN is '7654321'. We recommend that you change
the password after logging in to the machine. In this
example, the default System Manager ID and System PIN
are used to log in.
■● Logging In from the Machine
To log in as the administrator using the touch panel
display, perform the following procedures.
Press .
1
Press [Log In].
2
■● Logging In from a Computer
To log in as the administrator from a computer using the
Remote UI, perform the following procedures.
NOTE
• To log in as the administrator using the Remote UI,
you must specify the network connection settings in
advance. For instructions on specifying the network
connection settings, see “Network/USB Connection,” on
p. 27.
• If you are using a login service, see e-Manual > MEAP.
• For information on necessary system environment and
preparation to start the Remote UI, see e-Manual >
Remote UI.
Start the Web browser on your computer.
1
Enter 'http://<IP address or host name of the
2
machine>' in [Address].
Enter the System Manager ID and System
3
PIN → click [Administrator Login].
Enter the System Manager ID and System
3
PIN → press [Log in].
In the System PIN, the number you enter is masked with asterisks.
You are now logged in to the machine as an administrator.
When you are nished with the operation, press [Log Out]
or
(Log In/Out) on the control panel to log out.
To return to the Main Menu screen, press [Main Menu].
You are now logged in to the machine as an administrator.
When you have nished specifying settings and
performing operations, press [Log Out] to log out.
26 Flow of Basic Operations 2
Page 29

Network/USB Connection
TCP/IP AppleTalk Netware USB Connection
Specify [Conrm Network Connection Set. Changes], [Ethernet Driver Settings], [SNMP Settings],
Protocol Settings
(TCP/IP)
●Press → [Preferences] →
[Network].
Specify [IPv4 Settings], [IPv6 Settings],
[DNS Settings].
►e-Manual > Network
Using Network Cable
Network Settings
●Press → [Preferences] → [Network].
[Dedicated Port Settings], [Use Spool Function].
Macintosh Network
Settings
Make AppleTalk active on your
Macintosh.
►e-Manual > Network
Netware Print Service
Settings
You can specify the settings from
computer by using the following
software.
• NWADMIN or PCONSOLE (Novell
software provided with NetWare)
• Canon utilities
Using USB Cable
Settings for Using the
Machine as a USB Device
●Press → [Preferences] →
[External Interface].
Specify [USB Settings] → [On].
►e-Manual > Security
English
Connecting to
the TCP/IP Network
Protocol Settings
(AppleTalk)
●Press → [Preferences] →
[Network].
Specify [AppleTalk Settings].
►e-Manual > Network
Proceed to the Next Settings
Protocol Settings
(Netware)
●Press → [Preferences] →
[Network].
Specify [NetWare Settings].
►e-Manual > Network
Connecting to
the NetWare Network
27Flow of Basic Operations2
Page 30
Scan and Store/Access Stored Files
• If you are using the imageRUNNER ADVANCE C2230i/C2225i/C2220i
The PS Printer Kit or Direct Print Kit (for PDF/XPS) is required to print PDF les. (If the PS Printer Kit is used, the Direct Print Kit (for PDF/XPS) is not required.)
• If you are using the imageRUNNER ADVANCE C2220L
- The Color Universal Send Kit is required to use an Advanced Space on the network.
- You can only print JPEG/TIFF les.
Using Memory Media
●Press → [Preferences] → [Display Settings] → [Store Location Display Settings].
Using Advanced Space on the Network
Client Machine
Logging In to the Machine as an Administrator
Network (TCP/IP, AppleTalk, Netware) or USB
Displaying the Store Location
Select [On] for each item. The default setting is [O] for memory media.
Network Connection:
Network Settings: SMB/CIFS
(only if necessary)
Server Machine
►e-Manual > Settings/Registration
USB Settings
●Press → [Preferences] → [External
Interface] → [USB Settings] → [Use MEAP
Driver for External USB Device].
Select [O ].
►e-Manual > Security
External Reference
●Press → [Function Settings] → [Store/
Access Files] → [Network Settings].
1. Specify [Network Place Settings].
2. Specify [Protocol for External Reference].
Restart (The settings become eective.)
►e-Manual > Security
Open to Public
►See the manuals of the other
imageRUNNER ADVANCE series device
to use as a server.
Registering the Users
Login to the user management page → adding
the users.
Settings Completed
28 Flow of Basic Operations 2
Page 31

Sending Faxes/Printing
Required Options: Fax board or Remote Fax Kit is required, depending on the fax function. An optional product is required, depending on the print function.
Sending Faxes from the Machine
Sending Faxes from a Computer
Logging In to the Machine as an Administrator
Fax Line Settings
Specify [Set Line], [Register Unit Telephone Number], [Register Unit Name], [Select Line Type].
●Press → [Function Settings] → [Send] → [Fax Settings].
Setting the Current Date and Time
●Press → [Preferences] → [Timer/Energy Settings] → [Date/Time Settings].
Enter the date and time.
Printing the TX Terminal ID
●Press → [Function Settings] → [Send] → [Common Settings] → [TX Terminal ID].
Specify [Print].
Fax Driver Installation
Install the fax driver from the CD-ROM.
Printing from a Computer
Network Connection: Network (TCP/IP, AppleTalk, Netware) or USB
Network Settings: SMB/CIFS (only if necessary)
►e-Manual > Settings/Registration
English
►e-Manual > Settings/Registration
►e-Manual > Settings/Registration
Printer Driver Installation
Install the printer driver from the CD-ROM.
Setting the Fax Options
Specify the properties.
Settings Completed
Sending/Receiving Remote Fax
Required Options: Fax board or Remote Fax Kit is required, depending on the fax function.
Receiving Remote Fax
Server Machine Client Machine
Logging In to the Machine as an Administrator
Registering the
Destination
(Client Machine)
►See the manuals of the
other imageRUNNER
ADVANCE series device to
use as a server.
Setting the Client
Machine as Forwarding
Destination
●Press → [Function
Settings] → [Receive/
Forward] → [Common
Settings] → [Forwarding
Settings] → [Register].
Set the registered client machine as
forwarding destination.
►See the manuals of the
other imageRUNNER
ADVANCE series device to
use as a server.
Remote Fax
Receiving Settings
Example:
●Press → [Function
Settings] → [Send] →
[E-Mail/I-Fax Settings].
Select [Communication Settings] →
set the e-mail server.
►e-Manual > Settings/
Registration
Sending Remote Fax
Server Machine
Enabling
Remote Fax
►See the manuals of the
other imageRUNNER
ADVANCE series device to
use as a server.
Setting the Printer Options
Specify the properties.
Client Machine
Remote Fax
Sending Settings
●Press → [Function
Settings] → [Send] → [Fax
Settings] → [Remote Fax TX
Settings].
Set the IP address of the server.
►e-Manual > Settings/
Registration
Settings Completed
29Flow of Basic Operations2
Page 32

Scan and Send/Remote Scan
Required Options: An optional product is required, depending on the function.
Sending to
a File Server
Network Settings: SMB/CIFS
Logging On to
Windows with
Administrator Privileges
Network
Settings
Logging In to the Machine as an Administrator
Network Connection: TCP/IP
File Server Settings
•
FTP Server
• WebDAV Server
Sending by
E-Mail/I-Faxes
E-Mail Server
Settings
●Press → [Function
Settings] → [Send] →
[E-Mail/I-Fax Settings].
Select [Communication Settings] →
set the e-mail server → press [OK].
►e-Manual > Settings/
Registration
Remote
Scanning
Installing
the Scanner Driver
Install the scanner driver form the
CD-ROM.
Selecting
the Scanner Driver
Setting the User and
Password for Accessing
the Shared Folder
Switching
the Scanner Online
●Press [Scanner] → [Online].
►e-Manual > Scanner
Starting
Color Network ScanGear
or Network ScanGear
from a TWAIN-Compliant
Application
Settings Completed
30 Flow of Basic Operations 2
Page 33

Remote UI/MEAP
Remote UI Settings
(Managing the Machine
from a Computer)
Logging In to the Machine as an Administrator
Network Connection: TCP/IP
Enabling the Remote UI
●Press → [Management Settings] → [License/Other] → [Remote UI].
Select [On] to use SSL and Reference Print.
►e-Manual > Remote UI
MEAP Settings
(Managing Applications
from a Computer by Using SMS)
SSL Encrypted Communication Settings
●Press → [Preferences] → [Network] → [TCP/IP Settings] →
●Press → [Preferences] → [Network] → [TCP/IP Settings].
[SSL Settings] → [Key and Certicate].
Select 'Default Key' (preinstalled key pair and server certicate)
→ press [Set as the Default Key] → [Yes].
Enabling Access to the Machine
from the Web Browser
Set [Use HTTP] to [On].
►e-Manual > Network
►e-Manual > Network
English
Restart (The settings become eective.)
Starting Web Browser
Enter the following URL in <Address>.
http://<IP address of the machine or host name>
Enter the System Manager ID and System PIN → press [Administrator Login].
Click [Service Management Service].
Enter the password → click [Log In].
Settings Completed
31Flow of Basic Operations2
Page 34

Parts and Their Functions
This section provides you with the names and functions of all the parts of the machine.
For more information on optional products, parts and their functions, see e-Manual > Optional Products/Software.
External View
This section contains an external view of the imageRUNNER ADVANCE C2220L.
■● When the Color Image Reader Unit-G1, Cassette Feeding Unit-AF1, Inner Finisher-F1, 3 Way
Unit-C1*, Inner Finisher Additional Tray-A1, and Copy Tray-J1 Are Attached
* If you are using the imageRUNNER ADVANCE C2230i/C2225i/C2220i, the 3 Way Unit-C1 is standard-equipped.
4
13
12
11
1
2
10
3
5
16
8
9
6
7
15
14
32 Flow of Basic Operations 2
Page 35

Output Tray
Prints and copies are output to this tray.
Control Panel
Includes the keys, touch panel display, and indicators
required for operating the machine.
Feeder (Optional)
Originals placed in the feeder are fed one sheet at a time
to the platen glass for scanning.
USB Port (1)
Use the USB port to connect USB memory, external hard
disks, and other devices to the machine.
Upper Right Cover of the Main Unit
Open this cover when clearing a paper jam inside the
main unit.
LAN Port
Use an Ethernet cable to connect the machine to a
network.
USB Port (2)
Use the USB port to connect external hard disks and
other devices to the machine. You can also connect the
machine to a computer using a USB cable.
Lower Right Cover of the Main Unit
Open this cover when clearing a paper jam inside the
main unit.
Multi-Purpose Tray
Use the multi-purpose tray to feed paper manually, and
for loading nonstandard paper stock, such as envelopes.
Paper Drawer's Upper Right Cover
Open this cover when clearing a paper jam inside the
main unit.
Paper Drawer 2
Holds up to 550 sheets of paper (80 g/m
Paper Drawer 1
Holds up to 520 sheets of paper (80 g/m2).
Main Power Switch
Press to the "I" side to turn the power ON.
Waste Toner Container
Waste toner accumulates here.
LINE 2
Use this port to connect the Super G3 2nd Line Fax Board
to the machine.
LINE 1
Use this port to connect a fax line to the machine.
2
).
English
33Flow of Basic Operations2
Page 36

Internal View
This section contains an internal view of the imageRUNNER ADVANCE C2220L.
■● When the Color Image Reader Unit-G1, Cassette Feeding Unit-AF1, 3 Way Unit-C1*, Inner
Finisher-F1, Inner Finisher Additional Tray-A1, and Copy Tray-J1 Are Attached:
* If you are using the imageRUNNER ADVANCE C2230i/C2225i/C2220i, the 3 Way Unit-C1 is standard-equipped.
1
2
5
Platen Glass
Use the platen glass when scanning books, thick originals,
thin originals, transparencies, etc.
Upper Cover of the Fixing Unit
Open this cover to clear a paper jam in the xing unit.
Duplexing Unit
Pull out the duplexing unit to clear a paper jam.
4
3
Toner Replacement Cover
Open this cover to replace the toner cartridge.
Toner Cartridge
When toner runs out, pull out the toner cartridge, and
replace it with a new one.
34 Flow of Basic Operations 2
Page 37

Control Panel and Touch Panel Display
2
1
19
18
4
3
5
English
8
141617
12
1315
11 7
910
6
[Main Menu]
Press to display the Main Menu screen. Use each function
by selecting it from the Main Menu screen.
Touch Panel Display
The settings screen for each function is shown on this
display. Six function keys are displayed by default.
Numeric keys
Press to enter numerical values.
Energy Saver key
Press to set or cancel the Sleep mode. Lights when the
machine enters the Sleep mode.
Settings/Registration key
Press to specify settings/registration.
Counter Check key
Press to display the copy and print count totals on the
touch panel display.
Stop key
Press to stop a job in progress, such as a scan, copy, or fax
(scanning only) job.
Edit Pen
Use when operating the touch panel display, such as to
enter characters.
Start key
Press to start an operation.
Main Power Indicator
Lights when the main power is turned ON.
Error Indicator
Flashes or lights if there is an error in the machine.
When the Error indicator ashes, follow the instructions
that appear on the touch panel display. When the Error
indicator maintains a steady red light, contact your local
authorized Canon dealer.
Processing/Data Indicator
Flashes or blinks green when the machine is performing
operations, and maintains a steady green light when fax
data is stored in memory.
Clear key
Press to clear entered values or characters.
Reset key
Press to restore the standard settings of the machine.
ID(Log In/Out) key
Press to log in/out when a login service such as
Department ID Management or SSO-H has been set.
Brightness Adjustment Dial
Use to adjust the brightness of the touch panel display.
Volume Settings key
Press to display the screen for adjusting settings, such as
the transmission volume and fax sending/receiving alarm
volume.
[Status Monitor/Cancel]
Press to check the status of jobs or to cancel print jobs.
Also, you can check the status of the machine such as the
amount of paper remaining in the paper source.
[Quick Menu]
Press to display functions registered in the Quick Menu.
35Flow of Basic Operations2
Page 38

■● Use Quick Menu
If functions that are frequently used are set in the Quick Menu beforehand,
you can recall the function by pressing [Quick Menu].
If you are using a login service, Quick Menu screen set for each user appears.
To register a function in the Quick Menu, set the function and press [Register
to Quick Menu] from .
■● If You Want to Check or Change the Job Status
Press [Status Monitor/Cancel] to check the job status or cancel print jobs.
Also, you can check the status of the machine such as the amount of paper
remaining in the casettes.
■● Selecting Each Function
If [Main Menu] is pressed, the Main Menu screen is displayed. Select a
function from the Main Menu screen.
NOTE
You can display a shortcut key for a function on the top of the Main Menu
screen. For more information on storing the shortcut key for function, see
e-Manual > Basic Operations.
■● Logging In/Out
If you are managing the machine with a login service, such as Department
ID Management or SSO-H (Single Sign-On H), a log in screen appears.
If the log in screen appears, enter the Department ID and PIN or the user
name and password → press
(Log In/Out) or [Log Out] after you nish using the machine to log out.
(Log In/Out) or [Log In] on the screen. Press
36 Flow of Basic Operations 2
Page 39

Useful Functions of the Main Menu Screen and Touch Panel Display
■● If the touch panel display is turned OFF
If nothing is displayed on the touch panel display after the main power
switch is turned ON, press .
■● Customizing Main Menu Screen
You can specify the display settings for the shortcut buttons using the
on the top right of the screen. To perform this procedure, log in to the
machine as an administrator.
1. Press .
2. Press [Shortcut Button Settings].
3. Press the shortcut button you want to display → select the function to register
in the shortcut button.
NOTE
• The items displayed when is pressed may dier, depending on the
function.
• If authentication function is used, items displayed may dier or may not be
available, depending on the login user's privileges.
• For more information on the customizing, see e-Manual > Basic Operations.
■● Use Help
English
If (Help) is displayed on the top right of the function
setting screen, press (Help) to check the explanation
of the function or how to specify settings.
37Flow of Basic Operations2
Page 40

Main Power and Energy Saver Key
1
2
3
1
2
3
This section describes how to use the main power switch and the Energy Saver key.
Do not connect or disconnect the power cord with wet hands, as this may result in electrical shock.
■● How to Turn ON the Main Power
Make sure that the power plug is rmly inserted into the power outlet, and then turn ON the main power of the machine
following the procedure below.
1. Open the main power switch cover.
2. Press the main power switch to the "I" side.
3. Close the main power switch cover.
("I" side)
■● Shutting Down the Machine
This machine performs a procedure to protect the memory when the machine is shut down. This enables the machine to be
shut down safely, even if there are any jobs being processed, or a MEAP application is running while the machine is shutting
down.
(" " side)
• If you are using a login service, log in using the procedure for the login service you are
using.
• If you want to turn OFF the main power and then back ON again, wait for at least 10
seconds after the main power indicator is turned OFF before turning ON the main
power.
1. Open the main power switch cover.
2. Press the main power switch to the "
" side.
3. Close the main power switch cover.
• Do not turn the main power OFF while using Fax/I-Fax function. Sending or receiving
I-fax or fax documents cannot be done when the main power is turned OFF.
• The machine may take some time to completely shutdown. Do not unplug the power
cord until the main power indicator of the machine is OFF.
• If the main power is turned OFF during scanning or printing, a paper jam may occur.
■● Energy Saver Key
You can press to make the machine enter the Sleep mode and reduce power consumption.
If the machine is idle for a certain period of time, the machine will enter the Auto Sleep mode to minimize energy
consumption. Press
to cancel the Sleep mode and resume normal machine operations.
38 Flow of Basic Operations 2
Page 41

How to Make a Copy
This section describes the ow of basic copy operations. An optional product is required to use the Copy function.
Placing Originals
1
●
Place the original on the feeder
or the platen glass.
Selecting Function
2
●
Select [Copy] from the Main
Menu screen.
• Press [Copy].
Placing originals in the feeder
Adjust the slide guides to t the size of your
•
originals. Neatly place your originals with the
side to be copied face up.
• Copy Basic Features Screen is displayed. You can set various copying functions. For more
Placing originals on the platen glass
Open the feeder/platen cover.
•
• Place your originals face down.
information, see e-Manual > Copy.
English
Setting the Number of Copies
3
●
Enter the number of copies.
Start Copying
4
●
After specifying the settings,
press
.
• Press the numeric keys to enter the desired copy
quantity (1 to 999).
• Press .
• If a log in screen for Department ID Management or SSO-H appears, you must enter the applicable authentication information (ID, password/PIN). If the
Copy Card Reader-F1 is attached, rst insert a control card.
• If a login service, such as Department ID Management or SSO-H has been set, press (Log In/Out) to log out.
39Flow of Basic Operations2
Page 42

Sending a Fax
This section describes the ow of basic fax operations. An optional product is required to use the Fax function.
Placing Originals
1
●
Place the original on the feeder or
the platen glass.
Selecting Function
2
●
Select [Fax] from the Main Menu
screen.
• Press [Fax].
Placing originals in the feeder
Adjust the slide guides to t the size of your
•
originals. Neatly place your originals with the
side to be scanned face up.
• Fax Basic Features Screen is displayed. You can set various facsimile functions. For more
Placing originals on the platen glass
Open the feeder/platen cover.
•
• Place your originals face down.
information, see e-Manual > Fax.
Specify the Destination
3
●
Enter the fax number.
Start Sending the Fax
4
●
After specifying the settings,
press
.
• Enter the fax number using the numeric keys.
• Press .
After a job is sent, the send settings may be
retained except the specied destinations.
• To cancel the settings, press .
• To send other jobs with the same settings,
specify destinations for the jobs as the
destination specied for the previous job is not
retained.
• If a log in screen for Department ID Management or SSO-H appears, you must enter the applicable authentication information (ID, password/PIN). If the
Copy Card Reader-F1 is attached, rst insert a control card.
• If a login service, such as Department ID Management or SSO-H has been set, press (Log In/Out) to log out.
• The send settings for the last send job may be retained.
- To cancel the settings, press .
- The specied destinations are not retained.
40 Flow of Basic Operations 2
Page 43

Sending Scanned Data (E-Mail/I-Fax/File Servers)
This section describes the ow of basic scan and send operations. An optional product is required to use the Scan
function.
Placing Originals
1
●
Place the original on the feeder or
the platen glass.
Selecting Function
2
●
Select [Scan and Send] from the
Main Menu screen.
• Press [Scan and Send].
Placing originals in the feeder
Adjust the slide guides to t the size of your
•
originals. Neatly place your originals with the
side to be scanned face up.
• Scan and Send Basic Features screen is
displayed.
Placing originals on the platen glass
Open the feeder/platen cover.
•
• Place your originals face down.
You can set various send functions. For more
information, see e-Manual > Scan and Send.
English
Specify the Destination
3
●
Press [Address Book] → select
destination → press [OK].
Start Sending
4
●
After specifying the settings,
press
.
• Press [Address Book]. • Select one destination or multiple destinations
• Press . After a job is sent, the send settings may be
→ press [OK].
retained except the specied destinations.
• To cancel the settings, press .
• To send other jobs with the same settings,
specify destinations for the jobs as the
destination specied for the previous job is not
retained.
• If a log in screen for Department ID Management or SSO-H appears, you must enter the applicable authentication information (ID, password/PIN). If the
Copy Card Reader-F1 is attached, rst insert a control card.
• If a login service, such as Department ID Management or SSO-H has been set, press (Log In/Out) to log out.
• The send settings for the last send job may be retained.
- To cancel the settings, press .
- The specied destinations are not retained.
41Flow of Basic Operations2
Page 44

Storing Scanned Data
This section describes the ow of basic Scan and Store operations. An optional product is required to use the Scan
function. It also describes an example of how to store scanned data in memory media.
Placing Originals
1
●
Place the original on the feeder or
the platen glass.
Selecting Function
2
●
Select [Scan and Store] from the
Main Menu screen.
Placing originals in the feeder
Adjust the slide guides to t the size of your
•
originals. Neatly place your originals with the
side to be scanned face up.
• Press [Scan and Store]. • Select [Memory Media] from the screen where
Placing originals on the platen glass
Open the feeder/platen cover.
•
• Place your originals face down.
you can select the type of storage location.
As an example, this procedure uses memory media to
store scanned data.
Select Storage
3
●
Specify the memory media that
you want to store the le in.
• Select the memory media.
Start Scanning
4
●
After specifying the settings,
press
.
• Press [Scan]. You can set various scan functions. For more
• Press .
information, see e-Manual > Scan and Store.
42 Flow of Basic Operations 2
Page 45

• If a log in screen for Department ID Management or SSO-H appears, you must enter the applicable authentication information (ID, password/PIN). If the
Copy Card Reader-F1 is attached, rst insert a control card.
• If a login service, such as Department ID Management or SSO-H has been set, press (Log In/Out) to log out.
• To use memory media, specify the following settings in advance.
1. Press
2. Press [Preferences] → [Display Settings] → [Store Location Display Settings].
3. Select [On] for <Memory Media>.
4. Press [OK].
• To save the scanned data to memory media, connect a USB memory to the USB port.
• For information on the supported memory media, see e-Manual > Scan and Store.
• To access the Network (Advanced Space), see e-Manual > Scan and Store.
.
English
43Flow of Basic Operations2
Page 46

Accessing Stored Files
This section describes the ow of basic Access Stored Files operations. The procedure for printing les stored in
memory media is used here as an example.
Selecting Function
1
●
Select [Access Stored Files] from
the Main Menu screen.
Select Storage
2
●
Specify the storage location for
the le.
• Press [Access Stored Files].
• Select [Memory Media] from the Storage
Selection screen.
As an example, this procedure describes how to print
les stored in memory media.
• Select the desired memory media.
Select File
3
●
Select the le → press [Print].
Start Printing
4
●
Press [Start Printing].
• Select the le. • Press [Print].
You can set various print settings. For more
information, see e-Manual > Access Stored Files.
• If a log in screen for Department ID Management or SSO-H appears, you must enter the applicable authentication information (ID, password/PIN). If the
Copy Card Reader-F1 is attached, rst insert a control card.
• If a login service, such as Department ID Management or SSO-H has been set, press (Log In/Out) to log out.
44 Flow of Basic Operations 2
Page 47

Operating the Machine from a Computer (Remote UI)
The Remote UI (User Interface) is preinstalled software in the machine that enables you to access the machine's
functions by using your computer's Web browser. For example, the Remote UI enables you to access the machine to
check job status, execute jobs, and specify various settings.
■● The Remote UI Is Useful in the Following Situations
• If you want to check the job status
• If you want to edit Address Book from your computer
• If you want to check the remaining amount of paper or toner from your seat
Accessing the Remote UI from a Web Browser.
1
●
Access the Remote UI from a Web
browser.
Checking the Job Status and Specifying the Settings.
2
●
Check the job status and specify
the settings.
• Enter the IP address of the machine in the
address bar of the Web browser, and press
[ENTER] on the keyboard.
To check the job status:
Click [Status Monitor/Cancel].
•
To specify the settings:
Click [Settings/Registration].
•
English
• To login as the administrator, enter the System Manager ID and System PIN → click [Administrator Login].
• To login as a general user, click [General User Login].
• If the Log In screen is displayed, enter the user name and password → click [Log In].
• If a login service such as Department ID Management or SSO-H has been set, enter the appropriate login information.
45Flow of Basic Operations2
Page 48

Printing from a Computer
If you install a printer driver in your computer, you can use the machine to print data created using application
software. This section describes the ow of basic operations to print data from your computer.
Display Print Settings Screen
1
●
Select [Print] from the [File]
menu.
Display Properties Screen of Printer Driver
2
●
Select the printer to use.
• Select the printer to use in [Printer] → click
[Properties].
• From the [File] menu in the application
software, click [Print].
• The properties screen of the printer driver
appears.
The default setting for [Print Style] is [2-sided
printing]. However, for some driver versions,
[1-sided printing] is the default setting.
Specify Print Settings
3
●
Specify the print settings.
Start Printing
4
●
After specifying the settings, click
[OK].
• Specify the desired settings → click [OK].
• Click [OK].
• Printing methods may dier, depending on the applications you are using. For details, see the instruction manuals provided with the application
software.
• The screens may dier, depending on the operating system, and the type and version of the printer driver you are using.
46 Flow of Basic Operations 2
Page 49

Routine Maintenance
■■ Loading Paper. . . . . . . . . . . . . . . . . . . . . . . . . . . . . . . . . . . . . . . . . . . . . . . . . . . . . . . . . . . . . . . . . . . . . . . . . . . . . . . . . . . . 48
Loading Paper into a Paper Drawer . . . . . . . . . . . . . . . . . . . . . . . . . . . . . . . . . . . . . . . . . . . . . . . . . . . . . . . . . . . . . . . . . . . . . . . . . . . . . . . . . .48
Adjusting a Paper Drawer to Hold a Dierent Paper Size . . . . . . . . . . . . . . . . . . . . . . . . . . . . . . . . . . . . . . . . . . . . . . . . . . . . . . . . . . . . . .49
■■ Replacing the Stamp Ink Cartridge (Color Image Reader Unit-G1) (Optional). . . . . . . . . . . . . . . . . . . . . . . . . 51
■■ Replacing the Toner Cartridge/Waste Toner Container . . . . . . . . . . . . . . . . . . . . . . . . . . . . . . . . . . . . . . . . . . . . . . 52
Replacing the Toner Cartridge . . . . . . . . . . . . . . . . . . . . . . . . . . . . . . . . . . . . . . . . . . . . . . . . . . . . . . . . . . . . . . . . . . . . . . . . . . . . . . . . . . . . . . .52
Replacing the Waste Toner Container . . . . . . . . . . . . . . . . . . . . . . . . . . . . . . . . . . . . . . . . . . . . . . . . . . . . . . . . . . . . . . . . . . . . . . . . . . . . . . . . 53
■■ Routine Cleaning. . . . . . . . . . . . . . . . . . . . . . . . . . . . . . . . . . . . . . . . . . . . . . . . . . . . . . . . . . . . . . . . . . . . . . . . . . . . . . . . . 55
Cleaning the Platen Glass and Underside of the Feeder/Platen Cover. . . . . . . . . . . . . . . . . . . . . . . . . . . . . . . . . . . . . . . . . . . . . . . . . .55
Manual Feeder Cleaning. . . . . . . . . . . . . . . . . . . . . . . . . . . . . . . . . . . . . . . . . . . . . . . . . . . . . . . . . . . . . . . . . . . . . . . . . . . . . . . . . . . . . . . . . . . . .55
■■ Consumables . . . . . . . . . . . . . . . . . . . . . . . . . . . . . . . . . . . . . . . . . . . . . . . . . . . . . . . . . . . . . . . . . . . . . . . . . . . . . . . . . . . . 57
■■ When an Error Message/Error Code Is Displayed . . . . . . . . . . . . . . . . . . . . . . . . . . . . . . . . . . . . . . . . . . . . . . . . . . . 59
When an Error Message Is Displayed . . . . . . . . . . . . . . . . . . . . . . . . . . . . . . . . . . . . . . . . . . . . . . . . . . . . . . . . . . . . . . . . . . . . . . . . . . . . . . . . .59
When an Error Code Is Displayed . . . . . . . . . . . . . . . . . . . . . . . . . . . . . . . . . . . . . . . . . . . . . . . . . . . . . . . . . . . . . . . . . . . . . . . . . . . . . . . . . . . .59
■■ Service Call Message . . . . . . . . . . . . . . . . . . . . . . . . . . . . . . . . . . . . . . . . . . . . . . . . . . . . . . . . . . . . . . . . . . . . . . . . . . . . . 60
Contacting Your Local Authorized Canon Dealer . . . . . . . . . . . . . . . . . . . . . . . . . . . . . . . . . . . . . . . . . . . . . . . . . . . . . . . . . . . . . . . . . . . . .60
Setting the Limited Functions Mode from the Service Call Message Screen. . . . . . . . . . . . . . . . . . . . . . . . . . . . . . . . . . . . . . . . . . . . 61
■■ Location of Staple/Paper Jams . . . . . . . . . . . . . . . . . . . . . . . . . . . . . . . . . . . . . . . . . . . . . . . . . . . . . . . . . . . . . . . . . . . . 62
Locations of Paper Jams. . . . . . . . . . . . . . . . . . . . . . . . . . . . . . . . . . . . . . . . . . . . . . . . . . . . . . . . . . . . . . . . . . . . . . . . . . . . . . . . . . . . . . . . . . . . .62
Locations of Staple Jams . . . . . . . . . . . . . . . . . . . . . . . . . . . . . . . . . . . . . . . . . . . . . . . . . . . . . . . . . . . . . . . . . . . . . . . . . . . . . . . . . . . . . . . . . . . .64
3
47
Page 50

Loading Paper
This section describes how to load paper.
Loading Paper into a Paper Drawer
If the selected paper runs out, or the selected paper
drawer runs out of paper during printing, a screen
prompting you to load paper appears on the touch panel
display.
Follow the procedure below to load paper into the paper
drawers.
When handling paper, take care not to cut your hands
on the edges of the paper.
IMPORTANT
• A screen prompting you to load paper also appears if
the selected paper drawer is not fully inserted into the
machine. Make sure that the paper drawer is properly
in place.
• Do not load the following types of paper into the paper
drawers. Doing so may cause a paper jam.
- Severely curled or wrinkled paper
- Thin straw paper
- Paper which has been printed on using a thermal
transfer printer
- The reverse side of paper which has been printed on
using a thermal transfer printer
• Fan the stack of paper well before loading it. Paper
such as thin paper, recycled paper, pre-punched paper,
heavy paper, and transparencies should be fanned
particularly well before loading it.
• Never place paper or any other items in the empty part
of the drawer next to the paper stack. Doing so may
cause paper jams.
• When you are printing in the Staple mode, do not
remove the output sheets that are waiting to be
stapled. (Printing and stapling resume after you clear
the paper jam.)
NOTE
• The following paper sizes can be loaded into Paper
Drawers 1, 2, 3, and 4:
- Paper Drawer 1: A3 and A4
- Paper Drawer 2: A3, A4, A4R, A5R, envelopes, and
Custom size (139.7 mm x 182 mm to 304.8 mm x 457.2
mm)
- Paper Drawers 3 and 4: A3, A4, A4R, A5R, and Custom
size (139.7 mm x 182 mm to 304.8 mm x 457.2 mm)
- Envelopes can be loaded into Paper Drawer 2 only if
the Envelope Feeder Attachment-D1 is attached.
- Paper Drawers 3 and 4 can only be used if the Cassette
Feeding Unit-AF1 is attached.
• For more information on the paper types that can be
loaded in Paper Drawers 1, 2, 3, and 4, see e-Manual >
Basic Operations.
• If a message prompting you to load paper appears
during printing, the remaining prints are automatically
made after you load the correct paper. If you select a
dierent paper source, the remaining prints are made
after you press [OK].
• Press [Cancel] to cancel printing.
Open the paper drawer.
1
2
1
1. Press the open button on the paper drawer in which
you want to load paper.
2. Grip the handle, and pull out the paper drawer until it
stops.
Prepare the paper to load.
2
Open the packaging for the paper, and remove the paper
stack.
NOTE
• For high-quality printouts, use paper recommended by
Canon.
• Before loading paper, always fan the sheets several
times, and align the edges to facilitate feeding.
48 Routine Maintenance 3
Page 51

English
Load the paper stack into the paper drawer.
3
1,2
3
2
1
3
1. Make sure that the paper size setting of the paper
drawer matches the size of the paper to load in the
paper drawer.
2. Load the paper stack against the right wall of the paper
drawer.
3. Gently push the paper drawer back into the machine
until it clicks into place in the closed position.
When returning the paper drawer to its original
position, be careful not to get your ngers caught, as
this may result in personal injury.
IMPORTANT
• Paper which is curled must be straightened out before
loading it into the paper drawer.
• You will not be able to make copies or print if you load
paper that exceeds the loading limit mark ( ), or if
the paper drawer is not completely pushed into the
machine.
• Make sure that the height of the paper stack does not
exceed the loading limit mark ( ).
• Always check that the paper drawers are in place.
• If paper runs out and printing is stopped, load a new
paper stack. Printing restarts after the new paper stack
is loaded.
• If you print on the paper which has absorbed moisture,
steam may come out from the output area of the
machine. This is because the moist on the paper
evaporates when the high temperature is applied when
a toner is xed to the paper. It is not a malfunction.
(This especially happens in low room temperature.)
Adjusting a Paper Drawer to Hold
a Dierent Paper Size
If you want to load a dierent size paper into a paper
drawer, follow the procedure described below to adjust
the paper drawer guides.
When handling paper, take care not to cut your hands
on the edges of the paper.
Remove the paper loaded in the paper
1
drawer.
NOTE
• When loading paper into the paper drawer for the rst
time, set the paper size plate to match the paper size
being loaded. (See “Adjusting a Paper Drawer to Hold a
Dierent Paper Size,” on p. 49.)
• The following paper sizes and number of sheets can be
loaded in the Paper Drawers 1 and 2:
- Paper Drawer 1: 520 sheets (80 g/m
- Paper Drawer 2: 550 sheets (80 g/m
• If there are instructions on the paper package
about which side of the paper to load, follow those
instructions.
• When the paper is loaded into the paper drawer, the
side facing up is the one printed on.
• If problems, such as poor print quality or paper jams
occur, try turning the paper stack over and reloading it.
• For more information on the print direction of
preprinted paper (paper which has logos or patterns
already printed on it), see e-Manual > Copy.
• Rewrap any remaining paper in its original package,
and store it in a dry place, away from direct sunlight.
2
)
2
)
1. Press the open button on the paper drawer for which
you want to adjust.
2. Grip the handle, and pull out the paper drawer until it
stops.
3. Remove all of the remaining paper.
49Routine Maintenance3
Page 52

Adjust the position of the paper drawer
2
2
guides.
1
2
Change the paper drawer's paper size plate
4
to match the new paper size.
2
1
3
1. Slide the left guide while squeezing it on the top to
align it with the mark for the desired paper size.
2. Slide the front guide while squeezing it on the top to
align it with the mark for the desired paper size.
IMPORTANT
Slide the guides until they click into place. If the left guide
and front guide are not aligned correctly, the paper size
will not correctly appear on the touch panel display. It
is also necessary to adjust the guides correctly to avoid
causing a paper jam, dirty prints, or making the inside of
the machine dirty.
Load the appropriate size paper into the
3
paper drawer.
1,2
1. Make sure that the paper size setting of the paper
drawer matches the size of the paper to load in the
paper drawer.
2. Load the paper stack against the right wall of the paper
drawer.
1. Open the inside cover of the paper drawer, and lift up
the plate.
2. Rotate the plate so that the new paper size is on the
right side of the plate.
3. Insert the plate straight down, and close the inside
cover.
NOTE
The paper size that cannot be used depending on the
model and settings is also listed on the paper size plate.
Gently push the paper drawer back into
5
the machine until it clicks into place in the
closed position.
When returning the paper drawer to its original
position, be careful not to get your ngers caught, as
this may result in personal injury.
IMPORTANT
Only A4 transparencies can be used. Make sure that
the paper drawer guides is set to 'A4' when loading
transparencies in a paper drawer. If transparencies of a
dierent size (other than A4) are loaded in a paper drawer,
the paper size and remaining amount of paper will not be
detected correctly.
50 Routine Maintenance 3
Page 53

Replacing the Stamp Ink Cartridge (Color Image Reader Unit-G1) (Optional)
Originals sent via the feeder can be stamped to indicate
that they have been sent. Replace the stamp ink
cartridge when the stamp mark is faint or no longer
visible.
When replacing the stamp ink cartridge, take care not
to allow ink to come into contact with your hands or
clothing. If ink gets onto your hands or clothing, wash
it o immediately with cold water.
NOTE
The feeder (Color Image Reader Unit-G1) is an optional
product.
Open the covers.
1
2
1
1
Close the covers.
3
2
1
1. Close the inner cover.
2. Close the feeder cover.
When closing the covers, be careful not to get your
ngers caught, as this may result in personal injury.
English
1. Pull the lever → open the feeder cover.
2. Open the inner cover, holding it by its tab.
Load the stamp ink cartridge.
2
1
2
1. Remove the old the stamp ink cartridge, using
tweezers.
2. Push in the new the stamp ink cartridge until it clicks,
using tweezers.
IMPORTANT
• Make sure that the stamp ink cartridge is not
protruding from the surface.
• Insert the stamp ink cartridge properly, or paper jams
may occur.
51Routine Maintenance3
Page 54

Replacing the Toner Cartridge/Waste Toner Container
Replacing the Toner Cartridge
When there is only a small amount of toner remaining
inside the machine, a message appears on the touch
panel display. You can continue printing, but at this time
you should purchase a new toner cartridge to have it
available when needed.
When all of the toners run out completely and prints can
no longer be made, a screen with instructions on how to
replace the toner cartridge appears on the touch panel
display. Follow the procedure described below to replace
the toner cartridge.
If you press [Close], you can continue operations, such as
setting modes and scanning originals, even if you do not
replace the toner cartridge immediately.
IMPORTANT
• Use only toner cartridges intended for use with this
machine.
• For information on the supported Canon genuine
toner, see “Consumables,” on p. 57.
• Do not replace toner cartridges until the message
prompting you to do so appears.
• Do not attempt to replace the toner cartridge while the
machine is printing.
• The colour of the toner to be replaced is displayed on
the touch panel display. If multiple toner cartridges
must be replaced, replace the toner cartridges in the
following order: Black, Yellow, Magenta, Cyan.
• If you continue copying or printing in black-and-white
after cyan, magenta, or yellow toner runs out, do
not remove the depleted toner cartridges from the
machine.
• You can set the machine to display a message
indicating that the remaining toner is low. (See
e-Manual > Settings/Registration.)
NOTE
• When a message that the toner is low appears,
approximately 1,000 pages can still be printed. It is
recommended that you get a new toner cartridge ready
for replacement before the toner runs out.
• Complete instructions on how to replace the toner
cartridge can be accessed by pressing [Previous] or
[Next] on the touch panel display.
• If toner runs out during a print job, the remaining prints
are made after you replace the toner cartridge.
• If black toner is left, you can continue copying and
printing in black-and-white.
• After replacing toner cartridges, if printed colours are
dierent from the colours printed before you replaced
the toner cartridges, perform [Auto Adjust Gradation] in
[Adjustment/Maintenance]. (See e-Manual > Settings/
Registration.)
• Do not burn or throw used toner cartridges into
open ames, as this may cause the toner to ignite,
resulting in burns or a re.
• If you accidentally spill or scatter toner, carefully
gather the toner particles together or wipe them
up with a soft, damp cloth in a way that prevents
inhalation. Never use a vacuum cleaner that does
not have safeguards against dust explosions
to clean up spilled toner. Doing so may cause a
malfunction in the vacuum cleaner, or result in a
dust explosion due to static discharge.
• Keep toner out of the reach of small children.
• If toner is ingested, consult a physician immediately.
• If toner gets onto your hands or clothing, wash
it o immediately with cold water. Washing it o
with warm water will set the toner, and make it
impossible to remove the toner stains.
Press [ ].
1
NOTE
If the Black toner or all of the toners run out, this step is
not necessary.
Remove the displayed colour's toner
2
cartridge.
2
1
3
1. Open the front cover of the main unit.
2. Completely open the cover for the toner cartridge to
replace.
3. Pull out the toner cartridge.
Pull the toner cartridge out halfway, and then remove it
completely while supporting it and keeping it straight
with your other hand from underneath.
52 Routine Maintenance 3
Page 55

Do not burn or throw used toner cartridges into open
ames, as this may cause the toner remaining inside
the cartridges to ignite, resulting in burns or a re.
IMPORTANT
Do not touch the tip of the toner cartridge or subject
it to shock by hitting it. Doing so may cause the toner
cartridge to leak.
Prepare the new toner cartridge.
3
1. Open a package containing the indicated colour's toner
cartridge, and remove the toner cartridge.
Insert the new toner cartridge.
4
2
1
1. Align the arrow on the ring near the end of the new
toner cartridge with the arrow on the toner inlet of the
machine, as indicated in the diagram.
2. Push the new toner cartridge in as far as possible.
NOTE
Support the new toner cartridge with your hand from
underneath while pushing it into the machine with your
other hand.
Close the covers.
5
2
1
English
2. Hold the new toner cartridge in both hands, as shown
on the left, and gently tilt it several times.
3. Remove the protective cap from the new toner
cartridge.
Twist the protective cap of the new toner cartridge in
the direction of the arrow to remove it.
1. Close the cover for the toner cartridge you replaced.
2. Close the front cover of the main unit.
When closing the covers, be careful not to get your
ngers caught, as this may result in personal injury.
Replacing the Waste Toner Container
When the waste toner container nears capacity, a
message appears on the touch panel display. In this case,
you should prepare a new waste toner container.
When the waste toner container is full, a screen with
instructions on how to replace the waste toner container
appears on the touch panel display. Follow the procedure
described below to replace the waste toner container.
Even if you do not replace the waste toner container
immediately, you can perform printing for a while. The
number of prints you can make depends on the content
you print.
However, if you continue printing, an error will occur and
you will become unable to print.
• Do not burn or throw used waste toner containers
into open ames. Also, do not store waste toner
containers in places exposed to open ames, as this
may cause the toner to ignite, resulting in burns or
a re.
• If you accidentally spill or scatter toner, carefully
gather the toner particles together or wipe them
up with a soft, damp cloth in a way that prevents
inhalation. Never use a vacuum cleaner that does
not have safeguards against dust explosions
to clean up spilled toner. Doing so may cause a
malfunction in the vacuum cleaner, or result in a
dust explosion due to static discharge.
53Routine Maintenance3
Page 56

• If toner is ingested, consult a physician immediately.
• If toner gets onto your hands or clothing, wash
it o immediately with cold water. Washing it o
with warm water will set the toner, and make it
impossible to remove the toner stains.
IMPORTANT
• Your local authorized Canon dealer will dispose of used
waste toner containers. Use the provided cover to cover
up the opening of the used waste toner container.
• Used toner cannot be reused. Do not mix new and used
toner together.
• Use only waste toner containers intended for use with
this machine.
• Do not replace the waste toner container before the
message prompting you to replace it appears on the
touch panel display.
NOTE
• Complete instructions on how to replace the waste
toner container can be accessed by pressing [Previous]
or [Next] on the touch panel display.
• If the waste toner container must be replaced during a
print job, the remaining prints are made after the new
waste toner container is installed.
Pull out the waste toner container from the
1
left rear side of the machine.
Put the removed waste toner container
3
into a bag, and then tie it up at the top to
prevent the toner remaining inside the
cartridge from scattering.
NOTE
Use a bag in the box in which the new waste toner
container is stored.
Put the bag containing the used waste toner
4
container into the box.
2
1
Back Left Side of the Main Unit
1. Open the cover for the waste toner container.
2. Pull out the waste toner container.
Attach the provided cover to the used waste
2
toner container.
2
1
1. Remove the cover from the used waste toner container.
2. Cover the opening of the used waste toner container
with the cover removed in step 1.
Insert the new waste toner container.
5
1
2
1. Insert the new waste toner container.
2. Close the cover for the waste toner container.
When closing the cover for the waste toner container,
be careful not to get your ngers caught, as this
may result in personal injury.
When removing the waste toner container, be careful
not to tilt it, as the toner may spill and get onto your
hands or clothing.
54 Routine Maintenance 3
Page 57

Routine Cleaning
1
2
2
2
1
2
1
If the original is not copied clearly, clean the following
parts of the machine. For high-quality printouts, we
recommend cleaning these parts once or twice a
month.
■● Platen glass
■● Underside of the feeder/platen cover
■● Feeder's rollers
• When cleaning the machine, rst turn OFF the
main power switch, and disconnect the power cord.
Failure to observe these steps may result in a re or
electrical shock.
• Disconnect the power cord from the power outlet
regularly, and clean the area around the base of
the power plug's metal pins and the power outlet
with a dry cloth to ensure that all dust and grime is
removed. If the power cord is connected for a long
period of time in a damp, dusty, or smoky location,
dust can build up around the power plug and
become damp. This may cause a short circuit and
result in a re.
IMPORTANT
• When cleaning with a cloth, do not dampen it too
much, as this may damage the original or break the
machine.
• Do not use alcohol, benzene, paint thinner, or other
solvents for cleaning. Doing so may result in damage to
the plastic parts.
Manual Feeder Cleaning
If originals that have been fed through the feeder have
streaks or appear dirty, clean the feeder's rollers.
Clean the rollers of the feeder with a cloth dampened
with water, and wipe them with a cloth which is wrung
after being dampened in water, and then wipe them
clean with a soft, dry cloth.
IMPORTANT
• Spin the rollers while cleaning them.
• If the document feed scanning area is dirty, documents
may not be scanned clearly, and the size of the
document may not be detected correctly.
Clean the rollers of the feeder.
1
1
1
1. Pull the lever, and open the feeder cover.
2. Clean the rollers (a total of three places) inside the
feeder cover.
English
NOTE
The feeder (Color Image Reader Unit-G1) is an optional
product.
Clean the rollers inside the inner cover.
2
Cleaning the Platen Glass and Underside of the Feeder/Platen Cover
If the platen glass or the underside of the feeder/platen
cover is dirty, the original may not be scanned clearly, or
the size of the original may be detected incorrectly. Clean
the platen glass and the underside of the feeder/platen
cover by following the procedure below.
Clean the platen glass and the underside of
1
the feeder/platen cover with a cloth which
is wrung after being dampened in water or
a mild detergent, and then wipe them clean
with a soft, dry cloth.
1. Clean the platen glass.
Also, clean the feeder scanning area (thin glass strip).
2. Clean the underside of the feeder/platen cover.
1. Open the inner cover, holding it by its tab.
2. Clean the rollers (a total of three places) inside the inner
cover.
Clean the transparent plastic area on top of
3
the inner cover.
1. Clean the plastic area.
2. Close the inner cover.
When closing the cover, be careful not to get your
ngers caught, as this may result in personal injury.
55Routine Maintenance3
Page 58

Clean the feeder scanning area.
1
2
3
2
1
4
1. Open the feeder.
2. Clean the feeder scanning area with a cloth which
is wrung after being dampened in water or a mild
detergent, and then wipe the area with a soft dry cloth.
Clean the roller and the surrounding area.
5
1. Turn the roller while turning the feed dial.
2. Clean the area while turning the roller.
3. Close the feeder.
When closing the feeder, be careful not to get your
ngers caught, as this may result in personal injury.
Close the feeder cover.
6
When closing the cover, be careful not to get your
ngers caught, as this may result in personal injury.
56 Routine Maintenance 3
Page 59

Consumables
The following consumables are available from Canon.
For more information, contact your local authorized
Canon dealer.
We recommend that you order paper stock and toner
from your local authorized Canon dealer before your
stock runs out.
■● Recommended Paper
In addition to plain paper (A3, A4, and A5 size), recycled
paper, colour paper, transparencies (recommended for
this machine), tracing paper, labels, and other types of
paper stock are available.
Do not store paper in places exposed to open ames,
as this may cause the paper to ignite, resulting in
burns or a re.
IMPORTANT
• Some commercially available paper types are not suited
for this machine. Contact your local authorized Canon
dealer when you need to purchase paper.
• To prevent moisture build-up, tightly wrap any
remaining paper in its original package for storage.
NOTE
For high-quality printouts, use paper recommended by
Canon.
■● Toner
If a message prompting you to replace the toner cartridge
appears on the touch panel display, replace the used
toner
cartridge with a new one.
Toner comes in four colours: black, cyan, magenta, and
yellow.
Check the toner colour that you need to replace before
ordering toner from your local authorized Canon dealer.
Also, when replacing the toner cartridge, make sure that
you replace toner of the correct colour.
Use only toner cartridges intended for use with this
machine.
For optimum print quality, using Canon genuine toner is
recommended.
Product Name Supported Canon Genuine
Toner
imageRUNNER
ADVANCE C2230i/
C2225i/C2220i/C2220L
*1 Black Toner Cartridge
*2 Cyan, Magenta, or Yellow Toner Cartridge
Canon C-EXV 34 Black Toner
Canon C-EXV 34 Cyan Toner
Canon C-EXV 34 Magenta Toner
Canon C-EXV 34 Yellow Toner
*1 *2
• Do not burn or throw used toner cartridges into
open ames, as this may cause the toner remaining
inside the cartridges to ignite, resulting in burns or
a re.
• Do not store toner cartridges in places exposed to
open ames, as this may cause the toner to ignite,
resulting in burns or a re.
• If you accidentally spill or scatter toner, carefully
gather the toner particles together or wipe them
up with a soft, damp cloth in a way that prevents
inhalation. Never use a vacuum cleaner that does
not have safeguards against dust explosions
to clean up spilled toner. Doing so may cause a
malfunction in the vacuum cleaner, or result in a
dust explosion due to static discharge.
Keep toner out of the reach of small children. If toner
is ingested, consult a physician immediately.
IMPORTANT
• Store toner cartridges in a cool location, away from
direct sunlight. (The recommended storage conditions
are temperatures below 30°C, and humidity below
80%.)
• [Be careful of counterfeit toners]
Please be aware that there are counterfeit Canon toners in the
marketplace. Use of counterfeit toner may result in poor print quality
or machine performance. Canon is not responsible for any malfunction,
accident or damage caused by the use of counterfeit toner. For more
information, see http://www.canon.com/counterfeit.
English
57Routine Maintenance3
Page 60

■● Stamp Ink Cartridge
The stamp ink cartridge is used to stamp originals. Use
the tweezers provided to remove and replace the stamp
ink cartridge.
Stamp Ink Cartridge-C1
■● Staple Cartridge
■● Genuine Consumables
Canon continuously develops technology innovations
in Canon Toners, Drums and Cartridges, specically
designed for use in Canon Multi-Functional machines.
Experience the benets of optimal print performance,
print volume and high quality outputs, achieved through
Canon's new advanced technologies. Therefore, the use
of Canon genuine consumables is recommended for your
Canon Multi-Functional machines.
Go to http://www.canon-europe.com/consumables/
to understand the secret behind Canon's Consumable
products.
Finisher
Booklet Finisher-M1 Staple Cartridge-D2
Staple Finisher-M1
Booklet Finisher-M1
Inner Finisher-F1
Staple Cartridge
(Name/Shape)
Staple Cartridge-D3
Staple-J1
58 Routine Maintenance 3
Page 61

When an Error Message/Error Code Is Displayed
When an Error Message Is Displayed
Error messages may appear on the touch panel display
of the machine or the Web browser.
Self-diagnostic error messages appear in the following
cases:
■● When scanning or printing cannot be
performed because of an operational error
■● When you need to make a decision or take
some action during scanning or printing
■● When you need to make a decision or take
some action while browsing the network
Example of an Error Message on the Touch Panel Display
When an Error Code Is Displayed
If a job or operation does not complete successfully, the
error code is displayed on the Details screen for Log on
the Status Monitor/Cancel screen.
You can check the error code in the following locations:
■● Details screen for Log on the Status
Monitor/Cancel screen:
When a job or operation is not completed normally:
■● Results row of the Communication
Management Report:
If an error occurs during a send, receive, or fax job, the
error code is printed.
04/12/2012
DEVICE INFORMATION COMMUNICATION LOG REPORT
iRADV C2230i
English
Example of an Error Message on the Web Browser
For information on error messages and instructions on
resolving errors, see e-Manual > Problem Solving.
START TIME END TIME TYPE
DELIVER DEPT.ID
DELIVER
DELIVER
DELIVER
TO/FROM DATA DETAILS RESULT
ADDRESS BOOK
DEPT.ID
ADDRESS BOOK
DEPT.ID
ADDRESS BOOK
DEPT.ID
ADDRESS BOOK
For information on error codes and instructions on
resolving errors, see e-Manual > Problem Solving.
59Routine Maintenance3
Page 62

Service Call Message
1
2
3
If a malfunction occurs and the machine cannot
operate normally, a screen prompting you to contact
your local authorized Canon dealer is displayed.
If a screen such as the one above is displayed, contact
your local authorized Canon dealer. (See “Contacting Your
Local Authorized Canon Dealer,” on p. 60.)
If a screen such as the one below is displayed and the
print or scan function does not operate normally, some
functions may still be available.
■● When [Limited Func. Mode] Is Displayed:
■● When a Service Call Message Is Displayed on
the Bottom of the Screen:
Even if a message prompting you to call your service
representative appears on the bottom of the screen, some
functions may still be available.
For more information on the available functions, see
e-Manual > Problem Solving.
Contacting Your Local Authorized Canon Dealer
If a screen prompting you to contact your local authorized
Canon dealer is displayed, follow the procedure described
below.
Turn OFF the main power of the main unit.
1
If [Limited Func. Mode] is displayed, you can temporally
set the Limited Functions Mode to continue to use the
machine until the cause of the malfunction is cleared.
For more information, see “Setting the Limited Functions
Mode from the Service Call Message Screen,” on p. 61.
1. Open the main power switch cover.
2. Press the main power switch to the "
3. Close the main power switch cover.
" side.
IMPORTANT
If you turn OFF the main power switch when there is a job
waiting to print, that job is erased.
60 Routine Maintenance 3
Page 63

English
Wait at least 10 seconds after the Main
2
1
2
3
2
2
Power Indicator is turned o, and then turn
the main power switch back to ON.
1
1. Open the main power switch cover.
2. Press the main power switch to the "I" side.
3. Close the main power switch cover.
3
Setting the Limited Functions Mode from the Service Call Message Screen
When [Limited Func. Mode] is displayed, follow the
procedures below.
IMPORTANT
If you turn OFF the main power switch when there is a job
waiting to print, that job is erased.
NOTE
If you set Limited Functions Mode to 'On' from the
Service Call Message screen, [Limited Functions Mode] in
[Management Settings] (Settings/Registration) is also set
to 'On'. (See e-Manual > Security.)
If the machine still does not operate
3
normally, follow the procedure below, and
then contact your local authorized Canon
dealer.
1. Turn the main power switch OFF.
2. Remove the power plug from the power outlet.
Do not connect or disconnect the power cord with wet
hands, as this may result in electrical shock.
Always grasp the power plug when disconnecting the
power cord. Pulling on the power cord may expose or
snap the core wire, or otherwise damage the power
cord. If the power cord is damaged, this could cause
current to leak, resulting in a re or electrical shock.
NOTE
When you contact your local authorized Canon dealer,
have the following information available:
- Product name
- Details of the malfunction
- The error code displayed on the touch panel display
Press [Limited Func. Mode] → [Yes].
1
A message prompting you to restart the machine (turning
the main power switch OFF, and then ON) appears.
Turn OFF the main power of the main unit.
2
1. Open the main power switch cover.
2. Press the main power switch to the "
3. Close the main power switch cover.
Wait at least 10 seconds after the Main
3
" side.
Power Indicator is turned o , and then turn
the main power switch back to "I" side.
1
3
1. Open the main power switch cover.
2. Press the main power switch to the "I" side.
3. Close the main power switch cover.
The machine starts up in the Limited Functions mode.
61Routine Maintenance3
Page 64

Location of Staple/Paper Jams
2
3
1
1
2
Paper Jams and staple jams may occur in the following parts of the machine. See the applicable section to clear the
paper jam. For details on the procedure, see the e-Manual.
Locations of Paper Jams
e-Manual
> Problem Solving > Locations of Paper Jams
Main Unit, Inside the Fixing Unit
Cassette Feeding Unit-AF1
(Optional)
Color Image Reader Unit-G1
(Optional)
Paper Drawers
3
2
1
Copy Tray-J1 (Optional)
Inner Finisher-F1 (Optional)
62 Routine Maintenance 3
Page 65

English
1
2
3
Inside the Top Cover of the
Finisher
Buer Pass Unit-K1
Saddle Stitcher Unit
Inside the Front Cover
Inner 2Way Tray-F1 (Optional)
63Routine Maintenance3
Page 66

Locations of Staple Jams
A
B
e-Manual
> Problem Solving > Locations of Staple Jams
Staple Finisher-M1/Booklet Finisher-M1
(Optional)
Saddle Stitcher Unit of the Booklet
Finisher-M1
Inner Finisher-F1 (Optional)
2
1
64 Routine Maintenance 3
Page 67

Appendix
■■ Specications . . . . . . . . . . . . . . . . . . . . . . . . . . . . . . . . . . . . . . . . . . . . . . . . . . . . . . . . . . . . . . . . . . . . . . . . . . . . . . . . . . . . 66
Main Unit . . . . . . . . . . . . . . . . . . . . . . . . . . . . . . . . . . . . . . . . . . . . . . . . . . . . . . . . . . . . . . . . . . . . . . . . . . . . . . . . . . . . . . . . . . . . . . . . . . . . . . . . . . .66
Color Image Reader Unit-G1 . . . . . . . . . . . . . . . . . . . . . . . . . . . . . . . . . . . . . . . . . . . . . . . . . . . . . . . . . . . . . . . . . . . . . . . . . . . . . . . . . . . . . . . . .67
Color Image Reader Unit-G2 . . . . . . . . . . . . . . . . . . . . . . . . . . . . . . . . . . . . . . . . . . . . . . . . . . . . . . . . . . . . . . . . . . . . . . . . . . . . . . . . . . . . . . . . .68
Cassette Feeding Unit-AF1 . . . . . . . . . . . . . . . . . . . . . . . . . . . . . . . . . . . . . . . . . . . . . . . . . . . . . . . . . . . . . . . . . . . . . . . . . . . . . . . . . . . . . . . . . .68
Envelope Feeder Attachment-D1 . . . . . . . . . . . . . . . . . . . . . . . . . . . . . . . . . . . . . . . . . . . . . . . . . . . . . . . . . . . . . . . . . . . . . . . . . . . . . . . . . . . .68
Staple Finisher-M1 . . . . . . . . . . . . . . . . . . . . . . . . . . . . . . . . . . . . . . . . . . . . . . . . . . . . . . . . . . . . . . . . . . . . . . . . . . . . . . . . . . . . . . . . . . . . . . . . . . 69
Booklet Finisher-M1 . . . . . . . . . . . . . . . . . . . . . . . . . . . . . . . . . . . . . . . . . . . . . . . . . . . . . . . . . . . . . . . . . . . . . . . . . . . . . . . . . . . . . . . . . . . . . . . . .70
Inner Finisher-F1 . . . . . . . . . . . . . . . . . . . . . . . . . . . . . . . . . . . . . . . . . . . . . . . . . . . . . . . . . . . . . . . . . . . . . . . . . . . . . . . . . . . . . . . . . . . . . . . . . . . .71
Inner Finisher Additional Tray-A1 . . . . . . . . . . . . . . . . . . . . . . . . . . . . . . . . . . . . . . . . . . . . . . . . . . . . . . . . . . . . . . . . . . . . . . . . . . . . . . . . . . . .72
Inner 2Way Tray-F1 . . . . . . . . . . . . . . . . . . . . . . . . . . . . . . . . . . . . . . . . . . . . . . . . . . . . . . . . . . . . . . . . . . . . . . . . . . . . . . . . . . . . . . . . . . . . . . . . . .72
Copy Tray-J1 . . . . . . . . . . . . . . . . . . . . . . . . . . . . . . . . . . . . . . . . . . . . . . . . . . . . . . . . . . . . . . . . . . . . . . . . . . . . . . . . . . . . . . . . . . . . . . . . . . . . . . . .73
Copy Card Reader-F1. . . . . . . . . . . . . . . . . . . . . . . . . . . . . . . . . . . . . . . . . . . . . . . . . . . . . . . . . . . . . . . . . . . . . . . . . . . . . . . . . . . . . . . . . . . . . . . .73
Super G3 FAX Board-AH2 . . . . . . . . . . . . . . . . . . . . . . . . . . . . . . . . . . . . . . . . . . . . . . . . . . . . . . . . . . . . . . . . . . . . . . . . . . . . . . . . . . . . . . . . . . . .73
Send Function . . . . . . . . . . . . . . . . . . . . . . . . . . . . . . . . . . . . . . . . . . . . . . . . . . . . . . . . . . . . . . . . . . . . . . . . . . . . . . . . . . . . . . . . . . . . . . . . . . . . . .74
Network Environment. . . . . . . . . . . . . . . . . . . . . . . . . . . . . . . . . . . . . . . . . . . . . . . . . . . . . . . . . . . . . . . . . . . . . . . . . . . . . . . . . . . . . . . . . . . . . . . 75
Printer Settings . . . . . . . . . . . . . . . . . . . . . . . . . . . . . . . . . . . . . . . . . . . . . . . . . . . . . . . . . . . . . . . . . . . . . . . . . . . . . . . . . . . . . . . . . . . . . . . . . . . . .75
■■ Frequently Asked Questions . . . . . . . . . . . . . . . . . . . . . . . . . . . . . . . . . . . . . . . . . . . . . . . . . . . . . . . . . . . . . . . . . . . . . . 76
4
65
Page 68

Specications
Specications are subject to change without notice for product improvement or future release.
Main Unit
Item Specications
Name Canon imageRUNNER ADVANCE C2230i/C2225i/C2220i/C2220L
Type Reader-Printer Separated
Colour Supported Full Colour
Resolution for Writing 1,200 x 1,200 dpi
Paper Drawers:
Available Paper
Paper Sizes
Warm-Up Time*
First Copy Time
Copy Speed*
Margin
Weight:
Paper Drawer 1: 64 to 120 g/m
Paper Drawer 2: 64 to 163 g/m
Type:
Paper Drawer 1:
Thin, Plain 1 (65 to 82 g/m2), Plain 2 (83 to 99 g/m2), Plain 3 (100 to 105 g/m2), Recycled, Color, PrePunched, Bond, and Heavy 1 (106 to 120 g/m2)
Paper Drawer 2:
Thin, Plain 1 (65 to 82 g/m2), Plain 2 (83 to 99 g/m2), Plain 3 (100 to 105 g/m2), Recycled, Color,
Pre-Punched, Bond, and Heavy 1 (106 to 120 g/m2), Heavy 2 (121 to 163 g/m2), Transparency, and
Envelopes
Multi-Purpose Tray:
Weight:
64 to 220 g/m
Type:
Thin, Plain 1 (65 to 82 g/m2), Plain 2 (83 to 99 g/m2), Plain 3 (100 to 105 g/m2), Recycled, Color, PrePunched, Bond, Heavy 1 (106 to 120 g/m2), Heavy 2 (121 to 163 g/m2), Heavy 3 (164 to 220 g/m2),
Tracing, Coated, Labels, Transparency, and Envelopes
Paper Drawer 1:
A3 and A4
Paper Drawer 2:
A3, A4, A4R, A5R, Custom Size (139.7 x 182 mm to 304.8 x 457.2 mm), and Envelopes
Multi-Purpose Tray:
305 x 457 mm, 320 x 450 mm (SRA3), A3, A4, A4R, A5, A5R, Custom Size (99 x 139.7 mm to 320 x 457.2
mm) and Envelopes*
* Kakugata 2 envelopes can only be loaded horizontally.
After Powering ON (when [Quick Startup Settings for Main Power] is set to 'O'): 34 seconds
After Powering ON (when [Quick Startup Settings for Main Power] is set to 'On'): 10 seconds
The time until key operations can be performed on the touch panel display is 7 seconds or less.
Even if [Quick Startup Settings for Main Power] is set to 'On', the machine does not startup quickly,
depending on the situations.
Returning from the Sleep mode: 10 seconds
* Activation time may vary, depending on the environment and conditions under which the machine is
being used. (At a room temperature of 20°C in all above cases.)
Full Colour: 8.9 seconds
Black-and-White: 5.9 seconds
1:1 (sheet/minute)
A3 15 15 15
A4 30 25 20
A4R 20 20 20
A5R 30 25 20
* Except when paper is fed from the multi-purpose tray.
The copy speed may vary, depending on the settings for paper type, paper size, and the sending method.
When continuously copying, adjustments for machine temperature or image quality may cause machine
operations to pause or become slow.
Top: 4.0 mm
Left and Right: 2.5 mm
Bottom: 2.5 mm
2
imageRUNNER ADVANCE
2
2
C2230i
imageRUNNER ADVANCE
C2225i
imageRUNNER ADVANCE
C2220i/C2220L
66 Appendix 4
Page 69

English
Item Specications
Paper Drawers:
Paper Drawer 1:
640 sheets (64 g/m2), 520 sheets (80 g/m2)
Paper Feeding System/Capacity
Memory Capacity 2 GB
Hard Disk Capacity
Power Source 220 - 240 V AC, 50/60 Hz, 4.0 A
Power Consumption
Dimensions (H x W x D)
Weight
Installation Space (W x D)
*1*2
Paper Drawer 2:
680 sheets (64 g/m2), 550 sheets (80 g/m2)
Multi-Purpose Tray:
100 sheets (80 g/m2)
160 GB (Used space: 80 GB)
*1 The hard disk capacity is subject to change in future release.
*2 The hard disk is not available for imageRUNNER ADVANCE C2220L.
Maximum Power Consumption:
1.5 kW
When the machine is in the Sleep mode*:
0.8 W
When the main power switch is turned OFF:
When [Quick Startup Settings for Main Power] is set to 'On': 0.45 W
When [Quick Startup Settings for Main Power] is set to 'O': 0.19 W
* Depending on the system and conditions of use, these values may dier.
Only the Main Unit
imageRUNNER ADVANCE C2230i/C2225i/C2220i:
756 mm x 565 mm x 680 mm
imageRUNNER ADVANCE C2220L:
756 mm x 565 mm x 650 mm
With the Color Image Reader Unit-G1
imageRUNNER ADVANCE C2230i/C2225i/C2220i:
928 mm x 565 mm x 680 mm
imageRUNNER ADVANCE C2220L:
928 mm x 565 mm x 650 mm
With the Color Image Reader Unit-G2
imageRUNNER ADVANCE C2230i/C2225i/C2220i:
828 mm x 565 mm x 680 mm
imageRUNNER ADVANCE C2220L:
828 mm x 565 mm x 650 mm
imageRUNNER ADVANCE C2230i/C2225i/C2220i:
Approximately 74 kg
imageRUNNER ADVANCE C2220L:
Approximately 70 kg
imageRUNNER ADVANCE C2230i/C2225i/C2220i:
846 mm x 680 mm (when the multi-purpose tray is extended)
imageRUNNER ADVANCE C2220L:
846 mm x 650 mm (when the multi-purpose tray is extended)
Color Image Reader Unit-G1
Item Specications
Original Feeding Mechanism Automatic Document Feeder
Size:
A3, A4, A4R, A5, and A5R
Size and Weight of Originals
Original Tray Capacity 50 sheets (80 g/m2)
Original Scanning Speed
Resolution for Reading 600 x 600 dpi
Number of Tones 256
Acceptable Originals Sheet, book, three dimentional objects (up to 2 kg)
Weight:
1-sided scanning: 42 to 128 g/m
2-sided scanning: 50 to 128 g/m
Copying:
1-sided scanning: 30 sheets/minute (A4 in Black-and-White/Full Colour at 600 dpi)
Scanning:
1-sided scanning: 51 sheets/minute (A4 in Black-and-White/Full Colour at 300 dpi)
2
2
67Appendix4
Page 70

Item Specications
Regular paper size: Same Ratio
1:1
Reduction
1:0.70 (A3 → A4R)
1:0.50 (A3 → A5R)
Magnication
Copy Ratio: 25% to 400% (in 1% increments)
Multiple Copies 1 to 999 sheets
Power Source/Consumption
Dimensions (H x W x D)
Weight
Document Feeder: From the main unit / Approximately 30 W
Scanner (Platen Glass): From the main unit / Approximately 20 W
Document Feeder: 135 mm x 565 mm x 540 mm
Scanner (Platen Glass): 72 mm x 565 mm x 511 mm
Document Feeder: Approximately 7.9 kg
Scanner (Platen Glass): Approximately 7.5 kg
1:0.25
Enlargement
1:1.41 (A4R → A3)
1:2.00 (A5R → A3)
1:4.00
Color Image Reader Unit-G2
Item Specications
Resolution for Reading 600 x 600 dpi
Number of Tones 256
Acceptable Originals Sheet, book, three dimentional objects (up to 2 kg)
Regular paper size: Same Ratio
1:1
Reduction
1:0.70 (A3 → A4R)
1:0.50 (A3 → A5R)
Magnication
Copy Ratio: 25% to 400% (in 1% increments)
Power Source/Consumption From the main unit /Approximately 20 W
Dimensions (H x W x D)
Weight
Platen Cover: 37 mm x 563 mm x 507 mm
Scanner (Platen Glass): 72 mm x 565 mm x 511 mm
Platen Cover: Approximately 1.7 kg
Scanner (Platen Glass): Approximately 7.5 kg
1:0.25
Enlargement
1:1.41 (A4R → A3)
1:2.00 (A5R → A3)
1:4.00
Cassette Feeding Unit-AF1
Item Specications
Paper Sizes A3, A4, A4R, A5R, and Custom size (139.7 mm x 182 mm to 304.8 mm x 457.2 mm)
Paper Drawers Capacity
Power Source/Maximum Power
Consumption
Dimensions (H x W x D) 248 mm x 565 mm x 650 mm
Weight Approximately 27.5 kg
550 sheets x 2 cassettes (80 g/m2)
680 sheets x 2 cassettes (64 g/m2)
From the main unit/Approximately 30 W
Envelope Feeder Attachment-D1
Item Specications
Acceptable Envelopes COM10 No.10, Monarch, DL, and ISO-C5
Capacity 50 sheets (or 30 mm in height)
Feeding Speed
Dimensions (H x W x D) 81 mm x 439 mm x 307 mm
Weight Approximately 1.2 kg
68 Appendix 4
Monarch, DL, ISO-C5: 12 cpm
COM10 No.10: 10 cpm
Page 71

Staple Finisher-M1
Item Specications
Size:
305 mm x 457 mm, 320 mm x 450 mm (SRA3), A3, A4, A4R, A5, A5R, Custom size (99 mm x 139.7 mm to
320 mm x 457.2 mm), and Envelopes
Weight:
Paper Size/Weight/Type
Capacity Per Tray (Upper Tray)
Capacity Per Tray (Lower Tray)
Max. Stapling Capacity/Available
Staple Size
Power Source/Maximum Power
Consumption
Dimensions (H x W x D)
Weight Approximately 46 kg
Installation Space Including the
Main Unit (W x D)
64 g/m2 to 220 g/m
Type:
Thin, Plain 1 (65 to 82 g/m2), Plain 2 (83 to 99 g/m2), Plain 3 (100 to 105 g/m2), Recycled, Color, PrePunched, Bond, Heavy 1 (106 to 120 g/m2), Heavy 2 (121 to 163 g/m2), Heavy 3 (164 to 220 g/m2),
Tracing, Coated, Labels, Transparency, and Envelopes*
* If an envelope is loaded vertically, it cannot be output from the Staple Finisher-M1.
No nishing set, Collate, Group mode:
A4, A5, and A5R:
1,300 sheets (or 188 mm in height)
305 x 457 mm, 320 x 450 mm (SRA3), A3, and A4R:
650 sheets (or 96 mm in height)
Collate + Oset, Group + Oset mode:
A4:
1,300 sheets (or 188 mm in height)
A3 and A4R:
650 sheets (or 96 mm in height)
Staple mode:
A4:
1,300 sheets/30 sets (or 188 mm in height)
A3 and A4R:
650 sheets/30 sets (or 96 mm in height)
No nishing set, Collate, Group mode with dierent paper sizes:
650 sheets (or 96 mm in height)
Staple mode with dierent paper sizes:
650 sheets/30 sets (or 96 mm in height)
No nishing set, Collate, Group mode:
A4, A5, and A5R:
1,700 sheets (or 243 mm in height)
305 x 457 mm, 320 x 450 mm (SRA3), A3, and A4R:
650 sheets (or 96 mm in height)
Collate + Oset, Group + Oset mode:
A4:
1,700 sheets (or 243 mm in height)
A3 and A4R:
650 sheets (or 96 mm in height)
Staple mode:
A4:
1,700 sheets/30 sets (or 243 mm in height)
A3 and A4R:
650 sheets/30 sets (or 96 mm in height)
No nishing set, Collate, Group mode with dierent paper sizes:
650 sheets (or 96 mm in height)
Staple mode with dierent paper sizes:
650 sheets/30 sets (or 96 mm in height)
Corner Staple/Double Staple mode:
A4:
50 sheets (64 to 82 g/m2)
30 sheets (83 to 105 g/m2)
2 sheets (106 to 220 g/m2)
A3 and A4R:
30 sheets (64 to 82 g/m2)
20 sheets (83 to 105 g/m2)
2 sheets (106 to 220 g/m2)
From the main unit/Approximately 84 W
1,097 mm x 673 mm x 647 mm
(when the auxiliary tray is extended)
imageRUNNER ADVANCE C2230i/C2225i/C2220i:
1,577 mm x 680 mm
imageRUNNER ADVANCE C2220L:
1,577 mm x 650 mm
(when the multi-purpose tray and the auxiliary tray are extended)
2
English
69Appendix4
Page 72

Booklet Finisher-M1
Item Specications
Size:
Weight:
Paper Size/Weight/Type
Capacity Per Tray (Upper Tray)
Capacity Per Tray (Lower Tray)
Max. Stapling Capacity/Available
Staple Size
Max. Saddle Stitch Capacity/
Available Saddle Stitch Size
Power Source/Maximum Power
Consumption
Dimensions (H x W x D)
Type:
No nishing set, Collate, Group mode:
Collate + Oset, Group + Oset mode:
Staple mode:
No nishing set, Collate, Group mode with dierent paper sizes:
Staple mode with dierent paper sizes:
No nishing set, Collate, Group mode:
Collate + Oset, Group + Oset mode:
Staple mode:
No nishing set, Collate, Group mode with dierent paper sizes:
Staple mode with dierent paper sizes:
Corner Staple/Double Staple mode:
Saddle Stitch:
Saddle Folding:
Size:
From the main unit/Approximately 118 W
1,097 mm x 786 mm x 656 mm
(when the auxiliary tray is extended)
305 mm x 457 mm, 320 mm x 450 mm (SRA3), A3, A4, A4R, A5, A5R, Custom size (99 mm x 139.7 mm to
320 mm x 457.2 mm), and Envelopes
64 to 220 g/m
Thin, Plain 1 (65 to 82 g/m2), Plain 2 (83 to 99 g/m2), Plain 3 (100 to 105 g/m2), Recycled, Color, PrePunched, Bond, Heavy 1 (106 to 120 g/m2), Heavy 2 (121 to 163 g/m2), Heavy 3 (164 to 220 g/m2),
Tracing, Coated, Labels, Transparency, and Envelopes*
* If an envelope is loaded vertically, it cannot be output from the Booklet Finisher-M1.
A4, A5, and A5R:
1,300 sheets (or 188 mm in height)
305 x 457 mm, 320 x 450 mm (SRA3), A3 and A4R:
650 sheets (or 96 mm in height)
A4:
1,300 sheets (or 188 mm in height)
A3 and A4R:
650 sheets (or 96 mm in height)
A4:
1,300 sheets/30 sets (or 188 mm in height)
A3 and A4R:
650 sheets/30 sets (or 96 mm in height)
650 sheets (or 96 mm in height)
650 sheets/30 sets (or 96 mm in height)
A4, A5, and A5R:
1,700 sheets (or 243 mm in height)
305 x 457 mm, 320 x 450 mm (SRA3), A3, and A4R:
650 sheets (or 96 mm in height)
A4:
1,700 sheets (or 243 mm in height)
A3 and A4R:
650 sheets (or 96 mm in height)
A4:
1,700 sheets/30 sets (or 243 mm in height)
A3 and A4R:
650 sheets/30 sets (or 96 mm in height)
650 sheets (or 96 mm in height)
650 sheets/30 sets (or 96 mm in height)
A4:
50 sheets (64 to 82 g/m2)
30 sheets (83 to 105 g/m2)
2 sheets (106 to 220 g/m2)
A3 and A4R:
30 sheets (64 to 82 g/m2)
20 sheets (83 to 105 g/m2)
2 sheets (106 to 220 g/m2)
11 to 16 sheets (64 to 82 g/m2)
6 to 10 sheets (83 to 105 g/m2)
1 to 5 sheets (106 to 120 g/m2)
1 sheet (64 to 209 g/m2)
305 x 457 mm, A3, and A4R
2
70 Appendix 4
Page 73

Item Specications
Weight Approximately 75 kg
imageRUNNER ADVANCE C2230i/C2225i/C2220i:
Installation Space Including the
Main Unit (W x D)
1,689 mm x 680 mm
imageRUNNER ADVANCE C2220L:
1,689 mm x 650 mm
(when the multi-purpose tray and the auxiliary tray are extended)
Inner Finisher-F1
Item Specications
Size:
305 x 457 mm, 320 x 450 mm (SRA3), A3, A4, A4R, A5, A5R, Custom size (99mm x 139.7 mm to 320 mm x
457.2 mm) and Envelopes
Weight:
Paper Size/Weight/Type
Capacity Per Tray (Standard Tray)
Capacity Per Tray (Inner Finisher
Additional Tray-A1)
Max. Stapling Capacity/Available
Staple Size
64 to 220 g/m
Type:
Thin, Plain 1 (65 to 82 g/m2), Plain 2 (83 to 99 g/m2), Plain 3 (100 to 105 g/m2), Recycled, Color, PrePunched, Bond, Heavy 1 (106 to 120 g/m2), Heavy 2 (121 to 163 g/m2), Heavy 3 (164 to 220 g/m2),
Tracing, Coated, Labels, Transparency, and Envelopes*
* If an envelope is loaded vertically, it cannot be output from the Inner Finisher-F1.
No nishing set, Collate, Group mode:
A4, A5, and A5R
750 sheets (or 94 mm in height)
(when theInner Finisher Additional Tray-A1 is not attached)
350 sheets (or 44 mm in height)
(when theInner Finisher Additional Tray-A1 is attached)
305 x 457 mm, 320 x 450 mm (SRA3), A3, and A4R:
500 sheets (62.5 mm in height)
(when the Inner Finisher Additional Tray-A1 is not attached)
350 sheets (44 mm in height)
(when the Inner Finisher Additional Tray-A1 is attached)
Collate + Oset, Group + Oset mode:
A4:
750 sheets (or 94 mm in height)
(when the Inner Finisher Additional Tray-A1 is not attached)
350 sheets (or 44 mm in height)
(when the Inner Finisher Additional Tray-A1 is attached)
A3 and A4R:
500 sheets (or 62.5 mm in height)
(when theInner Finisher Additional Tray-A1 is not attached)
350 sheets (or 44 mm in height)
(when theInner Finisher Additional Tray-A1 is attached)
Staple mode:
A4:
30 sets (or 94 mm in height)
A3 and A4R:
30 sets (or 44 mm in height)
No nishing set, Collate, Group mode with dierent paper sizes:
350 sheets (or 44 mm in height)
Staple mode with dierent paper sizes:
30 sets (or 44 mm in height)
No nishing set, Collate, Group, Collate + Oset, Group + Oset mode:
305 mm x 457 mm, 320 mm x 450 mm (SRA3), A3, A4, A4R, A5, and A5R:
100 sheets (or 12.5 mm in height)
Staple mode:
A3, A4, and A4R:
15 sets (or 8.1 mm in height)
No nishing set, Collate, Group mode with dierent paper sizes:
100 sheets (or 12.5 mm in height)
Staple mode with dierent paper sizes:
15 sets (or 8.1 mm in height)
Corner Staple/Double Staple mode:
A4:
50 sheets (64 to 82 g/m2)
30 sheets (83 to 105 g/m2)
2 sheets (106 to 220 g/m2)
A3 and A4R:
30 sheets (64 to 82 g/m2)
20 sheets (83 to 105 g/m2)
2 sheets (106 to 220 g/m2)
2
English
71Appendix4
Page 74

Item Specications
Power Source/Maximum Power
Consumption
Dimensions (H x W x D)
Weight
Installation Space Including the
Main Unit (W x D)
From the main unit/Approximately 39 W
260 mm x 590 mm x 550 mm
(when the auxiliary tray is extended)
Approximately 14.0 kg
(when the Inner Finisher Additional Tray-A1 is attached)
imageRUNNER ADVANCE C2230i/C2225i/C2220i:
1,021 mm x 680 mm
imageRUNNER ADVANCE C2220L:
1,021 mm x 650 mm
(when the multi-purpose tray and the auxiliary tray are extended)
Inner Finisher Additional Tray-A1
Item Specications
Paper Size/Weight/Type See specications of "Paper Size/Weight/Type" in Inner Finisher-F1.
Capacity Per Tray See the specications of "Capacity Per Tray (Inner Finisher Additional Tray-A1)" in Inner Finisher-F1.
Dimensions (H x W x D) 70 mm x 382 mm x 450 mm
Weight Approximately 1.4 kg
Inner 2Way Tray-F1
Item Specications
Size:
305 mm x 457 mm, 320 mm x 450 mm (SRA3), A3, A4, A4R, A5, A5R, Custom size (99 mm x 139.7 mm to
320 mm x 457.2 mm), and Envelopes
Weight:
Paper Size/Weight/Type
Capacity
Dimensions (H x W x D) 76 mm x 426 mm x 407 mm
Weight Approximately 574 g
Installation Space Including the
Main Unit (W x D)
64 to 220 g/m
Type:
Thin, Plain 1 (65 to 82 g/m2), Plain 2 (83 to 99 g/m2), Plain 3 (100 to 105 g/m2), Recycled, Color, PrePunched, Bond, Heavy 1 (106 to 120 g/m2), Heavy 2 (121 to 163 g/m2), Heavy 3 (164 to 220 g/m2),
Tracing, Coated, Labels, Transparency, and Envelopes
Tray A:
A4, A5, and Envelopes
250 sheets (80 g/m2)
A5R
150 sheets (80 g/m2)
305 x 457 mm, 320 x 450 mm (SRA3), A3, A4R and Custom size (99 mm x 139.7 mm to 320 mm x 457.2
mm)
100 sheets (80 g/m2)
Tray B:
305 x 457 mm, 320 x 450 mm (SRA3), A3, A4, A4R, A5, A5R, Custom size (99 mm x 139.7 mm to 320 mm x
457.2 mm) and Envelopes*
100 sheets (80 g/m2)
* If an envelope is loaded vertically, it cannot be output from Tray B.
imageRUNNER ADVANCE C2230i/C2225i/C2220i:
846 mm x 680 mm
imageRUNNER ADVANCE C2220L:
846 mm x 650 mm
(when the multi-purpose tray and the auxiliary tray are extended)
2
72 Appendix 4
Page 75

Copy Tray-J1
Item Specications
Size:
A3, A4, A4R, and A5R
Weight:
Paper Size/Weight/Type
Capacity
Dimensions (H x W x D)
Weight Approximately 438 g
Installation Space Including the
Main Unit (W x D)
64 to 120 g/m
Type:
Thin, Plain 1 (65 to 82 g/m2), Plain 2 (83 to 99 g/m2), Plain 3 (100 to 105 g/m2), Recycled, Color, PrePunched, Bond, and Heavy 1 (106 to 120 g/m2)
A4 and A5R:
100 sheets (80 g/m2)
A3 and A4R:
75 sheets (80 g/m2)
144 mm x 365 mm x 373 mm
(when the auxiliary tray is extended)
87 mm x 243 mm x 373 mm
(when the auxiliary tray is not extended)
imageRUNNER ADVANCE C2230i/C2225i/C2220i:
930 mm x 680 mm
imageRUNNER ADVANCE C2220L:
930 mm x 650 mm
(when the auxiliary tray is extended)
Copy Card Reader-F1
2
English
Item Specications
Available Cards Magnetic
Card Readout Method Magnetic readout
Magnetic Card Reading Direction Face up
Store/Replay Replay
Power Source From the main unit
Dimensions (H x W x D)
Weight
40 mm x 88 mm x 96 mm
(excluding the attachment kit and cable)
Approximately 200 g
(including the attachment kit and cable)
Super G3 FAX Board-AH2
NOTE
Specications remain the same even when the Super G3 2nd Line Fax Board is installed.
Item Specications
Telephone Line Used
Scan line Density
(Scan, Transmission)
Transmission Speed Super G3: 33.6 kbps, G3: 14.4 kbps
Compression Method MH, MR, MMR, JBIG
Transmission Type Super G3, G3
Sending Original Sizes A3, A4, A4R, A5
Receiving Paper Sizes A3, A4, A4R, A5, A5R
Transmission Times JBIG: Approximately 2.6 seconds
Auto Dial Function
Image Memory Approximately 6,000 pages
*1 When using an IP telephone service, facsimile communication may not be performed normally via an IP telephone line. It is
recommended to use facsimile communication via a general telephone (Public Switched Telephone Network) line.
*2 Pels stands for picture elements (pixels).
*3 Sent as A4
*1
Public Switched Telephone Network
Normal: 8 pels
Fine: 8 pels
Super-Fine: 8 pels
Ultra-Fine: 16 pels
*3
*3
, A5R
Address Book: 1,800 destinations
(including destinations stored in one-touch buttons)
*2
/mm x 3.85 line/mm
*2
/mm x 7.7 line/mm
*2
/mm x 15.4 line/mm
*2
/mm x 15.4 line/mm
73Appendix4
Page 76

Send Function
■● Scan Features
Item Specications
Communication Protocol FTP (TCP/IP), SMB (TCP/IP), WebDAV
Data Format TIFF, JPEG, PDF, XPS, OOXML (Power Point)
Resolution
System Environment
Interface 1000BASE-T, 100BASE-TX, 10BASE-T
Colour Mode
Original Type Text, Text/Photo, Photo
Others Preview, Browse Windows (SMB) File Server
Optional PDF/XPS/OOXML
Functions
*1 PDF les optimized for Web viewing.
■● E-Mail and I-Fax Features
100 x 100 dpi, 150 x 150 dpi, 200 x 100 dpi, 200 x 200 dpi, 200 x 400 dpi, 300 x 300 dpi, 400 x 400 dpi, 600 x
600 dpi
Windows 2000 Server SP4, Windows XP Professional SP3, Windows Server 2003 R2 SP2, Windows
Vista SP2, Windows Server 2008 SP2, Windows Server 2008 R2 SP2, Windows 7, Solaris 10, Mac OS X
10.4.x/10.5.x/10.6.x, Red Hat Linux 9
Automatic-Color Select (Full Color/Grayscale), Automatic-Color Select (Full Color/Black-and-White), Full
Color, Grayscale, Black-and-White
PDF
XPS Compact, OCR, Device Signature, User Signature
OOXML Power Point, OCR
Compact, Trace and Smooth, Encryption, OCR, Device Signature, User Signature,
Optimization for Web*1, PDF/A-1b, Reader Extensions
Item Specications
Communication Protocol SMTP, POP3
I-Fax Communication Mode Simple, Full
For Sending E-mail
Resolution
Format
Original Size
Server Software Microsoft Exchange 2003 SP2, Microsoft Exchange 2007 SP2, Sendmail 8.14.4, Lotus Domino R7.0
Other Searches a destination via the LDAP Server, Preview
Optional PDF/XPS/OOXML
Functions (E-mail only)
*1 Available after setting RX conditions of the destination.
*2 Sent as A4
*3 PDF les optimized for Web viewing.
For Sending I-Fax
(Black-and-White)
For Sending I-Fax
(Colour)
E-mail TIFF, JPEG, PDF, XPS, OOXML (Power Point)
I-Fax
(Black-and-White)
I-Fax
(Colour)
E-mail A3, A4, A4R, A5, A5R
I-Fax A3, A4, A4R, A5*2, A5R
PDF
XPS Compact, OCR, Device Signature, User Signature
OOXML Power Point, OCR
100 x 100 dpi, 150 x 150 dpi, 200 x 100 dpi, 200 x 200 dpi, 200 x 400 dpi, 300 x
300 dpi, 400 x 400 dpi, 600 x 600 dpi
*1
200 x 100 dpi, 200 x 200 dpi, 200 x 400 dpi
x 600 dpi
100 x 100 dpi*1, 200 x 200 dpi*1, 300 x 300 dpi*1, 400 x 400 dpi*1, 600 x 600 dpi
TIFF (MH, MR*1, MMR*1)
TIFF (Prole-C)
Compact, Trace and Smooth, Encryption, OCR, Device Signature, User Signature,
Optimization for Web*3, PDF/A-1b, Reader Extensions
*1
*1
*2
, 300 x 300 dpi*1, 400 x 400 dpi*1, 600
*1
74 Appendix 4
Page 77

Network Environment
■● Hardware Specications
Network Interface 10Base-T/100Base-TX/1000Base-T (RJ-45)
■● Software Specications
Protocol Supported
TCP/IP
IPX/SPX
AppleTalk
Frame type: Ethernet II
Print applications: LPD/Raw/IPP/IPPS/FTP/WSD/SMB
Frame type: Ethernet II/Ethernet 802.2/Ethernet 802.3/Ethernet SNAP/Auto Detect
Print applications: Bindery PServer/NDS PServer/RPrinter/NPrinter
Frame type: Ethernet SNAP
Print application: PAP (Printer Access Protocol)
Printer Settings
■● Software Specications
Command Language PCL5c, PCL6, PostScript 3
Resident Fonts
Printable Area
PCL: 93 Scalable fonts, 2 OCR fonts, and 10 Bitmap fonts
PS: 136 Scalable fonts
PCL5c, PCL6: Reduced to 4.23 mm from the top, bottom, left, and right edges of the paper.
PostScript 3: Reduced to 4 mm from the top, bottom, left, and right edges of the paper.
• With 320 x 450 mm (SRA3) size paper, you cannot print in the areas 4 mm from the top and bottom
edges of the paper and 7.5 mm from the left and right edges of the paper.
• When printing in the 0 mm mode (apart from 320 mm x 450 mm (SRA3)), the upper margin
becomes 4 mm, the lower margin becomes 2.5 mm, and the side margins both become 2.5 mm. The
printable area is enlarged.
• When printing in the 0 mm mode (320 mm x 450 mm (SRA3)), the upper margin becomes 4 mm,
the lower margin becomes 2.5 mm, and the side margins both become 7.5 mm. The printable area
is enlarged.
English
75Appendix4
Page 78

Frequently Asked Questions
Q1 I want to make a rush copy, but I cannot because of the long copy job.
You can temporarily stop the current copy job and give priority to a rush copy by using the Interrupt mode.
A
On the Main Menu Screen, press [Copy] → [Interrupt] → set the desired copy mode.
Q2 How do I change the default settings for the Copy screen from the Colour mode to the Black mode?
You can store the current settings as the default settings using the following method.
A
1. On the Main Menu Screen, press [Copy] → [Select Color] → [Black].
2. Press
Q3 Can I send a fax to multiple destinations?
Specify the destinations using the following method.
A
On the Main Menu Screen, press [Fax] → enter a fax number using
the other fax numbers → press [OK].
Q4 Can you give me information on how to send to an SMB server and specify its settings?
You can specify the settings using the following method.
Setting the Shared Folder on the Computer-Side (Using Windows 7):
1. Right-click a new folder → click [Properties] → [Sharing].
2. Click [Sharing] → select the users you want to authorize access for → click [Add] → select [Read/Write] for <Permission Level>
for the added users.
3. Click [Sharing] → [End] → [Advanced Sharing] → select [Share this folder].
4. Click [Permission] → select the users you want to authorize access for → select [Allow] for [Full Control].
5. Click [OK] → [OK] → [Close].
A
Specifying the File Server on the Touch Panel Display:
1. On the Main Menu Screen, press [Scan and Send] → [New Destination] → [File].
2. From the protocol drop-down list, select [Windows (SMB)].
● Specifying the File Server by Host Search:
● Specifying the File Server by Browsing:
→ [Change Default Settings] → [Register] → [Yes].
- (numeric keys), , or → press [OK] → continue entering
❏ Press [Search Host] → on the search criteria screen, enter the IP address for the computer you are using→ press [Start
Searching].
❏ Specify the le server → conrm the settings.
❏ Press [Browse] → select the work group name and le server → specify each setting.
Q5 Can I move the Address Book registered on another Canon machine onto this machine?
You can use the import and export mode of the Remote UI to move the Address Book.
From the Remote UI Screen:
1. Click [Settings/Registration] → select [Data Management] for <Management Settings>.
2. Click [Address Lists] for <Import/Export Individually>.
Exporting the Address Book from Another Canon Machine:
A
1. Click [Export...] → select the Address List and the format of the le. → click [Start Exporting].
2. Specify the location to store the le → click [Store].
Importing the Address Book to the Machine:
1. Click [Import...] → select the Address List and the format of the le.
2. Specify the desired settings → click [Start Importing].
Q6 Can I forward the data received via fax/I-fax?
If you specify forwarding settings, you can forward received documents that match the previously set conditions to the Condential Fax
Inbox of this machine, other machines, or the le server.
A
1. On the control panel, press
2. Press [Forwarding Settings] → [Register] → specify the forwarding conditions.
Q7 How do I change the default settings (scan settings and le format) of the Scan and Send Basic Features screen?
You can store the current settings as the default settings using the following method.
A
1. On the Main Menu Screen, press [Scan and Send] → specify the scan settings and the le format.
2. Press
Q8 Can I add an arbitrary subject when sending e-mail?
You can enter an e-mail subject in [Subject/Message] in [Options].
A
1. On the Main Menu Screen, press [Scan and Send] → specify the destination → press [Options].
2. Press [Subject/Message] → enter the subject → press [OK].
→ [Change Default Settings] → [Yes].
→ [Function Settings] → [Receive/Forward] → [Common Settings].
Q9 I cannot print PDF les. Are optional products required?
The following optional products are required to print PDF les:
A
PS Printer Kit or Direct Print Kit (for PDF/XPS). If you are using the PS Printer Kit, the Direct Print Kit (for PDF/XPS) is unnecessary.
76 Appendix 4
Page 79

English
Q10 The content of the reverse side appears on the copies.
You can erase the background colour of the original and prevent the original image on the reverse side of thin originals from appearing
on the copies by using [Background Density].
A
1. On the Main Menu Screen, press [Copy] → [Options] → [Density].
2. Press [Background Density] → [Auto] or [Adjust].
Q11 Can I scan an original loaded in the machine and save it to a computer?
It is possible if you are using Windows. Install the Network ScanGear Driver in your computer, and then switch the network scan
function to online.
To Install the Driver:
A
Install the driver using the UFR II User Software CD-ROM that comes with the machine.
To Switch the Network Scan Function to Online:
On the Main Menu Screen, press [Scanner] → [Online].
Q12 Can I make copies or send a facsimile of dierent size originals at the same time?
Use the Dierent Size Originals mode.
A
On the Main Menu Screen, press [Copy] or [Fax] → [Options] → [Dierent Size Originals].
Q13 Can I output paper to a dierent tray according to the function?
You can set the output tray for each function and set priorities for outputting paper.
A
1. On the control panel, press
2. Press [Output Tray Settings] → set the output and priority settings for Tray A/B/C → press [OK].
Q14 How can I manage documents that failed to be forwarded?
You can specify how to manage jobs that failed to be forwarded using the following method.
A
1. On the control panel, press
2. Press [Handle Files with Forwarding Errors] → select how to manage the forwarding errors → press [OK].
→ [Function Settings] → [Common] → [Paper Output Settings].
→ [Function Settings] → [Receive/Forward] → [Common Settings].
Q15 How do I print the data received from specic destinations only?
You can set the Store/Print Received File mode in Forwarding Settings to print the data received from specic destinations only.
1. On the control panel, press
A
2. Press [Forwarding Settings] → [Register] → specify the destinations in [Conditions].
3. Set <Store/Print Received File> to 'On' → press [OK].
Q16 What is the model number of the staple cartridge for the nisher or the stamp ink cartridge for the feeder?
The model numbers of the consumables for the feeder and nisher are as follows:
A
Stamp Ink Cartridge-C1 (for the Color Image Reader Unit-G1) / Staple-J1 (for the Staple Finisher-M1, Booklet Finisher-M1, and Inner
Finisher-F1) / Staple Cartridge-D2, Staple Cartridge-D3 (for the Booklet Finisher-M1)
Q17 The touch panel display has become completely black.
The main power has not been turned ON, or the machine may have entered the Auto Sleep mode to save energy. Follow the procedure
below.
Turning the main power ON:
1. Check whether the power plug is rmly inserted into the outlet.
A
2. Open the main power switch cover located on the right side of the machine and switch the main power switch to the "I" side to
turn the power ON.
Recovering from the Auto Sleep mode:
On the control panel, press
Q18 I have just sent an important document via facsimile. Can I check to make sure that it was sent correctly?
You can check the send job status from the Status Monitor/Cancel screen
A
On the Main Menu Screen, press [Status Monitor/Cancel] → [Send] → [Log].
Q19 Can I restrict the number of colour copies/prints?
If Department ID Management is used, you can restrict the colour output within groups.
1. On the control panel, press
A
2. Press [On] → [Register PIN] → [Register].
3. Enter the Department ID and PIN → press [OK].
4. Press [Turn Limits On/O and Set Page Limits] → specify the page limit settings → press [OK].
→ [Function Settings] → [Receive/Forward] → [Common Settings].
.
→ [Management Settings] → [User Management] → [Department ID Management].
Q20 Can I change the language displayed on the touch panel display?
You can change the language displayed using the following method.
1. On the control panel, press
A
2. Press [On] → [OK] → [Language/Keyboard Switch].
3. Select the language to display → press [OK].
→ [Preferences] → [Display Settings] → [Language/Keyboard Switch On/O].
77Appendix4
Page 80

Q21 Can I change the screen or the order that the functions are displayed on the touch panel display when the power is turned ON?
You can change the default display that appears after the machine is turned ON using the following method. You can also change the
order that the functions are displayed or the layout.
Setting the Default Display That Appears after the Machine Is Turned ON:
1. On the control panel, press
A
2. Select the settings → press [OK].
Changing the Displayed Functions:
On the Main Menu Screen, press
function keys → press [OK].
Q22 I want to check the IP address for this machine to run the Remote UI, but I do not know how to check it.
You can check the IP address from the touch panel display of this machine.
1. On the control panel, press
A
2. Select [IPv4 Settings] or [IPv6 Settings] → [Use IPv4] or [Use IPv6] → [OK].
3. Press [IP Address Settings] or [Manual Address Settings].
Q23 Is there a way to adjust the sound heard when fax sending/receiving is complete?
You can use
A
On the control panel, press → or to adjust the Alarm Volume and Monitor Volume → press [OK].
on the control panel to adjust the volume.
→ [Preferences] → [Display Settings] → [Default Screen after Startup/Restoration].
→ [Main Menu Button Display Settings] → select the layout or the order to display the
→ [Preferences] → [Network] → [TCP/IP Settings].
78 Appendix 4
Page 81

imageRUNNER ADVANCE
C2230i/C2225i/C2220i/C2220L
Guide de I'utilisateur
Page 82

Guides de la machine
Les guides de cette machine sont les suivants. Les consulter pour obtenir des informations détaillées.
Les guides signalés par ce symbole sont disponibles en version imprimée.
Les guides signalés par ce symbole sont fournis sur le CD-ROM qui accompagne la machine.
Guide de l'utilisateur (ce guide)
• Décrit les précautions d'emploi de la machine.
• Présente une vue d'ensemble des fonctions, des opérations de base et de la conguration
nécessaire avant d'utiliser des fonctions.
• Décrit les procédures d'entretien et de dépannage de la machine.
• Fournit les spécications de la machine.
• Comprend les réponses aux questions les plus fréquemment posées.
Manuel électronique
Guide au format HTML
• Décrit toutes les fonctions de la machine. Ce guide comprend également une fonction de recherche
qui permet de retrouver des informations spéciques.
• Inclut la section "Procédures pratiques" qui présente des ux d'opérations pratiques faisant appel aux
fonctions de la machine.
Guide d'installation des pilotes
• Fournit des informations sur l'installation des pilotes d'imprimante, fax et autres.
- Guide d'installation du pilote d'imprimante
- Guide d'installation du pilote d'imprimante Mac
- Guide d'installation du pilote de télécopie
- Guide d'installation du Network ScanGear
• Fournis sur le même CD-ROM que pour chaque pilote.
Pour visualiser un chier PDF, Adobe Reader/Adobe Acrobat Reader est nécessaire. Si Adobe Reader/Adobe Acrobat Reader
n'est pas installé sur le système, il est possible de le télécharger depuis le site Web d'Adobe Systems Incorporated.
Page 83

Sommaire
1 Préface
Présentation du guide . . . . . . . . . . . . . . . . . . . . . . . . . . . . . . . . . . . . . . . . . . . . . . . . . . . . . . . . . . . . . . . . . . . . . . . . . . . . . . . . .6
Conventions adoptées . . . . . . . . . . . . . . . . . . . . . . . . . . . . . . . . . . . . . . . . . . . . . . . . . . . . . . . . . . . . . . . . . . . . . . . . . . . . . . . . . . . . . . . . . . . . . . . 6
Touches et boutons utilisés dans ce guide . . . . . . . . . . . . . . . . . . . . . . . . . . . . . . . . . . . . . . . . . . . . . . . . . . . . . . . . . . . . . . . . . . . . . . . . . . . . 6
Illustrations utilisées dans ce guide . . . . . . . . . . . . . . . . . . . . . . . . . . . . . . . . . . . . . . . . . . . . . . . . . . . . . . . . . . . . . . . . . . . . . . . . . . . . . . . . . . . 6
Abréviations utilisées dans ce guide . . . . . . . . . . . . . . . . . . . . . . . . . . . . . . . . . . . . . . . . . . . . . . . . . . . . . . . . . . . . . . . . . . . . . . . . . . . . . . . . . . 6
Marques . . . . . . . . . . . . . . . . . . . . . . . . . . . . . . . . . . . . . . . . . . . . . . . . . . . . . . . . . . . . . . . . . . . . . . . . . . . . . . . . . . . . . . . . . . . . . . . . . . . . . . . . . . . . . 7
Présentation du Manuel électronique . . . . . . . . . . . . . . . . . . . . . . . . . . . . . . . . . . . . . . . . . . . . . . . . . . . . . . . . . . . . . . . . . .8
Installation du Manuel électronique . . . . . . . . . . . . . . . . . . . . . . . . . . . . . . . . . . . . . . . . . . . . . . . . . . . . . . . . . . . . . . . . . . . . . . . . . . . . . . . . . . 8
Page d'accueil du Manuel électronique . . . . . . . . . . . . . . . . . . . . . . . . . . . . . . . . . . . . . . . . . . . . . . . . . . . . . . . . . . . . . . . . . . . . . . . . . . . . . . . 9
Mentions légales . . . . . . . . . . . . . . . . . . . . . . . . . . . . . . . . . . . . . . . . . . . . . . . . . . . . . . . . . . . . . . . . . . . . . . . . . . . . . . . . . . . . 10
Nom du produit. . . . . . . . . . . . . . . . . . . . . . . . . . . . . . . . . . . . . . . . . . . . . . . . . . . . . . . . . . . . . . . . . . . . . . . . . . . . . . . . . . . . . . . . . . . . . . . . . . . . .10
Exigences CEM de la directive européenne. . . . . . . . . . . . . . . . . . . . . . . . . . . . . . . . . . . . . . . . . . . . . . . . . . . . . . . . . . . . . . . . . . . . . . . . . . .10
Faisceau laser . . . . . . . . . . . . . . . . . . . . . . . . . . . . . . . . . . . . . . . . . . . . . . . . . . . . . . . . . . . . . . . . . . . . . . . . . . . . . . . . . . . . . . . . . . . . . . . . . . . . . . .10
Informations complémentaires . . . . . . . . . . . . . . . . . . . . . . . . . . . . . . . . . . . . . . . . . . . . . . . . . . . . . . . . . . . . . . . . . . . . . . . . . . . . . . . . . . . . . .10
Programme international ENERGY STAR. . . . . . . . . . . . . . . . . . . . . . . . . . . . . . . . . . . . . . . . . . . . . . . . . . . . . . . . . . . . . . . . . . . . . . . . . . . . . .10
Logo IPv6 Ready . . . . . . . . . . . . . . . . . . . . . . . . . . . . . . . . . . . . . . . . . . . . . . . . . . . . . . . . . . . . . . . . . . . . . . . . . . . . . . . . . . . . . . . . . . . . . . . . . . . .10
Directive DEEE . . . . . . . . . . . . . . . . . . . . . . . . . . . . . . . . . . . . . . . . . . . . . . . . . . . . . . . . . . . . . . . . . . . . . . . . . . . . . . . . . . . . . . . . . . . . . . . . . . . . . .11
Directive R & TTE . . . . . . . . . . . . . . . . . . . . . . . . . . . . . . . . . . . . . . . . . . . . . . . . . . . . . . . . . . . . . . . . . . . . . . . . . . . . . . . . . . . . . . . . . . . . . . . . . . . .11
Norme de sécurité des données (IEEE 2600) . . . . . . . . . . . . . . . . . . . . . . . . . . . . . . . . . . . . . . . . . . . . . . . . . . . . . . . . . . . . . . . . . . . . . . . . . .11
Copyright. . . . . . . . . . . . . . . . . . . . . . . . . . . . . . . . . . . . . . . . . . . . . . . . . . . . . . . . . . . . . . . . . . . . . . . . . . . . . . . . . . . . . . . . . . . . . . . . . . . . . . . . . . . 11
Logiciel de tierce partie . . . . . . . . . . . . . . . . . . . . . . . . . . . . . . . . . . . . . . . . . . . . . . . . . . . . . . . . . . . . . . . . . . . . . . . . . . . . . . . . . . . . . . . . . . . . .11
Logiciels soumis à d'autres conditions . . . . . . . . . . . . . . . . . . . . . . . . . . . . . . . . . . . . . . . . . . . . . . . . . . . . . . . . . . . . . . . . . . . . . . . . . . . . . . .12
Limites de responsabilité . . . . . . . . . . . . . . . . . . . . . . . . . . . . . . . . . . . . . . . . . . . . . . . . . . . . . . . . . . . . . . . . . . . . . . . . . . . . . . . . . . . . . . . . . . . .12
Restrictions à l'usage de votre produit et à l'utilisation des images . . . . . . . . . . . . . . . . . . . . . . . . . . . . . . . . . . . . . . . . . . . . . . . . . . . .12
Super G3. . . . . . . . . . . . . . . . . . . . . . . . . . . . . . . . . . . . . . . . . . . . . . . . . . . . . . . . . . . . . . . . . . . . . . . . . . . . . . . . . . . . . . . . . . . . . . . . . . . . . . . . . . . .12
Consignes de sécurité importantes. . . . . . . . . . . . . . . . . . . . . . . . . . . . . . . . . . . . . . . . . . . . . . . . . . . . . . . . . . . . . . . . . . . 13
Installation. . . . . . . . . . . . . . . . . . . . . . . . . . . . . . . . . . . . . . . . . . . . . . . . . . . . . . . . . . . . . . . . . . . . . . . . . . . . . . . . . . . . . . . . . . . . . . . . . . . . . . . . . .13
Alimentation électrique . . . . . . . . . . . . . . . . . . . . . . . . . . . . . . . . . . . . . . . . . . . . . . . . . . . . . . . . . . . . . . . . . . . . . . . . . . . . . . . . . . . . . . . . . . . . .13
Manipulation . . . . . . . . . . . . . . . . . . . . . . . . . . . . . . . . . . . . . . . . . . . . . . . . . . . . . . . . . . . . . . . . . . . . . . . . . . . . . . . . . . . . . . . . . . . . . . . . . . . . . . .14
Entretien et inspections . . . . . . . . . . . . . . . . . . . . . . . . . . . . . . . . . . . . . . . . . . . . . . . . . . . . . . . . . . . . . . . . . . . . . . . . . . . . . . . . . . . . . . . . . . . . .15
Consommables . . . . . . . . . . . . . . . . . . . . . . . . . . . . . . . . . . . . . . . . . . . . . . . . . . . . . . . . . . . . . . . . . . . . . . . . . . . . . . . . . . . . . . . . . . . . . . . . . . . . . 16
Autres points importants . . . . . . . . . . . . . . . . . . . . . . . . . . . . . . . . . . . . . . . . . . . . . . . . . . . . . . . . . . . . . . . . . . . . . . . . . . . . . . . . . . . . . . . . . . . .16
Emplacement et manipulation . . . . . . . . . . . . . . . . . . . . . . . . . . . . . . . . . . . . . . . . . . . . . . . . . . . . . . . . . . . . . . . . . . . . . . . 17
Précautions d'installation. . . . . . . . . . . . . . . . . . . . . . . . . . . . . . . . . . . . . . . . . . . . . . . . . . . . . . . . . . . . . . . . . . . . . . . . . . . . . . . . . . . . . . . . . . . .17
Eviter les conditions suivantes . . . . . . . . . . . . . . . . . . . . . . . . . . . . . . . . . . . . . . . . . . . . . . . . . . . . . . . . . . . . . . . . . . . . . . . . . . . . . . . . . . . . . 17
Le branchement électrique doit être sûr. . . . . . . . . . . . . . . . . . . . . . . . . . . . . . . . . . . . . . . . . . . . . . . . . . . . . . . . . . . . . . . . . . . . . . . . . . . .18
Déplacement de la machine . . . . . . . . . . . . . . . . . . . . . . . . . . . . . . . . . . . . . . . . . . . . . . . . . . . . . . . . . . . . . . . . . . . . . . . . . . . . . . . . . . . . . . .18
Prévoir une surface susante. . . . . . . . . . . . . . . . . . . . . . . . . . . . . . . . . . . . . . . . . . . . . . . . . . . . . . . . . . . . . . . . . . . . . . . . . . . . . . . . . . . . . .18
Précautions d'emploi. . . . . . . . . . . . . . . . . . . . . . . . . . . . . . . . . . . . . . . . . . . . . . . . . . . . . . . . . . . . . . . . . . . . . . . . . . . . . . . . . . . . . . . . . . . . . . . . 19
Sauvegarde/exportation des données. . . . . . . . . . . . . . . . . . . . . . . . . . . . . . . . . . . . . . . . . . . . . . . . . . . . . . . . . . . . . . . . 21
2 Flux des opérations de base
Fonctionnalités de cette machine . . . . . . . . . . . . . . . . . . . . . . . . . . . . . . . . . . . . . . . . . . . . . . . . . . . . . . . . . . . . . . . . . . . . 24
Travail de documentation révolutionnaire sur une machine multitâche évolutive. . . . . . . . . . . . . . . . . . . . . . . . . . . . . . . . . . . . . .24
Paramétrage pour utiliser les fonctions souhaitées. . . . . . . . . . . . . . . . . . . . . . . . . . . . . . . . . . . . . . . . . . . . . . . . . . . . 26
Connexion en tant qu'administrateur . . . . . . . . . . . . . . . . . . . . . . . . . . . . . . . . . . . . . . . . . . . . . . . . . . . . . . . . . . . . . . . . . . . . . . . . . . . . . . . .26
Connexion réseau/USB . . . . . . . . . . . . . . . . . . . . . . . . . . . . . . . . . . . . . . . . . . . . . . . . . . . . . . . . . . . . . . . . . . . . . . . . . . . . . . . . . . . . . . . . . . . . . .27
Lire et mémoriser/Accès aux chiers enregistrés. . . . . . . . . . . . . . . . . . . . . . . . . . . . . . . . . . . . . . . . . . . . . . . . . . . . . . . . . . . . . . . . . . . . . .28
Envoi d'un fax/impression . . . . . . . . . . . . . . . . . . . . . . . . . . . . . . . . . . . . . . . . . . . . . . . . . . . . . . . . . . . . . . . . . . . . . . . . . . . . . . . . . . . . . . . . . . .29
Envoi/réception de fax à distance. . . . . . . . . . . . . . . . . . . . . . . . . . . . . . . . . . . . . . . . . . . . . . . . . . . . . . . . . . . . . . . . . . . . . . . . . . . . . . . . . . . . 29
Lecture et envoi/Lecture à distance. . . . . . . . . . . . . . . . . . . . . . . . . . . . . . . . . . . . . . . . . . . . . . . . . . . . . . . . . . . . . . . . . . . . . . . . . . . . . . . . . .30
Interface utilisateur distante/MEAP . . . . . . . . . . . . . . . . . . . . . . . . . . . . . . . . . . . . . . . . . . . . . . . . . . . . . . . . . . . . . . . . . . . . . . . . . . . . . . . . . .31
Nomenclature. . . . . . . . . . . . . . . . . . . . . . . . . . . . . . . . . . . . . . . . . . . . . . . . . . . . . . . . . . . . . . . . . . . . . . . . . . . . . . . . . . . . . . . 32
Vue externe. . . . . . . . . . . . . . . . . . . . . . . . . . . . . . . . . . . . . . . . . . . . . . . . . . . . . . . . . . . . . . . . . . . . . . . . . . . . . . . . . . . . . . . . . . . . . . . . . . . . . . . . . 32
Vue interne . . . . . . . . . . . . . . . . . . . . . . . . . . . . . . . . . . . . . . . . . . . . . . . . . . . . . . . . . . . . . . . . . . . . . . . . . . . . . . . . . . . . . . . . . . . . . . . . . . . . . . . . .34
Panneau de commande et acheur tactile. . . . . . . . . . . . . . . . . . . . . . . . . . . . . . . . . . . . . . . . . . . . . . . . . . . . . . . . . . . . . . . . . . . . . . . . . . .35
Fonctions pratiques de l'écran Menu principal et acheur tactile . . . . . . . . . . . . . . . . . . . . . . . . . . . . . . . . . . . . . . . . . . . . . . . . . . . . .37
Interrupteur principal et touche d'économie d'énergie . . . . . . . . . . . . . . . . . . . . . . . . . . . . . . . . . . . . . . . . . . . . . . . . 38
Comment faire une copie . . . . . . . . . . . . . . . . . . . . . . . . . . . . . . . . . . . . . . . . . . . . . . . . . . . . . . . . . . . . . . . . . . . . . . . . . . . . 39
Envoi d'un fax. . . . . . . . . . . . . . . . . . . . . . . . . . . . . . . . . . . . . . . . . . . . . . . . . . . . . . . . . . . . . . . . . . . . . . . . . . . . . . . . . . . . . . . 40
Envoi de données lues (E-Mail/I-Fax/Serveur de chiers). . . . . . . . . . . . . . . . . . . . . . . . . . . . . . . . . . . . . . . . . . . . . . . 41
Mémorisation des données lues . . . . . . . . . . . . . . . . . . . . . . . . . . . . . . . . . . . . . . . . . . . . . . . . . . . . . . . . . . . . . . . . . . . . . 42
Accès aux chiers enregistrés . . . . . . . . . . . . . . . . . . . . . . . . . . . . . . . . . . . . . . . . . . . . . . . . . . . . . . . . . . . . . . . . . . . . . . . . 44
Fonctionnement de la machine à partir d'un ordinateur (interface utilisateur distante). . . . . . . . . . . . . . . . . . 45
Impression à partir d'un ordinateur . . . . . . . . . . . . . . . . . . . . . . . . . . . . . . . . . . . . . . . . . . . . . . . . . . . . . . . . . . . . . . . . . . 46
3
Page 84

3 Entretien périodique
Chargement du papier . . . . . . . . . . . . . . . . . . . . . . . . . . . . . . . . . . . . . . . . . . . . . . . . . . . . . . . . . . . . . . . . . . . . . . . . . . . . . . 48
Chargement du papier dans une cassette . . . . . . . . . . . . . . . . . . . . . . . . . . . . . . . . . . . . . . . . . . . . . . . . . . . . . . . . . . . . . . . . . . . . . . . . . . . .48
Modication du format papier d'une cassette . . . . . . . . . . . . . . . . . . . . . . . . . . . . . . . . . . . . . . . . . . . . . . . . . . . . . . . . . . . . . . . . . . . . . . . .49
Remplacement de la cartouche d'encre de marquage (Lecteur Couleur-G1) (en option) . . . . . . . . . . . . . . . . . 51
Remplacement de la cartouche de toner/du réceptacle . . . . . . . . . . . . . . . . . . . . . . . . . . . . . . . . . . . . . . . . . . . . . . . 52
Remplacement de la cartouche de toner. . . . . . . . . . . . . . . . . . . . . . . . . . . . . . . . . . . . . . . . . . . . . . . . . . . . . . . . . . . . . . . . . . . . . . . . . . . . .52
Remplacement du réceptacle de toner usagé . . . . . . . . . . . . . . . . . . . . . . . . . . . . . . . . . . . . . . . . . . . . . . . . . . . . . . . . . . . . . . . . . . . . . . . .53
Entretien courant . . . . . . . . . . . . . . . . . . . . . . . . . . . . . . . . . . . . . . . . . . . . . . . . . . . . . . . . . . . . . . . . . . . . . . . . . . . . . . . . . . . 55
Nettoyage de la vitre d'exposition et de la surface intérieure du chargeur/cache d'exposition. . . . . . . . . . . . . . . . . . . . . . . . . .55
Nettoyage manuel du chargeur. . . . . . . . . . . . . . . . . . . . . . . . . . . . . . . . . . . . . . . . . . . . . . . . . . . . . . . . . . . . . . . . . . . . . . . . . . . . . . . . . . . . . .56
Consommables . . . . . . . . . . . . . . . . . . . . . . . . . . . . . . . . . . . . . . . . . . . . . . . . . . . . . . . . . . . . . . . . . . . . . . . . . . . . . . . . . . . . . 57
Achage d'un message d'erreur/code d'erreur . . . . . . . . . . . . . . . . . . . . . . . . . . . . . . . . . . . . . . . . . . . . . . . . . . . . . . . 59
Lorsqu'un message d'erreur s'ache. . . . . . . . . . . . . . . . . . . . . . . . . . . . . . . . . . . . . . . . . . . . . . . . . . . . . . . . . . . . . . . . . . . . . . . . . . . . . . . . .59
Lorsqu'un code d'erreur s'ache . . . . . . . . . . . . . . . . . . . . . . . . . . . . . . . . . . . . . . . . . . . . . . . . . . . . . . . . . . . . . . . . . . . . . . . . . . . . . . . . . . . .59
Message d'incident de fonctionnement . . . . . . . . . . . . . . . . . . . . . . . . . . . . . . . . . . . . . . . . . . . . . . . . . . . . . . . . . . . . . . 60
Contact avec le revendeur agréé Canon local. . . . . . . . . . . . . . . . . . . . . . . . . . . . . . . . . . . . . . . . . . . . . . . . . . . . . . . . . . . . . . . . . . . . . . . . .60
Réglage du mode Fonctions limitées à partir de l'écran Message d'incident de fonctionnement . . . . . . . . . . . . . . . . . . . . . . .61
Emplacements des bourrages papier/d'agrafes . . . . . . . . . . . . . . . . . . . . . . . . . . . . . . . . . . . . . . . . . . . . . . . . . . . . . . . 62
Emplacements des bourrages papier . . . . . . . . . . . . . . . . . . . . . . . . . . . . . . . . . . . . . . . . . . . . . . . . . . . . . . . . . . . . . . . . . . . . . . . . . . . . . . . .62
Emplacements des bourrages d'agrafes. . . . . . . . . . . . . . . . . . . . . . . . . . . . . . . . . . . . . . . . . . . . . . . . . . . . . . . . . . . . . . . . . . . . . . . . . . . . . . 64
4 Annexe
Spécications . . . . . . . . . . . . . . . . . . . . . . . . . . . . . . . . . . . . . . . . . . . . . . . . . . . . . . . . . . . . . . . . . . . . . . . . . . . . . . . . . . . . . . . 66
Machine proprement dite . . . . . . . . . . . . . . . . . . . . . . . . . . . . . . . . . . . . . . . . . . . . . . . . . . . . . . . . . . . . . . . . . . . . . . . . . . . . . . . . . . . . . . . . . . .66
Lecteur Couleur-G1 . . . . . . . . . . . . . . . . . . . . . . . . . . . . . . . . . . . . . . . . . . . . . . . . . . . . . . . . . . . . . . . . . . . . . . . . . . . . . . . . . . . . . . . . . . . . . . . . .67
Lecteur Couleur-G2 . . . . . . . . . . . . . . . . . . . . . . . . . . . . . . . . . . . . . . . . . . . . . . . . . . . . . . . . . . . . . . . . . . . . . . . . . . . . . . . . . . . . . . . . . . . . . . . . .68
Socle double cassette-AF1. . . . . . . . . . . . . . . . . . . . . . . . . . . . . . . . . . . . . . . . . . . . . . . . . . . . . . . . . . . . . . . . . . . . . . . . . . . . . . . . . . . . . . . . . . .68
Module enveloppes-D1 . . . . . . . . . . . . . . . . . . . . . . . . . . . . . . . . . . . . . . . . . . . . . . . . . . . . . . . . . . . . . . . . . . . . . . . . . . . . . . . . . . . . . . . . . . . . .69
Module de Finition agrafage-M1. . . . . . . . . . . . . . . . . . . . . . . . . . . . . . . . . . . . . . . . . . . . . . . . . . . . . . . . . . . . . . . . . . . . . . . . . . . . . . . . . . . . . 69
Module de Finition P.A.C.-M1 . . . . . . . . . . . . . . . . . . . . . . . . . . . . . . . . . . . . . . . . . . . . . . . . . . . . . . . . . . . . . . . . . . . . . . . . . . . . . . . . . . . . . . . .70
Module de nition interne-F1 . . . . . . . . . . . . . . . . . . . . . . . . . . . . . . . . . . . . . . . . . . . . . . . . . . . . . . . . . . . . . . . . . . . . . . . . . . . . . . . . . . . . . . .72
Bac séparateur pour Module de Finition interne-A1 . . . . . . . . . . . . . . . . . . . . . . . . . . . . . . . . . . . . . . . . . . . . . . . . . . . . . . . . . . . . . . . . . .73
Bac Séparateur interne-F1 . . . . . . . . . . . . . . . . . . . . . . . . . . . . . . . . . . . . . . . . . . . . . . . . . . . . . . . . . . . . . . . . . . . . . . . . . . . . . . . . . . . . . . . . . . .73
Réceptacle-J1 . . . . . . . . . . . . . . . . . . . . . . . . . . . . . . . . . . . . . . . . . . . . . . . . . . . . . . . . . . . . . . . . . . . . . . . . . . . . . . . . . . . . . . . . . . . . . . . . . . . . . . .73
Lecteur de Carte-F1 . . . . . . . . . . . . . . . . . . . . . . . . . . . . . . . . . . . . . . . . . . . . . . . . . . . . . . . . . . . . . . . . . . . . . . . . . . . . . . . . . . . . . . . . . . . . . . . . . 74
Carte FAX (Super G3)-AH2 . . . . . . . . . . . . . . . . . . . . . . . . . . . . . . . . . . . . . . . . . . . . . . . . . . . . . . . . . . . . . . . . . . . . . . . . . . . . . . . . . . . . . . . . . . . 74
Fonction d'envoi . . . . . . . . . . . . . . . . . . . . . . . . . . . . . . . . . . . . . . . . . . . . . . . . . . . . . . . . . . . . . . . . . . . . . . . . . . . . . . . . . . . . . . . . . . . . . . . . . . . .75
Environnement réseau . . . . . . . . . . . . . . . . . . . . . . . . . . . . . . . . . . . . . . . . . . . . . . . . . . . . . . . . . . . . . . . . . . . . . . . . . . . . . . . . . . . . . . . . . . . . . .76
Réglages d'impression . . . . . . . . . . . . . . . . . . . . . . . . . . . . . . . . . . . . . . . . . . . . . . . . . . . . . . . . . . . . . . . . . . . . . . . . . . . . . . . . . . . . . . . . . . . . . .76
Questions fréquentes. . . . . . . . . . . . . . . . . . . . . . . . . . . . . . . . . . . . . . . . . . . . . . . . . . . . . . . . . . . . . . . . . . . . . . . . . . . . . . . . 77
4
Page 85

Préface
Merci d'avoir porté votre choix sur une machine Canon imageRUNNER
ADVANCE C2230i/C2225i/C2220i/C2220L. Nous vous invitons à lire
attentivement ce guide avant toute manipulation, an de tirer le meilleur
parti des avantages oerts par la machine.
Pour plus d'informations sur les réglages des fonctions décrites dans ce
guide, voir le Manuel électronique. Nous vous prions également de le
conserver avec soin pour pouvoir le consulter en cas de besoin.
■■ Présentation du guide . . . . . . . . . . . . . . . . . . . . . . . . . . . . . . . . . . . . . . . . . . . . . . . . . . . . . . . . . . . . . . . . . . . . . . . . . . . . . .6
Conventions adoptées . . . . . . . . . . . . . . . . . . . . . . . . . . . . . . . . . . . . . . . . . . . . . . . . . . . . . . . . . . . . . . . . . . . . . . . . . . . . . . . . . . . . . . . . . . . . . . . 6
Touches et boutons utilisés dans ce guide . . . . . . . . . . . . . . . . . . . . . . . . . . . . . . . . . . . . . . . . . . . . . . . . . . . . . . . . . . . . . . . . . . . . . . . . . . . . 6
Illustrations utilisées dans ce guide . . . . . . . . . . . . . . . . . . . . . . . . . . . . . . . . . . . . . . . . . . . . . . . . . . . . . . . . . . . . . . . . . . . . . . . . . . . . . . . . . . . 6
Abréviations utilisées dans ce guide . . . . . . . . . . . . . . . . . . . . . . . . . . . . . . . . . . . . . . . . . . . . . . . . . . . . . . . . . . . . . . . . . . . . . . . . . . . . . . . . . . 6
Marques . . . . . . . . . . . . . . . . . . . . . . . . . . . . . . . . . . . . . . . . . . . . . . . . . . . . . . . . . . . . . . . . . . . . . . . . . . . . . . . . . . . . . . . . . . . . . . . . . . . . . . . . . . . . . 7
■■ Présentation du Manuel électronique . . . . . . . . . . . . . . . . . . . . . . . . . . . . . . . . . . . . . . . . . . . . . . . . . . . . . . . . . . . . . . .8
Installation du Manuel électronique . . . . . . . . . . . . . . . . . . . . . . . . . . . . . . . . . . . . . . . . . . . . . . . . . . . . . . . . . . . . . . . . . . . . . . . . . . . . . . . . . . 8
Page d'accueil du Manuel électronique . . . . . . . . . . . . . . . . . . . . . . . . . . . . . . . . . . . . . . . . . . . . . . . . . . . . . . . . . . . . . . . . . . . . . . . . . . . . . . . 9
■■ Mentions légales . . . . . . . . . . . . . . . . . . . . . . . . . . . . . . . . . . . . . . . . . . . . . . . . . . . . . . . . . . . . . . . . . . . . . . . . . . . . . . . . . 10
Nom du produit. . . . . . . . . . . . . . . . . . . . . . . . . . . . . . . . . . . . . . . . . . . . . . . . . . . . . . . . . . . . . . . . . . . . . . . . . . . . . . . . . . . . . . . . . . . . . . . . . . . . .10
Exigences CEM de la directive européenne. . . . . . . . . . . . . . . . . . . . . . . . . . . . . . . . . . . . . . . . . . . . . . . . . . . . . . . . . . . . . . . . . . . . . . . . . . .10
Faisceau laser . . . . . . . . . . . . . . . . . . . . . . . . . . . . . . . . . . . . . . . . . . . . . . . . . . . . . . . . . . . . . . . . . . . . . . . . . . . . . . . . . . . . . . . . . . . . . . . . . . . . . . .10
Informations complémentaires . . . . . . . . . . . . . . . . . . . . . . . . . . . . . . . . . . . . . . . . . . . . . . . . . . . . . . . . . . . . . . . . . . . . . . . . . . . . . . . . . . . . . .10
Programme international ENERGY STAR. . . . . . . . . . . . . . . . . . . . . . . . . . . . . . . . . . . . . . . . . . . . . . . . . . . . . . . . . . . . . . . . . . . . . . . . . . . . . .10
Logo IPv6 Ready . . . . . . . . . . . . . . . . . . . . . . . . . . . . . . . . . . . . . . . . . . . . . . . . . . . . . . . . . . . . . . . . . . . . . . . . . . . . . . . . . . . . . . . . . . . . . . . . . . . .10
Directive DEEE . . . . . . . . . . . . . . . . . . . . . . . . . . . . . . . . . . . . . . . . . . . . . . . . . . . . . . . . . . . . . . . . . . . . . . . . . . . . . . . . . . . . . . . . . . . . . . . . . . . . . .11
Directive R & TTE . . . . . . . . . . . . . . . . . . . . . . . . . . . . . . . . . . . . . . . . . . . . . . . . . . . . . . . . . . . . . . . . . . . . . . . . . . . . . . . . . . . . . . . . . . . . . . . . . . . .11
Norme de sécurité des données (IEEE 2600) . . . . . . . . . . . . . . . . . . . . . . . . . . . . . . . . . . . . . . . . . . . . . . . . . . . . . . . . . . . . . . . . . . . . . . . . . .11
Copyright. . . . . . . . . . . . . . . . . . . . . . . . . . . . . . . . . . . . . . . . . . . . . . . . . . . . . . . . . . . . . . . . . . . . . . . . . . . . . . . . . . . . . . . . . . . . . . . . . . . . . . . . . . . 11
Logiciel de tierce partie . . . . . . . . . . . . . . . . . . . . . . . . . . . . . . . . . . . . . . . . . . . . . . . . . . . . . . . . . . . . . . . . . . . . . . . . . . . . . . . . . . . . . . . . . . . . .11
Logiciels soumis à d'autres conditions . . . . . . . . . . . . . . . . . . . . . . . . . . . . . . . . . . . . . . . . . . . . . . . . . . . . . . . . . . . . . . . . . . . . . . . . . . . . . . .12
Limites de responsabilité . . . . . . . . . . . . . . . . . . . . . . . . . . . . . . . . . . . . . . . . . . . . . . . . . . . . . . . . . . . . . . . . . . . . . . . . . . . . . . . . . . . . . . . . . . . .12
Restrictions à l'usage de votre produit et à l'utilisation des images . . . . . . . . . . . . . . . . . . . . . . . . . . . . . . . . . . . . . . . . . . . . . . . . . . . .12
Super G3. . . . . . . . . . . . . . . . . . . . . . . . . . . . . . . . . . . . . . . . . . . . . . . . . . . . . . . . . . . . . . . . . . . . . . . . . . . . . . . . . . . . . . . . . . . . . . . . . . . . . . . . . . . .12
■■ Consignes de sécurité importantes . . . . . . . . . . . . . . . . . . . . . . . . . . . . . . . . . . . . . . . . . . . . . . . . . . . . . . . . . . . . . . . . 13
Installation. . . . . . . . . . . . . . . . . . . . . . . . . . . . . . . . . . . . . . . . . . . . . . . . . . . . . . . . . . . . . . . . . . . . . . . . . . . . . . . . . . . . . . . . . . . . . . . . . . . . . . . . . .13
Alimentation électrique . . . . . . . . . . . . . . . . . . . . . . . . . . . . . . . . . . . . . . . . . . . . . . . . . . . . . . . . . . . . . . . . . . . . . . . . . . . . . . . . . . . . . . . . . . . . .13
Manipulation . . . . . . . . . . . . . . . . . . . . . . . . . . . . . . . . . . . . . . . . . . . . . . . . . . . . . . . . . . . . . . . . . . . . . . . . . . . . . . . . . . . . . . . . . . . . . . . . . . . . . . .14
Entretien et inspections . . . . . . . . . . . . . . . . . . . . . . . . . . . . . . . . . . . . . . . . . . . . . . . . . . . . . . . . . . . . . . . . . . . . . . . . . . . . . . . . . . . . . . . . . . . . .15
Consommables . . . . . . . . . . . . . . . . . . . . . . . . . . . . . . . . . . . . . . . . . . . . . . . . . . . . . . . . . . . . . . . . . . . . . . . . . . . . . . . . . . . . . . . . . . . . . . . . . . . . . 16
Autres points importants . . . . . . . . . . . . . . . . . . . . . . . . . . . . . . . . . . . . . . . . . . . . . . . . . . . . . . . . . . . . . . . . . . . . . . . . . . . . . . . . . . . . . . . . . . . .16
■■ Emplacement et manipulation . . . . . . . . . . . . . . . . . . . . . . . . . . . . . . . . . . . . . . . . . . . . . . . . . . . . . . . . . . . . . . . . . . . . 17
Précautions d'installation. . . . . . . . . . . . . . . . . . . . . . . . . . . . . . . . . . . . . . . . . . . . . . . . . . . . . . . . . . . . . . . . . . . . . . . . . . . . . . . . . . . . . . . . . . . .17
Eviter les conditions suivantes . . . . . . . . . . . . . . . . . . . . . . . . . . . . . . . . . . . . . . . . . . . . . . . . . . . . . . . . . . . . . . . . . . . . . . . . . . . . . . . . . . . . . 17
Le branchement électrique doit être sûr. . . . . . . . . . . . . . . . . . . . . . . . . . . . . . . . . . . . . . . . . . . . . . . . . . . . . . . . . . . . . . . . . . . . . . . . . . . .18
Déplacement de la machine . . . . . . . . . . . . . . . . . . . . . . . . . . . . . . . . . . . . . . . . . . . . . . . . . . . . . . . . . . . . . . . . . . . . . . . . . . . . . . . . . . . . . . .18
Prévoir une surface susante. . . . . . . . . . . . . . . . . . . . . . . . . . . . . . . . . . . . . . . . . . . . . . . . . . . . . . . . . . . . . . . . . . . . . . . . . . . . . . . . . . . . . .18
Précautions d'emploi. . . . . . . . . . . . . . . . . . . . . . . . . . . . . . . . . . . . . . . . . . . . . . . . . . . . . . . . . . . . . . . . . . . . . . . . . . . . . . . . . . . . . . . . . . . . . . . . 19
■■ Sauvegarde/exportation des données . . . . . . . . . . . . . . . . . . . . . . . . . . . . . . . . . . . . . . . . . . . . . . . . . . . . . . . . . . . . . 21
1
5
Page 86

Présentation du guide
Conventions adoptées
Des symboles sont utilisés dans ce guide pour attirer
l'attention sur les procédures, restrictions, précautions
d'emploi et consignes de sécurité à observer.
Avertissement concernant les opérations susceptibles
de représenter un danger de mort ou de provoquer des
blessures si les instructions ne sont pas respectées. Ces
recommandations sont à respecter rigoureusement.
Point important concernant les opérations susceptibles
de provoquer des blessures si les instructions ne sont
pas respectées. Ces recommandations sont à respecter
rigoureusement.
IMPORTANT
Point important concernant le fonctionnement. A lire
attentivement pour bien utiliser la machine et éviter de
l'endommager ou de causer des dommages matériels.
REMARQUE
Informations complémentaires concernant le
fonctionnement ou les procédures.
Il est conseillé de lire ces informations.
Point concernant une opération ne devant pas être
exécutée. A lire attentivement. Veiller à ne pas exécuter
les opérations décrites.
Touches et boutons utilisés dans ce guide
Les symboles et noms de touches/boutons suivants
illustrent la manière dont les touches de l'acheur tactile
sont désignées dans ce guide:
• Touches de l'acheur tactile : [Nom de clé]
Exemple: [Annuler]
[Fermer]
• Touches du panneau de commande : Icône de la touche
Exemple:
• Boutons sur l'écran de l'ordinateur : [Nom du bouton]
Exemple: [OK]
[Ajouter]
Illustrations utilisées dans ce guide
Les illustrations fournies dans ce manuel représentent
une machineimageRUNNER ADVANCE C2220L équipée
des équipements optionnels suivants:
• Lecteur Couleur-G1
• Module de nition interne-F1
• Bac séparateur pour Module de Finition interne-A1
• Socle double cassette-AF1
• Module Séparateur 3 sorties-C1
• Réceptacle-J1
Abréviations utilisées dans ce guide
Dans ce guide, les noms de produits et les noms de
modèles sont abrégés de la manière suivante :
• Système d'exploitation Microsoft Windows 2000:
Windows 2000
• Système d'exploitation Microsoft Windows Server
2003:
Windows Server 2003
• Système d'exploitation Microsoft Windows Server 2003
R2:
Windows Server 2003 R2
• Système d'exploitation Microsoft Windows XP:
Windows XP
• Système d'exploitation Microsoft Windows Vista:
Windows Vista
• Système d'exploitation Microsoft Windows Server
2008:
Windows Server 2008
• Système d'exploitation Microsoft Windows Server 2008
R2:
Windows Server 2008 R2
• Système d'exploitation Microsoft Windows 7:
Windows 7
• Système d'exploitation Microsoft Windows:
Windows
• Microsoft Internet Explorer:
Internet Explorer
• Microsoft Windows Internet Explorer:
Internet Explorer
• Novell NetWare:
NetWare
• Apple Macintosh:
Macintosh
• Apple Mac:
Mac
6 Préface 1
Page 87

Marques
MEAP et le logo MEAP sont des marques de Canon Inc.
Ce produit contient la technologie Universal Font Scaling
Technology ou UFST® sous licence de Monotype Imaging,
Inc. UFST® est une marque déposée de Monotype
Imaging, Inc. auprès du United States Patent and
Trademark Oce et elle peut être déposée dans certains
pays.
Apple, AppleTalk, EtherTalk, LocalTalk, Mac, Macintosh,
MacOS et Safari sont des marques de Apple Inc.,
déposées aux Etats-Unis et dans d'autres pays.
Microsoft, Windows, Windows Vista, Windows Server,
Internet Explorer, Excel et PowerPoint sont des marques
commerciales ou déposées de Microsoft Corporation aux
Etats-Unis et/ou dans d'autres pays.
Adobe, PostScript et le logo PostScript sont des marques
ou des marques déposées d'Adobe Systems Incorporated
aux Etats-Unis et dans d'autres pays.
Copyright © 2007 -08 Adobe Systems Incorporated. All
rights reserved.
Protected by U.S. Patents 5,737,599; 5,781,785; 5,819,301;
5,929,866; 5,943,063; 6,073,148; 6,515,763; 6,639,593;
6,754,382; 7,046,403; 7,213,269; 7,242,415; Patents
pending in the U.S. and other countries.
All instances of the name PostScript in the text are
references to the PostScript language as dened by
Adobe Systems Incorporated unless otherwise stated.
The name PostScript also is used as a product trademark
for Adobe Systems' implementation of the PostScript
language interpreter.
Except as otherwise stated, any reference to a "PostScript
printing device," "PostScript display device,"or similar
item refers to a printing device, display device or item
(respectively) that contains PostScript technology created
or licensed by Adobe Systems Incorporated and not to
devices or items that purport to be merely compatible
with the PostScript language.
Adobe, the Adobe logo, PostScript, the PostScript logo,
and PostScript 3 are either registered trademarks or
trademarks of Adobe Systems Incorporated in the United
States and/or other countries.
Linux is a registered trademark of Linus Torvalds.
Microsoft and Windows are either registered trademarks
or trademarks of Microsoft Corporation in the United
States and/or other countries.
Le logo PDF est une marque ou une marque déposée
d'Adobe Systems Incorporated aux Etats-Unis et dans
d'autres pays.
Copyright © 2008 Adobe Systems Incorporated. All rights
reserved.
Protected by U.S. Patents 6,185,684; 6,205,549; 7,213,269;
7,272,628; 7,278,168; Patents pending in the U.S. and
other countries.
All instances of the name PostScript in the text are
references to the PostScript language as dened by
Adobe Systems Incorporated unless otherwise stated.
The name PostScript also is used as a product trademark
for Adobe Systems' implementation of the PostScript
language interpreter.
Except as otherwise stated, any reference to a "PostScript
printing device," "PostScript display device,"or similar
item refers to a printing device, display device or item
(respectively) that contains PostScript technology created
or licensed by Adobe Systems Incorporated and not to
devices or items that purport to be merely compatible
with the PostScript language.
Adobe, the Adobe logo, PostScript, the PostScript Logo,
and PostScript 3 are either registered trademarks or
trademarks of Adobe Systems Incorporated in the United
States and/or other countries.
All other trademarks are the property of their respective
owners.
Les autres noms de produits ou de sociétés cités dans
le présent guide peuvent être des marques de leurs
propriétaires respectifs.
Français
All other trademarks are the property of their respective
owners.
7Préface1
Page 88

Présentation du Manuel électronique
Installation du Manuel électronique
■● Procéder comme suit pour installer le Manuel électronique.
■❏ Windows
1. Insérer le CD-ROM du Manuel électronique dans le lecteur de l'ordinateur.
2. Sélectionner la langue dans laquelle on souhaite consulter le Manuel électronique.
3. Sélectionner [Installer].
Si l'on sélectionne [Acher Manuels], le Manuel électronique s'ache sans être installé.
4. Lire le contrat de licence puis cliquer sur [Oui].
Le Manuel électronique est enregistré dans le dossier [Documents]
qui a été créée sur le Bureau ou sur le chier [index. html] pour acher le Manuel électronique.
* Le dossier porte un nom diérent suivant le système d'exploitation utilisé. Il se nomme [Documents] sous WindowsVista/7 et [Mes
documents] sous Windows2000/XP.
■❏ Macintosh
1. Insérer le CD-ROM du Manuel électronique dans le lecteur de l'ordinateur.
2. Faire glisser et déposer le dossier [fra_iRADV_C2230i_Manual] ou [fra_iRADV_C2220L_Manual] à l'emplacement
d'enregistrement.
3. Cliquer deux fois sur le chier [index.html] disponible dans le dossier [fra_iRADV_C2230i_Manual] ou [fra_iRADV_C2220L_
Manual]. Le Manuel électronique s'ache.
• Suivant le système d'exploitation utilisé, il se peut qu'un message relatif à la sécurité s'ache. Dans ce cas, autoriser
l'achage du contenu.
■● Si le Manuel électronique ne s'ache pas (CD-ROM)
La fonction de lecture automatique du CD-ROM peut être désactivée. Dans ce cas, exécuter la procédure ci-dessous.
■❏ Windows 7
1. Cliquer sur [Démarrer] dans la barre des tâches → cliquer sur [Ordinateur].
2. Cliquer deux fois sur l'icône du Manuel électronique.
3. Cliquer deux fois sur [Maninst.exe].
*
de l'ordinateur. Cliquer deux fois sur l'icône de raccourci
■❏ Windows XP/Vista
1. Cliquer sur [Démarrer] dans la barre des tâches → cliquer sur [Poste de travail].
2. Cliquer deux fois sur l'icône du Manuel électronique.
3. Cliquer deux fois sur [Maninst.exe].
■❏ Windows 2000
1. Cliquer deux fois sur [Poste de travail] sur le bureau.
2. Cliquer deux fois sur l'icône du Manuel électronique.
3. Cliquer deux fois sur [Maninst.exe].
8 Préface 1
Page 89

Page d'accueil du Manuel électronique
12
213 4 5
6
7
891011
Sélectionnez une fonction
Les instructions de chaque fonction et les opérations sont
décrites.
[Haut]
La page d'accueil du Manuel électronique s'ache.
[Plan du site]
Le plan de site du Manuel électronique s'ache.
[Aide]
Le mode d'utilisation du Manuel électronique s'ache.
[Glossaire]
Le glossaire s'ache.
Avant toute chose…
Cette section présente les informations nécessaires pour
utiliser la machine, et les informations sur les produits et
logiciels en option.
Sélectionnez une utilisation
Cette section comprend l'introduction aux fonctions de la
machine pour chaque objectif.
[Adresses]
Les renseignements sur la machine sont achés.
[Marques]
Les marques sont achées.
[Copyright]
Les informations sur les droits d'auteur sont achées.
[Renonciation]
Les mentions légales sont achées.
Saisir mot(s) clé(s) ici
Saisir un mot clé dans la boîte de dialogue de recherche
et appuyer sur
recherche s'ache.
. La page des résultats de la
■● Lancement d'une recherche
Saisir un mot-clé dans le champ de saisie situé dans la partie supérieure de la "Page d'accueil" ou dans la zone de recherche
de la "Page de rubrique", puis cliquer sur
pour acher les résultats de recherche.
■● Impression d'une page de rubrique
• Sur une page de rubrique, on peut imprimer par catégorie ou par rubrique.
• Il se peut que les images et les couleurs de fond des rubriques ne s'impriment pas, suivant les paramètres du navigateur
Web.
Français
9Préface1
Page 90

Mentions légales
Nom du produit
Conformément aux règlements en matière de sécurité,
le nom du produit doit être déposé. Dans certaines des
zones de commercialisation du produit, il se peut que
le nom déposé soit celui indiqué entre parenthèses cidessous.
• imageRUNNER ADVANCE C2230i/C2225i/C2220i/
C2220L (F163100)
Exigences CEM de la directive européenne
Cet équipement est conforme aux principales exigences
CEM de la directive européenne. Ce produit est conforme
aux spécications CEM de la directive européenne
pour une alimentation secteur nominale de 230 V,
50 Hz, avec une tension nominale de 220V – 240V,
50/60Hz. L'utilisation de câble blindé est nécessaire pour
satisfaire aux exigences techniques CEM de la directive
européenne.
Faisceau laser
Canon certie que ce produit est un produit laser
de Classe 1, d'après les normes IEC 60825-1:2007 et
EN 60825-1:2007, ce qui signie qu'il n'émet pas de
rayonnements laser dangereux.
Le système optique étant conçu de sorte que les
rayonnements émis demeurent captifs des capots de
protection et des portes externes, à aucun moment du
cycle de fonctionnement le faisceau laser ne risque de
rayonner hors de la machine.
Ne pas retirer les capots de protection et les portes
externes, sauf indication expresse du guide d'utilisation
de la machine.
Informations complémentaires
Lors de l'entretien ou du réglage du système optique du
produit, veiller à ne placer aucun objet brillant (tournevis,
etc.) sur le trajet du faisceau laser. En outre, les objets
personnels, tels que montres, alliances, etc., doivent être
enlevés avant de travailler avec le produit.
Ils sont susceptibles de rééchir le faisceau qui, visible
ou invisible, peut occasionner des lésions oculaires
permanentes.
L'étiquette ci-dessous est apposée sur le capot droit de la
cassette et sur le cache de l'orice d'approvisionnement
en toner.
L'utilisation de commandes ou réglages, ou l'exécution
de procédures autres que celles spéciées dans les
guides de la machine peuvent être cause d'exposition
à un rayonnement dangereux.
Programme international ENERGY STAR
En tant que partenaire ENERGY
STAR®, Canon Inc. a déterminé
que cette machine satisfait
le programme international
ENERGY STAR en matière de
rendement énergétique.
Le programme international
ENERGY STAR pour
l'équipement bureautique
est destiné à promouvoir les
économies d'énergie pour
les ordinateurs et autres
équipements de bureau. Il
encourage le développement
et la diusion de produits
équipés de fonctions réduisant
la consommation d'énergie
de manière ecace. Il s'agit
d'un système ouvert auquel
les entreprises peuvent
participer de leur plein gré.
Les produits concernés sont
les équipements de bureau,
tels que les ordinateurs, les
écrans, les imprimantes, les
télécopieurs et les copieurs.
Les normes et les logos sont les
mêmes pour tous les pays.
Logo IPv6 Ready
La pile de protocoles
disponible sur cette machine
a obtenu le logo IPv6 Readyphase 2 dans le cadre du
programme établi par l'IPv6
Forum.
D'après les normes IEC 60825-1:2007 et EN 60825-1:2007,
ce produit correspond aux catégories suivantes :
CLASS 1 LASER PRODUCT
LASER KLASSE 1
APPAREIL À LASER DE CLASSE 1
APPARECCHIO LASER DI CLASSE 1
PRODUCTO LÁSER DE CLASE 1
APARELHO A LASER DE CLASSE 1
LUOKAN 1 LASER-TUOTE
LASERPRODUKT KLASS 1
10 Préface 1
Page 91

Directive DEEE
Union européenne (et Espace économique européen)
uniquement.
Ces symboles indiquent que ce produit ne doit pas être
mis au rebut avec les ordures ménagères, comme le
spécient la Directive européenne DEEE (2002/96/EC),
la Directive européenne relative à l'élimination des piles
et des accumulateurs usagés (2006/66/EC) et les lois en
vigueur dans votre pays, appliquant ces directives.
Si un symbole de toxicité chimique est imprimé sous le
symbole illustré ci-dessus conformément à la Directive
relative aux piles et aux accumulateurs, il indique la
présence d'un métal lourd (Hg = mercure, Cd = cadmium,
Pb = plomb) dans la pile ou l'accumulateur à une
concentration supérieure au seuil applicable spécié par
la Directive.
Ce produit doit être coné à un point de collecte désigné,
par exemple, chaque fois que vous achetez un produit
similaire neuf, ou à un point de collecte agréé pour le
recyclage équipements électriques ou électroniques (EEE)
et des piles et accumulateurs.
Le traitement inapproprié de ce type de déchet risque
d'avoir des répercussions sur l'environnement et la
santé humaine, du fait de la présence de substances
potentiellement dangereuses généralement associées
aux équipements électriques ou électroniques.
Votre coopération envers la mise au rebut correcte de ce
produit contribuera à l'utilisation ecace des ressources
naturelles.
Pour de plus amples informations sur le recyclage de
ce produit, veuillez contacter vos services municipaux,
votre éco-organisme ou les autorités locales. Vous pouvez
également vous rendre sur le site www.canon-europe.
com/environment.
(Espace économique européen : Norvège, Islande et
Liechtenstein)
Directive R & TTE
Cet équipement (F163100) est
conforme aux exigences de la
directive européenne 1999/5/CE
et peut être utilisé dans l'Union
européenne. (Uniquement pour les
modèles dotés d'une fonctionnalité
de télécopie.)
(Europe uniquement)
Canon Inc./Canon Europa N. V.
Norme de sécurité des données (IEEE 2600)
La machine est conforme à la norme IEEE Std 2600™ 2008 (appelée "IEEE 2600" dans le présent document),
norme générale de sécurité des données pour les
périphériques et imprimantes multifonctions, et est en
mesure de répondre aux exigencies de sécurité dé nies
par cette norme.*
Pour savoir comment la machine répond aux exigences
de sécurité dé nies par la norme IEEE 2600, voir le
Manuel électronique > Sécurité > Norme de sécurité IEEE
2600.
* La validation IEEE 2600,1 CC n'a pas été obtenue pour
cette machine.
Copyright
Copyright 2012 Canon Inc. Tous droits réservés.
Aucune partie de ce document ne peut être reproduite
ou transmise sous quelque forme et par quelque moyen
que ce soit, électronique ou mécanique, notamment
par photocopie ou enregistrement, ou par tout système
de stockage ou d'extraction d'informations, sans le
consentement écrit préalable de la société Canon Inc.
Ce produit comprend des logiciels et/ou des modules
logiciels dont la licence appartient à Canon Inc. ou lui est
cédée par un tiers. L'utilisation et la distribution de ces
logiciels et/ou modules sont soumises aux conditions (a)
à (c) indiquées ci-dessous.
(a)
UFST: Copyright © 1989 - 1996, 1997, 2003, 2004, 2008, all
rights reserved, by Monotype Imaging Inc.
(b)
Copyright © Unpublished Work of Novell, Inc. All Rights
Reserved.
(c)
Portions of this software are copyright © 2007 The
FreeType Project (www.freetype.org). All rights reserved.
Logiciel de tierce partie
Ce produit comprend des modules logiciels de tierces
parties.
L'utilisation et la distribution de ces modules logiciels,
toutes les mises à jour des modules logiciels incluses
(globalement, le « LOGICIEL »), sont soumises aux
conditions (1) à (9) ci-dessous.
(1) Vous acceptez de vous conformer aux lois sur
le contrôle des exportations, restrictions ou
réglementations en vigueur dans les pays impliqués
dans le cas où ce produit incluant le LOGICIEL
est expédié, transféré ou exporté dans un pays
quelconque.
(2) Les titulaires des droits sur le LOGICIEL conservent
à tous égards le titre, la propriété et les droits de
propriété intellectuelle relatifs au LOGICIEL. Sauf
lorsque expressément stipulé dans ce document,
aucune licence ou droit explicite ou implicite, ne
vous est transmis ou accordé par la présente par
les titulaires des droits sur le LOGICIEL pour toute
propriété intellectuelle des titulaires des droits sur le
LOGICIEL.
(3) Vous pouvez utiliser le LOGICIEL exclusivement avec
le produit Canon que vous avez acheté
(le « PRODUIT »).
(4) Vous ne pouvez attribuer, concéder en sous-licence,
commercialiser, distribuer ou transférer le LOGICIEL
à un tiers, sans le consentement écrit préalable des
titulaires des droits sur le LOGICIEL.
(5) Nonobstant ce qui précède, vous pouvez transférer
le LOGICIEL uniquement lorsque (a) vous attribuez
tous vos droits au PRODUIT et tous les droits et
obligations sous les conditions au cessionnaire et (b)
le dit cessionnaire accepte d'être lié par toutes ces
conditions.
(6) Vous ne pouvez décompiler, désosser, désassembler
ou autrement restituer le code du LOGICIEL sous une
forme lisible par un humain.
(7) Vous ne pouvez modier, adapter, traduire, louer,
louer à bail ou prêter le LOGICIEL ou créer des travaux
dérivés à partir de celui-ci.
(8) Vous n'êtes pas autorisé à retirer le LOGICIEL du
PRODUIT ou à en faire des copies séparées.
(9) Vous ne recevez pas en licence la portion lisible par un
humain (le code source) du LOGICIEL.
Français
11Préface1
Page 92

Nonobstant les points (1) à (9) énoncés ci-dessus, si les
autres conditions s'appliquent aux modules logiciels de
tierces parties, ces modules logiciels sont soumis à ces
autres conditions.
Logiciels soumis à d'autres conditions
Se reporter au Manuel électronique disponible sur le CDROM fourni avec ce produit pour obtenir des informations
complémentaires et connaître les conditions de licence
applicables.
Pour obtenir le code source de certains logiciels associés à
ce produit, sous leur licence respective, envoyer un e-mail
en anglais ou en japonais à l'adresse suivante:
<oipossg@canon.co.jp>.
Se reporter au Manuel électronique disponible sur le CDROM fourni avec ce produit pour obtenir des informations
complémentaires et connaître les conditions de licence
applicables.
Limites de responsabilité
Les informations contenues dans ce document sont
susceptibles de modication sans préavis.
A L'EXCEPTION DES GARANTIES STIPULEES ICI, CANON
INC. EXCLUT TOUTE GARANTIE, EXPLICITE OU IMPLICITE,
RELATIVE AU PRESENT MATERIEL, NOTAMMENT CELLES
AYANT TRAIT A L'APTITUDE A ETRE COMMERCIALISE,
A LA QUALITE MARCHANDE, A L'ADAPTATION A UN
USAGE PARTICULIER ET A L'ABSENCE DE CONTREFACON.
CANON INC. NE POURRA EN AUCUN CAS ETRE TENU
RESPONSABLE DES DOMMAGES DIRECTS, INDIRECTS OU
ACCESSOIRES DE QUELQUE NATURE QUE CE SOIT, NI DES
PERTES OU DEPENSES RESULTANT DE L'UTILISATION DU
PRESENT MATERIEL.
Super G3
L'expression SuperG3 qualie
la nouvelle génération de
télécopieurs utilisant des
modems 33,6Kbps* conformes
à la norme UIT-TV.34. Les
télécopieurs SuperG3 à
grande vitesse permettent
d'obtenir des durées d'émission
d'environ troissecondes* par
page, ce qui se traduit par
une réduction des frais de
téléphone.
* Temps de transmission
d'environ troissecondes
par page avec un modem
33,6Kbps, basé sur la
mire n°1 du CCITT/UIT-T
(JBIG, mode standard).
Le réseau téléphonique
public commuté (RTPC)
autorise actuellement des
vitesses de transmission
de 28,8Kbps ou moins,
selon l'état des lignes
téléphoniques.
REMARQUE
La fonction fax n'est disponible que si la carte FAX est
installée.
Restrictions à l'usage de votre produit et à l'utilisation des images
L'utilisation de votre produit pour numériser, imprimer
ou reproduire de quelque manière que ce soit certains
documents, ainsi que l'utilisation des images numérisées,
imprimées ou reproduites par votre produit, peuvent
être interdites par la loi et peuvent engager votre
responsabilité civile et/ou pénale. Vous trouverez cidessous une liste non exhaustive des documents dont la
reproduction peut être interdite. Cette liste a uniquement
vocation à vous servir de guide. Si vous avez un doute
sur la légalité de l'utilisation de votre produit pour
numériser, imprimer ou reproduire de quelque manière
que ce soit un document particulier et/ou sur la légalité
de l'utilisation des images ainsi numérisées, imprimées
ou reproduites, nous vous recommandons de prendre
préalablement les conseils juridiques nécessaires.
• Billets de banque
• Chèques de voyage
• Mandats, ordres de paiement
• Titres de restauration
• Bons de caisse et certicats de dépôt
• Passeports, pièces d'identité et permis de conduire
• Timbres postaux (oblitérés ou non)
• Documents d'immigration
• Badges d'identication ou insignes
• Timbres scaux (oblitérés ou non)
• Papiers militaires
• Certicats de valeurs mobilières (actions, obligations, ,,.)
et de parts sociales
• Eets de commerce, lettres de change, billets à ordre et
chèques
• Certicats d'action
• Titres de propriété
• Dans certains cas, documents faisant l'objet d'un droit
de propriété intellectuelle sans l'autorisation de leur
titulaire.
12 Préface 1
Page 93

Consignes de sécurité importantes
Lire ces consignes de sécurité attentivement avant
toute manipulation de la machine. Elles sont destinées
à éviter les blessures pour l'utilisateur ou toute autre
personne et les dommages matériels. De plus, étant
donné que cela peut provoquer des accidents ou des
blessures, n'eectuer aucune opération qui ne soit pas
explicitement spéciée dans le guide. Une mauvaise
utilisation de cette machine risque de provoquer des
blessures et/ou des dommages importants, nécessitant
des réparations non couvertes par la garantie limitée.
Installation
• Ne jamais bloquer les ouvertures d'aération de la
machine. Elles permettent de ventiler correctement
ses composants internes. Si elles sont obstruées, il y
a risque de surchaue. Ne jamais placer la machine
sur une surface souple, telle qu'un sofa ou un tapis.
• Ne pas placer la machine à un endroit présentant
l'une des caractéristiques suivantes :
- emplacement humide ou poussiéreux ;
- proximité d'eau ou d'un robinet ;
- exposition directe à la lumière du soleil ;
- température élevée ;
- proximité de ammes à l'air libre.
• Ne pas placer la machine à proximité d'alcool, de
diluant ou de toute autre substance inammable.
Un contact entre de tels produits et les éléments
électriques de la machine pourrait provoquer un
incendie ou une électrocution.
• Ne pas placer sur la machine les objets ci-dessous.
En eet, s'ils venaient au contact d'un élément
haute tension à l'intérieur de celle-ci, ils risqueraient
de provoquer un incendie ou une électrocution. Si
l'un de ces objets tombe dans la machine ou si un
liquide est renversé dessus, mettre immédiatement
l'interrupteur principal sur Arrêt et débrancher la
che d'alimentation de la prise secteur. Contacter
ensuite le revendeur agréé Canon local.
- Collier ou autre objet métallique ;
- Tasse, vase, pot de eur et autre récipient
contenant de l'eau ou un liquide.
• Ne pas placer la machine sur un support instable
(estrade par exemple), sur une surface inclinée ou
à un endroit soumis à de fortes vibrations, car elle
pourrait tomber ou se renverser, avec un risque de
blessure pour l'utilisateur.
• Après l'installation, ne pas retirer les cales de
maintien de la machine car celle-ci risquerait
alors de se renverser, avec risque de blessure pour
l'utilisateur.
Alimentation électrique
• Ne pas endommager ni modier le cordon
électrique et ne pas poser dessus d'objet lourd.
Ne pas non plus tirer dessus, ni lui imposer une
courbure excessive, car cela provoquerait un
dommage électrique suivi d'un incendie ou d'une
électrocution.
• Eloigner le cordon de toute source de chaleur,
car sa gaine risquerait de fondre, ce qui pourrait
provoquer un incendie ou une électrocution.
• Ne pas brancher ni débrancher le cordon
d'alimentation avec des mains humides car cela
pourrait provoquer une électrocution.
• Il y a danger d'incendie ou d'électrocution si l'on
branche la machine sur une prise multiple ou sur
une rallonge avec prise multiple.
• Ne pas replier ni attacher le cordon électrique en
position repliée car cela pourrait provoquer un
incendie ou une électrocution.
• Il y a danger d'incendie ou d'électrocution si la che
du cordon électrique n'est pas introduite à fond
dans la prise secteur.
• Ne pas utiliser de cordon électrique autre que celui
fourni avec la machine car cela pourrait provoquer
un incendie ou une électrocution.
• En règle générale, ne pas utiliser de rallonge.
L'emploi d'une rallonge risque, en eet, de
provoquer un incendie ou une électrocution.
• Ne pas utiliser d'alimentation autre que celle
spéciée car il y aurait sinon danger d'incendie ou
d'électrocution.
• Toujours maintenir la che d'alimentation en
débranchant le cordon. En eet, en tirant sur le
cordon, on risque de dénuder ou de rompre les ls,
ou de provoquer d'autres dégâts au cordon. Or, un
cordon d'alimentation endommagé peut provoquer
des fuites de courant entraînant un incendie ou une
électrocution.
Français
13Préface1
Page 94

IMPORTANT
Laisser un dégagement susant autour de la prise
secteur an qu'il soit facile de débrancher la machine.
Si la prise est obstruée par des objets, elle ne sera pas
accessible en cas d'urgence.
Manipulation
• Ne jamais essayer de démonter ni de modier la
machine. Celle-ci contient des éléments haute
tension et d'autres parties dont la température
est extrêmement élevée ; il y aurait alors danger
d'incendie ou d'électrocution.
• En cas de bruit suspect ou de dégagement de
fumée, de chaleur ou d'odeurs inhabituelles, mettre
immédiatement l'interrupteur principal sur Arrêt et
débrancher la machine de la prise secteur. Contacter
ensuite le revendeur agréé Canon local. L'utilisation
prolongée de la machine dans cet état pourrait
provoquer un incendie ou une électrocution.
• Ne pas utiliser de produit aérosol au contenu
inammable à proximité de la machine. Si le gaz
qu'il contient venait au contact de l'un de ses
composants électriques internes, il y aurait danger
d'incendie ou d'électrocution.
• Pour éviter d'endommager le cordon électrique
et de provoquer un incendie, toujours mettre
l'interrupteur principal sur Arrêt et débrancher le
câble d'interface avant de déplacer la machine.
On risquerait sinon d'endommager le cordon
ou le câble et de provoquer un incendie ou une
électrocution.
• S'assurer que la che d'alimentation électrique est
bien enchée dans la prise de courant si la machine
a été déplacée. Ne pas utiliser la machine lorsque la
connexion est mauvaise, cela pourrait occasionner
un incendie.
• Ne pas laisser tomber de trombone, d'agrafe ou
autre objet métallique dans la machine. Ne pas
non plus renverser à l'intérieur de liquide ou de
substance inammable (alcool, benzine, diluant,
etc.). En eet, s'ils venaient au contact d'un élément
haute tension à l'intérieur de celle-ci, ils risqueraient
de provoquer un incendie ou une électrocution. Si
l'un de ces objets tombe dans la machine ou si un
liquide est renversé dessus, mettre immédiatement
l'interrupteur principal sur Arrêt et débrancher la
che d'alimentation de la prise secteur. Contacter
ensuite le revendeur agréé Canon local.
• Ne pas utiliser ce produit à d'autres ns qu'une
machine multitâche numérique couleur.
• Ne pas placer d'objets lourds sur la machine, car ils
risquent de se renverser ou de tomber, avec risque
de blessure pour l'utilisateur.
• Fermer avec précaution le chargeur/cache
d'exposition pour ne pas se pincer les mains et se
blesser.
• Ne pas appuyer trop fort sur le chargeur/cache
d'exposition lors de la copie de livres épais sur la
vitre d'exposition pour ne pas l'endommager ou se
blesser.
• Ne pas toucher le module de nition lorsque la
machine imprime, an d'éviter tout risque de
blessure.
• Les papiers qui viennent de sortir de la machine
peuvent être très chauds. Retirer le papier du
réceptacle de sortie ou aligner le papier avec
prudence. Toucher le papier juste après sa
sortie risque d'occasionner des brûlures à basse
température.
• Ne pas approcher les mains, les cheveux, les
vêtements, etc. de la sortie et des rouleaux
du chargeur. Même lorsqu'elle n'est pas en
fonctionnement, les mains, les cheveux et les
vêtements peuvent être agrippés par la machine en
cas de démarrage soudain, provoquant de possibles
blessures et dommages.
• Si la machine est équipée d'un module de nition,
ne pas placer la main sur la partie du réceptacle où
s'eectue l'agrafage (près des rouleaux), sous peine
de se blesser.
Module de Finition
agrafage-M1/Module de
Finition P.A.C.-M1
Module de nition
interne-F1
• Lorsque la cassette est retirée, veiller à ne pas
introduire la main dans la machine pour éviter de se
blesser.
14 Préface 1
Page 95

• Le rayonnement laser peut être dangereux. Le
système optique étant conçu de sorte que les
rayonnements émis demeurent captifs des capots
de protection et des portes externes, à aucun
moment du cycle de fonctionnement le faisceau
laser ne risque de rayonner hors de la machine.
Lire les remarques et instructions qui suivent
concernant la sécurité.
- Ne jamais ouvrir un capot si cette ouverture n'est
pas demandée dans les guides de cette machine.
- Ne pas retirer l'étiquette d'avertissement ci-
dessous qui est apposée sur la machine. Si
l'étiquette a été enlevée, contacter le revendeur
Canon local agréé.
- Si le laser n'était plus conné à l'intérieur de
la machine, il pourrait provoquer des lésions
oculaires graves en cas d'exposition.
- L'utilisation de commandes ou réglages, ou
l'exécution de procédures autres que celles
spéciées dans les guides de la machine peuvent
être cause d'exposition à un rayonnement
dangereux.
IMPORTANT
Appuyer sur par mesure de sécurité lorsque la
machine doit rester inutilisée pendant une période
prolongée, la nuit par exemple. De même, toujours
mettre l'interrupteur principal sur Arrêt et débrancher la
che secteur si on prévoit de ne pas l'utiliser pendant une
durée plus longue (en période de fêtes par exemple).
Entretien et inspections
• Lors du nettoyage de la machine, commencer
par mettre l'interrupteur principal sur Arrêt, puis
débrancher la machine de la prise secteur. Cette
précaution permet d'écarter tout risque d'incendie
ou d'électrocution.
• Débrancher la machine régulièrement, puis
nettoyer la zone qui entoure la base des broches
métalliques de la prise, ainsi que la prise elle-même
à l'aide d'un chion sec. Il s'agit de retirer toute
poussière et saleté. Si la machine demeure branchée
trop longtemps dans un local humide, poussiéreux
ou enfumé, la poussière risque de s'accumuler
autour de la prise et de prendre l'humidité. Cela
peut entraîner un court-circuit et déclencher un
incendie.
• Pour nettoyer la machine, prendre un chion imbibé
d'un nettoyant doux mélangé à de l'eau. Ne pas
utiliser d'alcool, de benzène, de diluant ou d'autres
produits inammables. Vérier l'inammabilité
du nettoyant avant utilisation. Un contact entre
de tels produits et les parties haute tension de la
machine pourrait provoquer un incendie ou une
électrocution.
• De hautes tensions sont présentes dans certaines
zones à l'intérieur de la machine. Lors de
l'élimination d'un bourrage à l'intérieur de la
machine ou de toute autre inspection interne,
veiller à ce qu'aucun objet métallique (collier,
bracelet, etc.) ne soit en contact avec elle pour éviter
les risques de brûlure ou d'électrocution.
• Ne pas brûler ni jeter les cartouches de toner au
feu car le toner restant pourrait s'enammer et
occasionner des brûlures ou un incendie.
• S'assurer que la che d'alimentation électrique
est bien enchée dans la prise de courant après le
nettoyage de la machine. Ne pas utiliser la machine
lorsque la connexion est mauvaise, cela pourrait
occasionner un incendie.
• Vérier le cordon d'alimentation et la che
d'alimentation électrique régulièrement. Dans les
conditions suivantes, contacter le revendeur agréé
Canon local, étant donné que ces situations peuvent
occasionner un incendie :
- Il y a des marques de brûlure sur la che
d'alimentation électrique.
- La che d'alimentation électrique est déformée ou
cassée.
- L'alimentation électrique se coupe et se rétablit
lorsque le cordon d'alimentation est courbé.
- Il y a des coupures, ssures ou dentelures sur le
cordon d'alimentation.
- Une partie du cordon d'alimentation devient très
chaude.
• Vérier le cordon d'alimentation et la che
d'alimentation électrique régulièrement pour
s'assurer qu'ils ne sont pas manipulés de la manière
suivante, car cela pourrait provoquer un incendie ou
une électrocution :
- La partie de branchement de la che
d'alimentation électrique est mal xée.
- Une tension est appliquée au cordon
d'alimentation par un objet lourd ou en le xant à
l'aide d'agrafes.
- La che d'alimentation électrique est mal xée.
- Le cordon d'alimentation est xé dans un faisceau.
- Le cordon d'alimentation s'avance sur une allée.
- Le cordon d'alimentation se trouve devant un
radiateur.
Français
15Préface1
Page 96

• L'ensemble de xation et les pièces environnantes
dans la machine peuvent devenir très chauds en
cours d'utilisation. En retirant le papier bloqué
ou en inspectant l'intérieur de la machine, ne
pas toucher l'ensemble de xation ni les pièces
environnantes pour éviter toute brûlure ou
électrocution.
• Lors de l'élimination d'un bourrage à l'intérieur de
la machine ou de toute autre inspection interne,
ne pas s'exposer à la chaleur émise par l'ensemble
de xation et ses alentours pendant une durée
prolongée, car cela pourrait occasionner des
brûlures à basse température, même si on ne les
touche pas directement.
• Si un bourrage papier se produit, suivre les
indications achées sur l'acheur tactile pour
retirer le papier bloqué à l'intérieur de la machine.
Ne pas introduire les doigts dans la partie qui n'est
pas indiquée sur l'acheur tactile, car cela pourrait
entraîner des blessures ou des brûlures.
• Lors de l'élimination d'un bourrage ou du
remplacement de la cartouche de toner, veiller à ne
pas se salir les mains ou les vêtements avec le toner.
En cas de contact, rincer immédiatement à l'eau
froide. Un lavage à l'eau chaude aurait pour eet de
xer le toner et de créer une tache indélébile.
• Retirer délicatement le papier bloqué à l'intérieur
de la machine pour éviter que le toner se disperse
et entre en contact avec les yeux ou la bouche.
En cas de contact avec les yeux ou la bouche, les
rincer immédiatement à l'eau froide et consulter un
médecin.
• Prendre garde à ne pas se couper avec le bord des
feuilles de papier ou des originaux bloqués lorsque
l'on supprime un bourrage. Si le papier reste
bloqué, contacter le revendeur Canon local agréé.
• Lors du retrait d'une cartouche de toner, procéder
avec précaution an d'éviter que de le toner ne
soit projeté et ne pénètre dans les yeux ou dans la
bouche. Si cela se produit, rincer immédiatement à
l'eau froide et consulter un médecin.
• Ne pas tenter de démonter la cartouche de toner,
sous peine de disperser le toner qui pourrait alors
pénétrer dans les yeux ou la bouche. Si cela se
produit, rincer immédiatement à l'eau froide et
consulter un médecin.
• En cas de fuite de toner de la cartouche, veiller
à éviter toute ingestion ou tout contact avec la
peau. En cas de contact avec la peau, laver avec du
savon et de l'eau. Si la peau reste irritée après le
lavage ou en cas d'ingestion, consulter un médecin
immédiatement.
Consommables
• Ne pas brûler ni jeter les cartouches de toner au
feu car le toner restant pourrait s'enammer et
occasionner des brûlures ou un incendie.
• Ne pas stocker les cartouches de toner ou le papier
à des emplacements exposés à des ammes à
l'air libre, car ils pourraient alors s'enammer et
occasionner des brûlures ou un incendie.
• En cas de renversement accidentel de toner,
rassembler avec précaution les particules de toner
ou les enlever à l'aide d'un chion doux humide
de façon à en éviter l'inhalation. Ne jamais utiliser
un aspirateur non équipé d'un dispositif de
protection contre les explosions de poussières pour
nettoyer le toner renversé. Cela peut entraîner un
dysfonctionnement de l'aspirateur ou une explosion
de poussières due à une décharge électrostatique.
• Conserver le toner et les autres consommables hors
de portée des enfants. En cas d'ingestion, consulter
immédiatement un médecin.
• Ne pas tenter de démonter la cartouche de toner,
sous peine de disperser le toner qui pourrait alors
pénétrer dans les yeux ou la bouche.
• Si cela se produit, rincer immédiatement à l'eau
froide et consulter un médecin.
• En cas de fuite de toner de la cartouche, veiller
à éviter toute ingestion ou tout contact avec la
peau. En cas de contact avec la peau, laver avec du
savon et de l'eau. Si la peau reste irritée après le
lavage ou en cas d'ingestion, consulter un médecin
immédiatement.
• Les cartouches de toner usagées doivent être
placées dans un sac an d'éviter que le toner restant
ne se disperse, et être conservées à l'abri des
ammes.
Autres points importants
A l'attention des porteurs de stimulateur cardiaque :
Ce produit émet un ux magnétique de faible
intensité. Si l'on constate une anomalie, il faut s'en
éloigner et consulter son médecin.
16 Préface 1
Page 97

Emplacement et manipulation
Cette section décrit les précautions à prendre pour
l'emplacement et la manipulation. Il est conseillé de lire
cette section avant d'utiliser la machine.
Précautions d'installation
■■Eviter les conditions suivantes
• Sites soumis à des températures et à une
humidité extrêmement élevées ou basses.
Proximité immédiate d'une source de chaleur
(chaudière, radiateur, etc.), d'une source d'humidité
(robinet, chaue-eau à gaz, humidicateur), ou dans
un froid excessif (local non chaué en hiver, contre un
climatiseur, etc.).
• Exposition directe au soleil
Si c'est inévitable, prévoir un rideau. Vérier que les
rideaux ne bloquent pas les ouvertures et les grilles
d'aération de la machine et n'interfèrent pas avec le
cordon ou l'alimentation électrique.
• Poussière
• Vapeurs d'ammoniac
• Proximité de substances inammables (alcool,
diluants ou autres solvants)
• Emplacement soumis à de fortes vibrations
Sol instable.
Français
• Brusques variations de température
En cas d'élévation subite de la température d'un local
froid, des gouttes d'eau se forment dans la machine
(condensation), ce qui peut avoir des répercussions
sur la qualité des copies, la lecture d'un original ou
l'impression des images sur les copies.
• Pièces mal ventilées
En cours de fonctionnement, la machine génère de
l'ozone et d'autres substances en faible quantité. Bien
que la sensibilité à l'ozone et aux autres substances
varie, la quantité dégagée n'est pas nocive. L'ozone
et les autres substances peuvent gêner en cas
d'utilisation prolongée dans une pièce peu aérée ou
en cas de réalisation d'un grand nombre de copies. Il
est recommandé d'ouvrir régulièrement les portes et
les fenêtres du local pour travailler dans des conditions
plus agréables.
• Proximité immédiate d'un ordinateur, d'un
appareil de précision
Les interférences ou les vibrations provenant de la
machine peuvent nuire au bon fonctionnement de ces
appareils.
• A côté d'un récepteur d'ondes hertziennes
(télévision, radio, équipements électroniques
similaires)
La machine risque de provoquer des interférences.
Prévoir une bonne distance et un branchement sur
circuit électrique séparé.
17Préface1
Page 98

• Contacter un revendeur Canon agréé si la
communication n'est pas disponible.
Selon votre langue ou la connexion téléphonique que
vous utilisez, vous risquez de ne pas pouvoir réaliser la
communication de données. Dans ce cas, contacter le
revendeur Canon local agréé.
• Ne pas retirer les cales de maintien de la
machine.
Une fois la machine installée, ne pas retirer les cales de
maintien de la machine.
Ce blocage est indispensable pour assurer une bonne
stabilité de la machine et pour éviter qu'elle ne bascule
si l'on place un objet lourd ou si l'on exerce une
pression à l'avant lorsque l'on ouvre complètement les
magasins papier ou les diérents modules.
■■Le branchement électrique doit être
sûr
• Brancher la machine sur une prise secteur de
220 - 240 V CA.
• Vérier que la prise choisie est en bon état et
avec une tension stable.
• La prise secteur doit être exclusivement
réservée à l'alimentation de la machine.
• Il y a danger d'incendie ou d'électrocution si
l'on branche la machine sur une prise multiple
ou sur une rallonge avec prise multiple.
• Le fait de marcher sur le cordon
d'alimentation, de le xer avec des agrafes
ou de poser dessus un objet lourd peut
l'endommager. Un cordon abîmé ne doit
jamais rester en service, faute de quoi il risque
de provoquer des accidents tels qu'un incendie
ou une électrocution.
■■Déplacement de la machine
• Si la machine a besoin d'être déplacée,
contacter le revendeur agréé Canon local
avant de le faire, même si la machine doit
seulement être transférée vers un nouvel
emplacement situé au même étage. Ne pas
tenter de déplacer la machine soi-même.
■■Prévoir une surface susante
Il convient de prévoir susamment d'espace de part et
d'autre de la machine pour permettre son utilisation dans
de bonnes conditions.
Les mesures ci-dessous s'applique à l'imageRUNNER
ADVANCE C2220L.
• Si le Lecteur Couleur-G1 est installé:
100 mm ou plus
1 109 mm
• Le cordon d'alimentation ne doit pas être
tendu pour éviter de perdre la connexion
et pour se protéger contre les risques de
surchaue susceptibles de provoquer un
incendie.
• Si la partie branchement du cordon
d'alimentation est soumise à une tension
trop importante, cela risque d'endommager
le cordon ou les ls situés à l'intérieur de la
machine peuvent se déconnecter et provoquer
ainsi un incendie. Eviter les situations
suivantes :
- Brancher et débrancher fréquemment le cordon
d'alimentation.
- Se prendre les pieds dans le cordon d'alimentation.
- Plier le cordon d'alimentation près de la partie
branchement et soumettre la prise ou la partie
branchement à une tension constante.
- Surcharger la prise secteur.
884 mm
Si la machine est un modèle imageRUNNER ADVANCE C2230i/C2225i/
C2220i, sa largeur est de 1 139 mm.
• Si le Lecteur Couleur-G1, le Module de nition
interne-F1, le Module Séparateur 3 sorties-C1
et le Réceptacle-J1 sont installés :
250 mm ou plus
1 109 mm
1 224 mm
Si la machine est un modèle imageRUNNER ADVANCE C2230i/C2225i/
C2220i, sa largeur est de 1 139 mm.
18 Préface 1
Page 99

• Si le Lecteur Couleur-G1, le Module de Finition
P.A.C.-M1, le Module Séparateur 3 sorties-C1 et
le Module de Liaison Trieuse-K1 sont installés :
100 mm ou plus
1 109 mm
1 892 mm
Si la machine est un modèle imageRUNNER ADVANCE C2230i/C2225i/
C2220i, sa largeur est de 1 139 mm.
• En cas de bruit anormal ou de dégagement de
fumée, mettre immédiatement l'interrupteur
principal sur Arrêt, débrancher la machine
et contacter le revendeur agréé Canon local.
L'utilisation de la machine, dans ce cas,
risque de provoquer un incendie ou une
électrocution. Laisser un espace susant
autour de la prise secteur pour pouvoir la
débrancher en cas de nécessité.
Précautions d'emploi
• Ne jamais essayer de démonter ni de modier
la machine.
• Quand il est nécessaire d'accéder à l'intérieur
de la machine, se rappeler que celle-ci
comporte des parties extrêmement chaudes
et sous haute tension. celle-ci comporte des
parties extrêmement chaudes et sous haute
tension. Ne tenter aucune intervention non
indiquée dans le présent guide.
• Veiller à ne pas répandre de liquide et à ne
pas laisser tomber de trombones ou d'agrafes,
ni d'autres objets à l'intérieur de la machine.
Il pourrait en résulter des courts-circuits
pouvant l'endommager et causer des accidents
tels qu'électrocution ou incendie.
• Ne pas éteindre la machine ni ouvrir les
portes avant en cours de fonctionnement. Un
bourrage pourrait s'ensuivre.
• Ne pas utiliser de produit aérosol au contenu
inammable (tel que de la colle) à proximité
de la machine. Cela pourrait provoquer un
incendie.
Français
• En cours de fonctionnement, la machine
génère de l'ozone et d'autres substances en
faible quantité. Bien que la sensibilité à l'ozone
et aux autres substances varie, la quantité
dégagée n'est pas nocive. L'ozone et les autres
substances peuvent gêner en cas d'utilisation
prolongée dans une pièce peu aérée ou en cas
de réalisation d'un grand nombre de copies.
Il est recommandé d'ouvrir régulièrement les
portes et les fenêtres du local pour travailler
dans des conditions plus agréables.
19Préface1
Page 100

• Par mesure de sécurité, appuyer sur en cas
d'inutilisation prolongée, la nuit par exemple.
De même, toujours mettre l'interrupteur
principal sur Arrêt et débrancher le cordon
électrique si on prévoit de ne pas utiliser la
machine pendant une durée plus longue (en
période de fêtes par exemple).
• Utiliser un câble modulaire de moins de 3
mètres.
• Utiliser un câble USB de moins de 3 mètres.
20 Préface 1
 Loading...