

Instructions for installation and use
Frost Free Fridge Freezer
CRCF5174W
INSTRUCTION BOOK
English
The light design
CANDY

DEAR CUSTOMER
T
hank you for buying this fridge freezer. To ensure that you get the best results from your
new product please read and follow these instructions carefully and operate the machine accordingly.
This booklet provides important guidelines for safe use, installation, maintenance and some
useful advice for getting the best from your appliances.
Please ensure that the packing material is disposed of in accordance with the current environmental requirements.
When disposing of any refrigerator freezer equipment please contact your local waste disposal department for advice on safe disposal.
This appliance must be only used for its intended purpose.
CAUTION
The appliance is not intended for use by young children or infirm person without supervision.
Young children should be supervised to ensure that they don’t play with the appliance.
GENERAL
This product is widely used in homes for refrigeration and preserving foods, such as bever-
ages and fruit.. It’s mostly suitable for refrigerating and preserving foods such as fruits and
beverage. It enjoys the advantage of being smaller than larger models on the market, having
a lower energy consumption and is easy to use.
INTRODUCTION
UNPACKING YOUR PRODUCT
WARNING: Use two or more people to move fridge freezer. Failure to do so can result
in back or other injury.
Remove tape and any labels from your refrigerator freezer before using (except the rating
label). To remove any remaining tape or glue, rub the area briskly with your thumb. Tape or
glue residue can also be easily removed by rubbing a small amount of liquid soap over the
adhesive with your fingers. Wipe with warm water and dry. Do not use sharp instruments,
rubbing alcohol, flammable fluids, or abrasive cleaners to remove tape or glue. These products can damage the surface of your refrigerator-freezer. When moving the refrigeratorfreezer, do not tilt the refrigerator-freezer beyond 45°from upright position.
3

CLEANING BEFORE USE
After you remove all of the packaging materials, especially the foam between the outside
condenser and cabinet clean the inside of your fridge freezer before using it.
ELECTRICAL REQUIREMENT
WARNING: DO NOT REMOVE GROUND PRONG.
DO NOT USE AN ADAPTOR.
DO NOT USE EXTENSION CORD.
Failure to follow these instructions can result in death, fire or electrical shock. Before you
move your refrigerator-freezer into its final location, it is important to make sure you have
the proper electrical connection.
RECOMENDED EARTHING METHOD
AC220-240Volt /50Hz ,AC only 10 ampere fused and properly earthed electrical supply is required. It is recommended that a separate circuit serving only this appliance be provided. Use
a receptacle which cannot be turned off with a switch or pull chain. Do not use an extension
cord.
NOTE: Before performing any type of installation, disconnect the fridge freezer from the
electrical source. When you are finished, connect the fridge freezer to the electrical source
and reset the control to the desired setting.
INTRODUCTION
4
Please always follow the safety advice listed below:
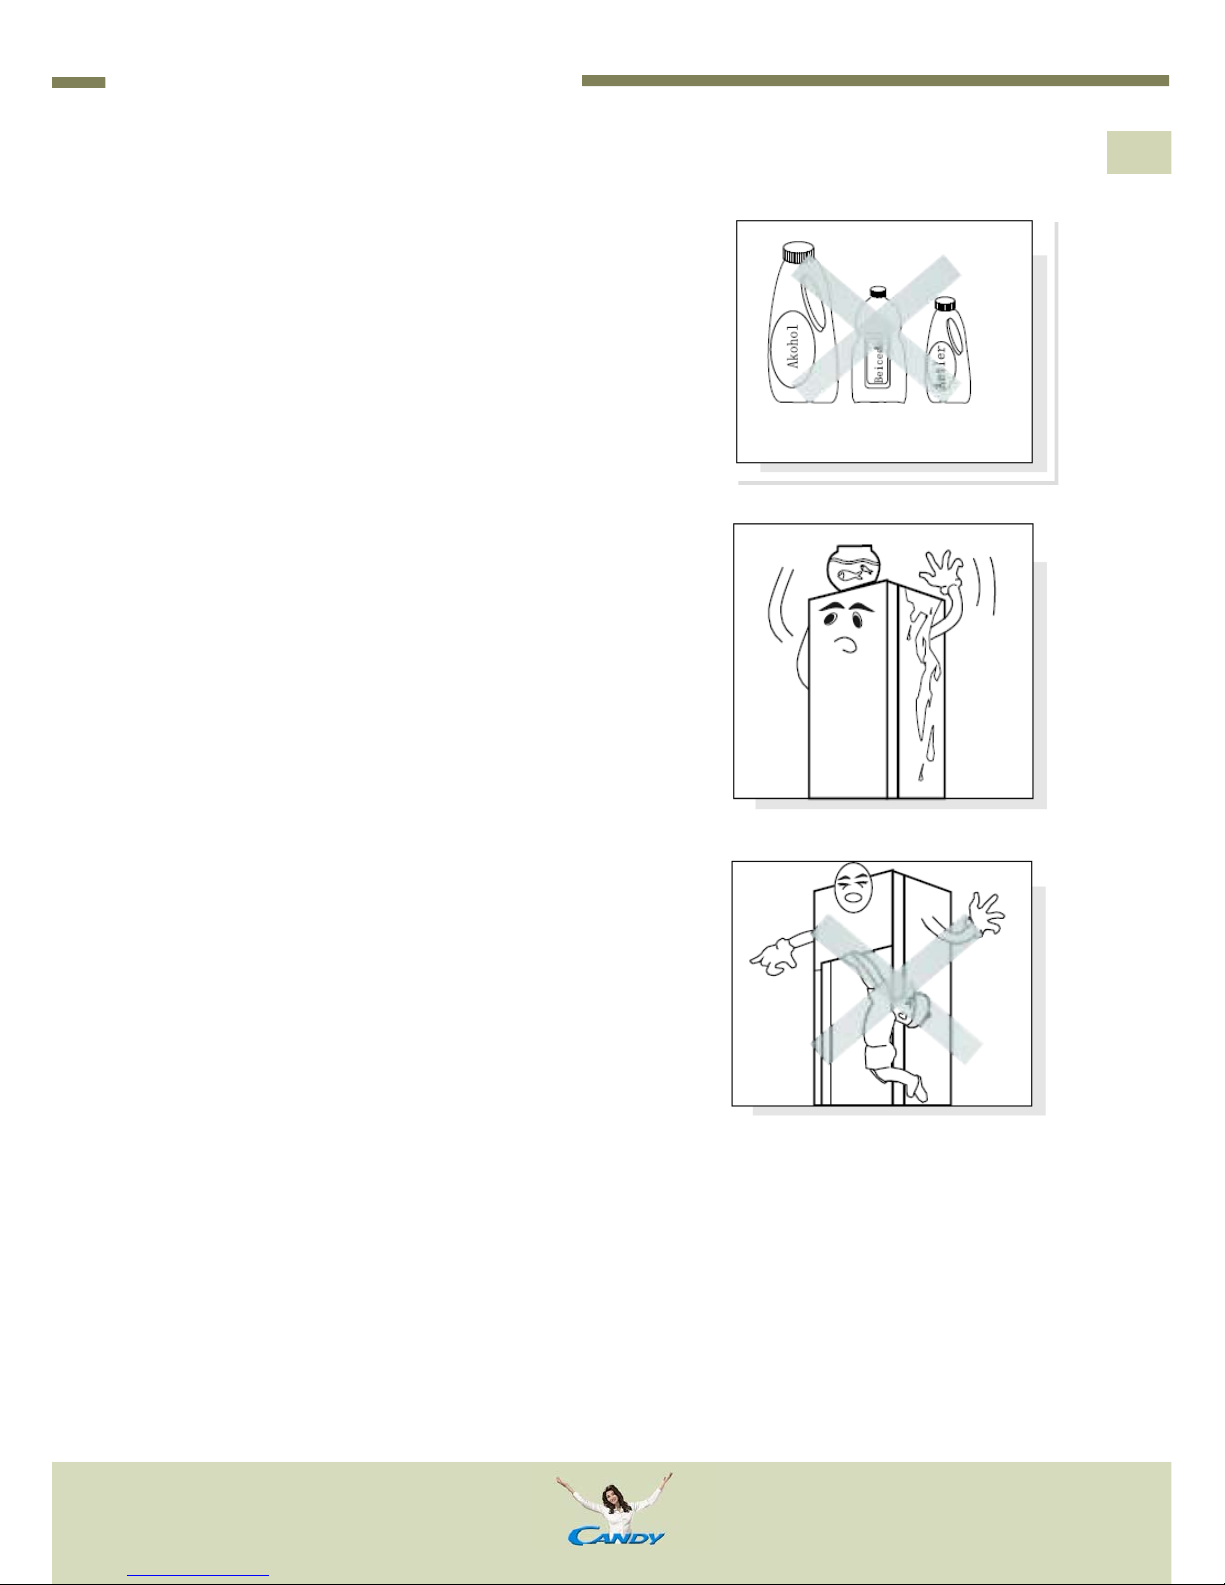
The unit should be operated in the absence of flammable or explosive fumes.
It is prohibited to put the flammable, acid or volatile
goods in cabinet.
Please unplug the unit immediately if you find any
abnormal smell or smoke, and contact your local service center.
Please don’t allow water on the cabinet, or put a vessel full of water on the refrigerator. If the refrigerator is
wet, the electrical insulation capability may be weakened.
Hanging or sitting on the door is very dangerous, it
may overturn the unit and subvert the goods in (or
on) the refrigerator.
SAFETY PRECAUTIONS
5
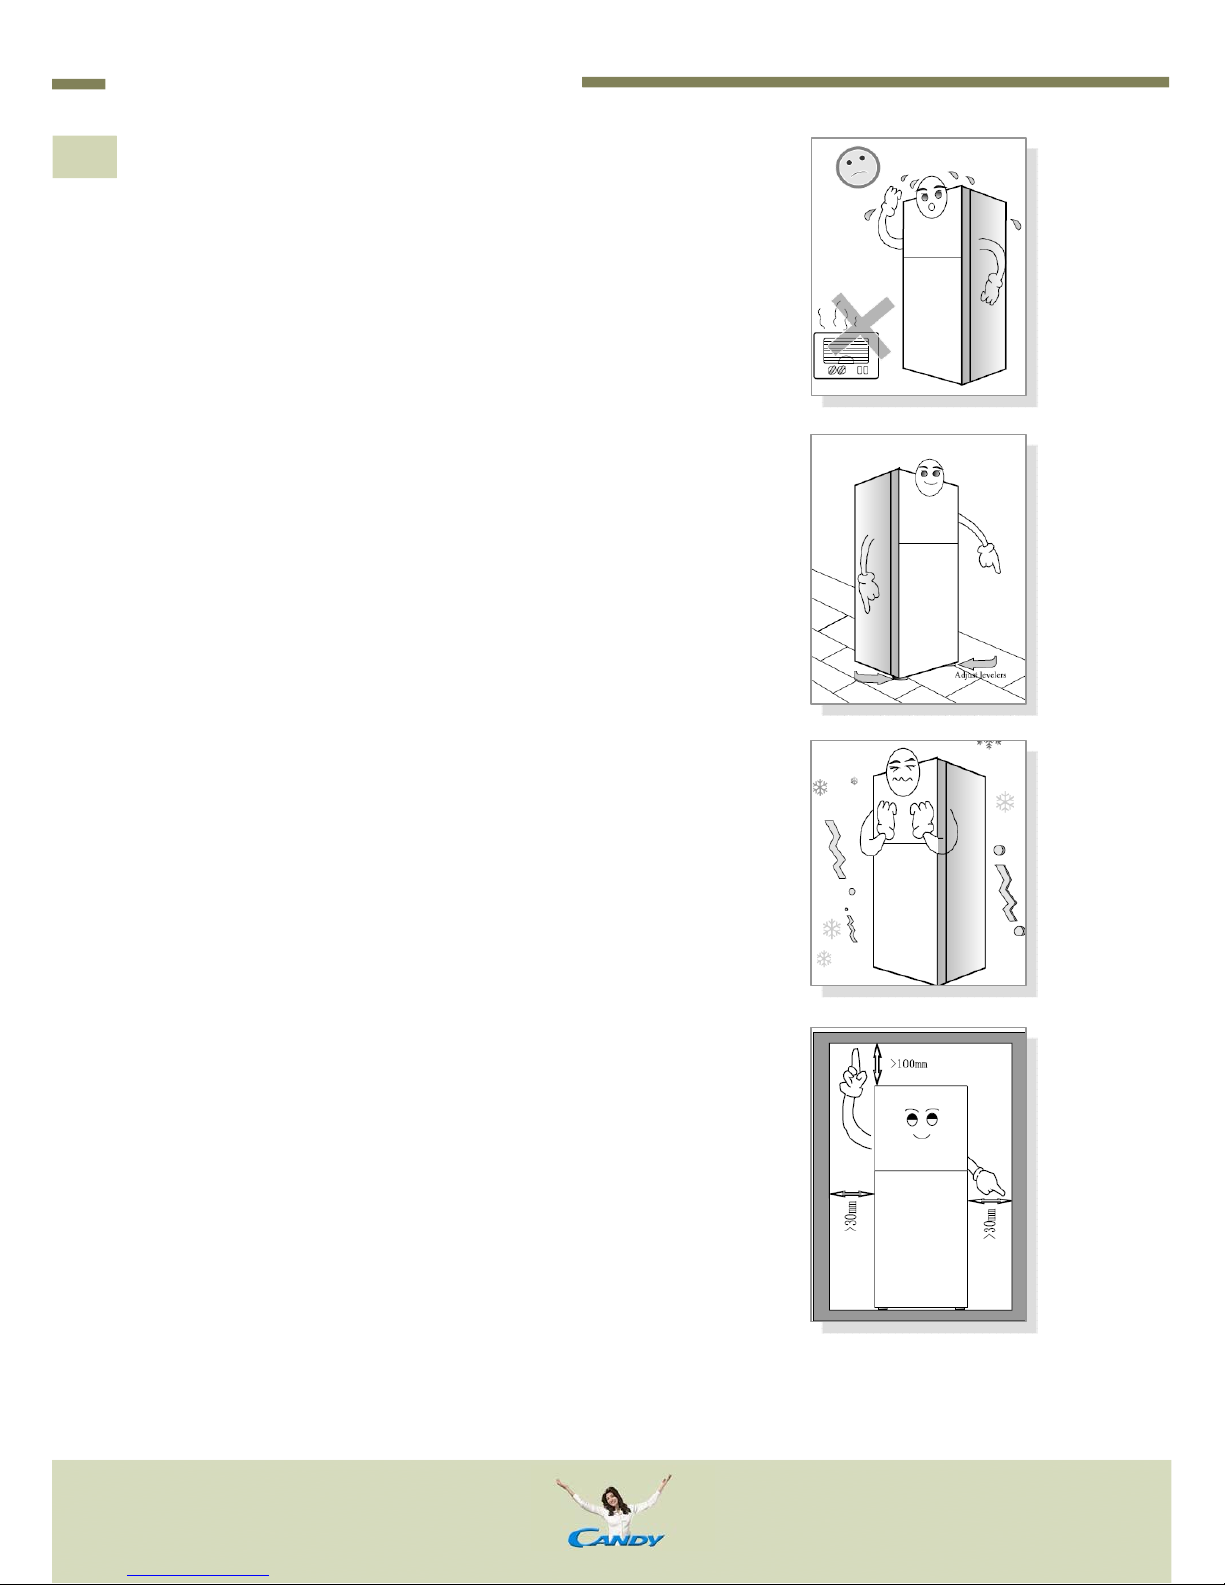
The unit should be placed in a ventilated and dry environment.
Do not put the unit in direct sunshine, and keep it as far as
possible from heat sources.
If the product is not levelled during the installation the doors
may not close or seal properly, causing cooling, frost or
moisture problems. It’s very important that you may either
turn the adjustable feet clockwise to raise the side to the
product or turn counter-clockwise to lower the side.
Don’t put the unit in cold area.
There should be enough spare space around the unit as
shown, to allow proper ventilation.
INSTALLATION
6

Make sure the unit has been placed properly and all instructions have been observed.
.
Adjust the control knob to the middle position, and then
plug in the unit.
CONTROL KNOB
It is normal to adjust the temperature of the fridge compartment.
You can adjust the temperature by turn-control knob located at the right side of the fridge
compartment.
The temperature will get lower if you turn the knobs to the lowest value. ("1" indicates the
coolest position, "6" indicated the warmest position). Position "3" is recommended.
The letter “OFF” means that the product will not cool.
USE OF THE APPLIANCES
FROZEN FOOD STORAGE
The temperature of the freezer is colder than -18C.
It is used to store food which needs to be kept for a longer period.
After buying frozen food, please put it into the freezer
compartment as soon as possible.
7
OPERATION CHECK
7

The temperature in the fresh compartment is between 0~10 C, although this lower temperature can limit the bacteria propagation, it is not suitable for a long period of food storage.
FRESH FOOD STORAGE
Do not place hot food directly into the refrigerator.
The internal temperature will increase and force the
compressor to work harder and will consume more energy.
It is better to put the food in a sealed bag before
placing into the refrigerator.
In order to keep vegetables fresh in the crisper, any
water should be removed first, otherwise the vegetables may spoil. If you put the vegetables in a bag, they
may be stored for a longer period.
Wrap or store food in the refrigerator in airtight and moisture-proof material.
This prevents food odour and taste transfer throughout refrigerator.
• Fruit: wash, allow to dry and store in plastic bags, preferably in the crisper.
• Leafy vegetables: remove wrapping and trim or tear off bruised and discoloured areas,
wash in cold water and drain. Place in plastic bag or plastic container and store in the
crisper.
• Fish: use fresh fish the same day as purchased.
• Meat: store most meat in original wrapping as long as it’s airtight and moisture-proof.
Re-wrap if necessary.
• Leftovers – Cover leftovers with plastic wrap or aluminium foil.
FOOD STORAGE
8

FROZEN FOOD STORAGE
When using the fridge freezer for the first time, turn the temperature control to set “6” for at
least two hours before introducing the food to be stored. All frozen food products you purchase should be placed in the freezer compartment as soon as possible to avoid defrosting.
Storage recommendation printed on the packaging of frozen food by the manufacturers
should be always be followed. Be careful that the drawer doesn’t damage the refrigeration
pipeline.
FREEZING FRESH FOOD
Ensure that your freezing operations are carried out under the most hygienic conditions as
freezing alone does not sterilize the food. It is advisable to freeze the food by packing it into
separate meal portions and not in bulk form. Never put hot or even warm foodstuffs into the
freezer compartment. Prior to storing the frozen food, pack it in plastic bags, aluminium
sheets or freezing containers and place into the freezer compartment. See the data plate on
the back of the refrigerator-freezer for the maximum permissible amount in kilograms of
fresh food that can be frozen in any 24 hour period with a room temperature of 25. Never
freeze more than the maximum permissible.
Note: Never put bottled food or drinks in the freezer compartment. For best performance,
leave enough space in the Freezer compartment for air to circulate around the packages.
FOOD STORAGE
9

MAINTAINING YOUR REFRIGERATOR-FREEZER
The fridge freezer should be clean at least once a month to prevent odours form building up.
Wipe up spills immediately.
To clean your refrigerator-freezer:
• Unplug it
• Remove all movable parts from inside, such as shelves and crisper. Etc.
• Use a clean sponge or soft and a mild detergent in warm water. Do not use abrasive or
harsh cleaners.
• Hand wash, rinse and dry all surfaces thoroughly.
• Do not use cleaning waxes, concentrated detergents, bleaches or cleaners containing
petroleum on plastics and rubber parts.
• Never use paper towels, window sprays, scouring cleansers or flammable fluids on plas-
tic parts as these can scratch or damage material.
CHANGING THE BULBS
Unplug fridge freezer or disconnect fridge freezer from power supply before you remove the
bulb.
• Replace the bulb with 15-watt appliance bulb. Not all bulbs will fit your product. Be sure
to replace the bulb with one of the same size and shape.
• Plug in fridge freezer or reconnect fridge freezer to the power supply.
• The lamp used in this appliance is a “special purpose lamp” intended only for the usage
with this appliance.
• This “special purpose lamp” is not intended for household room illumination.
PROLONGED OFF PERIODS
If the product is not in use for a long period of time please proceed as follows:
• Disconnect the product from the main supply by removing the plug from the wall
socket.
• Clean and dry the inside as instructed under the heading of cleaning the product.
• Leave the door open to prevent any unpleasant smells from building up while the prod-
uct is not in use.
MAINTENANCE
10

1. Remove the top bar cover fixed by four screws with
caps, then take off two top end cap covers lips and a
top cover buckle
2. Remove three screws of the top hinge, take the door
hinge as axis, turn over the top hinge in clockwise direction, then the top hinge could be removed. Take off
the top door, and put it aside.
3. Remove middle hinge, screws, screw caps and plastic
inserting nails. Install them on the other side. Take off
the lower door and put it away.
4. The disassembly and installation of bottom parts
A. Disassemble lower hinge and screws. Then install
them on the other side and consolidate the lower
hinge.
Note: the product incline angle less 45°
B. Swap over the position of the adjustable foot to
the other side of the cabinet.
C. Swap over the position of the lower door block to
the other side, and install the screws and consolidate them.
5. Install the lower door
6. Tighten the screws of the middle hinge on the reversi-
ble side.
7. Install the top door and remove the existing top door
block. Install a new top door block (not the same one)
on the reversible side. Screw it down.
DOOR REVERSIBILITY
11

8. Reuse the disassembled top hinge, three screws and
hinge shaft sleeve.
A. Disassemble the axis of the hinge, swap over its po-
sition to the other side, then consolidate the axis
and screw it down.
B. Install the assembled top hinge. Screw it down and
fix it on target side
9. Install the top bar cover and a top cover buckle. Screw
down the four screws and cover them with caps. Finally
insert the top endcap cover slip
We recommend you have someone to assist you.
NOTE:
To take the door off it is necessary to tilt the Appliance backward.
You should rest the Appliance on something solid e.g.a chair just below the top panel
Do not lay the Appliance completely flat as this may damage the coolant system
MAINTENANCE
12

Before calling for service please check the following issues first:
1. The product doesn’t work
A. Power failure
B. The power plug in not plugged into the power outlet
C. The fuse has blown
2. The refrigerator is cooling excessively
A. The temperature control dial may be set too high
B. If you place foodstuffs containing a lot of moisture directly under the cool air outlets,
they will freeze easily. This doesn’t indicate a malfunction.
3. The refrigerator is not cooling sufficiently
A. The food may be packed too tightly together which will block the flow of cool air
B. You may have put something hot or a lot of foodstuffs into the refrigerator
C. The door may not have been closed properly
D. The door gaskets may be damaged
E. The refrigerator may not be ventilated
F. There may be insufficient clearance between the refrigerator and the surfaces immedi-
ately both sides and above
G. The temperature control dial may not be set properly
4. The defrosting water overflows inside the refrigerator and onto the floor
A. Check that the drain pipe and the drain hose are not logged
B. Check that the drain pan is housed properly
5. Condensation form on the outside of the refrigerator
Condensation may form on the outside when the humidity is high such as during a wet
season. This is the same results as the condensation formed when chilled water is poured
into a glass. It doesn’t indicate, therefore, a failure, wipe dry with a dry cloth.
6. You hear a sound like a water flowing
A sound like a water flowing is the refrigerator flowing. It doesn’t indicate a malfunction.
7. The cabinet’s side panel heats up
The side panel of the cabinet will heat up when the door is open or closed frequently,
TROUBLE SHOOTING
13

when starting the unit and when the unit operates in summer with high ambient outside
temperature. In such case, do not touch the panel, it results from the dissipation of the
heat from inside the cabinet and it does not mean that something is wrong with the re-
frigerator.
8. The doors will not close completely
A. The drawers are out of position
B. The gaskets are dirty
C. The appliances is not level
9. The product is noisy when running
Check the product is level and it is not in contact with another appliance or kitchen furni-
ture.
CONTACTING CUSTOMER SERVICE
If the problem is not due to one of the items listed in Trouble shooting please contact the
dealer or service engineer.
TROUBLE SHOOTING
14

WARNING
1. WARNING – Keep ventilation openings, in the appliance enclosure or in the built-in struc-
ture, clear of obstruction.
2. WARNING – Do not damage the refrigerant circuit.
3. WARNING – Do not use mechanical devices or other means to accelerate the defrosting
process, other than those recommended by the manufacturer.
4. WARNING – Do not use electrical appliances inside the food storage compartments of the
appliance, unless they are of the type recommended by the manufacturer.
5. The appliance has to be unplugged after use and before carrying out user maintenance on
the appliance.
6. This appliance is not intended for use by persons (including children) with reduced physi-
cal, sensory or mental capabilities, or lack of experience and knowledge, unless they have
been given supervision or instruction concerning use of the appliance by a person respon-
sible for their safety.
7. Children should be supervised to ensure that they do not play with the appliance.
8. If the supply cord is damaged, it must be replaced by the manufacturer, its service agent or
similarly qualified persons in order to avoid a hazard.
9. Please dispose of the fridge freezer according to local regulators for contains flammable
blowing gas and refrigerant.
10. Disconnect the power supply before replacing the lamp
11. Before disposing of the appliances remove the doors so that small children cannot get
trapped inside.
SAFETY INSTRUCTION
15

PA C K I N G
The packing material is 100% recyclable and bears the recycling symbol. Comply with local
disposal regulations. Keep the packing materials (plastic bags, polystyrene parts, etc.) out of
the reach children, as they are a potential source of danger.
SCRAPPING/DISPOSAL
The appliance is manufactured using recyclable material. This appliances is marked in compli-
ance with the European Directive 2002/96/EC on Waste Electrical and Electronic Equipment
(WEEE). By ensuring the correct scrapping of this appliance, you can help prevent potentially
negative consequences for the environment and the health of persons.
The symbol on the appliance , or on the accompanying documents, indicates that this
appliance should not be treated as domestic waste but must be taken to a suitable collec-
tion centre for the recycling of electrical and electronic equipment. When scrapping the ap-
pliance, make it unusable by cutting off the power cable and removing the doors and shelves
so that children cannot easily climb inside. Scrap the appliance in compliance with the local
regulations on waste disposal, taking it to a special collection centre; do not leave the appli-
ance unattended even for a few days, since it is a potential source of danger for children. For
further information on the treatment, recovery ad recycling of this appliance, contact your
local office, the household waste collection service or the shop where you purchased the ap-
pliance.
INFORMATION
Appliances with Isobutane (R600a): isobutene is a natural gas without environmental impact
but is flammable. Therefore make sure the refrigerant circuit pipes are not damaged.
DECLARATION OF CONFORMITY
This appliance is intended for storing food and is manufactured in conformity with European
regulation (EC) No. 1935/2004.
This product has been designed, manufactured, marked in compliance with:
• the safety objectives of Low Voltage Directive 2006/95/EC
• the protection requirements of EMC Directive 2004/108/EC
Electrical safety of the appliance is guaranteed only if it is connected to an efficient and ap-
proved earthling system.
GENERAL RECCOMENDATIONS
4

A WIDE AND UNIQUE COOLING COLLECTION
Simplicity. Ultimate sophistication.

Designed and developed in Italy by Candy Group
Printed in P.R.C.
 Loading...