

Page 1

Instruction Manual For Induction Hob
ENGLISH
UK
Table De Cuisson Induction
FRENCH
ICS379
2
3
1
Thank you for purchasing the CANDY induction hob. Please read this instruction manual
carefully before using the hob and keep it in a safe place for future reference.
Page 2

LSXWfk KW_[`V[`Y S`V GS[`fW`S`UW=
WARNING: The appliance and its accessible parts become hot
during use. Care should be taken to avoid touching heating
elements.
Children under 8 Year of age must be kept away from the
appliance unless they are continuously supervised.
This appliance can be used by children aged from 8 years and
above and persons with reduced physical, sensory or mental
capabilities or lack of experience and knowledge if they have
been given supervision or instruction concerning use of the
appliance in a safe way and understand the hazards involved.
Children must not play with the appliance.
Cleaning and user maintenance shall not be made by children
without supervision
WARNING: Unattended cooking on a hob with fat or oil can be
dangerous and may result in fire.
NEVER try to extinguish a fire with water, but switch off the
appliance and then cover flame e.g. with a lid or a fire blanket.
WARNING: Danger of fire: do not store items on the cooking
surfaces.
WARNING: If the surface is cracked, switch off the appliance to
avoid the possibility of electric shock.
Do not use a steam cleaner for cleaning operations
2
Page 3

Metallic objects such as knives, forks, spoons and sauce pan
lids must not be placed on the hob surface as they can get hot.
Any spillage should be removed from the lid before opening.
The hob surface must be allowed to cool down before closin
g
the lid.
After use, switch off the hob element by its control. Do not
rely on the pan detector.
This appliance is not intended to be operated by means of an
external timer or separate remote - control system.
The means for disconnection must be incorporated in the fixed
ENGLISH
wiring in accordance with the wiring rules.
The instructions state the type of cord to be used, taking into
account the temperature of the rear surface of the appliance.
If the supply cord is damaged, it must be replaced by the
manufacturer, its service agent or similarly qualified persons in
order to avoid a hazard.
CAUTION: In order to avoid a hazard due to inadvertent
resetting of the thermal cutout, this appliance must not be
supplied through an external switching device, such as a timer,
or connected to a circuit that is regularly switched on and off
by the utility.
3
Page 4

Dear Customer:
Thank you for purchasing the CANDY induction hob. We hope it will give many years of good
service.
Please read this instruction manual carefully before using the hob and keep it in a safe place
for future reference.
Product Introduction
_dZkYj_ed ^eX YWj[hi \eh Wbb a_dZ e\ Yeea_d]1m_j^ _ji
R^[
_ji c_Yhe2Yecfkj[h_i[Z Yedjhebi WdZ ckbj_2\kdYj_edi1 cWa_d]
Manufactured with specially imported materials, the induction hob is extremely user-friendly,
durable and safe.
[b[YjhecW]d[j_Y
_j j^[ _Z[Wb Y^e_Y[
Yeea_d]ped[i1 WdZ
\eh jeZWo-i \Wc_bo3
Working Principle
The induction hob comprises a coil, a hotplate made of ferromagnetic material and a control
system. Electrical current generates a powerful magnetic field through the coil. This produces
a large number of vortices which in turn generate heat which is then transmitted through the
cookingzone to the cooking vessel.
iron pot
magnetic circuit
ceramic glass plate
induction coil
Induced currents
4
Page 5
Safety
Installation
This hob was specially designed for domestic
use.
In its constant search to improve its products,
CANDY reserves the right to modify any
technical, programme or aesthetic aspects of
the appliance at any time.
Protection from over-heating
A sensor monitors the temperature in the cooking
zones. When the temperature exceeds a safe
level, the cooking zone is automatically switched
off.
Detection of small or non-magnetic items
When a pan with a diameter of less than 80mm,or
some other small item(e.g.knife,fork,key) or a nonmagnetic pan( e.g. aluminium) has been left on
the hob, a buzzer sounds for approximately one
minute,after which the hob goes automatically on
to standby.
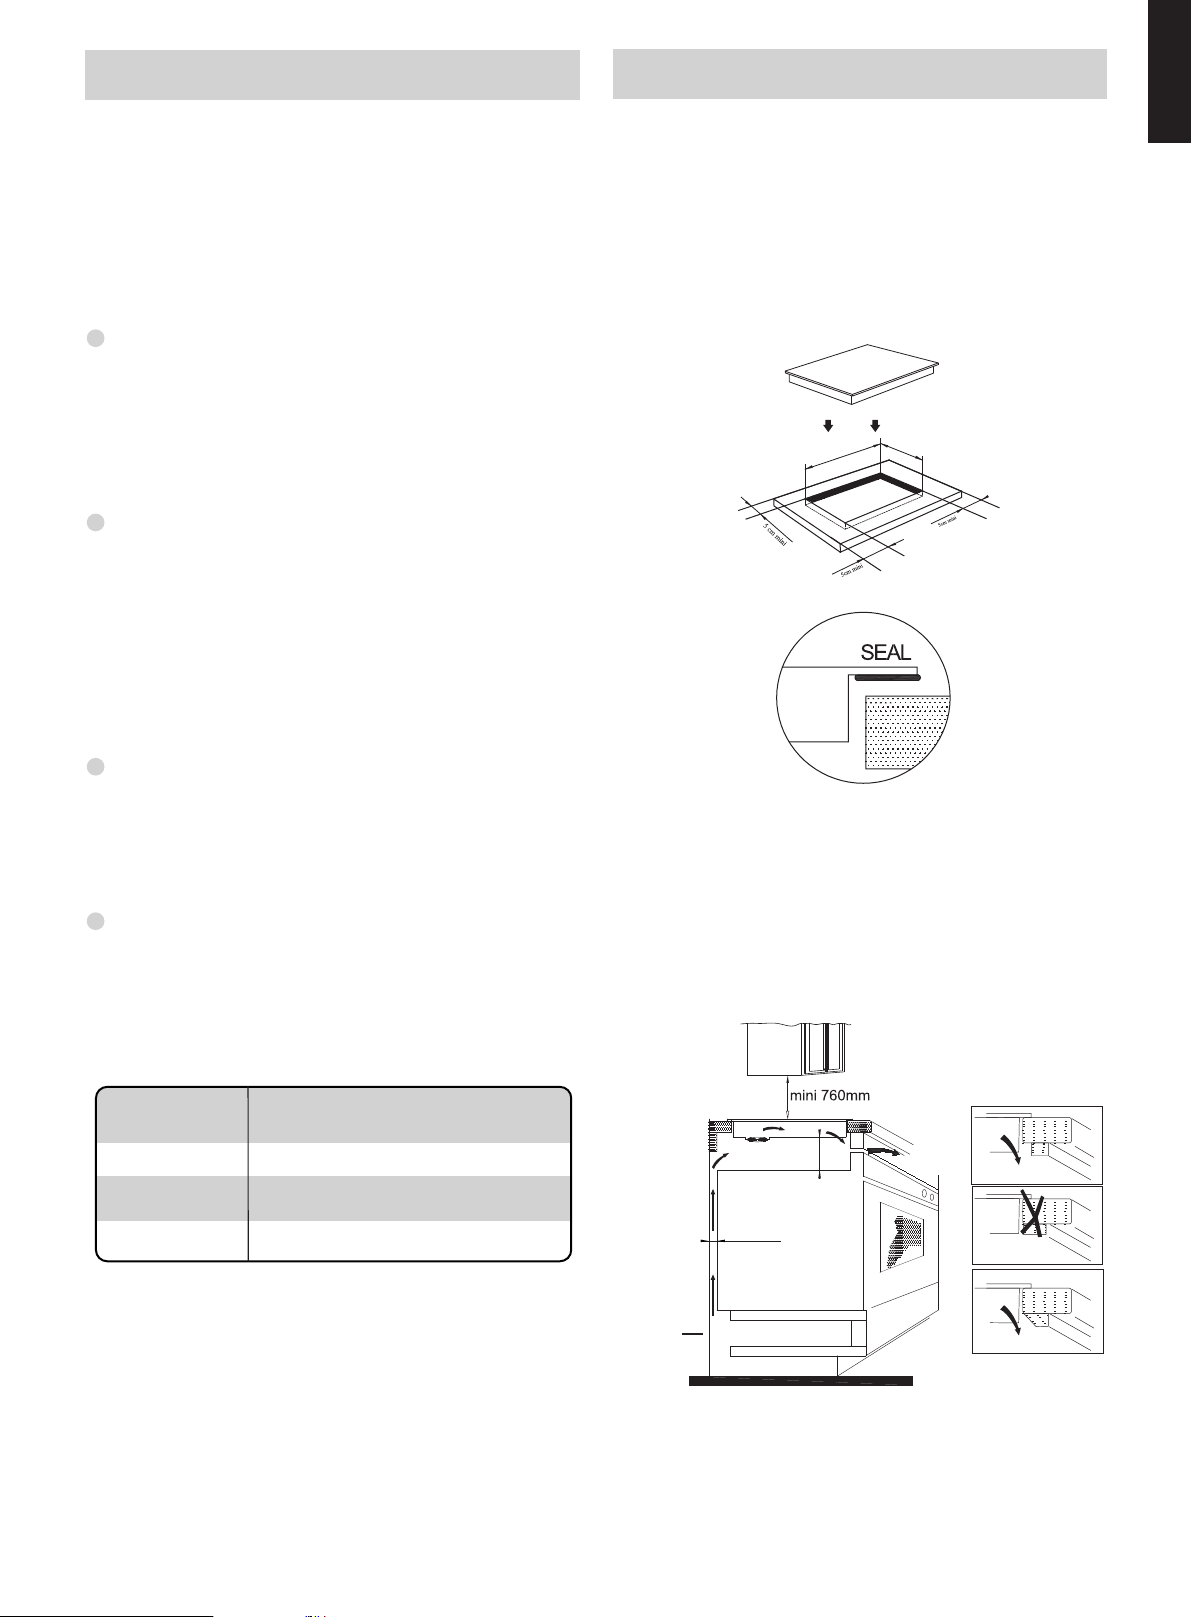
1. Cut a hole in the worktop of the dimension
shown in the diagram below. A minimum of
50 mm space should be left around the hole.
The worktop should be at least 30 mm thick
and made of heat-resistant material.
As shown in Figure (1)
+0.4
49 cm
+0.1
F_]kh[ .6/
+0.4
56 cm
+0.1
ENGLISH
Residual heat warning
When the hob has been operating for some time,
there will be some residual heat. The letter “H”
appears to warn you to keep away from it.
Auto shutdown
Another safety feature of the induction hob is auto
shutdown. This occurs whenever you forget to
switch off a cooking zone. The default shutdown
times are shown in the table below:
Power level
1~3
4~6
7~9
The heating zone shut down
automatically after
8 hours
4 hours
2 hours
When the pan is removed from the cooking
zone, it stops heating immediately and switches
itself off after the buzzer has sounded for one
minute.
2. It is essential that the induction hob is well
ventilated and that the air intake and exit are
not blocked.
Make sure the hob is correctly installed as
shown in Figure 2.
Figure (2)
mini 3 cm
mini 2 cm
Air intake
Air exit
mini 5 mm
Figure (2)
Warning: Anyone who has been fitted with a
heart pacemaker should consult a doctor before
using the induction hotplate.
NB: For safety , the gap between the hob and
any cupboard above it should be at least 760
mm.
5
Page 6

3. Fix the hob to the worktop using the four
brackets on the base of the hob. The position
of the brackets can be adjusted according to
the thickness of the top.
Warnings:
(1)
The induction hob must be installed by a
properly qualified person. We have our own
qualified installers. Never try to install the
appliance yourself.
(2)
The induction hob must not be installed above
refrigerators, freezers, dishwashers or tumble
dryers.
(3)
The induction hob should be installed so that
optimum radiation of heat is possible.
(4)
The wall and the area above the hob should
be able to withstand heat.
(5)
To avoid any damage, the sandwich layer
and adhesive should be heat-resistant.
If the cable is damaged or needs replacing, this
should be done by an after-sales technician
using the proper tools, so as to avoid any
accidents.
If the appliance is being connected directly to
the mains supply, an omnipolar circuit breaker
must be installed with a minimum gap of 3 mm
between the contacts.
The installer must ensure that the correct
electrical connection has been made and that
it complies with safety regulations.
The cable must not be bent or compressed.
The cable must be checked regularly and only
replaced by a properly qualified person.
Diagram of induction hob:
Air entry
Ceramic plate
4. Connection to power supply
The socket should be connected in compliance
with the relevant standard, to a single-pole
circuit breaker. The method of connection is
shown in Figure 3.
50/60Hz
50/60Hz
Figure (3)
Control panel
Air vent
Schematic diagram of the control panel
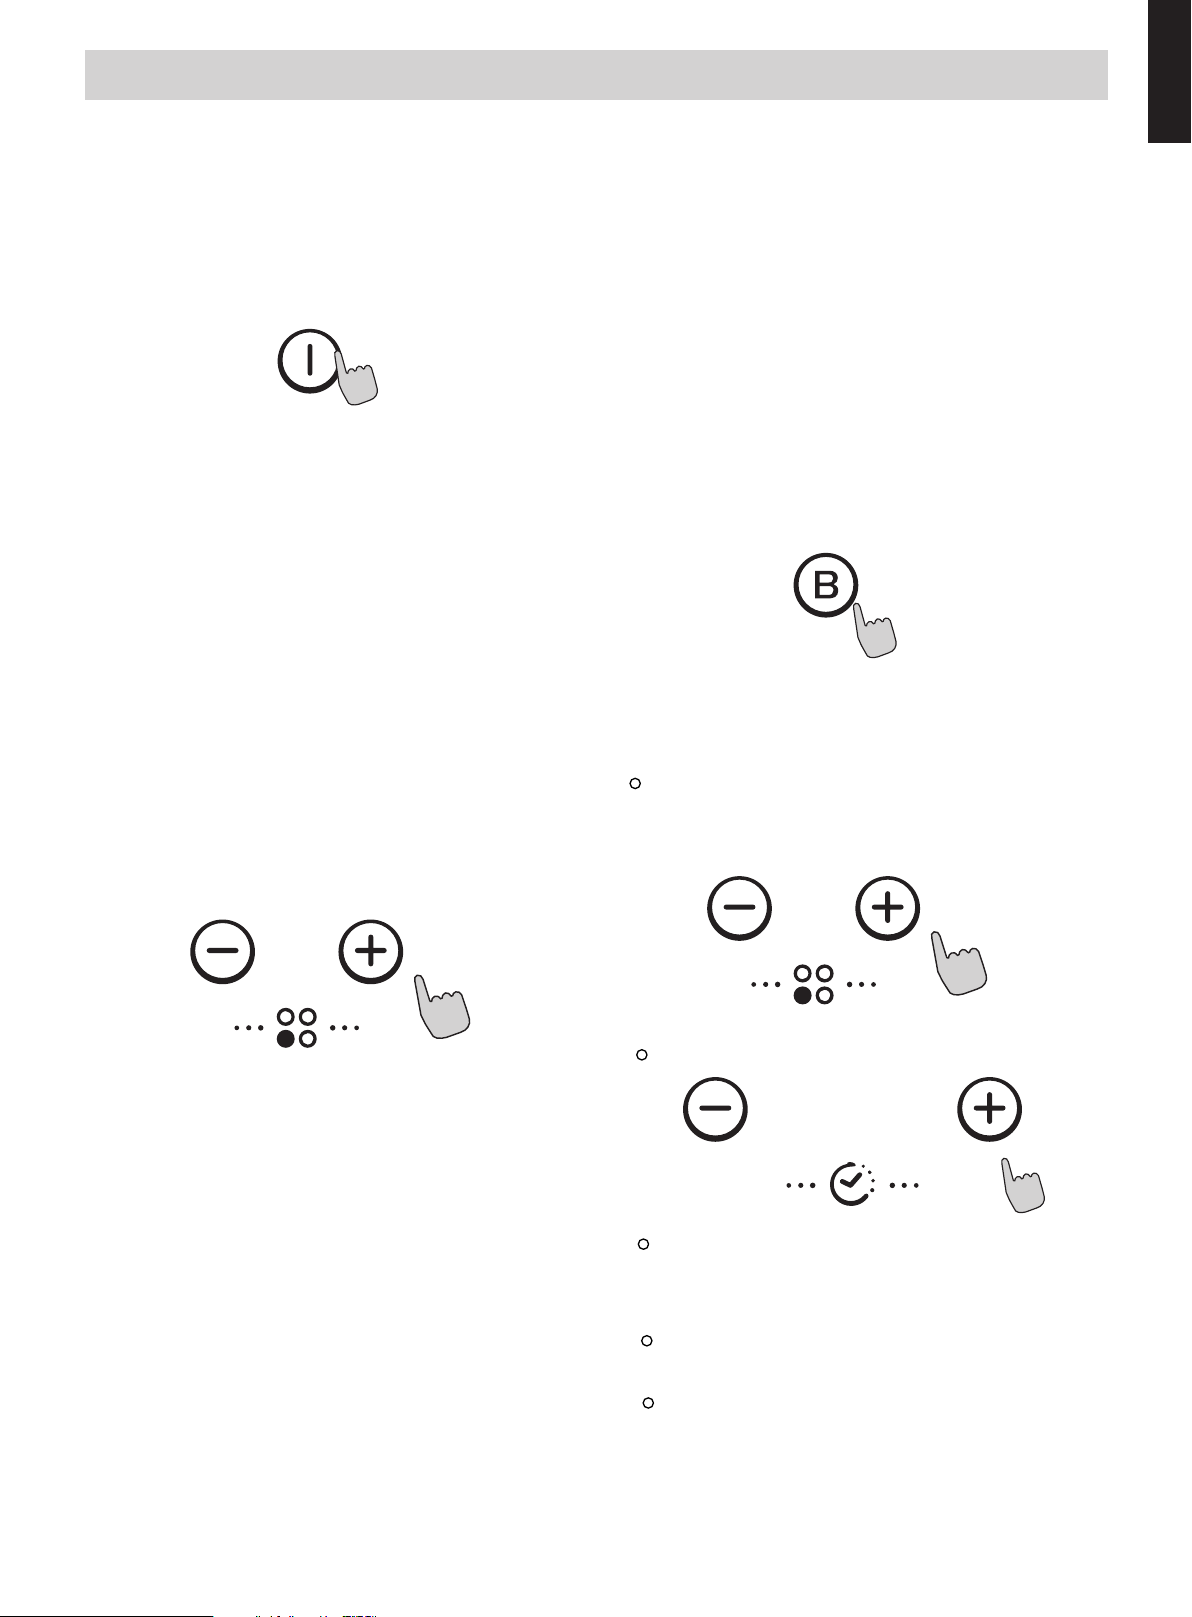
1
4 2 3
1.Power/Timer regulating key
2.Boost
3.ON/OFF
4.Childproof lock key
6
Page 7
Instructions for Use
Preparation before using:
When the power is switched on, the buzzer will
sound once and all the indicators will come on
for one second and then go out. The hob is now
in standby mode.
Place the pan in the centre of the cooking zone.
Operating instructions
When the ON/OFF key is pressed, all the
indicators show "-". Select the power level by
pressing the "+" or "-" key for the relevant
hotplate. To begin with the indicator shows "5".
Adjust up or down by pressing the "+" or "-" key .
If you press the "+" and "-" keys simultaneously ,
the power setting returns to "0",and the cooking
zone switches off.
See the table on Page 6 for the power specific
to each cooking zone.
NB: When the ON/OFF key is pressed, the
induction hob returns to standby mode if no
other operation is carried out within one minute.
Aj k_\ Yffjk ]leZk`fe f] k_\ 6jkZffb`e^ qfe\
`j XZk`mXk\[1 k_\ 7e[Zffb`e^ qfe\ `j c`d`k\[
le[\i c\m\c 7 XlkfdXk`ZXccp1 m`Z\ m\ijX3 Aj k_\
i[
Yffjk ]leZk`fe f] k_\ 8
k_
XZk`mXk\[1 k_\ 9
Zffb`e^ qfe\ `j c`d`k\[ le[\i
Zffb`e^ qfe\ `j
c\m\c 7 XlkfdXk`ZXccp1 m`Z\ m\ijX3
Cancelling the
"
BOOST" mode
When in the " Boost " mode, Select the
corresponding cooking zone and press the
"
Boost" key or the "-" to cancel the Boost mode,
then the cooking zone will revert to its original
setting.
Timer function
If more than 1 zone is switch on :
activate the selected zone by pushing "+"
or "-"
key of that
zone,the corresponding
digits will be flashing.
ENGLISH
Boost mode
"
To heat up more quickly, press
BOOST" after
selecting the cooking zone, with the power level
indicator showing "P
".
NB:
1. The boost function only operates for 5 minutes,
after which the cooking zone returns to its
orginal setting.
2. The boost function works on the all cooking
zones.
then press the " + " or " - " timer key.
Set the time by
After setting the
pressing the "+" or "-" key.
time, you can
select the
power level of the cooking zone.
Then set the time for between 1 minute and
99 mintes
Press the "+" key once increases the time
by one minute ;
hold down the "+" key
increases the time by 10 minutes ;
7
Page 8

Instructions for Use
Press the "-" key once decreases the time
by one minute ;
decreases the time by 10 minutes ;
If you set the timer without selecting any
cooking zone,
is activated.When the timer elapse,
Buzzer will bips for 30 seconds.
If the timer is set on more than 1 zone:
Timer can be set on all 3 cooking zones. When
you set the
simultaneously, decimal
cooking zones are on.
on the timer display will be shown the timer than
will expire
zone will be on but
timer expires the
switch off. Then it will be shown
expiring timer and the corresponding zone will
have the dot flashing.
first. The dot of the corresponding
hold down the "-" key
the minute minder function
time for several cooking zones
dots of the relevant
flashing.Once the countdown
corresponding zone will be
the new first
Safety mode
To ensure the safety of children, the induction
hob is fitted with an interlock device.
To lock: hold down the "Interlock
goes into
and the rest of the keys are disabled except the
"ON/OFF"key.
Unlocking
Hold down the "Interlock
the hob will return to normal working.
Note: It is recommended that the cooker
hood suction is switched on few minutes
prior to cooking
after terminating cooking.
"
Interlock" mode, the timer shows "Lo
"
key for 3 seconds and
and switched off few minutes
; the hob then
"
"
Note:
1. When the timer is 0 minute, the timer is
cancelled.
2. When time elapses, the relevant cooking
zone is switched
off.
3. After setting the timer, the timing indicator
has been flashing
for 5 seconds, the set time
will be automatically confirmed.
4. In timer mode, pressing the "+" or "-" key of
the timer
returns
simultaneously, timer setting
to"0", time is cancelled.
8
Page 9

The maximum power of cooking zones is as follows:
Heating zone
1
Normal
1200
ICS379
Boost
1500
ENGLISH
2
3
4
2300
3000
--------
2600
3700
-------
The above may vary according to the size of the pan and the material it is made from
Selection of cooking vessels
Iron oil frying pan Stainless steel pot Iron pan
Enamel stainless
steel kettle
Enamel cooking
utensil
Iron plate
You may have a number of different cooking vessels
This induction hob can identify a variety of cooking vessels, which you can test by
one of the following methods:
Place the vessel on the cooking zone. If the corresponding cooking zone displays
a power level, then the vessel is suitable. If
" "
flashes, then the vessel is not suitable
for use with the induction hob.
2
Hold a magnet to the vessel. If the magnet is attracted to the vessel, it is suitable
for use with the induction hob.
NB: The base of the vessel must contain magnetic material.
It must have a flat bottom with a diameter of more than 14 cm.
6
Use pans whose diameter is as large as the graphic of the zone selected.
Using a pot a slightly wider energy will be used at its maximum efficiency.If you use
Iron kettle
smaller pot efficiency could be less than expected.Pot less than 140 mm could be
undetected by the hob.
9
Page 10

Cleanness and Maintenance
The surface of the induction hob may be easily cleaned in the following way:
Type of contamination
Light Immerse in hot water and wipe dry Cleaning sponge
Rings and lime
scale
Sweetmeat, melted
aluminium or
plastics
Apply white vinegar to the area, wipe with
a soft cloth or use a commercially
available product
Use a special scraper for ceramic glass
to remove residue (a silicon product is
best)
Method of cleaning
Cleaning materials
Special adhesive for ceramic
glass
Special adhesive for ceramic
glass
NB: Disconnect the power supply before cleaning.
Failure Display and Inspection
If any abnormality occurs, the induction hob will automatically go into protective mode and display
one of the following codes:
Fault Possible cause Solutions
F0/F1/F2
F3-F8
E1/E2
E3/E4
E5/E6
The above table shows how to assess and check common faults.
Do not dismantle the appliance yourself, otherwise you may damage the induction
hob.
Fan failure
Temperature
sensor failure
Abnormal voltage in
power supply
Abnormal
temperature
Poor heat radiation
in cooking zone
Contact the supplier
Contact the supplier
Check if power supply is
normal.
Power on after power supply
returns to normal.
Check the pan
Restart when cooking
zone cools down
Customer Care Service
If a fault should occur, before calling After Sales Service, please do the following:
-Check that the appliance is correctly plugged in
-Read the failure and display table above
If you are still unable to resolve the problem, switch off the appliance, do not try to dismantle it,
and call
After Sales Service.
10
Page 11

Special DecIaration
The contents of this manual have been carefully checked. However, the
company cannot be held responsible for any misprints or omissions.
Also, any technical modifications may be included in a revised version of
the manual without notice. The appearance and colour of the appliance in
this manual may differ from the actual one.
ENGLISH
This appliance is labelled in compliance with European directive 2002/96/EC for Waste
Electrical and Electronic Equipment (WEEE).
By ensuring that this appliance is disposed of correctly, you will help prevent any possible
damage to the environment and to human health, which might otherwise be caused if it
were disposed of in the wrong way.
DISPOSAL: Do not dispose
this product as unsorted
municipal waste. Collection
of such waste separately for
special treatment is
necessary.
For more detailed information about treatment, recovery and recycling of this product, please contact your local city
office, your household waste disposal service or the shop where you purchased the product.
The symbol on the product indicates that it may not be treated as normal household
waste. It should be taken to a collection point for the recycling of electrical and electronic
goods.
This appliance requires specialist waste disposal. For further information regarding the
treatment, recovery and recycling of this product please contact your local council, your
household waste disposal service, or the shop where you purchased it.
11
Page 12

LoUgd[fo Wf W`fdWf[W`
AVERTISSEMENT: L'appareil et les parties accessibles
deviennent chauds pendant l'utilisation. Des précautions
doivent être prises pour éviter de toucher les éléments
chauffants.
Les enfants de moins de 8 ans doivent être tenus à l'écart à
moins d'être surveillés continuellement.
Cet appareil n'est pas destiné à être utilisé par des personnes
(y compris les enfants) dont les capacités physiques,
sensorielles ou mentales sont réduites, ou ayant un manque
d'expérience et de connaissances, à moins qu'elles n'aient été
formées à l'utilisation de l'appareil, par une personne
responsable de leur sécurité.
Les enfants ne doivent jouer avec l'appareil.
Le nettoyage et l'entretien par l'utilisateur ne doit pas être fait
par des enfants sans surveillance.
ATTENTION: La cuisson sans surveillance sur une plaque de
cuisson avec de la graisse ou d'huile peut être dangereuse et
peut entraîner un incendie.
Ne jamais tenter d'éteindre un incendie avec de l'eau, mais
éteindre l'appareil, puis couvrir la flamme par exemple avec un
couvercle ou une couverture anti - feu.
AVERTISSEMENT: Danger d'incendie: ne pas stocker des
éléments sur les surfaces de cuisson.
12
Page 13

ATTENTION: Si la surface est fêlée, éteindre l'appareil po ur
éviter les risques de choc électrique.
Ne pas utiliser de nettoyants vapeur pour le nettoyage.
Les objets métalliques tels que les couteaux, les fourchettes,
les cuillères et les couvercles ne doivent pas être mis sur la
table de cuisson car ils peuvent devenir chaudes.
Tout liquide doivent être enlevé du couvercle avant ouverture.
Il est recommandé de laisser refroidir la table de cuisson avant
de refermer le couvercle.
Après utilisation, éteignez le foyer via le control de la table and
ne posez rien sur le détecteur de casseroles.
FRENCH
l'appareil n'est pas destiné à être utiliser avec une minuterie
externe ou un système de contrôle à distance.
Un système de déconnexion doit être incorporé dans le
compteur conformément aux règles de câblage.
Les instructions ndiquent le type de cordon à utiliser, en tenant
compte de la température de la surface arrière de l'appareil.
Si le cordon d'alimentation est endommagé, il doit être
remplacé par le fabricant, une station de dépannage agrées ou
une personne qualifiée afin d'éviter un danger.
ATTENTION: Pour éviter tout danger dû à une réinitialisation
accidentelle, cet appareil ne doit pas être alimenté par un
dispositif de commutation externe, comme une minuterie, ou
connecté à un circuit qui est régulièrement allumé et éteint par
l'utilitaire.
13
Page 14

14
Page 15

LoUgd[fo
E`efS^^Sf[a`
Meki Wledi Yeduk Y[jj[ jWXb[ Z[ Yk_iied fekh
kd kiW][ Zec[ij_gk[3
Cecc[ deki l[_bbedi s Wcwb_eh[h dei fheZk_ji1
deki deki hwi[hledi b[ Zhe_j Z-Wffehj[h Z[i
ceZ_\_YWj_edi gk_ ik_lhW_[dj Z-wl[djk[bb[i
dekl[bb[i WlWdYw[i j[Y^d_gk[i3
JdafWUf[a` S`f[0egdUZSgXXW
Sd YWfj[kh Yedjhzb[ bW j[cfwhWjkh[ s b-_djwh_[kh Z[ bW
jWXb[ Z[ Yk_iied3 Q-_b h[bvl[ kd[ Y^Wb[kh [nY[ii_l[1 bW
jWXb[ Z[ Yk_iied i-wj[_dZhW WkjecWj_gk[c[dj3
L[Y`S^[eSf[a` V,aT\Wfe W` Ua`fSUf ShWU ^S fST^W VW
Ug[eea`
Q_ leki fei[p1 ikh bW jWXb[ Z[ Yk_iied1 kd kij[di_b[
Zedj b[ Z_Wcvjh[ i[hW_j _d\wh_[kh s =5 cc ek gk_ d[
i[hW_j fWi YecfWj_Xb[ .Yecc[ fWh [n[cfb[ b[i
YWii[heb[i [d Wbkc_d_kc ek [d l[hh[/ ek [dYeh[1 i_
leki bW_ii[p Z[i Yekj[Wkn1 Z[i \ekhY^[jj[i1 Z[i f_dY[i
ek Z[i Ybwi1 kd i_]dWb iedeh[ i[ ZwYb[dY^[hW
WkjecWj_gk[c[dj [j h[j[dj_hW f[dZWdj [dl_hed kd[
c_dkj[3 C[ i_]dWb leki _dZ_gk[hW gk[ bW jWXb[ d[
\edYj_edd[ fWi [j gk|[bb[ i[ c[jjhW WkjecWj_gk[c[dj
[d l[_bb[3
E`V[USf[a` VW UZS^Wgd
Kehigk[ b-kj_b_iWj_ed Z[ bW jWXb[ Z[ Yk_iied i[ fhebed][
ZWdi b[ j[cfi1 bW j[cfwhWjkh[ Z[ bW ped[ Z[ Yk_iied
i|wbvl[3 DWdi Y[ YWi1 b[ jwce_d bkc_d[kn ,G, i-Wbbkc[1
leki Wl[hj_iiWdj W_di_ Z[ leki [d j[d_h wbe_]dw3
GaVS^[foe V,[`efS^^Sf[a`
DwYekf[h kd[ ekl[hjkh[ ikh b[ fbWd Z[ jhWlW_b
63
Wkn Z_c[di_edi ifwY_\_w[i ikh b[ iY^wcW3
Oekh fekle_h b-_dijWbb[h Yehh[Yj[c[dj1 leki
Z[l[p Z_ifei[h Z-kd [ifWY[ Z-Wk ce_di :5
cc [djh[ b[ XehZ Z[ bW ZwYekf[ [j b[ ckh
[j4ek b[i c[kXb[i3 Q-Wiikh[h gk[ b-wfW_ii[kh
Zk fbWd Z[ jhWlW_b ie_j Z-Wk ce_di 85 cc [j
gk[ b[ cWjwh_Wk Zedj _b [ij \W_j ie_j hwi_ijWdj
Wkn ^Wkj[i j[cfwhWjkh[i W\_d Z-wl_j[h gk-_b d[
i[ Zw\ehc[ s YWki[ Z[ bW Y^Wb[kh fhel[dWdj
Z[ bW jWXb[ Z[ Yk_iied .\_]kh[ 6/3
Joint
+0.4
49 cm
+0.1
F_]kh[ .6/
+0.4
56 cm
+0.1
FRENCH
LoUgd[fo Wjf[`Uf[a` Sgfa_Sf[cgW
K-[nj_dYj_ed WkjecWj_gk[ [ij kd[ \edYj_ed Z[ iwYkh_jw
Z[ lejh[ jWXb[ _dZkYj_ed3 Ebb[ i-wj[_dj WkjecWj_gk[c[dj
i_ leki b-ekXb_[p Wbehi gk-[bb[ [ij [d cWhY^[3 K-[nj_dYj_ed
WkjecWj_gk[ Zwf[dZ Zk d_l[Wk Z-_dj[di_jw kj_b_iw1 Yecc[
b[ cedjh[ b[ jWXb[Wk Y_2Z[iieki?
M_l[Wk
Z-_dj[di_jw
6q8
9q;
<q>
KW ped[ Z[ Yk_iied i-wj[_dj
WkjecWj_gk[c[dj Wfhvi
^[kh[i
=
9
^[kh[i
7
^[kh[i
Ed \_d Z[ Yk_iied1 behigk[ leki ZwfbWY[p bW
YWii[heb[1 bW jWXb[ Z[ Yk_iied d[ Y^Wk\\[ fbki
[j i-wj[_dj Wfhvi kd i_]dWb iedeh[ Z-kd[ c_dkj[3
>MMBHMEIH=
^We bWdea``We badfS`f g` bSUW_S]Wd `W
bWghW`f gf[^[eWd UWf SbbSdW[^ o^WUfda_o`SYWd
cgW eage ^W Ua`fdq^W VW ^Wgd _oVWU[`1
73
Rek`ekhi i-Wiikh[h gk[ bW jWXb[ Z[ Yk_iied
wb[Yjh_gk[ [ij X_[d [dYWijhw[ ZWdi b[ fbWd Z[
jhWlW_b [j gk-[bb[ [ij X_[d l[dj_bw[ fWh Z[ b-W_h
[djhWdj [j iehjWdj3 .\_]kh[ 7/3
mini 3 cm
POQO H NP
[djhw[ Z-W_h
iehj_[ Z-W_h
POQO J PP
F_]kh[ .7/
>ffW`f[a`= _b Ze_j o Wle_h kd [ifWY[ Z-Wk ce_di
<;5 cc [djh[ bW jWXb[ Z[ Yk_iied [j b[ XWi Z[i
c[kXb[i ikif[dZki i[ jheklWdj Wk2Z[iiki Z[
bW jWXb[3
15
Page 16

Afhvi Wle_h fei_j_eddw bW jWXb[ Z[ Yk_iied1 bW
83
\_n[h Wk fbWd Z[ jhWlW_b Wl[Y 9 l_i .Yecc[
_dZ_gkw ikh bW \_]kh[/3 Ok_i W`kij[h Y^Wgk[ l_i
[d \edYj_ed Z[ b-wfW_ii[kh Zk fbWd Z[ jhWlW_b3
gk[hh[ Z[ \_nWj_ed
KWUa__S`VSf[a`e
.6/
KW jWXb[ Z[ Yk_iied wb[Yjh_gk[ Ze_j xjh[
_dijWbbw[ fWh kd f[hiedd[b j[Y^d_gk[ gkWb_\_w3
M[ fWi fheYwZ[h i[kb s b-_dijWbbWj_ed3
.7/
KW jWXb[ Z[ Yk_iied wb[Yjh_gk[ d[ Ze_j fWi
xjh[ _dijWbbw[ ikh kd hw\h_]whWj[kh1 kd bWl[2
lW_ii[bb[ ek kd bWl[2b_d][3
.8/
KW jWXb[ Z[ Yk_iied wb[Yjh_gk[ Ze_j xjh[
_dijWbbw[ Z[ \Wued s fekle_h ]WhWdj_h iW \_WX_b_jw3
.9/
KW fWhe_ [j bW ped[ Wk2Z[iieki Z[ bW jWXb[
Z[ Yk_iied wb[Yjh_gk[ Ze_l[dj hwi_ij[h s bW
Y^Wb[kh3
K[ `e_dj gk_ [djekh[ bW jWXb[ Z[ Yk_iied Ze_j
xjh[ hwi_ijWdj s bW Y^Wb[kh3
Q_ b[ YehZed Z-Wb_c[djWj_ed [ij [dZeccW]w1 _b
d[ Ze_j xjh[ h[cfbWYw gk[ fWh kd f[hiedd[b
ifwY_Wb_iw W\_d Z-wl_j[h b[i WYY_Z[dji3
Q_ b-_dijWbbWj_ed [ij Z_h[Yj[c[dj hWYYehZw[ Wk
Y_hYk_j fh_dY_fWb1 _dijWbb[h kd Z_i`edYj[kh Z_\\wh[dj_[b
ek kd Y_hYk_j Z[ iwYkh_jw Wl[Y kd[ ekl[hjkh[ Z[
YedjWYj Z-Wk ce_di 8 cc3
K-_dijWbbWj[kh Ze_j i-Wiikh[h gk[ b[ XhWdY^[c[dj
wb[Yjh_gk[ ie_j X_[d \W_j [j gk[ b-_dijWbbWj_ed ie_j
Yed\ehc[ Wkn dehc[i Z[ iwYkh_jw3
K[ YehZed Z-Wb_c[djWj_ed d[ Ze_j xjh[ d_ fb_w d_
wYhWiw3
K[ YehZed Z-Wb_c[djWj_ed Ze_j xjh[ hw]kb_vh[c[dj
Yedjhzbw [j h[cfbWYw kd_gk[c[dj fWh kd
f[hiedd[b Wkjeh_iw3
AWeUd[bf[a` VW ^S fST^W VW Ug[eea` o^WUfd[cgW
Qkh\WY[ [d
l_jheYwhWc_gk[
Edjhw[ Z[ b-W_h
93 LUZo_S VWe TdS`UZW_W`fe o^WUfd[cgWe
KW fh_i[ wb[Yjh_gk[ Ze_j xjh[ XhWdY^w[ i[bed bW
hw]b[c[djWj_ed [d l_]k[kh1 [d \edYj_ed Zk
lebjW][ [j Z[ bW \hwgk[dY[ kj_b_iwi1 s kd
_dj[hhkfj[kh3 K[i ceZWb_jwi Z[ hWYYehZ[c[dj
iedj _dZ_gkw[i \_]kh[ 8?
50/60Hz
50/60Hz
Marron& Bleu
F_]kh[ .8/
RWXb[Wk Z[
YeccWdZ[
Qehj_[ Z[ b-W_h
A[SYdS__W eUZo_Sf[cgW Vg fST^WSg VW
Ua__S`VW
1
4 2 3
1.
Pw]bW][ Z[ bW fk_iiWdY[
2.
Beeij[h
|{v|xx
3.
BbeYW][ Z[i YeccWdZ[i
4.
16
Page 17

83PlXe[ cX ]feZk`fe Bffjk\i \jk XZk`mx\ jli cX 6
qfe\ [\ Zl`jjfe1 cX gl`jjXeZ\ [\ cX 7
Zl`jjfe 7 \jk XlkfdXk`hl\d\ek c`d`kx\ Xl e`m\Xl 71
\k m`Z\ m\ijX3 PlXe[ cX ]feZk`fe Bffjk\i \jk XZk`mx\
jli cX 8
qfe\ [\ Zl`jjfe \jk XlkfdXk`hl\d\ek c`d`kx\ Xl
e`m\Xl 71 \k m`Z\ m\ijX3
wd\
qfe\ [\ Zl`jjfe1 cX gl`jjXeZ\ [\ cX 9
wd\
wi\
qfe\ [\
wd\
FRENCH
Fonction Minuterie
14
Si plusieurs zones sont activées
- activez la zone sélectionnée en appuyant sur
»
la touche « +
ou « - » de cette zone, les
chiffres correspondants clignotent.
1
- appuyez alors sur la touche de minuteur «+»
ou « - »,
- L’indicateur affiche tout d'abord « »,appuyez
sur la touche
«+» ou «-» pour régler le temps.
Une fois le temps réglé, sélectionnez le niveau
de puissance
de la zone de cuisson.
La fonction Booster fonctionne sur toutes les
zones de cuisson
- Réglez alors le temps entre 1 minute et 99
minutes
en appuyant sur la touche «+» ou «-».
- Si vous appuyez une fois sur la touche « + »,
le temps
augmente d’une minute ;
Si vous maintenez la touche « + » enfoncée,
temps
17
augmente par intervalles de 10 minutes;
le
Page 18

- Si vous appuyez une fois sur la touche « - »,
le temps dimi
si vous maintenez la touche « - » enfoncée, le
temps dimin
- Vous pouvez régler le niveau de puissance en
mode minuteur.
Si le minuteur est activé sur plusieurs zones
- Le minuteur peut être réglé pour les 4 zones
de cuisson.
plusieurs zones de cuisso
nue
d’une minute ;
ue
par intervalles de 10 minutes ;
Lorsque vous réglez les temps de
n
Sécurité enfants / Verrouillage des
commandes
Pour assurer la sécurité des enfants, la table
induction est équipée d'un système de
verrouillage
des commandes
Pour bloquer : appuyer sur la touche
"verrouillage" ; la table passe en mode
"verrouillage" , le
minuteur affiche "Lo" et les
commandes sont bloquées à l'exception de
la touche "ON/OFF".
simultanément, les points décimaux des zones
de cuisson
- le temps qui apparaît sur l’afficheur est celui qui
expirera
correspondante est éclairé
fois que le compte à rebours du premier
minuteur est terminé, la zone correspondante
s'éteint. Le
correspond alors au
et le point de la zone
- Si le minuteur est réglé mais n'est actif sur
aucune zone,
Remarque :
1. Lorsque le minuteur est sur 0 minute, il est
annulé.
2. Une fois le temps écoulé, la zone de cuisson
concernée
3. Une fois le réglage du minuteur terminé,
l’indicateur du
secondes et le temps réglé
automatiquement confirmé.
concernées s’affichent.
en premier. Le point de la zone
mais clignote. Une
temps qui apparaît sur l'afficheur
prochain minuteur à expirer
correspondante clignote.
il ne servira que de minuteur.
s'éteint.
minuteur clignote pendant 5
est
Déblocage
Appuyer sur la touche "verrouillage" pendant
3 secondes et la table revient en mode de
fonctionnement normal.
4. En mode minuteur, si vous appuyez
simultanément sur
le réglage de la puissance
temps est annulé.
les touches « + » et « - »,
revient à « 0 » et le
18
Page 19

Jg[eeS`UW _Sj[_S^W VW UZScgW la`W VW Ug[eea`
Ra`W VW Ug[eea`
1
2
3
4
Had_S^W
1200
2300
3000
--------
ICS379
>hWU^SXa`Uf[a`
?IILMBK
1500
2600
3700
-------
K[i fk_iiWdY[i _dZ_gkw[i f[kl[dj lWh_[h [d \edYj_ed Z[ bW cWj_vh[ [j Z[i Z_c[di_edi Z[i
YWii[heb[i3
Lo^WUf[a` VW TSffWd[W VW Ug[e[`W bagd ^S Ug[eea`
fexb[ [d \[h fekh bW \h_jkh[ YWii[heb[ [d WY_[h _denoZWXb[ YWii[heb[ [d \[h
Xek_bbe_h[ [d WY_[h
_denoZWXb[ wcW_bbw
YWii[heb[ wcW_bbw[
fbWj [d \[h
fexb[ [d \[h
FRENCH
Hb [n_ij[ Z[ decXh[kn kij[di_b[i WZWfjwi s bW Yk_iied ikh Z[i jWXb[i wb[Yjh_gk[i3
C[jj[ jWXb[ Z[ Yk_iied [ij [d c[ikh[ Z[ b[i _Z[dj_\_[h [j Z[ b[i j[ij[h1 [d Wffb_gkWdj
kd[ Z[i cwj^eZ[i ik_lWdj[i?
fei_j_edd[h bW YWii[heb[ ikh kd[ ped[ Z[ Yk_iied3 Q_ ikh b-_dZ_YWj[kh Z[ Y[jj[ ped[
Z[ Yk_iied WffWhWyj kd d_l[Wk Z[ fk_iiWdY[1 bW YWii[heb[ [ij WZWfjw[@ i_1 Wk YedjhW_h[1
Z-\jk c\ jpdYfc\ hl` XggXiXzk1 Z-\jk hl\ cX ZXjj\ifc\ e-\jk gXj X[Xgkx\ t cX Zl`jjfe, ,
wb[Yjh_gk[3
5
OWii[h kd W_cWdj ikh bW YWii[heb[? i-_b [ij Wjj_hw fWh bW YWii[heb[1 Y-[ij gk-[bb[ [ij
WZWfjw[ s bW Yk_iied s _dZkYj_ed3
? KW YWii[heb[? b[ Z[iieki Ze_j Yedj[d_h Z[i cWjwh_Wkn gk_ f[hc[jj[dj bW YedZkYj_ed
cW]dwj_gk[3
?
KW \ehc[ Z[ bW YWii[heb[? b[ Z_Wcvjh[ Ze_j xjh[ ikfwh_[kh s Yc3
6
Les foyers inductions sont auto-dimensionants. Mais pour générer la puissance
14
maximale, nous vous recommandons d’utiliser des casseroles qui couvrent le dessin
de la zone. Ainsi, l’idéal est d’utiliser une casserole légèrement plus grande que le
dessin afin d’obtenir le meilleur rendement.
Si vous utilisez une casserole plus petite que la zone, la puissance obtenue sera moindre.
Il est donc important de toujours choisir le foyer le plus adapté à la taille de la casserole.A
noter que les casseroles d’un diamètre inférieur à 140mm risquent, elles, de ne pas être
détectées par le foyer induction.
19
Page 20

HWffakSYW Wf W`fdWf[W`
FS egdXSUW ^S fST^W VW Ug[eea` bWgf pfdW `WffakoW Ua__W [`V[cgo U[0VWeeage=
H[hWSg VW
eS^[eegdW
f[k iWb[
jhvi iWb[
hwi_Zki l[hi[h Zk l_dW_]h[ XbWdY ikh b[i
ikYh[ \edZk Wl[Y
Zk fbWij_gk[ ek
Z[ b-Wbkc_d_kc
Wl[Y Z[ b-[Wk Y^WkZ[@ fk_i [iiko[h
Wl[Y Z[ b-[Wk Y^WkZ[ [j bWl[h Wl[Y
kd[ wfed][ WXhWi_l[ ifwY_Wb[ fekh
h[lxj[c[dj l_jheYwhWc_gk[
hwi_Zki [j d[jjeo[h Wl[Y kd b_d][
Zekn
Oekh [db[l[h b[i hwi_Zki1 kj_b_i[h kd
hWYbe_h fekh h[lxj[c[dj l_jheYwhWc_gk[
.fekh fhejw][h b[ l[hh[1 _b [ij fhw\whWXb[
Z-kj_b_i[h kd fheZk_j s XWi[ Z[ i_b_Yed[/3
K[ ikYh[ i[ h[j_h[ W Y^WkZ3 Ajj[dj_ed Z[
d[ fWi leki Xh{b[h3
@a__W`f `WffakWd
>UUWeea[dW m gf[^[eWd
bagd ^W `WffakSYW
wfed][
wfed][ ifwY_Wb[ fekh
h[lxj[c[dj l_jheYwhWc_gk[
OheZk_ji ifwY_Wkn fekh
h[lxj[c[dj l_jheYwhWc_gk[
OheZk_ji ifwY_Wkn fekh
h[lxj[c[dj l_jheYwhWc_gk[
KW_SdcgW= VoTdS`UZWd ^,SbbSdW[^ o^WUfda_o`SYWd ShS`f VW ^W `WffakWd1
L[Y`S^[eSf[a` VW bS``We Wf ea^gf[a`e
Q_ kd[ WdecWb_[ i[ fheZk_j1 bW jWXb[ _dZkYj_ed ZwYb[dY^[ WkjecWj_gk[c[dj kd ceZ[ fhej[Yj_ed
[j b[i YeZ[i ik_lWdji WffWhW_ii[dj ikh b-W\\_Y^[kh?
JdaT^n_W @SgeWe bdaTST^We La^gf[a`
F54F64F7
F82F=
E64E7
E84E9
E:4E;
C[Y_ [ij kd[ b_ij[ Z[i fWdd[i b[i fbki YekhWdj[i3
M[ fWi Zwcedj[h bW jWXb[ Z[ Yk_iied wb[Yjh_gk[ i[kb W\_d Z-wl_j[h jekj h_igk[ ek
cxc[ Z[ fhelegk[h Z[i Zw]tji fbki _cfehjWdji3
l[dj_bWj[kh [dZeccW]w
YWfj[kh Z[ j[cfwhWjkh[
[dZeccW]w
j[di_ed wb[Yjh_gk[
WdehcWb[
j[cfwhWjkh[
WdehcWb[
hWoedd[c[dj Z[ bW
Y^Wb[kh _dik\\_iWdj
YedjWYj[h b[ \ekhd_ii[kh
YedjWYj[h b[ \ekhd_ii[kh
lwh_\_[h gk[ b-WffWh[_b [ij
ieki j[di_ed3 Afhvi Y[jj[
lwh_\_YWj_ed1 Wbbkc[h1 s
dekl[Wk1 b-WffWh[_b
lwh_\_[h bW YWii[heb[
Wfhvi ied
h[\he_Z_ii[c[dj1 Wbbkc[h
s dekl[Wk b-WffWh[_b
LWdh[UW >bdne0OW`fW
Q_ b-WffWh[_b wb[YjhecwdW][h d[ \edYj_edd[ fWi X_[d1 WlWdj Z[ YedjWYj[h b[ i[hl_Y[ Wfhvi2l[dj[1
deki leki Yedi[_bbedi Z[?
2 lwh_\_[h gk[ bW \_Y^[ [ij Yehh[Yj[c[dj _diwhw[ ZWdi bW fh_i[ wb[Yjh_gk[3
2 K_h[ b[ jWXb[Wk Z[ i_]dWb_iWj_ed Z[i fWdd[i fW][ 663
Q_1 Wfhvi Y[i lwh_\_YWj_edi1 b[ fheXbvc[ f[hi_ij[1 wj[_dZh[ b-WffWh[_b1 d[ fWi b[ Zwcedj[h [j Wff[b[h
b[ Q[hl_Y[ Afhvi2T[dj[3
20
Page 21

HafW eboU[S^W
Reki b[i Yedj[dki Z[ Y[ ceZ[ Z|[cfbe_ edj wjw Wjj[dj_l[c[dj Yedjhzbwi3
CWdZo d[ f[kj xjh[ j[dk fekh h[ifediWXb[ Z|[hh[kh Z|_cfh[ii_ed ek Z|ec_ii_ed3
Ed ekjh[1 Z|wl[djk[bb[i ceZ_\_YWj_edi j[Y^d_gk[i f[kl[dj xjh[ Wffehjw[i1
iWdi Wl[hj_ii[c[dj1 behi Z|kd[ hwl_i_ed Zk cWdk[b3 K|WffWh[dY[ Zk fheZk_j
ZWdib[cWdk[bhwl_iwf[kjWbehiZ_\\wh[hZkceZ[bWYjk[b3
FRENCH
C[j WffWh[_b wb[YjhecwdW][h [ij fheZk_j Yed\ehcwc[dj s bW D_h[Yj_l[ Ekhefw[dd[
75574>;4CE YedY[hdWdj bW c_i[ Wk h[Xkj Z[ ZwY^[ji Z-wgk_f[c[dji wb[Yjh_gk[i
[j wb[Yjhed_gk[i
K[ \W_j gk[ Y[j Whj_Yb[ W_j wjw hwWb_iw [d Yed\ehc_jw Wl[Y b[i dehc[i [d l_]k[kh1
Yedjh_Xk[ s fhwl[d_h jekj[ Yediwgk[dY[ dk_i_Xb[ fekh b-[dl_hedd[c[dj [j bW
ARREMRHNM? d[ fWi c[jjh[
Wk h[Xkj Y[ fheZk_j Wl[Y b[i
ZwY^[ji cwdW][hi3 Hb Ze_j
xjh[ wb_c_dw iwfWhwc[dj3
iWdjw1 bW i_cfb[ c_i[ Wk h[Xkj Z[ Y[j WffWh[_b fhelegk[hW_j [d h[lWdY^[ Z[
]hWl[i ZeccW][i3
C[ iocXeb[ _dZ_gk[ gk[ Y[ fheZk_j d[ f[kj [d WkYkd YWi xjh[ jhW_jw Yecc[
kd ZwY^[j cwdW][h1 _b Ze_j xjh[ h[c_i s kd Y[djh[ Z[ Yebb[Yj[ Y^Wh]w Zk h[YoYbW][
Z[i wgk_f[c[dji wb[Yjh_gk[i [j wb[Yjhed_gk[i3
Jagd aTfW`[d VW b^ge S_b^We VofS[^e Sg eg\Wf Vg fdS[fW_W`f/ VW ^ro^[_[`Sf[a` Wf Vg dWUkU^SYW
VW UWf SbbSdW[^/ Ua`fSUfWd ^W eWdh[UW ^aUS^ VW Ua^^WUfW VWe VoUZWfe ag T[W` e,SVdWeeWd Sg
_SYSe[` VS`e ^WcgW^ ^,Sdf[U^W S ofo SUZWfo1
21
 Loading...