

Page 1
BUILT-IN OVEN AND HOB
USER'S MANUAL
GB
EINBAUOFEN UND KOCHFELD
BEDIENUNGSANLEITUNG
DE
FORNUIS MET GEÏNTEGREERDE OVEN
GEBRUIKSAANWIJZING
NL
FOUR ENCASTRABLE ET TABLE DE CUISSON
MANUEL DE L'UTILISATEUR
FR
CANDY HOOVER GROUP S.R.L. • Via Comolli 16 • 20861 Brugherio (MB) - Italy
• CUTC64
• CUTC64FF
• CUTC64EXDNF
• CUTC64EXDFF
• CUTCE64EXDFF
• CUTCE64EXDNF
• HCTS827XL/E
• HCT601X/E
• HCT201X/E
Page 2

Page 3

CONTENTS
Safety Instructions
1. General Warnings
1.1 Declaration Of Compliance
1.2 Safety Hints
1.3 Installation
1.4 Fitting The Oven Into The Kitchen Unit
1.5 Important
1.6 Connecting To The Power Supply
2. Introduction Of Product
3. Oven Equipment
4. Useful Tips
4.1 Shelf Safety System
4.2 Grilling
4.3 Cooking Time
4.4 Cleaning And Maintenance
4.5 Aquactiva Function
4.6 Service Centre
5. Preparation For Installation And Use
5.1 Choosing A Place For The Oven
5.2 Oven And Hob Installation
5.2.1. Installation Steps
5.2.2. Fixing the vitroceramic hob
5.2.3. Fixing the oven
5.2.4. Warning
5.3 Wiring And Safety Of The Built-in Combined Oven
5.4 Vitroceramic Hob Without Control Knob “PVS”
6. Using The Oven
6.1 Control Panels
6.2 Use Of The Electronic Programmer
6.3 Setting The Correct Time
6.4 Using The Cooktop Burners
6.5 Using The Oven
6.6 Functions
7. Cleaning And Maintenance
7.1 General
7.2 Cleaning The Oven
7.3 Cleaning The Solid Hotplate Hob
7.4 Cleaning The Vitroceramic Hob
7.5 Maintenance
8. Service And Transportation
8.1 Requirements Before Contacting To Service
8.2 Information Related To Transport
................................................................................................7
................................................................................4
..............................................................................5
................................................................5
........................................................................................5
..........................................................................................5
..............................................5
...........................................................................................5
.....................................................5
........................................................................6
..................................................................................6
...........................................................................................7
..........................................................................7
.....................................................................................7
................................................................7
............................................................................7
...................................................................................7
...................................................7
.......................................................7
.................................................................8
...........................................................................8
............................................................8
..............................................................................8
.........................................................................................8
..................................9
...............................................................................10
.................................................................................10
.................................................11
.................................................................11
............................................................12
...............................................................................12
.........................................................................................13
...............................................................14
...........................................................................................14
.........................................................................14
....................................................14
.......................................................14
...................................................................................14
...............................................................14
...................................14
....................................................14
GB
...........................9
SOMMAIRE
Conseils de sécurité
1. Instructions generales
1.1 Declaration de conformité
1.2 Consignes de sécurité
1.3 Installation
1.4 Mise en place du four dans son meuble
1.5 Important
1.6 Alimentation electrique
2. Introduction du produit
3. Equipement du four equipement different selon le type de four
4. Consignes utiles
4.1 Grilles du four, nouveau système d'arrêt
4.2 La cuisson au gril
4.3 Temps de cuisson
4.4 Conseils de nettoyage et d'entretien
4.5 Fonction aquactiva
4.6 Assistance technique
5. Préparation à l'installation et à l'utilisation
5.1 Choisir un emplacement pour le four
5.2 Installation du four et de la table de cuisson
5.2.1 Étape d'installation
5.2.2 Fixation de la table de cuisson vitrocéramique
5.2.3 Fixation du four
5.2.4 Avertissement
5.3 Câblage et sécurité du four combiné encastrable
5.4 Table de cuisson vitrocéramique sans bouton de commande "PVS"
6. Utilisation du four
6.1 Panneaux de commande
6.2 Utilisation du programmateur électronique
6.3 Reglage de l'heure
6.4 Utilisation des brûleurs de la table de cuisson
6.5 Utilisation du four
6.6 Fonction
7. Nettoyage et Maintenance
7.1 Remarques générales
7.2 Nettoyage du four
7.3 Nettoyage et entretien
7.4 Nettoyage de la table de cuisson vitrocéramique
7.5 Entretien
8. Service et transport
8.1 Exigences avant de contacter le service
8.2 Informations relatives au transport
..........................................................................................27
...........................................................................................35
...........................................................................................36
............................................................................26
.....................................................................27
................................................................27
.....................................................................27
........................................................................................27
..........................................27
.....................................................................27
..................................................................28
..............................................................................29
.........................................29
.............................................................................29
............................................................................29
...............................................29
...........................................................................29
.......................................................................29
...................................29
...............................................29
....................................30
........................................................................30
.............................30
.............................................................................30
...............................................................................30
............................31
............................................................................32
.................................................................32
......................................33
...........................................................................33
.................................34
.............................................................................34
...............................................................36
......................................................................36
............................................................................36
......................................................................36
............................36
.........................................................................36
..........................................36
..................................................36
FR
.28
...31
INHALT
Sicherheitsvorschriften
1. Allgemeine Hinweise
1.1 Konformitätserklärung
1.2 Sicherheitshinweise
1.3 Installation
1.4 Einbau In Den Schrank
1.5 Wichtig
1.6 Elektrischer Anschluß
2. Ihr Neues Haushaltsgerät
3. Ofenausstattung
4. Einige Nützliche Hinweise
4.1 Kippgesicherte Gitterroste
4.2 Grillen
4.3 Garzeiten
4.4 Reinigung Und Wartung
4.5 Aquactiva Funktion
4.6 Technischer Kundendienst
5. Vorbereitungen Für Installation Und Gebrauch
5.1 Der Richtige Platz Für Ihren Ofen
5.2 Ofen - Und Kochfeldinstallation
5.2.1. Installationsschritte
5.2.2. Glaskeramisches Kochfeld fixieren
5.2.3. Ofen fixieren
5.2.4. Warnung
5.3 Verkabelung Und Sicherheit Einbauofen
5.4 Ceranfelder Ohne Bedienelemente “PVS”
6. Bedienung
6.1 Bedienfeld
6.2 Gebrauch Des Elektronischen Programmierers
6.3 Einstellung Der Richtigen Uhrzeitt
6.4 Kochplatten Verwenden
6.5 Ofen Verwenden
6.6 Funktionen
7. Reinigung Und Wartung
7.1 Allgemein
7.2 Ofen Reinigen
7.3 Kochplatten-kochfeld Reinigen
7.4 Glaskeramisches Kochfeld Reinigen
7.5 Wartung
8. Service Und Transport
8.1 Bevor Sie Sich An Den Kundendienst Wenden
8.2 Hinweise Zum Transport
........................................................................................16
.............................................................................................16
..............................................................................................18
.........................................................................................18
.......................................................................................19
........................................................................................21
.......................................................................................21
.......................................................................................24
.........................................................................................25
...........................................................................................25
.......................................................................15
.......................................................................16
......................................................................16
.........................................................................16
....................................................................16
......................................................................16
................................................................17
..............................................................................17
..................................................................18
................................................................18
..................................................................18
...........................................................................18
...............................................................18
...................................................18
.......................................................19
......................................................................19
..............................................19
................................................................................19
.........................................20
........................................20
...................................................22
...................................................................23
..............................................................................23
..................................................................25
.................................................................................25
.......................................................25
...............................................25
....................................................................25
.................................................................25
DE
............................18
...............................22
...............................25
INHOUD
Veiligheidsvoorschriften
1. Algemene aanwijzingen
1.1 Lees deze handleiding aandachtig
1.2 Veiligheidsvoorschriften
1.3 Installatie
1.4 Inbouw van de oven
1.5 Belangrijk
1.6 Elektrische aansluiting
2. Inleiding product
3. Uitrusting van de oven (afhankelijk van het model)
4. Nuttige tips
4.1 Veiligheidssysteem voor de roosters
4.2 Grilleren
4.3 Kooktijd
4.4 Schoonmaken en onderhoud
4.5 Aquactivafunctie
4.6 Service centre
5. Voorbereiding op installatie en gebruik
5.1 Een plaats kiezen voor de oven
5.2 Installatie oven en fornuis
5.2.1. Installatiestappen
5.2.2. Het vitrokeramische fornuis bevestigen
5.2.3. De oven bevestigen
5.2.4. Waarschuwing
5.3 Bedrading en veiligheid van de inbouwoven
5.4 Vitrokeramisch fornuis zonder bedieningsknop
6. Het gebruik van de oven
6.1 Bedieningspanelen
6.2 Elektrische programma's gebruiken
6.3 De juiste tijd instellen
6.4 De kookplaten gebruiken
6.5 De oven gebruiken
6.6 Functie
7. Reiniging en onderhoud
7.1 Algemeen
7.2 De oven schoonmaken
7.3 Reiniging en onderhoud
7.4 Onderhoud
8. Onderhoud en vervoer
8.1 Eisen voordat u contact opneemt met onderhoudsdienst
8.2 Informatie met betrekking tot vervoer
..........................................................................................38
.........................................................................................38
.......................................................................................40
...........................................................................................40
............................................................................................40
.............................................................................................46
............................................................................................47
.......................................................................................47
.....................................................................37
.................................................................38
..................................................38
...................................................................38
.........................................................................38
.....................................................................38
.............................................................................39
.....................39
...............................................40
..........................................................40
..............................................................................40
..................................................................................40
........................................40
......................................................40
...............................................................41
..........................................................................41
.......................................41
.....................................................................41
.............................................................................41
...................................42
...............................42
.................................................................43
..........................................................................43
.................................................44
.......................................................................44
.................................................................45
..........................................................................45
.................................................................47
....................................................................47
...................................................................47
....................................................................47
..............................................47
NL
...............47
Page 4

SAFETY INSTRUCTIONS
• During cooking, moisture may condense inside the oven cavity or on the glass of the door. This is a normal
condition. To reduce this effect, wait 10-15 minutes after turning on the power before putting food inside the
oven. In any case, the condensation disappears when the oven reaches the cooking temperature.
• Cook the vegetables in a container with a lid instead of an open tray.
• Avoid leaving food inside the oven after cooking for more than 15/20 minutes.
• WARNING: the appliance and accessible parts become hot during use. Be careful not to touch any hot
parts.
• WARNING: the accessible parts can become hot when the oven is in use. Children must be kept at a safe
distance.
• WARNING: ensure that the appliance is switched off before replacing the bulb, to avoid the possibility of
electric shocks.
• WARNING: before initiating the automatic cleaning cycle:
- Clean the oven door;
- Remove large or coarse food residues from the inside of the oven using a damp sponge. Do not use detergents;
- Remove all accessories and the sliding rack kit (where present);
- Do not place tea towels
• In ovens with meat probe it is necessary, before making the cleaning cycle, close the hole with the nut
provided. Always close the hole with the nut when the meat probe is not used.
• Children under 8 must be kept at a safe distance from the appliance if not continuously supervised.
• Children must not play with the appliance. The appliance can be used by those aged 8 or over and by those
with limited physical, sensorial or mental capacities, without experience or knowledge of the product, only if
supervised or provided with instruction as to the operation of the appliance, in a safe way with awareness of
the possible risks.
• Cleaning and maintenance should not be carried out by unsupervised children.
• Do not use rough or abrasive materials or sharp metal scrapers to clean the oven door glasses, as they can
scratch the surface and cause the glass to shatter.
• The oven must be switched off before removing the removable parts and, after cleaning, reassemble them
according the instructions.
• Only use the meat probe recommended for this oven.
• Do not use a steam cleaner for cleaning operations.
• Connect a plug to the supply cable that is able to bear the voltage, current and load indicated on the tag
and having the earth contact. The socket must be suitable for the load indicated on the tag and must be
having the earth contact connected and in operation. The earth conductor is yellow-green in colour. This
operation should be carried out by a suitably qualified professional. In case of incompatibility between the
socket and the appliance plug, ask a qualified electrician to substitute the socket with another suitable type.
The plug and the socket must be conformed to the current norms of the installation country. Connection to
the power source can also be made by placing an omnipolar breaker between the appliance and the power
source that can bear the maximum connected load and that is in line with current legislation. The
yellow-green earth cable should not be interrupted by the breaker. The socket or omnipolar breaker used for
the connection should be easily accessible when the appliance is installed.
• The disconnection may be achieved by having the plug accessible or by incorporating a switch in the fixed
wiring in accordance with the wiring rules.
• If the power cable is damaged, it must be substituted with a cable or special bundle available from the manufacturer or by contacting the customer service department.
• The type of power cable must be H05V2V2-F.
• Failure to comply with the above can compromise the safety of the appliance and invalidate the guarantee.
• Any excess of spilled material should be removed before cleaning.
• The appliance must not be installed behind a decorative door in order to avoid overheating.
• When you place the shelf inside, make sure that the stop is directed upwards and in the back of the cavity.
The shelf must be inserted completely into the cavity
• WARNING: Do not line the oven walls with aluminum foil or single-use protection available from stores.
Aluminum foil or any other protection, in direct contact with the hot enamel, risk melting and deteriorating the
enamel of the insides.
• WARNING: Never remove the oven door seal.
• No additional operation/setting is required in order to operate the appliance at the rated frequencies.
04 GB
Page 5

1. GENERAL WARNINGS
Thank you for choosing one of our products. To get the most out of your oven we recommend that you:
• Read the notes in this manual carefully: they contain important instructions on how to install, use and service this oven safely.
• Keep this booklet in a safe place for easy, future reference.
When the oven is first switched on it may give out acrid smelling fumes. This is because the bonding agent for insulating panels around the oven has
been heated up for the first time. This is a completely normal, if it does occur you merely have to wait for the fumes to clear before putting the food into
the oven. An oven by its very nature becomes very hot. Especially the glass of the oven door.
1.1 DECLARATION OF COMPLIANCE
The parts of this appliance that may come into contact with foodstuffs
comply with the provisions of EEC Directive 89/109.
By placing the mark on this product, we are confirming
compliance to all relevant European safety, health and environmental
requirements which are applicable in legislation for this product.
When you have unpacked the oven, make sure that it has not been
damaged in any way. If you have any doubts at all, do not use it:
contact a professionally qualified person. Keep packing materials
such as plastic bags, polystyrene, or nails out of the reach of children
because they are dangerous for children.
1.2 SAFETY HINTS
•The oven must be used only for the purpose for which it was
designed: it must only be used for cooking food. Any other use, e.g. as
a form of heating, is an improper use of the oven and is therefore
dangerous.
•The manufacturers cannot be held responsible for any damage
caused by improper, incorrect or unreasonable use. When using any
electrical appliance you must follow a few basic rules.
– Do not pull on the power cable to remove the plug from the socket.
– Do not touch the oven with wet or damp hands or feet.
– Do not use the oven unless you are wearing something on your feet.
– It is not generally a good idea to use adapters, multiple sockets for
several plugs and cable extensions.
– If the oven breaks down or develops a fault switch it off at the mains
and do not touch it.
•If the cable is at all damaged it must be replaced promptly.
When replacing the cable, follow these instructions. Remove the
power cable and replace it with one of the H05RRF, H05VV-F,
H05V2V2-F type. The cable must be able to bear the electrical current
required by the oven. Cable replacement must be carried out by
properly qualified technicians. The earthing cable (yellow-green) must
be 10 mm longer than the power cable.
Use only an approved service centre for repairs and ensure that only
original parts are used. If the above instructions are not adhered to the
manufacturers cannot guarantee the safety of the oven.
1.3 INSTALLATION
Installation is the customer’s responsibility. The manufacturers
have no obligation to carry this out. If the assistance of the
manufacturer is required to rectify faults arising from incorrect
installation, this assistance is not covered by the guarantee.
The installation instructions for professionally qualified personal
must be followed. Incorrect installation may cause harm or injury
to people, animals or belongings. The manufacturer cannot be
held responsible for such harm or injury.
1.5 IMPORTANT
If the oven is to work properly, the kitchen housing must be
suitable. The panels of the kitchen unit that are next to the oven
must be made of a heat resistant material. Plastics or glues that
cannot withstand such temperatures will melt and deform the unit.
Once the oven has been lodged inside the unit, the electrical parts
must be completely insulated. This is a legal safety requirement.
All guards must be firmly fixed into place so that it is impossible to
remove them without using special tools.
Remove the back of the kitchen unit to ensure an adequate
current of air circulates around the oven. The hob must have
a rear gap of at least 45 mm.
1.6 CONNECTING TO THE POWER SUPPLY
Plug into the power supply. Ensure first that there is a third contact
that acts as earthing for the oven. The oven must be properly
earthed.
If the model of oven is not fitted with a plug, fit a standard plug to
the power cable. It must be able to bear the power supply indicated
on the specifications plate. The earthing cable is yellowgreen. The
plug must be fitted by a properly qualified person. If the socket and
the plug are incompatible the socket must be changed by a
properly qualified person.A properly qualified person must also
ensure that the power cables can carry the current required to
operate the oven.
An ON/OFF switch may also be connected to the power supply.
The connections must take account of the current supplied and
must comply with current legal requirements. The yellow-green
earthing cable must not be governed by the ON/OFF switch. The
socket or the ON/OFF switch used for connecting to the power
supply must be easily accessible when the oven has been
installed.
Important: During installation, position the power cable in such a
way that it will not be subjected to temperatures of above 50°C at
any point.
The oven complies with safety standards set by the regulatory
bodies. The oven is safe to use only if it has been adequately
earthed in compliance with current legal requirements on wiring
safety. You must ensure that the oven has been adequately
earthed.
The manufacturers cannot be held responsible for any harm
or injury to persons, animals or belongings caused by failure
to properly earth the oven.
The cabling and wiring system must be able to bear the maximum
electric power required by the oven. This is indicated on the
specifications plate. If you are in any doubt at all, use the services
of a professionally qualified person.
1.4 FITTING THE OVEN INTO THE KITCHEN UNIT
Fit the oven into the space provided in the kitchen unit; it may be
fitted underneath a work top or into an upright cupboard. Fix the
oven in position by screwing into place.(Figure 11).
To locate the fixing holes, open the oven door and look inside.To
allow adequate ventilation, the measurements and distances
indicated in the diagram on last page must be adhered to when
fixing the oven.
Note: For ovens that are combined with a hob unit the instructions
contained in the manual for the hob unit must be followed.
05 GB
Page 6
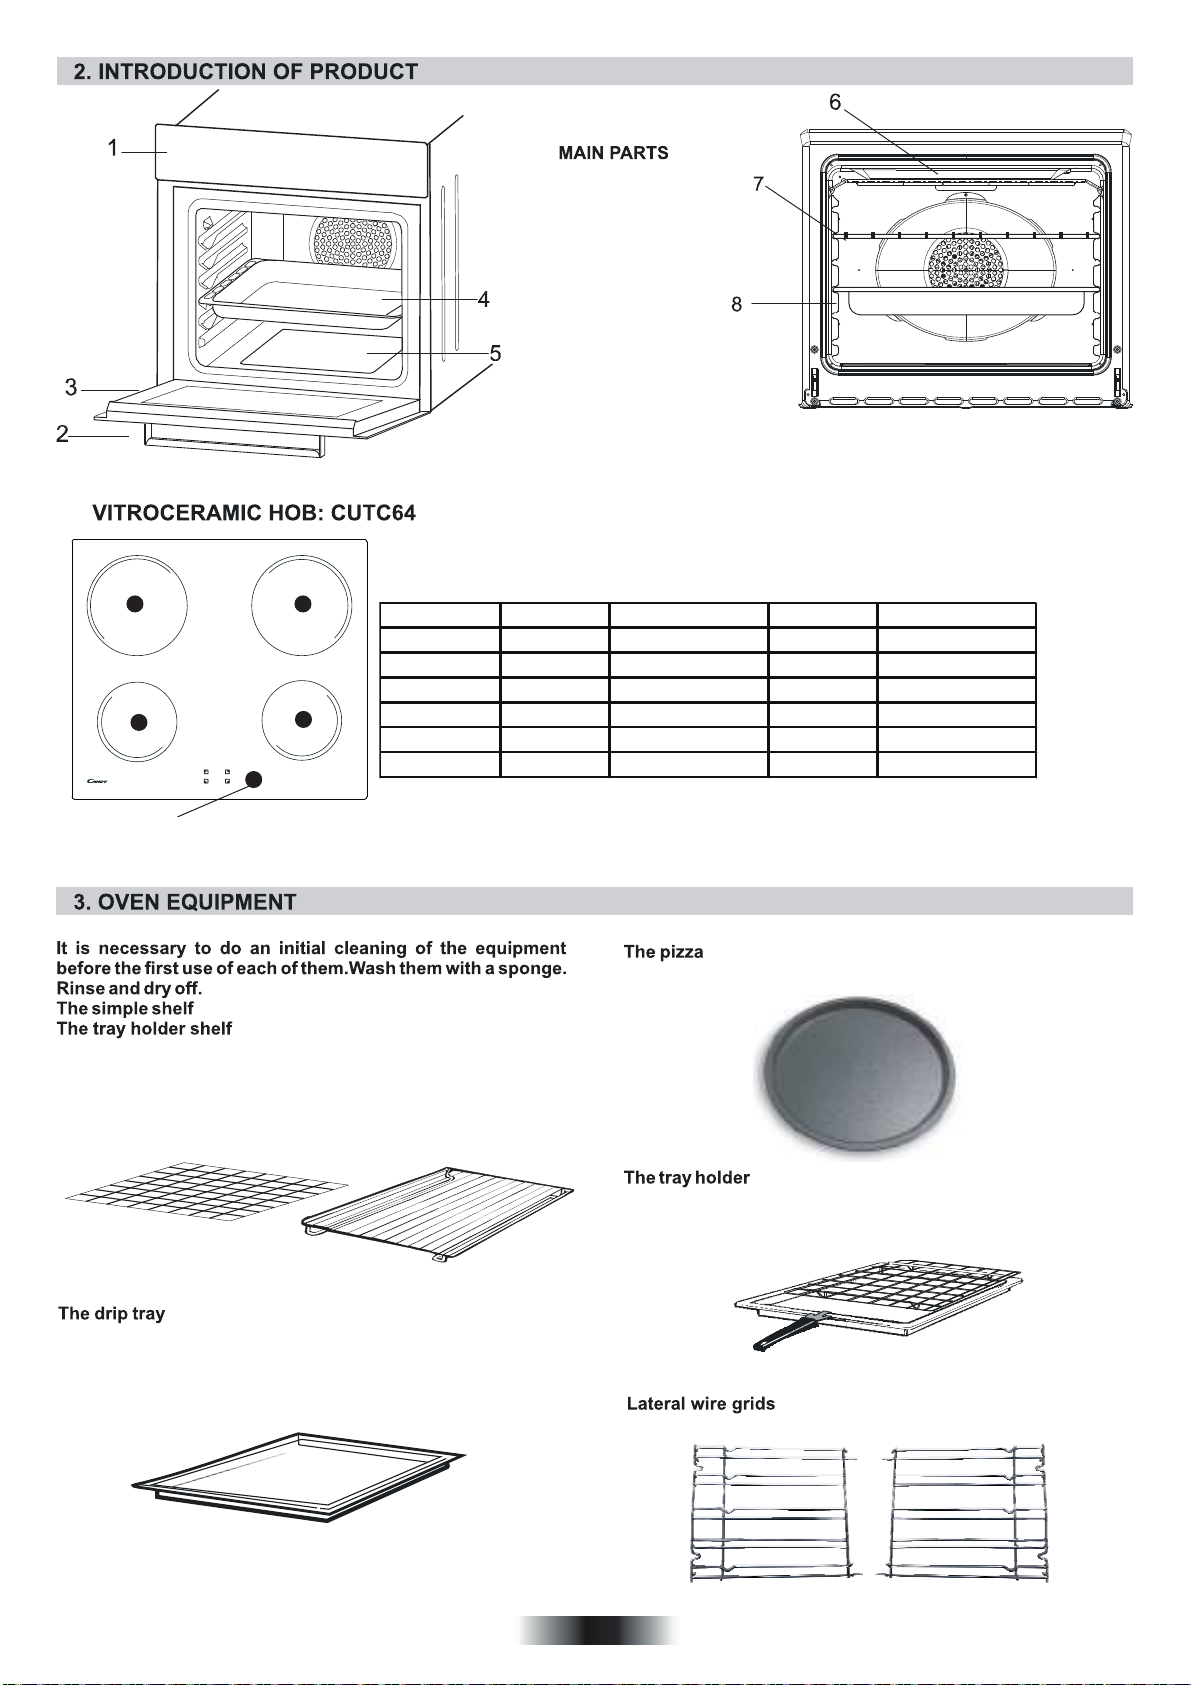
Figure 1
1. Control Panel
2. Oven Door Handle
3. Oven Door
4. Tray
5. Lower Heating
Element
6. Upper Heating
Element
7. Grid
8. Racks
Figure 2
2 3
Models 1 2 3 4
CUTC64 1200W / Ø155 1800W / Ø190 1800W / Ø190 1200W / Ø155
CUTC64FF 1200W / Ø155 1800W / Ø190 1800W / Ø190 1200W / Ø155
CUTC64EXDNF 1200W / Ø155 1600W+800W / Ø180 1200W / Ø155 1000W+700W / Ø190
1
4
CUTC64EXDFF 1200W / Ø155 1600W+800W / Ø180 1200W / Ø155 1000W+700W / Ø190
CUTCE64EXDFF 1200W / Ø155 1500W+900W / Ø180 1200W / Ø155 1000W+700W / Ø190
5
Vitroceramic Surface
CUTCE64EXDNF 1200W / Ø155 1500W+900W / Ø180 1200W / Ø155 1000W+700W / Ø190
Heater diameters can be changed for releated models.
Image 3
(according to the model)
can take moulds and dishes.
is especially good for grilling things. Use it
with the drip tray.
The special profile of the shelves means they stay horizontal even
when pulled right out. There is no risk of a dish sliding or spilling.
set is designed for pizza cooking. In order to obtain the
best results the set must be used together with Pizza function.
Figure 6
Figure 4
catches the juices from grilled foods. It is only used
with the Grill, Rotisserie, or Fan Assisted Grill ; remove it from the
oven for other cooking methods.
Never use the drip tray as a roasting tray as this creates smoke
and fat will spatter your oven making it dirty.
Figure 5
The tray holder shelf is ideal for grilling. Use it in conjunction with
the drip tray. A handle is included to assist in moving the both
accessories safely. Do no leave the handle inside the oven.
Figure 7
Lateral wire grid if included.
06 GB
Page 7
4. USEFUL TIPS
4.1 SHELF SAFETY SYSTEM
The oven features a new shelf safety
system.
This allows you to pull out the oven
shelves when inspecting the food
without danger of food spillages or
shelves falling accidentally out of the
oven.
Figure 8
To remove the shelves pull out and lift.
4.2 GRILLING
Grilling makes it possible to give food a rich brown colour quickly.
For browning we recommend that you insert the grill onto the
fourth level, depending on the proportions of the food (see fig.
page 12).
Almost all food can be cooked under the grill except for very lean
game and meat rolls.
Meat and fish that are going to be grilled should first be lightly
doused with oil.
4.3 COOKING TIME
For recommended cooking times and temperatures the first time you
use the oven, refer to the tables on page 12. You may then wish to vary
these times and settings in the light of your own experience.
4.4 CLEANING AND MAINTENANCE
Clean the stainless steel and enamelled surfaces with warm, soapy
water or with suitable brand products. On no account use abrasive
powders that may damage surfaces and ruin the oven’s appearance.
It is very important to clean the oven each time that it is used. Melted
fat is deposited on the sides of the oven during cooking. The next time
the oven is used this fat could cause unpleasant odours and might
even jeopardise the success of the cooking. Use hot water and
detergent to clean; rinse out thoroughly.
To make this chore unnecessary all models can be lined with catalytic
self-cleaning panels: these are supplied as an optional extra (see the
section SELF-CLEANING OVEN WITH CATALYTIC LINING).
Use detergents and abrasive metal pads like «brillo pads» for the
stainless steel grills.
The glass surfaces as the top, oven door and warming compartment
door must be cleaned when they are cold. Damage that occurs to
them because this rule was not adhered to are not covered by the
guarantee.
To replace the interior light:
• switch off the mains power supply and unscrew bulb. Replace with an
identical bulb that can withstand very high temperatures.
4.6 SERVICE CENTRE
Before calling the Service Centre
If the oven is not working, we recommend that:
you check that the oven is properly plugged into the power supply.
If the cause of the fault cannot be detected:
disconnect the oven from the mains, do not touch the oven and call the
after sales service.
Before calling the Service Centre remember to make a note of the
serial number on the specifications plate.
The oven is supplied with a guarantee certificate that ensures that it
will be repaired free of charge by the Service Centre
5. PREPARATION FOR INSTALLATION AND USE
Manufactured with best quality parts and materials, this modern,
functional and practical oven will meet your needs in all respects.
Make sure to read this manual to obtain successful results and not
to experience any problems in the future. The information given
below contain rules that are necessary for correct positioning and
service operations. They should be read without fail especially by
the technican who will install the appliance.
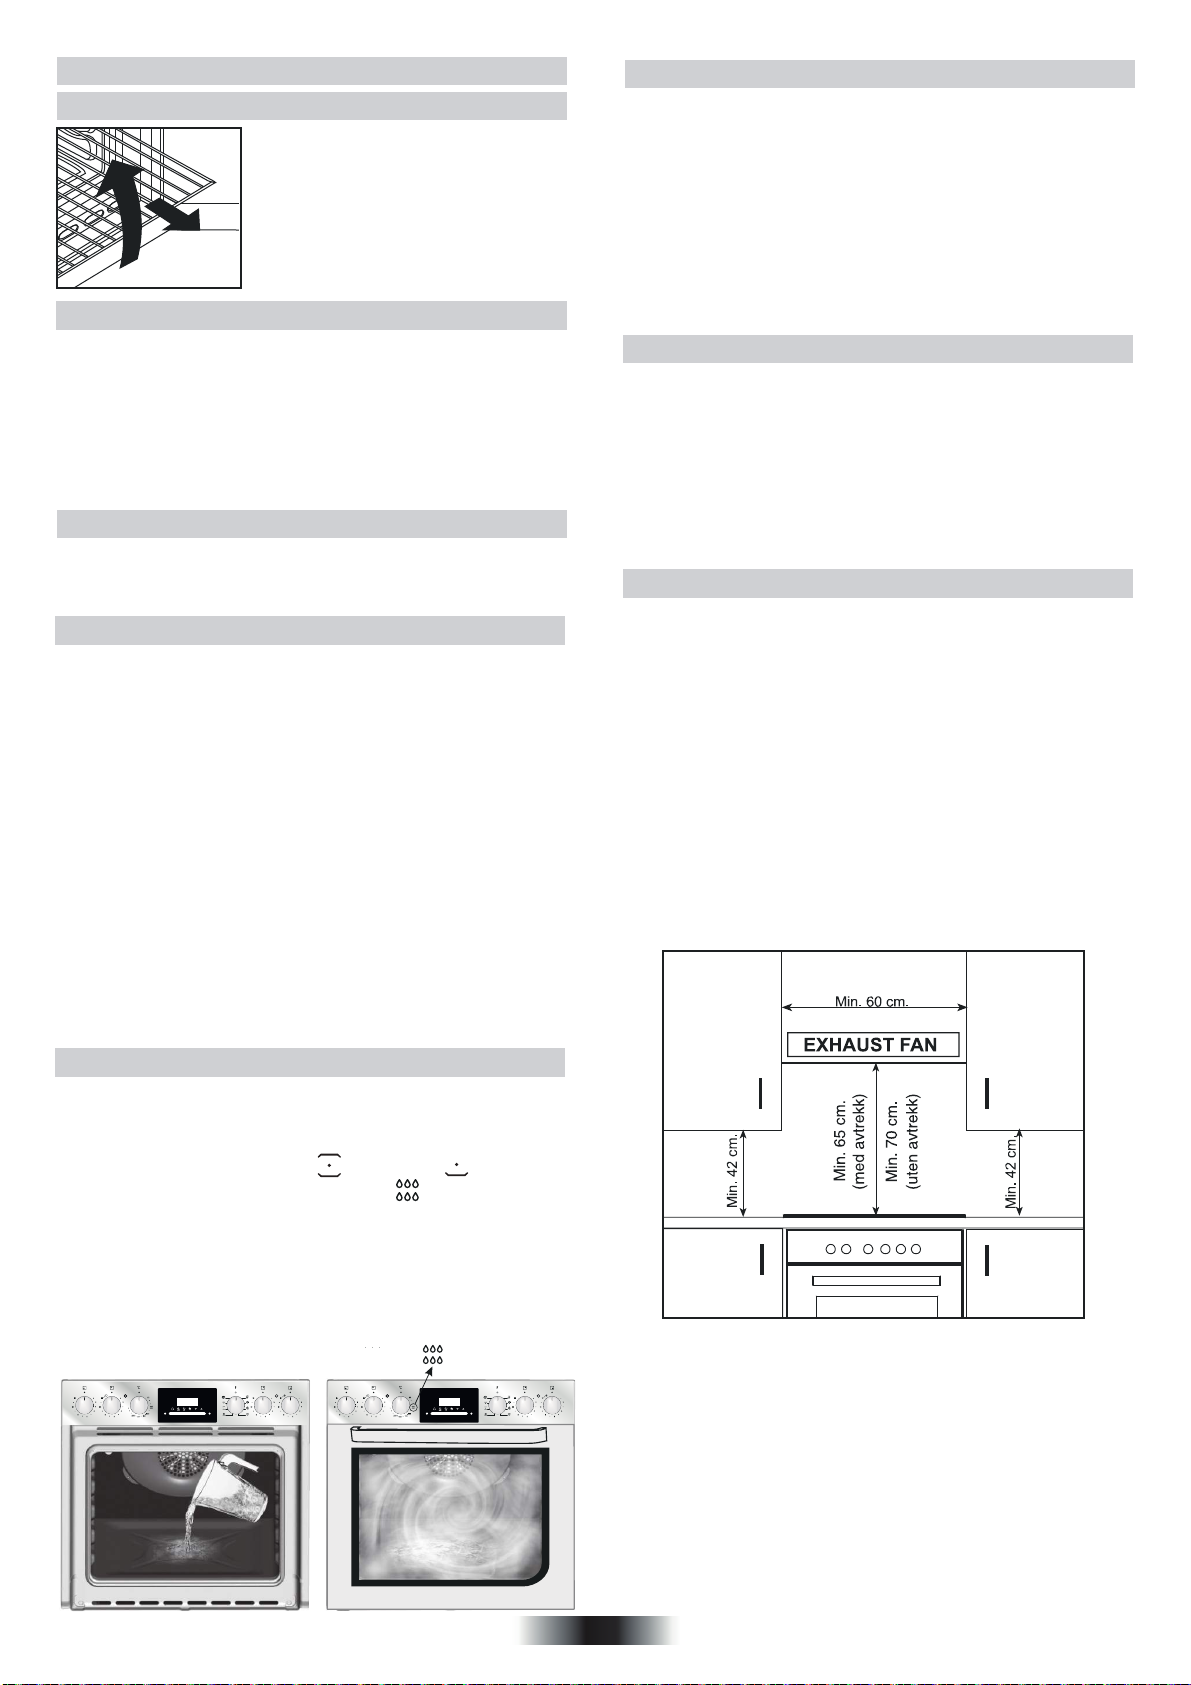
5.1 CHOOSING A PLACE FOR THE OVEN / HOB
There are several points to pay attention to when choosing a place
for your oven. Make sure to take into account our
recommendations below in order to prevent any problems and
dangerous situations, which might occur later!
• When choosing a place
paid that there are no flammable or combustible materials in the
close vicinity, such as curtains, oilcloth etc., Which quickly catch
fire.
• Required changes to wall
above the built-in combined product as well as minimum height
from the
oven board are show in Figure 9.
Accordingly, the exhaust fan should be at a minimum
height of 65 cm from the worktop. If there is no exhaust fan the
height should not be less than 70 cm.
for the oven / hob, attention should be
cabinets and exhaust fans
4.5 AQUACTIVA FUNCTION
The Aquactiva procedure uses steam to help remove remaining fat
and food particles from the oven.
1. Pour 300 ml of water into the Aquactiva container at the bottom
of the oven.
2. Set the oven function to Static ( )or Bottom ( )heater
3. Set the temperature to the Aquactiva icon
4. Allow the program to operate for 30 minutes.
5. After 30 minutes switch off the program and allow the oven to
cool down.
6. When the appliance is cool, clean the inner surfaces of the oven
with a cloth.
Warning: Make sure that the appliance is cool before you touch it.
Care must be taken with all hot surfaces as there is a risk of burns.
Use distilled or drinkable water.
MAX
300 ml
MAX
Figure 9
07 GB
Page 8
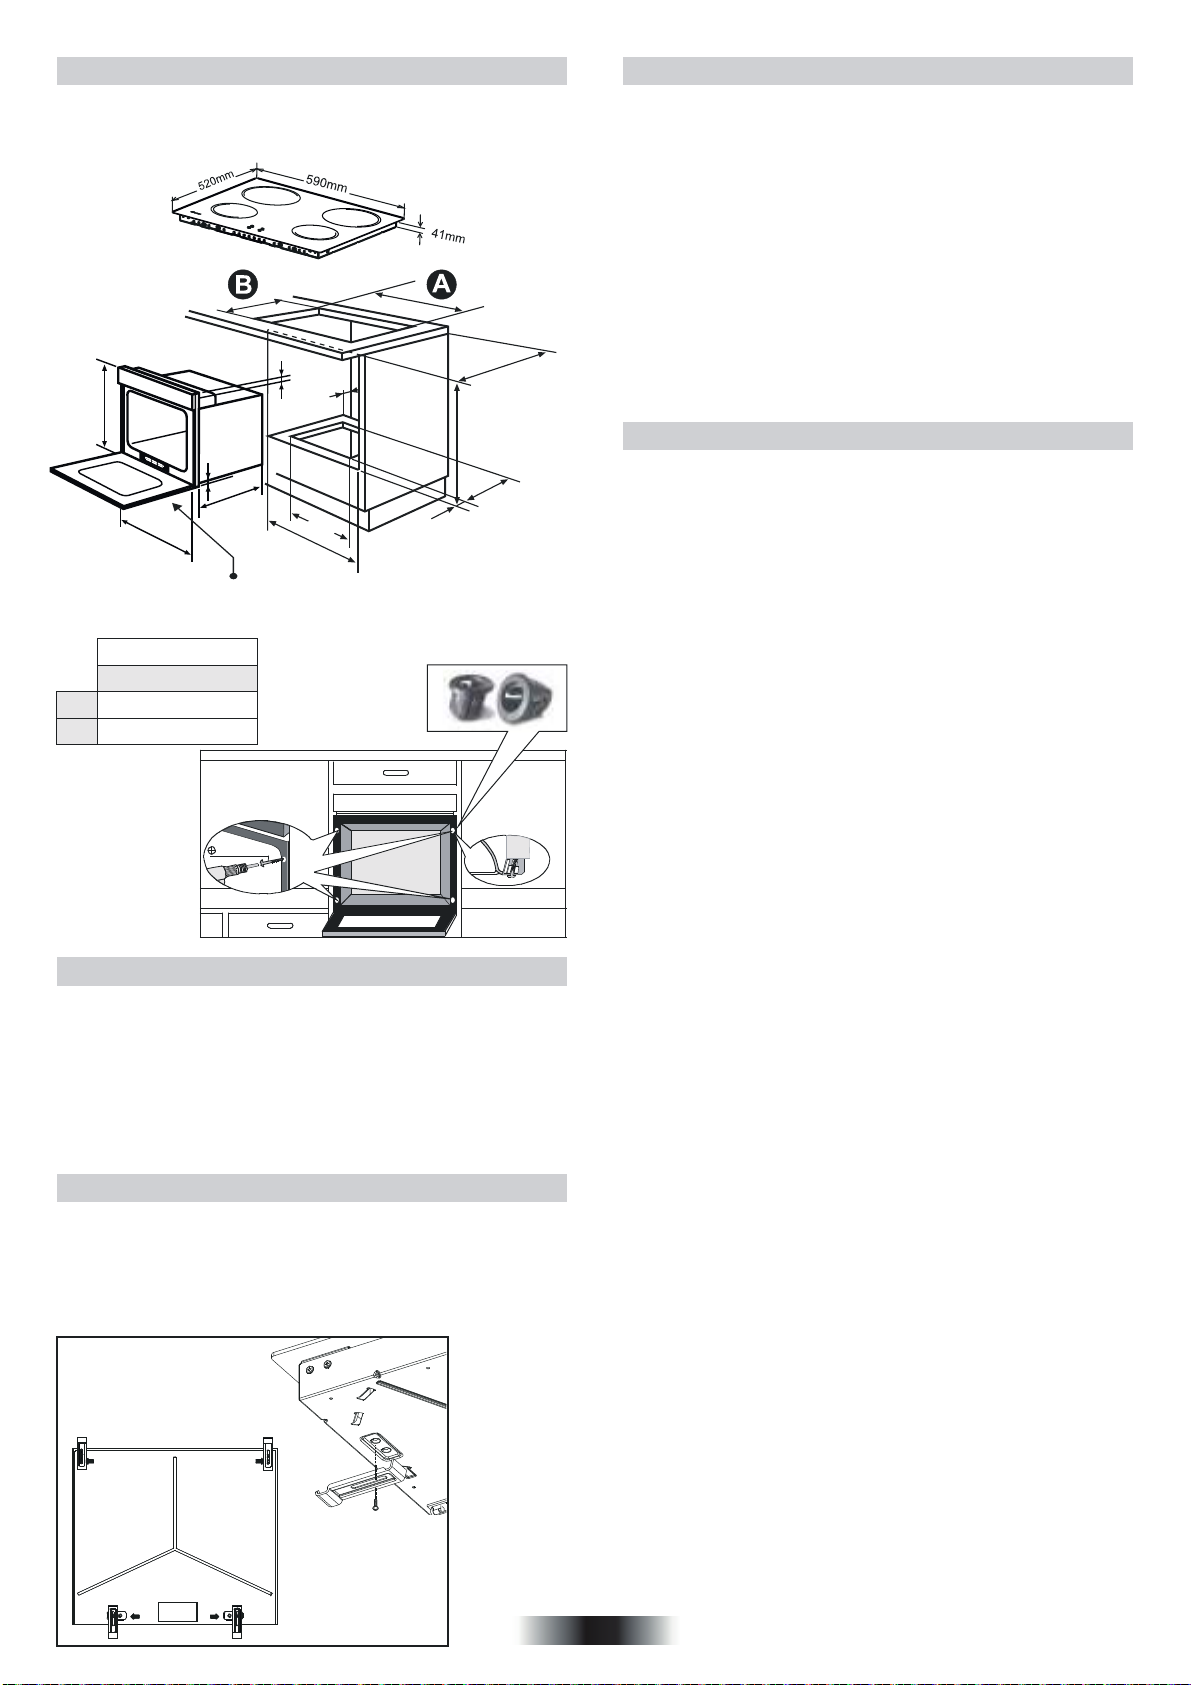
5.2 OVEN and HOB INSTALLATION
5.2.3. Fixing the oven
Figure 10 - Regular Installation of Oven
595 mm
595 mm
5 mm
530 mm
15 mm
400 mm
560 mm
45
mm
560 mm
Min. 600 mm
400 mm
50 mm
Rating Plate
Table 2
BUILDING-IN HOBS
VITRO
A
B
560 mm
490 mm
4x3.5x25
5.2.1. Installation Steps
1.Place the hob into the opening on worktop. The size of opening is
given in Figure 10. Fordetails, see the headings either Fixing the
vitroceramic hob.
.2.Connect the hob to the oven using the the plug given on the hob.
The socket for plug is placed on the rear panel of oven.
3.Connect the oven to the electrical supply.
4.Place the oven into its built-in niche. Either placement in Figure10 is
applicable depending on the size of cabinet opening. For details, see
the heading Fixing the oven.
5.2.2. Fixing the vitroceramic hob
Normal Fixing:
• Get the fixing clips from accessory bag and screw them into the
position shown on bottom box. (Do not tighten the screws to block
clips, they should move freely)
• Insert the hob in center position of cut out.
• Turn the clips and tighten them fully.
Fit the oven into the space provided in the kitchen unit; it may be
fitted underneath a work top or into an upright cupboard. Fix the
oven in position by screwing into place, using the two fixing holes
in the frame. To locate the fixing holes, open the oven door and
look inside.
The dimensions and material of
the cabinet in which the oven will
be installed must be correct and resistant to increases in
temparature. In a correct installation, contact with electrical or
insulated parts must be prevented. Insulating parts need to be
fitted in a way to ensure that they cannot be removed by using any
kind of tool. Installing the appliance in the close vicinity of a
refrigerator or a deep-freezer is not recommended. Otherwise, the
performance of the above-mentioned appliances will be
negatively affected due to emanating heat.
5.2.4. Warning
Warning regarding the installation of built-in oven without cooling
fan. Prior inserting the oven, it is necessary to remove the rear
kitchen element panel in the area of the oven opening. Equally, the
front part of the element must have an opening.
• When a cooktop burner knob is brought to another position than
the ‘’0’’ position, the operation light will be on.
• Use only pots which fit the burner diameter.
• Before placing the pot on the burner, be sure that its bottom is not
wet.
• Never operate a cooktop burner while empty. Pot temperature
may be high when the appliance is in use. Therefore, it is
recommended that you keep children and pets away from the hob
both during and after operation.
• In case you notice any crack on the ceramic glass , it must be
immediately switched off and replaced by the Authorised Service.
• After use (in order to ensure its continuously effective operation
and long service life), hotplates need to be thoroughly cleaned
using appropriate cleaning materials. In order to prevent any
formation of rust and preserve their initial appearance, it is
recommended to clean the hotplates rubbing them with a piece of
cloth that is slightly damped by oil. Never
• In order to prevent waste of energy, the pots to be used should
not be smaller or larger than the burner surfaces.
• Take the necessary measures so that small children will not come
close to the burner surface in any way, as it will be hot in operating
position.
• Due to the flammable nature of hot oil, operations such as frying
should be performed with the container lids closed.
• Do not cut anything, bread etc., on the glass. Do not use pots with
aluminium bottoms. Avoid placing too heavy materials on your
hob.
• Do not place materials such as plastic, aluminium on the ceramic
glass surface. If for any reason there should be a plastic or
aluminium material melted on it, clean it up with a spatula
immediately.
• Do not wipe the ceramic surface with materials such as dish cloth
or sponge. Residues of detergents may lead to fire as well as
cause the glass colour to fade.
use steam cleaners.
Figure 11
08 GB
Page 9
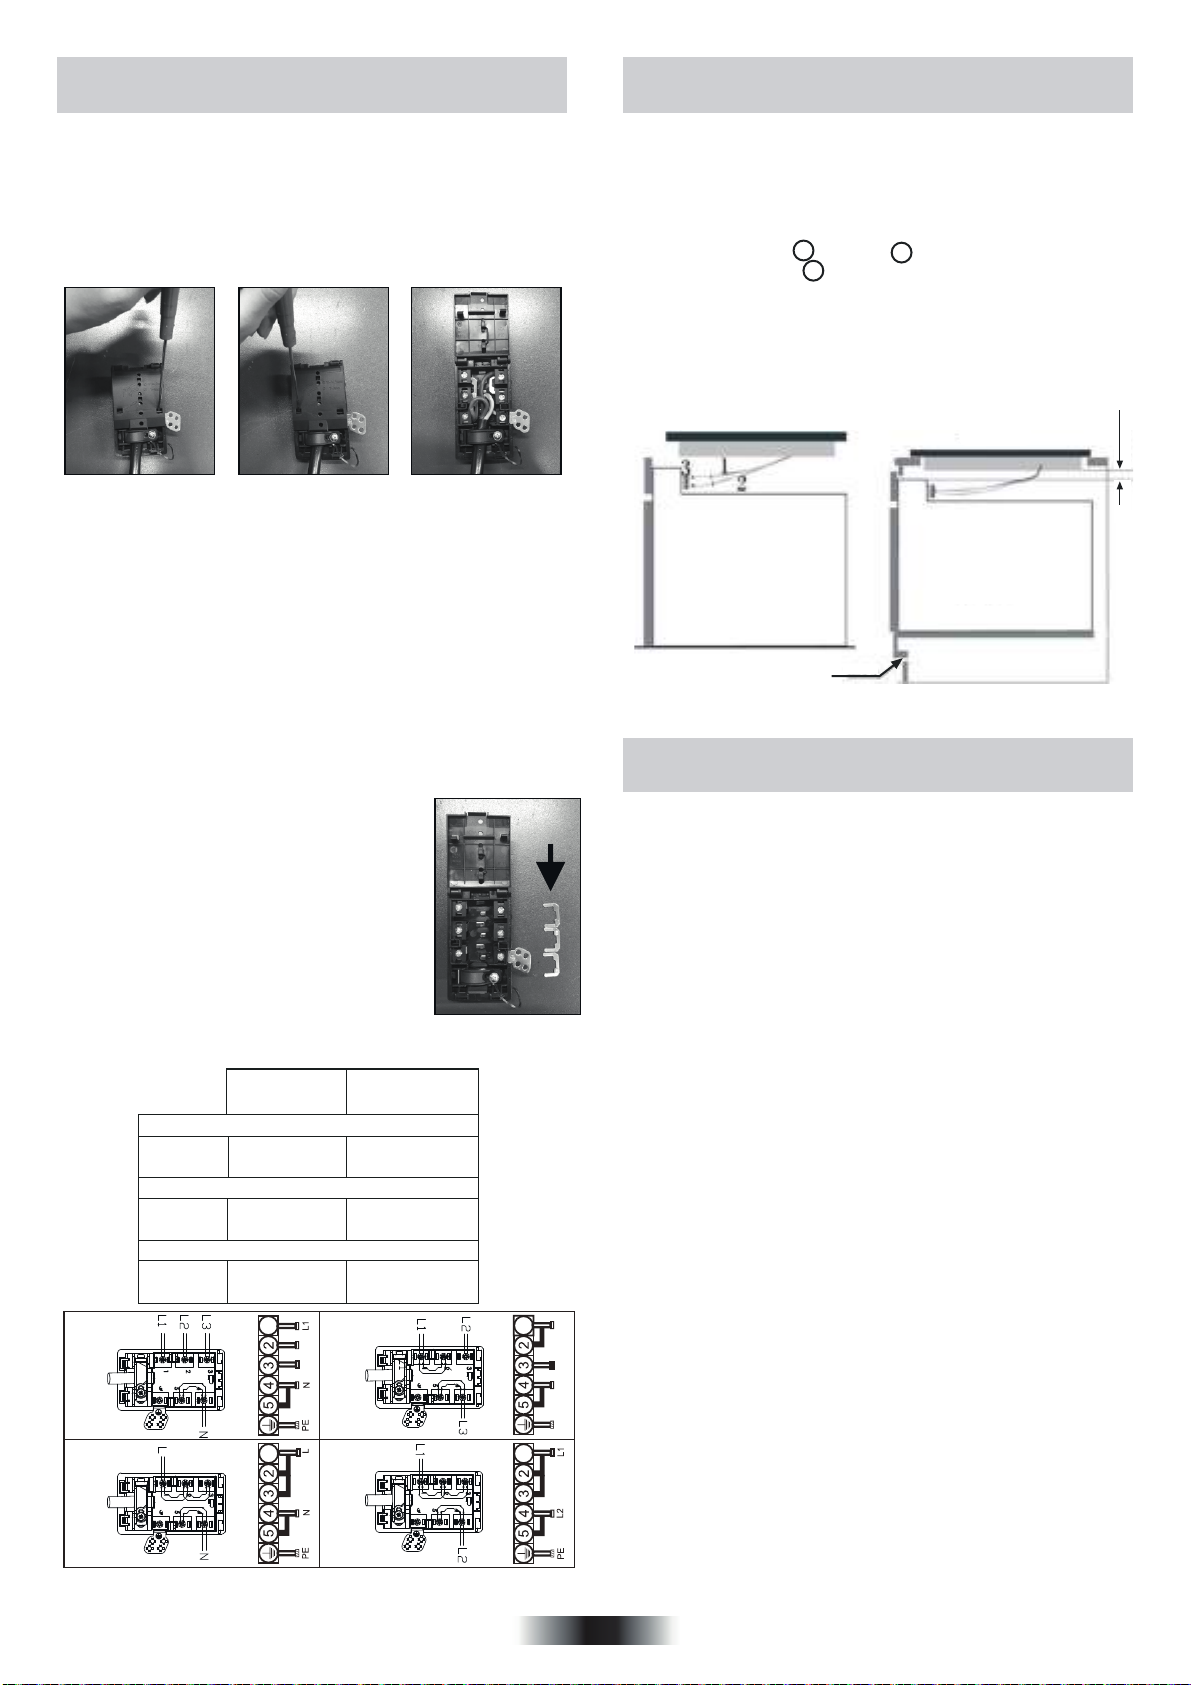
5.3 WIRING AND SAFETY OF THE BUILT-IN
COMBINED OVEN
5.4 VITROCERAMIC HOB WITHOUT
CONTROL KNOB
•Before making the connection, make sure that the installation is
protected by a suitable fuse, see table, and that it is fitted with
wires of a large enough section to supply the appliance normally.
•
Turn over the oven / hob, glass side against the work top, taking
care to protect the glass.
•Open the cover in the following sequence;
Figure 12 Figure 13 Figure 14
• Unscrew the cable clamp “1”,
• Find the two tabs located on the sides,
• Put the blade of a flat screw-driver in front of each tab “2” e “3”,
push in and press,
• Remove the cover.
To release the power supplying cord.
• Remove the screws retaining the terminal block which contains
the shunt bars and the conductors of the supply cord,
• Pull out the supply cord.
Connection to the electrical circuit on glass ceramic
hob shall
be
made only via the oven.
To proceed with the connection, it is necessary to joint
male connectors 1 and 2 of the hob with the
“female” connectors 3 of the oven or of the control panel.
INSTALLATION WITH OVEN
22 mini
HOB
OVEN
550x10
Bult-in oven "apertures" : Refer to the
Figure 17
instructon booklet concerned.
•Operations to be carried out to make a mew connection:
-Choose the power supply cable in accordance with the
recommendations in the table.
-Pass the power supply cable in to the clamp.
-Strip the end of each conductor of the supply
SHUNT
cord on a 10 mm length, by taking in account
the requested length of the cord for the
connection to the terminal block.
-According to the installation and with the help
of shunt bars which you should have recovered
in the
first operation, fix the conductor as
shown on the chart.
-Fix the cover.
-Screw the cable clamp.
Note: make sure the terminal board screws are
Figure 15
tight.
~
380-415 V3 N
~
LAY OUT
"1-3-5"
MONOPHASE or TWO PHASES 220-240 V
Cable
HO5V2V2F
THREE PHASES 220-240 V3~
Cable
HO5V2V2F
THREE PHASES 380-415 V2N~
Cable
HO5V2V2F
4x1,5 mm
4x1,5 mm
3x4 mm
1
1
2
L2
L3
2
2
~
220-240 V3
~
LAY OUT
"2-4"
3x4 mm
4x1,5 mm
4x1,5 mm
~
2
2
2
1
1
This connection can be made before or after the oven is
screwed into place.
L1
L3 L2
PE
220-240 V
N
Neutral
=
220-240 V2
PE
EarthL1 / L2 / L3 = Phase
=
Figure 16
09 GB
Page 10
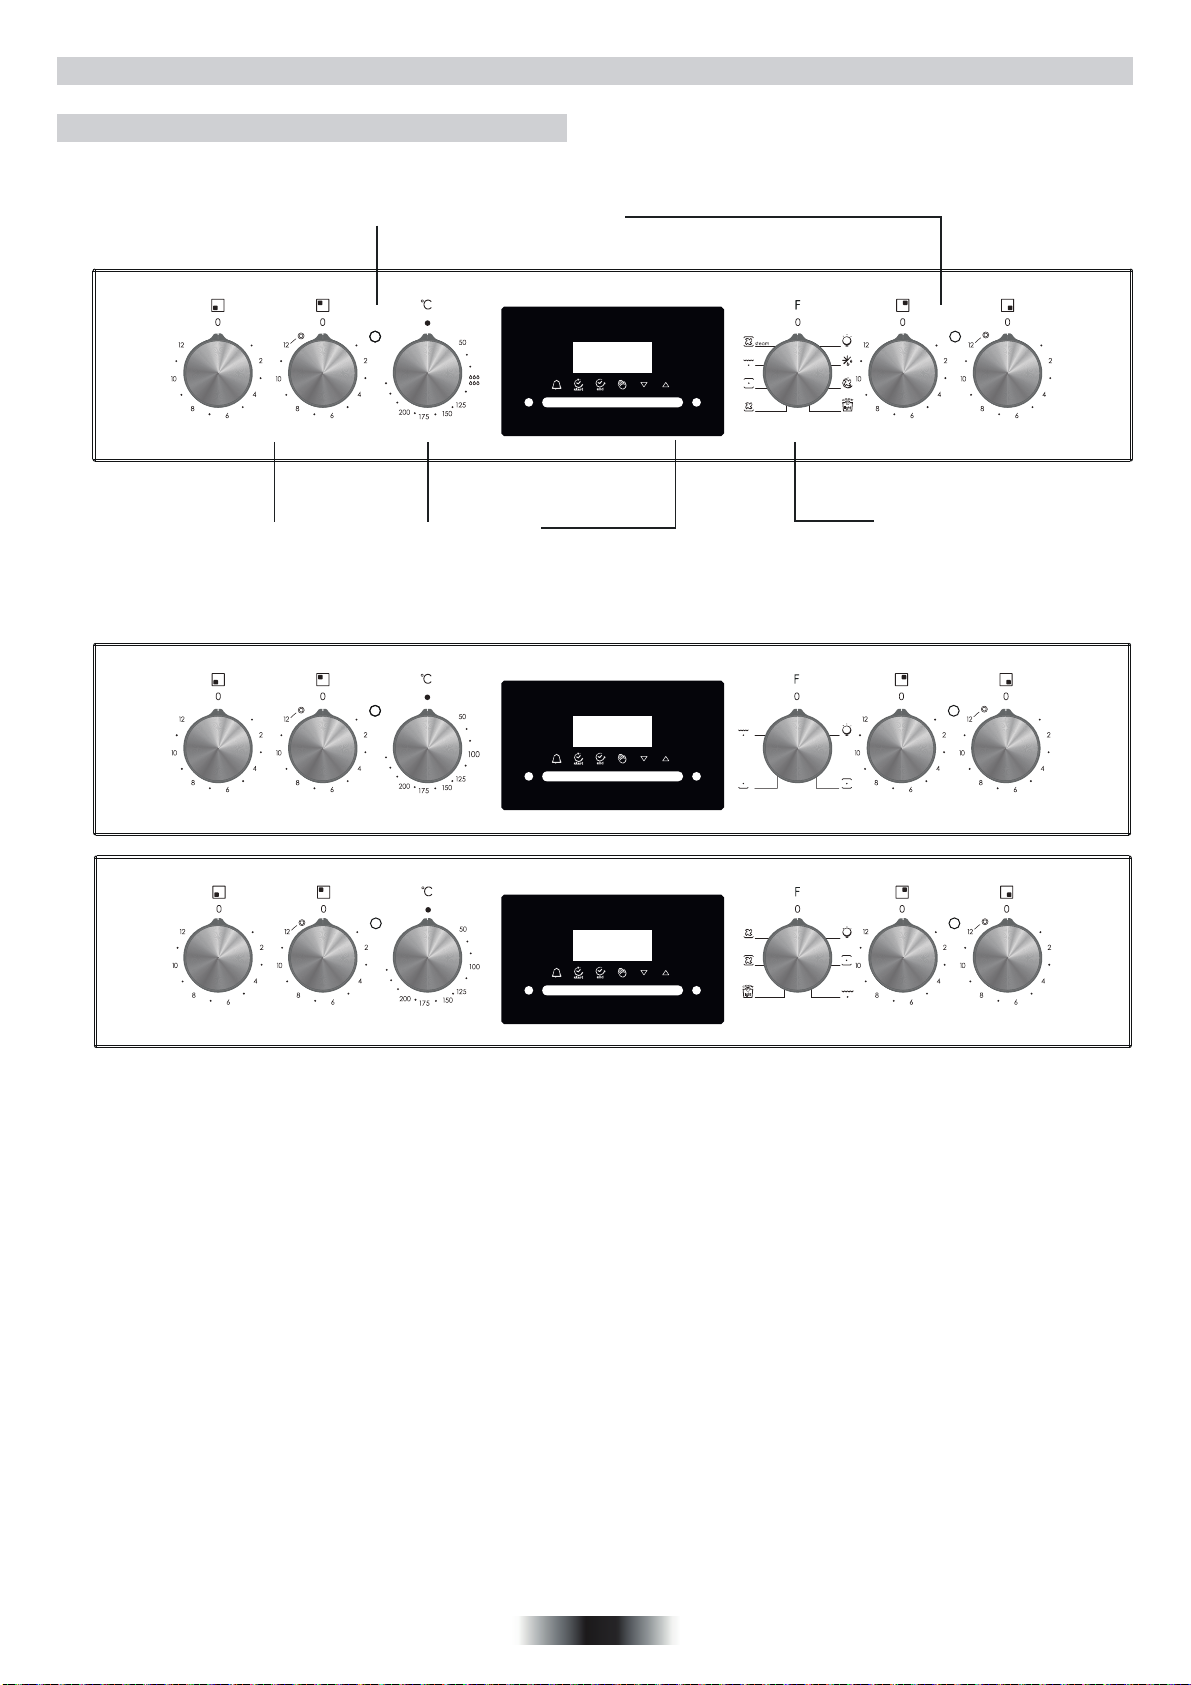
6. USING THE OVEN / HOB
6.1 CONTROL PANELS
Figure 18
Oven Thermostat Light
Electric Burner
Control Knob
MAX
Oven
Thermostat Knob
MAX
Electric Burner Control Light
Timer Control
Knob
Oven Function
Control Knob
Figure 19
MAX
10 GB
Page 11
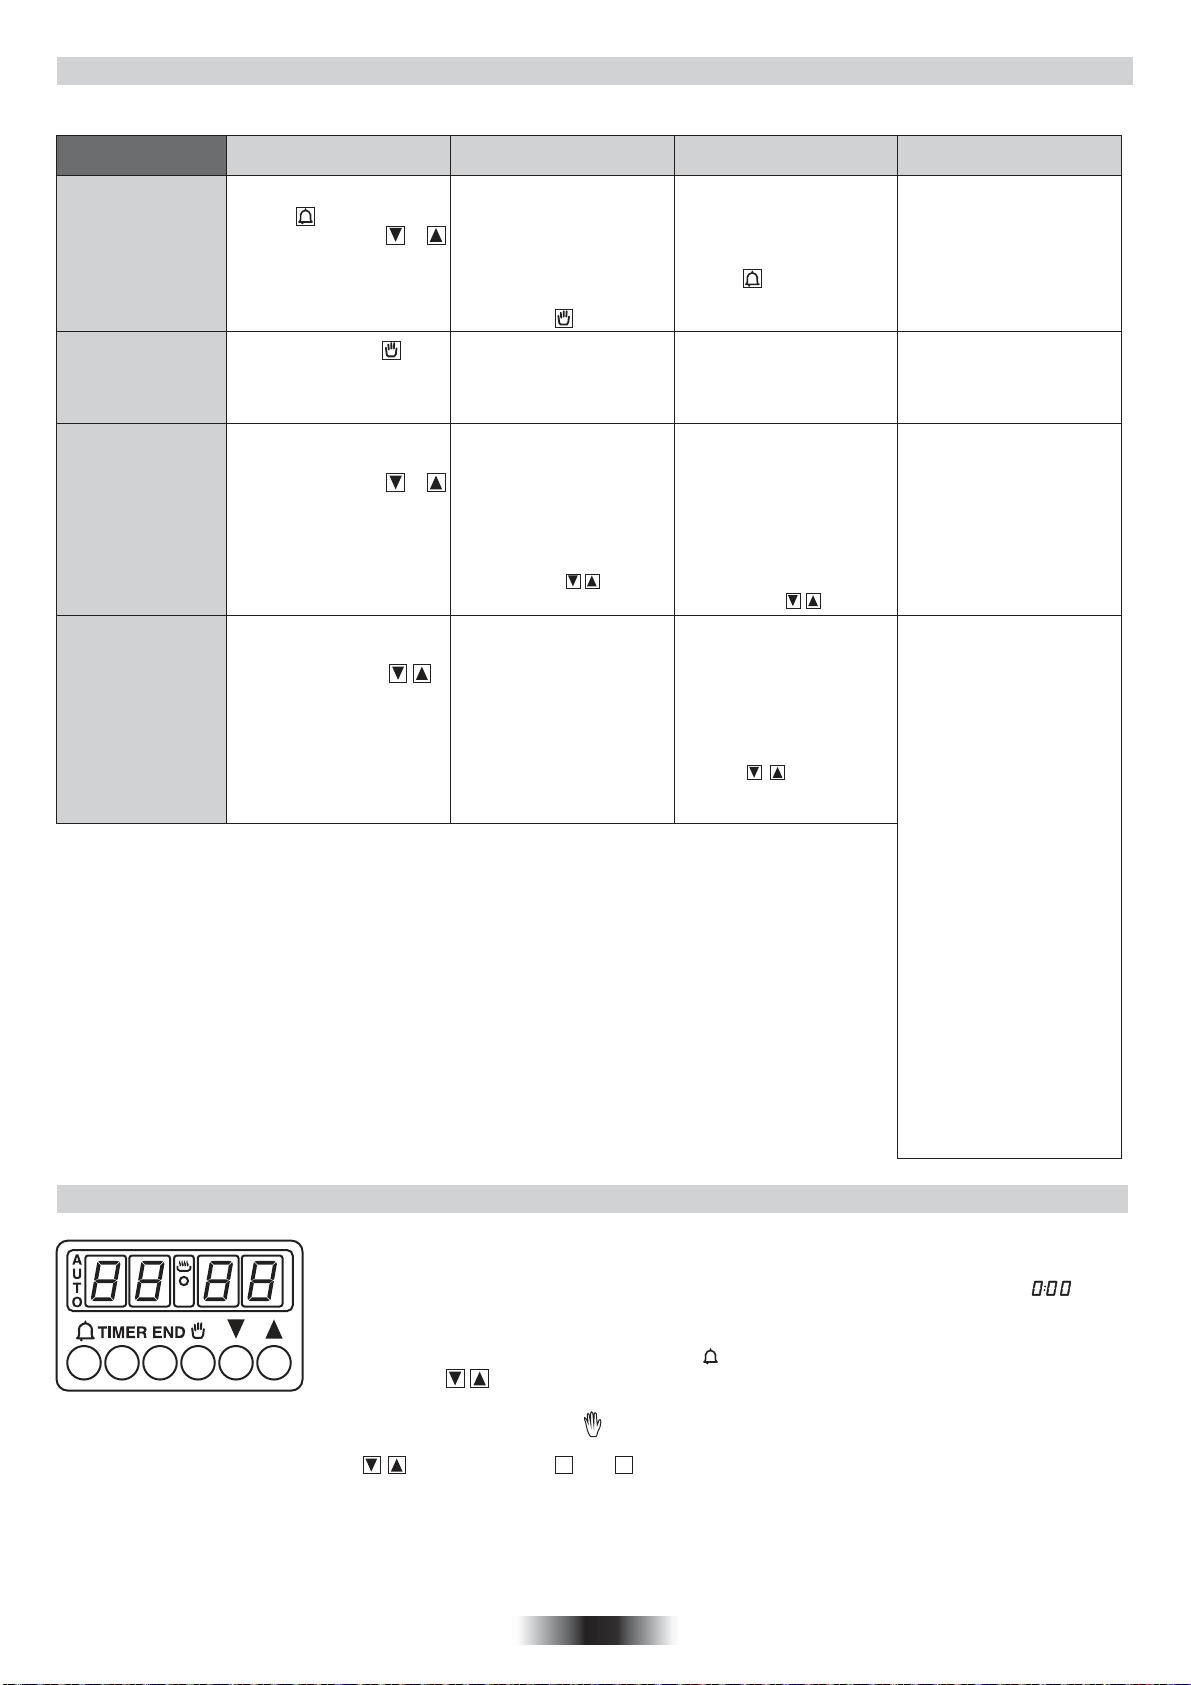
6.2 USE OF THE ELECTRONIC PROGRAMMER
FUNCTION
MINUTE MINDER
MANUAL
FUNCTION
COOKING
TIME
END OF
COOKING
HOW TO ACTIVATE IT
• Press and hold the
button
• Press the buttons or
to set the required time
• Release all the buttons
• Press the button
• Set the cooking function
with the oven function
selector
•
Press and hold the
TIMER button
• Press the buttons or
to set the lenght of cooking required
• Release all buttons
• Set the cooking function with
the oven function selector
• Press and hold the END
button
• Press the buttons
to set the time at which you
wish the oven to switch off
• Release the buttons
• Set the cooking function
with the oven function
selector
HOW TO SWITCH IT OFF
• When the set time as
elapsed an audible alarm
is activated (this alarm will
stop on its own, however
it can be stopped
immediately by pressing
the button)
•
Turn the oven function
selector to position O.
• When the time is elapsed
the oven will switch off
automatically. Should you
wish to stop cooking
earlier either turn the
function selector to 0, or
set time to 0:00
(TIMER and buttons)
• At the time set, the oven
will switch off. To switch
off manually, turn the
oven function selector
to position O.
WHAT IT DOES
• Sounds an alarm at the
end of the set time.
• To check how long is
left to run press the
button
• Enables you to operate
the oven.
• It allows to preset the
cooking time required
for the recipe chosen
• To check how long is
left to run press the
TIMER button.
• To alter/change the
preset time press
TIMER and buttons
• Enables you to set the
end of cooking time
• To check the preset
time press the END
button
• To modify the preset
time press buttons
END +
WHAT IT IS FOR
•Allows to use the oven as
alarm clock (could be
activated either with
operating the oven or
with out operating the
oven)
• For cooking the desired
recipes
• At the end of the
cooking set time,
the oven will switch
off automatically and an
audible alarm will ring.
This function is typically
•
used with “cooking time”
function. For example
if the dish has to be cooked
for 45 minutes and needs
to be ready by 12:30,
simply select the required
function, set the cooking
time to 45 minutes and the
end of cooking time to
12:30.
• Cooking will start automa-
tically at 11:45 (12:30
minus 45 mins) and will
continue until the pre-set
end-of-cooking-time, when
the oven will switch itself
off automatically.
WARNING.
If the END of cooking is
selected without setting
the length of cooking time,
the oven will start cooking
immediately and it will
stop at the END of
cooking time set.
6.3 SETTING THE CORRECT TIME
WARNING : the first operation to carry out after the oven has been installed or following the
interruption of power supply (this is recognizable the display pulsating and showing ) is
setting the correct time. This is achieved as follows.
• Press and hold the TIMER and END buttons ( and TIMER on some models)
• Set time with buttons
• Release all buttons
ATTENTION the oven only operates if set on manual function or preset time.
N.B.: on some models the symbols are replaced by + and - .
11 GB
Page 12
6.4 USING THE COOKTOP BURNERS
6.5 USING THE OVEN
The hob part of the product is controlled via the on the control
panel (Figure 20).
Stage "0" means off position. The remaining 12 stages indicate
the following types of use:
• Locate the sign corresponding to the
cooking zone that you need.
• Turn the control knob to the required
cooking setting.
Initially we recommend that the heat zone
be set at the highest position until such
times as the contents of the saucepan
have reached the required temperature,
the heat can then be reduced to the
required cooking setting.
• The residual heat indicator light is
illuminated when the hob surface
Figure 20
temperature reaches 60 degrees or
above. It will remain on even if the hob is
switched off and will only go out when the hob surface has cooled
down.
• To switch off the hob, turn the knob to "0".
Warning : The extra large highlight zone, will depending upon the
dimensions of the cookware and/or the quantity of food being
cooked provide even higher levels
of performance.
* The oval heating zone consists of two heating areas, a
circular area with a complementary oval shaped section.
Turn the control knob from 1 to 12 to regulate the circular area. To
operate the oval section, simply turn the control knob to position
12 and then select a position from 1 to 12.
* The heating area consists of two concentric zones.
The inner circle is activated when the knob is turned to any of the
positions from 1 to
12. The outer ring will only be activated when
the control is turned beyond 12 up to a power of 1700 W.
First, you need to adjust the oven function (Figure 22 and 23) and
then set the oven temperature to desired value (Figure 24).
Otherwise, the oven will not operate.
When the temperature inside your oven reaches the value you set,
the thermostat will cut the circuit and the thermostat light will go off.
When the temperature falls below the set value, the thermostat will
again be turned on and the thermostat light will be on.
Figure 22 Figure 23 Figure 24
Table 3
Energy Class
EXPLANATION
Symbol
Light
The oven light, red warning light and the fan will be turned
on. Performs the function of defrosting the frozen foods.
Air that has been heated is blown by the fan onto the
different levels. It is ideal for cooking different types of
food at the same time (e.g. meat and fish) without mixing
tastes and smells. It cooks very gently and is ideal for
sponge cakes, pastries, etc.
according
to CENELEC
60350-1
EN
Position
Very Low
1-2
1
Low
3-4
2
Moderate
5-6
3
Medium
7-8
4
High
9-10
5
6
Very High
11-12
YES NO NO NO
To keep a dish hot, melt butter and chocolate...
Slow cooking, sauces, stews, rice pudding poached eggs...
Beans, frozen foods, fruit, boiling water...
Steamed apples, fresh vegetables, pasta, crepes, fish...
More intense cooking, omelettes, steaks...
Steaks,chops, frying...
Some Tips
NO
Figure 21
Resistance of the vitroceramic glass to heat and extreme changes
of temperature is very high. A redness will be noticed on the
heated surface with time. When any heating unit is run, you may
hear a weak sound; this is normal and it has to do with the
technical structure of the system.
It does not pose any problems in terms of quality. In case sharpedged pots should rub against or roughly placed on the
vitroceramic glass, the sur face may become damaged. It is
recommended that you pay attention to this.
:
retaining the heat.
the food has heated through.
*
The oven’s thermostat and warning light and the lower
and upper heating elements will be switched on.
The oven’s thermostat and warning light and the fan,
the lower and upper heating elements will be switch on
STEAM
using the water inside the cavity to generate steam.
The oven’s thermostat and warning light and the fan,
the lower and upper heating elements will be switch on.
The oven’s thermostat and warning light, the upper
heating element, the grill heater, the fun function will be
switched on.
This function is ideal for delicate dishes (pies-souffle).
The oven’s thermostat and warning light and the
lower heating element will be switch on.
The oven’s thermostat and warning light and the
upper heating element will be switch on.
HCTS827XL/E,
HCT601X/E,
HCT201X/E
HCTS827XL/E
HCT601X/E
* Tested in accordance with the CENELEC EN 60350-1 used
for definition of energy class.
Where possible, avoid pre-heating the oven and always try
to fill it.
Open the oven door as infrequently as possible, because
heat from the cavity disperses every time it is opened.
For a significant energy saving, switch off the oven between
5 and 10 minutes before the planned end of the cooking time,
and use the residual heat that the oven continues to
generate.
Keep the seals clean and in order, to avoid any heat
dispersal outside of the cavity.
If you have an electric contract with an hourly tariff, the
"delayed cooking" programme makes energy saving more
simple, moving the cooking process to start at the reduced
tariff time slot.
12 GB
Page 13
6.6 FUNCTIONS
Availability of the functions explained below vary depending on
the product model.
LAMP
Turns on the oven light.
DEFROST
When the dial is set to this position. The fan circulates air at
room temperature around the, frozen food so that it defrosts
in a few minutes without the protein content of the food
being changed or altered.
MULTI-LEVEL
Both top and bottom elements are used with the fan
circulating the air inside the oven. We recommend you use
this method for poultry, pastries, fish and vegetables. Heat
penetrates into the food better and both the cooking and
preheating times are reduced. You can cook different foods at the
same time with or without the same preparation in one or more
positions. This cooking method gives even heat distribution and
the smells are not mixed. Allow about ten minutes extra when
cooking foods at the same time.
CONVENTIONAL
In this type of cooking which is described as the
traditional method, the heat emanating evenly from the lower and
upper resistors into the oven ensures even cooking of the lower
and upper side of the food that you are cooking. Adjust the
thermostat knob of your oven to a temperature recommended on
the cooking table for the cooking operation you will perform. A
preheating of the oven for about 10 minutes is recommended.
Leave the food to cook, which is placed in a suitable container, for
the recommended duration. This position is a preferred function in
making cakes, sponge cakes, pastry, baked pasta, lasagne,
pizza.
After the cooking/baking, turn off the oven function control knob
and the thermostat. Take the cooked/baked food out of the oven,
place it on a safe place and ensure that the oven completely cools
off by keeping the oven door open. As the oven will be hot, stay
away from the oven and keep your children away as well.
EASY STEAM
The bottom heating together with the fan will be
STEAM
switched on using the water inside the cavity to gener-
ate steam.
It is necessary to add 200ml of water in the cavity and rotate the
knob to this function. Please refer to the related recipes table.
GRILL
This function is used for grills, roast chicken and roast on
skewer. For grills; put the foods on the grid , and on the highest
rack. After placing the oven tray on the third . Rack, you can start
the grill operation. The tray placed on the thrid rack will ensure that
the oil dropping from the foods will be collected.
When grilling, the oven door must be closed and the oven
temperature should be adjusted to 190° C.
Turn your oven’s thermostat knob so it will point to this
temperature value. After a preheating period of 5 minutes, put your
foods into the oven.
After the cooking, turn off the oven function control knob and the
thermostat.
Take the cooked/baked food out of the oven, place it on a safe
place and ensure that the oven completely cools off by keeping the
oven door open. As the oven will be hot, stay away from the oven
and keep your children away.
CONVECTION + FAN
This is the position where the ai r coming from the lower
and upper
Adjust the thermostat knob of your oven to a temperature
recommended on the cooking table for the cooking operation you
will perform. Turn the oven so it will point to the symbol of this
function, adjust the oven timer to the recommended time for the
cooking and preheat the oven for about 10 minutes. The food
placed in a suitable container is put into the oven and the
operation is started. This position is a position where usually very
good results are obtained in baking pastry. All parts of the foods wil
l be cooked evenly in this position.
Suitable for cooking with one tray.
After the cooking/baking, turn off the oven function control knob
and the temperature setting. Take the cooked/baked food out of
the oven, place it on a safe place and ensure that the oven
completely cools off by keeping the oven door open. As the oven
will be hot, stay away from the oven and keep your children away.
BOTTOM HEATING + FAN
air inside the oven. This method is ideal for juicy fruit flans, tarts,
quiches and pâté. It prevents food from drying and encourages rising
in cakes, bread dough and other bottom-cooked food. Place the shelf
in the bottom position.
BOTTOM
dishes. Use this for flans, quiches, tarts, pate and any cooking that
needs more heat frombelow.
COOK LIGHT
use of the grill and fan combined with a pulsating cycle of air, it will
retain the moisture content of the food, grilling the surface and using a
shorter cooking time, without compromising on taste.
It is particularly suitable for cooking meat, roasted vegetables and
omelettes. The cycle of pulsed air keeps the humidity inside the oven
and the moisture content of the food, preserving the nutritional values
and ensuring a rapid uniform cooking process.
Try all your recipes and reduce the amount of dressing you usually use
and experience the lightness of this new function!
DISHES
Layered
pastry
Cake
Cookie
Grilled
meatballs
Watery
food
Chicken
Chop
Beefstake
Two-tray cake
Two-tray pastry
heating elements is circulated into the oven by the fan.
The bottom heating element is used with the fan circulating the
Using the lower element. Ideal for cooking all pastry based
The "COOK LIGHT" function allows you to cook in a healthier
way, by reducing the amount of fat or oil required. Thanks to the
LOWER - UPPER
Thermostat
pos. (°C).
170 - 190
170 - 190
170 - 190
175 -200
200
Rack
pos.
2-3
2-3
2-3
3
2-3
LOWER-UPPER FAN GRILL
Cooing
period (dk)
35 - 45
30 - 40
30 - 40
40 - 50
45 - 60
Thermostat
pos. (°C).
170 - 190
150 - 190
150 - 190
175 -200
200
Rack
pos.
2-3
2-3-4
2-3-4
2-3
3
Cooing
period (dk)
25 - 35
25 - 35
25 - 35
40 - 50
45 - 60
Thermostat
pos. (°C).
200
200
200
200
Rack
pos.
4-5
5
5
Cooing
period (dk)
10 - 15
50 - 60
15 - 25
15 - 25
Table 4
13 GB
Page 14
7. CLEANING AND MAINTENANCE
7.1 GENERAL
Never leave a scraper with a razor blade within the reach of
children.
Never use abrasive products or scouring powders.
Before starting to clean your oven, be sure that all control knobs
are off and your appliance is cooled off. Unplug the appliance.
Do not use cleaning materials containing particles that might
scratch the enamelledand painted parts of your oven. Use cream
cleaners or liquid cleaners, which do not contain particles.
As they might harmthe surfaces, do not use caustic creams,
abrasive cleaning powders, rough wire wool or hard tools. In the
event the excess liquids spilling over your oven should burn, it may
cause a damage to the enamel. Immediately clean up the spilt
liquids.
7.2 CLEANING THE OVEN
Make sure to unplug the oven before starting to clean it.You will
obtain best results if you clean the oven interior while the oven is
slightly warm. Wipe your oven with a soft piece of cloth dampened
with soap water after each use. Then wipe it again, this time with a
wetted cloth, and wipe it dry. A complete cleaning may be
necessary from time to time, using a liquid cleaning material. Do
not clean using dry and powder type cleaners. For products with
catalytic enamel frames, the rear and side walls of the inner frame
do not require cleaning. However; depending on usage, it is
recommended that you replace them after a certain period of time.
7.3 CLEANING THE VITROCERAMIC HOB
. Before carrying out any maintenance work on the hob, allow it
to cool down.
. Only products, (creams and scrapers) specifically
aglass ceramic surfaces should be used. They are obtainable
from hardware stores.
. Avoid spillages, as anything which falls on to the hob surface
will quickly burn and will make cleaning more difficult.
. It is advisable to keep away from the hob all substances which
are liable to melt, such as plastic items, sugar, or sugar-based
products.
.MAINTENANCE:
- Place a few drops of the specialised cleaning product on the
hob surface.
- Rub any stubborn stains with a soft cloth or with slightly damp
kitchen paper.
- Wipe with a soft cloth or dry kitchen paper until the surface is
clean.
If there are still some stubborn stains:
- Place a few more drops of specialised cleaning fluid on the
surface.
- Scrape with a scraper, holding it at an angle of 30° to the hob,
until the stains disappear.
- Wipe with a soft cloth or dry kitchen paper until the surface is
clean.
- Repeat the operation if necessary.
A FEW HINTS:
Frequent cleaning leaves a protective layer which is essential to
prevent scratches and wear. Make sure that the surface is clean
before using the hob again. To remove marks left by water, use
a few drops of white vinegar or lemon juice. Then wipe with
absorbent paper and a few drops of specialised cleaning fluid.
The glass ceramic surface will withstand scraping from flat-bottomed cooking vessels, however, it is always better to lift them
when moving them from one zone to another.
NB:
designed for
30° Maxi
. The metal surround : to safely clean the metal surround wash
with soap and water, rinse, then dry with a soft cloth.
Any change in the colour of the glass-ceramic surface
does not affect its operation or the stability of the surface.
Such discolorations are mostly a result of burnt food
residues or use of cookware made of materials such as
aluminium or copper; these stains are difficult to remove.
7.4 MAINTENANCE
Replacing the Oven Light Bulb
It is recommended that you leave this operation to the Authorised
Service.
Unplug the oven first and make sure that it is cold. After removing
the lid infront of the light, take the bulbout. Insert the new bulb
resistant to 300 C, which you will find at Authorised Services, into
the place of the bulb you have removed. Then fit the light
protecting lid back into its place. After that, your oven will be ready
for use.
0
8. SERVICE AND TRANSPORTATION
8.1 REQUIREMENTS BEFORE CONTACTING
TO SERVICE
If the oven does not operate ;
The oven may be plugged off, there has been a black out.
If the oven does not heat ;
The temperature may be not adjusted with oven’s temperature
control switch.
If the oven light does not operate does not light;
The electricity should be controlled.
It should be controlled whether the ulb is defective.
Cooking (If lower-upper part does not cook equally) ;
Control the shelf locations, cooking period and temperature
values according to the manual. In case of the product doesn't
work properly and malfunctioning causes cannot be found, switch
off the product. Please do not tamper with it and call the Technical
Service.
It is important to communicate to Authorized Technical Service the
product model and it's serial number that can be found on the
rating label.
8.2 INFORMATION RELATED TO TRANSPORT
If you need any transport ;
Keep the original packaging of product and carry it with its original
packaging when needed.
Follow the transport signs on the packaging.
If the original packaging is not available;
Do not use a sponge which is too wet.
Never use a knife or a screwdriver.
A scraper with a razor blade will not damage the surface, as long
as it is kept at an angle of 30°.
Take measure for the external surfaces (glass and painted
surfaces) of oven and hob aganist possible blows.
14 GB
Page 15

SICHERHEITSVORSCHRIFTEN
• Während des Garvorgangs kann Feuchtigkeit im Ofenraum oder auf dem Glas der Tür kondensieren.
Dies ist ein normaler Zustand. Um diesen Effekt zu verringern, warten Sie 10-15 Minuten nach dem
Einschalten des Geräts, bevor Sie die Speisen in den Ofen stellen. In jedem Fall verschwindet das Kondensat, wenn der Ofen die Gartemperatur erreicht hat.
• Das Gemüse in einem Behälter mit Deckel anstelle einer offenen Schale kochen.
• Vermeiden Sie es, Speisen nach dem Garvorgang länger als 15/20 Minuten im Ofen zu lassen.
• WARNUNG: Das Gerät und die zugänglichen Teile des Gerätes werden während des Betriebs heiß. Das
Berühren der heißen Geräteteile sollte vermieden werden.
• ACHTUNG: Zugängliche Teile können heiß werden, wenn der Ofen in Betrieb ist. Kinder fernhalten.
• Dieses Gerät ist nicht bestimmt zum Gebrauch durch Personen (einschließlich Kindern) mit beeinträchtigten körperlichen, sensorischen oder geistigen Fähigkeiten oder durch Personen, die keine entsprechenden Erfahrungen oder Kenntnisse besitzen, es sei denn, sie werden beaufsichtigt oder angewiesen
durch eine Person, die für ihre Sicherheit verantwortlich ist.
• Kinder dürfen nicht mit dem Gerät spielen.
• Die Reinigung und Wartung des Gerätes darf nicht durch Kinder ohne Aufsicht durchgeführt werden.
• Während des Betriebs wird das Gerät heiß. Bitte vermeiden Sie die Berührung der heißen Geräteteile.
WARNUNG: zugängliche Geräteteile werden während des Betriebs heiß. Kinder sollten fern gehalten
werden.
• Nutzen Sie keine scharfen oder scheuernden Reiniger oder scharfe Metallreiniger um den Herd und das
Glass zu reinigen, da dadurch Kratzer auf der Oberfläche entstehen können.
• Der Ofen muss ausgeschaltet werden, bevor der Deckel zur Reinigung entfernt wird. Anschließend den
Deckel gemäß der Anweisungen wieder montieren.
• Nutzen Sie nur die empfohlene Temperatureinstellung für den Ofen.
• Nutzen Sie kein Dampfreinigungsgerät zur Reinigung des Ofens.
• An die Zuleitung ist ein Stecker anzuschließen, der für die auf dem Typenschild aufgeführte Spannung,
Stromstärke und Last ausgelegt ist und über einen Schutzkontakt verfügt. Die Steckdose muss für die auf
dem Typenschild aufgeführte Last ausgelegt und der Schutzkontakt angeschlossen und in Betrieb sein.
Der Schutzleiter ist gelb-grün gefärbt. Dieser Vorgang darf nur von entsprechend qualifiziertem Fachpersonal durchgeführt werden. Im Falle einer Inkompatibilität zwischen Steckdose und Gerätestecker müssen
Sie einen qualifizierten Elektriker bitten, die Steckdose durch eine geeigneten Typ zu ersetzen. Stecker und
Buchse müssen zu den im Installationsland geltenden aktuellen Normen konform sein. Zwischen Gerät und
Stromquelle lässt sich auch ein allpoliger Schutzschalter zwischenschalten, der für die maximale Anschlussleistung ausgelegt ist und aktuelle gesetzliche Bestimmungen einhält. Der gelb-grüne Schutzleiter darf
durch den Schutzschalter nicht unterbrochen werden. Bei der Geräteinstallation ist darauf zu achten, dass
die für den Anschluss verwendete Buchse bzw. der allpolige Schutzschalter leicht zugänglich sind.
• Die Trennung von der Stromversorgung darf durch Herausziehen des Steckers aus der Steckdose oder
Auslösen eines gemäß gängiger Verkabelungsnormen in die Festverdrahtung zwischengeschalteten
Schutzschalters erfolgen.
• Wenn das Netzkabel beschädigt ist, muss es durch ein Kabel bzw. Spezialbündel ersetzt werden, das
beim Hersteller erhältlich ist. Wenden Sie sich dazu an den Kundendienst.
• Der Netzkabeltyp muss H05V2V2-F sein.
• Eine Nichteinhaltung der oben genannten Anweisungen kann die Schutzfunktion des Geräts gefährden
und zum Erlöschen der Garantie führen.
• Überschüssiges verschüttetes Material ist vor dem Reinigen zu entfernen.
• Zum Vermeiden von Überhitzung darf das Gerät nicht hinter einer Verkleidungstür installiert werden.
• Beim Einschieben des Ofenrostes ist darauf zu achten, dass der Anschlag nach oben und hinten Richtung
Ofenraum zeigt.
Das Rost muss vollständig in den Ofenraum eingeschoben werden.
• WARNHINWEIS: Die Seitenwände des Ofens nicht mit Aluminium oder Einweg-Schutz, wie er in
Geschäften erhältlich ist, auskleiden. Aluminiumfolie oder jeglicher andere Schutz, der in direkten Kontakt
mit der heißen Emaille kommt, kann Schmelzen und Verschleiß der Emaille an den Innenseiten verursachen.
• WARNHINWEIS: Entfernen Sie niemals die Dichtung der Ofentür.
• Es ist kein zusätzlicher Vorgang oder eine andere Einrichtung erforderlich, um das Gerät mit der angegebenen Spannung zu betreiben.
15 DE
Page 16

1. ALLGEMEINE HINWEISE
Herzlichen Glückwunsch! Sie haben ein hochwertiges Qualitätsprodukt erworben. Damit Ihr Gerät stets zu Ihrer Zufriedenheit arbeitet, raten wir
Ihnen folgendes:
• Lesen Sie dieses Heft aufmerksam durch: es enthält wichtige Hinweise zur korrekten Benutzung Ihres Gerätes
• Bewahren Sie diese Bedienungsanleitung zur späteren Benutzung sorgfältig auf. Bei der ersten Inbetriebnahme kann es zu Rauchentwicklung
und beißendem Geruch kommen. Hierbei handelt es sich um einen ganz normalen Vorgang, der auf die erste Erwärmung des Isolierplattenklebers
zurückzuführen ist, welcher zur Verkleidung des Backofens verwendet wurde. Warten Sie mi t dem Einschieben der Speisen, bis kein Rauch mehr
vorhanden ist. Die Backofentür wird während des Betriebes naturgemäß heiß.
1.1 KONFORMITÄTSERKLÄRUNG
Dieses Gerät entspricht der EU-Vorschrift 89/109 für die Bereiche, die
mit Lebensmitteln in Berührung kommen.
Mit der Anbringung des -Zeichens am Gerät zeigen wir an, dass
wir sämtliche für dieses Produkt geltenden und notwendigen
europäischen Sicherheits-, Gesundheits- und Umweltstandards
einhalten und hierfür haftbar sind.
1.2 SICHERHEITSHINWEISE
•Dieses Gerät darf ausschließlich für den Zweck eingesetzt werden,
für den es hergestellt wurde, nämlich die Zubereitung von Speisen.
Jede andere Anwendung (beispielsweise das Heizen von Räumen)
ist deshalb als zweckentfremdet zu betrachten und demzufolge
gefährlich. Der Hersteller kann für eventuelle Schäden, die auf einen
ungeeigneten, fehlerhaften und unvernünftigen Einsatz
zurückzuführen sind, nicht verantwortlich gemacht werden.
Die Verwendung jedes elektrischen Gerätes erfordert die Beachtung
einiger grundsätzlichen Regeln. Das sind insbesondere:
- das Gerät nicht mit nassen oder feuchten Händen oder Füßen
berühren.
- das Gerät nicht barfuß bedienen
- bei Ausfällen und/oder Funktionsstörungen ist das Gerät
abzuschalten. Versuchen Sie nicht, den Fehler auf eigene Faust zu
beheben.
- Bei Beschädigung des Zuleitungskabels ist dieses so schnell wie
möglich auszutauschen. Dies ist ausschließlich durch qualifiziertes
Fachpersonal durchzuführen, unter Beachtung folgender Hinweise:
Blechschutzdeckel abnehmen, Kabel abschrauben und durch ein
anderes (T
muß der Leistung des Gerätes entsprechen. Der Erdleiter (gelb-grün)
muß vorschriftsgemäß 10 mm länger sein als die Hauptleiter.
Bei einer erforderlichen Reparatur wenden Sie sich bitte an Ihren
zuständigen Werkskundendienst und verlangen Sie die Verwendung
von Original-Ersatzteilen.
Die Mißachtung der vorgenannten Hinweise kann die Sicherheit des
Gerätes beeinträchtigen.
yp HO5RR-F, H05VVF, H05V2V2-F) ersetzen. Das Kabel
1.5 WICHTIG
1.6 ELEKTRISCHER ANSCHLUß
1.3 INSTALLATION
Der Einbau erfolgt auf Kosten des Endverbrauchers. Der
Hersteller ist von diesem Dienst entbunden. Eventuell an den
Hersteller herangetragene Ansprüche, die auf einen falschen
Einbau zurückgehen, sind von jeder Garantieleistung
ausgeschlossen. Der Einbaumuß entsprechend der Anleitung
und durch qualifiziertes Fachpersonal erfolgen. Durch einen
falschen Einbau können Schäden an Personen, Tieren oder
Sachen verursacht werden, für die der Hersteller nicht
verantwortlich gemacht werden kann.
1.4 EINBAU IN DEN SCHRANK
11
16 DE
Page 17

2. IHR NEUES HAUSHALTSGERÄT
Modelle 1 2 3 4
HAUPTKOMPONENTEN
1. Bedienfeld
2. Ofenturgriff
3. Ofentur
4. Backblech
5. Unteres Heizelement
6. Oberes Heizelement
7. Rost
8. Einschube
Abbildung 1
GLASKERAMISCHES KOCHFELD: CUTC64
2 3
CUTC64 1200W / Ø155 1800W / Ø190 1800W / Ø190 1200W / Ø155
CUTC64FF 1200W / Ø155 1800W / Ø190 1800W / Ø190 1200W / Ø155
CUTC64EXDNF 1200W / Ø155 1600W+800W / Ø180 1200W / Ø155 1000W+700W / Ø190
1
Glaskeramik
4
5
CUTC64EXDFF 1200W / Ø155 1600W+800W / Ø180 1200W / Ø155 1000W+700W / Ø190
CUTCE64EXDFF 1200W / Ø155 1500W+900W / Ø180 1200W / Ø155 1000W+700W / Ø190
CUTCE64EXDNF 1200W / Ø155 1500W+900W / Ø180 1200W / Ø155 1000W+700W / Ø190
Heizungsdurchmesser können für verwandte Modelle geändert werden.
Abbildung 3
3. OFENAUSSTATTUNG (Je nach Modell)
Abbildung 2
Des Pizza-Set ist ideal zum Pizzabacken.
Das Set sollte zusammen mit dem Backprogramm genutzt
werden
Abbildung 4
Der Soßenfänger ist zum Auffangen des Saftes der Grillstücke
bestimmt.
Er kann auf den Rost gestellt, under ihn geschoben oder auf die
Bodenplatte gestellt werden. Den Soßenfänger niemals als
Unterlage zum Braten verwenden.
Dies würde Rauchentwicklung und Fettspritzer und damit eine
schnelle Verschmutzung des Ofens verursachen.
Abbildung 5
Abbildung 6
Gitter mit Aufnahme Das Gitter mit Aufnahme für die Fettpfanne
ist ideal zum Grillen. Verwenden Sie es hierzu in Kombination mit
der Fettpfanne. Ein Griff wird mit dem Gitter mitgeliefert, damit
beide Zubehörteile sicher ein-und ausgezogen werden können.
Lassen Sie bitte den Griff nicht im Backofen, wenn dieser im
Betrieb ist.
Abbildung 7
Seitliche Draht Gitter
Seitliche Drahtnetz wenn inbegriffen.
17 DE
Page 18

4. EINIGE NÜTZLICHE HINWEISE
verursachen können. Verwenden Sie destilliertes- oder Trinkwasser.
4.1 KIPPGESICHERTE GITTERROSTE
Abbildung 8
4.2 GRILLEN
Zum Grillen empfehlen wir, das Grillgut je nach Größe auf den 3.
Oder 4. Gitterrost von unten zu schieben (seite 22). Fast alle
Fleischsorten eignen sich zom Grillen, mit Ausnahme von sehr
magerem Wild. Vor dem Grillen sollte das Grillgut ein wenig mit Öl
oder Fett bestrichen werden.
4.3 GARZEITEN
Auf Seite 22 finden Sie eine Tabelle, in der Richtzeiten und
Temperaturen zum Braten und Backen verschiedener Speisen
angegeben sind. Durch Ihre persönliche Erfahrung werden Sie diese
Angaben entsprechend Ihrem Geschmack und Ihren Gewohnheiten
anpassen können.
4.4 REINIGUNG UND WARTUNG
MAX
300 ml
MAX
4.6 TECHNISCHER KUNDENDIENST
5. VORBEREITUNGEN FÜR INSTALLATION
UND GEBRAUCH
Dieser moderne, funktionale und praktische Ofen wurde mit Teilen
und Materialien höchster Güte hergestellt und wird Ihre
Ansprüche in jeder Hinsicht erfüllen. Vergessen Sie nicht, diese
Anleitung aufmerksam durchzulesen, damit Sie gleich zu Anfang
richtig und sicher mit dem Gerät arbeiten können und es auch in
Zukunft nicht zu Problemen kommt. In den nachstehenden
Informationen finden Sie bestimmte Regeln, die wichtig für
richtige Aufstellung und Wartungsarbeiten sind. Diese
Informationen sollten (insbesondere vom Installateur) mit
besonderer Aufmerksamkeit gelesen werden.
4.5 AQUACTIVA FUNKTION
Mit der Aquactiva Funktion wird Dampf im Inneren des Backofens
erzeugt um die restlichen Fett- und Speisereste aus dem Backofen
zu entfernen.
1. Gießen Sie 300 ml Wasser in den Behälter Aquactiva am Boden
des Ofens ein.
2. Wählen Sie die Backofenfunktion auf Ober-/Unterhitze ( ) oder
Unterhitze ( ).
3. Stellen Sie die Temperatur auf das Aquactiva Symbol ein .
4. Stellen Sie eine Zeit von 30 Minuten für das Programm ein.
5. Nach 30 Minuten schaltet das Programm ab. Lassen Sie den Ofen
abkühlen.
6. Wenn das Gerät abgekühlt ist, reinigen Sie die Innenflächen des
Backofens mit einem Tuch.
Achtung!
Vergewissern Sie sich, dass das Gerät abgekühlt ist bevor Sie es
berühren. Achten Sie auf heiße Oberflächen, da sie Verbrennungen
5.1 DER RICHTIGE PLATZ FÜR IHREN OFEN / KOCHFELD
Bei der Auswahl des richtigen Aufstellungsortes für Ihren Ofen
müssen einige Punkte beachtet werden. Halten Sie sich in jedem
Fall an unsere nachstehenden Empfehlungen, damit es später
nicht zu Problemen oder gefährlichen Situationen kommt!
•
Bei der Auswahl des richtigen Platzes für Ihren Ofen / Kochfeld
sollten Sie darauf achten, dass sich keine entflammbaren oder
explosiven Materialien in nächster Nähe befinden; dies können
Vorhänge, ölige Tücher und ähnliche Materialien sein, die schnell
Feuer fangen.
• In Abbildung 10 finden Sie eine Darstellung der
erforderlichen Gegebenheiten oder Änderungen hinsichtlich
Wandschränken und Abzugshauben sowie der nötigen
Minimalabstände zum Ofen und seinen Flächen.
Demzufolge sollte die Abzugshaube mit einem minimalen
Abstand von 65 cm von der Oberfläche des Kochfeldes
angebracht werden. Ohne Abzugshaube sollte ein Abstand von
mindestens 70 cm eingehalten werden.
ABZUG
Min. 65 cm
Min. 70 cm
(Mit Abzug)
(Ohne Abzug)
18 DE
Abbildung 9
Page 19

5.2 OFEN - UND KOCHFELDINSTALLATION
5.2.3. Ofen fixieren
Abbildung 10 - Bündige Ofeninstallation
595 mm
595 mm
5 mm
530 mm
15 mm
400 mm
560 mm
45
mm
560 mm
Min. 600 mm
400 mm
50 mm
Typenschild
Tabelle 1
EINBAU KOCHFELD
VITRO
A
B
560 mm
490 mm
4x3.5x25
5.2.1. Installationsschritte
1. Setzen Sie das Kochfeld in die Arbeitsplattenaussparung ein. Die
Größe der Aussparung entnehmen Sie bitte Abbildung 11.
Details finden Sie unter Kochplatten-Kochfeld fixieren oder
Glaskeramisches Kochfeld fixieren.
2. Verbinden Sie das Kochfeld über den Stecker am Kochfeld mit dem
Ofen. Das Gegenstück des Steckers befindet sich an der Rückwand
des Ofens.
3. Schließen Sie den Ofen an die Stromversorgung an.
4. Setzen Sie den Ofen in die Einbauoffnung. Je nach Größe der
Einbauöffnung kann das Gerät wie in Abbildung 11. Details finden Sie
unter Ofen fixieren.
5.2.2. Glaskeramisches Kochfeld fixieren
Normal Befestigung:
• Nehmen Sie die Befestigungsclips aus dem Zubehörbeutel und
schrauben Sie sie an der am Unterkasten markierten Position fest.
(Ziehen Sie die Schrauben nur so fest an, dass sich die Clips noch
frei bewegen können.)
• Setzen Sie das Kochfeld in die Mitte der Aussparung ein.
• Drehen Sie die Clips und ziehen Sie sie vollständig fest.
Une fois le four inséré dans son meuble, I’ancrage se fait par 2 vis
visibles en ouvrant la porte du four, voir illustration sur dernière
page.
Die Abmessungen des Gehäuses, in das der Ofen eingebaut wird,
müssen absolut passend, das Material muss für höhere
Temperaturen geeignet sein. Zur
korrekten Installation darf das
Produkt keine elektrischen oder isolierten Teile berühren. Isolierte
Teile müssen so angebracht werden, dass sie auch mit Werkzeugen
nicht entfernt werden können. Wir raten von der Installation des
Gerätes in nächster Nähe zu Kuhl - und Gefriergeräten ab.
Andernfalls kann die Leistung dieser Geräte durch Abwärme des
Produktes beeinträchtigt werden.
5.2.4. Warnung
Installation eines Einbauofens ohne Kühlungslüfter.
Vor dem Einsetzen des Ofens muss die Rückwand des
Küchenmöbels im Bereich des Ofens entfernt werden.
Gleichermaßen muss am Vorderteil des Möbels eine Öffnung von
mindestens 10 mm vorhanden sein.
•Wenn Sie einen der Einstellknöpfe aus der „0“-Position drehen,
leuchtet die Kochplatten-Kontrollleuchte auf.
•Verwenden Sie ausschließlich Geschirr mit passendem
Durchmesser.
•Vergewissern Sie sich, dass der Boden Ihres Kochgeschirrs nicht
nass ist, wenn Sie das Geschirr auf die Kochstelle setzen.
•Lassen Sie die Kochstellen nicht ohne aufgesetztes Geschirr
arbeiten. Im Betrieb erreicht das Geschirr naturgemäß eine hohe
Temperatur. Daher sollten Sie Kinder und Haustiere vom Herd
fernhalten; dies gilt sowohl im Betrieb als auch in der Zeit kurz
danach.
•Falls Sie Sprünge oder Risse in der Glaskeramik entdecken sollten,
schalten Sie das Gerät sofort ab und lassen das beschädigte
Kochfeld vom autorisierten Kundendienst austauschen.
•Nach dem Einsatz muss das Kochfeld mit geeigneten
Reinigungsmitteln sorgfältig gereinigt werden, damit es Ihnen lange
Zeit Freude
Rost bilden kann und das Gerät lange Zeit wie neu aussieht, sollten
Sie das Kochfeld mit einem Lappen abwischen, auf den Sie ein klein
wenig Öl gegeben haben. Benutzen Sie niemals Dampfreiniger.
•Um keine Energie zu
Geschirrs niemals kleiner oder größer als der Durchmesser der
Kochstelle sein.
•Sorgen Sie dafür, dass kleine Kinder niemals nahe an die
Kochplatten gelangen können, da sich diese im Betrieb natürlich
stark erhitzen.
•Da sich heiße Öle und Fette entzünden können, sollten Sie
Zubereitungsarten wie Frittieren nur mit aufgelegtem Deckel
ausführen.
•Missbrauchen Sie die Glaskeramik nicht als Schneidbrett oder
Arbeitsfläche. Benutzen Sie kein Geschirr mit Aluminiumboden.
Stellen Sie keine schweren Gegenstände auf dem Kochfeld ab.
•Stellen Sie keine Gegenstände aus Kunststoff, Aluminium oder
ähnlichen Materialien auf der Glaskeramik ab. Falls doch einmal ein
Gegenstand aus Kunststoff oder Aluminium
auf der Glaskeramik schmelzen sollte, schaben Sie die Rückstände
sofort mit einem Schaber ab.
•Reiben Sie nicht mit Geschirrtüchern oder Schwämmen über die
Glaskeramik. Rückstände von Reinigungsmitteln können einen
Brand verursachen und zu unschönen Verfärbungen der Oberfläche
fähren.
bereitet und zuverlässig arbeiten kann. Damit sich kein
verschwenden, sollte der Durchmesser des
Abbildung 11
19 DE
Page 20

5.3 VERKABELUNG UND SICHERHEIT
EINBAUOFEN
•Bevor Sie die Verbindung herstellen, stellen Sie sicher, dass das
Gerät durch eine angemessene Sicherung geschützt-siehe
hierzu die umseitige Tabelle-und mit Kabeln mit zu einer normalen
Versorgung ausreichendem Querschnitt ausgestattet ist.
• Drehen Sie das Kochfeld / Backofen so um, dass die Seite aus
Glas auf der Arbeitsplatte aufliegt, wobei für einen geeigneten
Schutz des Glases zu sorgen ist.
•Klap pen Si e den Deckel u n ter Beac htung der
nachstehenden Reihenfolge auf:
~
380-415 V3 N
~
220-240 V
1
1
L2
L3
=
N
~
220-240 V3
~
220-240 V2
Nullleiter
PE
MasseL1 / L2 / L3 = Phase
=
1
1
Abbildung 16
5.4 CERANFELDER OHNE BEDIENELEMENTE
L1
L2
L3
PE
Abbildung 12
Abbildung 13 Abbildung 14
•Finden Sie die zwei Stifte, die an den Seiten angebracht sind;
•Legen Sie das Blatt eines Schraubenziehers vor je einen Stift,
legen Sie es hinein und drücken Sie ein;
•Nehmen Sie den Deckel ab.
•Drehen Sie die Schrauben heraus, welche die Einheit mit den
Shunt-Schienen und den Leitern des Netzkabels halten;
•Lösen Sie die Kabelschellen, um das Netzkabel entfernen zu
können;
•ziehen Sie das Netzkabel heraus.
•Schritte zur Herstellung einer neuen Verbindung
•Wählen Sie das Netzkabel gemäß den Anweisungen in der
umseitigen Tabelle.
•Führen Sie das Netzkabel durch die Kabelschelle hindurch;
•Isolieren Sie die Enden jedes Leiters auf eine Länge von 10 mm
ab; dabei berücksichtigen Sie die erforderliche Länge des
Netzkabels für den Anschluss an das Klemmbrett
•Auf der Grundlage der nachstehenden Tabelle
positionieren Sie die Shunt-Schienen, die Sie im
SHUNT
dem vorherigen Arbeitsschritt aufgehoben
haben, unter Beachtung der
entsprechenden
Markierungen auf dem Klemmbrett (die ShuntSchienen ermöglichen es, eine
Brücke zwischen
zwei Klemmen herzustellen) und befestigen Sie
die Leiter. Überprüfen Sie die Befestigung an den
verschiedenen Klemmen.
•Schrauben Sie die Kabelschelle wieder auf und
schließen Sie den Deckel fest.
Abbildung 15
Der Anschluß ans Stromnetz des Ceranfeldes
erfolgt über den
Backofen.
Um die Geräte miteinander anzuschließen, genügt es, den
Kompaktstecker 1 und 2 des Ceranfeldes mit dem K
o m p aktstec k e r 3 d e s Bac k o f e n s o d e r d e s
Einbauschaltbretts zu verbinden.
INSTALLATION MIT EINBAU-BACKOFEN
CERANFELD
22 mini
BACKOFEN
550x10
Einbau-Backofen "Öffnung" :
Abbildung 17
Bedienungs- und installationsanleitung ofen.
Die Verbindung des Ceranfeldes mit dem Backofen kann vor
oder nach der Installation des Backofens erfolgen
ANORDNUNG
"1-3-5"
EINPHASIG oder ZWEIPHASIG 220-240 V~
Kabel
HO5V2V2F
DREIPHASIG 220-240 V3~
Kabel
HO5V2V2F
DREIPHASIG 380-415 V2N~
Kabel
HO5V2V2F
3x4 mm
4x1,5 mm
4x1,5 mm
2
2
2
ANORDNUNG
"2-4"
2
3x4 mm
4x1,5 mm
4x1,5 mm
2
2
20 DE
Page 21

6. BEDIENUNG / BACKOFEN
6.1 BEDIENFELD / BACKOFEN
Ofentemperatur-Leuchte
MAX
Abbildung 1
8
Ofenfunktion-Einstellknopf Ofentemperatur-Einstellknopf
MAX
Kochplatten-Kontrollleuchte
Kochplatten-Einstellknopf
Abbildung
MAX
19
21 DE
Page 22

6.2 GEBRAUCH DES ELEKTRONISCHEN PROGRAMMIERERS
FUNKTION
MANUELLER
BETRIEB
MANUELLE
FUKTIONS-
EINSTELLUNG
BACKDAUER
BACKZEITENDE
EINSCHALTEN
•Den Knopf drücken und
gedrückt halten.
•Die Knöpfe drücken,
um die erforderliche Backzeit
einzustellen.
•Alle Knöpfe loslassen.
•Drücken Sie den Knopf
•Wählen Sie die Backfunktion
mit dem entsprechenden
Kontrollknebel für die
Backofenfunktion.
•Den Knopf TIMER drücken
und gedrückt halten.
•Die Knöpfe drücken,
um die erforderliche Backzeit
einzustellen.
•Alle Knöpfe loslassen.
•Stellen Sie die Backfunktion
mit dem entsprechenden
Kontrollknopf die
Backfunktion ein.
•Den Knopf END drücken
und gedrückt hal ten.
•Die Knöpfe drücken,um
den Zeitpunkt zu wählen,
wenn Sie möchten, dass der
Ofen sich abschaltet.
•Knöpfe loslassen.
•Wählen Sie die Backfunktion
mit dem entsprechenden
Kontrollknopf für die
Backofenfunktion
AUSSCHALTEN FUNKTION
•Wenn die eingestellte
Backzeit abgelaufen ist, wird
ein akustisches Signal aktiviert
(dieser Alarm hört von alleine
auf, er kann jedoch sofort
ausgeschaltet werden, wenn
man auf drückt).
•Drehen Sie den Kontrollknopf
für die Backfunktion bis zur
gewünschten Position O.
•Wenn die eingestellte Zeit
abgelaufen ist, schaltet sich der
Ofen automatisch ab.Wenn Sie
den Backvorgang vorzeitig
ab-bzw.unterbrechen möchten,
drehen Sie den Knopf zum
Auswählen der Ofenfunktion bis
zur Position O oder stellen Sie
die programmierte Zeit auf 0.00
(Knöpfe TIMER und )
•Zum eingestellten Zeitpunkt
wird der Ofen sich automatisch
abschalten.
•Wenn Sie den Ofen manuell
ausschalten möchten, drehen
Sie den Knopf zur Einstellung
der Ofenfunktion auf Position
O.
•Aktiviert einen Alarm am
Ende der eingestellten
Backzeit.
•Um die Restzeit zu erfahren,
drücken Sie den Knopf .
•Es ermöglicht den
Gebrauch des Ofens.
•Es ermöglicht Ihnen,die für
das gewählte Rezept
erforderliche Backzeit vorzuprogrammieren.
•Um die Restzeit zu erfahren
drücken Sie den Knopf TIMER.
•Um die eingestellte Zeit zu
ändern, drücken Sie den Knopf
TIMER und nehmen Sie die
neue Einstellung durch
Betätigung der Knöpfe vor
•Es ermöglicht die
Einstellung der Backendzeit.
•Um die voreingestellte Zeit
zu überprüfen, drücken Sie
den Knopf END.
•Um die voreingestellte Zeit
zu ändern, drücken Sie den
Knopf END und die Knöpfe
gleichzeitig.
NÜTZLICH FÜR
•Es ermöglicht Ihnen, das
Signal als Erinnerungsfunktion
zu benutzen (auch wenn der
Ofen nicht zum Backen
verwendet wird)
•Zum Zubereiten der
gewünschten Rezepte
•Bei Erreichen der
eingestellten Backzeit schaltet
sich der Ofen automatisch ab
und ein akustisches Signal
ertönt.
•Diese Funktion wird
zusammen mit der Backdauer
benutzt. Z.B. Soll Ihre Speise
45 Minuten backen und um
12:30 fertig sein. Wählen Sie
zuerst die Backfunktion, dann
Backzeitdauer 45 Minuten
einstellen, dann Backzeitende
12:30 eingeben. Der
Backofen startet automatisch
um 11:45 (12:30 minus 45
Min.) und schaltet sich dann
zu der eingestellten Zeit ab.
ACHTUNG:
Wenn nur die Backendzeit,
nicht jedoch die
Dauer der Backzeit
eingestellt worden ist,
setzt sich der Ofen sofort
in Betrieb und schaltet
sich bei Erreichen der
eingestellten Backendzeit
ab.
6.3 EINSTELLUNG DER RICHTIGEN UHRZEIT
HINWEIS: Das erste, was nach der Installation des Ofens oder nach der Unterbrechung der
Stromversorgung (die am blinkenden Display mir der Anzeige zu erkennen ist) gemacht
werden muss, ist die Einstellung der korrekten Uhrzeit.
• Die Knöpfe TIMER + END drücken und gedrückt halten. ( + TIMER bei einigen Modellen)
• Die Zeit mit den Knöpfen und einstellen.
• Alle Knöpfe loslassen.
ACHTUNG: Der Ofen arbeitet nur, wenn er auf manuelle Funktion eingestellt ist oder eine bestimmte Backzeit programmiert
worden ist.
HINWEIS: Bei einigen Modellen stehen anstelle der Symbole die Zeichen + und - .
22 DE
Page 23

6.4 KOCHPLATTEN VERWENDEN
Das Kochfeld wird uber die 7-stufigen Einstellknopfe
am Bedienfeld (Abbildung ) gesteuert.
Stufe „0“ bedeutet: Ausgeschaltet. Die restlichen 6 Stufen
verwenden Sie fur Folgendes:
• Suchen Sie sich das Zeichen, das Ihr
gewünschtes Kochfeld anzeigt.
• Drehen Sie den Kontrollknebel, bis die
gewünschte Kochposition eingestellt
ist.
Wir empfehlen, die Pfanne bei hoher
Temperatur richtig anzuheizen und sie
dann auf die gewünschte Temperatur
zurückzudrehen.
• Die Restwärmeanzeige leuchtet auf,
wenn die Temperatur 60°C oder mehr
beträgt.
Sie wird auch weiterhin Resthitze
Abbildung 2
wenn die Temperatur unter 60°C gefallen ist.
• Um die Kochzone auszuschalten, drehen Sie den Knopf auf
Position"0".
Dei erweiterbaren Kochzonen ermöglichen bei größeren Töpfen oder
größeren Mengen von Speisen eine bessere Garleistung dank der
zuschaltbaren runden bzw. ovalen Kochfläche.
* Die Bräterzone besteht aus einer runden und einer ovalen
Fläche, die zusammen zu einer Bräterzone geschaltet werden
können.
Die runde Zone wird durch Drehen des Knopfes von der Position 1 bis
12 eingestellt. Zur Einstellung der Bräterzone, 2400 W, drehen Sie
den Kontrollknebel von der Position 12 bis zum Stop und wählen Sie
dann die gewünschte Hitzeleistung durch Einstellung von Position 1
bis 12.
* 2 Zonen Feld : Das ist eine Zweikreis-Zone und besteht aus
einer inneren, runden Fläche und einer äußeren, ringförmigen
Fläche.
Die innere Kochfläche wird durch Drehen des entsprechenden
Kontrollknebeln von 1 bis 12 eingestellt. Zum Zuschalten der äußeren
Ringzone (Gesamtleistung 1700 W) drehen Sie den Kontrollknebel
über die Position 12 hinaus und stellen Sie dann die gewünschte
Leistung ein.
anzei g e n, se l bst we n n d a s Koch f eld
abgeschaltet wurde, solange, bis das Kochfeld
genügend abgekülhlt ist. Sie schaltet sich ab,
6.5 OFEN VERWENDEN
Zuerst wählen Sie die gewünschte Ofenfunktion (Abbildung 22 und 23),anschließend stellen Sie die gewünschte Ofentemperatur ein (Abbildung 24).
Andernfalls arbeitet Ihr Ofen nicht. Wenn die Temperatur im Inneren des
Ofens die von Ihnen vorgegebene Temperatur erreicht, werden die
Heizelemente vom Thermostat ausgeschaltet, die Ofentemperatur-Leuchte erlischt.
Wenn die Temperatur unter den eingestellten Wert abfällt, schalten sich die
Heizelemente wieder ein, die Ofentemperatur- Leuchte leuchtet auf.
Abbildung 22 Abbildung 23 Abbildung 24
Tabelle 3
Energieklasse
Erläuterung
Symbol
Light
In dieser Einstellung erfolgt eine Luftzirkulation bei
Raumtemperatur zum Auftauen von Tiefkülkost in
wenigen Minuten, ohne eine Veränderung des Proteingehalts herberzurunren.
Die zwischen 50’C und 240’C heiße Luft wird gleichmäßig
in den Backofen verteilt. Ideal für das gleichzeitige Braten
von verschiedenen Arten von Speisen (Fleisch, Fisch),
ohne dabei eine Vermischung von Geschmack und
Geruch zu verursachen. Geeignet auch für schonendes
Backen, z.B. Für Blätterteig, Biskuitteig o.Ä.
*
Ofenthermostat, Warnleuchten sowie unteres und oberes
Heizelement schalten sich ein.
gemäß
CENELEC
EN 60350-1
HCTS827XL/E,
HCT601X/E,
HCT201X/E
Einstellung
Sehr langsam
1-2
1
3-4
2
3
4
5
6
Langsam
5-6
Normal
Mittel
7-8
Hoch
9-10
Sehr hoch
11-12
RICHTIG FALSCH
Warmhalten von Geschirr, Schmelzen von Butter und Schokolade usw
Langsames Kochen, Bechamel, Eintöpfe, Milchreis, pochierte Eier usw
Trockene Bohnen, Tiefgefrorenes, Obst, Kochendes Wasser...
Gedünstete Äpfel, frisches gemüse Pasta, Crêpes, Fisch
Intensives langsames Kochen, Omeletts, Steaks...
Steaks, Kotelettes, Braten....
FALSCH
FALSCH
FALSCH
Abbildung 21
Glaskeramik ist besonders widerstandsfähig gegen Hitze und
starke Temperaturänderungen. Beim starken Aufheizen leuchtet die
jeweilige Kochstelle rot auf. Beim Erhitzen kännen leise
Geräusche auftreten; dies ist völlig normal und liegt am
technischen Aufbau des Systems. Eine leichte Geräuschentwicklung
wirkt sich nicht auf die Qualität aus. Die Glaskeramik kann
beschädigt werden, wenn Sie Kochgeschirr mit scharfen Kanten
darüber schieben oder unsanft auf der Glaskeramik abstellen.
Gehen Sie entsprechend sorgsam vor.
Energiespartipps:
• ochfelds zu erreichen, platzieren
Sie das Kochgeschirr bitte in der Mitte der Kochzone.
• Mit einem Deckel verringern Sie die Garzeit und sparen Energie.
•
Garzeiten zu reduzieren.
• verringern
Sie diese, wenn das Gargut durchg ehend erhitzt ist.
• Benutzen Sie Kochtöpfe, deren Durchmesser der Kennzeichnung
des gewählten Kochfelds entspricht.
Der Thermostat und die Warnleuchte des Ofens sowie
der Ventilator und die unteren und oberen Heizelemente
STEAM
werden eingeschaltet, so dass mithilfe des in der
Vertiefung vorhandenen Wassers Dampf erzeugt wird.
Der Thermostat und die Warnleuchte des Ofens sowie
der Ventilator und die unteren und oberen Heizelemente
werden eingeschaltet.
Ofenthermostat, Warnleuchten, Lüfter, oberes Heizelement, Grillelement und Lüfter schalten sich ein.
Diese Funktion ist ideal für empfindlichen Speisen
(Soufflês, kuchen).
Der Thermostat und die Warnleuchte des Ofens sowie
das untere Heizelemente werden eingeschaltet.
Der Thermostat und die Warnleuchte des Ofens sowie
das obere Heizelemente werden eingeschaltet.
EN 60350-1
Energiespartipps:
• Sofern möglich, das Vorheizen des Backofens vermeiden und
seine Kapazität voll ausnutzen.
• Die Backofentür so selten wie möglich öffnen, weil die Hitze
aus dem Innenraum bei jedem Öffnen verloren geht.
• Für eine deutliche Energieersparnis den Backofen 5-10
Minuten vor dem Ende der Garzeit ausschalten und mit der
Restwärme zu Ende garen.
• Die Dichtungen sollten sauber und unversehrt bleiben, damit
keine Hitze aus dem Inneren verloren geht.
• Falls Sie einen Stromversorgungsvertrag mit wechselndem
Stundentarif haben, erleichtert das Programm der „verzögerten
Startzeit“ das Stromsparen, indem der Anfang des
Garvorgangs in die Zeit verschoben wird, wo der günstigere
Stromtarif gilt.
23 DE
HCTS827XL/E
HCT601X/E
Page 24

6.6 FUNKTIONEN
Je nach Modell sind eventuell nicht alle der nachstehend erklärten
Funktionen verfügbar.
LAMPE
Schaltet das Licht im Backofen an.
AUFTAUEN
In dieser Einstellung erfolgt eine Luftzirkulation bei
Raumtemperatur zum Auftauen von Tiefkühlkost in wenigen
Minuten, ohne eine Veränderung des Proteingehalts
herbeizuführen.
MULTI-LEVEL
Dİe zwischen 50°C und 240°C heiße Luft wird
gleichmäßig in den Backofen verteilt. Ideal für das gleichzeitige
Braten von verschiedenen Arten von Speisen (Fleisch, Fisch),
ohne dabei eine Vermischung von Geschmack und Geruch zu
verursachen. Geeignet auch für schonendes Backen, z.B. Für
Blätterteig, Biskuitteig o:ä.
NATÜRLICHE KONVEKTION
Bei dieser klassischen Backofenfunktion werden
Lebensmittel gleichmäßig von oben und unten erhitzt. Stellen Sie
die Ofentemperatur je nach gewünschter Zubereitungsart auf die
empfohlene Temperatur ein, die Sie der Temperaturtabelle
entnehmen können. Wir empfehlen, den Ofen etwa 10 Minuten
lang vorzuheizen. Lassen Sie die Lebensmittel eventuell in einem
geeigneten Behälter uber die gesamte Zubereitungsdauer im
Backofen. Diese Funktion eignet sich besonders zum Backen
von Kuchen, Biskuit, Gebäck, Nudelgerichten, Lasagne und
Pizza.
Nach der Zubereitung schalten Sie Ofenfunktion - und
Ofentemperatur-Einstellknopf ab. Nehmen Sie die zubereiteten
Lebensmittel aus dem Ofen, stellen Sie sie an einem sicheren Ort
ab und lassen Sie den Ofen abkuhlen, indem Sie die Ofentür
geöffnet lassen. Da der Ofen eine Zeit lang heiß bleibt, halten Sie
sich und besonders Kinder vom Ofen fern.
EASY STEAM
Das untere Heizelement und das Gebläse sind
STEAM
eingeschaltet und entwickeln Wasserdampf mit
dem Wasser in der Backmuffel.
Es ist hierzu notwendig 200ml Wasser auf den Boden der Backmuffel zu geben und den Drehknopf auf diese Funktion zu
drehen. Bitte beachten Sie die zugehörige Tabelle "Rezepte".
GRILL
Diese Funktion nutzen Sie für Grillgerichte,
Brathähnchen und Spieße. Grillgerichte geben Sie auf das
Grillrost, das Sie auf der höchsten Stufe einschieben. Nachdem
Sie das Backblech in der 3. Position von unten eingeschoben
haben, beginnen Sie mit dem Grillen. Das auf der 3. Position von
unten eingeschobene Backblech sorgt dafür, dass von den
Lebensmitteln herabtropfendes Öl oder Fett aufgefangen wird.
Beim Grillen muss die Ofentür geschlossen bleiben, die
Temperatur sollte auf 190 °C eingestellt werden.
Stellen Sie den Temperatur-Einstellknopf auf die gewünschte
Temperatur ein. Lassen Sie den Ofen 5 Minuten lang vorheizen,
geben Sie die Lebensmittel anschließend in den Ofen. Nach der
Zubereitung schalten Sie Ofenfunktion-und OfentemperaturEinstellknopf ab. Nehmen Sie die zubereiteten Lebensmittel aus
dem Ofen, stellen Sie sie an einem sicheren Ort ab und lassen Sie
den Ofen abkühlen, indem Sie die Ofentür geöffnet lassen. Da der
Ofen eine Zeit lang heiß bleibt, halten Sie sich und besonders
Kinder vom Ofen fern.
Ofentemperatur je nach gewünschter Zubereitungsart auf die
empfohlene Temperatur ein, die Sie der Temperaturtabelle entnehmen können. Stellen Sie den Ofenfunktion - Einstellknopf auf das
Symbol dieser Funktion ein, stellen Sie den Ofentimer (sofern
vorhanden) auf die empfohlene Zubereitungszeit ein und lassen Sie
den Ofen etwa 10 Minuten lang vorheizen. Geben Sie die Lebensmit
tel (eventuell in einem passenden Behälter) in den Ofen. Diese
Funktion eignet sich insbesondere zum Backen von Gebäck. Die
Lebensmittel werden dabei besonders gleichmäßig durchgegart. Zur
Zubereitung mit einem Rost/Backblech.
Nach der Zubereitung schalten Sie Ofenfunktion - und Ofentemperatur - Einstellknopf ab. Nehmen Sie die zubereiteten Lebensmittel aus
dem Ofen, stellen Sie sie an einem sicheren Ort ab und lassen Sie
den Ofen abkühlen, indem Sie die Ofentür geöffnet lassen. Da der
Ofen eine Zeit lang heiß blei
bt, halten Sie sich und besonders Kinder
vom Ofen fern.
UNTERHITZE + LÜFTER
Das untere Heizelement wird zusammen mit dem Ventilator
gebraucht, der die Luft im Ofen umwälzt. Diese Garmethode ist ideal
für saftige Obstkuchen, Quiche und Pasteten.
Das Essen trocknet nicht aus, Kuchen, Brotteige und sonstige
Rezepte mit Unterhitze gehen gut auf. Auf unterster Schiene backen.
UNTERHITZE
Bei dieser Funktion wird die groste Hitze imunteren Bereich des
Ofens erreicht.Unterhitze eignet sich besonders fur Geback und
Kuchen.
COOK LIGHT
Mit der "COOK LIGHT" -Funktion können Sie gesünder kochen,
indem Sie die Menge an Fett oder Öl reduzieren. Dank der
Verwendung von Grill und Ventilator in Verbindung mit einem pulsierenden
Luftzyklus behält es den Feuchtigkeitsgehalt des Grillguts, grillt die
Oberfläche und verkürzt die Garzeit, ohne den Geschmack zu beeinträchtigen. Es eignet sich besonders zum Kochen von Fleisch, gebratenem
Gemüse und Omelettes. Der Zyklus der gepulsten Luft hält die Feuchtigkeit im Ofen und den Feuchtigkeitsgehalt des Lebensmittels aufrecht,
wodurch die Nährwerte erhalten bleiben und ein schneller gleichmäßiger
Kochprozess gewährleistet wird. Probieren Sie alle Ihre Rezepte und
reduzieren Sie die Menge an Dressing, die Sie normalerweise verwenden,
und erleben Sie die Leichtigkeit dieser neuen Funktion!
Ober-/Unterhitze + Umluft Grill
Temperatur
Garzeit
position
(Min.)
35 - 45
30 - 40
30 - 40
40 - 50
45 - 60
(°C)
170 - 190
150 - 190
150 - 190
175 -200
200
position
Einschub-
2-3
2-3-4
2-3-4
3
2-3
Garzeit
(Min.)
25 - 35
25 - 35
25 - 35
40 - 50
45 - 60
Temperatur
(°C)
200
200
200
200
Garzeit
(Min.)
position
Einschub-
5
10 - 15
50 - 60
4-5
15 - 25
5
15 - 25
Tabelle 4
SPEISEN
Schichtgebäck
Kuchen
Kekse
Frikadellen
Wasserhaltige
Speisen
Geflügel
Koteletts
Rindersteaks
Zwei-Blech-
Kuchen
Drei-Blech-
Kuchen
Ober-/Unterhitze
Temperatur
(°C)
170 - 190
170 - 190
170 - 190
175 -200
200
Einschub-
2-3
2-3
2-3
3
2-3
-
KONVEKTION
+ LÜFTER
Bei dieser Funktion wird heiße Luft an den oberen und
unteren Heizelementen entlang geleitet und durch den Lüfter
gleichmäßig im Inneren des Backofens verteilt. Stellen Sie die
24 DE
Page 25

7. REINIGUNG UND WARTUNG
7.1 ALLGEMEIN
Bevor Sie Ihren Ofen reinigen, vergewissern Sie sich zunächst,
dass sämtliche Bedienelemente abgeschaltet sind und der Ofen
abgekühlt ist. Ziehen Sie wenn möglich den Netzstecker.
Benutzen Sie keine Reinigungsmittel, die Scheuermittel
enthalten: Diese können die emaillierten und lackierten Teile Ihres
Ofens beschädigen. Verwenden Sie Creme - oder
Flüssigreiniger ohne Scheuerzusätze.
Benutzen Sie keinerlei ätzende Reiniger, Scheuerpulver,
Stahlwolle oder harte Gegenstände, damit die Oberflächen
Ihres Gerätes nicht beschädigt werden. Überlaufende
Lebensmittel und verschüttete Flüssigkeiten können sich in
die Oberflächen Ihres Ofens einbrennen und Schäden an der
Emaille verursachen.
7.2 OFEN REINIGEN
Trennen Sie den Ofen vor dem Reinigen von der
Stromversorgung. Der Ofen - Innenraum lässt sich am besten
reinigen, wenn er noch etwas warm ist. Wischen Sie den Ofen
nach jeder Benutzung mit einem weichen Tuch aus, das Sie mit
etwas Seifenwasser angefeuchtet haben. Wischen Sie den Ofen
anschließend mit einem feuchten Tuch aus, danach wischen Sie
ihn trocken. Von Zeit zu Zeit sollten Sie den Ofen mit einem
flüssigen Reinigungsmittel komplett reinigen. Benutzen Sie keine
Trockenreiniger und keine Reinigungspulver. Bei Produkten mit
katalytischen Emaillerahmen müssen Rückwand und
Seitenwände des Ofen-Innenraums nicht gereinigt werden.
Allerdings sollten diese nach einer bestimmten Zeit (abhängig von
der Nutzung) ausgetauscht werden.
7.3 GLASKERAMISCHES KOCHFELD REINIGEN
. Lassen Sie das Kochfeld abkühlen, bevor Sie irgendwelche
Maßnahmen treffen.
. Verwenden Sie ausschließlich Produkte (Reinigungsmittel und
Schaber), die speziell für Glaskeramikflächen vorgesehen sind.
Solche Produkte finden Sie im Fachhandel.
. Vermeiden Sie Verschüttungen, weil alles, was auf die Oberfläche
des Kochfelds gerät, rasch einbrennt und das Reinigen erschwert.
. Daher sollten alle Materialien vom Kochfeld ferngehalten werden,
die schmelzen könnten, wie beispielsweise Kunststoffe, Zucker oder
zuckerbasierte Produkte.
INSTANDHALTUNG:
- Geben Sie einige Tropfen einer speziellen Reinigungsflüssigkeit
auf die Kochfeldoberfläche.
- Entfernen Sie Rückstände mit einem weichen Tuch oder
angefeuchtetem Küchenpapier.
- Wischen Sie mit einem trockenen Tuch oder Küchenpapier nach,
bis die Oberfläche sauber ist.
Falls immer noch Rückstände vorhanden sind:
- Geben Sie etwas von der speziellen Reinigungsflüssigkeit auf die
Kochfeldoberfläche.
- Fahren Sie mit einen Kochfeldschaber im Winkel von 30° über das
Kochfeld, bis die Rückstände verschwunden sind.
- Wischen Sie mit einem trockenen Tuch oder Küchenpapier nach,
bis die Oberfläche sauber ist.
- Wiederholen Sie den Vorgang bei Bedarf.
EINIGE TIPPS:
Häufiges Reinigen hinterlässt eine Schutzschicht, die wesentlich ist,
um Kratzer und Verschleißspuren zu verhindern. Achten Sie darauf,
dass die Oberfläche sauber ist, bevor Sie das Kochfeld wieder
benutzen. Wasserspuren entfernen Sie mit ein paar Tropfen
Haushaltsessig oder Zitronensaft. Wischen Sie anschließend mit
einem saugfähigen Papiertuch und einigen Tropfen spezieller
Reinigungsflüssigkeit nach.
Die Glaskeramikoberfläche hält ebenbödigem Kochgeschirr zwar
stand, dennoch sollte Kochgeschirr stets angehoben werden, um es
auf eine anderen Kochzone zu stellen.
Hinweis:
30° Maxi
Benutzen Sie keinen zu nassen Schwamm.
Benutzen Sie niemals ein Messer oder einen Schraubendreher.
Ein Schaber mit einer Rasierklinge verursacht keine Schäden auf
der Oberfläche, solange er in einem Winkel von 30° gehalten wird.
Halten Sie Kochfeldschaber immer außerhalb der Reichweite von
Kindern.
Benutzen Sie niemals abrasive Produkte oder Scheuerpulver.
Die Metalleinfassung: Reinigen Sie die Metalleinfassung mit
Haushaltsreiniger und Wasser und wischen Sie sie dann mit einem
weichen Tuch trocken.
Farbveränderungen der Glaskeramikoberfläche haben keinerlei Auswirkung auf deren Funktion oder Stabilität. Derartige
Verfärbungen sind in der Regel auf angebrannte Lebensmittelreste oder die Verwendung von Kochgeschirr zurückzuführen,
das aus Materialien wie Aluminium oder Kupfer besteht. Diese
Rückstände sind schwer wieder zu entfernen.
7.4 WARTUNG
Ofenbeleuchtung austauschen
Wir empfehlen, diesen Arbeitsschritt dem autorisierten
Kundendienst zu überlassen. Trennen Sie den Ofen von der
Stromversorgung und vergewissern Sie sich, dass er komplett
abgekuhlt ist. Entfernen Sie zunächst das Schutzglas, nehmen
Sie dann das Leuchtmittel aus der Fassung. Setzen Sie ein
neues, bis 300 C beständiges Leuchtmittel in die Fassung ein;
0
dieses Leuchtmittel erhalten Sie beim autorisierten
Kundendienst. Setzen Sie dann das Schutzglas wieder auf.
Anschließend können Sie Ihren Ofen wieder ganz normal
benutzen.
8. SERVICE UND TRANSPORT
8.1 BEVOR SIE SICH AN DEN KUNDENDIENST
WENDEN
Falls der Ofen nicht funktionieren sollte:
Der Ofen ist eventuell von der Stromversorgung getrennt oder ein
Stromausfall ist eingetreten.
Falls sich der Ofen nicht aufheizen sollte:
Möglicherweise haben Sie vergessen, die Ofentemperatur
einzustellen.
Falls die Ofenbeleuchtung nicht aufleuchten sollte:
Überprufen Sie die Stromversorgung.
Vergewissern Sie sich, dass das Leuchtmittel nicht defekt ist.
Probleme beim Garen (z. B. ungleichmäßige Erwärmung bei
Oberhitze/Unterhitze):
Kontrollieren Sie, ob das Grillrost/Backblech in der richtigen
Position eingeschoben, die richtige Garzeit eingehalten und die
Temperatur richtig eingestellt wurde. Falls das Gerät nicht richtig
arbeiten sollte und keine Ursache festgestellt werden kann,
schalten Sie das Gerät aus. Versuchen Sie bitte keine
eigenmächtigen Reparaturen; wenden Sie sich an den
technischen Kundendienst. Wenn Sie sich an den autorisierten
technischen Kundendienst wenden, halten Sie Informationen
zum Modell und seiner Seriennummer (16-stellige Nummer,
beginnend mit einer 3) bereit. Diese Daten finden Sie auf dem
Typenschild.
8.2 HINWEISE ZUM TRANSPORT
Falls das Gerät transportiert werden muss:
Zum Transportieren des Gerätes benutzen Sie am besten das
Original - Verpackungsmaterial. Halten Sie sich an die
Transporthinweise auf der Verpackung.
Falls die Originalverpackung nicht aufbewahrt wurde:
Schützen Sie die Außenflächen (Glas und lackierte Flächen) von
Ofen und Kochfeld vor möglichen Stößen.
25 DE
Page 26

CONSEILS DE SÉCURITÉ
• Pendant la cuisson de l’humidité peut se créer dans la cavité ou sur la surface de la porte. Le cas décrit
est normal. Si on veut reduire cet effet, il faut laisser réchauffer le four 10-15 minutes avant d’introduire
les aliments. L’humidité va disparaître grâce à la juste température de cuisson.
• Nous vous conseillons de faire la cuisson des légumes dans un récipient avec couvercle pas sur un
plateau.
• Une fois que la cuisson est terminée, nous vous conseillons de ne pas laisser les aliments à l’intérior de
la cavité pour plus de 15/20 minutes.
• AVERTISSEMENT: L'appareil et les parties accessibles deviennent chauds pendant l'utilisation. Des
précautions doivent être prises pour éviter de toucher les éléments chauffants.
• ATTENTION: les parties accessibles peuvent devenir très chaudes quand le four est en marche. Les
enfants doivent être tenus à une distance de sécurité.
• Cet appareil n'est pas destiné à être utilisé par des personnes (y compris les enfants) dont les capacités
physiques, sensorielles ou mentales sont réduites, ou ayant un manque d'expérience et de
connaissances, à moins qu'elles n'aient été formées à l'utilisation de l'appareil, par une personne
responsable de leur sécurité.
• Les enfants ne doivent pas jouer avec l'appareil.
• Le nettoyage et l'entretien par l'utilisateur ne doit pas être fait par des enfants sans surveillance.
• En cours d'utilisation l'appareil devient chaud. Des précautions doivent être prises pour éviter de
toucher les éléments chauds à l'intérieur du four.
AVERTISSEMENT: Les parties accessibles peuvent devenir chaudes pendant l'utilisation. Les jeunes
enfants doivent être tenus à l'écart.
• Ne pas utiliser de nettoyants abrasifs ou de racloirs métalliques tranchants pour nettoyer la vitre de la
porte du four car ils peuvent rayer la surface, entrainant des risques d'explosion.
• Le four doit être éteint avant d'enlever la protection et après le nettoyage, la protection doit être replacée
en respectant les instructions.
• Utiliser seulement la sonde de température recommandée pour ce four.
• Ne pas utiliser de nettoyants vapeur pour le nettoyage.
• Brancher le câble d’alimentation sur une prise de courant qui supporte le voltage ; le courant et la
charge sont indiqués sur l’étiquette ; vérifier la présence d’une mise à la terre. La prise d’alimentation doit
supporter la charge indiquée sur l’étiquette et être dotée d’une mise à la terre en état de fonctionnement.
Le conducteur de mise à la terre est jaune et vert. Cette opération doit être exécutée par du personnel
qualifié. En cas d’incompatibilité entre la prise d’alimentation et la fiche du câble de l’appareil, demander
à un électricien professionnel de remplacer la prise d’alimentation par un dispositif compatible. La fiche
du câble d’alimentation et la prise d’alimentation doivent être conformes aux normes en vigueur dans le
pays d’installation. Il est possible de brancher l’appareil à la prise d’alimentation en installant un
disjoncteur multipolaire qui supporte la charge électrique maximale, conformément aux lois en vigueur,
entre l’appareil et la prise d’alimentation. Le conducteur jaune et vert de mise à la terre ne doit pas être
bloqué par le disjoncteur. La prise d’alimentation ou le disjoncteur multipolaire utilisé pour le
branchement doit rester à tout moment accessible lors de l’installation de l’appareil.
• Le débranchement doit se faire en accédant à la prise d’alimentation ou en prévoyant un interrupteur
sur le circuit électrique fixe, conforme aux normes électriques.
• Si le câble d’alimentation est endommagé, il doit être remplacé par un câble ou un faisceau de câbles
spécial disponible auprès du fabriquant ou en contactant le service après-vente.
• Le câble d’alimentation requis est le H05V2V2-F.
• Le non-respect des consignes ci-dessus peut compromettre la sécurité de l’appareil et annuler la
garantie.
• Tout produit déversé en quantité doit être éliminé avant le nettoyage.
• Ne pas installer l’appareil derrière une porte décorative, pour éviter la surchauffe.
• En introduisant le plateau dans le four, s’assurer que le stop est dirigé vers le haut et au fond de la cavité.
Le plateau doit complètement être inséré dans la cavité
• AVERTISSEMENT: Ne tapissez pas les parois du four avec du papier aluminium ou un autre matériau
de protection jetable en vente dans le commerce. Tout papier aluminium ou autre matériau de protection
qui entrerait au contact direct de l'émail chaud risquerait de fondre et de détériorer l'émail intérieur du
four.
• AVERTISSEMENT: Ne retirez jamais le joint de la porte du four.
• Aucun réglage/opération supplémentaire n’est requis pour faire fonctionner l’appareil aux fréquences
nominales.
26 FR
Page 27

1. INSTRUCTIONS GENERALES
- Lire attentivement les instructions contenues dans cette brochure, elles fournissent d’importantes indications sur la sécurité d’installation, l’emploi
du four et son entretien.
- Conserver soigneusement cette notice d’utilisation pour toutes consultations ultérieures.
- Après avoir déballé votre four, vérifier que l’appareil est complet.
- Les emballages comme le plastique, le polystyrène, peuvent constituer un danger pour les enfants. Ne pas les laisser à leur portée.
ATTENTION
Lors de la première utilisation du four, il peut se produire un dégagement de fumée âcre provoqué par le premier échauffement du collant des
panneaux d’isolation enveloppant le four. Ce phénomène est normal. Attendez que la fumée cesse avant de cuire des aliments.
Lorsque le four est en fonctionnement, la porte en verre est particulièrement chaude. ll est donc nécessaire que les enfants ne la touchent pas.
ATTENTION: La tension et la fréquence d’alimentation sont indiquées sur la plaque signalétique (illustration dernière page). Faites appel
à un professionnel pour l’installation de votre four.
1.1 DECLARATION DE CONFORMITÉ:
• Les parties de cet appareil pouvant être en contact avec des
substances alimentaires sont conformes à la prescription de la dir.
CEE 89/109
En utilisant le symbol sur ce produit, nous déclarons sur notre
propre responsabilité que ce produit est conforme à toutes les normes
Européennes relatives à la sécurité, la santé et à l’environnement.
1.2 CONSIGNES DE SECURITE
Cet appareil est conçu pour cuire des aliments. Tout autre utilisation
(exemple chauffage d’appoint) doit être considéré comme impropre.
Le constructeur ne peut être tenu comme responsable en cas de
dommages liés à une mauvaise utilisation ou a des modifications
techniques du produit.
L’emploi d’un appareil électrique nécessite quelques règles de
sécurité.
- Ne pas tirer sur le fil électrique pour débrancher la prise.
-Ne pas toucher l’appareil avec les pieds ou les mains mouillés.
-Evitez d’utiliser l’appareil pieds nus.
L’utilisation de multiprises et de rallonges pour raccorder votre
appareil est fortement déconseillé. En cas de panne ou de mauvais
fonctionnement il faut éteindre le four avant de le démonter. En cas de
détérioration du fil électrique, remplacez-le rapidement en suivant les
indications suivantes: ôtez le fil d’alimentation électrique et
remplacez-le par un (du type H05RR-F, H05VV-F, H05V2V2F) adapté
à la puissance de l’appareil. Vous veillerez à ce que cette opération
soit effectuée par un centre technique agréé. Pour l’utilisateur c’est la
certitude d’obtenir des pièces de rechange d’origine. Le non-respect
de ces règles peut compromettre la sécurité de l’appareil.
1.5 IMPORTANT
Le meuble qui va supporter le four doit avoir des caractéristiques
appropriés. Les panneaux du meuble doivent pouvoir résister à la
chaleur.
Dans le cas de meubles en bois plaqué, les colles doivent résister à
une température de 120°C sinon il y a un risque de décollement ou de
déformations. Conformément aux normes de sécurité, une fois
encastré, aucun contact ne doit être possible avec les parties
électriques.
Toutes les parties qui assurent la protection doivent être fixées de
façon à ne pas pouvoir être enlevées sans outil. Pour garantir une
bonne aération, retirer la paroi arrière du meuble.
1.6 ALIMENTATION ELECTRIQUE
Brancher la fiche dans une prise de courant équipée d’un troisième
contact correspondant à la prise de terre. Montez sur le fil une prise
normaliséé capable de supporter la charge indiquée sur la plaquette.
Le fil conducteur de masse à la terre est identifié par les couleurs
jaune et verte. Veiller à ce que votre installation soit capable de
supporter toute la puissance absorbée par le four. Si votre installation
électrique n’est pas conforme faites la modifier par un électricien afin
de prévenir tous risques. On peut également effectuer le
branchement au réscau en interposant entre l’appareil et le réseau un
interrupteur omnipolaire dimensionnée en fonction de la charge et
conforme aux normes en vigueur. Le fil de terre jaune et vert ne doit
pas être interrompu par l’interrupteur. La prise et l’interrupteur
omnipolaire utilisés doivent être facilement accessibles une fois
l’appareil électroménager installé.
•Ne pas tapisser les parois du four avec des feuilles en
aluminium ou des protections jetables du commerce. La feuille
d'aluminium ou toute autre protection, en contact direct avec
l'email chauffe, risque de fondre et de deteriorer l'email du
moufle..
1.3 INSTALLATION
La mise en service de l’appareil est à la charge de l’acheteur, le
constructeur est dégagé de ce service. Les pannes liées à une
mauvaise installation ne seront pas couvertes par la garantie. Une
mauvaise installation peut provoquer des dommages aux personnes,
aux animaux domestiques; dans ce cas la responsabilité du
contructeur ne peut être engagée.
1.4 MISE EN PLACE DU FOUR DANS SON MEUBLE
Une fois le four inséré dans son meuble, I’ancrage se fait par 4 vis
visibles en ouvrant la porte du four.
Pour permettre une meilleure aération du meuble, les fours doivent
être encastrés conformément aux mesures et distances indiquées sur
l’illustration de la dernière page.
N.B.: Pour les fours à associer avec des plaques de cuisson, il est
indispensable de respecter les instructions contenues dans la
brochure jointe à l’appareil à associer.
27 FR
Page 28

2. INTRODUCTION DU PRODUIT
Image 1
TABLE VITROCÉRAMIQUE : CUTC64
ALES
1. Panneau de commande
2. Poignée de porte du four
3. Porte du four
4. Plateau
5. Élément chauffant inférieur
6. Élément chauffant supérieur
8. Étagères
Image 2
2 3
Modelle 1 2 3 4
CUTC64 1200W / Ø155 1800W / Ø190 1800W / Ø190 1200W / Ø155
CUTC64FF 1200W / Ø155 1800W / Ø190 1800W / Ø190 1200W / Ø155
CUTC64EXDNF 1200W / Ø155 1600W+800W / Ø180 1200W / Ø155 1000W+700W / Ø190
1
4
CUTC64EXDFF 1200W / Ø155 1600W+800W / Ø180 1200W / Ø155 1000W+700W / Ø190
CUTCE64EXDFF 1200W / Ø155 1500W+900W / Ø180 1200W / Ø155 1000W+700W / Ø190
5
Surface vitrocéramique
CUTCE64EXDNF 1200W / Ø155 1500W+900W / Ø180 1200W / Ø155 1000W+700W / Ø190
Les diamètres de chauffage peuvent être modifiés pour les modèles associés.
Image 3
3. EQUIPEMENT DU FOUR EQUIPEMENT DIFFERENT SELON LE TYPE DE FOUR
Avant la première utilisation des différents accessoires, nous
recommandons un nettoyage avec une éponge additionnée de
produit lessiviel, suivi d'un rinçage et d'un séchage.
La grille simple sert de support aux moules et aux plats.
La grille porte-plat sert plus particulièrement à recevoir les grillades.
Elle est à associer au plat récolte sauce.
grilles restent
glissement ou de
Le plat récolte-sauce est destiné à recevoir le jus des grillades. Il
n'est à utiliser qu'en mode grilloir, Tournebroche ou Turbogril (selon
modèle de four).
l'horizontale jus u'en but e. Aucun ris ue de
du plat.
leur profil les
Image 4
Le set Pizza est l’idéal pour la cuisson de pizza. Le set doit être
utilisé avec le mode de cuisson pizza.
Le gril plat II est á combiner avec le plat récoltesauce pour
tous types de grillades. Une poignée est fournie, pour permettre
de retirer I’ensemble sans se brûler. Ne pas stocker la poignée
dans L’enceinte du four.
Image 6
Le plat récolte-sauce est destiné à recevoir le jus des grillades. Il
n'est à utiliser qu'en mode grilloir, Tournebroche ou Turbogril (selon
modèle de four).
Attention : en cuisson autre que les modes Grilloir,Tournebroche, et
Turbo-gril, le plat récolte-sauce doit être retiré du four.
Ne jamais utiliser le plat
des de des projections de graisse et
un encrassement rapide du four.
comme plat , il en
Image 5
Image 7
Grille fil latéral si inclus.
28 FR
Page 29

4. CONSIGNES UTILES
4.1 GRILLES DU FOUR, NOUVEAU SYSTÈME D’ARRÊT
Tous les fours bénéficient d’un nouveau
système d’arrêt des grilles. Ce système
permet de sortir complètement la grille en
totale sécurité. Parfaitement bloquée elle
ne peut pas basculer vers l’avant malgré la
présence d’un poids important. Plus
stables,ces grilles assurent une plus
Image 8
grande sécurité et tranquillité.
4.2 LA CUISSON AU GRIL
Le préchauffage est superflu. La cuisson peut se faire porte close et
les aliments doivent être placés par rapport au gril en fonction des
résultats que l’on souhaite obtenir.
- Plus près pour les aliments dorés en surface et saignants.
- Plus loin pour les aliments bien cuits à l’intérieur.
Le lèchefrite permet la récupération du jus.
Ne jamais utiliser le lèchefrite comme plat à rotir, il en résulterait
dégagements de fumée, des projections de graisse et un
encrassement rapide du four.
4.3 TEMPS DE CUISSON
Dans les pages 12 un tableau récapitulatif indique les temps de
cuisson et les températures selon les préparations.
4.4 CONSEILS DE NETTOYAGE ET D’ENTRETIEN
Pour nettoyer les surfaces en inox et en émail, utilisez de l’eau tiède
légèrement savonneuse. Vous pouvez utiliser un produit adapté au
nettoyage de ce type de surface. Eviter absolument les produits
abrasifs qui pourraient endommager la surface du four. En cas de
salissures tenaces, évitez d’utiliser des ustensiles susceptibles de
rayer irrémédiablement la surface de votre four. Il est conseillé de
nettoyer régulièrement l’intérieur de votre four après chaque cuisson.
Si vous ne respectez pas le nettoyage de votre four après chaque
cuisson vous aurez une odeur désagréable, et les projections de
graisse seront encore plus difficiles à enlever. Pour l’intérieur du four
utiliser de l’eau chaude avec une éponge grattoir. Il existe dans le
commerce des produits adaptés au nettoyage du four. Le nettoyage
du four est fastidieux. Il existe en option des panneaux autonettoyants
spéciaux avec un émail microporeux qui peuvent s’adapter sur les
fours (voir paragraphe four autonettoyant par catalyse).
Pour nettoyer les grilles inox, utilisez une éponge avec grattoir.
Attendre que la surface soit froide avant de la nettoyer. L’utilisation
d’eau froide au contact de la vitre chaude peut briser la vitre. Si cela
devait arriver la garantie ne couvrirait pas ce dommage. Pour changer
l’ampoule d’éclairage du four veillez à débrancher électriquement le
four. Les ampoules de four sont spécifiques, elles sont conçues pour
résister à une température élevée.
4.6 ASSISTANCE TECHNIQUE
En cas de de mauvais fonctionnement, vérifier si la prise est
branchée. Après ces vérifications, adressez vous à votre revendeur
ou prévenez directement notre service technique qui interviendra
dans les plus brefs délais. Veiller à ce que le coupon de garantie fourni
avec le produit soit correctement rempli, avec la date d’achat du four.
5. PRÉPARATION À L'INSTALLATION ET À
L'UTILISATION
Fabriqué avec des pièces et des matériaux de la meilleure qualité, ce
four moderne, fonctionnel et pratique répondra à tous vos besoins.
Assurez-vous de lire ce manuel pour obtenir des résultats satisfaisants
et ne pas rencontrer de problèmes à l'avenir. Les informations
données ci-dessous contiennent les règles nécessaires pour un
positionnement et un entretien corrects. Elles doivent être lues avec
attention, en particulier par le technicien qui installera l'appareil.
5.1 CHOISIR UN EMPLACEMENT POUR LE FOUR / PLAQUE
Il y a plusieurs points à prendre en compte lors du choix de
l'emplacement de votre four. Veillez à tenir compte de nos
recommandations ci-dessous afin de prévenir tout problème ou
situation dangereuse qui pourrait survenir plus tard !
• Lors du choix de l'emplacement du four / plaque, veillez à ce qu'il n'y
ait pas de matériaux inflammables ou combustibles à proximité
immédiate, tels que rideaux, toile cirée, etc. qui prennent rapidement
feu.
• Les modifications requises aux armoires murales et aux ventilateurs
d'extraction au-dessus du produit combiné encastrable ainsi que la
hauteur minimale à partir de la plaque du four sont illustrées à la
Image 9.
En conséquence, le ventilateur d'extraction doit se trouver à une
hauteur minimale de 65 cm du plan de travail. S'il n'y a pas de
ventilateur d'extraction, la hauteur ne doit pas être inférieure à 70 cm.
VENTILATEUR D'EXTRACTION
4.5 FONCTION AQUACTIVA
Le système Aquactivautilise la vapeur pour éliminer les graisses et les
restes de nourritures incrustées sur les parois du four.
1. Verser 300 ml d’eau dans la zone prévue à cet effet (au centre de la
cavité – voir schéma)
2. Mettre le programme convection naturelle ( ) ou sole seule ( ).
3. Mettre la température sur Aquactiva
4. Laisser agir 30 minutes.
5. Une fois les 30 minutes écoulées, éteindre le programme et attendre
que le four refroidisse.
6. Une fois que le four est refroidi passer un linge propre pour éliminer
les résidus.
Attention:
Ne pas toucher les parois tant qu’elles n’ont pas refroidies ( risque de
brûlures).
N’utiliser que de l’eau potable ou distillée.
Image 9
29 FR
Page 30

5.2 INSTALLATION DU FOUR ET DE LA TABLE
DE CUISSON
Image 10 - Installaton régulère du four
595 mm
5mm
530 mm
595 mm
Plaque sgnalétque
Tableau 2
TABLES DE CUISSON
ENCASTRABLES
VITROCÉRAMIQUE
15 mm
400 mm
560 mm
45
mm
560 mm
Mn. 600 mm
400 mm
50 mm
560 mm
490 mm
5.2.1 Étapes d'installation
1. Placez la table de cusson dans l'ouverture du plan de traval. Les
dmensons de l'ouverture sont Κllustrées à la Image 10. Pour plus de
détals, vor les rubrques suvantes Fxaton de la table
vtrocéramque.
2. Connecter la table de cussonaufouràl'aΚde de la fche fournesur
la table de cusson. La prse de courant est placée sur le panneau
arrère dufour.
3. Branchez le four à l’almentaton secteur.
4. Placez le four dans sanche encastrée.L'un oul'autre emplacement
de laImage 10 est applcable selon latalle de l'ouverture de l'armore.
Pour plus de détals, vor la rubrque Fxaton du four.
5.2.2 Fxaton de la table de cusson vtrocéramque
Normal Fxng:
- Get the fxng clps from accessory bag and screw them Κnto the
poston shown on bottom box. (Do not tghten the screws to block
clps, theyshould move freely)
- Insert the hob Κn centerposton of cut out.
- Turn the clps and tghten them fully.
5.2.3 Fxaton du four
Installez le four dans l'espace prévu à cet effet dans l'élément de
cusne ; Κl peut être Κnstallé sous un plande traval oudans une armore
vertcale. Fxez le four en place en le vssant à l'ade des deux trous de
xaton
f
dans le cadre.Pour repérerles trousde fxaton,
ouvrez la porte
du four et regardezà l'ntéreur.
Les dmensons et le matérau de l'armore dans laquelle le four sera
Κnstallé dovent être corrects et résstants aux augmentatons de
température. Dans uneΚnstallaton correcte, lecontact avecdes pèces
électrques ou Κsolées dotêtreévΚté. Les pèces Κsolantes dovent être
montées de manère à ce qu'elles ne pussent pas être enlevées à
l'ade d'un outl quelconque. Il n'est pas recommandé d'nstaller
l'apparelàproxΚmté Κmmédated'unréfrΚgérateur ou d'uncongélateur.
Dans le cas contrare, les performances des apparels susmentonnés
seront affectées négatvement parl'émsson dechaleur.
5.2.4 Avertssement
AvertΚssement concernant l'nstallaton d'un four encastrable sans
ventlateur d'extracton. Avant d'nsérer le four, Κl est nécessare
d'enlever le panneau arrère de l'élément de cusne dans la zone de
l'ouverture du four. Demême, la parte avantde l'élémentdotavoΚr une
ouverture.
• Lorsqu'un bouton dubrûleur dela tablede cusson est amené à une
autre poston que la poston "0", le témondefonctΚonnement
s'allume.
•N'utΚlsez que des casseroles qucorrespondent au damètre du
brûleur.
• Avant de placer la casserole sur le brûleur, assurez-vous que son
fond n'est pas moullé.
•N
tΚlsez jamas un brûleur de table de cusson lorsqu'l est vde. La
'u
température de la casserole peut être élevée lorsque l'apparelest
utlsé.
Il est donc recommandé de tenr les enfants et les anmaux
domestques élognés de la table de cusson pendant et après le
fonctonnement.
•SΚvous remarquez une fssure sur la vtrocéramque, celle-cdotêtre
Κmmédatement étente etremplacée parle servce autorsé.
• Après utlsaton (afn d'assurer un fonctonnement effcace contnu et
une longue durée de ve), les plaques à Κnducton dovent être
nettoyées à fond à l'ade de produts de nettoyage approprés. Afn
d'évter toute formaton de roulle et de préserver leur aspect Κntal, Κl
est recommandé de nettoyer les plaques à Κnducton en les frottant
avec un chffon légèrement Κmbbé d'hule. N'utlsez jamasde
nettoyeurs à vapeur.
•AfΚnd'évΚter tout gaspllage d'énerge, les casseroles à utlser ne
dovent pas être plus pettes ou plus grandes que les surfaces du
brûleur.
• Prenez les mesuresnécessares pour que les petts enfantsne
s'approchent pas de la surface du brûleur, car Κl sera chaud en poston
de fonctonnement.
•EnraΚsondelanaturenflammable del'hule chaude, les opératons
telles que la frture dovent êtreeffectuées avec lescouvercles des
récpents fermés.
•NerΚen couper, pan, etc. sur le verre. N'utlsez pas de casseroles
avec fond enalumnum. Évtez deplacer des matéraux troplourds sur
votre table de cusson.
• Ne posez pas de matéraux tels que du plastque ou de l'alumnum
sur la surface en vtrocéramque. S, pour quelque rason que ce sot,
un matérau en plastque ou en alumnum devat fondre sur elle,
nettoyez-la Κmmédatement à l'ade d'une spatule.
• N'essuyez pas la surface de la vtrocéramque avec des matéraux
tels qu'un torchon ouune éponge.Les résdus de détergents peuvent
provoquer un Κncende et décolorerle verre.
Image 11
30 FR
Page 31

5.3 CÂBLAGE ET SÉCURITÉ DU FOUR COMBINÉ
ENCASTRABLE
Avant de réaliser le branchement, assurez-vous que l'installation est
protégée par un fusible adéquat et qu'elle est équipée de câbles de section
suffisante pour alimenter normalement l'appareil.
Retournez la table de cuisson, côté verre, sur le plan de travail, en prenant
soin de protéger le verre.
Ouvrez le couvercle selon les étapes suivantes :
~
380-415 V3 N
~
L1
1
L2
~
L3
220-240 V3
1
1
L3 L2
PE
1
~
Image 12 Image 13 Image 14
- dévissez le serre-câble « 1 » ;
- localisez les deux pattes situées sur les côtés ;
- introduisez un tournevis plat devant les pattes « 2 » et « 3 », enfoncez et
appuyez ;
- déposez le couvercle.
Pour retirer le cordon d'alimentation :
- Retirez les vis fixant la plaque à bornes contenant les barres shunt et les
conducteurs du cordon d'alimentation ;
- Retirez le cordon d'alimentation.
Opérations nécessaires pour réaliser un nouveau branchement :
- choisissez le cordon d'alimentation en fonction des recommandations du
tableau ;
- Faites passer le cordon dans le serre-câble ;
- Découvrez l'extrémité de chaque fil du cordon d'alimentation sur 10 mm,
en tenant compte de la longueur de cordon nécessaire pour le
branchement à la plaque à bornes ;
- Selon l'installation et avec l'aide des barres shunt que vous avez
récupérées à la première étape, fixez le conducteur comme indiqué sur le
graphique ;
- Fixez le couvercle ;
- Vissez le serre-câble.
220-240 V
N
=
Neutre
220-240 V2
PE
=
TerreL1 / L2 / L3 = Phase
Image 16
5.4 TABLE DE CUISSON VITROCÉRAMIQUE
SANS BOUTON DE COMMANDE
La connexion au circuit électrique, sur le four ou sur la table de cuisson
vitrocéramique, doit se faire via le four.
Pour procéder à la connexion, il est nécessaire de raccorder les
connecteurs mâles et de la table de cuisson avec les
connecteurs « femelles » du four ou du panneau de commande.
INSTALLATION AVEC FOUR
TABLE DE CUISSON
FOUR
Remarque : vérifiez que les vis du bornier sont bien serrées.
Opérations nécessaires pour réaliser un nouveau branchement :
- Choisissez le cordon d'alimentation en fonction des recommandations
du tableau ;
- Faites passer le cordon dans le serre-câble ;
- Découvrez l'extrémité de chaque fil du cordon
d'alimentation sur 10 mm, en tenant compte de la
SHUNT
lo n g ueur d e cordon né c essaire po u r le
branchement à la plaque à bornes ;
- Selon l'installation et avec l'aide des barres shunt
que vous avez récupérées à la première étape,
fixez le conducteur comme indiqué sur le graphique
;
- Fixez le couvercle ;
- Vissez le serre-câble.
Image 15
DISPOSITION
"1-3-5"
MONOPHASÉS ou BIPHASÉS 220-240 V~
Câble
HO5V2V2F
3x4 mm
TRIPHASÉS 220-240 V3~
Câble
HO5V2V2F
4x1,5 mm
TRIPHASÉS 380-415 V2N~
2
2
DISPOSITION
"2-4"
2
3x4 mm
4x1,5 mm
2
Image 17
Ouvertures de four encastrable : Se
référer au livret d'instructions concerné.
Cette connexion peut être faite avant ou après que le four soit
vissé en place.
Câble
HO5V2V2F
4x1,5 mm
2
4x1,5 mm
2
31 FR
Page 32

6. UTILISATION DU FOUR / CUISINIÈRE
6.1 PANNEAUX DE COMMANDE
Lampe du thermostat du four Lampe du thermostat du four
MAX
Image 18
Image 19
Bouton de commande du
brûleur électrique
Bouton du
thermostat du four
MAX
MAX
Bouton decommande
de la minuterie
Bouton de commande
des fonctions du four
32 FR
Page 33

6.2 UTILISATION DU PROGRAMMATEUR ÉLECTRONIQUE
6.3 REGLAGE DE L’HEURE
33 FR
Page 34

ABLE
DE CUISSON
La partie de la table de cuisson du produit est commandée par le
panneau de commande (Image 20).
L'étape "0" signifie la position d'arrêt . Les 12 étapes restantes indiquent
les types d'utilisation suivants :
• Repérez le panneau correspondant à la zone de cuisson dont
vous avez besoin.
• Tournez le bouton de commande à la position de cuisson
souhaitée.
Dans un premier temps, nous recommandons de régler la zone de
cuisson à la position la plus haute jusqu'à ce que le contenu de
casserole ait atteint la température désirée, ce qui permet de réduire la
chaleur à la position de cuisson souhaitée.
• Le voyant de contr
le de la chaleur résiduelle s'allume lorsque la
température de la surface de la table de
cuisson atteint 60 degrés ou plus. Il reste
allumé m
me si la table de cuisson est
éteinte et ne s'éteint que lorsque la
surface de cuisson est refroidie.
Pour éteindre la table de cuisson,
tournez le bouton sur
0 .
Avertissement : La zone de surlignage extra
large, en fonction des dimensions de
l'ustensile de cuisson et/ou de la quantité
d'aliments cuits,
offre des niveaux de performance encore
plus élevés.
Image 20
La zone de chauffage ovale se compose
de deu
zones de chauffage, une zone
circulaire avec une section ovale complémentaire.
Tournez le bouton de commande de 1 à 12 pour régler la zone circulaire.
Pour faire fonctionner la section ovale, tournez simplement le bouton de
commande en position 12, puis sélectionnez une position de 1 à 12.
La zone de chauffage se compose de deu zones concentriques.
Le cercle intérieur est activé lorsque le bouton est tourné sur l'une des
positions de 1 à 12. La bague extérieure n'est activée que lorsque la
commande est tournée au-delà de 12 jusqu'à une puissance de 1700 W.
la
TION DU FOUR
Vous devez d'abord régler la fonction du four (Image 22 et 23), puis
régler la température du four à la valeur souhaitée (Image 24).
Sinon, le four ne fonctionnera pas.
Lorsque la température à l'intérieur de votre four atteint la valeur que
vous avez réglée, le thermostat coupe le circuit et le voyant du
thermostat s'éteint. Lorsque la température descend en dessous de la
valeur de consigne, le thermostat s'allume de nouveau et le voyant du
thermostat s'allume.
Image 22 Image 23 Image 24
Tableau 3
Classe
énergétique
EXPLICATION
Symbole
Faible
Le voyant lumineux du four, le voyant d'avertissement
rouge et le ventilateur s'allument. Exécute la fonction de
décongélation des aliments congelés.
L'air chauffé est soufflé par le ventilateur sur les différents
niveaux. Il est idéal pour cuire différents types d'aliments
en même temps (par ex. viande et poisson) sans
mélanger les goûts et les odeurs. Il cuit très doucement et
est idéal pour les gâteaux éponges, les pâtisseries, etc.
selon
CENELEC EN
60305-1
Position Quelques conseils
Très faible
Faible
Modéré
Medium
Élevé
Très élevé
Pour garder un plat chaud, faire fondre le beurre et le chocolat
Cuisson lente, sauces, ragoûts, riz au lait, oeufs pochés....
Haricots, surgelés, fruits, eau bouillante....
Pommes cuites à la vapeur, légumes frais, pâtes, crêpes,
Cuisine plus intense, omelettes, steaks....
Steaks, côtelettes, friture....
OUI NON NON NON NON
Image 21
La résistance de la vitrocéramique à la chaleur et aux changements
extrêmes de température est très élevée. Une rougeur se remarque
sur la surface chauffée avec le temps. Lorsque n'importe quelle unité
de chauffage est en marche, vous pouvez entendre un son faible ;
c'est normal et est dû à la structure technique de l'installation.
Il ne pose aucun problème en termes de qualité. Dans le cas où des
casseroles à bords tranchants frottent contre la vitrocéramique ou
sont placés grossièrement sur celle-ci, la surface peut s'abîmer. Il est
recommandé de faire attention à cela.
Conseils pour des économies d’énergie :
• Pour obtenir la meilleure efficacité de votre table de cuisson, placez
la casserole au centre du foyer de cuisson.
• L'utilisation d'un couvercle permet de réduire le
temps de cuisson et
d'économiser de l'énergie en conservant la chaleur.
• Minimisez la quantité de liquide ou de graisse pour réduire le temps
de cuisson.
• Commencez la cuisson à température élevée et réduisez la lorsque
les aliments sont bien chauds.
• Utilisez des casseroles dont le diamètre est aussi grand que le
graphique du foyer sélectionné.
*
Le thermostat et le voyant lumineux du four ainsi que les
éléments chauffants inférieur et supérieur s'allum
Le thermostat, le voyant lumineux, la ventilation et les
éléments chauffants supérieurs du four s'allument, tandis
STEAM
que l’eau contenue dans la cavité du four sert à produire
de la vapeur.
Le thermostat, le voyant lumineux, la ventilation et les
éléments chauffants inférieur et supérieur du four
s'allument.
Le thermostat et le voyant lumineux du four, l'élément
chauffant supérieur, l'élément chauffant du grill, ainsi
que la fonction du ventilateur s'allument.
Cette fonction est idéale pour les plats délicats
(tartessoufflés).
Le thermostat, le voyant lumineux et l’élément chauffant
inférieur du four s'allument.
Le thermostat, le voyant lumineux et l’élément chauffant
supérieur du four s'allument.
ent.
HCTS827XL/E,
HCT601X/E,
HCT201X/E
HCTS827XL/E
HCT601X/E
* Testé conformément à la norme CENELEC EN 60305-1 utilisée
pour la définition de la classe énergétique.
Conseils pour des économies d’énergie :
•
Lorsque cela est possible, éviter le préchauffage du four et éviter
de le faire tourner à vide.
• N'ouvrez la porte du four que lorsque cela est nécessaire, car il y
a des déperditions de chaleur à chaque fois qu'il est ouvert.
• Pour une économie d'énergie significative, éteindre le four entre
5 et 10 minutes avant la fin de cuisson prévue, et utiliser la chaleur
que le four continue de générer.
• Gardez les joints propres et en bon état, pour éviter toute
déperdition d'énergie.
• Si vous avez un contrat électrique avec un tarif heure creuse, le
programme "cuisson différée" peut vous faire réaliser des
économies d'énergie en déplaçant le début du programme à un
intervalle de temps à tarif réduit.
34 FR
Page 35

6.6 FONCTION
La disponibilité des fonctions expliquées ci-dessous varie en fonction
du modèle du produit.
L'AMPOULE
Allumage de l’éclairage du four
DÉCONGÉLATION
Fonctionnement de la turbine de cuisson qui brasse l’air dans
l’enceinte du four. Idéale pour réaliser une décongélation avant
une cuisson.
La température est pré-réglée à 40°C constants, aucun réglage n'est
possible.
CHALEUR PULSÉE
Fonction recommandée pour les volailles, les pâtisseries, les
poissons, les légumes... La chaleur pénètre mieux à l'intérieur
du mets à cuire et réduit le temps de cuisson, ainsi que le temps
de préchauffage. Vous pouvez réaliser des cuissons combinées avec
préparations identiques ou non sur un ou deux gradins. Ce mode de
cuisson assure en effet une répartition homogène de la chaleur et ne
mélange pas les odeurs.
Prévoir une dizaine de minutes de plus, pour la cuisson combinée.
CONVECTION NATURELLE
utilisation simultanée de la résistance de sole et de voûte.
Préchauffer le four une dizaine de minutes. Idéale pour toutes
les cuissons à l'ancienne, pour saisir les viandes rouges, les
rosbifs, gigots, gibiers, le pain, les papillotes, les feuilletages. Placer
le mets à cuire à un niveau de gradin moyen.
EASY STEAM
Le chauffage par le fond et le ventilateur sont mis en
STEAM
marche en utilisant l'eau à l'intérieur de la cavité pour
générer de la vapeur.
Il est nécessaire d'ajouter 200ml d'eau dans la cavité et de choisir la
fonction « EASY STEAM ». Veuillez-vous référer au tableau des
recettes correspondantes.
GRILL
l'utilisation du grilloir se fait porte fermée. Un préchauffage de 5
mins est nécessaire pour le rougissement de la résistance.
Succès assuré pour les grillades, les brochettes et les gratins.
Les viandes blanches doivent être écartées du grilloir ; le temps de
cuisson sera alors plus long, mais la viande sera plus savoureuse.
Les viandes rouges et filets de poissons peuvent être placés sur
la grille avec le plat récolte sauce glissé dessous.
Le four a deux positions de gril : Gril: 2140 W
RÉSISTANCE INFÉRIEURE + VENTILATEUR
Idéale pour les tartes à fruits juteux, les tourtes, les quiches, les
pâtés. Elle évite le dessèchement des aliments et favorise la
levée pour les cuissons de cakes, pâte à pain et autres cuissons
par le dessous. Placer la grille sur le gradin inférieur. Avec ce mode de
cuisson, un préchauffage est nécessaire en Chaleur Brassée
pendant une dizaine de minutes.
CONVECTION + VENTILATEUR
rculer dans le
Ajustez le bouton du thermostat de votre four à la température
eur.
e du four à la durée
ssonavec un plateau.
complètement en gardant la porte dufour ouverte. Comme le four sera
chaud, ne vousapprochez pas du four et gardez vos enfants à l'écart.
RÉSISTANCE INFÉRIEURE
Utilisation de la resistance de sole. Ideale pour la cuisson de
tartes, de creme caramel, flans, terrine, toutes preparations qui
necessitent une cuisson par le dessous (cocottes : poulet,
boeuf)
COOK LIGHT
La fonction "COOK LIGHT" vous permet de cuisiner de manière
plus saine en réduisant la quantité de graisse ou d'huile requise.
Grâce à l'utilisation du gril et du ventilateur combinés à un cycle d'air
pulsé, il retient la teneur en humidité des aliments, grille la surface et
réduit le temps de cuisson sans compromettre le goût.
Il est particulièrement adapté à la cuisson des viandes, des légumes
grillés et des omelettes. Le cycle de l'air pulsé maintient l'humidité à
l'intérieur du four et la teneur en eau de l'aliment, préservant ainsi les
valeurs nutritionnelles et assurant un processus de cuisson rapide et
uniforme.
Essayez toutes vos recettes et réduisez la quantité de vinaigrette que
vous utilisez habituellement et découvrez la légèreté de cette nouvelle
fonction!
PLATS
Pâte
feuilletée
Gâteau
Cookie
Boulettes
de viande
grillées
Nourriture
aqueuse
Poulet
Steak
haché
Steak de
boeuf
Gâteau à
deux
plateaux
Pâtisserie à
deux
plateaux
Thermostat
pos. (°C).
Période
cuisson
pos.
Étagère
(min)
de
Thermostat
pos. (°C).
Période
cuisson
pos.
Étagère
(min)
de
Thermostat
pos. (°C).
eur et
sson que
nte vers le
ron
on où l'on
e. Toutes les
on.
on du four
ts du four,
Tableau 4
Période
de
cuisson
pos.
Étagère
(min)
s
t
35 FR
Page 36

7. NETTOYAGE ET ENTRETIEN
7.1 REMARQUES GÉNÉRALES
Avant de commencer à nettoyer votre four, assurez-vous que tous les
boutons de commande sont éteints et que votre appareil est refroidi.
Débranchez l'appareil.
N'utilisez pas de produits de nettoyage contenant des particules qui
pourraient rayer les parties émaillées et peintes de votre four. Utilisez des
nettoyants crémeux ou des nettoyants liquides, qui ne contiennent pas de
particules.
Ne pas utiliser de crèmes caustiques, de poudres de nettoyage abrasives,
de la laine de verre rugueuse ou d'outils durs, car ils pourraient
endommager les surfaces. Dans le cas où l'excès de liquide débordant de
votre four brûlerait, cela pourrait endommager l'émail. Nettoyez
immédiatement les liquides renversés.
7.2 NETTOYAGE DU FOUR
Assurez-vous de débrancher le four avant de commencer à le nettoyer.
Vous obtiendrez de meilleurs résultats si vous nettoyez l'intérieur du four
alors que le four est légèrement chaud. Essuyez votre four avec un chiffon
doux imbibé d'eau savonneuse après chaque utilisation. Essuyez-le à
nouveau, cette fois-ci avec un chiffon humide, puis essuyez-le à sec. Un
nettoyage complet peut s'avérer nécessaire de temps à autre, à l'aide d'un
produit de nettoyage liquide. Ne pas nettoyer avec des nettoyants secs et
en poudre. Pour les produits avec cadres en émail catalytique, les parois
arrière et latérales du cadre intérieur ne nécessitent pas de nettoyage.
Cependant, selon l'utilisation, il est recommandé de les remplacer après
une certaine période de temps.
Toute variation de la couleur du verre vitrocéramique n'a pas
d'influence sur son fonctionnement, ni sur la solidité de sa
surface. Les variations de couleur sont pour la plupart dues à des
résidus alimentaires brûlés ou à des ustensiles de cuisine en
aluminium ou en cuivre (ces dernières sont difficiles à éliminer).
7.4 ENTRETIEN
Remplacement de l'ampoule du voyant du four
Il est recommandé de confier cette opération au Service Autorisé.
Débranchez d'abord le four et assurez-vous qu'il est froid. Après avoir
enlevé le couvercle devant le voyant, retirez l'ampoule. Insérez la nouvelle
ampoule résistante à 300 °C, que vous trouverez auprès des services
agréés, à la place de l'ampoule que vous avez retirée.
Remettez ensuite le couvercle de protection du voyant en place. Après
cela, votre four sera prêt à l'emploi.
8. SERVICE ET TRANSPORT
8.1 EXIGENCES AVANT DE CONTACTER LE
SERVICE
Si le four ne fonctionne pas ;
Le four est peut-être débranché, il y a eu une panne de courant.
Si le four ne chauffe pas ;
La température peut ne pas être réglée à l'aide de l'interrupteur de contrôle
de la température du four.
7.3 NETTOYAGE ET ENTRETIEN
.
commerce.
.
.
de cuisson.
ENTRETIEN :
- Versez quelques gouttes d'un détergent spécifique sur la table de
cuisson.
- Frottez les taches tenaces à l'aide d'un chiffon doux ou de papier
absorbant légèrement humide.
- Essuyez avec un chiffon doux ou du papier absorbant sec jusqu'à ce
que la surface soit propre.
Si des taches subsistent :
- Versez quelques gouttes supplémentaires de détergent spécifique sur
la table de cuisson.
- Grattez à l'aide d'un racleur en le tenant à un angle de 30° par rapport à
la table de cuisson, jusqu'à disparition de la tache.
- Essuyez avec un chiffon doux ou du papier absorbant sec jusqu'à ce
que la surface soit propre.
- Recommencez si nécessaire.
QUELQUES CONSEILS :
Le nettoyage fréquent crée une couche protectrice essentielle pour éviter
les rayures et l'usure de la table de cuisson. Assurez-vous que la surface
de la table de cuisson est propre avant de la réutiliser. Pour éliminer les
traces d'eau, utilisez quelques gouttes de vinaigre blanc ou de jus de
citron. Puis essuyez avec du papier absorbant et quelques gouttes de
détergent spécifique.
La surface vitrocéramique résiste aux rayures des ustensiles de cuisson à
fond plat. Toutefois, il est préférable de les soulever pour les déplacer
d'une zone de cuisson à
l'autre.
Si le voyant du four ne fonctionne pas ou il ne s'allume pas ;
L'électricité doit être contrôlée.
Il faut vérifier si l'ampoule est défectueuse.
Cuisson (si la partie inférieure-supérieure ne cuit pas de la même
façon) ;
Contrôler l'emplacement des étagères, la durée de cuisson et les valeurs
de température conformément au manuel. Si le produit ne fonctionne pas
correctement et qu'aucune cause de dysfonctionnement ne peut être
trouvée, éteignez le produit. N'y touchez pas et appelez le service
technique.
Il est important de communiquer au service technique autorisé le modèle
du produit et son numéro de série qui se trouve sur la plaque signalétique.
8.2 INFORMATIONS RELATIVES AU TRANSPORT
Si vous avez besoin de transport ;
Conserver l'emballage d'origine du produit et le transporter avec son
emballage d'origine si nécessaire.
Suivre les indications de transport sur l'emballage.
Si l'emballage d'origine n'est pas disponible ;
Mesurer les surfaces extérieures (surfaces en verre et surfaces peintes)
du four et de la table de cuisson contre d'éventuels coups
N.B.:
30° Maxi
Ne pas utiliser d'éponge trop humide.
Ne jamais utiliser de couteau ou de tournevis.
Un racleur équipé d'une lame de rasoir n'endommage pas la surface,
tant qu'il est maintenu à un angle de 30°.
Ne pas laisser le racleur avec lame de rasoir à la portée des enfants.
Ne jamais utiliser de produits abrasifs ou de poudre à récurer.
Bordure métallique : Pour nettoyer la bordure métallique en toute sécurité,
lavez à l'eau et au savon, rincez, puis séchez avec un chiffon doux.
36 FR
Page 37

VEILIGHEIDSVOORSCHRIFTEN
• Tijdens het koken kan vocht in de ovenholte of op het glas van de deur condenseren. Dit is normaal. Om
dit effect te verminderen, wacht u 10-15 minuten na het inschakelen van de stroom voordat u voedsel in
de oven doet. Condensatie verdwijnt in elk geval de wanneer de oven de kooktemperatuur bereikt.
• Kook de groenten in een bakje met deksel in plaats van een open blad.
• Laat geen voedsel in de oven achter na het koken voor langer dan 15/20 minuten.
• WAARSCHUWING: Het apparaat en de bereikbare delen worden heet tijdens het gebruik. Zorg ervoor
dat u de warmingselementen niet aanraakt.
• WAARSCHUWING: de bereikbare delen kunnen heet worden wanneer de oven in gebruik is. Kinderen
moeten op veilige afstand worden gehouden.
• Dit apparaat kan op een veilige manier worden gebruikt door kinderen van 8 jaar en ouder en personen
met verminderde lichamelijke, zintuiglijke of geestelijke vermogens of gebrek aan ervaring en kennis als
zij onder toezicht staan of worden geïnstrueerd over het gebruik van het apparaat.
• Kinderen niiet met het apparaat laten spelen.
• Schoonmaak en onderhoud niet door kinderen laten doen zonder toezicht.
• Tijdens het gebruik wordt het apparaat heet. Pas op dat u de verwarmingselementen in de oven niet
aanraakt. WAARSCHUWING: Onderdelen kunnen heet worden. Hou jonge kinderen op afstand.
• Gebruik geen agressieve schuurmiddelen of scherpe metalen schrapers om de oven glazen deur
schoon te maken, aangezien zij kunnen krassen op het oppervlak, tevens kan dit een barst in het glas
veroorzaken.
• De oven moet uitgeschakeld worden voordat u de beveiliging verwijderd, deze moet vervolgens
geplaatst worden zoals aangegeven in de handleiding.
• Gebruik alleen de aanbevolen temperatuursmeter voor deze oven.
• Gebruik geen stoomreiniger.
• Bevestig een stekker aan de voedingskabel die in staat is de spanning, stroom en belasting te
verdragen die vermeld staan op het etiket, en een aardcontact heeft. Het stopcontact moet geschikt zijn
voor de belasting die op het etiket staat aangegeven en moet een goed werkende aarding hebben. De
aardgeleider is groen-geel gekleurd. Dit moet worden gedaan door een gekwalificeerd vakman. In het
geval van incompatibiliteit tussen het stopcontact en de stekker van het apparaat, moet u een
gekwalificeerd elektricien vragen om het stopcontact te vervangen door een ander, geschikt stopcontact.
De stekker en het stopcontact moeten conform de huidige normen zijn van het land waar het apparaat
geïnstalleerd wordt. Aansluiting op de stroombron kan ook tot stand worden gebracht door tussen het
apparaat en de stroombron een omnipolaire stroomonderbreker aan te brengen, die de maximaal
aangesloten belasting kan verdragen en voldoet aan de huidige wetgeving. De geel-groene aardkabel
mag niet worden onderbroken door de stroomonderbreker. Het stopcontact of de omnipolaire
stroomonderbreker die gebruikt wordt voor de aansluiting moet gemakkelijk te bereiken zijn wanneer het
apparaat geïnstalleerd is.
• Afkoppeling is mogelijk doordat de stekker bereikbaar is of door een schakelaar in de vaste bedrading te
monteren overeenkomstig de bedradingsregels.
• Als de voedingskabel beschadigd is, moet hij worden vervangen door een kabel of speciale bundel die
verkrijgbaar is bij de fabrikant, of via de klantenservice
• De voedingskabel moet van het type H05V2V2-F zijn.
• Als niet aan bovenstaande wordt voldaan, kan de veiligheid van het apparaat worden aangetast en de
garantie komen te vervallen.
• Gemorst materiaal moet worden verwijderd alvorens het apparaat schoon te maken.
• Om oververhitting te vermijden, mag het apparaat niet achter een decoratieve deur worden geplaatst.
• Als u het schap erin plaatst, moet u ervoor zorgen dat de aanslag aan de bovenkant en achterin de
ovenruimte zit. Het schap moet helemaal in de ruimte worden geschoven
• WAARSCHUWING: Bekleed de ovenwanden niet met in de handel verkrijgbare aluminiumfolie of
wegwerpbeschermingen. Aluminiumfolie of andere beschermingen die direct in contact komen met het
hete email, kunnen smelten en het email binnenin aantasten.
• WAARSCHUWING: Verwijder nooit de afdichting van de ovendeur.
• Er zijn geen aanvullende handelingen/instellingen nodig om het apparaat op de nominale frequenties te
gebruiken.
37 NL
Page 38

1. ALGEMENE AANWIJZINGEN
Lees deze handleiding aandachtig. Hierin treff u betangrijke gegevens aan omtrent installatie, gebruik en onderhoud. Bewaar deze handleiding voor
eventuele toekomstige raadpleging.
De eerste keer dat de oven in werking wordt gesteld, kan er een stinkende walm vrijkomen. Dit is te wijten aan de eerste verhitting van de lijm op de
isolatiepanelen rond de oven. Dit is volkomen normaal. Wij raden u aan uw oven eerst een half uur op vol vermogen aan te zetten om deze walm uit
de oven te verwijderen. Wacht u tot de walm verdwijnt, alvorens u het voedsel in de oven plaatst.
Bij een ingeschakelde oven wordt het glas van de deur behoorlijk warm.
1.1 LEES DEZE HANDLEIDING AANDACHTIG
De onderdelen, die in contact komen met voedsel voldoen aan de
EEC richtlijn 89/109.
Door het plaatsen van de markering op dit product, verklaren
wij, op onze eigen verantwoordelijkheid, alle Europese veiligheids-,
gezondheids- en milieu-eisen na te leven opgesteld in de regelgeving
geldig voor dit product.
1.2 VEILIGHEIDSVOORSCHRIFTEN
•Het apparaat dient uitsluitend gebruikt te worden voor het doel,
waarvoor het is ontworpen, d.w.z. het bereiden van voedsel. Elk ander
doel, bijvoorbeeld als verwarming, is onjuist gebruik van de oven en
gevaarlijk.
De fabrikant is niet verantwoordelijk voor mogelijke schade ten
gevolge van een onjuist, verkeerd of onverstanding gebruik van de
oven.
•Bij het gebruik van elk elektrische apparaat dienen
verschillende regels in acht genomen te worden:
- Trek niet aan de kabel om de stekker uit het stopcontact te halen;
- Raak het apparaat niet met vochtige of natte handen of voeten aan;
- Gebruik het apparaat niet indien u geen schoeisel draagt;
- Gebruik geen adapters, tussenverbindingen en/of verlengsnoeren;
- Zet het apparaat bij hapering of siechte werking af en ga er niet aan
sieutelen.
De kabel dient bij beschadiging direct vervangen te worden en wel op
de volgende wijze:
- Haal de stekker uit het stopcontact of schakel de gehele elektrische
installatie uit;
- Verwijder de kabel en vervang hem door een even lange nieuwe,
(van het type H05RR-F, H05VV-F, H05V2V2-F). Deze kabel moet
geschikt zijn voor het vermogen van het apparaat;
- Dit dient door een technische specialist uitgevoerd te worden;
- De aarde-draad (geel/groen) moet 10 mm langer zijn dan de andere
draden.
•Voor reparaties aan het apparaat dient u zich uitsluitend tot een
officiële technische service te wenden, alwaar u originele onderdelen
kunt bestellen. Indien al hetgeen hierboven niet in acht wordt
genomen, kan de veiligheid van het apparaat niet gegarandeerd
worden.
•Bedek de wanden van de oven nooit met aluminiumfolie of met
wegwerp producten om de oven schoon te houden.
Aluminiumfolie en andere producten kunnen smelten als ze in
aanraking komen met de hete ovenwanden, en kunnen de
emaillaag aantasten.
1.3 INSTALLATIE
De installatie valt onder de verantwoording van de koper zelf. De
fabrikant is voor de installatie niet verantwoordelijk. Eventuele
bijstand van de fabrikant bij onjuiste installatie valt niet onder de
garantie. De oven dient door een technisch bevoegd persoon
geïnstalleerd te worden volgens de installatie instructies. De fabrikant
is niet verantwoordelijk voor eventuele persoonlijke of materiële
schade ten gevolge van een onjuiste installatie.
1.5 BELANGRIJK
De inbouwkast dient geschikt te zijn voor inbouw van het apparaat
teneinde een goede werking te kunnen garanderen. De panelen van
de kasten naast de oven dienen warmtebestendig te zijn. Bij kasten
met houtfineer dient de lijm een temperatuur van 120°C te kunnen
weerstaan. Plastic of gelijmde materialen, die niet bestending zijn
tegen deze temperatuur kunnen vervormd worden of loslaten.
Volgens de veiligheidsnormen dient het ingebouwde apparaat niet in
contact te komen met elektrische onderdelen.
Alle beveiligingsonderdelen dienen zodanig aangebracht te zijn, dat
zij niet zonder gereedschap verwijderd kunnen worden.
Teneinde een goede ventilatie te garanderen, dient de
achterwand van de inbouwope- ning verwijderd te worden. Het
voetstuk dient een opening van minstens 45 mm te hebben.
1.6 ELEKTRISCHE AANSLUITING
Steek de stekker in een correct geïnstalleerd geaard stopcontact. Bij
modellen zonder stekker dient met een standaardstekker aan te
brengen, die geschikt is voor het op het typeplaatje vermelde
vermogen. De aarddraad is geel/groen. Deze verbinding dient door
een technisch bevoegd persoon uitgevoerd te worden. Indien het
stopcontact en de stekker niet op elkaar afgestemd zijn, laat dan een
technisch bevoegd persoon een ander stopcontact installeren. Deze
dient ook na te gaan of de draaddoor- snede van het stopcontact
geschikt is voor het door het apparaat opgenomen vermogen.
Aansluiting kan ook plaatsvinden door een geschikte meerpolige
(aan/uit) schakelaar te plaatsen tussen het elektrische net en het
apparaat, die aan de geldende normen voldoet. Zorg ervoor dat de
(geel/groen) geaarde kabel de schakelaar niet raakt. Het stopcontact
of de meerpolige schakelaar dienen op een gemakkelijk toegankelijke
plaats bij de oven gemonteerd te worden.
Belangrijk: Zorg er bij de installatie voor dat de voedingskabel
nergens warmer kan worden dan 50°C. De oven voldoet aan de
veiligheidseisen als voorzien in de normen van de desbetreffende
instituten. De elektrische veiligheid wordt uitsluitend gegarandeerd
indien het apparaart op de juiste wijze met een doelmatige
aardingsinstallatie is verbonden ingevolge de huidige normen m.b.t.
elektrische veiligheid. Ga na of aan deze fundamentele veiligheidseis
is voldaan en laat de installatie, ingeval van twijfel, grondig nakijken
door een installateur.
Ga na of het elektrische vermogen van de stopcontacten
overeenkomt met het maximum vermogen van het apparaat, zoals is
aangegeven op het typeplaatje. Haal er, in geval van twijfel, een
technisch bevoegd persoon bij.
De fabrikant is niet verantwoordelijk voor eventuele persoonlijke
of materiële schade als gevolg van de nietaarding van de
installatie.
ATTENTIE: De spanning en energieverbruik staan vermeld op de
modelsticker (laatste pagina).
1.4 INBOUW VAN DE OVEN
Plaats de oven in de daarvoor bestemde opening: onder het aanrecht
of in kolomopstelling. De oven wordt vast gezet door de vier
schroeven in de gaten in de rand vast te draaien. U kunt de schroeven
zien, wanneer u de deur opent. Voor een goede ventilatie dienen bij
het inbouwen van de oven de op de laatste pagina aangegeven maten
en afstanden in acht te worden genomen.
Opmerking: Bij ovens die onder een kookplaat aangebracht worden,
dient men de aanwijzingen in de handleiding voor de kookplaat op te
volgen.
38 NL
Page 39

Figuur 1
Modellen 1 2 3 4
VITROKERAMISCH: CUTC64
2 3
1
Vitrokeramisch oppervlak
Figuur 3
1. Bedieningspaneel
2. Deurhandgreep
3. Ovendeur
4. Bakplaat
5. Onderste
verwamingselement
6. Bovenste
verwamingselement
8. Rekken
Figuur 2
CUTC64 1200W / Ø155 1800W / Ø190 1800W / Ø190 1200W / Ø155
CUTC64FF 1200W / Ø155 1800W / Ø190 1800W / Ø190 1200W / Ø155
CUTC64EXDNF 1200W / Ø155 1600W+800W / Ø180 1200W / Ø155 1000W+700W / Ø190
4
CUTC64EXDFF 1200W / Ø155 1600W+800W / Ø180 1200W / Ø155 1000W+700W / Ø190
CUTCE64EXDFF 1200W / Ø155 1500W+900W / Ø180 1200W / Ø155 1000W+700W / Ø190
5
CUTCE64EXDNF 1200W / Ø155 1500W+900W / Ø180 1200W / Ø155 1000W+700W / Ø190
Verwarmingsdiameters kunnen worden gewijzigd voor gerelateerde modellen.
(Afhankelijk van het model)
Maak voor het gebruik de accessoires eerst schoon, spoel ze af met
water en maak ze goed droog.
dient als steun voor vormen en schotels.
dient meer bepaald voor het grillen. Dit wordt
meestal samen met de lekbak gebruikt.
Dankzij hun speciaal profiel blijven ze steeds horizontaal, zelfs
wanneer ze maximaal uitgetrokken zijn. Er bestaat geen enkel risico
op het schuiven of overlappen van de gerechten.
Figuur 4
is bestemd voor het opvangen van de jus bij het grillen.
Deze wordt slechts gebruikt in de modus Grillen, Draaispit of Turbogrill,
afhankelijk van het model. Voor alle andere bakwijzen moet u deze uit
de oven halen. De lekbak nooit als bakschaal gebruiken, er kan zich
rookontwikkeling, vetverspreiding en een snelle vervuiling van de oven
voordoen.
beste resultaat moet u deze gebruiken in combinatie met de Pizza
is ontwikkeld voor het bakken van een pizza. Voor het
functie
Figuur 6
wordt in combinatie met de lekbak gebruikt voor alle
soorten grillgerechten. Een handgreep wordt meegeleverd om het
geheel uit de oven te kunnen nemen zonder dat u zich brandt. Laat de
handgreep nooit in de oven liggen.
Figuur 7
Zijdelingse draadstructuur, indien inbegrepen
Figuur 5
39 NL
Page 40

4. NUTTIGE TIPS
4.1 VEILIGHEIDSSYSTEEM VOOR DE ROOSTERS
Deze oven is uitgerust met een nieuw
veiligheidssysteem voor het uitrekken van
de roosters. Dit systeem stelt u in staat om
de roosters naar voren te trekken zonder
het gevaar op te lopen, dat het rooster of het
bereide voedsel per ongeluk uit de oven
vallen. Om de roosters uit de oven te halen,
Figuur 8
dient u deze naar voren te trekken en lets
op te tillen
4.2 GRILLEREN
Grilleren maakt het mogelijk het voedsel snel een diepe bruine kleur te
geven. Afhankelijk van de grootte van uw gerecht raden wij u aan dit op
het vierde niveau te zetten.
Bijna elk voedsel kan worden bereid onder de grill afgezien van erg
mager vlees of.een rollade. Vlees en vis dat u gaat grillen, dient u eerst
licht tebestrijken met olie.
4.2 KOOKTIJD
Als u de oven voor de eerste keer gebruikt, raadpleegt u de tabellen op
pagina 12 voor de aanbevolen kooktijden en temperaturen. Hierna kunt
u naar eigen ervaring en inzicht deze tijden en instellingen aanpassen.
4.4 SCHOONMAKEN EN ONDERHOUD
Opgelet voor allehete oppervlakken, omdateen risicoop
brandwonden bestaat.
Gebruik gedestilleerd ofdrinkbaar water.
4.6 SERVICE CENTRE
Before calling the Service Centre
If the oven is not working, we recommend that:
you check that the oven is properly plugged into the power supply.
If the cause of the fault cannot be detected:
disconnect the oven from the mains, do not touch the oven and call the
after sales service.
Before calling the Service Centre remember to make a note of the
serial number on the specifications plate.
The oven is supplied with a guarantee certificate that ensures that it
will be repaired free of charge by the Service Centre
DE GLAZEN ONDERDELEN
Wij bevelen u aan om na elk gebruik het glas van de ovendeur schoon
te maken d.m.v. absorberend papier. Indien er teveel vetspatten op
zitten kan u deze nadien met een uitgewrongen spons en een
sc h o onmaakmiddel r e i n igen en daar n a spoel e n . Noo i t
schuurmiddelen of snijdende voorwerpen gebruiken. U mag nooit een
stoomreiniger of hogedrukreiniger gebruiken om de oven schoon te
maken. Laat het apparaat eerst afkoelen alvorens het schoon te
maken; haal vervolgens de stekker uit het stopcontact of sluit de
elektriciteit af middels de hoofdschakelaar. Maak de roestvrijstalen en
geëmaillerde delen schoon met warm water en niet bijtende of
vloeibare zeep. Gebruik geen schuurmiddelen, bijtende
wasmiddelen, bleekmiddelen of zuren om het apparaat schoon te
maken. Het is heel belangrijk de oven schoon te maken na iedere keer
dat u de oven heeft gebruikt. Vetten, die aan de wanden van de oven
zijn blijven zitten, kunnen de volgende keer dat u de oven gebruikt,
voor nare geurtjes zorgen of zelfs het kookresultaat beïnvloeden.
Gebruik heet water met een geschikt schoonmaakmiddel om de oven
schoon te maken; vewijder de zeepresten grondig. De oven kan ook
uitgerust worden met zelfreinigende ovenwanden, zodat het
bovenstaande onnodig wordt. (Zie hiervoor het volgende hoofdstuk).
Gebruik voor het schoonmaken van de roestvrijstalen grill een
schoonmaakmiddel en schuursponsje. De glazen oppervlakken dient
u schoon te maken, wanneer deze koud zijn. Schade aan de glazen
delen vallen niet onder de garantie indien u het bovenstaande niet in
acht neemt.
Om het binnenlichtje te vervangen dient u: de stekker uit het
stopcontact te halen of de elektriciteit af te sluiten en de oude lamp te
vervangen door een soortgelijke nieuwe lamp.
5. VOORBEREIDING OP INSTALLATIE EN GEBRUIK
Deze mode r n e, functionele en praktische oven is geproduceerd met
de beste, k w a litatief hoogwaardige onderdelen en materialen en zal
in alle opzicht en aan uw verwachtingen voldoen. Lees deze
handleiding om een goed resultaat te behalen en om in de toekomst
geen problemen tegen te komen. In de onderstaande informatie staan
regels die noodzakelijk zijn voor een goede plaatsing en onderhoud.
Lees deze in zijn geheel door en laat ook de installateur die het
apparaat installeert deze doornemen.
5.1 EEN PLAATS KIEZEN VOOR DE OVEN /
HAARDPLAAT
U moet op meerdere zaken letten als u een plaats gaat kiezen voor uw
oven. Houd rekening met de onderstaande aanbevelingen om
problemen en eventuele latere gevaarlijke situaties te voorkomen!
• Als u een plaats voor de oven / haardplaat kiest, let er dan op dat er
zich geen ontvlambare of brandbare materialen in de dichte nabijheid
van de oven bevinden, zoals gordijnen, doeken met olie, etc., die snel
vlam kunnen vatten.
• Benodigde veranderingen van wandkasten en afzuiging boven het
inbouwproduct en de minimale hoogte vanaf de oven staan in figuur 9.
De afzuiging dient zich op een minimale afstand van 65 cm van het
werkblad te bevinden. Als er geen afzuiging aanwezig is, dient de
hoogte niet minder te zijn dan 70 cm.
4.5 AQUACTIVAFUNCTIE
DeAquactivaprocedure maakt gebruik vanstoomom achtergebleven
vetenetensrestenuit de ovente helpen verwijderen.
1. Giet 300ml water inhet Aquactivareservoir aan de onderkant van de
oven.
2. Stel deovenfunctieStatic ( ) ofBottom ( ) verwarming in
3. Stel de temperatuur inmet het pictogramAquactiva
4. Stel hetprogrammamet een looptijd van 30minuten in.
5. Na30minutenschakelthetprogrammauit en koelt deovenaf.
6. Als het apparaatafgekoeld is, kan het reinigen van debinnenkant
vande oven meteen doekbeginnen.
Waarschuwing:
Zorg ervoordat het apparaatafgekoeld is voordatu het aanraakt.
AFZUIGING
Figuur 9
40 NL
Page 41

5.2 INSTALLATIE OVEN EN FORNUIS
Afbeeldng 10 – Regulere nstallate van de oven
595 mm
595 mm
5mm
530 mm
15 mm
400 mm
560 mm
mm
45
560 mm
Mn. 600 mm
400 mm
50 mm
Typeplaat
Tabel 2
FORNUIZEN INBOUWEN
VITRO
560 mm
490 mm
5.2.1 Installatestappen
1. Plaats het fornusn de openng van het werkblad. De afmetngen
van de openng worden weergegeven ΚnfΚguur 10. Ze voor meer
Κnformate Het vtrokeramsche fornus bevestgen.
2. Slut het fornus aan op de oven met de stekker van het fornus. De
aanslutng voor de stekker bevndt zch op het achterpaneel van de
oven.
3. Slut deoven aan op hetelektrctetsnet.
4. Plaats deoven Κndenbouwplaats. Afhankeljk vande kastopenng,
Κs plaatsng volgens fguur 10 van toepassng.
Ze voormeer Κnformate De oven bevestgen.
5.2.2 Het vtrokeramsche fornus bevestgen
Normale bevestiging:
- Haal de bevestigingsklemmenuit dezak metaccessoires enschroef
ze op de plaatsen die aangegeven staan op de onderkant. (Draai de
schroeven niet vast om de klemmen te blokkeren, ze moeten vrij
kunnen bewegen)
- Plaats de kookplaat in het midden van deuitsnede.
- Draai de klemmen en draai ze helemaal vast.
5.2.3 De oven bevestgen
Plaats de oven ΚnderuΚmte Κn de keukeneenhed. Dt kan onder een
werkblad zjn ofΚn een kast. Zetde ovenop haar plekdoor deze vastte
schroeven met de twee bevestgngsgaten Κn hetframe.
Open de ovendeur en kjk Κn de oven om deze bevestgngsgaten te
vnden.
De afmetngen en het materaal van de kast waarn de oven wordt
geplaatst, denen te kloppen en denen bestand te zjn tegen hoge
temperaturen. Bj een juste ΚnstallatedΚent contact met elektrsche of
geïsoleerde delen te worden voorkomen. Geïsoleerde delen moeten
zo worden geplaatst dat deze net met gereedschap verwjderd
kunnen worden. Installate van het apparaat ΚndedΚchte nabjhed van
een koelkast of vrezer wordt net aanbevolen. Door de utstralende
warmte kunnen de prestates van voornoemde apparten negatef
worden beïnvloed.
5.2.4 Waarschuwng
Waarschuwng met betrekkng
zonder koelventlator. Voordat u de oven plaatst, dent u het achterste
keukenpaneel Κn de openng van de oven te verwjderen. Het voorste
deel van het onderdeel dent ookvan eenopenng voorzen te zjn.
• Het lampje lcht op als het knopje van het fornus op een andere
stand staat dan de “0”.
• Gebruk alleen pannen de even groot zjn als de dameter van de
kookplaten.
• Voordat u de pan op de kookplaat plaatst, controleert u of de
onderkant net natΚs.
• Zet een kookplaat noot aan zonder dat er een pan op staat. De
temperatuur van de pan kan hoog zjn als het apparaat Κn gebruks.
Derhalve wordt aanbevolen om knderen en deren tjdens en na
gebrukbuΚten berek van het fornus tehouden.
• Inden
onmddelljk ut
u scheuren zet Κn het keramsche glas, dan dent u het fornus
te schakelen en te laten vervangen door de
geautorseerde onderhoudsdenst.
• Na gebruk (voor een voortdurend effectef gebruk en lange
levensduur) moeten kookplaten goed te worden schoongemaakt met
daarvoor geschkte rengngsmddelen. Om roestvormng te
voorkomen en het oorspronkeljke uterljk te behouden, wordt
aanbevolen om de kookplaten schoon te maken door ze schoon te
wrjven met een doek delΚcht Κs bevochtgd met ole. Gebruk geen
stoomrengers.
• Om tevoorkomen dat stroom verloren gaat, moetende pannendeu
gebrukt net groter of klener zjn dan de oppervlakken van de
kookplaten.
• Tref de nodge maatregelen zodat klene knderen net Κnde
nabjhed van het oppervlak van de kookplaten komen. Deze zjn
tjdens enna gebru
k nameljk
• Door de ontvlambare aard van hete ole, denen handelngen zoals
bakken net teworden utgevoerd met eengesloten klep.
• Er mag nets op het glas worden gesneden, zoals brood. Geen
pannen met alumnum onderkant gebruken. Plaats geen zware
materalen opuw fornus.
• Plaats geen materalen van kunststof of alumnum op het
keramsche, glazen oppervlak. Inden er, om wat voor reden dan ook,
kunststof of alumnum materaal op gesmolten Κs, verwjdert u dt
onmddelljk met een spatel.
• Veeg het keramsche oppervlak net schoon met materalen zoals
afwasborstels of schuursponsjes. Resten vaatwasmddelen kunnen
tot brand leden enkunnen dekleur van het glas doen vervagen.
tot de Κnstallate van de Κnbouwoven
erg heet.
Fguur 11
41 NL
Page 42

5.3 BEDRADING EN VEILIGHEID VAN DE
INBOUWOVEN
Voordat u de aansluiting tot stand brengt, dient u te zorgen dat de
installatie beschermd is door een geschikte zekering, en dat hij
voorzien wordt van stroomdraden met een diameter die groot genoeg
is om het apparaat normaal van stroom te voorzien.
Keer de kookplaat / oven om met de glazen kant op het werkblad;
wees voorzichtig om het glas te beschermen.
Open het deksel in deze volgorde:
~
380-415 V3 N
~
220-240 V
L1
1
L2
~
L3
220-240 V3
1
~
220-240 V2
1
L3 L2
PE
1
Figuur 12
Figuur 13 Figuur 14
- schroef kabelklem "1"`los;
- zoek de twee lipjes aan de zijkanten op;
- zet het blad van een platte schroevendraaier voor de lipjes "2" en "3", duw ze
in en druk;
- verwijder het deksel.
Het netsnoer losmaken:
- Verwijder de schroeven van het klemmenblok met de shunts en de geleiders
van het netsnoer;
- Trek het netsnoer eruit.
Uit te voeren handelingen om een nieuwe aansluiting te maken:
- Kies de netvoedingskabel in overeenstemming met de aanbevelingen in de
tabel;
- Steek de netvoedingskabel in de klem;
- Strip het uiteinde van elke geleider van het netsnoer tot een lengte van 10
mm; houd hierbij rekening met de benodigde lengte van het snoer voor de
aansluiting op het klemmenblok;
- Volgens de installatie en met behulp van de shunts die u bewaard heeft bij
de eerste handeling, bevestigt u de geleider zoals weergegeven op het
diagram;
- Bevestig het deksel;
- Schroef de kabelklem vast.
N
=
Neutro
PE
=
TierraL1 / L2 / L3 = Phase
Figuur 16
5.4 VITROKERAMISCH FORNUIS ZONDER
BEDIENINGSKNOP
La connexion au circuit électrique, sur la table de cuisson
vitrocéramique, doit se faire via le four.
Om de aansluiting te vervolgen, moeten de mannelijke
connectors en van het fornuis worden aangesloten op
de vrouwelijke connectors v a n de oven o f het
bedieningspaneel.
INSTALLATIE MET OVEN
KOOKPLAAT
OVEN
Opmerking: zorg ervoor dat de schroeven van het klemmenbord goed
zijn vastgedraaid.
Uit te voeren handelingen om een nieuwe
aansluiting te maken:
- Kies de netvoedingskabel in overeenstemming met
SHUNT
de aanbevelingen in de tabel;
- Steek de netvoedingskabel in de klem;
- Strip het uiteinde van elke geleider van het netsnoer
tot een lengte van 10 mm; houd hierbij rekening met
de benodigde lengte van het snoer voor de
aansluiting op het klemmenblok;
- Volgens de installatie en met behulp van de shunts
die u bewaard heeft bij de eerste handeling, bevestigt
u de geleider zoals weergegeven op het diagram;
- Bevestig het deksel;
- Schroef de kabelklem vast.
INDELING
"1-3-5"
INDELING
Figuur 15
"2-4"
MONOFASE of TWEE FASEN 220-240 V~
Kabel
HO5V2V2F
3x4 mm
2
3x4 mm
2
DRIE FASEN 220-240 V3~
Kabel
HO5V2V2F
4x1,5 mm
2
4x1,5 mm
2
DRIE FASEN 380-415 V2N~
Kabel
HO5V2V2F
4x1,5 mm
2
4x1,5 mm
2
Figuur 17
desbetreffende instructieboekje.
Deze aansluiting kan worden gemaakt voor of nadat de oven op
zijn plek is geschroefd.
Opening inbouwoven: Raadpleeg het
42 NL
Page 43

6. HET GEBRUIK VAN DE OVEN / HET FORNUIS
6.1 BEDIENINGSPANELEN
Temperatuurlampje oven Bedieningslampje elektrische kookplaat
MAX
Figuur 18
Figuur 19
Bedieningsknop
elektrische kookplaat
TimerknopTemperatuurknop
oven
MAX
MAX
Bedieningsknop
ovenfunctie
43 NL
Page 44

6.2 ELEKTRISCHE PROGRAMMA'S GEBRUIKEN
FUNCTIE HOE INSCHAKELEN HOE UITSCHAKELEN HOE WERKT HET
KOOKWEKKER
HANDMATIG
FUNCTIE
BEREIDING TIJD
EINDE VAN DE
BEREIDING
• Houd de -knop ingedrukt
• Druk op de of -knop
om de tijd in te stellen
• Laat alle knoppen los
• Druk op de -knop
• Stel de bereidingsfunctie
in met de
functiekeuzeschakelaar
• Houd de TIMERKNOP
ingedrukt
• Druk op de of -knop
om de gewenste
bereidingstijd in te stellen
• Laat alle knoppen los
• Stel de bereidingsfunctie
in met de
functiekeuzeschakelaar
• Houd de EINDE-knop
ingedrukt
• Druk op de -knoppen
om de tijd in te stellen
waarop de oven moet
worden uitgeschakeld
• Laat de knoppen los
• Stel de bereidingsfunctie
in met de
functiekeuzeschakelaar
• Wanneer de ingestelde tijd
verstreken is, wordt een
akoestisch alarm
geactiveerd (dit alarm
stopt vanzelf, maar het
kan onmiddellijk gestopt
worden door op de knop
te drukken)
• Zet de
functiekeuzeschakelaar
van de oven op .
• Na verloop van tijd wordt
de oven automatisch
uitgeschakeld. Mocht u de
kooktijd eerder willen
beëindigen, zet u de
functiekeuzeschakelaar op 0
of zet u de tijd op 0:00
(TIMERKNOP en -knop)
• Na verloop van tijd wordt
de oven automatisch
uitgeschakeld. Mocht u de
kooktijd eerder willen
beëindigen, zet u de
functiekeuzeschakelaar op 0
of zet u de tijd op 0:00
(TIMERKNOP en -knop)
• Geeft een alarm af aan het
einde van de ingestelde tijd.
• Om te controleren hoe lang
lang het nog moet duren,
drukt u op de -knop
• Hiermee bedient u de oven. • Voor het bereiden van de
• Hiermee kan de kooktijd
worden ingesteld die nodig
is voor het gekozen recept
• Om te controleren hoe lang
het nog moet duren, drukt
u op de TIMERKNOP.
• Druk op de TIMERKNOP
en de -knop om de
vooraf ingestelde tijd te
wijzigen
• Hiermee kan de kooktijd
worden ingesteld die nodig
is voor het gekozen recept
• Om te controleren hoe lang
het nog moet duren, drukt
u op de TIMERKNOP.
• Druk op de TIMERKNOP
en de -knop om de
vooraf ingestelde tijd te
wijzigen
WAAR WORDT HET VOOR
GEBRUIKT
• Maakt het mogelijk de oven
als wekker te gebruiken (kan
worden geactiveerd door de
oven te bedienen of door de
oven uit te schakelen).
gewenste recepten
• Aan het einde van de
kooktijd schakelt de oven
automatisch uit en klinkt er
een akoestisch alarm.
• Deze functie wordt meestal
ge br ui kt m e t d e f un c t i e
"bereidingstijd". Als de schaal
b.v. 45 minuten gekookt moet
worden en voor 12:30 klaar
moet zijn, kiest u gewoon de
gewenste functie, stelt u de
kooktijd in op 45 minuten en het
einde van de kooktijd op 12:30.
• H e t b e r e i d e n s t a r t
automatisch om 11:45 uur
(12:30 min 45 minuten) en gaat
door tot het vooraf ingestelde
einde van de kooktijd, waarna
d e o v e n a u t o m a t i s c h
uitschakelt.
WAARSCHUWING!
Al s h e t E I ND E v a n h et
bereiden wordt geselecteerd
zonder de lengte van de
kooktijd in te stellen, begint
de oven onmiddellijk met
koken en stopt hij bij het
EINDE van de ingestelde
bereidingstijd.
6.3 DE JUISTE TIJD INSTELLEN
WAARSCHUWING: installatie van de oven of na onderbreking van de
stroomtoevoer (herkenbaar aan de knipperende weergave van ) is het
instellen van de juiste tijd. Doe dit als volgt.
• Houd de TIMERKNOP en EIND-knop ingedrukt ( en TIMER op sommige
modellen)
• Stel de tijd in met de -knoppen
• Laat alle knoppen los
LET OP: de oven werkt alleen als deze is ingesteld op handmatig of vooraf ingestelde tijd.
N.B.: op sommige modellen zijn de -symbolen vervangen door en .
44 NL
Page 45

6.4 DE KOOKPLATEN GEBRUIKEN
Het fornuisonderdeel van het product kan worden bediend via het
bedieningspaneel (figuur 20).
Fase “0” betekent niet in positie. De overige 12 fases geven de volgende
soorten gebruik aan:
•
het teken dat bij de kookzone hoort die u nodig hebt.
Figuur 20
Waarschuwing: De extra grote, gemarkeerde zone leidt, afhankelijk van
de afmetingen van de pannen en/of de kwaliteit van het te bereiden
voedsel, tot nog betere prestaties.
De ovaalvormige verwarmingszone bestaat uit twee
verwarmingsgebieden: een cirkelvormig gebied met een aanvullend
ovaalvormig deel.
Zet de bedieningsknop op 1 tot 12 om het cirkelvormige gebied te
bedienen. O m het ovaalv ormige deel t e bedienen, z et u de
bedieningsknop op stand 12 en kiest u een positie van 1 tot 12.
Het verwarmingsgebied bestaat uit twee concentrische zones.
De binnenste cirkel wordt geactiveerd als de knop op een van de posities
van 1 tot 12 wordt gezet. De buitenste ring wordt alleen geactiveerd als de
bediening hoger dan 12 wordt gezet, tot een spanning van 1700 W.
• Draai de bedieningsknop op de gewenste
kookinstelling.
We raden u aan om in eerste instantie de
warmtezone op de hoogste positie in te stellen
tot de inhoud van de pan de gewenste
temperatuur heeft bereikt.
Vervolgens kan de temperatuur worden
verlaagd tot de gewenste kookinstelling.
• Het lampje van de restwarmteindicator
licht op als het oppervlak van het fornuis
Figuur 21 60 graden of warmer is. Dit lampje
blijft zelfs verlic h t als het fornuis i s
uitgeschakeld en gaat pas uit als het fornuis is
afgekoeld.
de knop op om het fornuis uit te
schakelen.
Eerst moet u de ovenfunctie verstellen (figuur 22 en 23) en de temperatuur
van de oven op de gewenste waarde zetten (figuur 24).
Anders werkt de oven niet.
Als de temperatuur in uw oven de ingestelde waarde bereikt, zal de
thermostaat de stroom onderbreken en gaat het temperatuurlampje uit.
Als de temperatuur onder de ingestelde waarde ligt, wordt de thermostaat
weer ingeschakeld en gaat het temperatuurlampje aan.
Figuur 22 Figuur 23 Figuur 24
Tabel 3
Energieklasse
UITLEG
Symbool
Licht
Het ovenlampje, rode waarschuwingslampje en de ventilator
worden ingeschakeld. Ontdooit bevroren voedsel.
Verhitte lucht wordt door de ventilator op de verschillende
niveaus geblazen. Het is ideaal om verschillende soorten
voedsel tegelijk te bereiden (bijv. vlees en vis) zonder smaak
en geur te mengen. Het kookt zeer zacht en is ideaal voor
biscuitgebak, pasteien, enz.
vologens
CENELEC EN
60305-1
Stand Enkele tips
Om een gerecht warm te houden en boter of chocolade te smelten...
Laag
Middelhoog
Normaal
Hoog
Langzaam koken, sauzen, stoven, rijstepap, gepocheerde eieren...
Bonen, bevroren voedsel, fruit, water koken...
Gestoomde appels, verse groenten, pasta, pannenkoeken, vis...
Intensiever koken, omelet, biefstuk...
Biefstuk, varkensvlees, bakken...
JA NEE NEE NEE NEE
Figuur 21
De weerstand van het vitrokeramische glas tot warmte en extreme
temperatuurwisselingen is zeer hoog. Het verwarmde oppervlak zal door
de tijd heen rood kleuren. Als een verwarmingseenheid in gebruik is, kunt
u een zacht geluid horen. Dit is normaal en heeft niets te maken met de
technische samenstelling van het systeem.
Dit geeft geen kwaliteitsproblemen. Het oppervlak kan beschadigd raken
als pannen met scherpe randen tegen het vitrokeramische glas wrijven of
niet goed geplaatst worden. Aanbevolen wordt om hierop te letten.
Tips voor energiebesparing:
• Voor een optimale werking van de kookplaat, dient u de pan in het
midden van de kookzone te plaatsen.
• Het gebruik van een deksel verkort de bereidingstijden en bespaart
energie door de warmte vast te houden.
• Houd de hoeveelheid vocht of vet beperkt om de bereidingstijden te
verkorten.
• Begin te koken op een hoge instelling en verlaag de instelling zodra het
voedsel is doorverwarmd.
• Gebruik pannen waarvan de doorsnede even groot is als de grafiek van
de gekozen zone.
Het temperatuurlampje en waarschuwingslampje en de
*
bovenste en onderste verwarmingselementen worden
ingeschakeld.
Het temperatuurlampje, het waarschuwingslampje en de
ventilator, en de bovenste en onderste verwarmingselement-
STEAM
en worden ingeschakeld en het water in de ovenruimte wordt
gebruikt om stoom te genereren.
Het temperatuurlampje, het waarschuwingslampje en de
ventilator, en de bovenste en onderste verwarmingselementen worden ingeschakeld.
Het temperatuurlampje en waarschuwingslampje, het
bovenste verwamingselement, de grill en de ventilator worden
ingeschakeld.
Deze functie is ideaal voor delicate gerechten (taarten,
soufflés).
Het temperatuurlampje, het waarschuwingslampje en het
onderste verwarmingselement worden ingeschakeld.
Het temperatuurlampje, het waarschuwingslampje en het
bovenste verwarmingselement worden ingeschakeld.
HCTS827XL/E,
HCT601X/E,
HCT201X/E
HCTS827XL/E
HCT601X/E
* Getest in overeenstemming met de CENELEC EN 60305-1, gebruikt
voor definitie van de energieklasse.
Tips voor energiebesparing:
• Indien mogelijk, vermijd het voorverwarmen van de oven en vermijd om
de oven zonder inhoud te laten draaien.
• Laat de ovendeur niet open alleen wanneer dat nodig is, omdat er
warmteverlies ontstaat elke keer dat de oven open staat.
• Voor een aanzienlijke energiebesparing, schakelt u de oven 5 tot 10
minuten uit voor het voorziene einde van de bereidingstijd en gebruik de
warmte die de oven blijft genereren.
• Houd de dichtingen schoon en in goede staat, om energieverlies te
voorkomen.
• Als u een contract heeft met een laag energie tarief, kunt u gebruik maken
van het "uitgesteld koken".
• Deze zal uw programma laten starten in een periode waar u aan een
voordelig tarief kookt. Dit helpt u bij het besparen van energie.
45 NL
Page 46

6.6 FUNCTIE
De beschikbaarheid van de onderstaande functies is afhankelijk van
het productmodel.
LAMP
Zet de ovenverlichting aan.
ONTDOOIEN
Als de knop op deze stand is gezet, laat de ventilator lucht op
kamertemperatuur langs het bevroren voedsel circuleren zodat
het in enkele minuten ontdooit zonder dat de eiwitten die het
voedsel bevat wijzigingen ondergaan.
MULTI-NIVEAU
Wij adviseren om deze methode te gebruiken voor gevogelte,
pasteien, vis en groenten. De hitte dringt beter in het voedsel
door en zowel de bereidings- als de voorverhittingstijden
worden verkort. U kunt verschillende gerechten tegelijk klaarmaken,
met of zonder dezelfde bereiding in een of meer posities. Deze
bereidingsmethode geeft een gelijkmatige verdeling van de hitte, en
geuren worden niet met elkaar vermengd.
Reken ongeveer tien minuten extra als u meerdere gerechten
tegelijkertijd bereidt.
CONVENTIONEEL
Bij deze manier van koken, die als de traditionele manier wordt
beschreven, wordt de warmte gelijk verdeeld vanuit de onderste
en bovenste elementen in de oven zodat zowel de boven- als
onderkant van het voedsel dat u bereidt gelijkmatig wordt gekookt. Zet
de temperatuurknop van uw oven op een temperatuur die wordt
aanbevolen in de kooktabel voor de bereiding die u wilt doen.
Verwarm de oven ongeveer tien minuten voor. Bereid het eten in een
daarvoor geschikte bak gedurende de aanbevolen tijd. Deze positie
heeft de voorkeur voor het maken van cake, sponscake, gebak,
gebakken pasta, lasagne, pizza.
Na het koken/bakken, schakelt u de bedieningsknop van de
ovenfunctie en de thermostaat uit. Haal het gekookte/gebakken eten
uit de oven, zet het op een veilige plek en laat de oven geheel afkoelen
door de ovendeur open te houden. De oven is heet. Blijf daarom uit
EASY STEAM
Om gebruik te maken van de stoomfunctie, moet er
STEAM
wordt het water omgevormd tot stoom door een combinatie van de
bodemverwarming & de ventilator. Zie bijbehorende recepten.
GRILL
elementen roodheet te laten worden.
Succes is gegarandeerd voor braadgerechten, kebabs en
gegratineerde gerechten. Wit vlees moet op een zekere afstand van
de grill worden gehouden; de bereidingstijd is dan langer, maar het
vlees smaakvoller. U kunt rood vlees en visfilets op het rooster leggen
met de lekbak eronder geschoven.
De oven heeft twee grillstanden: Grill: 2140 W Barbecue: 3340 W
200 ml water toegevoegd worden in de holte & de
functie “EASY STEAM” moet gekozen worden. Zo
Gebruik de grill met de deur gesloten. Alleen het bovenste
verwarmingselement wordt gebruikt en u kunt de temperatuur
aanpassen. Vijf minuten voorverhitting is nodig om de
HETE LUCHT
+ VENTILATOR
s van het
lator
d. Zet de temperatuurknop
n de
lt doen. Zet de oven op het
mer van de oven op de aanbevolen
n een
kt u
lt maken.Alle delen
d.
kt voor koken met één lade.
ngsknop van de
t. Haa l het
ge plek en
laat de oven geheel afkoelen door de ovendeur open te houden. De
t de buurt van de oven en houd ook
t de buurt.
BODEMVERWARMING + VENTILATOR
Ideaal voor sappige fruittaarten, pasteien, quiches, patés. Het
voorkomt het drogen van voedsel en bevordert het ontstaan van
gebak, deegbrood en ander koken van onderaf. Plaats het
rooster op de onderste trede. Met deze bereidingsmethode is
voorverwarmen gedurende ongeveer tien minuten nodig in Heat
Brewed.
BODEMVERWARMING
Gebruik van enige weerstand. Ideaal voor het bakken van
taarten, karamelcrème, vlaaien, terrine, alle bereidingen die van
onderen nodig zijn (ovenschotels: kip, rundvlees)
COOK LIGHT
Met de functie "COOK LIGHT" kunt u gezonder koken, door de
hoeveelheid vet of olie die nodig is te verminderen. Dankzij het
gebruik van de grill en ventilator in combinatie met een pulserende
cyclus van lucht, behoudt het het vochtgehalte van het voedsel, grilt
het op het oppervlak en gebruikt een kortere kooktijd, zonder afbreuk
te doen aan de smaak.
Het is met name geschikt voor het koken van vlees, geroosterde
groenten en omeletten. De cyclus van gepulseerde lucht houdt de
vochtigheid in de oven en het vochtgehalte van het voedsel, behoud
de voedingswaarden en zorgt voor een snel, uniform kookproces.
Probeer al uw recepten en verminder de hoeveelheid dressing die u
gewoonlijk gebruikt en ervaar de lichtheid van deze nieuwe functie!
Tabel 4
GERECH-
TEN
Laagjes
deeg
Cake
Koekjes
Gegrilde
gehaktballen
Voedsel dat
water bevat
Kip
Varkensvlees
Rundvlees
Tweelaagstaart
Tweelaagsgebak
Temperatuur
pos. (°C).
Rek
pos.
Berei-
dingstijd
(dk)
Temperatuur
pos. (°C).
TOR
Rek
Berei-
dingstijd
pos.
(dk)
Temperatuur
pos. (°C).
GRILL
Rek
Berei-
dingstijd
pos.
(dk)
46 NL
Page 47

7. REINIGING EN ONDERHOUD
7.1 ALGEMEEN
Voordat u uw oven gaat schoonmaken, controleert u of alle
bedieningsknoppen uit staan en of het apparaat is afgekoeld. Haal het
apparaat uit het stopcontact. Gebruik geen reinigingsmiddelen die
schurende deeltjes bevatten waardoor emaillen en geverfde delen van
uw oven beschadigd kunnen raken. Gebruik afwasmiddel of een ander
schoonmaakmiddel dat geen schurende deeltjes bevat.
Gebruik geen zuurhoudende middelen, schuurmiddelen of poeders,
schuursponsjes of andere ruwe middelen gezien deze het oppervlak
kunnen beschadigen. Indien u vloeistoffen over uw oven hebt
geknoeid die verbranden, dan kan dit schade veroorzaken aan het
emaille.
Ruim gemorste vloeistoffen onmiddellijk op.
7.2 DE OVEN SCHOONMAKEN
Haal de stekker van de oven uit het stopcontact voordat u deze gaat
schoonmaken. U bereikt het beste resultaat als u de binnenkant van de
oven schoonmaakt terwijl de oven nog een beetje warm is. Veeg uw
oven na elk gebruik schoon met een zachte doek die is bevochtigd met
een zeepoplossing. Veeg het vervolgens na met een vochtige doek en
daarna met een droge doek. Het is van tijd tot tijd nodig om de oven
grondig schoon te maken met een vloeibaar reinigingsmiddel. Niet
schoonmaken met droge reinigingsmiddelen of reinigingsmiddelen in
poedervorm. Bij producten met geleidende, emaillen frames, hoeven
de achterzijde en zijkanten van het binnenste frame niet te worden
schoongemaakt. Afhankelijk van het gebruik wordt aanbevolen om
deze na bepaalde tijd te vervangen.
7.3 REINIGING EN ONDERHOUD
Laat de kookplaat afkoelen voordat u onderhoudswerkzaamheden
uitvoert.
. Er mogen alleen producten (reinigingsmiddelen en schrapers)
worden gebruikt die specifiek ontwikkeld zijn voor oppervlakken van
glaskeramiek. Deze zijn verkrijgbaar bij uw vakhandel.
. Voorkom morsen, omdat alles wat op het oppervlak van de kookplaat
valt snel zal verbranden en moeilijker te reinigen is.
. Geadviseerd wordt om alle stoffen die snel smelten uit de buurt van de
kookplaat te houden, zoals plastic voorwerpen, suiker of producten op
basis van suiker.
ONDERHOUD:
- Breng enkele druppels van het speciale reinigingsmiddel aan op het
oppervlak van de kookplaat.
- Wrijf hardnekkige vlekken weg met een zachte doek of met vochtig
keukenpapier.
- Neem de kookplaat af met een zachte doek of droog keukenpapier
tot het oppervlak schoon is.
Als er nog steeds hardnekkig vlekken zijn:
- Breng nog enkele druppels van het speciale reinigingsmiddel aan
op het oppervlak.
- Schraap met een schraper en houd deze vast onder een hoek van
30° ten opzichte van de kookplaat, tot de vlekken verdwenen zijn.
- Neem de kookplaat af met een zachte doek of droog keukenpapier
tot het oppervlak schoon is.
- Herhaal deze handeling zo nodig.
ENKELE TIPS:
Door de kookplaat regelmatig te reinigen, wordt er een beschermende
laag gevormd, die essentieel is om krassen en slijtage te voorkomen.
Zorg dat het oppervlak schoon is voordat u de kookplaat opnieuw
gebruikt. Om watersporen te verwijderen gebruikt u enkele druppels
witte azijn of citroensap. Neem de kookplaat daarna af met
keukenpapier en een paar druppels speciaal reinigingsmiddel.
Het oppervlak van glaskeramiek is bestand tegen krassen van pannen
met een vlakke bodem; het is echter altijd beter om ze op te tillen als u
ze van de ene naar de andere zone verplaatst.
NB:
30° Maxi
Gebruik nooit agressieve reinigingsproducten of schuurpoeders.
De metalen omlijsting: om de metalen omlijsting veilig te reinigen,
neemt u deze af met water en zeep, en droogt u hem af met een zachte
doek.
Eventuele kleurveranderingen in het oppervlak van
glaskeramiek heeft geen invloed op de werking of de
stabiliteit van het oppervlak. Dergelijke verkleuringen zijn
meestal het gevolg van verbrande voedselresten of het
gebruik van pannen van aluminium of koper; deze vlekken
zijn moeilijk te verwijderen.
7.4 ONDERHOUD
Het lampje van de oven vervangen
Aanbevolen wordt om dit aan de geautoriseerde onderhoudsdienst
over te laten.
Haal eerst de stekker uit het stopcontact en controleer of de oven is
afgekoeld. Verwijder het kapje van de lamp en verwijder de lamp.
Plaats de nieuwe lamp, die bestand is tot temperaturen van 300 °C en
die verkrijgbaar zijn bij geautoriseerde onderhoudsdiensten op de
plaats van de oude lamp. Plaats het beschermkapje vervolgens terug.
Hierna is uw oven gereed voor gebruik.
8. ONDERHOUD EN VERVOER
8.1 EISEN VOORDAT U CONTACT OPNEEMT
MET ONDERHOUDSDIENST
Als de oven niet werkt
De stekker van de oven is eruit of er is stroomuitval geweest.
Als de oven niet verwarmt
De temperatuur kan niet worden ingesteld met de bedieningsknop van
de oven.
Het lampje van de oven werkt niet
De elektriciteit moet worden gecontroleerd.
Controleer of de lamp defect is.
Koken (als het onderste en bovenste deel niet gelijkmatig kookt)
Controleer de locaties van de planken, de bereidingstijd en de
temperatuur volgens de handleiding. Als het product niet goed werkt
en de oorzaak niet kan worden gevonden, schakelt u het product uit.
Repareer het product niet zelf en bel de technische onderhoudsdienst.
Het is belangrijk om het productmodel en het serienummer door te
geven aan de geautoriseerde, technische onderhoudsdienst. Deze
vindt u op het etiket.
8.2 INFORMATIE MET BETREKKING TOT
VERVOER
Als u vervoer nodig hebt
Bewaar de originele verpakking van het product en draag het indien
nodig in de originele verpakking.
Volg de tekens op de verpakking.
Als de originele verpakking niet meer beschikbaar is
Tref maatregelen voor de externe oppervlakken (glazen en geverfde
oppervlakken) van de oven en het fornuis om ze te beschermen tegen
stoten en vallen
Gebruik geen spons die te nat is.
Gebruik nooit een mes of een schroevendraaier.
Een schraper met een snijblad beschadigt het oppervlak niet,
zoals deze onder een hoek van 30° wordt vastgehouden.
Houd een schraper met een snijblad altijd buiten het bereik van
kinderen.
47 NL
Page 48

42831643 • 70 gr - A4 • 07.2019 • Rev_C
Ths applance Κs marked accordng to the European drectve 2012/19/EU on Waste Electrcal and Electronc Equpment (WEEE). WEEE contans both pollutng
substances (whch can cause negatve consequencesfor theenvronment) and basccomponents (whch can bereused).
It Κsmportant to have WEEE subjected to specfc treatments, Κn
play anΚmportant roleΚn ensurng that WEEE does not become an envronmental Κssue; Κts essental to follow somebasc rules:
• WEEEshall not betreated as householdwaste.
• WEEEshall behanded overto therelevant collecton ponts managedby themuncpalty orby regstered companes. Inmany countres, for large WEEE, home collecton
could bepresent.
equvalent type and hasthe samefunctons as the suppled equpment.
ENERGY SAVINGAND RESPECTINGTHE ENVIRONMENT
Where possble, avod pre-heatng theoven andalways try to fll Κt. Open the oven dooras Κnfrequently as possble, becauseheat fromthe cavty dsperses every tme Κts opened.For a
sgnfcant energy savng, swtch off the oven between5 and10 mnutes beforethe planned endof thecookng tme,and usethe resdual heat thatthe oven contnues to generate.Keep
the seals clean and Κnorder,toavoΚd any heat dspersal outsde of the cavty. If you have an electrc contract wth an hourly tarff, the "delayed cookng" programme makes energy
savng more smple, movng the cookngprocess tostart at thereduced tarff tΚme slot.
engetragenen Unternehmenverwaltet werden. Invelen Ländern können begroßen elektrschenund elektronschen Altgeräten hemsche Sammeldenste verfügbar sen.
• WennSeeΚn neues Gerät erwerben, kann das alte Gerät möglcherwese an denHändler übergeben werden, der es kostenlos auf ener 1:1- Basssammeln muss, solangedas
Gerät von demglechen Typ Κst und deselbenFunktonenhat we das geleferteGerät
ENERGIESPARENDUND UMWELTSCHONEND
Verzchten Se nach Möglchket darauf, den Ofen vorzuhezen, und machen Sehn stetsso volles geht. Öffnen SedΚe Ofentürso selten we möglch, da bejedem ÖffnenWärme
aus dem Garraum entwecht.Das Abschalten desOfens 5bs10MΚnuten vor dem vorgesehenen Ende der Garzet spartgroße Mengen EnergeeΚn. Dabewrd
Ofens zum Fertggaren
Garraum entwechenkann.
Wenn der Versorgungsvertragmt Ihrem Stromversorgerje nachTageszet unterschedlche Tarfe vorseht, könnenSe durch dasGaren mt „Zetprogrammerung“den Garbegnn
auf den Anfang des günstgen Zetraums legen.
• When you buy a new applance, the old one may be returned to the retaler who has to collect Κt free of charge on a one-to-one bass, as long as the equpment Κsof
Deses Gerät Κst ΚnÜberenstmmung mtder europäschen Rchtlne 2012/19/EU zu elektrschenund elektronschen Altgeräten (WEEE) gekennzechnet. Elektrsche
und elektronsche Altgeräte enthalten sowohl Schadstoffe (de negatve Auswrkungen auf de Umwelt haben können) als auch Basskomponenten (de
wederverwendet werden können). Es Κst wchtg, dass elektrsche und elektronsche Altgeräte spezfscher Handhabung unterlegen, damt alle Schadstoffe
angemessen entfernt undentsorgt undalle Materalen wederverwertet undrecycelt werden.
Verbraucher spelen ene wchtge Rolle beder Gewährlestung, dass elektrsche und elektronscheAltgeräte ncht zuUmweltproblemen werden;es Κst wchtg,enge
grundlegende Regeln zubefolgen:
• Elektrscheund elektronscheAltgeräte könnenncht alsHaushaltsabfall behandeltwerden.
• Elektrscheund elektronscheAltgeräte solltenan relevanteSammelpunkte übergeben werden, de von derStadtverwaltung oder
der Spesen genutzt. Achten Se darauf, dass deDΚchtungen sauber und ΚneΚnem guten Zustand snd, da se dafür sorgen, dass kene Htze aus dem
order to remove and dspose
properly all pollutants, and recover and recycle all materals. Indvduals can
de Restwärmedes
FR
Cet apparel est marqué conformément à la drectve européenne 2012/19/UE surles déchets deséqupements électrques et électronques (DEEE). La catégore DEEE
recouvre àla fos les substances polluantes(pouvant avor desretombées négatves surl'envronnement) et lescomposants de base(pouvant être réutlsés).
Il est Κmportant de soumettre les DEEE à des tratements spécfques, afn d'enlever et élmner tous les polluants de manère adéquate et de récupérer et recycler tous les
matéraux. Toute personne peut jouer un rôle Κmportant en vellant à ceque les déchets WEEE ne devennent pas unproblème envronnemental ; pour cela, Κl est essentel
de suvre quelques règles de base :
• Lesdéchets WEEE nedovent pas êtretratés comme des déchets ménagers.
• Lesdéchets WEEE dovent être remsaux ponts de collecte pertnentsgérés parla muncpalté oupar dessocétés reconnues. Dansde nombreuxpays, lesproduts
le récupérersans fras demanère Κndvdualsée,tant quel’équpement est de
type équvalent et a les mêmes fonctons quel’équpement fourn.
ÉCONOMIES D'ÉNERGIEET RESPECT DEL'ENVIRONNEMENT
Spossble,évtez de préchauffer lefour etessayez detoujours leremplr.Ouvrez la portedu four ausspeuque possble, carla chaleur dela cavté sedsperse à chaquefos qu’elle est
ouverte. Pour une économe d'énergesΚgnfcatve, coupez le four entre 5 et 10 mnutes avant la fnprévuedutempsdecuΚsson et utlsez la chaleur résduelle que le fourcontnue de
générer. Mantenez les jonts propres afn d'évter la dsperson de chaleur hors de la cavté. Svous avez un contrat d'électrcté
dfférée» permetde smplfer les économes d'énerge enreportant ledébut duprocessus decusson pendantla tranchehorareàtarΚf rédut.
DEEE encombrantspeuvent fare l’objet d’une collecte àdomcle. • Lorsquevous achetez un nouvel apparel, l’ancen peut être retourné au détallant quest endevorde
avec un tarf horare, le
programme de «cusson
NL
Dt apparaat Κs voorzen van een merkteken Κn overeenstemmng met de Europese rchtljn 2012/19/EU Κnzake Afgedankte Elektrsche en Elektronsche Apparatuur
(AEEA).
AEEA bevat vervulende stoffen (de negateve gevolgen voor het mleu kunnen hebben) en bassonderdelen (de hergebrukt kunnen worden). Het Κs belangrjk om AEEA
specfeke behandelngen te laten ondergaan, tenende alle vervulende stoffen te verwjderen of op de juste maner af te voeren en alle materalen terug te wnnen en te
recyclen. Personen kunnen een belangrjke rol spelen om ervoor te zorgen datAEEA net Κn het mleu terecht komt; hervoor moeten enkele elementare regels worden
gevolgd:
•AEEA mag net wordenbehandeld alsgewoon husvul.
• Wanneer u een neuw apparaat koopt, kunt u uw oude apparaat vaak Κnleveren bj de leverancer, de het grats meeneemt, zoals de apparatuur van hetzelfde type Κs en dezelfde
functes heeft als degeleverde apparatuur.
STROOMBESPARINGEN HETMILIEU BESCHERMEN
Vermjd waarmogeljk het voorverwarmen van de oven, en probeer dezealtjd te vullen. Open de ovenzo mn mogeljk, want telkens wanneer dedeur geopend wordt ontsnapt er htte
ut de ovenrumte. Een belangrjke energebesparng Κs mogeljk door de oven 5 tot 10 mnuten voor het geplande ende van de beredngstjd ut te schakelen en de restwarmte te
gebruken dedeovenblΚjft produceren. Houd de afdchtngen schoon en Κn goede staat, om te voorkomen dat er zch htte buten de ovenrumte verspredt. Als u een
elektrctetscontract heeft met eenurentaref, maakt het"utgestelde beredngsprogramma" het nogeenvoudger om energe tebesparen doorhet beredngsproces te laten begnnen
op hetmoment dat hetdaltaref Κngaat.
•AEEA moet naareen specaal Κnzamelpunt vande gemeenteof vangeregstreerde bedrjven wordengebracht. Inveel landenwordt groteAEEA thusopgehaald.
The manufacturer wll not be responsble for any Κnaccuracy resultng from prntng or transcrpt errors contaned Κn ths brochure.We reservethe rght to carry
out modfcatons to products as requred, Κncludng the Κnterests of consumpton, wthout prejudce to the characterstcs relatng tosafety or functon.
Der Hersteller übernmmt kene Hauftung für eventuelle Druck-oder Übersetzungsfehler deser Bedenungsanletung. Der Hersteller behält sch vor,
technsche Änderungen zurVerbesserung der Produktqualtät Κm Interesse desEndverbrauchers vorzunehmen.
FR
Le fabrcant ne pourra être tenu pour responsable de toute Κnexacttude résultant d'erreurs d’mpresson ou de transcrpton contenues dans cette brochure.
Nous nous réservons le drot d’apporter des modfcatons aux produts, le cas échéant, y comprs dans l’ntérêt de la consommaton, sans préjudce des
caractérstques relatves àla sécurté ou la foncton.
NL
De fabrkant ΚsnΚet verantwoordeljk voor onnauwkeurgheden de het gevolg zjn vandruk- oftranscrptefouten Κn dezebrochure. Wj behouden ons het recht
voor om wjzgngen Κn productenaan tebrengen zonder dat de kenmerkenmet betrekkng tot velghed offunctes worden aangetast .
 Loading...