

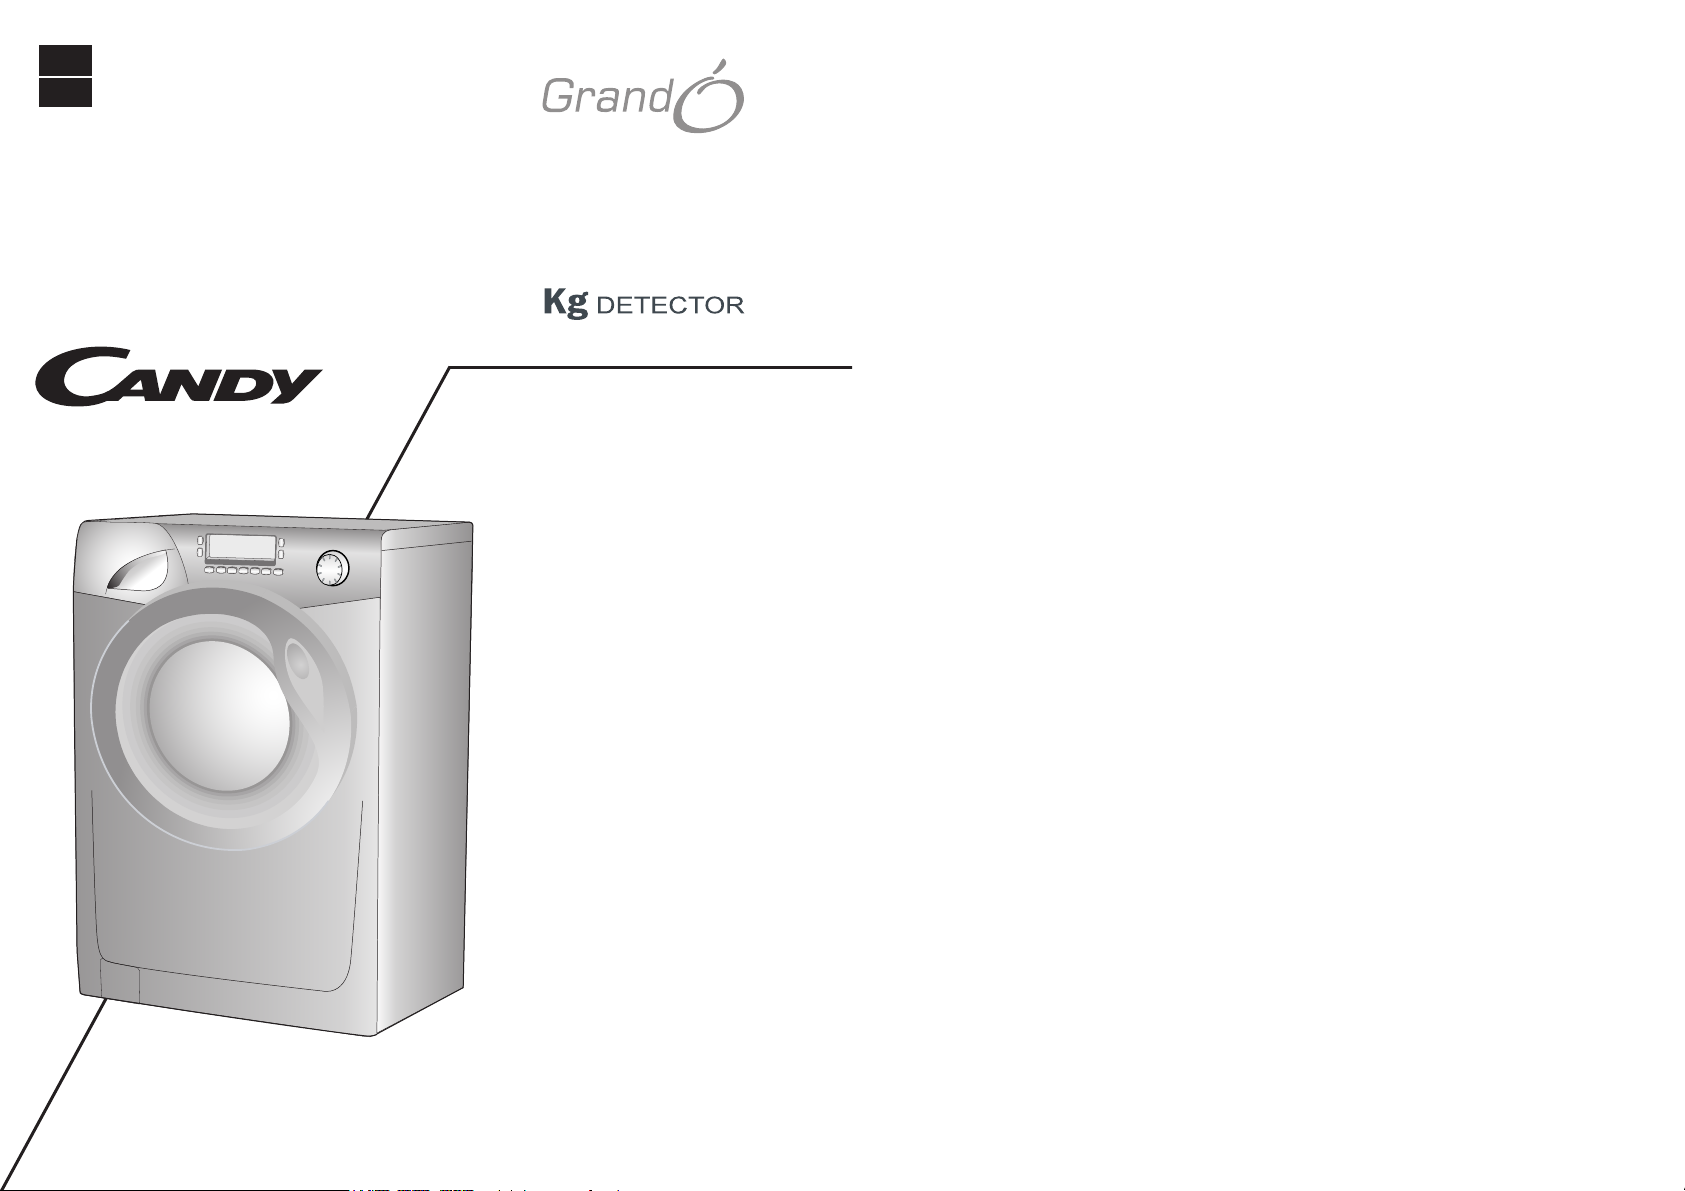
Candy GO 121054 L User Instructions
Instrucciones para el uso
User instructions
ES
EN
GO L

ES
ÍNDICE CAPÍTULO
INDEX
EN
CAPÍTULO
CHAPTER
Notas generales a la
entrega
Garantía
Normas de seguridad
Datos técnicos
Puesta en funcionamiento
instalación
Descripción de los mandos
Tabla de programas
Seleción
Cubeta del detergente
El producto
Lavado
Limpieza y mantenimiento
ordinario
General points on delivery
Guarantee
Safety Measures
Technical Data
Setting up and Installation
Control Description
Table of Programmes
Selection
Detergent drawer
The Product
Washing
Cleaning and routine
maintenance
1
2
3
4
5
6
7
8
9
10
11
12
Causas de averías
Faults Search
13
3
ES
EN
ES
EN
CAPÍTULO 1
AS GENERALES
NOT
DE ENTREGA
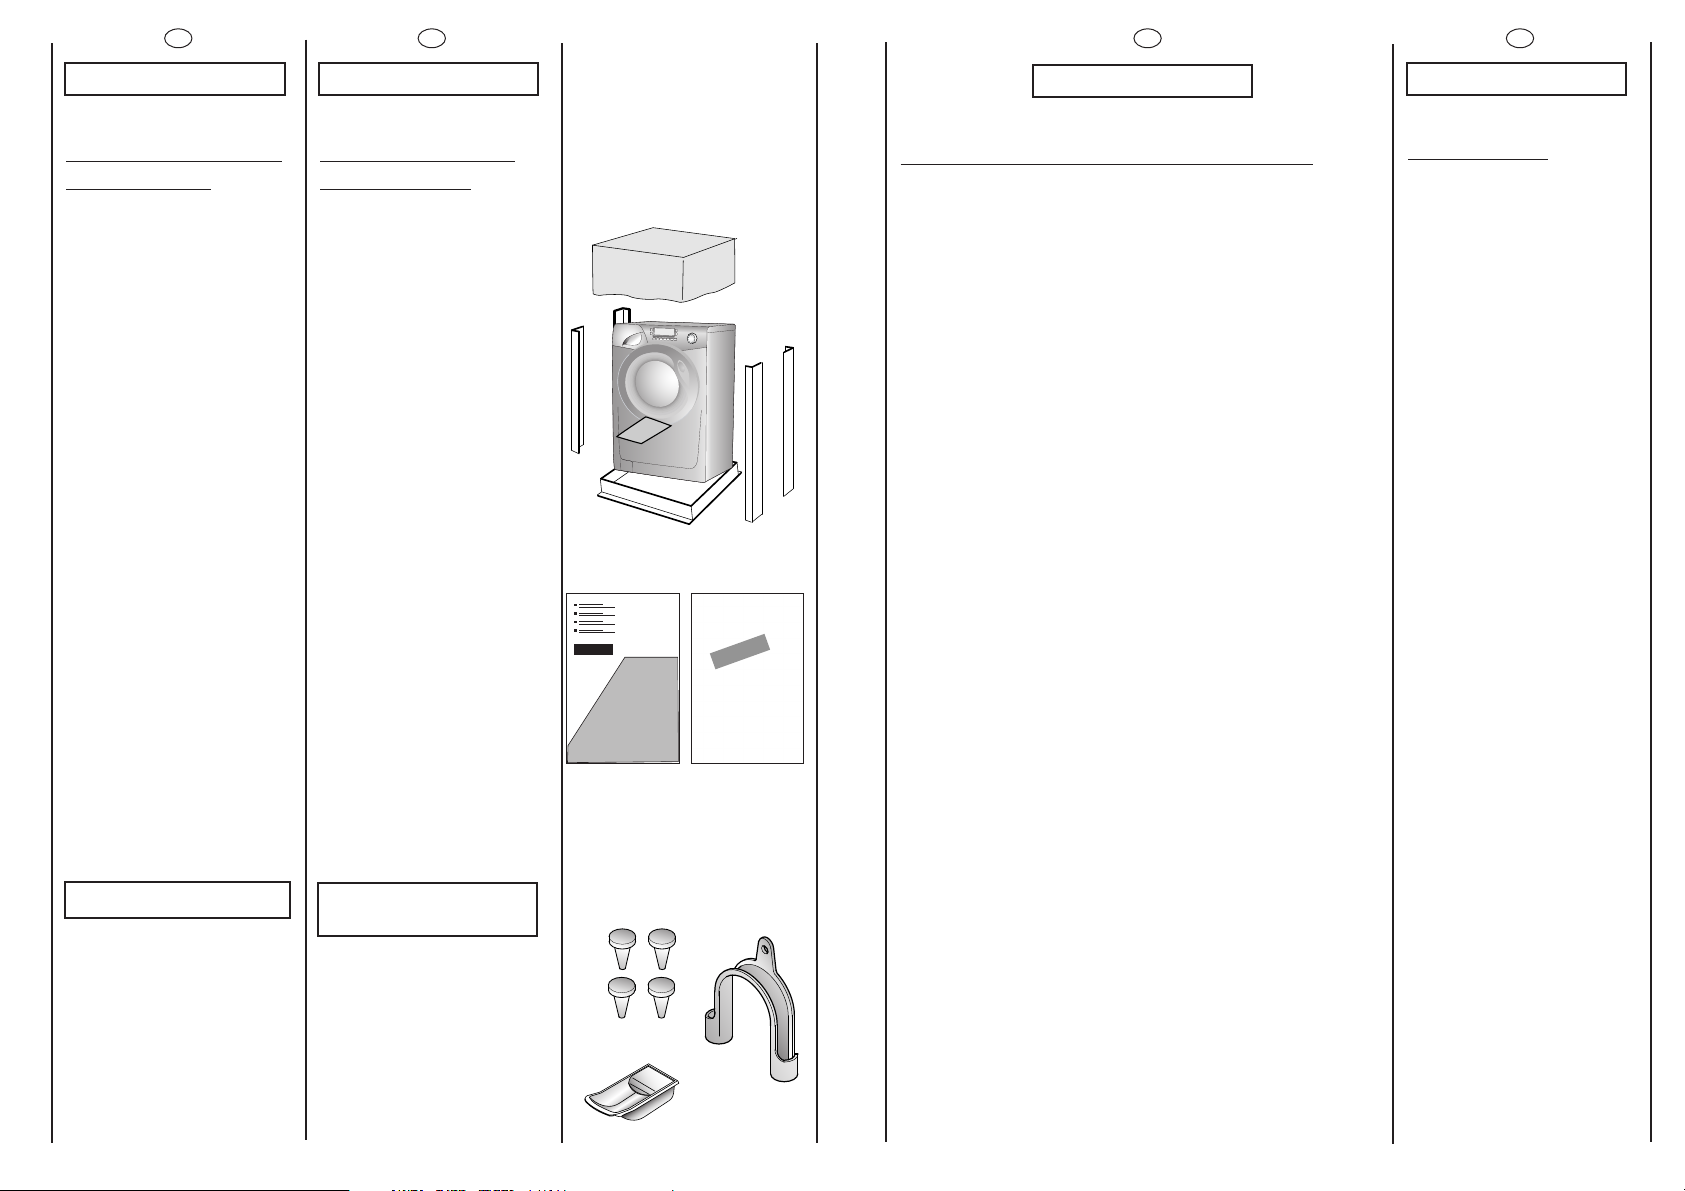
A la entrega compruebe
que con la máquina estén:
A) MANUAL DE
INSTRUCCIONES
B) CERTIFICADOS DE
GARANTÍA
C) TAPONES
D) CURVAS PARA EL TUBO
DE DESAGÜE
E) DEPÓSITO
DETERGENTE LÍQUIDO
O BLANQUEADOR.
CONSÉRVELOS
y compruebe que no haya
sufrido desperfectos durante
el transporte, en caso
contrario llame al centro de
asistencia técnica más
cercano.
CHAPTER 1
GENERAL POINTS
ON DELIVERY
On delivery, check that the
following are included with
the machine:
A) INSTRUCTION MANUAL
B) GUARANTEE
CERTIFICATES
C) CAPS
D) BEND FOR OUTLET TUBE
E) LIQUID DETERGENT OR
LIQUID BLEACH
COMPARTMENT
(CONTAINER)
KEEP THEM IN A SAFE
PLACE
Check that the machine has
not incurred damage during
transport. If this is the case,
contact your nearest
Centre.
C
E
AB
D
CAPÍTULO 2
SERVICIO DE ASISTENCIA AL CLIENTE
¿Qué hacer con el CERTIFICADO DE GARANTÍA?
El aparato está garantizado en las condiciones y términos
indicados en el certificado colocado en el producto y sobre
la base de las disposiciones del decreto legislativo 24.240,
hasta los 12 meses vigentes a partir de la fecha de la entrega.
Ud. deberá conservar el certificado de garantía,
debidamente cumplimentado, para mostrarlo al Servicio
Oficial del Fabricante en caso de necesitar su intervención,
junto con un documento fiscalmente válido expedido por el
vendedor en el momento de la compra (albarán de entrega,
factura,recibo u otro documento fiscal) en el cual se indiquen
el nombre del vendedor, la fecha de entrega, datos
identificativos del producto y el precio de compra. .
El Servicio de Asistencia Técnica, después de verificar el
derecho de intervención, intervendrá, sin cobrarle el derecho
fijo de intervención a domicilio, ni la mano de obra, ni los
recambios que son totalmente gratuitos.
ANOMALÍAS Y MAL FUNCIONAMIENTO, ¿a dónde debo
dirigirme?
Para cualquier problema, el Servicio Oficial del Fabricante
está a su completa disposición para facilitarle la ayuda que
necesite. Ahora bien, en caso de que el aparato que Ud. ha
adquirido presente anomalías o mal funcionamiento, antes
de dirigirse al Servicio Oficial del Fabricante, le
recomendamos encarecidamente realizar las
comprobaciones indicadas en el capítulo 13.
UN ÚNICO NÚMERO DE TELÉFONO PARA OBTENER ASISTENCIA.
Si el problema persiste, marcando el "Número único" 4363-0403
para capital federal y gran Buenos Aires y el 0810-321-22639
para el interior del pais se pondrá en contacto directamente
con el Servicio Oficial del Fabricante más cercano a su
domicilio.Para más información, consulte el sitio web
www.candy.com.ar
¿Dónde puedo encontrar la PLACA DE CARACTERISTICAS DEL
PRODUCTO?
Es importante que Ud. comunique al Servicio Oficial del
Fabricante la sigla del producto y el número de identificación
(16 caracteres que comienzan con el número 3) que
encontrará en el certificado de garantía y en la placa de
características situada en el frontis de la lavadora (zona de la
puerta). De esta forma, Ud. podrá evitar desplazamientos
innecesarios del técnico, ahorrando los correspondientes
costes.
CHAPTER 2
GUARANTEE
The appliance is supplied
with a guarantee certificate
which allows free use of the
Technical Assistance Service.
4
5

ES
CAPÍTULO 3
NORMAS DE
SEGURIDAD
ATENCION:
PARA CUALQUIER
TRABAJO DE LIMPIEZA
Y MANTENIMIENTO
● Desenchúfela.
● Cierre el grifo del agua.
● Candy provede a todas
sus máquinas de toma de
tierra.
Asegúrese de que la
instalación electrica tenga
toma de tierra,en caso
contrario llame a un Servicio
cualificado.
Aparato conforme a la
Directiva Europea
73/23/CEE, sustituida
respectivamente de
2006/95/CE, y sucesivas
modificaciones.
● No toque el aparato con
las manos, los pies mojados o
húmedos.
● No use el aparato estando
descalzo.
● No use, si no es con
especial cuidado, alargos en
cuartos de baño o aseos.
ATENCION:
DURANTE EL LAVADO EL
AGUA PUEDE
ALCANZAR LOS 90°C.
● Antes de abrir el ojo de
buey, asegúrese de que no
haya agua en el tambor.
6
EN
CHAPTER 3
SAFETY MEASURES
IMPORTANT:
FOR ALL CLEANING
AND MAINTENANCE
WORK
● Remove the plug
● Turn off the water inlet tap.
● All Candy appliances are
earthed. Ensure that the
main electricity circuit is
earthed. Contact a qualified
electrician if this is not the
case.
Appliance complies
with European Directives
73/23/EEC, replaced by
2006/95/EC and subsequent
amendments.
● Do not touch the
appliance with wet or damp
hands or feet.
● Do not use the appliance
when bare-footed.
● Extreme care should be
taken if extension leads are
used in bathrooms or shower
rooms. Avoid this where
possible.
WARNING: DURING THE
WASHING CYCLE,THE
WATER CAN REACH A
TEMPERATURE OF 90°C.
● Before opening the
washing machine door,
ensure that there is no water
in the drum.
ES
● No use adaptadores o
enchufes múltiples.
● Este aparato no esta
destinado a ser usado por
niños, personas
discapacitadas o inexpertas
en su uso a no ser que sean
vigiladas o instruidas sobre el
uso del aparato por una
persona responsable de su
seguridad.
Vigile a los niños de manera
que se asegure que no
juegan con el aparato.
● No tire del cable de
alimentación, ni del aparato,
para desconectar la toma
de corriente.
● No deje el aparato a la
intemperie o expuesto a la
acción de los agentes
atmosfericos (lluvia, sol, etc..).
● En caso de traslado no la
sujete nunca por los mandos
ni por la cubeta de
detergente.
● Durante su transporte no
apoye el ojo de buey en la
carretilla.
Importante!
Si se va a instalar el aparato
sobre una alfombra o
moqueta, es necesario tener
cuidado para evitar que se
obstruyan las rejillas de
ventilación situadas en la
base de la lavadora.
● Levántela ayudado por
otra persona tal como
aparece en la figura.
● En caso de avería y/o mal
functionamiento del
aparato, desconéctelo,
cierre el grifo del agua y no
manipule el
electrodoméstico. Para su
eventual reparación diríjase
únicamente a un centro de
Asistencia Técnica y solicite
el uso de recambios
originales. El incumplimiento
de estas sugerencias puede
comprometer la seguridad
del aparato.
● Si el cable de alimentación
resultase dañado, tendrá
que ser sustituido por un
cable especiäl disponible en
el servicio de asistencia
técnica.
EN
● Do not use adaptors or
multiple plugs.
● This appliance is not
intended for use by persons
(including children) with
reduced physical,sensory or
mental capabilities, or lack of
experience and knowledge,
unless they have been given
supervision or instruction
concerning use of the
appliance by a person
responsible for their safety.
Children should be
supervised to ensure that
they do not play with the
appliance.
● Do not pull the mains lead
or the appliance itself to
remove the plug from the
socket.
● Do not leave the
appliance exposed to
atmospheric agents (rain, sun
etc.)
● In the case of removal,
never lift the appliance by
the knobs or detersive
drawer.
● During transportation
do not lean the door against
the trolley.
Important!
When the appliance
location is on carpet floors,
attention must be paid so as
to ensure that there is no
obstruction to the bottom
vents.
● Lift the appliance in pairs
as illustrated in the diagram.
● In the case of failure
and/or incorrect operation,
turn the washing machine
off, close the water inlet tap
and do not tamper with the
appliance. Contact a
Technical Assistance Centre
for any repairs and ask for
original spare parts.
Avoidance of these norms
may compromise the safety
of the appliance.
● Should the supply cord
(mains cable) be demaged,
this is to be replaced by a
specific cable available from
the after sales service centre.
7
ES
EN
ES
EN
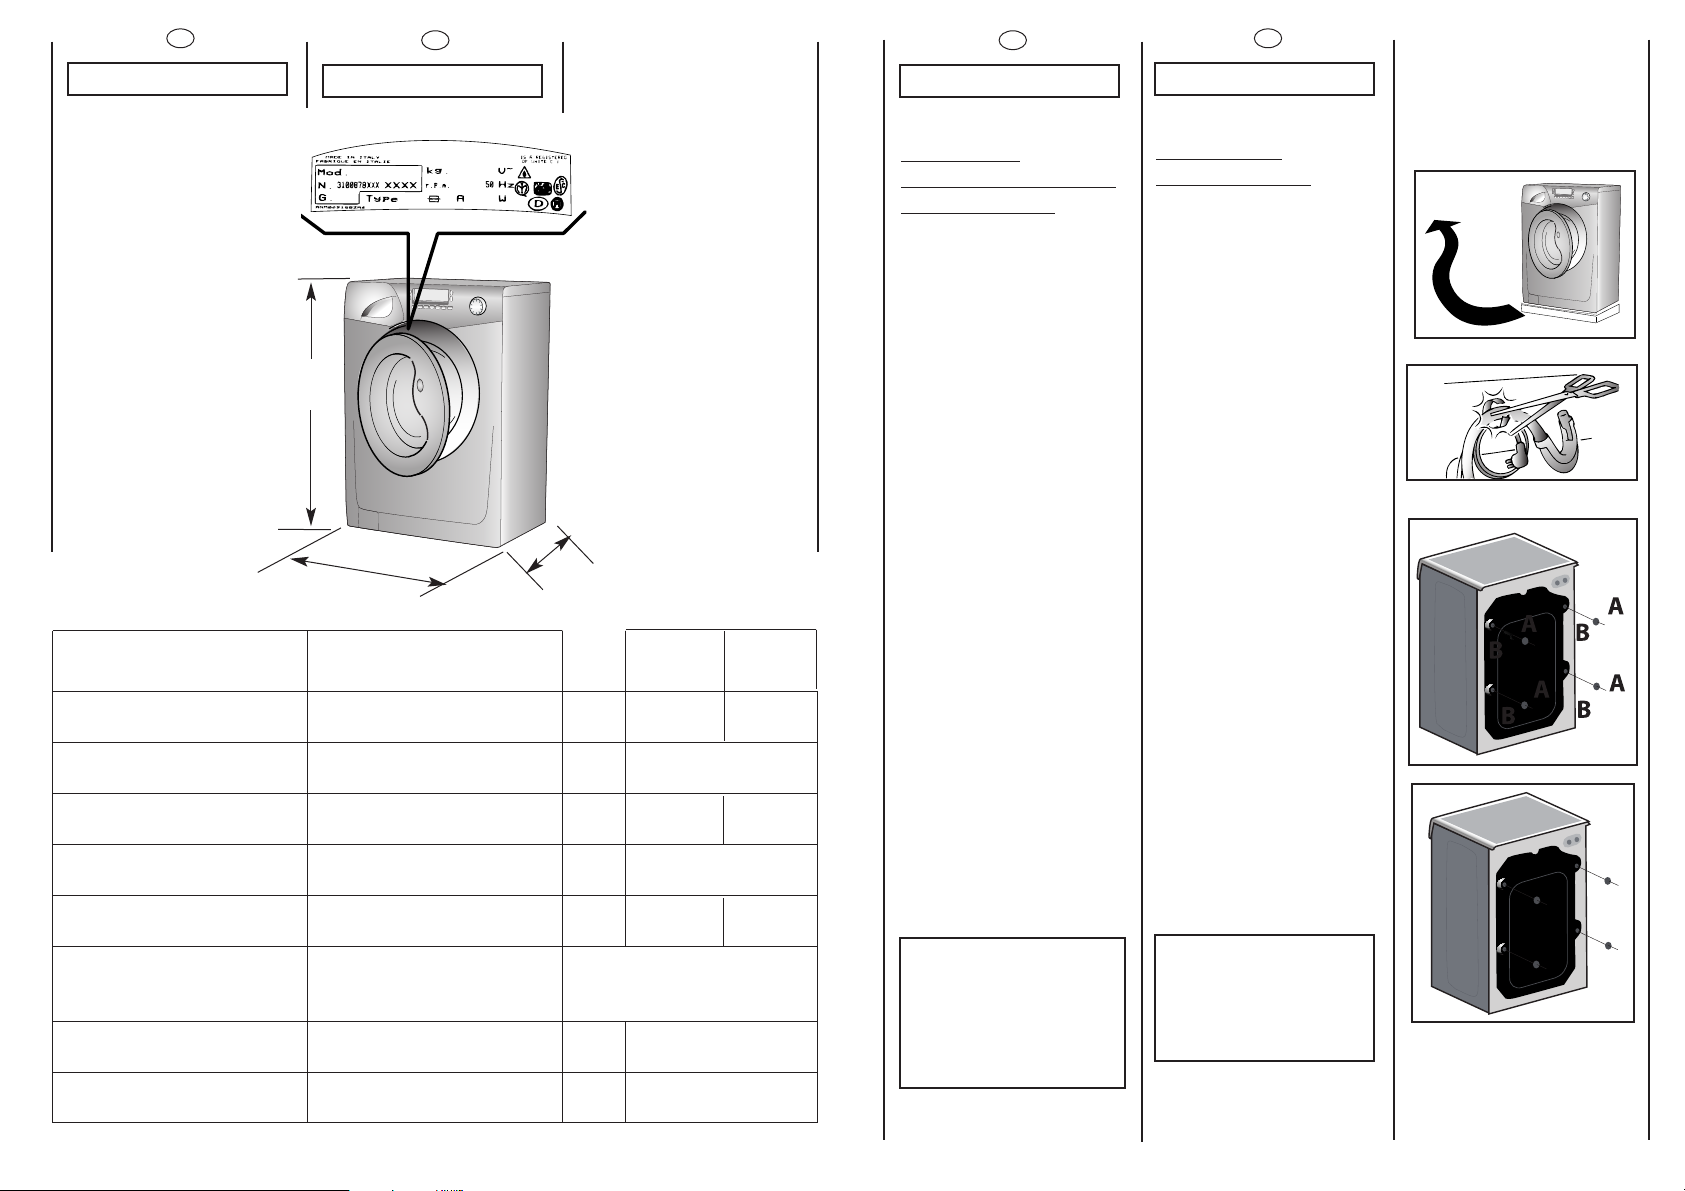
CAPÍTULO 4
DATOS TÉCNICOS
CAPACIDAD DE ROPA
SECA
CHAPTER 4
85
cm
60 cm
TECHNICAL DATA
MAXIMUM WASH
LOAD DRY
52 cm
64 cm
kg
CAPÍTULO 5
PUESTA EN
FUNCIONAMIENTO
ALACIÓN
INST
Ponga la máquina cerca
del lugar de uso sin la base
del embalaje.
Cortar las cintas que rodean
el tubo, prestando atención
de no dañar el mismo ni el
cable electrico.
Destornille los 2 o 4 tornillos
64 cm52 cm
8
10,5
(A) del lado posterior y
extraer los 2 o 4 distanciales
(B)
CHAPTER 5
SETTING UP
INSTALLA
Move the machine near its
permanent position without
the packaging base.
Carefully cut the securing
strap that holds the main
cord and the drain hose.
Remove the 2 or 4 fixing
screws marked (A) and
remove the 2 or 4 spacers
marked (B)
TION
NIVEL NORMAL DE AGUA
POTENCIA
ABSORBIDA
CONSUMO DE ENERGÍA
(PROG. 90°C)
AMPERIOS DEL FUSIBLE DE
LA RED
REVOLUCIONES DE
CENTRIFUGADO (Rev./min.)
PRESIÓN EN EL CIRCUITO
HIDRÁULICO
TENSION
8
NORMAL WATER LEVEL
POWER INPUT
ENERGY CONSUMPTION
(PROG. 90°C)
POWER CURRENT FUSE
AMP
SPIN
r.p.m.
WATER PRESSURE
SUPPLY VOLTAGE
l
W
kWh
A
MPa
V
2150
10
VER TARJETA DE DATOS
SSEEEE RRAATTIINNGG PPLLAATTEE
min. 0,05
max. 0,8
220-240
6÷15
1,8
2400
16
Tapar los 2 o 4 orificios
utilizando los tapones
contenidos en la bolsa de
instrucciones.
ATENCIÓN:
NO DEJE AL ALCANCE
DE LOS NIÑOS LOS
ELEMENTOS DE
EMBALAJE YA QUE
PUEDEN SER
PELIGROSOS.
Cover the 2 or 4 holes using
the caps provided in the
instruction booklet pack.
WARNING:
DO NOT LEAVE THE
PACKAGING IN THE
REACH OF CHILDREN
AS IT IS A POTENTIAL
SOURCE OF DANGER.
9
A
B
C
min 50 cm
max 85 cm
+2,6 mt max
max 100 cm
min 4 cm
ES
Aplique la lamina de
polionda como se muestra
en la figura.
Conecte el tubo del agua
al grifo.
El aparato debe ser
conectado a la red
hidraulica sólo con los
nuevos tubos de carga
disponibles en dotación.
Los viejos tubos de carga no
tienen que ser reutilizados.
ATENCIÓN:
NO ABRA EL GRIFO.
EN
Fix the sheet of corrugated
material on the bottom as
shown in picture.
Connect the fill hose
to the tap.
The appliance must be
connected to the water
mains using new hose-sets.
The old hose-sets should not
be reused.
IMPORTANT:
DO NOT TURN THE TAP
ON AT THIS TIME.
ES
Nivele la máquina con los 4
pies.
a) Girar la tuerca en el sentido
de las agujas del reloj para
desbloquear el tornillo del pie.
b) Girar el pie y hacerlo bajar o
subir hasta conseguir su
perfecta adherencia al suelo.
c) Bloquear el pie girando la
tuerca en el sentido contrario a
las agujas del reloj hasta que se
adhiera al fondo de la
lavadora.
EN
Use the 4 feet to level the
machine with the floor:
a) Turn the nut clockwise to
release the screw adjuster of
the foot.
b) Rotate foot to raise or
lower it until it stands firmly on
the ground.
c) Lock the foot in position
by turning the nut anticlockwise until it comes up
against the bottom of the
machine.
Acerque la lavadora a la
pared procurando que no
se formen curvas o
estrangulamientos, fije el
tubo desagüe al borde de
la pila.
o mejor aún, a un desagüe
fijo,con un diámetro mayor
que el del tubo de la
lavadora,a una altura
mínima de 50 cm.
En caso necesario, utilice la
curva rígida adjunta.
10
Position the washing
machine next to the wall.
Hook the outlet tube to the
edge of the bath tub,
paying attention that there
are no bends or
contractions along the tube.
It is better to connect the
discharge hose to a fixed
outlet of a diameter greater
than that of the outlet tube
and at a height of min. 50
cm. If is necessary to use the
plastic sleeve supplied.
Verificar que el mando de los
porgramas esté en posición
OFF y que la escotilla esté
cerrada.
Enchúfela.
ATENCIÓN:
En el caso que sea necesario
sustituir el cable de
alimentación, asegurese de
respetar el siguiente código de
colores durante la conexión de
cada cable:
AZUL - NEUTRO (N)
MARRÓN - FASE (L)
AMARILLO-VERDE - TIERRA ( )
El aparato tiene que ser
colocado de forma que el
enchufe sea accesible una vez
instalado.
Ensure that the knob is on the
“OFF” position and the load
door is closed
Insert the plug.
ATTENTION:
should it be necessary to
replace the supply cord,
connect the wire in
accordance with the
following colours/codes:
BLUE - NEUTRAL (N)
BROWN - LIVE (L)
YELLOW-GREEN - EARTH ( )
After installation, the
appliance must be
positioned so that the plug is
accessible.
11
ES
EN
ES
EN
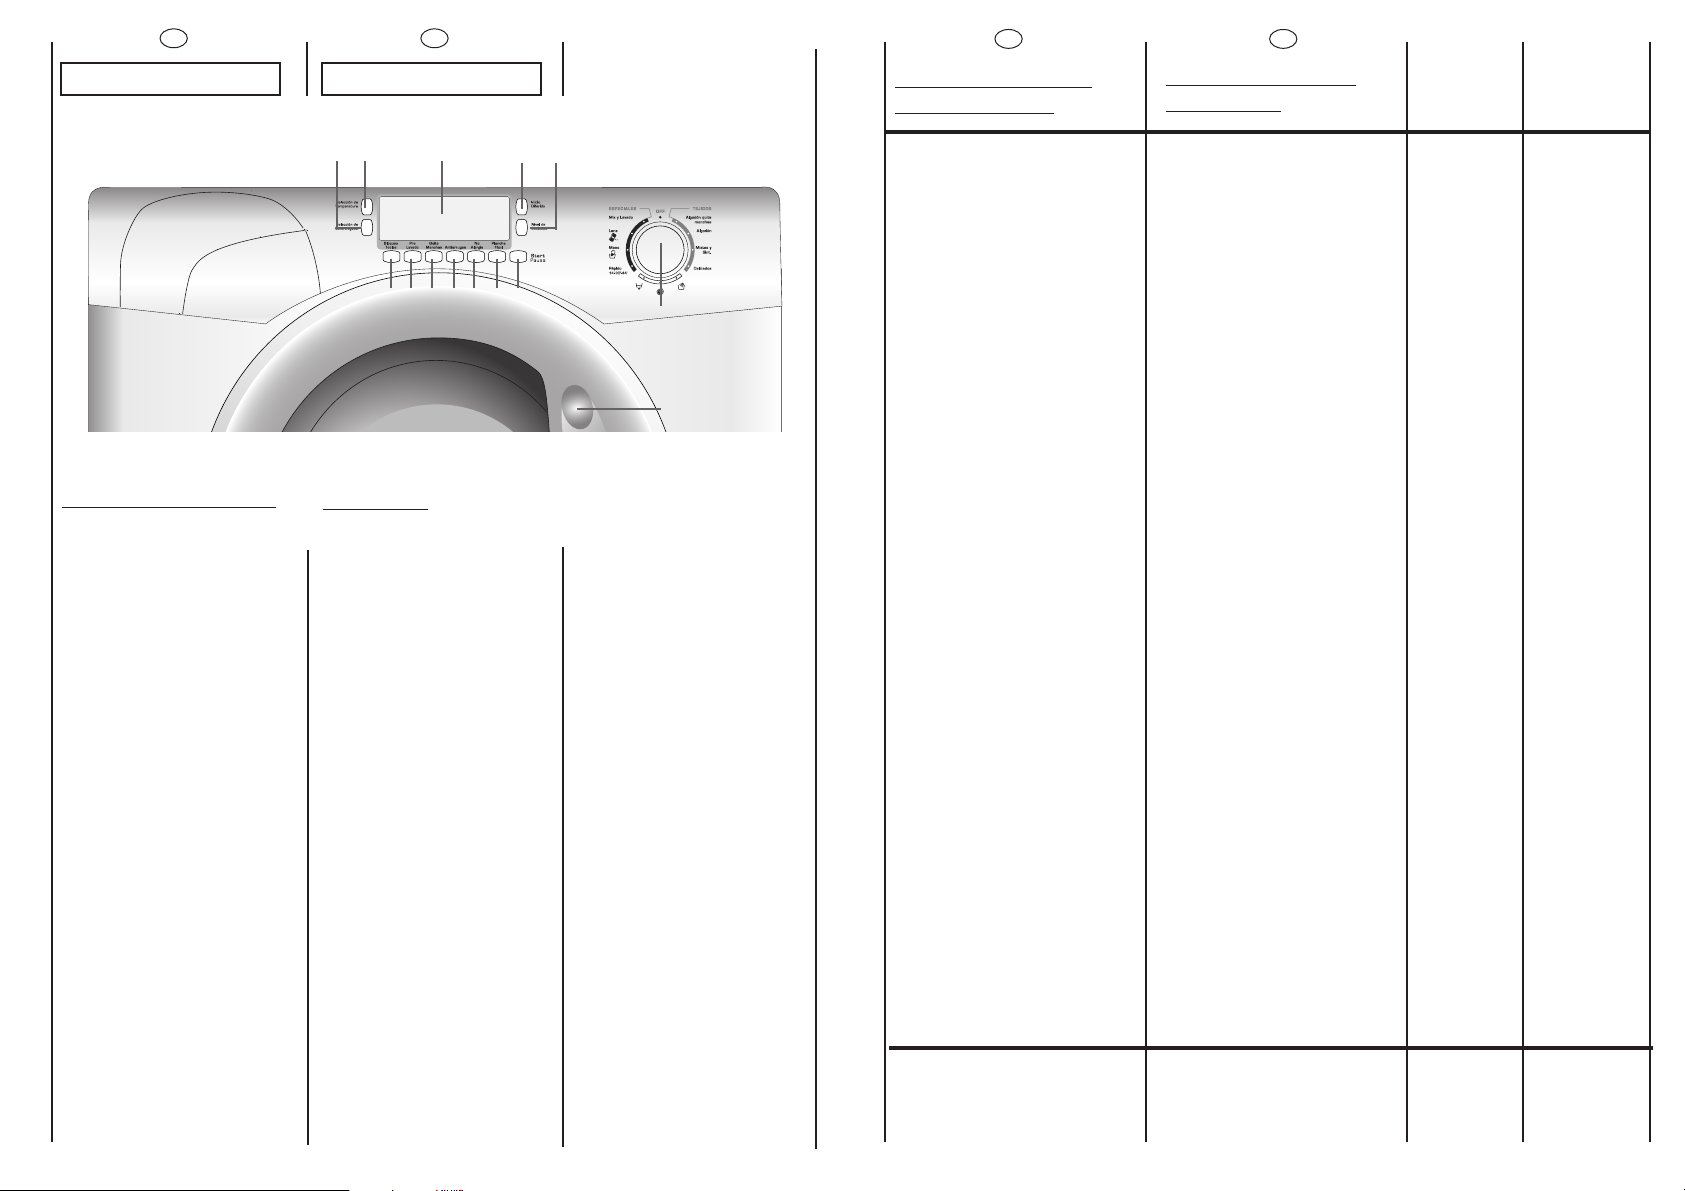
CAPÍTULO 6
R
CUADRO DE MANDOS
Manilla apertura puerta
Mando selector de programas
con posición de “OFF”
Tecla Selección Temperatura
Tecla Selección
Centrifugado
Tecla Nivel de Suciedad
Tecla Inicio Diferido
Opción bloqueo teclas
Tecla Prelavado
Tecla Quita Manchas
Tecla Antiarrugas
Tecla No Alergia
Tecla Plancha Fàcil
Tecla Start/Pausa
Display Digital
Cubeta del detergente
12
CHAPTER 6
C QDF
E
GHI LMNP
CONTROLS
Door handle
Timer knob for wash
programmes with OFF position
Wash Temperature button
Spin Speed button
Degree of soiling button
Start Delay button
Programme Lock button
Pre-wash button
Intensive button
“Rinse Hold” button
Aquaplus button
Crease Guard button
Start button
Digital Display
Detergent drawer
B
DESCRIPCIÓN DE
LOS MANDOS
“Kg DETECTOR”
(Función activa solamente en
los programas algodón y
sintéticos.) Es el último grito de
la electrónica aplicada a las
tecnologías de lavado.
“Kg DETECTOR” permite medir,
durante todas las fases del
lavado,una serie de
informaciones sobre la ropa
introducida en el interior del
tambor.
De este modo, “Kg DETECTOR”,
en los primeros 4 minutos del
ciclo de lavado:
- Regula la cantidad de agua
A
A
B
C
D
E
F
G
H
I
L
M
N
P
Q
R
necesaria.
- determina la duración del
lavado.
- regula los aclarados según la
carga y el tipo de ropa que se
ha elegido lavar.
- regula el ritmo de rotación
del tambor para adaptarlo al
tipo de tejido.
- reconoce la presencia de
espuma, aumentando
ocasionalmente el nivel del
agua durante los aclarados.
- regula el número de vueltas
del centrifugado en función
de la carga,evitando que se
produzcan desequilibrios.
De este modo, el programa
“Kg DETECTOR” elije por usted,
entre los cientos de
combinaciones posibles de
lavado,cuál se adapta mejor
a las condiciones de cada
colada.
“Kg DETECTOR” satisface las
exigencias de sencillez en la
utilización de la lavadora,
permitiendo una introducción
simplificada del programa de
lavado.De hecho,el usuario,
sólo con indicar el tipo de
tejido introducido en el tambor
y el grado de suciedad de la
ropa, obtendrá una colada
perfectamente limpia y con el
más elevado grado de
secado obtenible, además de
con un centrifugado que
cuida de las prendas.
MANILLA APERTURA PUERTA
Para abrir la puerta pulse la
palanca situada en el interior
de la manilla.
DESCRIPTION OF
CONTROL
“Kg DETECTOR”
(Function active only on
Cotton and Synthetics
programmes)
Through every wash phase
“Kg DETECTOR” allows to
monitor information on
the wash load in the drum.
So, as soon as the “Kg
DETECTOR” is set in motion, in
the first 4 minutes of the wash,
it:
- adjusts the amount of water
required
- determines the length of the
wash cycle
- controls rinsing
according to the type of
fabric selected to be washed
it:
- adjusts the rhythm of drum
rotation for the type of fabric
being washed
- recognises the presence of
lather,increasing,if necessary,
the amount of water during
rinsing
- adjusts the spin speed
according to the load, thus
avoiding any imbalance.
In this way “Kg DETECTOR” is
able to decide, by itself,the
most suitable programme for
each individual wash from
the hundreds of possible
wash combinations.
“Kg DETECTOR” meets the
need for easy use by
permitting a simplified
programme selection.In
fact,the user need only tell
the machine the type of
fabric in the drum and the
degree of soiling, to obtain a
perfect wash with the highest
level of drying possible with a
spin which really cares for
your clothes.
DOOR HANDLE
Press the finger-bar inside
the door handle to open the
door
A
13
ES
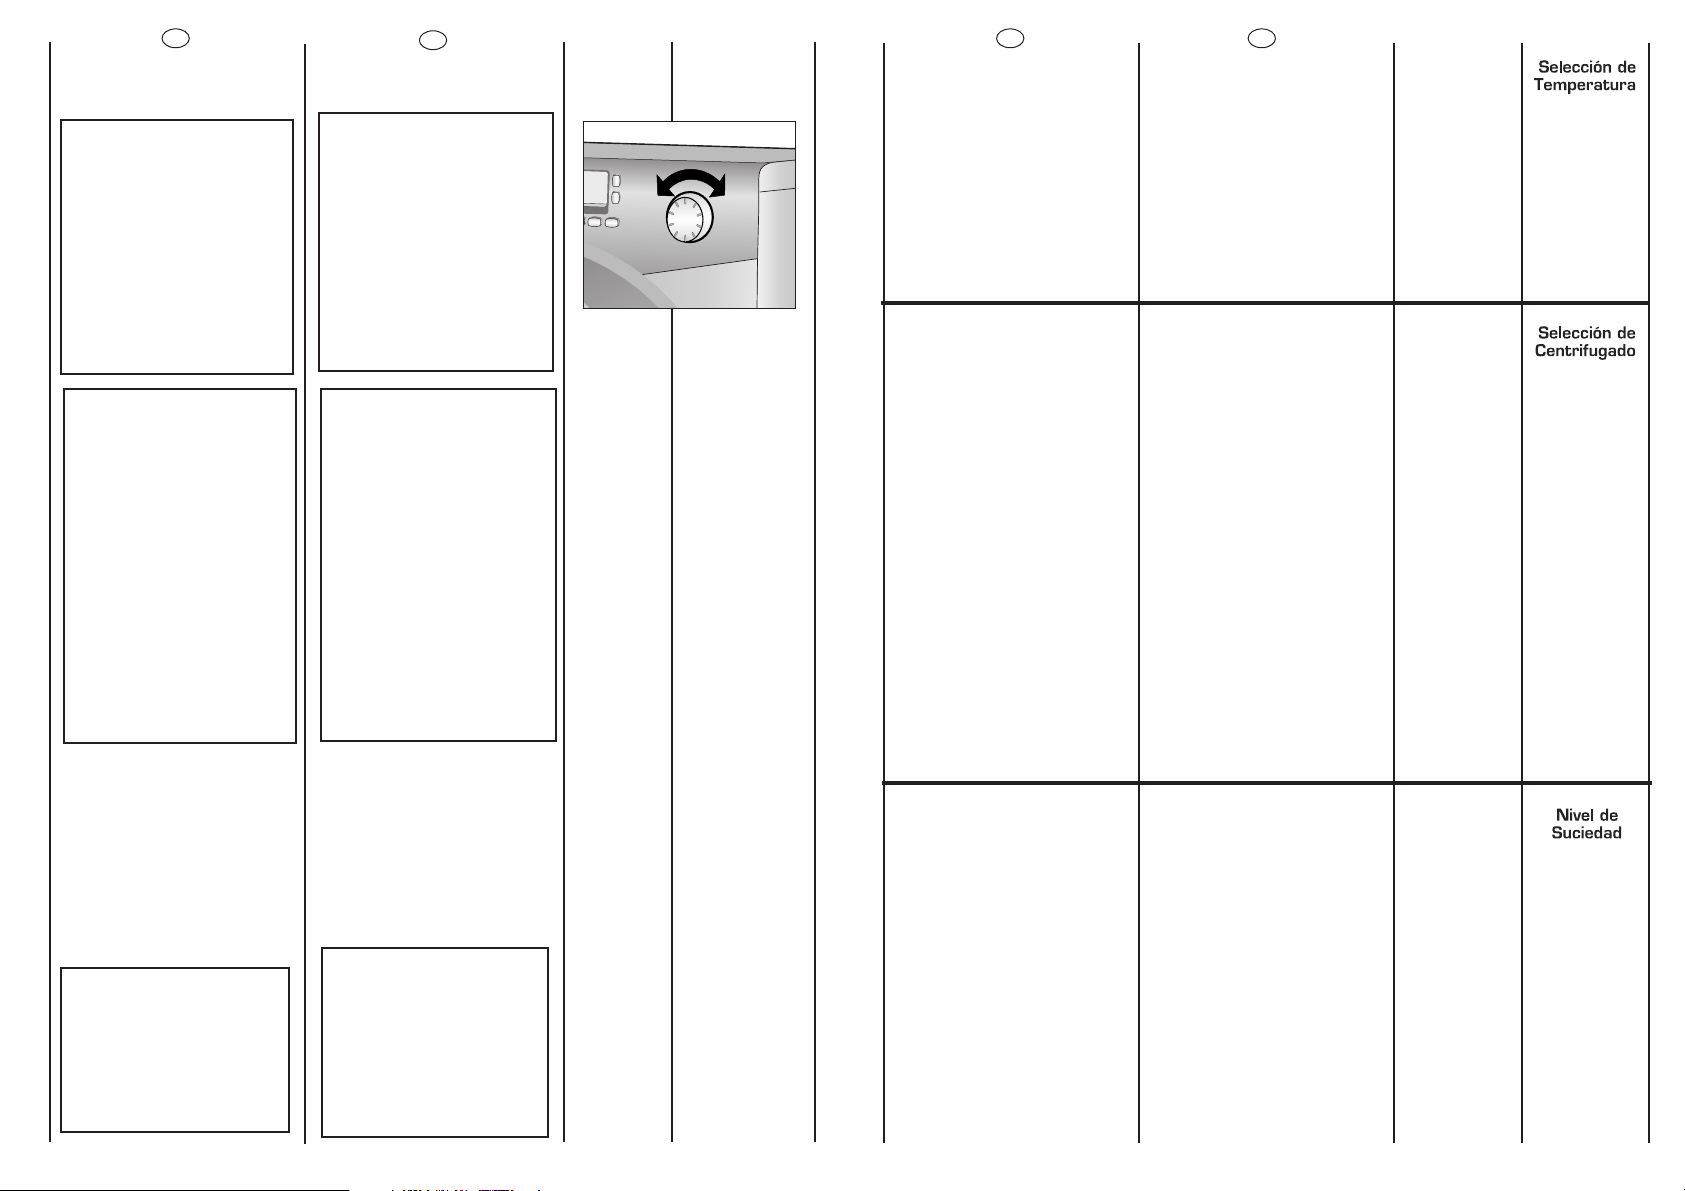
MANDO SELECTOR DE
PROGRAMAS CON POSICIÓN
DE “OFF”
GIRANDO EL MANDO, EL
DISPLAY SE ILUMINARÁ,
VISUALIZANDO LOS
PARÁMETROS DEL
PROGRAMA ELEGIDO.
AL FINAL DEL CICLO O
DESPUÉS DE UN PERIODO
DE INACTIVIDAD, LA
LUMINOSIDAD DEL DISPLAY
DISMINUYE PARA UN
AHORRO ENERGÉTICO.
NOTA: PARA APAGAR LA
LAVADORA, GIRAR EL
MANDO DE PROGRAMAS
HASTA LA POSICIÓN “OFF”.
LOS DETERGENTES
ACTUALES RESULTAN
BASTANTE EFICACES
INCLUSO CON BAJAS
TEMPERATURAS. POR ESTE
MOTIVO RECOMENDAMOS,
INCLUSO PARA LOS
PROGRAMAS INTENSIVOS,
LA UTILIZACIÓN DE
TEMPERATURAS MÁS
BAJAS.
TAMBIÉN ES POSIBLE
AUMENTAR LA
TEMPERATURA DE LAVADO
PULSANDO EL BOTÓN
TEMPERATURA.
DIRIGIRSE AL CUADRO DE
MANDOS PARA AVERIGUAR
LA TEMPERATURA MÁXIMA
PERMITIDA PARA CADA
PROGRAMA.
Accionar la tecla
“START/PAUSA" para iniciar la
fase de lavado.
El ciclo de lavado se
completará con el mando
selector de programas
colocado sobre el programa
seleccionado hasta el final
del ciclo de lavado.
Al final del ciclo de lavado,
apague la lavadora llevando
el mando selector de
programas a la posición
“OFF”.
NOTA:
SE DEBE LLEVAR SIEMPRE
EL MANDO SELECTOR DE
PROGRAMAS A LA
POSICIÓN "OFF" AL
FINAL DEL CICLO DE
LAVADO Y ANTES DE
SELECCIONAR UNO
NUEVO.
14
EN
PROGRAMME SELECTOR WITH
OFF POSITION
WHEN THE PROGRAMME
SELECTOR IS TURNED THE
DISPLAY LIGHTS UP TO
SHOW THE SETTINGS FOR
THE PROGRAMME
SELECTED.
FOR ENERGY SAVING, AT
THE END OF THE CYCLE OR
WITH AN INACTIVITY
PERIOD, THE DISPLAY LEVEL
CONTRAST WILL DECREASE.
N.B. TO SWITCH THE
MACHINE OFF, TURN THE
PROGRAMME SELECTOR
TO THE “OFF” POSITION.
TODAY, MOST DETERGENTS
HAVE BEEN IMPROVED TO
WASH EFFICIENTLY AT
LOWER TEMPERATURES,
THEREFORE WE HAVE SET
THE DEFAULT TEMPERATURE
SETTINGS OF EACH
PROGRAMME TO A LOWER
LEVEL, SAVING ELECTRICITY
AND REDUCING THE
CARBON FOOTPRINT OF
YOUR MACHINE.
YOU CAN SELECT AN HIGH
TEMPERATURE BY PRESSING
THE TEMPERATURE BUTTON.
PLEASE REFER TO THE
PROGRAMME GUIDE FOR
THE MAXIMUM
TEMPERATURE TO WHICH
EACH PROGRAMME CAN
BE SET.
Press the "Start/Pause" button
to start the selected cycle.
The programme carries out
with the programme selector
stationary on the selected
programme till cycle ends.
Switch off the washing
machine by turning the
selector to OFF.
NOTE:
THE PROGRAMME
SELECTOR MUST BE
RETURN TO THE OFF
POSITION AT THE END OF
EACH CYCLE OR WHEN
STARTING A SUBSEQUENT
WASH CYCLE PRIOR TO
THE NEXT PROGRAMME
BEING SELECTED AND
STARTED.
B
ES
TECLA “SELECCIÓN
TEMPERATURA”
Cuando se selecciona un
programa,en el display
aparece indicada la
temperatura aconsejada.
Es posible disminuir o aumentar
la misma accionando varias
veces dicha tecla.A cada
presión, la temperatura
seleccionada aparecerá en el
display.
TECLA “SELECCIÓN
CENTRIFUGADO”
La fase de centrifugado es muy
importante para la preparación
de un buen secado y su modelo
está dotado de la máxima
flexibilidad para cada exigencia.
Accionando esta tecla,se
puede reducir la máxima
velocidad de centifugado
posible para el programa
seleccionado,hasta su
completa exclusión.
Para activa el centrifugado,es
suficiente accionar de nuevo la
tecla,hasta lograr la velocidad
deseada.
Para proteger los tejidos, no es
posible aumentar la velocidad
de centrifugado mas allá de la
que automáticamente se indica
en el momento de la selección
del programa.
Es posible modificar la velocidad
de centrifugado en cualquier
momento,aún sin llevar la
lavadora a la posición PAUSA.
TECLA “NIVEL DE SUCIEDAD”
Mediante esta tecla
(disponible sólo en los
programas ALGODÓN y
MIXTO) es posible escoger 3
niveles de intensidad de
lavado,según el grado de
suciedad de los tejidos.
Después de seleccionar el
programa,el piloto se sitúa
automáticamente en el nivel
mínimo permitido; pulsando el
botón se aumenta el nivel y,
en consecuencia, también se
modifican los parámetros de
la duración del ciclo.
Utilizando este botón después
de haber seleccionado el
programa rápido,es posible
elegir entre 3 programas
distintos de 14, 30 y 44 minutos
de duración,respectivamente.
EN
“WASH TEMPERATURE” BUTTON
When a programme is
selected on the display is
show the recommended
wash temperature.
The temperature button can
be used to decrease or
increase the temperature of
your chosen wash cycle.
Each time the button is
pressed, the new temperature
level is shown on the display.
“SPIN SPEED” BUTTON
The spin cycle is very
important to remove as much
water as possible from the
laundry without damaging
the fabrics.You can adjust
the spin speed of the
machine to suit your needs.
By pressing this button, it is
possible to reduce the
maximum speed,and if you
wish, the spin cycle can be
cancelled.
To reactivate the spin cycle is
enough to press the button
until you reach the spin
speed you would like to set.
For not damage the fabrics, it
is not possible to increase the
speed over that
automatically suitable during
the selection of the program.
It is possible to modify the
spin speed in any moment,
also without to pause the
machine.
“DEGREE OF SOILING” BUTTON
By selecting this button
(active only on COTTON and
MIXED FIBRES programmes)
there is a choice of 3 levels of
wash intensity, depending on
how much the fabrics are
soiled. Once the programme
has been selected the
indicator light will
automatically show the
minimum level required for
that programme.Pressing the
button increases the duration
of the wash cycle,and
adjusts the wash settings
accordingly. For example:
Using this button on the Rapid
Wash cycle will enable you to
select either a 14, 30 or 44
minute wash cycle.
C
D
E
15
 Loading...