

Page 1
Page 2

WARNING
YOUR VEHICLE CAN BE HAZARDOUS TO OPERATE. A collision or rollover
can occur quickly, even during routine maneuvers such as turning and driving on hills or over obstacles, if you fail to take proper precautions.
For your safety, understand and follow all the warnings contained in this
Operator's Guide and the labels on your vehicle. Failure to follow these
warnings can result in SEVERE INJURY OR DEATH!
Keep this Operator's Guide with the vehicle at all times.
WARNING
Disregarding any of the safety precautions and instructions contained in this
Operator’s Guide, SAFETY VIDEO and on-product labels could cause injury
including the possibility of death!
Category R (recreational) and 2-UP vehicles are for off road use only. It is mainly
for general recreational use but it may also be used for utility purposes.
Printed in Canada. (vmo2007-012 DR)
®™ and the BRP logo are trademarks of Bombardier Recreational Products Inc. or its affiliates.
©2006 BombardierRecreational Products Inc. and BRP US Inc. All rights reserved.
Page 3

IMPORTANT INFORMATION
This Operator’s Guide utilizes the following symbols to emphasize particular information:
The Safety Alert Symbol indicates a potential personal injury hazard.
WARNING
CAUTION: Denotes an instruction which, if not followed, could severely
damage vehicle components.
NOTE: Indicates supplementary information needed to fully complete an instruc-
tion.
2-UP vs 1-UP models:
Throughout this Operator's Guide, the term “1-UP” refers to vehicles designed to carry the operator only while the term “2-UP” refers to vehicles
designed to carry also a passenger.
Make sure to identify and follow the warnings and instructions that are applicable to your specific model.
All safety documentation should remain with the vehicle at the time of sale.
All content of the SAFETY INFORMATION section should be interpreted by the
reader as a warning which, if not followed, may result in injury including the possibility of death.
The following trademarks are the property of Bombardier Recreational Products Inc.:
Can-Am™
Outlander™
®
Rotax
XP-S™
TTI™
Indicates a potential hazard that, if not avoided, could
result in serious injury or death.
WARNING
______________________
1
Page 4

FOREWORD
Congratulations on your purchase of a
new Can-Am™ ATV.It isbackedby the
BRP warranty and a network of authorized Can-Am ATV distributors/dealers
ready to provide the parts, service or
accessories you may require.
Your distributor/dealer is committed
to your satisfaction. He has taken
training to perform the initial setup
and inspection of your vehicle as well
as completed the final adjustment
before you took possession. At delivery, your distributor/dealer would have
explained the operation, maintenance
and safety features of the vehicle. We
trust you have taken full advantage of
this! If you need more complete servicing information, please ask your
distributor/dealer.
Atdelivery,youwerealsoinformedof
the warranty coverage and completed
the Warranty Registration Form which
is to be sent to us for processing. In
the near future you should be receiving a warranty card which will confirm
our receipt of the registration as well
as be used for warranty or recall purposes.
You are invited to contact our customer assistance center should you
experience problems which cannot
be resolved by an authorized Can-Am
ATV distributor/dealer.
It is understood that this Operator’s
Guide may be translated into another
language. In the event of any discrepancy, the English version shall prevail.
Throughout this document the masculine is used to denote the masculine or
feminine.
If you want to view and/or print an
extra copy of your Operator's Guide,
simply visit the following website
www.operatorsguide.brp.com.Also note that the guide is available in
several languages.
The information and components/
system descriptions contained in this
document are correct at the time of
publication. BRP, however, maintains
a policy of continuous improvement
of its products without imposing upon
itself any obligation to install them
on products previously manufactured.
Due to late changes, some differences between the manufactured
product and the descriptions and/or
specifications in this guide may occur.
BRP reserves the right at any time to
discontinue or change specifications,
designs, features, models or equipment without incurring any obligation
upon itself.
The illustrations in this document
show the typical construction of the
different assemblies and may not reproduce the full detail or exact shape
of the parts. However, they represent
parts that have the same or similar
function.
The use of RIGHT and LEFT indications in the text always refers to driving position (when sitting on vehicle).
Specifications are given in the international metric system with the SAE
U.S. equivalent in parenthesis. Where
precise accuracy is not required, some
conversions are rounded off for easier
use.
We recommend genuine BRP products for replacement parts and accessories. They’ve been especially designed for your vehicle and manufactured to meet BRP’s demanding standards.
A SHOP MANUAL can be obtained for
complete service and maintenance information and more repair information.
_______________________
2
Page 5

TABLE OF CONTENTS
While reading this Operator’s Guide, remember that:
WARNING
Indicates a potential hazard that, if not avoided, could result in serious injury or death.
NOTICE................................................................................ 7
EuropeanCommunity ........................................................... 7
INTRODUCTION ..................................................................... 8
SAFETY INFORMATION
SPECIAL SAFETYMESSAGES................................................... 11
General........................................................................... 11
Training........................................................................... 11
Performance..................................................................... 11
Age............................................................................... 11
Speed ............................................................................ 11
Riding ............................................................................ 11
Operation........................................................................ 14
Maintenance .................................................................... 14
Basics for Passenger........................................................... 14
OPERATION WARNINGS.......................................................... 15
RIDING THE VEHICLE.............................................................. 45
Pre-Operation Check ........................................................... 46
Clothing.......................................................................... 47
Carrying Loads/Passenger ..................................................... 48
Hauling a Trailer (if so equipped) . ............................................. 48
Working with yourVehicle..................................................... 49
Recreational Riding............................................................. 49
Environment..................................................................... 49
Design Limitation ............................................................... 50
Off-HighwayOperation......................................................... 50
General Operating and Safety Precautions .................................. 50
Uphill Driving.................................................................... 51
DownhillDriving ................................................................ 51
Side Hilling....................................................................... 52
Drop-Offs........................................................................ 52
Riding Techniques .............................................................. 52
Routine Maintenance........................................................... 63
______________________
3
Page 6

HANGTAG .......................................................................... 64
ON-PRODUCT LABELS ............................................................ 66
VEHICLE INFORMATION
HOW TO IDENTIFY YOUR VEHICLE............................................. 72
Engine and Vehicle Identification Number Location......................... 72
Compliance Label............................................................... 73
BREAK-IN PERIOD.................................................................. 74
Engine............................................................................ 74
Belt............................................................................... 74
10-Hour Inspection ............................................................. 74
CONTROLS/INSTRUMENTS/EQUIPMENT.................................... 75
1)Throttle Lever ................................................................ 77
2)2WD/4WD Selector.......................................................... 77
3)Brake Lever................................................................... 77
4)ParkingBrake................................................................. 77
5)TransmissionLever.......................................................... 78
6) Multi-Function Switch ....................................................... 79
7) Speedometer................................................................. 81
8)12-Volt Power Outlet........................................................ 84
9)Ignition Switch ............................................................... 84
10) Fuel Tank Cap............................................................... 84
11) Fuel Gauge.................................................................. 85
12) Fuel Valve ................................................................... 85
13) BrakePedal ................................................................. 86
14) Footpeg...................................................................... 86
15) Grab Handles ............................................................... 86
16) Passenger's Seat/Storage Box............................................ 87
17) Operator's Seat............................................................. 88
18) Access Panel................................................................ 89
19) Rear Storage Compartment............................................... 89
20) Cargo Racks................................................................. 89
21) TrailerHitch ................................................................. 90
22) Radiator Cap ................................................................ 90
23) Fuses ........................................................................ 90
24) Tool Kit....................................................................... 91
25) Rewind StarterHandle..................................................... 91
26) Dipstick...................................................................... 91
27) Winch........................................................................ 92
28) Winch Control Switch...................................................... 92
29) Roller Fairlead............................................................... 92
30) Vehicle Lock................................................................. 92
31) Direction IndicatorSwitch ................................................. 93
32) Horn Button................................................................. 93
_______________________
4
Page 7

33) Hazard WarningButton .................................................... 93
34) Winch Remote Control .................................................... 93
35) Winch Remote Control Connection .. .................................... 94
LIQUIDS.............................................................................. 95
Fuel............................................................................... 95
Engine/Transmission Oil........................................................ 95
Engine Coolant.................................................................. 97
Brake Fluid....................................................................... 98
Battery........................................................................... 98
OPERATING INSTRUCTIONS..................................................... 99
General........................................................................... 99
Pre-Operation Check ........................................................... 99
Starting the Engine ........................................................... 100
Shifting the Transmission .................................................... 101
Winch Operation.............................................................. 101
Stopping the Engine.......................................................... 101
Post-OperationCare.......................................................... 102
SPECIAL PROCEDURES......................................................... 103
Turn Over ...................................................................... 103
Vehicle Immersion............................................................ 103
CARGO AND TRANSPORTATION ............................................. 104
Cargo........................................................................... 104
Transportation................................................................. 105
TROUBLESHOOTING............................................................ 106
SPECIFICATIONS................................................................. 110
MAINTENANCE INFORMATION
MAINTENANCECHART......................................................... 116
GENERAL.......................................................................... 120
ENGINE/TRANSMISSION ...................................................... 121
Oil Change and Oil Filter Replacement..................................... 121
Oil StrainerCleaning.......................................................... 122
Coolant Replacement ........................................................ 122
Air Filter........................................................................ 123
Air FilterHousingDraining................................................... 124
Drive Belt ...................................................................... 125
CVT Cover Drain Plug ........................................................ 125
Valve Adjustment............................................................. 125
Spark Arrester................................................................. 125
Radiator ........................................................................ 125
______________________
5
Page 8

CARBURETOR .................................................................... 127
FUELSYSTEM.................................................................... 128
Throttle Cable Lubrication. ................................................... 128
Throttle Lever Adjustment................................................... 129
ELECTRICAL....................................................................... 131
Spark Plug ..................................................................... 131
Battery......................................................................... 131
Fuses........................................................................... 132
BulbReplacement............................................................ 133
DRIVE TRAIN...................................................................... 136
Drive ShaftBoot/Protector................................................... 136
Wheel Bearing Condition .................................................... 136
Tires/Wheels .................................................................. 136
SUSPENSION..................................................................... 138
Lubrication..................................................................... 138
Inspection...................................................................... 138
Adjustment.................................................................... 138
BRAKE.............................................................................. 139
Adjustment.................................................................... 139
Brake Fluid Replacement .................................................... 139
BODY/FRAME..................................................................... 140
Engine Compartment......................................................... 140
Hitch/TrailerBallCondition................................................... 140
Chassis Fasteners ............................................................ 140
SeatFasteners................................................................ 140
Vehicle Cleaning andProtection............................................. 140
STORAGE AND PRESEASON PREPARATION ............................... 141
WARRANTY
TM
BRP INTERNATIONAL LIMITED WARRANTY: 2007 CAN-AM
PRIVACY OBLIGATION/DISCLAIMER......................................... 147
CHANGE OF ADDRESS/OWNERSHIP ........................................ 149
_______________________
6
ATV.... 144
Page 9

NOTICE
This Operator's Guide has been prepared to acquaint the owner/operator
of a new vehicle with the various vehicle controls, maintenance and safe
operating instructions. It is indispensable for the proper use of the product.
This Operator's Guide uses the following symbols.
WARNING
Indicates a potential hazard that, if
notavoided, could result in serious
injury or death.
CAUTION: Denotes an instruction
which, if not followed, could severely damage vehicle components.
NOTE: Indicates supplementary infor-
mation needed to fully complete an instruction.
Although the mere reading of such information does not eliminate the hazard, the understanding and application
of the information will promote the
correct use of this vehicle.
To fully appreciate the pleasures, enjoyment and excitement of using this
vehicle, there are some basic rules
that MUST be observed and followed
by any user.
European Community
This warning applies only in the European Countries where on road usage
is allowed.
WARNING
On road use:
• This vehicle is built for OFFROAD purposes only. It may
be used for short distances
on paved surfaces at reduced
speed, in order to move the
vehicle from an off-road location to another.
• When driving this vehicle on
roads, always refrain from
speeding and substantially
reduce vehicle speed when
turning.
• Failure to do so can cause a
loss of vehicle control, possibly resulting in serious injury.
Front winch:
• The front winch hook of the
so equipped vehicle must be
removed and stored when
riding the vehicle on public
trails and/or roads.
• Failure to do so can increase the risk of injury to
bystanders.
______________________
7
Page 10

INTRODUCTION
Your distributor/dealer should have
provided you with some basic information on the particular controls and
features of your new vehicle. Please
take the time to study this Operator's
Guide and all on-product warning labels as well as the SAFETY VIDEO
that came with this vehicle. They
more completely describe what you
should know about this vehicle before
riding it.
Whether you are a new user or an experienced rider, it is important for your
personal safety as well as passenger
safety that you know the controls and
features of thisvehicle. Equally important is knowing how to properly ride.
Irrespective of your age, experience or
state regulations, it is always prudent
for you or any other person who may
ride your vehicle, to take an approved
safe riding course. Please check with
your distributor/dealer or local authorities for availability in your area. If you
are a completely new rider, this should
be done before your first ride. Your instructor should be able to provide advice on local conditions and safe riding
practices particular to the area.
Riding conditions vary from place
to place. Each is subject to weather
conditions which may radically change
from time to time and from season to
season.
Riding on sand is different than riding on snow or through forests or
marshes. Each location may require a
greater degree of awareness and skill
may not be suitable with a passenger. Show good judgement. Always
proceed with caution. Please do not
take any unnecessary risks that could
leave you or your passenger stranded
or possibly injured.
The vehicle handling, stability and
braking distance may be affected
when riding with a passenger. Safely reduce speed when riding with a
passenger. Allow greater distance for
braking.
The contents of this Operator's Guide
provide riding information which has
been proven reliable by other users.
They are not intended as a definitive
means of avoiding accidents. How
you apply this information, coupled
with your mental and physical condition, the particular terrain hazard and
your risk acceptance level will have
an effect on your riding experience.
Have fun... and ride responsibly.
This Operator's Guide has been prepared to acquaint the owner/operator
of a new vehicle with the various vehicle controls, maintenance and safe
operating instructions. They are indispensable for the proper use of the
product.
We would be pleased to receive any
comments on the content and format
of this Operator's Guide, the SAFETY
VIDEO or on-product warnings labels.
_______________________
8
Page 11

SAFETY
INFORMATION
____________
SAFETY INFORMATION
____________
9
Page 12

WARNING
Operator:
– A person under 16 years old should never operate this vehicle.
– Never carry a passenger on a 1-UP model.
– Never carry more than one (1) passenger on a 2-UP model.
_____________________________________________________________________
For 2-UP Models Only:
Operator:
– Passenger must be seated on the designated passenger seat and hold
on to the grab handles at all times.
– The operator is responsible for the safety of the passenger. In doubt,
disembark him before executing any maneuver.
– The vehicle handling, stability and braking distance may be affected
when riding with a passenger. Safely reduce speed when riding with
a passenger.
– Allow greater distance for braking.
– Always practice the maneuvers described in this Operator's Guide with-
out and with passenger.
– Inform the passenger concerning the basic rules for a safe ride.
Passenger:
– The passenger should be 12 years old or more and must be capable of
keeping his feet on footrests and his hands on grab handles at all times
when he is seated on this vehicle.
– Passenger should always hold on to rear passenger grab handles. Nev-
er hold on to the operator.
– Passenger should pay attention to vehicle and operator movements.
– Passenger should always wear the appropriate protective gear, includ-
inganapprovedhelmetwitharigidchinguard.
– Passenger should always keep hands and feet in the proper place during
operation.
– Never get up during vehicle operation. An excessive movement could
cause loss of control.
Failure to follow the recommendations here could cause changes in vehicle handling which could lead to an accident resulting in severe injuries
including the possibility of death for the passenger and/or the operator.
___________
10
SAFETY INFORMATION
___________
Page 13

SPECIAL SAFETY MESSAGES
General
THIS VEHICLE IS NOT A TOY AND
CAN BE HAZARDOUS TOOPERATE.
This vehicle handles differently from
other vehicles including motorcycles
and cars. A collision or rollover can
occur quickly, even during routine maneuvers such as turning and driving on
hillsor over obstacles,ifyou failto take
proper precautions.
SEVERE INJURY OR DEATH can result if you do not follow these instructions:
Training
Read this Operator's Guide and all
on-product warning labels carefully and follow the operating procedures described. Watch and pay attention to the SAFETY VIDEO before operation.
Never operate this vehicle without
proper instruction. Takeatrain-
ing course. All operators should
receive training from a certified
instructor. See your authorized
Can-Am ATV distributor/dealer for
more informations.
Performance
2-UP Models
The vehicle handling, stability and
braking distance may be affected when riding with a passenger.
Safely reduce speed when riding
with a passenger. Allow greater
distance for braking.
Age
Always follow this age recommen-
dation: A personunder 16 years old
should never operate this vehicle.
Passenger on 2-UP models should
be 12 years old or more and must
be capable of keeping his feet on
the footrests and his hands on grab
handles at all times when seated.
Speed
Never operate at excessive speeds.
Always go at a speed that is proper for the terrain, visibility, and operating conditions, and your experience.
Riding
Never carry a passenger on this
vehicle unless you are operating a
2-UP model.
2-UP Models: Never carry more
than one (1) passenger on this vehicle. This passenger should be
12 years old or more and must be
capable of keeping his feet on the
footrests and his hands on grab
handles at all times when seated.
Never operate this vehicle on any
paved surfaces unless it is for short
distances, at reduced speed and in
order to move the vehicle from an
off-road location to another.
Always respect the road traffic laws
when you operate this vehicle on
the roadway, even a dirt or gravel
road.
Never take place on this vehicle
without wearing an approved helmet that fits properly. The operator
and the passenger (2-UP models)
should also wear eye protection
(goggles or face shield), gloves,
boots, long sleeved shirt or jacket,
and long pants. The passenger on
2-UP models should have an approved helmet including a rigid chin
guard.
____________
SAFETY INFORMATION
___________
11
Page 14

Never consume alcohol or drugs be-
fore or while riding this vehicle.
Never attempt wheelies, jumps, or
other stunts.
Always go slowly and be extra
careful when operating on unfamiliar terrain. Always be alert to
changing terrain conditions when
operating this vehicle. If you are
operating a 2-UP model, always
keep in mind that you are carrying
a passenger.
Never operate on excessively
rough, slippery or loose terrain until you have learned and practiced
the skills necessary to control this
vehicle on such terrain. Always be
especially cautious on these kinds
of terrain. If you are operating a
2-UP model, always keep in mind
that you are carrying a passenger.
Always follow proper procedures
for turning as described further in
this Operator's Guide. Practice
turning at low speeds before attempting to turn at faster speeds.
Do not turn at excessive speed.
Carrying a passenger with 2-UP
models may affect the stability and
the handling of the vehicle.
Never operate this vehicle on hills
too steep for the vehicle or for your
abilities. Do not forget, with 2-UP
models, the operator is responsible
for the safety of the passenger. In
doubt, disembark him before climbing hill. Always remember that the
vehicle handling, stability and braking distance may be affected when
riding with a passenger.
Always follow proper procedures
for climbing hills as described
further in this Operator's Guide.
Check the terrain carefully before
you start up any hill. Never climb
hills with excessively slippery or
loose surfaces. Shift operator and
passenger (2-UP models) weight
forward. Never open the throttle suddenly or make sudden gear
changes. Never go over the top of
any hill at high speed. If you are
operating a 2-UP model, always
keep in mind that you are carrying
a passenger.
Always follow proper procedures
for going down hills and for braking on hills as described further in
this Operator's Guide. Check the
terrain carefully before you start
down any hill. Shift operator and
passenger (2-UP models) weight
backward. Never go down a hill at
high speed. Avoid going down a
hill at an angle that would cause the
vehicle to lean sharply to one side.
Go straight down the hill where
possible. If you are operating a
2-UP model, always keep in mind
that you are carrying a passenger.
Always follow proper procedures
for crossing the side of a hill as
described further in this Operator's
Guide. Avoid hills with excessively
slippery or loose surfaces. Shift
operator and passenger weight
(2-UP models) to the uphill side of
the vehicle. Never attempt to turn
the vehicle around on any hill until you have mastered the turning
technique described in this Operator's Guide on level ground. Avoid
crossing the side of a steep hill if
possible. If you are operating a
2-UP model, always keep in mind
that you are carrying a passenger.
___________
12
SAFETY INFORMATION
___________
Page 15

Always use proper procedures if
you stall or roll backwards when
climbing a hill. To avoid stalling,
use proper gear and maintain a
steady speed when climbing a hill.
If you stall or roll backwards, follow
the special procedure for braking
described in this Operator's Guide.
First, disembark the passenger
(2-UP models) then the operator.
Dismount on the uphill side or to a
side if pointed straight uphill. Turn
the vehicle around and remount,
following the procedure described
further in this Operator's Guide.
Always check for obstacles before
operating in a new area. Never attempt to operate over large obstacles, such as large rocks or fallen
trees. Always follow proper procedures when operating over obstacles as described further in this Operator's Guide. Do not forget, with
2-UP models, the operator is responsible for the safety of the passenger. In doubt, disembark him to
get through the obstacles.
Always be careful when skidding
or sliding. If you are operating a
2-UP model and have a passenger
onboard, never attempt skidding or
sliding; overturn or passenger ejection may occur. Learn to safelycontrol skidding or sliding by practicing
at low speeds and on level smooth
terrain. On extremely slippery surfaces, such as ice, go slowly and be
very cautious in order to reduce the
chance of skidding out of control.
Never operate this vehicle in fast
flowing water or in water deeper
than that specified in this Operator's Guide. Remember that wet
brakes may have reduced stopping
ability. Test your brakes after leaving water. If necessary, apply them
several times to let friction dry out
the pads. With 2-UP models, the
vehicle braking distance may be affected when riding with a passenger. Safely reduce speed when riding with a passenger. Allow greater
distance for braking.
Always be sure there are no ob-
stacles or people behind the vehicle when you operate in reverse.
When it is safe to proceed in reverse, go slowly. Take into account
that on a 2-UP model the passenger
can obstruct your view.
2-UP Models Only
Do not forget, the operator is re-
sponsible for the safety of the passenger. If in doubt, disembark him.
Always practice the maneuvers described in this Operator's Guide
without and with passenger. Always remember that the vehicle
handling, stability and braking distance may be affected when riding
with a passenger. Safely reduce
speed when riding with a passenger. Allow greater distance for
braking. In some situations, this
vehicle can be used easily with the
operator alone but not necessarily
with a passenger. Use your common sense.
Never carry passenger on a 2-UP
model if the storage box is installed
(in place of rear seat).
The operator and the passenger
must always keep both hands on
the handlebars or grab handles and
both feet on the footrests of the
vehicle during operation.
____________
SAFETY INFORMATION
___________
13
Page 16

Never operate a 2-UP model with-
out the passenger's seat or the storage box properly installed.
Operation
Never exceed the stated load lim-
its for this vehicle including operator
and passenger (2-UP models), all
other loads and added accessories.
Cargo should be properly distributed and securely attached. Reduce
speed and follow instructions in this
guide for carrying cargo or pulling
a trailer. Allow greater distance for
braking.
Always inspect your vehicle each
time you use it to make sure it is in
safe operating condition. Always
follow the inspection and maintenance procedures and schedules
described in this Operator's Guide.
Maintenance
Always use the tire size and type
specified further in this Operator's
Guide. Always maintain proper tire
pressure as described further in this
Operator's Guide.
Never modify this vehicle through
improper installation or use of accessories. Only use BRP's approved accessories. NEVER install
a passenger seats on a 1-UP model
or use the racks to carry a passenger.
Never take place on this vehicle
without wearing an approved helmet (including a chin guard) that fits
properly. You should also wear eye
protection (goggles or face shield),
gloves, boots, long sleeved shirt or
jacket, and long pants.
Once underway, if you feel uncom-
fortable or insecure for any reason,
don't wait, tell the driver to slow
down or stop.
Basics for Passenger
2-UP Models Only
You must be seated on the desig-
nated passenger's seat and hold on
to the grab handles at all times.
You must be 12 years old or more
and must be capable of keeping
your feet on the footrests and your
hands on grab handles at all times
when seated.
___________
14
SAFETY INFORMATION
___________
Page 17
OPERATION WARNINGS
While reading this Operator’s Guide, remember that:
WARNING
Indicates a potential hazard that, if not avoided, could result in serious injury or death.
NOTE: The following illustrations are general representations only. Your model
may differ.
WARNING
V00A0AQ
POTENTIAL HAZARD
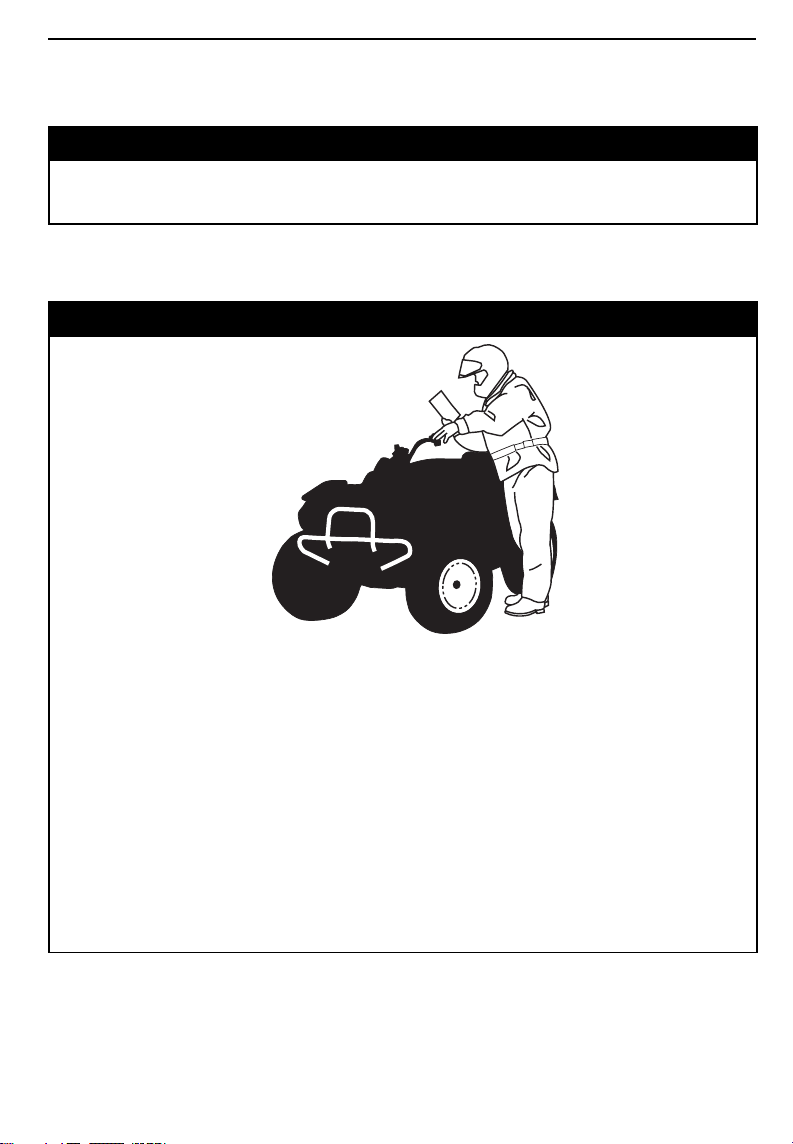
Operating this vehicle without proper instruction.
WHAT CAN HAPPEN
The risk of an accident is greatly increased if the operator does not know
how to operate this vehicle properly in different situations and on different
types of terrain with or without passenger (2-UP models).
HOW TO AVOID THE HAZARD
Beginning and inexperienced operators should complete a training course.
They should then regularly practice the skills learned in the course and the
operating techniques described in this Operator's Guide.
For more information about a training course, contact an authorized
Can-Am ATV distributor/dealer.
____________
SAFETY INFORMATION
___________
15
Page 18
WARNING
V00A1AQ
POTENTIAL HAZARD
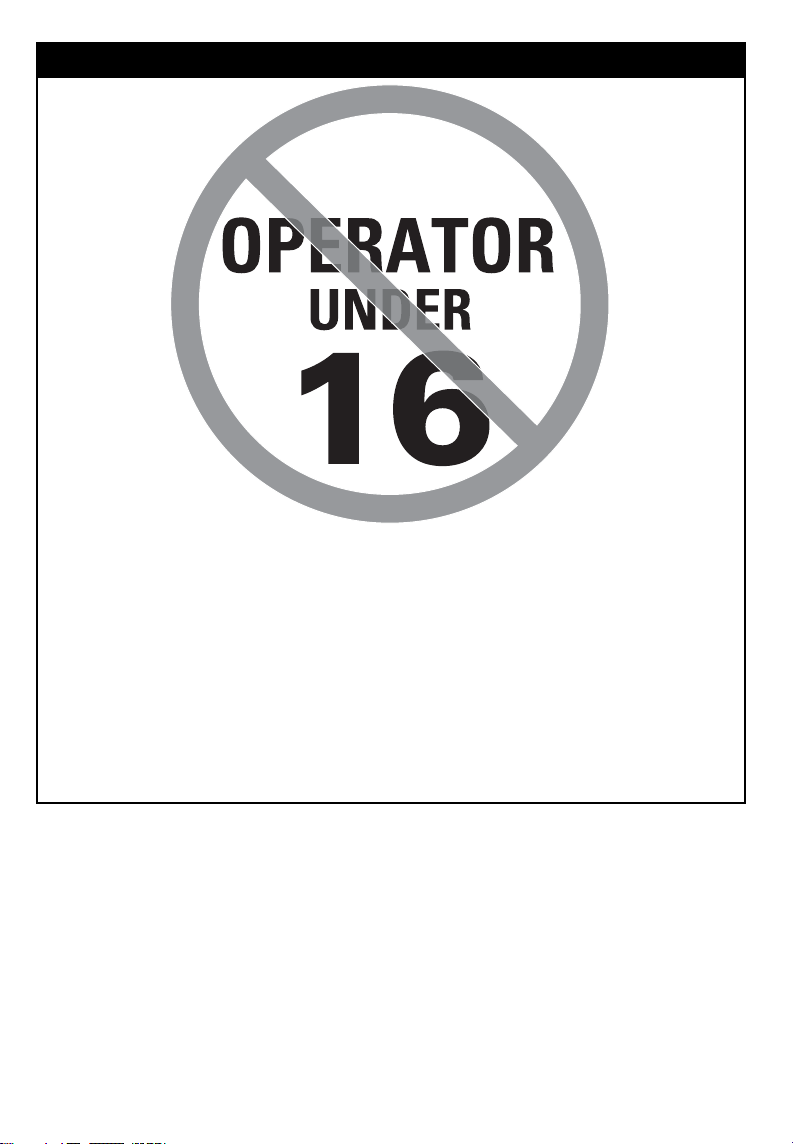
Failure to follow the age recommendations for this vehicle.
WHAT CAN HAPPEN
A lack of respect for this age recommendation can lead to severe injury or
death of the child.
Even though a child may be within the age group for which this vehicle is
recommended, he may not have the skills, abilities, or judgment needed
to operate this vehicle safely and may be involved in a serious accident.
HOW TO AVOID THE HAZARD
No one under 16 should operate this vehicle.
___________
16
SAFETY INFORMATION
___________
Page 19
2-UP Models Only
WARNING
V00A1BQ
POTENTIAL HAZARD
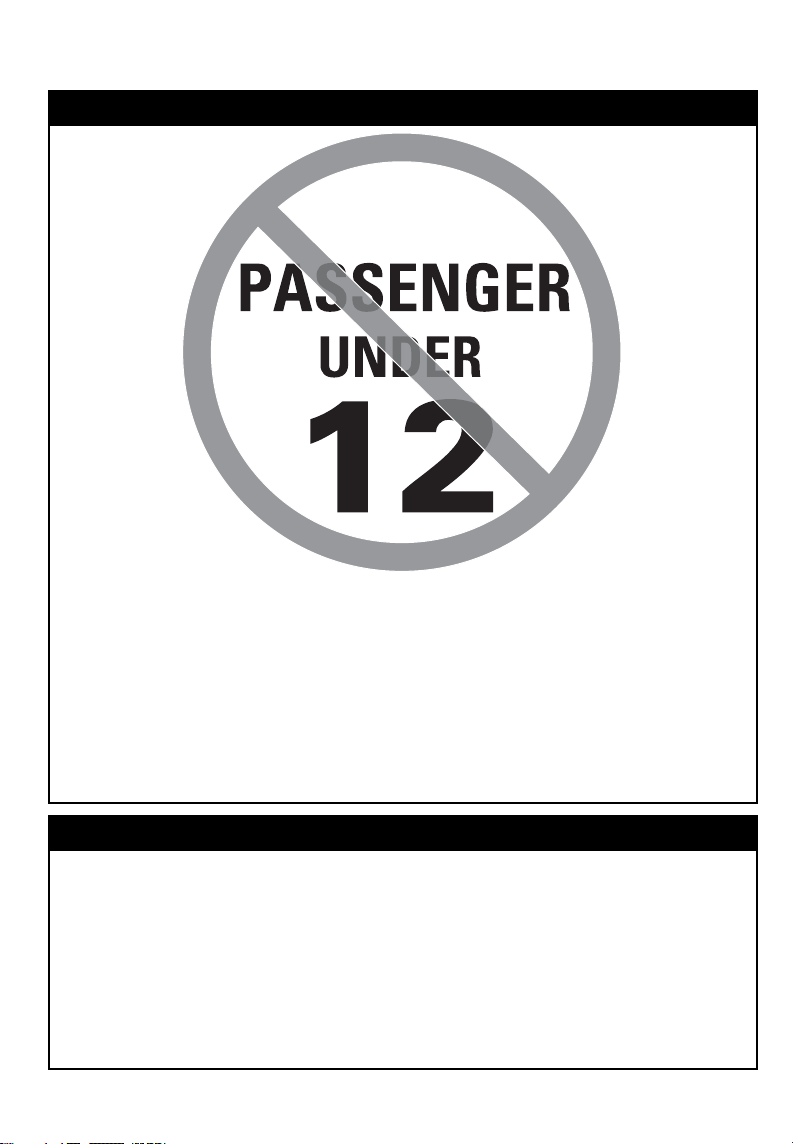
Failure to follow the age recommendations on 2-UP models for the passenger.
WHAT CAN HAPPEN
A child, under 12, may not have the ability needed to ride safely and may
be involved in a serious accident.
HOW TO AVOID THE HAZARD
No one under 12 should be riding on this vehicle.
WARNING
POTENTIAL HAZARD
Failure to respect the physical limitations of the passenger on 2-UP models.
WHAT CAN HAPPEN
A passenger that cannot completely lean his feet on footrests can be ejected when riding on uneven terrain.
HOW TO AVOID THE HAZARD
The passenger must be capable of keeping his feet on the footrests and his
hands on grab handles at all times when he is seated on the vehicle.
____________
SAFETY INFORMATION
___________
17
Page 20
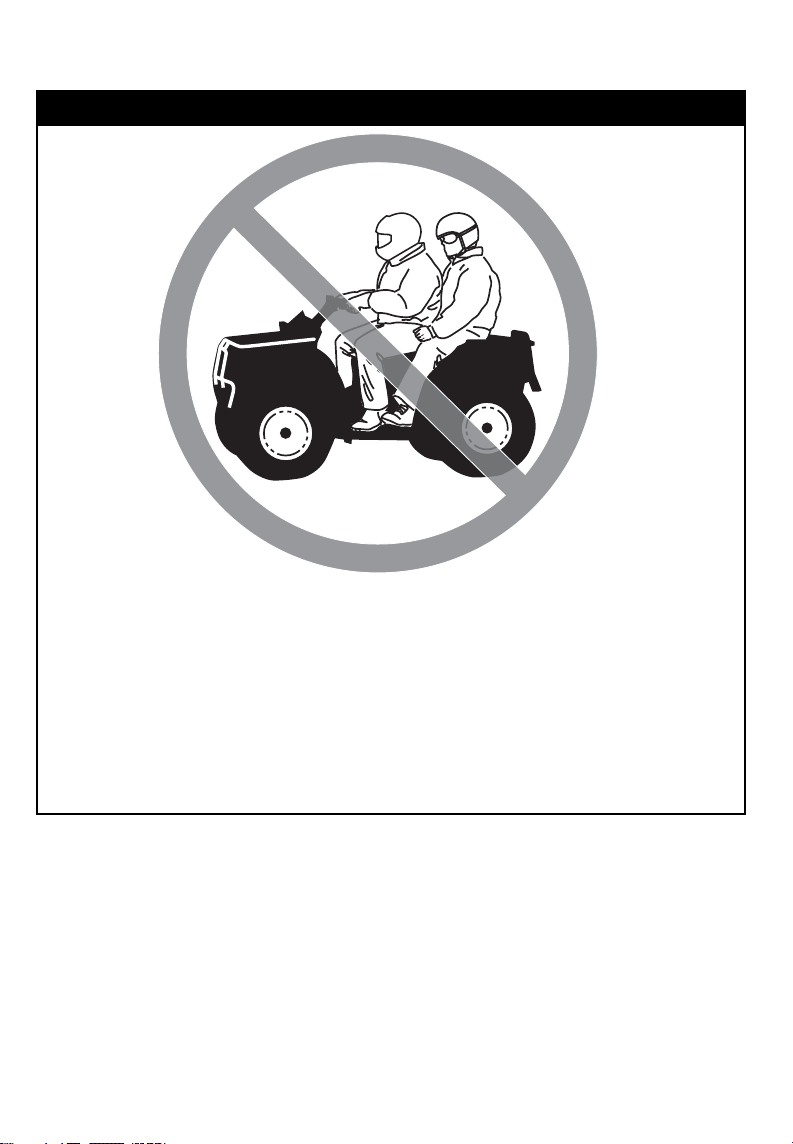
1-UP Models Only
WARNING
V00A02Q
POTENTIAL HAZARD
Carrying a passenger on this vehicle.
WHAT CAN HAPPEN
Greatly reduces your ability to balance and control this vehicle.
Could cause an accident, resulting in harm to you and/or your passenger.
HOW TO AVOID THE HAZARD
Never carry passenger. Even with a long seat that provides unrestricted
operator movement, it is not designed nor intended to carry passenger(s).
___________
18
SAFETY INFORMATION
___________
Page 21
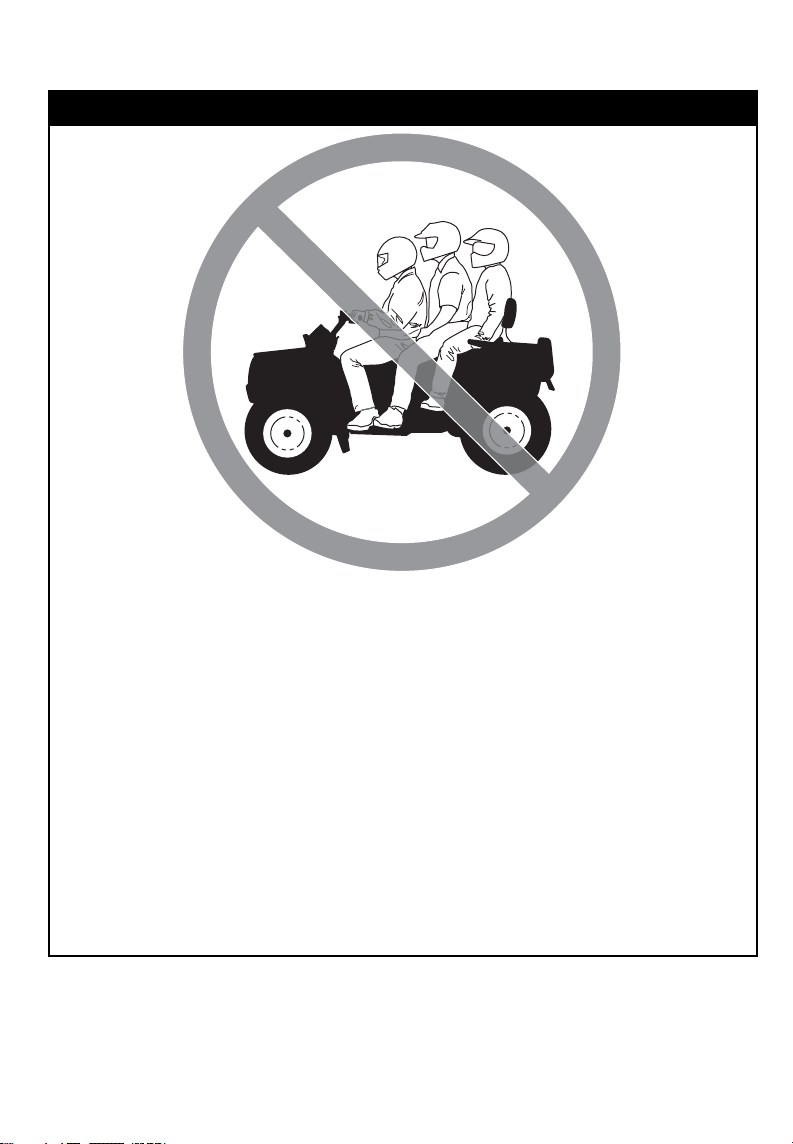
2-UP Models Only
WARNING
V00A1CQ
POTENTIAL HAZARD
Carrying more than one (1) passenger on this vehicle.
WHAT CAN HAPPEN
Carrying more than one (1) passenger reduces your ability to balance and
control this vehicle.
Could cause an accident, resulting in harm to you and/or your passengers.
HOW TO AVOID THE HAZARD
Never carry more than one (1) passenger. Even with a long seat that provides unrestricted operator movement, the vehicle is not designed nor intended to carry more than one (1) operator and one (1) passenger. The
passenger must be used the designated passenger's seat when he is seated on the vehicle.
When the storage box is installed (in place of rear seat), the vehicle becomes a ONE-RIDER vehicle (1-UP model) and NO PASSENGER must be
allowed on it.
____________
SAFETY INFORMATION
___________
19
Page 22
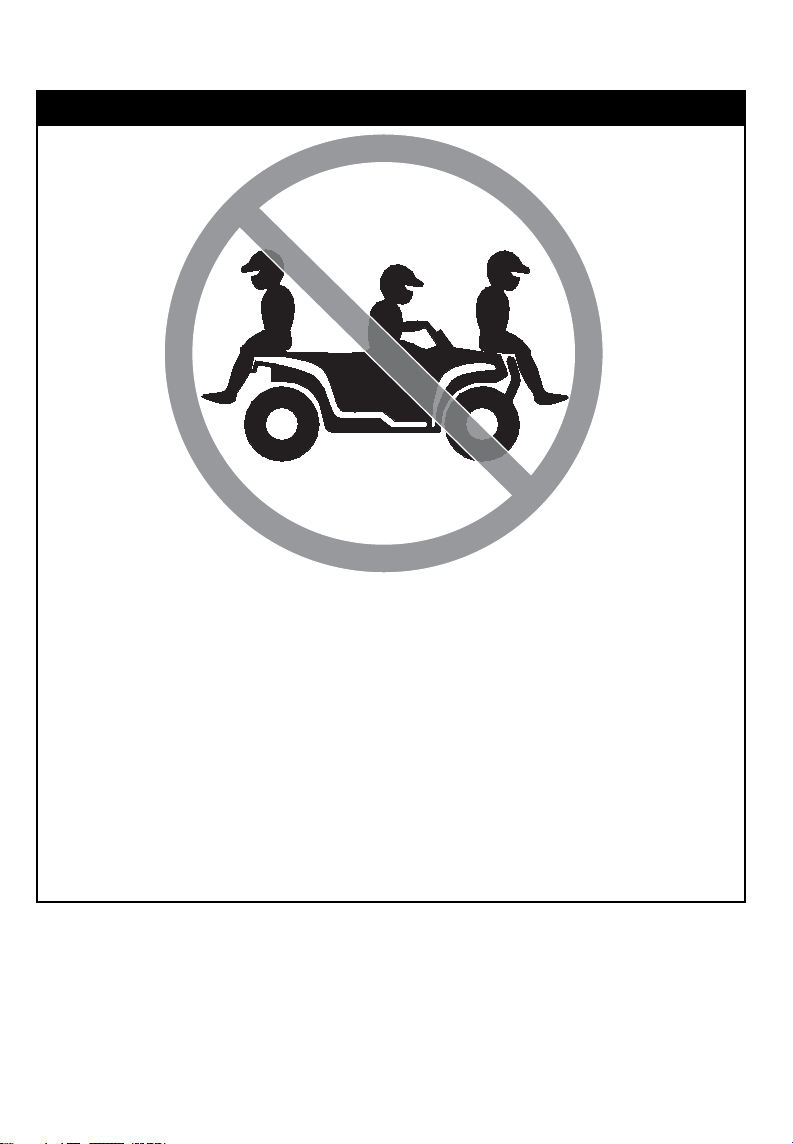
2-UP Models Only
WARNING
V00A2DQ
POTENTIAL HAZARD
Allowing passenger to sit in a location other than the designated passenger's seat.
WHAT CAN HAPPEN
Passenger seated in a location other than the designated passenger's seat
could:
– impair vehicle stability which could lead to a loss of control
– suffer injury from impact on hard surfaces.
Could cause an accident, resulting in harm to you and/or your passenger.
HOW TO AVOID THE HAZARD
Passenger must always remain seated on designated passenger's seat with
feet firmly planted on footrests and always hold on to the grab handles.
___________
20
SAFETY INFORMATION
___________
Page 23
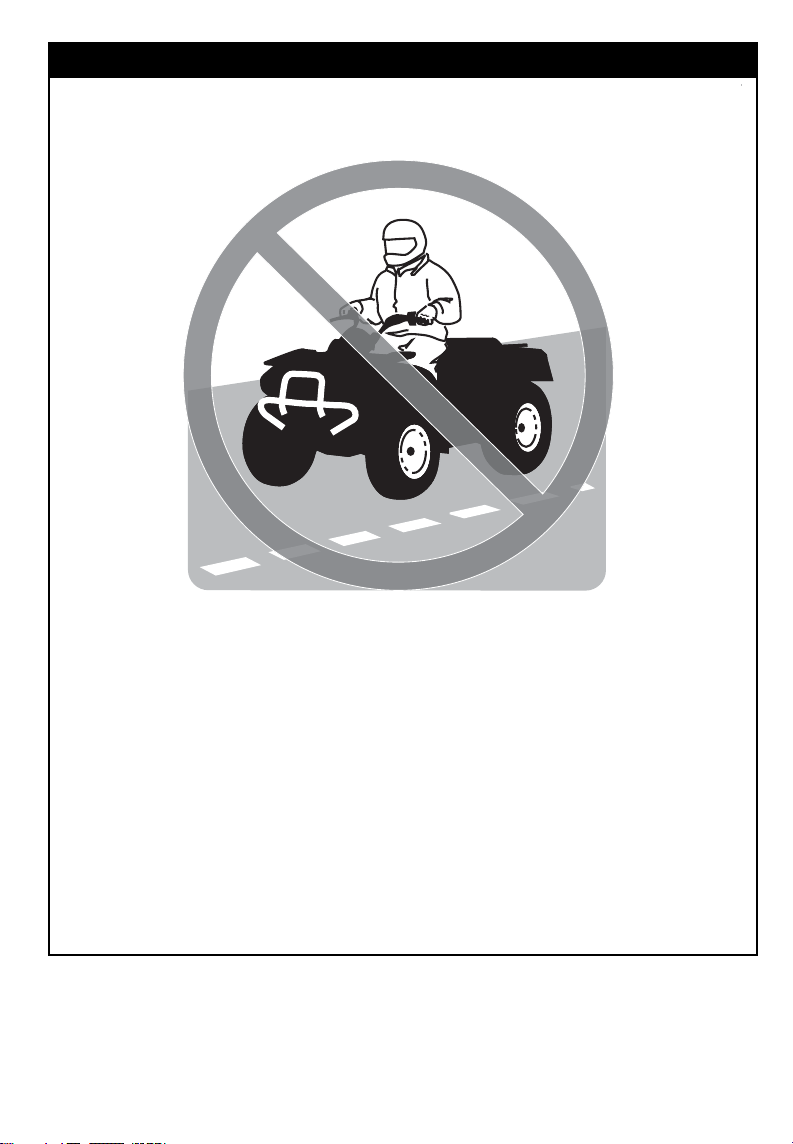
WARNING
V00A04Q
POTENTIAL HAZARD
Operating this vehicle on public streets, roads or highways.
WHAT CAN HAPPEN
You can collide with another vehicle. Paved surfaces may seriously affect
handling and control of the vehicle, and may cause the vehicle to go out
of control.
HOW TO AVOID THE HAZARD
If a road usage is allowed in your area, operate your vehicle on paved surfaces only forshort distance and forthe only purpose of movingthe vehicle
from an off-road usage to another.
Always operate your vehicle at low speed (never exceed 65 km/h (40 MPH))
and reduce the speed before making a turn.
Always respect all road traffic laws when operating your vehicle on public
roads or streets.
____________
SAFETY INFORMATION
___________
21
Page 24
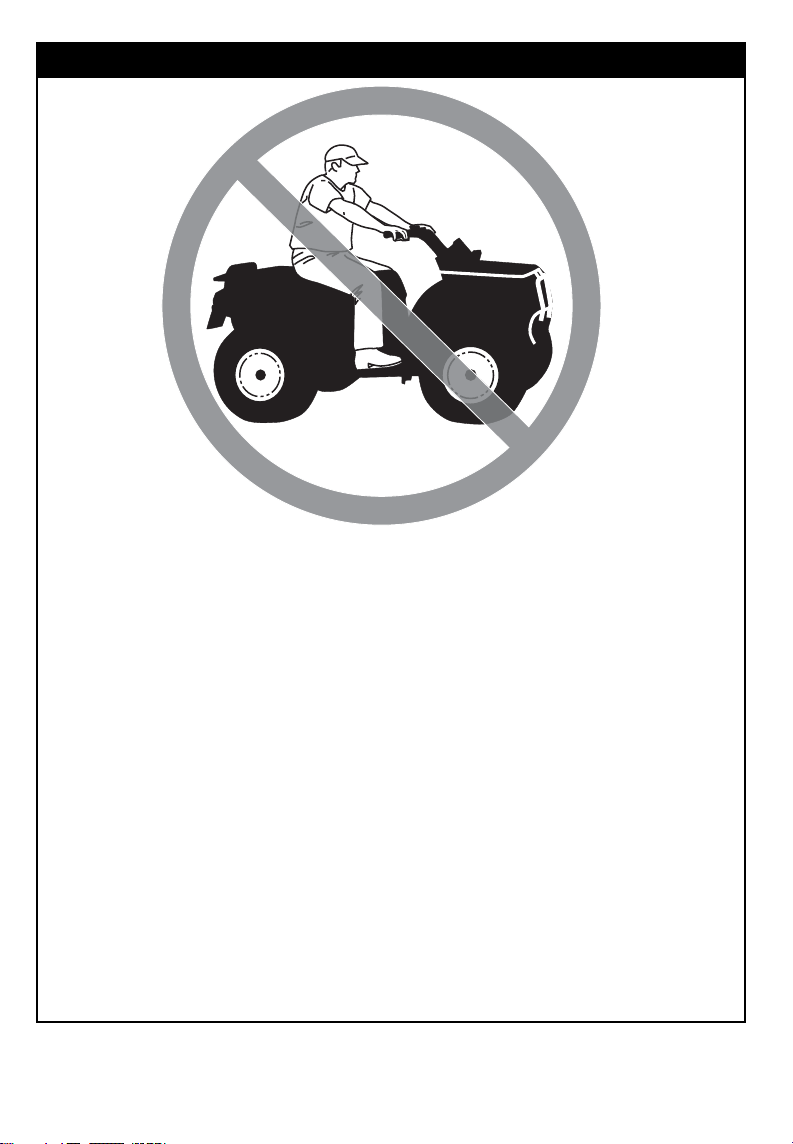
WARNING
V00A06Q
POTENTIAL HAZARD
Riding this vehicle without wearing an approved helmet, eye protection
and protective clothing. On 2-UP models, passenger should also have an
approved helmet with a rigid chin guard.
WHAT CAN HAPPEN
The following items concern the operator and the passenger (2-UP models):
– riding without an approved helmet increases the chances of a severe
head injury or death in the event of an accident
– riding without eye protection can result in an accident and increases
the chances of a severe injury in the event of an accident
– riding without protective clothing increases the chances of severe in-
jury in the event of an accident.
HOW TO AVOID THE HAZARD
Always wear an approved helmet that fits properly. You should also wear:
– eye protection (goggles or face shield)
– rigid chin guard (recommended for the passenger)
– gloves and boots
– Iong sleeved shirt or jacket
–Iongpants.
___________
22
SAFETY INFORMATION
___________
Page 25
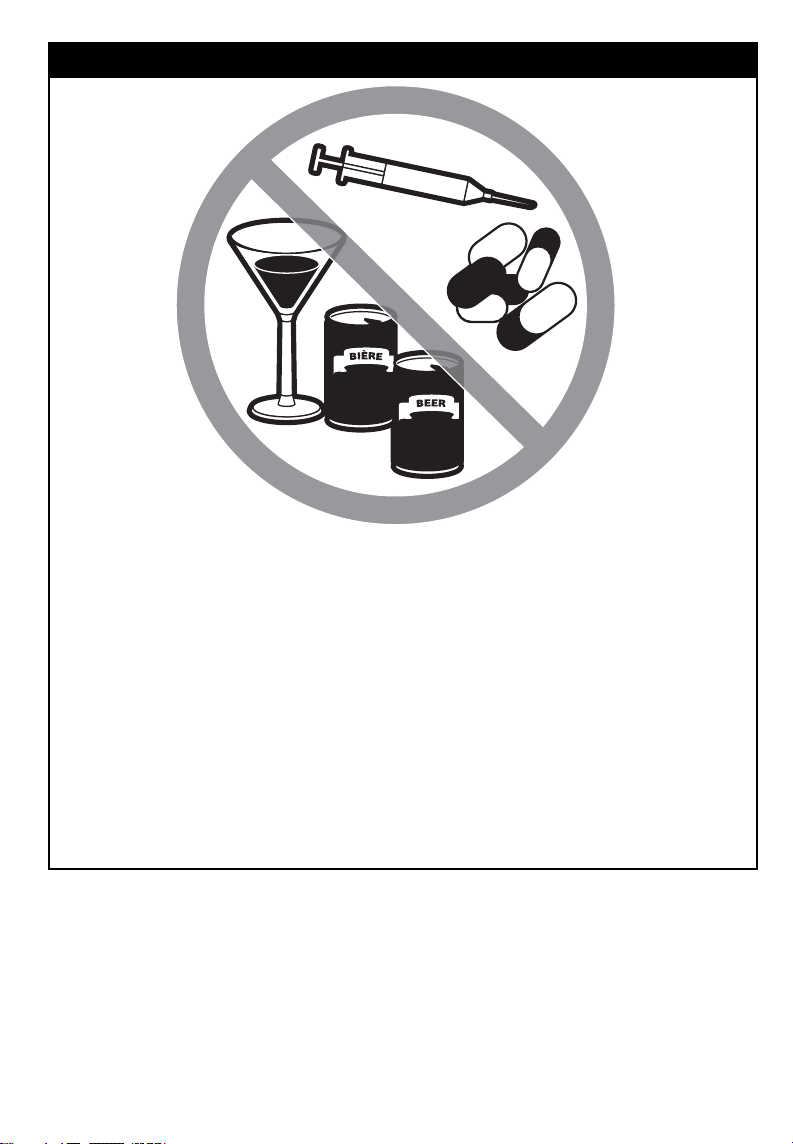
WARNING
V00A07Q
POTENTIAL HAZARD
Riding this vehicle after consuming alcohol or drugs.
WHAT CAN HAPPEN
Could cause the passenger to fall off (2-UP models).
Could seriously affect your judgment.
Could cause you to react more slowly.
Could affect your balance and perception.
Could result in an accident or death of passenger (2-UP models) and/or
operator.
HOW TO AVOID THE HAZARD
The operator and the passenger (2-UP models) should never consume alcohol or drugs before or while riding this vehicle.
____________
SAFETY INFORMATION
___________
23
Page 26
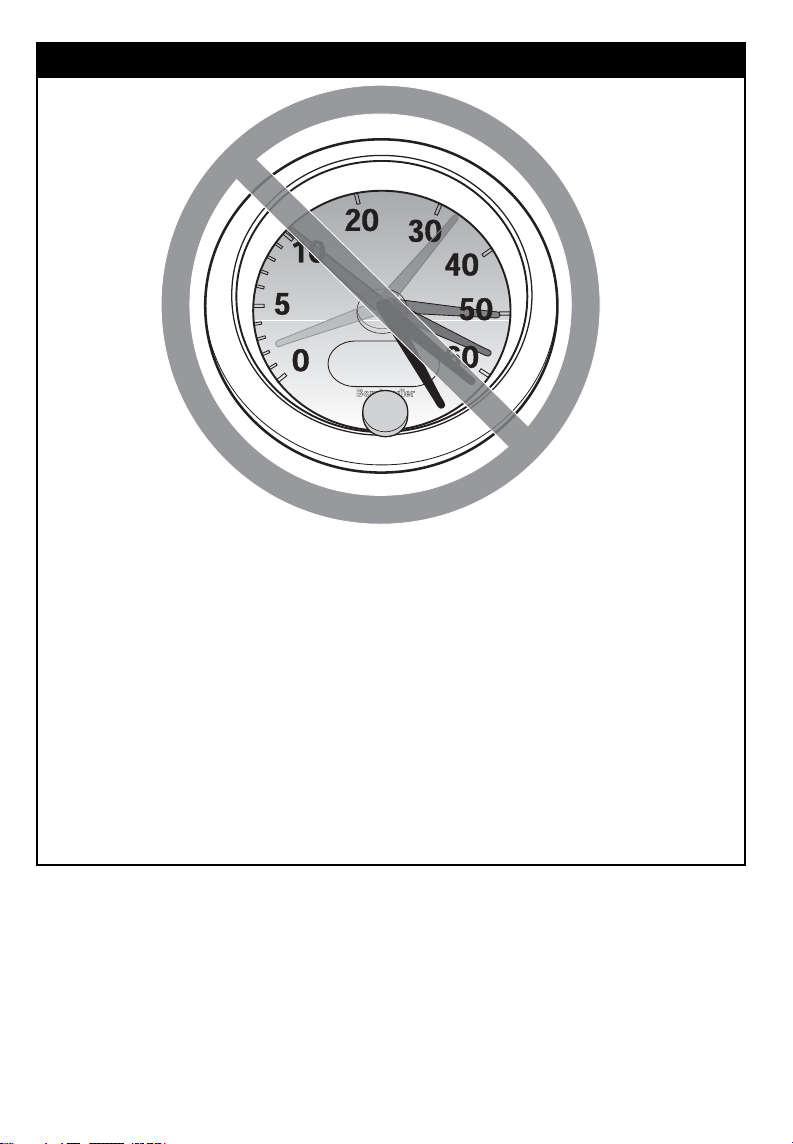
WARNING
V00A08Q
POTENTIAL HAZARD
Operating this vehicle at excessive speeds.
WHAT CAN HAPPEN
Increases your chances of losing control of the vehicle, which can result in
an accident.
HOW TO AVOID THE HAZARD
Always travel at a speed which is proper for the terrain, visibility and operating conditions, and your experience. The maximum speed authorized
with this vehicle is 65 km/h (40 MPH). Always reduce speed before making
aturn.
On 2-UP models, the vehicle handling, stability and braking distance may
be affected when riding with a passenger. Safely reduce speed when riding with a passenger. Allow greater distance for braking.
___________
24
SAFETY INFORMATION
___________
Page 27
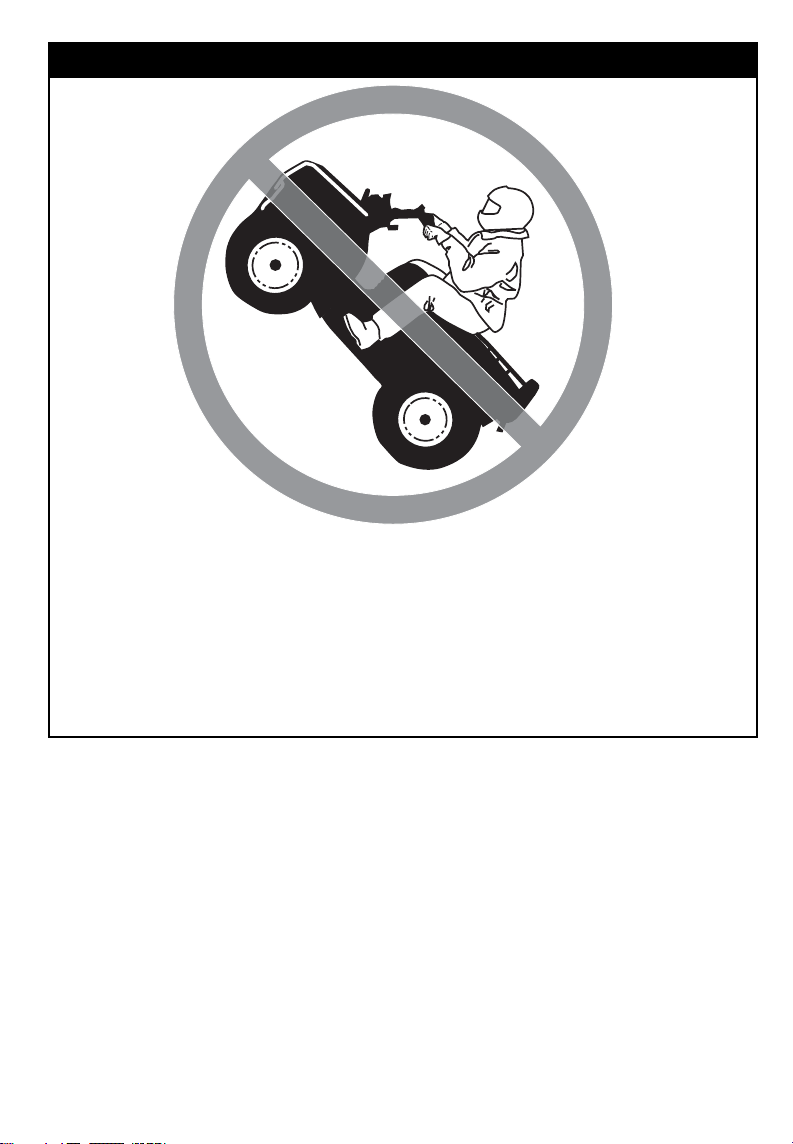
WARNING
V00A09Q
POTENTIAL HAZARD
Attempting wheelies, jumps and other stunts.
WHAT CAN HAPPEN
Increases the chance of an accident, for the operator and the passenger
(2-UP models), including an overturn.
HOW TO AVOID THE HAZARD
Never attempt stunts, such as wheelies or jumps. Do not try to show off.
____________
SAFETY INFORMATION
___________
25
Page 28

WARNING
POTENTIAL HAZARD
Failure to inspect the vehicle before operating.
Failure to properly maintain the vehicle.
WHAT CAN HAPPEN
Increases the possibility of an accident or equipment damage.
HOW TO AVOID THE HAZARD
Always inspect your vehicle each time you use it to make sure the vehicle
is in safe operating condition.
Always follow the inspection and maintenance procedures and schedules
described further in this Operator's Guide.
WARNING
POTENTIAL HAZARD
Riding on frozen waterways.
WHAT CAN HAPPEN
Severe injury or death can result if the vehicle and/or operator and/or passenger (2-UP models) break through the ice.
HOW TO AVOID THE HAZARD
Never ride this vehicle on a frozen surface before you are sure the ice is
thick enough and sound enough to support the vehicle and its load, as
well as the force that is created by a moving vehicle.
___________
26
SAFETY INFORMATION
___________
Page 29
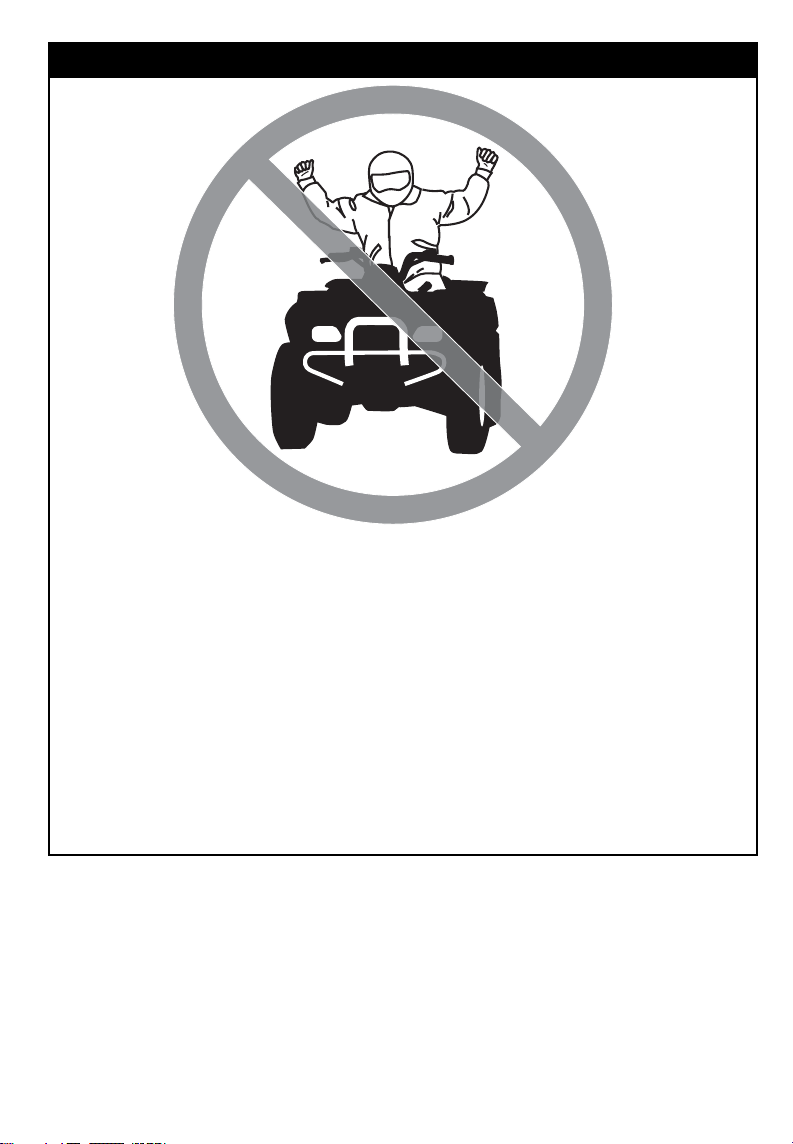
WARNING
V00A0BQ
POTENTIAL HAZARD
Removing hands from handlebars for the operator and from grab handles
for the passenger (2-UP models), or feet from the footrests during operation.
WHAT CAN HAPPEN
Removing even one hand or foot can reduce your ability to control the
vehicle or could cause you to lose your balance and fall off the vehicle.
If you remove a foot from the footrests, your foot or leg may come into
contact with the rear wheels, which could injure you or cause an accident.
HOW TO AVOID THE HAZARD
Operator and passenger (2-UP models) must always keep both hands on
the handlebars or on grab handles and both feet on the footrests during
vehicle operation.
____________
SAFETY INFORMATION
___________
27
Page 30
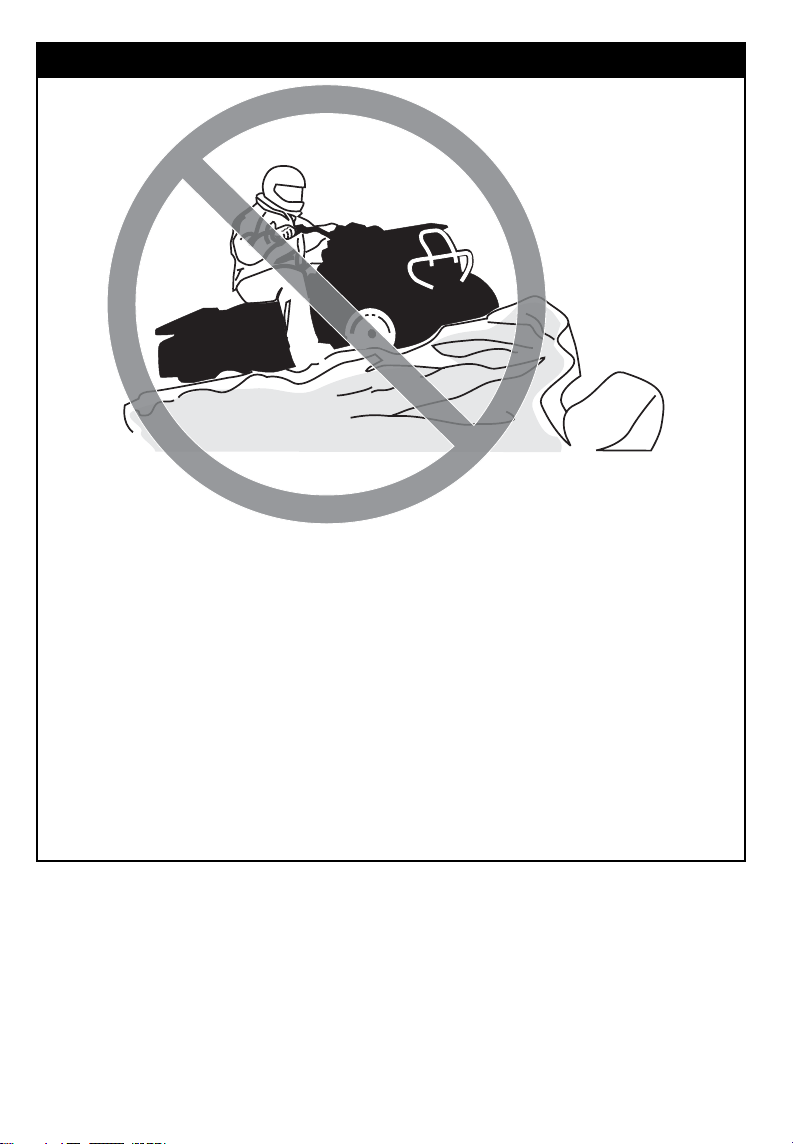
WARNING
V00A0CQ
POTENTIAL HAZARD
Failure to use extra care when operating this vehicle on unfamiliar terrain.
WHAT CAN HAPPEN
You can come upon hidden rocks, bumps, or holes, without enough time
to react.
Could result in the vehicle overturning, passenger ejection (2-UP models)
or loss of control.
HOW TO AVOID THE HAZARD
Go slowly and be extra careful when operating on unfamiliar terrain.
Always be alert to changing terrain conditions when operating the vehicle.
Do not forget, on 2-UP models, the operator is responsible for the safety
of his passenger. Safely reduce speed when riding with a passenger.
___________
28
SAFETY INFORMATION
___________
Page 31
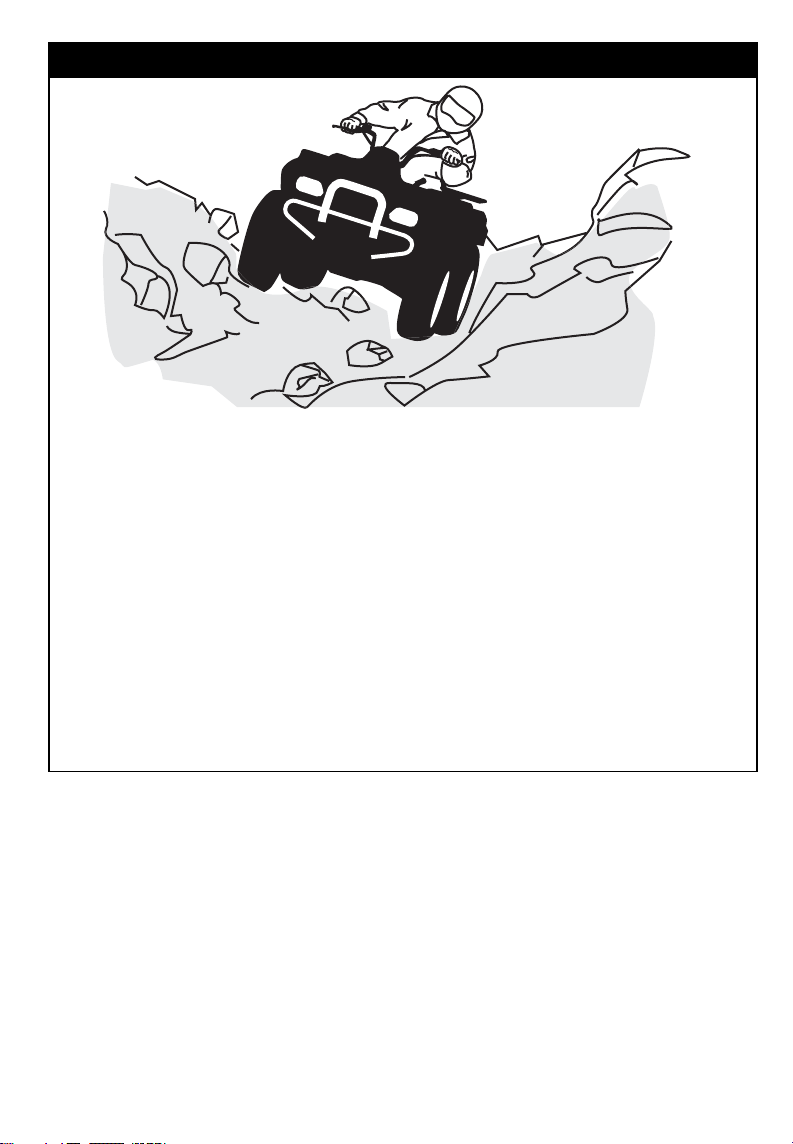
WARNING
V00A0DQ
POTENTIAL HAZARD
Failure to use extra care when operating on excessively rough, slippery or
loose terrain.
WHAT CAN HAPPEN
Could cause loss of traction or vehicle control, which could result in an
accident, including an overturn or passenger ejection (2-UP models).
HOW TO AVOID THE HAZARD
Do not operate on excessively rough, slippery or loose terrain until you
have learned and practiced the skills necessary to control this vehicle on
such terrain.
Always be especially cautious on these kinds of terrain.
Do not forget, on 2-UP models, the operator is responsible for the safety
of the passenger. In doubt, disembark him before operating on these terrains.
____________
SAFETY INFORMATION
___________
29
Page 32
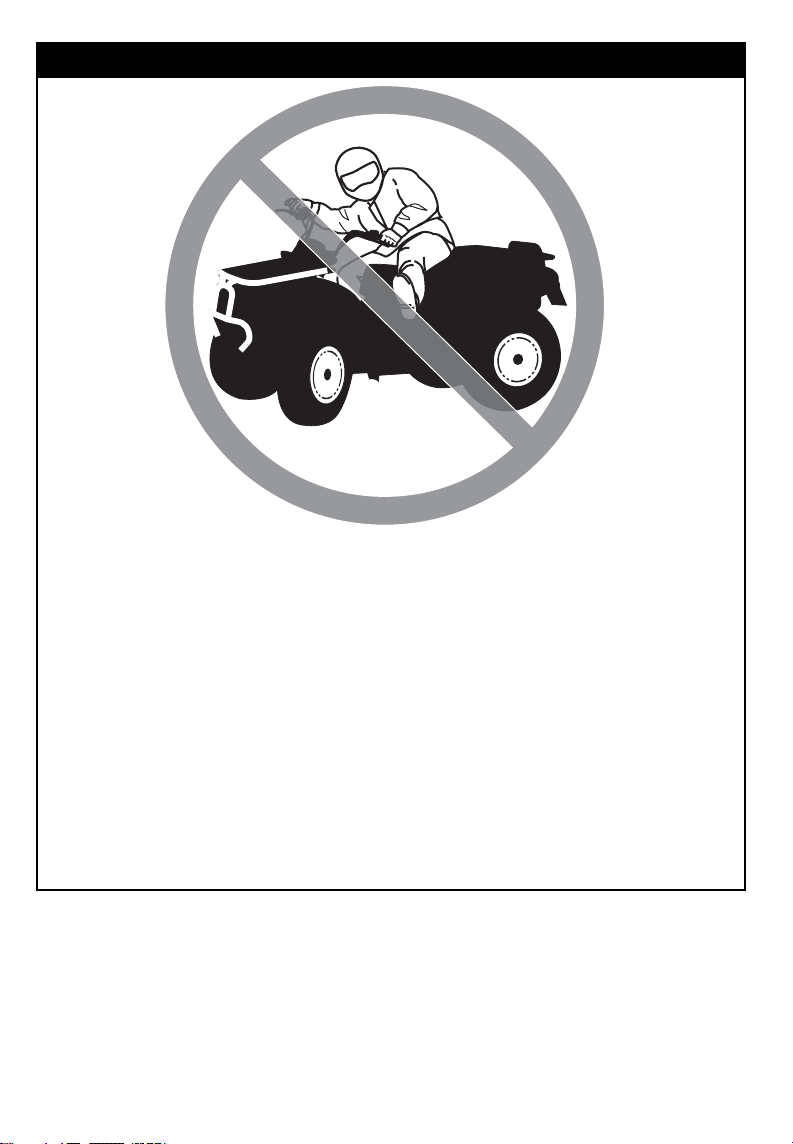
WARNING
V00A0EQ
POTENTIAL HAZARD
Turning improperly.
WHAT CAN HAPPEN
Vehicle could go out of control, causing a collision, an overturn or a passenger ejection (2-UP models).
HOW TO AVOID THE HAZARD
Always follow proper procedures for turning as described further in this
Operator's Guide. Practice turning at low speeds before attempting to turn
at faster speeds.
Do not forget, on 2-UP models, the operator is responsible for the safety
of the passenger. Never perform this maneuver with a passenger. Always
remember that the vehicle handling, stability and braking distance may be
affected when riding with a passenger.
Do not turn at excessive speed.
___________
30
SAFETY INFORMATION
___________
Page 33
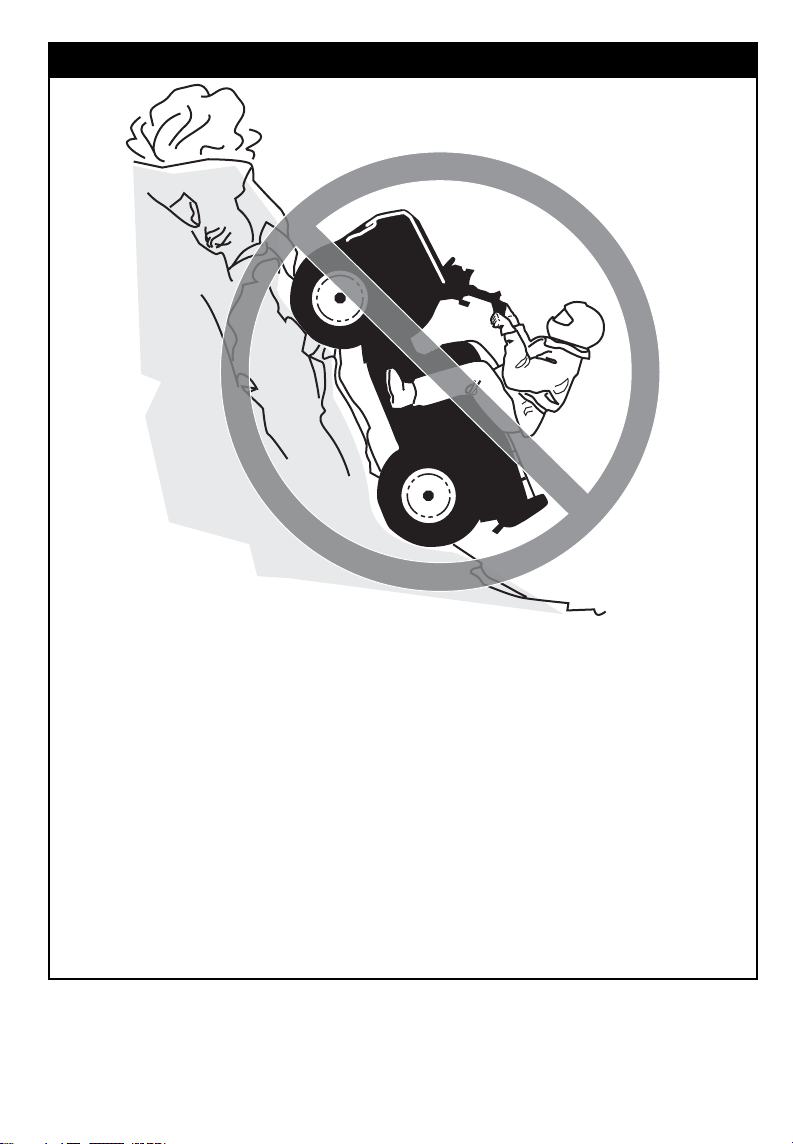
WARNING
V00A0QQ
POTENTIAL HAZARD
Operating on excessively steep hills.
WHAT CAN HAPPEN
The vehicle can overturn more easily on extremely steep hills than on level
surfaces or small hills.
HOW TO AVOID THE HAZARD
Never operate this vehicle on hills too steep for the vehicle or for your abilities.
Practice, without and with passenger (2-UP models), on smaller hills before
attempting larger hills.
Always remember that, on 2-UP models, even if this vehicle can climb
some steep hills, it is not recommended to climb such hills with a passenger; always disembark him before attempting this maneuver. Show good
judgement.
____________
SAFETY INFORMATION
___________
31
Page 34
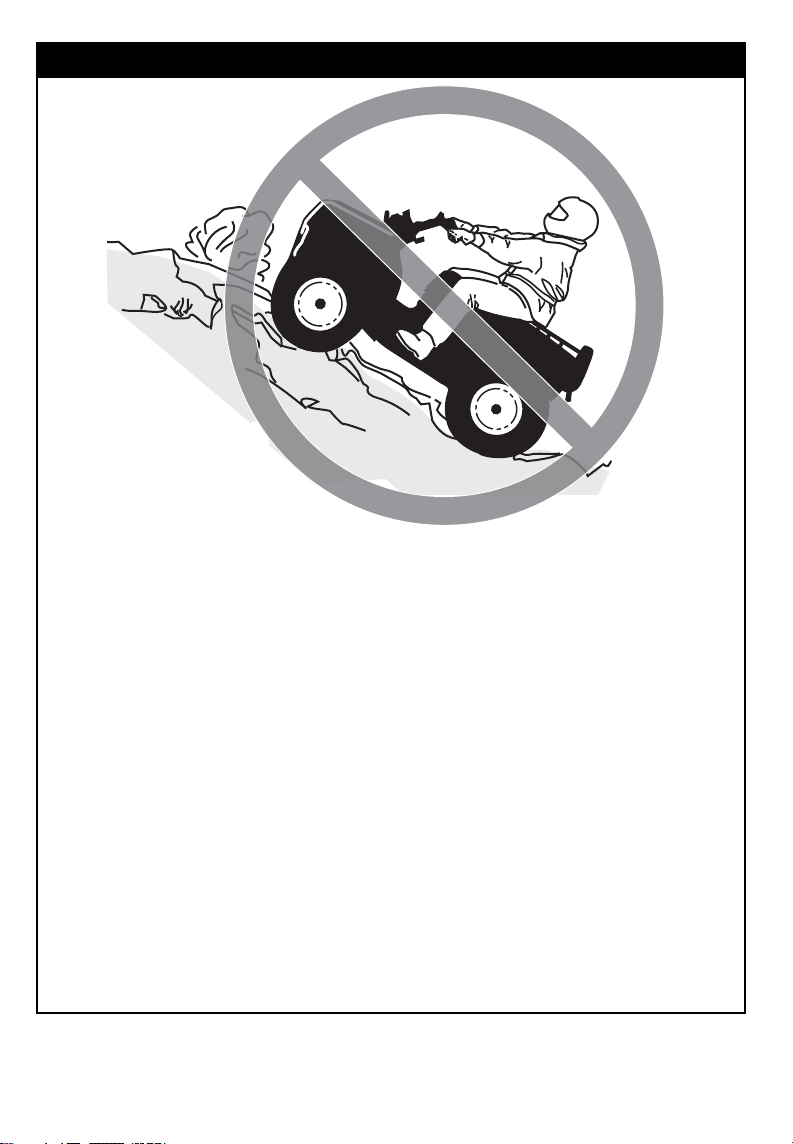
WARNING
V00A0FQ
POTENTIAL HAZARD
Climbing hills improperly.
WHAT CAN HAPPEN
Could cause loss of control, passenger ejection (2-UP models) or cause
vehicle to overturn.
HOW TO AVOID THE HAZARD
Always follow proper procedures for climbing hills as described further in
this Operator's Guide.
Always check the terrain carefully before you start up any hill. Do not forget, on 2-UP models, the operator is responsible for the safety of the passenger. In doubt, disembark him before climbing hill. Always remember
that the vehicle handling, stability and braking distance may be affected
when riding with a passenger.
Never climb hills with excessively slippery or loose surfaces.
Shift operator and passenger (2-UP models) weight forward.
Never open the throttle suddenly or make sudden gear changes. The ve-
hicle could flip over backwards.
Never go over the top of any hill at high speed. An obstacle, a sharp drop,
or another vehicle or person could be on the other side of the hill.
___________
32
SAFETY INFORMATION
___________
Page 35
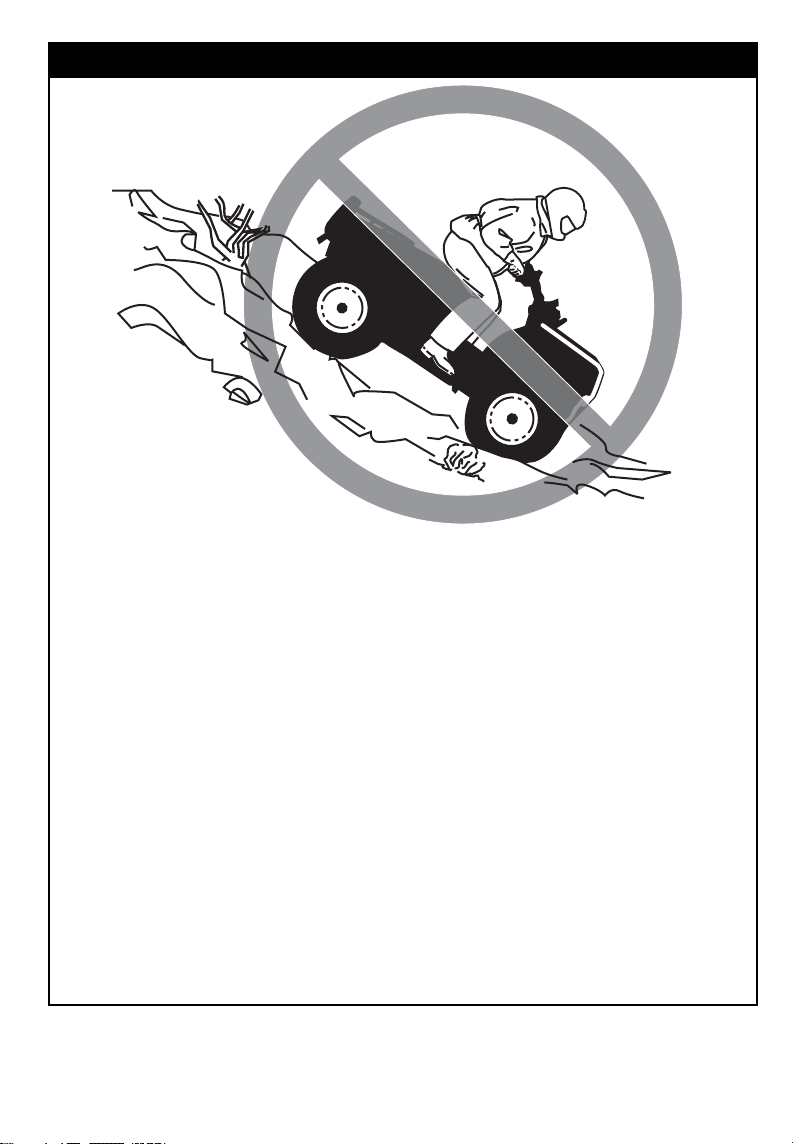
WARNING
V00A0GQ
POTENTIAL HAZARD
Going down a hill improperly.
WHAT CAN HAPPEN
Could cause loss of control, passenger ejection (2-UP models) or cause
vehicle to overturn.
HOW TO AVOID THE HAZARD
Always follow proper procedures for going down hills as described further
in this Operator's Guide. NOTE: A special technique is required when brak-
ing as you go down a hill.
Always check the terrain carefully before you start down any hill. Do not
forget, on 2-UP models, the operator is responsible for the safety of the
passenger. In doubt, disembark him before going down hill. Always remember that the vehicle handling, stability and braking distance may be
affected when riding with a passenger.
Shift operator and passenger (2-UP models) weight backward. On 2-UP
models, passenger must hold the grab handles firmly.
Never go down a hill at high speed.
Avoid going down a hill at an angle which would cause the vehicle to lean
sharply to one side. Go straight down the hill where possible.
____________
SAFETY INFORMATION
___________
33
Page 36
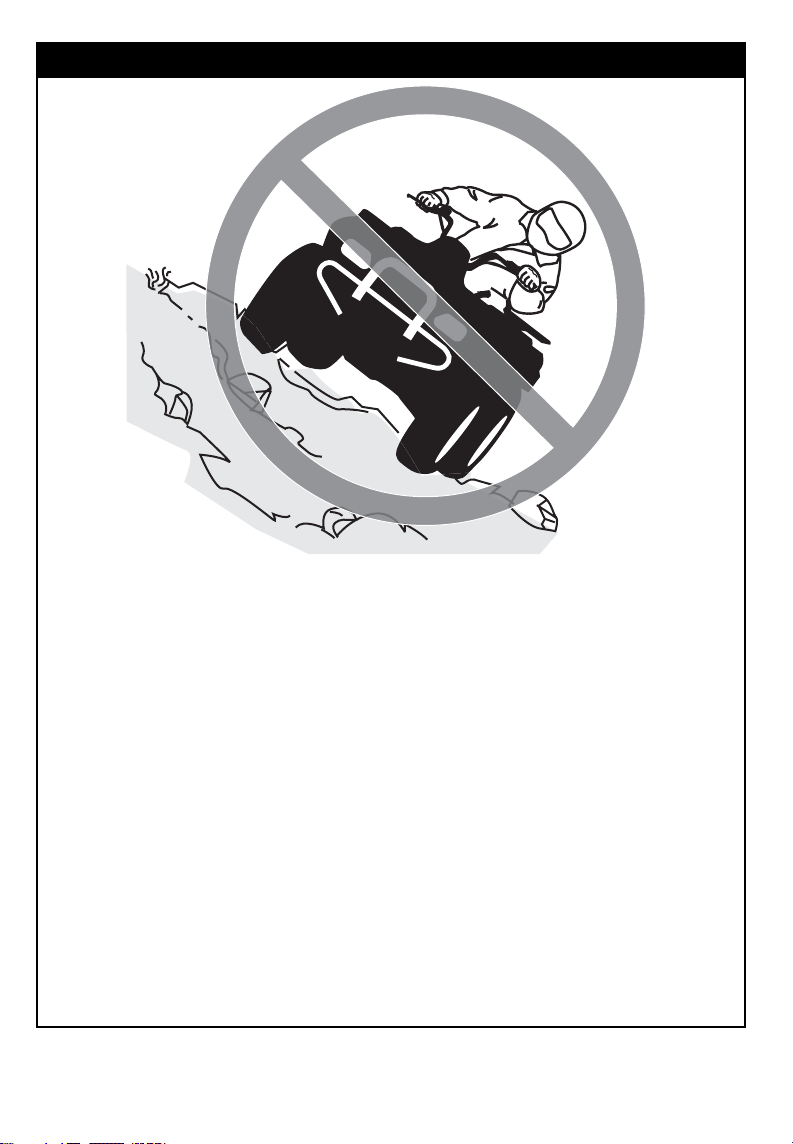
WARNING
V00A0HQ
POTENTIAL HAZARD
Improperly crossing hills or turning on hills.
WHAT CAN HAPPEN
Could cause loss of control, passenger ejection (2-UP models) or cause
vehicle to overturn.
HOW TO AVOID THE HAZARD
Never attempt this maneuver on 2-UP models when the passenger is on
board. Always disembark him before executing.
Never attempt to turn the vehicle around on any hill until you have mastered the turning technique as described further in this Operator's Guide
on level ground. Be very careful when turning on any hill.
Avoid crossing the side of a steep hill if possible.
When crossing the side of a hill:
Always follow proper procedures as described further in this Operator's
Guide.
Avoid hills with excessively slippery or loose surfaces.
Operator and passenger (2-UP models) must shift their weight to the uphill
side of the vehicle.
___________
34
SAFETY INFORMATION
___________
Page 37
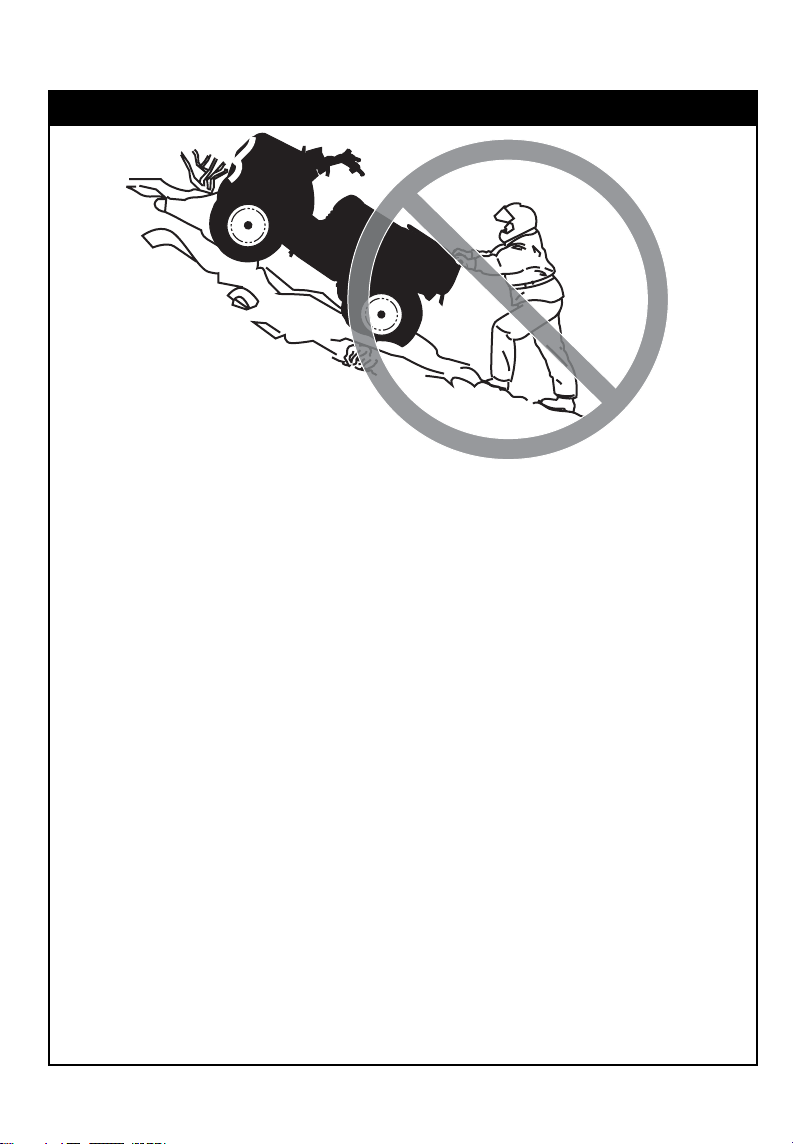
1-UP Models Only
WARNING
V00A0IQ
POTENTIAL HAZARD
Stalling, rolling backwards or improperly dismounting while climbing a
hill.
WHAT CAN HAPPEN
Could result in vehicle overturning.
HOW TO AVOID THE HAZARD
Use proper gear and maintain steady speed when climbing a hill.
If you lose all forward speed:
Keep your weight uphill. Never open the throttle suddenly or make sudden
gear changes. The vehicle could flip over backwards.
Apply the brakes.
Lock parking brake after you are stopped.
Dismount on uphill side, or to a side if pointed straight uphill.
If you begin rolling backwards:
Keep your weight uphill. Never open the throttle suddenly or make sudden
gear changes. The vehicle could flip over backwards.
Never apply the rear brake while rolling backwards.
Apply the front brake gradually.
When fully stopped, apply rear brake as well and lock parkin
Dismount on uphill side, or to a side if pointed straight uphill.
Turn the vehicle around and remount, following the procedure described
further in this Operator's Guide.
gbrake.
____________
SAFETY INFORMATION
___________
35
Page 38
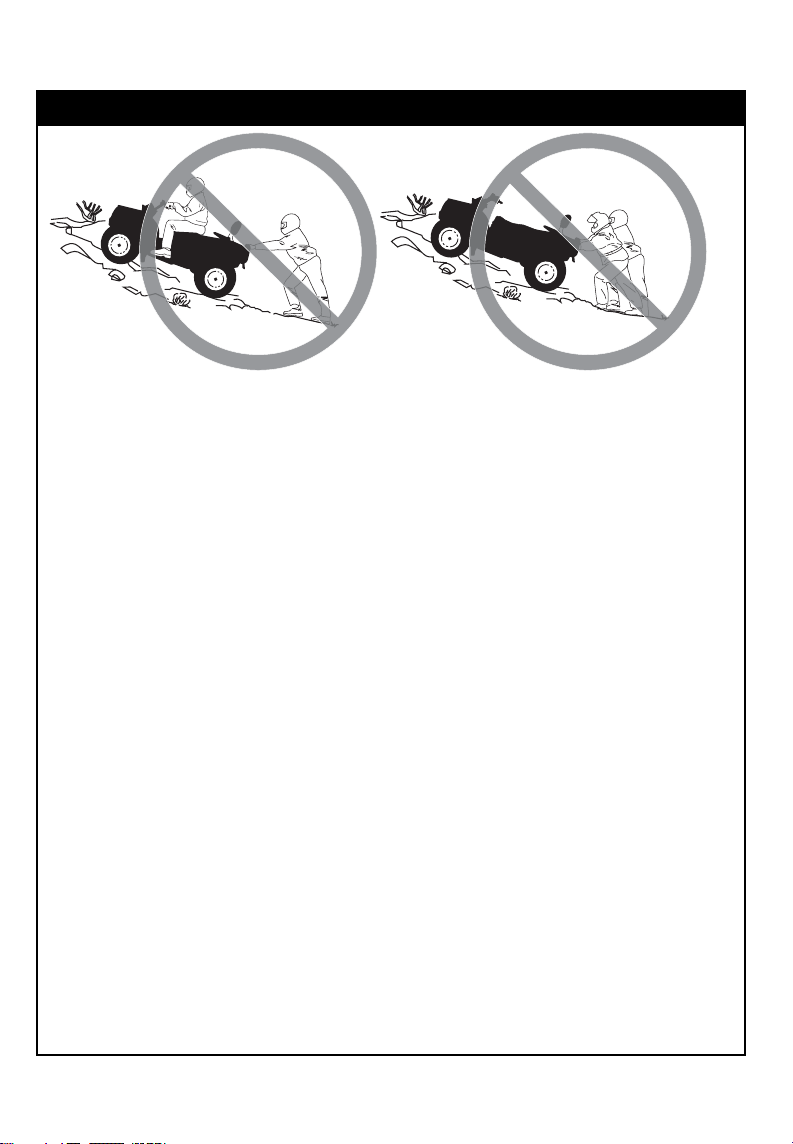
2-UP Models Only
WARNING
V00A1PQ
POTENTIAL HAZARD
Stalling, rolling backwards or improperly dismounting while climbing a
hill.
WHAT CAN HAPPEN
Could result in vehicle overturning.
HOW TO AVOID THE HAZARD
Use proper gear and maintain steady speed when climbing a hill.
If you lose all forward speed:
Operator and passenger must keep their weight uphill. Never open the
throttle suddenly or make sudden gear changes. The vehicle could flip
over backwards.
Apply the brakes.
Lock parking brake after you are stopped.
First, disembark the passenger, then dismount on uphill side, or to a side
if pointed straight uphill.
If you begin rolling backwards:
Operator and passenger must keep their weight uphill. Never open the
throttle suddenly or make sudden gear changes. The vehicle could flip
over backwards.
Never apply the rear brake while rolling backwards.
Apply the front brake gradually.
When fully stopped, apply rear brake as well and lock parking brake.
First, disembark the passenger, then dismount on uphill side, or to a side
if pointed straight uphill.
Turn the vehicle around and remount, following the procedure described
further in this Operator's Guide.
___________
36
SAFETY INFORMATION
___________
Page 39
WARNING
V00A0JQ
POTENTIAL HAZARD
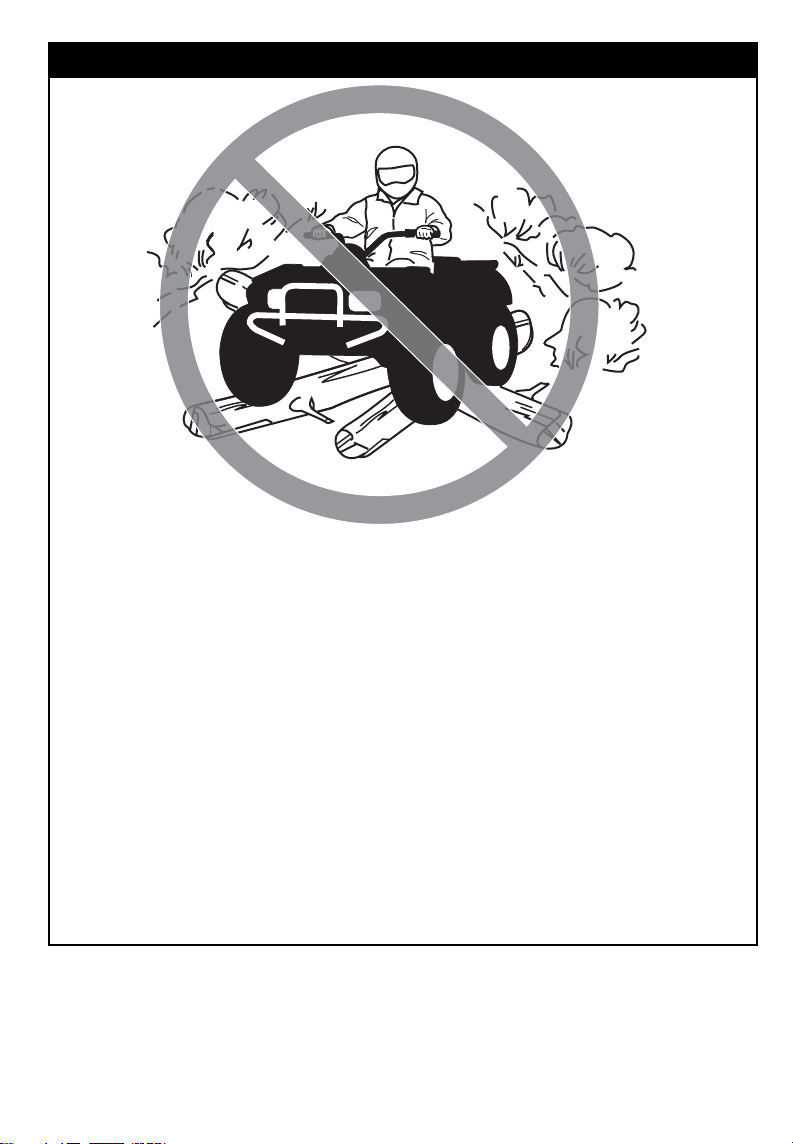
Improperly operating over obstacles.
WHAT CAN HAPPEN
Could cause loss of control, passenger ejection (2-UP models) or a collision.
Could cause the vehicle to overturn.
HOW TO AVOID THE HAZARD
On 2-UP models, the operator is responsible for the safety of his passenger.
In doubt, disembark him before riding over obstacles. Always remember
that the vehicle handling and stability may be affected when riding with a
passenger.
Before operating in a new area, check for obstacles.
Never attempt to ride over large obstacles, such as large rocks or fallen
trees.
When you go over obstacles, always follow proper procedures as de-
scribed further in this Operator's Guide.
____________
SAFETY INFORMATION
___________
37
Page 40
WARNING
V00A0KQ
POTENTIAL HAZARD
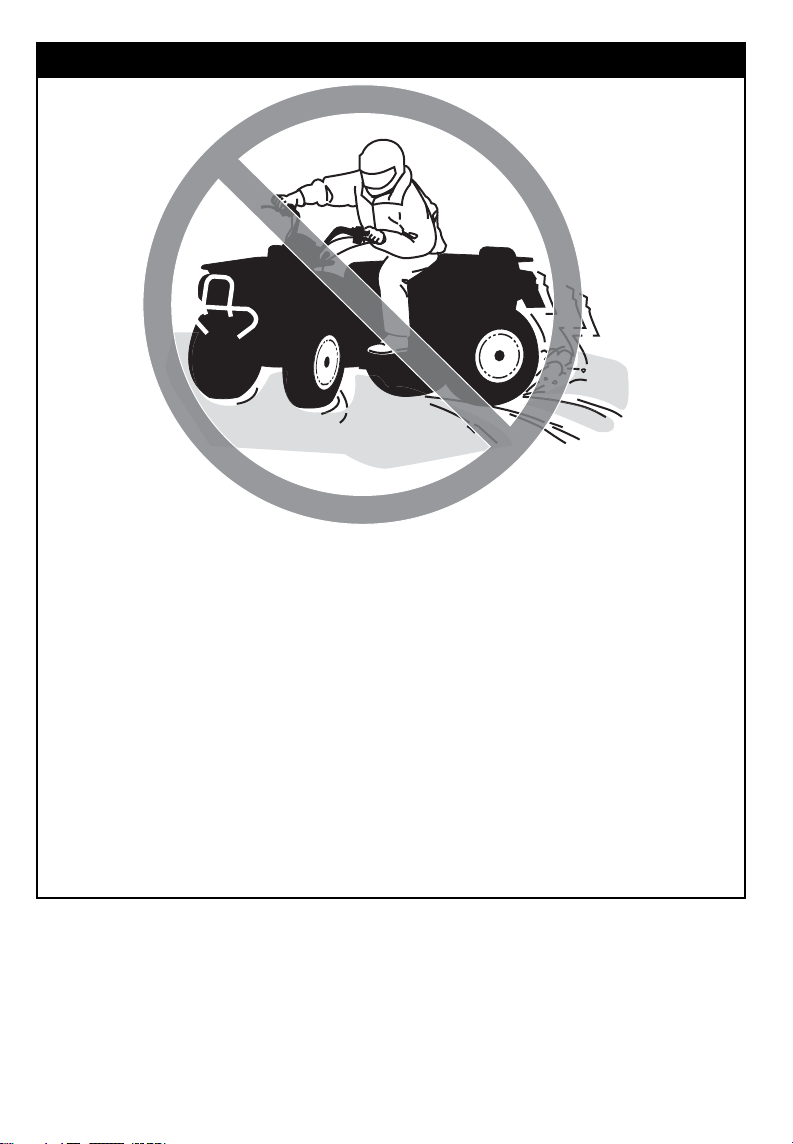
Skidding or sliding improperly.
WHAT CAN HAPPEN
You may lose control of this vehicle.
You may also regain traction unexpectedly, which may cause the vehicle
to overturn or passenger ejection (2-UP models).
HOW TO AVOID THE HAZARD
On 2-UP models, never slide or skid with passenger. Always remember
that the vehicle handling and stability may be affected when riding with a
passenger.
Learn to safely control skidding or sliding by practicing at low speeds and
on level smooth terrain.
On extremely slippery surfaces, such as ice, go slowly and be very cautious
in order to reduce the chance of skidding or sliding out of co
ntrol.
___________
38
SAFETY INFORMATION
___________
Page 41
WARNING
V00A0LQ
POTENTIAL HAZARD
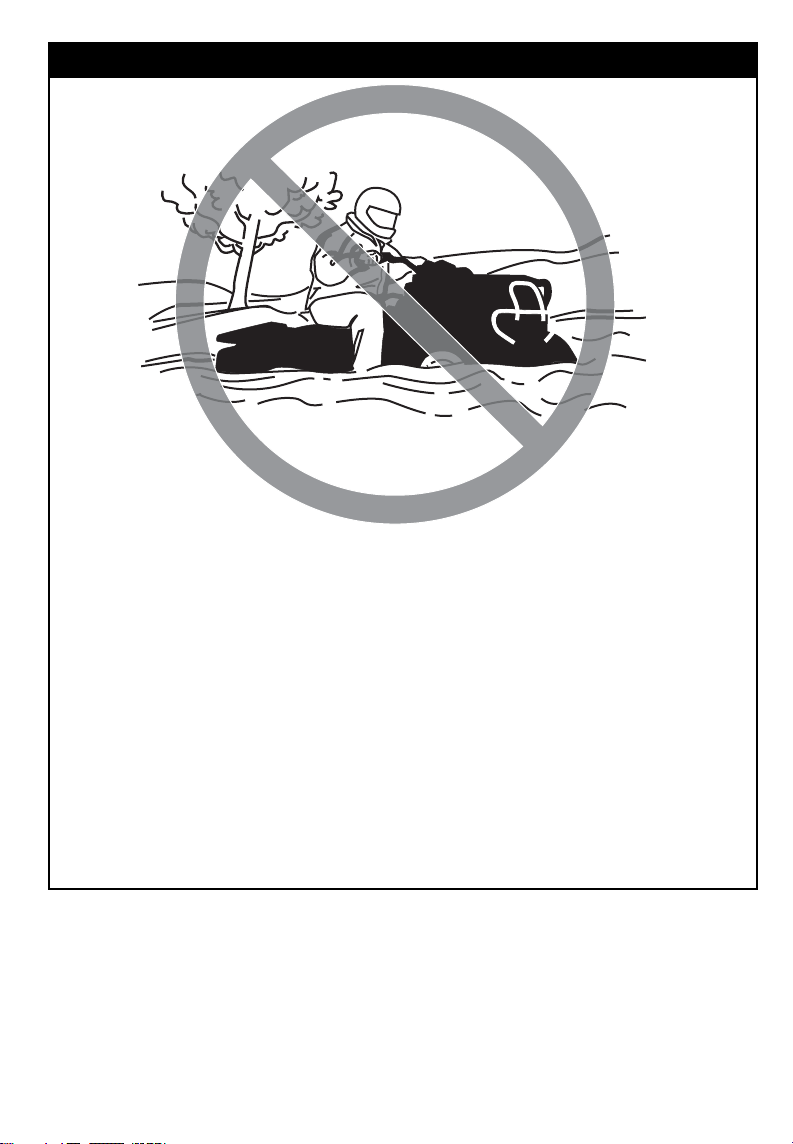
Operating this vehicle through deep or fast flowing water.
WHAT CAN HAPPEN
Tires may float, causing loss of traction and loss of control, which could
lead to an accident.
HOW TO AVOID THE HAZARD
Never operate this vehicle in fast flowing water or in water deeper than
that specified further in this Operator's Guide.
Check water depth and current before you attempt to cross any water. Water should not go above footrests.
Remember that wet brakes may have reduced stopping ability. Test your
brakes after leaving water. If necessary, apply them several times to let
friction dry out the pads. Do not forget, on 2-UP models, allow greater
distance for braking when you ride with a passenger.
____________
SAFETY INFORMATION
___________
39
Page 42
WARNING
V00A0MQ
POTENTIAL HAZARD
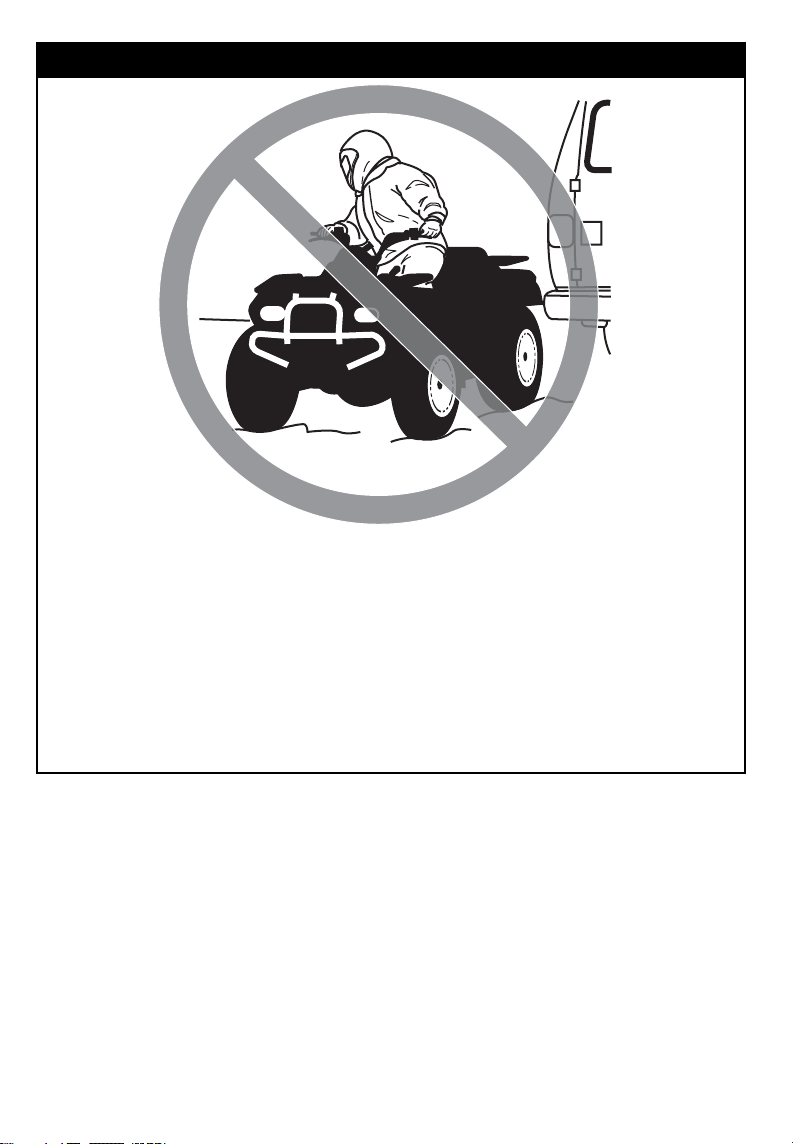
Improperly operating in reverse.
WHAT CAN HAPPEN
You could hit an obstacle or person behind the vehicle, resulting in serious
injury.
HOW TO AVOID THE HAZARD
When you select reverse gear, make sure there are no obstacles or people
behind the vehicle. When it is safe to proceed, go slowly. On 2-UP models,
take account that the passenger can obstruct your view.
___________
40
SAFETY INFORMATION
___________
Page 43
WARNING
V00A0OQ
POTENTIAL HAZARD
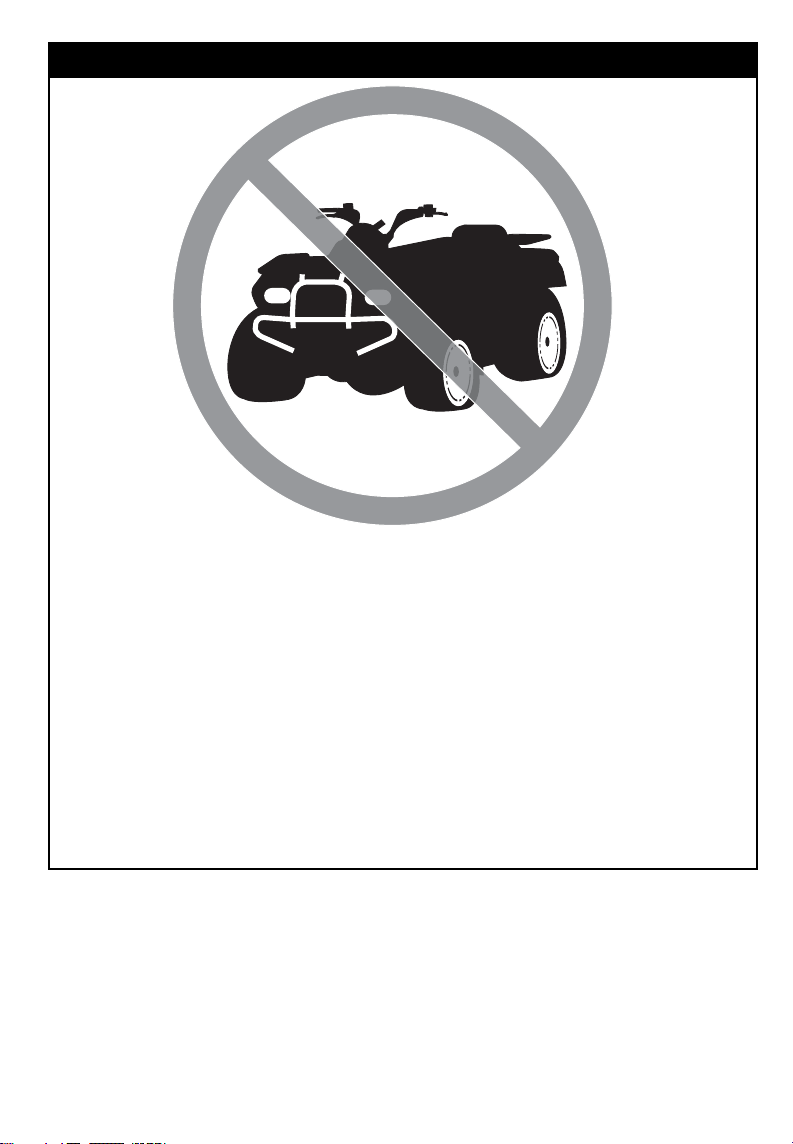
Operating this vehicle with improper tires, or with improper or uneven tire
pressure.
WHAT CAN HAPPEN
Use of improper tires on this vehicle, or operation of this vehicle with improper or uneven tire pressure, may cause loss of control, tire blow outs,
tire to move around on its rim, and increases the risk of an accident.
HOW TO AVOID THE HAZARD
Always use the size and type of tires specified further in this Operator's
Guide for this vehicle.
Always maintain proper tire pressure as described further in this Operator's Guide.
Always replace wheels or tires that are damaged.
____________
SAFETY INFORMATION
___________
41
Page 44
WARNING
V00A26Q
POTENTIAL HAZARD
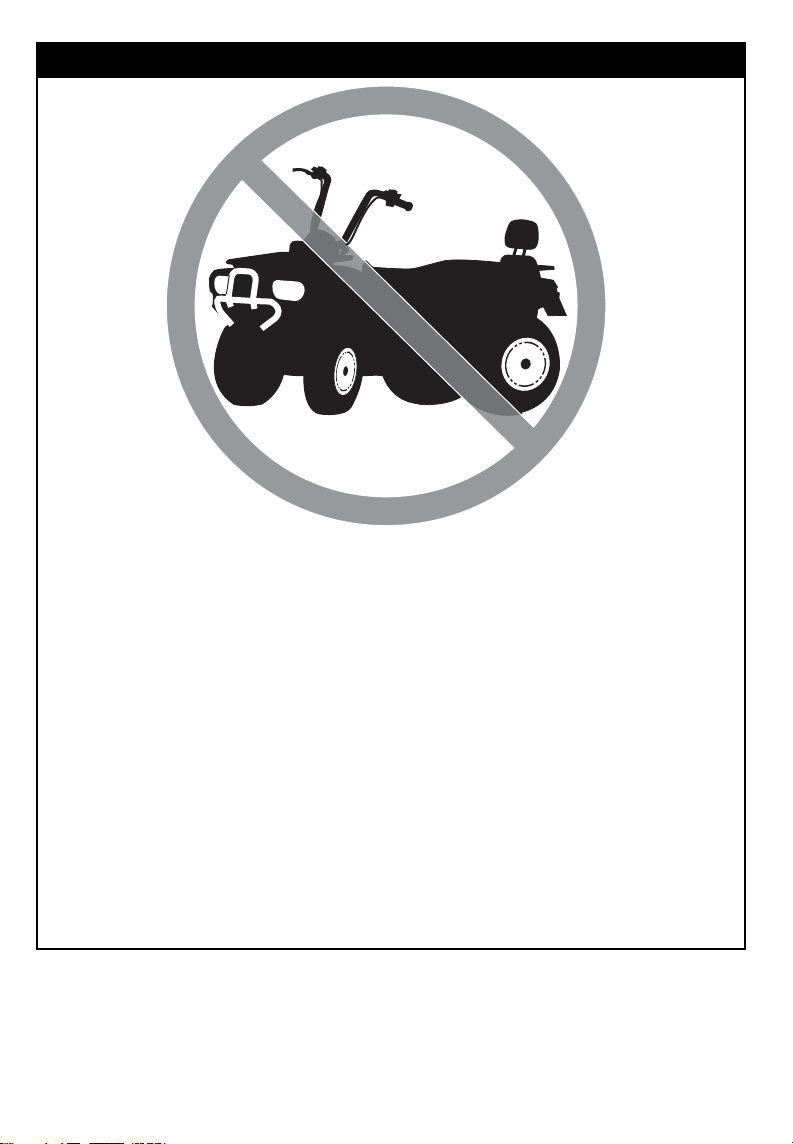
Operating this vehicle with improper modifications.
WHAT CAN HAPPEN
Improper installation of accessories or modification of this vehicle may
cause changes in handling which in some situations could lead to an accident.
HOW TO AVOID THE HAZARD
Never modify this vehicle through improper installation or use of accessories. All parts and accessories added to this vehicle should be approved
by BRP and should be installed and used according to instructions. If you
have questions, consult an authorized Can-Am ATV distributor/dealer.
NEVER install passenger seat (1-UP models) or use the racks to carry a
passenger.
Modification of the vehicleto increase speed and performance may violate
the terms and conditions of your vehicle limited warranty. In addition, certain modifications including the removal of engine or exhaust components
are illegal under most laws.
___________
42
SAFETY INFORMATION
___________
Page 45
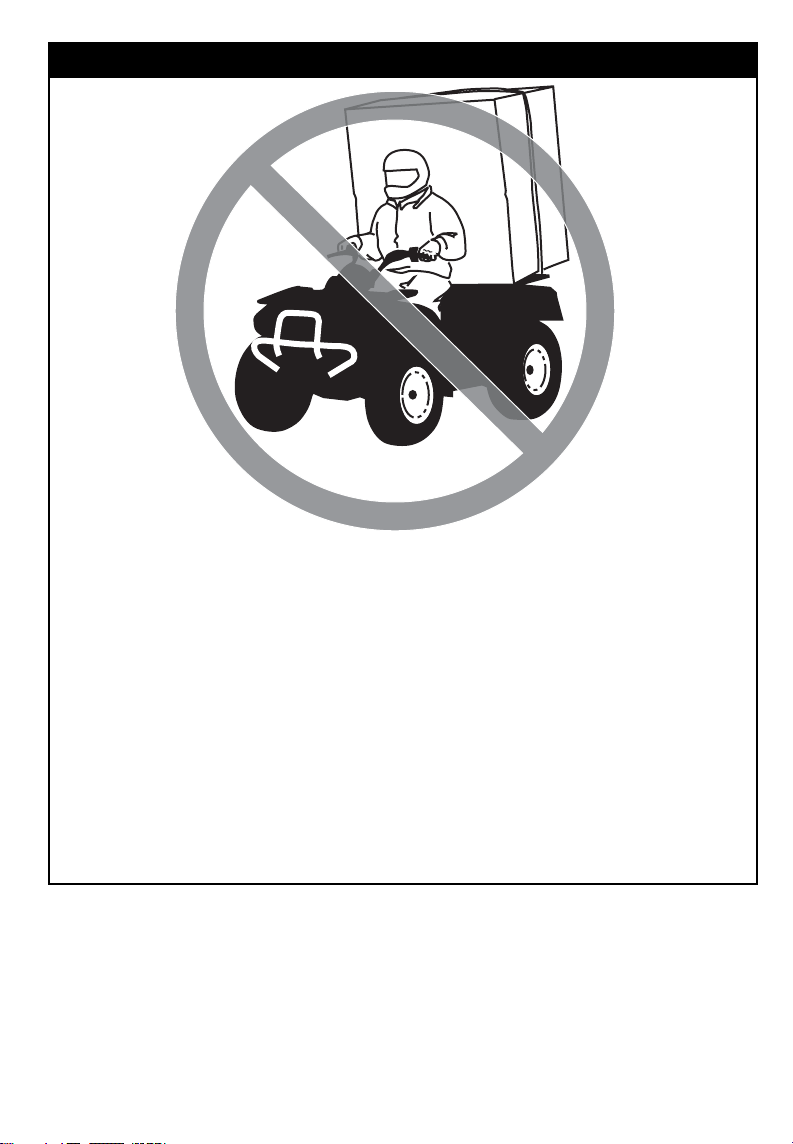
WARNING
V00A0PQ
POTENTIAL HAZARD
Overloading this vehicle or carrying or towing cargo improperly.
WHAT CAN HAPPEN
Could cause changes in vehicle handling which could lead to an accident.
HOW TO AVOID THE HAZARD
Never exceed the stated load capacity for this vehicle including operator
and passenger (2-UP models), as well as other loads and added accessories.
Cargo should be properly distributed and securely attached.
Reduce speed when carrying cargo or pulling a trailer. Allow greater dis-
tance for braking.
Always follow the instructions in this Operator's Guide for carrying cargo
or pulling a trailer.
____________
SAFETY INFORMATION
___________
43
Page 46
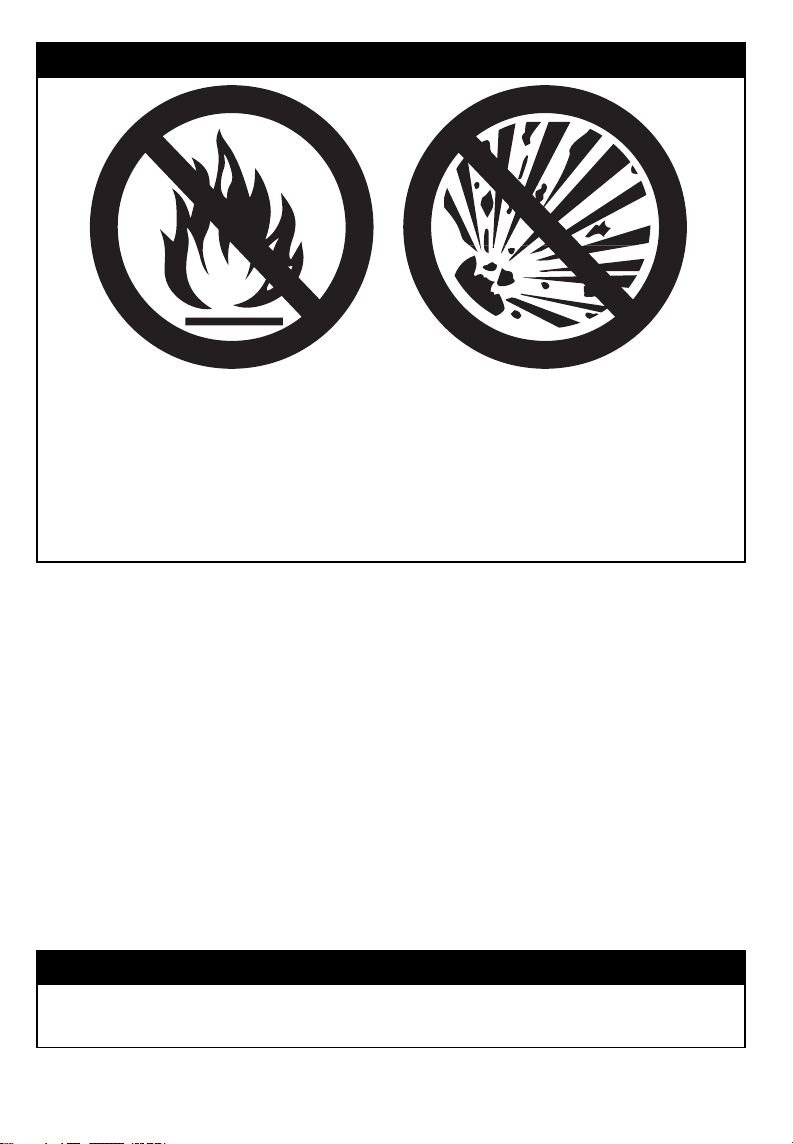
WARNING
V03M01Q
POTENTIAL HAZARD
Transporting flammable or dangerous material can lead to explosions.
WHAT CAN HAPPEN
This can cause serious injury or death.
HOW TO AVOID THE HAZARD
Never transport flammable or dangerous material.
While reading this Operator’s Guide, remember that:
WARNING
Indicates a potential hazard that, if not avoided, could result in serious injury or death.
___________
44
SAFETY INFORMATION
___________
Page 47

RIDING THE VEHICLE
To fully appreciate the pleasures and
excitement of riding this vehicle, there
are some basic rules and tips that you
MUST follow. Some may be new to
you while others may be common
sense or obvious. Nonetheless, we
ask that you take a few minutes to
read this Operator's Guide completely
before you operate this vehicle.
Information in this Operator's Guide
is limited. It is strongly recommended that you obtain further information
and training from your local authorities, ATV clubs or a recognized ATV
training organization.
BRP does not recommend that anyone under the age of 16 drive this vehicle. On 2-UP models, the passenger
should be 12 years old or more and
must be capable of keeping his feet
on the footrests and his hands on the
grab handles at all times when seated. For the child's safety, we strongly recommend you also follow and enforce this recommendation. You are
the sole judge of a rider's capability to
understand the risks and operate a vehicle safely.
Persons with cognitive or physical impairments or who are high risk takers
have an increased exposure to overturns or collisions which may result in
injury including death.
Become completely familiar with the
operational controls and the general
operation of the vehicle before venturing into off road conditions. Practice driving in a suitable area free of
hazards and feel the response of each
control. Drive at low speeds. Higher speeds require greater experience,
knowledge and suitable riding conditions.
When riding with a 2-UP model, the
vehicle handling, stability and braking
distance will be affected when riding with a passenger. Safely reduce
speed when riding with a passenger.
Allow greater distance for braking.
Not all vehicles are the same. Each
has its own unique performance characteristics, controls and features.
Each will ride and handle differently.
Never assume that the vehicle will go
everywhere safely. Sudden changes
in terrain caused by holes, depressions, banks, softer or harder "ground"
or other irregularities may cause the
vehicle to topple or become unstable.
To avoid this, slow down and always
observe the terrain ahead. If the vehicle does begin to topple or tipover, it is
usually the best advice to immediately
get off... AWAY from the direction of
the tipover!
____________
SAFETY INFORMATION
___________
45
Page 48

Pre-Operation Check
WARNING
The pre-operation check is very
important prior to operating the
vehicle. Always check the proper operation of critical controls,
safety features and mechanical
components before starting. If
not done, severe injury or death
might occur.
Before using this vehicle, the operator
should always:
• Remove the vehicle lock.
• Apply parking brake and check if it
operates properly.
• Check tire pressure and condition.
• Check wheels and bearings for
wear and damage.
• Check location of controls and ensure they work properly.
• Verify if steering operates freely.
• Activate throttle control lever several times toensure it operates freely.
It must return to idle position when
released.
• Activate the brake lever and brake
pedal to make sure the brakes fully
apply. Lever and pedal must fully
return when released.
• Ensure transmission lever is working then reset in PARK position.
• Check fuel, oil and coolant levels.
• Check for oil leaks on the engine/
transmission and drive train components.
• Ensure fuel valve is in fully open
position (ON).
• Clean headlamps, direction indicator lamps and brake lamp.
• Ensure front access compartment
cover and rear storage compartment cover are properly latched.
• Ensure that the operator’s and either the passenger’s seats or the
storage box (2-UP models) are in
place and properly latched.
• If you transport cargo, respect load
capacity. Ensure cargo is properly
secured to the racks.
• If you are pulling a trailer or other
equipment, ensure it respects the
tongue capacity and towing capacity. Ensure trailer is properly secured to hitch.
• Look and feel for loose parts while
engine is off. Check fasteners.
• Ensure the path of travel is free of
persons and obstacles.
• Check operation of ignition switch,
engine start button, engine stop
switch, headlamps and direction indicator switches as well as hazard
warning button.
• Check operation of direction indicatorswitchesaswellashazardwarning button.
• Start engine and drive forward
slowly a few feet and apply all
brakes individually to test them.
2-UP Models Only
– Check passenger’s seat and back-
rest condition.
– Check the grab handles condition.
– Educate the passenger concerning
the basic rules for a safe ride.
– Make sure that the passenger, if
carrying one, is seated on the designated passenger's seat.
– When storage box is installed (in
place of rear seat), check if it is
latched properly.
Correct any problem you may have
found before riding. See an authorized Can-Am ATV distributor/dealer
as necessary.
___________
46
SAFETY INFORMATION
___________
Page 49
Clothing
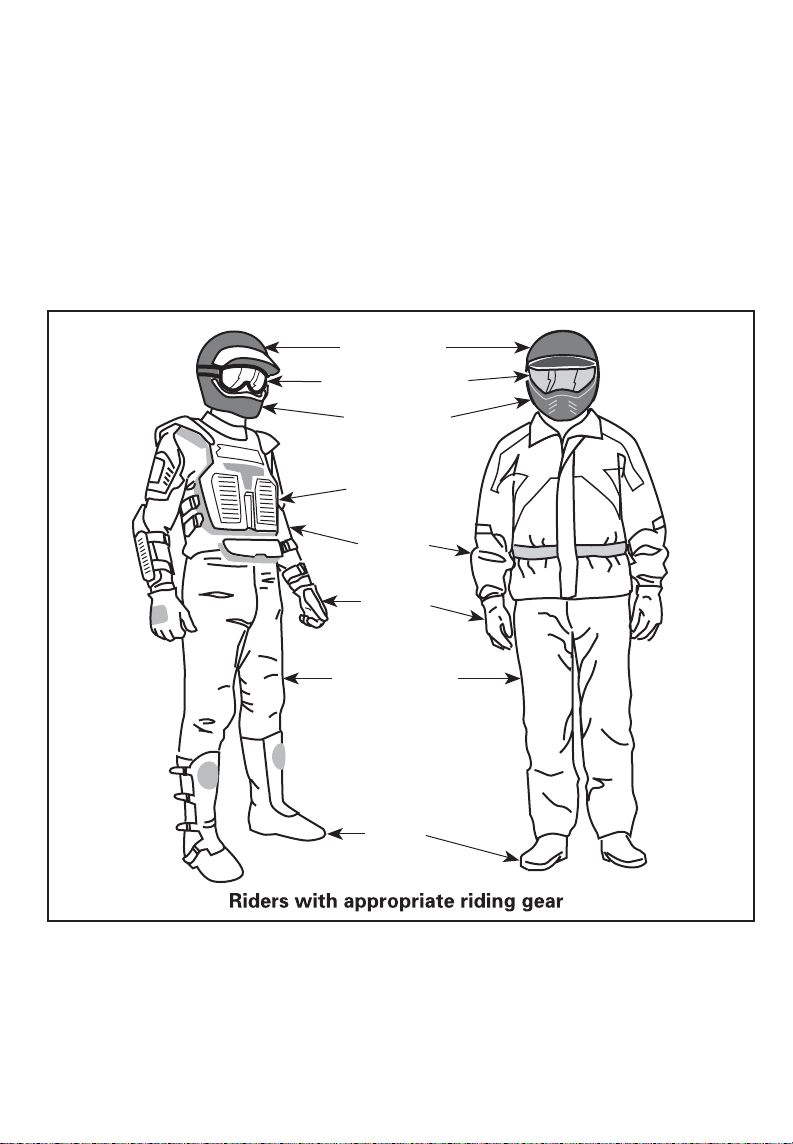
Actual weather conditions should help you decide how to dress. However, it
is important that the operator and the passenger always wear the appropriate
protective clothing and apparel, including an approved helmet, eye protection,
boots, gloves, long sleeved shirt and pants. The passenger should have an approved helmet including a rigid chin guard. This type of clothing will provide you
protection from some of the minor hazards you may encounter en route. Operator and passenger must never wear loose clothing such as a scarf that may
get entangled in the vehicle or on tree branches and shrubs. Depending on conditions, antifogging goggles or sunglasses may be required. Different colored
lenses available for goggles or sunglasses help you distinguish terrain variations.
Sunglasses should only be worn during the daytime.
Approved
helmet
Eye protection
Rigid chin
guard
Chest
protector
Long
sleeves
Gloves
V00A0RN
____________
Long, sturdy
pants
Boots
SAFETY INFORMATION
___________
47
Page 50

Carrying Loads/Passenger
Any load carried on the vehicle and/or the carrying rack(s) will affect the stability
and control of the vehicle. For this reason, do not exceed the load limits of the
vehicle manufacturer. Always make sure the load is secured and cannot interfere
with your proper control. Always be aware that the "load" may slide or fall off and
create an accident. Avoid loads that may protrude sideways and get snagged or
caught in brush or other obstacles. Avoid covering and obstructing the headlamp
or brake lamp with the cargo.
Vehicles Equipped with Storage Compartments
Always make sure any storage compartment latches are closed. If a removable
compartment cover is removed to carry a load, make sure that the load is secure
and that smaller objects cannot "fly out". Secure compartment covers.
1-UP Models
This vehicle is designed to carry ONE (1) operator only. Do not install passenger
seats or use the racks to carry a passenger.
2-UP Models
This vehicle is designed specifically to carry an operator and ONE (1) passenger
only. The passenger must be seated on the designated passenger's seat and
hold on to the grab handles at all times. NEVER install other passenger's seat
other than the one recommended by BRP. Do not use the racks or their location
to carry passenger(s). Carrying more than one (1) passenger may affect the stability and your control of the vehicle. When the storage box is installed (in place
of rear seat), the vehicle becomes a ONE-RIDER vehicle (1-UP model) and NO
PASSENGER must be allowed on it.
Hauling a Trailer (if so equipped)
Riding this vehicle with a trailer substantially increases the risk of toppling, especially on inclined slopes. If a trailer is used make sure that its hitch is compatible
with the one on the vehicle. Make sure the trailer is horizontal with the vehicle.
(In some instances a special extension may have to be installed on the vehicle
hitch). Use security chains to secure the trailer with the vehicle. This vehicle
may require additional stopping distance if hauling heavy loads, especially on inclined surfaces and when a passenger (2-UP models) is on board. Be careful not
to skid or slide. When stopped or parked, block the vehicle and trailer wheels
from possible movement. Always make sure load is evenly distributed on the
trailer. Use caution when disconnecting a loaded trailer; it or its load may topple
on you or others. Do not turn at high speeds. Always use low gear range and
slow down a lot.
___________
48
SAFETY INFORMATION
___________
Page 51

Working with your Vehicle
Your vehicle can help you perform anumber of different LIGHT tasks ranging from
snow removal to pulling wood or carrying cargo. A variety of accessories are
available from your authorized Can-Am ATV distributor/dealer. However, always
respect the load and capacities of the vehicle. Overloading of the vehicle can
overstress the components and cause failure. To prevent possible injury, it is
equally important to follow the instructions and warnings that accompany the
accessory. Avoid any physical exertion through lifting or pulling of heavy loads or
manpowering the vehicle. (Continue to read RECREATIONAL RIDING below).
Recreational Riding
Respect the rights and limitations of others. Stay away from areas designated
for other types of off road use. This includes snowmobile trails, equestrian trails,
cross country ski trails, mountain bike trails, etc. Never assume there are no
other users on the trail. Always stay to the complete right of the trail and do not
zig zag to one side of the trail then the other. Be prepared to stop or pull off to
the side if another trail user appears in front of you.
Join a local ATV club. They will provide you with a map and advice or inform you
where you can ride. If a club does not exist in your area, help start one. Group
riding and club activities provide a pleasurable, social experience.
Always keep a safe distance from other riders. Your judgment of speed, terrain conditions, weather, mechanical condition of your vehicle and the "trust in
judgment" you have in others around you will help you make a better choice of
appropriate safe distance. This vehicle, like any other motorized vehicle, cannot
stop "on a dime". On 2-UP models, the vehicle handling, stability and braking distance may be affected when riding with a passenger. Safely reduce speed when
riding with a passenger. Allow greater distance for braking.
Always operate this vehicle at low speed, do not exceed 65 km/h (40 MPH),
and reduce the speed before making a turn when the vehicle is operated on the
roadway.
Before you ride, tell someone where you are planning to travel and your expected
time of return. Never consume alcohol or drugs before or while riding!
Depending on the length of your ride, carry additional tools or emergency equipment. Find out where you can get additional gasoline and oil. Be prepared for
the possible conditions you may encounter. An emergency first aid kit should
always be a consideration.
Environment
One of the benefits of this vehicle is that it can take you off the beaten path
away from most communities. However, you should always respect nature and
the rights of others to enjoy it. Do not ride in environmentally sensitive areas.
Do not drive over forest crops or shrubs... nor cut down trees or take down
fencing... nor spin your wheels and destroy the terrain. “Tread Lightly”.
____________
SAFETY INFORMATION
___________
49
Page 52

Chasing wildlife is in many areas illegal. Wildlife can die of exhaustion after being
chased by a motorized vehicle. If you encounter animals on the trail, stop and
observe quietly and with caution. It will be one of the better memories of your
life.
Observe the rule... “what you take in, carry out”. Do not litter. Do not start
campfires unless you have permission to do so... and then only... away from
dry areas. The hazards you may create on the trail may cause injury to others or
yourself, even at a later date.
Respect farm lands. Always obtain the permission of the landowner before riding
on private land. Respect crops, farm animals and property lines. If you come to
a closed a gate, close it again after yourself.
Finally, do not pollute streams, lakes or rivers and do not modify the engine or
muffling system, or remove any of its components.
Design Limitation
Although the vehicle is exceptionally rugged for its class, it is still a light vehicle
by definition and its operation must be restricted to its proper purpose.
The addition of weight to any part of the vehicle changes its gravitational stability
and modifies its performance.
Off-Highway Operation
The very nature of off-highway operation is dangerous. Any terrain, which has
not been specially prepared to carry vehicles, presents an inherent danger where
angularity, terrain substance and exact steepness are unpredictable. The terrain
itself presents a continual element of danger, which must be knowingly accepted
by anyone venturing over it.
An operator who takes a vehicle off-road should always exercise the utmost care
in selecting the safest path and keeping close watch on the terrain ahead of him.
On no account should the vehicle be operated by anyone who is not completely
familiar with the driving instructions applicable to the vehicle, nor should it be
operated on steep or treacherous terrain.
General Operating and Safety Precautions
Care, caution, experience and driving skill are the best precautions against the
hazards of vehicle operation.
Whenever there is the slightest doubt that the vehicle can safely negotiate an
obstacle or a particular piece of terrain, always choose an alternate route.
In off-road operation, power and traction, not speed, are important. Never drive
faster than visibility and your own ability to select a safe route permit.
Constantly watch the terrain ahead for sudden changes in slopes or obstacles,
such as rocks or stumps, that may cause loss of stability, resulting in tipover or
rollover.
On 2-UP models, the vehicle handling, stability and braking distance may be affected when riding with a passenger. Safely reduce speed when riding with a
passenger. Allow greater distance for braking.
___________
50
SAFETY INFORMATION
___________
Page 53

Never operate the vehicle if the controls do not function normally.
When operating in reverse, check that the path behind the vehicle is free of peo-
ple or obstacles. Proceed slowly and avoid sharp turns. When riding on a 2-UP
models, take into account that the passenger can obstruct your view. Disembark
him if necessary.
When stopped or parked, always apply the parking brake. This is especially important when parking on a slope. On very steep inclines or if the vehicle is carrying cargo, the wheels should be blocked using rocks or bricks. Remember to
turn the fuel valve to the closed position.
For the users in the European Community, it is mandatory to remove the winch
hook (if so equipped) to operate the vehicle on the roadway. Failure to follow
this requirement could cause additional injuries including the possibility of death
if an accident occurs.
Uphill Driving
Due to configuration, this vehicle has excellent climbing ability, so much so that
tipover is possible before traction is lost. For example, its common to encounter
terrain situations where the top of the hill has eroded to a point that the hill peak
rises very sharply. The vehicle can readily negotiate such a condition, however,
in doing so, when the front of the vehicle is driven to a point that the vehicle's
balance changes rearward tipover can occur.
The same situation may apply if an embedded object causes the front of the
vehicle to climb more than desired. If such a situation occurs take an alternate
route. Be aware of side hilling dangers when doing so.
It is also wise toknow the terraincondition on theother side of the hill or bank. All
too often there exists a sharp drop-off that is impossible to negotiate or descend.
Downhill Driving
This vehicle can climb slopes that are steeper than it can safely descend. Therefore, it is essential to assure that a safe route exists to descend a slope before
you climb it.
Decelerating while negotiating a slippery downhill slope could "toboggan" the vehicle. Maintain steady speed and/or accelerate slightly to regain control.
While reading this Operator’s Guide, remember that:
WARNING
Indicates a potential hazard that, if not avoided, could result in serious injury or death.
____________
SAFETY INFORMATION
___________
51
Page 54

Side Hilling
Whenever possible, such operation should be avoided. If necessary, do so with
extreme caution. Always disembark the passenger before performing this operation. Side hilling on steep inclines could result in rollover. In addition, slippery
or unfirm surfaces could result in uncontrollable side sliding. Do not attempt to
turn the vehicle downhill with the slide. Avoid all objects or depressions that will
intensify the raising of one side of the vehicle higher than the other, thus causing
rollover.
Drop-Offs
This vehicle will "bottom-out" and usually stop if either the front or rear wheels
are driven over a drop-off. If the drop is sharp or deep, the vehicle will nose dive
and tipover.
WARNING
Avoid negotiating drop-offs. Reverse and select an alternate route.
Riding Techniques
Riding your vehicle too fast for the conditions may result in injury. Apply only
enough throttle to proceed safely. Statistics show that high speed turns usually
result in mishaps and injury. Always remember that this vehicle is heavy! Its
pure weight alone may entrap you should it fall and pin you down.
This vehicle is not designed for jumping nor can it, or you, absorb the energy of
high impacts such as jumping. Performing "wheelies" can cause the vehicle to
flip over onto you. Both practices have a high risk for you and your passenger
(2-UP models) and should be avoided at all times.
To maintain proper control it is strongly advised that you keep your hands on the
handlebar and within easy reach of all controls. The same holds true for your
feet. To minimize the possibility of any leg or foot injury, keep your feet on the
footrests at all times. Do not direct your toes outwards nor place your foot out to
assist turning as they can be hit or snagged by passing obstacles or may contact
the wheels. When riding on a 2-UP models, your passenger must keep his hands
on grab handles and his feet on footrests at all times.
___________
52
SAFETY INFORMATION
___________
Page 55
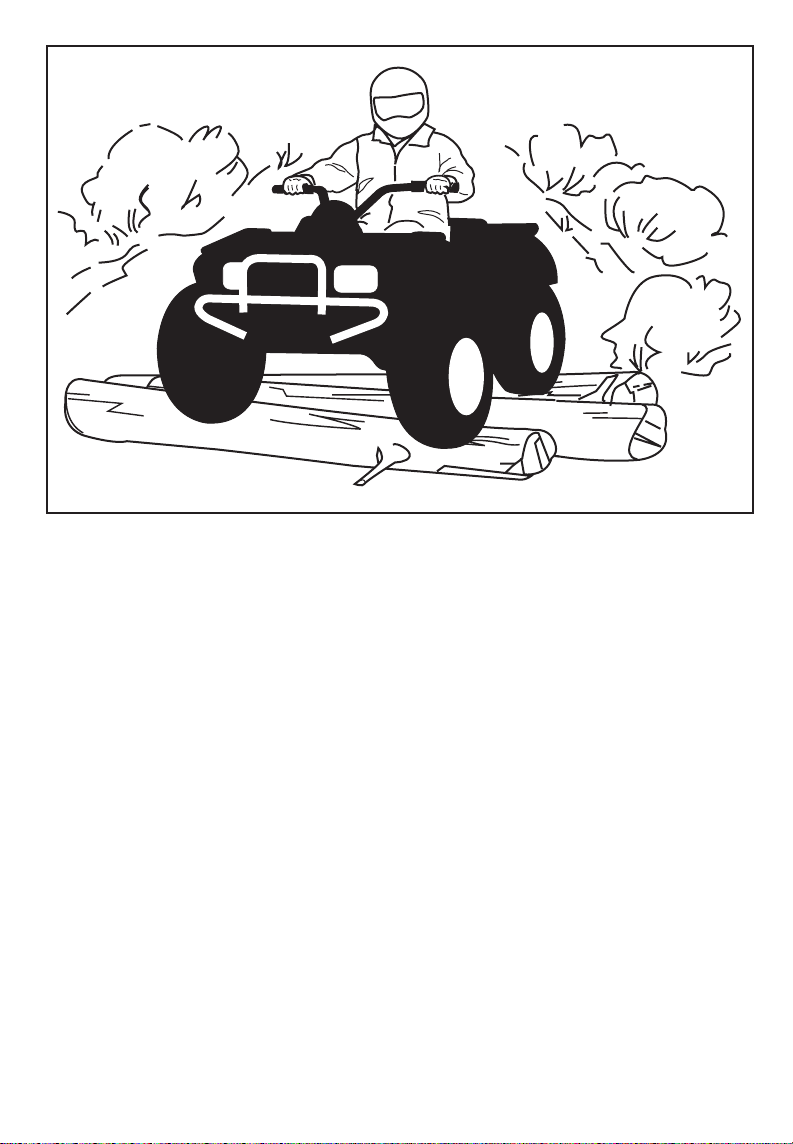
V00A0UL
Even though there is an adequate suspensions system on this vehicle there are
"washboard" or rough terrain conditions that will make you feel uncomfortable
and even cause back injury. "Posting" or riding in a crouched position will often
be required. Slow down and allow your flexed legs to absorb impact.
If a road usage is allowed in your area, operate your vehicle on paved surfaces
only for short distance and for the only purpose of moving the vehicle from an offroad usage to another. Always operate your vehicle at low speed (never exceed
65 km/h (40 MPH)) and reduce the speed before making a turn. Always respect
all road traffic laws when operating your vehicle on public roads or streets. If you
have to cross a road, the lead driver should get off his vehicle then observe and
give directions to the other riders. The last person after crossing then assists the
lead driver to cross. Do not travel sidewalks. They are designated for pedestrian
use.
Water can be a unique hazard. If it is too deep the vehicle may "float" and topple.
Check the water depth and current before you attempt tocross any water. Water
should not go above the footrest. Be wary of slippery surfaces such as rocks,
grass, logs, etc., both in the water and on its banks. A loss of traction may occur.
Do not attempt to enter the water at high speed. The water will act as a brake
and could throw you.
____________
SAFETY INFORMATION
___________
53
Page 56
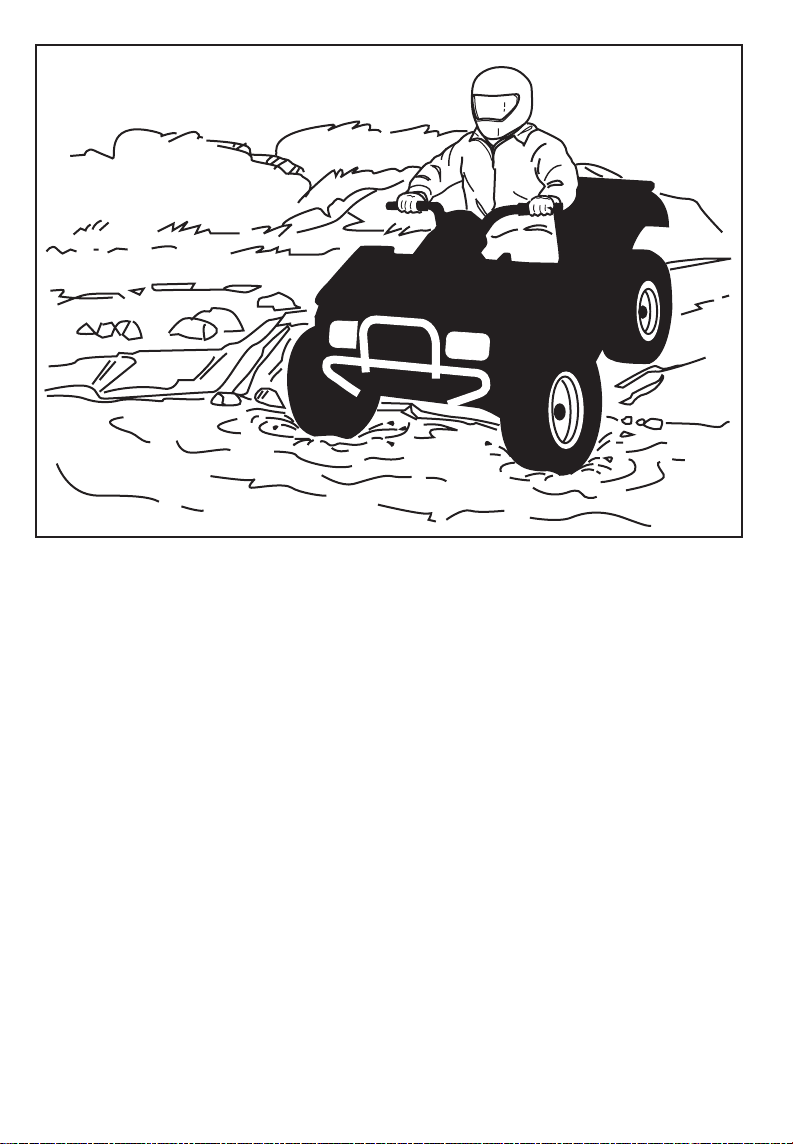
V00A0VL
Water will affect the braking ability of yourvehicle. Make sure you dry the brakes
by applying them several times after the vehicle leaves the water. On 2-UP models, the vehicle braking distance may be affected when riding with a passenger.
Safely reduce speed when riding with a passenger. Allow greater distance for
braking.
Mud or marsh lands may be encountered near water. Be prepared for sudden
"holes" or changes in depth. Similarly so, be watchful of hazards such as rocks,
logs, etc., partially covered by vegetation.
If your trip crosses frozen waterways, make sure that the ice is thick enough
and sound enough to support the total weight of yourself, your passenger (2-UP
models), the vehicle and its load. Be ever watchful of open water... it is a sure
indication that the ice thickness will vary. On 2-UP models, the operator is responsible for the safety of the passenger. If in doubt, do not attempt to cross.
Ice will also affect the control of vehicle. Slow down and do not "gun" the throttle. This will only result in spinning of the tires and possible tipover of the vehicle. Avoid rapid braking. This again will possibly result in an uncontrolled slide
and tipover of the vehicle or passenger ejection (2-UP models). Slush should be
avoided at all times since it could block the operation or controls of the vehicle.
When riding on a 2-UP models, never attempt this maneuver with a passenger.
Always remember that the vehicle handling and stability may be affected when
riding with a passenger.
___________
54
SAFETY INFORMATION
___________
Page 57
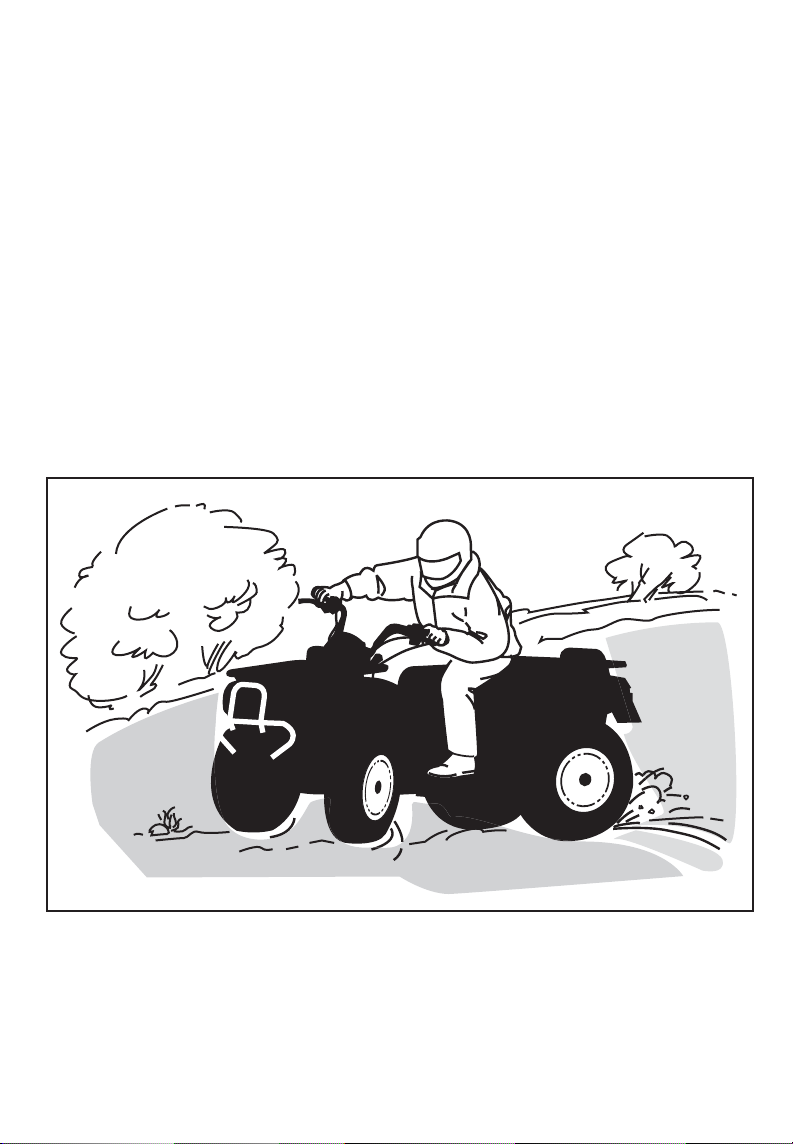
Sand and riding on sand dunes or on snow is another unique experience but
there are some basic precautions that should be observed. Wet, deep or fine
sand/snow may create a loss of traction and cause the vehicle to slide, drop off
or become "bogged" down. If this occurs look for a firmer base. Again, the best
advice is to slow down and be watchful of the conditions. When you ride with a
passenger (2-UP models), drive slowly.
When riding insand dunes it isadvisable to equip the vehicle with an antenna type
safety flag. This will help make your location more visible to others over the next
sand dune. Proceed carefully should you see another safety flag ahead. Since
the antenna type safety flag can snag and rebound on your body if caught, do
not use it in areas where there are low hanging branches or obstacles. Always
remember when riding on a 2-UP model that the vehicle handling and stability
may be affected when riding with a passenger.
Riding on loose stones or gravel is very similar to riding on ice. They will affect
the steering of vehicle... possibly causing it to slide or cause passenger ejection
(2-UP models) and tipover especially at high speeds. In addition, braking distance
may be a effected. Remember that "gunning" the throttle or sliding may cause
loose stones to be ejected rearwards into the path of another rider's way. Never
do it deliberately. Always remember on a 2-UP models that vehicle handling,
stability and braking distance may be affected when riding with a passenger.
V00A0WL
If you do get into a slide or skid, it may help to turn the handlebar into the direction
of the skid until you regain control. Never jam the brakes and lock the wheels.
Respect and follow all posted trail signs. They are there to help you and others.
____________
SAFETY INFORMATION
___________
55
Page 58

Obstacles in the “trail” should be traversed with caution. This includes loose
rocks, fallen trees, slippery surfaces, fences, posts, and embankments and depressions. You should avoid them whenever possible. Remember that some
obstacles are too large or dangerous to cross and should be avoided. When riding on 2-UP models, the operator is responsible for the safety of the passenger
and in doubt, disembark him before getting through the obstacles. Small rocks
or fallen trees may be safely crossed... approach at a 90° angle. Stand on the
footrests while keeping your knees flexed. Adjust speed without losing momentum and do not “gun” the throttle. Hold handlebar or grab handles firmly. Place
operator and passenger (2-UP models) body weight rearwards and proceed. Do
not try to lift the vehicle front wheels off the ground. Be aware that the object
may be slippery or may move while crossing.
When driving on hills or slopes two things are highly important... be prepared
for slippery surfaces or terrain variations and obstacles and... use proper body
positioning. When riding on 2-UP models, the operator is responsible for the
safety of the passenger and in doubt, disembark him before getting through the
obstacles.
___________
56
SAFETY INFORMATION
___________
Page 59
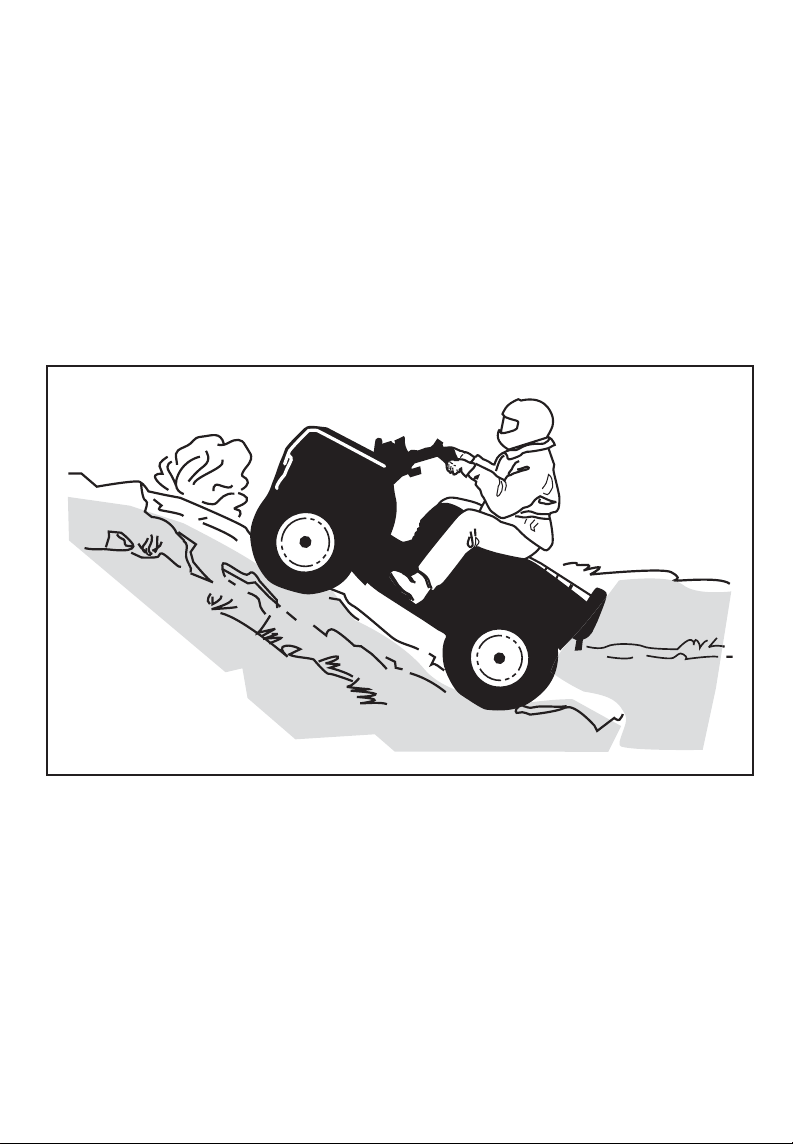
Uphill
1-UP Models
Keep your body weight forward towards the top of the hill. Keep your feet on
the footpegs and shift into low gear then accelerate and when necessary, change
gear quickly as you climb. Do not over-speed since this may cause the front of
the vehicle to lift from the ground and fall back on you. If the hill is too steep and
you cannot proceed or the vehicle begins to roll backwards, apply the brake, being
careful not to slide. Dismount then use the "U" turn or "K" turn (while walking
back, next to the vehicle on the up hill side and with a hand on the brake lever,
slowly back the rear of the vehicle toward the top of the hill then drive downhill).
Always walk or dismount on the upside of the slope while keeping clear of the
vehicle and its rotating wheels. Do not try to hold on to the vehicle if it begins to
topple. Stay clear. Do not ride overthe crest of the hill at high speed. Obstacles,
including sharp drop-offs, may exist.
V00A0XL
____________
SAFETY INFORMATION
___________
57
Page 60
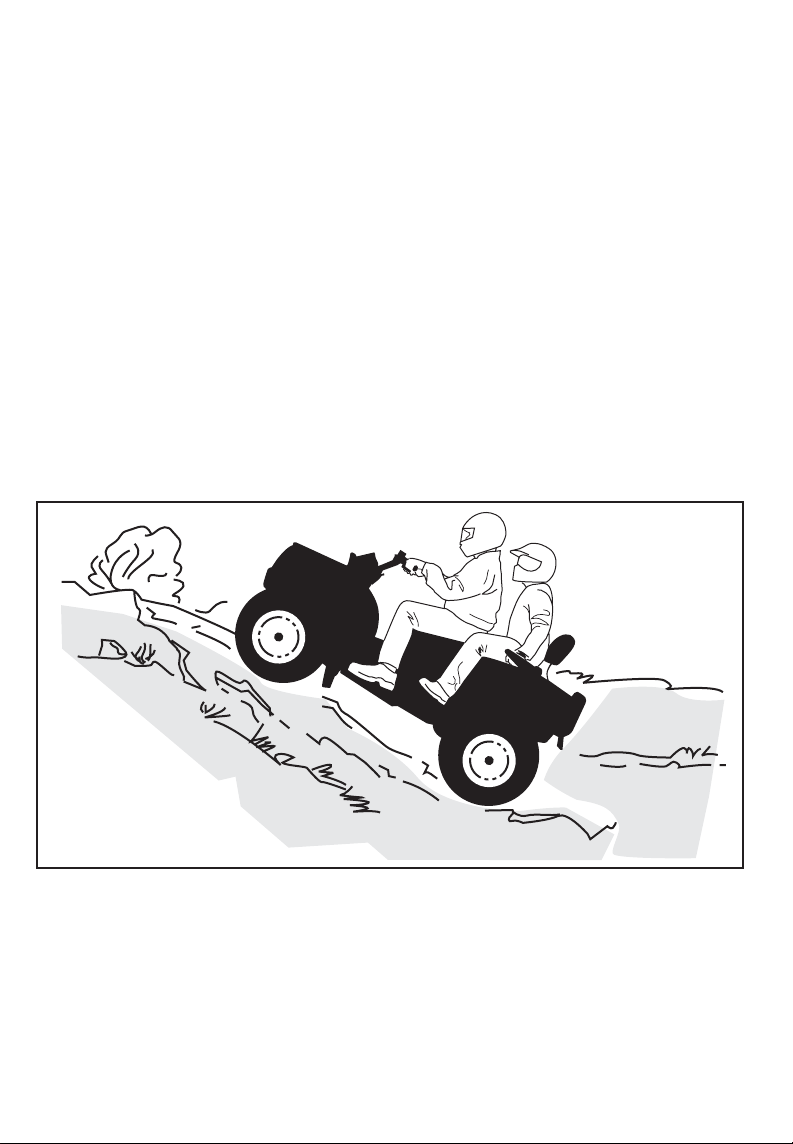
2-UP Models
Do not forget, the operator is responsible for the safety of the passenger. In
doubt, disembark him before climbing hill. Always remember that the vehicle
handling, stability and braking distance may be affected when riding with a passenger.
If you decide to keep your passenger, he must synchronize his movements with
yours.
Operator and passenger must keep their body weight forward, towards the top
of the hill. Keep feet on the footrests and shift into low gear then accelerate and
when necessary, change gear quickly as you climb. Do not over-speed since
this may cause the front of the vehicle to lift from the ground and fall back on
you. If the hill is too steep and you cannot proceed or the vehicle begins to roll
backwards, apply thebrake, being careful notto slide. Dismount, passenger first,
then use the "U" turn or "K" turn (while walking back, next to the vehicle on the
up hill side and with a hand on the brake lever, slowly back the rear of the vehicle
toward the top of the hill then drive downhill). Always walk or dismount on the
upside of the slope while keeping clear of the vehicle and its rotating wheels.
Do not try to hold on to the vehicle if it begins to topple. Stay clear. Do not
ride over the crest of the hill at high speed. Obstacles, including sharp drop-offs,
may exist. The passenger should get on the vehicle only when the vehicle has
returned to a safe location.
V00A1XL
___________
58
SAFETY INFORMATION
___________
Page 61
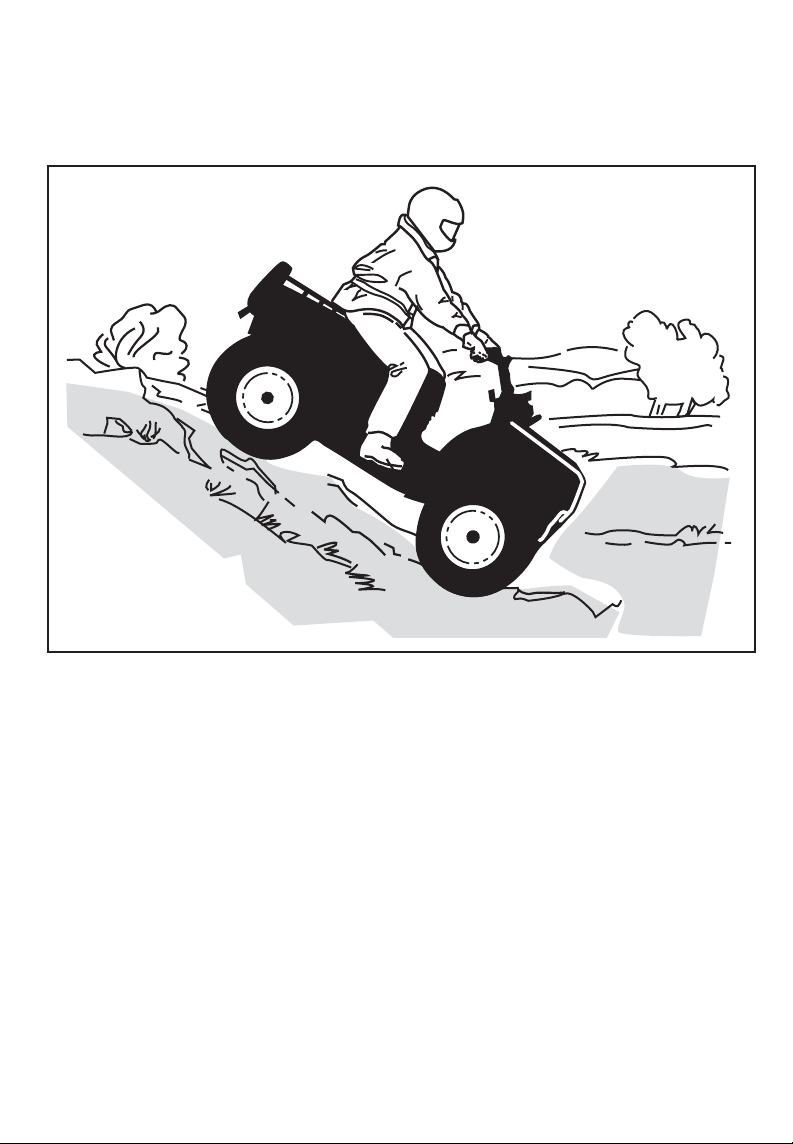
Downhill
1-UP Models
Keep your body weight rearwards. Apply the brake gradually to prevent skidding.
Do not "coast" down the slope using solely engine compression or in neutral gear.
V00A0YL
____________
SAFETY INFORMATION
___________
59
Page 62
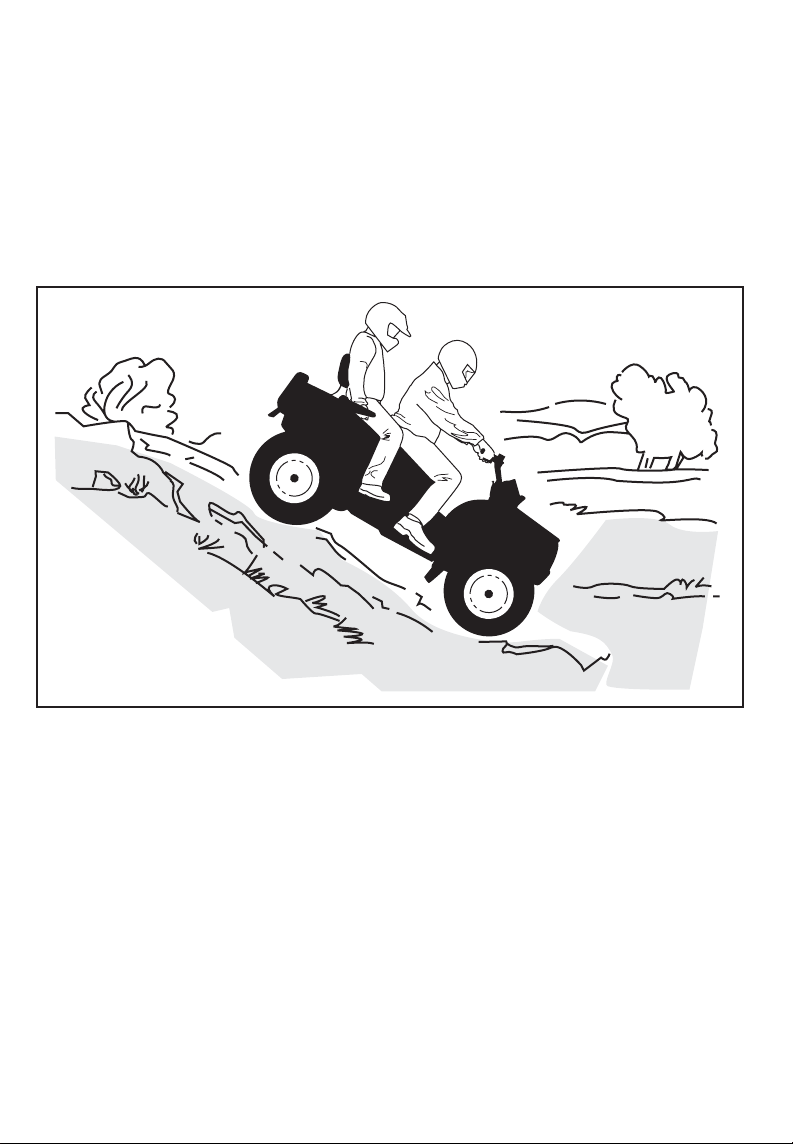
2-UP Models
Do not forget, the operator is responsible for the safety of the passenger. In
doubt, disembark him before going down the hill. Always remember that the
vehicle handling, stability and braking distance may be affected when riding with
a passenger.
If you decide to keep your passenger, he must synchronize his movements with
yours.
Operator and passenger must keep their body weight rearwards. Apply thebrake
gradually toprevent skidding. Do not “coast” down the slope using solely engine
compression or in neutral gear.
V00A1YL
___________
60
SAFETY INFORMATION
___________
Page 63
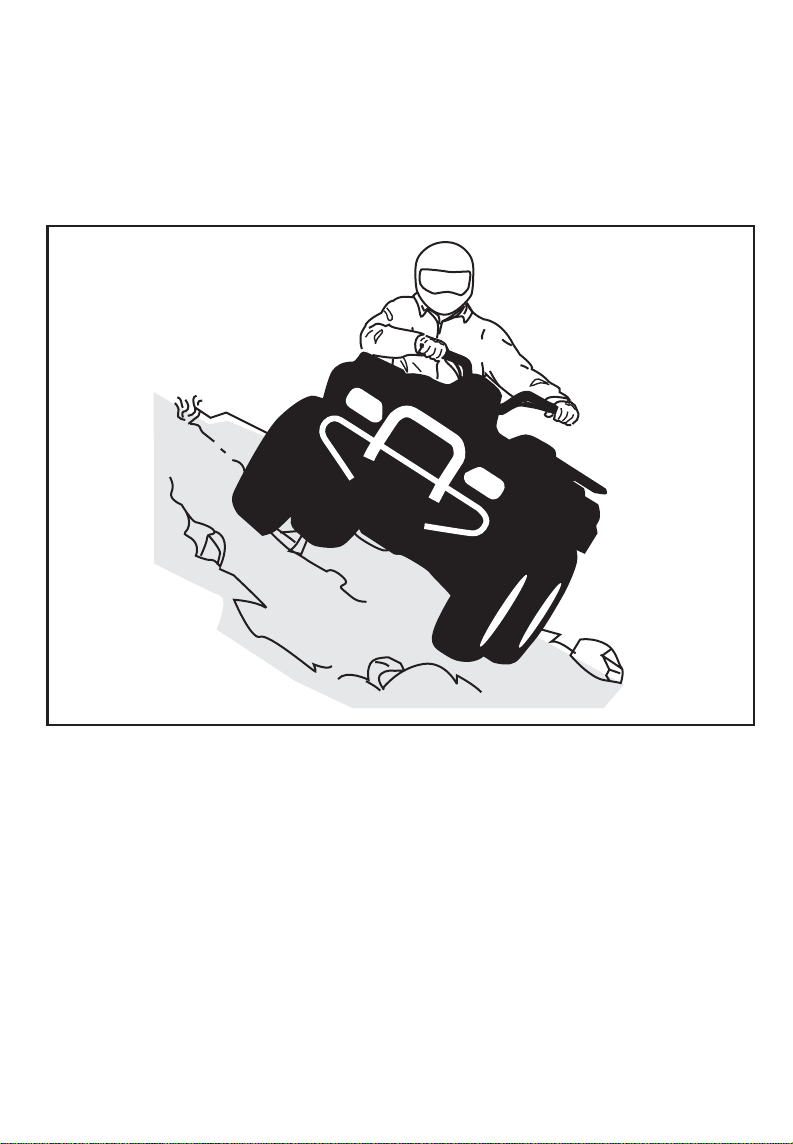
Side hilling
1-UP Models
This is one of the most risky types of riding since it may drastically change the
balance of the vehicle. It should be avoided wherever possible. If it is necessary
to do so however, it is important that you ALWAYS keep your body weight on
the upside of the slope... and be prepared to dismount on that side should the
vehicle begin to topple. Do not try to stop or save the vehicle from damage.
V00A0ZL
____________
SAFETY INFORMATION
___________
61
Page 64
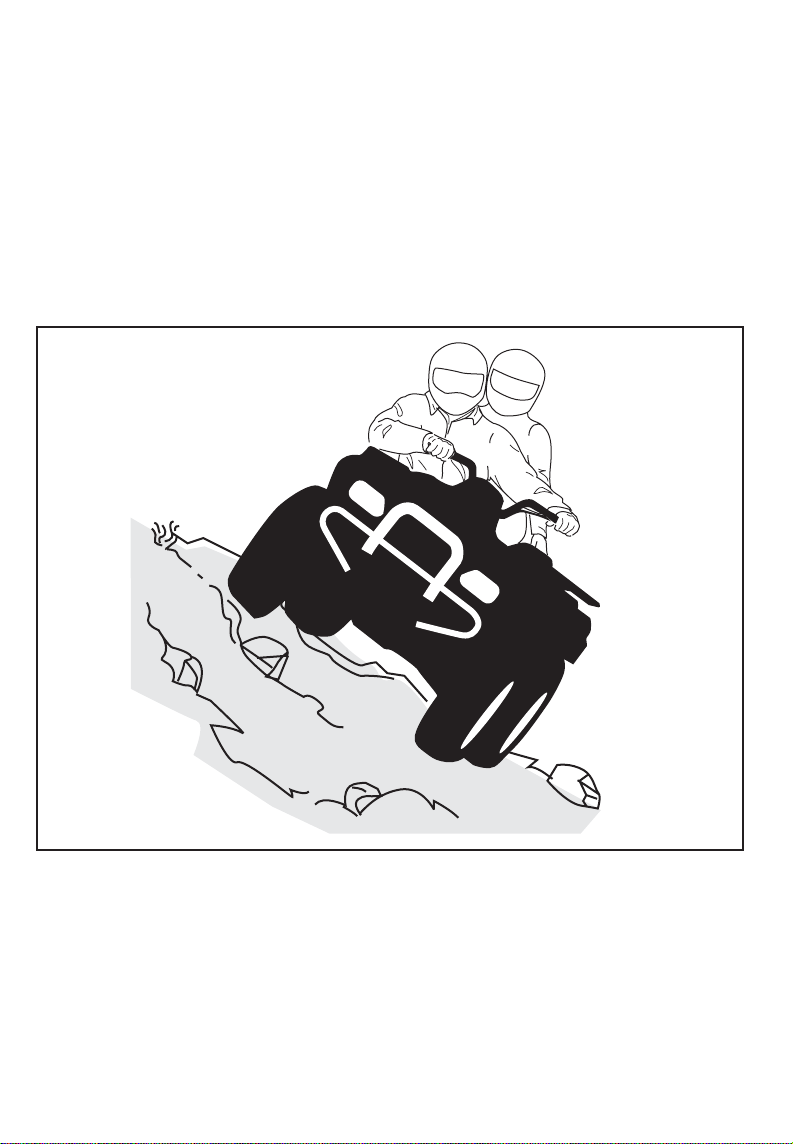
2-UP Models
Do not forget, the operator is responsible for the safety of the passenger. In
doubt, disembark him before proceeding. Always remember that the vehicle
handling, stability and braking distance may be affected when riding with a passenger.
If you decide to keep your passenger, he must synchronize his movements with
yours.
This is one of the most risky types of riding since it may drastically change the
balance of the vehicle. It should be avoided wherever possible. If it is necessary
to do so however, it is important that you ALWAYS keep your body weight on
the upside of the slope... and be prepared to dismount on that side should the
vehicle begin to topple. Do not try to stop or save the vehicle from damage.
V00A1ZL
___________
62
SAFETY INFORMATION
___________
Page 65

Routine Maintenance
Once yourride completed, itis wise to remove any build up of snow, ice, mud and
grime. Not only will this help you keep your vehicle longer and in good condition
for resale but will eliminate potential hazards the next time you use the vehicle.
Wash your vehicle in warm soapy water then allow it to dry. (A towel may help).
Do not wash your vehicle outside during freezing weather. Apply appropriate
lubrication as described in the MAINTENANCE section.
Part of your responsibility towards safety is to respect the contents of this
Operator's Guide. It provides valuable advice on how to properly take care
of your vehicle. If further assistance is required your authorized Can-Am ATV
distributor/dealer is always willing to help.
Modification of the vehicle to increase speed and performance may violate the
terms and conditions of your vehicle limited warranty. In addition, certain modifications including the removal of engine or exhaust components are illegal under
most laws.
Changing the wheel and/or tire size may affect the stability of the vehicle. Incorrect tire pressure may lead to blow outs or cause a tire to move around on its
rim and become lost or damaged. Wheels or tires which are damaged should
always be replaced.
2-UP Models Only
The vehicle handling, stability and braking distance may be affected when riding
with a passenger. Safely reduce speed when riding with a passenger. Allow
greater distance for braking.
The operator is responsible for the safety of the passenger. In doubt, disembark
him before executing the maneuver. Use your common sense.
While reading this Operator’s Guide, remember that:
WARNING
Indicates a potential hazard that, if not avoided, could result in serious injury or death.
____________
SAFETY INFORMATION
___________
63
Page 66
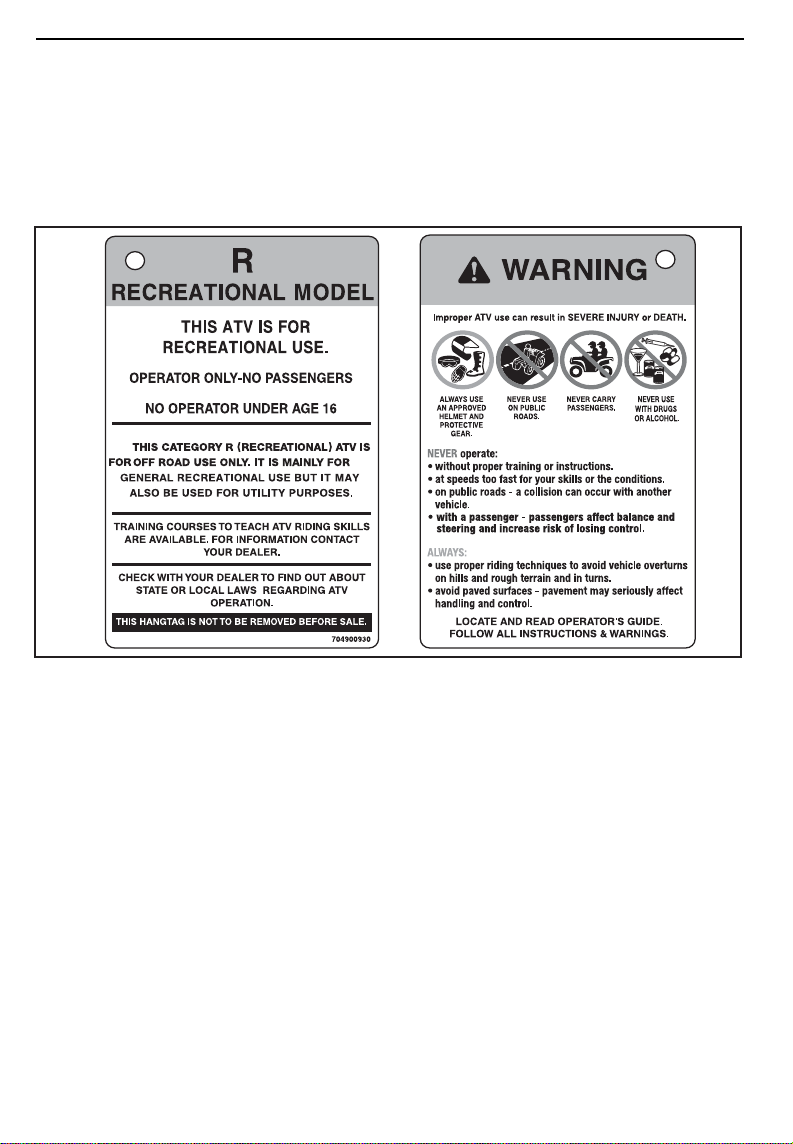
HANG TAG
This vehicle comes with a hang tag and labels containing important safety information.
Any person who rides this vehicle should read and understand this information
before riding.
1-UP Models
V07M11L
___________
64
SAFETY INFORMATION
___________
Page 67
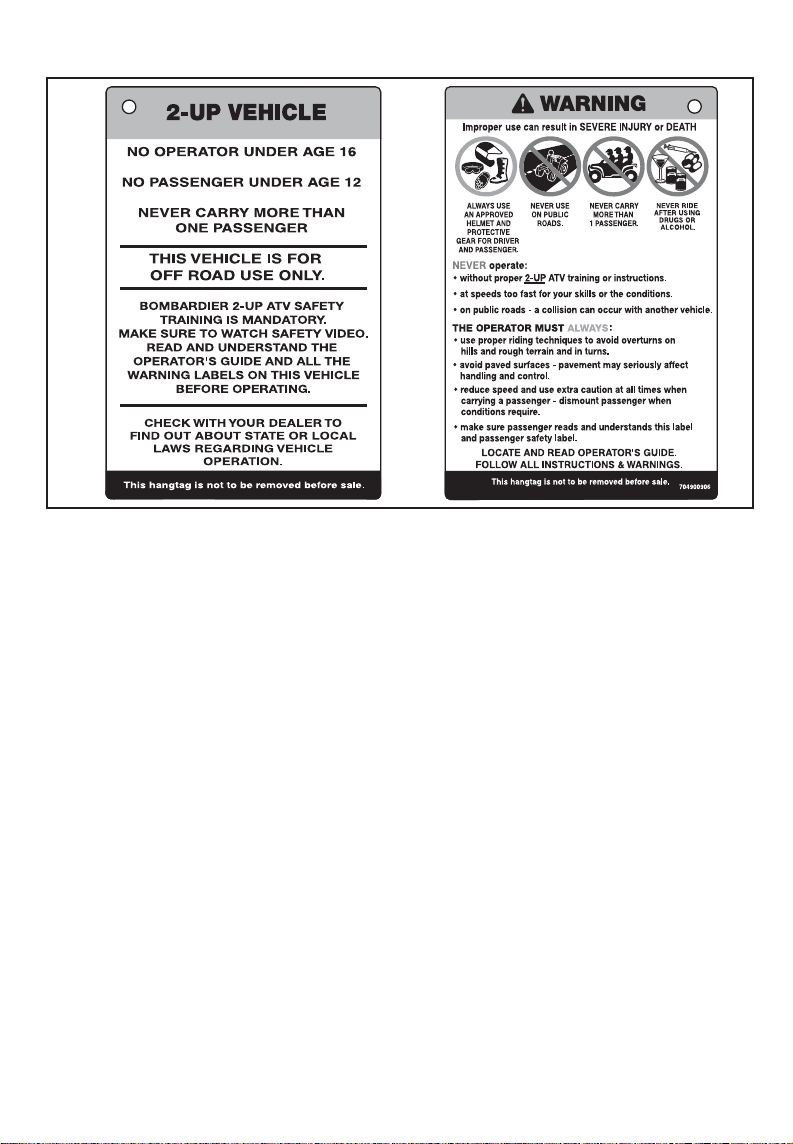
2-UP Models
V00M0BL
____________
SAFETY INFORMATION
___________
65
Page 68
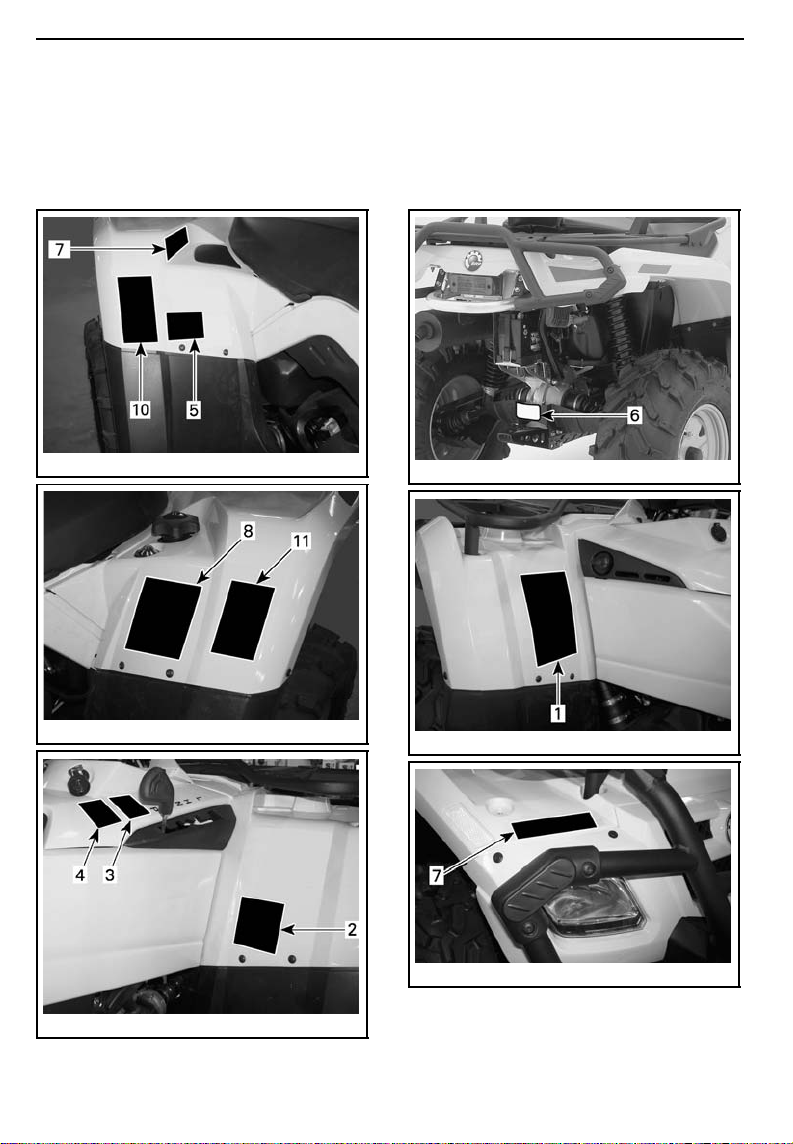
ON-PRODUCT LABELS
The following labels are on your vehicle and they should be considered permanent parts of the vehicle. If missing or damaged, they can be replaced free of
charge. See an authorized Can-Am ATV distributor/dealer.
NOTE: The following illustrations used in this Operator's Guide are a general
representation only. Your model may differ.
vmo2007-011-002_b
vmo2007-011-003_b
vmo2007-011-001_a
vmo2007-003-006_b
vmo2007-011-004_a
vmo2007-011-005_a
___________
66
SAFETY INFORMATION
___________
Page 69
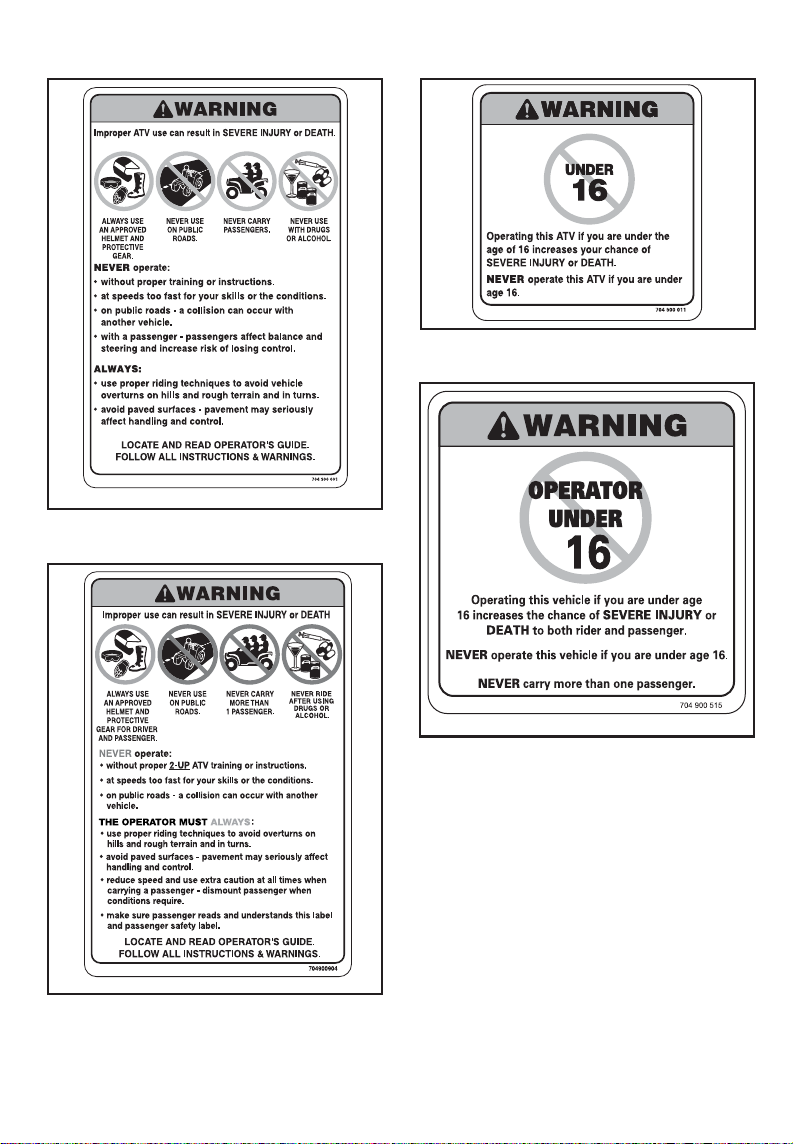
V01M01Z
1-UP MODELS
Label 1
Label 2
V01M02Z
1-UP MODELS
V00M0CY
2-UP MODELS
____________
V01M0RY
2-UP MODELS
SAFETY INFORMATION
___________
67
Page 70
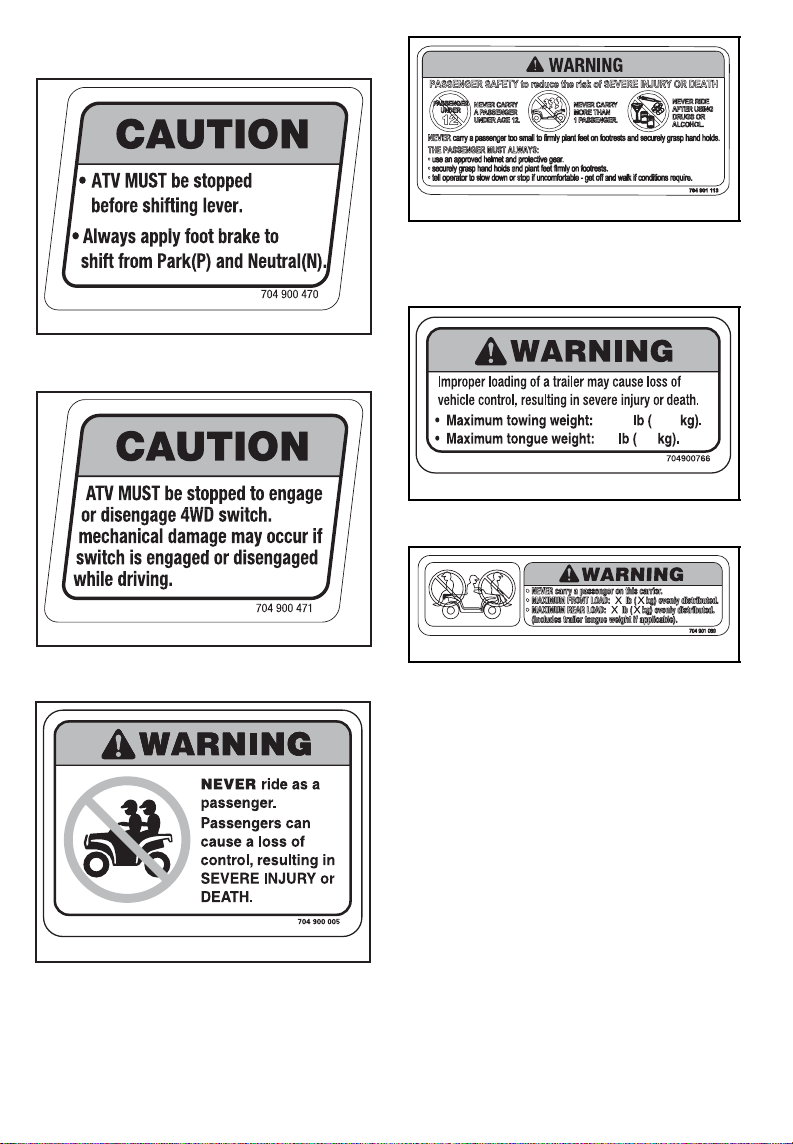
V07M06Y
Label 3
Label 4
vmo2006-008-003_aen
2-UP MODELS
vmo2006-016-008_en
Label 6
XX
Label 7
XXX
XXX
XX
V07M07Y
Label 5
V01M07Z
1-UP MODELS
___________
68
vmo2006-005-010_en
SAFETY INFORMATION
___________
Page 71
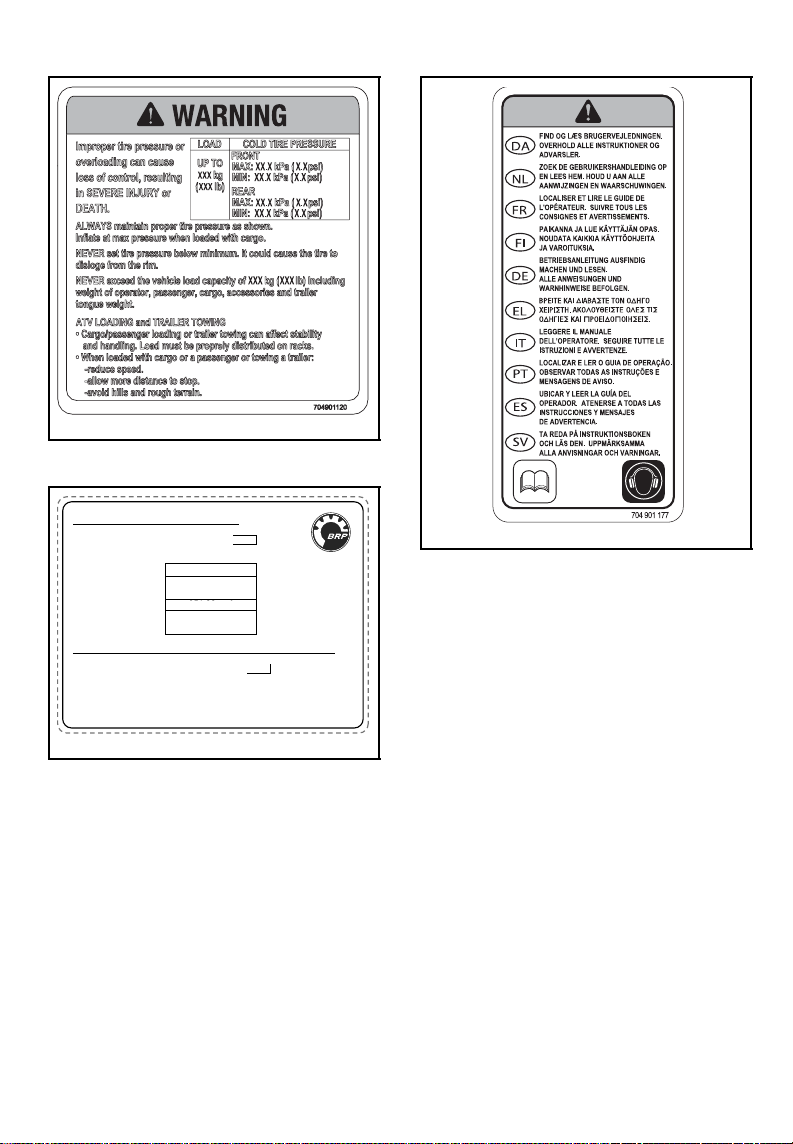
Label 8
vmo2006-008-004_aen
Label 9
(0,66,21&21752/,1)250$7,21
7+,69(+,&/(,6&(57,),('7223(5$7(21
81/($'('*$62/,1($1'0((767286(3$
$1'&$/,)251,$5(*8/$7,216)25$796,(1*,1(6
(1*,1()$0,/<
&(57,),&$7,21
67$1'$5')(/
(1*,1(',63/$&(0(17
(;+$867(0,66,21
&21752/6<67(0
5(16(,*1(0(176685/(',6326,7,)$17,32//87,21
&(9e+,&8/((67&(57,),e3285)21&7,211(5¬/(66(1&(
6$163/20%(7,/5e321'$8;1250(6'(/(3$(7
5e*/(0(17$7,216&$/,)251,(11(63285/(6977¬027(856,
6((23(5$725¶6*8,'()250$,17(1$1&(63(&,),&$7,216
92,5*8,'('8&21'8&7(853285/(663e&,),&$7,216'¶(175(7,(16
%20%$5',(55(&5($7,21$/352'8&76,1&
XXXXXXXXXXXXXX
JN:KU+&12[
XXXXX.XXXXXX
%&;;*&
XXXXXXXXX
FP
&$5%
XXXX
XXXX
)$0,//('(027(85
/,0,7('(6e0,66,216
'(/$)$0,//(
&</,1'5e(
6<67Ê0('(&2175Ð/(
'(6e0,66,216
XXXX
Label 10
vmo2006-014-003_a
vmo2007-002-002
LOCATED UNDER SEAT ON THE
UPPER BAR OF FRAME
____________
SAFETY INFORMATION
___________
69
Page 72
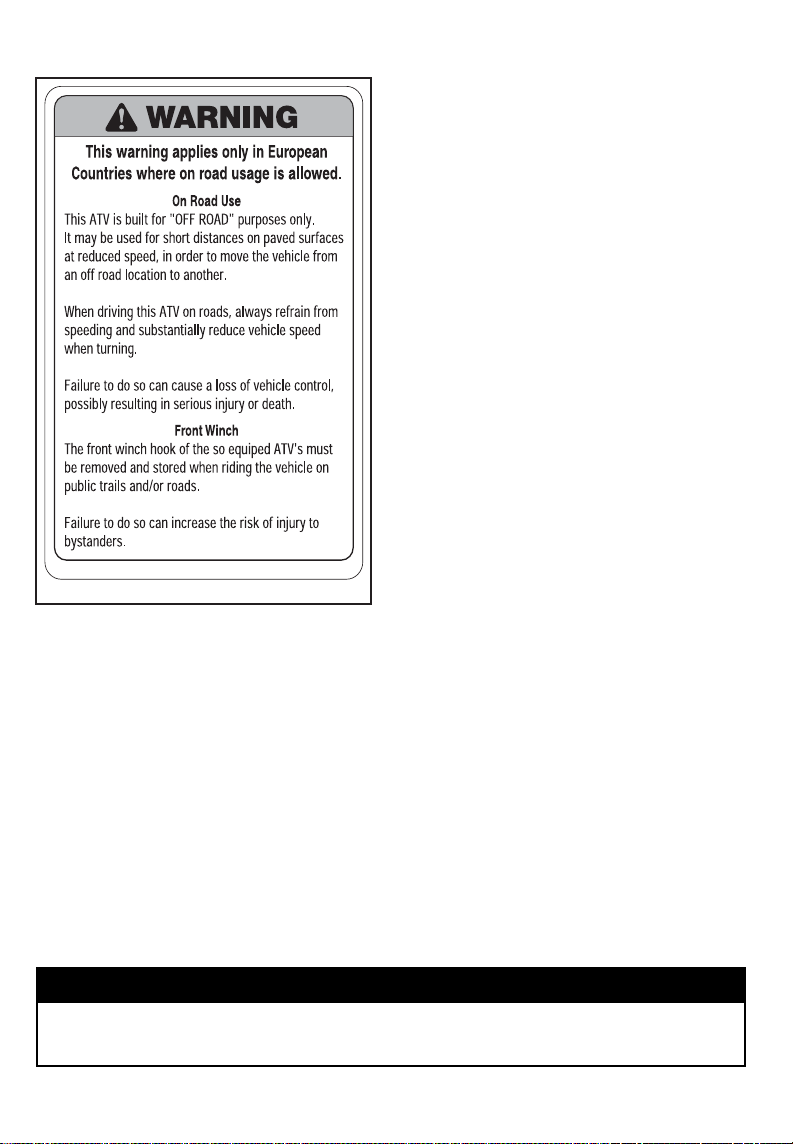
V01M0PY
Label 11
704 900 400
While reading this Operator’s Guide, remember that:
WARNING
Indicates a potential hazard that, if not avoided, could result in serious injury or death.
___________
70
SAFETY INFORMATION
___________
Page 73

VEHICLE
INFORMATION
_____________________
71
Page 74
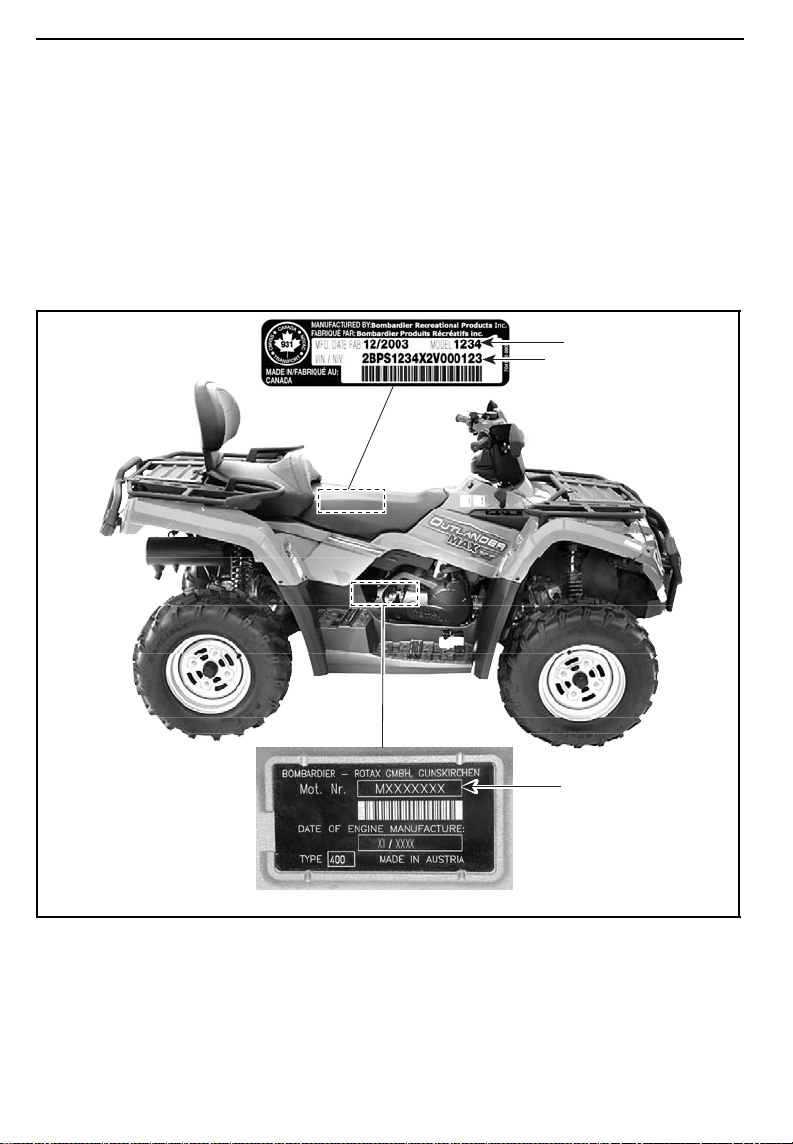
HOW TO IDENTIFY YOUR VEHICLE
The main components of your vehicle (engine and frame) are identified by different serial numbers. It may sometimes become necessary to locate these numbers for warranty purposes or to trace your vehicle in the event of loss. These
numbers are required by the authorized Can-Am ATV distributor/dealer to complete warranty claims properly. No warranty will be allowed by BRP if the engine
identification number (EIN) or vehicle identification number (VIN) is removed or
mutilated in any way. We strongly recommend that you take note of all the serial
numbers on your vehicle and supply them to your insurance company.
Engine and Vehicle Identification Number Location
3
2
vmo2006-008-005_a
TYPICAL — ALL MODELS
1. EIN (Engine Identification Number)
2. VIN (Vehicle Identification Number)
3. Model
______________________
72
1
Page 75
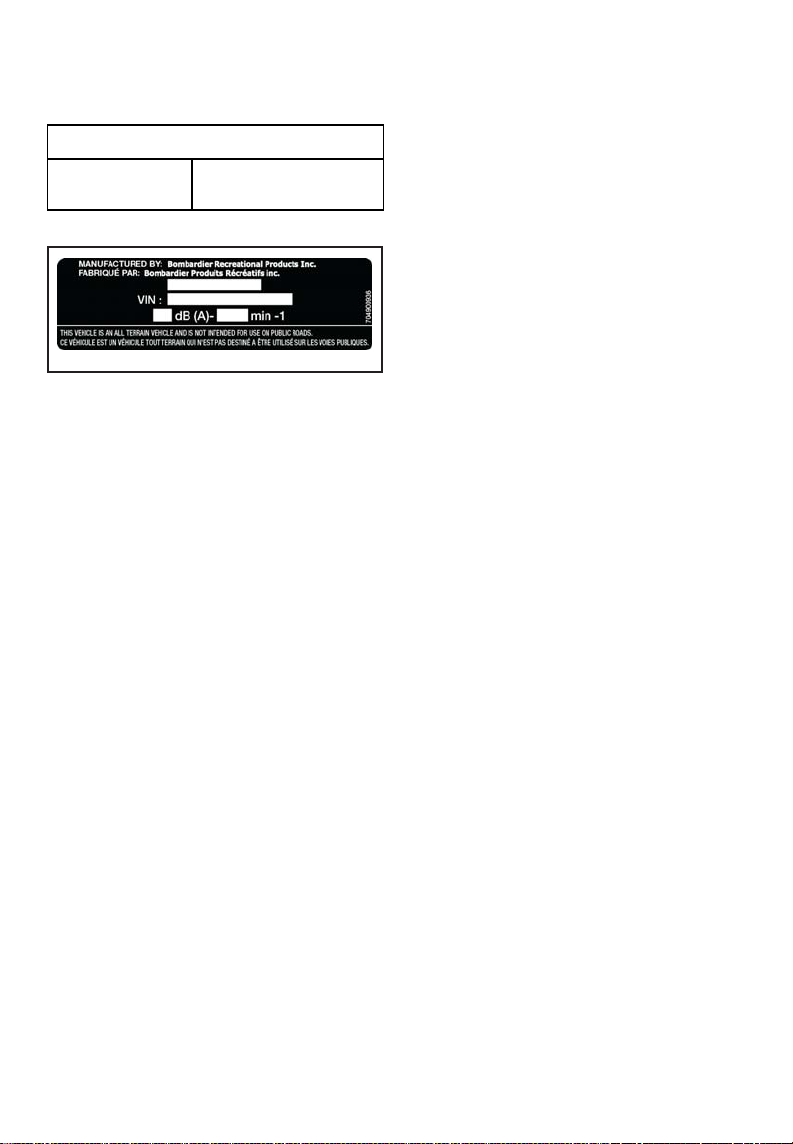
Compliance Label
This label indicates vehicle's compliance in many countries.
LABEL LOCATION
Outlander
Series
V00M0FY
EUROPEAN COMMUNITY COUNTRIES
Under seat, on the
upper bar of frame
_____________________
73
Page 76

BREAK-IN PERIOD
Engine
A break-in period of 10 operating hours
is required before running the vehicle
at sustained full throttle.
CAUTION: Never mix oil with fuel.
This vehicle has a 4-stroke engine.
Oil must be added to engine base
only.
During this period, maximum throttle
should not exceed 3/4. However, brief
full acceleration and speed variations
contribute to a good break-in. Continued wide open throttle accelerations,
prolonged cruising speeds and engine
overheating are detrimental during the
break-in period.
Belt
A new belt requires a break-in period of 50 km (30 mi). Avoid strong
acceleration/deceleration, pulling a
load or high speed cruising.
10-Hour Inspection
NOTE: The10-hour inspection is atthe
expense of the vehicle owner.
As with any precision piece of mechanical equipment, we suggest
that after the first 10 hours, 300 km
(185 mi) or 30 days after thepurchase,
whichever comes first, your vehicle
be inspected by an authorized Can-Am
ATV distributor/dealer. This inspection
will give you the opportunity to discuss the unanswered questions you
may have encountered during the first
hours of operation.
______________________
74
Page 77
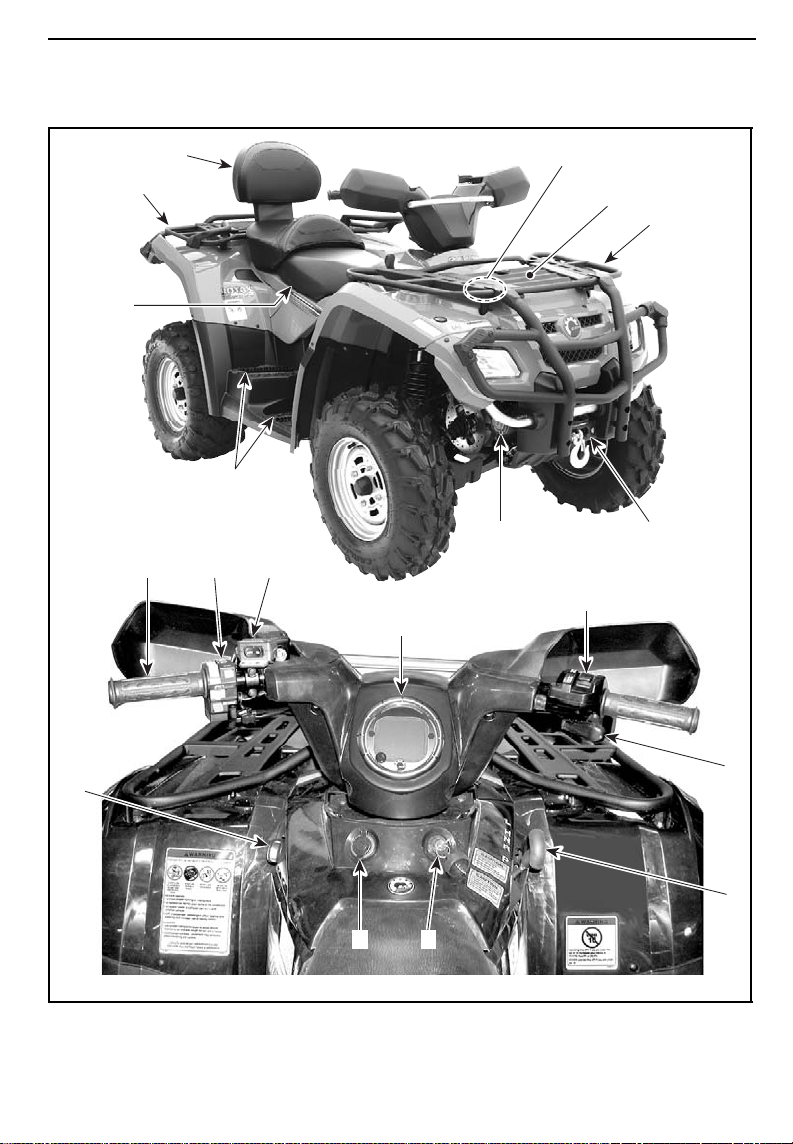
CONTROLS/INSTRUMENTS/EQUIPMENT
NOTE: Some controls/instruments/equipment are optional.
16 22,23,34,35
20
17
14
27 29
3,4 6 28,31,32
2
7
18
20
12
vmo2006-008-006_b
98
_____________________
1
5
75
Page 78
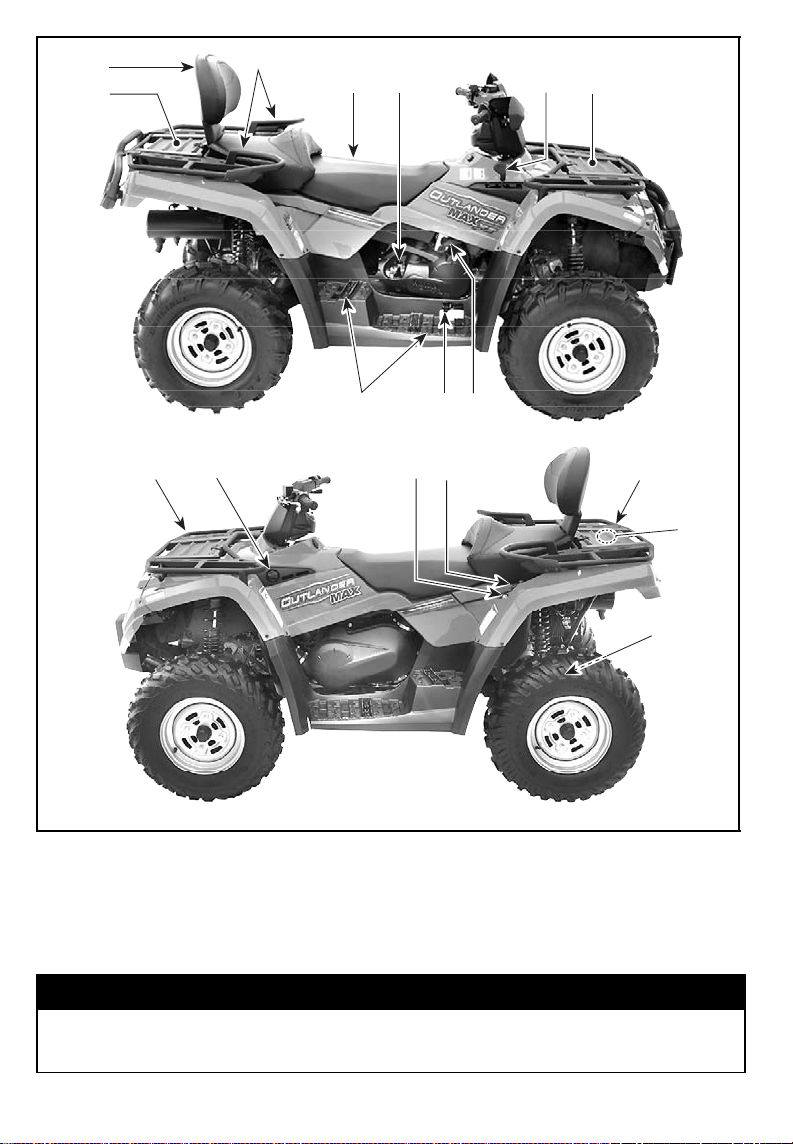
16
19
15
17
26
14 13 25
185
20 12 11 10
vmo2006-008-007_b
20
24
21
While reading this Operator’s Guide, remember that:
WARNING
Indicates a potential hazard that, if not avoided, could result in serious injury or death.
______________________
76
Page 79
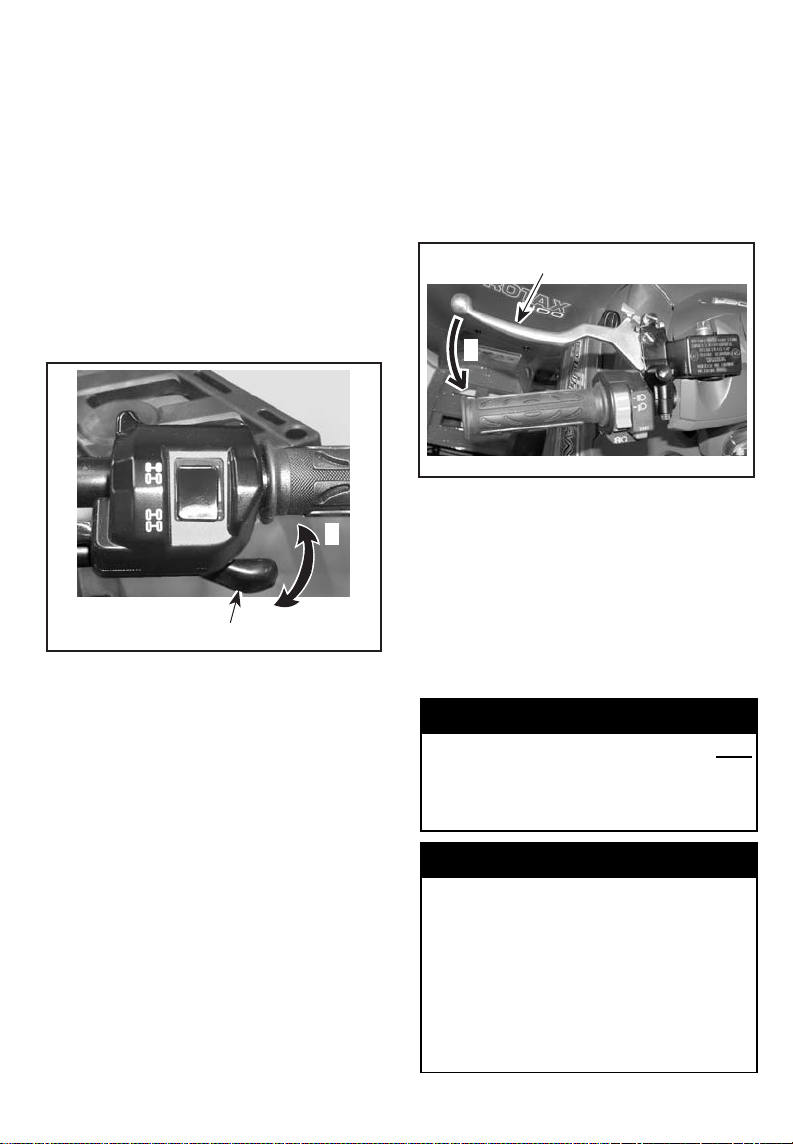
NOTE: This section gives basic func-
tions ofthe various controls of your vehicle. For more details of how to operate one control in conjunction with
some others, refer to OPERATING IN-
STRUCTIONS further in this section.
1) Throttle Lever
When pushed, it increases the engine
speed that allows the engagement of
the transmission on the selected gear.
When released, the engine speed
should return automatically to idle and
the vehicle will gradually slow down.
2
3
V07I01Y
TYPICAL
1. Throttle lever
2. To accelerate
3. To decelerate
1
2) 2WD/4WD Selector
This selector is not functional on the
European Community models.
NOTE: As on other wheeled vehicles,
the vehicle weight is transferred to the
front wheels when braking. To obtain
greater stopping efficiency, the brake
system distributes more braking force
to the front wheels. This will affect
vehicle handling and steering control
when braking vigorously. Take it into
account when braking.
1
2
V07K01Y
TYPICAL
1. Brake lever
2. To apply brakes
4) Parking Brake
When applied, it prevents the vehicle
from moving. Useful when the brake
needs to be locked for example when
doing aK-turn, during transportation or
when the vehicle is not in operation.
WARNING
Always use the parking brake and
engage the PARK position on the
transmission lever when the vehicle is not in operation.
3) Brake Lever
When the brake lever is compressed,
the front and rear brakes are applied.
When released, the brake lever should
automatically return to its original position. Braking effect is proportional to
the force applied on the lever and to
the type and condition of the terrain.
_____________________
WARNING
Make sure parking brake is fully
disengaged before operating the
vehicle.
When you ride the vehicle, brakes
that are caused to drag by a continuous pressure on the lever may
cause damage to the brake system
and cause loss of braking capaci
and/or fire.
ty
77
Page 80
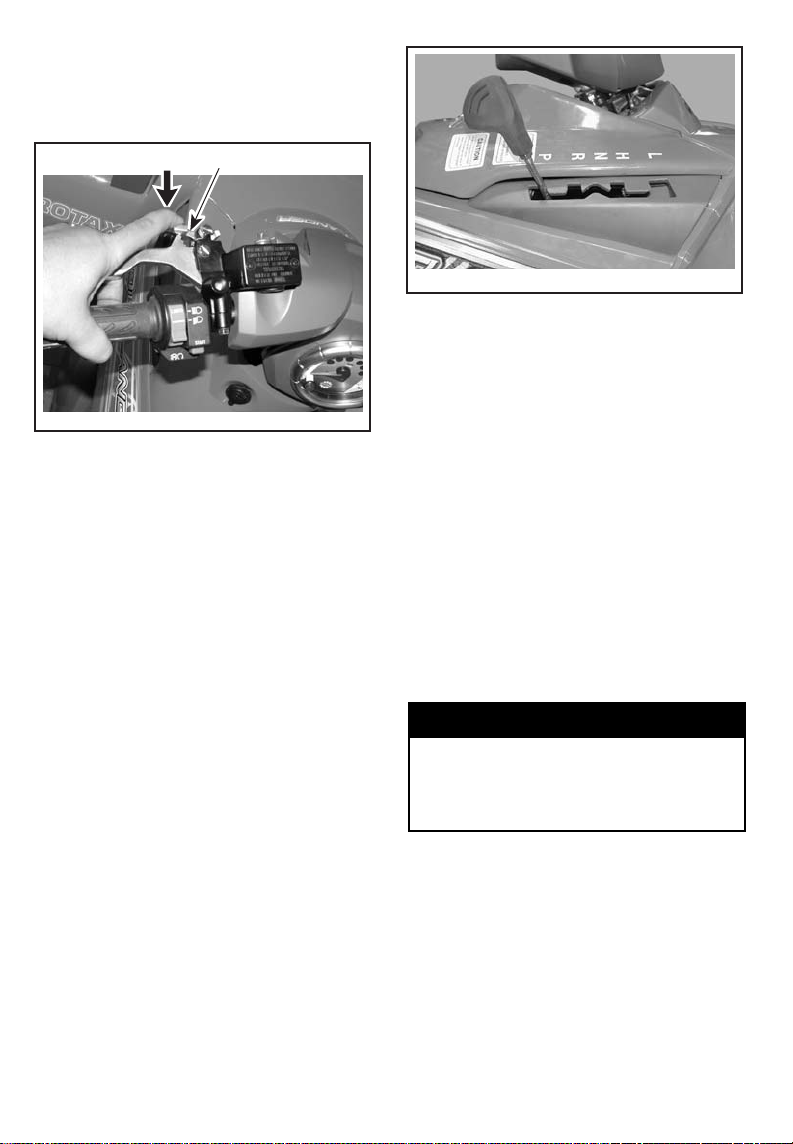
To engage mechanism: Squeeze
brake lever and maintain while moving lever lock. Brake lever is now
compressed and applying all brakes.
1
2
V07K02Y
TYPICAL
1. Brake lever lock
2. Press to apply parking brakes
To release mechanism: Squeeze
brake lever. Lever lock should automatically return to its original position.
Brake lever should return to rest position. Always release parking brake
before riding.
5) Transmission Lever
A 5-position lever: P, R, N, H and L.
To change the transmission position,
completely stop vehicle then move
lever to the desired position. Do not
force lever. If unable to shift, rock
the vehicle back and forth to move
the gears in the transmission and try
again.
V07D07Y
SHIFT PATTERN
CAUTION: Always completely stop
the vehicle and apply the brake
prior to moving the transmission
lever.
P: Park
This position locks the transmission to
help prevent vehicle movement. Always use when the vehicle is not in
operation. In some circumstances, it
may be necessary to rock the vehicle
back and forth to move the gears in
the transmission to allow the park to
be engaged.
R: Reverse
This allows the vehicle to go backward. The vehicle speed is limited.
WARNING
Before moving vehicle in reverse,
ensure the path behind is clear of
obstacles or bystanders. Remain
seated.
N: Neutral
This position disengages the transmission to allow manual vehicle movement.
______________________
78
Page 81
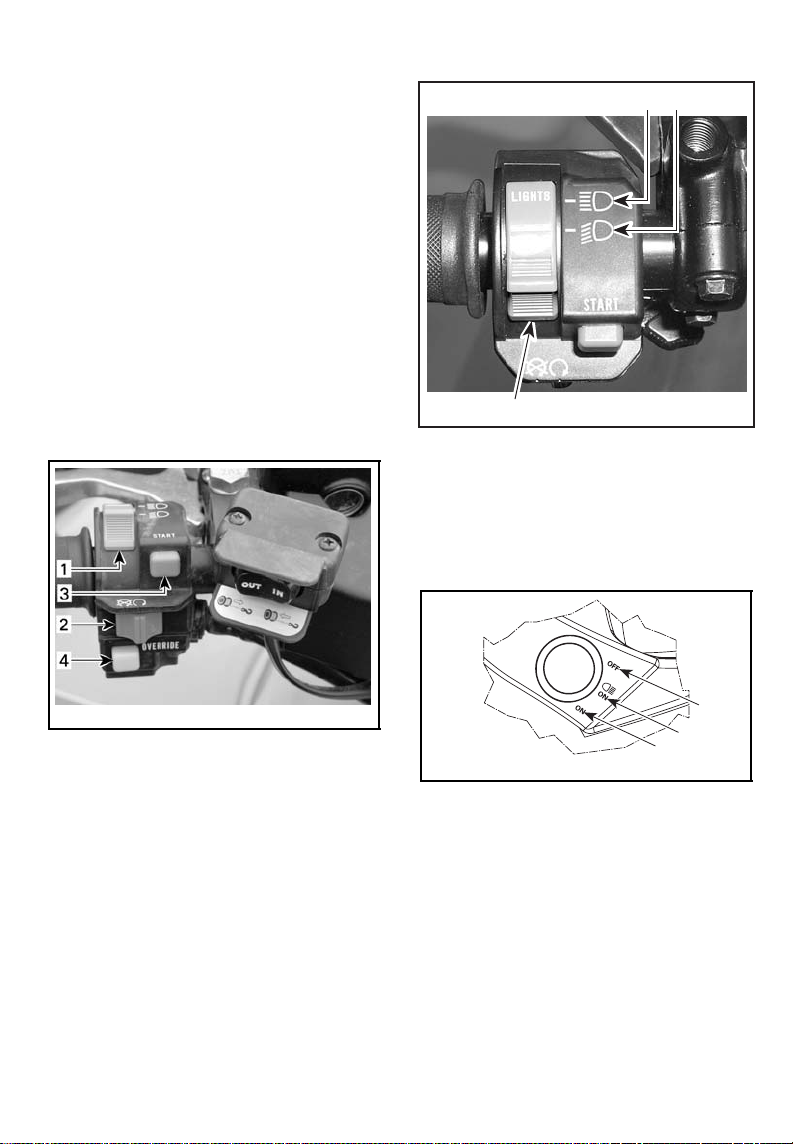
H: High gear
This selects the high speed range of
the transmission in the gear box. It is
the normal driving speed range. It allows the vehicle toreach its maximum
speed.
L: Low gear
This selects the low speed range of
the transmission in the gear box. It
is the working position. It allows the
vehicle to move slowly with the maximum traction and power.
NOTE: Use the low speed range to
pull any load or to climb a steep incline.
Headlamp Switch
3 2
6) Multi-Function Switch
The controls located on this multifunction switch are:
vmo2006-016-001_a
TYPICAL — MULTI-FUNCTION SWITCH
1. Headlamp switch
2. Engine stop switch
3. Engine start button
4. Override button
V07I03Y
TYPICAL
1. Headlamp switch
2. Low beam position and taillight
3. High beam position and taillight
1
NOTE: Place ignition switch to ON
"without light" position to close the
headlamp.
1
2
3
vmo2006-005-013_b
IGNITION SWITCH POSITIONS
1. OFF
2. ON "with light"
3. ON "without light"
Engine Stop Switch
This switch can be used to stop engine
and as an emergency control.
To stop engine, fully release throttle
lever then use the engine stop switch.
_____________________
79
Page 82
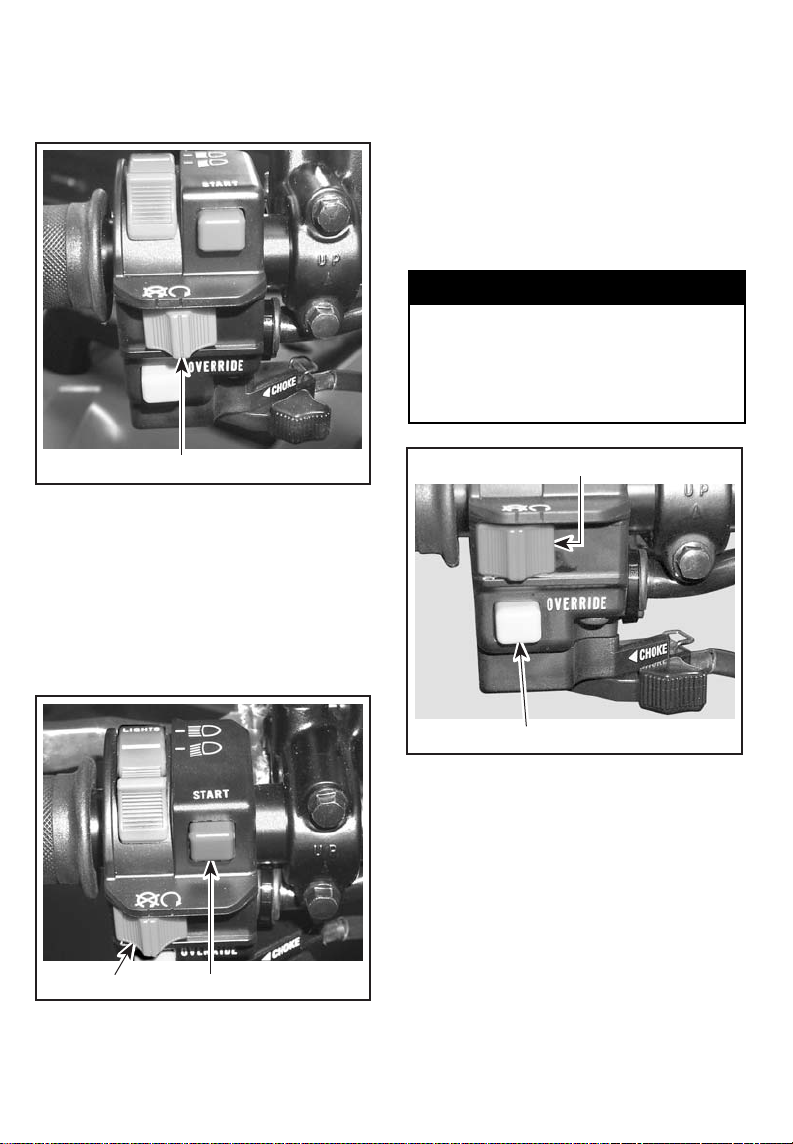
NOTE: While engine can be stopped
by turning ignition key to OFF position, we recommend the engine be
stopped by the engine stop switch.
NOTE: The engine will turn over but
will not start if the engine stop switch
is turned to OFF position.
Override Button
This button is used to override the reverse speed limiter system while power backing up. Press and hold the
override button then depress throttle
lever gradually.
WARNING
Never activate the override button if throttle lever is already depressed as a loss of control may
result, causing severe personal injury or death.
V07I05Y
TYPICAL
1. Engine stop switch
1
Engine Start Button
To start engine, place the engine stop
switch to RUN.
Press and hold the engine startbutton.
Release immediately after engine is
started.
V07I06Y
TYPICAL
1. Engine start button
2. Engine stop switch
2
1
2
V07I07Y
TYPICAL
1. Override button
2. Engine stop switch
1
Choke Lever
Located at bottom of multi-function
switch. This device features a variable
lever to ease cold start.
Position OFF is for normal use with a
warm engine.
______________________
80
Page 83
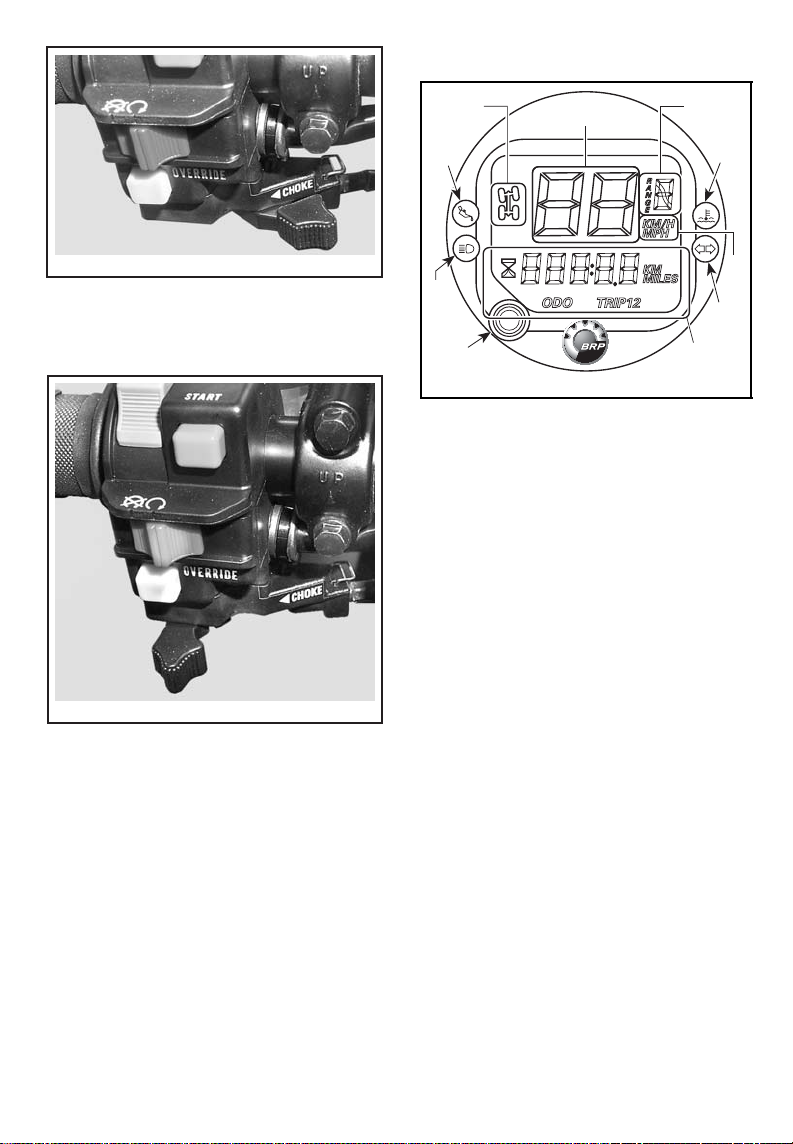
7) Speedometer
V07I08Y
CHOKE LEVER IN THE OFF POSITION
The full choke position is used for lower engine temperature.
V07I09Y
CHOKE LEVER IN THE FULL CHOKE
POSITION
The other positions between OFF and
FULL position, will be use depending
on the engine temperature.
2
7
9
1
vmo2006-006-002_a
TYPICAL
1. Display selector button
2. 4WD indicator lamp
3. Transmission position display
4. Vehicle speed display
5. Multi-function display
6. Unit display
7. Oil pressure indicator lamp
8. Engine temperature indicator lamp
9. Hi intensity indicator lamp
10. Direction indicator lamp
4
3
8
6
10
5
Unit Selection (MPH vs km/h)
The speedometer, odometer and trip
meter are factory preset in miles but it
is possible to change them to kilometer reading.
Turn ignition switch to OFF position.
Slightly lift speedometer at the bot-
tom using a small flat screwdriver until small locking tab is released from
steering cover.
Turn speedometer clockwise until
speedometer slightly pops-out from
steering cover.
_____________________
81
Page 84
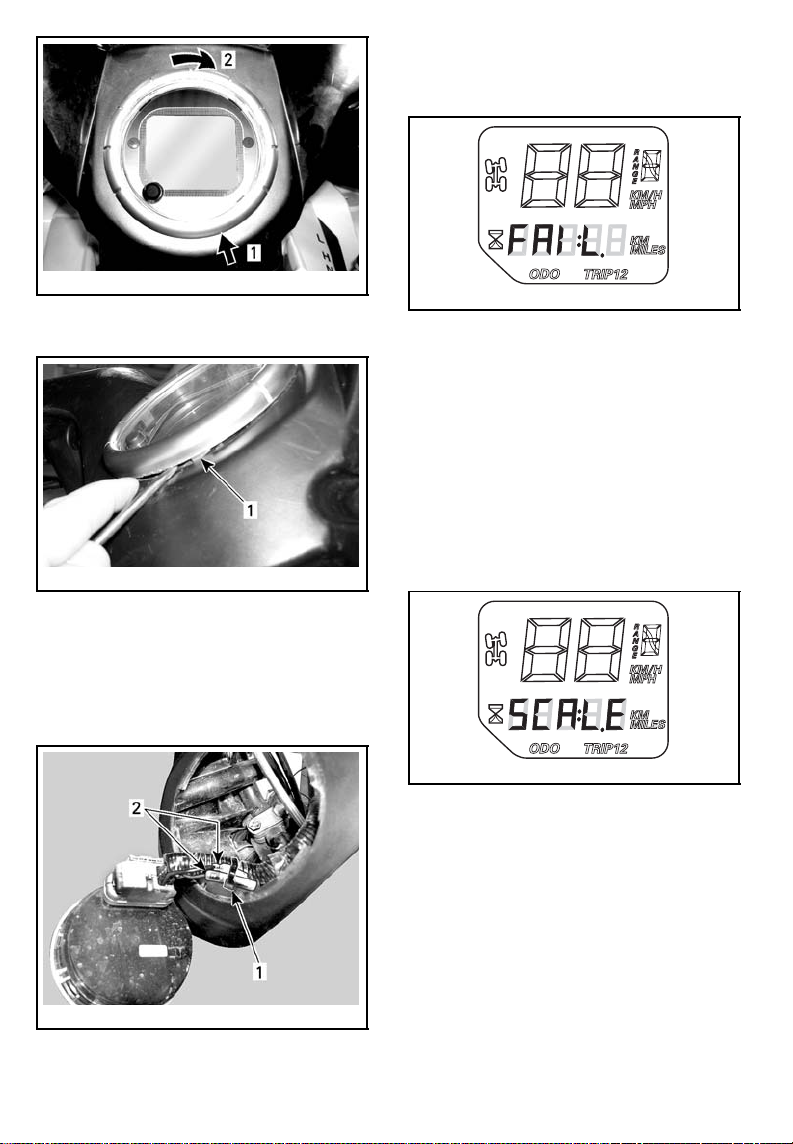
Speedometer Display Codes
Speedometer Reads FAIL
vmo2006-005-015_a
1. Lift to release locking tab
2. Turn clockwise to release speedometer
vmo2006-005-016_a
1. Locking tab
Plug connectors to change units from
miles to kilometers. Unplug to return
to miles reading.
Fix wires to the harness with new locking tie.
vmo2006-005-037
If your speedometer shows FAIL in
the multi-function display, it means
that the speedometer as sensed
18 volts in the electrical system,
caused by a disconnected or defective
voltage regulator.
Check voltage regulator connection
or contact an authorized Can-Am ATV
dealer for voltage regulator replacement.
Speedometer Reads SCALE
vmo2006-005-038
If your speedometer shows SCALE
in the multi-function display, it means
that the display selector button is
stuck in the down position or depressed when the electrical system
was activated.
vmo2006-005-017_a
1. Locking tie
2. Connectors to change units
______________________
82
Page 85
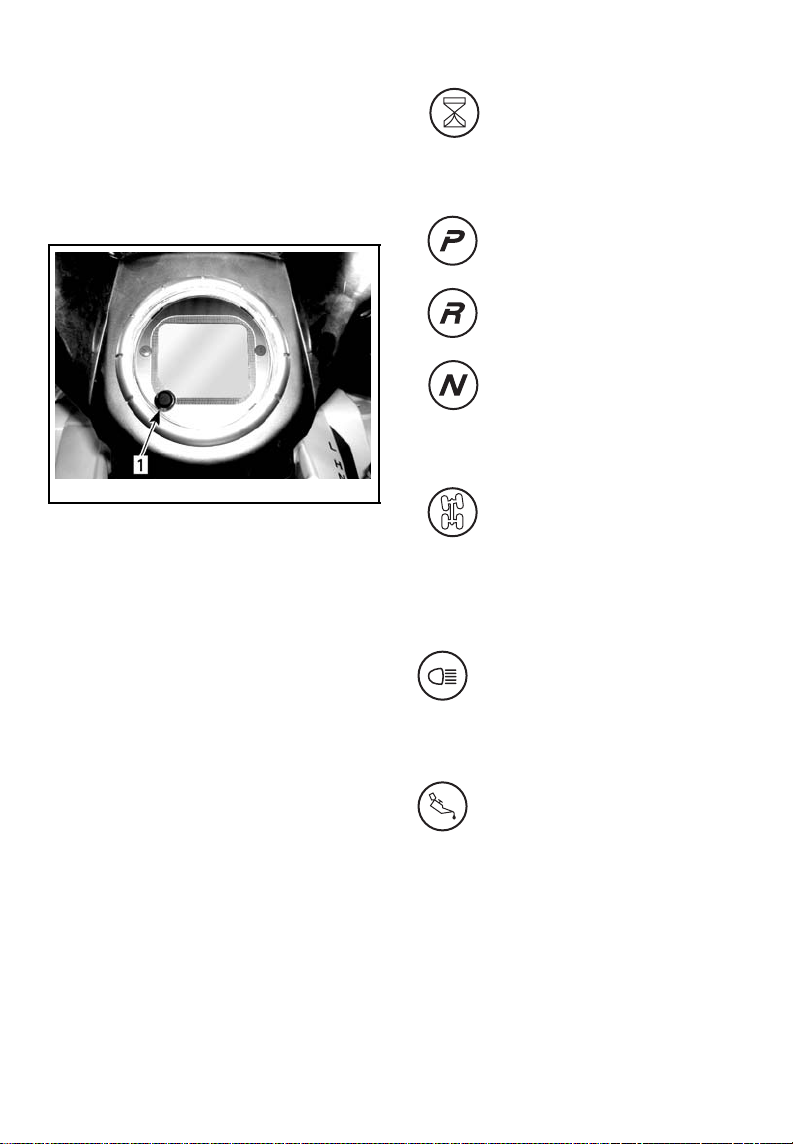
Display Selector Button
Use selector button to change
speedometer display to the desired
mode:
– hourmeter (resetable)
– odometer
– trip meter 1 (resetable)
– trip meter 2 (resetable)
vmo2006-005-015_b
1. Selector button
Multi-Function Display
Hourmeter
The hourmeter records
engine running time in hours
and minutes.
Transmission Position (RANGE)
Indicates the transmission is
in park position.
Indicates the transmission is
in reverse position.
Indicates the transmission is
in neutral position.
4-Wheel Drive System
Indicates the 4WD system
is activated.
Odometer (ODO)
Odometer records the total distance
travelled either in miles or kilometers.
Trip Meter (TRIP 1/TRIP 2)
For your convenience, your
speedometer is equipped with
two separate trip meter.
The trip meter records distance travelled since it has been reset. Distance
travelled is displayed either in miles or
kilometers.
It can be used to establish a fuel tank
range or distance between 2 way
points for instance.
Push and HOLD display selection button for 2 seconds to reset the trip meter.
_____________________
Indicator Lamps
High Intensity (BLUE)
When this indicator light is ON,
it indicates high intensity is
selected on the headlamps.
Oil Pressure (RED)
When this indicator light is ON,
it indicates a low oil pressure
condition of the engine.
CAUTION: If the light does not turn
off right after engine starting, stop
engine. See an authorized Can-Am
ATV distributor/dealer. Do not use
the vehicle until repaired.
83
Page 86
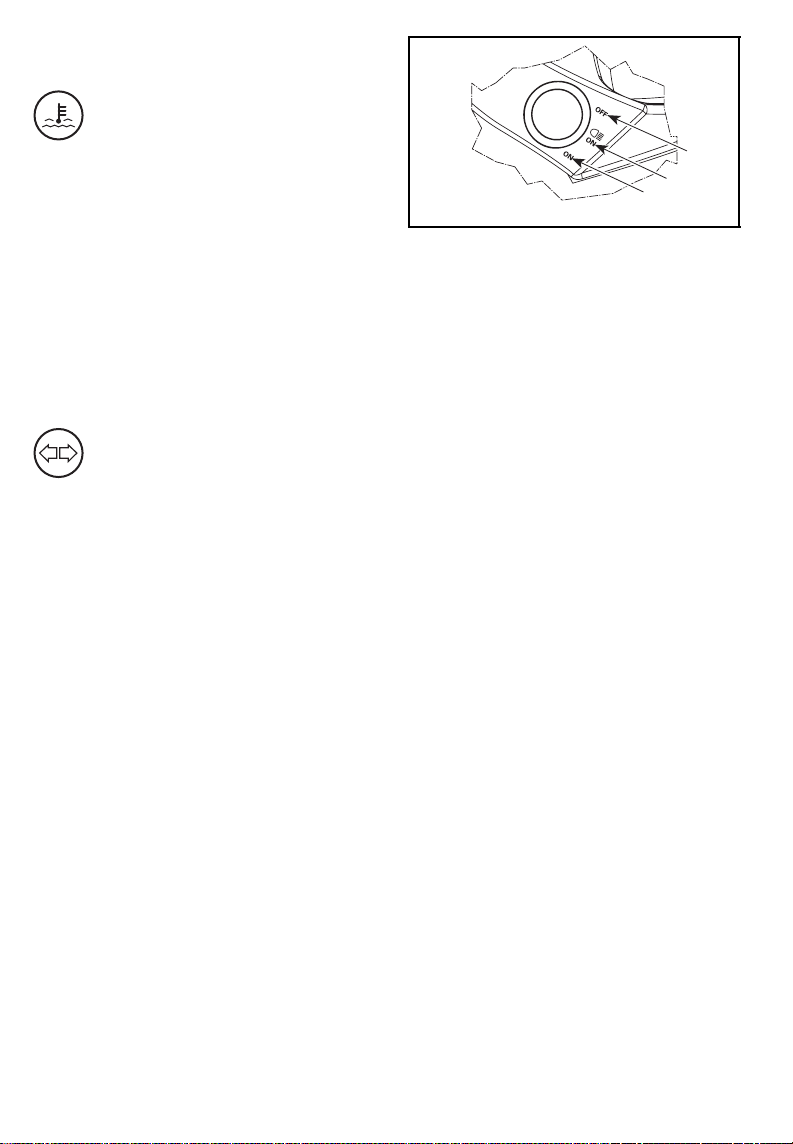
Engine Temperature (RED)
When this indicator light is
ON, it indicates the engine is
overheating.
If engine overheats, refer
to ENGINE OVERHEAT in
SPECIAL PROCEDURES.
CAUTION: If the light does not turn
off right after engine starting, stop
engine. Check engine oil level. Refill if necessary. If the oil level is
good, see an authorized Can-Am
ATV distributor/dealer. Do not use
the vehicle until repaired.
Direction Indicator (GREEN)
When the indicator light blinks,
it indicates which direction
indicator, left or right, is in
operation.
8) 12-Volt Power Outlet
It is located on the console.
Convenient for handheld spotlight or
other portable equipment.
Remove protective cap to use. Al-
ways reinstall it after use to protect
against weather.
Do not exceed the rating capacity.
See SPECIFICATIONS.
An auxiliary supply is available to
connect additional accessories. Two
wires are hidden in the wiring harness
at the rear of vehicle. See an authorized Can-Am ATV distributor/dealer
for more details.
1
2
3
vmo2006-005-013_b
IGNITION SWITCH POSITIONS
1. OFF
2. ON with lights
3. ON without lights
Insert key in switch and turn to the
desired position. To remove key, turn
key to OFF position then pull it out.
The ON with lights position, turns on
all lights with either the engine running or not. Remember that having
the lights on without the engine running discharges the battery. Always
turn the ignition key to OFF position after engine has been stopped.
NOTE: While engine can be stopped
by turning the ignition key to OFF position, we recommend the engine be
stopped by the engine stop switch.
10) Fuel Tank Cap
CAUTION: Never place anything
over fuel tank cap because the vent
hole on the top of fuel tank cap can
be blocked and the engine could
misfire.
Unscrew counterclockwise and remove cap to allow fuel tank filling then
fully tighten clockwise.
9) Ignition Switch
Key-operated, this is a 3-position
switch: OFF, ON with lights and ON
without lights.
______________________
84
Page 87
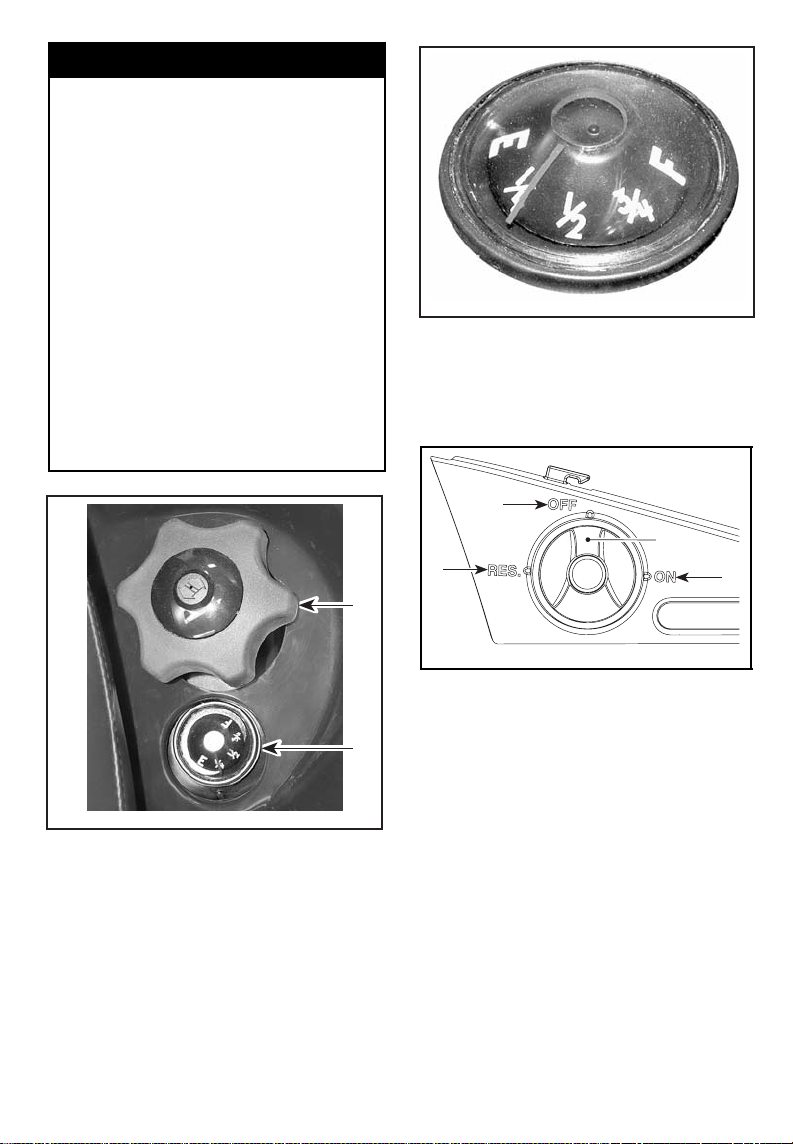
WARNING
Always stop engine before refueling. Open cap slowly. If a
differential pressure condition is
noticed (whistling sound heard
when loosening fuel tank cap)
have vehicle inspected and/or repaired before further operation.
Fuel is flammable and explosive
under certain conditions. Never
use an open flame to check fuel
level. Never smoke or allow flame
or spark in vicinity. Always work
in a well-ventilated area. Never
top up the fuel tank before placing the vehicle in a warm area.
As temperature increases, fuel expands and may overflow. Always
wipe off any fuel spillage from the
vehicle.
1
V04F0VY
12) Fuel Valve
This is a 3-position rotary valve: OFF,
ON, RES. Rotate the knob to align its
pointer with ON, OFF or RES.
3
1
4
2
2
V07F15Y
1. Fuel tank cap
2. Fuel gauge seat
11) Fuel Gauge
The gauge shows an approximate
amount of the fuel in tank.
_____________________
vmo2006-005-025_a
1. Align this pointer toward the desired position
2. ON
3. OFF
4. RES (reserve)
OFF
Stops fuel supply to carburetor.
CAUTION: Turn valve to OFF position when vehicle is not being operated or when transporting.
ON
Allows fuel to flow to carburetor. This
is the normal position for operation of
the vehicle.
85
Page 88
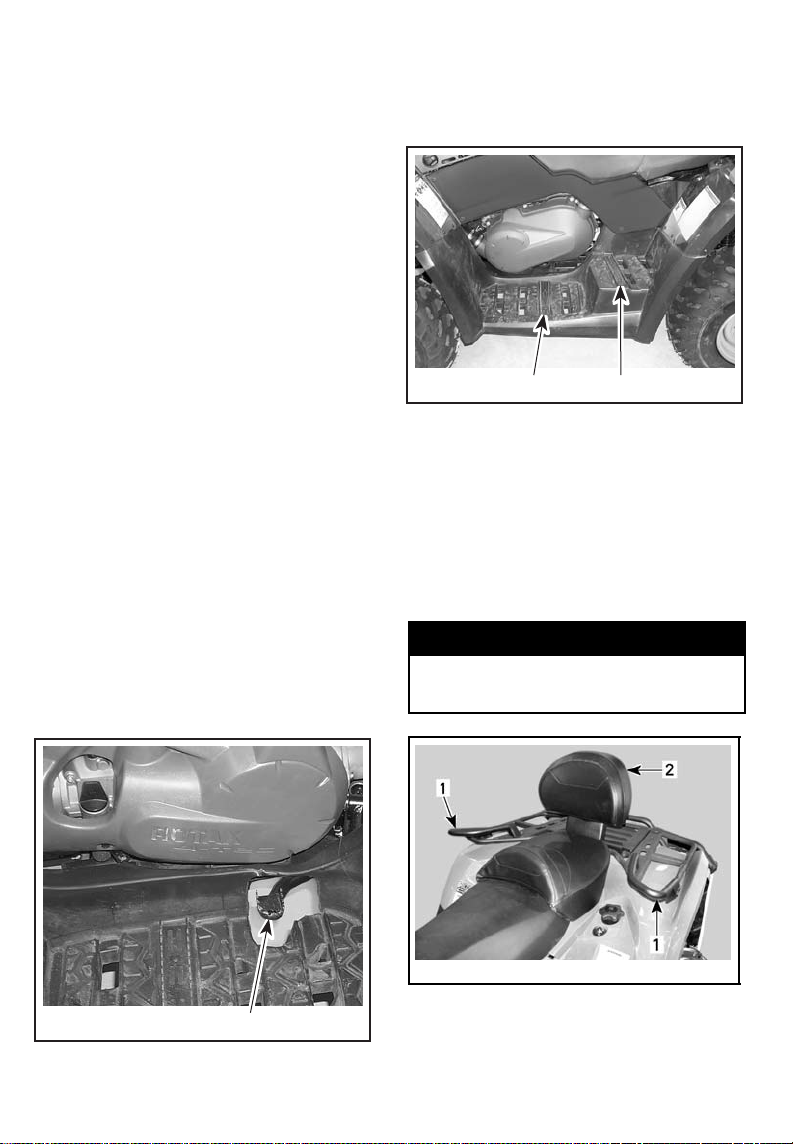
RES (reserve)
When fuel is exhausted in the fueltank
when in the ON position, an emergency supply of fuel is available by turning the knob to RES. The reserve contains approximately 12% of the fuel
tank capacity. Use this position only
when the ON supply is empty.
When down to the reserve, refuel as
soon as possible. Ensure to turn the
valve back to the ON position after refuelling.
CAUTION: Improper opening of fuel valve will restrict the flow of fuel. Make sure valve is fully opened
while running.
13) Brake Pedal
When pressed down, the rear brake
is applied. When released, the brake
pedal should return to its original position. Braking effect is proportional to
the force applied on the pedal and to
the type and condition of the terrain.
NOTE: The brake will have also an effect on front wheels through the drive
train.
The brake pedal applies the rear brake
only. Should the main brake system
fail, the rear brake can be activated by
depressing the brake pedal.
14) Footpeg
Use this area to keep your feet and the
passenger's (2-UP models) feet stable.
V07L1LY
TYPICAL — 2-UP MODELS
1. Operator's footpeg
2. Passenger's footpeg
1
2
15) Grab Handles
2-UP Models
The grab handles must be used by the
passenger to hold on firmly during vehicle operation.
WARNING
Never hold on to the operator. Always hold the grab handles firmly.
V07K0SY
1. Brake pedal
______________________
86
1
vmo2006-008-008_a
1. Grab handles
2. Passenger's seat
Page 89
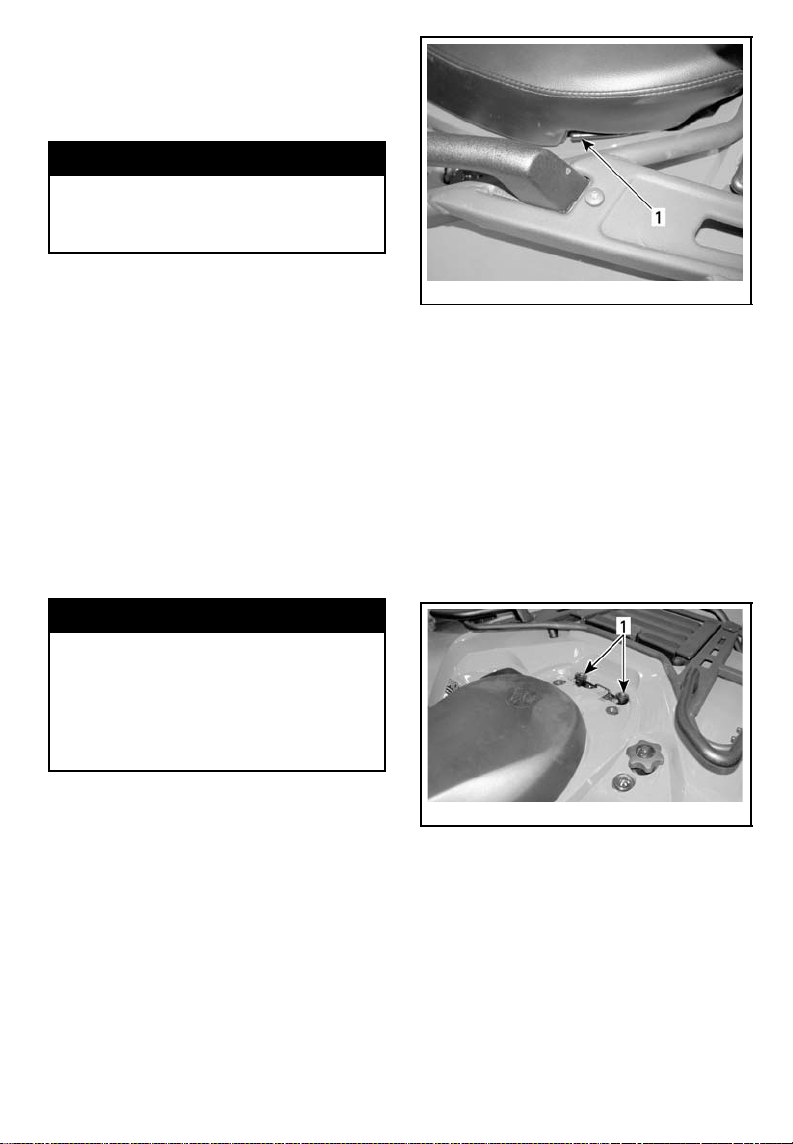
16)Passenger's Seat/
Storage Box
2-UP Models
WARNING
Never operate the vehicle without
passenger's seat or storage box
properly installed.
The passenger's seat is designed specially to allow a secure and pleasant
ride at ONE (1) passenger. The integrated backrest supports his back during the ride.
The storage box is used to convert
a two-rider vehicle (2-UP model) to a
one-rider vehicle (1-UP model) with extra cargo capacity.
The conversion of the vehicle is easy,
remove the passenger's seat then install the storage box or vise versa.
Use the procedure describes below to
remove and install the features correctly.
WARNING
Without its passenger's seat, the
vehicle becomes a ONE RIDER vehicle (1-UP model) and NO PASSENGER must be allowed on vehicle. NEVER carry passenger on
storage box.
Passenger's Seat Removal
– Pull one of the passenger's seat
handles. Those handles are located
underneath the RH or LH rear end
of seat.
vmo2006-008-009_a
TYPICAL — LH SIDE
1. Seat latch
– Gently lift the rear of seat.
– Pull seat rearwards.
– Continue lifting movement until you
can release the front retaining device then completely remove passenger's seat.
Passenger's Seat Installation
– Insert passenger's seat position-
ing tubes into rear fender provided
holes.
vmo2006-008-010_a
1. Holesfor passenger's seat positioningtubes
– When seat restsinits position, firm-
ly push seat down to latch.
NOTE: A distinctive snap will be felt.
Double check that the seat is secure
by giving it a tug to confirm proper
latching.
_____________________
87
Page 90
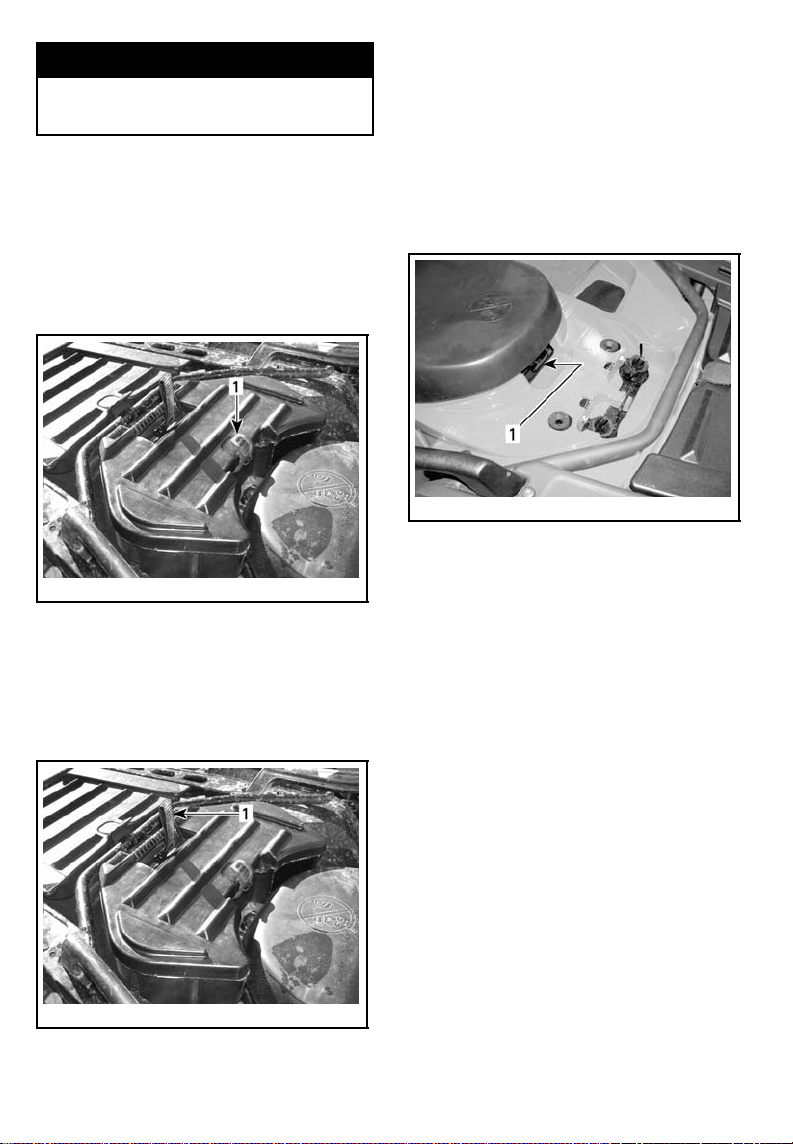
WARNING
Make sure seat is securely latched
before riding.
Storage Box Installation
– Remove passenger's seat.
– Position storage box onto rear fend-
er.
– When storage box rests in its posi-
tion, firmly push down to latch.
– To open storage box, unhook the
rubber latch.
vmo2006-008-012_b
1. Rubber latch
Storage Box Removal
– Pull storage box strap to release
from vehicle.
– Remove storage box.
– Reinstall passenger's seat.
17) Operator's Seat
NOTE: To remove the operator's seat,
the passenger's seat or storage box
removal is necessary.
Seat Removal
To remove the operator's seat, push
its latch forward. This latch is located
underneath the rear of seat.
vmo2006-008-011_a
1. Seat latch
Pull seat rearward. Continue lifting
movement until you can release the
front retaining device then completely
remove seat.
Seat Installation
Insertfronttabsofseatintoframe
hooks. When seat rests in its position,
firmly push seat down to latch.
NOTE: A distinctive snap will be felt.
Double check that the seat is secure
by giving it a tug to confirm proper
latching.
vmo2006-008-012_a
1. Strap
______________________
88
Page 91
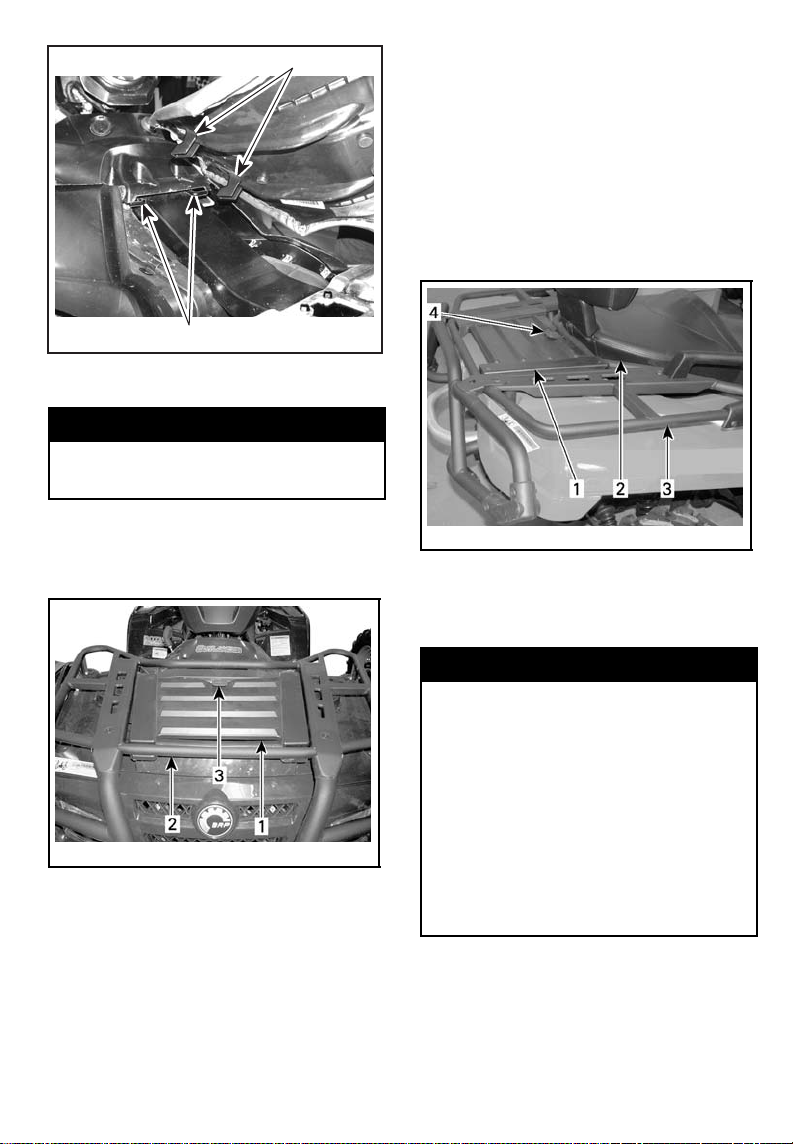
1
19) Rear Storage
Compartment
Convenient location to carry personal
articles such as a spare spark plugs,
first aid kit, etc. Unlatch cover, gently
lift then remove cover.
The compartment is equipped with
a drain plug. Remove plug to allow
draining when necessary. Reinstall
plug when finished.
V07L05Y
1. Insert these tabs in hooks
2. Hooks
2
WARNING
Make sure seat is securely latched
before riding.
18)Access Panel
To open the panel, unlatch, lift then
remove it completely.
vmo2006-005-026_a
1. Access panel
2. Front racks
3. Latch
This panel allows an easier access to
the service compartment. The service compartment contains different
maintenance items like rear brake
fluid reservoir, radiator cap, coolant
reservoir and fuse holders.
vmo2006-008-013_a
TYPICAL
1. Rear storage compartment cover
2. Seat
3. Rear racks
4. Latch
WARNING
When engine is running, always
engage the PARK position on the
transmission lever before opening
cover. Never leave any heavy or
loose breakable objects in the storage basket. Always latch cover before riding. If storage cover is removed to provide greater carrying
area, ensure that cargo is secured
and will not "fly out" when riding
atspeedonroughterrain. Slow
down.
20)Cargo Racks
Convenient racks to carry gear.
_____________________
89
Page 92
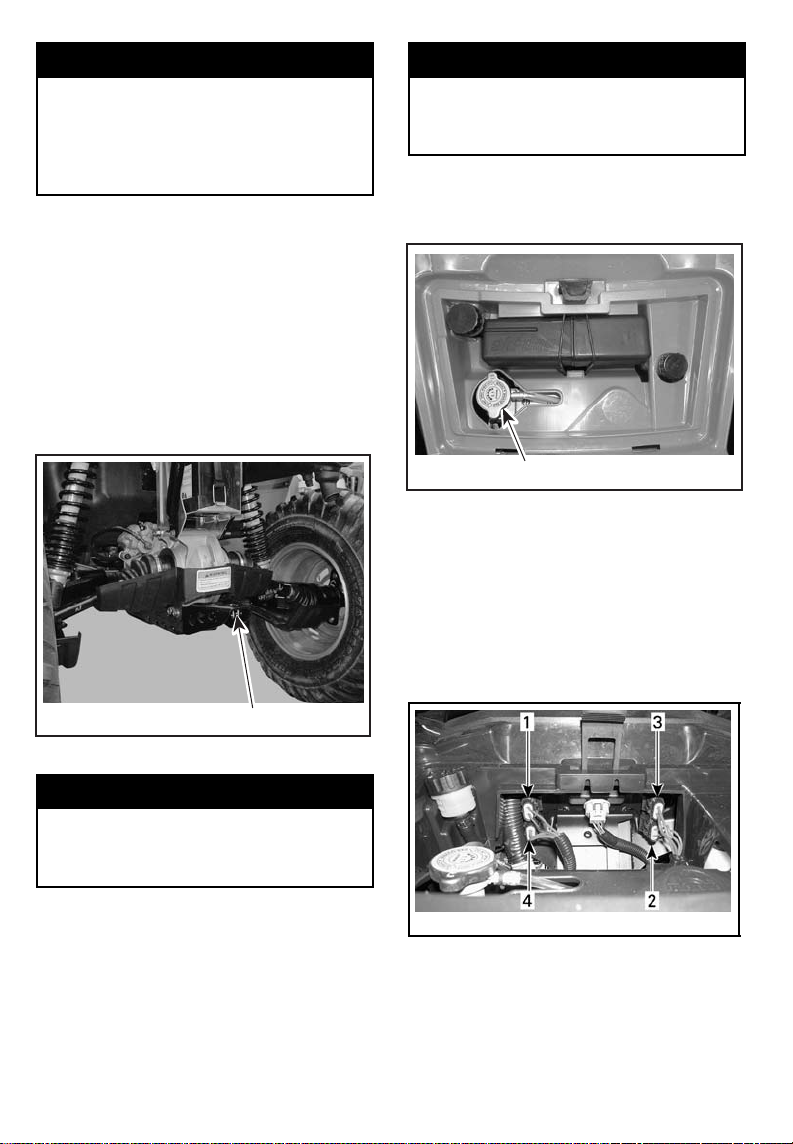
WARNING
Ensure to properly secure material
to racks. Do not overload. Ensure
load does not interfere with visibility and/or steering. Do not carry
passenger(s).
Refer to SPECIFICATIONS for carry-
ing loads and cargo weight distribution
recommendations.
21) Trailer Hitch
Convenient hitch to install a ball to
tow a trailer or other equipment. Install the proper ball size as per trailer
manufacturer recommendations. Refer to SPECIFICATIONS for carrying
loads and towing recommendations.
WARNING
In order to avoid getting burned,
do not remove the radiator cap
whentheengineishot.
To remove the radiator cap, press and
turn it counterclockwise. Reverse the
removal procedure to install.
V07L0TY
1. Trailer hitch
WARNING
Ensure to install the proper ball
size that matches the equipment
you will tow.
NOTE: Follow manufacturer's instruc-
tions for proper attachment.
1
22) Radiator Cap
Located in service compartment, under access panel.
V07A0AZ
TYPICAL
1. Radiator cap
1
23) Fuses
The electrical system is protected with
fuses. Refer to MAINTENANCE for
details.
The fuse holders are located in the service compartment.
vmo2006-005-029_a
FUSES LOCATION
1. Accessories (15 A)
2. Fan (20 A)
3. Main (20 A)
4. Charging system (30 A)
______________________
90
Page 93
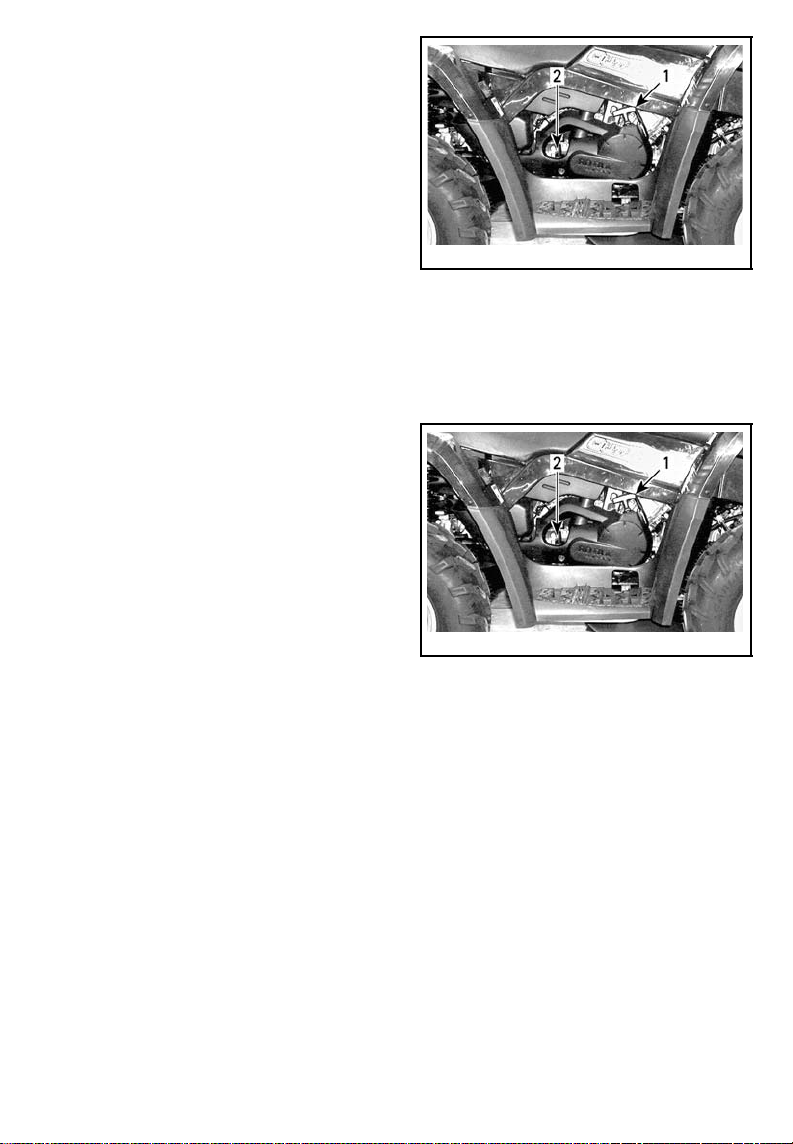
24) Tool Kit
The tool kit is located in the rear storage compartment. It contains tools
for basic maintenance, this Operator's Guide and the BASIC GUIDE TO
WINCHING TECHNIQUES with the
XT models.
The tools included in the tool kit are:
– pliers (1)
– screwdriver (1)
– open wrench 10/13 mm (1)
– open wrench 15/17 mm (1)
– socket wrench 10/13 mm (1)
– socket wrench 16/18 mm (1)
– tire pressure gauge (1)
– shock absorber key (1)
–fuse30A(1)
–fuse20A(1)
–fuse15A(1).
25) Rewind Starter Handle
The rewind starter handle is provided
as an emergency starting device.
Follow the usual starting procedure;
but use the rewind starter instead of
the electric starter.
Located on right side of vehicle. Autorewind type. To engage mechanism,
pull handle slowly until a resistance is
felt then continue to slowly pull the
handle until the compression stroke
peak (strong rotating resistance) is
overpassed then, pull vigorously.
Slowly release handle.
vmo2006-005-034_b
1. Rewind starter handle
2. Dipstick
26) Dipstick
Located on the right side of engine.
Allow to check the oil level in the engine.
vmo2006-005-034_b
1. Rewind starter handle
2. Dipstick
Refer to LIQUIDS to check the engine
oil level correctly.
_____________________
91
Page 94
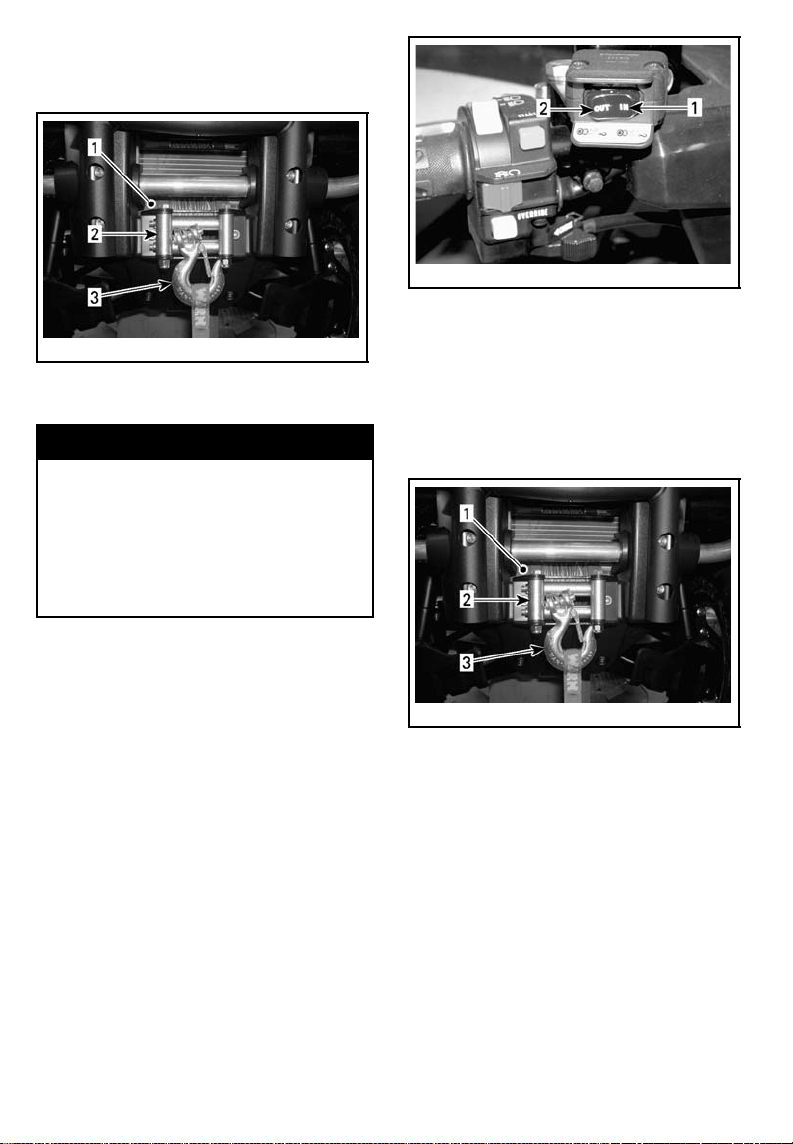
27) Winch
XT Models
vmo2006-005-032_a
1. In
2. Out
vmo2007-003-016_a
1. Winch
2. Roller fairlead
3. Winch hook
WARNING
The front winch hook of the so
equipped vehicles must be removed and stored when riding
the vehicle on public trails and/or
roads.
Failure to do so can increase the
risk of injury to bystanders.
28) Winch Control Switch
XT Models
Usethisswitchtorollinoroutwire
from winch.
To take out wire rope from winch,
press the left side of switch.
To get wire rope into the winch, press
the right side of switch.
Refer to BASIC GUIDETO WINCHING
TECHNIQUES for more informations.
NOTE: A winch remote control is also provided with the vehicle to ease
winch operation if necessary, refer to
WINCHREMOTECONTROLfurtherin
this section.
29)Roller Fairlead
XT Models
The roller fairlead is used to prevent
damages to the vehicle and guide the
wire rope into the winch.
vmo2007-003-016_a
1. Winch
2. Roller fairlead
3. Winch hook
30) Vehicle Lock
Many models of vehicle lock can be
used.
Please, check with your authorized
Can-Am ATV distributor/dealer to
know which model you must used
with your vehicle.
______________________
92
Page 95
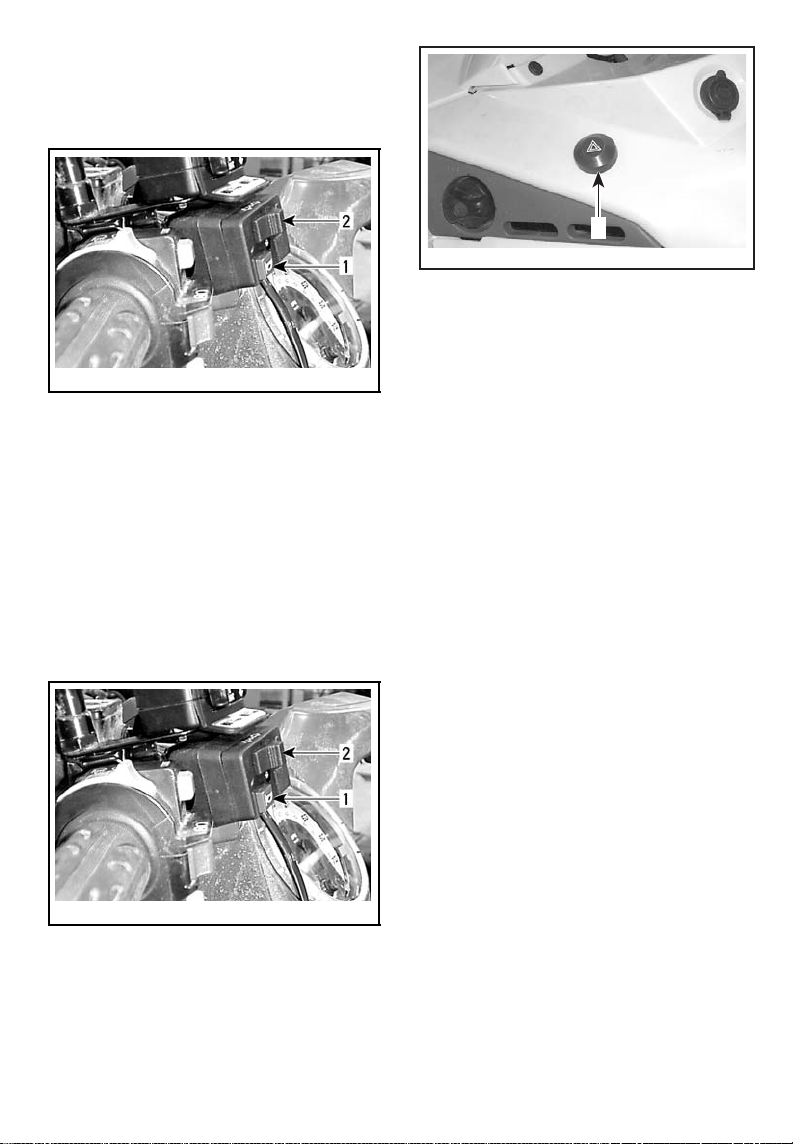
31) Direction Indicator
Switch
This switch is located on the left side
of handlebar.
vmo2006-006-003_a
TYPICAL
1. Horn button
2. Direction indicator switch
To activate the direction indicator
lamps, push the switch button on the
right or the left side, depending which
direction you picked. Reposition the
switchinthemiddlewhenthemaneuver is completed.
32)Horn Button
The horn button is located on the left
side of handlebar.
1
V07G24Y
TYPICAL
1. Hazard warning button
Device fitted to the vehicle that operates a simultaneous flashing of all the
direction indicator lamps, used when
the vehicle is stationary to indicate that
the vehicle is temporarily obstructing
traffic.
Press the hazard warning button once
to activate the device. Press once
again to deactivate.
The hazard warning button blinks also
when the hazard warning lights blink.
34) Winch Remote Control
XT Models
A winch remote control is provided
with the vehicle to ease winch operation if necessary.
The winch remote control is located in
the access panel of the front service
compartment.
vmo2006-006-003_a
TYPICAL
1. Horn button
2. Direction indicator switch
33) Hazard Warning Button
This button is located on the left side
of console.
_____________________
93
Page 96
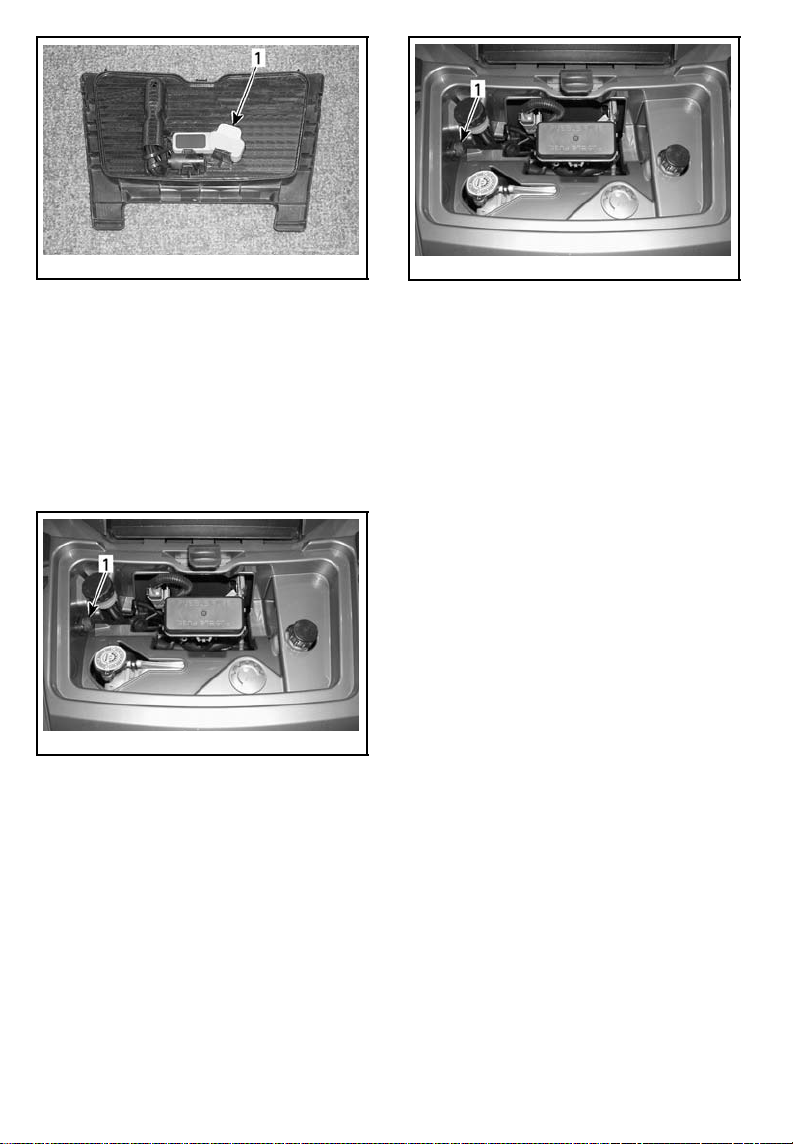
vmo2007-003-001_a
FRONT ACCESS PANEL
1. Winch remote control
To use the winch remote control
switch instead of the handlebar control switch, connect the remote control into the provided connection of
the front service compartment.
CAUTION: Always disconnect and
store the remote control when not
in use.
vmo2007-003-017_a
TYPICAL — FRONT SERVICE
COMPARTMENT
Refer to BASIC GUIDETO WINCHING
TECHNIQUES for more informations.
vmo2007-003-017_a
TYPICAL — FRONT SERVICE
COMPARTMENT
1. Remote control connection
35) Winch Remote Control
Connection
XT Models
Connection used to plug-in winch remote control to ease winch operation
if necessary.
______________________
94
Page 97
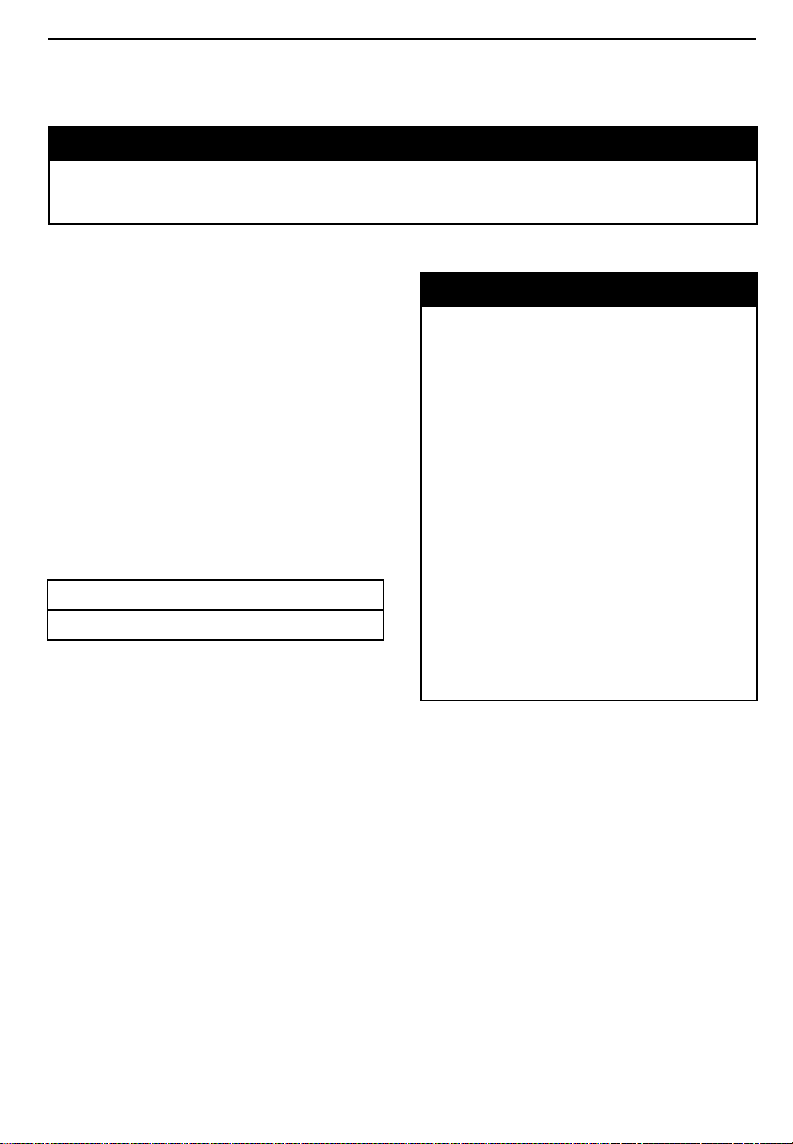
LIQUIDS
While reading this Operator’s Guide, remember that:
WARNING
Indicates a potential hazard that, if not avoided, could result in serious injury or death.
NOTE: This section specifies the rec-
ommended liquids and procedures to
check their levels. Refer to MAINTE-
NANCE for procedures to replace the
liquids.
Fuel
Recommended Fuel
Use regular unleaded gasoline, available from most service stations or oxygenated fuel containing a maximum
total of 10% of ethanol or methanol
or both. The gasoline used must have
the following recommended minimum
octane number.
OCTANE NUMBER
92 RON
CAUTION: Never experiment with
other fuels. The use of unrecommended fuel can result in vehicle performance deterioration and
damage to critical parts in the fuel
system and engine components.
CAUTION: Never mix oil with fuel.
This vehicle has a 4-stroke engine.
Oil must be added to engine base
only.
Fuel Level
WARNING
Always stop engine before refueling. Open cap slowly. If a differential pressure condition is noticed (whistling sound heard when
loosening fuel tank cap) have vehicle inspected and/or repaired
before further operation. Fuel is
flammable and explosive under
certain conditions. Never use an
open flame to check fuel level.
Never smoke or allow flame or
spark in vicinity. Always work in
a well-ventilated area. Never top
up the fuel tank before placing the
vehicle in a warm area. As temperature increases, fuel expands
and may overflow. Always wipe
off any fuel or oil spillage from the
vehicle.
Engine/Transmission Oil
Recommended Oil
Use 4-stroke engine oil that meets or
exceeds the requirements for API service classification SM, SL or SJ. Always check the API service label on
the oil container, it must contain at
least one of the above standards.
NOTE: The same oil lubricates both
engine and transmission.
_____________________
95
Page 98
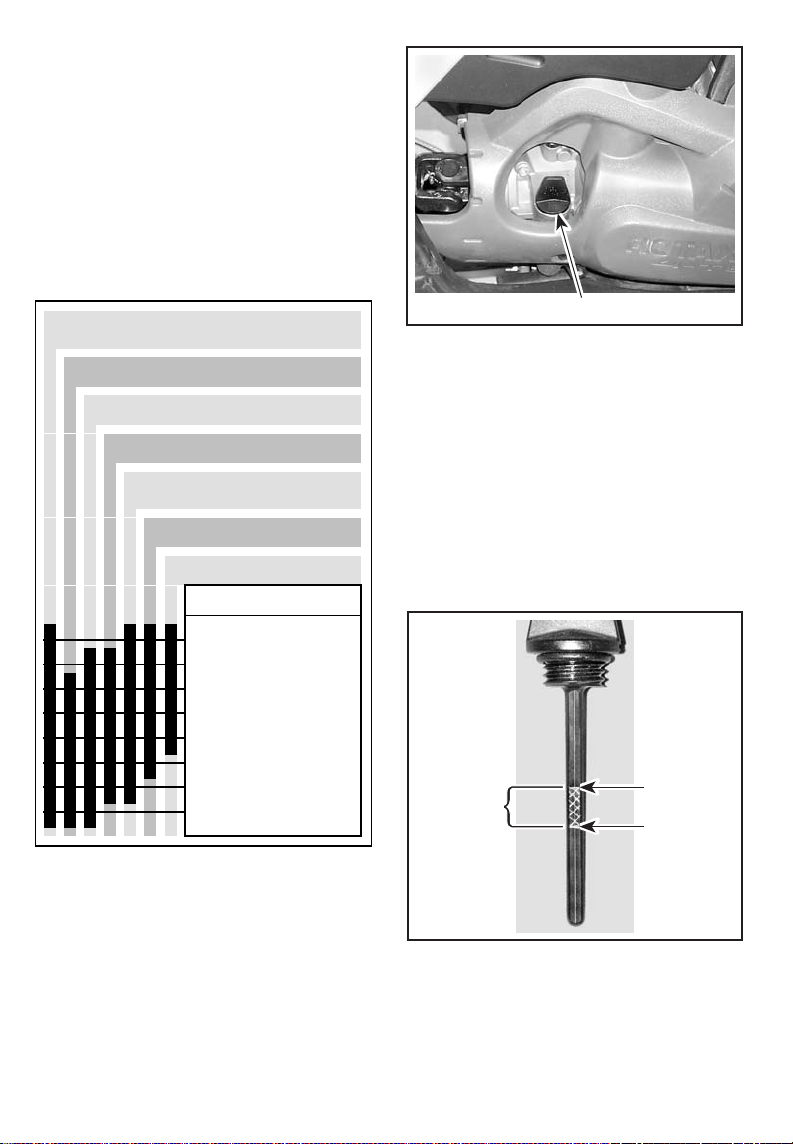
Oil Viscosity
SAE 5W30 oil is recommended for all
seasons.
However, during the hottest days of
the summer the BRP XP-S 10W40
mineral oil (P/N 219 700 346) can be
used.
NOTE: For improved overall performance and all season applications,
use XP-S 5W40 synthetic 4-stroke oil
(P/N 293 600 039).
XP-S 5W40 Synthetic Oil
(P/N 293 600 039)
SAE 0W30
SAE 5W30
SAE 10W30
XP-S 10W40 Mineral Oil
(P/N 219 700 346)
SAE 15W40
SAE 20W50
Temperature Range
50°C (122°F)
40°C (104°F)
30°C (86°F)
20°C (68°F)
10°C (50°F)
0°C (32°F)
- 10°C (14°F)
-20°C(-4°F)
- 30°C (- 22°F)
V07C24Y
RH SIDE OF ENGINE
1. Dipstick
1
With vehicle on a level surface and
engine cold, not running, check the oil
level as follows:
1. Unscrew dipstick then remove it
and wipe clean.
2. Reinstall dipstick, screw in it completely.
3. Remove and check oil level. It
should be near or equal to the upper mark.
1
3
2
Oil Level
CAUTION: Check level frequently and refill if necessary. Do not
overfill. Operating the engine/
transmission with an improper level may severely damage
engine/transmission. Wipe off any
spillage.
______________________
96
V07C02Y
1. Full
2. Add
3. Operating range
Page 99
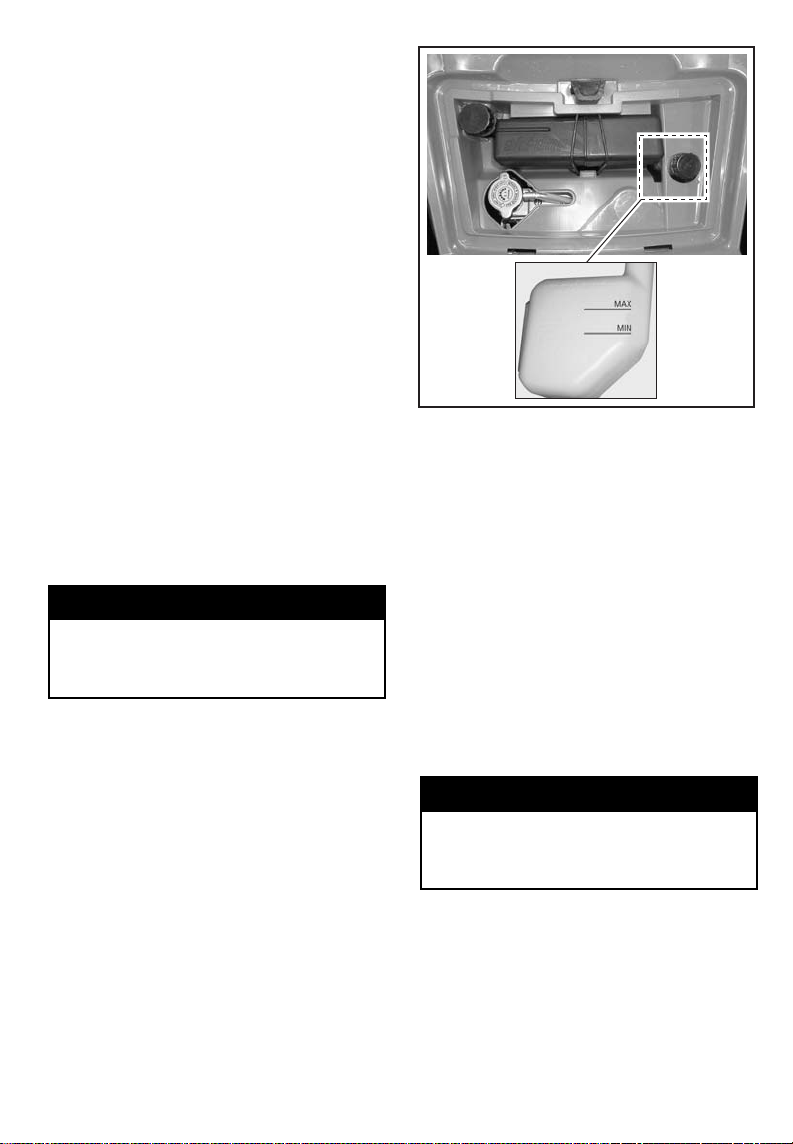
To add oil, remove dipstick. Place a
funnel into the dipstick tube to avoid
spillage.
Add a small amount of recommended
oil and recheck oil level.
Repeat the above procedures until
oil level reaches the dipstick's upper
mark. Do not overfill.
Properly tighten dipstick.
Engine Coolant
Recommended Coolant
Always use ethylene-glycol antifreeze
containing corrosion inhibitors specifically for internal combustion aluminum
engines.
Cooling system must be filled with
BRP premixed coolant (P/N 219 700
362) or with distilled water and antifreeze solution (50% distilled water,
50% antifreeze).
Coolant Level
WARNING
Check coolant level with engine
cold. Never add coolant in cooling system when engine is hot.
Remove access panel.
V07A0BY
TYPICAL
With vehicle on a level surface, liquid
should be between MIN. and MAX.
level marks of coolant reservoir.
NOTE: When checking level at temperature lower than 20°C (68°F), it
may be slightly lower than MIN. mark.
AddcoolantuptoMAX.markifrequired. Use a funnel to avoid spillage.
Do not overfill.
Properly reinstall and tighten filler cap
and reinstall access panel.
If the coolant is added in the coolant
reservoir, check the level in the radiator too. Add coolant if necessary.
WARNING
In order to avoid getting burned,
do not remove the radiator cap if
theengineishot.
NOTE: A cooling system that fre-
quently requires coolant is the indication of leaks or engine problems. See an authorized Can-Am
ATV distributor/dealer.
_____________________
97
Page 100
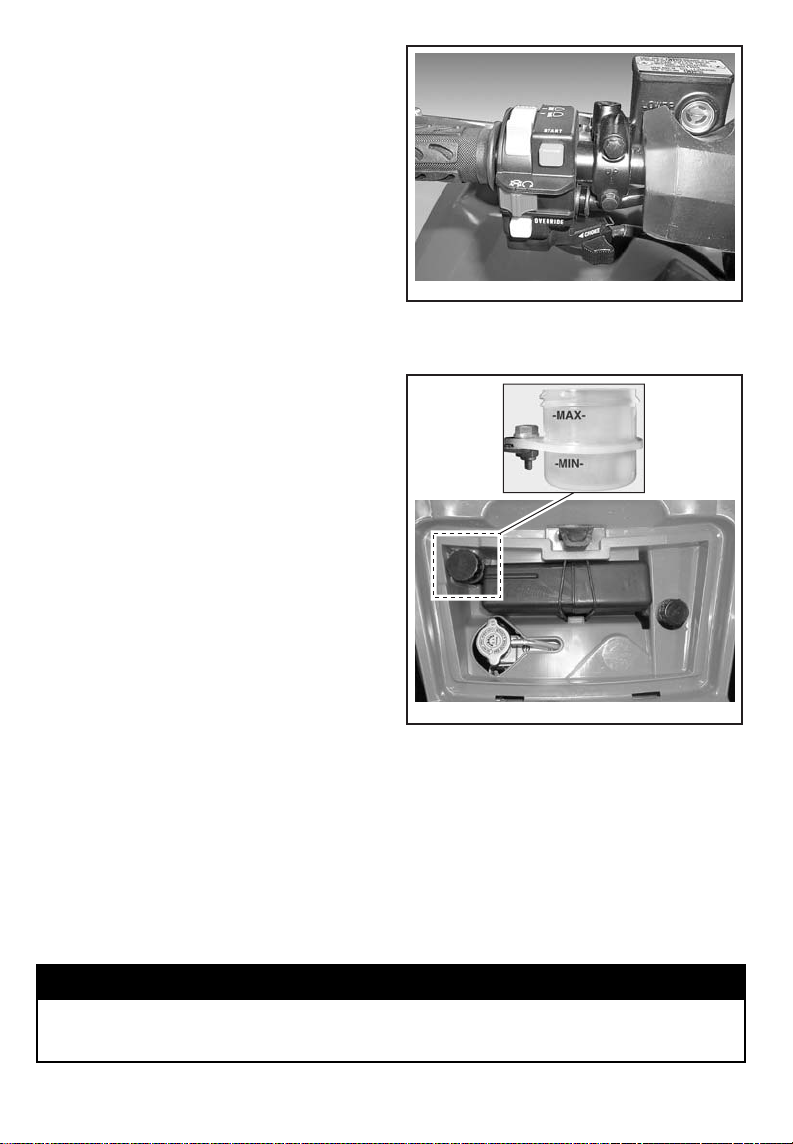
Coolant Replacement
Refer to MAINTENANCE section.
Brake Fluid
Recommended Fluid
Always use brake fluid meeting the
specification DOT 4 only.
CAUTION: To avoid serious damage to the braking system, do not
use fluids other than the recommended one, nor mix different
fluids for topping up.
Fluid Level
With vehicle on a level surface, check
brake fluid in reservoirs for proper level. They should be above MIN. mark.
Add fluid as required. Do not overfill.
Clean filler cap before removing.
CAUTION: UseonlyDOT4brake
fluid from a sealed container. Do
not use brake fluid taken from old
or already opened containers.
NOTE: A low level may indicate leaks
or worn brake pads. See an authorized Can-Am ATV distributor/dealer.
V07I02Z
TYPICAL
Brake Pedal Fluid Reservoir
Brake Lever Fluid Reservoir
Turn steering in the straight-ahead
position to ensure reservoir is level.
Check the brake fluid level, the reservoir is full when the fluid reaches of
the top of window.
Visually inspect lever boot condition.
Check for cracks, tears, etc. Replace
if damaged.
While reading this Operator’s Guide, remember that:
WARNING
Indicates a potential hazard that, if not avoided, could result in serious injury or death.
______________________
98
V07A0CY
TYPICAL
Battery
This vehicle is equipped with a dry
type battery that requires no maintenance.
Refer to MAINTENANCE to removal/
installation instructions.
 Loading...