

Page 1

OUTLANDER
OUTLANDER
TM
MAX
2018
Operator’s
Guide
Safety, Vehicle
and
Maintenance Information
TM
Series /
TM
Series
Includes
WARNING
Read this guide thoroughly. It contains important safety information.
Minimum recommended age: Operator: 16 years old. Keep this Operator’s Guide in the vehicle.
2 1 9 0 0 1 9 1 0
Original Instructions
Page 2
WARNING
YOUR VEHICLE CAN BE HAZARDOUS TO OPERATE. A collision or rollover
can occur quickly, if you fail to take proper precautions, even during routine
maneuvers such as turning and driving on hills or over obstacles.
For your safety, understand and follow all the warnings contained in this
Operator's Guide and on the labels on your vehicle. Failure to follow these
warnings can result in SEVERE INJURY OR DEATH!
Keep this Operator's Guide with the vehicle at all times.
WARNING
Disregarding any of the safety precautions and instructions contained in
this Operator’s Guide,
SAFETY VIDEO
and on-product safety labels could
result in an injury including the possibility of death!
WARNING
This vehicle may exceed the performance of other vehicles you may have
ridden in the past. Take time to familiarize yourself with your new vehicle.
The following trademarks are the property of Bombardier Recreational
Products Inc.:
CALIFORNIA PROPOSITION 65 WARNING
WARNING:
Operating, servicing and maintaining an off-road
vehicle can expose you to chemicals including engine
exhaust, carbon monoxide, phthalates, and lead, w
known to the State of California to cause cance
hich are
r and birth
defects or other reproductive harm. To m inimize exposure,
avoid breathing exhaust, do not idle the engine except
as necessary, service your vehicle in a well-ventilated
area and wear gloves or wash your hands frequently
when servicing your vehicle. For more information go to
www.p65warnings.ca.gov/products/passenger-vehicle.
In Can ada, products are distributed by Bombardier Recreational Products Inc.
(BRP). In USA, products are distributed by BRP US Inc.
Can-Am
®
D.E.S.S.™ DPS™ Outlander™ Rotax
This document contains the trademark of the following companies:
–
Garmin
®
, Garmin logo, City Navigator®and MapSource™are trademarks of
Garmin Ltd or its subsidiaries.
–
MicroS
†
–
Visco-Lok is a trademark of GKN Viscodrive GmbH.
†
–
QS3 is a trademark of Fox Factory, Inc.
™
D
and SD™are trademarks of SanDisk or its subsidiaries.
®
TTI™ XPS™
219001910 en SG
®™ and the BRP l ogo are trademar ks of Bombardi er Recreational Products Inc. or its affiliates.
©2017 Bombardi
er Recreational Products In c. and BRP US Inc. All rights reserved.
Page 3

FOREWORD
Dieses Handbuch i st möglicherweise in Ihrer Landessprache
Deutsch
English
Español
Français
verfügbar. Bitte w enden Sie sich an Ihren Händler oder besuchen Sie:
www.operatorsguides.brp.com
This guide may be available in your language. Check with your dealer or
go to: www.operatorsguides.brp.com
Es posible que este manual esté disponible en su idioma. Consulte a su
distribuidor o visite: www.operatorsguides.brp.com
Ce guide peut être disponible dans votre langue. Vérifier avec votre
concessionnaire ou aller à: www.operatorsguides.brp.com
本手册可能有您的语种的翻译版本。请向经销商问询,或者登录
www.operatorsguides.brp.com中文 查询。
日本語
Nederlands
Norsk
Português
Suomi
Svenska
Congratulations on your purchase of a
new Can-Am
BRP warranty and a network of auth
このガイドは、言語によって翻訳版が用意されています。.
ディーラーに問い合わせるか、次のアドレスでご確認ください:
www.operatorsguides.brp.com
Deze handleiding kan beschikbaar zijn in uw taal. Vraag het aan uw dealer
of ga naar: www.operatorsguides.brp.com
Denne boken kan finnes tilgjengelig på ditt eget språk. Kontakt din
forhandler eller gå til: www.operatorsguides.brp.com
Este manual pode estar disponível em seu idioma. Fale com sua
concessionária ou visite o site: www.operatorsguides.brp.com
Käyttöohjekirja voi olla saatavissa omalla kielelläsi. Tarkista jälleenmyyjältä
tai käy osoitteessa: www.operatorsguides.brp.com
Denna bok kan finnas tillgänglig på ditt språk. Kontakta din återförsäljare
eller gå till: ww w.operatorsguides.brp.com
®
ATV. It is backed by the
orized Can-Am deale rs ready to provide
the parts, service or accessories you
may require.
Your dealer is committed to your satisfaction. He has taken tra
ining to perform the initial setup and inspection of
your vehicle as well as completed the
final a djustment befor
e you took possession. If you need more complete
servicing information , please ask your
dealer.
At delivery, you were also informed of
the warranty coverage and signed the
PREDELIVERY CHECK LIST
to ensure
your new vehicle was prepared to your
entire satisfaction.
Know Before you Go
To learn how to reduce the risk for you
or bystanders being injured
read this Operator's Guide before you
operate the vehicle.
Also, read all safety labels on your ATV
and watch attentively your
VIDEO
.
This vehicle is for off road use only. It is
mainly for general rec
reational use but
it may also be used for utility purposes.
or killed,
SAFETY
_______________
1
Page 4
FOREWORD
Failure to follow the warnings contained in this Operator's Guide can
result in SERIOUS INJURY or DEATH.
Age Recommendation
This vehicle is a category G, alw ays follow this age recommendation:
– A person under 16 years old should
never operate this vehicle.
– Passenger on 2-UP models must be
capable of keeping his feet on the
footrests and his hands on grab handles at all times when seated on this
vehicle.
Training Course
Never operate this vehicle without
proper instruction. Take a training
course. All operators should receive
training from a certified instructor.
For more information about ATV safety,
contact an authorized Can-Am dealer
to find ou t about available training
courses nearest you.
In the United States, call the Specialty
Vehicle Institute of America (SVIA)
at 1 800 887–2887 or in Canada, the
Canada Safety Council (CSC) at 1 613
739–1535.
Safety Messages
The types o f safety messages, what
they look like and how they are used in
this guide are explained as follows:
The safety alert symbol
a potential injury hazard.
indicates
WARNING
Indicates a potential hazard, if not
avoided, could result in serious injury or death.
CAUTION Indicates a hazard
situation which, if not avoided,
could result in minor or moderate
injury.
NOTICE
which, if not followed, could severely damage vehicle components
or other property.
Indicates an instruction
About this Operator's
Guide
This Operator's Guide has been prepared to acquaint the owner/operator
of a new vehicle with the various vehicle controls, maintenance and safe
operating instructions. It is indispensable for the proper use of the product.
WARNING
Throughout this Operator's Guide,
the term “1-UP” refers to vehicles designed to carry the operator
only while the term “2-UP” refers
to vehicles designed to carry also
a passenger.
Make sure to identify and follow
the warnings and instructions
that are applicable to your specific
model.
Note that this guide is available in several languages. In the event of any discrepancy, the English version shall prevail.
Keep this Operator's Guide in the vehicle as you can refer to it for things such
as maintenance, troubleshooting and
instructing others.
Ifyouwanttoviewand/orprintan
extra copy of your Operator's Guide,
simply visit the following w eb s ite
www.operatorsguides.brp.com.
The inform ation contained in this document are correct at the time of publication. H o wever, BRP maintains a policy of continuous improvement of its
products without imposing upon itself
any ob ligation to install them on products previously manufactured. Due
to late changes, some differences between the manufactured product and
the descriptions and/or specifications
in this guide may occur. BRP reserves
_______________
2
Page 5

the right at any time to discontinue or
change specifications, designs, features, models or equipment without
incurring any obligation upon itse lf.
This Operator's Guide and the
DVD
should remain with the vehicle
when it is sold.
SAFETY
FOREWORD
While reading this Operator’s Guide, remember that:
WARNING
Indicates a potential hazard that, if not avoided, could result in serious
injury or death.
_______________
3
Page 6

TABLE OF CONTENTS
FOREWORD .......................................................................... 1
KnowBefore you Go............................................................. 1
Safety Messages................................................................. 2
About this Operator's Guide .................................................... 2
SAFETY INFORMATION
GENERAL PRECAUTIONS......................................................... 10
AvoidCarbon MonoxidePoisoning ............................................ 10
AvoidGasolineFires and Other Hazards ...................................... 10
AvoidBurns fromHot Parts .................................................... 10
Accessories and Modifications ................................................ 10
SPECIAL SAFETY MESSAGES ................................................... 11
OPERATIONWARNINGS .......................................................... 14
PRE-RIDEINSPECTION............................................................ 42
Pre-RideInspection Check List ................................................ 42
RIDINGTHE VEHICLE .............................................................. 45
RidingGear ...................................................................... 46
Carryinga Passenger ........................................................... 47
RecreationalRiding ............................................................. 47
Environment..................................................................... 48
DesignLimitation ............................................................... 48
Off-RoadOperation ............................................................. 48
RidingTechniques............................................................... 49
MOVINGLOADS AND DOING WORK........................................... 60
WorkingwithyourVehicle...................................................... 60
CarryingLoads .................................................................. 60
Loading the Cargo Racks ....................................................... 61
Hauling a Load(if Equipped withHitch) ....................................... 62
Pulling a Trailer(if Equipped with Hitc h) ........................................ 62
IMPORTANT ON-PRODUCT LABELS(CANADA/UNITED STATES)......... 63
HangTag......................................................................... 63
VehicleSafetyLabels ........................................................... 65
ComplianceLabels.............................................................. 70
TechnicalInformation Labels................................................... 70
IMPORTANT ON-PRODUCT LABELS (ALL COUNTRIES EXCEPT
CANADA/UNITED STATES)....................................................... 71
HangTag......................................................................... 71
VehicleSafetyLabels ........................................................... 73
ComplianceLabels.............................................................. 79
TechnicalInformation Labels................................................... 79
_______________
4
Page 7

TABLE OF CONTENTS
VEHICLE INFORMATION
CONTROLS.......................................................................... 82
1) Throttle Lever................................................................. 83
2) LH Brake Lever ............................................................... 83
3) RH Brake Lever ............................................................... 84
4) ParkingBrake Lever.......................................................... 84
5) BrakePedal ................................................................... 85
6) ShiftLever .................................................................... 85
7) RF D.E.S.S Key ............................................................... 87
8) LH Handlebar Switches...................................................... 88
9) Multifunction Switch......................................................... 88
10) 2WD/4WD SelectorSwitch................................................ 90
MULTIFUNCTIONGAUGE (LCD) ................................................. 92
Multifunction GaugeDescription .............................................. 92
Multifunction GaugeFeatures ................................................. 94
Multifunction GaugeSet-Up ................................................... 94
MULTIFUNCTIONGAUGE (ANALOG/DIGITAL) ............................... 96
Multifunction GaugeDescription .............................................. 96
Gauge Setup..................................................................... 98
EQUIPMENT....................................................................... 100
1) Windshield (IfEquipped)................................................... 102
2) Operator's Seat............................................................. 102
3) Passenger'sSeat/Glove Box (2-UP Models) ............................. 102
4) Footpegs .................................................................... 105
5) Operator's Heated Grips (If Equipped).................................... 105
6) Heated Throttle Lever (If Equipped)....................................... 106
7) Grab Handles (2-UPModels) .............................................. 106
8) Passenger'sHeatedGrips (IfEquipped).................................. 107
9) 12-Volt Power Outlet....................................................... 107
10) HeatedVisorConnector (If Equipped)................................... 107
11) RearStorage Compartment.............................................. 107
12) Cargo Racks ............................................................... 108
13) TrailerHitch ................................................................ 109
14) Tool Kit ..................................................................... 109
15) Winch (If Equipped)....................................................... 109
16) GPS Receiver(GlobalPositioning System)(If Equipped) .............. 110
17) ACS Compressor(If Equipped) .......................................... 111
18) RecoveryHook............................................................ 112
ADDITIONALACCESSORIES ................................................... 113
1) UnderbodyProtectivePlates .............................................. 113
2) GunBoot.................................................................... 113
FUEL................................................................................ 115
FuelRequirements............................................................ 115
VehicleFueling Procedure.................................................... 115
_______________
5
Page 8

TABLE OF CONTENTS
BREAK-INPERIOD................................................................ 117
Operation DuringBreak-In.................................................... 117
BASIC PROCEDURES ............................................................ 118
Startingthe Engine............................................................ 118
Waking Upthe ElectricalSystem ............................................ 118
ChangingGearSelection ..................................................... 118
Stoppingthe Engineand Parkingthe Vehicle ............................... 118
SPECIAL PROCEDURES ......................................................... 120
WhattoDoifWater Entered the CVT ....................................... 120
WhattoDoifWater Entered the Air Filter Housing ........................ 120
WhattoDoifVehicle isTurned Over ........................................ 121
WhattoDoifVehicle isImmersedinWater ................................ 121
TUNEYOUR RIDE ................................................................ 122
SuspensionAdjustment...................................................... 122
Dynamic Power Steering (DPS) Assist Level Adjustment (Models with
DPS)............................................................................ 125
VEHICLE TRANSPORTATION................................................... 127
MAINTENANCE
MAINTENANCE SCHEDULE.................................................... 130
SEVERE DUSTY CONDITIONS .............................................. 130
MAINTENANCE SCHEDULELEGEND ..................................... 130
MAINTENANCE SCHEDULE ................................................ 131
MAINTENANCE PROCEDURES ................................................ 134
Air Filter ........................................................................ 134
EngineOil ...................................................................... 137
Oil Filter ........................................................................ 139
Radiator........................................................................ 140
EngineCoolant ................................................................ 141
Muffler Spark Arrester ........................................................ 143
CVT Air Filter (850/1000R) .................................................... 145
Gearbox Oil .................................................................... 146
ThrottleCable ................................................................. 147
Spark Plugs .................................................................... 149
Battery ......................................................................... 150
Fuses........................................................................... 151
Lights........................................................................... 152
Drive Shaft Boot and Protector............................................... 154
Wheel Bearing................................................................. 154
Wheelsand Tires.............................................................. 155
Steering........................................................................ 158
Suspension.................................................................... 158
Brakes.......................................................................... 159
VEHICLE CARE.................................................................... 161
Post-Operation Care .......................................................... 161
_______________
6
Page 9

TABLE OF CONTENTS
VEHICLE CARE (cont’d)
VehicleCleaning and Protection ............................................. 161
STORAGE AND PRESEASON PREPARATION................................ 163
TECHNICAL INFORMATION
VEHICLE IDENTIFICATION ...................................................... 166
VehicleIdentification Number ............................................... 166
EngineIdentification Number(EIN).......................................... 166
Radio Frequency Digitally Encoded Security System (RF D.E.S.S. key) . . 166
NOISE EMISSION CONTROL SYSTEM REGULATION (CANADA/UNITED
STATES)............................................................................ 168
NOISE EMISSION AND VIBRATION VALUES (ALL COUNTRIES EXCEPT
CANADA/UNITED STATES)..................................................... 169
EC-DECLARATION OFCONFORMITY ......................................... 170
SPECIFICATIONS ................................................................. 171
TROUBLESHOOTING
TROUBLESHOOTING GUIDELINES ........................................... 180
MULTIFUNCTIONGAUGE MESSAGES....................................... 184
WARRANTY
BRP LIMITED WARRANTY USA AND CANADA: 2018 CAN-AM
US EPA EMISSION-RELATED WARRANTY ................................... 191
BRP INTERNATIONAL LIMITED WARRANTY: 2018 CAN-AM
BRP LIMITED WARRANTY FOR THE EUROPEAN ECONOMIC AREA, THE
COMMONWEALTH OF THE INDEPENDENT STATES AND TURKEY: 2018
CAN-AM
PRIVACY INFORMATION........................................................ 204
CONTACT US...................................................................... 205
CHANGEOFADDRESS/OWNERSHIP......................................... 206
®
ATV .................................................................... 198
CUSTOMER INFORMATION
North America ................................................................. 205
Europe ......................................................................... 205
Oceania ........................................................................ 205
South America................................................................. 205
Asia............................................................................. 205
®
ATV.... 188
®
ATV....... 194
_______________
7
Page 10

TABLE OF CONTENTS
_______________
8
Page 11

SAFETY
INFORMATION
________
SAFETY INF
ORMATION
________
9
Page 12

GENERAL PRECAUTIONS
Avoid Carbon Monoxide
Poisoning
All engine exhaust contains carbon
monoxide, a deadly gas. Breathing carbon monoxide can cause headaches,
dizziness, drowsiness, naus ea, confusion and eventually death.
Carbon monoxide is a colorless, odorless, tasteless gas that may be present
even if you do not see or smell any engine exhaust. Deadly levels of carbon
monoxide can collect rapidly, and you
can quickly be overcome and unable
to save yourself. Also, deadly levels of
carbon monoxide can linger for hours
or days in enclosed or poorly ventilated
areas. If you experience any symptoms of carbon monoxide poisoning,
leave the area immediately, get fres h
air and seek medical treatment.
To prevent serious injury or death from
carbon monoxide:
– Never run the vehicle in poorly v en-
tilated or partially enclo se d areas
such as garages, carports or barns.
Even if you try to ventilate engine
exhaust with fans or open windows
and doors, carbon monoxide can
rapidly reach dangerous levels.
– N ev er run the vehicle outdoors
where engine exhaust can be drawn
into a building through openings
such as windows and doors.
Avoid Gasoline Fires and
Other Hazards
Gasoline is extremely flammable and
highly explosive. Fuel vapors can
spread and be ignited by a spark or
flame many feet away from the engine. To reduce the risk of fire or explosion, follow these instructions:
– Use only an approved red gasoline
container to store fuel.
– - Never fill a gasoline container on
the vehicle. An electrical static discharge may ignite the fuel.
– For refueling, strictly adhere to in-
structions in
– N ever start or operate the engine if
the fuel cap is not properly installed.
Gasoline is poisonous and can cause
injury or death.
– Never siphon gasoline by mouth.
– If you swallow gasoline, get any in
your eye(s), or inhale gasoline vapor,
see your doctor immediately.
If gasoline spills on you, wash with
soap and water and change your
clothes.
FUEL
.
Avoid B urns from Hot Parts
Certain components become hot during operation. Avoid contact with
those parts during and shortly after
operation to avoid burns.
Accessories and
Modifications
Any modifications or addition of accessories may affect the ha nd ling of you r
vehicle. It is important to take the time
to get familiar with the vehicle once
modifications are made to understand
how to adapt your driving behavior accordingly.
Do not temper with unauthorized modifications or install equipment not
specifically certified by BRP for the
vehicle. These modifications have not
been tested by BRP and they may increase the risk of injury or loss of control, or render the vehicle illegal to ride.
As an example, tempering with tire
specifications may affect the behavior
of the vehicle and increase the risk of a
loss of control.
Ask your authorized BRP dealer for
suitable available accessories for your
vehicle.
_______
10
SAFETY I
NFORMATION
________
Page 13

SPECIAL SAFETY MESSAGES
THIS VEHICLE IS NOT A TOY AND CAN BE HAZARDOUS TO OPERATE.
– This vehicle handles differently from other vehicles including motorcycles
and cars. A collision or ro llov er can occur quickly, if you fail to take proper
precautions, even during routine maneuvers such as turning and driving on h ills
or over obstacles.
SEVERE INJURY OR DEATH can result if you do not comply with the follow in g in structions:
– Read this Operator's Guide and all on-product safety labels carefully and follow
the operating procedures described. Watch and pay attention to the
VIDEO
– Always follow this age recommendation: A person under 16 years old should
never operate this vehicle.
– Never take place on this vehicle without wearing an approved helmet of the
proper size and other required riding gears. Refer to
THE VEHICLE
– Never carry a passenger on this vehicle unless you are operating a 2-UP model.
Passenger(s) affect balance and steering and increase risk of losing control.
– On 1-UP models, do not make any modifications to accommodate a passenger
or use racks to carry a passenger.
– This v ehicle is not designed to ride on paved surfaces; if you must shortly use
the vehicle on such surfaces, avoid abrupt inputs to steering, accelerator and
brakes. Reduce your speed.
– This vehicle is not designed for riding on roads or highways (in most places it is
an illegal practice). Riding your vehicle on roads or h ig hw ays could cause a collision with another vehicle.
– Never use this vehicle if you are tired, ill or with drugs or alcohol. Your reaction
time and judgement is g reatly affected under these conditions.
– N ever attempt wheelies, jumps, or other stunts.
– Never operate at excessive speeds. Always go at a speed that is proper for the
terrain, visibility, and operatin g conditions, an d your experience.
– A lways go slowly and be extra caref ul when operating on unfam iliar terrain. Al-
ways be alert to changing terrain conditions when operating this vehicle.
– Never operate on excessively rough, slippery or loose terrain until you have
learned and practiced the skills necessary to control this vehicle on such terrain.
Always be especially cautious on these kinds of terrain.
– Always follow proper procedures for turning as described in
NIQUES
– N ever operate this vehicle on hills too steep for the vehicle or for yo u r abilities.
– A lways follow proper procedures for climbing hills as described in
TECHNIQUES
climb hills with excessively slippery or loose surfaces.
– A lways follow proper procedures for going down hills and for b ra king on hills as
described in
down any hill.
– A lwa ys follow proper procedures for crossing the side of a hill as described in
RIDING TECHNIQUES
before operating the vehicle.
for detailed information.
.
. Check the te rrain carefully before you start up any hill. Never
RIDING TECHNIQUES
. Avoid hills with exce ssiv ely slippery or loose surfaces.
RIDING GEARinRIDING
. Check the terrain carefully before you start
SAFETY
RIDING TECH-
RIDING
________
SAFETY INF
ORMATION
________
11
Page 14

SPECIAL SAFETY MESSAGES
– Always use proper procedures if you stall or roll backwards when climbing a
hill. To avoid stalling, use low gear and maintain a steady speed when climbing
a hill. If you stall or roll backwards, follow t he d riving technique procedures as
described in
– Always check for obstacles before operating in a new area. Never attempt to
operate over large obstacles, such as large rocks or fallen trees. Always follow
proper procedures when operating over obstacles as described in
TECHNIQUES
– Always be careful when skidding or sliding. Learn to safely control skidding or
sliding by practicing at low speeds and on level smooth terrain. On extremely
slippery surfaces, such as ice, go slowly and be very cautious in order to reduce
the chance of skidding out of control. If you are operating a 2-UP model and
have a passenger on-board, never attempt skidding or sliding; overturn or
passenger ejection may occur.
– Never oper ate this vehicle through deep or fast flowing water. Water s
never exceed footrests. Remember that wet brakes may have reduced stopping ability. Test your brakes after leaving water, mud or snow. If necessary,
apply them several times to let friction dry out the pads.
– A lways keep in mind th at braking distance is readily affecte d by b
to; weather and terrain conditions, braking system and tire conditions, vehicle
speed and attitude, and vehicle load including towing. Remember to adjust
your driving accordingly.
– Always be sure there are no obstacles or people behi
operate in reverse. When it is safe to proceed in reverse, go slowly. Take into
account that on a 2-UP model the passenger can obstruct your view.
– BRP recommends sitting on your ATV when operating in reverse. Avoid stand-
ing up. Your weight could shift forward agains
pected acceleration and may lead to a loss of control.
– Never exceed the stated load limits for this vehicle including operator, passen-
ger (2-UP models), all otherloads and added accessories. Cargo should be properly distributed and securely attac
this guid e for carrying cargo or pulling a trailer. Allo w greater distance for braking.
– Always inspect and confirm the safe operating condition of your vehicle prior to
ride. Refer to
ules as described in this Operator's Guide. Refer to
– N ever operate the vehicle if the controls do not function normally.
– Always maintain proper tire pressure. When replacing tires, use only the rec-
ommended tire size and type. For tire information, refer to
in this guide.
– Riding your vehicle to
Apply only enough throttle to proceed safely. Statistics show that mishaps and
injury usua lly result from high speed turns. Always remember th at this vehicle
is heavy! Its pure we
– This vehicle is no
energy generatedduring manoeuvres such as jumping which, can be passed on
to you, the operator. Performing wheelies can cause the vehicle to flip over onto
you. Both pract
and should be avoided at all times.
– The tires of this vehicle are not suited for paved road use.
RIDING TECHNIQUES
.
PRE-RIDE INSPECT
.
ut not limited
nd the vehicle when you
t throttle lever, causing an unex-
hed. Reduce speed and follow instructions in
. Alway s follow the maintenance sched -
ION
MAINTENANCE
.
SPECIFICATIONS
o fast for your skills o r the conditions may result in injury.
ight alone may entrap you should it fall resu lting in injury.
t designed for jumping, nor can it fully absorb the h igh impac t
ices have a high risk for you and your passenger (2-UP models)
RIDING
hould
_______
12
SAFETY I
NFORMATION
________
Page 15

SPECIAL SAFETY MESSAGES
2-UP Models
Driver must:
– Not forget is responsible for the safety of the passenger.
– Inform the passenger concerning the basic rules for a safe ride.
– Instruct the passenger to read the vehicle’s safety labels and to watch the
SAFETY VIDEO
– Always practice the maneuvers described in this Operator's Guide without and
with a passenger. Greater skills are require d with a passenger.
– A lways remember that the vehicle handling and stability may be affected when
riding with a passenger. Safely reduce speed. U se proper judgement. If in
doubt, do not attempt and disembark the passenger before executing any
maneuver.
– Always remember that the vehicle braking distance may be longer when riding
with a passenger. Allow grea ter distance for braking.
– Never carry passenger on a 2-UP model if the passenger seat is not properl
stalled.
– Never carry more than one (1) passenger. Do not allow passenger to sit any-
where else than the designated passenger's sea t.
– N ever carry a passenger if you judge his ability or judgement insufficie nt to con-
centrate on the terrain conditions and adapt accordingly.
– Never carry a passenger who has used drugs or alcohol, o
slow reaction time and impair judgment.
Passenger must:
– Be capable of resting his feet on the footrests and his
when seated on this vehicle.
– Never take place on this vehicle without wearing an approved helmet (including
a chin guard) that fits properly. The passenger should also wear eye protection
(goggles or face shield), gloves, boots, l
pants.
– Be seated on the designated passenger's seat.
– Always keep hands on grab handles and feet on the footrests during operation.
Never hold on to the operator.
– Never get up during vehicle operation. An excessive m ovement could cause
loss of control.
– Pay attention t o vehicle and op
– Not wait and tell the driver to
secure for any reason.
.
yin-
r is tired or ill. Th es e
hands on grab handles
ong sleeved shirt or jacket, and long
erator movements.
slow down or stop if you feel uncomfortable or in-
________
SAFETY INF
ORMATION
________
13
Page 16
OPERATION WARNINGS
The following warning and their format have been requested by the United States
Consumer Product Safety Commission and are required to be in the Operator's
Guide for all ATVs.
NOTE: The followin g illustrations are general representations only. Your model
may differ.
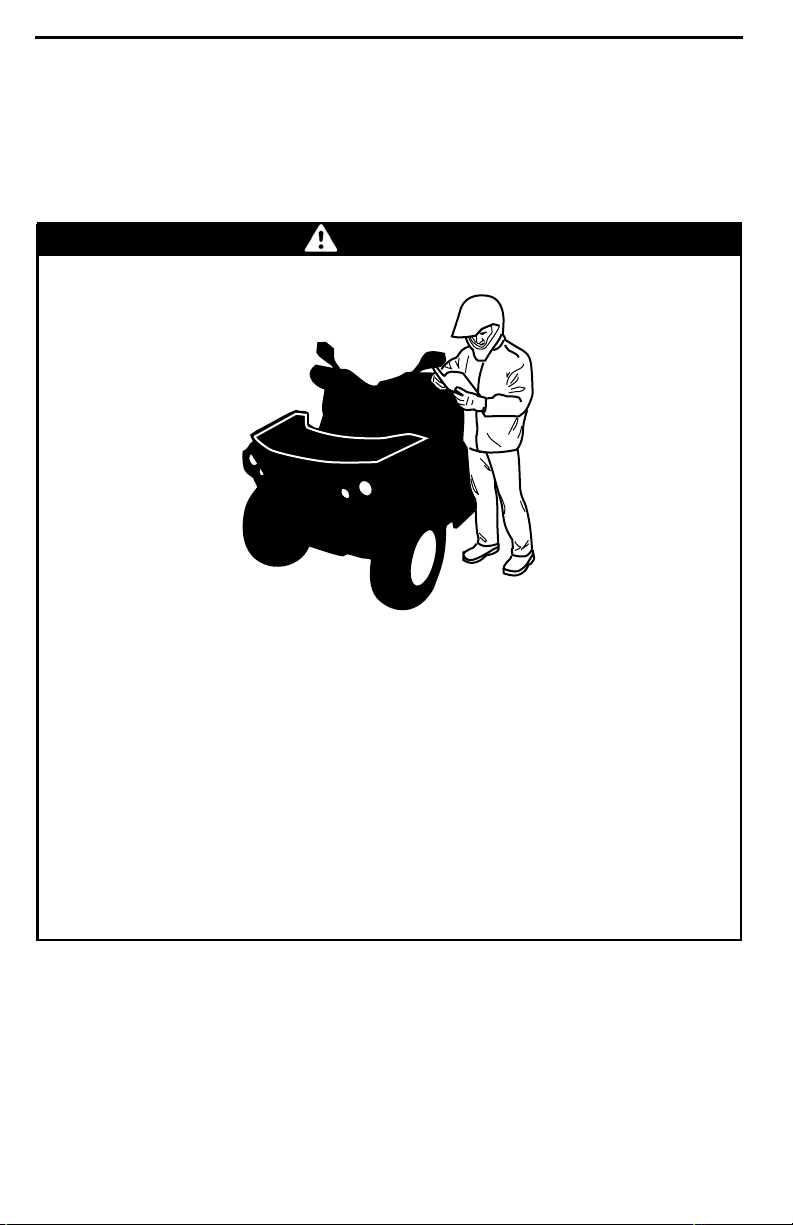
WARNING
POTENTIAL HAZARD
Operating this vehicle without proper instruction.
WHAT CAN HAPPEN
The risk of an accident is greatly increased if the operator does not know
how to operate this vehicle properly in different situations and on different
types of terrain.
HOW TO AVOID THE HAZARD
Beginners and inexperienced operators should
They should then regularly practice the skills learned during the course as
well as the operating techniques described in this Operator's Guide.
For more information about a training course, contact an authorized
Can-Am dealer.
_______
14
SAFETY I
NFORMATION
complete a training course.
________
Page 17
OPERATION WARNINGS
WARNING
V00A1AQ
POTENTIAL HAZARD
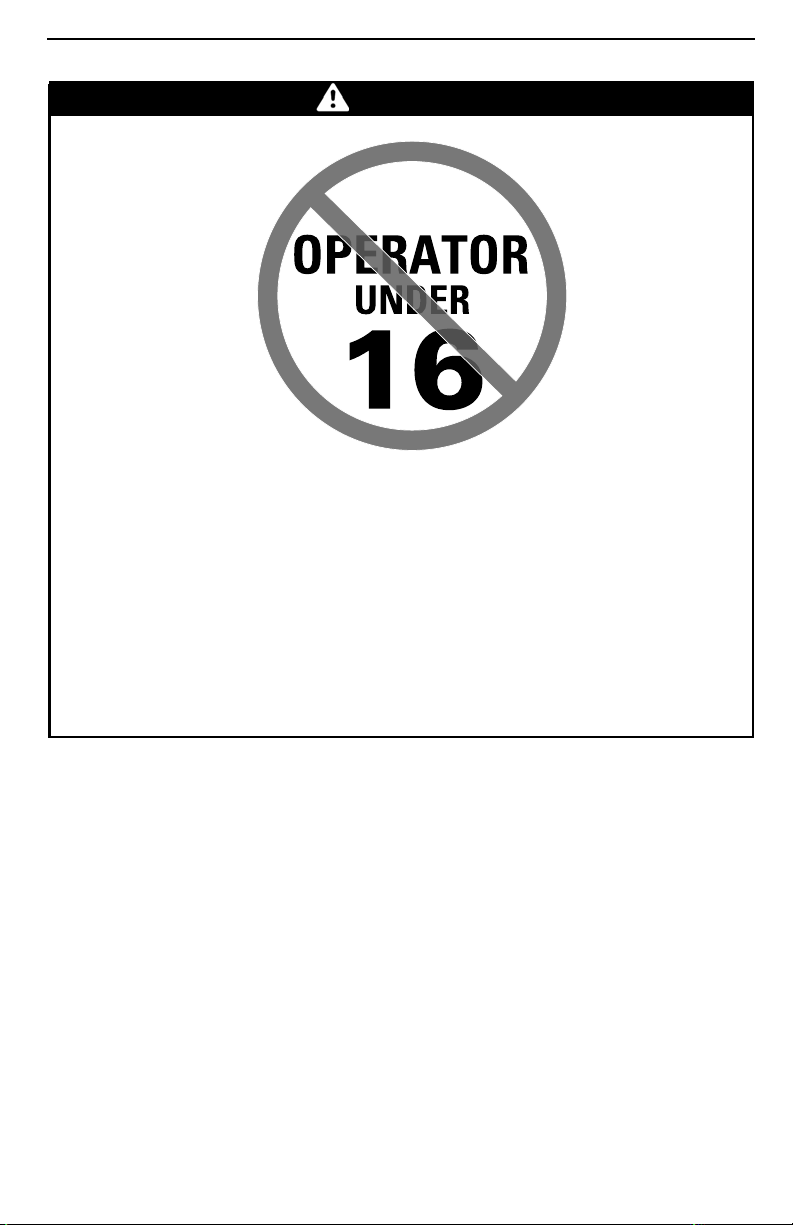
Failure to follow the age recommendations for this vehicle.
WHAT CAN HAPPEN
A lack of respect for this age recommendation can lead to severe injury or
death of the child.
Even though a child may be within the age group for which this vehicle is
recommended, he may not have the skills, abilities, or judgment needed to
operate this vehicle safely and may be involved in a serious accident.
HOW TO AVOID THE HAZARD
No one under 16 should operate this vehicle.
________
SAFETY INF
ORMATION
________
15
Page 18
OPERATION WARNINGS
2-UP Models Only
WARNING
vmo2014-005-100
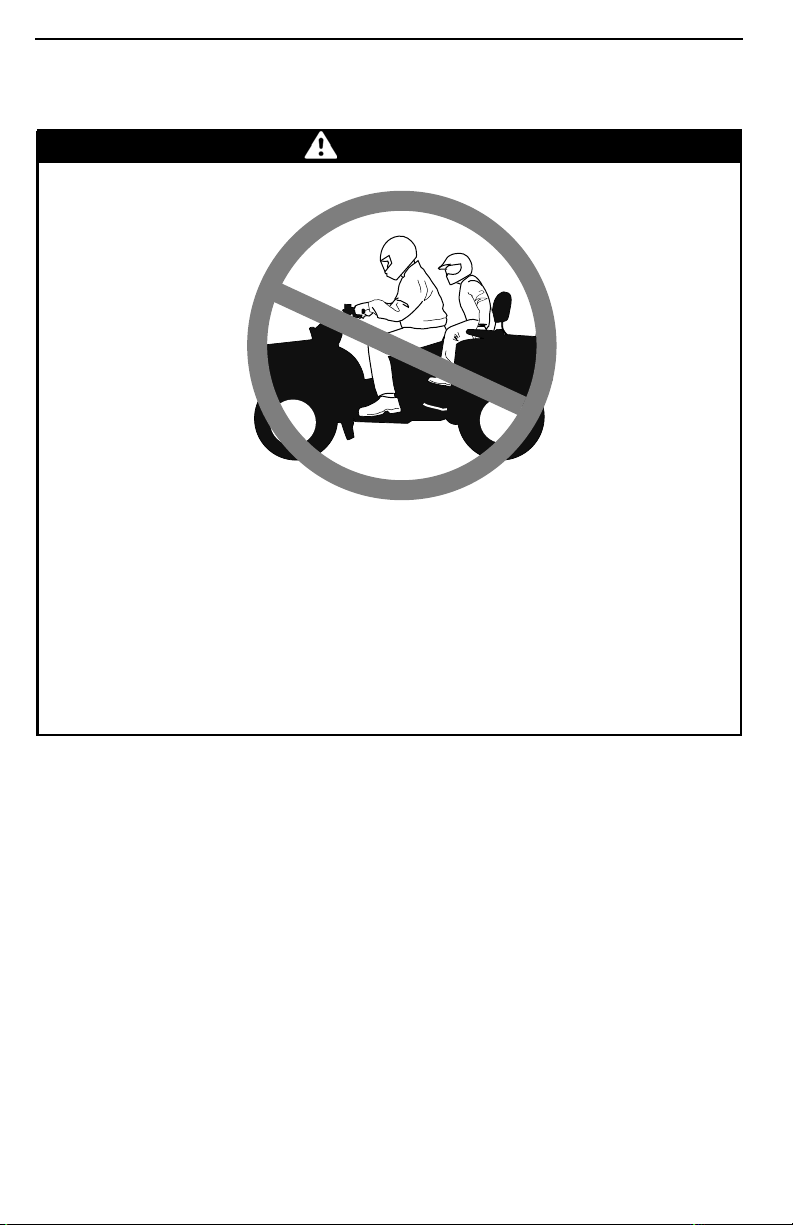
POTENTIAL HAZARD
Failure to respect the physical limitations of the passenger on 2-UP models.
WHAT CAN HAPPEN
A passenger that cannot completely lean his feet on footrests can be ejected
when riding on uneven terrain.
HOW TO AVOID THE HAZARD
The passenger must be capable of keeping his feet on the footrests and his
hands on grab handles at all times when he is seated on the vehicle.
_______
16
SAFETY I
NFORMATION
________
Page 19
OPERATION WARNINGS
1-UP Models Only
WARNING
V00A02Q
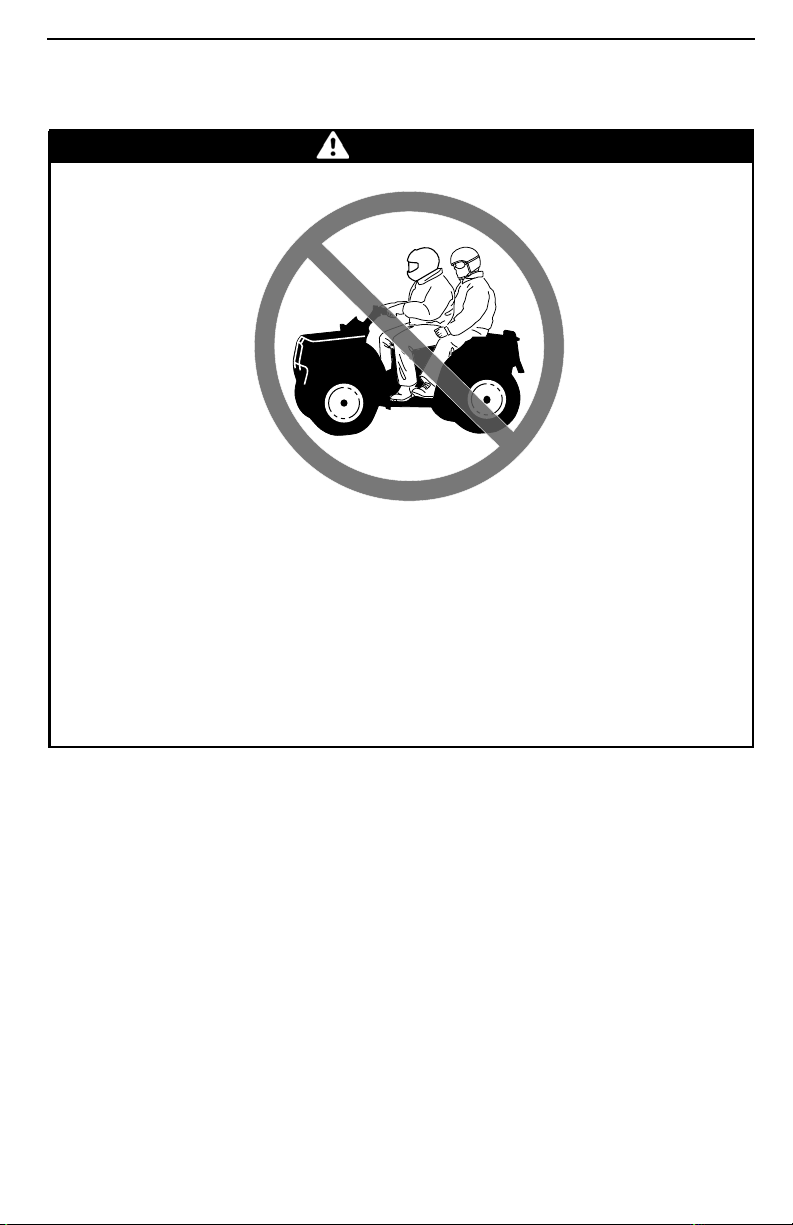
POTENTIAL HAZARD
Carrying a passenger on this vehicle.
WHAT CAN HAPPEN
Greatly reduces your ability to balance and control this vehicle.
Could cause an accident, resulting in harm to you and/or your passenger.
HOW TO AVOID THE HAZARD
Never carry passenger. Even with a long seat that pr
erator movement, it is not designed nor intended to carry passenger(s).
ovides unrestricted op-
________
SAFETY INF
ORMATION
________
17
Page 20
OPERATION WARNINGS
2-UP Models Only
WARNING
V00A1CQ
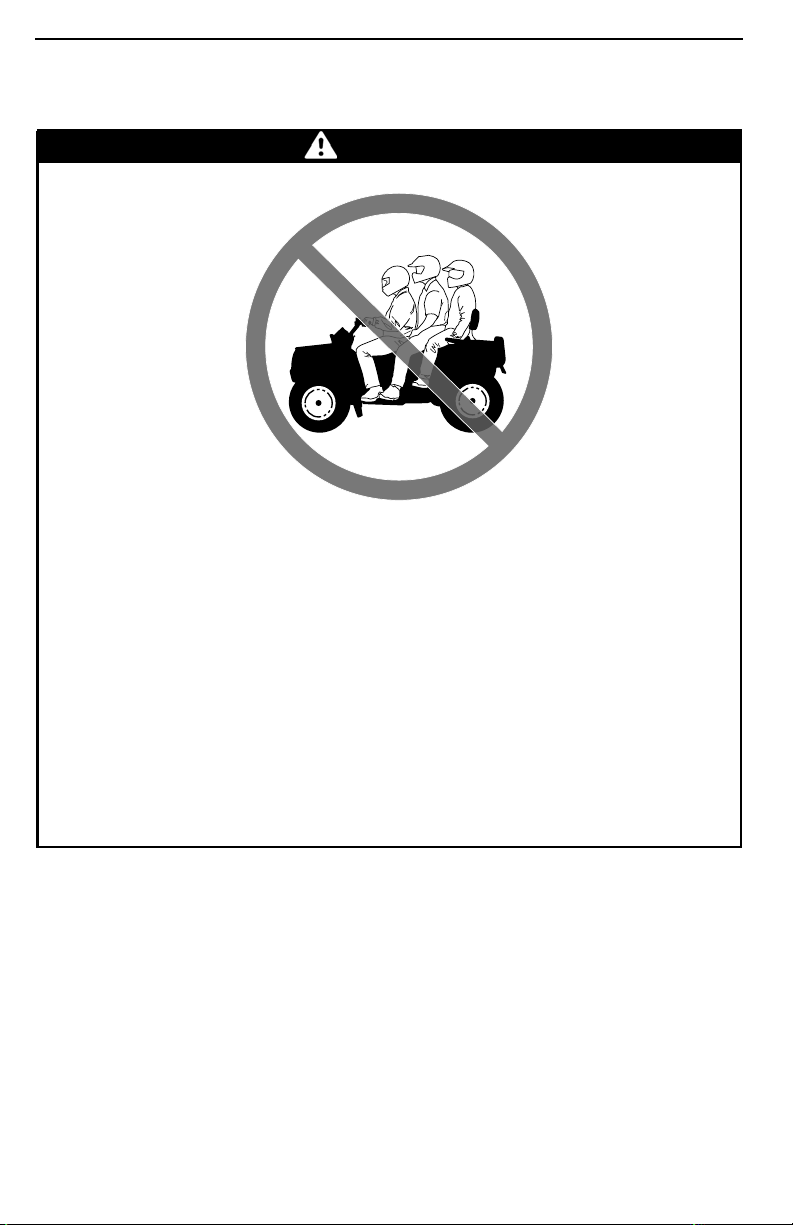
POTENTIAL HAZARD
Carrying more than one (1) passenger on this vehicle.
WHAT CAN HAPPEN
Carrying more than one (1) passenger reduces your ability to balance and
control this vehicle.
Could cause an accident, resulting in harm to you and/or your passengers.
HOW TO AVOID THE HAZARD
Never carry more than one (1) passenger. Even with a long seat that provides unrestricted operator movement, the vehicle is not designed nor
intended to carry more than one (1) operator and o
passenger must use the designated passenger's seat when he is seated on
thevehiclewithfeetfirmlyplantedonfootrestsandalwaysholdontothe
grab handles.
ne (1) passenger. The
_______
18
SAFETY I
NFORMATION
________
Page 21
OPERATION WARNINGS
WARNING
V00A2DQ
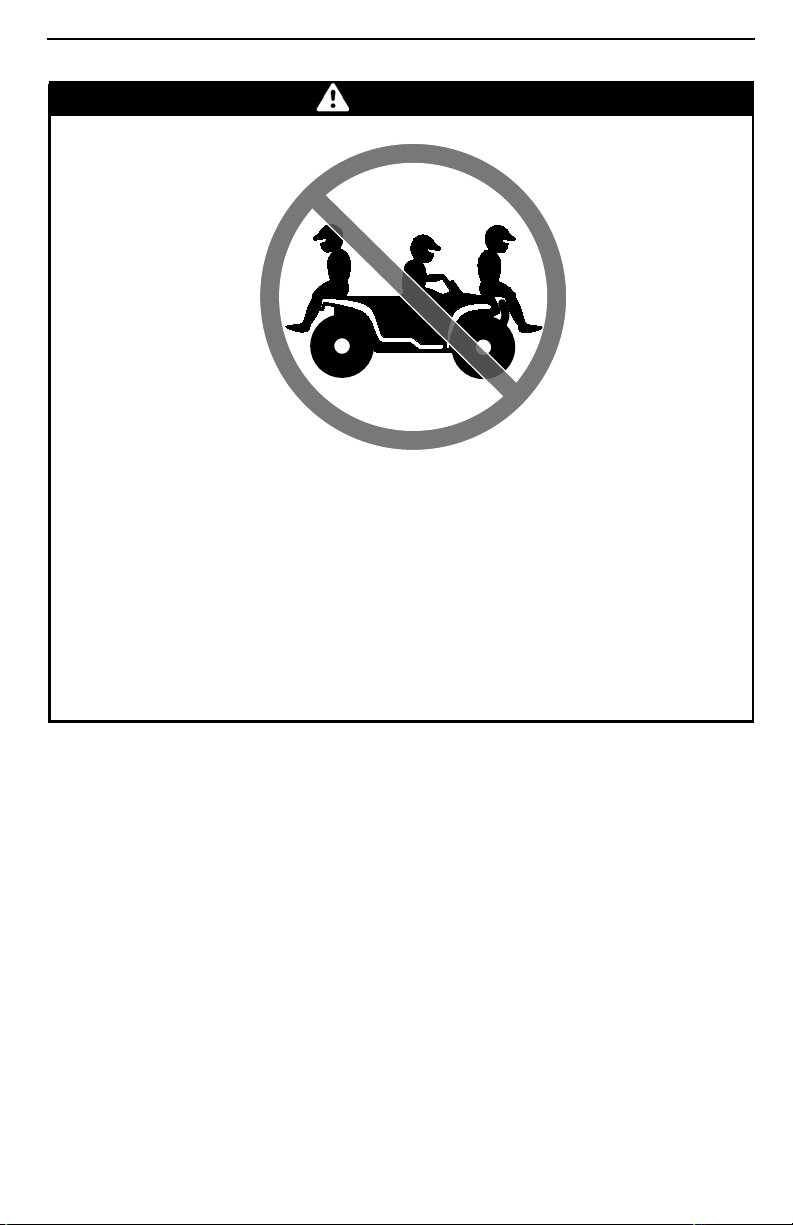
POTENTIAL HAZARD
Allowing passenger(s) to sit on front or rear racks on this vehicle.
WHAT CAN HAPPEN
Allowing a passenger could:
– Impair vehicle stability which could l ead to a loss of control.
– Result in injury to passenger(s) from impact on hard surfaces.
– Cause an accident, resulting in harm to you and/or your passenger(s).
HOW TO AVOID THE HAZARD
Never allow any passenger to sit on front or rear racks on this vehicle.
________
SAFETY INF
ORMATION
________
19
Page 22
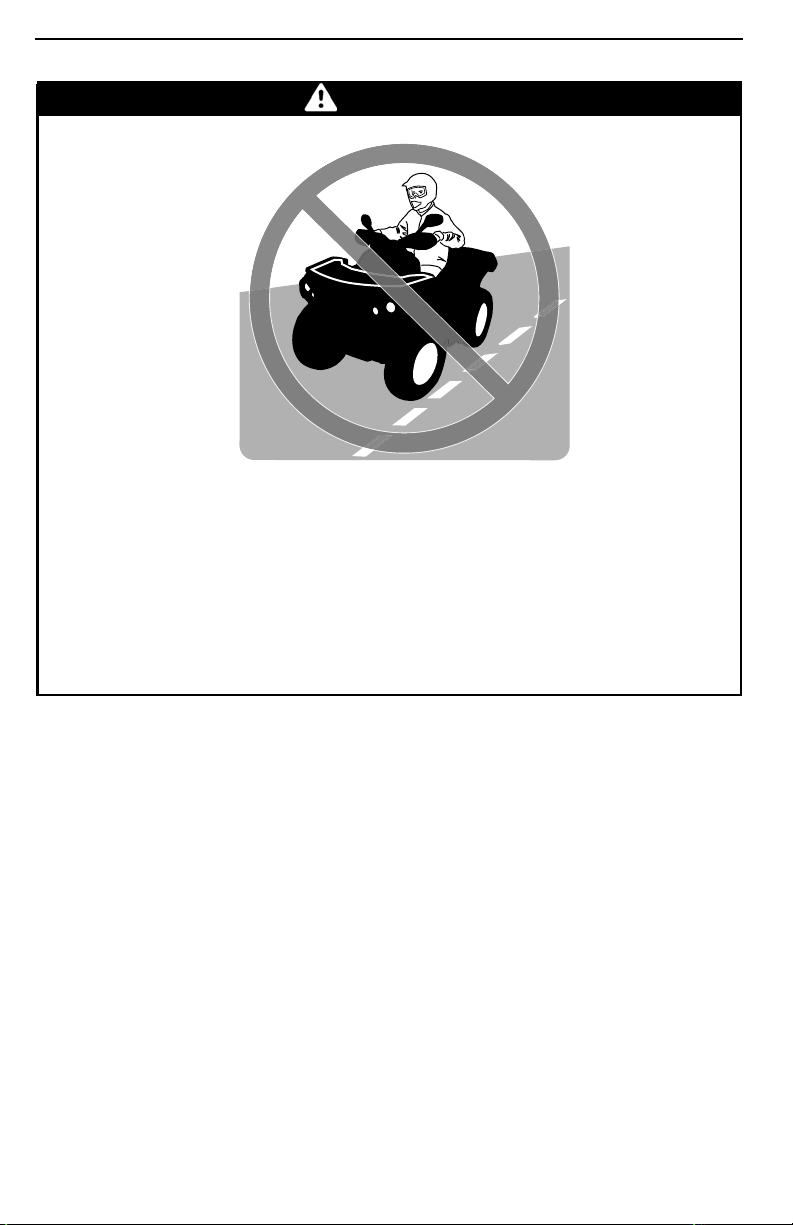
OPERATION WARNINGS
WARNING
POTENTIAL HAZARD
Operating this vehicle on public streets, roads or highways.
WHAT CAN HAPPEN
You can collide with another vehicle.
HOW TO AVOID THE HAZARD
Never operate this vehicle on any public street, road or highway, even a dirt
or gravel one. In many states it is illegal to operate this vehicle on public
streets, roads and highways.
_______
20
SAFETY I
NFORMATION
________
Page 23
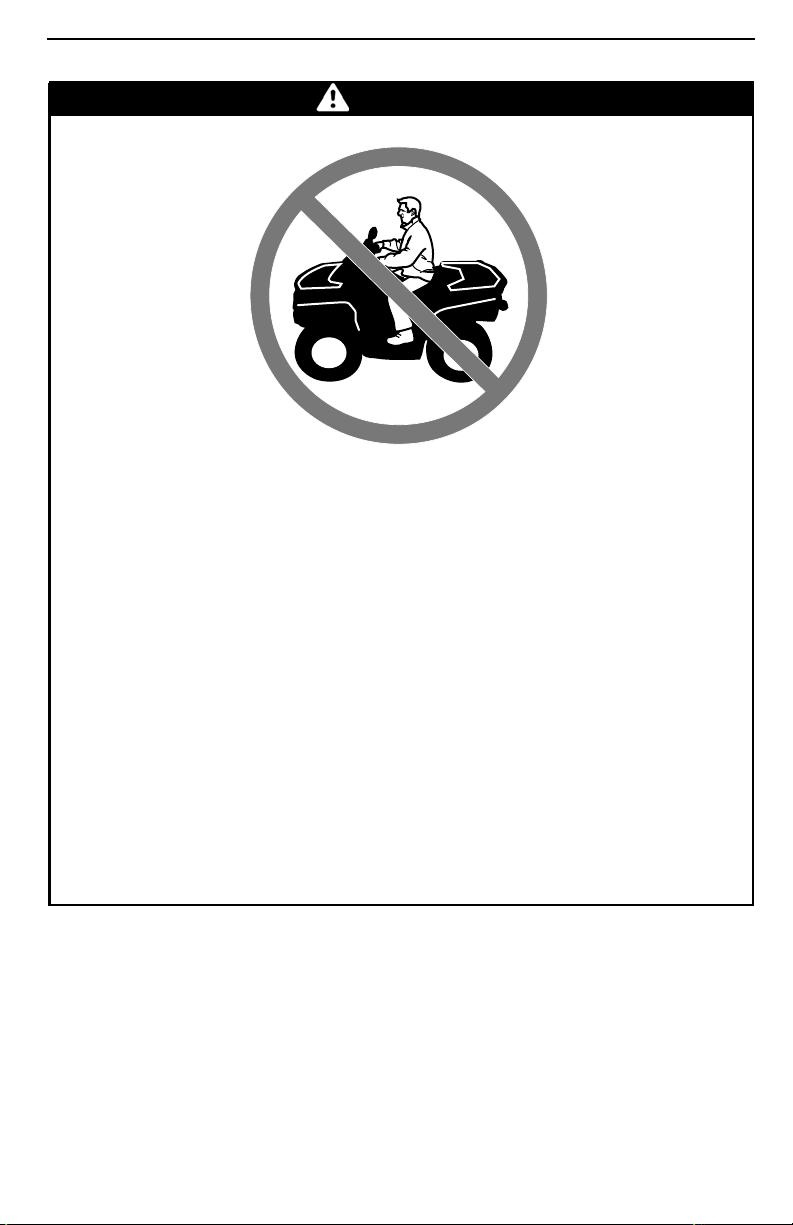
OPERATION WARNINGS
WARNING
POTENTIAL HAZARD
Riding this vehicle without wearing an approved helmet, eye protection
protective gear. On 2-UP models, passenger should also have an approved
helmet with a rigid chin guard.
WHAT CAN HAPPEN
– Riding without an approved helmet increases the chances of a severe
head injury or death in the event of an accident.
– Riding without eye protection can result in an accident and increases the
chances of a severe injury in the event of an accident.
– Riding without protective gear increases the chances of severe injury in
the event of an accident.
HOW TO AVOID THE HAZARD
Always wear an approved helmet that fits properly. You should also wear:
– Eye protection (goggles or face shield)
– Rigid chin guard
– Gloves and boots
– Long sleeved shirt or jacket
–Longpants.
and
________
SAFETY INF
ORMATION
________
21
Page 24
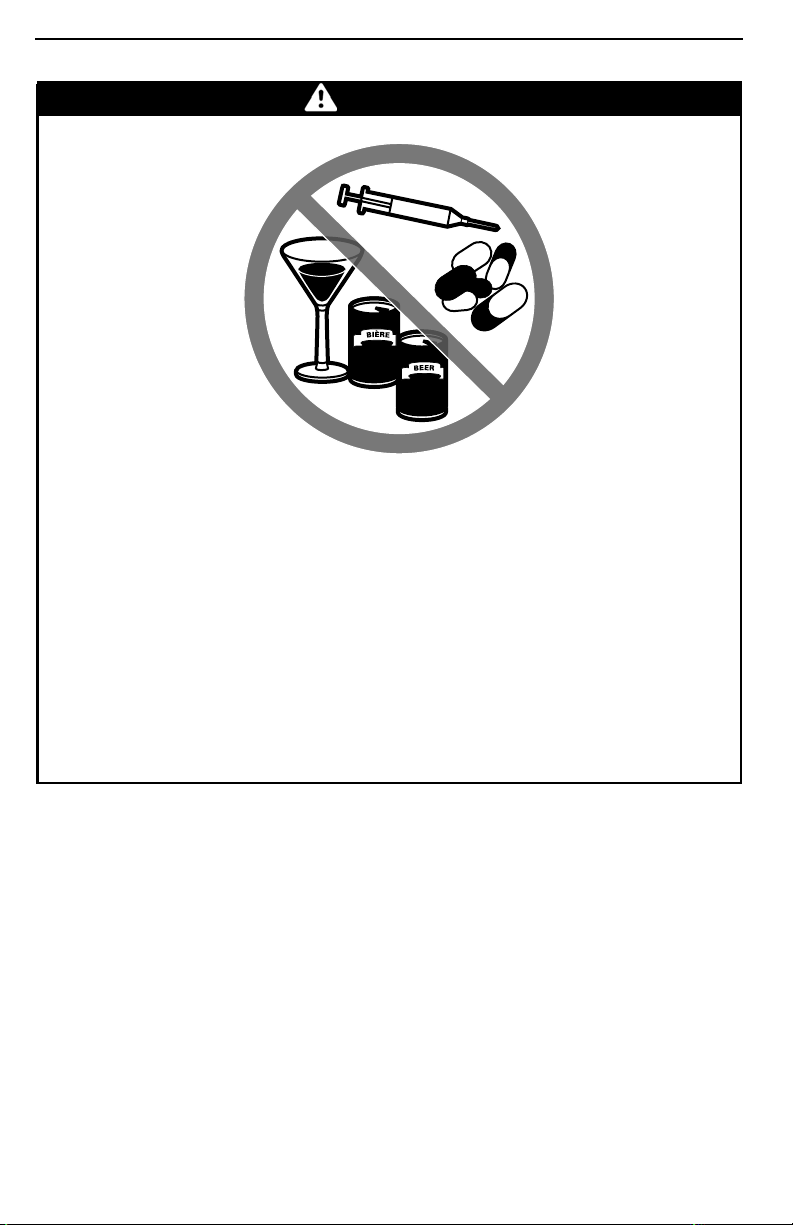
OPERATION WARNINGS
WARNING
V00A07Q
POTENTIAL HAZARD
Using this vehicle with drugs or alcohol.
WHAT CAN HAPPEN
Could cause the passenger to fall off (2-UP models).
Could seriously affect your judgment.
Could cause you to react more slowly.
Could affect your balance and perception.
Could result in an accident or death.
HOW TO AVOID THE HAZARD
The operator and the passenger (2-UP models) should never use this vehicle with drugs or alcohol.
_______
22
SAFETY I
NFORMATION
________
Page 25
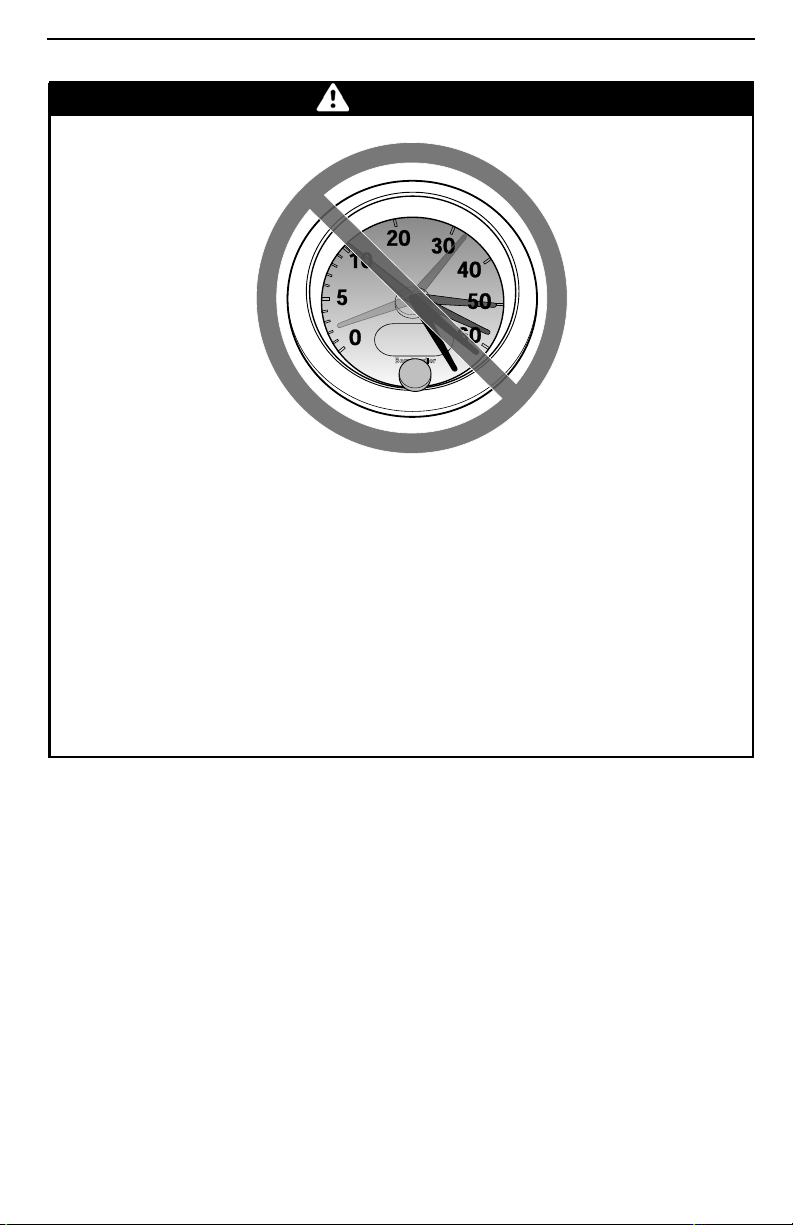
OPERATION WARNINGS
WARNING
V00A08Q
POTENTIAL HAZARD
Operating this vehicle at excessive speeds.
WHAT CAN HAPPEN
Increases your chances of losing control of the vehicle, which can result in
an accident.
HOW TO AVOID THE HAZARD
Always travel at a speed which is appropriate for the terrain, visibility and
operating conditions, and your experience.
On 2-UP models, the vehicle handling, stability and braking distance may
be affected when riding with a passenger. Safely reduce speed when riding
with a passenger. Allow greater distance for braking.
________
SAFETY INF
ORMATION
________
23
Page 26
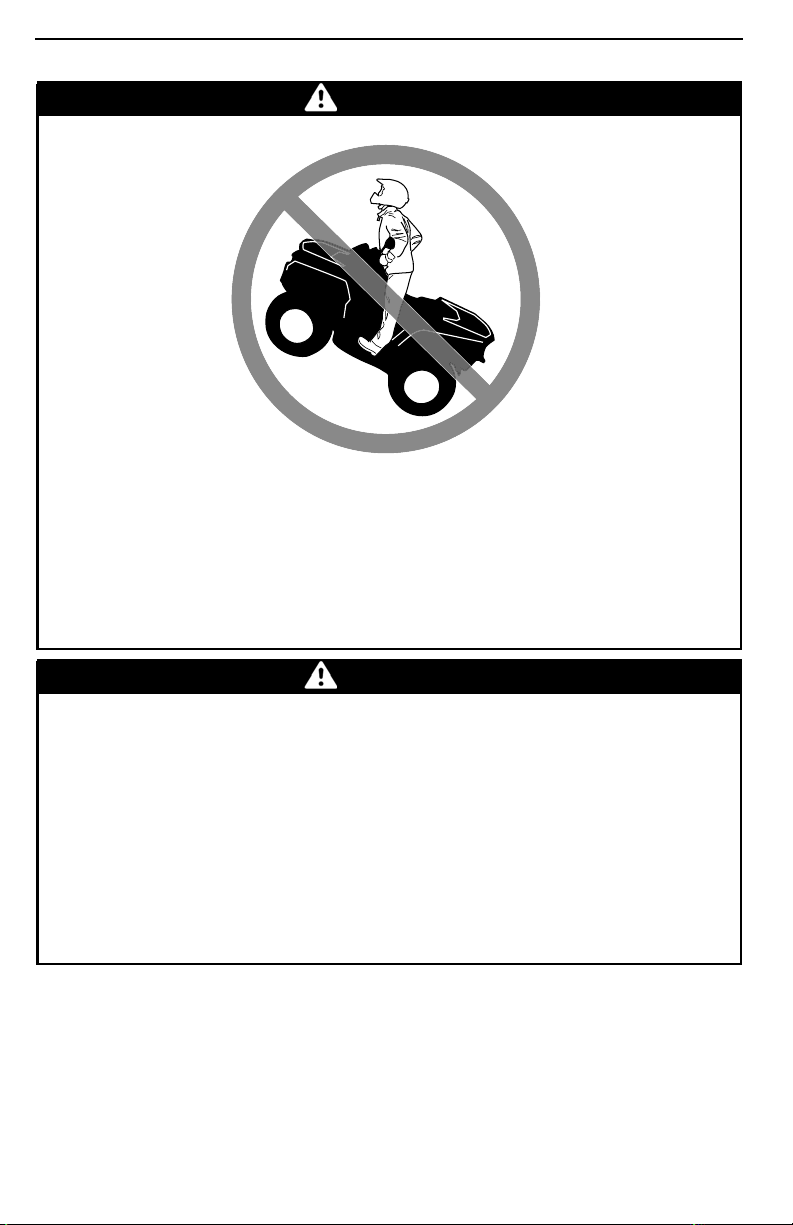
OPERATION WARNINGS
WARNING
POTENTIAL HAZARD
Attempting wheelies, jumps and other stunts.
WHAT CAN HAPPEN
Increases the chance of an accident, including an overturn.
HOW TO AVOID THE HAZARD
Never attempt stunts, such as wheelies or jumps. Do not try to show off.
WARNING
POTENTIAL HAZARD
Failure to inspect the vehicle before operating.
Failure to properly m aintain the vehicle.
WHAT CAN HAPPEN
Increases the possibility of an accident or equipmen
HOW TO AVOID THE HAZARD
Always inspect your vehicle prior to ride to make sure the vehicle is in safe
operating condition.
Always follow the maintenance schedule described in this Operator's
Guide.
_______
24
SAFETY I
NFORMATION
t damage.
________
Page 27
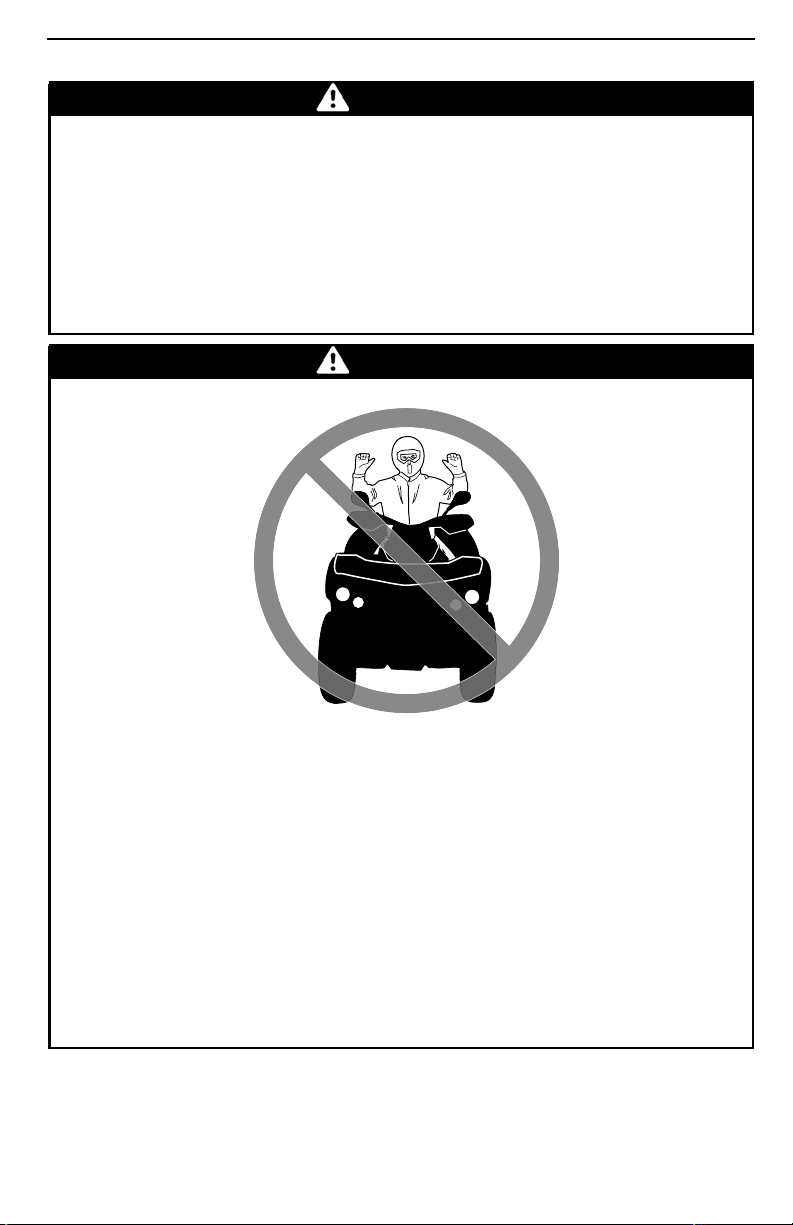
OPERATION WARNINGS
WARNING
POTENTIAL HAZARD
Riding on frozen waterways.
WHAT CAN HAPPEN
Breaking through the ice can lead to severe injury or death.
HOW TO AVOID THE HAZARD
Never ride this vehicle on a frozen surface before you are sure the ice is thick
enough and sound enough to support the vehicle and its load, as well as the
force that is created by a m oving vehicle.
WARNING
POTENTIAL HAZARD
Removing hands from handlebars for the operator
for the passenger (2-UP models), or feet from the footrests during operation.
WHAT CAN HAPPEN
Removing even one hand or foot can reduce yo
cle or could cause you t o lose your balance and fall off th e vehicle. If you remove a foot from the footrests, your foot or leg may come into contact with
the rear wheels, which could injure you o
HOW TO AVOID THE HAZARD
Operator must always keep both hands on the handlebars and passenger
(2-UP models) on grab handles..Both feet (operator and passenger on 2-UP
models) must rest on the footrests during vehicle operation.
________
SAFETY INF
r cause an accident.
ORMATION
and from grab handles
ur ability to control the vehi-
________
25
Page 28
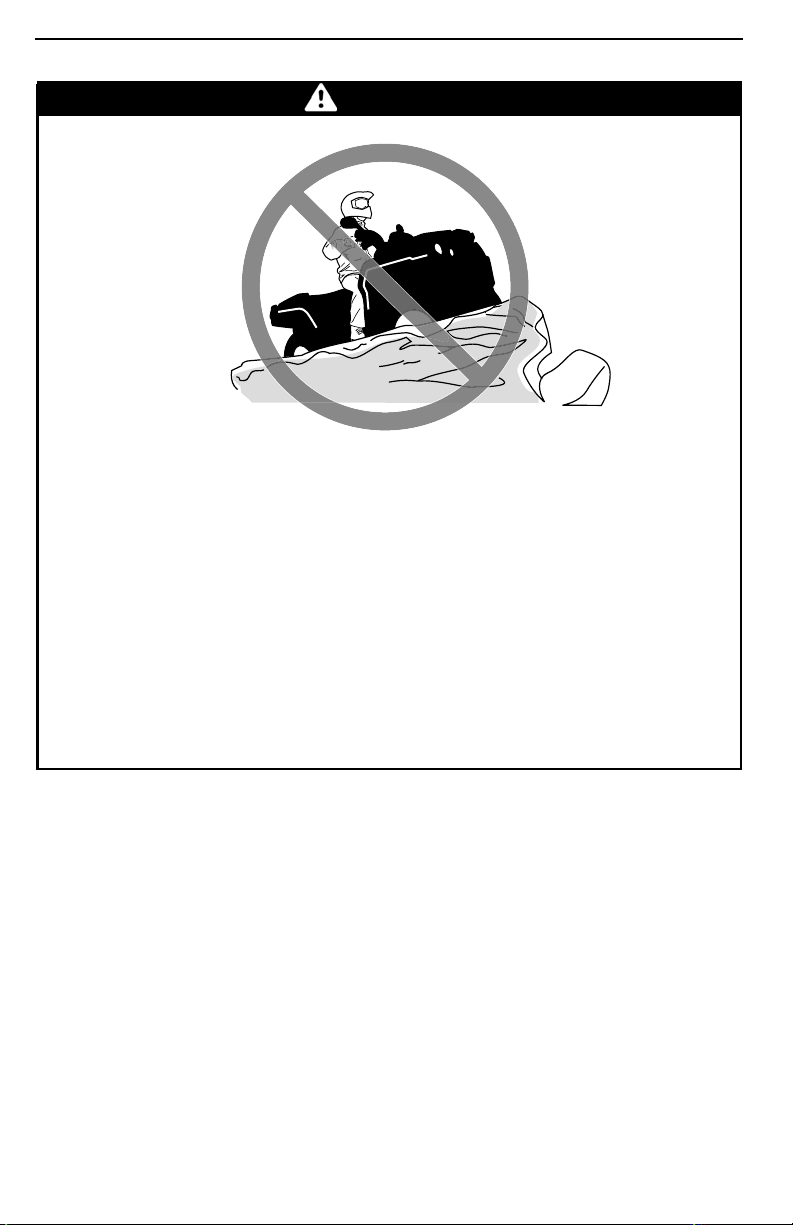
OPERATION WARNINGS
WARNING
POTENTIAL HAZARD
Failure to use extra care when operating this vehicle on unfamiliar terrain.
WHAT CAN HAPPEN
You can come upon hidden rocks, bumps, or holes, without eno
react.
Could resultin the vehicle overturning, passengerejecti
loss of control.
HOW TO AVOID THE HAZARD
Go slowly and be extra careful when operating on unfamiliar terrain.
Always be alert to changing terrain conditions when operating the vehicle.
Do not forget, on 2-UP models, the operator is responsib
his passenger. Safely reduce speed when riding with a passenger.
on (2-UP models) or
le for the safety of
ugh time to
_______
26
SAFETY I
NFORMATION
________
Page 29
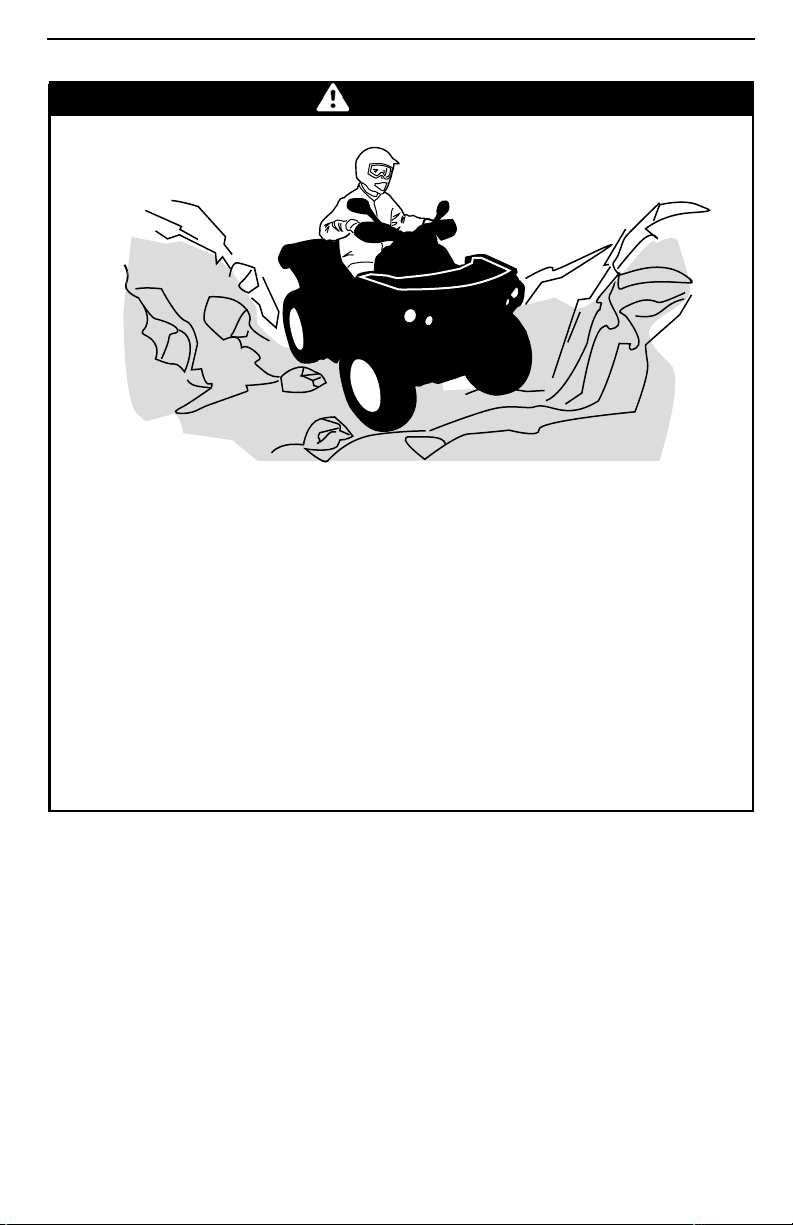
OPERATION WARNINGS
WARNING
POTENTIAL HAZARD
Failure to use extra care when operating on excessively rough, slippery or
loose terrain.
WHAT CAN HAPPEN
Could cause loss of traction or vehicle control, which could result in an accident, including an overturn or passenger ejection (2-UP models).
HOW TO AVOID THE HAZARD
Do not operate on excessively rough, slippery or loose terra
have learned and practiced the skills necessary to control this vehicle on
such terrain.
Always be especially cautious on these kinds of terrain.
Do not forget, on 2-UP models, the operator is respons
the passenger. In doubt, disembark him before operating on these terrains.
ible for the safety of
in until you
________
SAFETY INF
ORMATION
________
27
Page 30
OPERATION WARNINGS
WARNING
POTENTIAL HAZARD
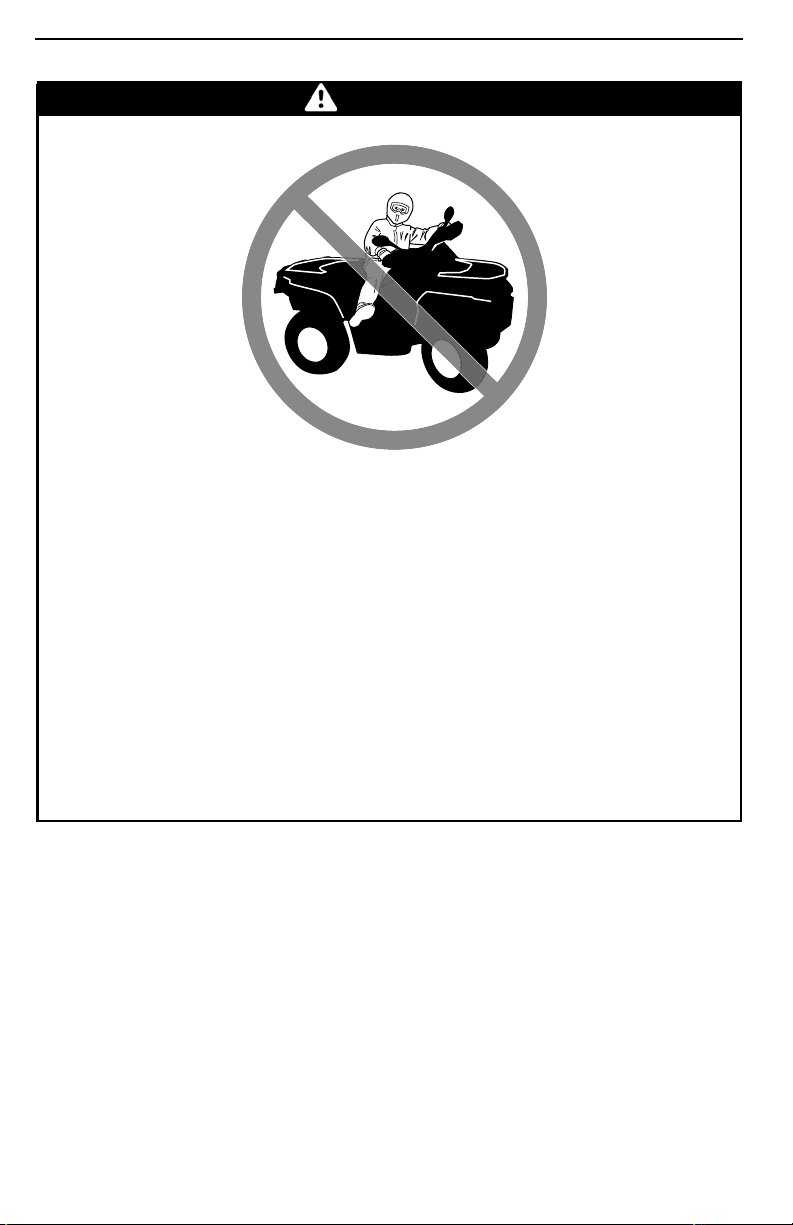
Turning improperly.
WHAT CAN HAPPEN
Vehicle could go out of control, causing a collision or an overturn or a passenger eje ction (2-UP models).
HOW TO AVOID THE HAZARD
Always follow proper procedures for turning as described in this Operator's
Guide. Practice turning at low speeds before attempting to turn at faster
speeds.
Do not forget, on 2-UP models, the operator is responsible for the safety of
the passenger. Never perform this maneuver with a passenger. Always remember that the vehicle handling, stability and braking distance may be affected when riding with a passenger.
Do not turn at excessive speed.
_______
28
SAFETY I
NFORMATION
________
Page 31
OPERATION WARNINGS
WARNING
POTENTIAL HAZARD
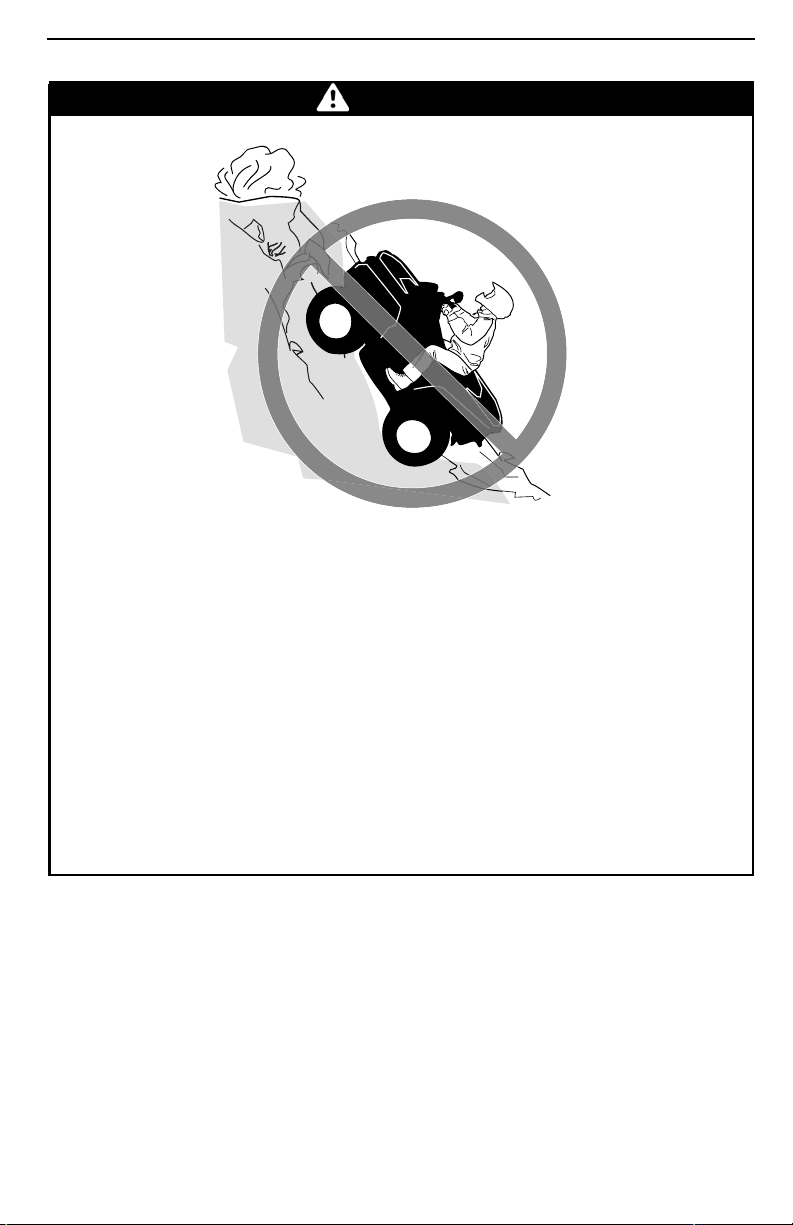
Operating on excessively steep hi lls.
WHAT CAN HAPPEN
The vehicle can overturn more easily on extremely steep hills than on level
surfaces or small hills.
HOW TO AVOID THE HAZARD
Never operate this vehicle on hills too steep for the vehicle or for your abilities.
Practice, without and with passenger (2-UP m odels), on smaller hills before
attempting larger hills.
Always remember that, on 2-UP models, even if this vehicle can climb some
steep hills, it is not recommended to climb such hills with a passenger; a lways disembark him before attempting this maneuver. Show good judgement.
________
SAFETY INF
ORMATION
________
29
Page 32
OPERATION WARNINGS
WARNING
POTENTIAL HAZARD
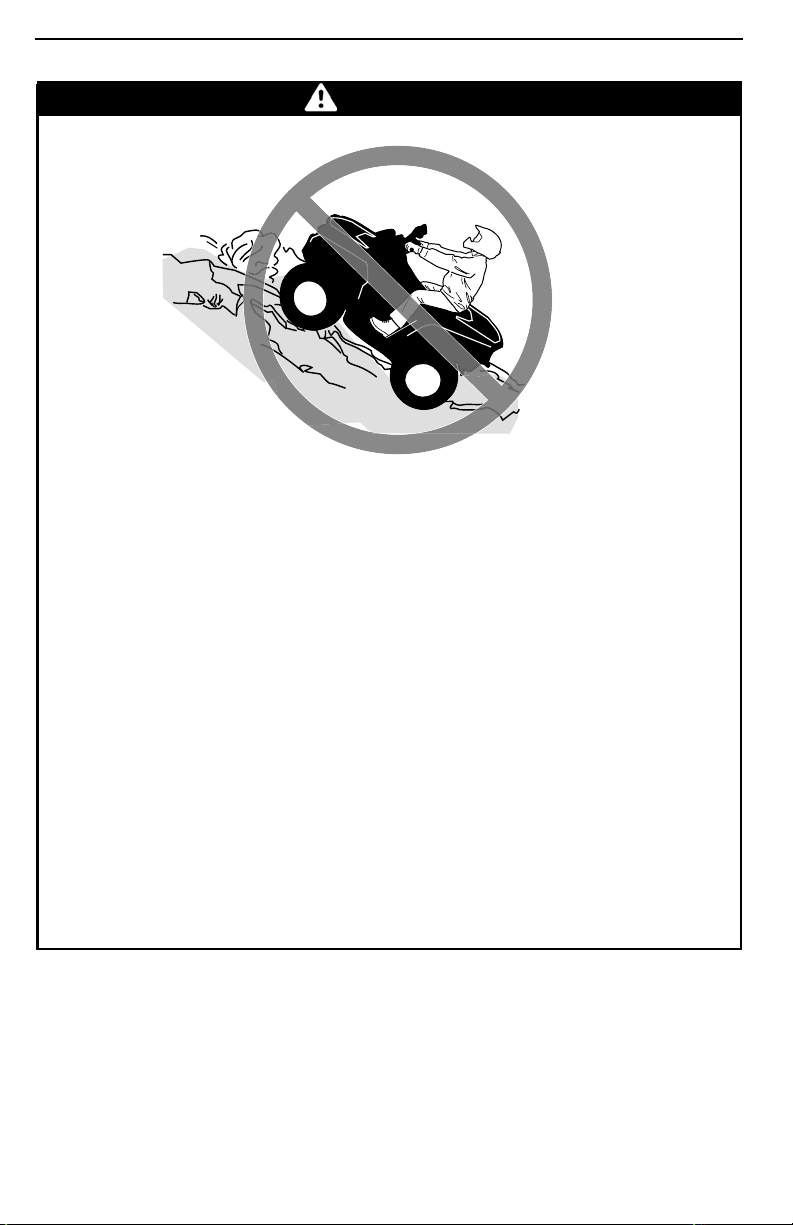
Climbing hills improperly.
WHAT CAN HAPPEN
Could cause loss of control, passenger ejection (2-UP models) or cause vehicle to overturn.
HOW TO AVOID THE HAZARD
Always follow proper procedures for climbing hills as described in this Operator's Guide.
Always check the terrain carefully before you start up any hill. Do not
forget, on 2-UP models, the operator is responsible for the safety of the
passenger. In doubt, disembark him before climbing hill. Always remember that the vehicle handling, stability and braking distance may be affected
when riding with a passenger.
Never climb hills with excessively slippery or loose surfaces.
Shift your weight forward (operator and passenger on 2-UP models).
Never open the throttle suddenly or make sudden gear changes. The vehi-
cle could flip over backwards.
Never go over the top of any hill at high speed. An obstacle, a sharp drop, or
another vehicle or person could be on the other side of the hill.
_______
30
SAFETY I
NFORMATION
________
Page 33
OPERATION WARNINGS
WARNING
POTENTIAL HAZARD
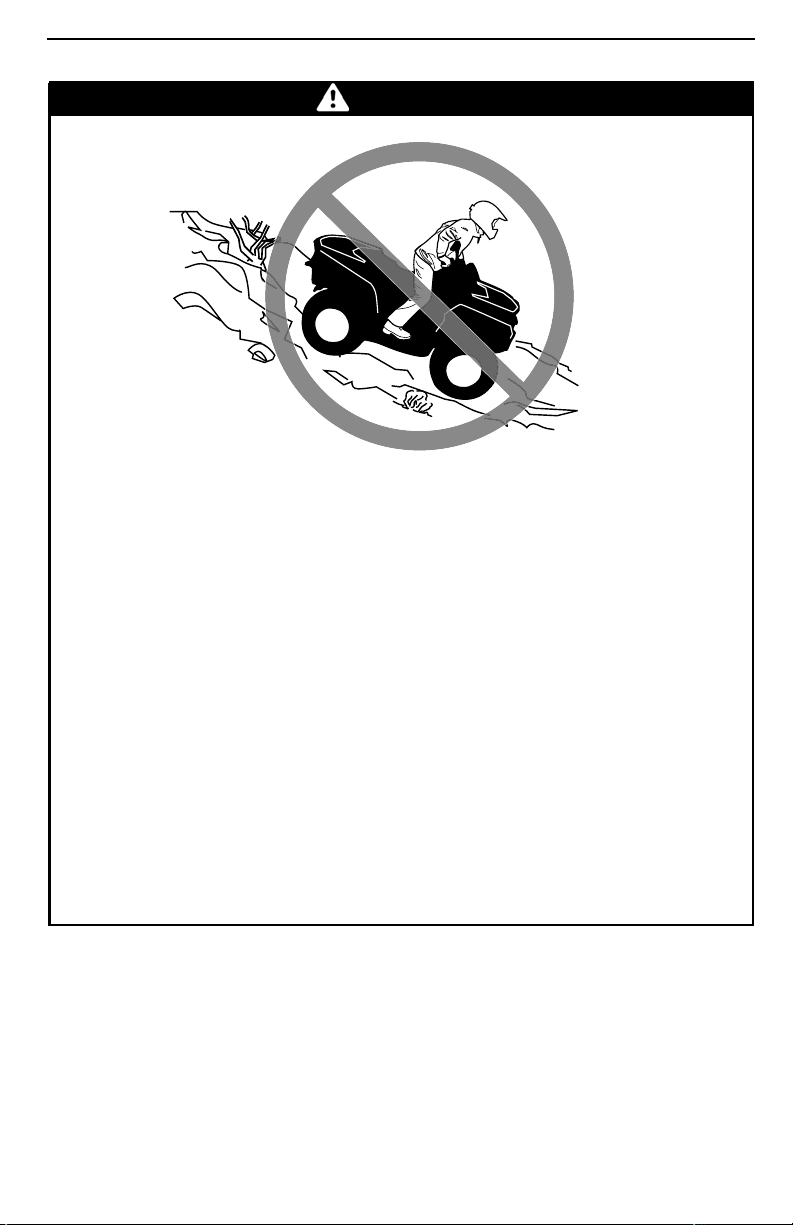
Going down a hill improperly.
WHAT CAN HAPPEN
Could cause loss of control, passenger ejection (2-UP models) or cause vehicle to overturn.
HOW TO AVOID THE HAZARD
Always follow proper procedures for going down hills as described in this
Operator's Guide.
NOTE: A special technique is required when braking as you go down a hill.
Always check the terrain carefully before you start do
forget, on 2-UP models, the operator is responsible for the safety of the
passenger. In doubt, disembark him before going down hill. Always remember that the v ehicle handling, stability and bra
affected when riding with a passenger.
Shift your weight backward (operator and passenger
Never go down a hill at high speed.
Avoid going down a hill at an angle which would cause the vehicle to lean
sharply to one side. Go straight down the hill where possible.
wn any hill. Do not
king distance may be
on 2-UP models).
________
SAFETY INF
ORMATION
________
31
Page 34
OPERATION WARNINGS
WARNING
POTENTIAL HAZARD
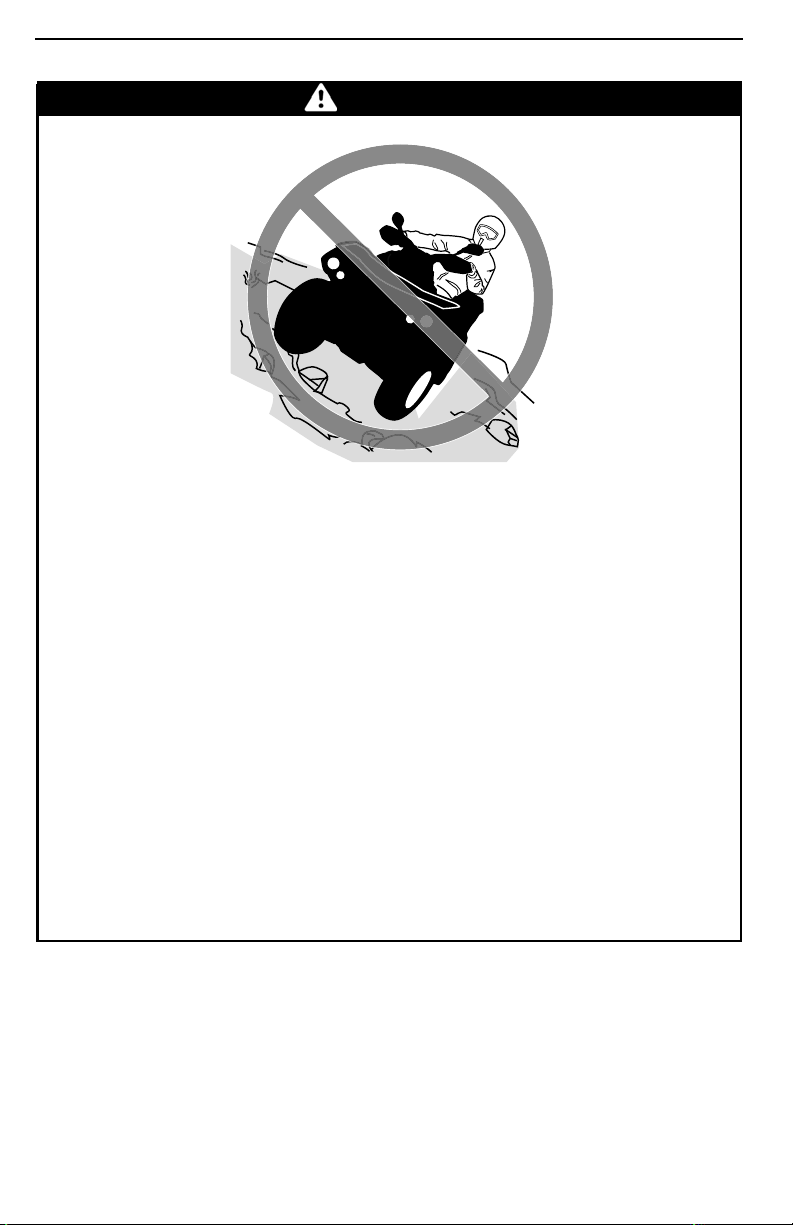
Improperly crossing hills or turning on hills.
WHAT CAN HAPPEN
Could cause loss of control, passenger ejection (2-UP models) or cause vehicle to overturn.
HOW TO AVOID THE HAZARD
Never attempt this maneuver on 2-UP models when the passenger
board. Always disembark him before executing.
Never attempt to turn the vehicle around on any hill un
the turningtechnique as described in this Operator's Guide on level ground.
Be very careful when turning on any hill.
Avoid crossing the side of a steep hill if possible.
When cross in g the side of a hill:
Always follow proper procedures as d escribed further in this Operator's
Guide.
Avoid hills with excessively slippery or loose surfaces.
Operator and passenger (2-UP models) must shift weight to the uphill side
of the vehicle.
til you have mastered
is on
_______
32
SAFETY I
NFORMATION
________
Page 35
OPERATION WARNINGS
WARNING
V00A1PQ
POTENTIAL HAZARD
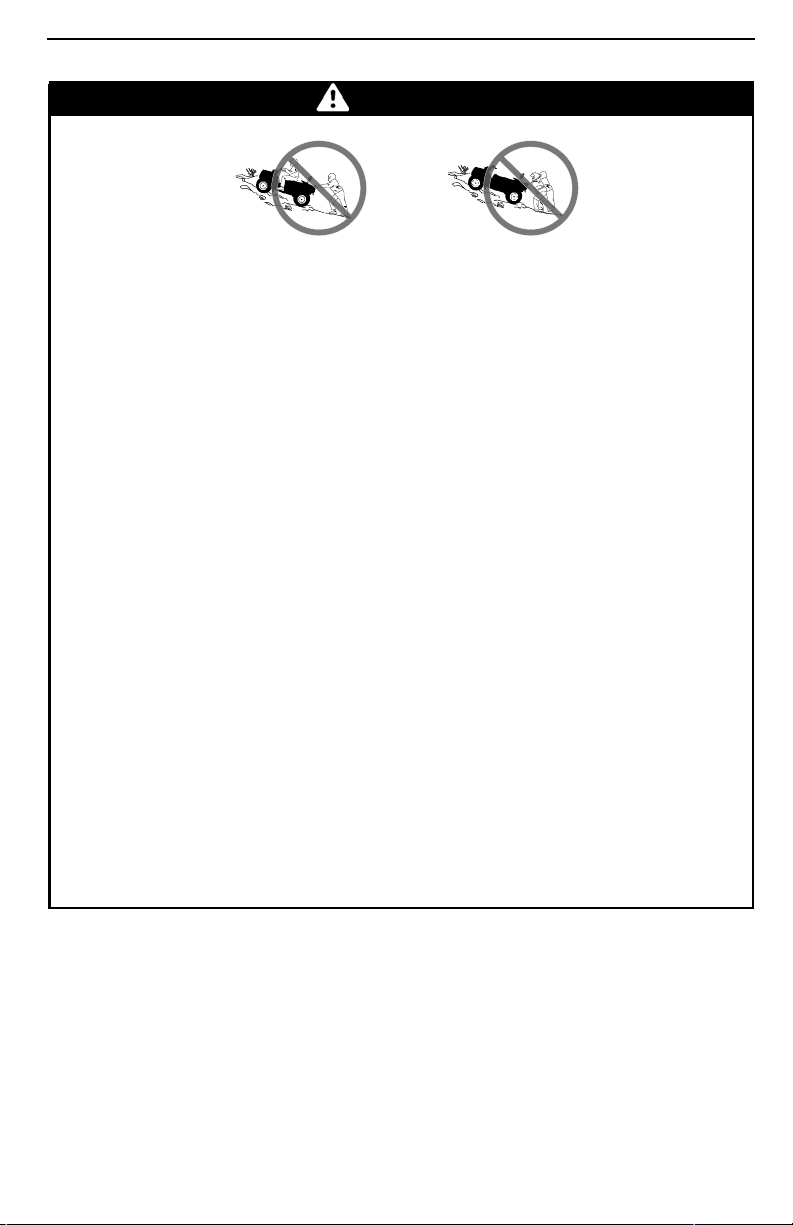
Stalling, rolling backwards or improperlydismounting while climbing a hill.
WHAT CAN HAPPEN
Could result in vehicle overturning.
HOW TO AVOID THE HAZARD
Use low gear and maintain steady speed when climbing a hill.
If you lose all forward speed:
Operator and passenger (2-UP models) must keep their weight uphill.
Never open the throttle suddenly or make sudden gear changes. The
vehicle could flip over backwards.
Apply the brakes.
Lock parking brake after you have stopped.
Disembark on uphill side, or to a side if pointed straight uphill (passenger
firston2-UPmodels).
If you begin rolling back wards:
Operator and passenger (2-UP models) must keep their weight uphill.
Never open the throttle suddenly or make sudden gear changes. The
vehicle could flip over backwards.
Never apply the rear brake while rolling backwards.
Apply the front brake gradually.
When fully stopped, apply rear brake as well and lock parking brake.
Disembark on uphill side, or to a side if pointed straight uphill (passenger
firston2-UPmodels).
Turn the vehicle around and remount, following the procedure described
further in this Operator's Guide.
________
SAFETY INF
ORMATION
________
33
Page 36
OPERATION WARNINGS
WARNING
POTENTIAL HAZARD
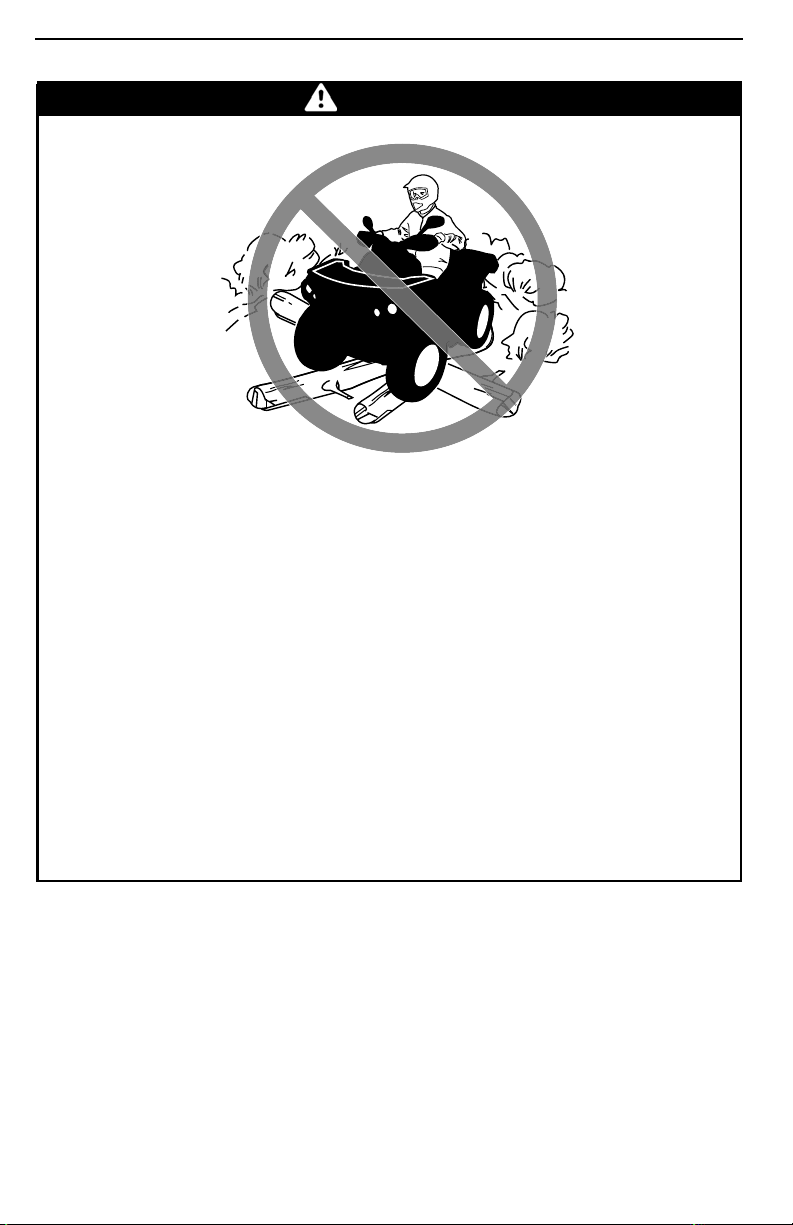
Improperly operating over obstacles.
WHAT CAN HAPPEN
Could cause loss of control (passenger ejection on 2-UP models), or a collision.
Could cause the vehicle to overturn.
HOW TO AVOID THE HAZARD
Before operating in a new area, check for obstacles.
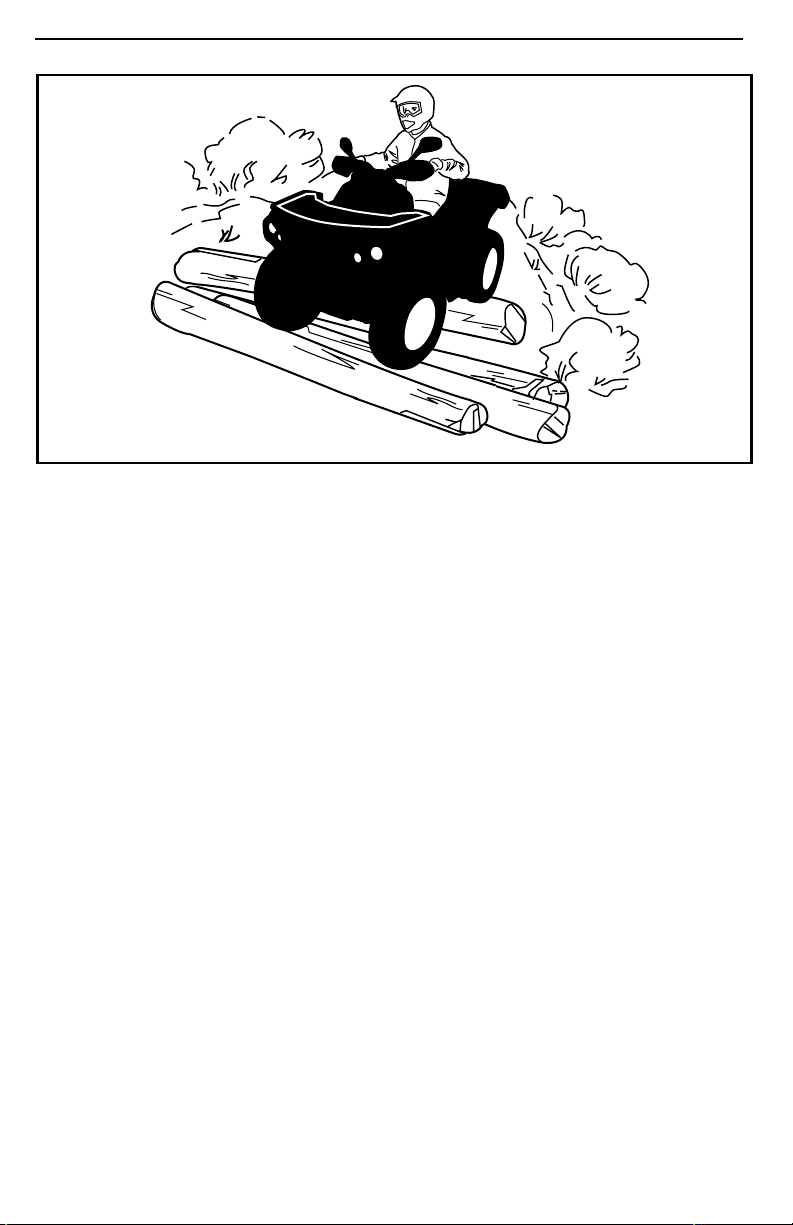
Never attempt to ride over large obstacles, such as large rocks or fallen
trees.
On 2-UP models, the operator is responsible for the safety of his passenger.
In doubt, disembark him before riding over obstacles. Always remember
that the vehicle handling and stability may be affected when riding with a
passenger.
When you go over obstacles, always follow proper procedures as described
in this Operator's Guide.
_______
34
SAFETY I
NFORMATION
________
Page 37
OPERATION WARNINGS
WARNING
POTENTIAL HAZARD
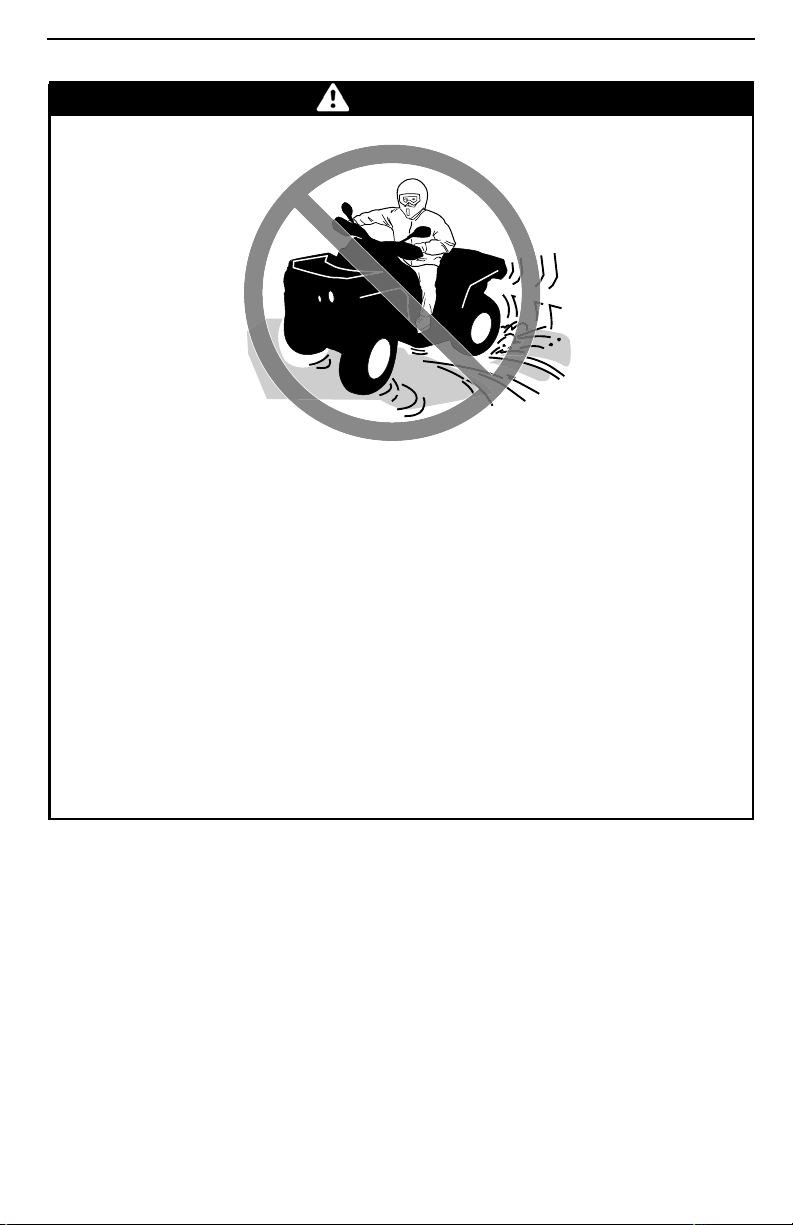
Skidding or sliding improperly.
WHAT CAN HAPPEN
You may lose control of this vehicle.
You may also regain traction unexpectedly, which may cause th
overturn or passenger ejection (2-UP models).
HOW TO AVOID THE HAZARD
Learn to safely control skidding or sliding by practicing at low speeds and
on level smooth terrain.
On 2-UP models, never slide or skid with passenger. Always remember that
the vehicle handling and stability may be affected when riding with a passenger.
On extremely slippery surfaces, such as ice, go slowly and be very cautious
in order to reduce the chance of skidding or sliding out of control.
evehicleto
________
SAFETY INF
ORMATION
________
35
Page 38
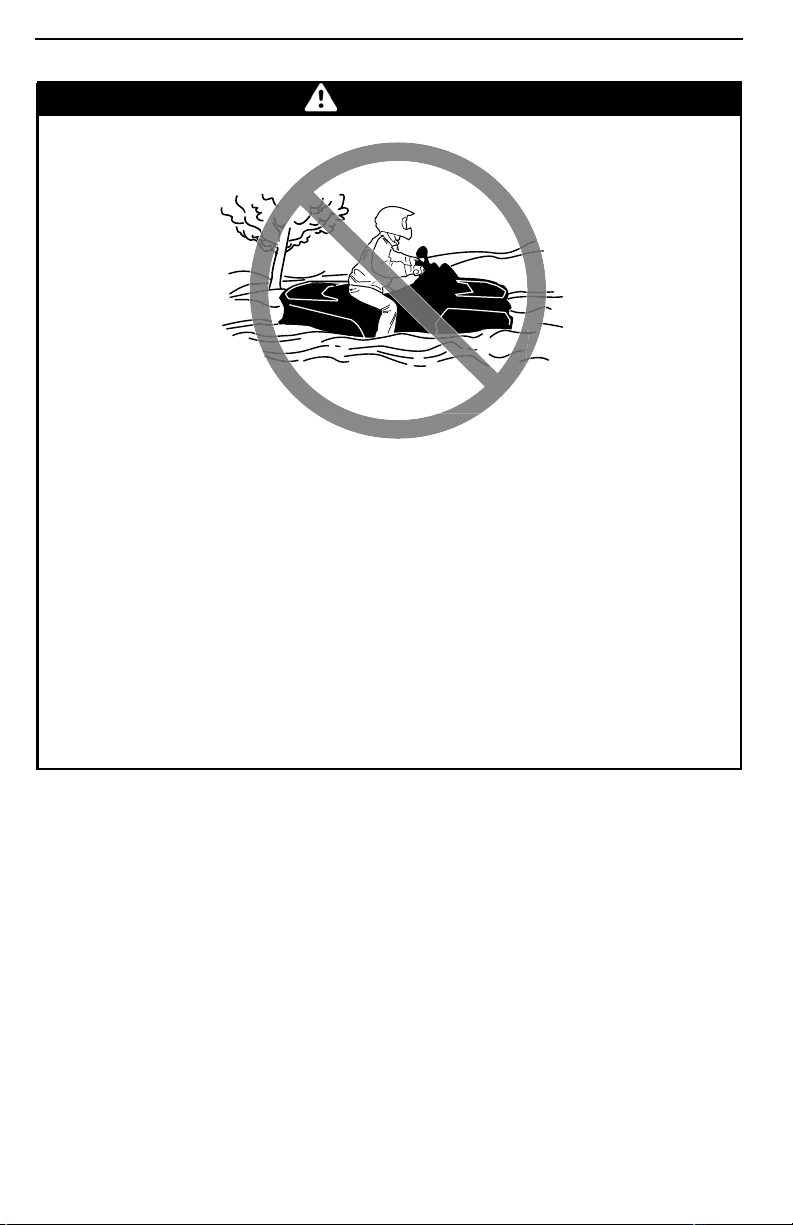
OPERATION WARNINGS
WARNING
POTENTIAL HAZARD
Operating this vehicle through deep or fast flowing water.
WHAT CAN HAPPEN
Tires may float, causing loss of traction and loss of control
to an accident.
HOW TO AVOID THE HAZARD
Never operate this vehicle in fast flowing water or in deep water.
Check water depth and current before you attempt to cross any water. Wa-
ter should not go above footrests.
Remember that wet brakes may have reduced stopping ability. Test your
brakes after leaving water. If necessary, apply them several times to let
friction dry out the pads.
, which could lead
_______
36
SAFETY I
NFORMATION
________
Page 39
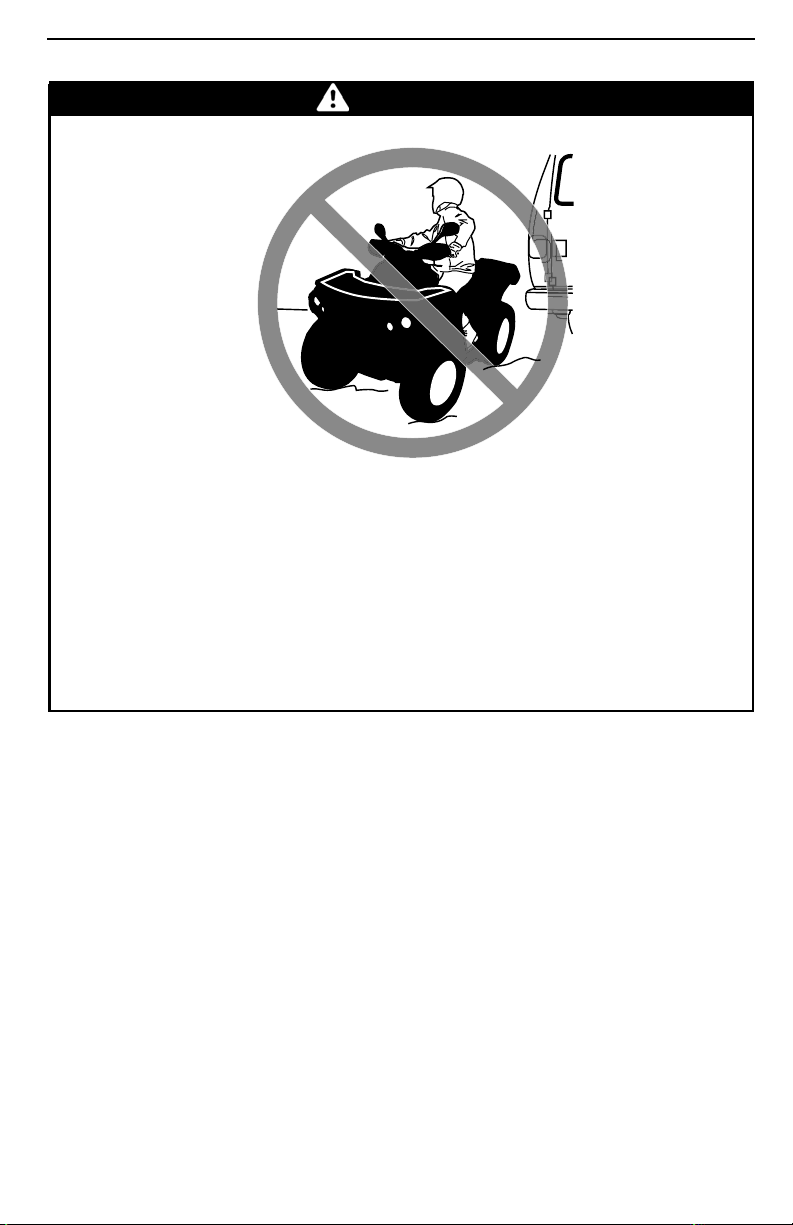
OPERATION WARNINGS
WARNING
POTENTIAL HAZARD
Improperly operating in reverse.
WHAT CAN HAPPEN
Youcouldhitanobstacleorpersonbehindthevehicle,resultinginserious
injury.
HOW TO AVOID THE HAZARD
When you select reverse gear, make sure there are no obstacles or people
behind the vehicle. When it is safe to proceed, go slowly. O
take account that the passenger can obstruct your view.
n2-UPmodels,
________
SAFETY INF
ORMATION
________
37
Page 40
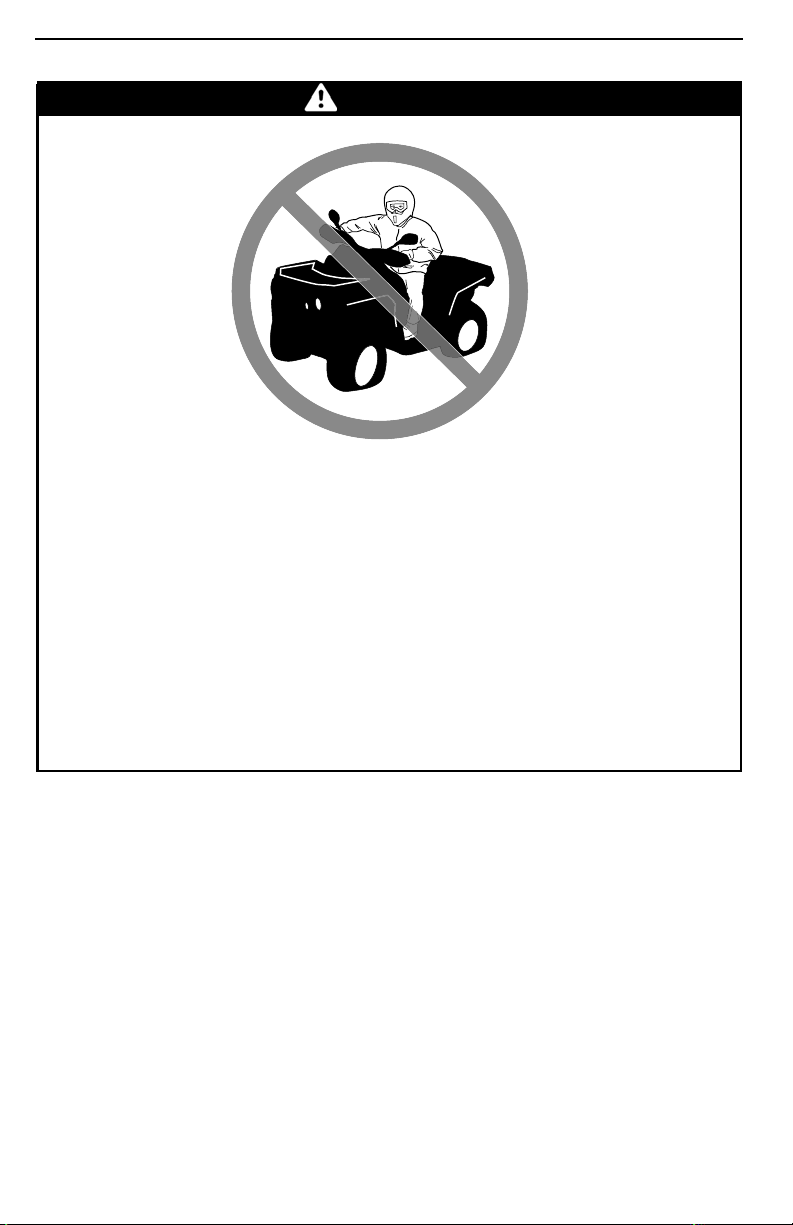
OPERATION WARNINGS
WARNING
POTENTIAL HAZARD
Operating this vehicle with improper tires, or with improper or uneven tire
pressure.
WHAT CAN HAPPEN
Use of improper tires on this vehicle, or operation of this vehicle with
improper or uneven tire pressure, may cause loss of control, tire blow outs,
tire to move around on its rim, and increases the risk of an a
HOW TO AVOID THE HAZARD
Always use the size and type of tires specified in this Operator's Guide for
this vehicle.
Always maintain proper tire pressure as described in this Operator's Guide.
Always replace wheels or tires that are dama g e d.
ccident.
_______
38
SAFETY I
NFORMATION
________
Page 41
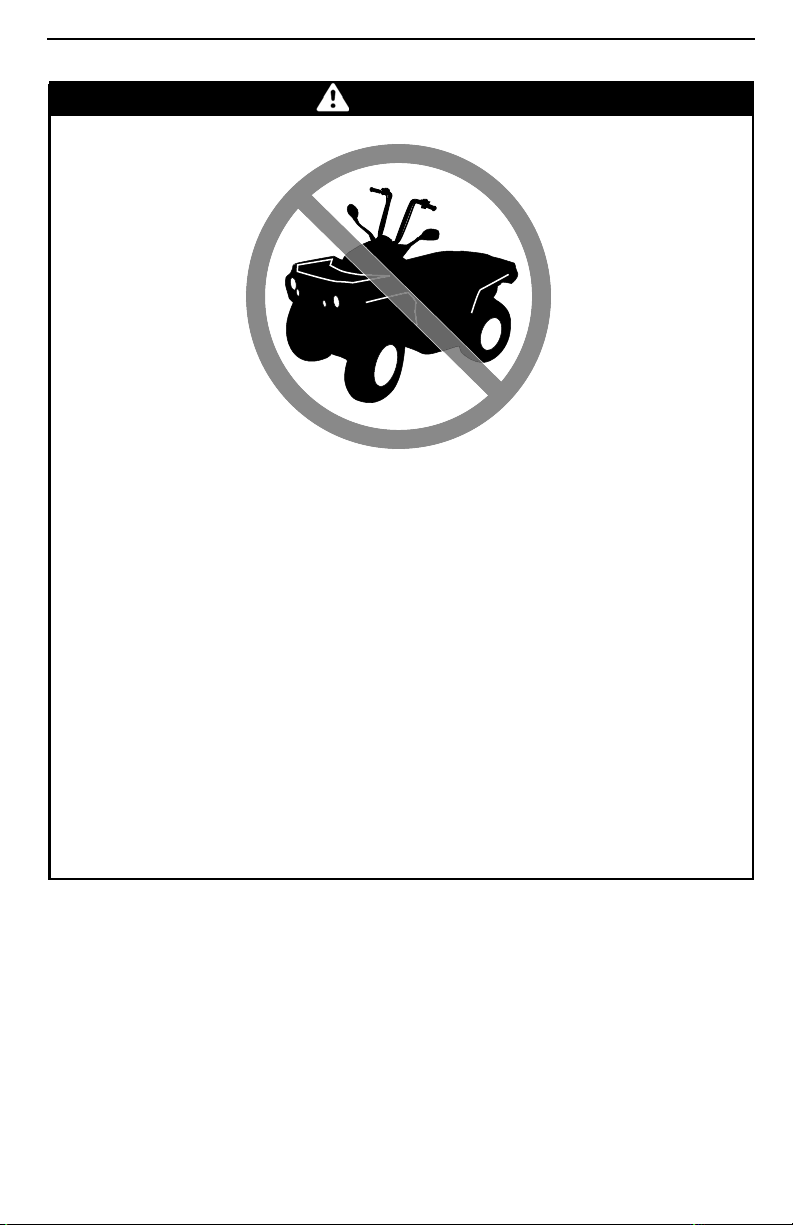
OPERATION WARNINGS
WARNING
POTENTIAL HAZARD
Operating this vehicle with improper m odifications.
WHAT CAN HAPPEN
Improper installation of accessories or modification of this vehicle may
cause changes in h andling which in some situations could lead to an accident.
HOW TO AVOID THE HAZARD
Never modify this vehicle through improper installation or use of accessories. All parts and accessories added to this vehicle should be approved
by BRP and should be installed and used according to
have questions, consult an authorized Can-Am dealer.
NEVER install a passenger seat (1-UP models) or use
passenger.
Modification of the vehicle to increase speed and p
the terms and conditions of your vehicle limited warranty. In addition, certain modifications including the removal of engine or exhaust components
are illegal under most laws.
instructions. If you
the racks to carry a
erformance m ay violate
________
SAFETY INF
ORMATION
________
39
Page 42
OPERATION WARNINGS
WARNING
POTENTIAL HAZARD
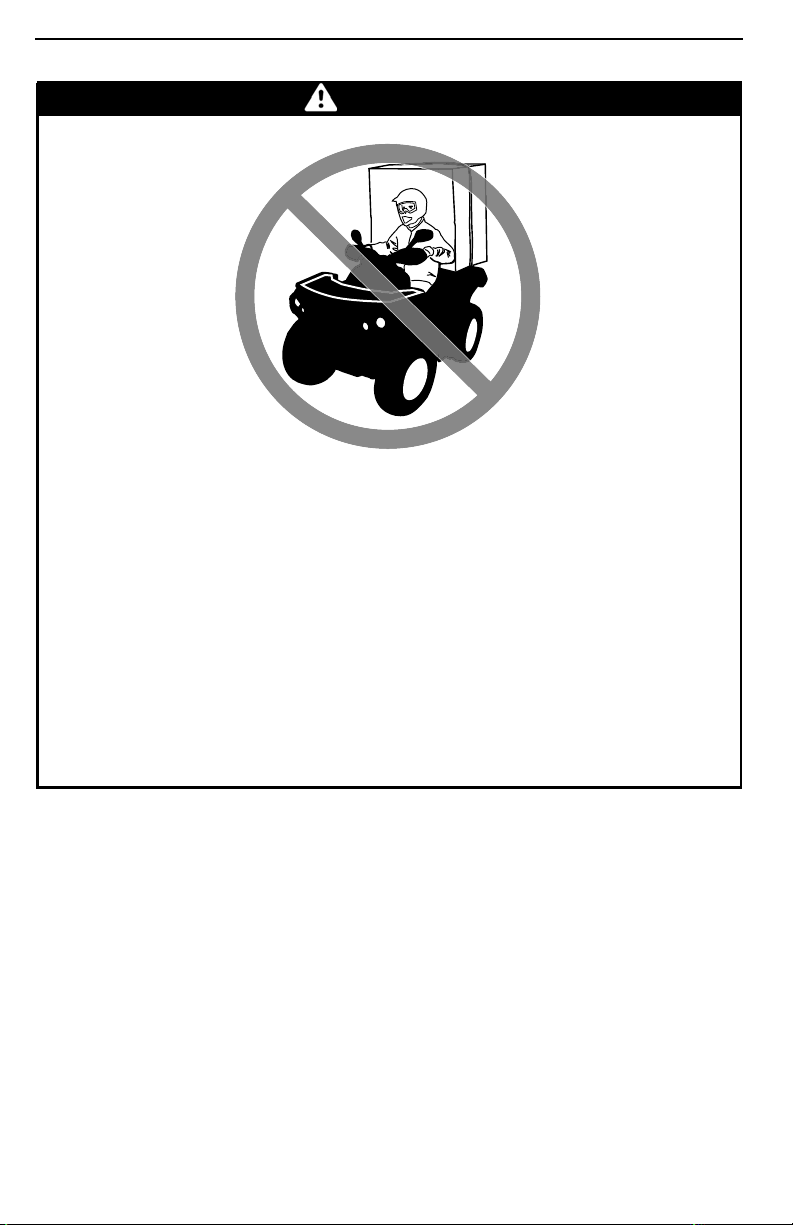
Overloading th is vehicle, carrying or towing cargo improperly.
WHAT CAN HAPPEN
Could cause changes in vehicle handling which could lead to an a ccident.
HOW TO AVOID THE HAZARD
Never exceed the stated load capacity for this vehicle including operator
and passenger (2-UP m odels) as well as other loads and added accessories.
Cargo should be properly distributed and securely attached.
Reduce speed when carrying cargo or pulling a trailer. Allow greater dis-
tance for braking.
Always follow the instructions in this Operator's Guide for carrying cargo or
pulling a trailer.
_______
40
SAFETY I
NFORMATION
________
Page 43
OPERATION WARNINGS
WARNING
V03M01Q
POTENTIAL HAZARD
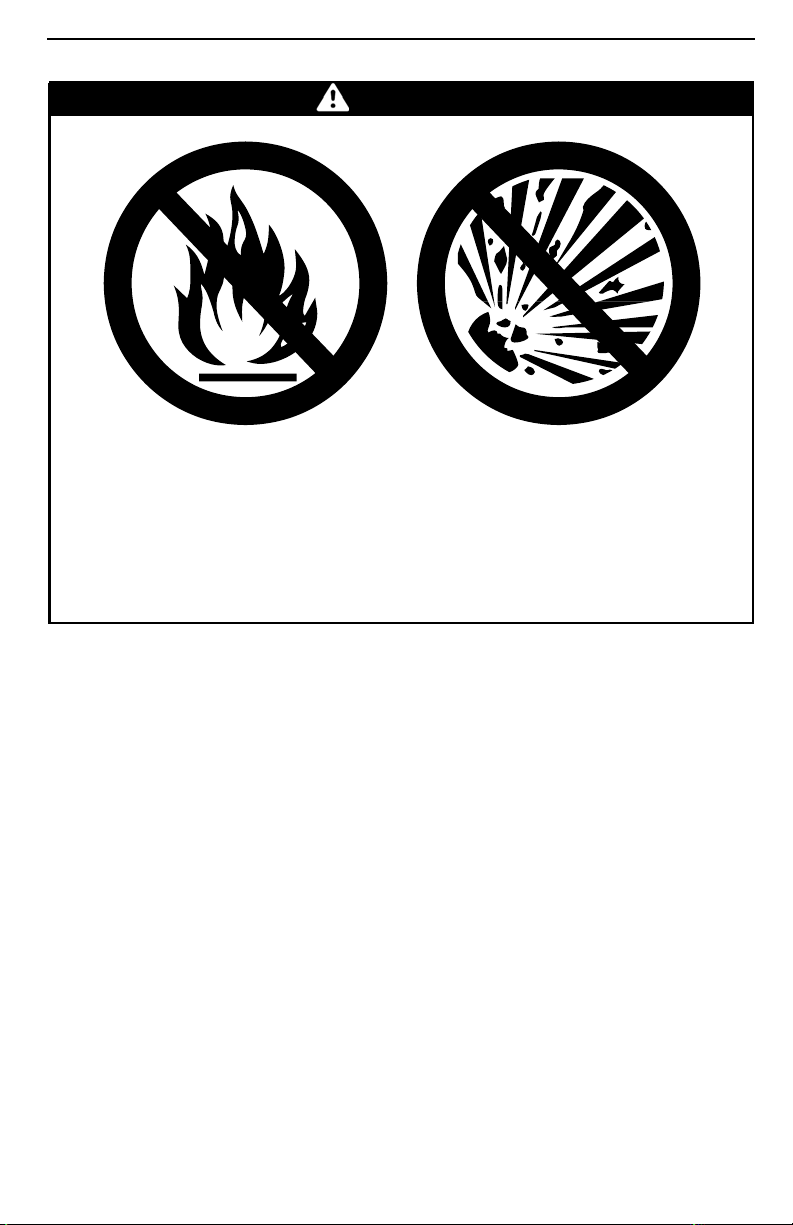
Transporting flammable or dangerous material can lead to explosions.
WHAT CAN HAPPEN
This can cause serious injury or death.
HOW TO AVOID THE HAZARD
Never transport flammable or dangerous material.
________
SAFETY INF
ORMATION
________
41
Page 44
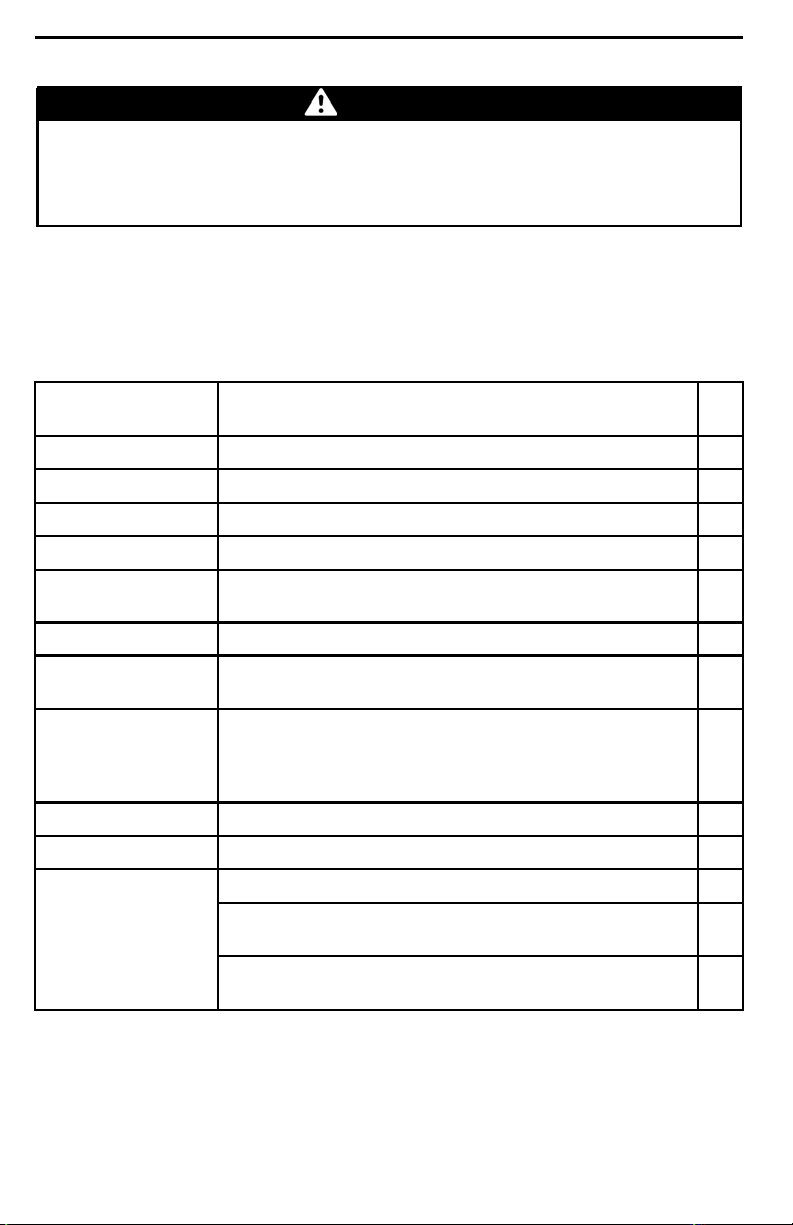
PRE-RIDE INSPECTION
WARNING
Perform a pre-ride inspection before each ride to detect any potential problem that could occur during operation. The pre-ride inspection can help you
monitor component wear and deterioration before they become a problem.
Correct any problem that you discover to reduce the risk of a breakdown or
crash.
Before using this vehicle, the operator should always perform the following
pre-ride inspection check list.
Pre-Ride Inspection Check List
What to Do Before Starting the Engine (Key OFF)
ITEMS TO BE
INSPECTED
Engine oil
Coolant Check coolant level.
Brake fluid
Leaks
Throttle lever
Parking brake Apply parking brake and check if it operates properly
Tire s
Wheels
Radiator
Drive shaft boots
Seat(s)
Check engine oil level.
Check brake fluid level
Check for any leaks under vehicle
Activate throttle lever several times to ensure it operates
freely. It must return to idle position when released
Check tire pressure and condition. Refer to
SPECIFICATIONS
Check wheels for damage and for abnormal play, and
check lug nuts are tightened. Tighten wheel beadlock
bolts (if equipped). Refer to
MAINTENANCE PROCEDURES
Check cleanliness of the radiator
Check drive shaft boots and protectors condition
Check if operator seat is in place and properly latched
Check if passenger seat or the glove box are in place and
properly latched (2-UP Models)
Check the passenger backrest and grab handles condition
(2-UP Models)
INSPECTION TO PERFORM
and adjust according to load.
WHEELS AND TIRES
for torque specification.
✔
in
_______
42
SAFETY I
NFORMATION
________
Page 45
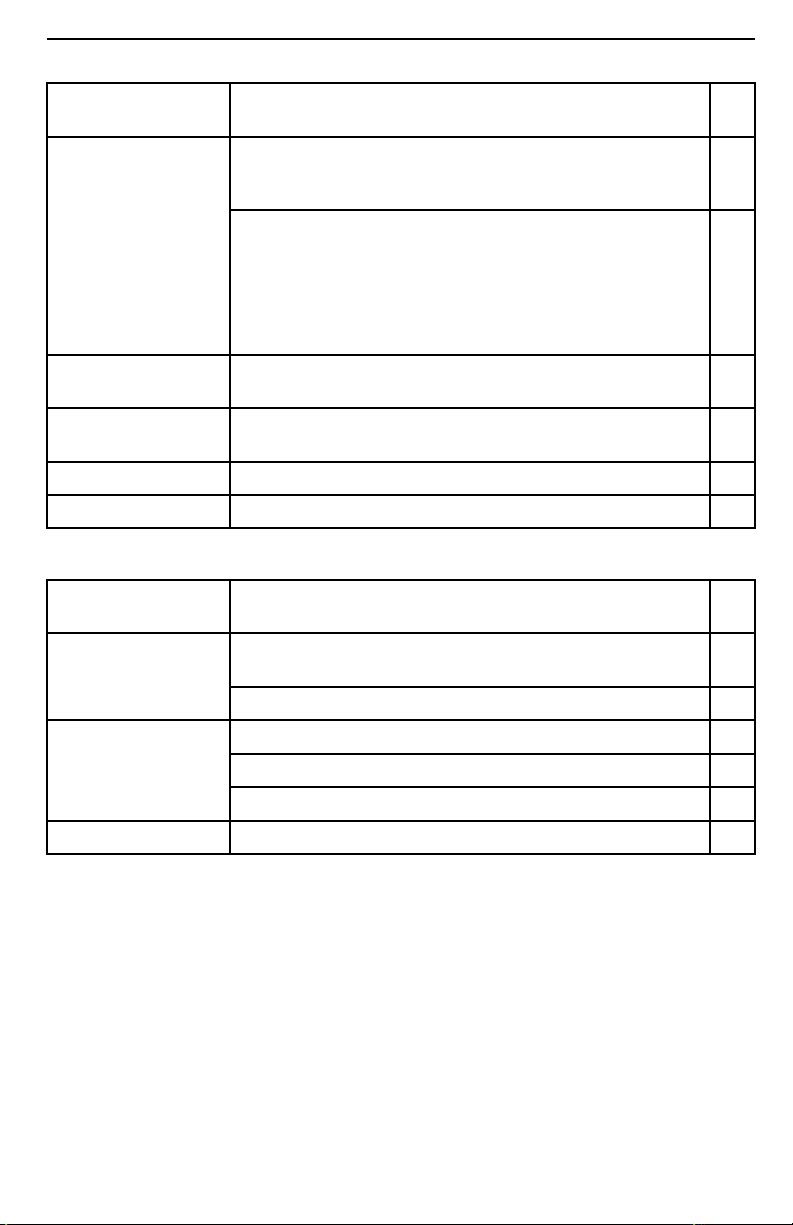
PRE-RIDE INSPECTION
ITEMS TO BE
INSPECTED
If you transport a cargo, respect the load capacity.
Refer to
Ensure cargo is properly secured to the racks
Cargo
Storage
compartment
Chassis and
suspension
Engine air fi lter Inspect and clean engine air filter
CVT air filter Inspect and clean CVT air filter
If you are pulling a trailer or another equipment:
– Check hitch and trailer ball condition
– Respect the tongue capacity and towing capacity as
indicated on the label affixed to the hitch or refer to
SPECIFICATIONS
– Ensure trailer is properly secured to hitch.
Check if rear storage compartment is properly latched
Check underneath vehicle for any debris on chassis or
suspension components and clean them prope rly
INSPECTION TO PERFORM
LOADING THE CARGO RACKS
What to Do Before Starting the Engine (Key ON)
ITEMS TO BE
INSPECTED
Multifunction gauge
Lights
Fuel level
Check operation of indicator lamps in multifunction gauge
(during first fe w seconds of key ON)
Check for messages on multifunction gauge
Check operation and cleanliness of headlights and taillight
Check operation of low and high beams
Check operation of brake light
Check the fuel level.
INSPECTION TO PERFORM
✔
.
✔
________
SAFETY INF
ORMATION
________
43
Page 46

PRE-RIDE INSPECTION
What to Do After the Engine is Started
ITEMS TO BE
INSPECTED
Steering
Shift lever Check operation of shift lever (P, R, N, H and L)
2WD/4WD selector
Brakes
Emergency engine
stop switch
RF D.E.S.S. Post
Check if steering operates freely by completely turning it
from side to side
Check operation of 2WD/4WD selector
Drive forward slowly a few feet and apply brake lever
and brake pedal i ndividually. The brakes must fully apply.
Lever and pedal must fully return when release d
Check that the emergency engine stop switch is working
properly
Check if D.E.S.S. post is working properly by pulling the
D.E.S.S. key from the D.E.S.S. post and stopping the
engine
INSPECTION TO PERFORM
✔
_______
44
SAFETY I
NFORMATION
________
Page 47

RIDING THE VEHICLE
To fully appreciate the pleasures and excitement of riding this vehicle, there are
some basic rules and tips that you MUST follow. Some may be new to you while
others may be common sense or obvious.
Please take the time to study this Operator's Guide and all on-product safety labels
as well as the
describe what you should know about this vehicle before riding it.
Whether you are a new user or an experienced rider, it is important for your
personal safety that you know the controls and features of this vehicle. Equally
important is knowing how to properly ride.
This is a high performance ATV for off-road use only. Inexperienced riders may
overlook risks a nd be surprised by the specific behavior of this ATV in any terrain
condition.
We recommend following the age recommendation indicated on the safety label
affixed on the unit. Even though a person m ay be within the age group for which
this vehicle is recommende d, he may not have the skills, abilities, or judgment
needed to operate this vehicle safely and may be involved in a serious accident.
Individuals with cognitive or physical impairments or who are high risk takers have
an increa se d exposure to overturns or collisions which may resu lt in injury including death.
Not all vehicles are the same. Each has its own unique performance characteristics, controls and features. Each w ill ride and handle differently.
Become completely familiar with the operational controls and the general operation of the vehicle before venturing into off road conditions. Practice driving in a
suitable area free of hazards and feel the response of each control. Drive at low
speeds. Higher speeds require greater experience, knowledge and suitable riding
conditions.
Riding conditions vary from place to place. Each is subject to weather conditions
which may radically change from time to time and from season to season.
Riding on sand is different than riding on snow or through forests or marshes.
Each location may require a greater degree of awareness and skill. Show good
judgement. Always proceed with caution. Please do not take any unnecessary
risks that could leave you stranded or possibly injured.
Never assume that the vehicle will go everywhere safely. Sudden changes in terrain caused by holes, depressions, banks, softer or harder “ground” or other irregularities may cause the vehicle to topple or become unstable. To avoid this, slow
down and always observe the terrain ahead. If the vehicle does begin to topple or
tipover,thebestadviceistoimmediatelygetoffAWAYfromthedirectionofthetip
over!
We encourage you to have an Annual Safety Inspection of your vehicle. Please
contact an authorized BRP dealer for further details. Though not required, it is
recommended that an authorized BRP dealer performs the preseason preparation
of your vehicle. Each visit to your authorized BRP dealer is a great opportunity for
your dealer to verify if your vehicle is included in any safety campaign. We also
urge you to visit your authorized BRP dealer in a timely manner if you become
aware of any safety related campaigns.
See an authorized BRP dealer for available accessories you may require.
SAFETY VIDEO
that came with this vehicle. They more completely
________
SAFETY INF
ORMATION
________
45
Page 48
RIDING THE VEH ICLE
Riding Gear
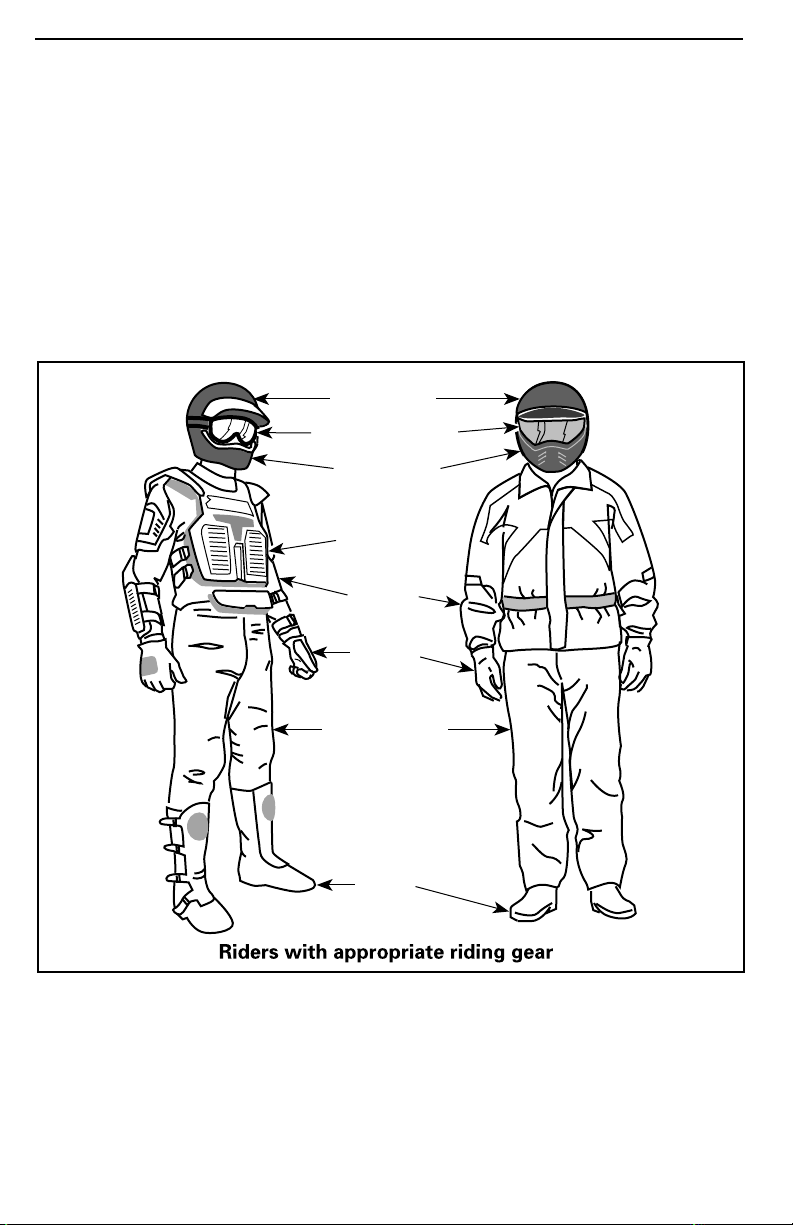
Actual weather conditions should help you decide how to dress. Dress for the
coldest weather expected. Thermal underwear next to the skin also provides a
good insulation. It is important that the operator always wears the appropriate
protective riding gear and apparel, including an approved helmet, eye protection,
boots, gloves, a long sleeved shirt and pants. This type of clothing will provide
you protection from some of the minor hazards you may encounter en route. The
operator must never wear loose clothing such as a scarf that may get entangled in
the vehicle or on tree branches and shrubs. Depending on conditions, anti-fogging
goggles or sunglasses may be required. Different colored lenses available for
goggles or sunglasses help you distinguish terrain variations. Sunglasses should
only be worn during the daytime.
Approved
helmet
Eye protection
Rigid chin
guard
Chest
protector
Long
sleeves
V00A0RN
_______
46
Gloves
Long, sturdy
pants
Boots
SAFETY I
NFORMATION
________
Page 49

RIDING THE VEHICLE
Carrying a Passenger
WARNING
– O n 1-UP models, NEVER exceed 90 km/h (55 MPH) if total load is more
than 164 kg (360 lb).
– O n 2-UP models, NEVER exceed 90 km/h (55 MPH) if total load is more
than 132 kg (291 lb).
– On 2-UP models, NEVER exceed 90 km/h w ith a passenger.
1-UP Models
This vehicle is designed to carry ONE (1) operator only. Do not install passenger
seat or use the racks to carry a passenger.
2-UP Models
This vehicle is designed specifically to carry an operator and ONE (1) passenger
only. The p assenger must be seated on the designated passenger's seat and hold
on to the grab handles at all times. NEVER install other passenger's seat other
than the one recommended by BRP. Do not use the racks or their location to carry
passenger(s). Carrying more than one (1) passenger may affect the stability and
your control of the vehicle. When the glove box is installed (in place of rear seat),
the vehicle becomes a ONE-RIDER vehicle (1-UP model) and NO PASSENGER
mustbeallowedonit.
Recreational Riding
Respect the rights and limitations of others. Stay away from areas designated
for other types of off road use. This includes snowmobile trails, equestrian trails,
cross country ski trails, mountain bike trails, etc. Never assume there are no other
users on the trail. Always stay to the complete right of the trail and do not zigzag
toonesideofthetrailthentheother. Bepreparedtostoporpullofftothesideif
another trail user appears in front of you.
Join a local ATV club. It will provide you with a map and advice or inform you where
you can ride. If a club does not existin your area, help to start one. Group ridingand
club activities provide a pleasurable, social experience.
Always keep a safe distance from other riders. Your judgment of speed, terrain conditions, weather, mechanical condition of your vehicle and the “trust in
judgment” you have in others around you will help you make a better choice of
appropriate safe distance. This vehicle, like any other motorized vehicle, cannot
stop “on a d ime”. Allow greater distance for braking. On 2-UP models, the
vehicle handling, stability and br akin g distance may be affe cted when r idin g with
a passenger. Safely reduce speed when riding with a passenger.
Before you ride, tell someone where you are planning to travel and your expected
time of return.
Depending on the length of your ride, carry additional tools , drinking water, food
and emergency equipment. Find out where you can get additionalgasoline and oil.
Be prepared for the possible conditions you may encounter.
________
SAFETY INF
ORMATION
________
47
Page 50

RIDING THE VEH ICLE
First aid kit Adjustable wrench
Mobile phone Knife
Friction tape Flashlight
Arope
Spare light bulbs
Provided tool kit
Colored lens goggles
Trail map
Snack
Environment
One of the benefits of this vehicle is that it can take you off the beaten path away
from most communities. However, you should always respect nature and the
rights of others to enjoy it. Do not ride in environmentally sensitive areas. Do not
drive over forest crops or shrubs nor cut down trees or take down fencing nor spin
your wheels and destroy the terrain. “Tread Lightly”.
This vehicle can cause OHV wildfires if debris builds up near the ex haust or other
engine hot spots and ignites then falls off into dry grass. Avoid riding in wet areas,
through muskeg or tall grass, where debris can build up. Should you ride in those
areas, inspect and remove all debris from your engine and hot spots.
Chasing wildlife is in m an y areas illegal. Wildlife can d ie of exhaustion after being
chased by a motorized vehicle. If you encounter animals on the trail, stop and observe quietly and with caution. It will be one of the better memories of your life.
Observe the rule “what you take in, carry out”. Do not litter. Do not start campfires unless you have permission to do so and then only away from dry areas. The
hazards you may create on the trail may cause injury to others or yourself, even at
a later date.
Respect farm lands. Always obtain the permission of the landowner before riding
on private land. Respect crops, farm animals and property lines. If you come to a
closed gate , close it again behind you.
Finally, do not pollute streams, lakes or rivers and do not modify the engine or exhaust system, or remove any of its components.
Design Limitation
Although the vehicle is exceptionally rugged for its class, it is still a light vehicle by
definition and its operation must be restricted to its proper purpose.
The addition of weight to any part of the vehicle changes its gravitational stability
and modifies its performance.
Off-Road Operation
The very nature of off-road operation is dangerous. Any terrain, which has not
been specially prepared to carry vehicles, presents an inherent danger where
angularity, terrain substance and exact steepness are unpredictable. The terrain
itself presents a continual element of danger, which must be knowingly accepted
by anyone venturing over it.
_______
48
SAFETY I
NFORMATION
________
Page 51

RIDING THE VEHICLE
An operator who takes a vehicleoff-road should always exercise the utmost care in
selecting the safest path and keeping close watch on the terrain ahead of him. On
no account should the vehicle be operated by anyone who is not completely familiar with the driving instructions applicable to the vehicle, nor should it be operated
on steep or treacherous terrain.
Riding Techniques
Information in this guide is limited. Increase your knowledge and improve your
skills by following a certified training course.
Care, caution, experience and driving skill are the best precautions against the hazards of vehicle operation.
Respect and follow all posted trail signs. They are there to help you and others.
In off-road operation, power and traction, not speed, are important. Never drive
faster than visibility and your own ability to select a safe route permits.
Constantly watch the terrain ahead for sudden changes in slopes or obstacles,
such as rocks or stumps, that may cause loss of stability, resultin g in tip over or
rollover.
It is also wise to know the terrain condition on the other side of a hill or bank. All too
often there exists a sharp drop-off that is impossible to negotiate or descend.
Whenever there is the slightest doubt that the vehicle can safely negotiate an obstacle or a particular piece of terrain, always choose an alternate rout
Always use proper riding techniques to avoid vehicle overturns on hills and rough
terrain and in turns.
e.
Body Position
To maintain proper control, it is strongly advised that you keep your hands on the
handlebar and within easy reach of all controls. The same holds true for your feet
on the footpegs. To minimize the possibility of a leg or foot inj
the footpegsat all times. Do not directyour toes outwards nor extend your feet out
to assist in turning as they can be hit or be snagged on passing obstacles, or may
come into contact with the wheels.
Even though there is a suspension on this vehicle, there are “washboard” or rough
terrain conditionsthat will make you feel uncomfortable an
injury. “Posting” or riding in a crouched position will often be required. Slow down
and allow your flexed legs to absorb part of the impact energy.
________
SAFETY INF
ORMATION
ury,keep your feet on
d can even cause a back
________
49
Page 52
RIDING THE VEH ICLE
vmo2012-012-520
2-UP Models
The passenger must keep his hands on the grab handles and his feet on footrests
at all times.
The passenger must synchronize his movements with the operator.
Crossing Roads
If you have to cross a road, the lead driver should get off his v
and give directions to the other riders. The last person after crossing then assists
the lead driver to cross. Do not travel on sidewalks. They are designated for
pedestrian use.
ehicle, then observe
Turnin g
Practice turning at low speeds before attempting to turn at faster speeds.
Keep both hands on handlebars and feet on footpegs.
Maintain a constant speed or a slight acceleration during turn.
To reduce the risk of rollovers:
– Use care when turning.
• Do not turn the handlebar too far or too fast for your speed and environment.
Adjust steering inputs accordingly.
• Slow down before entering a turn. Avoid hard braking during a turn.
• Avoid sudden or hard acceleration when turning, even from a stop or low
speed.
– Never attempt donuts, skids, slides,
starts to skid or slide, steer in the direction of the skid or slide. Never slam the
brakes and lock the wheels.
– Avoid paved surfaces. This vehicleis not designed to operateon paved surfaces
andismorelikelytorollover. Ify
slowly, and avoid abrupt acceleration and braking.
_______
50
SAFETY I
fishtails, jumps, or other stunts. If vehicle
ou must drive on pavement, turn gradually, go
NFORMATION
________
Page 53
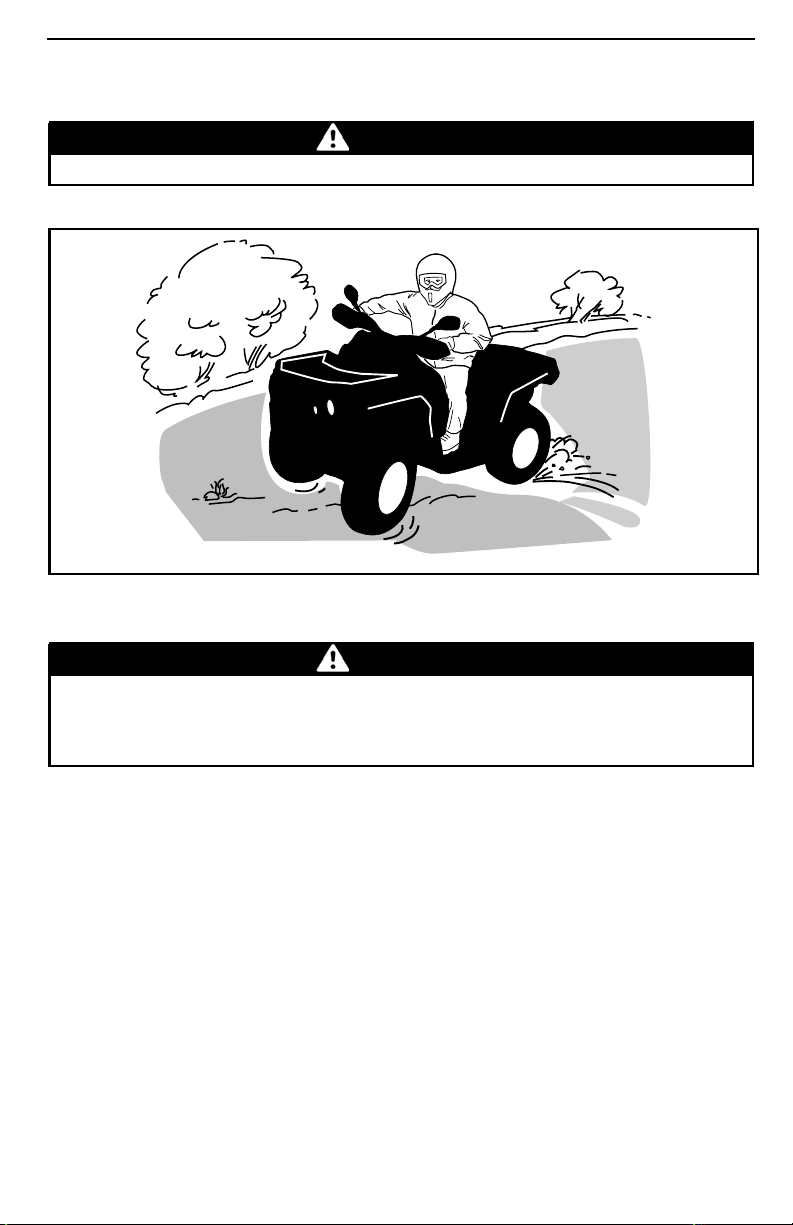
RIDING THE VEHICLE
Avoid sudden inputs to steering, throttle or brakes w hile turning.
WARNING
Do not attempt turns at e xcessive speed.
vmo2012-012-525
If you do g e t into a slide or skid, it may help to turn the handlebar in the direction of
the skid until you regain control. Never jam the brakes and lock the wheels.
WARNING
The tires of this v ehicle are not suited for paved road use. Also this vehicle
is not equipped with a rear differential (rear wheels are always turning at
the same speed). For these reasons, pavement may seriously affect the
handling and control of the vehicle.
Braking
Always keep both hands on handlebars and feet on footpegs when braking.
Practice braking to get familiar with the brake response .
– Do it at low speed first, then increase the speed.
– Practice braking in stra igh t line at different speeds and different braking force.
– Practice emergency braking; optimal braking is obtained in straight line, with
high force applied, without locking the wheels.
Remember, braking distance depends on vehicle speed, load and the type of surface. Also, the tires and brakes conditions play a major role.
NOTE: If going forward the vehicle weight is transferred to the front wheels when
braking. To obtain greater stopping efficiency, the brake system distributes more
braking force to the front wheels. This will affect vehicle handling and steering
control when braking vigorously. Take it into account when braking.
________
SAFETY INF
ORMATION
________
51
Page 54

RIDING THE VEH ICLE
Reverse Operation
When operating in reverse, check that the path behind the vehicle is free of people
or obstacles. Proceed slowly and avoid sha rp turns.
When riding on a 2-UP model, take into account that the passenger can obstruct
your view. Disembark the passenger if necessary.
We recommend sitting on your ATV when operating in reverse. Avoid standing
up. Your weight could shift forward against throttle lever, causing an unexpected
acceleration.
Obstacles
Obstacles in the “trail” should be traversed with caution. This includes loose
rocks, fallen trees, slippery surfaces, fences, posts, and embankments and
depressions. You should avoid them whenever possible. Remember that some
obstacles are too large or dangerous to cross and should be avoided. Small
rocks or fallen trees may be safely crossed approa ch at a 90° angle. Stand on
the footrests while keeping your knees flexed. Adjust speed without losing momentum and do not “gun” the throttle. Hold handlebar (operator) or grab handles
(passenger on 2-UP models) firmly. Place body weight rearwards (operator and
passenger 2-UP models) and proceed. Do not try to lift the vehicle front wheels
off the ground. Be aware that the object may be slippery or may move while
crossing.
When riding on 2-UP models, the operator is responsible for the safe
senger; in doubt, disembark the passenger before proceeding.
Uphill Driving
ty of the pas-
1-UP Models
Before trying to clim b a hill, keep these things in m ind. Hill Climbing should only
be attempted by experienced operators. Start on shallow slopes. Always drive
straight uphill and keep your body weight forward towards
Keep your feet on the footrests, shift your ATV into a lower gear and accelerate
before you start to climb. Try to keep a steady speed and go easy on the throttle
to avoid acceleration. Abrupt slope or terrain variat
an obstacle could have a big impact on the stability as it will lift the front of the
vehicle increasing the risk of tipping over. Some hills are too steep to safely stop or
recover from after an unsuccessful climbing attemp
If you're not careful, you could tip over when going up hills. If the hill is too steep
and you cannot proceed or the vehicle begins to roll backwards, apply the brake,
being careful not to slide. Dismount then us
next to the vehicle on the up hill side and with a hand on the brake lever, slowly
back the rear of the vehicle toward the top of the hill then drive downh ill). A lways
walk or dismount on the upside of the slope
its rotating w heels. Do not try to hold on to the vehicle if it begins to topple. Stay
clear. Do not ride over the crest of the hill at high speed. Obstacles, including
sharp drop-offs, may exist.
_______
52
SAFETY I
while keeping clear of the vehicle and
NFORMATION
ion or rolling one wheel over
t. Try to avoid steep inclines.
e the “K” turn (while walking back,
the top o f the hill.
________
Page 55
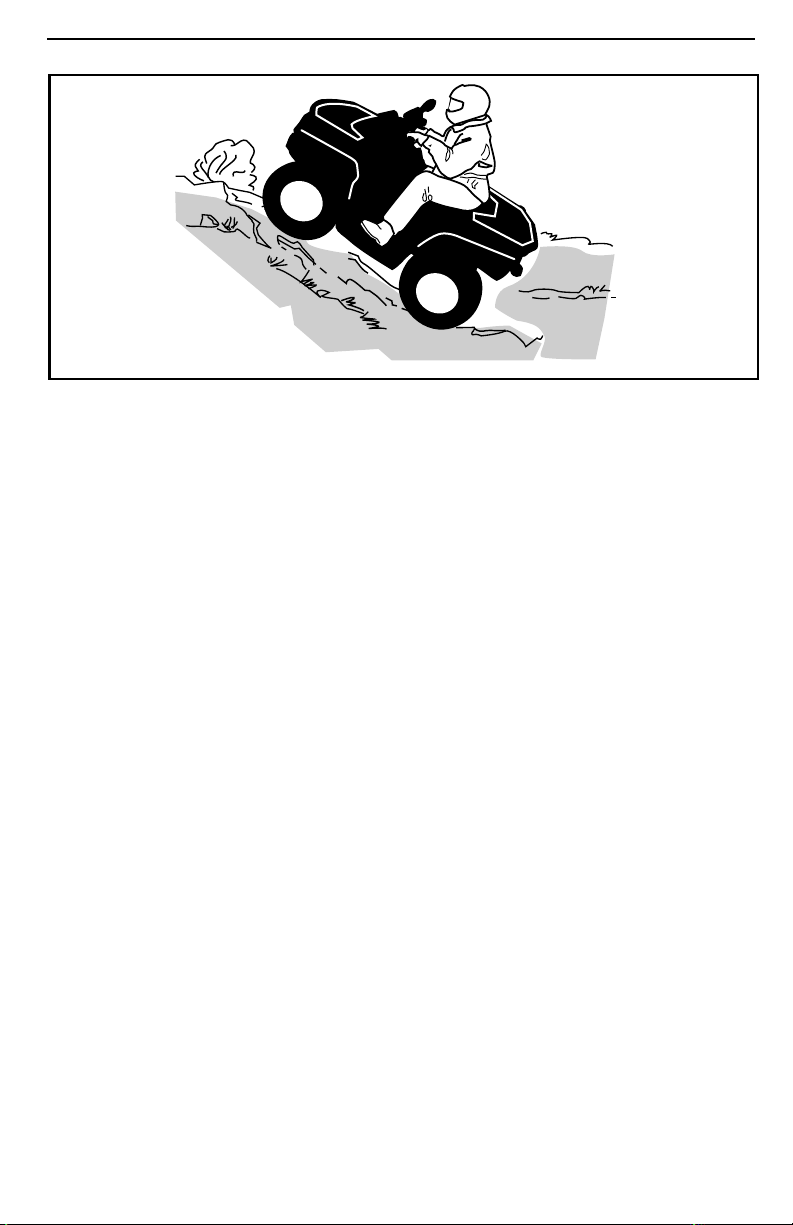
RIDING THE VEHICLE
vmo2012-012-526
2-UP Models
The passenger must synchronize his movements with the operator. The passenger must remain seated at all times.
Do not forget, the operator is responsible for the safety of the passenger. In doubt,
disembark the passenger before climbing a hill.
Before trying to clim b a hill, keep these things in m in d. Hill Climbing should only
be attempted by experienced operators. Start on shallow slopes. Always drive
straight uphill. Operator and passenger must keep their body weight forw ard,
towards the top of the hill. Keep feet on the footrests, shift the ATV into a lower
gear and accelerate before you start to climb. Try to keep a steady speed and
go easy on the throttle to avoid acceleration. A brupt slope or terrain variation or
rolling one wheel over an obstacle could have a big impact on the stability as it
will lift the front of the vehicle increasing the risk of tipping over. Some hills are
too steep to safely stop or recover from after an unsuccessful climbing attempt.
Try to avoid steep inclines. If you're not careful, you could tip over when going up
hills. If the hill is too steep and you cannot proceed or the vehicle begins to roll
backwards, apply the brake, being careful not to slide. Dismount, passenger first,
then use the “K” turn (while walking back, next to the vehicle on the up hill side
and with a hand on the brake lever, slowly back the rear of the vehicle toward the
top o f the hill then drive downhill). A lways walk or dismoun t on the upside of the
slope while keeping clear of the vehicle and its rotatin g wheels. Do no t try to hold
on to the vehicle if it begins to topple. Stay clear. Do not ride over the crest of the
hill at high speed. Obstacles, including sharp drop-offs, may exist. The passenger
should get on the vehicle only when the vehicle has returned to a safe location.
________
SAFETY INF
ORMATION
________
53
Page 56
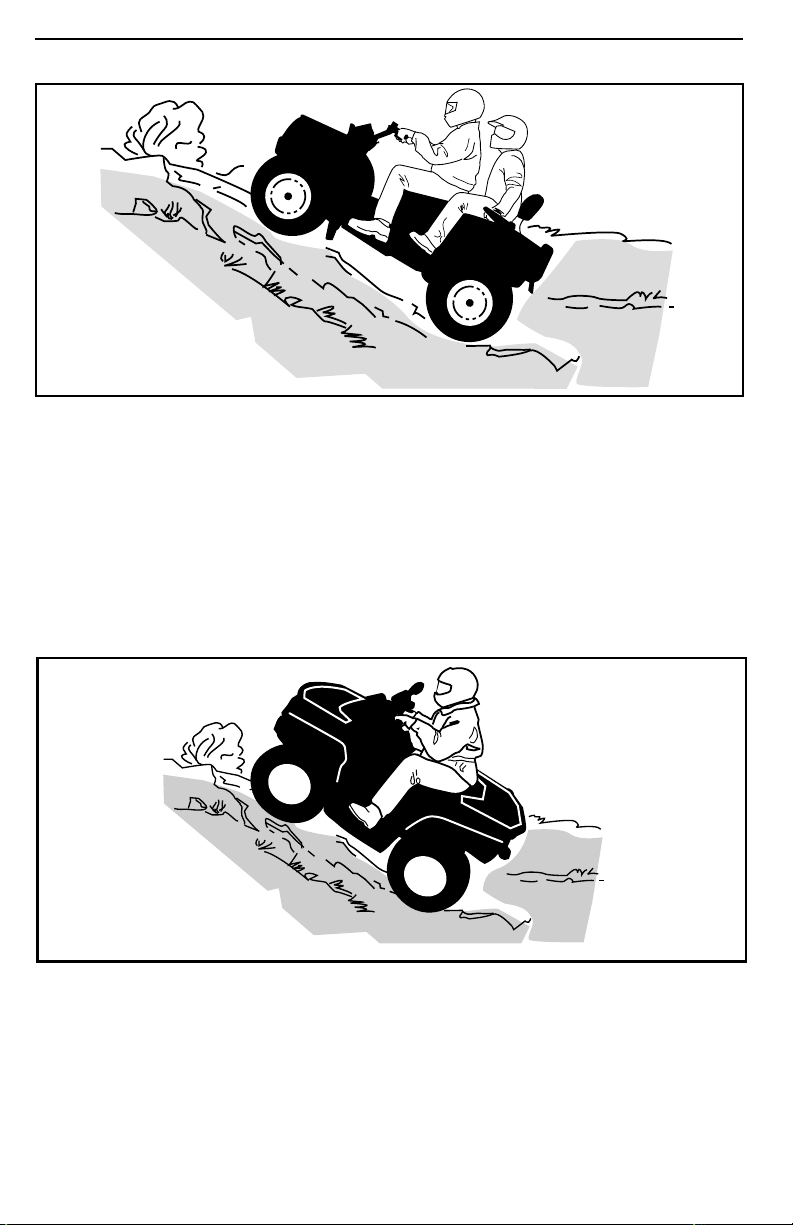
RIDING THE VEH ICLE
V00A1XL
Vehi cle Behav iors
Due to configuration, this vehicle has excellent climbing ability, so much so that
it is possible to tip over before traction is lost. For example, it is comm o n to
encounter terrain situations w here the top of the hill has eroded to a point that
the hill peak rises very sharply. The vehicle can readily negotiate such a condition,
however, in doing so, when the front of the vehicle is driven to a point that the
vehicle's balance moves rearward, a tip over can occur.
The same situation may apply if an embedded object causes the front of the vehicle to climb more than desired. If such a situation occurs take an altern ate route.
Be aware of side hilling dangers when doing so. Re fer to
SIDE HILLING
below.
vmo2012-012-526
Downhill Driving
1-UP Models
Keep your body weight rearwards. Stay seated. Apply the brake gradually to prevent skidding. Do not “coast” down the slope using solely engine compression or
in neutral gear.
_______
54
SAFETY I
NFORMATION
________
Page 57
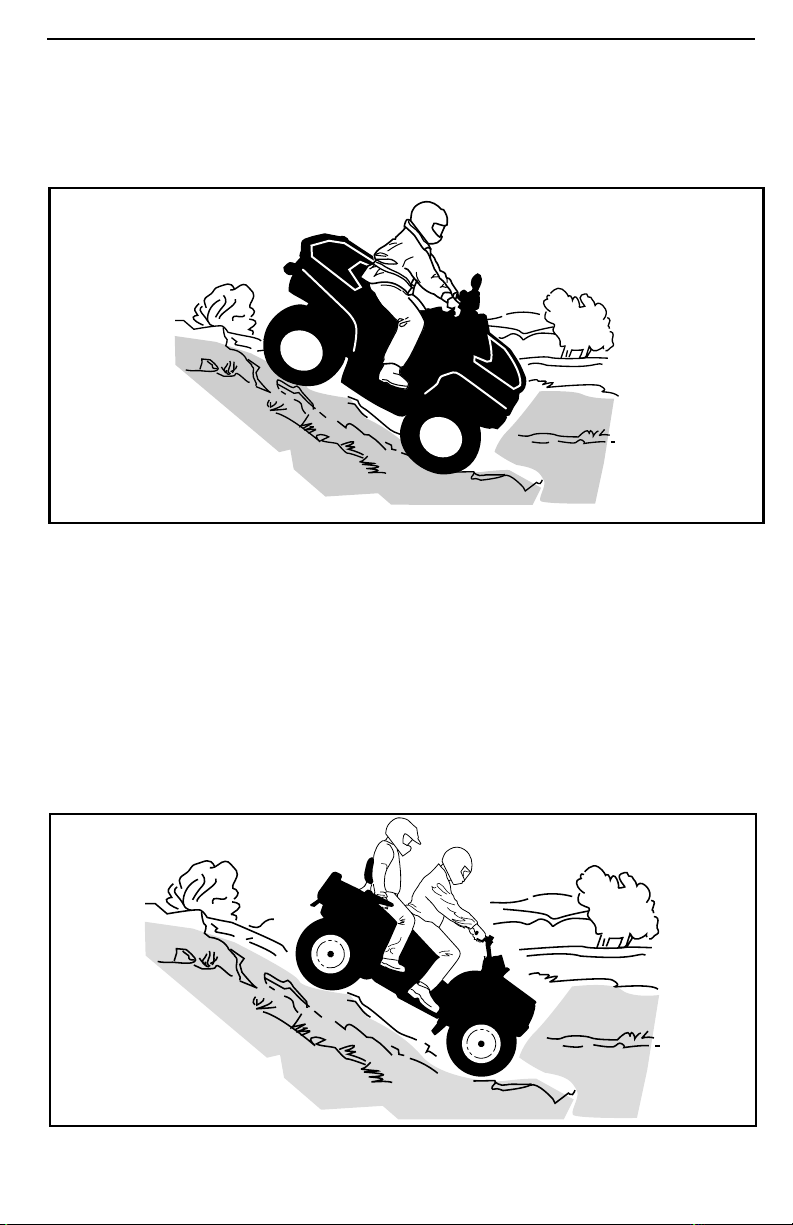
RIDING THE VEHICLE
Decelerating while negotiating a slippery downhill slope could “toboggan” the
vehicle. Maintain steady speed and/or accelerate slightly to regain control. Try
to avoid steep inclines. If you're not careful, you could tip over when going down
hills.
vmo2012-012-523
2-UP Models
The operator is responsible for the safety of the passenger; in doubt, disembark
the passenger before proceeding.
Always rememb e r that the vehicle handling, stability and braking dis tance may b e
affected when riding with a passenger.
The passenger must synchronize his movements with the operator. The passenger must remain seated at all times.
Operator and passenger must keep their body weight rearwards. Apply the brake
gradually to prevent skidding. Do not “coast” down the slope using solely engine
compression or in neutral gear. Try to avoid steep inclines. If you're not careful,
you could tip over when going down hills.
V00A1YL
________
SAFETY INF
ORMATION
________
55
Page 58
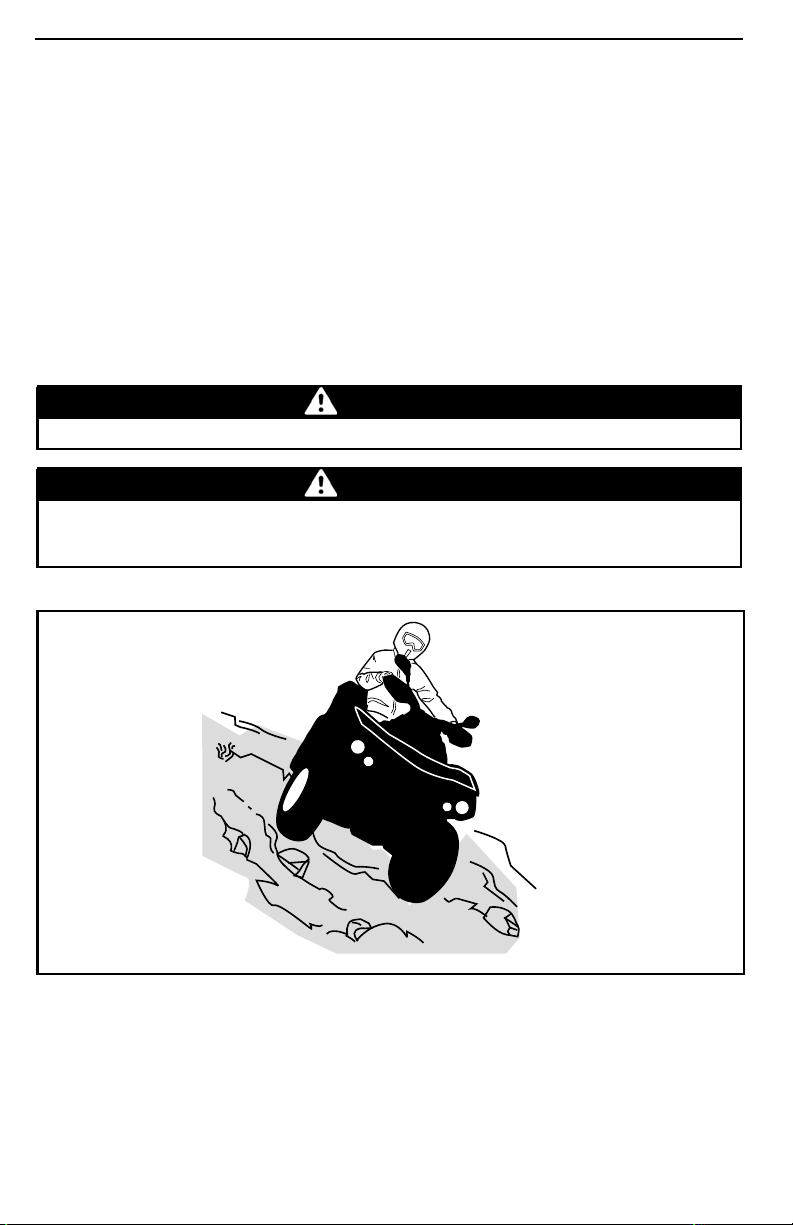
RIDING THE VEH ICLE
Vehi cle Behav iors
This vehicle can climb slopes that are steeper than it can safely descend. Therefore, it is essential to ensure that a safe route exists to descend a slope before you
climb it.
Side Hilling
This is one of the most risky types of riding since it ma y drastically change the balance of the vehicle. It should be avoided whenever possible. However, if it is necessary to do so , it is important that you ALWAYS keep your body weight on the upside of the slope and be prepared to dismount on that side should the vehicle begin
to topple.
Avoid all objects or depressions that will intensify the raising of one side of the vehicle higher than the other, thus causing rollover.
WARNING
Do not try to stop or save the vehicle from damage.
WARNING
Be careful when loading and transporting liquid reservoirs. They can affect
vehicle stability when side hilling by pulling downhill and increasing the risk
of a roll over.
vmo2012-012-527
2-UP Models
The passenger must synchronize h
ger must remain seated at all times.
The operator is responsible for t
the passenger before proceeding.
_______
56
he safety of the passenger; in doubt, disembark
SAFETY I
is movements with the operator. The passen-
NFORMATION
________
Page 59
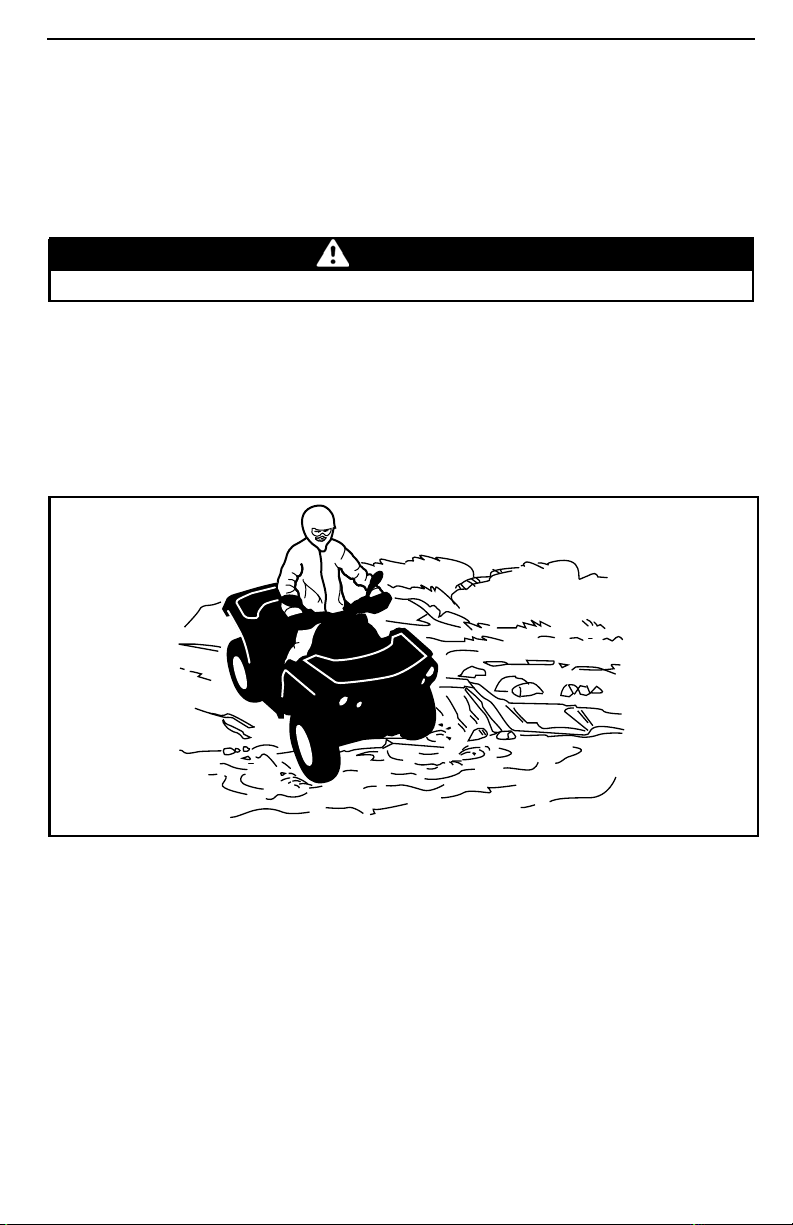
RIDING THE VEHICLE
Drop-Offs
This vehicle will “bottom-out” and usually stop if either the front or rear wheels are
driven over a drop-off. If the drop is sharp or deep, the vehicle will nose dive and tip
over.
When riding on a 2-UP model, the operator is responsible for the safety of the passenger; in doubt, disembark the passenger before proceeding.
WARNING
Avoid negotiating drop-offs. Reverse and select an alternate route.
Crossing Water
Water can be a unique hazard. If it is too deep the vehicle may “float” and topple.
Check the water depth and current before you attempt to cross any water. Water
should not go above the footrest. Be wary of slippery surfaces such as rocks,
grass, logs, etc., both in the water and on its banks. A loss of traction m ay occur.
Do not attempt to enter the water at high speed. The water will act as a brake and
could throw you off the vehicle, on the ground.
vmo2012-012-524
Wet brakes will affect the braking ability of your vehicle. Make sure you dry the
brakes by applying them several times after the vehicle leaves the water, mud or
snow. Allow greater distance for brak
Mud or marsh lands may be encountered near water. Be prepared for sudden
“holes” or changes in depth. Similarl
logs, etc., partially covered by vegetation.
Riding on Ice
If your route crosses frozen waterways, make sure the ice is thick enough and
sound enough to support the total
els), the vehicle and its load. Be ever watchful of open water it is a sure indication
that the ice thickness will vary.
________
SAFETY INF
ing.
y so, be watchful of hazards such as rocks,
weight of yourself, your passenger (2-UP mod-
ORMATION
________
57
Page 60

RIDING THE VEH ICLE
On 2-UP models, the operator is responsible for the safety of the passenger; in
doubt, do not attempt to cross.
Ice will also affect the control of the vehicle. Slow down and do not “gun” the
throttle. This will only result in spinning of the tires and possible tip over of the
vehicle or passenger ejection (2-UP models). Avoid rapid braking. This again will
possibly result in an uncontrolled slide and tip over of the vehicle or passenger
ejection (2-UP models). Slush should be avoided at all times since it could block
the operation or controls of the vehicle.
Riding on Snow Covered Surfaces
When performing the pre-ride inspection, pay special attent ion to locations on the
vehicle where snow and/o r ice accumulations may obstruct v isibility of the taillight
and reflectors, clog ventilation openings, block the radiator and fan, and interfere
with the mov em ent of control levers, switches and brake pedal. Before starting
with your ATV check the steering, throttle and brake lever and pedal controls for
interference free operation.
Whenever an ATV is ridden on a snow covered drive path the tire grip is generally
reduced causing the vehicle to react differently to control inputs from the op
On low grip surfaces, the steering responses are not as crisp and precise, stopping
distances are lengthened and acceleratio n becomes sluggish. Slow down and do
not "gun" the throttle. This will only result in spinning of the tires an d po
over steering slide of the vehicle. Avoid hard braking. This will possibly result in a
straight line slide of the vehicle. Again, the best advice is to safely reduce speed in
anticipation of a maneuver so to give yourself time and dista
hicle control before it spins out of your control.
As you drive your ATV over a loose snow covered surface, snow d
picked up in the wake turbulence of the m oving vehicle and transported to contact
and accumulate or melt on some exposed components including rotating parts
like brake discs. Water, snow or ice may affect the respon
system of your ATV. Even when not required to reduce vehicle speed apply brakes
frequently to prevent ice or snow accumulation and to dry brake pads and discs.
While doing so in low risk driving situations yo
yourself alerted to how the vehicle reacts to your control inputs. Always keep
brake pedal, footrests, floor boards, brake and throttle levers free of snow and ice.
Frequently wipe snow off seat, hand grips, h
The depth of the snow cover may hide rocks, tree stumps or other objects and if it
is wet may to tally impede the driv eabil
completely looses traction in slushy snow. Look far ahead and always be watchful
of any visible clues that might indic ate the presence of such obstacles. In do ub t
steer clear. Avoid driving on any fro
ice will safely support the ATV, its riders and its load of cargo. Remember that a
given thickness of ice may be sufficient to support a snowmobile but not an ATV
of an identical weight because of t
contact patches as compared to that of a snowmobile track and skis.
To maximize comfort and avoid f
equipment appropriate for the weather conditions you will be exposed to during
your ride.
ity as the vehicle becomes bogged down or
zen body of water before checking that the
he smaller load bearing surface of the four tire
rostbite, always wear clothing and ATV protective
u will test for grip level and keep
eadlights, taillights an d reflectors.
ncetoregaintotalve-
se time of the b rake
erator.
ssibly in an
ust will be
_______
58
SAFETY I
NFORMATION
________
Page 61

RIDING THE VEHICLE
At the end of each rid e it is a good practice to clean the vehicle body and all moving
components (brakes, steering components, drivelines, controls, radiator fan etc.)
from any snow or ice accumulations. Wet snow will turn to ice during the shut
down period and become more difficult to remove at the next pre-ride inspection.
Riding in snow may reduce the brakes stopping capability. Safely reduce speed
and allow greater distance for braking. Snow projection may cause ice build up or
snow accumulation on brake components and controls. Apply brakes frequently
to prevent ice or snow a ccumulation.
Riding on Sand
Riding on sand, sand dunes or on snow is another unique experience, but there are
some basic precautions that should be observed. Wet, deep or fine sand/snow
may create a loss of traction and cause the vehicle to slide, drop off or become
“bogged” down. If this occurs look for a firmer base. Again, the best advice is to
slow down and be watchful of the conditions. When you ride with a passenger
(2-UP models), slow down even more.
When riding in sand dunes it is advisable to equip the vehicle with an antenna type
safety flag. This will help make your location more visible to others over the n
sand dune. Proceed carefully should you see another safety flag ahead. Since the
antenna type safety flag can snag and rebound on your body if caught, do not use
it in areas where there are low hanging branches or obstacles. Always remem
when riding on a 2-UP model that the vehicle handling and stability may b e affected
when riding with a passenger.
Riding on Loose Stones
Riding on loo se stones or gravel is very similar to riding on ice
steering of vehicle possibly causing it to slide or tip ove r especially at high speeds
(resulting in operator and passenger ejection (2-UP models).
Again, the best advice is to slow down and be watchful of the conditions. When
you ride with a passenger (2-UP models), slow down even more.
In addition, braking distance may be affected. Remember that “gunning” the
throttle or sliding may cause loose stones to be ejected rearwards into the path of
another rider. Never do it deliberately.
. They w ill affect the
ext
ber
________
SAFETY INF
ORMATION
________
59
Page 62
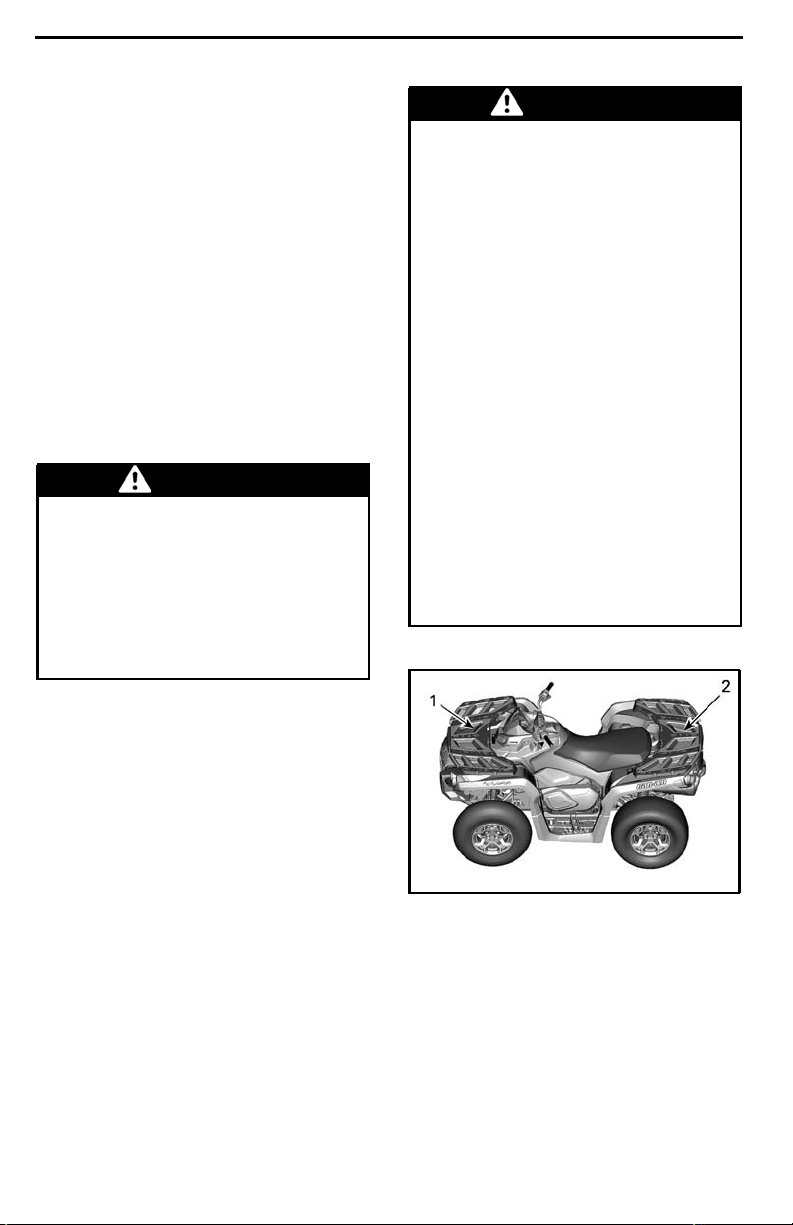
MOVING LOADS AND DOING WORK
Working with your Vehicle
Your vehicle can help you perform a
number of different LIGHT tasks ranging from snow removal to pulling wood
or carrying cargo. A variety of accessories are available from your authorized Can-Am dealer. To prevent possible injury, follow the instructions and
warnings that accompany the accessory. Always respect the load limits
of the vehicle. Overloading the vehicle can overstress the components
and cause failure. Avoid overexerting
yourself if you lift or pull heavy loads or
manually push the vehicle.
Carrying Loads
WARNING
– On1-UPmodels,NEVERexceed
90 km/h (55 MPH) if total load is
more than 164 kg (360 lb).
– On2-UPmodels,NEVERexceed
90 km/h (55 MPH) if total load is
more than 132 kg (291 lb).
– On2-UPmodels,NEVERexceed
90 km/h with a passenger.
WARNING
The vehicle handling, stability and
braking distance are affected when
loading racks and using the vehicle. Correct loading and weight
distribution are therefore important. Never overload, tow or carry
cargo improperly. Always ensure the cargo is safely secured
and properly distributed on the
rack(s) before operating the vehicle. Safely reduce speed according to terrain conditions when carrying cargo or pulling a trailer, and
avoid hills and rough terrain. Allow greater distance for braking,
especially on inclined surfaces and
when a passenger (2-UP models)
is on board. Be careful not to skid
or slide. Always secure cargo as
low as possible on the rack(s) to
reduce the effect of a higher center
of gravity. Failure to follow the recommendations here could cause
changes in vehicle handling which
couldleadtoanaccident.
Any load carried on the vehicle including a passenger (2-UP models) and/or
the carrying rack(s) will affect the handling, stability and braking distanc
the vehicle. Do not exceed the total
load allowed for this vehicle, including the weight of operator and passenger cargo, accessories and trailer
tongue weight. Refer to
TIONS
. Alw ays make sure the c
is secured, properly distributed (1/3
ofcargoweightinfrontand2/3of
cargo weight in ba ck) and c
terfere with controls lights. Always be
aware that the cargo may slide or fall
off and cause an accid
that may protrude sideways and get
snagged or caught in bushes or other
obstacles.
_______
60
SPECIFICA-
ent. Avoid loads
eof
argo
annot in-
SAFETY I
vmr2012-002-002_c
1. 1/3 of cargo weight
2. 2/3 of cargo weight
NFORMATION
________
Page 63

MOVING LOADS AND DOING WORK
MAXIMUM LOAD TABLE
1-UP
TOTAL
LOAD
ALLOWED
FRONT LOAD
REAR LOAD
MODELS
(EXCEPT
MOSSY
OAK)
2-UP AND
MOSSY
OAK
MODELS
235 kg
(517 lb)
272 kg
(600 lb)
45 kg
(100 lb)
90 kg
(200 lb)
Includes weight of operator, passenger,
cargo, accessories and trailer tongue
weight.
Evenly distributed.
Evenly distributed.
Includes rear rack, rear glove box
and tongue load.
The following is an example of suitable load distribution:
(VEHICLE WITH A TOTAL LOAD ALLOWED OF 235 KG (518 LB))
TOTAL
VEHICLE
LOAD
235 kg (51 8 lb)
EXAMPLE OF LOAD DISTRIBUTION
OPERATOR
AND
PASSENGER
100 kg
(220.5 lb)
CARGO LOAD ACCESSORIES
(231.5 lb)
LoadingtheCargoRacks
NOTICE
ing, do not exceed the weight limit of
90 kg (200 lb) for rear load and 45 kg
(100 lb) for front load.
Load cargo as low as possible – a
higher load can raise the vehicle’s
center of gravity, which can reduce
stability. Po sition cargo on the rack as
evenly distributed as possible.
Securetheloadonthecargorack. Do
not secure cargo to other parts of the
vehicle. If it is not properly secured, a
load may slide or f all off, possibly striking occupants or bystanders; or it may
shift during riding, affecting the handling of the vehicle.
When loading or unload-
TONGUE
WEIGHT
105 kg
10 kg (22 lb) 20 kg (44 lb)
Objects that are high may affect visibility for the driver and may act as projectiles in case of an accident. Loads that
protrude sideways can get snagged or
caught in bush, branches or other obstacles. Avoid covering and obstructing the brake lights with the cargo.
Ensure no cargo protrudes outside the
cargo rack and t hat cargo will not interfere with your visibility or control of the
vehicle.
NOTICE
racks capacity. Refer to
TIONS
Do not exceed the cargo
SPECIFICA-
.
Never carry ga soline container(s) or
any dangerous liquids on the cargo
rack.
________
SAFETY INF
ORMATION
________
61
Page 64

MOVING LOADS AND DOING WORK
Hauling a Load
(if Equipped with Hitch)
Never pull a load by attaching it to the
bumper; this can cause the vehicle to
tip over. Use only the trailer hitch (if in stalled) to pull a load.
In an emergency situation, use the
recovery hook to recover a stuck vehicle. Refer to
EQUIPMENT
When pulling loads with a chain or cable, ensure that there is no slack before
starting and maintain tension while
pulling.
When pulling loads with a chain or cable, be sure to brake progressively.
The inertia of the load could lead to an
impact.
When hauling a load, respe ct the maximum hauling capacity. See
A TRAILER
RECOVERY HOOKS
.
in this section.
in
PULLING
WARNING
A slack in the chain or cable can
causeittobreakandsnapback.
When pulling another vehicle, be sure
that someone is controlling the pulled
vehicle. They must brake and steer to
prevent the vehicle from going out of
control.
Reduce your speed when hauling a
load a nd turn gradually. Avoid hills and
rough terrain. Never attempt steep
hills. Allow more distance for braking, especially on inclined surfaces and
when a passenger (2-up models) is on
board. Be careful not to skid or slide.
Pulling a Trailer
(if Equipped with Hitch)
NOTICE
hitch must be properly installed on
the vehicle for hauling trailers.
A BRP approved rear
is used behind the vehicle make sure
that its hitch is compatible with the
one on the vehicle. Make sure the
trailer is horizon tal with the vehicle. (In
some instances a special extension
may have to be installed on the vehicle
hitch). Use security c hains or cables to
secure the trailer with the vehicle.
Reduce your speed w hen pulling a
trailer and turn gradually. Avoid hills
and rough terrain. Never attempt
steep hills. Allow more distance for
braking, especially on inclined surfaces
and when a passenger (2-up models)
is on board. Be careful not to skid or
slide.
Improperly loading a trailer may cause
a loss of control.
Do not exceed the towing capacity or
tongue capacity. Refer to
TIONS
.
Make sure there is at least some
weight on the tongue.
Always make sure load is evenly distributed and safely sec ured on the
trailer; an evenly ba lanced trailer is
easier to control.
Always put the shift lever to L (low
range) for hauling a trailer – in addition
to providing more torque, operating
in low range helps account for the increasedloadonthereartires.
When stopped or parked, block the vehicle and trailer wheels from possible
movement.
Use caution when disconnecting a
loaded trailer; it or its load may topple
on you or others.
When hauling a trailer, respect the maximum hauling capacity indicated on
thelabelonthehitch.
SPECIFICA-
Riding this vehicle with a trailer substantially increases the risk of toppling,
especially on inclined slopes. If a trailer
_______
62
SAFETY I
NFORMATION
________
Page 65
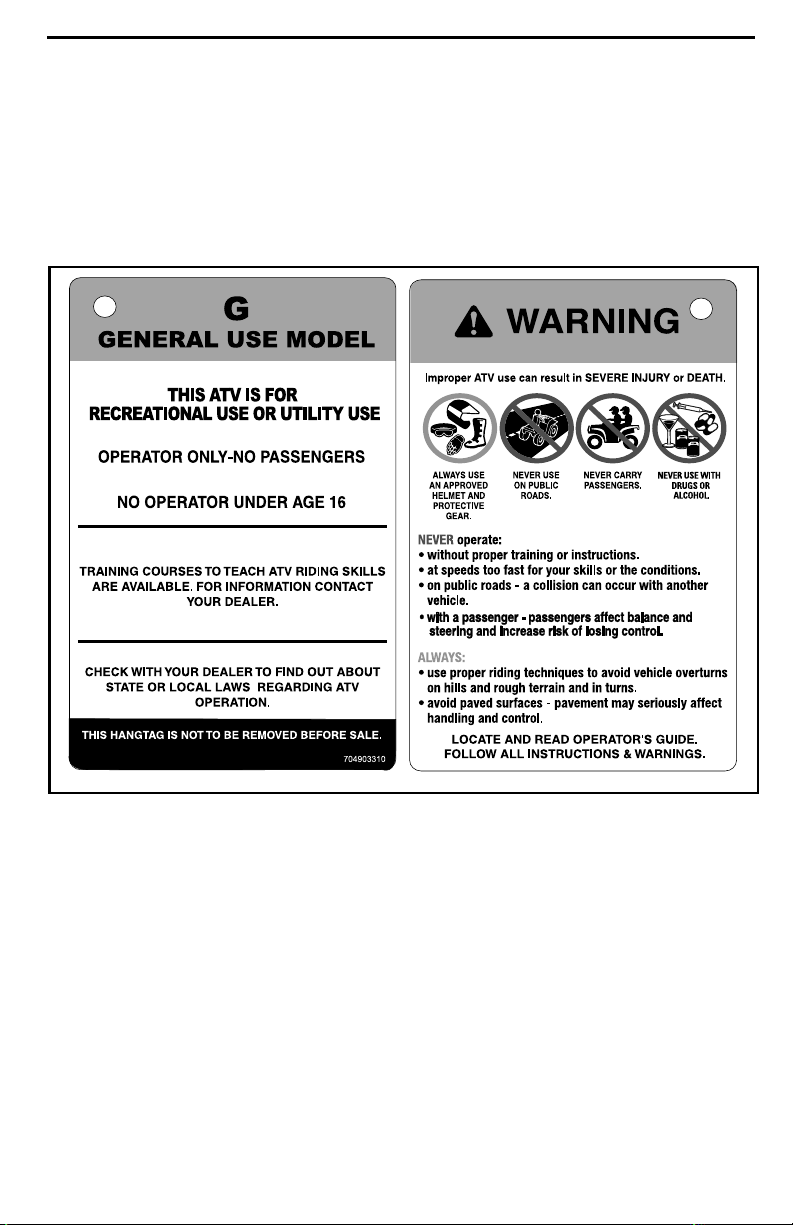
IMPORTANT ON-PRODUCT LABELS
(CANADA/UNITED STATES)
Hang Tag
This vehicle comes with a hang tag and labels containing important safety information.
Any person who rides this vehicle should read and understand this information before rid ing.
704903310
TYPICAL - 1-UP MODELS
________
SAFETY INF
ORMATION
________
63
Page 66
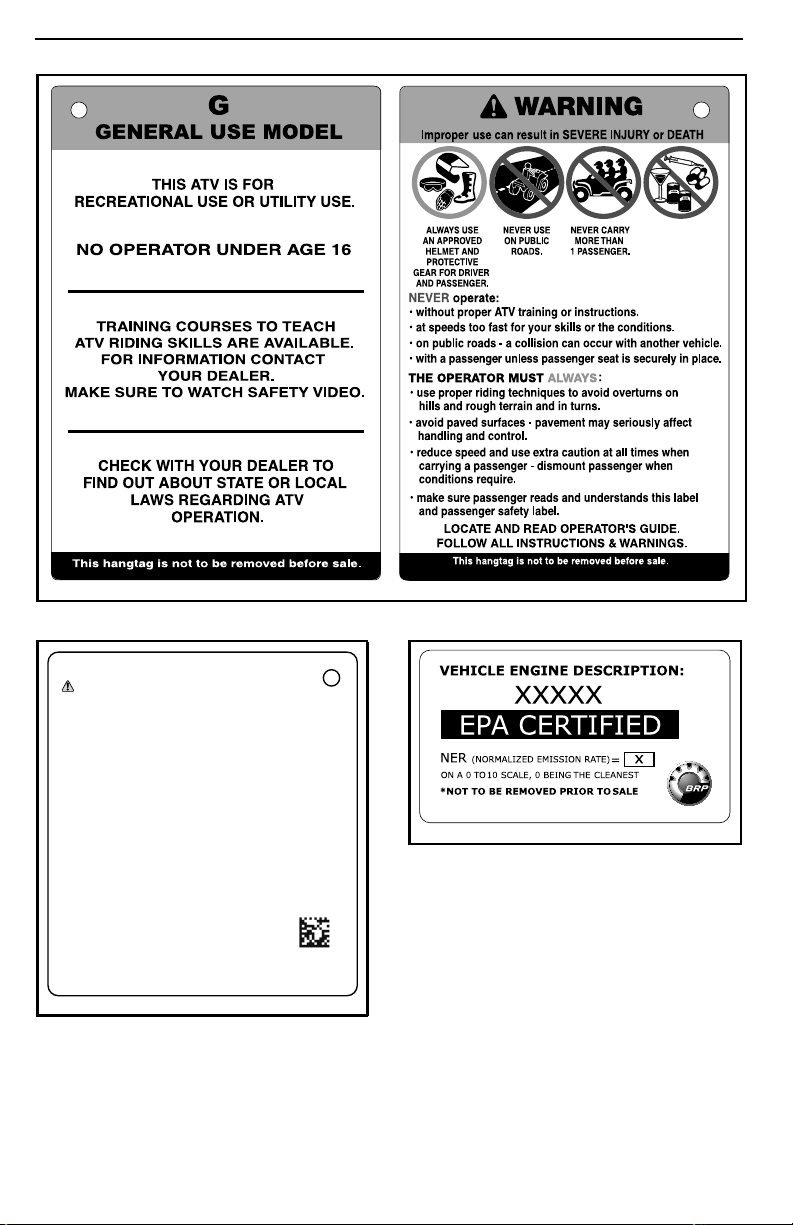
IMPORTANT ON-PRODUCT LABELS (CANADA/UNITED STATES)
704903314
TYPICAL - 2-UP MODELS
NEVER USE WITH
DRUGS OR
ALCOHOL.
704903314
. Operating, servicing and
WARNING
maintaining an off-road vehicle can expose
you to chemicals including engine exhaust,
carbon monoxide, phthalates, and lead,
which are known to the State of California
to cause cancer and birth defects or other
reproductive harm.
To minimize exposure, avoid breathing
exhaust, do not idle the engine except as
necessary, service your vehicle in a
well-ventilated area and wear gloves or wash
your hands frequently when servicing your
vehicle.
For more information go to
www.P65Warnings.ca.gov/products/
passenger-vehicle
EN-704906872-DEC
_______
64
704906872
SAFETY I
704901107
vmo2006-005-009_en
TYPICAL
NFORMATION
________
Page 67
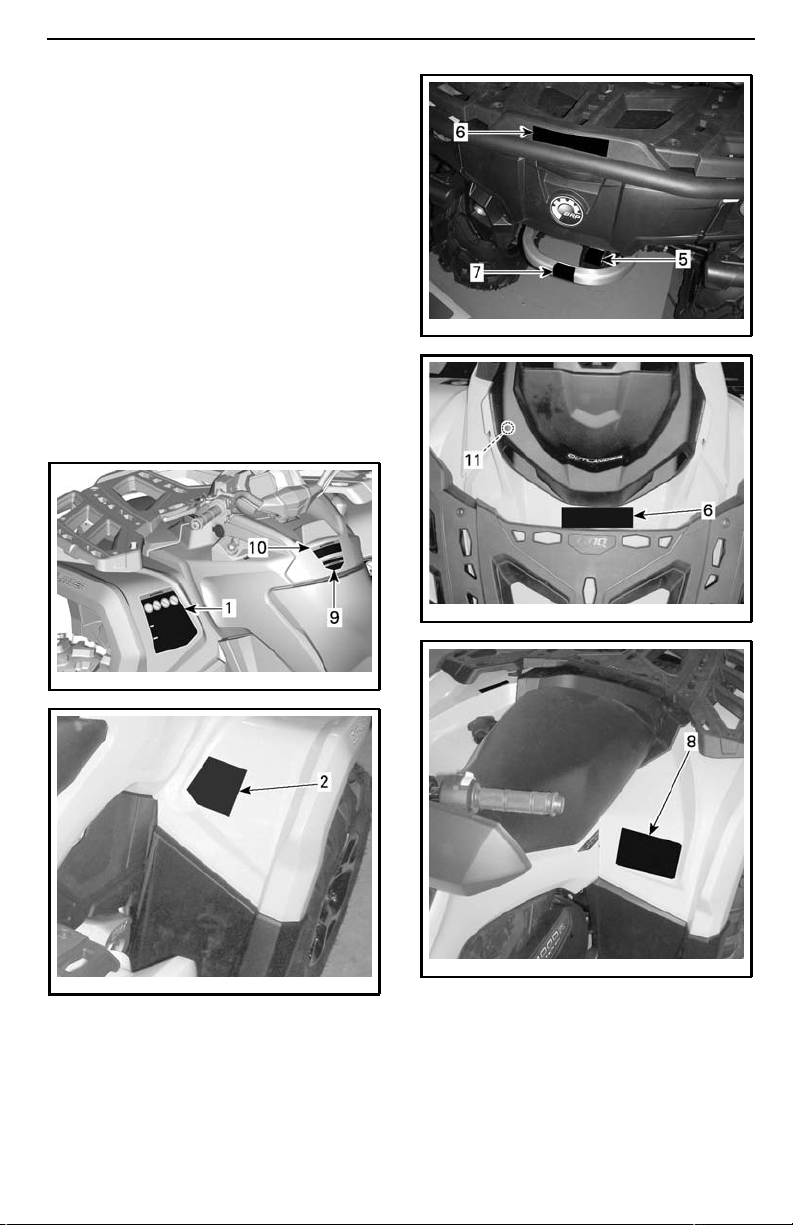
IMPORTANT ON-PRODUCT LABELS (CANADA/UNITED STATES)
Vehicle Safety Labels
Read and understand all the safety labels on your vehicle.
These labels are affixed to the vehicle
for the safety of the operator, passenger (2-UP) or bystanders.
The safety labels on your vehicle
should be considered permanent parts
of the vehicle. If missing or damaged,
theycanbereplacedfreeofcharge.
SeeanauthorizedCan-Amdealer.
NOTE: In the event of any discrepancy between this guide and the vehicle, the safety labels on the vehicle
have precedence over the labels in this
guide.
vmo2012-012-043_a
vmo2012-012-001_a
219001727-001_a
vmo2012-012-004_a
________
SAFETY INF
vmo2012-012-002_a
ORMATION
________
65
Page 68
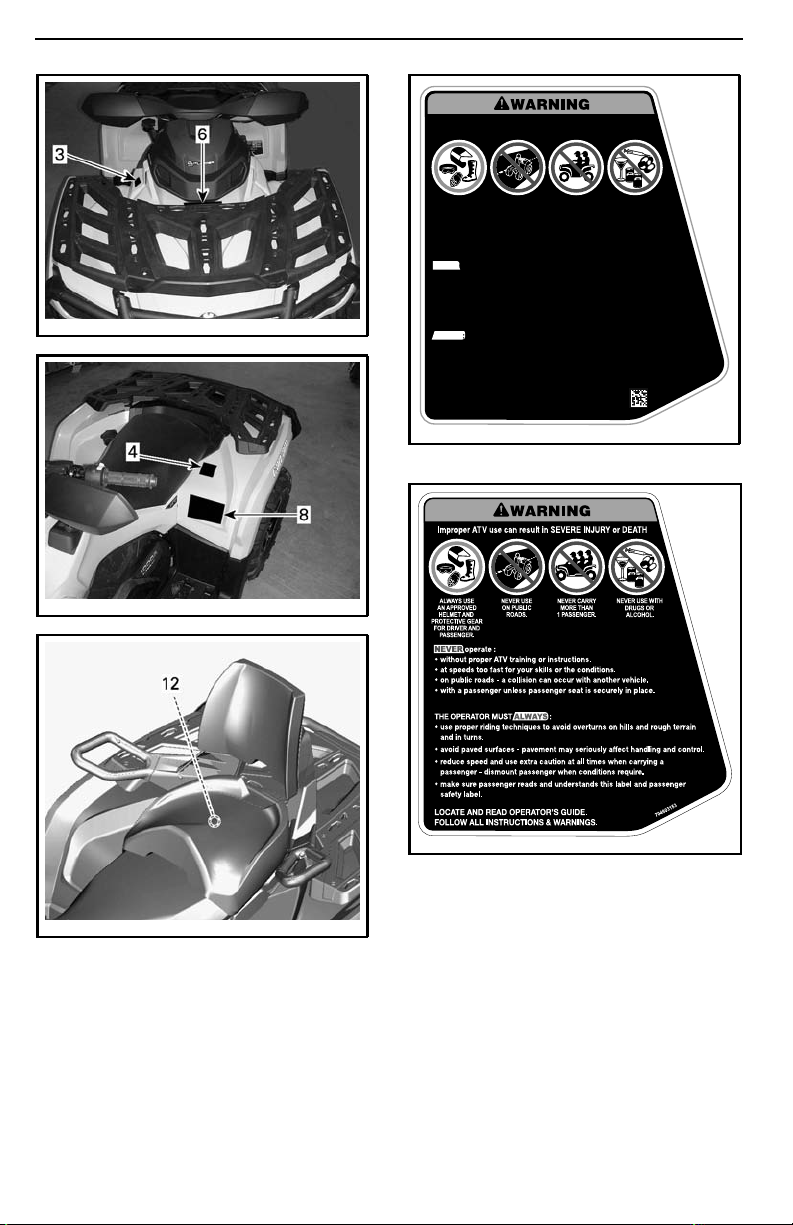
IMPORTANT ON-PRODUCT LABELS (CANADA/UNITED STATES)
Improper ATV use can result in SEVERE INJURY or DEATH
vmo2012-012-044_a
vmo2012-012-045_c
ALWAYS USE
AN APPROVED
HELMET AND
PROTECTIVE GEAR
NEVER operate:
• without the proper ATV training or instructions.
• at speeds too fast for your skills or conditions.
• on public roads - a collision can occur with another vehicle.
• with a passenger - passengers aect balance and steering and increase
risk of losing control.
ALWAY
• use proper riding techniques to avoid vehicle overturns on hills and rough
terrain and in turns.
• avoid paved surfaces - pavement may seriously aect handling and control.
EN-704906842-DEC
NEVER USE
NEVER CARRY
ON PUBLIC
PASSENGERS
ROADS
S
LOCATE AND READ OPERATOR’S GUIDE
FOLLOW ALL INSTRUCTIONS & WARNINGS.
NEVER USE
WITH DRUGS
OR ALCOHOL
LABEL 1 - 1-UP MODELS
704906842
vmo2013-007-004_e
TYPICAL
_______
66
SAFETY I
704903153C
LABEL 1 - 2-UP MODELS
NFORMATION
________
Page 69
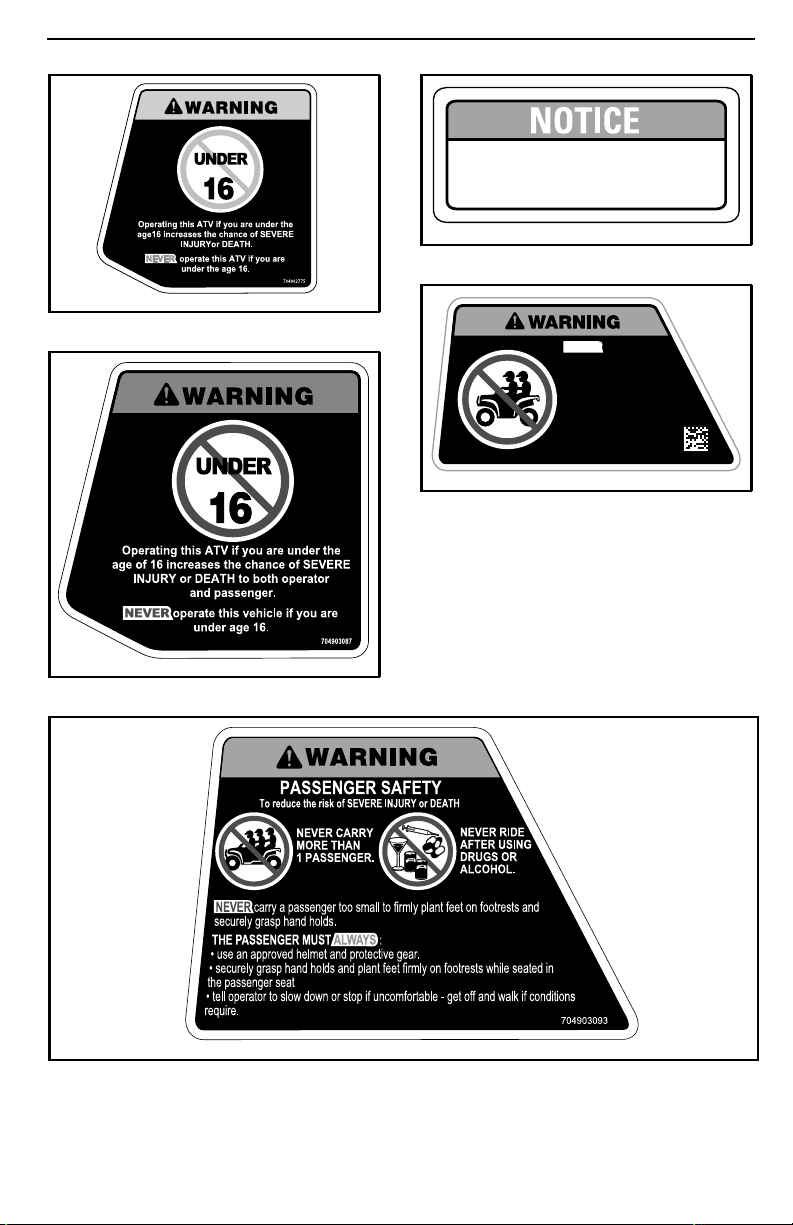
704902775A
LABEL 2 - 1-UP MODELS
IMPORTANT ON-PRODUCT LABELS (CANADA/UNITED STATES)
•This VEHICLE MUST be stopped before
shifting lever.
•ALWAYS apply foot brake to shift from
Park (P) and Neutral (N).
EN-704905695-DEC
LABEL 3
NEVER ride as a
passenger.
Passengers can cause a
loss of control, resulting
in SEVERE INJURY or
DEATH.
EN-704906851-DEC
LABEL 4 - 1-UP MODELS
704905695
704906851
704903087A
LABEL 2 - 2-UP MODELS
704903093B
LABEL 4 - 2-UP MODELS
________
SAFETY INF
ORMATION
________
67
Page 70
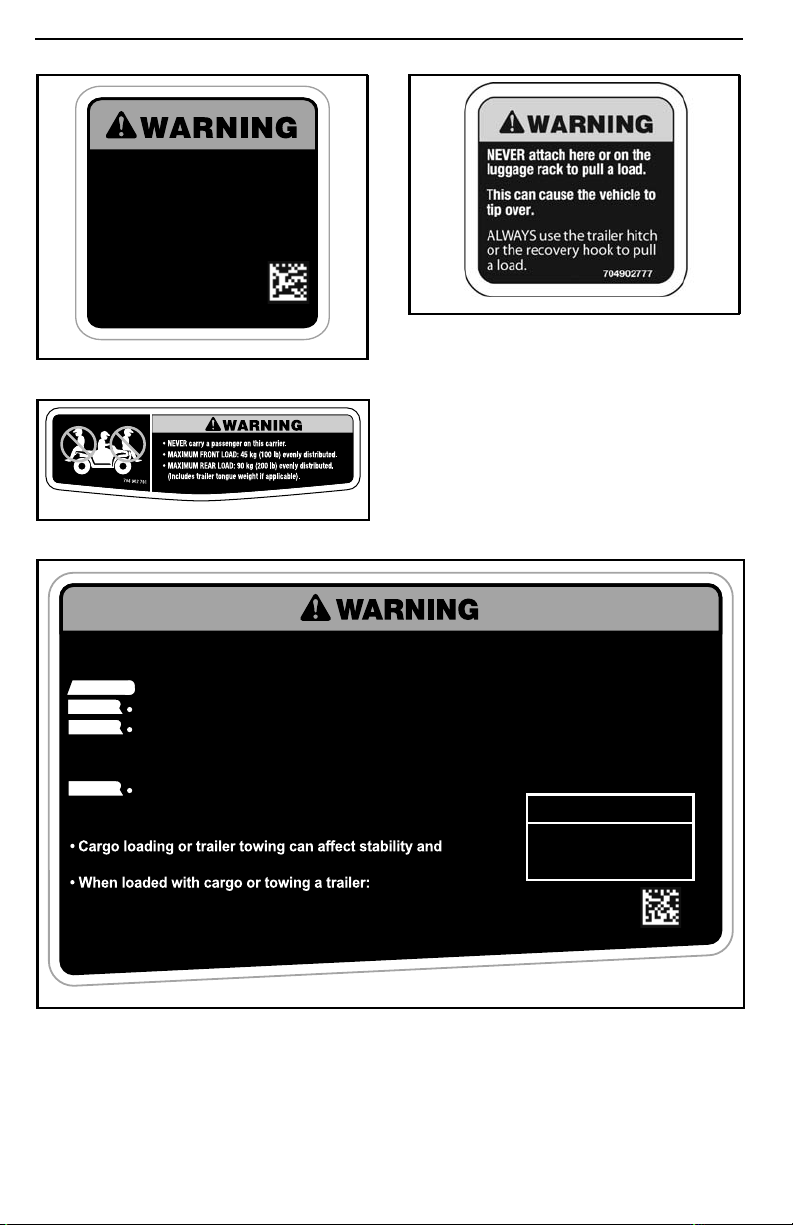
IMPORTANT ON-PRODUCT LABELS (CANADA/UNITED STATES)
Improper loading of a trailer may
cause loss of vehicle control,
resulting in severe injury or death.
• Maximum towing weight
590 kg (1300 lb)
• Maximum tongue
weight 23 kg (50 lb)
EN-704906853-DEC
LABEL 5
704902791
LABEL 6
6853
704902777A
LABEL 7
Improper tire pressure or overloading can cause loss of control, resulting in
SEVERE INJURY or DEATH.
ALWAYS maintain proper tire pressure according to the load on the vehicle. Refer to table.
NEVER underinflate tire as it could cause the tire to disloge from the rim.
NEVER exceed the vehicle load capacity of 235 kg (517 lb),
Mossy Oak configuration 272 kg (598 lb), including weight of operator, cargo,
accessories and trailer tongue weight.
NEVER exceed 90 km/h if total load is more than 164 kg (360 lb),
Mossy Oak configuration 132 kg (290 lb)
ATV LOADING and TRAILER TOWING
handling. Load must be proprely distributed on racks.
- reduce speed.
- allow more distance to stop.
- avoid hills and rough terrain.
EN-704906970-DEC
LABEL 8 - 1-UP MODELS
_______
68
SAFETY I
NFORMATION
COLD TIRE PRESSURE
48.3 kPa (7 psi)
FRONT
REAR
48.3 kPa (7 psi)
704906970
________
Page 71
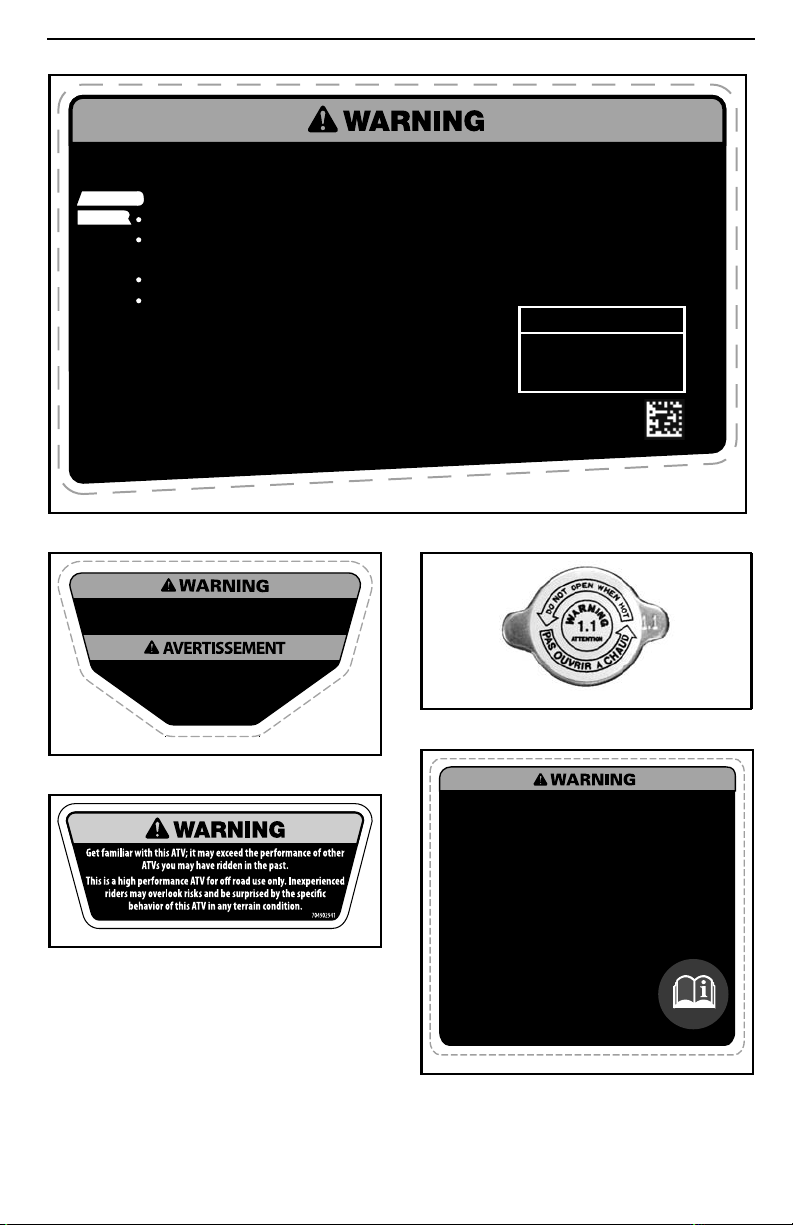
IMPORTANT ON-PRODUCT LABELS (CANADA/UNITED STATES)
Improper tire pressure or overloading can cause loss of control, resulting in
SEVERE INJURY or DEATH.
ALWAYS maintain proper tire pressure according to the load on the vehicle. Refer to table.
NEVER underinflate tire as it could cause the tire to disloge from the rim.
exceed the vehicle load capacity of 272 kg (600 lb), including weight of operator,
cargo, accessories and trailer tongue weight.
exceed 90 km/h if total load is more than 132 kg (290 lb)
exceed 90 km/h with a passenger
ATV LOADING and TRAILER TOWING
• Cargo loading or trailer towing can affect stability and
handling. Load must be proprely distributed on racks.
• When loaded with cargo or towing a trailer:
- reduce speed.
- allow more distance to stop.
- avoid hills and rough terrain.
704906307
LABEL 8 - 2-UP MODELS
This vehicle is an all terrain vehicle and is not
intended for use on public roads.
704905139
COLD TIRE PRESSURE
48.3 kPa (7 psi)
FRONT
REAR
48.3 kPa (7 psi)
704906307
Ce véhicule est un véhicule tout
terrain qui n’est pas destiné a
être utilisé sur les
voies publiques.
704905139
LABEL 9
704902941
LABEL 10
________
SAFETY INF
vmo2010-010-100_a
LABEL 11
Always make sure to properly install passenger seat or
glove box in place before riding.
TO INSTALL PASSENGER SEAT
. Ensure that the latch lever is in the open position by pulling it
towards the front of seat.
. Using a forward motion, insert both front tabs of the seat into
the vehicle anchor housings.
. Rotate downwards to engage the rear latch.
. Close the latch lever by pushing it rearwards to secure the seat
in position.
. Check if the seat is firmly secured in position before using it.
TO INSTALL GLOVE BOX
• Open glove box cover and turn handle to the unlock position.
• Align and insert glove box latching system into
this vehicle's “LINQ” opening.
• Turn handle to the lock position.
• Close cover and verify if glove box is locked
in position.
FOR MORE DETAILS REFER TO OPERATOR’S GUIDE
704904358
LABEL12-2-UPMODELS,UNDERGLOVE
BOX
ORMATION
________
704904358
69
Page 72
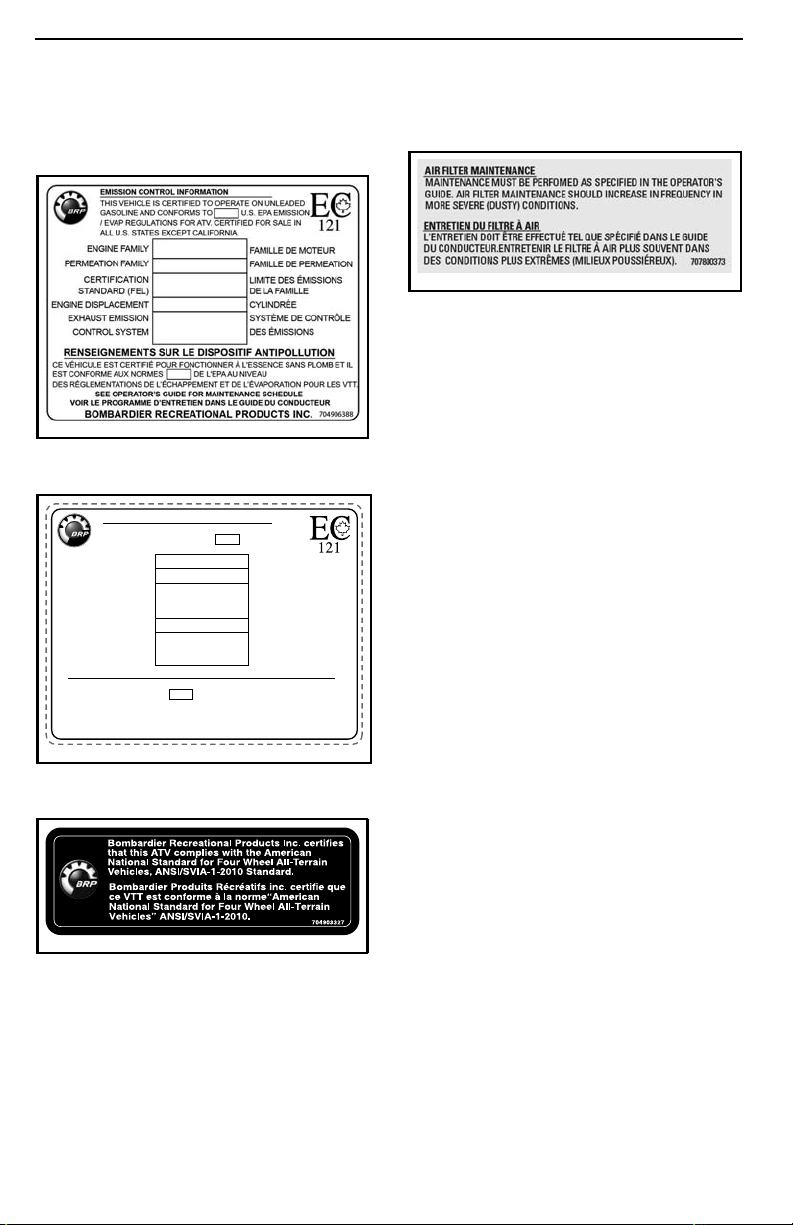
IMPORTANT ON-PRODUCT LABELS (CANADA/UNITED STATES)
Compliance Labels
These labels indicate vehicle's compliance.
704906388
TYPICAL - UNDER SEAT, EXCEPT
CALIFORNIA MODELS
EMISSION CONTROL INFORMATION
THIS VEHICLE IS CERTIFIED TO OPERATE ON UNLEADED
GASOLINE AND CONFORMS TO U.S. EPA AND
CALIFORNIA EMISSION / EVAP REGULATIONS FOR ATV.
ENGINE FAMILY
PERMEATION FAMILY
CERTIFICATION
STANDARD (FEL)
ENGINE DISPLACEMENT
EXHAUST EMISSION
CONTROL SYSTEM
RENSEIGNEMENTS SUR LE DISPOSITIF ANTIPOLLUTION
CE VÉHICULE EST CERTIFIÉ POUR FONCTIONNER À L'ESSENCE SANS PLOMB ET IL
EST CONFORME AUX NORMES DE L'EPA ET DE LA CALIFORNIE AU NIVEAU
DES RÉGLEMENTATIONS DE L’ÉCHAPPEMENT ET DE L’ÉVAPORATION POUR LES VTT.
SEE OPERATOR’S GUIDE FOR MAINTENANCE SCHEDULE
VOIR LE PROGRAMME D’ENTRETIEN DANS LE GUIDE DU CONDUCTEUR
BOMBARDIER RECREATIONAL PRODUCTS INC.
704904648
TYPICAL - UNDER SEAT, CALIFORNIA
MODELS
FAMILLE DE MOTEUR
FAMILLE DE PERMEATION
LIMITE DES ÉMISSIONS
DE LA FAMILLE
CYLINDRÉE
SYSTÈME DE CONTRÔLE
DES ÉMISSIONS
704904648
Technical Information
Labels
707800373
UNDER SEAT
704903327
REAR FENDER
_______
70
SAFETY I
NFORMATION
________
Page 73
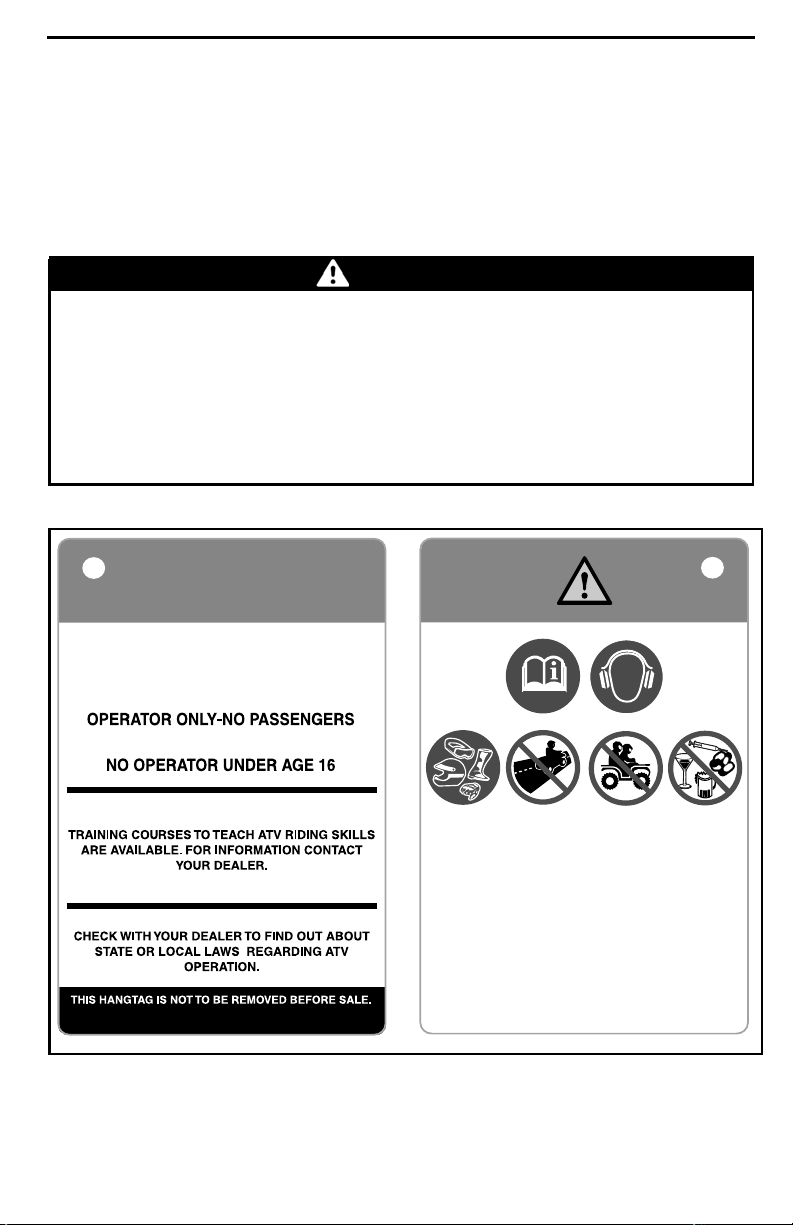
IMPORTANT ON-PRODUCT LABELS (ALL
COUNTRIES EXCEPT CANADA/UNITED STATES)
Hang Tag
This vehicle comes with a hang tag and labels containing important safety information.
Any person who rides this vehicle should read and understand this information before rid ing.
WARNING
– Locate and read operator's guide. Improper ATV use can result in SE-
VERE INJURY or DEATH. Follow all instruct io n s and warning s .
– Always wear ear protection.
– Always use an approved helmet and protective gear.
– Never use on public roads.
– Never carry passengers on 1-up models and NEVER carry more than one
passenger on 2-up models.
– Never use with drugs or alcohol.
G
GENERAL USE MODEL
RECREATION AL USE OR UTILITY USE
704903930A
TYPICAL - 1-UP MOD
________
THIS ATV IS FOR
704903930
ELS
SAFETY INF
ORMATION
________
71
Page 74
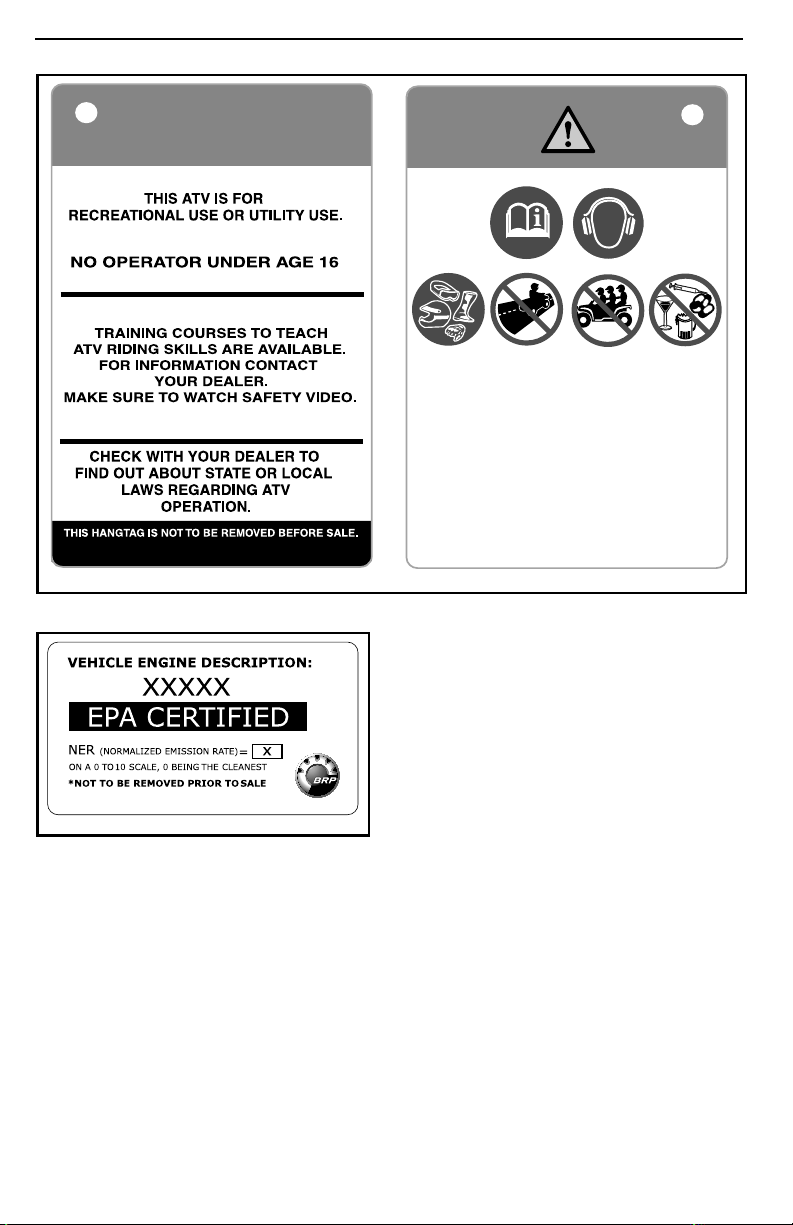
IMPORTANT ON-PRODUCT LABELS (ALL COUNTRIES EXCEPT CANADA/UNITED STATES)
G
GENERAL USE MODEL
704903946
704903946
TYPICAL - 2-UP MODELS
704901107
vmo2006-005-009_en
TYPICAL: APPLICABLE WH EN EQUIVALENT
TO A MODEL COMPLIANT TO US EPA
STANDARDS
_______
72
SAFETY I
NFORMATION
________
Page 75
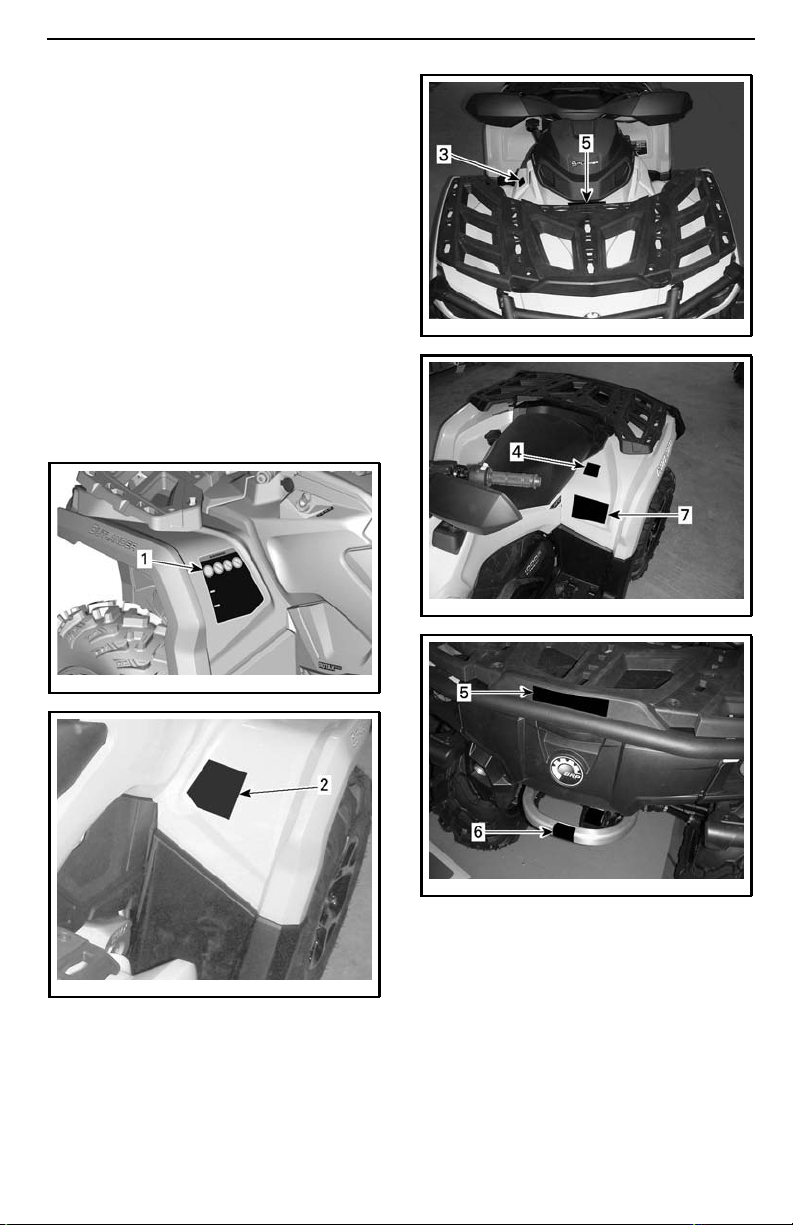
IMPORTANT ON-PRODUCT LABELS (ALL COUNTRIES EXCEPT CANADA/UNITED STATES)
Vehicle Safety Labels
Read and understand all the safety labels on your vehicle.
These labels are affixed to the vehicle
for the safety of the operator, passenger (2-UP) or bystanders.
The safety labels on your vehicle
should be considered permanent parts
of the vehicle. If missing or damaged,
theycanbereplacedfreeofcharge.
SeeanauthorizedCan-Amdealer.
NOTE: In the event of any discrepancy between this guide and the vehicle, the safety labels on the vehicle
have precedence over the labels in this
guide.
vmo2012-012-044_b
vmo2012-012-045_d
219001727-002_a
vmo2012-012-004_a
________
SAFETY INF
vmo2012-012-043_b
ORMATION
________
73
Page 76
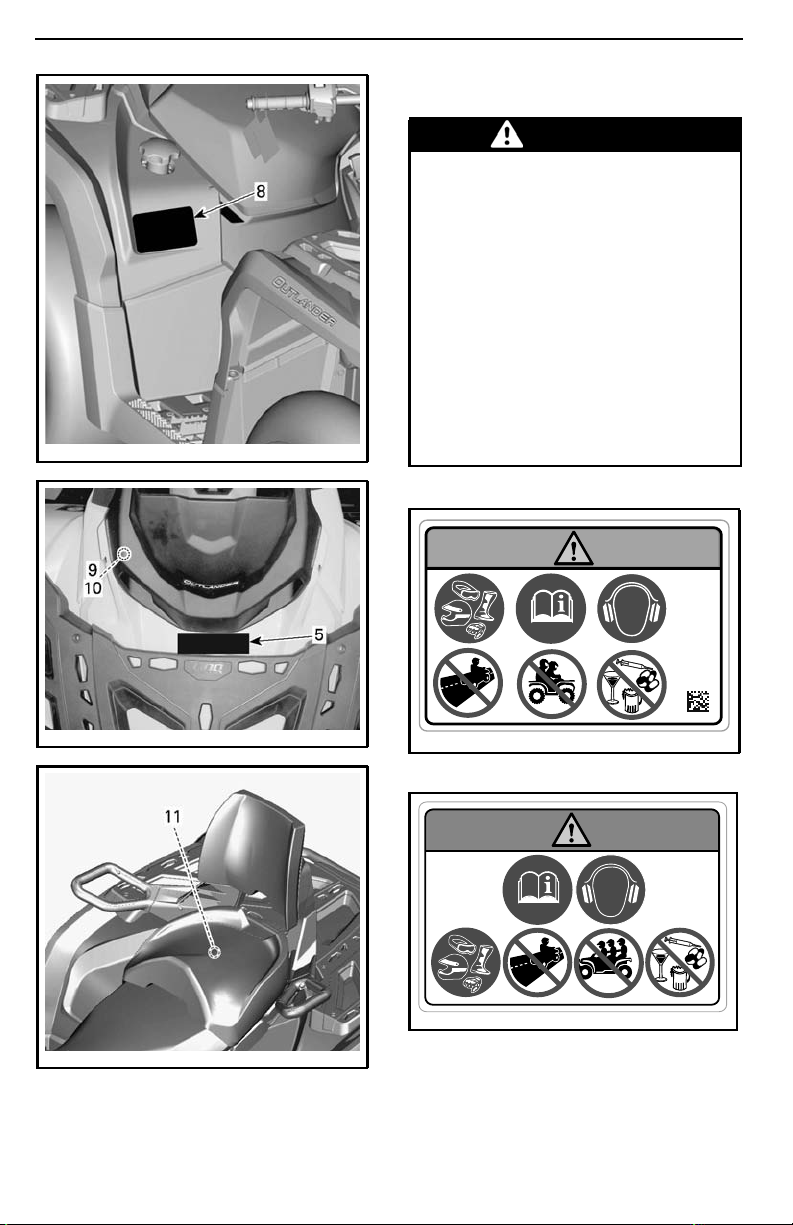
IMPORTANT ON-PRODUCT LABELS (ALL COUNTRIES EXCEPT CANADA/UNITED STATES)
Label 1
WARNING
– Locate and read operator's
guide. Improper ATV use can
result in SEVERE INJURY or
DEATH. Follow all instructions
and warnings.
– Always wear ear protection.
– Always use an approved helmet
and protective gear.
– Never use on public roads.
– Never carry a passenger on 1-up
models and NEVER carry more
than one passenger on 2-up
models.
vmo2014-020-003_a
– Never use with drugs or alcohol.
vmo2012-012-001_c
vmo2013-007-004_f
TYPICAL
_______
74
SAFETY I
EN-FR-704906847-DEC
LABEL 1 - 1-UP MODELS
704903734A
LABEL 1 - 2-UP MODELS
NFORMATION
704906847
704903734
________
Page 77
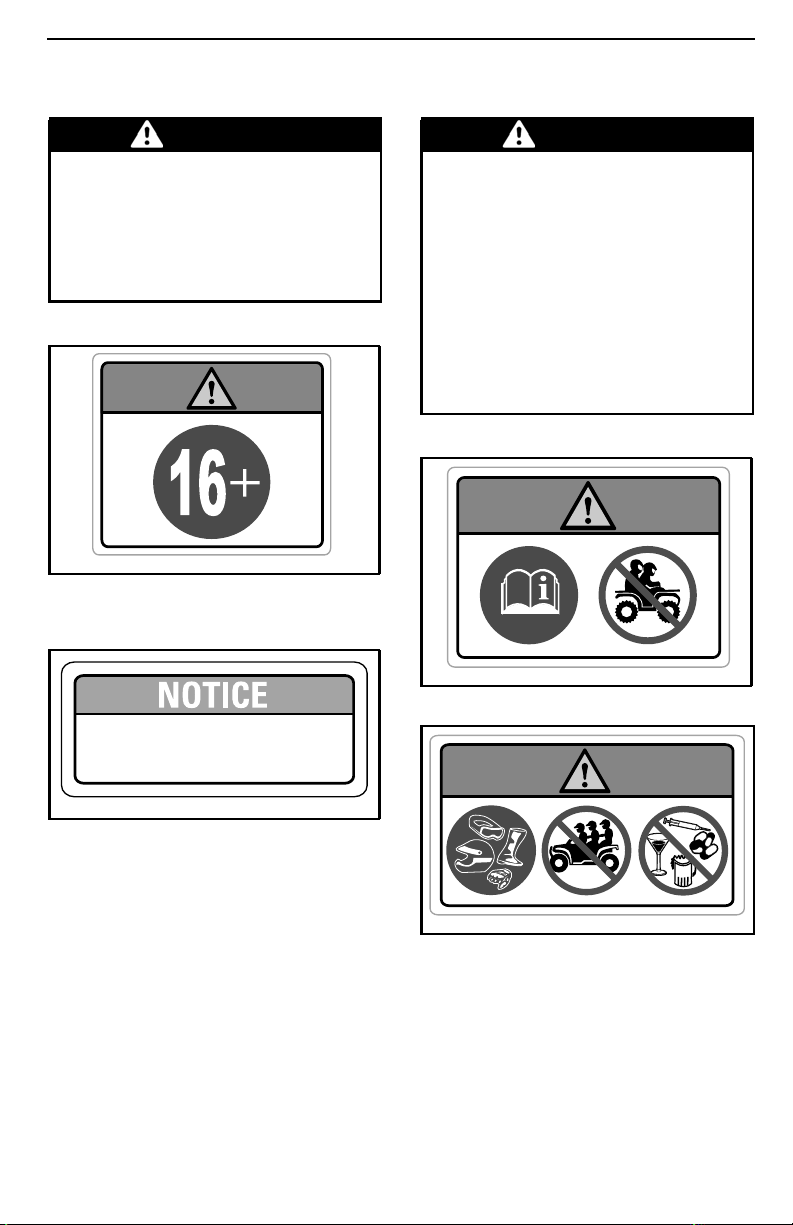
IMPORTANT ON-PRODUCT LABELS (ALL COUNTRIES EXCEPT CANADA/UNITED STATES)
Label 2
WARNING
Operating this ATVif you are under
the age of 16 increases the chance
of SEVERE INJURY or DEATH to
the operator, and to both the operator and passenger on 2-up models. NEVER operate this ATV if you
are under age 16.
704903964
704903964
LABEL 2
Label 3
•This VEHICLE MUST be stopped before
shifting lever.
•ALWAYS apply foot brake to shift from
Park (P) and Neutral (N).
704905695
Label 4
WARNING
– Locate and read operator's
guide.
– NEVER carry a passenger on
1-up models and NEVER carry
more than 1 passenger on 2-up
models.
– Passenger on 2-up models must
always use an approved helmet
and protective gear.
– Passenger on 2-up models must
NEVER ride after using drugs or
alcohol.
704903968
704903968
LABEL 4 - 1-UP MODELS
EN-704905695-DEC
LABEL 3
________
SAFETY INF
704903737
LABEL 4 - 2-UP MODELS
ORMATION
________
75
Page 78
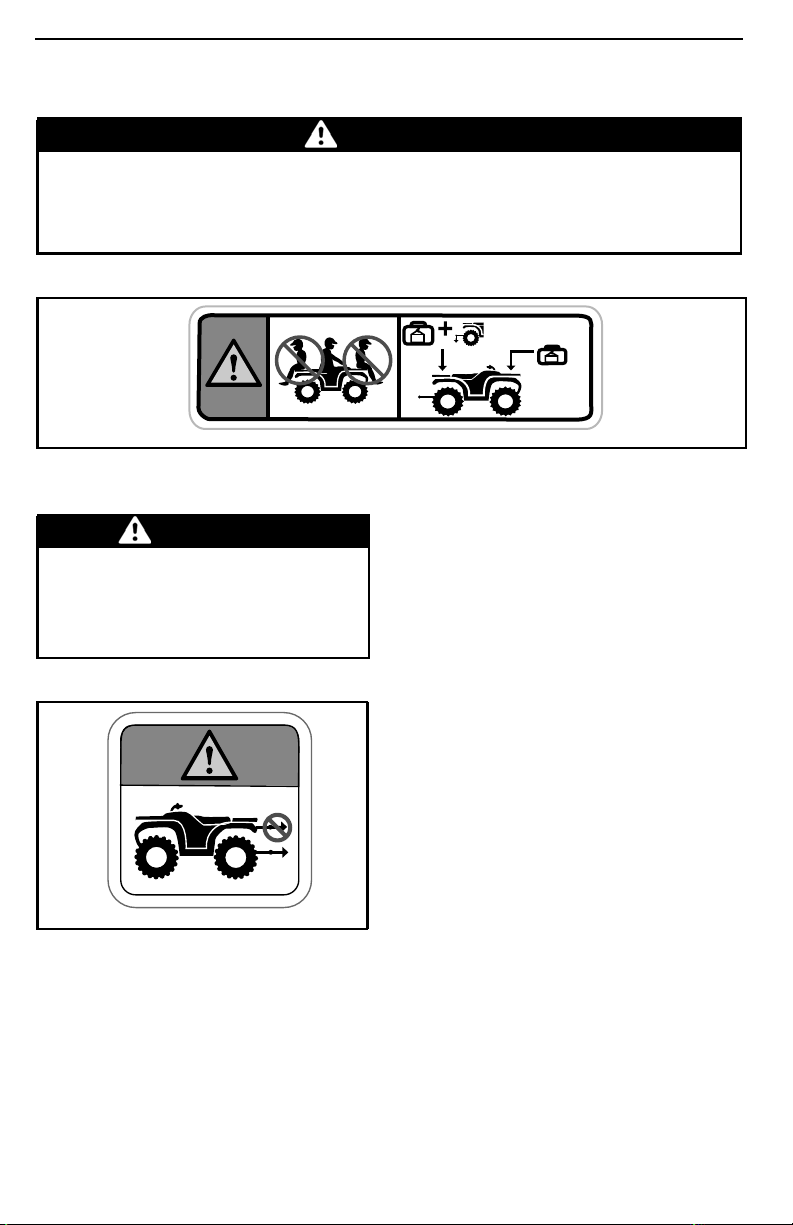
IMPORTANT ON-PRODUCT LABELS (ALL COUNTRIES EXCEPT CANADA/UNITED STATES)
Label 5
WARNING
– NEVER carry a passenger on this carrier.
– MAXIMUM FRONT LOAD: 45 kg (100 lb) evenly distributed.
– MAXIMUM REAR LOAD: 90 kg (200 lb) evenly distributed (including
trailer tongue weight if applicable).
< 90 kg (200 lb)
< 45 kg
(100 lb)
704903960
704903960
LABEL 5
Label 6
WARNING
NEVER attach here or on the luggage rack to pull a load This can
cause the vehicle to tip over. ALWAYS use the trailer hitch or the
recovery hook to pull a load.
704903955A
LABEL 6
_______
76
704903955
SAFETY I
NFORMATION
________
Page 79
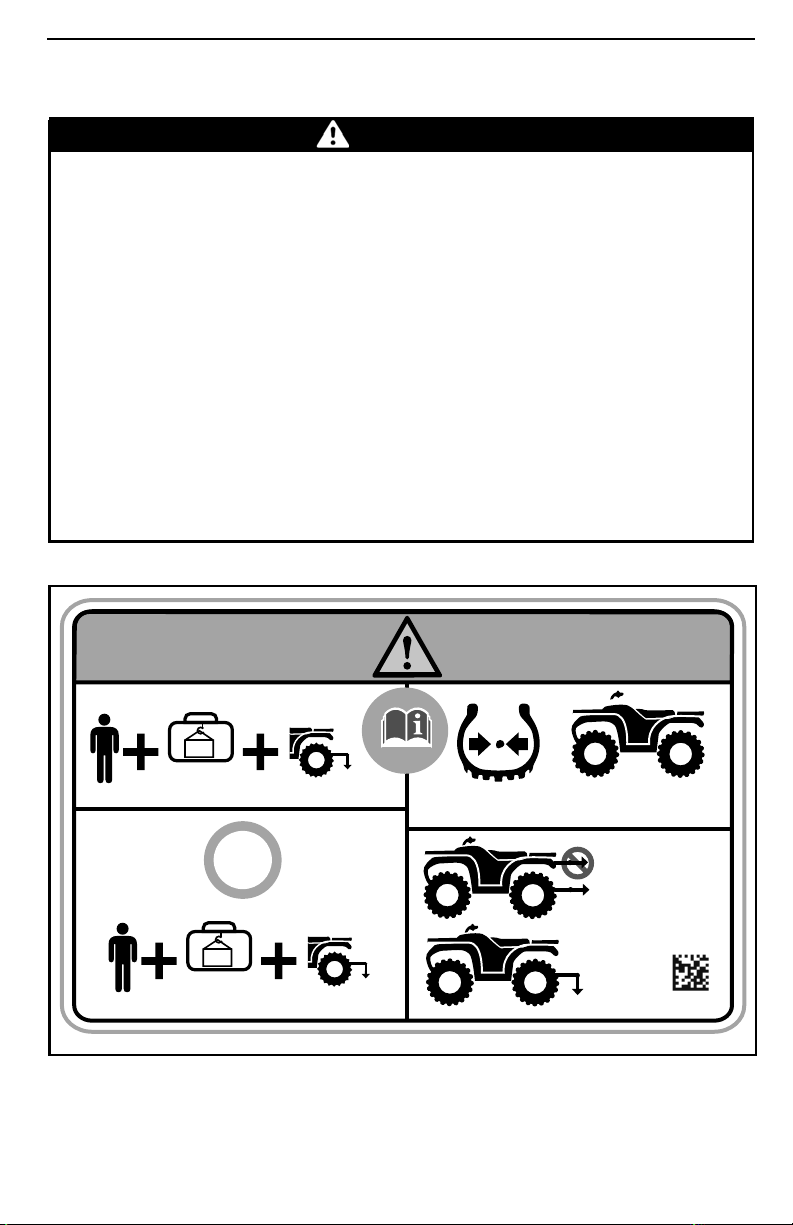
IMPORTANT ON-PRODUCT LABELS (ALL COUNTRIES EXCEPT CANADA/UNITED STATES)
Label 7
WARNING
– Locate and read operator's guide. Improper tire pressure or overloading
can cause loss of control, resulting in SEVERE INJURY or DEATH.
– ALWAYS maintain proper tire pressure as shown.
– On 1-up models, NEVER exceed the load capacity of 235 kg (517 lb)
including weight of operator, cargo, accessories, and trailer tongue
weight.
– On 2-up models, NEVER exceed the load capacity of 272 kg (600 lb)
including weight of operator, cargo, accessories, and trailer tongue
weight.
– ALWAYS pull a load using the trailer hitch or recovery hook.
– NEVER exceed the maximum towing weight of 590 kg (1,300 lb).
– NEVER exceed the maximum tongue weight of 23 kg (50 lb).
– On 1-up models, NEVER exceed 90 km/h (55 MPH) if total load is more
than 164 kg (360 lb).
– On 2-up models, NEVER exceed 90 km/h (55 MPH) if total load is more
than 132 kg (291 lb).
– On 2-up models, NEVER exceed 90 km/h with a passenger.
< 235 kg (517 lb)
< 272 kg (598 lb) Mossy Oak
90 km/h
55 mph
> 164 kg (360 lb)
> 132 kg (290 lb) Mossy Oak
EN-FR-704906972-DEC
LABEL 7 - 1-UP MODELS
________
SAFETY INF
kPa
ORMATION
=
48.3 kpa
(7 psi)
590 kg
(1300 lb)
23 kg
(50 lb)
48.3 kpa
(7 psi)
704906972
________
77
Page 80
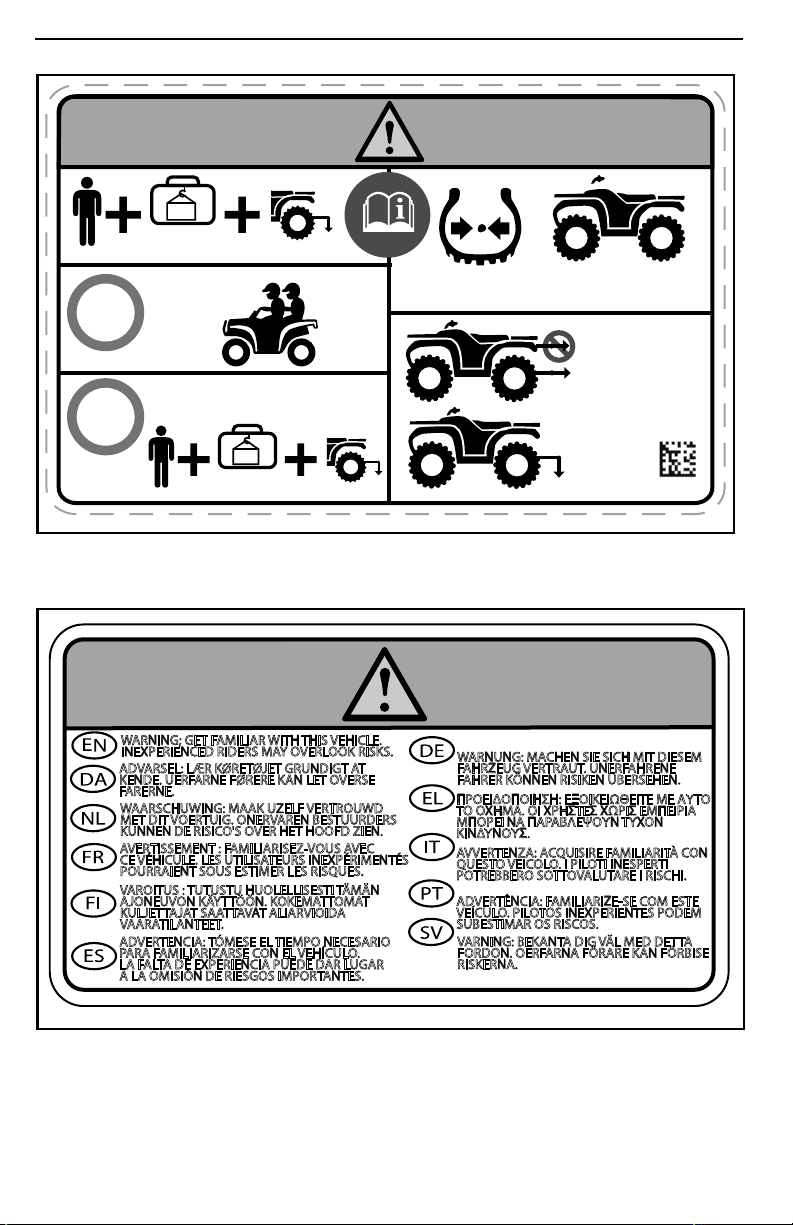
IMPORTANT ON-PRODUCT LABELS (ALL COUNTRIES EXCEPT CANADA/UNITED STATES)
=
< 272 kg (600 lb)
90 km/h
55 mph
90 km/h
55 mph
> 132 kg (290 lb)
704906309
LABEL 7 - 2-UP MODELS
Label 8
kPa
48.3 kpa
(7 psi)
590 kg
(1300 lb)
23 kg
(50 lb)
48.3 kpa
(7 psi)
704906309
WARNING; GET FAMILIAR WITH THIS VEHICLE.
INEXPERIENCED RIDERS MAY OVERLOOK RISKS.
ADVARSEL: LÆR KØRETØJET GRUNDIGT AT
KENDE. UERFARNE FØRERE KAN LET OVERSE
FARERNE.
WAARSCHUWING: MAAK UZELF VERTROUWD
MET DIT VOERTUIG. ONERVAREN BESTUURDERS
KUNNEN DE RISICO'S OVER HET HOOFD ZIEN.
AVERTISSEMENT : FAMILIARISEZ-VOUS AVEC
CE VÉHICULE. LES UTILISATEURS INEXPÉRIMENTÉS
POURRAIENT SOUS ESTIMER LES RISQUES.
VAROITUS : TUTUSTU HUOLELLISESTI TÄMÄN
AJONEUVON KÄYTTÖÖN. KOKEMATTOMAT
KULJETTAJAT SAATTAVAT ALIARVIOIDA
VAARATILANTEET.
ADVERTENCIA: TÓMESE EL TIEMPO NECESARIO
PARA FAMILIARIZARSE CON EL VEHÍCULO.
LA FALTA DE EXPERIENCIA PUEDE DAR LUGAR
A LA OMISIÓN DE RIESGOS IMPORTANTES.
EN-FR-704905720-DEC
LABEL 8
_______
78
SAFETY I
WARNUNG: MACHEN SIE SICH MIT DIESEM
FAHRZEUG VERTRAUT. UNERFAHRENE
FAHRER KÖNNEN RISIKEN ÜBERSEHEN.
ΠΡΟΕΙΔΟΠΟΙΗΣΗ: ΕΞΟΙΚΕΙΩΘΕΙΤΕ ΜΕ ΑΥΤΟ
ΤΟ ΟΧΗΜΑ. ΟΙ ΧΡΗΣΤΕΣ ΧΩΡΙΣ ΕΜΠΕΙΡΙΑ
ΜΠΟΡΕΙ ΝΑ ΠΑΡΑΒΛΕΨΟΥΝ ΤΥΧΟΝ
ΚΙΝΔΥΝΟΥΣ.
AVVERTENZA: ACQUISIRE FAMILIARITÀ CON
QUESTO VEICOLO. I PILOTI INESPER TI
POTREBBERO SOTTOVALUTARE I RISCHI.
ADVERTÊNCIA: FAMILIARIZE-SE COM ESTE
VEÍCULO. PILOTOS INEXPERIENTES PODEM
SUBESTIMAR OS RISCOS.
VARNING: BEKANTA DIG VÄL MED DETTA
FORDON. OERFARNA FÖRARE KAN FÖRBISE
RISKERNA.
NFORMATION
704905720
________
Page 81
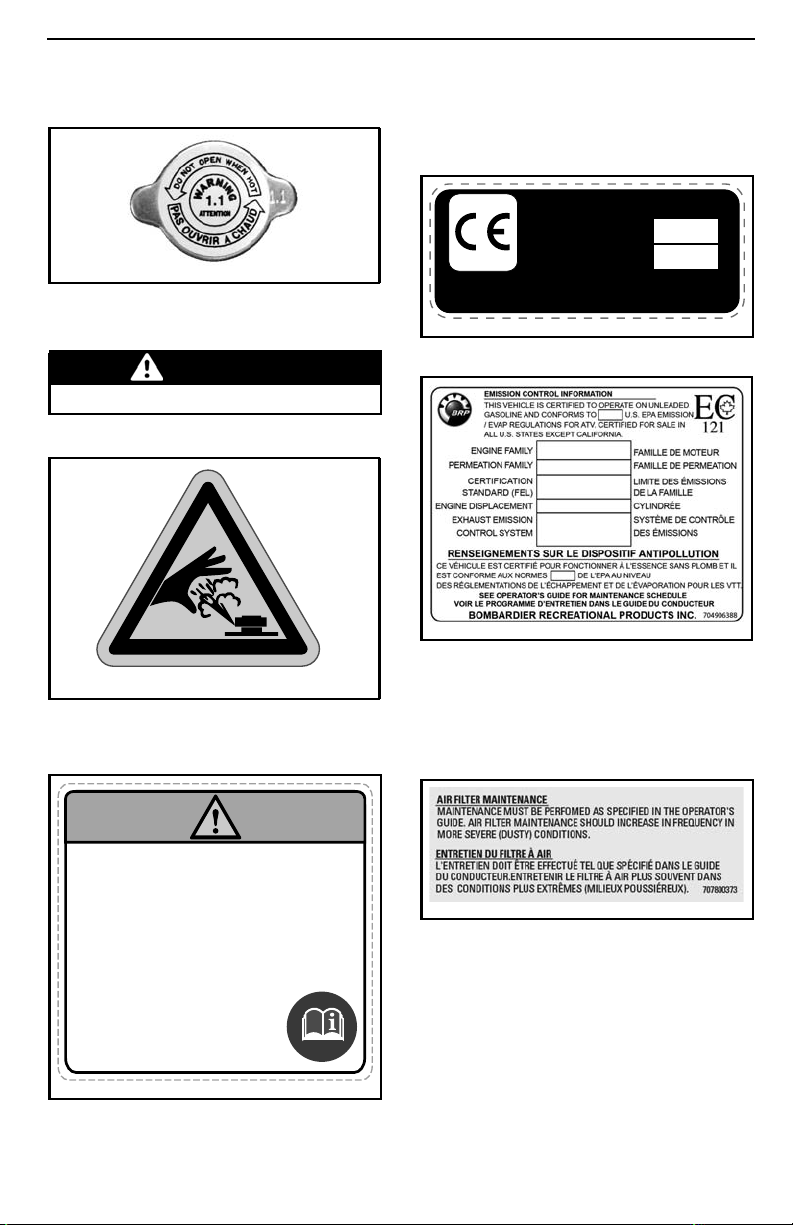
IMPORTANT ON-PRODUCT LABELS (ALL COUNTRIES EXCEPT CANADA/UNITED STATES)
Label 9
vmo2010-010-100_a
LABEL 9
Label 10
WARNING
Do not open when hot.
704903688
LABEL 10
Label 11
704903688
Compliance Labels
These labels indicate vehicle's compliance.
POWER
PUISSANCE
WET WEIGHT
POIDS EN ETAT
704904557
Representative: BRP Europe N.V., Skaldenstraat 125, Ghent, Belgium, 9042.
704904557
EN 15997
DE MARCHE
UNDER SEAT
704906388
TYPICAL: UNDER SEAT - APPLICABLE WHEN
EQUIVALENT TO A M ODEL CERTIFIED TO
US EPA STANDARDS
kW
kg
Technical Information
Labels
Always make sure to properly install passenger seat or
glove box in place before riding.
TO INSTALL PASSENGER SEAT
.Ensure that the latch lever is in the open position by pulling it
towards the front of seat.
.Using a forward motion, insert both front tabs of the seat into the
vehicle anchor housings.
.Rotate downwards to engage the rear latch.
.Close the latch lever by pushing it rearwards to secure the seat
in position.
.Check if the seat is firmly secured in position before using it.
TO INSTALL GLOVE BOX
• Open glove box cover and turn handle to the unlock position.
• Align and insert glove box latching system into
this vehicle's “LINQ” opening.
• Turn handle to the lock position.
• Close cover and verify if glove box is locked
in position.
FOR MORE DETAILS REFER TO OPERATOR’S GUIDE
704904442
LABEL 11 - UNDER GLOVE BOX
________
SAFETY INF
704904442
707800373
UNDER SEAT
ORMATION
________
79
Page 82

IMPORTANT ON-PRODUCT LABELS (ALL COUNTRIES EXCEPT CANADA/UNITED STATES)
This page is
intentionally blank
_______
80
SAFETY I
NFORMATION
________
Page 83

VEHICLE
INFORMATION
_______________
81
Page 84
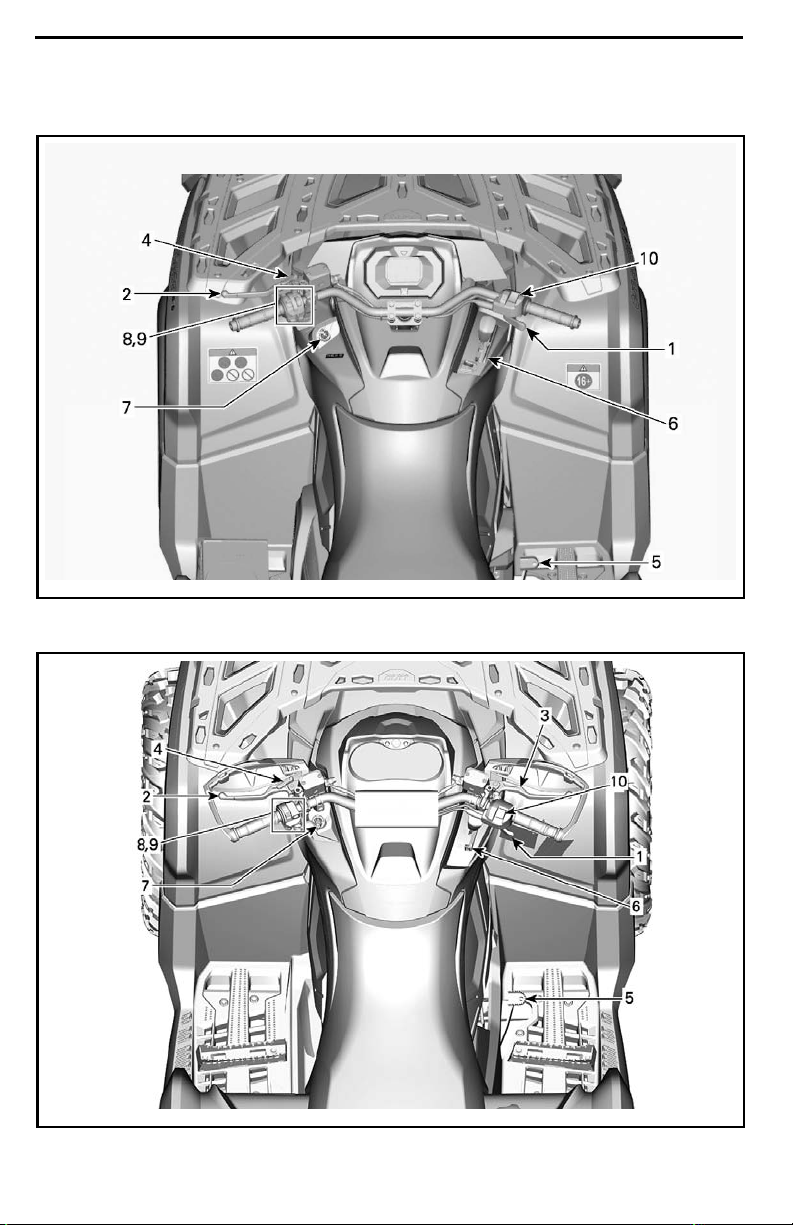
CONTROLS
All models except X xc
219001753-001_c
X xc models
219001910-100_a
______________
82
Page 85
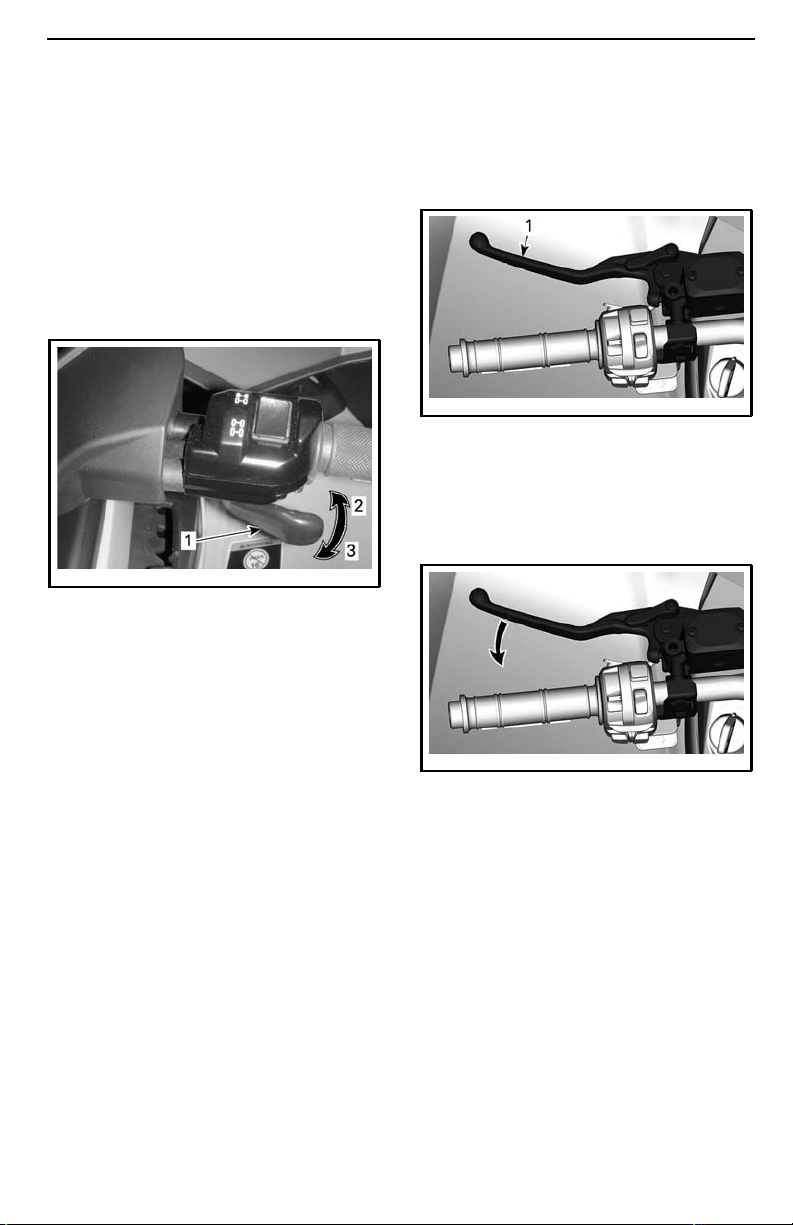
CONTROLS
1) Throttle Lever
The throttle lever is located on the RH
side of the handlebar.
The throttle lever controls the engine
speed.
To increase or maintain vehicle speed,
press the th ro ttle lever with your right
thumb.
To decrease vehicle speed, release the
throttle lever.
vmo2012-012-006_a
TYPICAL
1. Throttle lever
2. To accelerate
3. To decelerate
2) LH Brake Lever
All mod els except X xc
The brake lever is located on the LH
side of the handlebar.
219001872-001_d
1. Brake lever
The brake lever function is to slow
down or stop the vehicle.
When the brake lever is compressed,
the front and rear brakes are applied.
219001872-001_b
Braking effect is proportional to the
forceappliedonthelever.
X xc models
The LH brake lever is located on the LH
side of the handlebar.
_______________
83
Page 86
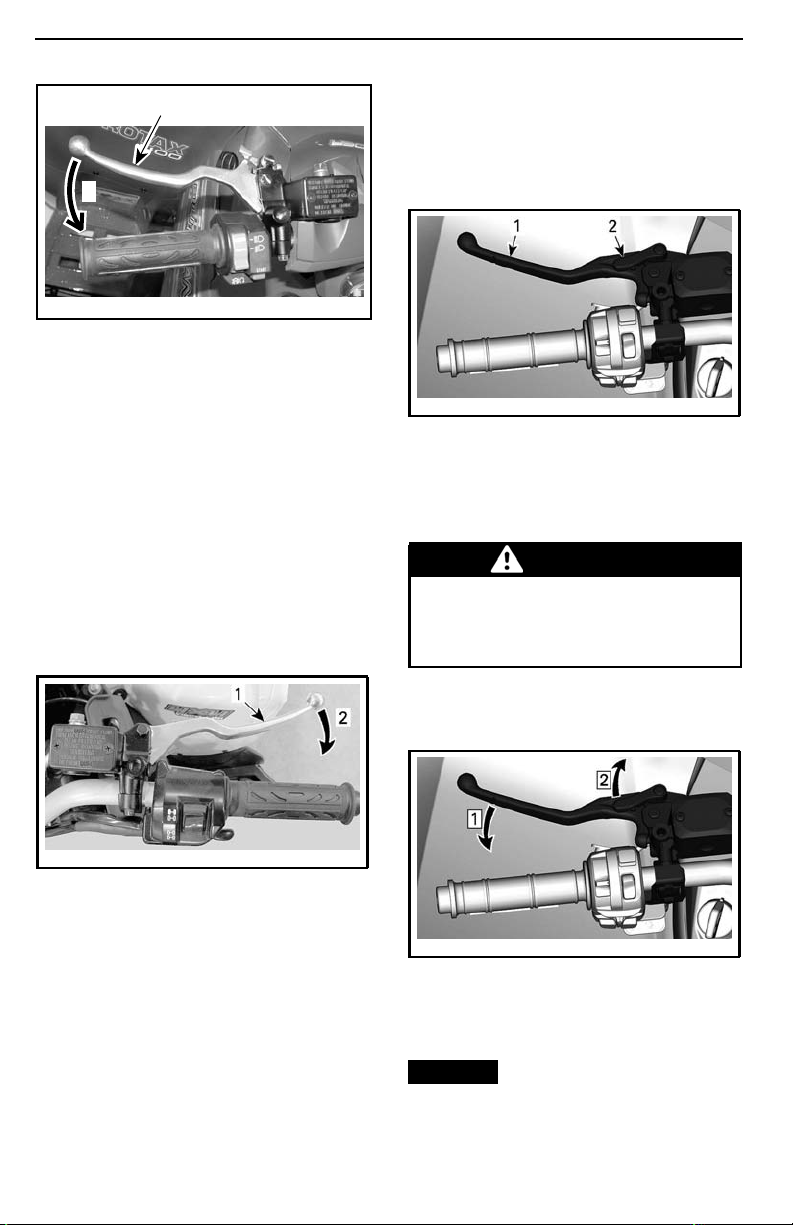
CONTROLS
1
2
V07K01Y
TYPICAL
1. Brake lever
2. To apply brakes
The LH brake lever function is to slow
down or stop the vehicle.
When the brake lever is pressed, the
rear brakes are applied.
Braking effect is proportional to the
forceappliedonthelever.
3) RH Brake Lever
X xc models
The RH brake lever is located on the RH
side of the handlebar.
4) Parking Brake Lever
All mod els except X xc
The parking brake lever is located on
the LH side of the handlebar.
219001872-001_c
1. Brake lever
2. Parking brake lever
The parking brake function is to maintain brakes to all wheels to prevent vehicle from moving when parked.
WARNING
Always use the parking brake and
engage the PARK position on the
shift lever when the vehicle is not
in operation.
vmo2008-014-003_a
TYPICAL
1. Brake lever
2. To apply brakes
The RH brake lever function is to slow
down or stop the vehicle
When the brake lever is pressed, the
front brakes are applied.
When released, the brake lever should
automatically return to its original pos ition.
Braking effect is proportional to the
forceappliedonthelever.
______________
84
To engage the parking brake proceed
as shown:
219001872-001_a
Step 1: Apply brakes
Step 2: Lock brakes
NOTE: The parking brake lever can be
set to several positions.
NOTICE
When the parking brake is
applied, make sure the vehicle stays
securely in place.
Page 87
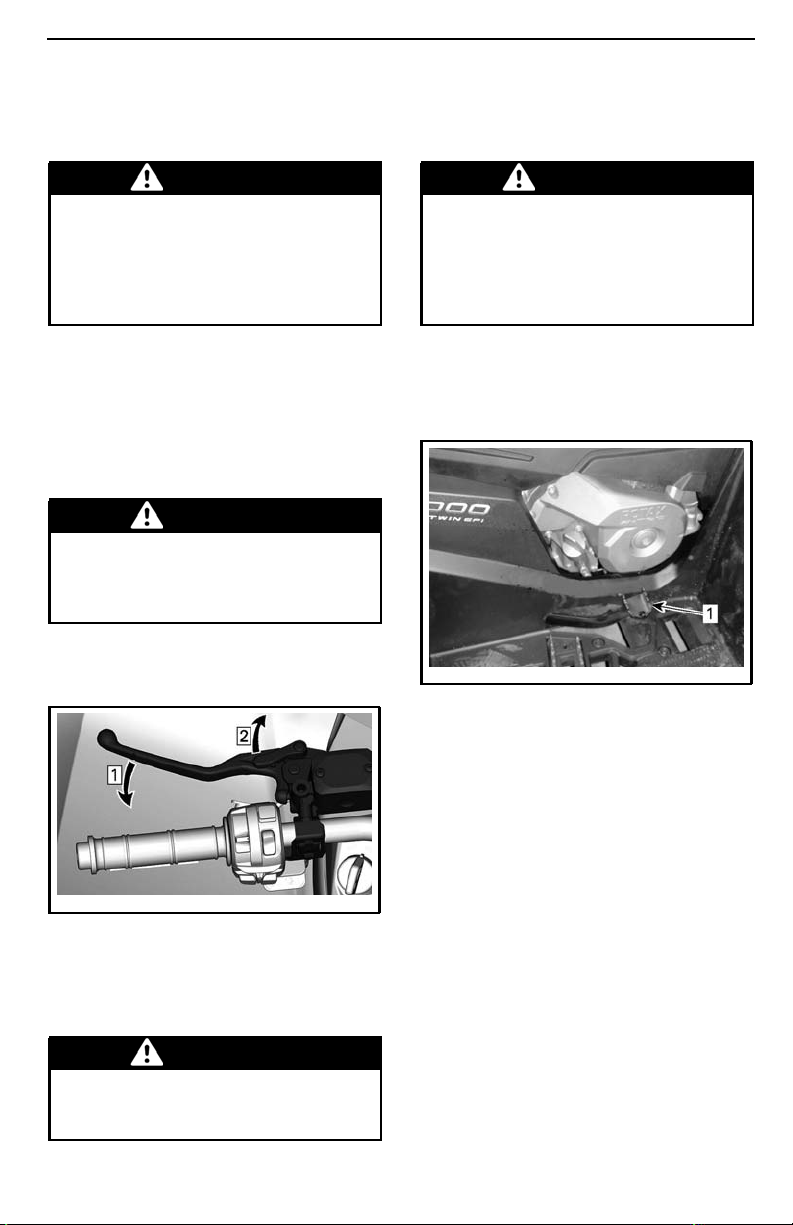
CONTROLS
To release the parking brake, simply
squeeze the brake lever. It should return to the rest position.
WARNING
Make sure parking brake is released before operating the vehicle. If parking brake is left ON
while riding, it may cause damage
to the brake system and cause loss
of braking capacity and/or fire.
X xc models
The parking brake lever is located on
the LH side of the handlebar.
The parking brake function is to maintain brake to rear wheels to prevent vehicle from moving when parked.
WARNING
Always use the parking brake and
engage the PARK position on the
shift lever when the vehicle is not
in operation.
To engage the parking brake proceed
as shown:
To release the parking brake, simply
squeeze the brake lever. It should return to the rest position.
WARNING
Make sure parking brake is released before operating the vehicle. If parking brake is left ON
while riding, it may cause damage
to the brake system and cause loss
of braking capacity and/or fire.
5) Brake Pedal
The brake pedal is located on the RH
side footrest.
vmo2012-012-015_a
1. Brake pedal
219001872-001_a
TYPICAL
Step 1: Apply brakes
Step 2: Lock brakes
NOTE: The parking brake lever can be
set in several positions.
WARNING
Ensure when the parking brake is
applied that the vehicle stays securely in place.
_______________
When the brake pedal is pressed
down, the rear brake is applied.
When released, the brake pedal should
return to its original position.
Braking effect is proportional to the
force applied on the pedal.
NOTE: The brake will have also an effect on front wheels through the drive
train when 4WD is engaged.
Should the brake lever system fail, the
rear brake can be used by depressing
the brake pedal.
6) Shift Lever
The shift lever is located on th
of the vehicle near steering column.
eRHside
85
Page 88
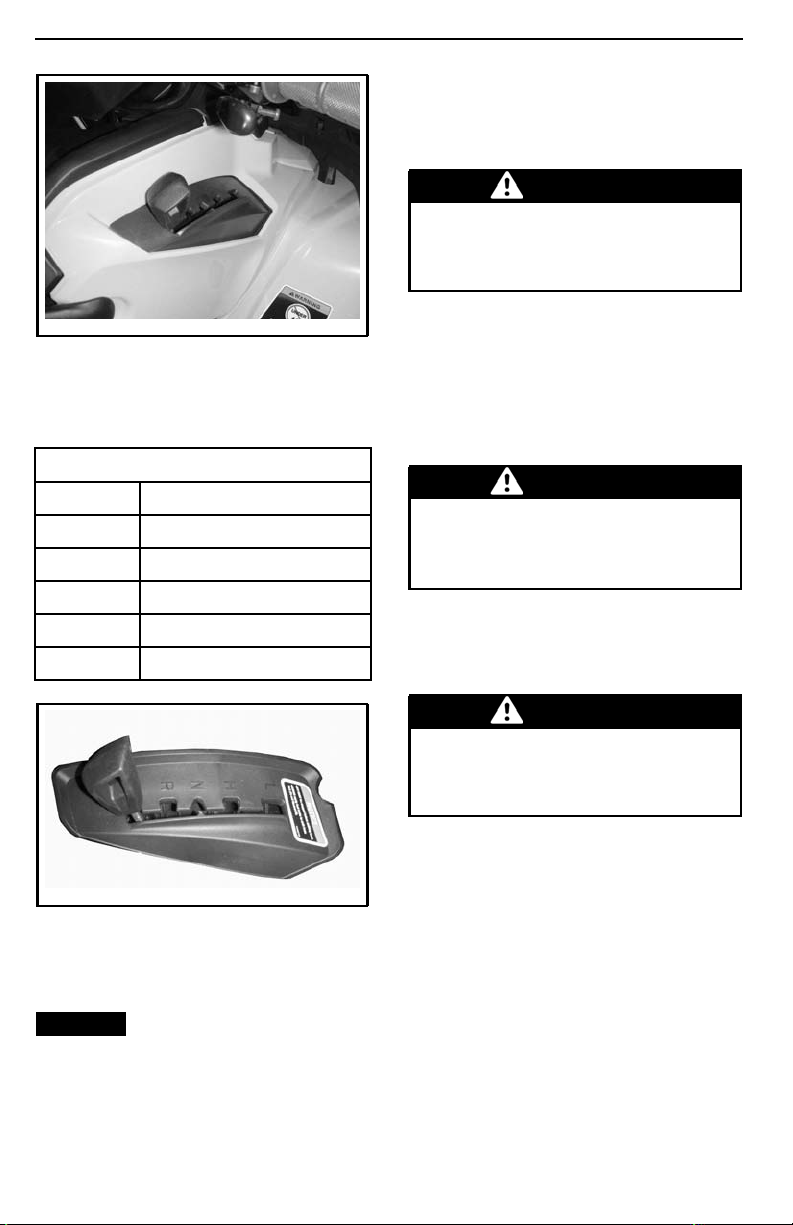
CONTROLS
P: Park
The park position locks the gearbox to
help prevent vehicle movement.
WARNING
Always use the PARK (P) position
when the vehicle is not in operation. The vehicle can roll if the
shiftleverisnotsettoP(PARK).
vmo2012-012-010
SHIFT LEVER LOCATION
The shift lever is used to change the
gearbox position.
The shift lever has 5 positions:
SHIFT LEVER POSITIONS
POSITION GEAR
PPark
RReverse
N Neutral
H High range (forward)
L Low range (forward)
vmo2012-012-036
SHIFT PATTERN
The vehicle must be stopped and
brakes applied prior to selectin
gear.
NOTICE
signed to shift while vehicle is moving.
This gearbox is not de-
gany
R: Reverse
The reverse position allow s the vehicle
to go backwards.
NOTE: In reverse operation, the engine's RPM is limited, thus limiting the
vehicle reverse speed.
WARNING
When driving downhill in reverse,
gravity can increase the vehicle
speed above the set limited reverse speed.
Neutral
The neutral position disengages the
gearbox.
WARNING
Always use the PARK (P) position
when the vehicle is not in operation. The vehicle can roll if the
shift lever is set to N (NEUTRAL).
High Range (Forward)
This position selects the high speed
range of the gearbox. It is the normal
driving speed range. It allows the vehicle to reach its maximum speed.
Low Range (Forward)
This position selects the low speed
range of the gearbox. It allows the vehicle to move slowly with maximum
torque at the wheels.
______________
86
Page 89
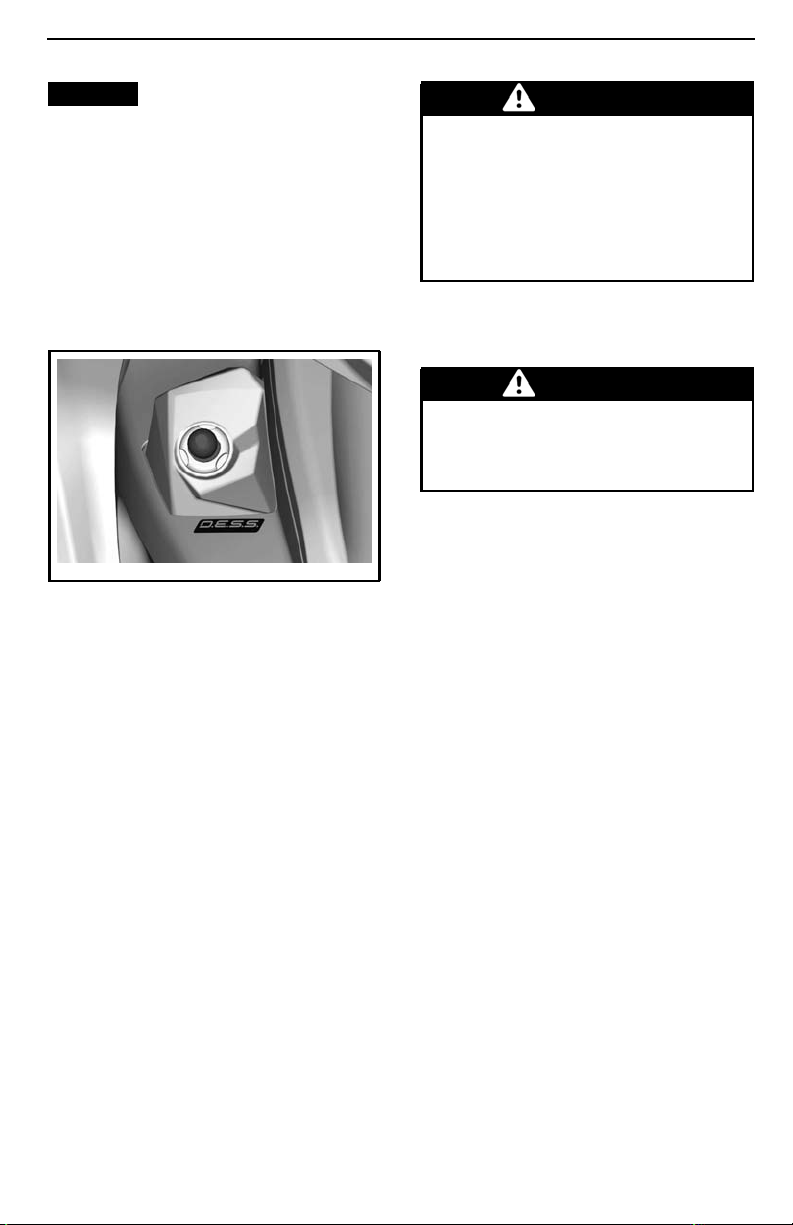
CONTROLS
NOTICE
to pull a trailer, carry heavy cargo,
go over obstacles or drive uphill and
downhill.
Use the low speed range
7) RF D.E.S.S Key
The RF D.E.S.S. key must be securely
attached to the D.E.S.S. post before
starting the engine
The D.E.S.S. post is located on the LH
side of cen tral panel below handlebar.
219001753-002
D.E.S.S. POST
Digitally Encoded Security System
(D.E.S.S.)
The D.E.S.S. key contain an electronic
circuit that gives it a unique electronic
serial number.
The D.E.S.S. system reads the key
code and allows engine starting for
keys it recognizes.
D.E.S.S. Flexibility
The D.E.S.S.of your vehiclecan be programmed by your authorized Can-Am
dealer to accept up to 8 different keys.
IfyouhavemorethanoneD.E.S.S.
equipped Can-Am vehicle, each can
be programmed by your authorized
Can-Am dealer to accept the other vehicle D.E.S. S. keys.
WARNING
Rollovers, tipovers, collisions and
loss of control resulting in serious injury or death are possible
with the performance or normal
keys. Using the normal key is not
a substitute for the operator being
prepared, qualified, and operating
with care.
Normal Key
The normal key is green
WARNING
On steep downhills, the engine
speed limiter may not prevent the
vehicle from accelerating beyond
this speed.
The normal key limits the vehicle rate
of acceleration and the vehicle speed
to 70 km/h (43 MPH).
This key may be useful for riders who
prefer more gradual acceleration, or
for ridin g in environmen ts whe re full
speed and high acceleration are not
desirable. For example, in narrow,
winding trails, operators may prefer
the normal key.
Performance Key
The performance key is grey and allows the user to access the full torque
of the engine as well as the top speed
of the vehicle.
This may be useful for riders who prefer crisper throttle response, and for
environments where higher speeds
and greater acceleration are appropriate. For example, in wide-open,
straight trails, operators may prefer
the performance key.
Types of Keys
The vehicle is delivered w ith 1 normal
key (green) and 1 performance key
(Grey).
_______________
87
Page 90
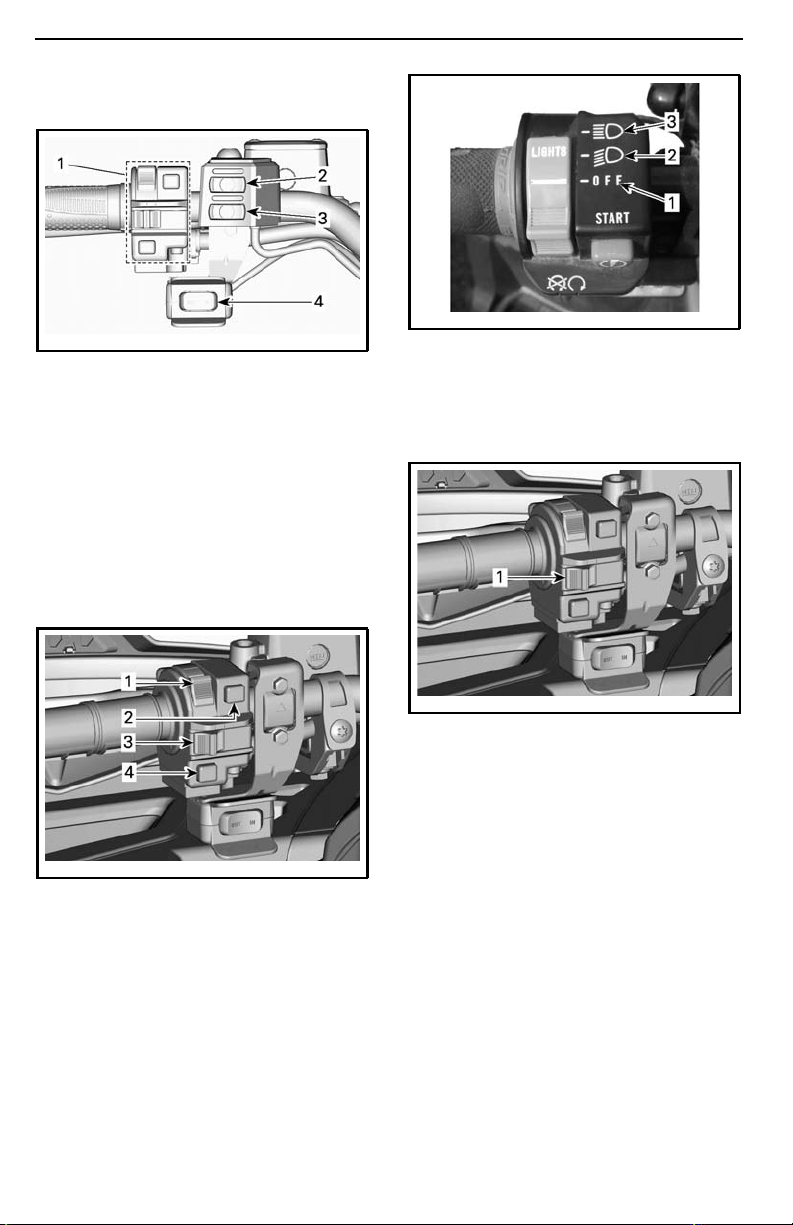
CONTROLS
8) LH Handlebar Switches
219001854-002_a
1. Multifunction switch (see details in this
section)
2. Heated grips switch (see EQUIPMENT for
details)
3. Heated throttle lever switch (see
EQUIPMENT for details)
4. Winch switch (see EQUIPMENT for details)
9) Multifunction Switch
The multifunction switch is located on
the LH side of the handlebar.
The controls located on this multifunction switch are:
219001733-003_a
HEADLIGHT SWITCH FUNCTIONS
1. Lights OFF
2. Low beam and taillight
3. High beam and taillight
Emergency Engine Stop Switch
219001731-001_a
TYPICAL — M ULTIFUNCTION SWITCH
1. Headlight switch
2. Engine start button
3. Emergency engine stop switch
4. Override/DPS/ACS button (if applicab le)
Low/High/OFF Headlight Switch
This switch is used to select either the
headlights low or high beams or
to turn
them off.
______________
88
219001731-001_b
TYPICAL
1. Emergency engine stop switch
This switch can be used to stop the engine and as an emergency control.
To stop engine, set the emergency engine stop switch to the S TOP position.
NOTE: While the engine can be
stopped by removing the D.E.S.S. key
from the D.E.S.S. post, we recommend the engine be stopped by setting
theemergencyenginestopswitchto
the STOP position.
Page 91
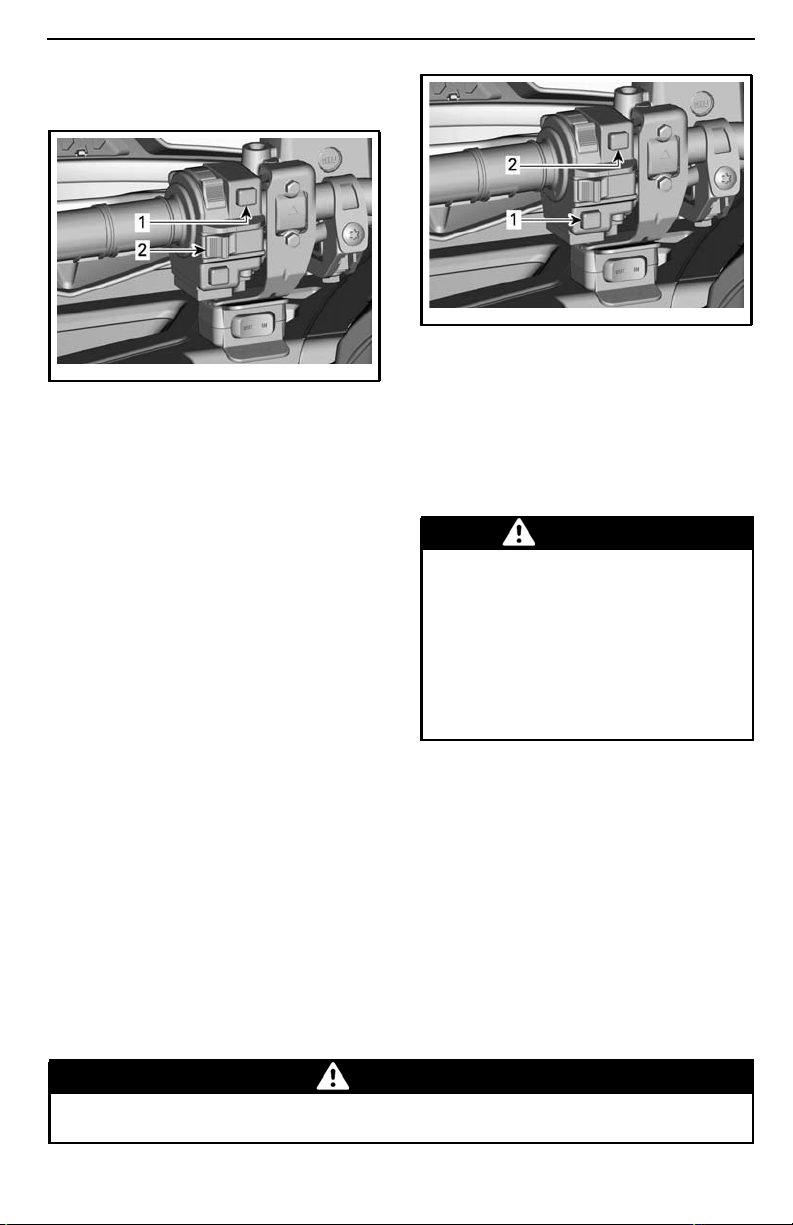
Engine Start Button
219001731-001_d
TYPICAL
1. Engine start button
2. Emergency engine stop switch
When eng ine start button is pressed
and held, it starts the engine.
NOTE: To allow engine starting, the
D.E.S.S. key must be securely installed
on the D.E.S.S. post and the emergency engine stop button set to RUN.
To power up the vehicle without starting the engine, refer to
THE ELECTRICAL SYSTEM
WAKING UP
.
Override/DPS/ACS Button
Depending on the vehicle model, this
button has up to 3 functions.
CONTROLS
219001731-001_c
TYPICAL
1. Override/DPS/ACS button
2. Engine start button
Override Function
The override switch main function is to
bypass the engine speed limiter in reverse operation by allowing maximum
engine torque.
WARNING
Use the "override" mode only if the
vehicle is caught in mud or other
soft terrain and the "low range" is
not enough. Make sure the area is
secure before using the "override"
mode. Do not use the "override"
mode when driving normally in
reverse, this would result in excessive speed.
To engage the override function, proceed as follows:
While the shift lever is set to REVERSE
position.
1. Ensure that the vehicle is stopped.
2. Press and hold the override button
then press the throttle lever gradually.
While reading this Operator’s Guide, remember that:
WARNING
Indicates a potential hazard that, if not avoided, could result in serious
injury or death.
_______________
89
Page 92
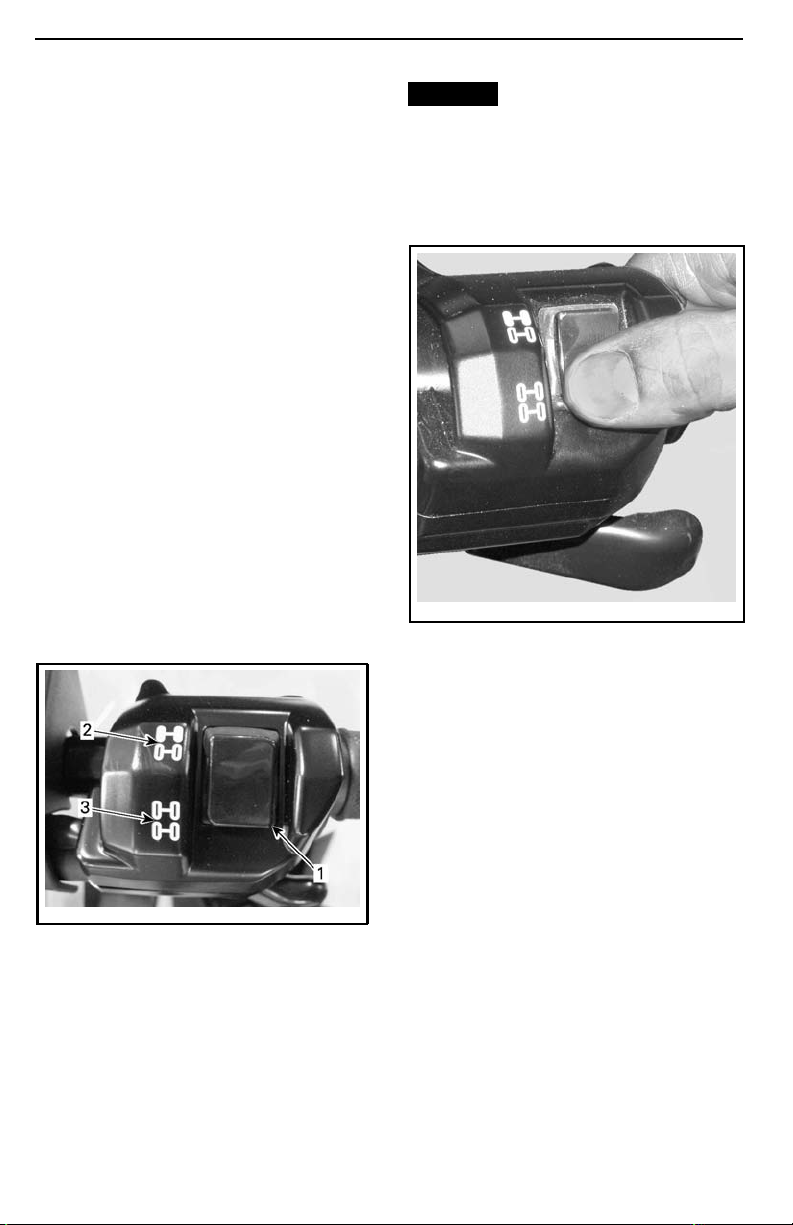
CONTROLS
NOTE: When using the override function, the gauge will scroll an OVER-
RIDE message to confirm that the
function is activated.
3. To disengage the override function,
simply release the override button.
DPS Function (Models with DPS)
Thisbuttonisalsousedtochangethe
DPS (Dynamic Power Steering) mode.
For complete information on DPS
modes, refer to
TUNE YOUR RIDE
.
ACS Function (Limited Models)
Thisbuttonisalsousedtochangethe
ACS suspension setting.
For complete information on DPS setting, refer to
TUNE YOUR RIDE
.
10) 2WD/4WD Selector
Switch
The 2WD/4WD selector is located o n
the RH side of the handlebar.
This switch is used to select the 2WD
or 4WD modes.
NOTICE
Mechanical damage
may occur if the 2WD/4WD selector switch is us ed while vehicle is
moving.
To engage the 4WD mode, press the
switch down.
V07I0DY
4WD MODE - TYPICAL
vmo2012-012-007_a
TYPICAL
1. Selector
2. 2WD position
3. 4WD position
Bring the vehicle to a complete stop
with the engine idling before changing
between 2WD and 4WD modes or the
opposite.
______________
90
To engage the 2WD mode, press the
switch up.
Page 93
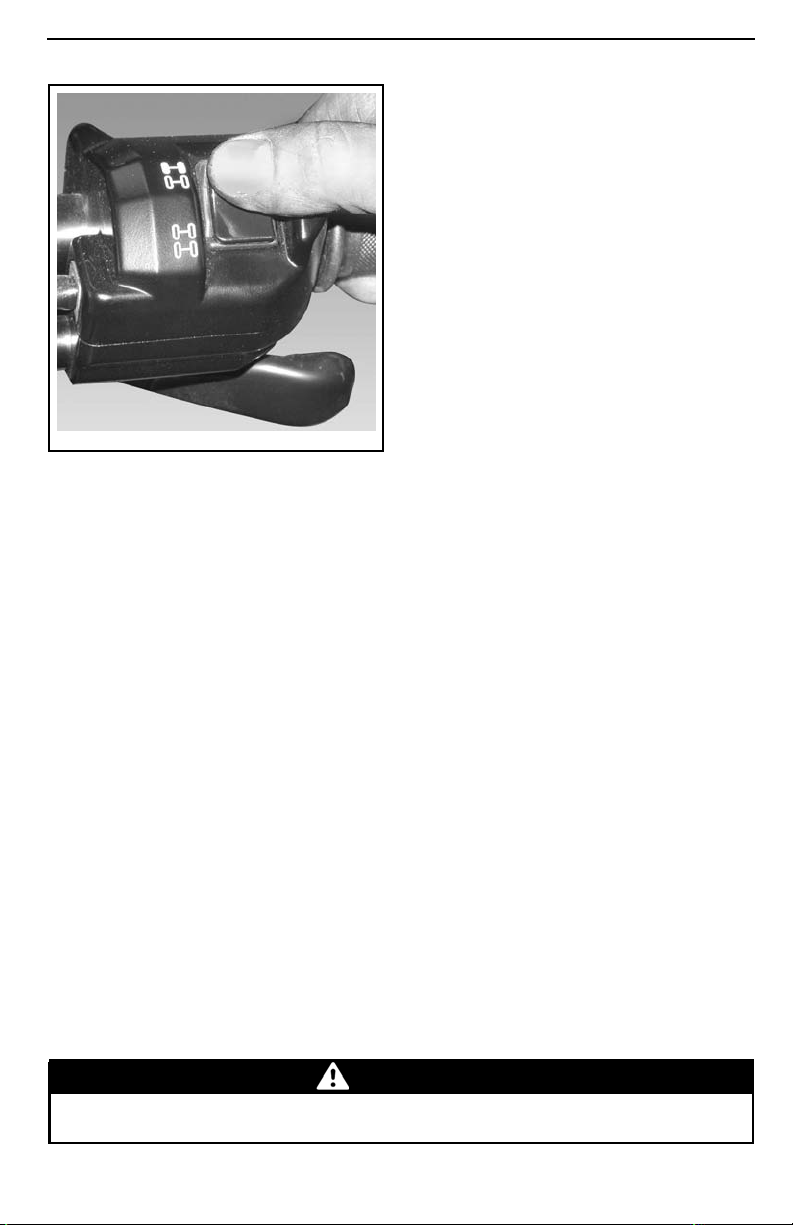
V07I0EY
2WD MODE - TYPICAL
CONTROLS
While reading this Operator’s Guide, remember that:
WARNING
Indicates a potential hazard that, if not avoided, could result in serious
injury or death.
_______________
91
Page 94
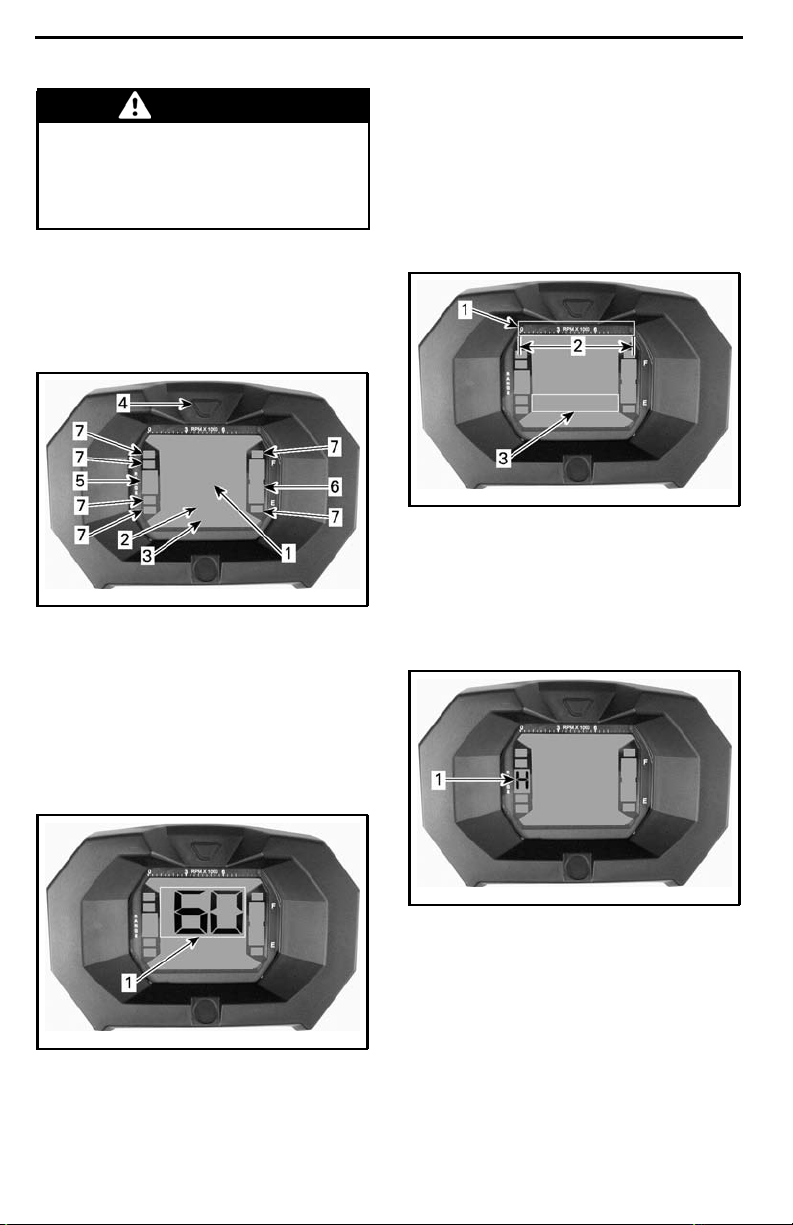
MULTIFUNCTION GAUGE (LCD)
WARNING
Reading the multifunction gauge
display can distract from the operation of the vehicle, particularly
from constantly scanning the environment.
Multifunction Gauge
Description
The multifunction gauge is located in
the gauge support.
vmo2012-012-029_a
1. Display 1
2. Display 2
3. Display 3
4. Display selector button
5. Gearbox position display
6. Fuel level display
7. Indicator lamps
Tachometer
Displays the engine speed in rev olutions per minute (RPM). Multiply by
1000 to obtain the actual RPM.
NOTE: RPM can also be displayed via
Display 2 (mode) display. Refer to
PLAY 2 (MODE)
vmo2012-012-029_k
1. Tachometer
2. Operating range
3. Tachometer via display 2 (mode)
in this section.
DIS-
Gearbox Position Display
This display will shows the selected
gearbox position.
Speedometer
Display the actual vehicle speed.
vmo2012-012-029_i
1. Vehicle speed (Display 1
______________
92
)
vmo2012-012-029_j
1. Transmission position
Page 95
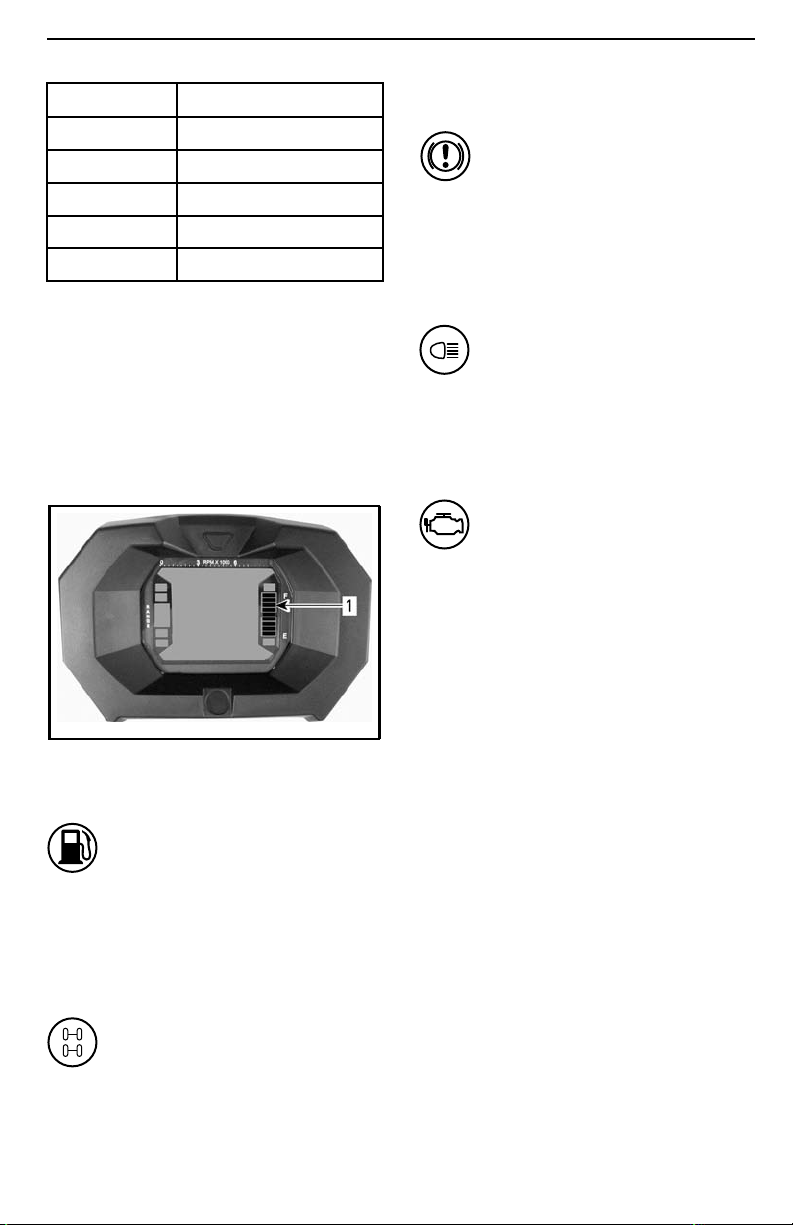
MULTIFUNCTION GAUGE (LCD)
DISPLAY FUNCTION
PPark
RReverse
N Neutral
HHighgear
L Low gear
NOTE: If the letter “E” is displayed
in the transmission position display, it
meansthatthereisaelectricalcommunication error. Contact an authorized
Can-Am dealer.
Fuel Level Display
Bar gauge that continuously indicates
the fuel level in the fuel tank.
Parking Brake Indicator Lamp
When this indicator is ON, it indicates
the brakes are applied for more than 15
seconds (while riding).
High Beam Indicator Lamp
When this indicator is ON, it indicates
that high beam is selected.
Check Engine Indicator Lamp
When this indicator is ON, it indicates
an engine fault code, look for a message at the LCD display.
Refer to
more details.
TROUBLESHOOTING
for
vmo2012-012-029_n
1. Fuel level display
Low fuel level Indicator Lamp
When this indicator turns ON, it indicates that there is approximately 5 L
(1.3 U.S. gal.) of fuel left in fuel tank.
4WD Indicator Lamp
When this indicator is ON, it indicates
the 4WD mode is selected.
_______________
93
Page 96
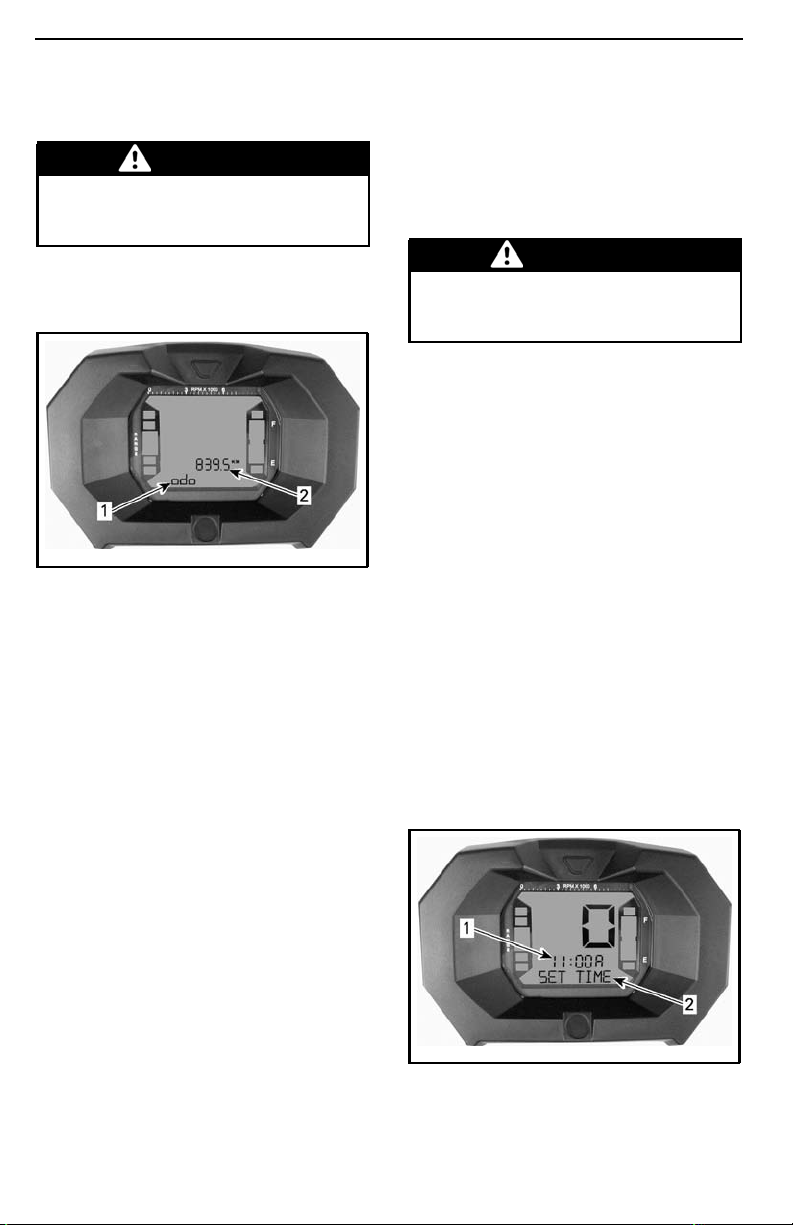
MULTIFUNCTION GAUGE (LCD)
Multifunction Gauge
Features
WARNING
Never adjust or set functions on
the multifunction gauge while riding the vehicle.
The modes can be displayed by pressing the selector button.
vmo2012-012-029_m
1. Display 2 (mode)
2. Display 3 (mode/message)
Odometer
Records the total distance travelled.
Clock
Displays current time.
Trip M et er
Records the distance travelled since it
has been reset.
Press and HOLD display selection buttontoreset.
Tachometer
Displays actual engine speed in revolutions per minute (RPM).
Multifunction Gauge
Set-Up
WARNING
Never adjust or set functions on
the multifunction gauge while riding the vehicle.
Unit Selection (MPH vs KM/H)
This multifunction gauge is factory preset in Imperial units but it is possible
to change it to Metric units, contact an
authorized Can-Am dea ler for unit settings.
NOTE: All features will have their units
changed all together.
Language Selection
The gauge display language can be
changed. Refer to an authorized
Can-Am dealer for language availability
and setup the gauge to your preference.
Clock Setting
To set current time, proceed as follows:
1. Select the clock display.
Hour Meter (Trip Time)
Records the vehicle running time
when the electrical system is activated
since it has been reset.
Press and HOLD display selection buttontoreset.
Engine Hour Meter
Records engine running time.
______________
94
vmo2012-012-029_o
1. Time (Display 2)
2. Message (Display 3)
Page 97

2. Press and HOLD button (SET TIME
will appear on display 3).
3. Choose the 12-hour (12H) or
24-hour (24H) format by pressing
button.
4. If the 12-hour format was selected,
choose Am ("A") or Pm ("P") by pressing button.
5. Choose hour first digit by pressing
button.
6. Choose hour second digit by pressing button.
7. Choose minutes first digit by pressing button.
8. Choose minutes second digit by
pressing button.
9. Press button to enter settings
(CLOCK will appear on display 3).
MULTIFUNCTION GAUGE (LCD)
_______________
95
Page 98
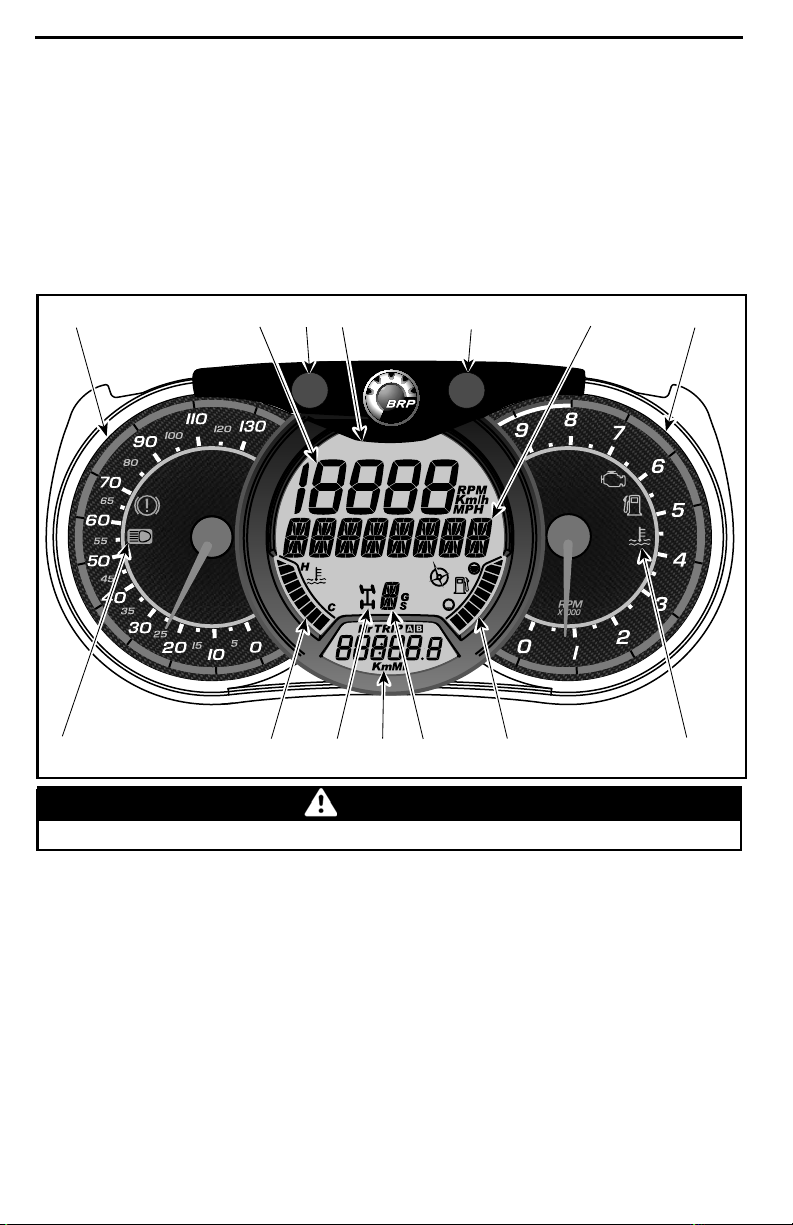
MULTIFUNCTION GAUGE (ANALOG/DIGITAL)
Multifunction Gauge Description
The Multifunction Gauge (Analog/digital) is located in the gauge support.
The Multifunction Gauge (Analog/digital) is comprised of a digital gauge and two
analog gauges (speedometer and tachometer).
The engine temperature and fuel level bar graphs are comprised in the digital
gauge.
Theindicatorslampsarecomprisedinbothanaloggauges.
10
2
M
M
12 13 85
S
S
9
111 376
5
vmo2013-009-034
WARNING
Do not adjust the display while riding. You could lose control.
4
______________
96
Page 99
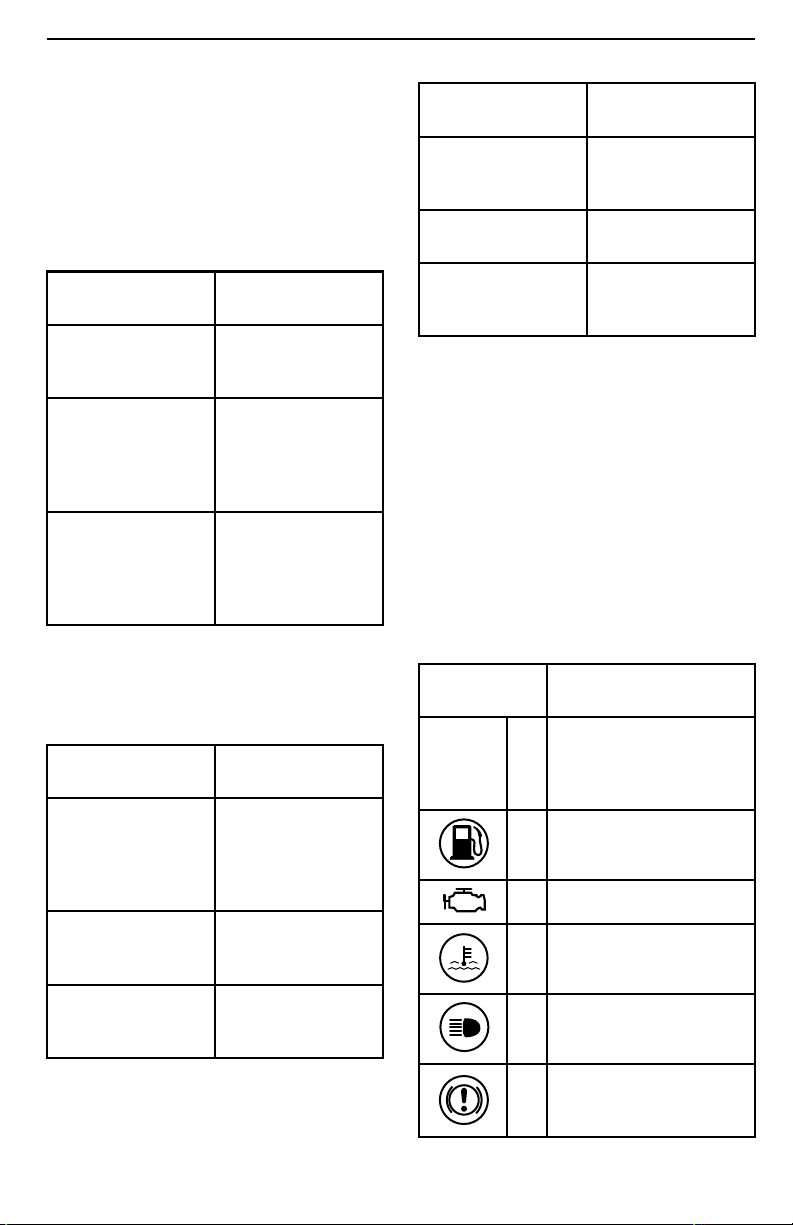
MULTIFUNCTION GAUGE (ANALOG/DIGITAL)
1) Analog Speedometer
Displays the actual vehicle speed in
km/h or mph.
2) MODE (M ) Button
Pressing the MODE (M) button will
scroll throughthe functions of the main
digital display.
FUNCTION
SEQUENCE
Air Suspension
(Limited model
only)
Numerical Display
is flashing
Multifunction
display is flashing
OPTIONS
Press ACS button
to change setting
(1 to 6)
Press SET (S) to
scroll and select
desired function
and press MODE
(M) to confirm
Press SET (S) to
scroll and select
desired function
and press MODE
(M) to confirm
3) SET (S) Button
Pressing the SET (S) b utto n will scroll
through the functions of the secondary
digital display.
FUNCTION
SEQUENCE
Clock
Cumulative
distance
odometer
Trip distance
—odometerA
(TRIP A)
INFORMATION
DISPLAYED
XX:XX (24:00
time base)
XX:XX A or P
(12:00 AM/PM
time base)
XXXXX.X km or mi
XXXXX.X km or mi
FUNCTION
SEQUENCE
Trip distance
—odometerB
(TRIP B)
Engine time
chronometer (Hr)
Trip tim e
chronometer
(HrTRIP)
INFORMATION
DISPLAYED
XXXXX.X km or mi
XXXXX.X
XXXXX.X
To reset any trip functions, push and
hold the MODE (M) button for three
seconds.
4) Analog Tachometer (RPM)
Measures engine speed in revolutions
per minute (RPM). Multiply by 1000 to
obtain actual RPM.
5) Indicator Lamps
Indicator lamps will inform you of various conditions or problems.
An indicator lamp can flash alone or in
combination with another lamp.
INDICATOR
LAMP(S)
All
indicator
lamps
On
On
On Check Engine
On
On
DESCRIPTION
All indicator lamps are
activated when ignition
switch is ON and the
engine is not started
Low Fuel
High Engine
Temperature
Headlights in the HIGH
beam position
Brakes are applied for
more than 15 seconds
On
while riding
_______________
97
Page 100

MULTIFUNCTION GAUGE (ANALOG/DIGITAL)
6) Main Digital Display
Displays useful real-time information
to the rider.
7) Multifunction Display
The vehicle speed or the engine revolutions (RPM) can be displayed. See
MODE (M) BUTTON
in this section.
Importantmessagescanalsobedisplayed. Refer to table below.
MESSAGE DESCRIPTION
Message displayed
when the brakes
BRAKE
PERFORMANCE
KEY
OVERRIDE
are applied
continuously for
15 seconds.
Displayed at power
up when a the
performance key
is used.
Override is
displayed when
the override switch
is pressed and the
shift lever is set to
reverse gear.
If an abnormal engine condition occurs, a message can be combined
withapilotlamp. Referto
BLESHOOTING
for details.
TROU-
8) Fuel Level Indicator
Bar graph that continuously indicates
the level of fuel left in the fuel tank.
9) Gearbox Position Indicator
Displays the selected gearbox position.
Limited Model Only
As a second function, will indicate the
current ACS position setting.
10) Engine Temperature Indicator
Bar graph that continuously indicates
the engine coolant temperature.
11) Numerical Display
The vehicle speed or the engine revolutions (RPM) can be displayed. See
MODE (M) BUTTON
in this section.
12) 4WD Mode Indicator
When this indicator is ON, the 4WD
system is activated.
13) Secondary Digital Display
Displays useful real time inform ation to
the rider. For display function informations, refer to
SET (S) BUTTON
.
Gauge Setup
Setting Metric/Imperial Units
See a Can-Am dealer for adjustments.
Setting Clock
1. Press SET (S) button to select clock
display.
2. Push and hold SET (S) button for
three seconds.
3. Press SET (S) button to select 12:00
AM PM or 24:00 time base.
4. If 12:00 AM PM time base is selected, A or P flashes. Press SET (S)
button to select A (AM) or P (PM).
5. Choose hour first digit by pressing
SET (S) button.
6. Choose hour second digit by pressing SET (S) button.
7. Choose minutes first digit by pressing SET (S) button.
8. Choose minutes second digit by
pressing SET (S) button.
9. Press SET (S) button.
______________
98
 Loading...