

Page 1
14” x 24” Wall Tent Stove
Model – CS14
Recommended Tent Size - 10’ x 12’ Min – 14’ x16’ Max
WARNING:
manual could result in damage, injury, or death.
Read all instructions before using this stove.
Failure to follow the instructions in this
Page 2

WARNING: Tent wood stoves are designed for use in tents and outside only. Do not use stove in a
cabin, workshop, etc. Insure you have fireproof material underneath the stove and have proper heat
standoff distance from walls.
WARNING: Keep all flame and heat sources away from the tent fabric. Many tents are flame
resistant. This does not mean they are fire proof. The material will burn if left in continuous contact
with a flame source. Do not insert the stove pipe directly through the fabric. A rubber military style
stove jack must be used. If a rain fly is being used on the tent a rubber military style stove jack must
be used in both the rain fly and the tent.
DANGER:
minimum opening of 20 square inches is required for adequate ventilation.
Always leave a window cracked or door partly opened when using this stove. A
WARNING: NEVER put your stove on a tent floor or other flammable material.
WARNING: Stove sparks will burn holes in a fire treated roof. A spark arrestor will prevent most
sparks from reaching your roof. The use of a rain fly with properly fitted stove jack will also help
prevent damage to your tent.
WARNING: NEVER USE FLAMMABLE LIQUIDS TO START A FIRE IN YOUR STOVE.
WARNING: Never allow your stove to get so hot that your stove or stovepipe becomes red. A red
hot stove will cause the metal to warp. Reduce airflow on your door air intake to reduce the stove
temperature.
Page 3

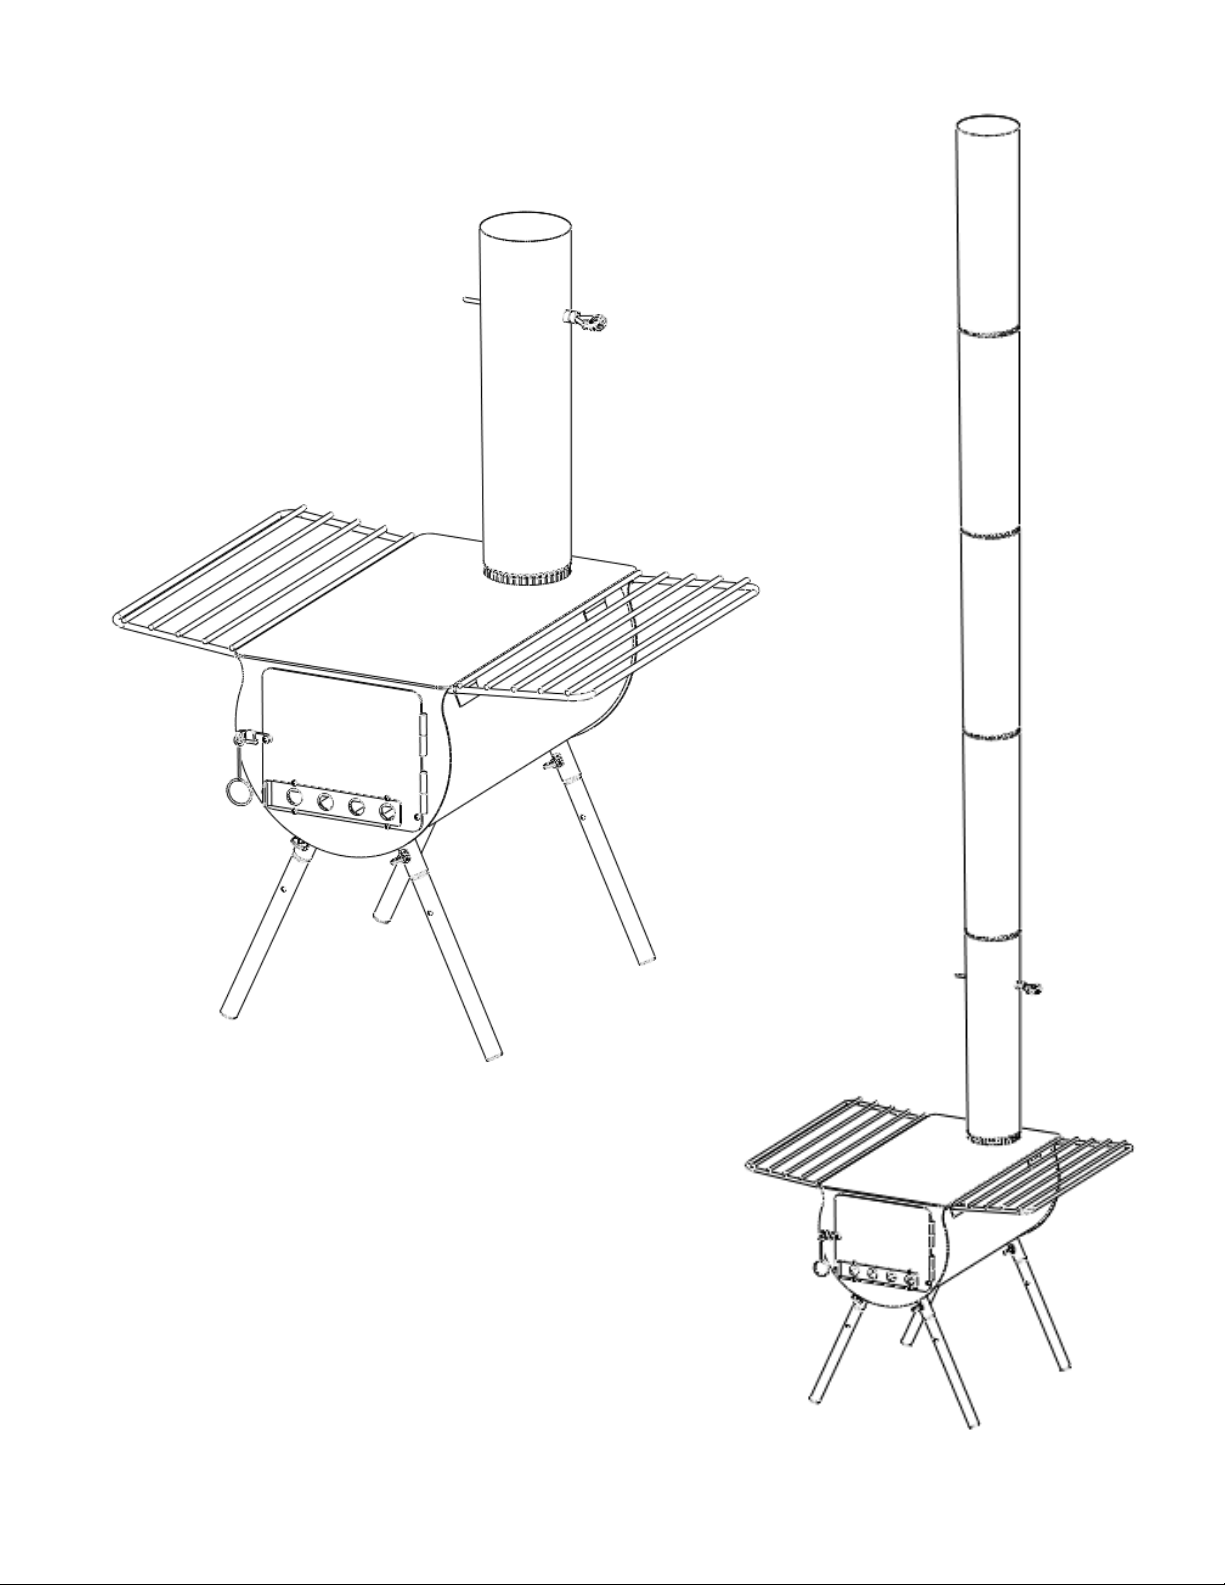
Setup Instructions
Always ensure your stove is on a level surface to avoid any possible problems.
Have a nonflammable area in front of your stove in case sparks or wood falls out of your stove when you
open the door.
This stove is designed so all accessories including an option water tank may be stored inside of the fire box.
1. Remove all components from the inside of the fire box.
2. Turn the stove upside down and install the legs. Tighten the
wing screw on each leg to hold in place.
3. Stand the stove upright on its legs. The legs may be adjusted
to level the stove or compensate for uneven ground.
4. Place the wood
grate in the bottom
of the fire box.
5. Attach the two wire shelves to the sides of the
fire box by inserting the ends of the shelf into the
tubes on either side of the stove.
Page 4
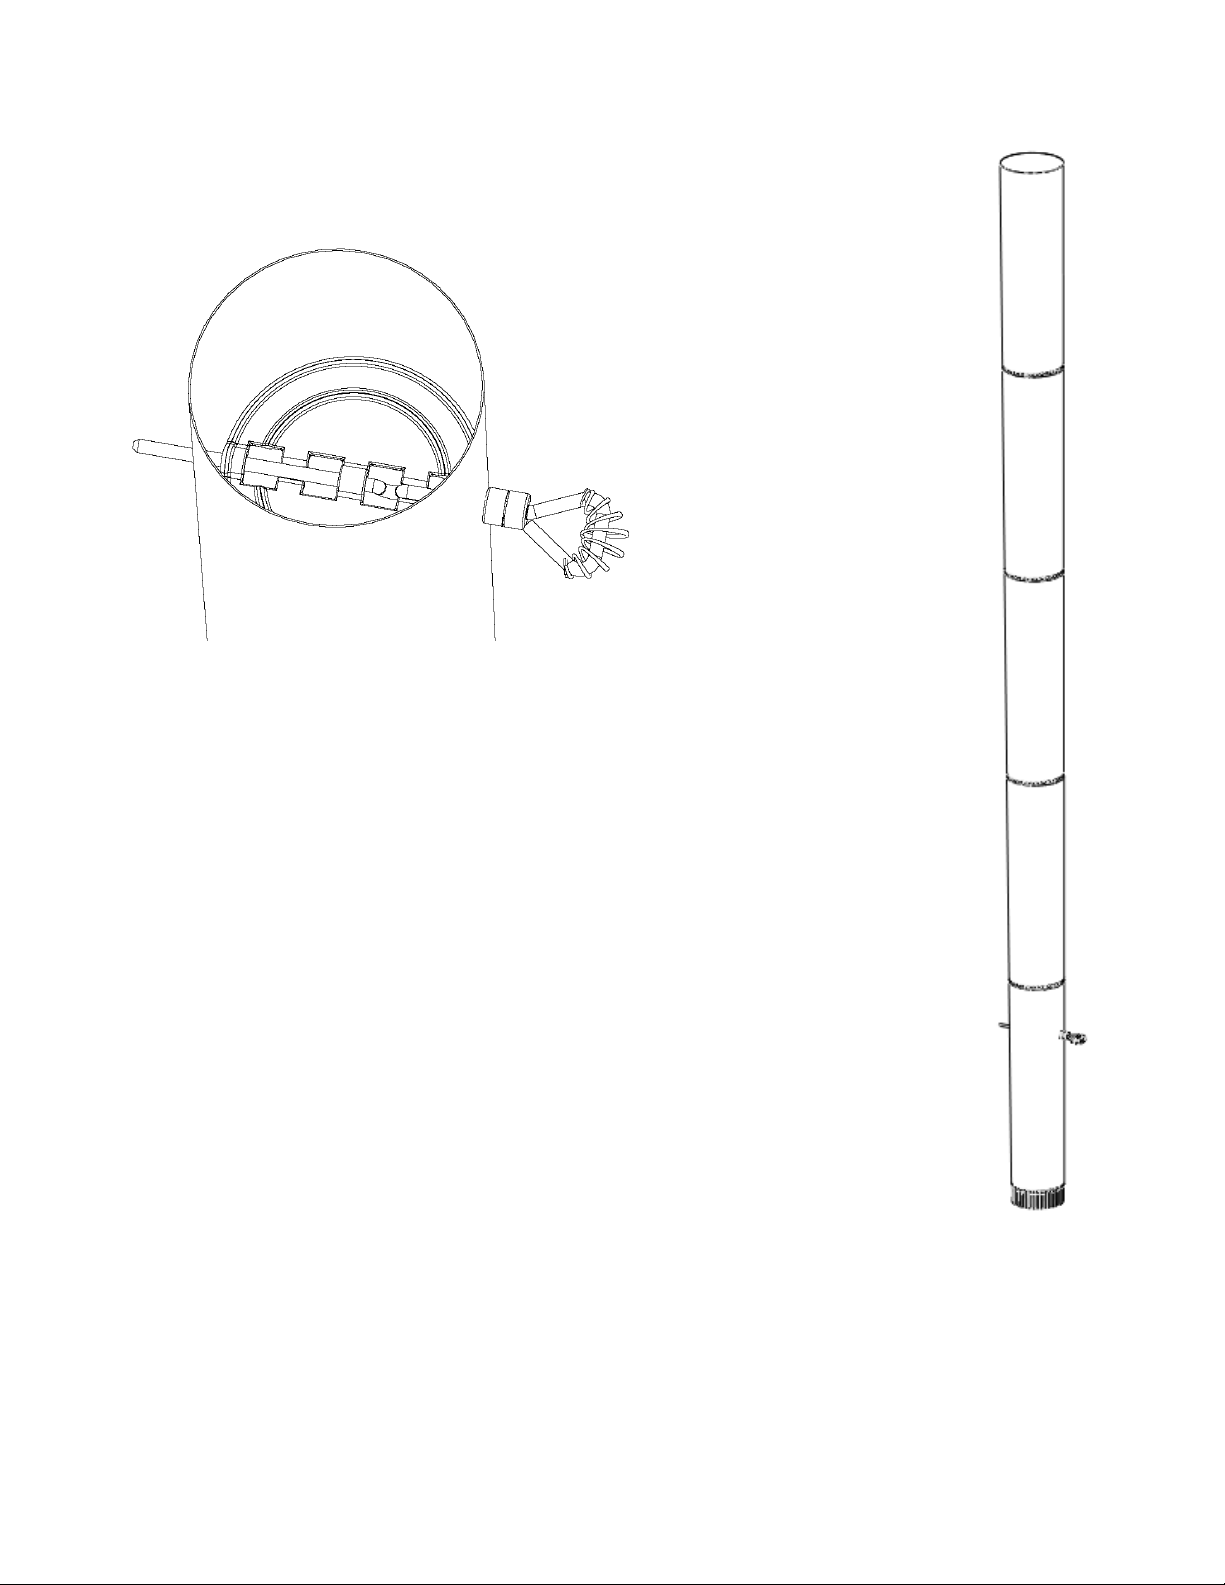
6. Installing the damper - There are 5 sections to the chimney. Each gets larger in
diameter as they go up. The first section has two holes for installing the damper. First
remove the wire rod from the damper. Hold the damper down inside the chimney and
insert the rod first through the hole in the pipe, through the damper, and out the hole
on the opposite side of the pipe. Take note that when damper rod handle is horizontal
the damper is closed. When the damper rod handle is vertical the damper is open.
7. Installing the chimney pipe - Starting with the largest pipe first install the spark
arrestor over the top of the pipe. Then install this pipe into the next and so on until all
five pipes are assembled together. (If using the stove in windy conditions sheet metal
screws should be used to fasten the pipes together.) Once the chimney is assembled
lift the chimney up through the stove jack in the tent and then install into the top of the
stove. (Note: Depending on stove jack size some chimney sections may need to be
installed down through the stove jack from the outside of the tent.)
(Warning:
The stove pipe should extend a minimum of 6” above the ridge of the tent.)
Page 5

Warning: Before using the stove in the tent for the first
time the paint must be properly cured.
Curing the paint - Set your new stove up in your backyard
or driveway and burn wood in the stove for 1-2 hour to cure
the paint.
Using the damper supplied with the stove is strongly
recommended. A damper makes your stove 10-15% more
efficient reducing the amount of wood you have to cut by
10-15% if you use a damper.
Warning: Keep the firebox portion of the stove a
minimum of 2 feet away from the walls of the tent.
Warning: Keep all combustible materials a minimum
of 3 feet away from the stove.
Warning: Maintain a 3 foot non flammable area
around your stove. This 3 foot standoff prevents any
flammables from catching fire due to the stove heat, prevents
sparks from popping through the air intake openings and
catching flammables on fire and also in case sparks pop out
when you open the stove door.
The stove pipe should extend a minimum of 6” above the
ridge of the tent. This allows sparks to blow away from the
tent roof reducing the possibility of spark holes being burnt
in the roof.
Always use the included spark arrester. When properly
used this device reduces the amount of sparks coming out of
the stove pipe. Check spark arrestor daily to insure there is
no buildup of creosote blocking the smoke from going
through the spark arrestor. The spark arrestor must be
cleaned every 2-3 days to prevent clogging and reduce the
risk of a chimney fire.
Stove sparks will burn holes in a fire treated roof. A spark
arrestor will prevent most sparks from reaching your roof.
The use of a rain fly with properly fitted stove jack will also
help prevent damage to your tent.
To reduce smoke in your tent always open the stove door
slowly with the damper wide open. If you open the stove
door quickly the smoke is drawn into the tent.
Page 6

The more you damper the stove pipe down or/and reduce the air intake on the stove door the more creosote
build up you will have in the stove pipe and spark arrestor. If you get too much creosote in the stove pipe
you can possibly have a fire in your stove pipe. When breaking camp, remove the creosote in your stove
pipe by gently banging the stove pipes together to loosen the creosote. It is normal to periodically clean the
spark arrestor every 2-3 days.
WOOD FOR STOVES: Dry hardwoods burn the most efficiently and provide the most heat. If you use
soft woods you will have to cut much more firewood and you will have more creosote buildup.
CAMPING IN WINDY CONDITIONS: If using the stove in windy conditions, secure all sections of
stove pipe at the joints and where the pipe attaches to the stove with sheet metal screws. Windy conditions
will cause the stove pipe to loosen when the tent roof billows in the wind. Also stake down the front and
back of your tent with the grommet on each end of your ridge to reduce movement of the tent.
Never store your stove with ash in the firebox. The ash will draw moisture and your stove will rust.
WATER HEATER: The stove is equipped with brackets for mounting a water tank to the side.
 Loading...