

Page 1
Page 2

Page 3

WAR NING
RISK OF ELECTRIC
SHOCK
CA UTION
The lightning ash with arrowhead
symbol, within an equilateral
triangle, is intended to alert the
user to the presence of uninsulated
“dangerous voltage” within the
product’s enclosure that may be of
sufcient magnitude to constitute a
risk of electric shock to persons.
CAUTION: TO REDUCE THE RISK
OF ELECTRIC SHOCK, DO NOT
REMOVE COVER (OR BACK).
NO USER-SERVICABLE PARTS
INSIDE. REFER SERVICING
TO QUALIFIED SERVICE
PERSONNEL.
The exclamation point within an
equilateral triangle, is intended
to alert the user to the presence
of important operating and
maintenance (servicing) instructions
in the literature accompanying the
appliance.
TO PREVENT FIRE OR SHOCK HAZARD, DO NOT
USE WITH AN EXTENSION CORD, RECEPTACLE
OR OTHER OUTLET UNLESS THE BLADES CAN BE
FULLY INSERTED TO PREVENT BLADE EXPOSURE
TO PREVENT FIRE OR SHOCK HAZARD, DO NOT
EXPOSE THIS APPLIANCE TO RAIN OR MOISTURE
IMPORTANT SAFETY INSTRUCTIONS
Do not install near any heat sources such as radiators, heat
registers, stoves, or other apparatus (including ampliers) that
produce heat.
Do not defeat the safety purpose polarized or grounding type
plug. A polarized plug has two blades with one wider than
the other. A grounding plug-type plug has two blades and a
third grounding prong. The wide blade or or the third prong
are provided for your safety. If the provided plug does not t
into your outlet, consult an electrician for replacement of the
obsolete outlet.
Protect the power cord from being walked on or pinched,
particularly at plugs, convenience receptacles, and at the point
where they exit from the apparatus.
Only use attachments / accessories specied by the
manufacturer.
Unplug this apparatus during lightning storms or when unused
for long periods of time.
Refer all servicing to qualied service personnel. Servicing is
required when the apparatus has been damaged in any way,
such as when the power-supply cord or plug is damaged, liquid
has been spilled or objects have fallen into the apparatus, the
apparatus has been exposed to rain or moisture, does not
operate normally, or has been dropped.
The appliance shall not be exposed to dripping or splashing
water and that no object lled with liquid such as vases shall
be placed on the apparatus
The AC wall plug is used as the disconnect device. It should
remain readily accessible at all times..
8.
9.
10.
11.
12.
13.
14.
15.
Read these instructions.
Keep these instructions.
Heed all warnings.
Follow all instructions.
Do not use this apparatus near water.
Clean only with a dry cloth.
Do not block any ventilation openings. Install in accordance with
the manufacturer’s instructions.
1.
2.
3.
4.
5.
6.
7.
810-00000S-190
Page 4

Page Index
Product Carton Contents ................................................ 2
Introduction ..................................................................... 4
Getting Started ............................................................ 5-6
Setting the Clock ............................................................ 7
Tone Alarm Backup Battery Installation .......................... 7
Standby and On .............................................................. 8
AM/FM Operation ...................................................... 8-10
CD Operation ........................................................... 11-13
Connecting an External Audio Source .......................... 14
Convenience Features ............................................. 15-16
Quick Reference Guide ......................................... 17-21
Radio and Disc Text Displays ....................................... 22
JOG Function .......................................................... 23-24
Wakeup Function ..................................................... 25-28
CD-ROM Operation ................................................. 29-32
PLAYER DOCK - Made for iPod (Optional) ............. 33-35
Specications ................................................................ 36
Page 5
- 2 -
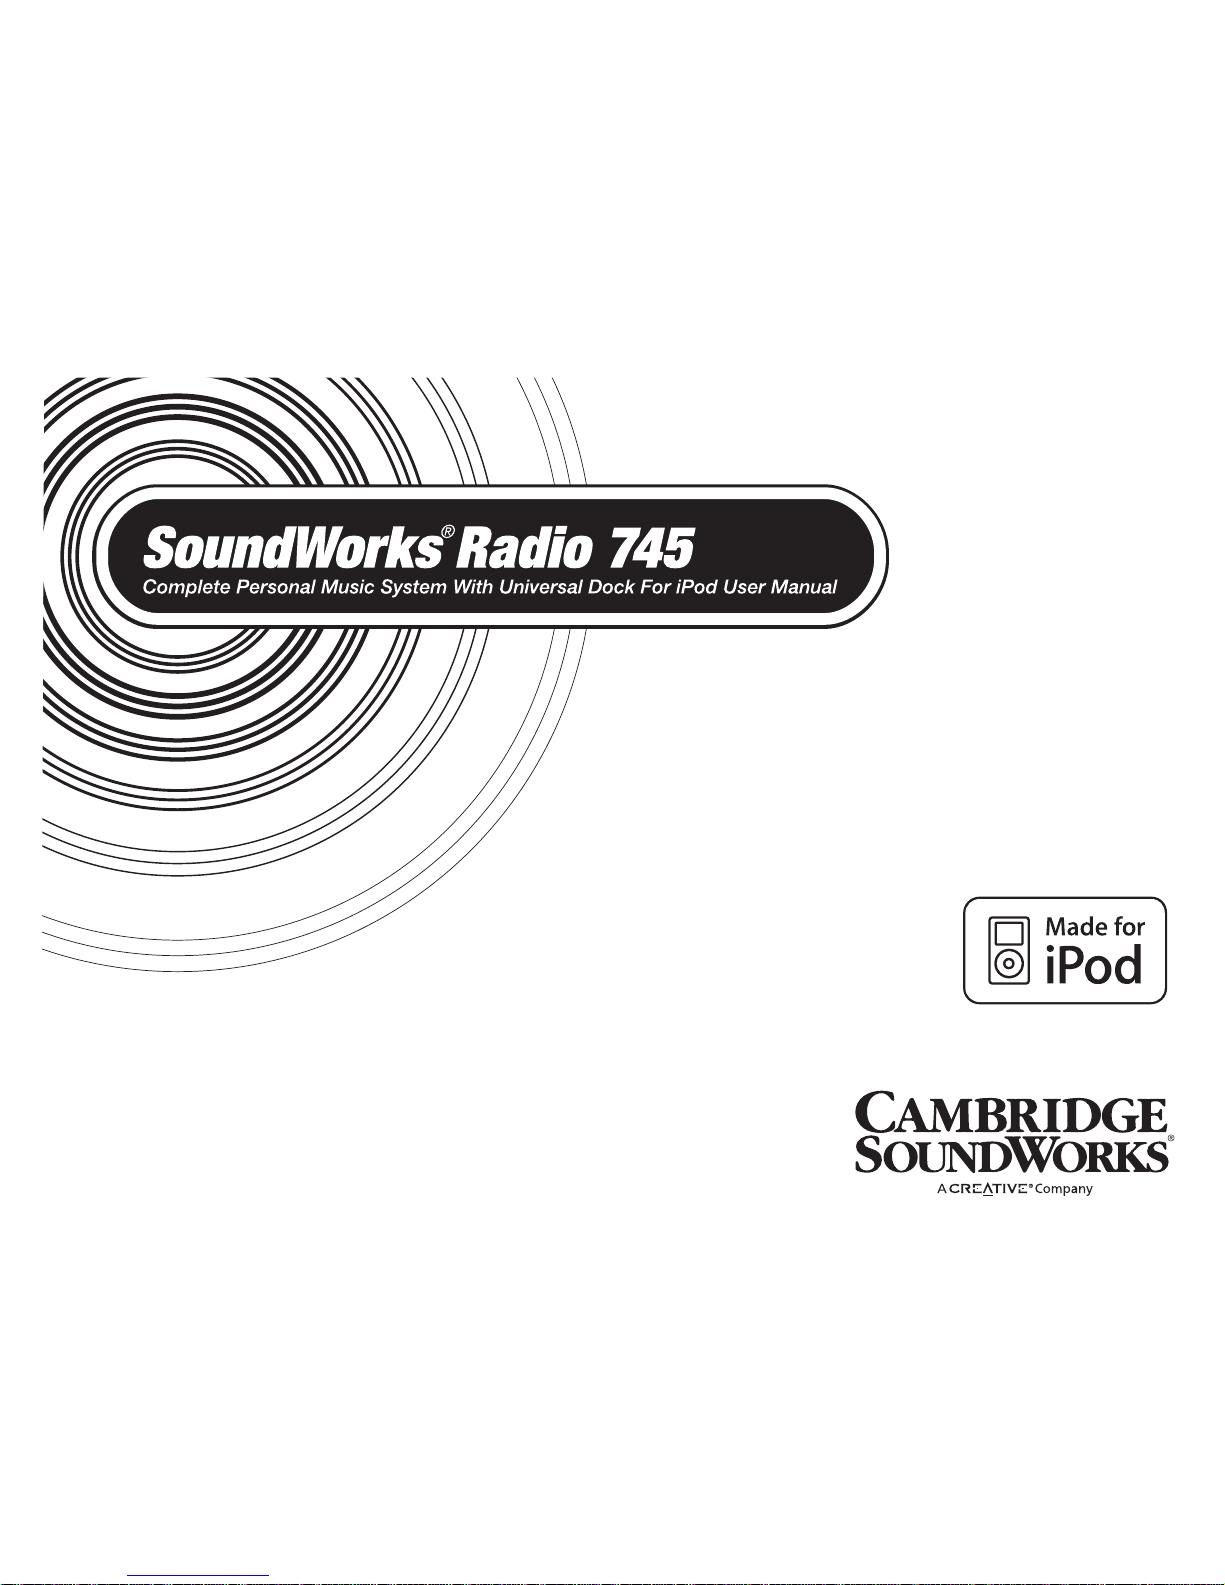
Product Carton Contents
1) SoundWorks Radio CD 745
2) External AM Loop Antenna
3) Infrared Remote Control
4) (Optional) Made for iPod Dock
Not Pictured:
5) External FM Wire Antenna
6) SoundWorks Radio CD 745 User Manual
A
L
A
R
M
S
T
ER
E
O
C
D
I
N
WI
D
E
M
O
N
O
1
1
2
2
3
4
5
6
7
8
S
NO
O
ZE/M
UT
E
T
RA
C
K
/
T
U
N
E
/
A
D
J
C
D
M
O
D
E
R
E
P
E
A
T
-
F
O
L
D
E
R
+
C
D
I
N
F
O
F
O
L
D
E
R
P
R
E
S
E
T
S
P
O
W
E
R
P
L
A
Y
E
R
A
U
X
F
M
/
A
M
J
O
G
C
D
S
E
E
K
TRACK/ TUNE /ADJ
FOLDERREPEAT
JOG
SLEEP
SNOOZE
MUTE
1 234
5 6 7 8
CD MODE
CD TIME
ALARMS
SEEK
DISC
STOP
AUX
PRESET S
VOLUME
FM
AM
HOLD
TO
ADJUST
1
2
SOUNDW ORKS R ADIO C D
ENTER
PLAYER
MENU
1
2
3
4
Page 6

- 3 -
Page 7

- 4 -
INTRODUCTION
The people at Cambridge SoundWorks hope you enjoy
your new high-performance SoundWorks Radio CD 745.
Your new radio has great FM stereo sound and plays
useful AM band stations. It stores 16 FM station presets
along with 8 AM station presets. An integral, slot-load disc
player plays audio CDs and MP3/WMA les on CD-ROM.
The large 32-character display and full-function remote
makes radio operation easy from across the room.
The SoundWorks Radio CD 745 displays three types of
supplementary text:
Radio Data Service (RDS) FM station text
CD-text
“ID3” text stored in most MP3 and WMA les.
An automatic dimmer function reduces display brightness
in dark rooms while maintaining good legibility in bright
light. An internal long-life power cell maintains the current
time accurately for many years. By inserting a 9V battery
(not supplied), a user ensures that an activated wakeup
function will work even during a power outage.
•
•
•
A front input jack allows easy connection of audio program
sources (like portable digital music and cassette players).
A convenient JOG button lets you select from a variety of
secondary adjustments (Bass and Treble, Snooze time
and Text display modes, among others).
Page 8
- 5 -
PLAYER
POWER
OUTPUT
INPUT
AM
ANTENNA
FM ANTENNA
EXT
INT
INPUT
75 OHMS
PLAYER
INPUT
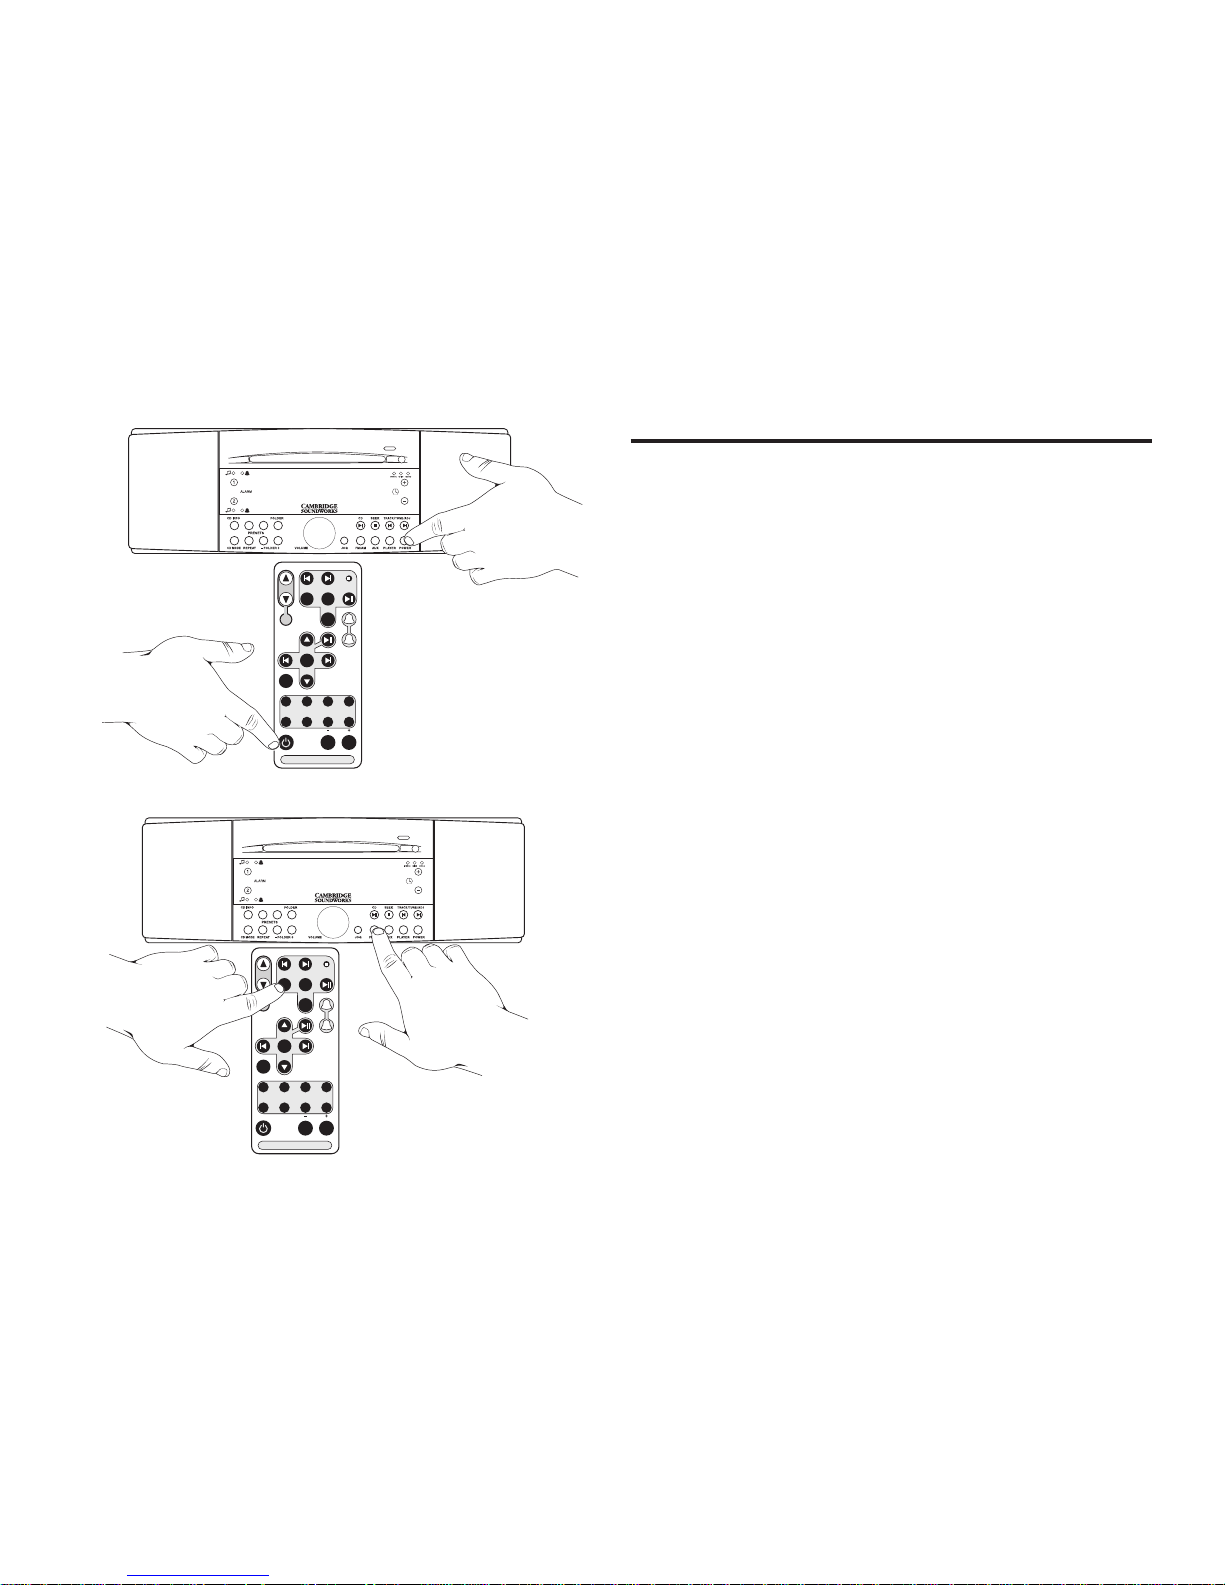
GETTING STARTED
Remove the SoundWorks Radio CD (See A) from its
protective polybag and place it in your preferred location.
The Radio CD’s Tone alarm sound and bass output will
be reduced if the Radio is placed on a compliant, soft
surface.
Connect the AM antenna (See B): To prepare the antenna (1), fold the base (2) and snap it into place (3).
Position the AM antenna (4) in any out-of-the-way site,
preferably at least 8 inches apart from the Radio CD.
Insert the AM Antenna’s miniplug into the Radio CD’s rear
panel minijack marked AM ANTENNA (5).
Rotate the AM antenna to achieve the best signal for
individual AM stations.
A
B
1 2
3 4
5
A
L
A
R
M
S
T
ER
E
O
C
D
I
N
WI
D
E
M
O
N
O
1
1
2
2
3
4
5
6
7
8
S
NO
O
ZE/M
UT
E
T
RA
C
K
/
T
U
N
E
/
A
D
J
C
D
M
O
D
E
R
E
P
E
A
T
-
F
O
L
D
E
R
+
C
D
I
N
F
O
F
O
L
D
E
R
P
R
E
S
E
T
S
P
O
W
E
R
P
L
A
Y
E
R
A
U
X
F
M
/
A
M
J
O
G
C
D
S
E
E
K
Page 9
- 6 -
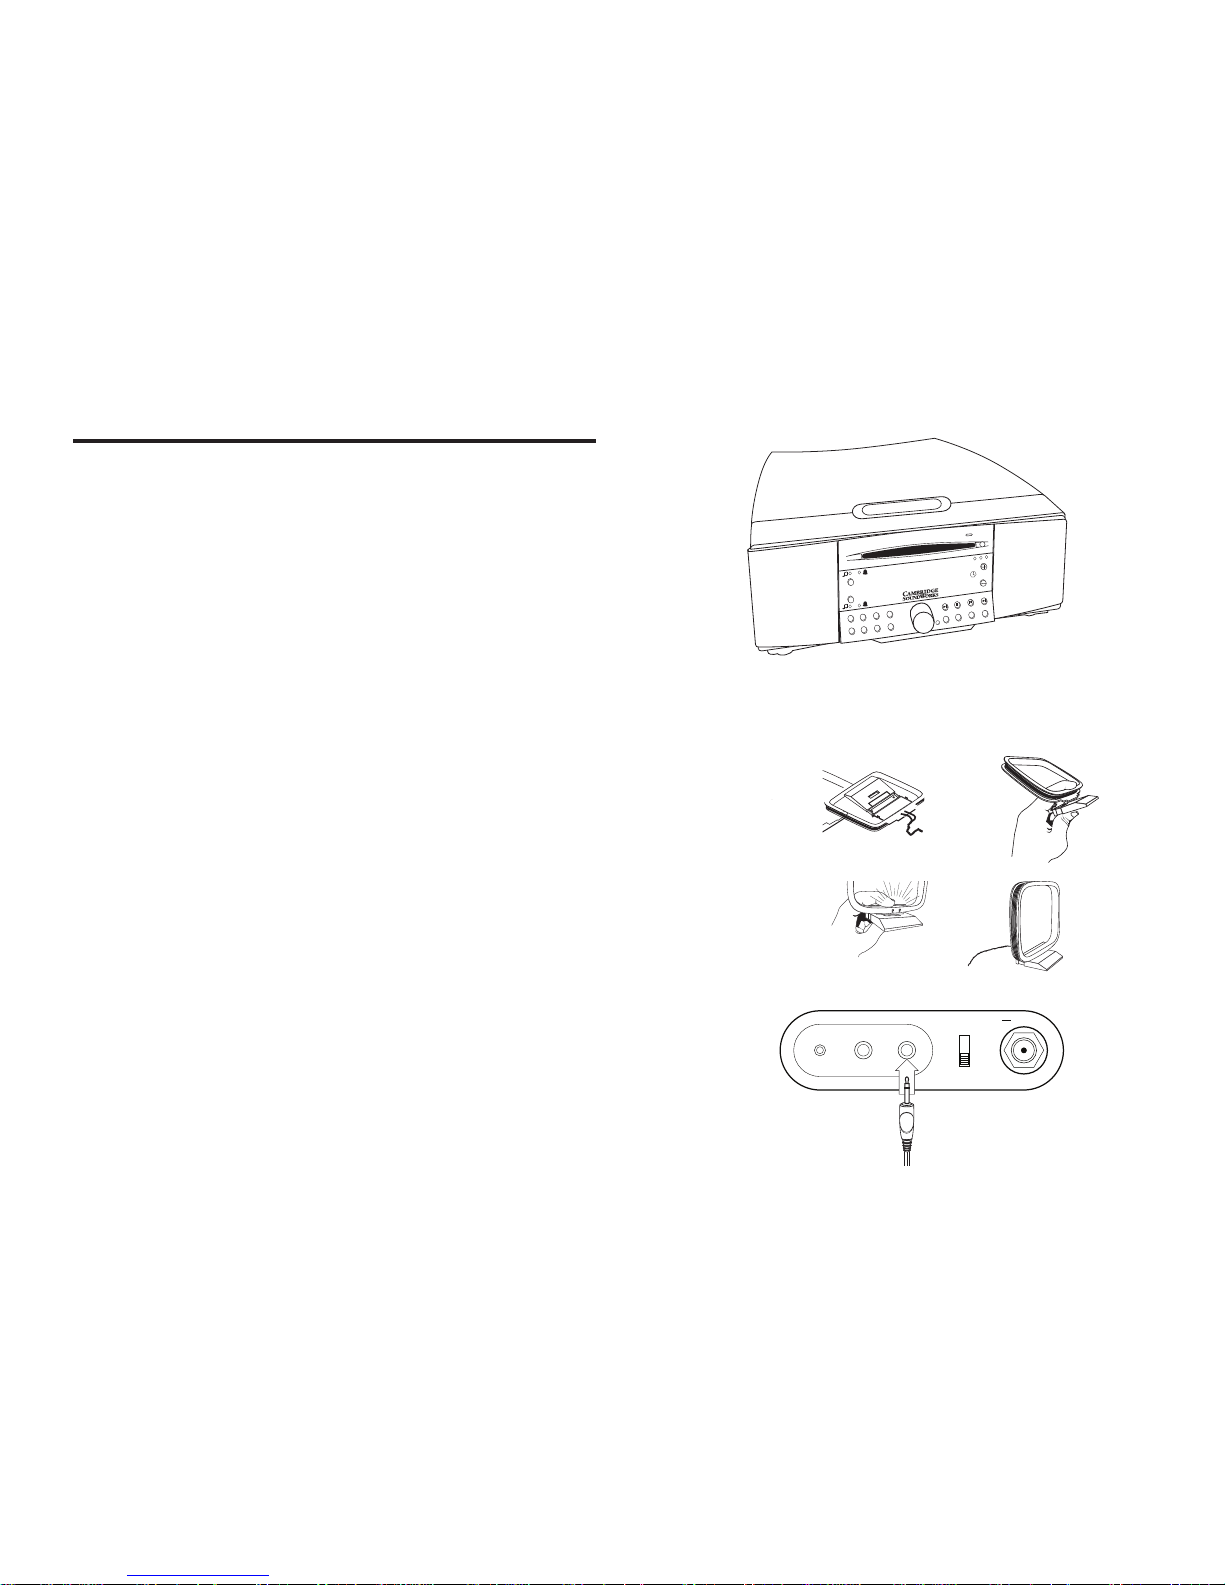
Connect the cord by inserting the SoundWorks Radio
CD’s AC plug into a convenient outlet.
The AC cord is also the Radio CD’s primary FM antenna.
It will function better if at least 50% or more of its length
follows a straight line (See C). Check to make sure
the FM antenna switch on the rear panel of the Radio
enclosure is in the INT (internal) position (factory default).
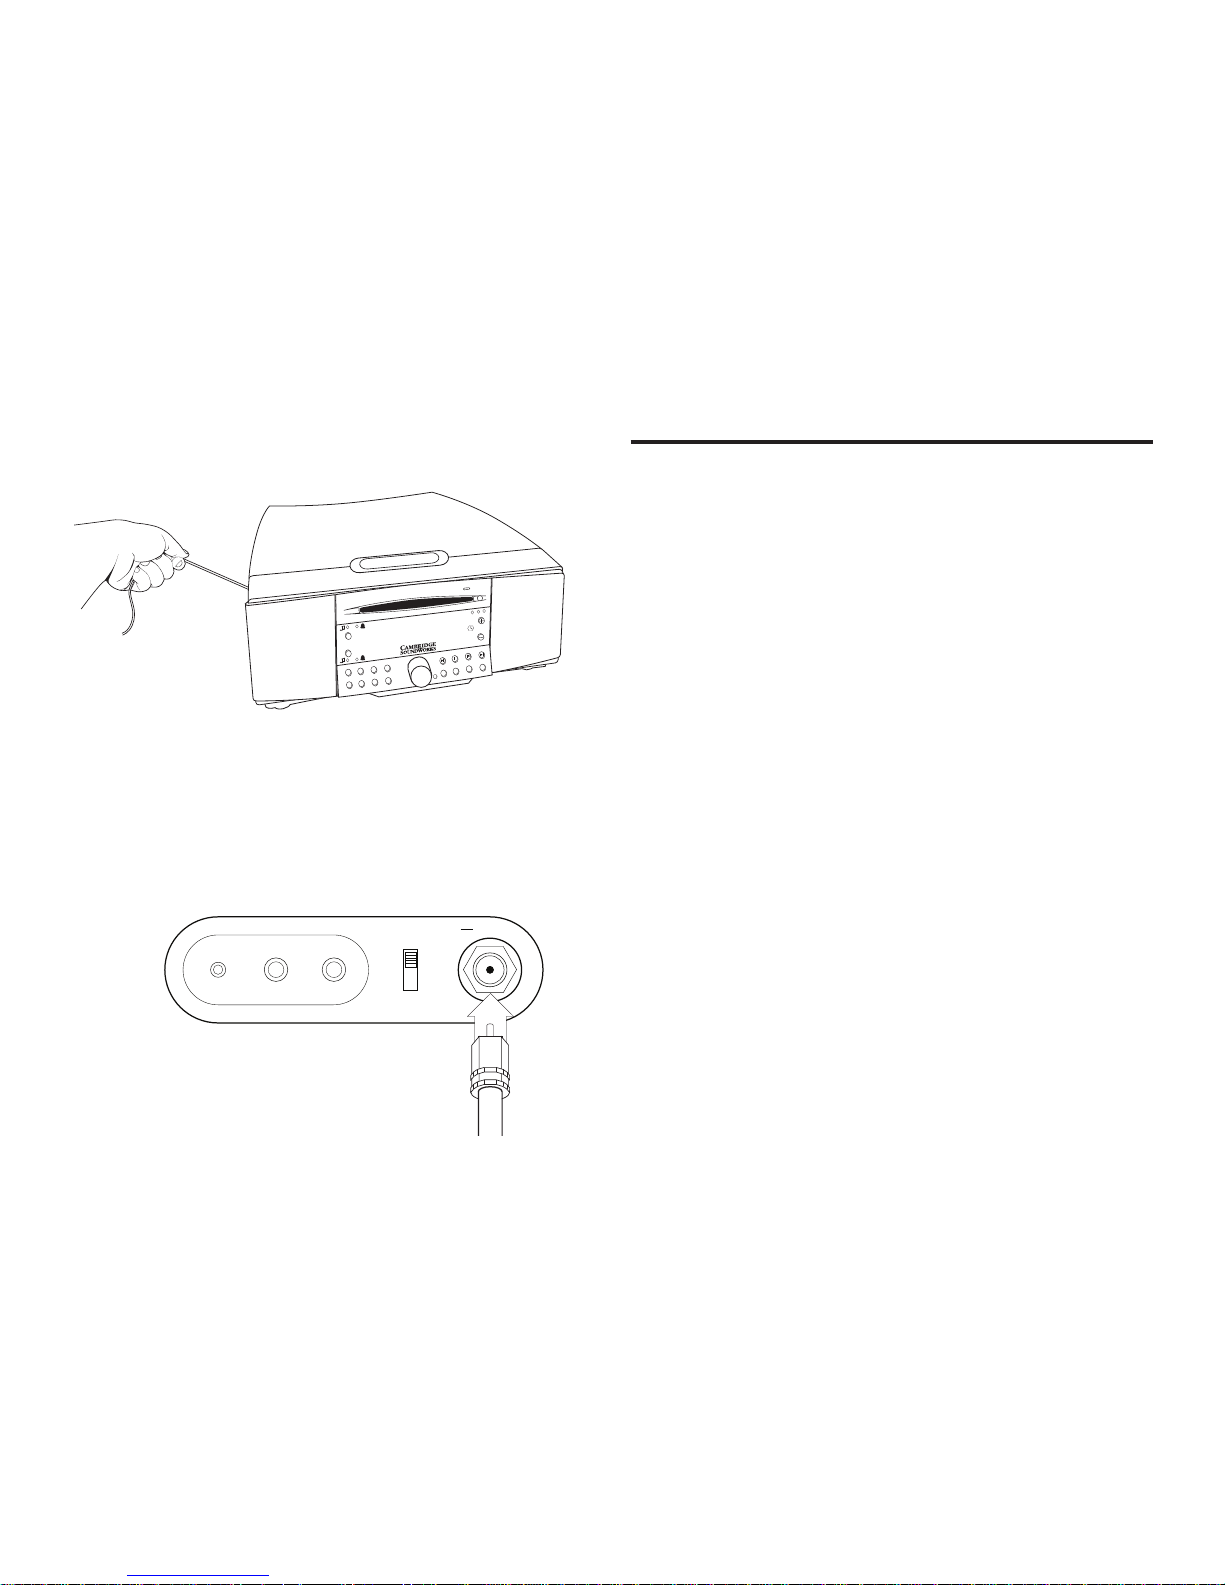
If desired, the external FM antenna can be connected and
used instead of the internal antenna (See D). Connect
the external antenna to the “F”-type connector of the rear
panel. Set the FM antenna switch to EXT (external).
C
D
A
L
A
R
M
S
T
ER
E
O
C
D
I
N
WI
D
E
M
O
N
O
1
1
2
2
3
4
5
6
7
8
S
NO
O
ZE/M
UT
E
T
RA
C
K
/
T
U
N
E
/
A
D
J
C
D
M
O
D
E
R
E
P
E
A
T
-
F
O
L
D
E
R
+
C
D
I
N
F
O
F
O
L
D
E
R
P
R
E
S
E
T
S
P
O
W
E
R
P
L
A
Y
E
R
A
U
X
F
M
/
A
M
J
O
G
C
D
S
E
E
K
PLAYER
POWER
OUTPUT
INPUT
AM
ANTENNA
FM ANTENNA
EXT
INT
INPUT
75 OHMS
PLAYER
INPUT
GETTING STARTED (Continued)
Page 10

- 7 -
GETTING STARTED (Continued)
Setting the Clock
You can adjust the current time whether the radio is in
Standby or On.
Just press the TIME ADJUST BUTTONS (next to the symbol)
on the right hand side of the display (see E).
Note: The current time can only be adjusted from the
radio CD faceplate. The remote control can adjust the
wakeup time setting, but not the current time.
Tone Alarm Backup Battery
For 48 hours of alarm function backup during an AC
power failure, obtain and install a 9 volt battery in the
radio’s battery compartment. Release the battery cover,
attach the battery and restore the cover.
If either alarm is set to activate (music or tone wake-up)
and the power fails, the battery sounds the tone alarm
at the appropriate time. Press POWER on the radio to
silence the alarm. Remove the battery if the unit is unplugged for more than 24 hours. Replace the battery after
30 minutes of emergency tone alarm operation (see F).
CD IN
1 2 3 4
5 6 7 8
TIME SET
9:43 AM
E
F
Page 11
- 8 -
TRACK/ TUNE /ADJ
FOLDERREPEAT
JOG
SLEEP
SNOOZE
MUTE
1 234
5 6 7 8
CD MODE
CD TIME
ALARMS
SEEK
DISC
STOP
AUX
PRESET S
VOLUME
FM
AM
HOLD
TO
ADJUST
1
2
SOUNDW ORKS R ADIO C D
ENTER
PLAYER
MENU
TRACK/ TUNE /ADJ
FOLDERREPEAT
JOG
SLEEP
SNOOZE
MUTE
1 234
5 6 7 8
CD MODE
CD TIME
ALARMS
SEEK
DISC
STOP
AUX
PRESET S
VOLUME
FM
AM
HOLD
TO
ADJUST
1
2
SOUNDW ORKS R ADIO C D
ENTER
PLAYER
MENU
CD IN
1 2 3 4
5 6 7 8
GETTING STARTED (Continued)
Standby and On
Pushing the POWER button chooses Standby or On
operation (see G).
The faceplate POWER button can also be used to engage
Sleep Delay operation (see page 16).
Selecting the Radio Bands
Pressing the FM/AM button cycles through two banks
of FM station presets, and one bank of AM station
presets. You can store eight FM stations in the Preset
bank FM1, eight different FM stations in Preset bank
FM2, and eight AM stations in the Preset bank AM
(see H).
If you switch from another mode to FM/AM, the radio
will return to the last Preset bank used (from Standby,
CD, PLAYER or from the AUX input). Pressing the
FM/AM button during FM/AM operation selects the
next present bank (FM1, FM2, or AM).
1.
2.
9:43 AM
CD IN
1 2 3 4
5 6 7 8
2
AM
ALARMS
TAP TO SET
PRESS & HOLD TO ADJUST
CD TIME
FM2 P1
88.1 9:43AM
H
G
Page 12
- 9 -
TRACK/ TUNE /ADJ
FOLDERREPEAT
JOG
SLEEP
SNOOZE
MUTE
1 234
5 6 7 8
CD MODE
CD TIME
ALARMS
SEEK
DISC
STOP
AUX
PRESET S
VOLUME
FM
AM
HOLD
TO
ADJUST
1
2
SOUNDW ORKS R ADIO C D
ENTER
PLAYER
MENU
GETTING STARTED (Continued)
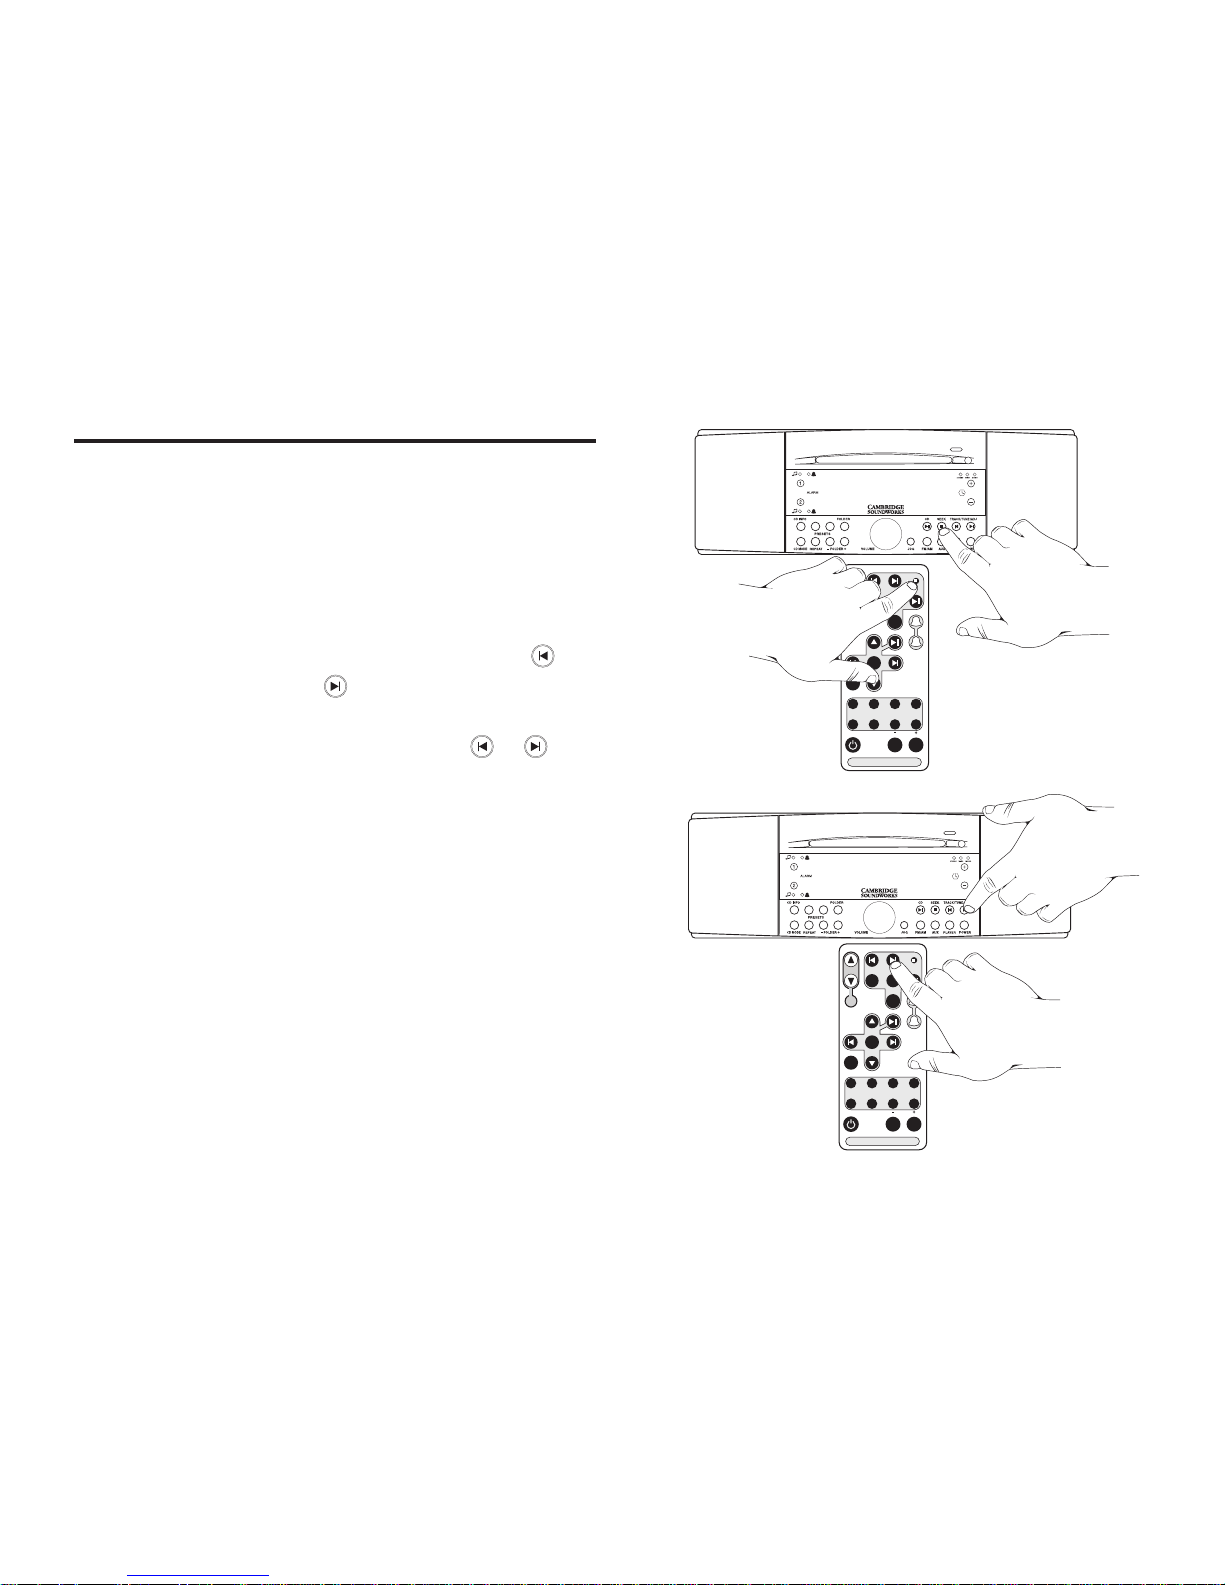
Tuning Stations
Autotune Method 1: Press the SEEK button (remote
or radio face) to automatically nd the next station or
higher frequency (see I).
Autotune Method 2: Press and hold either TRACK/
TUNE/ADJ button to seek the next station (the
button seeks down, the button seeks up) (see J).
Manual Tune: To nd a specic frequency, tap the
appropriate TRACK/TUNE/ADJ button ( or ).
Storing Stations in PRESET Banks
Press the FM/AM button to choose the desired Preset
bank (FM1, FM2, AM) radio band. Tune to the desired
station. Press and hold the desired PRESET button until a
short tone is heard. The station is stored (see K).
When an FM frequency is stored on a Preset, the current Stereo/
Wide/Mono and RDS Text setting is also stored. When the Preset is
tapped, the stored setting will override the JOG menu setting. Storing
a weak FM stereo station in MONO will insure cleaner reproduction
under varying reception conditions. You can also elect to store FM
stations with RDS text you do not wish to see in STATIC or NO TEXT
mode.
•
•
•
CD IN
1 2 3 4
5 6 7 8
AUX
POWER
FM2 P1
88.1 9:43AM
CD IN
1 2 3 4
5 6 7 8
FM2 P1
88.1 9:43AM
TRACK/ TUNE /ADJ
FOLDERREPEAT
JOG
SLEEP
SNOOZE
MUTE
1 234
5 6 7 8
CD MODE
CD TIME
ALARMS
SEEK
DISC
STOP
AUX
PRESET S
VOLUME
FM
AM
HOLD
TO
ADJUST
1
2
SOUNDW ORKS R ADIO C D
ENTER
PLAYER
MENU
X
I
J
Page 13

- 10 -
CD IN
1 2 3 4
5 6 7 8
FM2 P1
88.1 9:43AM
TRACK/ TUNE /ADJ
FOLDERREPEAT
JOG
SLEEP
SNOOZE
MUTE
1 234
5 6 7 8
CD MODE
CD TIME
ALARMS
SEEK
DISC
STOP
AUX
PRESET S
VOLUME
FM
AM
HOLD
TO
ADJUST
1
2
SOUNDW ORKS R ADIO C D
ENTER
PLAYER
MENU
K
Page 14

- 11 -
A
L
A
R
M
P
R
E
S
E
T
S
ST
E
R
EO
C
D
I
N
CD
I
N
F
O
C
D
M
O
D
E
J
O
G
F
M
1
/
2
C
D
S
E
E
K
A
M
A
U
X
PO
W
E
R
R
E
P
E
A
T
–
F
O
L
D
E
R
+
W
I
D
E
M
O
N
O
1
1
2
2
3
4
5
6
7
8
S
N
O
O
Z
E
/
M
U
T
E
WIDE
STEREO
MONO
CD IN
CD IN
Light
SELECTING CD PLAY
Important: Use only standard 12cm (4 ¾") compact
discs. Smaller discs will not work in the slot load
mechanism.
Insert a CD disc into the slot to automatically select
CD play. The CD IN light indicates if there is a disc
inside the radio CD (see L).
If there is a CD disc inside the radio CD, tapping the
CD button will start disc play (see M).
Choosing Selections
Track selection: Tap the appropriate TRACK/TUNE/
ADJ button ( or ) (see N).
CD-ROM folder selection: To move from the current
folder (directory), tap either or . See pages 2932 for an explanation of folder (directory) navigation.
Forward scan and reverse scan: Press and hold
TRACK/TUNE/ADJ button ( or ).
Disc Stop
Press the STOP button once ( ) to stop disc play with
“resume from same location” feature. Press the STOP
button twice to stop disc play and return to the start of the
disc.
1.
2.
•
•
•
T
RA
C
K
/
T
U
N
E
/
A
DJ
CD IN
1 2 3 4
5 6 7 8
CD ► T1 1m 23s
L
M
CD Insertion
CD Play/Pause
TRACK/ TUNE /ADJ
FOLDERREPEAT
JOG
SLEEP
SNOOZE
MUTE
1 234
5 6 7 8
CD MODE
CD TIME
ALARMS
SEEK
DISC
STOP
AUX
PRESET S
VOLUME
FM
AM
HOLD
TO
ADJUST
1
2
SOUNDW ORKS R ADIO C D
ENTER
PLAYER
MENU
Page 15

- 12 -
During Audio CD Play
Press STOP
1 time ................................ Resumes from Same Location
2 times ...................................... Start at beginning of Disc
During CD-ROM Play
Press STOP Disc Position
1 time ................................. Resume from Same Location
2 times ................................... Start at beginning of Folder
3 times ...................................... Start at beginning of Disc
CD Play and the Power button: Pressing the POWER
button during disc play causes the Radio CD to enter
STANDBY track resume mode. Pressing the POWER
button again resumes play at exactly the same location on
the disc (audio CD or CD-ROM).
Preset 4 “FOLDER” feature:
The SoundWorks Radio CD recognizes folders at the Top
Level of a CD-ROM. Pressing Preset 4 “FOLDER” during
CD-ROM Play will show the rst 16 letters of the name
of the folder containing the active MP3/WMA track. TOP
LEVEL is displayed if the le is not inside a folder.
SELECTING CD PLAY (Continued)
Page 16

- 13 -
SELECTING CD PLAY (Continued)
Disc Eject
Press the disc EJECT button (see O).
CD Info
The CD INFO button (preset 1) displays disc playing time
readouts, as follows:
Audio CD – Track time elapsed • Track time remaining
• CD time elapsed • CD time remaining
CD-ROM – File time elapsed
CD Mode
The CD MODE button (preset 5) selects the following
other disc play modes:
Audio CD - Random play • Play one track
CD-ROM - Random play • Play folder • Random play
folder • Play one le
Repeat
The REPEAT button (present 6) will repeat the current
play mode until the disc is ejected or the POWER button
is pressed. The repeat mode is maintained until the disc is
ejected or the POWER button is pressed.
•
•
CD IN
1 2 3 4
5 6 7 8
CD IN
1 2 3 4
5 6 7 8
CD ► T2 3m 16s
FM2 P1
88.1 9:43AM
TRACK/ TUNE /ADJ
FOLDERREPEAT
JOG
SLEEP
SNOOZE
MUTE
1 234
5 6 7 8
CD MODE
CD TIME
ALARMS
SEEK
DISC
STOP
AUX
PRESET S
VOLUME
FM
AM
HOLD
TO
ADJUST
1
2
SOUNDW ORKS R ADIO C D
ENTER
PLAYER
MENU
X
N
O
TRACK/TUNE
Disk Eject
Page 17

- 14 -
WIDE
STEREO
MONO
1 2 3 4
5 6 7 8
AUX
HEADPHONES
CD IN
FM2 P1
88.1 9:43AM
Q
TRACK/ TUNE /ADJ
FOLDERREPEAT
JOG
SLEEP
SNOOZE
MUTE
1 234
5 6 7 8
CD MODE
CD TIME
ALARMS
SEEK
DISC
STOP
AUX
PRESET S
VOLUME
FM
AM
HOLD
TO
ADJUST
1
2
SOUNDW ORKS R ADIO C D
ENTER
PLAYER
MENU
CD IN
1 2 3 4
5 6 7 8
Listening to External Sound Sources
If you have an external audio program source you want
to connect to the radio CD, like a portable MP3 player,
connect it to the AUX input on the front panel (see Q). The
AUX button on the front panel or remote control selects
this input (see R).
Using the PLAYER input with optional PLAYER DOCK
The PLAYER button on the front panel or remote control
selects this input.
Connection of a PLAYER DOCK and Dock Use
instructions are detailed on page 33.
CONNECTING AN EXTERNAL AUDIO SOURCE
FM2 P1
88.1 9:43AM
R
TRACK/ TUNE /ADJ
FOLDERREPEAT
JOG
SLEEP
SNOOZE
MUTE
1 234
5 6 7 8
CD MODE
CD TIME
ALARMS
SEEK
DISC
STOP
AUX
PRESET S
VOLUME
FM
AM
HOLD
TO
ADJUST
1
2
SOUNDW ORKS R ADIO C D
ENTER
PLAYER
MENU
Page 18

- 15 -
A
L
A
R
M
S
T
ER
E
O
C
D
I
N
WI
D
E
M
O
N
O
1
1
2
2
3
4
5
6
7
8
S
NO
O
ZE/M
UT
E
Mute
To mute the SoundWorks Radio CD: Press the
SNOOZE/MUTE bar (located on top of the radio) or the
SNOOZE/MUTE button on the remote control (see T).
Mute is cancelled if the POWER button is pressed, if a
disc is inserted or the volume is adjusted.
CONVENIENCE FEATURES
T
RA
C
K
/
T
U
N
E
/
A
D
J
C
D
M
O
D
E
R
E
P
E
A
T
-
F
O
L
D
E
R
+
C
D
I
N
F
O
F
O
L
D
E
R
P
R
E
S
E
T
S
P
O
W
E
R
P
L
A
Y
E
R
A
U
X
F
M
/
A
M
J
O
G
C
D
S
E
E
K
TRACK/ TUNE /ADJ
FOLDERREPEAT
JOG
SLEEP
SNOOZE
MUTE
1 234
5 6 7 8
CD MODE
CD TIME
ALARMS
SEEK
DISC
STOP
AUX
PRESET S
VOLUME
FM
AM
HOLD
TO
ADJUST
1
2
SOUNDW ORKS R ADIO C D
ENTER
PLAYER
MENU
T
Page 19

- 16 -
CD IN
1 2 3 4
5 6 7 8
SLEEP DELAY
45 MIN
Sleep Delay
To make the radio CD automatically turn off after a
specic period of time:
With the radio CD in standby, rapidly tap the POWER
button until the desired amount of play time is
reached (see U).
OR
Press the SLEEP button on the remote control until
the desired amount of play time is reached (see V).
Sleep delay is available for 15, 20, 30, 45, 60, 90 and 120
minute lengths. Sleep delay is cancelled if the POWER
button is pressed or if a disc is inserted. If you wish
to use the sleep function during disc play, insert a disc
before choosing the sleep function.
•
•
CONVENIENCE FEATURES (Continued)
TRACK/ TUNE /ADJ
FOLDERREPEAT
JOG
SLEEP
SNOOZE
MUTE
1 234
5 6 7 8
CD MODE
CD TIME
ALARMS
SEEK
DISC
STOP
AUX
PRESET S
VOLUME
FM
AM
HOLD
TO
ADJUST
1
2
SOUNDW ORKS R ADIO C D
ENTER
PLAYER
MENU
U
V
Page 20

- 17 -
HEADPHONES
1 2 3 4
5 6 7 8
2:11AM
INDICATES ALARM STATUS
= MUSIC WAKEUP
= TONE WAKEUP
DURING DISC PLAY, TAP THIS BUTTON FOR:
AUDIO CD: TRACK TIME ELAPSED, TRACK TIME REMAINING
TOTAL TIME ELAPSED, TOTAL TIME REMAINING
CD-ROM: TRACK TIME ELAPSED
DURING DISC PLAY, TAP THIS BUTTON FOR:
AUDIO CD: RANDOM PLAY, PLAY ONE TRACK
CD-ROM: RANDOM PLAY OF DISC, PLAY ONE FOLDER
RANDOM PLAY OF ONE FOLDER, PLAY ONE TRACK
RADIO STATION PRESET BUTTONS:
PRESS AND HOLD TO STORE CURRENT STATION
TAP TO ACTIVATE ALARM
PRESS AND HOLD TO ADJUST ALARM
QUICK REFERENCE GUIDE - SOUNDWORKS RADIO CD FACEPLATE
DURING DISC PLAY, TAP THIS BUTTON FOR
REPEAT PLAY OF CURRENT CD MODE
TAP THESE BUTTONS TO MOVE BETWEEN
DIFFERENT DIRECTORIES ON A CD-ROM DISC
INSERT HEADPHONES WITH 3.5mm STEREO MINIPLUG HERE FOR PRIVATE LISTENING
NORMAL OPERATION: PRESS TO MUTE SOUND.
DURING WAKEUP: PRESS TO ACTIVATE SNOOZE FEATURE.
Page 21

- 18 -
AUX
CD I
N
INSERT AUDIO SOURCE WITH 3.5mm STEREO MINIPLUG HERE, PRESS AUX TO HEAR IT
ADJUSTS VOLUME DURING NORMAL OPERATION:
ADJUSTS SETTINGS IN JOG BUTTON OPERATION
PRESS REPEATEDLY TO VIEW MANY RADIO SETTINGS.
USE VOLUME TO ADJUST SETTINGS.
BASS- +4 TO -4
TREBLE- +4 TO -4
STEREO, WIDE, MONO
LOUDNESS- ON, OFF
SNOOZE TIME- 5 MIN TO 22 MIN
RDS TEXT- SCROLLING, FIXED, OFF
DISC TEXT- SCROLLING, FIXED, OFF
TIME DISPLAY- 12 hr AM/PM OR 24 hr
DISPLAY LANGUAGE- ENGLISH, SPANISH,
FRENCH, ITALIAN OR GERMAN
SELECTS AM/FM RADIO BAND
PRESS AGAIN TO SWITCH BETWEEN FM PRESET BANK 1, 2, OR AM
SELECTS AUX INPUT
SELECTS PLAYER INPUT
FOR USE WITH OPTIONAL PLAYER DOCK
SELECTS RADIO “ON” OR “OFF”
(ALARMS ACTIVE IN “OFF” MODE)
PRESS REPEATEDLY FOR SLEEP DELAY FUNCTION
(15 MIN TO 120 MIN)
RADIO: TAP TO MANUAL TUNE, PRESS AND HOLD TO SEEK TO NEXT STATION.
DISC: TAP TO ADVANCE OR GO BACK ONE AUDIO SELECTION, PRESS AND
HOLD TO SCAN FORWARD OR BACKWARD THROUGH AN AUDIO SELECTION
RADIO: TAP TO AUTOMATICALLY SEEK THE NEXT STATION UP THE BAND.
DISC: TAP TO STOP PLAY.
TAP TO START DISC PLAY, TAP AGAIN TO PAUSE DISC PLAYBACK.
INDICATES AUDIO MODE
EJECTS DISC
INDICATES DISC INSIDE.
SETS CURRENT TIME IN NORMAL OPERATION
SETS WAKEUP TIME IN ALARMS MODE
Page 22

- 19 -
QUICK REFERENCE GUIDE - SOUNDWORKS RADIO CD REMOTE CONTROL
TRAC K/ TUN E/ADJ
FOLD ERREPE AT
JO
G
SLEEP
SNOOZE
MUTE
1 2
3
4
5 6 7 8
CD MOD E
CD TI ME
ALA RM
S
SEE K
DIS C
STO P
AUX
PRE SETS
VOLUME
FM
AM
HOLD
TO
ADJUST
1
2
SOU NDWO RKS RA DIO CD
ENTER
PLAYER
MENU
ADJUSTS VOLUME DURING NORMAL OPERATION
ADJUSTS SETTING IN JOG BUTTON OPERATION
FM: TAP TO MANUAL TUNE, PRESS
AND HOLD TO SEEK NEXT STATION.
ALARM SET: ADJUST WAKEUP TIME.
PLAYBACK AND
NAVIGATION
CONTROL FOR USE
WITH OPTIONAL
PLAYER DOCK
TAP TO AUTOMATICALLY
SEEK THE NEXT STATION
UP THE BAND.
TAP TO START DISC
NORMAL OPERATION: PRESS TO MUTE SOUND.
DURING WAKEUP: PRESS TO ACTIVATE SNOOZE
FEATURE.
RADIO STATION PRESET
BUTTONS:
PRESS AND HOLD TO
STORE CURRENT STATION
TAP TO ACTIVATE ALARM
PRESS AND HOLD TO ADJUST ALARM
SELECTS RADIO BAND
PRESS REPEATEDLY TO SWITCH
BETWEEN FM1, FM2, AND AM
SELECTS AUX INPUT
SELECTS PLAYER INPUT
FOR USE WITH OPTIONAL
PLAYER DOCK
PRESS REPEATEDLY TO CHOOSE SLEEP
TIME (15 MIN TO 120 MIN)
SELECTS RADIO “ON” OR “OFF”
ALARMS OPERATE IN “OFF” MODE
PRESS REPEATEDLY TO VIEW RADIO SETTINGS.
USE VOLUME TO ADJUST SETTINGS.
SEE *JOG MENU ITEMS - NEXT PAGE.
SOUNDWORKS RADIO CD 745 REMOTE CONTROL
RADIO AND ALARM FUNCTION
Page 23

- 20 -
TR
ACK /TU NE/ A
DJ
FOLD ER
REPE
AT
JOG
SLEEP
SNOOZE
MUTE
1 2
3
4
5 6 7 8
CD MOD E
CD TI ME
ALA RMS
SEE K
DIS C
STO P
AUX
PRE SETS
VOLUME
FM
AM
HOLD
TO
ADJUST
1
2
SOU NDWO RKS RA DIO CD
ENTER
PLAYER
MENU
TAP TO ADVANCE OR GO BACK ONE AUDIO SELECTION
PRESS AND HOLD TO SCAN FORWARD OR BACKWARD
THROUGH AN AUDIO SELECTION
PRESS REPEATEDLY TO VIEW MANY RADIO SETTINGS.
USE VOLUME TO ADJUST SETTINGS.
SEE *JOG MENU ITEMS.
PLAYBACK AND NAVIGATION CONTROL
FOR USE WITH OPTIONAL PLAYER DOCK
DURING DISC PLAY:
TAP TO STOP PLAY WITH
RESUME FEATURE
TAP TO START DISC PLAY
TAP AGAIN TO PAUSE DISC
PLAY
TAP THESE BUTTONS
TO MOVE BETWEEN
DIFFERENT FOLDERS
ON A CD-ROM
SELECTS PLAYER INPUT
FOR USE WITH OPTIONAL
PLAYER DOCK
SELECTS RADIO “ON” OR “OFF”
ALARMS OPERATE IN “OFF” MODE
BASS- +4 TO -4
TREBLE- +4 TO -4
STEREO, WIDE, MONO
LOUDNESS- ON, OFF
SNOOZE TIME- 5 MIN TO 22 MIN
RDS TEXT- SCROLLING, FIXED, OFF
DISC TEXT- SCROLLING, FIXED, OFF
TIME DISPLAY- 12 hr AM/PM OR 24 hr
DISPLAY LANGUAGE- ENGLISH,
SPANISH, FRENCH, ITALIAN OR
GERMAN
TAP THIS BUTTON FOR:
AUDIO CD: TRACK TIME ELAPSED
TRACK TIME REMAINING
TOTAL TIME ELAPSED
TOTAL TIME REMAINING
CD-ROM: TRACK TIME ELAPSED
TAP THIS BUTTON FOR:
AUDIO CD: RANDOM PLAY
PLAY ONE TR ACK
CD-ROM: RANDOM PLAY OF DISC
PLAY ONE FOLDER
RANDOM PLAY OF ONE FOLDER
PLAY ONE TR ACK
SOUNDWORKS RADIO CD 745 REMOTE CONTROL
DISC PLAY FUNCTION
*JOG MENU ITEMS:
Page 24

- 21 -
PLAYER
POWER
OUTPUT
INPUT
AM
ANTENNA
FM ANTENNA
EXT
INT
INPUT
75 OHMS
PLAYER
INPUT
POWER OUTPUT FOR OPTIONAL PLAYER DOCK
AM ANTENNA INPUT MINIJACK
3.5mm STEREO MINIJACK PLAYER INPUT
FOR OPTIONAL PLAYER DOCK
INTERNAL / EXTERNAL FM
ANTENNA SELECTOR
EXTERNAL FM ANTENNA “F”
TYPE INPUT
QUICK REFERENCE GUIDE - SOUNDWORKS RADIO CD REAR CONNECTIONS
Page 25

- 22 -
WIDE
STEREO MONO
Rocket Man..Elt
WBOS 8:57 AM
Radio Data Service (RDS)
Some FM radio stations broadcast Radio Data Service
(RDS) text along with their programs. Station Identication
Text is displayed in the rst 8 characters of the lower line.
This text generally does not change. Descriptive Text
is displayed on the top line. This text may describe the
station’s format or it may show the song title and artist.
CD-Text
Audio CDs now include descriptive text stored along
with their audio programs. The radio CD will decode and
display this text.
MP3/WMA File ID3 Text Information
MP3/WMA les downloaded from the internet may
contain ID3 text information. ID3 text information can be
added to MP3/WMA les as the le is created from an
uncompressed audio source. The radio CD will display
this text when present in MP3/WMA les. If there is no ID3
text information, the radio CD will display the le name.
Choosing Text Displays
The JOG menu has separate RDS text and Disc text
headings that let you choose between scrolling text
display, static text display or no text display.
RADIO AND DISC TEXT DISPLAYS
WIDE
STEREO MONO
CD > IN THE SUN
TRACK 3 3m 03s
WIDE
STEREO MONO
SYMPH 4 BRAHMS
MP3 11:09AM
RDS descriptive text
Identification text
CD descriptive text
MP3 file ID3 text
RADIO DATA SERVICE display
CD-Text display
MP3 ID3 Text display
Page 26

- 23 -
JOG button operation:
Press the JOG button on the radio or on the remote
control to select the rst JOG function (see W). Press the
JOG button again to select additional JOG functions.
Use the VOLUME knob or the VOLUME buttons ( )
on the remote control to adjust settings of JOG functions.
JOG operation is cancelled ve seconds after the last
JOG or VOLUME adjustment. Pressing any other radio
CD function also cancels JOG operation.
JOG FUNCTIONS
TRACK/ TUNE /ADJ
FOLDERREPEAT
JOG
SLEEP
SNOOZE
MUTE
1 234
5 6 7 8
CD MODE
CD TIME
ALARMS
SEEK
DISC
STOP
AUX
PRESET S
VOLUME
FM
AM
HOLD
TO
ADJUST
1
2
SOUNDW ORKS R ADIO C D
ENTER
PLAYER
MENU
CD IN
1 2 3 4
5 6 7 8
FM2 P1
88.1 9:43AM
W
VOLUME
Page 27

- 24 -
JOG functions:
Bass: Bass output can be adjusted in four steps
up or down.
Treble: Treble output can be adjusted in four
steps up or down.
Stereo/Wide/Mono: Adjustment cycles through
Stereo, Wide and Mono modes. Mono operation
is cancelled when standby is entered.
Loudness: With Loudness engaged, the radio
CD will boost the bass output at low volume
settings.
Snooze Time: Adjustable from 5 minutes to 22
minutes.
Disc Text Display: For audio CDs that have CD
text or MP3 les, choose between “scrolling text”
display, “static text” display and no text display.
RDS Text Display: For FM stations RDS text,
choose between “scrolling text” display, “static
text” display and no text display.
Time Display Mode: Choose 12 hour AM/PM
time (US standard) or 24 hour time (international
standard).
Display Language: Choose English, Spanish,
French, Italian or German.
•
•
•
•
•
•
•
•
•
JOG FUNCTIONS (Continued)
MONO
WIDE
STEREO
MONO
ADJUST BASS
+1
MONO
WIDE
STEREO
ADJUST TREBLE
+1
WIDE
STEREO
MONO
ADJUST LANGUAGE
English
BASS Adjustment display
WIDE
STEREO
ADJUST
STEREO
STEREO/WIDE/MONO
Adjustment display
TREBLE Adjustment display
WIDE
STEREO
MONO
ADJUST LOUDNESS
Off
LOUDNESS
Adjustment display
WIDE
STEREO MONO
ADJUST SNOOZE
9 MIN
SNOOZE Adjustment display
WIDE
STEREO
MONO
RADIO TEXT MODE
SCROLLING TEXT
RDS TEXT
Adjustment display
WIDE
STEREO MONO
DISC TEXT MODE
SCROLLING TEXT
DISC TEXT
Adjustment display
WIDE
STEREO MONO
ADJUST 12/24 hr
12 hr + AM or PM
Time Adjustment display
Language Adjustment display
Page 28

- 25 -
Adjusting the Wakeup Settings
During Wakeup Settings adjustment, you select
Wakeup Time and the Music Wakeup Source and
Volume. The choice of Tone or Music Wakeup is
selected later as the alarm is activated.
Note: Store any radio station you wish to use as a
Wakeup station in a preset location.
Press and hold either the ALARM 1 or the ALARM 2 button
until a short tone is heard (about 1.5 seconds). The radio
CD enters Wakeup Adjustment mode. Wakeup Adjustment
persists for about 15 seconds if no button is pressed. You
always have 5 seconds between adjustments.
At any point during the Wakeup Adjustment session, you can
choose your preferred Music Wakeup by selecting FM1, FM2,
AM or CD. After choosing a radio preset bank (FM1, FM2
or AM), choose the desired station by pressing its PRESET
button on the faceplate or the remote control.
To wake to a specic audio CD track: Insert the audio
CD, enter Alarm Adjustment session, press the CD Play/
Pause button to select wake to CD. Then use TRACK/TUNE/
ADJ buttons on the radio faceplate to select the desired track.
1.
2.
WAKEUP FUNCTIONS
TRACK/ TUNE /ADJ
FOLDERREPEAT
JOG
SLEEP
SNOOZE
MUTE
1 234
5 6 7 8
CD MODE
CD TIME
ALARMS
SEEK
DISC
STOP
AUX
PRESET S
VOLUME
FM
AM
HOLD
TO
ADJUST
1
2
SOUNDW ORKS R ADIO C D
ENTER
PLAYER
MENU
CD IN
1 2 3 4
5 6 7 8
Alarm 1
Adjustment
2
PO
WE
R
TRACK/ TUNE /ADJ
FOLDERREPEAT
JOG
SLEEP
SNOOZE
MUTE
1 234
5 6 7 8
CD MODE
CD TIME
ALARMS
SEEK
DISC
STOP
AUX
PRESET S
VOLUME
FM
AM
HOLD
TO
ADJUST
1
2
SOUNDW ORKS R ADIO C D
ENTER
PLAYER
MENU
CD IN
1 2 3 4
5 6 7 8
FM2 P1
88.1 9:43AM
Entering WAKEUP Adjustment
MUSIC WAKEUP Adjustment, First screen
Page 29

- 26 -
CD IN
1 2 3 4
5 6 7 8
Alarm 1 Time
8:52 AM
CD IN
1 2 3 4
5 6 7 8
Alarm 1 Volume
12
At any time during the Wake-up Adjustment session, you can
determine the Music Wake-up volume by adjusting the volume
on the radio faceplate or the remote control.
At any point in the Wake-up Adjustment session, you can
determine the wake-up time by using the TIME ADJUST
BUTTONS on the front panel or the TRACK/TUNE/ADJ
adjustment on the remote control.
End the Wake-up Adjustment session by pressing the same
ALARM button again, or just wait about 10 seconds. The Wakeup Adjustment session will automatically end. Either way, the
radio CD will store your new settings.
.
3.
4.
5.
WAKEUP FUNCTIONS (Continued)
E
TRACK/ TUNE /ADJ
FOLDERREPEAT
JOG
SLEEP
SNOOZE
MUTE
1 234
5 6 7 8
CD MODE
CD TIME
ALARMS
SEEK
DISC
STOP
AUX
PRESET S
VOLUME
FM
AM
HOLD
TO
ADJUST
1
2
SOUNDW ORKS R ADIO C D
ENTER
PLAYER
MENU
TRACK/ TUNE /ADJ
FOLDERREPEAT
JOG
SLEEP
SNOOZE
MUTE
1 234
5 6 7 8
CD MODE
CD TIME
ALARMS
SEEK
DISC
STOP
AUX
PRESET S
VOLUME
FM
AM
HOLD
TO
ADJUST
1
2
SOUNDW ORKS R ADIO C D
ENTER
PLAYER
MENU
PO
WAKEUP Volume adjustment
WAKEUP Time adjustment
Page 30

- 27 -
CD IN
1 2 3 4
5 6 7 8
Alarm 1 On
TONE 9:43AM
CD IN
Activating Wakeup:
While in standby or normal operation, tap either ALARM
button to cycle between:
Music Wakeup
Tone Wakeup
No Wakeup
A Music Wakeup indicator ( ) or a Tone Wakeup
indicator ( ) lights to show activation.
Music Wakeup only functions if the radio remains in
standby mode.
Tone Wakeup operates whenever it is activated. You can
use Tone Wakeup as a reminder function during the day
while using the radio normally.
•
•
•
WAKEUP FUNCTIONS (Continued)
TRACK/ TUNE /ADJ
FOLDERREPEAT
JOG
SLEEP
SNOOZE
MUTE
1 234
5 6 7 8
CD MODE
CD TIME
ALARMS
SEEK
DISC
STOP
AUX
PRESET S
VOLUME
FM
AM
HOLD
TO
ADJUST
1
2
SOUNDW ORKS R ADIO C D
ENTER
PLAYER
MENU
CD IN
1 2 3 4
5 6 7 8
Alarm 1 On
FM 9:43AM
CD IN
TRACK/ TUNE /ADJ
FOLDERREPEAT
JOG
SLEEP
SNOOZE
MUTE
1 234
5 6 7 8
CD MODE
CD TIME
ALARMS
SEEK
DISC
STOP
AUX
PRESET S
VOLUME
FM
AM
HOLD
TO
ADJUST
1
2
SOUNDW ORKS R ADIO C D
ENTER
PLAYER
MENU
1.
Page 31

- 28 -
SNOOZE 9min
9:43AM
CD IN
1 2 3 4
5 6 7 8
Alarm1 Off
Silencing a Wakeup
To cancel an operating Wakeup alarm for the day, but
keep it activated, tap the POWER button on the front
panel or the remote control. The Wakeup settings will
remain active and operate the next day.
To silence an alarm and deactivate it (cancel it from
function the next day), press the appropriate ALARM
button on the radio faceplate or the remote control.
Snooze Function
Tapping the SNOOZE/MUTE bar on the radio, or the
SNOOZE/MUTE button (see 2) on the remote will silence
a Wakeup alarm for a pre-determined period of time (5 to
22 minutes).
Adjust the SNOOZE delay period by using the JOG
function.
WAKEUP FUNCTIONS (Continued)
TRACK/ TUNE /ADJ
FOLDERREPEAT
JOG
SLEEP
SNOOZE
MUTE
1 234
5 6 7 8
CD MODE
CD TIME
ALARMS
SEEK
DISC
STOP
AUX
PRESET S
VOLUME
FM
AM
HOLD
TO
ADJUST
1
2
SOUNDW ORKS R ADIO C D
ENTER
PLAYER
MENU
TRACK/ TUNE /ADJ
FOLDERREPEAT
JOG
SLEEP
SNOOZE
MUTE
1 234
5 6 7 8
CD MODE
CD TIME
ALARMS
SEEK
DISC
STOP
AUX
PRESET S
VOLUME
FM
AM
HOLD
TO
ADJUST
1
2
SOUNDW ORKS R ADIO C D
ENTER
PLAYER
MENU
2.
Page 32

- 29 -
The radio CD recognizes MP3 and WMA compressed audio les stored on a CD-ROM disc. You can create (or “burn”)
your own CD-ROM compilation discs containing much more music than would t on a conventional audio CD. The radio
CD will also recognize folders at the top level of a CD-ROM and display their folder names. Use folders on a CD-ROM
as a convenient way to select between different group of music.
The radio CD recognizes a maximum of 99 tracks in any folder, or at the top level of a disc. The radio CD will not
recognize subfolders. The radio CD will treat MP3 les inside subfolders as being inside the top level folder.
.
Sequence of Play on a CD-ROM
The radio CD will rst recognize any MP3/WMA les stored on the top level of the CD-ROM. It will play those les
“le name” sequence. The radio CD will ignore any les that do not end in “.mp3” or “.wma”.
After the radio CD has played all MP3/WMA les on the top level of the CD-ROM, it will then play the contents of
any folders present on the CD-ROM in “le name” sequence.
If there are no “.mp3” or “.wma” audio les in the top level of the CD-ROM, the radio CD will automatically play the
contents of the rst folder on the CD-ROM (according to the “folder name” sequence).
Once all the contents of the rst folder are played, the radio CD will play the contents of any remaining folders at the
top level of the disc.
The FOLDER + and FOLDER – buttons skip to the next or previous directory in sequence according to the folder
names.
The diagram on page 19 is an example of the automatic play sequence the radio CD follows when playing the
contents of a CD-ROM.
a)
b)
c)
d)
e)
f)
CD-ROM PLAY
Page 33

- 30 -
mp
3
Title b
mp
3
Title a
Top Level of the CD-ROM
Folder a Folder b More Folders
CD-ROM
mp
3
mp
3
mp
3
mp
3
mp
3
mp
3
Title a
Title b
Title c
Title a
Title b
T
itle c
mp
3
mp
3
mp
3
Title a
Title b
T
itle c
1
2
3
4
5
6
7
8
9
10
11
Tips for Preparing an MP3 or WMA CD-ROM
Start the title of each track or folder with a number to designate its sequence. Many CD-ROM recording programs
support the automatic addition of sequence numbers to the start of each MP3/WMA le name.
The radio CD treats numbers as text when determining track and folder sequence. Use a leading zero on single digit
numbers (01, 02, 03..,) if the total of your tracks or folders is ten or greater.
The radio CD supports a maximum of 99 tracks at the top level of a CD or within any folder at the top level of the
CD-ROM.
1)
2)
3)
This diagram assumes you are using only “.mp3” les. A CD-ROM containing “.wma” les or a mix of
both “.mp3” and “.wma” les will operate in the same order..
PLAY SEQUENCE
Tracks and Folders
played in alphabetical
order.
Page 34

- 31 -
Arranging MP3 or WMA Files and Folders on a CD-ROM
Place only folders at the top level of your CD-ROM (no MP3/WMA les). This lets you cycle through the folders
using the FOLDER + and FOLDER – buttons in a similar manner to choosing discs in a multiple CD disc player.
RIP (compress) your favorite tracks from an audio CD into a folder on your computer hard drive. Make sure the
track titles start with numbers according to your desired track sequence.
Repeat the procedure for other groups of compressed audio les you wish to store on the same CD-ROM, saving
the les in separate folders on your hard drive.
Use folder titles with a number at the start, in a sequence of your choice.
“Burn” all the folders onto a CD-ROM at once.
Once completed, you could have a CD-ROM with much more music than a conventional audio CD. You can
navigate through each folder simply by pressing the FOLDER + and FOLDER – buttons.
CD-ROM Preparation:
Maximum number of individual MP3/WMA les supported on a CD-ROM: 295 les
If the total number of MP3/WMA les on the CD-ROM exceeds 295, the folder name display, folder play sequence and
MP3/WMA le play sequence will be unpredictable.
Maximum folders supported on a CD-ROM: 29 folders.
Multi-session CD-ROM: The SoundWorks Radio CD will recognize just the rst session of a CD-ROM. Burn complete
CD-ROMs for use with the SoundWorks Radio CD.
a)
b)
c)
d)
e)
f)
CD-ROM PLAY (Continued)
Page 35

- 32 -
mp3
mp3
mp3
mp3
mp3
mp3
mp3
mp3
mp3
mp3
mp3
mp3
mp3
mp3
mp3
mp3
01 Folder Name
01 Title
02 Title
03 Title
02 Folder Name
Top Level of the CD-ROM
03 Folder Name 04 Folder Name
CD-ROM
01 Title
02 Title
03 Title
01 Title
02 Title
03 Title
01 Title
02 Title
03 Title
This diagram assumes you are using only “.mp3” les. A CD-ROM containing “.wma” les or a mix of
both “.mp3” and “.wma” les will operate in the same order..
More Folders
Page 36

- 33 -
PLAYER DOCK - Universal Dock for iPod (Optional)
Using the iPock Dock
Connect the Dock’s two plugs to the SoundWorks Radio’s
rear input panel:
Insert the 3.5 mm plug into the PLAYER INPUT
minijack
Insert the 2.5 mm plug into the PLAYER POWER
OUTPUT minijack
Position the Dock to one side of the radio. Make
sure the Dock is facing the same direction as the
SoundWorks Radio. The SoundWorks Radio remote
controls the Dock directly.
Attach your iPod to the Apple iPod connector on the
top of the dock.
Push the PLAYER button on the front face of the
SoundWorks Radio, or the PLAYER button on the
SoundWorks Radio remote control to select the
PLAYER source.
1.
2.
3.
4.
5.
MENU
PLAYER
POWER
OUTPUT
INPUT
AM
ANTENNA
FM ANTENNA
EXT
INT
INPUT
75 OHMS
PLAYER
INPUT
2.5 mm
3.5 mm
Rear Connection Panel of SoundWorks Radio
Page 37

- 34 -
ENTER
MENU
PLAYER DOCK - Universal Dock for iPod (Continued)
Use the PLAYER CONTROL BUTTONS on the remote control
to perform iPod functions.
You will need to push the PLAY/PAUSE button
( ) in the PLAYER CONTROL BUTTONS section on the
SoundWorks Radio remote control, or the Play/Pause
button on the iPod to wake a hibernating iPod when
connected to the Dock.
Note:
The blue status light on the iPod dock comes on when
the SoundWorks Radio is ON. It will go out when the
SoundWorks Radio is in Standby.
The SoundWorks Radio remote will control a connected
iPod only while the SoundWorks Radio is ON.
The Dock will charge an iPod only when the Dock is
connected to a SoundWorks Radio that has AC power.
ENTER
MENU
PLAYER CONTROL BUTTONS on SoundWorks Radio remote
Blue light
Should the Dock stop responding to commands
from the SoundWorks Radio remote control, simply
unplug, then plug back in, the 2.5mm minijack from the
SoundWorks Radio’s PLAYER POWER OUTPUT jack
to reset the Dock.
Page 38

- 35 -
COMPOSITE
OUT
S-VIDEO
OUT
PRESETS
1
2
3
4
5
6
7
8
MENU
PLAYER DOCK - Universal Dock for iPod (Continued)
Use the COMPOSITE OUT or S-VIDEO OUT jack on the
back of the iPod dock for connection to a television. iPod
with video support required.
Use the second recess behind the iPod connector to store
the SoundWorks Radio remote control.
Page 39

- 36 -
SPECIFICATIONS
Internal audio sources:
FM stereo tuner with display of Radio Data Service text from
supporting FM stations.
AM tuner
CD Transport With:
Audio CD play supporting display of CD-text
Decode and playback of MP3 and WMA les from CD-ROM disc
MP3 Data rates supported: 30-300 kbps and variable data rates
Inputs:
One rear panel PLAYER INPUT 3.5 mm stereo minijack for use with
optional PLAYER DOCK
One rear panel PLAYER POWER OUTPUT for use with optional
PLAYER DOCK.
One rear panel AM Antenna 3.5 mm stereo minijack
Antenna stereo minijack conguration
Sleeve - no connection, tip and ring-wire loop antenna
One rear panel FM Antenna “F”-type jack, 75 ohms
Outputs:
One front panel Headphone 3.5 mm stereo minijack
Rear Panel Controls:
FM antenna INT/EXT switch
Dimensions:
English Metric
Height: 4 15/16 inches 125 mm
Width: 14 inches 356 mm
Depth: 9 7/8 inches 248 mm
Depth (with knob and AC cord):
10 3/8 inches 258 mm
Weight: 12 lbs 5.5 kg
Page 40

Rev 1a
English
P81-2380
 Loading...