

Page 1

SoundWorks
®
765i
USER MANUAL
Page 2
The exc al mation point within an
equilateral trian gle is intended
to alert the user to the presence
of important operating and
maintenance (servicing) instructions in the
literature accompanying the appliance.
symbol, within an equilateral
triangle, is intended to al ert the
user to the presence of uninsulated
“dangerous voltage” within the product’s
constit ute a risk of electric shock to persons .
1) Read these instructions.
2) Keep these instructions.
3) Heed all warnings.
4) Follow all instructions
5) Do not use this apparatus near water.
6) Clean only with dry cloth.
7) Do not block any ventiliation openings. Install in accordance with
the manufacturer’s instructions.
WARNING
DO NOT OPEN
TO PREVENT THE RISK OF ELECTRIC
SHOCK, DO NOT REMOVE COVER.
NO USER-SERVICEABLE PARTS
INSIDE. REFER SERVICING TO
QUALIFIED SERVICE PERSONNEL.
IMPORTANT SAFETY INSTRUCTIONS
8) Do not install near any heat sources such as radiators, heat
registers, stoves, or other apparatus (including that
produce heat.
SEE MARKING ON BOTTOM/BACK OF PRODUCT
Page 3

3
9) Do not defeat the safety purpose of the polarized or ground
ing-type plug. A polarized plug has two blades with one wider
than the other. A grounding type plug has two blades and a third
grounding prong. The wide blade or the third prong are provided
for your safety. If the provided plug does not into your outlet,
consult an electrician for replacement of the obsolete outlet.
10) Protect the power cord from being walked on or pinched, particu
-
larly at the point where they exit from the apparatus.
11) Only use attachments/accessories by the manufacturer.
13) Unplug this apparatus during lightning storms or when unused
for long periods of time.
14) Refer all servicing to service personnel. Servicing is
required when the apparautus has been damaged in any way,
such as power-supply cord or plug is damaged, liquid
has been spilled or objects have fallen into the apparatus, the ap
paratus has been exposed to rain or moisture, does not operate
normally, or has been dropped.
15) Do not expose this apparatus to drips or splashes.
16) Do not place any objects with liquids, such as vases, on the
apparatus.
17) Do not install this apparatus in a space such as a book
case or similar unit.
18) The apparatus draws nominal non-operating power from the AC
outlet with its STANDBY/ON switch in the standby position.
19) The apparatus should be located close enough to the AC outlet
so that you can easily grasp the power cord plug at any time.
CAUTION - Danger of explosion if
battery is incorrectly replaced. Replace
only with the same or equivalent type.
Batteries shall not be exposed to
andthe like.
Replaceable Lithium Battery
Disconnect the product from
the AC mains power by
removing the product’s AC
power plug from the AC
power outlet.
Use only with the cart, stand, tripod,
manufacturer, or sold with the apparatus.
When a cart is used, use caution when
moving the cart/apparatus combination
to avoid injury from tip-over.
12)
20)
Page 4

4
CAUTION
• DO NOT REMOVE THE EXTERNAL CASES OR CABINETS TO EXPOSE THE ELECTRON-
ICS. NO USER SERVICEABLE PARTS ARE INSIDE.
• IF YOU ARE EXPERIENCING PROBLEMS WITH THIS PRODUCT, CONTACT CAMBRIDGE
SOUNDWORKS FOR A SERVICE REFERRAL. DO NOT USE THE PRODUCT UNTIL IT
HAS BEEN REPAIRED.
For CANADA
AC POWER CORD CONNECTION
CAUTION:
TO PREVENT ELECTRIC SHOCK, MATCH WIDE BLADE OF PLUG TO WIDE SLOT, FULLY
INSERT.
Pour le CANADA
CORDE DE CONNEXION CA
ATTENTION:
POUR EVITER LES CHOCS ELECTRICQUES, INTRODUIRE LA LAME LA PLUS LARGE DE LA
FICHE DANS LA BORNE CORRESPONDANTE DE LA PRISE ET POUSSET JUSQU'AU FOND.
WARNING:TO PREVENT FIRE OR SHOCK HAZARD, DO NOT EXPOSE THIS APPLIANCE
TO RAIN OR MOISTURE.
FCC STATEMENT FOR THE U. S. A.
This equipment has been tested and found to
comply with the limits of part 15 of the FCC rules. These limits are designed to provide reasonable protection agains harmful interference in a residential installation. This
equipment generates, uses, and can radiate radio frequency energy and, if not installed
and used in accordance with the instructions, may cause harmful interference to radio
communications. However, there is no guarantee that interference will not occur in a
particular installation. If this equipment does cause harmful interference to radio or television reception, which can be determined by turning the equipment and on, the
user is encouraged to try to correct the interference by one or more of the following
measures:
• Reorient or relocate the equipment and/or the receiving antenna.
• Increase the separation between the equipment and receiver.
• Connect the equipment to an AC outlet on a circuit from that to which the
receiver is connected.
• Consult the dealer or an experienced radio/TV technician for help.
CAUTION
Changes or to this equipment not expressly approved by Cambridge
SoundWorks for compliance will void the user's warranty.
Page 5

5
Table of Contents
Introduction .........................................................................................................6
Contents ................................................................................................................6
Getting Started................................................................................................7-8
TV or No TV ...........................................................................................................9
Radio Operation .........................................................................................10-11
iPod Operation ................................................................................................. 12
Disc Play ........................................................................................................13-15
Quick Reference-Face and Top .............................................................16-17
Quick Reference-Remote Control ........................................................18-19
Quick Reference-Rear Panel ........................................................................ 20
Text Displays ......................................................................................................21
External Audio Source Connection ........................................................... 22
Convenience Features ...................................................................................23
JOG Menu Functions ......................................................................................24
Wakeup Alarm Operation .......................................................................25-27
Creating Writable Discs ...........................................................................28-29
Specication ...................................................................................................... 30
Page 6
6
Contents
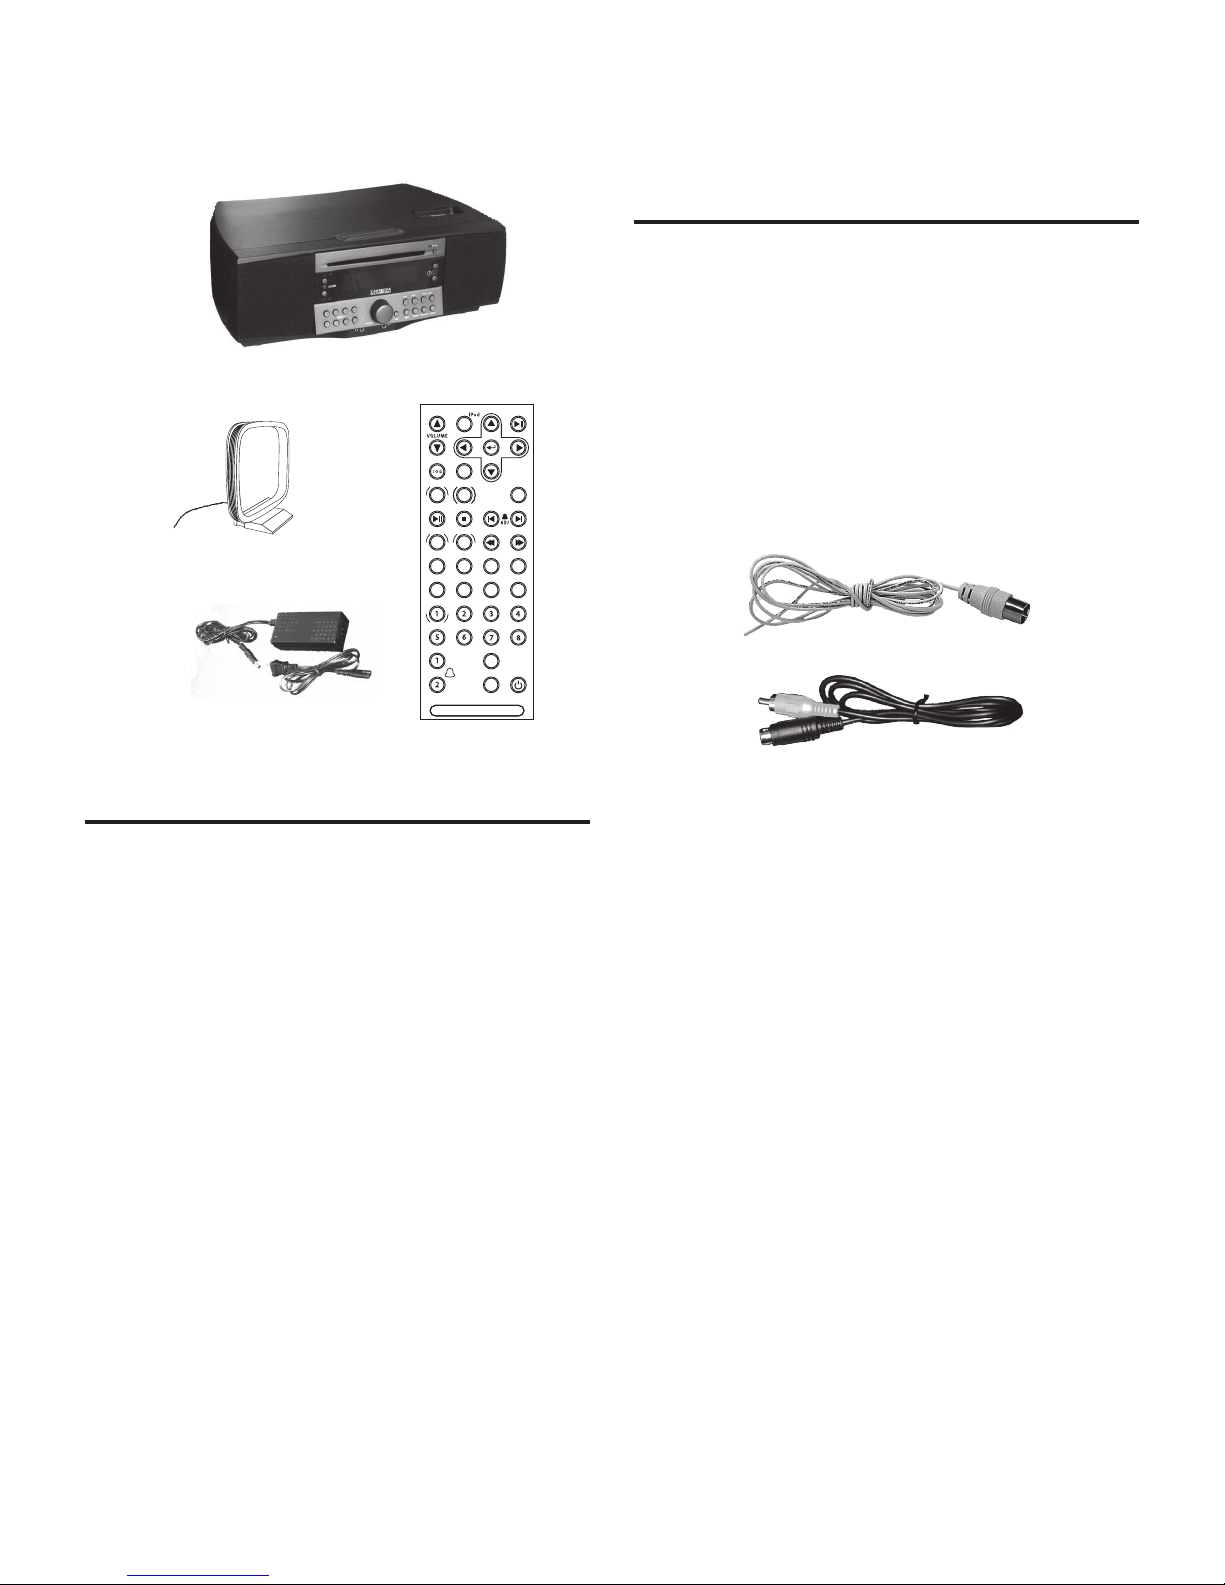
1) Sound Works 765i
2) External AM Loop Antenna
3) Infrared Remote Control
4) AC to DC Power Supply
5) FM Wire Antenna
(connected to 765i at back)
6) Composite Video Output connector
Not Pictured
SoundWorks 765i User Manual
1
2 3
4
PBC SETUP
MENU
SUBTITLE RANDOM
SLOW STEP TITLE REPEAT
MENU S EEK
TRACK/ TUNE
DISC INFO
AUX
SLEEP
SNOO ZE
SO U N DW O RK S i7 6 5
RADIO
ANGLE
PRE SE TS
MUTE
INTRODUCTION
The people at Cambridge SoundWorks hope you
enjoy your new high-performance SoundWorks
765i. In addition to bringing your iPod’s music
library to life, your new music system has great FM
stereo sound and plays useful AM band stations. It
stores 16 FM station presets along with 8 AM station
presets. An integral, slot-load DVD/CD disc player
plays audio CDs, and MP3/WMA les on CD-ROM
and DVD-ROM. The large 32-character display and
full-function remote makes 765i operation easy
from across the room.
TELEVISION SUPPORT
If you connect the 765i video output to a
compatible television or video monitor, you can
view video content from your iPod. In addition, you
can use the internal disc player to view DVD-videos
or jpg images on CD-ROM or DVD-ROM.
Additional Features
The SoundWorks 765i displays supplementary text on
its large 2 X 16 character LCD panel:
• Radio Data Service (RDS) FM station text.
• Text stored within audio and video les
stored on your iPod (not all iPod models
support this feature).
• An automatic dimmer function reduces display
brightness in dark rooms while maintaining good
legibility in bright light.
• The 765i has a built-in energy storage device that
maintains the current time accurately without AC
power for up to ve minutes.
• Front jacks allow easy connection of audio sources
(like portable digital music and cassette players) or
headphones for private listening.
• A convenient JOG button lets you select from a
variety of adjustments (Bass and Treble, Snooze time
and Text display modes, among others).
5
6
Page 7
7
GETTING STARTED
A) Remove the SoundWorks 765i from its protective
polybag and place it in your preferred location.
Note: The 765i’s bass output will be reduced if it is
placed on a plush surface, like a thick carpet or rug.
The Tone Alarm volume will also be reduced.
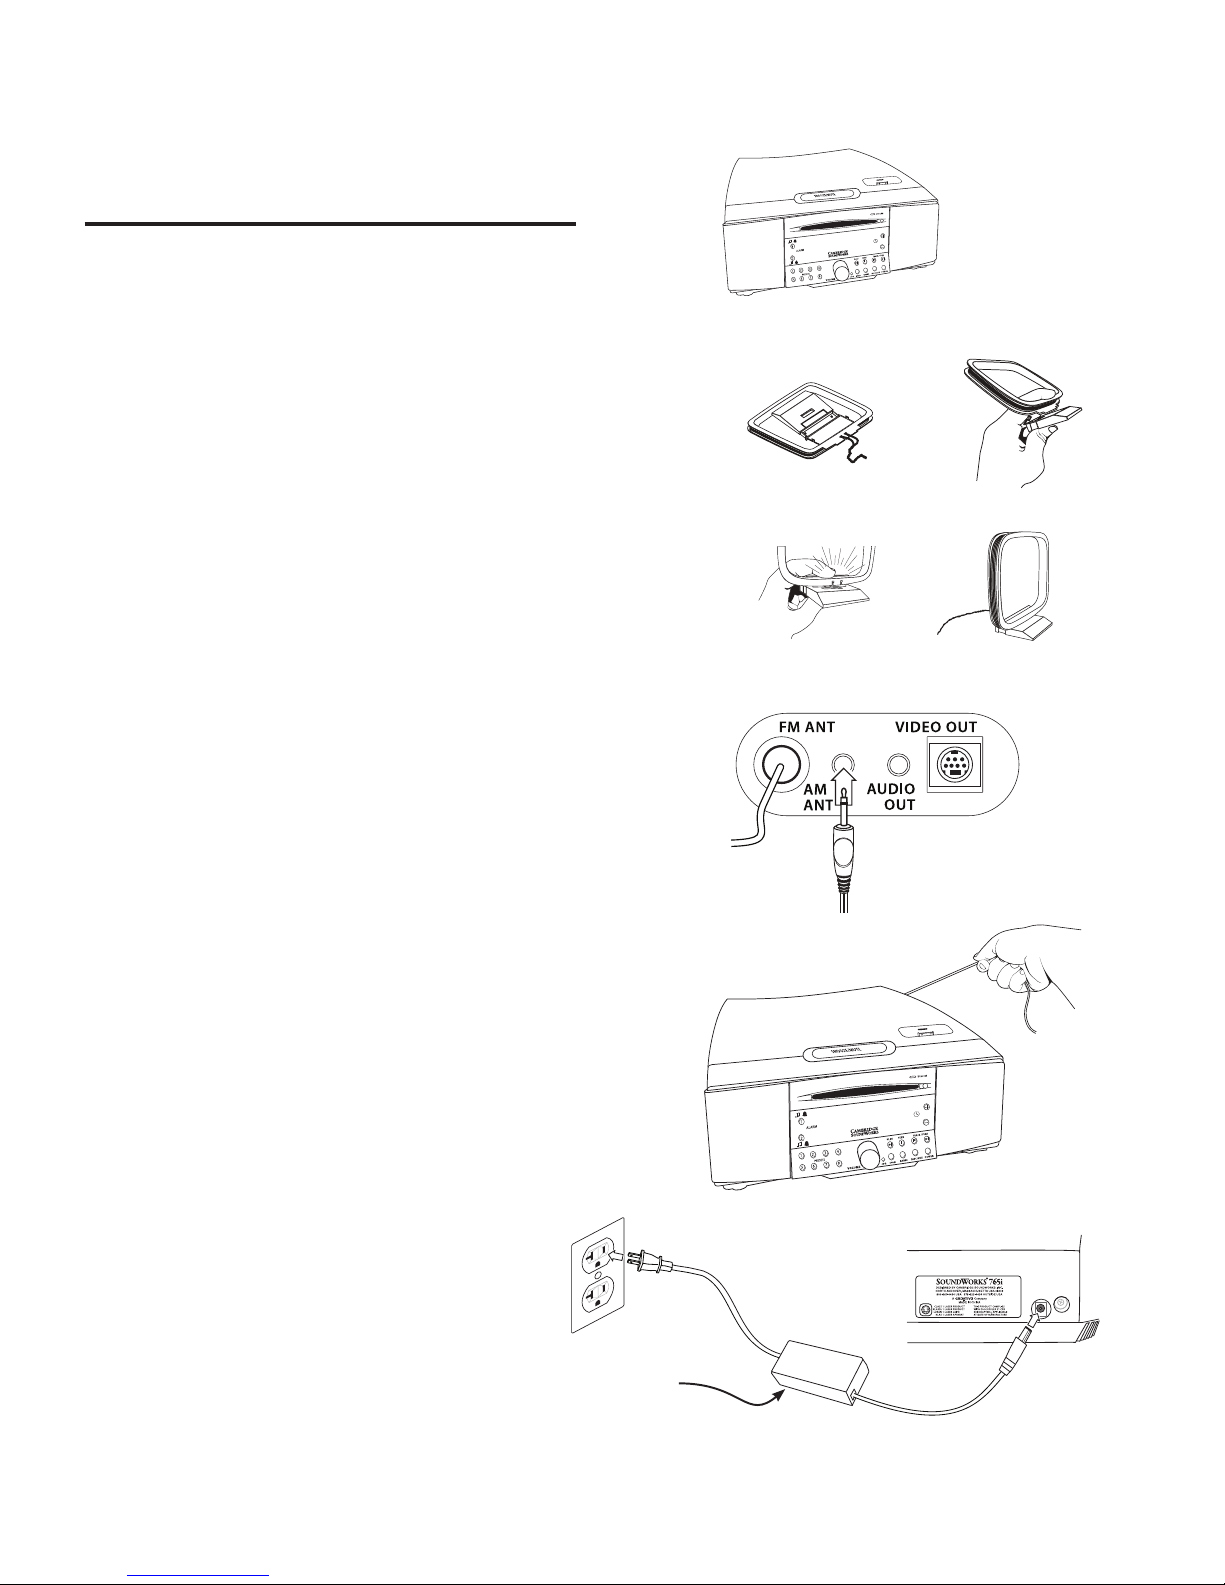
B) To prepare and connect the AM band antenna:
1) Locate the antenna
2) Fold the base
3) Snap the base into place
4) Position the AM antenna in an out-of-the-way
site. Avoid placing it near the 765i Power Supply.
Insert the AM Antenna’s miniplug into the REAR
CONNECTOR PANEL minijack marked AM ANT.
Rotate the AM antenna to achieve the best signal for
individual AM stations.
C) Straighten the wire antenna on the
REAR CONNECTOR PANEL marked “FM ANT”.
A
B
D
21
43
C
REAR CONNECTOR PANEL
D) Connect the Power Supply by inserting the its AC
plug into a convenient outlet. Then insert the Power
Supply’s smaller DC plug into the jack in the rear of
the 765i marked DC power.
1
STRAIGHTEN FM WIRE ANTENNA
765i POWER INPUT
For best AM radio reception, position
the Power Supply case at least three feet
away from the AM Antenna
Page 8

8
GETTING STARTED (Continued)
Set the Current Time
E) You can adjust the current time whether the
765i is in Standby or On. Just press the TIME ADJUST
BUTTONS (next to the symbol) on the right hand
side of the display.
Note: The remote control can adjust the wakeup
time setting, but not the current time.
Current Time Backup Feature
The 765i features a solid state storage device that
keeps the current time accurate in the event of
a short interruption in AC power. The 765i will
maintain clock accuracy for up to three minutes
without AC power.
This feature maintains alarm function in the event
of an short power outage. It also allows transfer
of the radio from one site to the another without
losing the current time, if you plan ahead and have
convenient access to AC power at the new site.
Standby and On
F) Pushing the POWER button chooses Standby or
On operation.
The faceplate POWER button can also be used to
engage Sleep Delay operation (see page 23).
TIME SET
9:43 AM
8:29 AM
PBC SETUP
MENU
SUBTITLE RAND OM
SLOW STEP TIT LE REPEAT
MENU SEEK
TRACK/TU NE
DISC INFO
AUX
SLEEP
SNOOZE
SO UN D WO R K S i 7 65
RADIO
ANGLE
PRES ET S
MUTE
POWER BUTTON
TIME ADJUST BUTTON
E
F
Page 9
9
TV OR NO TV
The 765i’s standard operation assumes there is no
television connected. A few of the remote control
commands change if “TELEVISION CONNECTED” is
selected in the JOG menu.
A) The proper JOG menu choice if a television
monitor is not connected is shown at left:
TELEVISION NOT CONNECTED
Leave this JOG menu choice unchanged if you do
not plan to connect a television.
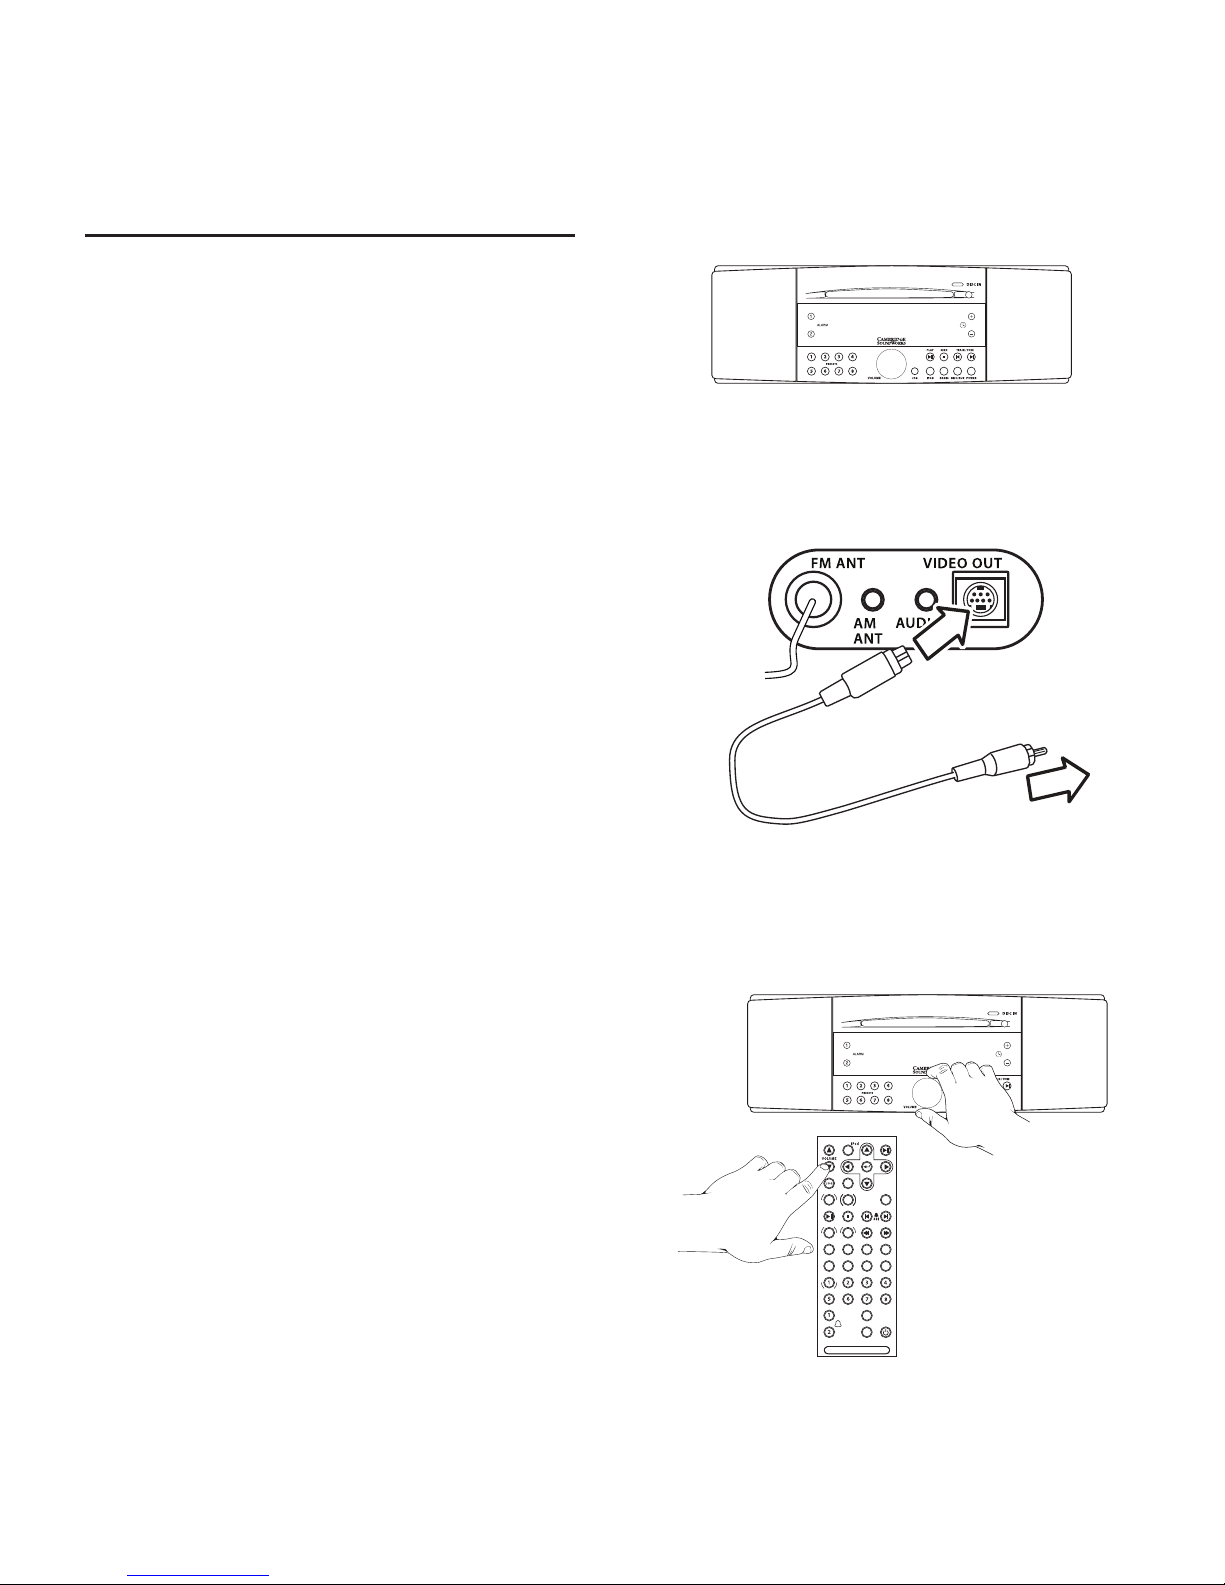
Connecting A Television
The 765i’s video output jack is a “hybrid” design,
providing both S-video output and composite video
output from the same jack. A connection cable is
provided with a composite video plug.
Any television with a composite video input can
be connected with the supplied video cable. A
composite video input is a round “RCA” type jack
with a single central hole, usually colored yellow.
An S-video connection provides better image
quality than composite video. If your television has
an S-video input jack, obtain a standard S-video
cable (S-video plugs at each end) to connect it.
B) Television connection is shown at right.
The 765i VIDEO OUT connection can only be made if
the plug is properly rotated. Do not force the plug in
to the connector jack.
Adjust The JOG Menu Television Status
C) Once you have connected the television, adjust
the JOG menu TELEVISION choice to
TELEVISION CONNECTED.
TELEVISION
CONNECTED
PBC SETUP
MENU
SUBTITLE RAND OM
SLOW STEP TIT LE REPEAT
MENU SEEK
TRACK/TU NE
DISC INFO
AUX
SLEEP
SNOOZE
SO UN D WO R K S i 7 65
RADIO
ANGLE
PRES ET S
MUTE
ADJUSTING THE TELEVISION STATUS
TELEVISION
NOT CONNECTED
JOG MENU TELEVISION CHOICE
A
C
CONNECTING THE COMPOSITE VIDEO CABLE
TO COMPOSITE VIDEO INPUT
765i REAR PANEL
B
Page 10
10
A
Selecting the
Radio Bands
A) Press RADIO to select radio operation. The 765i
returns to the last radio band and frequency used.
Pressing the RADIO button during radio operation
selects the next Radio band (FM1, FM2 or AM).
RADIO OPERATION
C
FM2 P1
89.7 9:43AM
PBC SETUP
MENU
SUBTITLE RAND OM
SLOW STEP TIT LE REPEAT
MENU SEEK
TRACK/TU NE
DISC INFO
AUX
SLEEP
SNOOZE
SO UN D WO R K S i 7 65
RADIO
ANGLE
PRES ET S
MUTE
B
FM2
95.3 10:57PM
PBC SETUP
MENU
SUBTITLE RAND OM
SLOW STEP TIT LE REPEAT
MENU SEEK
TRACK/TU NE
DISC INFO
AUX
SLEEP
SNOOZE
SO UN D WO R K S i 7 65
RADIO
ANGLE
PRES ET S
MUTE
PBC SETUP
MENU
SUBTITLE RAND OM
SLOW STEP TIT LE REPEAT
MENU SEEK
TRACK/TU NE
DISC INFO
AUX
SLEEP
SNOOZE
SO UN D WO R K S i 7 65
RADIO
ANGLE
PRES ET S
MUTE
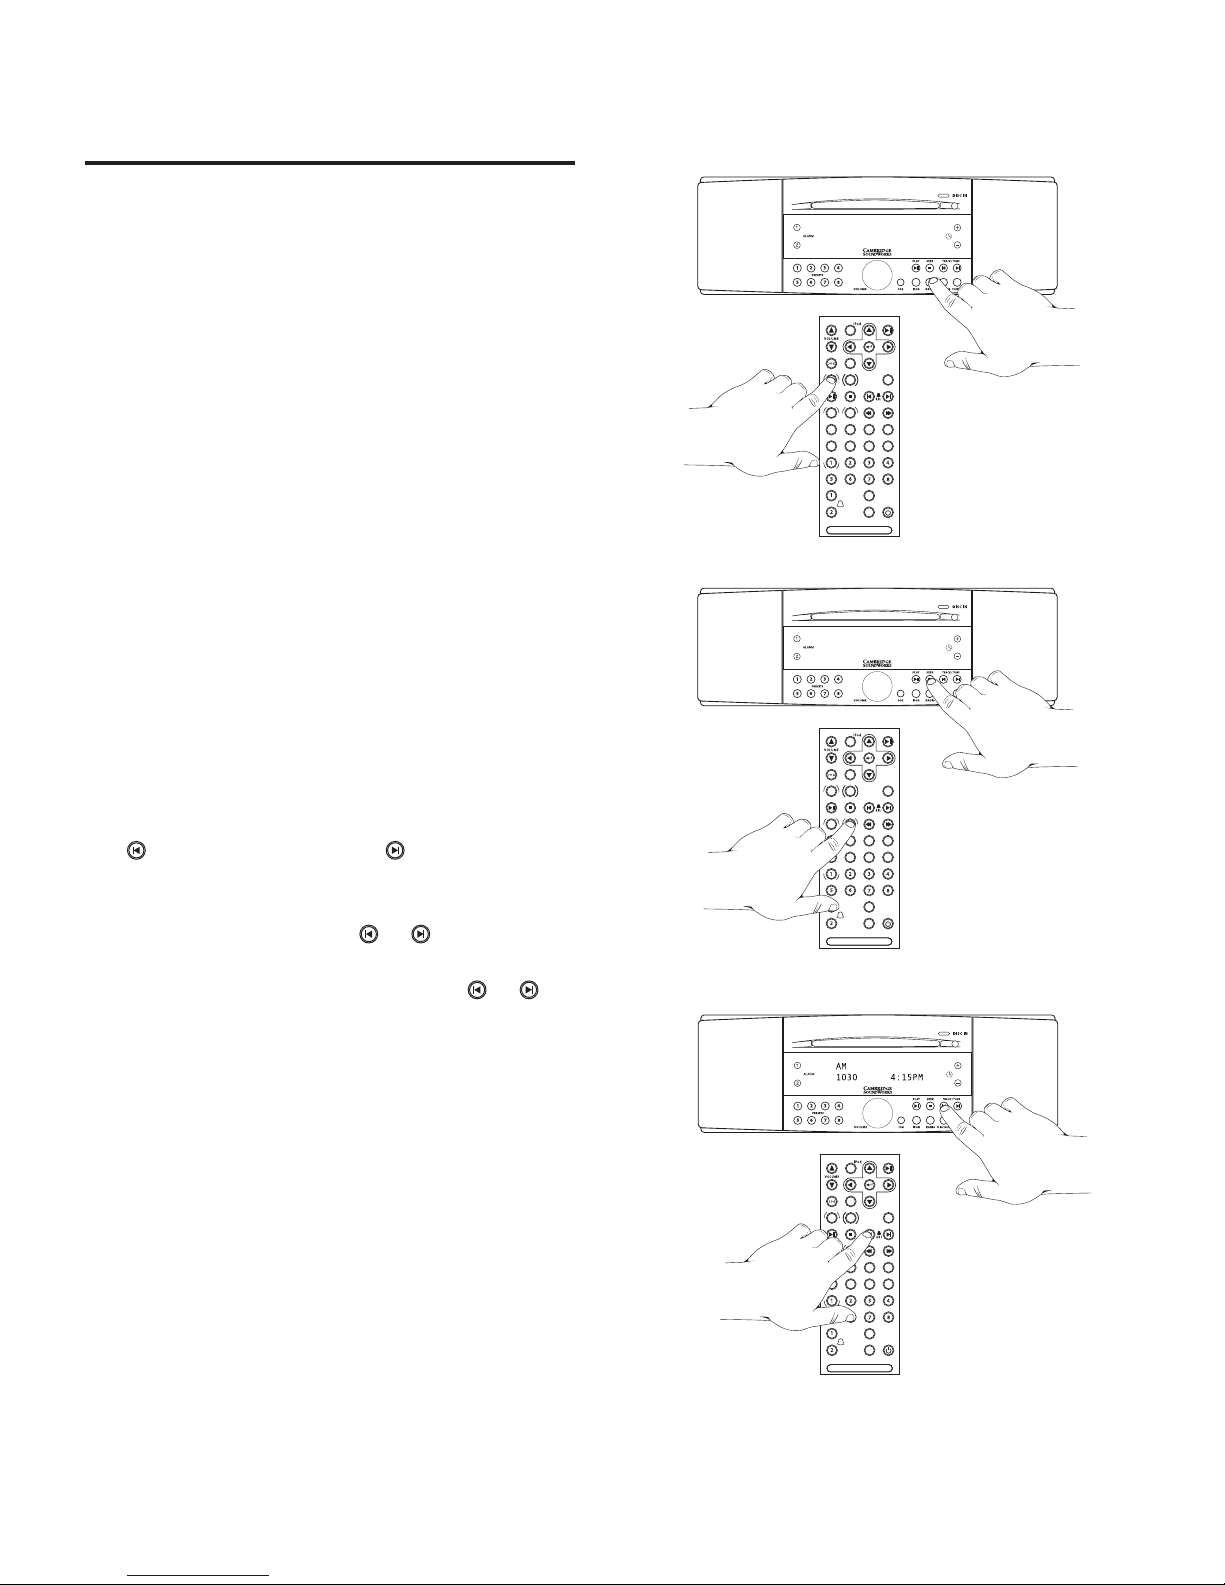
Tuning Stations
B) Autotune Method 1: Press the SEEK button
(remote or 765i face) to automatically tune (seek) to
the next station at a higher frequency.
C) Autotune Method 2: Press and hold either TRACK/
TUNE button to seek the next station.
The button seeks down, the button seeks up.
Manual Tune: To nd a specic frequency, press and
hold a TRACK/TUNE button ( or ) until you are
near the desired frequency. Tap the same button to
stop the seek function. Continue to tap or
to
advance one frequency increment at a time.
RADIO BUTTON
SEEK BUTTON
TRACK/TUNE BUTTON
Page 11

11
RADIO OPERATION (continued)
Storing Stations in PRESET Banks
You can store eight FM stations in the PRESET bank
while FM1 is selected, eight dierent FM stations
while FM2 is selected and eight AM stations while
AM is selected.
Press the RADIO button to choose the desired
Preset bank (FM1, FM2, AM) radio band. Tune to the
desired station. Press and hold the desired PRESET
button until a short tone is heard.
The station is stored.
SPECIAL FEATURE
When an FM frequency is stored in a Preset, the current
Stereo/Wide/Mono is also stored. When the Preset is tapped,
the stored setting will override the JOG menu setting.
Storing a weak FM stereo station in MONO will insure cleaner
reproduction under varying reception conditions.
FM P2
94.1 3:17PM
PBC SETUP
MENU
SUBTITLE RAND OM
SLOW STEP TIT LE REPEAT
MENU SEEK
TRACK/TU NE
DISC INFO
AUX
SLEEP
SNOOZE
SO UN D WO R K S i 7 65
RADIO
ANGLE
PRES ET S
MUTE
PRESET BUTTONS
Page 12

12
iPod DOCK
Using the iPod dock feature of the 765i
1) There are a variety of molded inserts included
with the SWR 765i. These inserts fit various iPod
models. Install the insert that best fits your iPod.
Make sure the insert snaps into the recess. The
top of the insert should be flush with the top of
the 765i.
2) Attach your iPod to the dock connector.
3) Select the iPod as a music source by pressing the
iPod button (remote or faceplate).
4) Use the iPod Buttons on the remote control to
control your iPod while it is docked in the 765i.
Note:
To wake a hibernating iPod, push the iPod PLAY/
PAUSE button on the 765i remote control,
or the Play/Pause button on the iPod.
The 765i will not control a connected iPod while the
765i is in STANDBY.
MENU
DISC
RADIO
MENU
1) Install the dock insert that fits your iPod.
2) Connect your iPod.
3) Select iPod
4) Use these iPod buttons to
operate your iPod.
Page 13

13
SELECTING DISC PLAY
Important: Use only standard 12 cm discs. Smaller
discs will not work in the slot load mechanism.
A) Insert a disc into the slot to automatically select
Disc play. The DISC IN light indicates if a disc is
inside the 765i.
B) If there is a disc inside the 765i, start disc play
by rst tapping the DISC/AUX button
, then the
PLAY/PAUSE button .
PAUSE: Tap the PLAY/PAUSE button
to cycle
between Play and Pause.
WIDE
STEREO
MONO
DISCIN
DISC IN
Light
DISC Insertion
CD�► T1 1m 23s
A
B
C
AUDIO DISC CONTROL
(Including Audio CDs, MP3/WMA audio les on writable CD or DVDs)
PBC SETUP
MENU
SUBTITLE RAND OM
SLOW STEP TIT LE REPEAT
MENU SEEK
TRACK/TU NE
DISC INFO
AUX
SLEEP
SNOOZE
SO UN D WO R K S i 7 65
RADIO
ANGLE
PRES ET S
MUTE
CD�► T3 0m 24s
PBC SETUP
MENU
SUBTITLE RAND OM
SLOW STEP TIT LE REPEAT
MENU SEEK
TRACK/TU NE
DISC INFO
AUX
SLEEP
SNOOZE
SO UN D WO R K S i 7 65
RADIO
ANGLE
PRES ET S
MUTE
D
CD T7 0m 24s
PBC SETUP
MENU
SUBTITLE RAND OM
SLOW STEP TIT LE REPEAT
MENU SEEK
TRACK/TU NE
DISC INFO
AUX
SLEEP
SNOOZE
SO UN D WO R K S i 7 65
RADIO
ANGLE
PRES ET S
MUTE
STOP BUTTON
TRACK ADVANCE, FAST SCAN OPERATION
PLAY BUTTON
C) Choosing Selections (illustration below)
Track selection: Tap the appropriate TRACK/TUNE
button ( or ).
Forward scan and reverse scan: Press and hold the
appropriate TRACK/TUNE button ( or ) to fast
scan. Release the button to stop fast scan.
D) Disc Stop (illustration to the right)
Press the STOP button once ( ) to stop disc play
with “resume from same location” feature. Press the
STOP button twice to stop disc play and return to
the start of the disc.
Page 14

14
DVD PLAY
Note: Disc insertion, Play, Pause and Track Advance
operation for a DVD video are the same as described
on the previous page for an Audio Disc.
Before inserting a DVD video disc, make sure you
have a television properly connected and that the
TELEVISION selection in the JOG menu is set to
TELEVISION CONNECTED.
DVD Controls
DVD video control is done with the remote control,
using the:
Gray “crossbar” buttons for on-screen control
Tan buttons for primary DVD play control
Black buttons for secondary DVD functions.
See pages 18 and 19 for a complete explanation of DVD
button functions.
PBC SETUP
MENU
SUBTITLE RAND OM
SLOW STEP TIT LE REPEAT
MENU S EEK
TRACK/T UNE
DISC INFO
AUX
SLEEP
SNOOZ E
SO U ND W O RK S i7 6 5
RADIO
ANGLE
PRE SE TS
MUTE
MEN U SEE K
TRA CK/ TU NE
DIS C
AUX
RAD IO
CROSSBAR BUTTONS
TAN BUTTONS
BLACK BUTTONS
DVD-RELATED BUTTONS ON THE REMOTE CONTROL
PBC SET UP SUBT ITLE RAND OM
SLOW ST EP T ITL E REPEAT
ANG LE
MENU
SETUP
Use the DVD MENU button to see the DVD-video
disc’s On-Screen menu.
Use the SETUP button to see the 765i’s DVD
conguration On-Screen menu.
FAST SCAN back BUTTON
FAST SCAN forward BUTTON
Press one of these buttons repeatedly to go from
normal play to 2x speed scan with sound, then
4X speed, 8X speed and 20x speed scan without
sound, then back to normal play.
MENU and SETUP buttons
The tan MENU button recall the DVD video’s onscreen menu. Use the DVD video’s on-screen menu
to nd specic titles and chapters on the disc. Use
the crossbar buttons to navigate within the onscreen menu.
The black SETUP button recalls the 765i’s DVD drive
conguration on-screen menu. Use this menu to
match the DVD video output to your television’s
screen shape and many other features.
See pages 18 and 19 for a complete explanation
of DVD button functions.
FAST SCAN buttons
If the 765i is connected to a television and the
“TELEVISION CONNECTED” JOG Menu choice is
selected, then the FAST SCAN buttons
are functional.
Page 15

15
ADDITIONAL DISC PLAY INFORMATION
During Disc Play
Press STOP
1 time Resumes from Same Location
2 times Start at beginning of Disc
Disc Play and the Power button: Pressing the
POWER button during disc play causes the 765i to
enter STANDBY track resume mode. Pressing the
POWER button again resumes play at exactly the
same location on the disc.
“FOLDER” navigation feature:
If the 765i is connected to a television and the
“TELEVISION CONNECTED” JOG Menu choice
is selected, then the File and Folder structure
of writable CDs and DVDs can be seen on the
television screen.
Use the Crossbar buttons to select the Folder and
File of your choice.
Disc Eject
Press the disc EJECT button.
CD�► T3 0m 24s
DISC EJECT BUTTON
Page 16

AUX
16
INSERT AUDIO SOURCE WITH 3.5 mm STEREO MINIPLUG HERE,
PRESS AUX TO HEAR IT
INDICATES ALARM STATUS
= MUSIC WAKEUP
= TONE WAKEUP
RADIO STATION PRESET BUTTONS:
PRESS AND HOLD TO STORE CURRENT STATION
TAP TO ACTIVATE ALARM
PRESS AND HOLD TO ADJUST ALARM
QUICK REFERENCE GUIDE - SOUNDWORKS 765i FACE AND TOP
INSERT HEADPHONES WITH 3.5 mm STEREO MINIPLUG HERE
FOR PRIVATE LISTENING
NORMAL OPERATION: PRESS TO MUTE SOUND.
DURING WAKEUP: PRESS TO ACTIVATE SNOOZE FEATURE.
Page 17

AUX
17
ADJUSTS VOLUME DURING NORMAL OPERATION
ADJUSTS SETTINGS IN JOG BUTTON OPERATION
PRESS REPEATEDLY TO VIEW MANY RADIO SETTINGS.
USE VOLUME TO ADJUST SETTINGS.
See page 24 for JOG Menu listing.
SELECTS IPOD, IF DOCKED
SELECTS RADIO
PRESS AGAIN TO SELECT BETWEEN FM1, FM 2, OR AM
SELECTS DISC PLAY, IF A DISC IS AVAILABLE.
PRESS AGAIN TO SELECT AUX FRONT PANEL INPUT
SELECTS RADIO
ON OR OFF (STANDBY )
ALARMS ACTIVE IN “OFF” MODE
PRESS REPEATEDLY FOR SLEEP DELAY FUNCTION
(15 MIN TO 120 MIN)
RADIO: TAP TO MANUAL TUNE,
PRESS AND HOLD TO SEEK TO NEXT STATION.
DISC: TAP TO ADVANCE OR GO BACK ONE AUDIO SELECTION,
PRESS AND HOLD TO SCAN FORWARD OR BACKWARD
THROUGH AN AUDIO SELECTION
RADIO: TAP TO AUTOMATICALLY SEEK THE NEXT STATION
UP THE BAND.
DISC: TAP TO STOP PLAY.
TAP TO START DISC PLAY, TAP AGAIN TO PAUSE DISC PLAYBACK.
EJECTS DISC
INDICATES DISC INSIDE
SETS CURRENT TIME IN NORMAL OPERATION
SETS WAKEUP TIME IN ALARM MODE
Page 18

PBC S ETUP
MENU
SUBTI TLE RAN DOM
SLOW STE P TIT LE REP EAT
MENU SEEK
TRAC K/TU NE
DISC INFO
AUX
SLEE P
SNO OZE
S OU N D WO R KS i 76 5
RADI O
ANGL E
PR ES ET S
MUTE
PBC S ETUP
MENU
SUBTI TLE RAN DOM
SLOW STE P TIT LE REP EAT
MENU SEEK
TRAC K/TU NE
DISC INFO
AUX
SLEE P
SNO OZE
S OU N D WO R KS i 76 5
RADI O
ANGL E
PR ES ET S
MUTE
18
QUICK REFERENCE GUIDE - SOUNDWORKS 765i REMOTE CONTROL
ADJUST VOLUME (NORMAL OPERATION)
ADJUST SETTING IN JOG BUTTON OPERATION
TRACK/TUNE/ADJ BUTTONS
FM: TAP TO MANUAL TUNE,
PRESS AND HOLD TO SEEK NEXT STATION.
ALARM ADJUSTMENT SESSION:
ADJUST WAKEUP TIME
SEEK: TAP TO AUTOMATICALLY SEEK
THE NEXT STATION UP THE BAND
NORMAL OPERATION:
PRESS TO MUTE SOUND
DURING WAKEUP:
PRESS FOR SNOOZE INTERVAL
PRESET BUTTONS:
PRESS AND HOLD TO STORE CURRENT STATION
ALARM BUTTONS:
TAP TO ACTIVATE ALARM
PRESS AND HOLD TO ADJUST ALARM
PRESS
RADIO TO SELECT RADIO AND BAND
PRESS REPEATEDLY TO CHOOSE BETWEEN
FM1, FM2, AND AM
SLEEP: PRESS REPEATEDLY TO CHOOSE
SLEEP TIME (15 MIN TO 120 MIN)
SELECTS RADIO “ON” OR “OFF”
ALARM WAKEUP OPERATES IN “OFF”
PRESS JOG REPEATEDLY TO VIEW RADIO SETTINGS
USE VOLUME TO ADJUST SETTINGS
SEE JOG MENU ITEMS - PAGE 24
ON/STANDBY/SLEEP FUNCTIONS
ALARM FUNCTIONS
RADIO FUNCTIONS
DISC FUNCTIONS
(DVD video, Audio CD,
CD-ROM, DVD-ROM)
PRESS DISC/AUX TO SELECT DISC
PRESS AGAIN TO CHOOSE AUX
PLAY/PAUSE AND STOP:
FIRST PRESS OF STOP ALLOWS RESUME
SECOND STOP PRESS RETURNS TO DISC START
Chapter/Track FORWARD/Chapter/Track BACK:
MENU (of DVD video disc only):
FAST SCAN FORWARD/BACK ON ALL DISCS:
IF JOG MENU CHOICE IS “NO TELEVISION CONNECTED”:
PRESS AND HOLD FOR X2 SPEED
JOG MENU CHOICE IS “TELEVISION CONNECTED”:
PRESS REPEATEDLY FOR X2, X4, X8 AND X20 SPEED
X2 SCAN HAS SOUND
X4, X8 AND X20 SCANS HAVE NO SOUND
SEE PAGE 24 FOR JOG MENU CHOICE EXPLANATION
DVD VIDEO FUNCTIONS
ANGLE: PRESS TO SHIFT VIDEO CAMERA
VIEW ON SUPPORTING DVD VIDEO DISCS
DVD VIDEO ON-SCREEN CROSSBAR:
MOVE ON-SCREEN CURSOR UP/DOWN/LEFT/RIGHT
AND PRESS CENTER ( )
INFO: PRESS TO RESTORE TIME ON THE LCD DISPLAY
DURING AUDIO DISC PLAY
PRESS TO SHOW CHAPTERS DURING DVD VIDEO PLAY
PLAY/PAUSE BUTTON ( )
Page 19

MENU
MENU SEEK
TRAC K/TU NE
DISC INFO
AUX
RADI O
PBC S ETUP
MENU
SUBTI TLE RAN DOM
SLOW STE P TIT LE REP EAT
MENU SEEK
TRAC K/TU NE
DISC INFO
AUX
RADI O
ANGL E
PR ES ET S
MENU
SUBT IT LE R AND OM
TRACK /T UNE
DIS C INF O
AUX
19
PRESS iPod TO SELECT DOCKED iPod PLAYER
PRESS
MENU TO SHOW THE iPod’s MENU FUNCTION
iPod FUNCTIONS
PRESS THE PLAY/PAUSE BUTTON ( ) TO TOGGLE
BETWEEN PLAY AND PAUSE
WITHIN IN A MENU, PRESS THE PREVIOUS AND NEXT
BUTTONS (
, ) TO MOVE BETWEEN iPod MENUS.
DURING PROGRAM PLAY, PRESS TO MOVE BACK AND
FORTH ALONG THE CURRENT PLAYLIST
PRESS AND HOLD THE BUTTONS TO FAST FORWARD
OR REWIND IN A PROGRAM
PRESS THE CENTER BUTTON ( ) TO CHOOSE MENU
ITEMS OR TO START PROGRAM PLAY
PRESS THE
UP AND DOWN BUTTONS ( , ) TO
MOVE UP AND DOWN WITHIN AN iPod MENU
THESE BUTTONS SUBSTITUTE FOR THE CLICK WHEEL ON AN iPod
PRESS SUBTITLE REPEATEDLY TO SELECT FROM
THE DVD VIDEO’S SUBTITLE OPTIONS
PRESS PBC TO FOR SEQUENTIAL PLAY
COMMANDS DURING SUPER VIDEO CD PLAY
PRESS SLOW REPEATEDLY FOR SLOW MOTION
FRAME RATES DURING DVD VIDEOS
PRESS
ANGLE FOR SHOW ALTERNATE VIEWS
DURING A SUPPORTING DVD VIDEO
PRESS
STEP FOR FREEZE FRAME DURING
A DVD VIDEO. PRESS AGAIN FOR THE NEXT
FRAME. PRESS PLAY/PAUSE TO EXIT STEP
PRESS RANDOM FOR RANDOM PLAY OF ANY DISC
PRESS
REPEAT FOR REPEAT PLAY OF ANY DISC
PRESS TITLE TO QUICKLY SEE THE TITLE MENUS OF
A DVD-VIDEO
PRESS
SETUP TO SEE THE DVD CONFIGURATION
ON-SCREEN MENU. SEE THE SEPARATE SHEET
DVD CONFIGURATION GUIDE FOR DETAILS
DVD SECONDARY FUNCTIONS
SPECIAL FUNCTION:
RESTORE DISC DRIVE DEFAULTS
WHILE IN DVD MODE, PRESS AND HOLD THE SETUP BUTTON
FOR THREE SECONDS. THE DVD DRIVE WILL RETURN
TO THE FACTORY DEFAULT SETTINGS-
NTSC VIDEO, ENGLISH LANGUAGE, NO SUBTITLES.
Page 20

20
QUICK REFERENCE GUIDE - SOUNDWORKS 765i REAR CONNECTIONS
THE FM WIRE ANTENNA COMES
PRE-INSTALLED ON THIS “F”-STYLE
CONNECTOR. REMOVE THE WIRE ANTENNA
TO CONNECT AN EXTERNAL ANTENNA TO
THE “F”-STYLE CONNECTOR.
VIDEO OUTPUT JACK
USE THE SUPPLIED COMPOSITE VIDEO CONNECTOR
OR CONNECT AN S-VIDEO CABLE (NOT SUPPLIED).
AM ANTENNA INPUT MINIJACK FIXED LEVEL AUDIO OUTPUT MINIJACK
INPUT/OUTPUT CONNECTOR BAY
Page 21

21
Radio Data Service (RDS)
Many FM radio stations broadcast Radio Data
Service (RDS) text along with their programs. The
765i shows two text elds from the RDS information.
Descriptive Text is displayed on the top line. This
text may describe the station’s format or it may
show the song title and artist. Station Identication
Text is displayed in the rst 8 characters of the lower
line. This text is supposed to be relatively constant
(no scrolling, text changes only every 30 seconds).
Some stations do not observe this convention.
iPod “current program” text
The 765i supports the display of text associated
with an iPod’s current audio or video program. Each
text eld (like Song Title, Album Title and Artist) is
shown one at a time, in a ve second cycle.
Note:
a) This feature is not available from all iPod models.
b) iPod program text does not appear on the 765i
large LCD until the Apple authentication process
has nished. Authentication can take between 10
seconds to over a minute to complete.
Choosing Text Displays
The JOG menu has separate RDS text and iPod
text headings. Each one lets you choose between
scrolling text display, static text display or no text
display.
RADIO AND DISC TEXT DISPLAYS
Rocket Man..Elto
EASY 104 8:57AM
RDS descriptive text
RADIO DATA SERVICE display
iPod Text display
Identication text
iPod program text
Leader Of The Pa
iPod 6:35PM
Page 22

22
AUX
Listening to An External Sound Source
A) If you have an external audio program source (a
portable MP3 player, for example), connect it to the
AUX input on the front panel.
B) The DISC/AUX button on the front panel or
remote control selects this input.
CONNECTING AN EXTERNAL AUDIO SOURCE
AUX
B
PBC SETUP
MENU
SUBTITLE RAND OM
SLOW STEP TIT LE REPEAT
MENU SEEK
TRACK/TU NE
DISC INFO
AUX
SLEEP
SNOOZE
SO UN D WO R K S i 7 65
RADIO
ANGLE
PRES ET S
MUTE
A
Page 23

23
Mute
A) To mute the SoundWorks 765i: Press the
SNOOZE/MUTE bar (located on top of the 765i) or
the SNOOZE/MUTE button on the remote control.
Mute is cancelled if the POWER button is pressed, if
a disc is inserted or the volume is adjusted.
CONVENIENCE FEATURES
A
B
FM2 P1
89.7 9:43AM
PBC SETUP
MENU
SUBTITLE RAND OM
SLOW STEP TIT LE REPEAT
MENU SEEK
TRACK/TU NE
DISC INFO
AUX
SLEEP
SNOOZE
SO UN D WO R K S i 7 65
RADIO
ANGLE
PRES ET S
MUTE
Sleep Delay
B) To make the 765i automatically turn o after a
specic period of time, either:
Faceplate-With the 765i “ON”, rapidly tap the POWER
button until the desired sleep delay interval is
reached.
OR
Remote Control-Press the SLEEP button until the
desired sleep delay interval is reached.
Sleep delay intervals are 15, 20, 30, 45, 60, 90 and
120 minute lengths. Sleep delay is cancelled if the
POWER button is pressed or if a disc is inserted. If
you wish to use the sleep function during disc play,
insert a disc before choosing the sleep function.
SLEEP DELAY
45 min
PBC SETUP
MENU
SUBTITLE RAND OM
SLOW STEP TIT LE REPEAT
MENU SEEK
TRACK/TU NE
DISC INFO
AUX
SLEEP
SNOOZE
SO UN D WO R K S i 7 65
RADIO
ANGLE
PRES ET S
MUTE
Page 24

24
PBC SETUP
MENU
SUBTITLE RAND OM
SLOW STEP TIT LE REPEAT
MENU SEEK
TRACK/TU NE
DISC INFO
AUX
SLEEP
SNOOZE
SO UN D WO R K S i 7 65
RADIO
ANGLE
PRES ET S
MUTE
JOG button operation:
Press the
JOG button (faceplate or remote control)
to select the rst JOG function. Press the JOG button
again to select additional JOG functions.
Use the VOLUME knob or the VOLUME buttons on
the remote control to adjust settings of JOG
functions. JOG operation is cancelled ve seconds
after the last JOG or VOLUME adjustment. Pressing
other 765i functions may cancel JOG operation.
JOG FUNCTIONS
JOG functions:
• Bass: Adjustment range is -4 to +4.
• Treble: Adjustment range is -4 to +4.
• Stereo/Wide/Mono Adjustment: STEREO
is the default setting. MONO and WIDE
operation is cancelled by
STANDBY.
• Loudness: Loudness boosts bass output at
low volume.
• Snooze Time: Adjust range is 5 minutes to 22
minutes.
• iPod Text Display: Adjustments are
“SCROLLING”, “STATIC”, and “NO TEXT”.
• RDS Text Display: Adjustments are
“SCROLLING”, “STATIC”, and “NO TEXT”.
• TELEVISION: Adjustments are “CONNECTED”
or “NOT CONNECTED”. Remote control
commands that require a television are
defeated if “NOT CONNECTED” is selected.
• Time Display Mode: Choose 12 hour AM/
PM time (US standard) or 24 hour time
(international standard).
DISC IN
ADJUST BASS
+1
BASS Adjustment display
ADJUST
STEREO
STEREO/WIDE/MONO
Adjustment display
TREBLE Adjustment display
ADJUST LOUDNESS
Off
ADJUST TREBLE
-1
LOUDNESS
Adjustment display
ADJUST SNOOZE
9 MIN
SNOOZE Adjustment display
RADIO TEXT MODE
SCROLLING TEXT
RDS TEXT TELEVISON STATUS
Adjustment display Adjustment display
IPOD TEXT MODE
SCROLLING TEXT
iPod TEXT
Adjustment display
TELEVISION
NOT CONNECTED
ADJUST 12/24 hr
12 hr + AM or PM
Time Adjustment display
JOG MENU START
JOG MENU CHOICES
Page 25

25
DISC IN
Alarm 1 Time
6:54 AM
PBC SETUP
TRACK/TUNE
AUX
SEEK
MENU
DISC
INFO
RADIO
MENU
SUBTITLE RANDOM
SLOW
ANGLE
STEP TITLE REPEAT
Adjusting the Wakeup Settings
During a Wakeup Setting adjustment session, you
select the Music Wakeup Source, adjust the Wakeup
Time and adjust the Music Wakeup Volume output.
The choice of Tone (beeper) or Music Wakeup is
selected later, when the Alarm is engaged.
Note: Store any radio station you wish to use as a
Wakeup station in one of the 24 PRESET locations.
To enter an ALARM ADJUSTMENT SESSION:
• Press and hold ALARM 1 or ALARM 2 about 1.5 seconds.
The 765i enters an ALARM ADJUSTMENT SESSION. The 765i
will wait for 15 seconds for the rst adjustment. After
the rst adjustment, you have ve seconds after each
additional adjustment you make.
At any time during the ALARM ADJUSTMENT SESSION, use the
Remote Control or Faceplate buttons to:
• Choose a Music Wakeup source-RADIO (FM1, FM2 or AM
band), iPod, or DISC.
• Choose a specic Wakeup Station-press its PRESET button
(when a radio band is the Music Wakeup source).
• Adjust the Music Wakeup volume using the VOLUME
control.
• Adjust the Wakeup Time with TIME ADJUST buttons on
the front panel or the TRACK/TUNE/ADJ buttons on the
remote control.
• End the ALARM ADJUSTMENT SESSION at any time by
pressing either ALARM button or by waiting about 10
seconds. The 765i will store your new settings.
Please note:
• Your iPod determines what le is played at Wakeup Time.
• A disc will play from the beginning at Wakeup Time.
• The 765i will revert to TONE wakeup if the wakeup source
(iPod or disc) is not installed in the radio at wakeup time.
WAKEUP FUNCTIONS
Alarm 1
Adjustment
AUDIO SETUP
TRACK/TUNE
AUX
SEEK
MENU
DISC
INFO
RADIO
MENU
SUBTITLE RAND OM
SLOW STEP TITLE REPEAT
DISC IN
PBC SETUP
TRACK/TUNE
AUX
SEEK
MENU
DISC
INFO
RADIO
MENU
SUBTITLE RANDOM
SLOW
ANGLE
STEP TITLE REPEAT
DISC IN
Alarm Vol 12
PBC SETUP
TRACK/TUNE
AUX
SEEK
MENU
DISC
INFO
RADIO
MENU
SUBTITLE RANDOM
SLOW
ANGLE
STEP TITLE REPEAT
Selecting a WAKEUP source.
(in this example, radio)
Adjusting WAKEUP volume
Entering WAKEUP Adjustment
Adjusting WAKEUP time
Page 26

26
Activating Alarm Operation:
In either STANDBY or NORMAL operation, tap
either ALARM button to cycle between:
Music Wakeup (see 1)
Tone Wakeup (see 2)
No Wakeup
A Music Wakeup indicator ( ) or a Tone Wakeup
indicator ( ) lights to show activation.
Music Wakeup only functions if the 765i remains in
standby mode.
Tone Wakeup occurs during either STANDBY or
NORMAL operation. You can use Tone Wakeup as a
reminder function during the day while using the
765i normally.
Deactivating Alarm Operation:
In either STANDBY or NORMAL operation, tap
either ALARM button until “NO WAKEUP” appears
on the 765i display.
•
•
•
WAKEUP FUNCTIONS (Continued)
1
PBC SET UP
MENU
SUBTITLE RANDOM
SLOW STEP TITLE REPEAT
MENU SEEK
TRACK/T UNE
DISC I NFO
AUX
SLEEP
SNOOZ E
SO U ND W OR K S i 7 6 5
RADIO
ANGLE
PRE SE TS
MUTE
PBC SET UP
MENU
SUBTITLE RANDOM
SLOW STEP TITLE REPEAT
MENU SEEK
TRACK/T UNE
DISC I NFO
AUX
SLEEP
SNOOZ E
SO U ND W OR K S i 7 6 5
RADIO
ANGLE
PRE SE TS
MUTE
2
Page 27

27
Silencing a Wakeup
To cancel and reset an active Wakeup alarm, tap the
POWER button or either Alarm button (see 3). The
Alarm will remain engaged and trigger the next day.
Snooze Function
Tapping the SNOOZE/MUTE bar on the 765i, or the
SNOOZE/MUTE button (see 4) on the remote will
silence a Wakeup alarm for a pre-determined period
of time (5 to 22 minutes).
Adjust the SNOOZE delay interval by pressing the
JOG button until ADJUST SNOOZE is displayed
on the upper line of the display. Use VOLUME to
select the desired SNOOZE time. Five seconds after
your last adjustment, the JOG menu will store your
selection and the radio will return to its previous
state (STANDBY or ON).
WAKEUP FUNCTIONS (Continued)
4
SNOOZE 9min
9:43AM
PBC S ETUP
MENU
SUBTITLE R ANDOM
SLOW ST EP TI TLE REPEAT
MENU SEEK
TRACK/ TUNE
DISC INF O
AUX
SLEEP
SNOOZ E
SO U ND W O RK S i7 6 5
RADIO
ANGLE
PRE SE TS
MUTE
PBC SET UP
MENU
SUBTITLE RANDOM
SLOW STEP TITLE REPEAT
MENU SEEK
TRACK/T UNE
DISC I NFO
AUX
SLEEP
SNOOZ E
SO U ND W OR K S i 7 6 5
RADIO
ANGLE
PRE SE TS
MUTE
ALARM 1
OFF
3
EITHER ALARM BUTTON
OR THE POWER BUTTON
RESETS AN ACTIVE ALARM.
Page 28

28
JPG les on CD-ROM or DVD-ROM
• If connected to a television, the 765i will display all the .jpg image les it reads on a CDROM or DVD-ROM. The default playback is a sequential presentation of each .jpg le,
with each .jpg image displayed for approximately 10 seconds.
The ideal maximum .jpg dimension for display on a television is no greater than 800
pixels
wide or no greater than 600 pixels tall. Larger les will still be shown, but the 765i will
respond more slowly with no dierence in the quality of the displayed image.
MP3 or WMA les on CD-ROM or DVD-ROM
The 765i plays MP3 and WMA (Windows Media Audio™) compressed audio les stored on a
CD-ROM or DVD-ROM disc. Create (or “burn”) your own compilation discs, which can contain
much more music than would t on a conventional audio CD.
The 765i will play through all the MP3 or WMA audio les on a disc in its drive. The Random
and Repeat functions are available on these discs. Navigation of les on these discs is limited
to backward or forward sequential track selection.
If a television is attached to the Video output of the 765i and the “TELEVISION CONNECTED”
Jog Menu choice is selected, the television monitor can be used to navigate among folders
and then to choose particular tracks on the CD-ROM or DVD-ROM.
Sequence of Play on a CD-ROM or DVD-ROM
• The 765i will play MP3/WMA les within a folder on a CD-ROM or DVD-ROM according
to the alphabetical sequence of the metadata stored in the les (specically, the “album”
name and “track” number for each le). All the tracks associated with the rst “album”
name will be played in “track” number sequence, followed by all the les associated with
the next “album” name, and so on.
• The 765i gives rst priority to any MP3/WMA les stored on the top level of the CD-ROM.
The top level of the disc is shown as “FOLDER 1” on a television connected to the Video
Out of the 765i.
• The 765i will ignore any les that do not end in “.mp3” or “.wma”.
• When 765i has played all MP3/WMA les on the top level of the CD-ROM or DVD-ROM ,
it then plays the contents of all folders on the disc, in the alphabetical sequence of the
folder names.
• Once all the contents of the rst folder are played, the 765i will play the contents of any
remaining folders at the top level of the disc.
• The diagram on page 21 is an example of the play sequence the 765i follows.
• The 765i does not distinquish between “.mp3” les and “.wma” les when determining
play sequence.
CD-ROM/DVD-ROM PLAY
Page 29

29
Tips for Preparing an MP3 or WMA CD-ROM
• Name each folder starting with a number to determine its sequence.
• The 765i treats numbers as text when determining track and folder sequence.
Use a leading zero on single digit numbers (01, 02, 03..,) if the total of your
tracks or folders is ten or greater.
mp
3
mp
3
Folder a Folder b More Folders
DISC
mp
3
mp
3
mp
3
mp
3
mp
3
mp
3
mp
3
mp
3
mp
3
1
2
3
4
5
6
7
8
9
10
11
This diagram assumes you are using only “.mp3” files. A CD-ROM containing “.wma” files or a mix of
both “.mp3” and “.wma” files will operate in the same order..
PLAY SEQUENCE
Tracks and Folders
played in alphabetical
order.
Album A
Title 1
Album A
Title 1
Album A
Title 2
Album B
Title 1
Album A
Title 1
Album A
Title 2
Album B
Title 1
Album A
Title 1
Album A
Title 2
Album B
Title 1
Album B
Title 1
Top Level of the CD-ROM or DVD-ROM
Arranging MP3 or WMA Files and Folders on a CD-ROM/DVD-ROM
• Place all MP3/WMA les inside folders at the top level of your CD-ROM.
Do not nest folders inside folders.This makes navigation of folders on the
television screen easier.
• RIP (compress) your favorite tracks from an audio CD into a folder on your
computer hard drive. Check to make sure the album and track number for
each le is correct. Album data downloaded from the internet may not be
accurate.
• Repeat the procedure for other groups of compressed audio les you wish to
store on the same disc, saving the les in separate folders on your hard drive.
• Start the folder titles with a number, in a sequence of your choice.
• “Burn” all the folders onto a disc using the “disc at once” option (avoid “track
at once” burning).
• Once completed, you can have a disc with much more music than a
conventional audio CD.
Page 30

30
SPECIFICATIONS
Internal audio sources:
FM stereo tuner with display of Radio Data Service text from
supporting FM stations.
AM tuner
DVD Transport With:
Audio CD play
Decode and playback of MP3 and WMA les from CD-ROM or
DVD-ROM disc.
DVD-Video disc play
Video CD play
Inputs:
One Front panel Auxiliary audio input (3.5 mm stereo minijack)
One Apple iPod Dock on the top panel
One Rear panel AM Antenna 3.5 mm minijack
One Rear panel FM Antenna “F”-type jack.
One Rear panel DC Power input jack.
Outputs:
One Front panel Headphone output (3.5 mm stereo minijack)
One Rear panel Audio Signal output (3.5 mm stereo minijack)
One Rear panel hybrid S-video/Composite video jack.
Dimensions:
Height: 5 in 125 mm
Width: 14 in 356 mm
Depth: 10 in 248 mm
Depth (with knob and AC cord): 11 in 258 mm
Weight: 12 lbs 5.5 kg
Power Consumption, maximum:
50 watts at 14 VDC
Electrical Rating:
Unit rated power input: DC 14V , 4000 mA
For use with TenPao model no: 5060BP1400400 Power Adapter
Page 31

31
Page 32

32
Cambridge SoundWorks
120 Water Street
North Andover, MA USA 01845
Rev. 1.3, 01 Sept. 2007
P81-2440
 Loading...