

Page 1
C
a
l
c
u
l
a
t
e
d
I
n
d
u
s
t
r
i
e
s
C
a
l
c
u
l
a
t
e
d
I
n
d
u
s
t
r
i
e
s
C
a
l
c
u
l
a
t
e
d
I
n
d
u
s
t
r
i
e
s
User’s Guide
Digi
Roller Plus
™
WL
M+
Wall Area
H
LxW
+
Area #
All Clear
On/Off
Calculated Industries
®
M–
RESET
DEL
M+
AREA #
4840 Hytech Drive
Carson City, NV 89706
775/885-4900 ◆ Fax: 775/885-4949
Digi
Roller
™
WL
M+
LxW
+
All Clear
On/Off
Calculated Industries
®
M–
RESET
DEL
M+
D
IGI
R
OLLER
/D
IGI
R
OLLER
P
LUS
™
Page 2

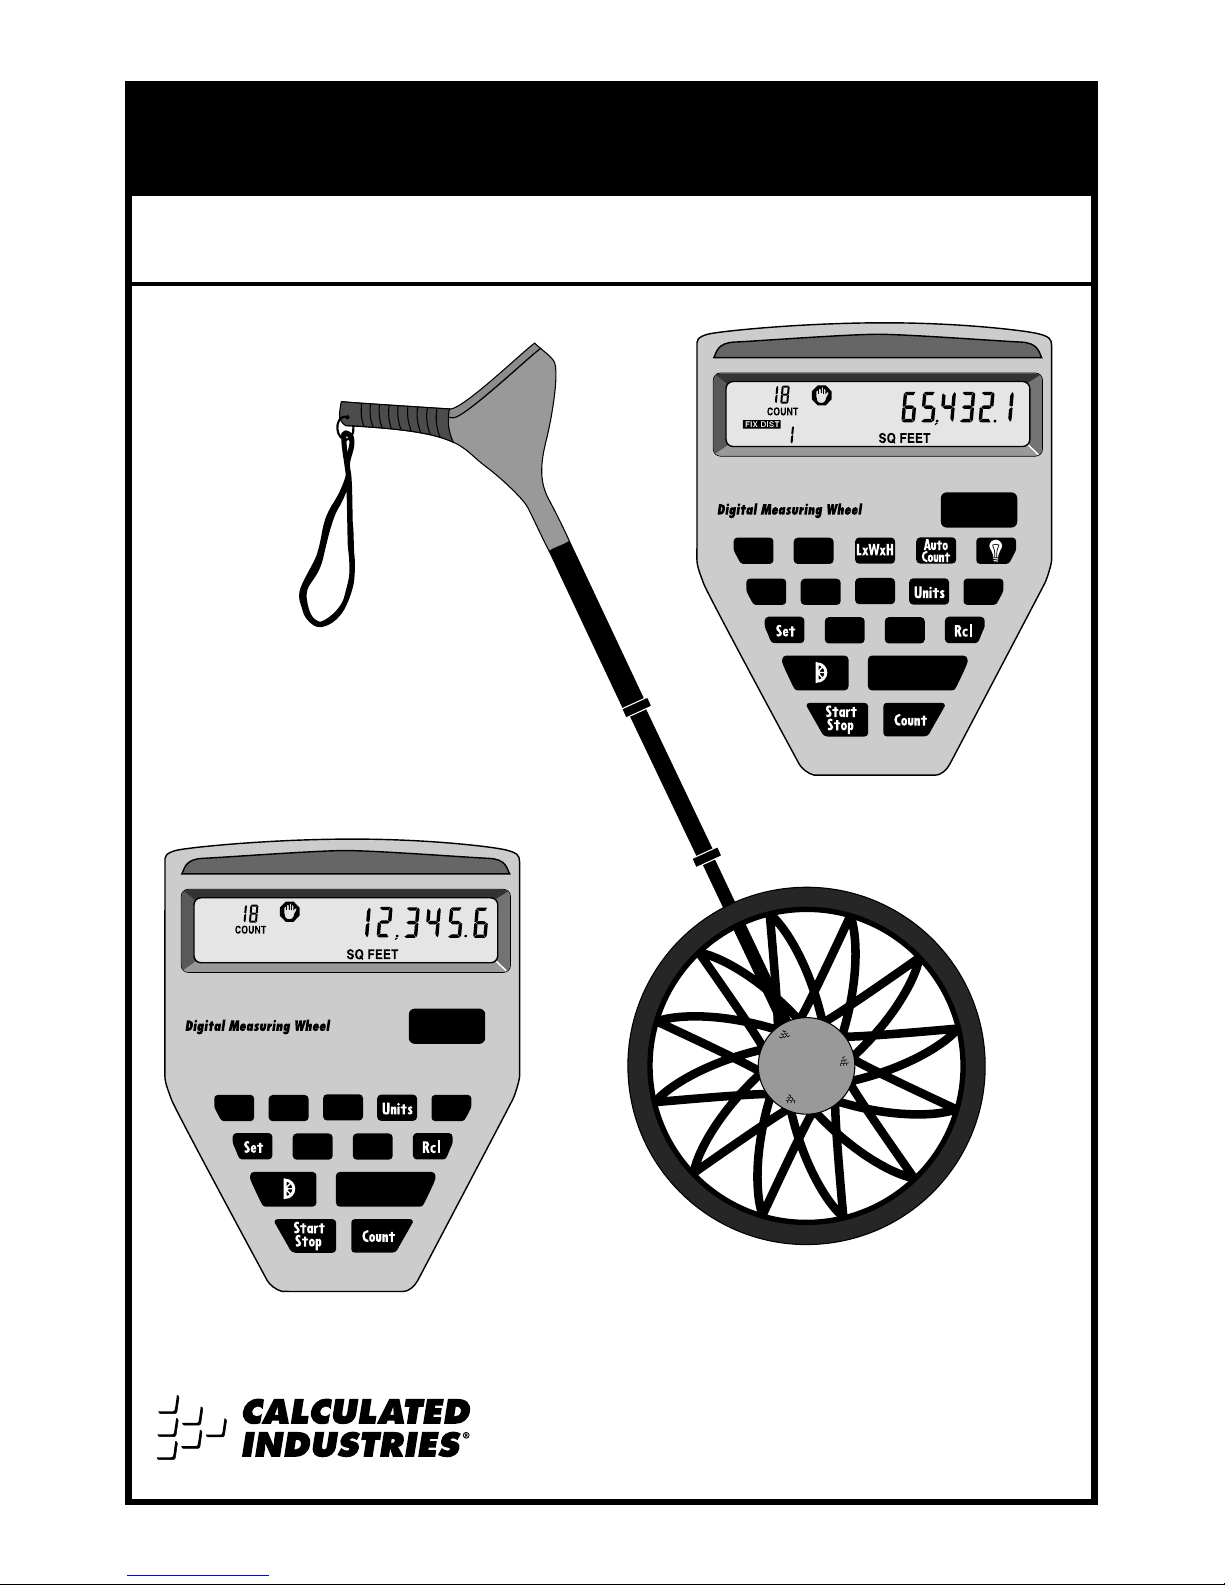
Introducing:
D
IGI
R
OLLER
/D
IGI
R
OLLER
P
LUS
™
The
DigiRoller/DigiRoller Plus
is a revolutionary new digital
measuring tool that lets you roll distances quicker and easier
than ever before! Replacing the tape measure and mechanical
measuring wheel, it measures linear distances and displays
them digitally, calculates area and volume, stores multiple measurements in memory, and performs other handy functions that
let one person measure faster, more accurately, and more conveniently. If your job involves measuring distances or taking
square footage, the new DigiRoller/ DigiRoller Plus is the tool for
you!
■ Large digital display located in handle for easy viewing
■ Measures and stores Length, Width, and Height
†
■ Calculates Area, Volume
†
, and Wall Area
†
■ Takes true “Wall-to-Wall” measurements
■ Measurement unit selection and conversion
■ Count and Auto-Count
†
functions
■ Programmable “Fixed Distance”
†
■ Stores up to 9 different “Areas” or measurements
†
■ Ergonomic and durable
■ And much, much more!
†
DigiRoller Plus Only
4840 Hytech Drive, Carson City, NV 89706
TEL: 775/885-4900 ◆ FAX: 775/885-4949
Page 3

Table of Contents
Preliminary Turning the DigiRoller On/Off 2
Information DigiRoller Parts Diagram 3
Key Layout/Definitions 4
Using the Display 8
Display Test/Annunciators 10
Changing Units of Measurement 11
Turning the Bell On/Off 12
Using the “Rolling” a Measurement 13
DigiRoller Storing and Recalling Measurements 15
Deleting Stored Measurements 16
Using the Counter 16
Taking Wall-to-Wall Measurements 17
Taking Area Measurements 18
DigiRoller Plus Lighting the Display Background 21
Features Taking Volume Measurements 22
Storing/Recalling Multiple Measurements 25
Editing Stored Measurements 28
Deleting All Area # Measurements 31
Taking Wall Area Measurements 32
Using Auto-Count/Fixed Distance 34
Deleting All Stored Values 35
Appendix Changing Batteries 36
Changing/Calibrating a Different Wheel Size 37
Default Settings 41
Error Codes 42
Caring for your DigiRoller 43
Common Questions & Answers 44
Product Specifications 46
Limited Warranty 47
1 – User’s Guide
Page 4
Turning the DigiRoller On/Off
On/Off Key
Turn the DigiRoller on by pressing the [On/Off] key. To turn it
off, press the key again.
Auto Shut-Off
The DigiRoller/DigiRoller Plus is designed to shut itself off if it
is not used for 8-12 minutes. Values shown on the display will
be cleared. However, when you turn the unit on again, the
previously displayed value will re-display. All stored values
will be retained.
PRELIMINARY INFORMATION
2 – DigiRoller/DigiRoller Plus
™
Page 5
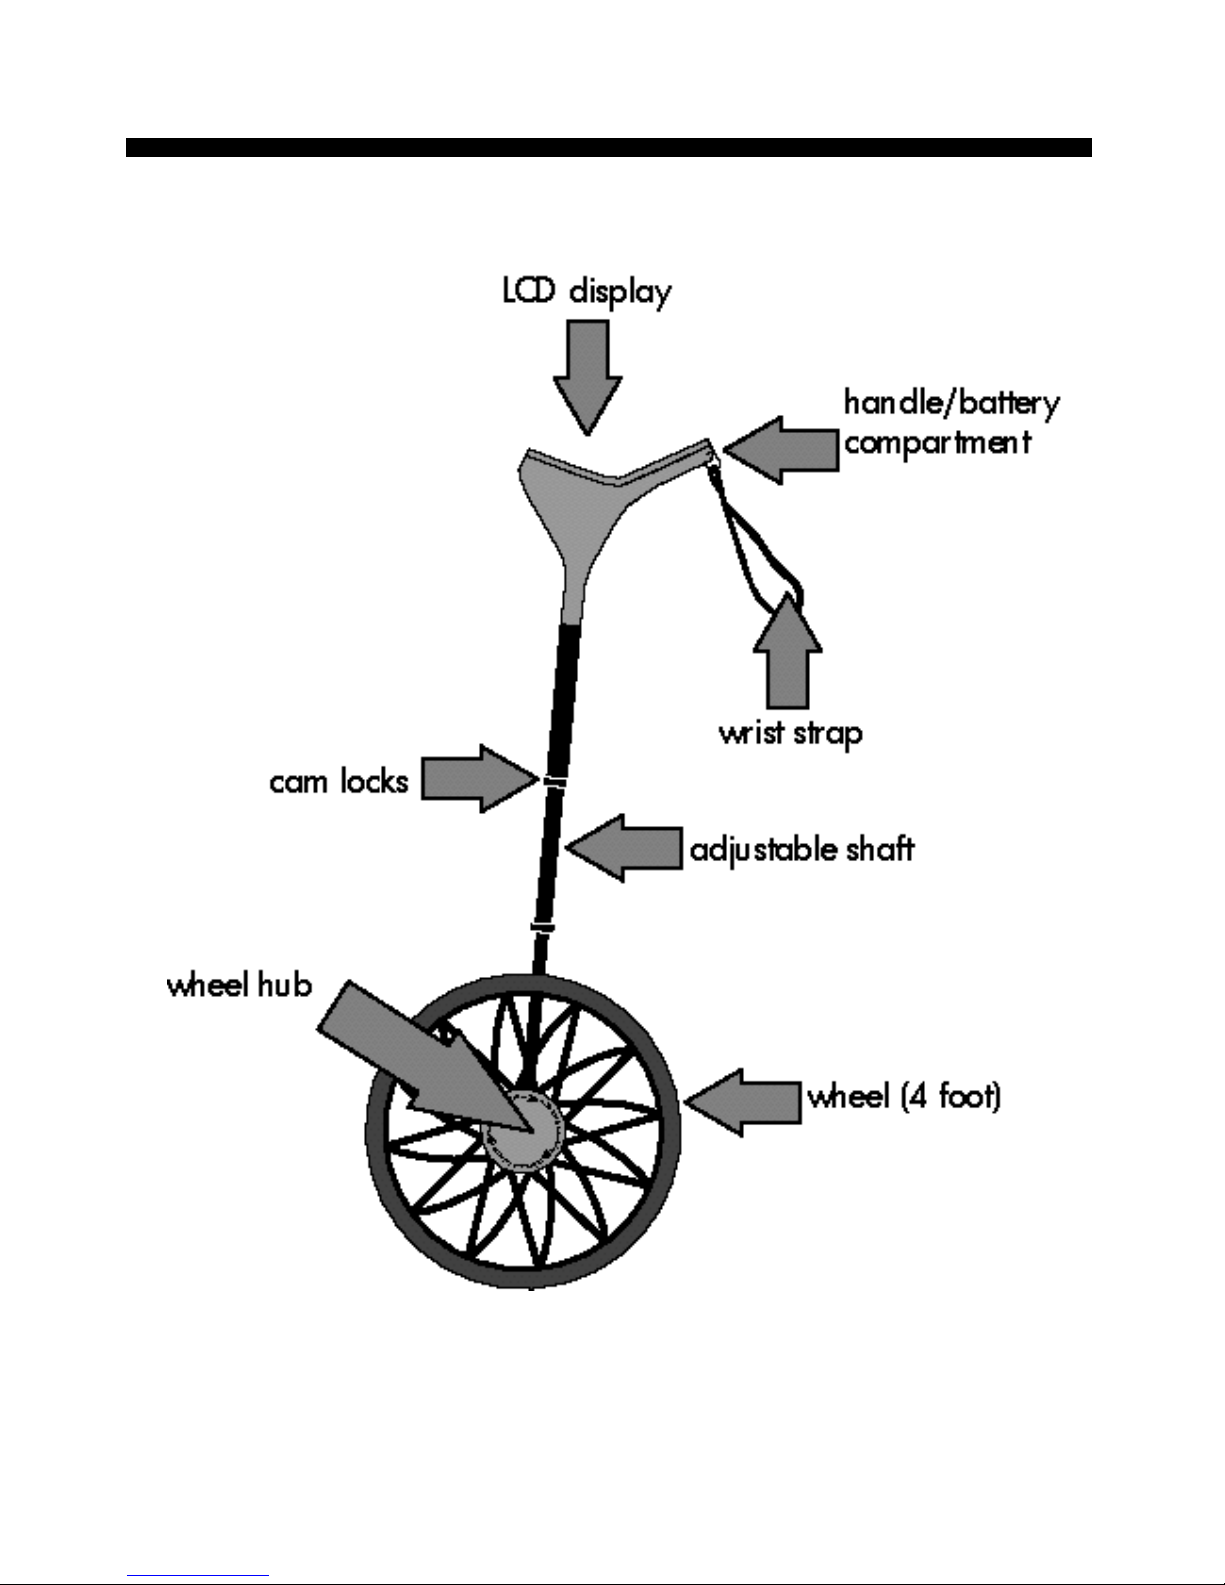
DigiRoller Parts
3 – User’s Guide
Page 6
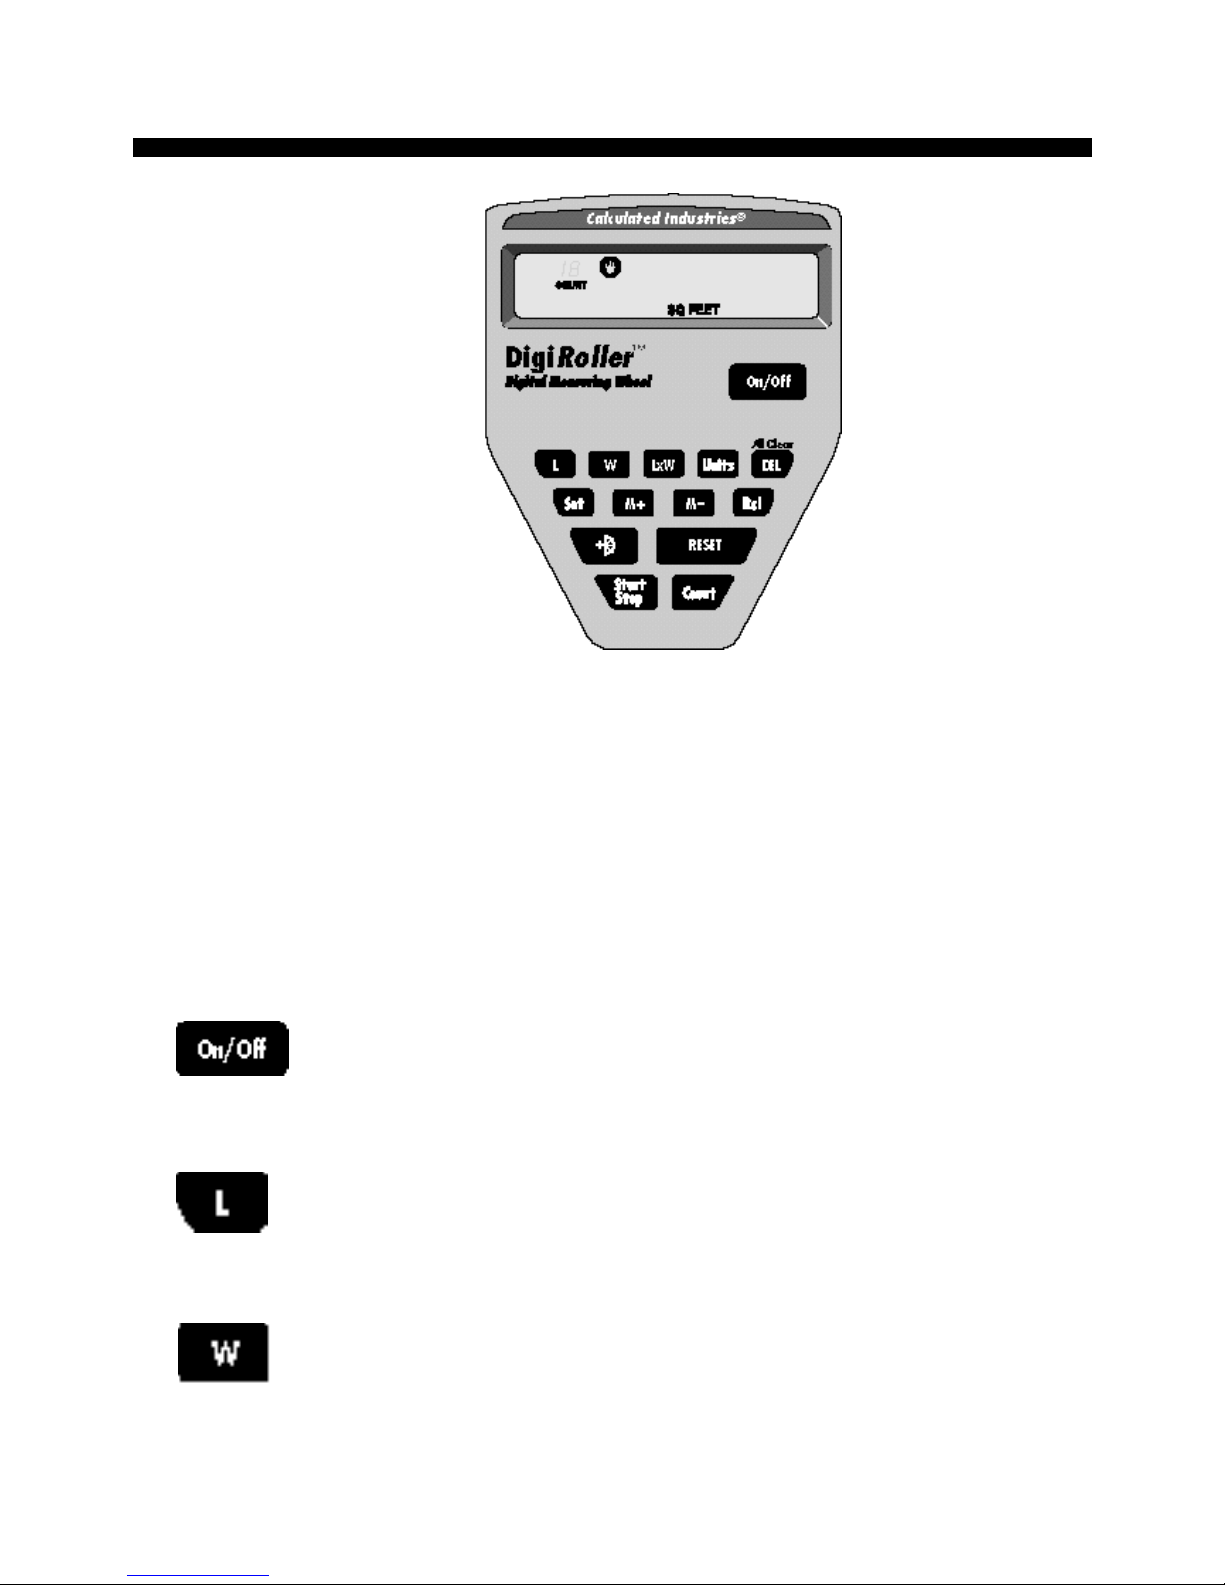
Key Layout & Definitions - Both Models
The DigiRoller/DigiRoller Plus is unique to measuring wheels because
it has keys that allow you to store and manipulate the distances measured.
The following is a list of keys that you may use as you operate the
unit: (see page 10 for a list of LCD annunciators)
Power On/Off Key — Turns the unit on or off.
Length Key — Enters and stores rolled length value.
Width Key — Enters and stores rolled width value.
4 – DigiRoller/DigiRoller Plus
™
Page 7
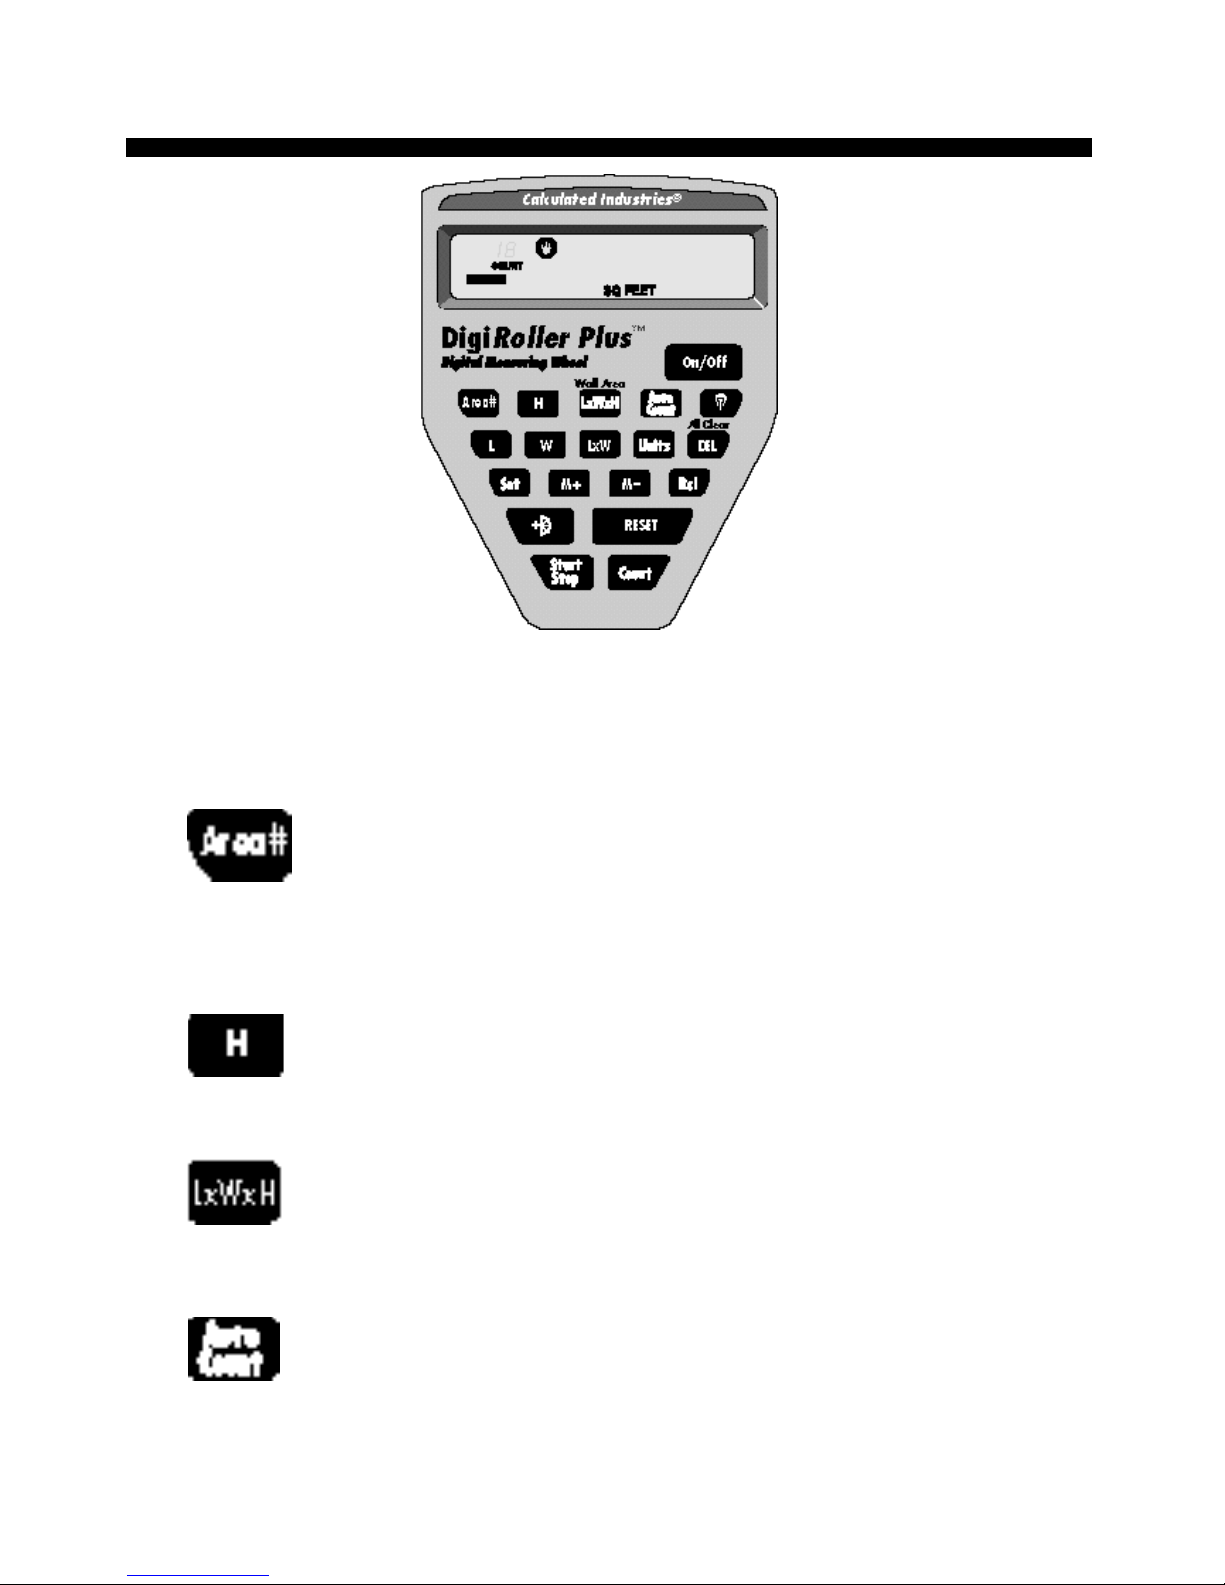
Area Key — Calculates and displays rolled area.
Units of Measurement Key — Selects desired unit for-
mat: Feet-Inches, Decimal Feet, Decimal Inches,
Yards, Meters, and Acres (display only). Each press
of this key will convert the displayed measurement
to another unit format.
Delete/All Clear Key — Deletes, or erases, the values
stored in the next key pressed (e.g., [DEL] [L] deletes
the current measurement stored as length, [DEL]
[ W ] deletes the current measurement stored as
width, etc). To perform an All Clear, press [Set]
[DEL] [DEL]. This key sequence will clear all stored
data and memory registers.
Recall Key — Recalls and displays the value of the
next key pressed (for example, [Rcl] [W] displays
the value stored in the Width key). [Rcl] [Rcl] will
bring back or un-erase a previously displayed value
that has been cleared or deleted.
Memory Add Key — Stores any displayed value into
permanent memory. When you store a value in
memory, it is added to the values you previously
stored in memory. Note that you cannot add two
measurements of unlike dimensions (for example,
you cannot add feet-inches and square feet).
5 – User’s Guide
Page 8
Memory Subtract Key — Subtracts the displayed
value from permanent memory.
Set Key — Used to access special functions.
Add Wheel Radius Key — Adds the radius measure-
ment of the wheel to the total linear measurement,
to allow for true wall-to-wall distance.
Reset/Clear Display Key — Clears the display to 0.
Does not clear stored values.
Start/Stop Key — This key switches the unit between
start and stop modes. You will press this key to
begin measuring. When you are in stop mode, a stop
sign annunciator will display and the unit will stop
measuring. Press [Start/Stop] or [RESET] to resume
measuring.
Manual Count Key — Each time you press this key,
the unit will show the count in the upper left of the
display. The unit will count from 1-199, and then
will roll over and continue counting from 1.
However, if you press [Rcl] [Count], the accumulated total will display (for example, 203) on the right
side of the display.
6 – DigiRoller/DigiRoller Plus
™
Page 9
DigiRoller Plus model (only)
The DigiRoller Plus model has an additional row of keys.
Multiple Area Storage Key — For each of the 9 area
number registers, you can store length, width, height,
area, volume, and wall area.
Height — Stores a fixed height distance or a rolled
height for calculating cubic volumes and wall areas.
Volume — Calculates volume measurements from
entered or stored length, width, and height values.
AutoCount Mode — Places the unit in “Auto-Count”
Mode, allowing you to program a fixed distance to be
automatically counted. The DigiRoller Plus will auto-
7 – User’s Guide
Page 10

matically count each time it reaches the distance you
have set (for example, it will count the number of
times you roll 5 feet), and show the number of times
it has measured this distance on the upper left of the
display.
Light Key — Turns the display back-light on or off.
Using the Display
Clearing the Display
To clear the display, press the [RESET] key.
Changing the Display Contrast Level
You can control the brightness of the display by adjusting the
contrast level setting.
8 – DigiRoller/DigiRoller Plus
™
Page 11
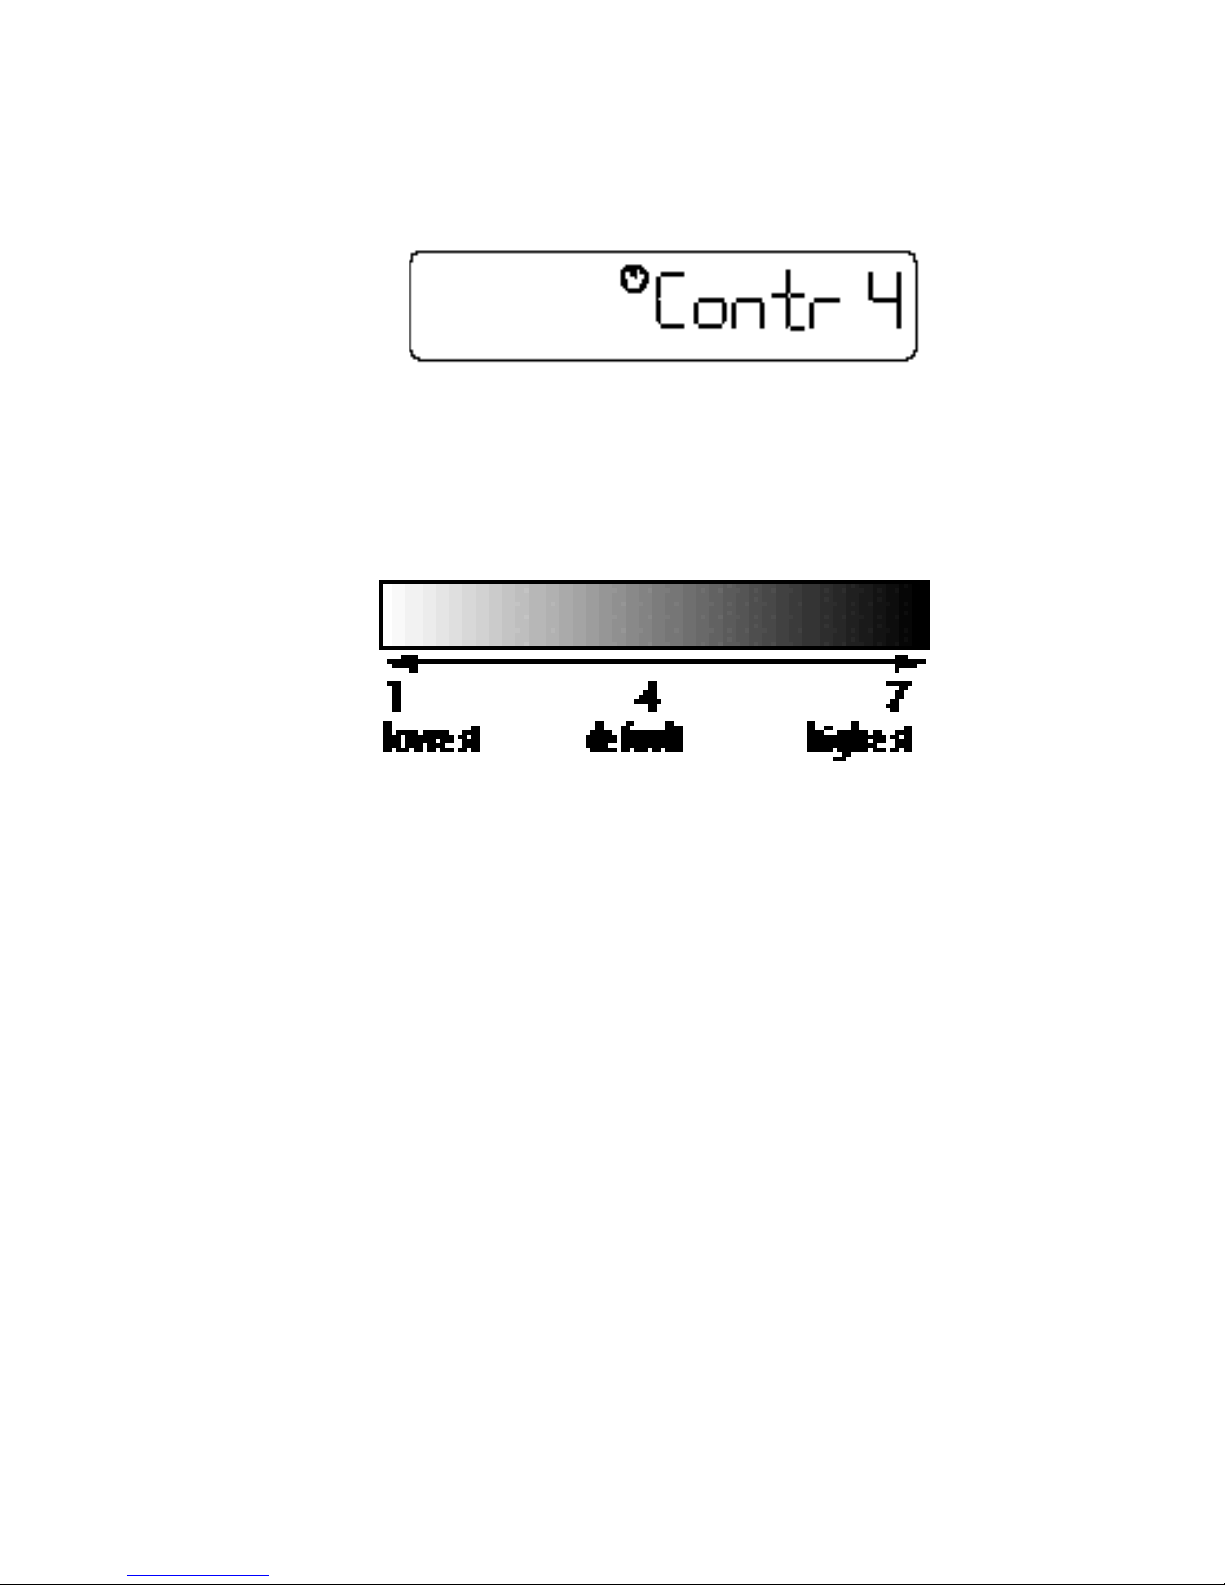
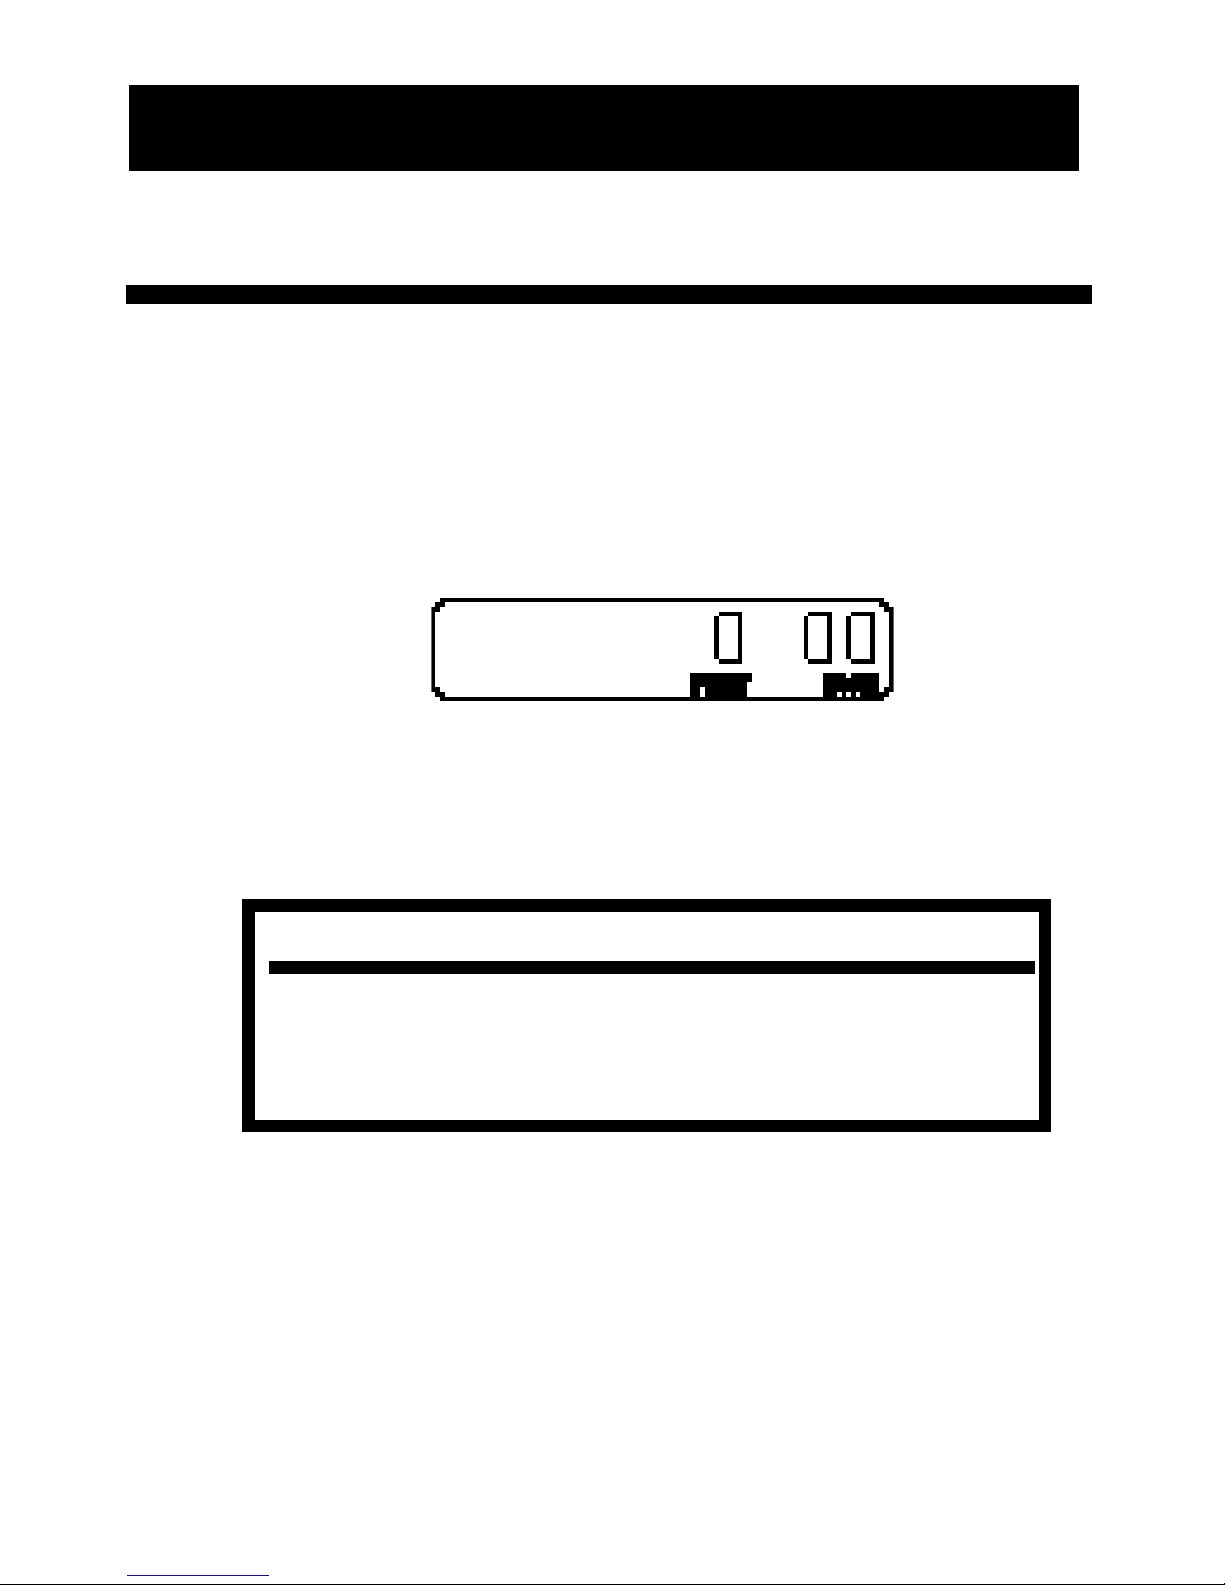
1) Press the [RESET] and [Set] keys at the same time. You will
see this display (level 4 is the default setting):
2) While holding the [RESET] key down, press the [Set] key
to advance the contrast level to the desired setting (1-7).
3) When you have found the contrast level you want, release
the [RESET] key. Press the [RESET] key again to exit the
contrast level mode.
9 – User’s Guide
Page 12
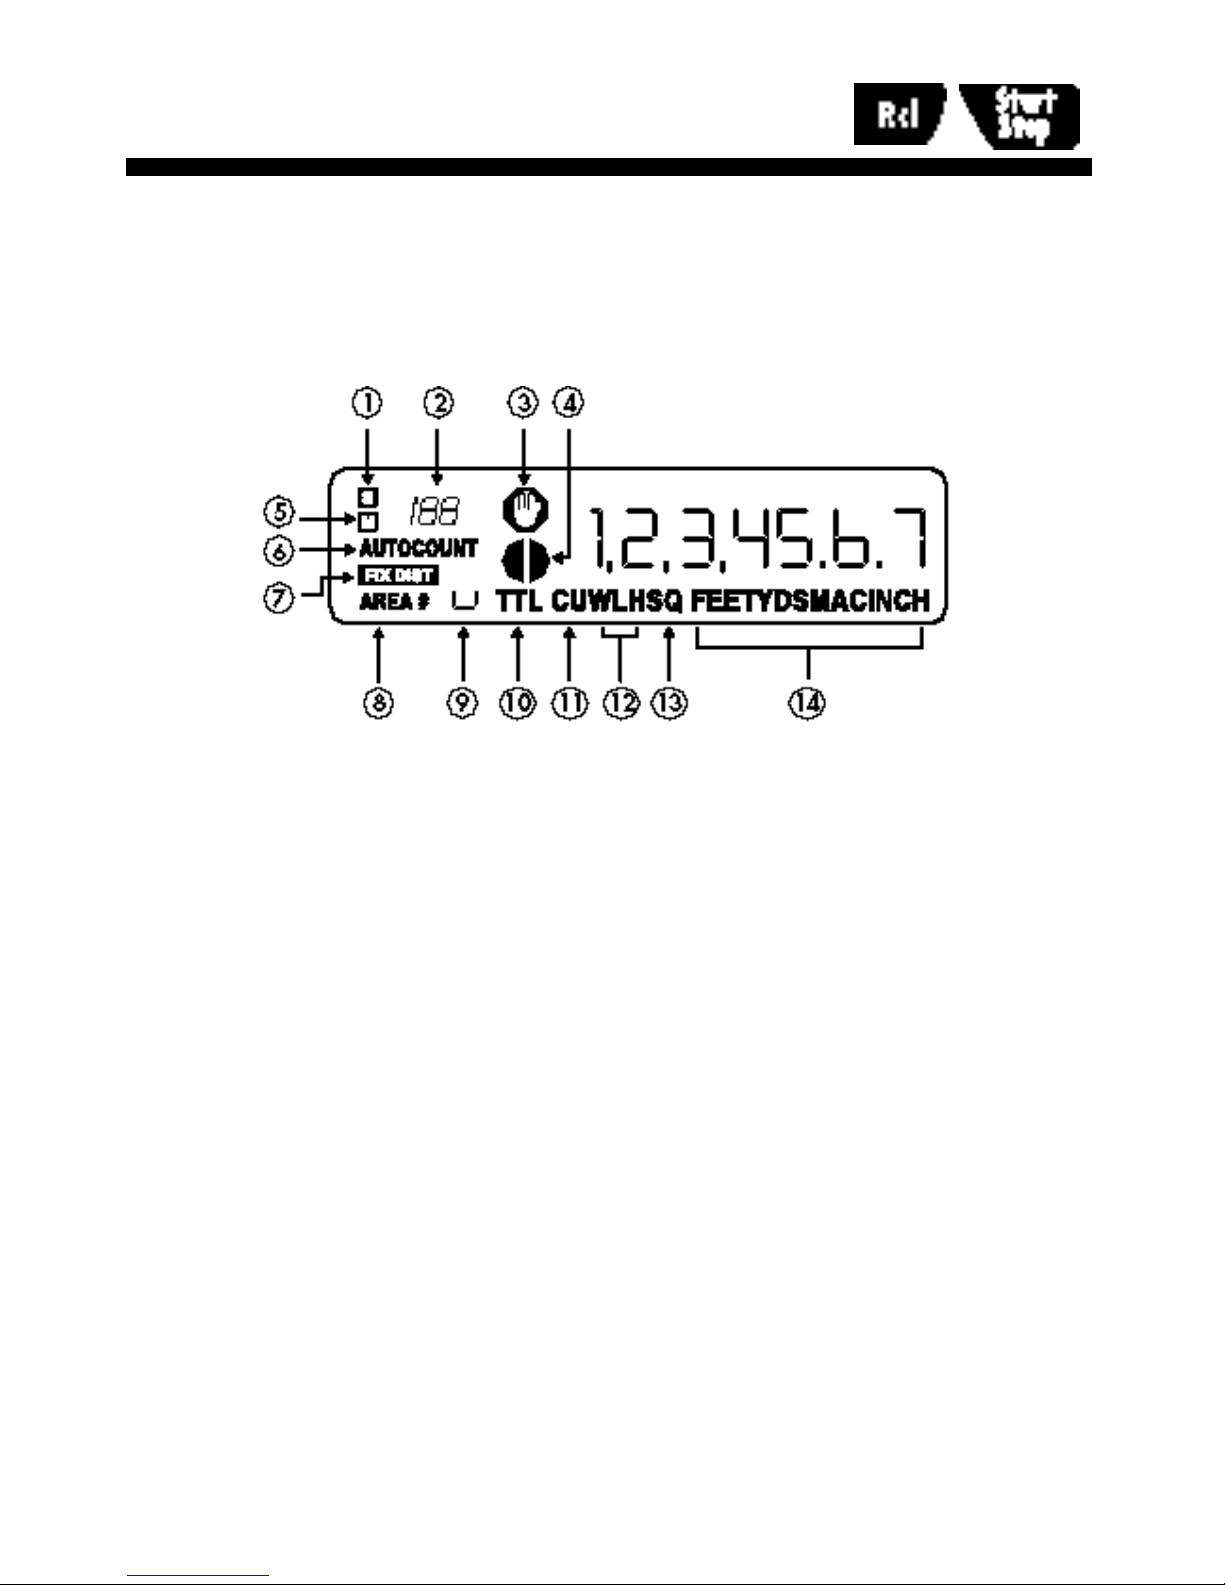
Display Test/Annunciators
To perform a display test and light all annunciators, press [Rcl]
[Start/Stop]. Press [RESET] to clear the display test.
(1) Set symbol
(2) Count number
(3) Stop symbol
(4) Wheel Radius symbol
(5) Memory symbol
(6) Count/AutoCount symbols
(7) Fixed Distance symbol
(8) Area Number symbol
(9) Area Number indicator
(10) Total symbol
(11) Cubic symbol
(12) Width, Length, Height symbols
(13) Square symbol
(14) Units of measurement symbols
10 – DigiRoller/DigiRoller Plus
™
Page 13
Changing Units of Measurement
T h e DigiRoller/DigiRoller Plus can display and convert
between the following units of measurement:
■ Feet-Inch
■ Decimal Feet
■ Inches
■ Yards
■ Meters
■ Acres (for displaying area values only)
You select your preferred measuring unit with the [Units] key.
Each press will advance through the above unit settings.
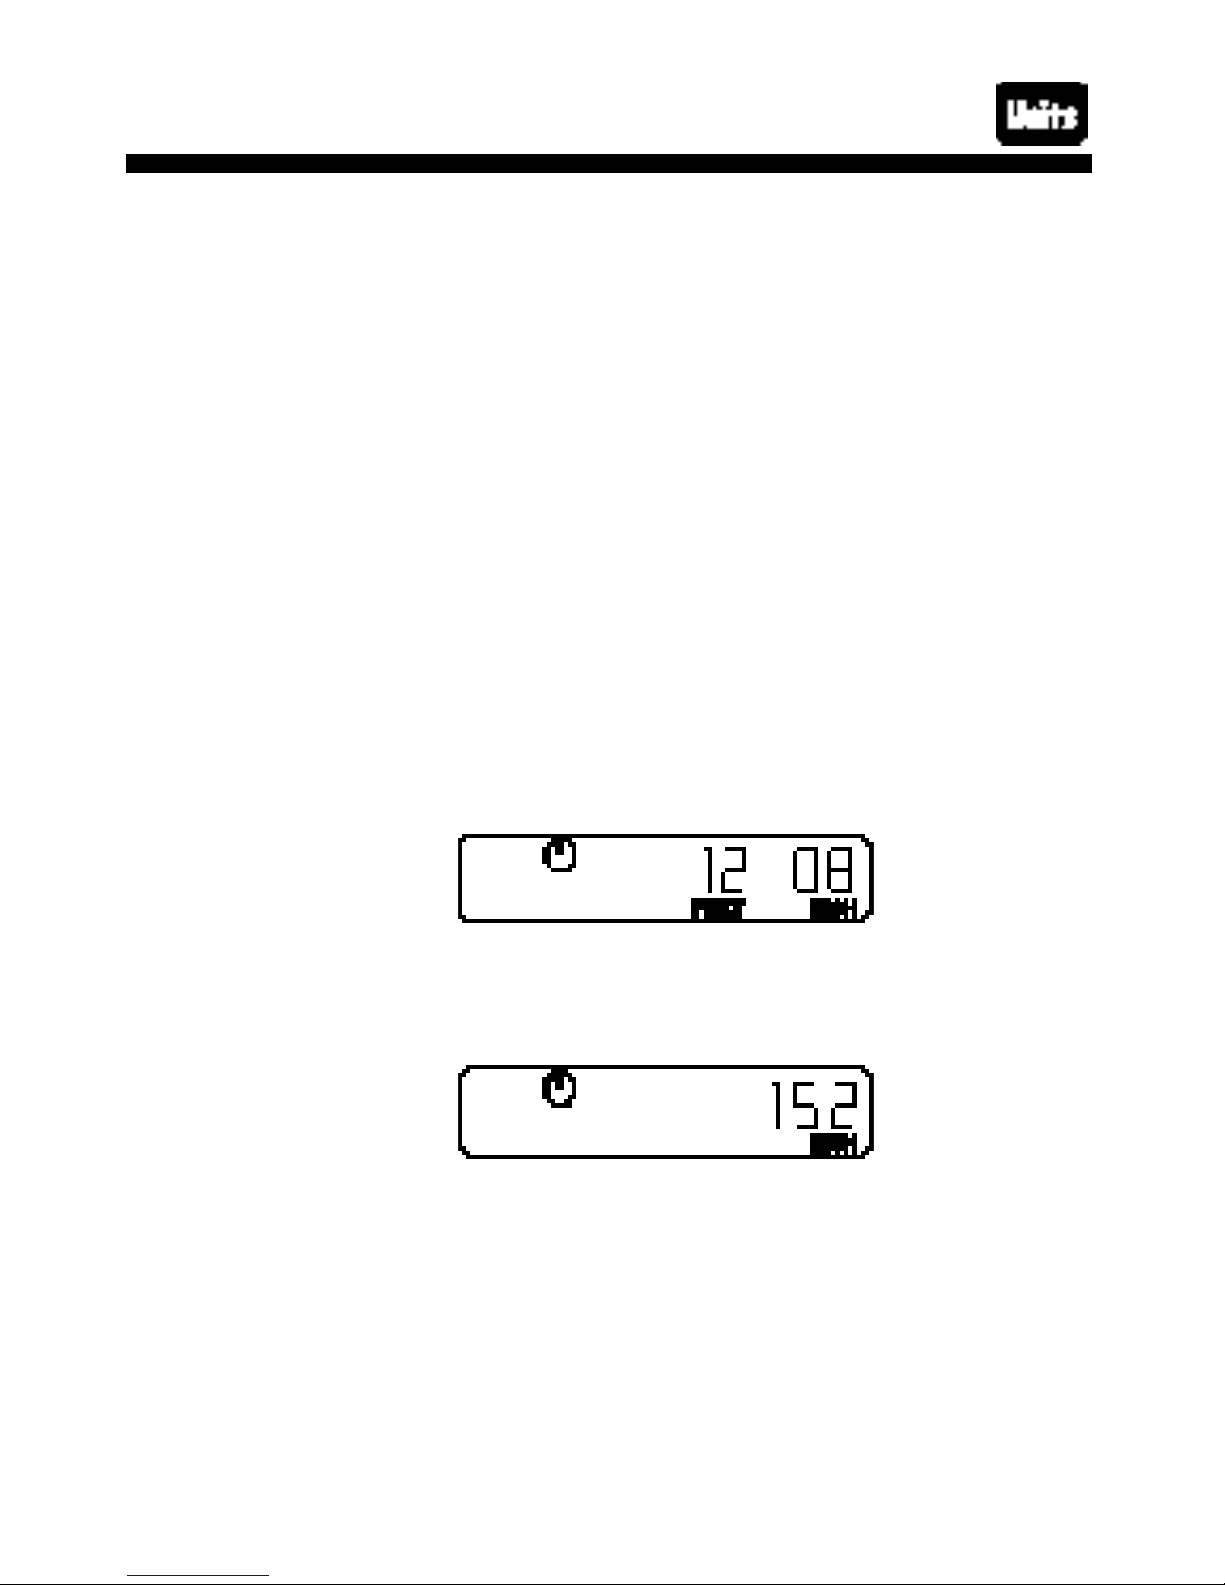
Any measurement on the display can be converted to the
desired unit of measurement by pressing the [Units] key. For
example, if the display shows:
and you would rather see the value displayed in inches, press
the [Units] key. You will see:
You can select different units of measurement for each measurement convention (linear, square, cubic) just by pressing
the [Units] key while displaying any linear, square or cubic
value. The units of measurement you choose will remain as
they were last displayed until you change them (even if you
turn off the DigiRoller/DigiRoller Plus).
11 – User’s Guide
Page 14

To use the Metric Measuring Mode, press [Set] then [Reset]
and [Units] together. The DigiRoller will measure in Metric
units until you press these keys again.
Turning the Bell On/Off
The DigiRoller/DigiRoller Plus has a built-in bell sound, which
you can turn on or off. The bell is only heard when you are
using the Count/Auto Count functions. To turn the bell on or
off, press the following two keys simultaneously: [RESET]-
[Rcl]. Note that you may have trouble hearing the bell in
noisy outdoor settings.
12 – DigiRoller/DigiRoller Plus
™
Page 15
“Rolling” a Measurement
H e re’s how to take a measurement with the D i g i R o l l e r /
DigiRoller Plus:
1) Turn the unit On by pressing the [On/Off] key. If the display does not show zero (0), press the [RESET] key to clear
the display.
2) Begin walking while rolling the DigiRoller/DigiRoller Plus.
You will see the display registering your measurements.
NOTE:
If you move the handle up or down while you are using the unit, you will
add or subtract a small distance (4-8”) to any roll. For this reason, it is
important to try to keep the unit in the same position throughout the roll.
USING THE DIGIROLLER/DIGIROLLER PLUS
13 – User’s Guide
Page 16
3) When you are finished measuring, press the [Start/Stop]
key again.
4) To store the measurement, press the appropriate key (ex.
[L] for length, [W] for width). If you do not store the measurement, you can then press the [Start/Stop] key again to
continue measuring.
5) If you have stored the measurement, press the [Start/Stop]
key to begin a new measurement. If you didn’t store the
measurement, press the [RESET] key to clear the display
then begin rolling.
14 – DigiRoller/DigiRoller Plus
™
Page 17

Storing and Recalling Values
The DigiRoller/DigiRoller Plus has several keys that can be
used to store and recall values:
The DigiRoller Plus can also store and recall values in the [H],
[LxWxH], [AutoCount], and [Area#] keys.
To recall any of the values above, press the [Rcl] key and then
press the key that has the value you want to display. For
example, to recall the length that was rolled, press [Rcl] [L].
Storing Measurements
in Permanent Memory
You can store rolled measurements in the standard calculator
type memory, by pressing the [M+] key after rolling. To subtract a measurement from a previously stored value, press the
[M-] key after rolling. To recall the total stored in Memory,
press [Rcl] [M+].
NOTE:
This memory feature acts just like a standard, limited calculator memory
function; it will accumulate and total the measurements added to it.
15 – User’s Guide
Page 18

Deleting Stored Measurements
To permanently delete a stored value, press the delete key
[DEL] and then the key that has the value you want to delete.
Be careful when pressing the [DEL] key, as it will permanently erase the stored value of the next key pressed.
If you accidentally press the [DEL] key, press [RESET] to prevent any stored value from being erased.
Using the Counter
The DigiRoller/DigiRoller Plus has a manual “count” function
that allows you to count various items you may be tracking as
you roll your measurement (for example, parking spaces, fire
hydrants, etc.).
When you want to count something, press the [Count] key. If
the bell is on, the unit will beep each time you press the
[Count] key and the count total in the upper left corner of the
display will increase by 1. To subtract a count, press the [Set]
key then the [Count] key.
16 – DigiRoller/DigiRoller Plus
™
Page 19

Taking Wall-to-Wall Measurements
Unlike other measuring wheels, the DigiRoller/DigiRoller Plus
has a built-in function which enables you to measure true
wall-to-wall distances (taking into account the wheel’s radius
when measuring up to a wall). The wheel radius key [+D]
will add the radius of the wheel to the measurement.
To measure a room accurately, press the wheel radius key
whenever your measurements begin or end against one wall.
When you press this key, the DigiRoller will add distance to
the measurement. Depending on your selected wheel size and
measurement units, the first and second presses of this key
may not appear to be adding equal distances. However, this is
a display value only; internal calculations will be accurate.
17 – User’s Guide
Page 20

Taking Area Measurements
Your DigiRoller/DigiRoller Plus automatically calculates areas
once you’ve rolled a length and width. Remember, press
[RESET] to begin each new measurement.
1) Roll the first distance. Press the length key [L] and your
rolled distance will be automatically stored as the length.
2) Press [RESET]. Roll the second distance and press the
width key [W].
3) Press [RESET]. Press the [L x W] key to calculate the area.
18 – DigiRoller/DigiRoller Plus
™
Page 21

Calculating Complex Areas
You can calculate complex areas using the D i g i R o l l e r /
DigiRoller Plus easily. Using the memory keys [M+], [M-], you
can add and subtract measurements from your total area. See
the diagram below.
.
To find the total area, you will need to divide the area to be
measured into sections (see diagram below) and find the area
for each section. Then you can subtract the empty area from
the total area.
Step 1 - Find the total area:
Step: Key:
Roll & store length
of first section [L]
19 – User’s Guide
Page 22

Step: Key:
Roll & store width [W]
Find area [L x W]
Store area in memory [M+]
Step 2 - Find area to be subtracted
Step: Key:
Roll & store length
of empty space [L]
Roll & store width [W]
Find area [L x W]
Subtract from total
in memory [M-]
Calculate actual area [Rcl] [M+]
20 – DigiRoller/DigiRoller Plus
™
Page 23

Lighting the Display Background
The DigiRoller Plus has a built-in back-light to light up the dis-
play so that you can read your measurements better in poor-
ly-lit environments.
1) Press the [Light] key to light up the display.
2) Press the key again to turn the light off.
3) If you forget to turn the light off, it will shut itself
off automatically after 8-12 minutes.
Using the light consumes battery power more rapidly; use it
only when necessary and turn it off when you are done.
DIGIROLLER PLUS FEATURES
21 – User’s Guide
Page 24

Taking Volume Measurements
The DigiRoller Plus is programmed to quickly and easily calculate volumes if you’ve rolled in a height or if you’ve set a
fixed height.
You can roll or set a height for each of the nine Area Number
storage registers. Once you roll or set a height, it is used for all
subsequent volume calculations unless you change it.
Remember to press [RESET] to begin each new measurement.
Calculating Volume Using a Rolled Height
Step: Key:
Roll length [L]
Roll width [W]
Roll height [H]
Find volume [LxWxH]
22 – DigiRoller/DigiRoller Plus
™
Page 25

Calculating Volume Using a Fixed Height
To set or program a fixed height, for example, eight feet-seven
inches, do the following:
Step: Key:
Enter program mode [Set] [H]
The Feet-Inch annunciator will start flashing. Press [M+] if
you want to change the units of measurement. The display will
scroll through the various units of measurement. Press [Set] to
select the measurement unit and begin storing. The first zero
(0) will start flashing.
Enter eight feet [M+] (press 8 times)
([M-] to subtract)
Store measurement [Set]
Enter seven inches [M+] (press 7 times)
([M-] to subtract)
Store height/depth [Set]
Clear display [RESET]
23 – User’s Guide
Page 26

Now you can find the volume using the fixed height you’ve
just set. Remember to press [RESET] to begin each new measurement.
Step: Key:
Roll length [L]
Roll width [W]
Recall fixed height [Rcl] [H]
(optional)
Find cubic volume [LxWxH]
24 – DigiRoller/DigiRoller Plus
™
Page 27

Storing Multiple Measurements
Your DigiRoller Plus has a unique [Area#] key used for storing
and recalling multiple measurements. You can store length,
width, height, area, and volume for each of the 9 [Area #] reg-
isters. You can recall these measurements later, even if you
turn off the DigiRoller (for example, to review your measurements back at the office). When you recall your measurements, you can also view totals for each (L, W, H, LxW,
LxWxH, Wall Area).
25 – User’s Guide
Area # L W H LxW LxWxH Wall Area
Page 28

Remember to press [RESET] to begin each new measurement.
Step: Key:
(Area #1)
Roll & store length [L]
Roll & store width [W]
Find area [L x W]
Store as Area #1 [Area#]
(Area #2)
Roll & store length [L]
Roll & store width [W]
Find area [L x W]
Store as Area #2 [Area#]
26 – DigiRoller/DigiRoller Plus
™
Page 29

Continue the above steps for each area you wish to calculate
and store, up to 9 areas.
If you try to store a tenth value, the word “FULL” will display. Press [RESET] to clear this error message. If you want to
add this last value, you must then delete and/or edit the values stored in the Area Number registers. See the “Editing
Stored Measurements” section for information on editing values in the Area Number registers.
Recalling Stored Measurements
To review your stored areas, press [Rcl] [Area#]. The last Area
Number measurement that you stored or recalled will be displayed. Once you press these two keys, you can review all
stored values for each Area Number – length, width, height,
area, volume, wall area and totals for each.
Step: Key:
Area# 1 [Rcl] [Area#] (until Area# 1 appears)
Recall length [L]
Recall width [W]
Recall area [L X W]
27 – User’s Guide
Page 30

Recall Area #2 [Area#]
Recall length [L]
Recall width [W]
Recall area [L X W]
Recall total area [Area#]
Continue until you have reviewed all your stored measurements. To exit the Area Number review mode, press [RESET].
28 – DigiRoller/DigiRoller Plus
™
Page 31

Editing Stored Measurements
Duplicating values in an Area Number register:
Step Key
Find Area Number Register with the value [Area#]
you want to duplicate
Find the value you want to duplicate [L]
OR [W]
OR [H]
Store measurement in permanent memory [M+]
Find Area Number with the value [Area#]
you want to replace
Recall replacement value [Rcl] [M+]
Replace old value with duplicated value [Set] [L]
OR [Set] [W]
OR [Set] [H]
To replace a value in an Area Number register:
Step Key
Roll measurement [Start/Stop]
Store measurement in permanent memory [M+]
Find Area Number Register with the value [Area#]
you want to replace
29 – User’s Guide
Page 32

Step Key
Find the value you want to replace [L]
OR [W]
OR [H]
Recall replacement value [Rcl] [M+]
Replace old value with new value [Set] [L]
OR [Set] [W]
OR [Set] [H]
Deleting a value in an Area Number register:
Step Key
Find Area Number Register with value [Area#]
you want to delete
Delete value [DEL] [L]
OR [DEL] [W]
OR [DEL] [H]
OR [DEL] [LxW]
OR [DEL] [LxWxH]
Note that deleting [LxW] and/or [LxWxH] also deletes the
individual measurements contained (length, width, height).
Deleting an individual Area Number register ([L], [W], [H]):
Press [DEL] [Area#].
30 – DigiRoller/DigiRoller Plus
™
Page 33

Deleting All Area# Measurements
Use the following special three key sequence to clear all measurement values previously stored in the [Area#] key: press
[Set] [DEL] [Area#].
CAUTION:
ALL stored values in [AREA#] will be erased at once.
31 – User’s Guide
Page 34

Taking Wall Area Measurements
The DigiRoller Plus can calculate the total wall surface area of
a room. Wall area is defined as:
([Length x 2] x Height) + ([Width x 2] x Height)
You will only need to roll a length and width, and roll or set a
height. Then you can calculate the total wall surface area of
that room. See the “Taking Volume Measurements” section
for information on rolling or setting a fixed height.
32 – DigiRoller/DigiRoller Plus
™
Page 35

Remember to press [RESET] to begin each new measurement.
Step Key
Set or roll height See “Taking Volume Measurements” section
Roll length of wall [L]
Roll width [W]
Recall height [H]
Find wall area [Set] [LxWxH]
33 – User’s Guide
Page 36

Using Auto-Count/Fixed Distance Mode
The DigiRoller Plus has an Auto-Count mode that allows you
to count how many times you’ve rolled a certain distance
(that you’ve set). If the bell is on, you will hear a short beep
each time you roll that distance and the counter in the upper
left of the display will increase by one.
For example, you want to count the number of times that you
roll 6 feet 8 inches.
Step: Key:
Enter AutoCount Mode [Set] [AutoCount]
(Feet-Inch starts flashing)
The Feet-Inch annunciator will start flashing. Press [M+] if
you want to change the units of measurement. The display will
scroll through the various units of measurement. Press [Set] to
select the measurement unit and begin storing. The first zero
(0) will start flashing.
Enter six feet [M+]
(press 6 times)
Store feet measurement [Set]
(-00 starts flashing)
34 – DigiRoller/DigiRoller Plus
™
Page 37

Enter 8 inches [M+]
(press 8 times)
Store inch measurement [Set]
Clear the display [RESET]
Begin rolling. The unit will automatically count the number of
times you roll 6 feet 8 inches and beep each time.
Delete All Stored Values
To clear all registers and stored values, press [Set] [DEL]
[DEL].
CAUTION:
All stored values will be erased!
35 – User’s Guide
Page 38

Changing Batteries
The DigiRoller/DigiRoller Plus is powered by 4 AAAbatteries.
For best results, use DURACELL®(MN-2400) batteries. The
batteries normally provide approximately 400 hours of use.
You should replace the batteries when:
■ the display becomes weak or erratic
■ the words “Lo Batt” show on the display
■ the display light is dim
1) Turn the unit off and position the unit so that the handle
faces you. Using a small Phillips screwdriver, unscrew the
battery compartment cover (see the diagram below).
Remove the cover.
.
APPENDIX
36 – DigiRoller/DigiRoller Plus
™
Page 39

2) Remove all four batteries and insert four new ones. Insert
two of the batteries on the left side with the positive ends
facing outward; insert the other two batteries on the right
side with the negative ends facing outward (see diagram).
3) Replace the battery compartment cover. Tighten the screw
on the cover.
Changing Wheel Size (Optional)
For your convenience, the DigiRoller/DigiRoller Plus i s
designed to work with two different size wheel circumferences: 2- foot and 4-foot.
If you have more than one wheel (wheels sold separately), use
the following procedure to change wheels:
1) Turn the unit off and place it in front of you on a flat surface, so that the threaded axle shaft faces up.
2) Unscrew the wheel hub cover by turning it in a counterclockwise direction.
CAUTION:
Batteries contain hazardous chemicals.
Please dispose of used batteries properly.
37 – User’s Guide
Page 40

Remove wheel hub cover Turn counter-clockwise
3) Remove the wheel hub cover from the threaded axle shaft.
4) Remove the old wheel from the unit.
5) Place the wheel on the threaded axle shaft. IMPORTANT:
The flat spot inside the wheel hole MUST be aligned to the
flat spot on the threaded axle shaft in order for the unit to
measure properly.
threaded axle shaft
38 – DigiRoller/DigiRoller Plus
™
Page 41

6) Put the wheel hub cover back in place and turn it in a
clock-wise direction to close. Tighten the cover so that
there is no space between the cover and the wheel and
make sure that the wheel does not wobble.
Replace wheel hub cover Turn clockwise to close
7) See the following section for directions on calibrating for
the new wheel size.
39 – User’s Guide
Page 42

Calibrating the DigiRoller
You will need to recalibrate the DigiRoller if you:
■ change the wheel size
■ change the batteries (if you’re using a 2-ft wheel).
After changing the batteries, the unit resets the wheel circumference size to 4 feet (the default size). You must reprogram
the unit to accept a different wheel circumference size so that
it will measure correctly.
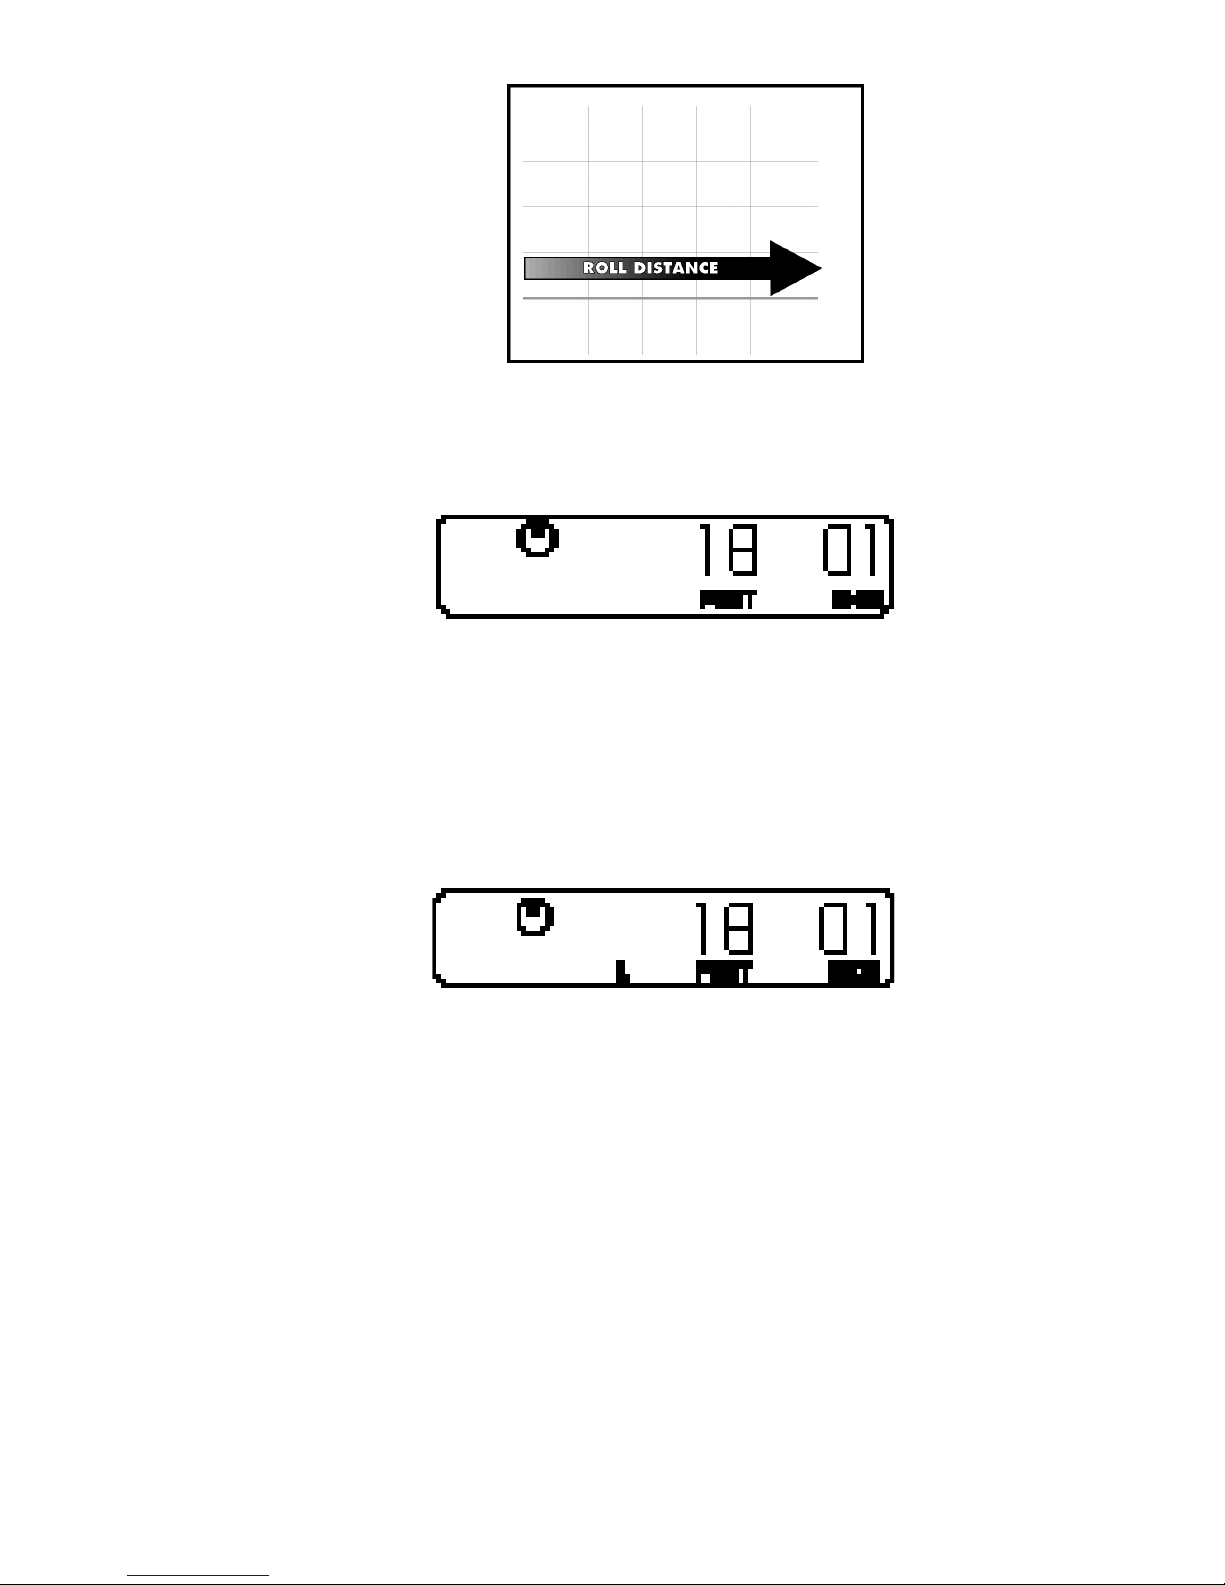
1) Turn the unit on. Press the [Rcl] key and then press the
[RESET] and [+D] keys at the same time. You will see the
following*:
*NOTE: If you are in Metric Mode or have meters selected as
the current units of measurement, the display will
show approximately 1.22 meters.
2) Repeatedly press the [+D] key until the display shows the
desired wheel size. The unit will display the 2-foot, 3-foot
and 4-foot settings (note that we currently only provide
wheels with 2- & 4-foot circumferences).
3) Press the [RESET] key to clear the display and return the
unit to the measuring mode.
40 – DigiRoller/DigiRoller Plus
™
Page 43

Default Settings
The default settings for the DigiRoller/DigiRoller Plus are:
■ Feet-Inch Mode
■ 4 Foot Wheel
■ 100% Wheel Calibration *
■ Display Contrast Level 4
■ Bell On
On the DigiRoller Plus only, you can reset the unit by pressing
[Set] then press the [RESET] and [Light] keys at the same
time. This will clear all measurement values and return the
unit to the default settings.
After you press these keys, the display will show:
Press [RESET] to clear the display and begin measuring.
If you have the DigiRoller (regular model), you can either reset
these values individually, or reset the unit by opening and
closing the battery compartment cover.
*You can change the wheel calibration percentage to be less than
or greater than 100%, to add or subtract a percentage factor to
your measurements. To change the calibration percentage, press
[Set] then [RESET] and [+D] at the same time. The 100 figure
will start flashing. Use the [M+] and [M-] keys to move the percentage up or down. Press [Set]. The .0 figure will start flashing.
Press the [M+] and [M-] keys to change this figure. When you
have selected the desired calibration percentage, press [Set]. The
new calibration percentage will display briefly and the unit will
be ready to measure.
41 – User’s Guide
Page 44

Error Codes
When an error occurs, the display will show one of the following messages:
Error 1 Attempt to enter a wheel ratio of 0%
Error 2 Attempt to add values of unlike dimensions in memory
Error 3 Attempt to move a current room with 0 length, 0 width,
and non-zero height into the area key
nonE Attempt to enter fixed distance or autocount mode with
zero (0) stored in the fixed distance key
Lo bAtt Low battery power
FULL Attempt to move measurement(s) into the Area Number
registers but all Area Number registers are full
OFLO Attempt to display a value too large for display
Most errors can be cleared by pressing the [RESET] key.
42 – DigiRoller/DigiRoller Plus
™
Page 45

Caring for your DigiRoller
1. Keep the LCD display and keypad protected from prolonged exposure to water. Wipe off excessive moisture.
2. Avoid temperatures below -10°C (14°F) or above 60°C
(140°F).
3. Even though this product is extremely durable, take care
not to drop or strike against objects.
4. When you see the “Lo Batt” indicator, replace the batteries.
You may purchase batteries at any store.
5. If you change the wheel, be sure to re-calibrate the unit so
that it will measure correctly.
6. As with all measuring wheels, measurements will vary
when rolling “against the grain” of the carpet. Be sure to
take this difference into account when measuring indoors.
43 – User’s Guide
Page 46

Common Questions & Answers
Q: My DigiRoller/DigiRoller Plus won’t register measurements when
I roll. What’s wrong?
A: Make sure you press the [Start/Stop] key to start your measuring
(display will no longer show the stop symbol when unit is in start
or measuring mode).
Q: My display shows the words “Lo Batt.” What does this mean?
A: When you see the Low Battery Indicator “Lo Batt,” replace all
four of the AAA batteries. You may purchase replacement batteries at any store.
Q: My DigiRoller/DigiRoller Plus display is dim and hard to read.
How can I make the display easier to read?
A: You may adjust the LCD contrast control for easier viewing (see
the section “Changing the Display Contrast Level” on page 8 for
instructions on changing the contrast level).
Q: My measurements are coming up (long/short) when I roll on car-
pet. What’s wrong?
A: As with all measuring wheels, measurements will vary when
rolling “against the grain” of carpet. Be sure to take this difference
into account when measuring indoors.
44 – DigiRoller/DigiRoller Plus
™
Page 47

Q: I’ve taken several measurements for the same thing but the mea-
surements are different. Is something wrong with the DigiRoller?
A: When you are measuring a distance, you need to ensure that you
start and stop your measurement while holding the DigiRoller at
the same angle (preferably upright or vertical). If you do not, your
measurement may be inaccurate. When you move the unit from
an angled to a vertical position or vice versa, the unit will add or
subtract by as much as 4-8”, therefore changing the overall measurement. Also, rolling the unit backwards will subtract measurement units.
Q: My wheel “wobbles” when I roll the unit – is this normal?
A: When the wheel starts to wobble, you should check two things: 1)
check that the flat spot inside the wheel hole and the flat spot on
the axle shaft are aligned; 2) check that the hub cover is on finger
tight (approximately 1/2 additional turn after the wheel hub
cover touches the wheel surface).
45 – User’s Guide
Page 48

Product Specifications
Power Source: 4 AAA Duracell®Batteries
Battery Life: 400 Hours (approximate)
Auto Shut-Off: 8-12 Minutes
Sensor Resolution: .5 inch per 4 ft (12.7mm/1.22m)
Measuring Range: 0 to 999,999.9 (Feet, Yds., Meters)
Wheel Accuracy: 99.9% (1 inch/100 ft)
Speed Limit 8 mph
Display Capacity: 999,999.9 (7 digits)
Internal Math Accuracy: 10 digits
Operating Temperature: -10°C (14°F) – 60°C (140°F)
Length (Extended): 2ft Wheel 47” L (1194mm)
4ft Wheel 50” L (1270mm)
Length (Contracted): 2ft Wheel 30” L (762mm)
4ft Wheel 33” L (838mm)
Weight: 2-4 lbs (1-2kg)
[depending on wheel size]
46 – DigiRoller/DigiRoller Plus
™
Page 49

LIMITED WARRANTY
This product, except the battery and case, is warranted by
Calculated Industries, Inc. (CII), to the original purchaser to be free
from defects in material and workmanship under normal use for a
period of one (1) year from the date of purchase. During the warranty period, and upon proof of purchase, the device will be repaired or
replaced (with the same or similar model at CII’s option), without
charge for either parts or labor at the CII repair center listed below.
The purchaser shall bear all shipping, packing and insurance costs
to the repair center — C.O.D. returns will not be accepted. In addition,
the purchaser must include $10.95 for return shipping and handling.
The warranty will not apply to this product if it has been misused,
abused or altered. Without limiting the foregoing, leakage of battery,
bending or dropping the unit, or visible cracking of the LCD display
or casing are presumed to be defects resulting from misuse or abuse.
Neither this warranty nor any other warranty express or implied,
including implied warranties of merchantability, shall extend beyond
the warranty period. No responsibility is assumed for any incidental
or consequential damages, including but without limiting the same, to
the mathematical accuracy of the product, keystroke procedures or
example material offered. The keystroke procedures and pre-programmed material are sold on an “as is” basis. The entire risk as to
their quality and performance is with the user.
Some states do not allow limitations on how long an implied warranty lasts and some states do not allow the exclusion or limitation of
incidental or consequential damages, so that the above limitations or
exclusions may not apply to you. This warranty gives you specific
legal rights which vary from state to state and country to country.
47 – User’s Guide
Page 50

Calculated Industries, a leading manufacturer of special function calculators and digital measuring instruments, is always looking for new
product ideas in these areas.
If you have one, or if you have any suggestions for improvements to
this product or its User’s Guide, please call or write our Product
Development Department. Thank you.
4840 Hytech Drive
Carson City, NV 89706 U.S.A.
775/885-4900 • FAX: 775/885-4949
DigiRoller™ and DigiRoller Plus™ are trademarks
of Calculated Industries, Inc.
ALL RIGHTS RESERVED.
Calculated Industries® is
a registered trademark.
Designed in the United States of America
by Calculated Industries, Inc.
©1995, Calculated Industries, Inc.
DRP-Man.v1.1
LOOKING FOR NEW IDEAS
Page 51

Revision Table - DRP Manual
4/12/95
1) Took out screens from LCDs.Changed some of the graphics.
2) Added a paragraph on the wheel radius key page.
3) Added sentence to several sections about resetting before
beginning new measurement.
4) Changed wording on section about wheel change.Also took
out screens on some graphics in that section.
5) Made some minor formatting changes ([RESET] was not capitalized everywhere it was used, the names of some keys were
not bolded, slightly changed format of the section about editing
stored measurements, changed the size of the All Clear LCD too small,)
6) Added speed limit to product specifications page.
7) Added sentence to section on storing and recalling values
about the extra storage keys on the DRP.
8) Changed LCDs in several sections to reflect square feet
instead of square yards.(Area, Volume, and Storing Multiple
Measurements sections)
49 – User’s Guide
 Loading...