

Page 1
AKENG45_STS Page 1 Monday, April 28, 2008 11:38 AM
Cadillac
STS/STS-V
Owner's Manual
Table of Contents
How to Use this Manual................................. 3
Important Safety Precautions........................ 5
Section 1
Instrumentation and Controls ..................... 21
Section 2
Seats and Restraints................................... 253
Section 3
Starting and Operating Instructions ......... 301
Section 4
Service and Maintenance........................... 355
Section 5
Problems on the Road................................ 431
05AKENG45
Index........................................................... 467
Page 2

AKENG45_STS Page 2 Monday, April 28, 2008 11:38 AM
Important Notes About this Manual
We thank you for choosing a
General Motors product, and we
want to assure you of our continuing commitment to your motoring
pleasure and satisfaction.
This manual should be considered
a permanent part of the vehicle.
Keep it with the vehicle when sold,
to provide the next owner with
important operating, safety and
maintenance information.
Environment-friendly and recycled
materials were used in the development and manufacture of your
vehicle. The production methods
used to make your vehicle are also
environment-friendly.
Production waste is recycled, with
some of the waste material recovered for re-use. Water requirements have been reduced to help
conserve natural resources.
All information, illustrations and
specifications in this manual are
based on the latest product information available at the time of
printing. We reserve the right to
make changes in the product without further notice.
The illustrations throughout the
manual are typical and are not
intended to be exact representations of any part of your vehicle.
Please be aware that the vehicle
you purchased may not be
equipped with each option that is
explained in this manual.
This Owner's Manual is supplemented by a "Maintenance Schedule and Warranty and Owner
Assistance Information" booklet.
Although we feel that this Owner's
Manual is complete, in that it
covers the more important vehicle
operating information, it is most
valuable when used with the
Maintenance Schedule.
. . . 2
Page 3

AKENG45_STS Page 3 Monday, April 28, 2008 11:38 AM
How to Use this Manual
When it comes to service, keep in
mind that your dealer knows your
vehicle best and is committed to
your complete satisfaction. Your
dealer invites you to return for all
of your service needs both during
and after the warranty period.
Should you have any concern that
has not been handled to your satisfaction, follow the steps outlined
in the "Maintenance Schedule and
Warranty and Owner Assistance
Information" booklet.
FOR CONTINUING SATISFACTION AND QUALITY, KEEP YOUR
GM VEHICLE ALL GM. GENERAL
MOTORS PARTS ARE IDENTIFIED
BY ONE OF THESE TRADEMARKS:
Use this manual to learn about the
features of your new vehicle and
how they operate.
The manual is intended to be used
as a reference guide to help you to
quickly identify and use the various
features of your vehicle. For this
reason, the manual is organized
according to feature location as
opposed to feature operation.
It also includes some very important safety and maintenance information and even deals with some
problems you may have while
driving.
This manual is divided into five
sections:
• Section 1: Instrumentation
and Controls
To get a general understanding of
how the content of this manual is
organized, imagine yourself sitting
in the driver's seat. Your attention
is first focused on the instrument
panel directly in front of you, then
up and out to the mirrors,
windows and doors and continuing back around the vehicle to the
rear cargo area, then up to the
overhead area and the roof. The
content of this manual is organized to follow this order. The vast
majority of your vehicle's instruments and controls are built into
these areas, and are discussed first
in this manual, in Section 1.
3 . . .
Page 4

AKENG45_STS Page 4 Monday, April 28, 2008 11:38 AM
How to Use this Manual
• Section 2: Seats and
Restraints
Next, focus on the center of
your vehicle: the seats and
safety belts. Information about
these features and about your
vehicle's air bag system is covered in Section 2. Section 2
also includes any information
pertaining to child restraints.
• Section 3: Starting and Operating Instructions
Once you have been familiarized with your vehicle's instruments, controls, seats and
restraint systems in Sections 1
and 2, Section 3 outlines your
vehicle's starting and operating instructions. This section
includes information about
your keys and keyless entry (if
equipped), about the ignition
and vehicle starting, and about
the transmission, transfer case
(if equipped), parking, traction,
steering, brake, and suspension
systems. It also covers your
vehicle's specific loading and
towing capabilities.
• Section 4: Service and
Maintenance
The Service and Maintenance
section:
- contains fuel information
- helps you locate the various
components in your vehicle's
engine compartment
- offers basic maintenance and
fluid information for the
major, easily-accessible
engine components (e.g., oil,
coolant, transmission fluid,
power steering fluid, brake
fluid, refrigerant, washer
fluid, battery)
. . . 4
Page 5

AKENG45_STS Page 5 Monday, April 28, 2008 11:38 AM
How to Use this Manual
- contains information about
tire inflation, inspection, rotation and replacement
- locates and describes your
vehicle's fuses and circuit
breakers
- contains some bulb replacement instructions and
specifications
- includes major component
specifications and capacities
• Section 5: Problems on the
Road
This section tells you how to
handle certain problems you
may have while driving. It
covers:
- jump starting your vehicle
- towing your vehicle
- engine overheating
- changing a flat tire
Each section begins with a brief
table of contents to help you
locate the information you want.
5 . . .
Page 6
AKENG45_STS Page 6 Monday, April 28, 2008 11:38 AM
Important Safety Precautions
CAUTION AND NOTICE BOXES
CAUTIONS and NOTICES alert you
to conditions that may result in
injury, or that may damage your
vehicle.
CAUTION
Means: This can hurt people.
NOTICE
Means: This can damage your
vehicle.
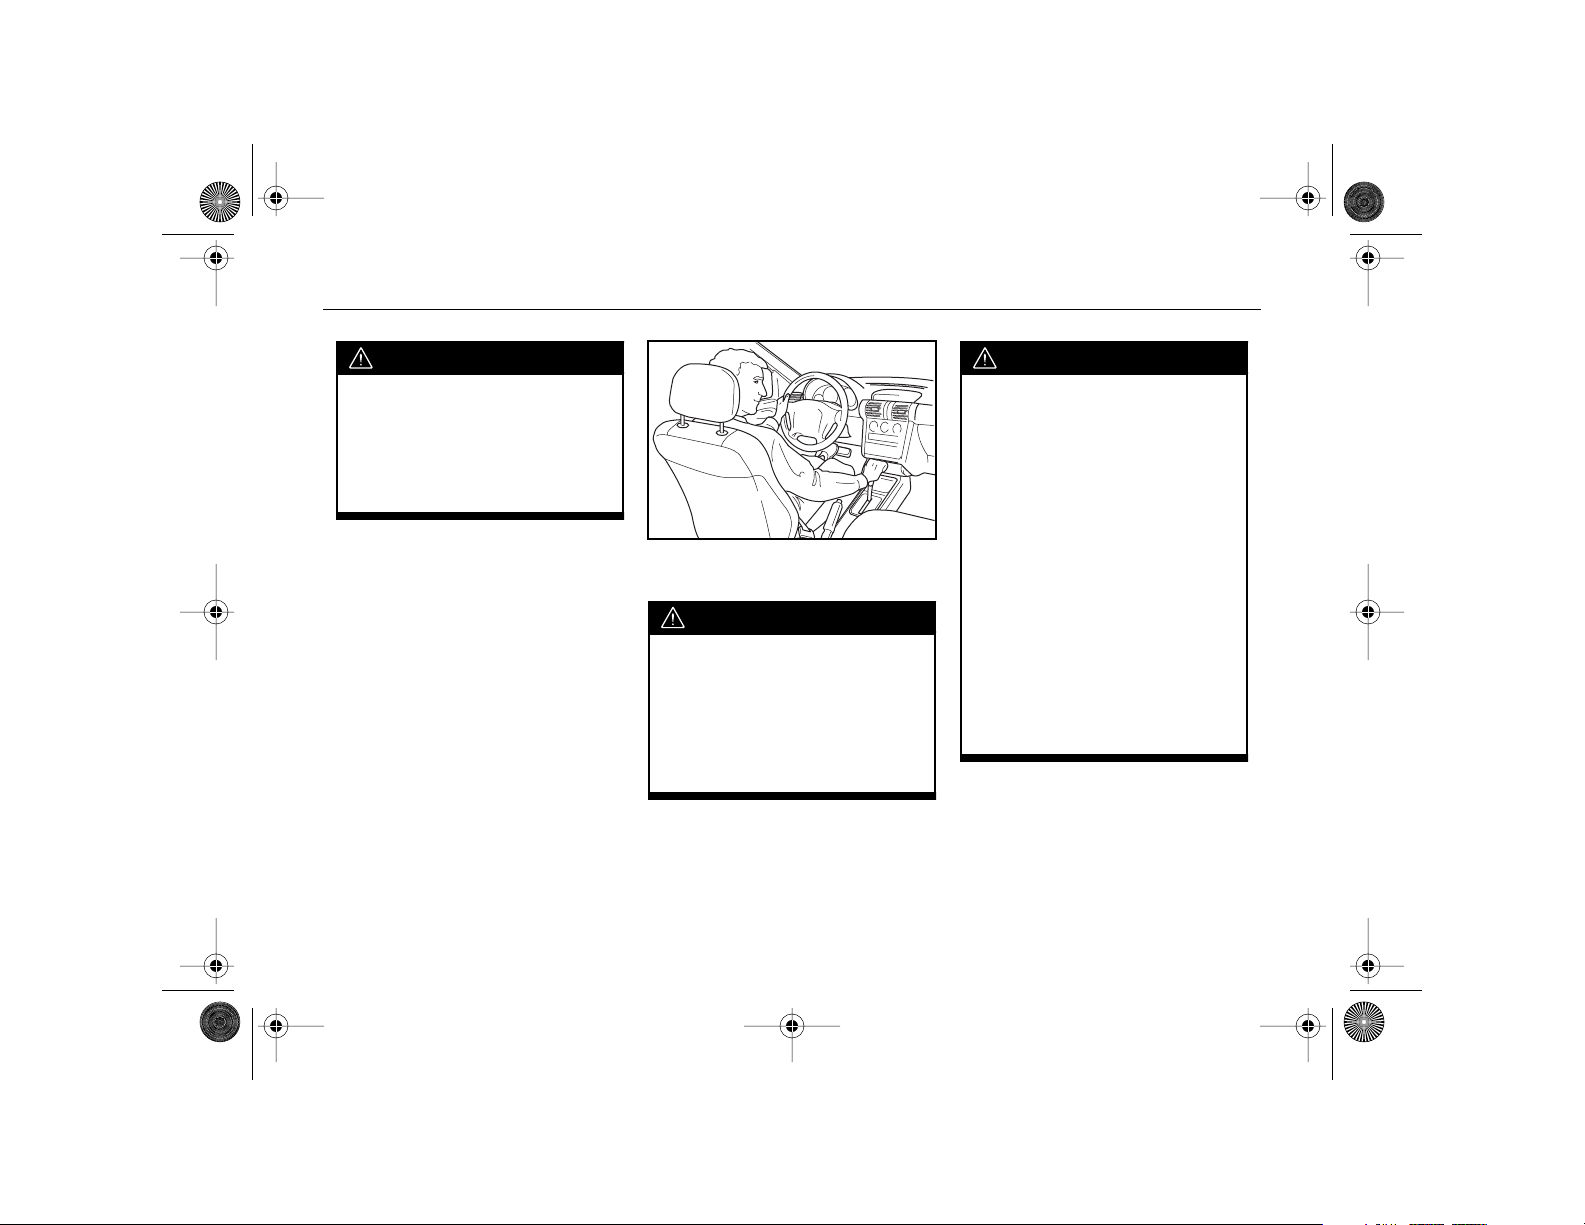
Seating Position
CAUTION
Do not adjust the driver's seat
when the vehicle is moving.
The seat could jerk and cause a
loss of control.
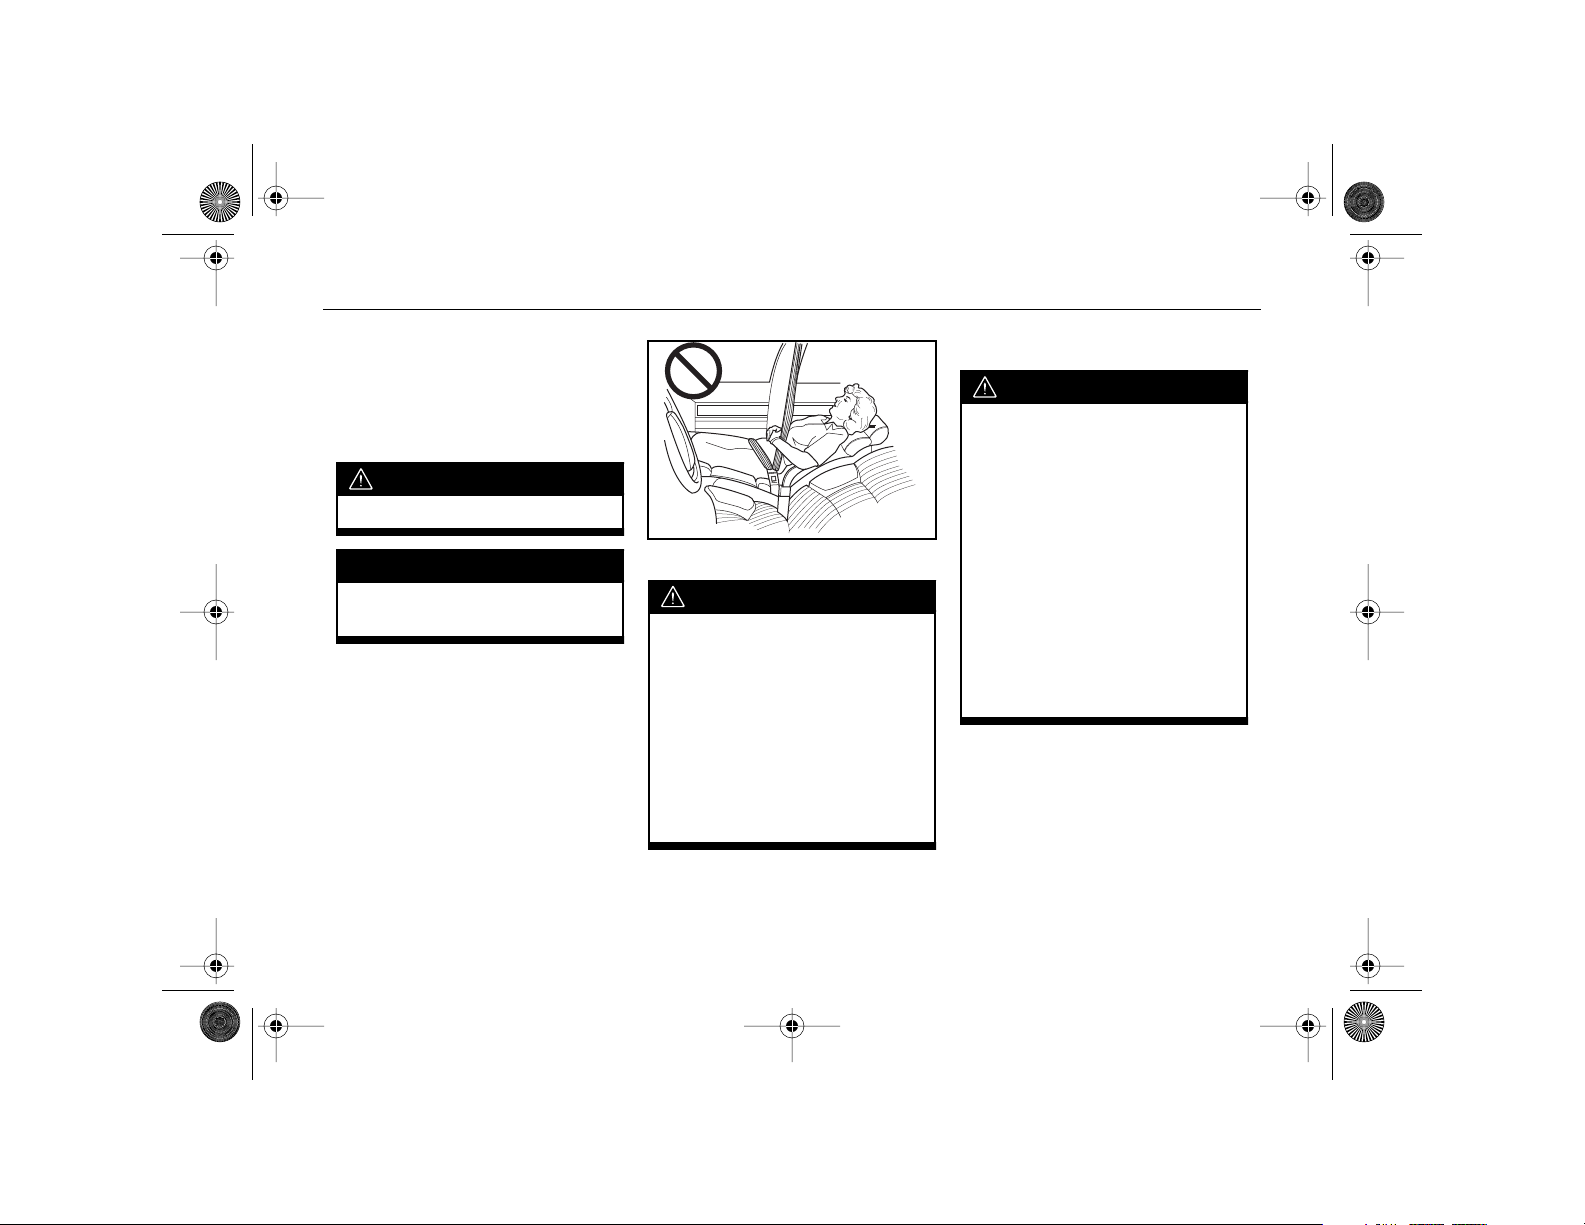
Sitting in a reclined position
when your vehicle is in motion
can be dangerous. Even if you
buckle up, your safety belts
can't do their job when the
seatback is excessively reclined.
Safety Belts
CAUTION
Always wear your safety belt. Be
sure it is adjusted properly at all
times.
Do not let anyone ride where
they cannot wear a safety belt
properly. If you are in a crash
and you are not wearing a safety belt, you can be seriously
injured or killed. In the same
crash, you might not be injured
if you are buckled up. Always
fasten your safety belt, and
check that your passengers'
belts are fastened properly, too.
. . . 6
Page 7
AKENG45_STS Page 7 Monday, April 28, 2008 11:38 AM
CAUTION (Continued)
Wearing a safety belt improperly could cause serious injury.
The lap part of the belt should
be worn low and snug on the
hips, just touching the thighs.
In a crash, this applies force to
the strong pelvic bones, and
you would be less likely to slide
under the lap belt. If you slid
under it, the belt would apply
force to your abdomen. This
could cause serious or even fatal
injuries.
Important Safety Precautions
CAUTION (Continued)
Wear your belt fitted closely
against the body. Do not wear
your shoulder belt under your
arm. Make sure the belt is not
twisted across your body.
You could be seriously injured if
your belt is buckled in the
wrong place. Always buckle
your belt into the buckle nearest you.
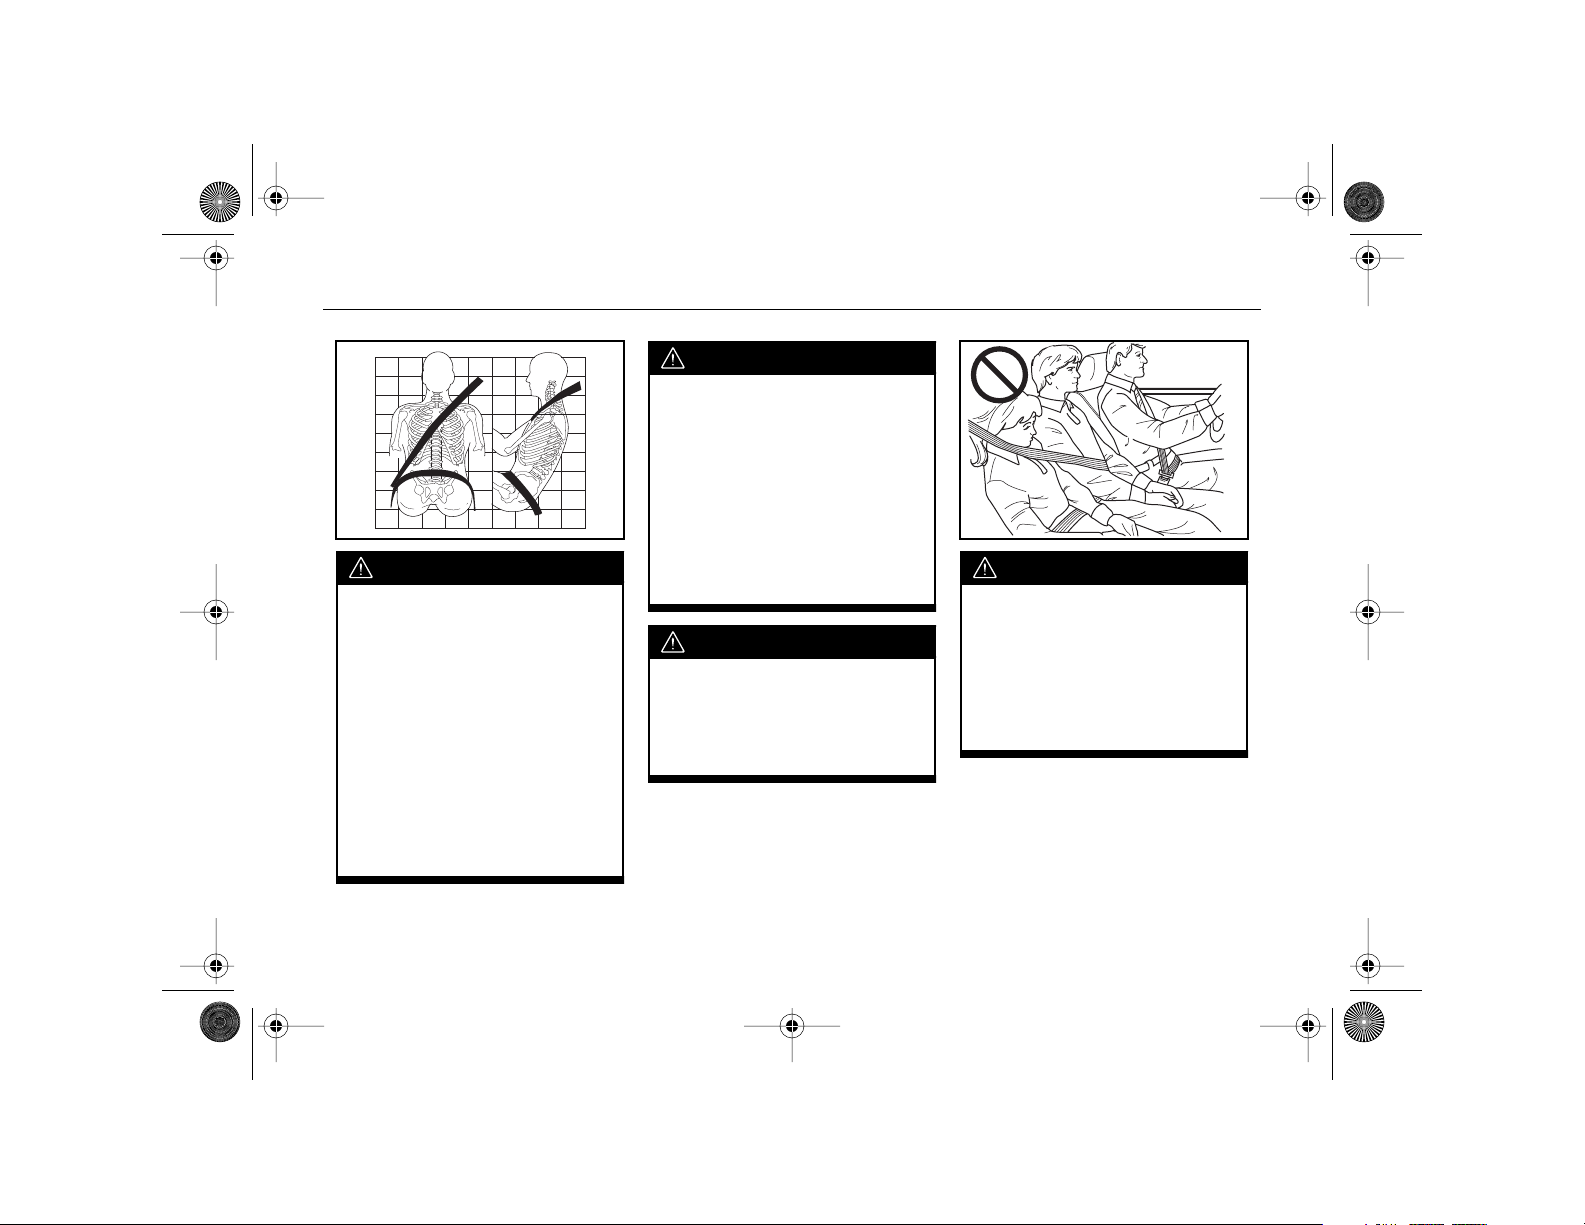
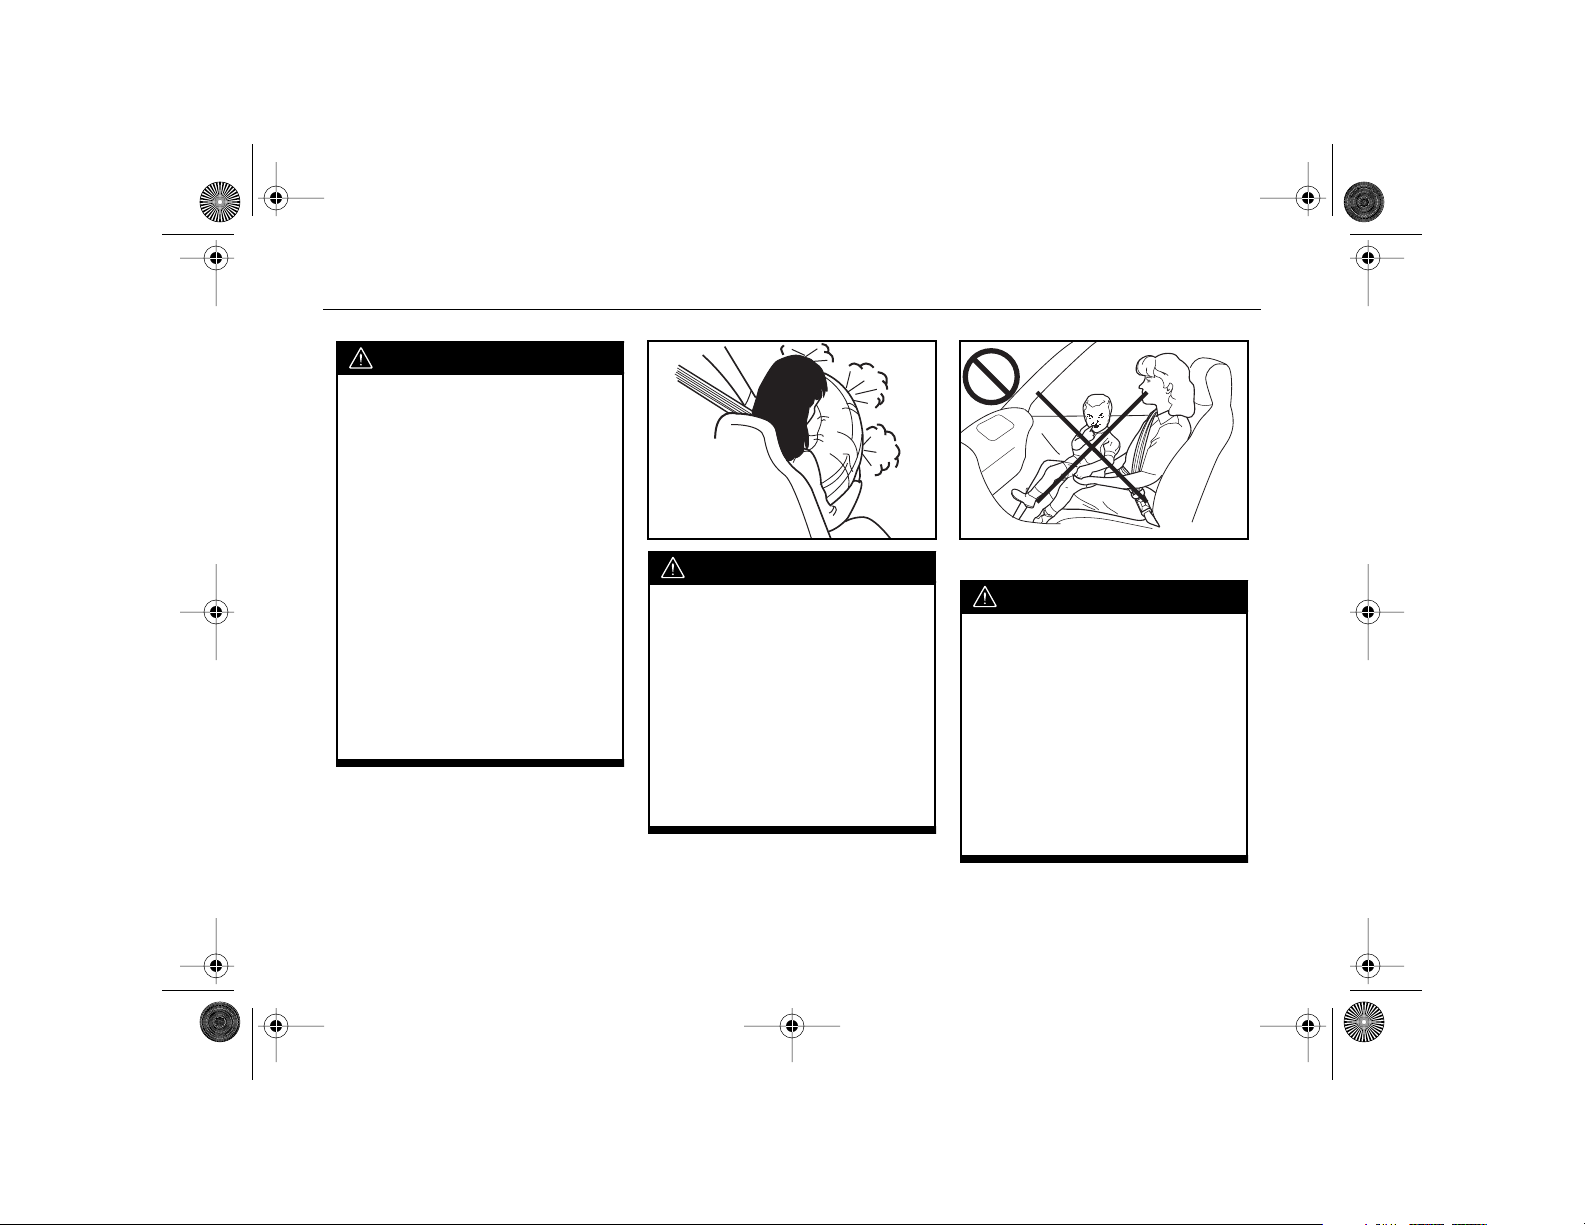
CAUTION
The shoulder belt should go
over the shoulder and across
the chest. These parts of the
body are best able to take belt
restraining forces.
CAUTION (Continued)
A safety belt must be used by
only one person at a time. Do
not allow two children to share
the same belt.
Accident statistics show that
children are safer if they are
restrained in the rear seat.
7 . . .
Page 8
AKENG45_STS Page 8 Monday, April 28, 2008 11:38 AM
Important Safety Precautions
CAUTION (Continued)
A pregnant woman should
wear a lap-shoulder belt, and
the lap portion should be worn
as low as possible throughout
the pregnancy.
Air Bags
CAUTION
Both the safety belt restraint
system and the air bag restraint
system are designed to best
protect adults.
Anyone who is up against, or
very close to, an inflating air
bag could be seriously injured
or killed.
CAUTION (Continued)
Be sure that if children are too
small to be well restrained by
the safety belt system, that they
are secured in an appropriate
child restraint.
The presence of an airbag is not
a substitute for a safety belt and
is only effective in conjunction
with the safety belts.
. . . 8
Page 9
AKENG45_STS Page 9 Monday, April 28, 2008 11:38 AM
CAUTION (Continued)
Air bags are designed to be
used with the safety belts. Even
with an air bag, if you are in a
crash and not wearing a safety
belt, your injuries could be
much worse.
If you are too close to an inflating air bag, it could seriously
injure you. Safety belts help
keep you in position in case an
air bag inflates in a collision.
The driver should sit as far back
as possible while still able to
maintain control of the vehicle.
The path of an inflating air bag
must be kept clear of any
objects at all times.
CAUTION (Continued)
When an air bag inflates, it
leaves dust in the air. This dust
could cause breathing problems for people with a history of
asthma or other breathing trouble. To avoid this, everyone in
the vehicle should get out as
soon as it is safe to do so. If you
are unable to get out of the
vehicle, then open a window or
door.
Important Safety Precautions
Children and Safety Restraints
CAUTION
Never hold a baby in your arms
while riding in a vehicle. During
a crash a baby will become so
heavy you can't hold it. For
example, in a crash at only 40
km/h, a 5.5 kg baby will
suddenly become a 110 kg
force on your arms. The baby
would be almost impossible to
hold. Secure the baby in an
infant restraint.
9 . . .
Page 10
AKENG45_STS Page 10 Monday, April 28, 2008 11:38 AM
Important Safety Precautions
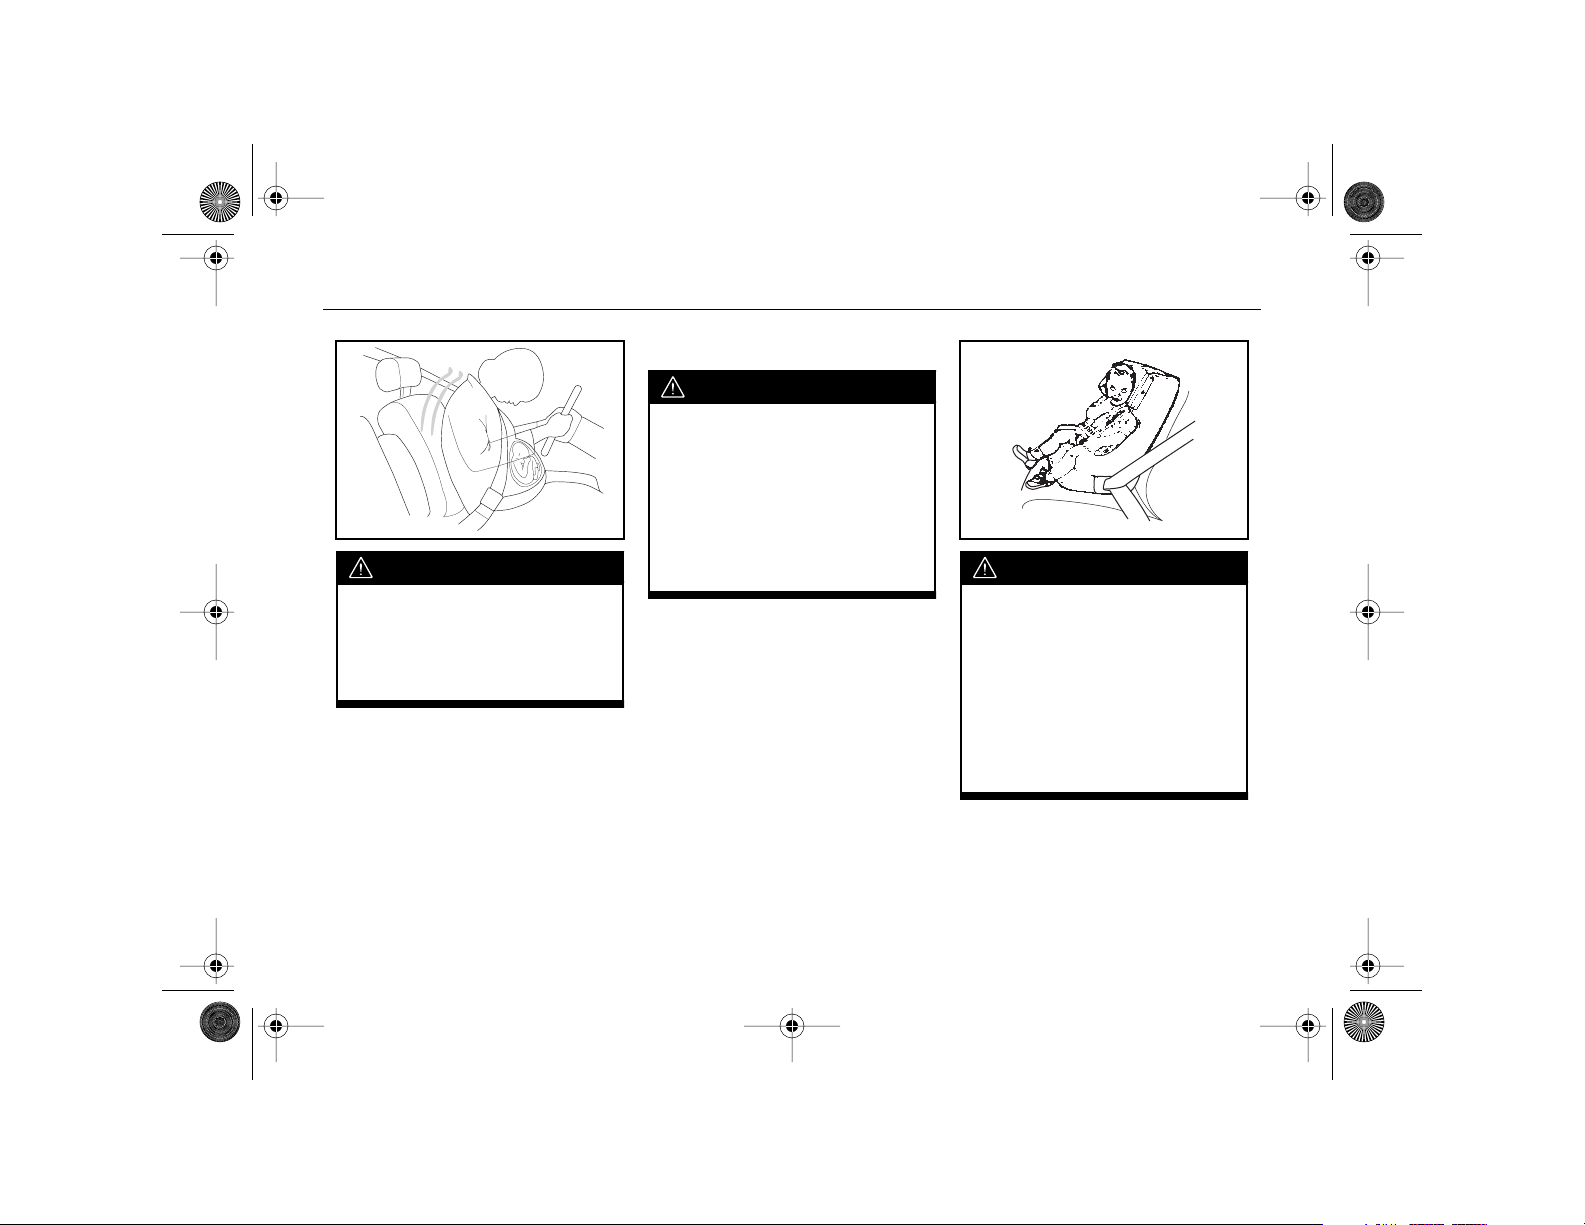
CAUTION (Continued)
A rear-facing child restraint in
the front seat could be pushed
into the seatback by the front
passenger's air bag if it inflates.
A child in a rear-facing child
restraint can be seriously
injured if this happens. In vehicles with the front passenger's
inflatable restraint system,
always secure a rear-facing
child restraint in the rear seat.
. . . 10
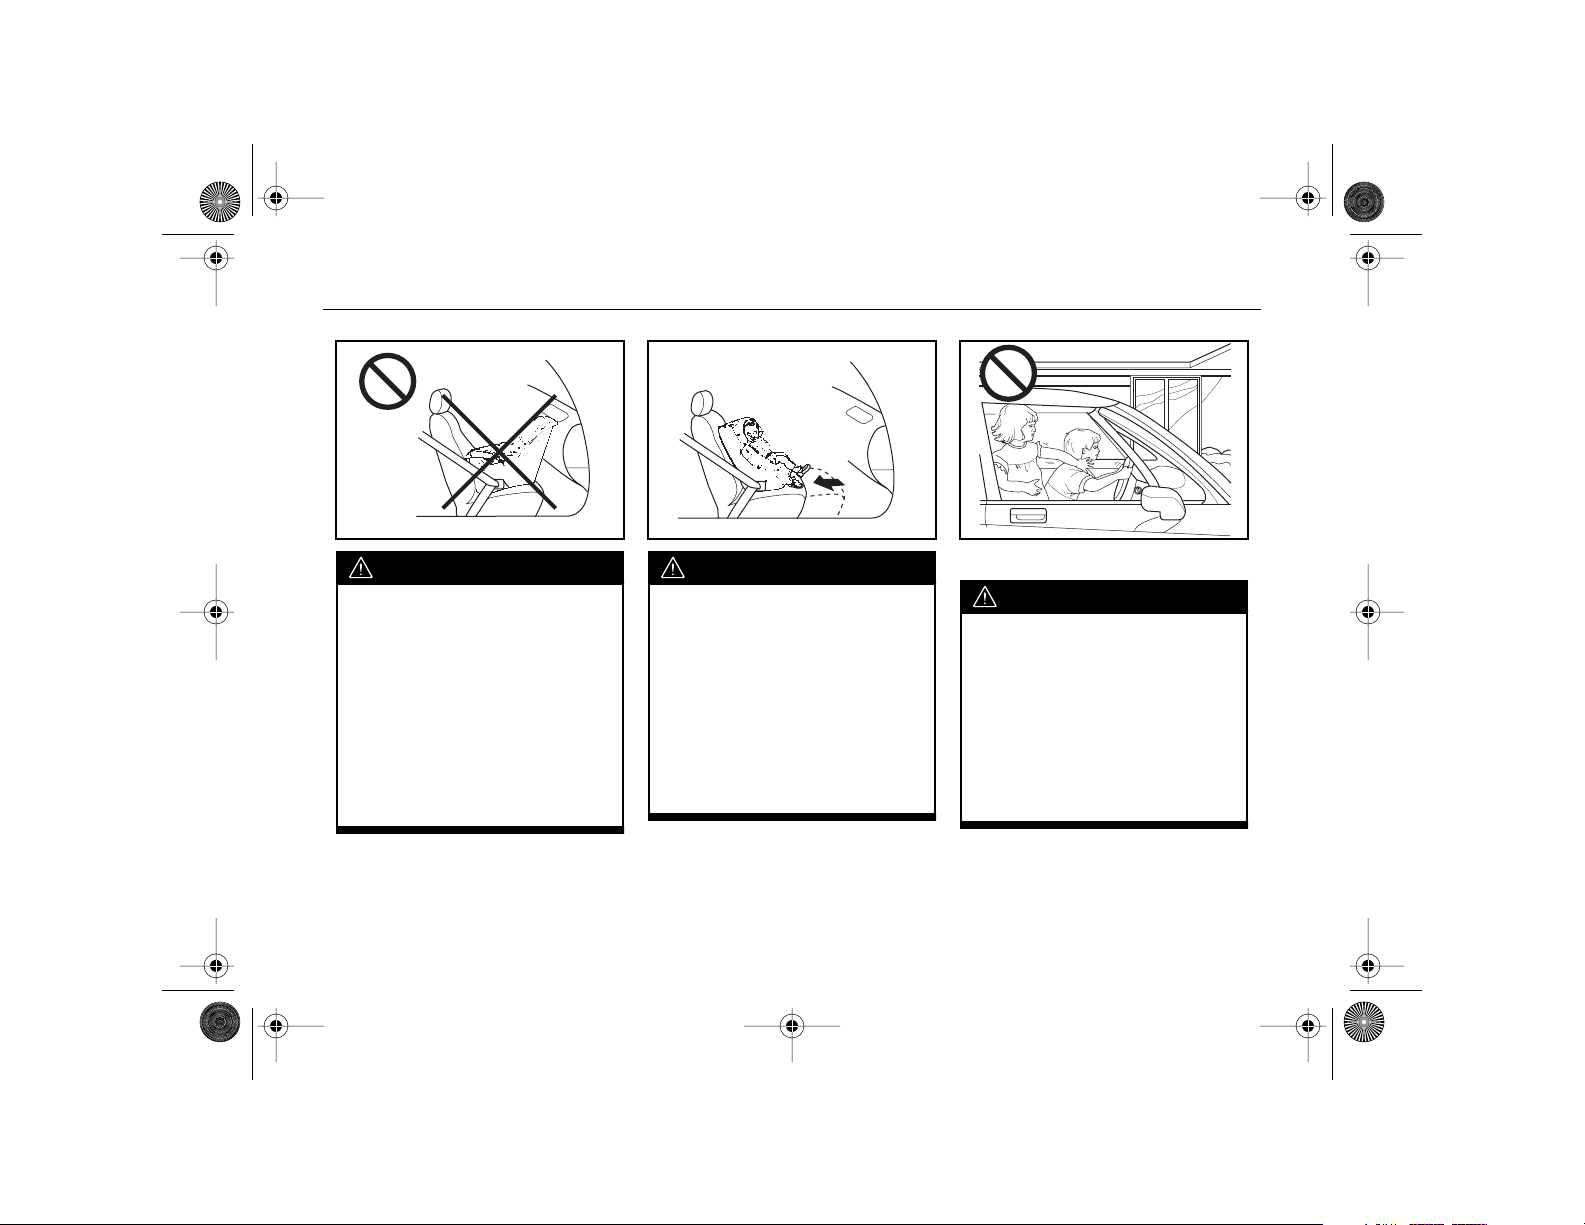
CAUTION
Infants who must use rearfacing child restraints cannot
ride safely in passenger air bagequipped vehicles that do not
have rear seats.
If, however, you secure a
forward-facing child restraint in
the front passenger seat, be
sure to move the front passenger seat as far back as it will go.
Leaving Your Vehicle
CAUTION
Avoid leaving your vehicle while
the engine is running.
Do not leave children in the
vehicle with the ignition key.
They could operate the power
windows or other controls and
could even make the vehicle
move. A child or others could
be injured or even killed.
Page 11
AKENG45_STS Page 11 Monday, April 28, 2008 11:38 AM
D
R
P
Important Safety Precautions
CAUTION (Continued)
It is very dangerous to leave
children inside the vehicle for
any extended period of time especially in hot weather. When
you leave the vehicle, take your
children with you.
Vehicles with Automatic
Transmissions
CAUTION (Continued)
If your vehicle is equipped with
an automatic transmission,
observe the following precautions to ensure proper and safe
operation. Otherwise, the vehicle may move suddenly and/or
cause an accident.
CAUTION (Continued)
• Be sure the shift lever is in P
(Park) and the parking brake
is firmly applied when you
leave your vehicle.
• Keep your foot firmly on the
brake pedal and do not race
the engine when shifting out
of P (Park) or N (Neutral).
• Do not shift into
(Reverse) when the engine
is racing.
• Do not shift into
while the vehicle is moving.
Read Section 3, "Starting and
Operating Instructions", for
more information.
(Drive) or
(Park)
11 . . .
Page 12
AKENG45_STS Page 12 Monday, April 28, 2008 11:38 AM
Important Safety Precautions
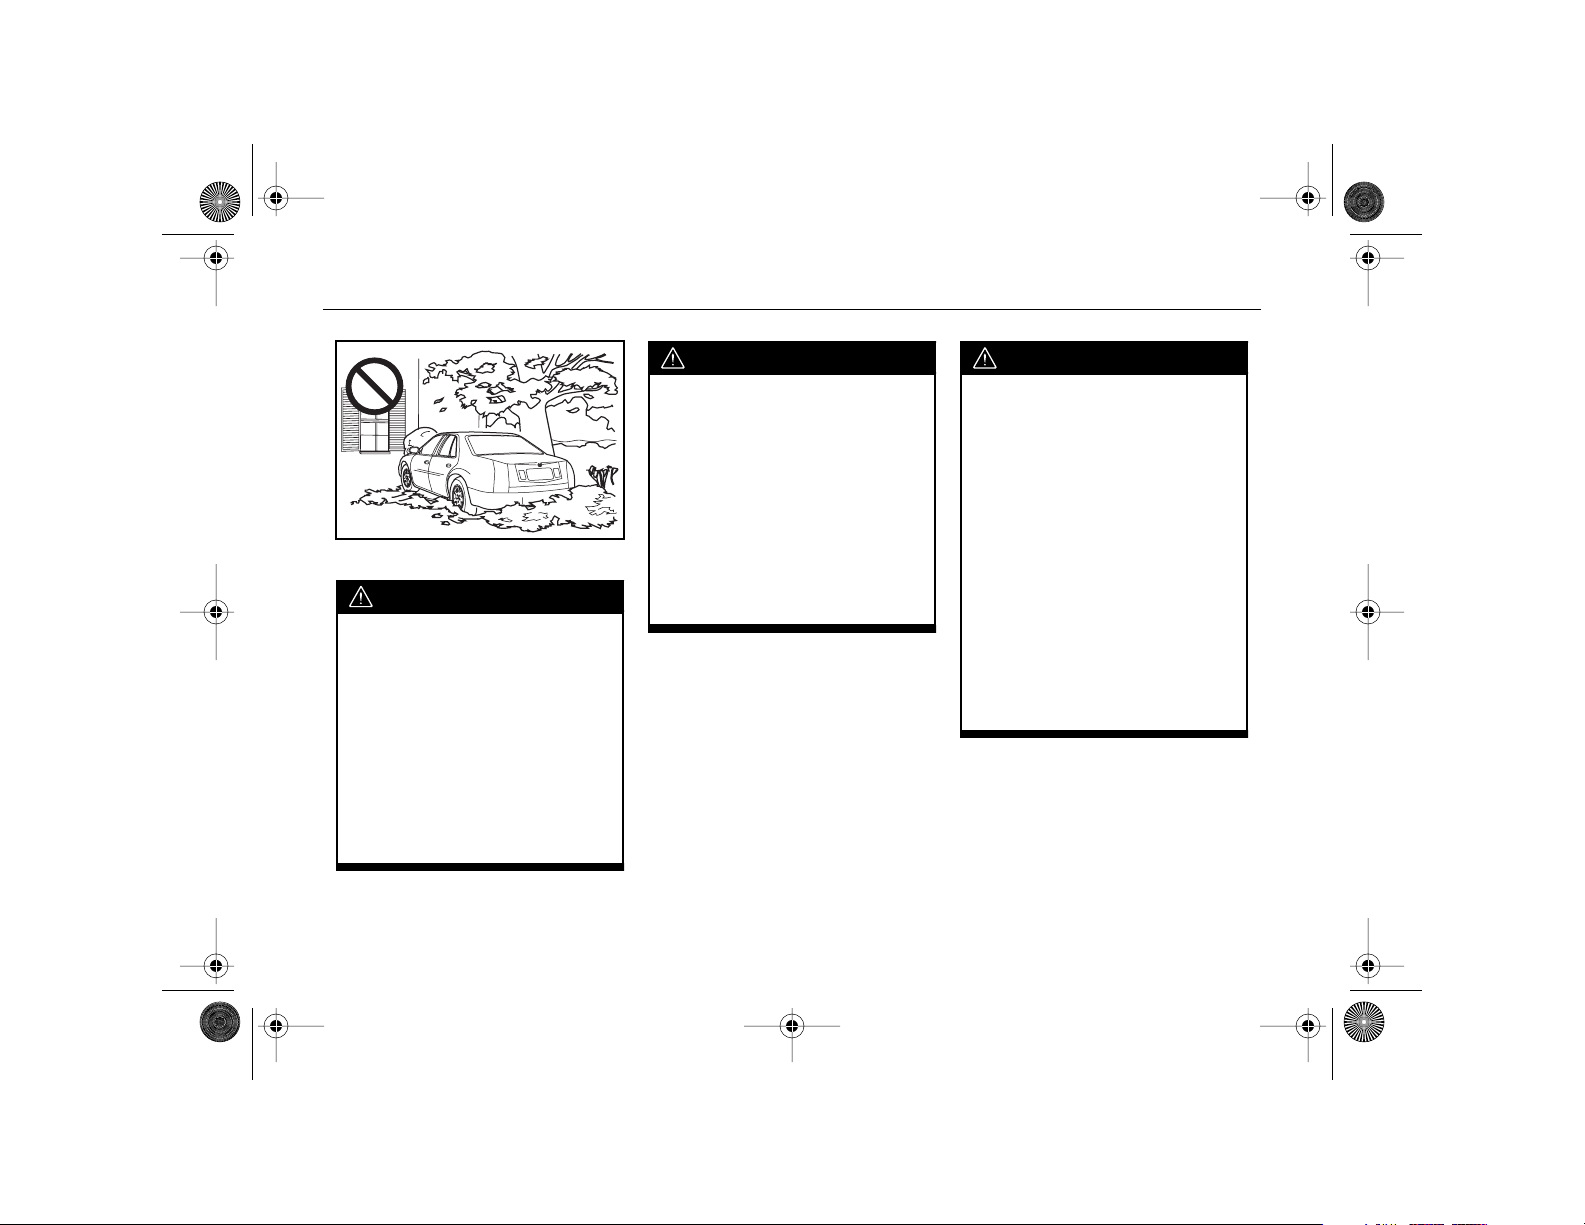
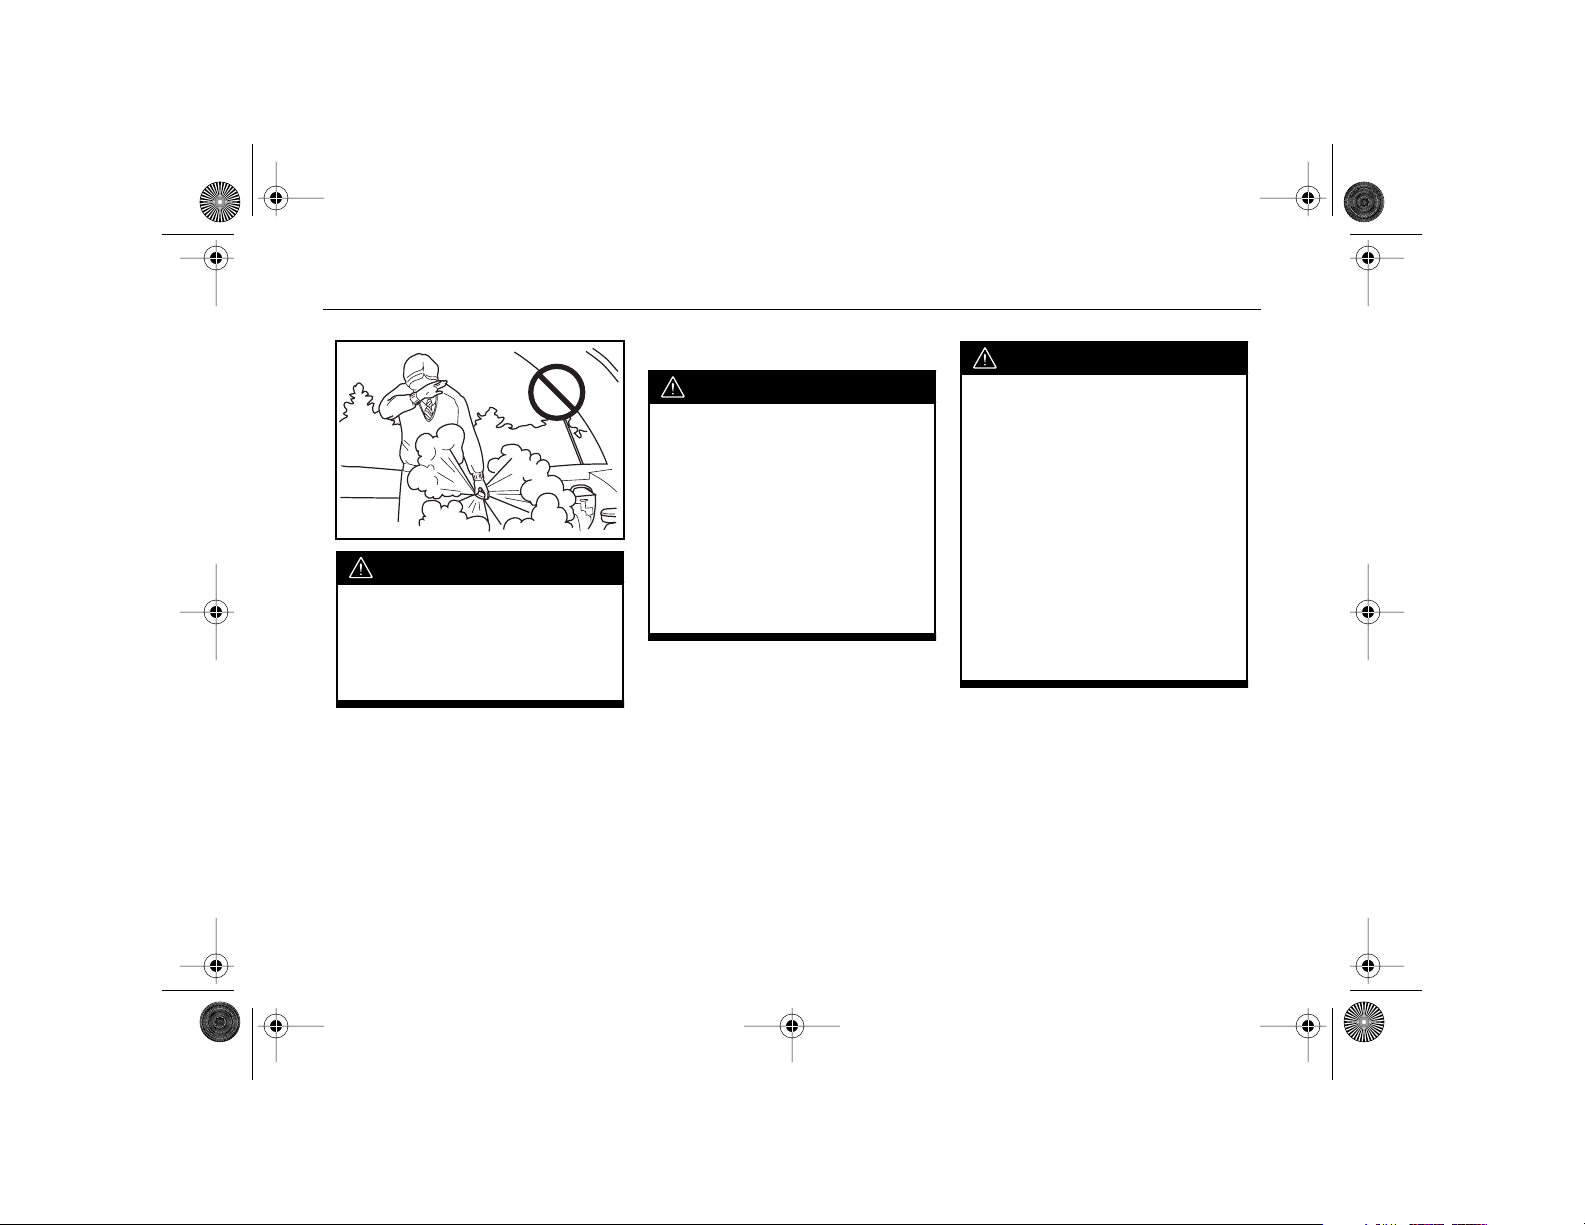
Exhaust Warnings
CAUTION
• Things that can burn can
touch hot exhaust parts
under your vehicle and ignite.
Don't park over papers,
leaves, dry grass or other
things that can burn.
• Engine exhaust can kill. It
contains carbon monoxide
(CO) gas, which you can't see
or smell. It can cause unconsciousness and death.
. . . 12
CAUTION (Continued)
• Do not idle the engine in a
closed-in place, such as the
garage. Carbon monoxide
(CO) gas could get into your
vehicle.
• Idling the engine with the
windows closed and the air
conditioning fan off (if
equipped), may allow dangerous exhaust fumes into
your vehicle.
CAUTION (Continued)
• It can also be very dangerous
to drive with the trunk, rear
windows, hatch or rear doors
open. If you must drive with
one of these open or with
their seal broken, make sure
all other windows are closed
and turn the fan on to the
highest speed using any setting that brings in outside air.
Doing this will force outside
air into the vehicle.
• Make sure that no window,
door, trunk or hatch at the
rear of the vehicle is open if
you are pulling a trailer.
Page 13
AKENG45_STS Page 13 Monday, April 28, 2008 11:38 AM
Important Safety Precautions
CAUTION (Continued)
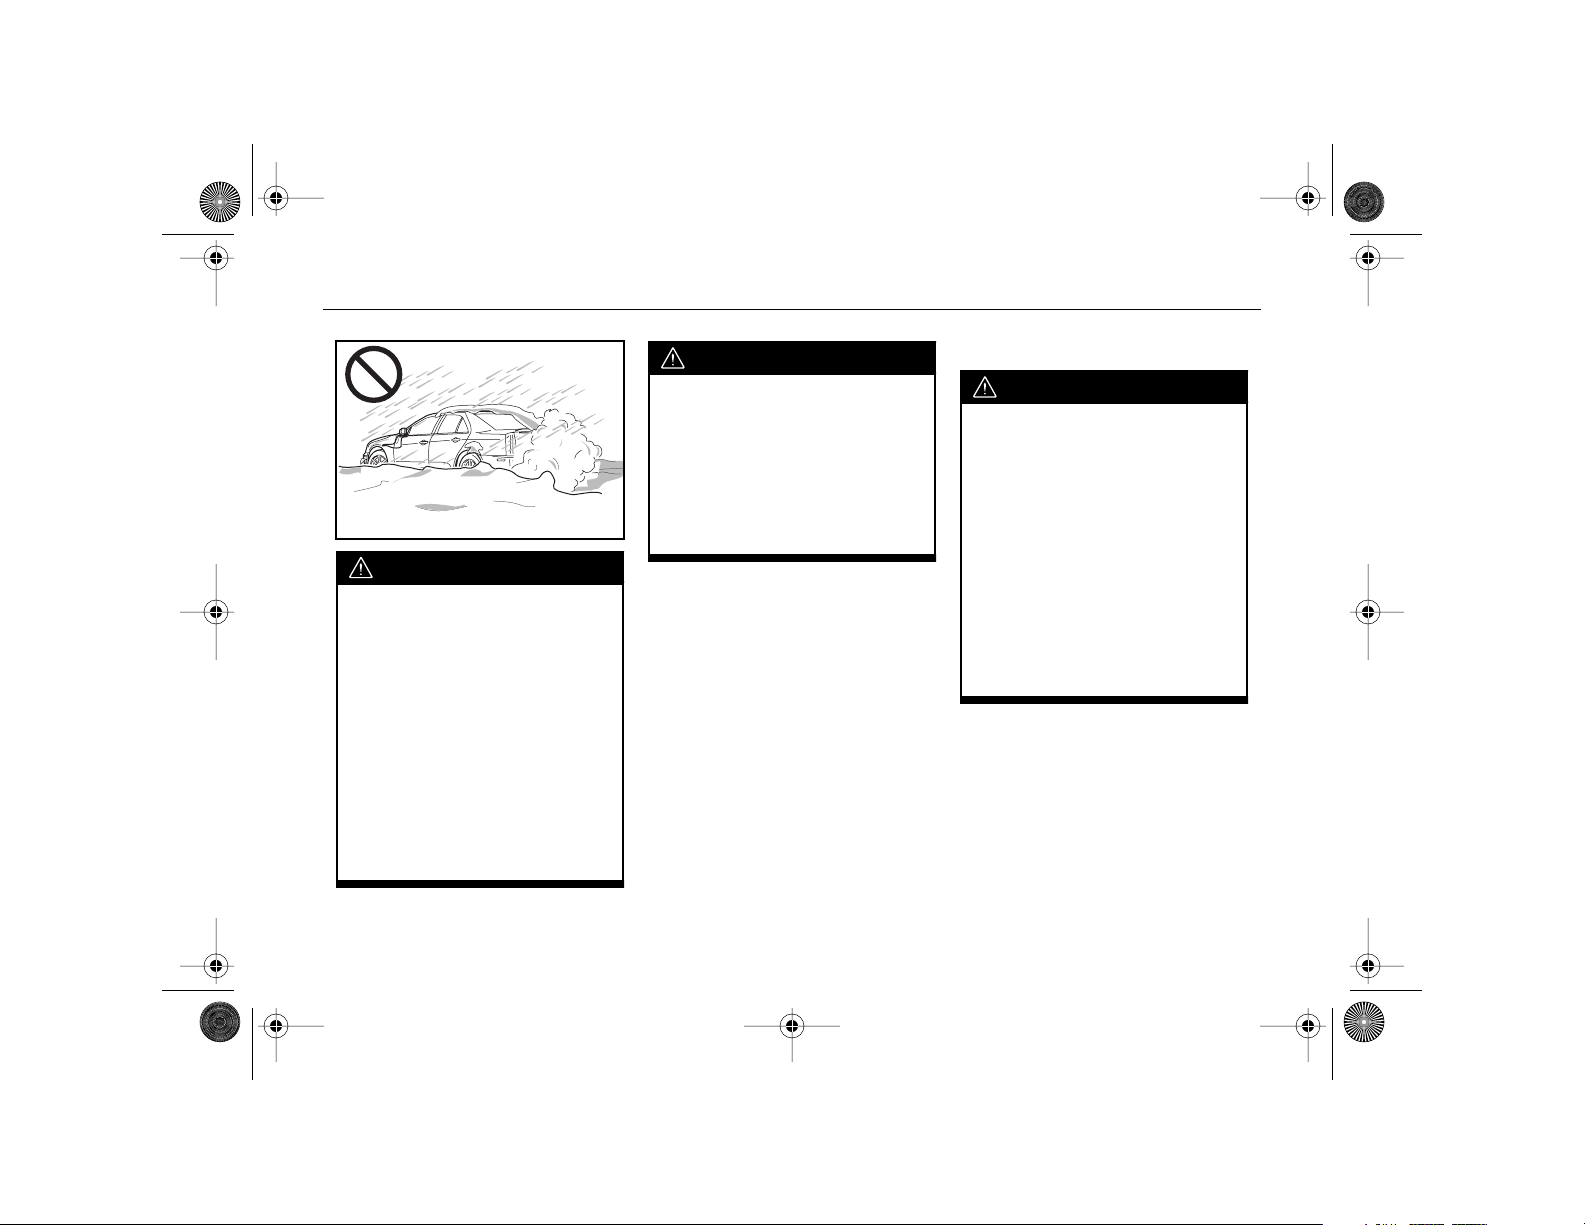
• Engine exhaust may also be
entering your vehicle if:
– your exhaust system
sounds strange or different
– your vehicle gets rusty
underneath
– your vehicle has been
damaged or improperly
serviced
– the base of your vehicle,
especially your exhaust
pipe, is blocked by snow or
debris
CAUTION (Continued)
If you suspect that exhaust is
entering your vehicle, drive
with all the windows open, turn
the air conditioning (if
equipped) on to any setting
that circulates outside air and
have the vehicle serviced
immediately.
Water and Your Vehicle
CAUTION
After a car wash or driving
through a puddle, the brakes
may not work well. Apply light
pedal pressure until the brakes
work normally.
Do not drive through deep
puddles. If water enters into an
air inlet, it might damage the
engine. If you must drive
through a puddle, drive carefully so as not to allow the water to
splash against the underbody of
the vehicle.
13 . . .
Page 14
AKENG45_STS Page 14 Monday, April 28, 2008 11:38 AM
Important Safety Precautions
CAUTION (Continued)
Flowing or rushing water
creates strong forces. If you try
to drive through flowing water,
as you might at a low water
crossing, your vehicle can be
carried away. As little as six
inches of flowing water can
carry away a smaller vehicle. If
this happens, you and other
vehicle occupants could drown.
Don't ignore police warning
signs, and otherwise be very
cautious about trying to drive
through flowing water.
Driving on Hills
CAUTION
If you need to stop on a hill, do
not hold the vehicle there with
the accelerator pedal. This
could damage the transmission.
Apply the brakes to hold the
vehicle in position.
When you are going down a
steep hill, use a lower shift
range, along with the brakes, to
control the vehicle's speed.
Do not coast downhill in
Neutral or with the ignition off.
The brakes could overheat and
you could have an accident.
Vehicle Loading
CAUTION
Do not load your vehicle in
excess of the Gross Vehicle
Weight Rating or either Gross
Axle Weight Rating. If you do,
parts on your vehicle could
break and it could change the
way your vehicle handles. Overloading could result in loss of
vehicle control and personal
injury. It can also shorten the
service life of your vehicle.
. . . 14
Page 15
AKENG45_STS Page 15 Monday, April 28, 2008 11:38 AM
Important Safety Precautions
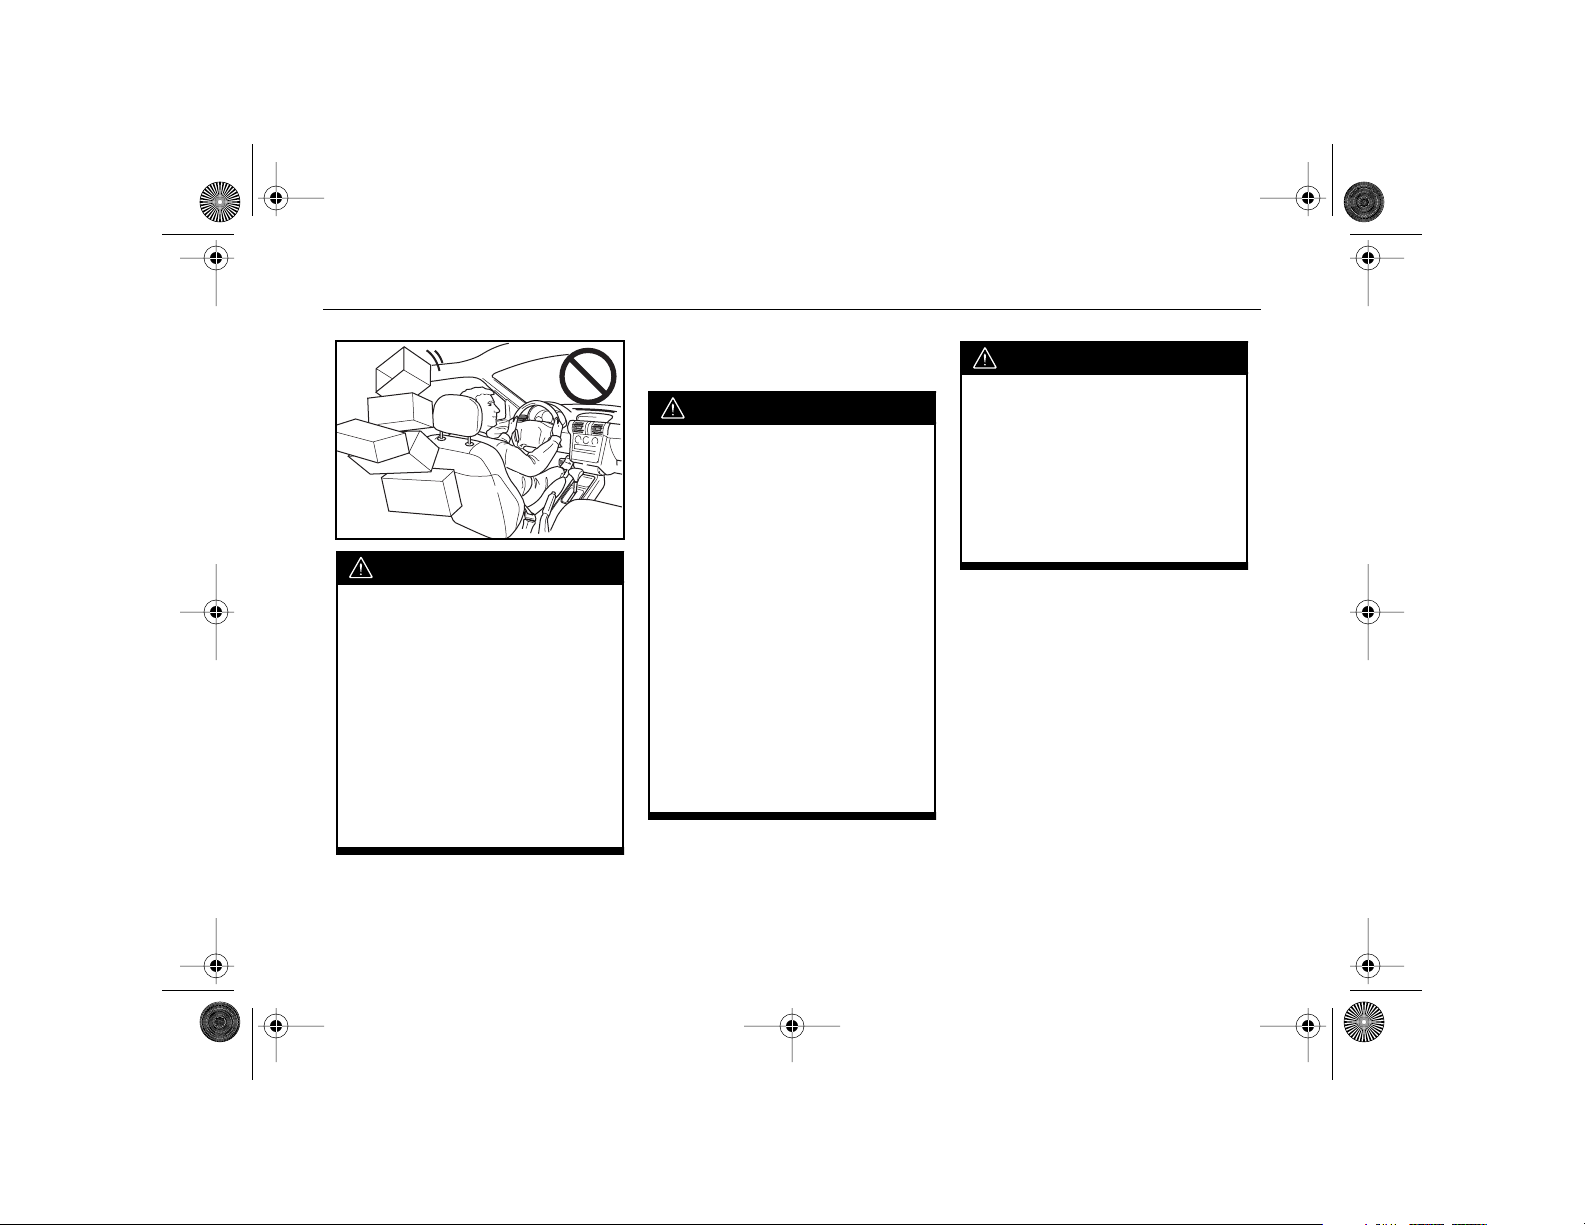
CAUTION (Continued)
Things you put inside your vehicle can strike and injure people
in a sudden stop or turn, or in a
crash. Put things in the cargo
area of your vehicle and try to
spread the weight evenly.
Never stack things inside the
vehicle any higher than the
seatbacks. Do not leave unsecured child restraints inside the
vehicle. Try to secure anything
that is carried inside the vehicle.
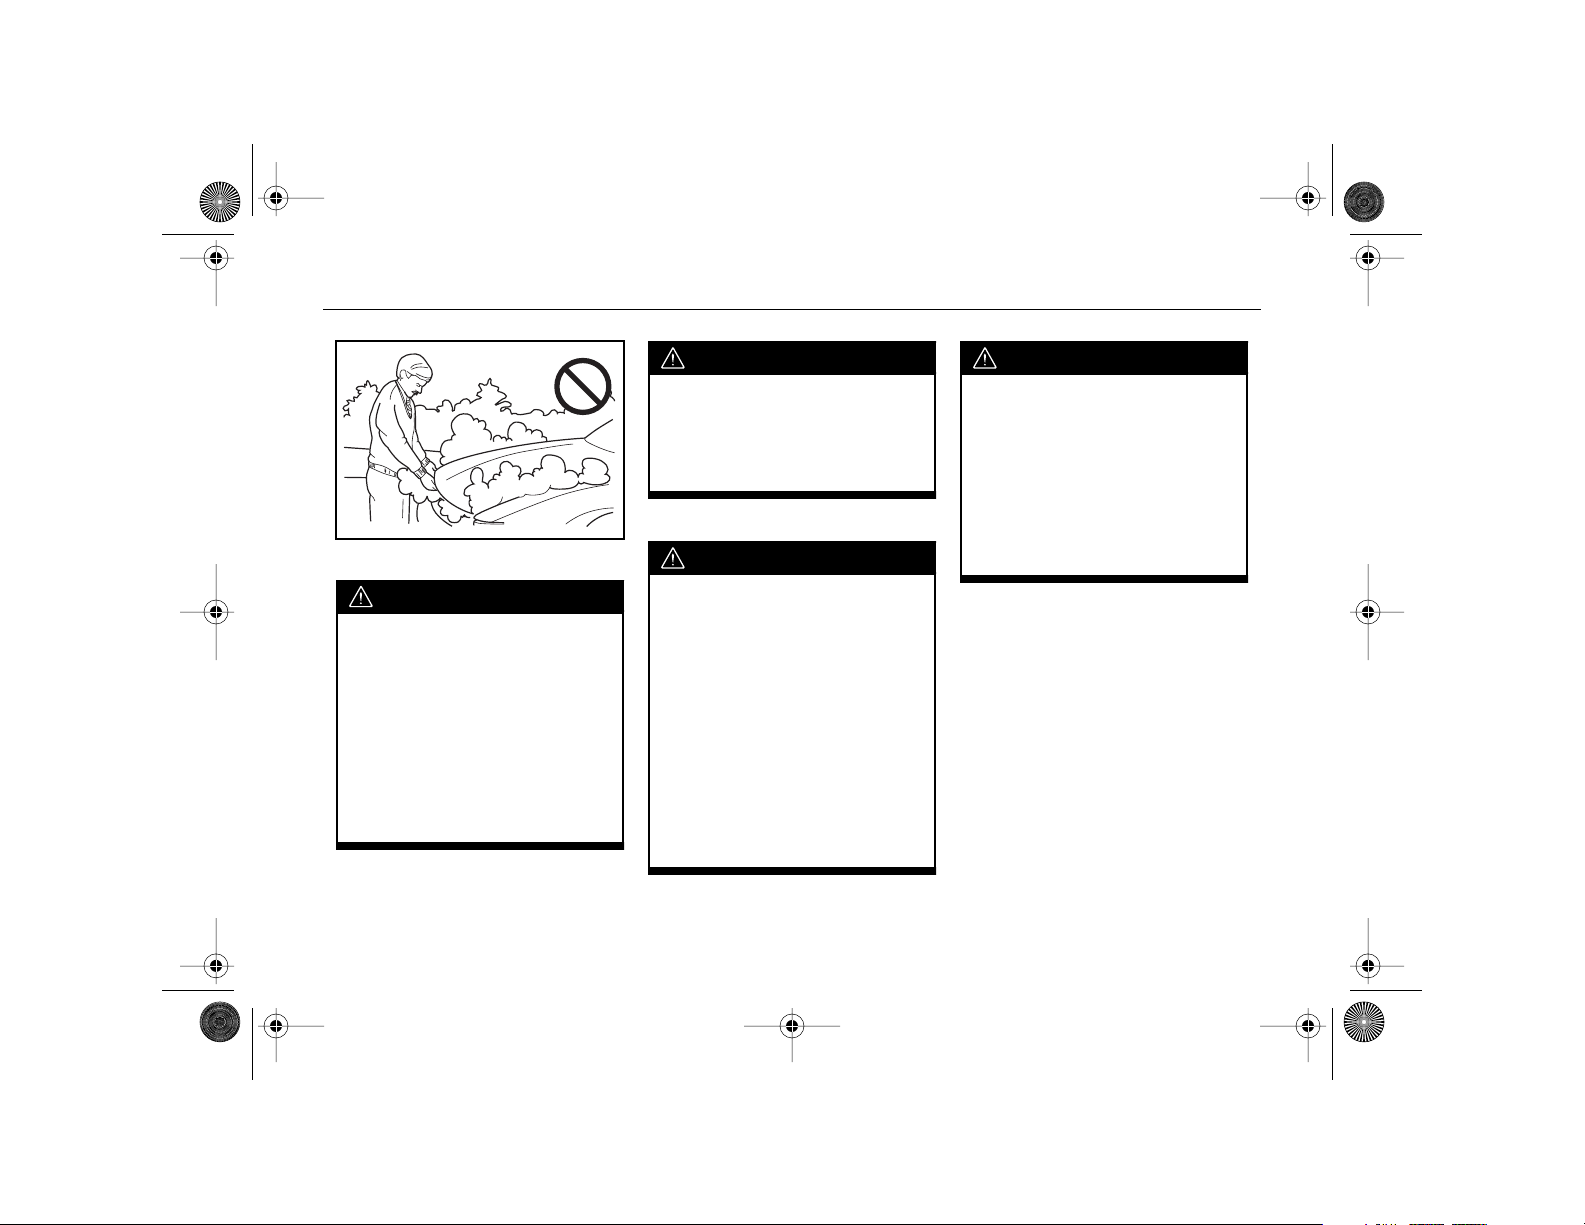
Fuel and Other Flammable
Materials
CAUTION
Turn off the engine before
refueling.
When you open the fuel filler
cap, open it slightly at first to
release the pressure inside the
tank, then turn it all the way.
Never fill a portable fuel
container while it is in your
vehicle.
Dispense gasoline only into
approved containers.
Do not smoke while pumping
gasoline.
Do not carry combustible materials, such as gasoline, in the
vehicle.
CAUTION (Continued)
Do not put paper or flammable
items in an ashtray. They may
catch fire from a cigarette.
To allow room for fuel expansion in the fuel tank (caused by
heat from the engine), fill the
tank only until the pump's automatic nozzle shuts off.
15 . . .
Page 16

AKENG45_STS Page 16 Monday, April 28, 2008 11:38 AM
Important Safety Precautions
Batteries
CAUTION
Vehicle batteries can hurt you.
They contain acid and electricity that can burn and gas that
can explode or ignite. Use care
and follow any applicable
instructions when working near
a battery.
Do not let battery fluid touch
your skin. If you do get it in your
eyes or on your skin, flush the
place with water and get medical help immediately.
Do not use a match or flame
near a vehicle's battery. If you
need more light, use a
flashlight.
CAUTION (Continued)
Every new GM vehicle uses an
AC Delco
no maintenance. However, if
another battery has filler caps,
be sure the right amount of
fluid is there. If it is low, add
water to make sure that there is
no explosive gas present.
®
battery that requires
Towing Your Vehicle
CAUTION
To help avoid injury to you or
others:
• Do not let anyone ride in a
vehicle that is being towed.
• Do not tow faster than safe or
posted speeds.
• Be sure to secure any loose or
damaged parts.
• Never get under a vehicle
after it has been lifted.
• Always use separate safety
chains on each side of the
vehicle.
. . . 16
Page 17
AKENG45_STS Page 17 Monday, April 28, 2008 11:38 AM
Important Safety Precautions
Engine Compartment
CAUTION
Steam from an overheated
engine can burn you badly.
Stay away from the engine if
you see or hear steam coming
from it.
Be careful when working
around the engine compartment. Some engine parts can
get very hot and could burn
you.
CAUTION (Continued)
Exercise extreme caution
around the electric engine fan.
It sometimes starts by itself,
even when the engine is not
running.
Cooling System
CAUTION
Do not run the engine if the
coolant is leaking. If the vehicle
loses all coolant, it could cause
an engine fire and you could be
burned.
Adding only plain water or a
liquid other than the recommended coolant can be
dangerous. The engine could
overheat, but you would not
get the overheat warning. The
engine could catch on fire and
you or others could be burned.
CAUTION
Under some conditions the
ethylene glycol in engine coolant is combustible. To avoid
being burned,
ant on the exhaust system or on
hot engine parts. If you have
any doubt, have this operation
performed by a qualified
technician.
do not spill cool-
17 . . .
Page 18
AKENG45_STS Page 18 Monday, April 28, 2008 11:38 AM
Important Safety Precautions
CAUTION (Continued)
Steam and scalding liquids from
a hot cooling system can blow
out and burn you badly. Never
turn the cap when the engine
and cooling system are hot.
Changing a Flat Tire
CAUTION
Changing a tire can cause injury. The vehicle can slip off the
jack and injure you or other
people.
Getting under a vehicle when it
is jacked up is dangerous. If the
vehicle slips off the jack, you
could be badly injured or killed.
Never get under a vehicle when
it is supported only by a jack.
CAUTION (Continued)
Rust or dirt on the wheel, or on
the parts to which it is fastened,
can make the wheel nuts
become loose after a time. The
wheel could come off and cause
an accident. When you change
a wheel, remove any rust or dirt
from the places where the
wheel attaches to the vehicle. In
an emergency, you could use a
cloth or a paper towel to do
this; but be sure to use a scraper
or wire brush later, if necessary,
to get all the rust or dirt off.
. . . 18
Page 19
AKENG45_STS Page 19 Monday, April 28, 2008 11:38 AM
Important Safety Precautions
System Problems
CAUTION
Driving with the brake warning
light on can lead to an accident.
Have the brakes checked immediately if the brake warning
light stays on.
Do not keep driving with low oil
pressure. Your engine could
overheat and may catch on fire.
You or others could be burned.
Check the oil as soon as possible and have your vehicle
serviced.
CAUTION
If any warning light on the
instrument panel illuminates
while you are driving, immediately park your vehicle in a safe
place, and follow the instructions in this manual.
If the engine stalls while you are
driving, the power-assisted
brake and steering systems will
not work properly, and braking
and steering will require
substantial effort. Try to pull
over to a safe place before your
vehicle stops.
NOTICE
Additional electronic equipment, such as a CB radio, cellular phone, navigation package
or two-way radio, may interfere
with the operation of your vehicle's engine, radio or other electronic systems and even
damage them. Please consult
with an authorized GM dealer
before installing electronic
equipment.
19 . . .
Page 20
AKENG45_STS Page 20 Monday, April 28, 2008 11:38 AM
Important Safety Precautions
Additional Safety Cautions
CAUTION
Drinking and driving is very
dangerous. Your reflexes,
perceptions, attentiveness and
judgment can be affected by
even a small amount of alcohol.
You can have a serious, or even
fatal collision if you drive after
drinking. Please don't drink and
drive or ride with a driver who
has been drinking. Ride home
in a cab or designate a driver
who will not drink.
CAUTION (Continued)
Medical research shows that
alcohol in a person's system can
make crash injuries worse. This
is especially true of injuries to
the brain, spinal cord or heart.
This means that when any
person who has been drinking whether a driver or a passenger
- is in a crash, that person's
chance of being killed or
permanently disabled is higher
than if the person had not been
drinking.
CAUTION
Unlocked doors can be dangerous. Make sure to lock all doors
while riding in the vehicle.
Turn the cruise control switch
off when you are not using it.
. . . 20
Page 21

AKENG45_STS Page 21 Monday, April 28, 2008 11:38 AM
–
1
Dash- and Console-Mounted Instruments
and Controls...................................................25
Instrument Cluster ..........................................27
Warning Lights................................................29
Driver Information Center ...............................41
Driver Information Center Buttons ..................42
Vehicle Information Displays ...........................47
Trip Information Displays ................................52
Driver Information Center Messages ...............53
Head-Up Display ............................................ 72
Hazard Warning Flasher .................................. 77
Valet Lockout Switch .......................................78
Traction Control System .................................79
Competitive Driving Mode
(STS-V Model Only)........................................81
Stabilitrak
Accessory Power Outlets ................................. 84
®
System.......................................... 82
Section 1 - Instrumentation and Controls
Lights ............................................................... 85
Lights Main Switch ..........................................85
Automatic Headlight System...........................88
Wiper Activated Headlights............................. 89
Headlight Washers .......................................... 89
Headlight Leveling Control .............................90
Fog Lights.......................................................90
Rear Fog Lights ...............................................91
Interior Lights .................................................91
Instrument Light Dimmer ...............................91
Illuminated Entry System.................................92
Reading Lights ................................................92
Battery Saver................................................... 93
Heating and Air Conditioning System............93
Dual Zone Climate Control System .................94
Sensors .........................................................101
Air Outlets ....................................................102
Operating Tips..............................................102
Rear Window Defogger................................. 102
Rear Climate Control.....................................104
Passenger Compartment Air Filter ................. 105
21 . . .
Page 22

AKENG45_STS Page 22 Monday, April 28, 2008 11:38 AM
Section 1 - Instrumentation and Controls
Sound System and Clock...............................106
RDS Sound System with 6-Disc CD Player .....108
Setting the Clock and Date ...........................109
Radio Controls ..............................................110
Compact Disc Changer .................................123
Playing MP3 format CDs ............................... 126
Disc Error ......................................................133
Care of Your Compact Disc Player.................134
Care of Your Compact Discs..........................134
Reconfigurable Radio Display Buttons ...........135
Radio Personalization ....................................136
Radio Main Menu (Base Sound System) ........136
Main Menu Items (Base Sound System) ........136
Audio Steering Wheel Controls ......................142
Anti-Theft Feature .........................................144
Antenna ........................................................144
Navigation System .......................................145
Controls Mounted on Steering
Wheel/Column .............................................146
Multifunction Lever.......................................146
Audio Steering Wheel Controls .....................147
Heated Steering Wheel Control ....................147
Telescopic Power Tilt Wheel Control .............148
Horn .............................................................148
Windshield Wipers/Washer Stalk ...................149
Multifunction Lever.......................................153
Turn Signal ...................................................153
Main Light Controls ...................................... 154
Cruise Control...............................................154
Forward Collision Alert System ..................... 154
Forward Collision Alert System ....................154
Alerting the Driver ........................................156
Vehicle Detection.......................................... 157
Alert System Messages.................................. 158
Cruise Control ...............................................158
Traditional Cruise Control ............................158
Adaptive Cruise Control ...............................162
Operation .....................................................164
Cleaning the System ..................................... 178
Mirrors...........................................................179
Outside Mirrors............................................. 179
Inside Day/Night Mirror................................181
Vanity Mirrors ............................................... 182
Windows........................................................183
Power Windows............................................ 184
Doors .............................................................187
Door Locks.................................................... 187
Rear Door Security Lock ................................ 189
. . . 22
Page 23
AKENG45_STS Page 23 Monday, April 28, 2008 11:38 AM
Section 1 - Instrumentation and Controls
Trunk Area .....................................................190
Trunk Release................................................191
Rear Seat Pass-Through Door ........................192
Emergency Trunk Release Handle..................193
Convenience Net ..........................................193
Overhead Area and Roof...............................194
Sun Visors .....................................................194
Sunroof ........................................................194
Reading Lights ..............................................196
Storage ..........................................................196
Center Console Armrest ................................196
Glove Box .....................................................197
Map Pockets .................................................197
Cupholders ...................................................197
Convenience Net ..........................................198
Ashtrays and Lighter .....................................198
Retained Accessory Power ............................200
Ultrasonic Rear Parking Assist....................... 200
Ultrasonic Rear Parking Assist System
Problems .....................................................202
Battery Load Management ...........................203
Electric Power Management......................... 204
Vehicle Programming and Personalization
Features ........................................................ 204
Feature Customization (Base Sound System) . 208
PERSONAL SETTINGS MENU
(Base Sound System) ...................................208
DRIVER SELECTION Menu.............................233
DRIVER EXIT SETTINGS Menu ....................... 236
Feature Customization (Navigation System) .. 237
Language Selection Menu............................. 237
PERSONAL SETTINGS Menu
(Navigation System) .................................... 239
MEMORY Menu............................................ 251
23 . . .
Page 24
AKENG45_STS Page 24 Monday, April 28, 2008 11:38 AM
Instrumentation and Controls
. . . 24
1
9
108 18
11 9 12 13 14 15 16 17 19
65432
1 7 1 1
Page 25

AKENG45_STS Page 25 Monday, April 28, 2008 11:38 AM
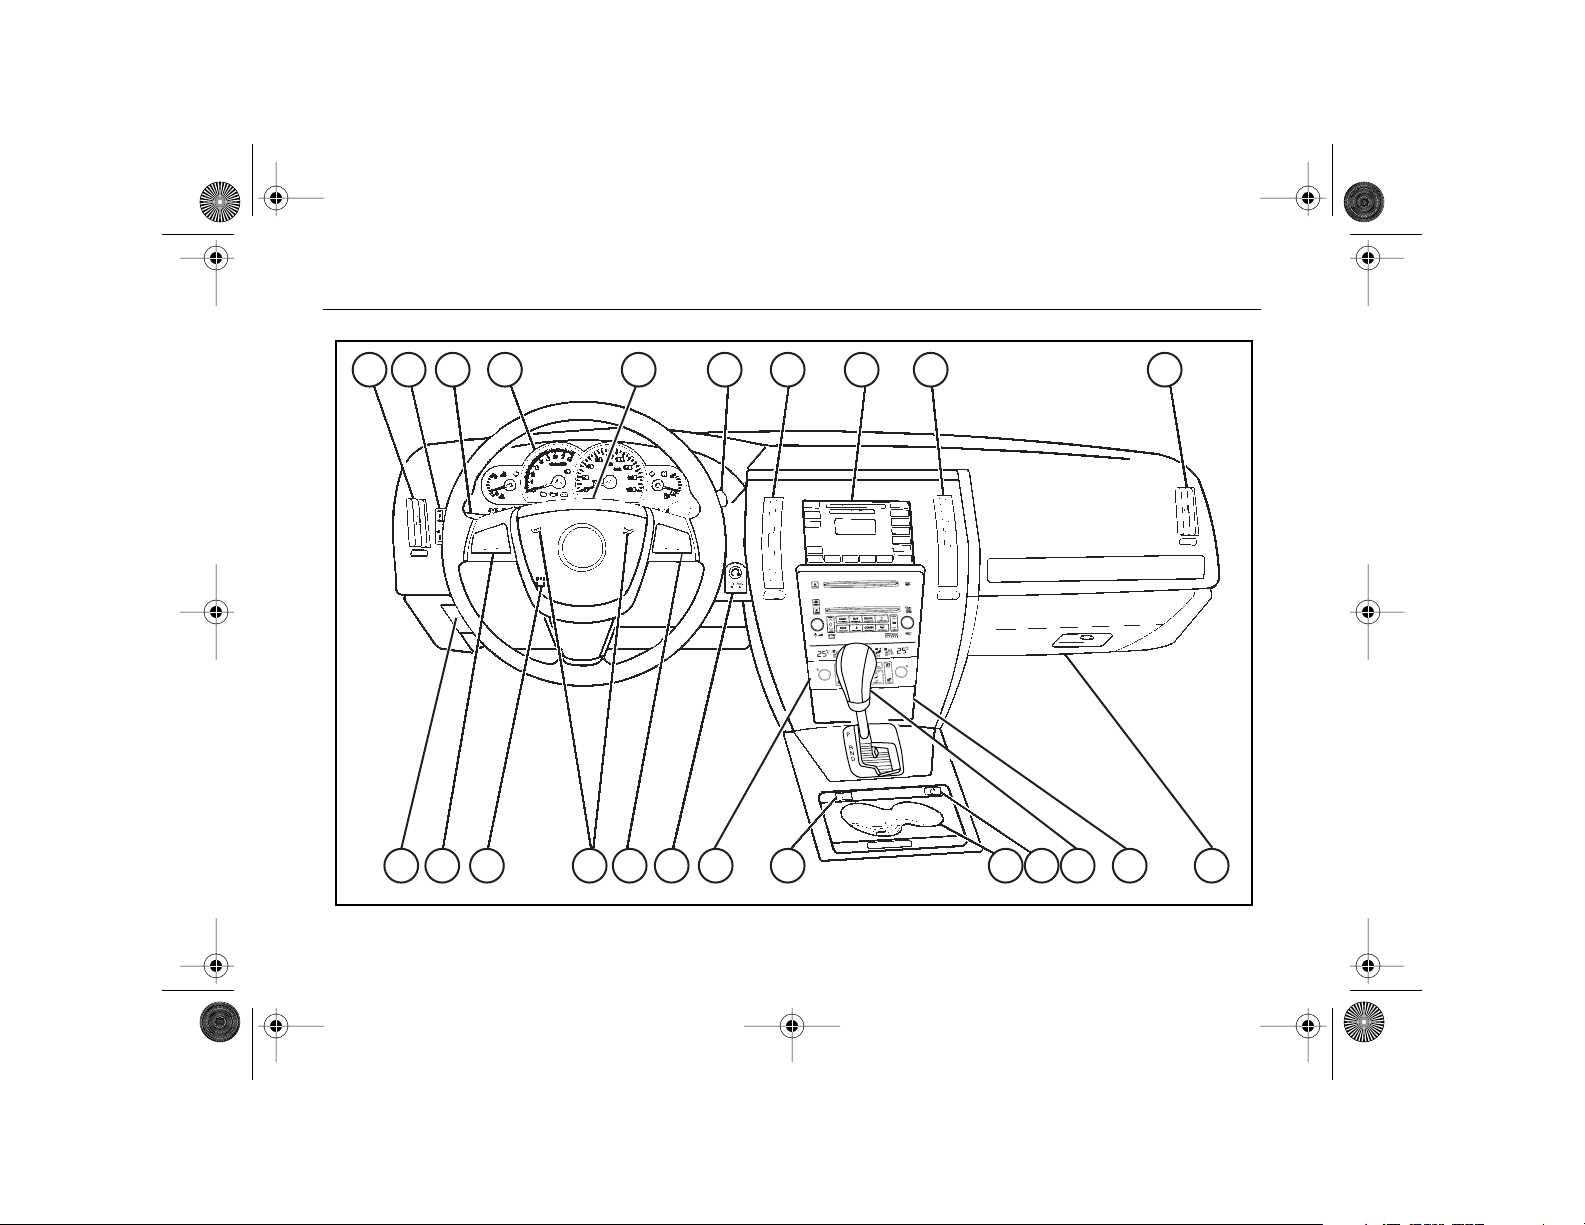
Section 1
■ DASH- AND CONSOLEMOUNTED
INSTRUMENTS AND
CONTROLS
1. Air Vent
2. Instrument Light Dimmer
Driver Information Center
Buttons
Head-Up Display Controls (If
equipped)
3. Multifunction Lever
This lever controls the following features:
- Turn Signals
- Headlights and Other Exterior Lights
- Fog Lights
- Cruise Control
- Adaptive Cruise Control (If
equipped)
- Forward Collision Alert System (If equipped)
4. Instrument Cluster
5. Driver Information Center
Display
6. Windshield Wipers/Washer
Stalk
7. Sound System and Clock
Navigation System (If
equipped)
8. Hood Release
9. Steering Wheel Controls
- Audio Steering Wheel
Controls
- Adaptive Cruise Control But-
ton (If equipped)
- Cruise Control Cancel Button
- Heated Steering Wheel Con-
trol (If equipped)
10. Telescopic Power Tilt Wheel
Control
11. Horn
12. Keyless Ignition Controls
13. Heating and Air Conditioning
System
14. Hazard Warning Flasher
Control
15. Cupholders
16. Traction Control Button
17. Gear Shift Lever
18. Ashtray and Lighter
19. Glove Box
25 . . .
–
Page 26
AKENG45_STS Page 26 Monday, April 28, 2008 11:38 AM
Instrumentation and Controls
1 4 23 2 7
. . . 26
685
Page 27

AKENG45_STS Page 27 Monday, April 28, 2008 11:38 AM
Section 1
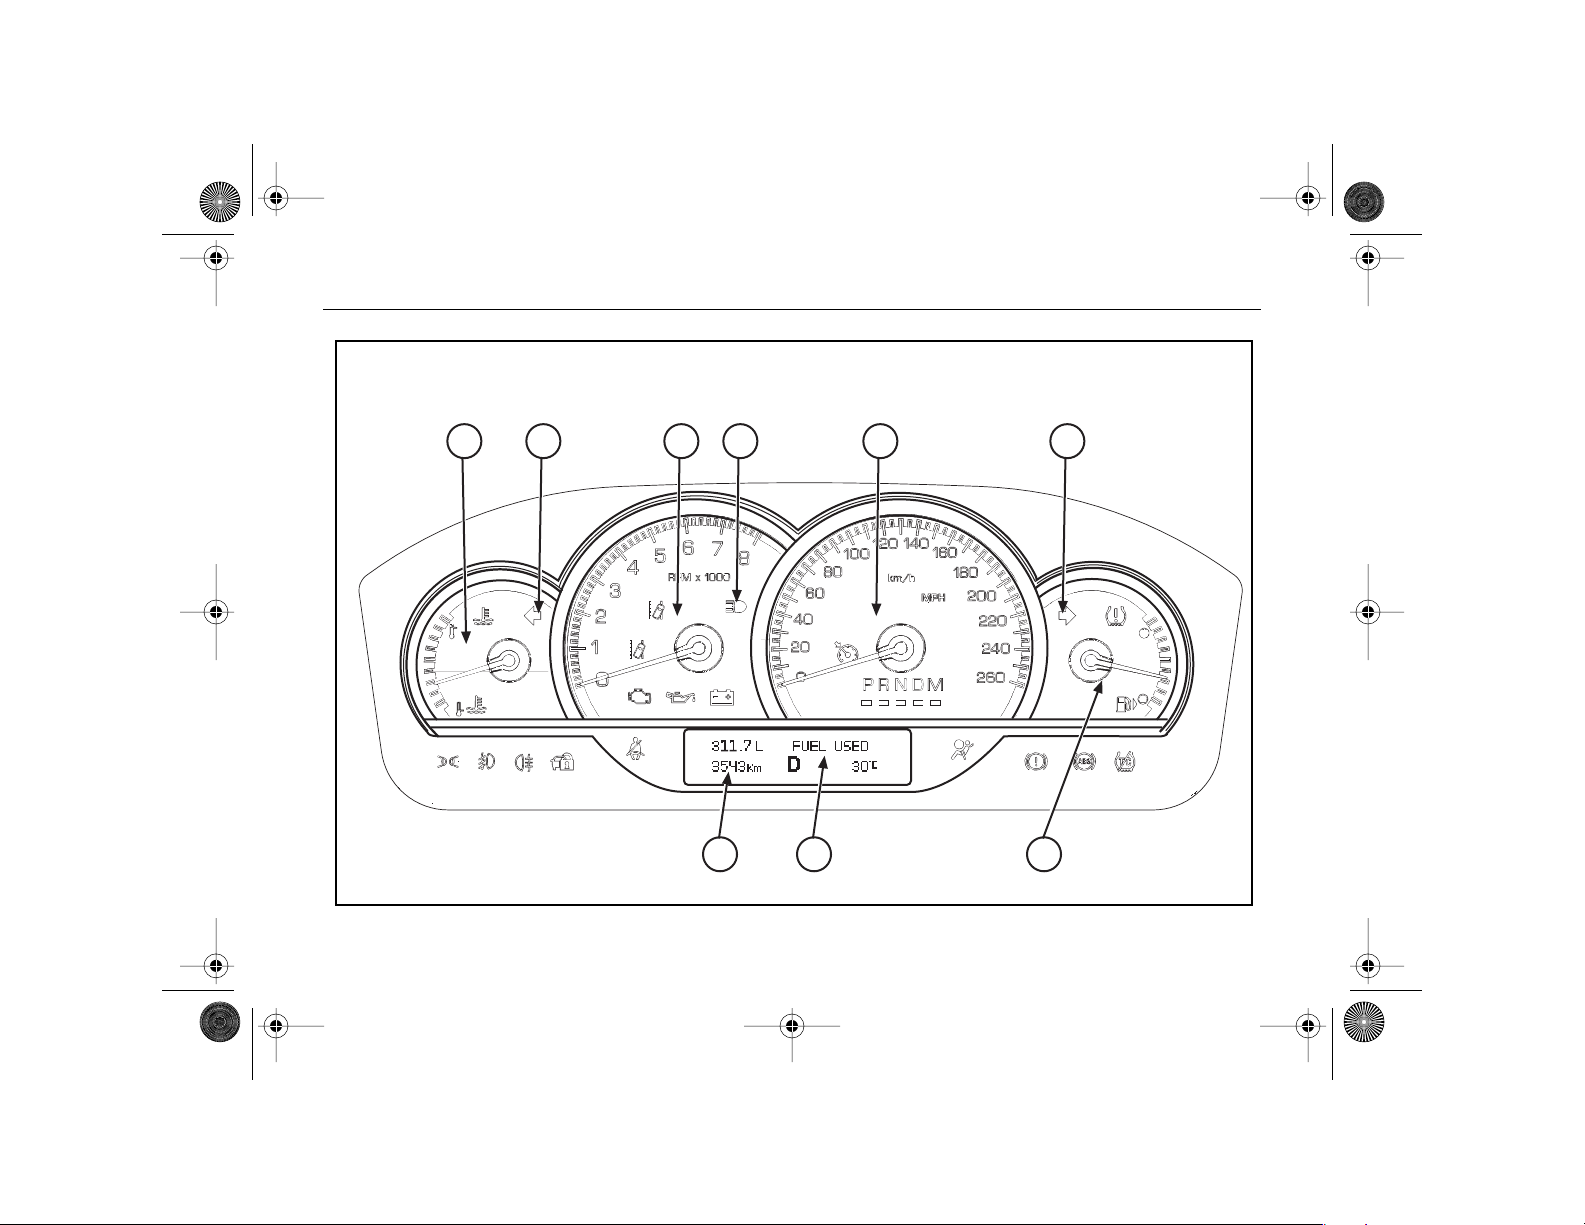
INSTRUMENT CLUSTER
The instrument cluster is designed
to let you know at a glance how
your vehicle is running.
You can use the Driver Information
Center to change your display's
readings between English and
metric units.
See "Driver Information Center"
later in this section for
information.
For information about the various
warning lights located on your
instrument cluster or elsewhere in
your vehicle, see "Warning Lights"
later in this section.
1. High Beam Indicator
The indicator light turns on
when the headlights are set to
high beams.
2. Turn Signal Indicators
An arrow will flash in the direction of the turn or lane change
when the turn signal is
activated.
–
3. Engine Coolant Temperature
Gage
This gage shows the engine
coolant temperature. If the
pointer moves into the shaded
warning area, the engine is too
hot!
If the engine coolant has overheated, stop the vehicle and
turn the engine off immediately. See Sections 4 and 5 for
more information on your vehicle's cooling system.
27 . . .
Page 28

AKENG45_STS Page 28 Monday, April 28, 2008 11:38 AM
Instrumentation and Controls
4. Speedometer
The speedometer displays the
vehicle's speed.
The reading will be indicated
in metric units of km/h (kilometers per hour) or MPH
(Miles Per Hour).
5. Odometer/Trip Odometers
The odometer and the trip
odometers are viewable in the
bottom line of the driver information center display.
The odometer shows how far
your vehicle has been driven.
Your vehicle has two trip
odometers which are distinguished as TRIP A and TRIP B.
Each trip odometer can tell
you how far your vehicle has
been driven since you last set
the trip odometer to zero.
See the following under "Driver Information Center" later in
this section for more
information:
-Trip Information Displays
- Driver Information Center
Buttons
Trip Information Button
. . . 28
Page 29

AKENG45_STS Page 29 Monday, April 28, 2008 11:38 AM
Section 1
6. Fuel Gage
The fuel gage shows how
much fuel is in the fuel tank.
The fuel gage works only when
the engine is on.
If the fuel is low, the FUEL LEV-
EL LOW message will appear
on the Driver Information Center display.
A chime will also sound if the
fuel is low.
The arrow on the gage indicates the side of the vehicle
where the fuel door is located.
7. Tachometer
The tachometer displays engine speed in thousands of
revolutions per minute (RPM).
8. Driver Information Center
Display
See "Driver Information Center" later in this section for
information.
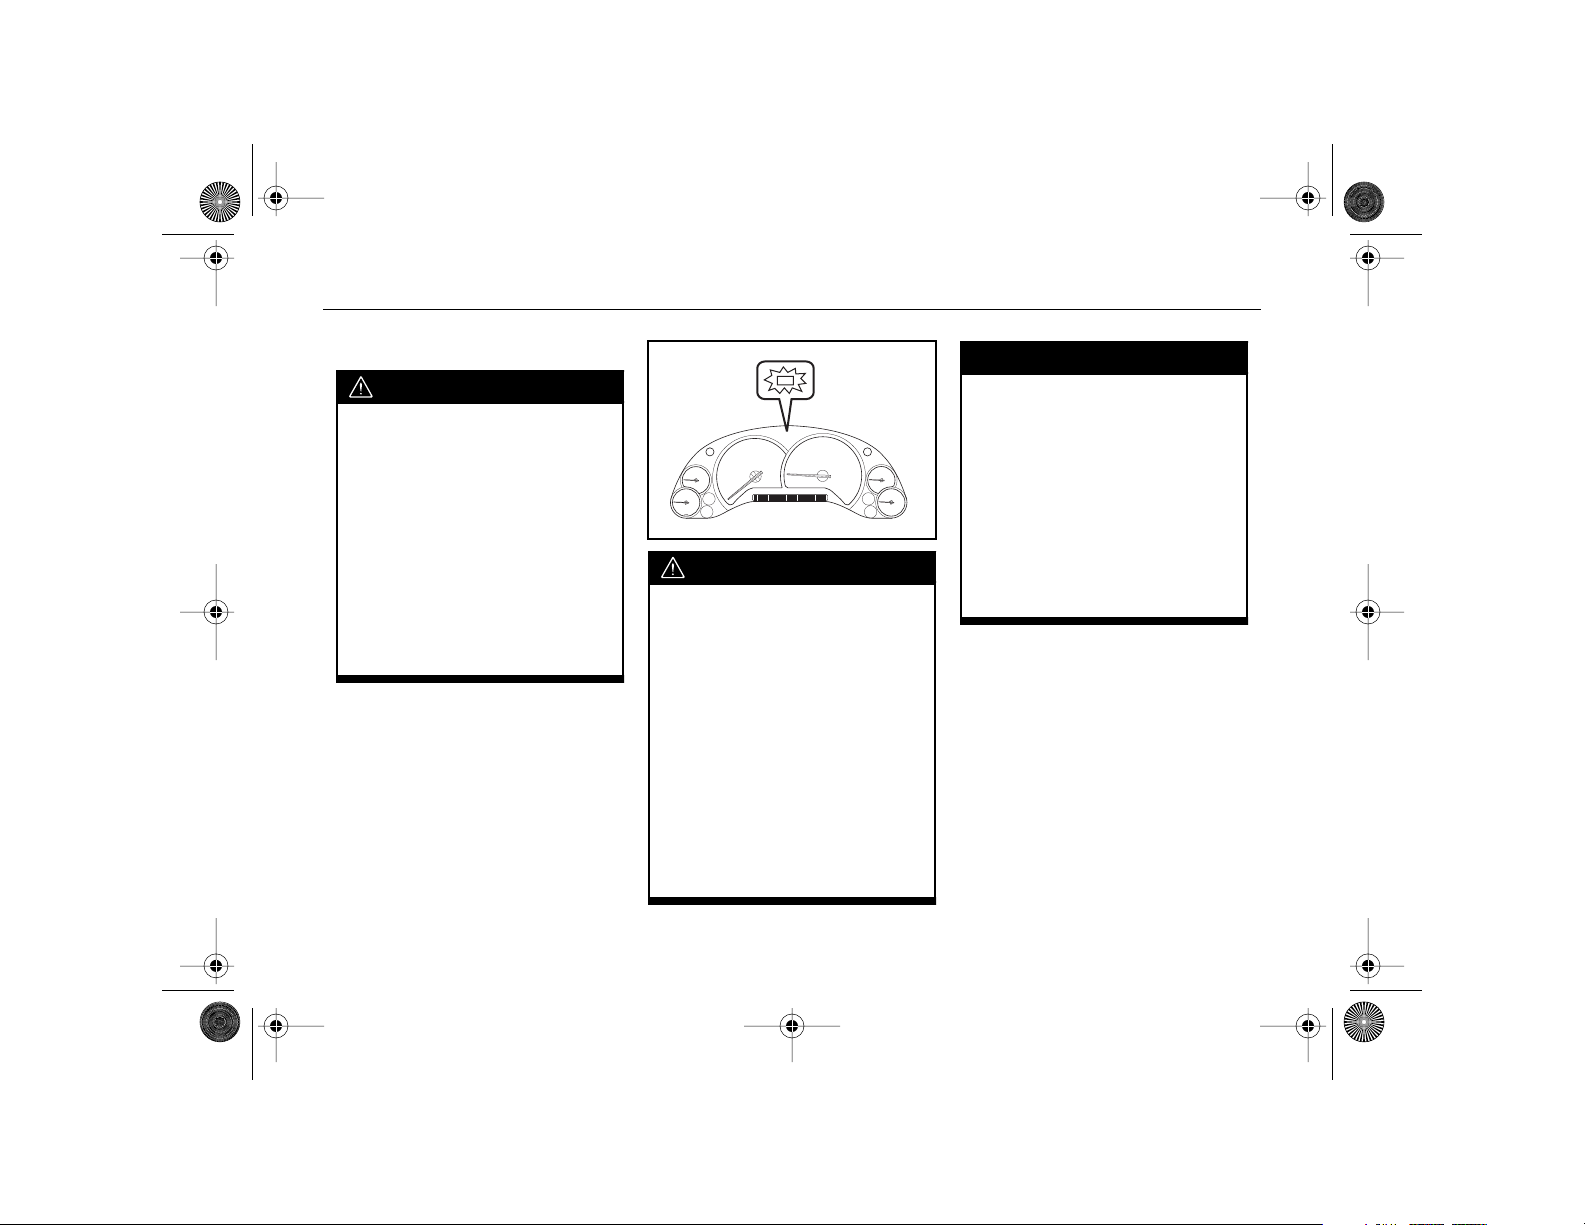
Warning Lights
Your vehicle has a number of
warning lights.
The warning lights go on when
there may be or there is a problem
with one of your vehicle's functions. Some warning lights come
on briefly when you start the
engine just to let you know they're
working properly.
Your vehicle also has a Driver Information Center that works along
with the warning lights and gages.
See "Driver Information Center"
later in this section.
–
29 . . .
Page 30
AKENG45_STS Page 30 Monday, April 28, 2008 11:38 AM
Instrumentation and Controls
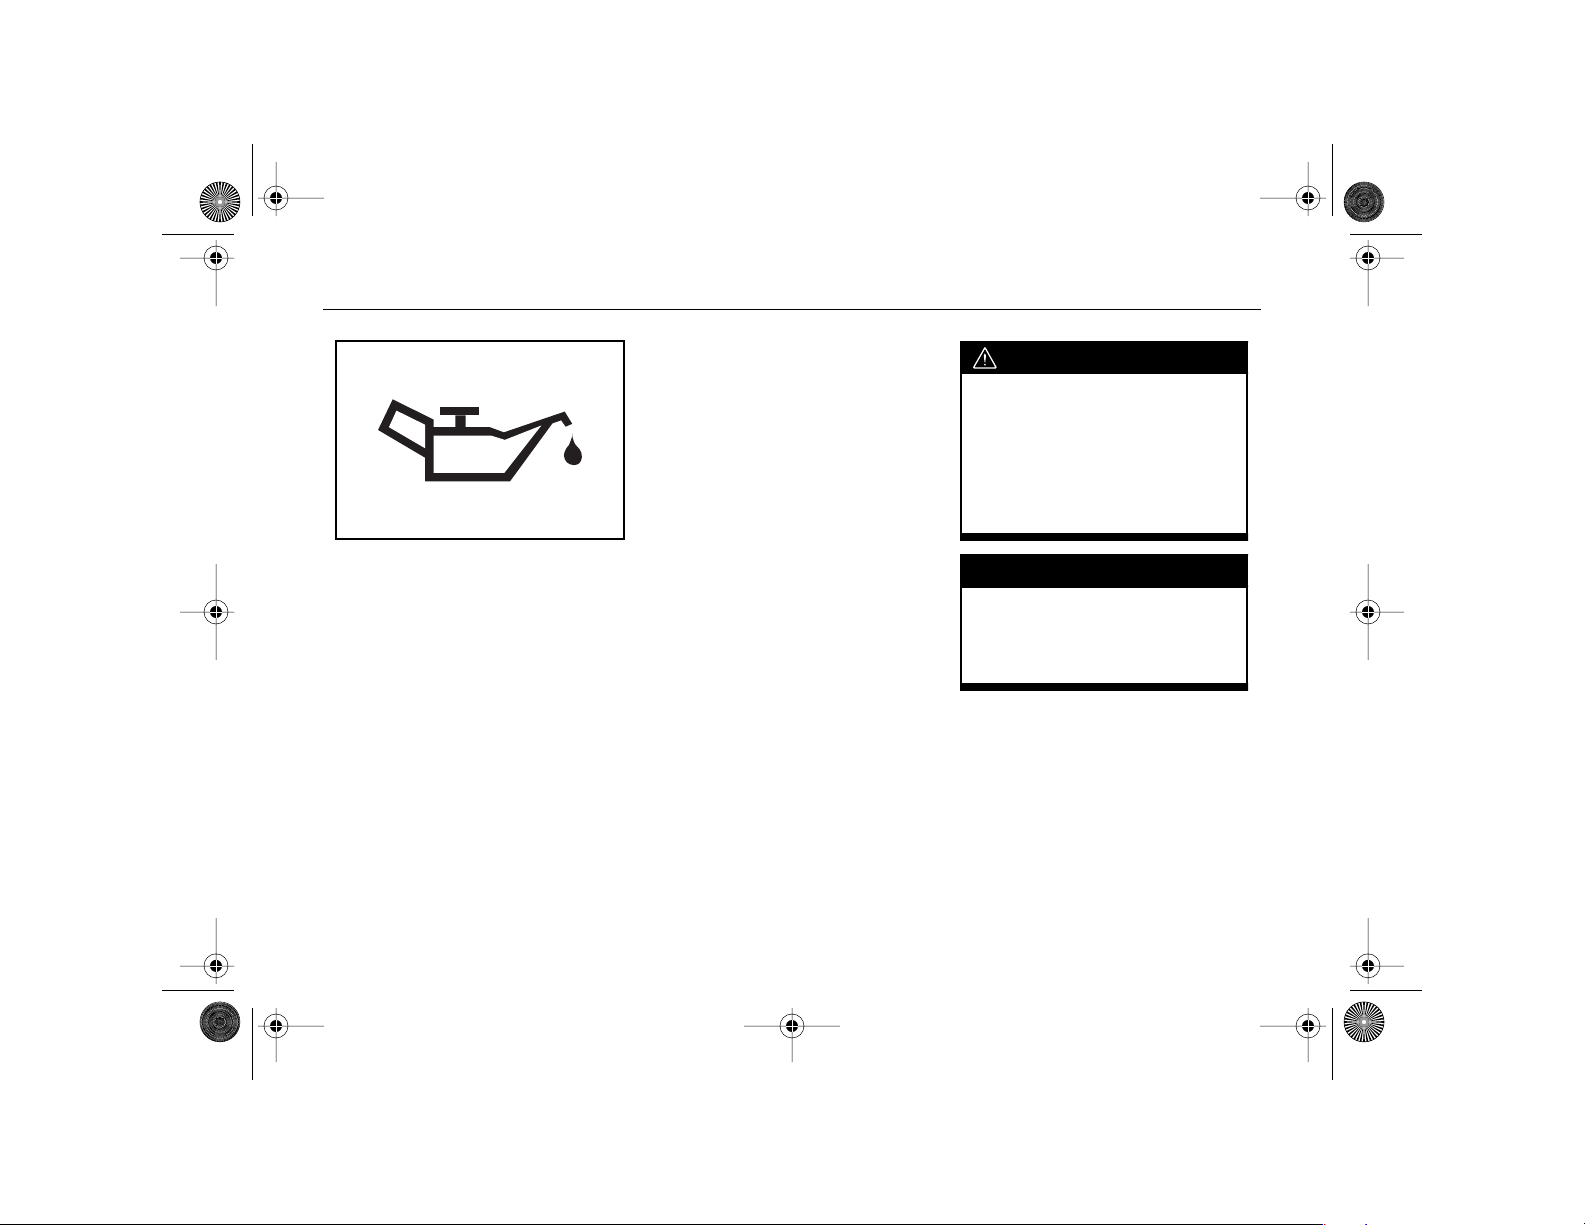
Engine Oil Pressure Warning
Light
This light should come on briefly
as you start the engine, as a check
to show you it is working properly.
If it doesn't come on, then have it
fixed so it will be ready to warn
you if there is a problem.
If you have a problem with the oil,
this light may stay on after you
start the engine, or come on while
you are driving. This indicates that
oil is not going through the engine
quickly enough to keep it lubricated. The engine could be low on
oil, or could have some other oil
problem. Have it fixed right away.
Sometimes when the engine is
idling at a stop, the light may blink
on and off. This is normal.
A chime may also sound when the
light comes on.
CAUTION
Do not keep driving with low oil
pressure. Your engine could
overheat and may catch on fire.
You or others could be burned.
Check the oil as soon as possible and have your vehicle
serviced.
NOTICE
Engine damage due to neglected oil problems can be costly to
repair and is not covered by
your warranty.
. . . 30
Page 31

AKENG45_STS Page 31 Monday, April 28, 2008 11:38 AM
Charging System Light
The charging system light monitors the generator and battery
charging systems.
This light should come on when
the ignition is on but the engine is
not running, as a check to show
you it is working properly.
If it doesn't come on, then have it
fixed so it will be ready to warn
you if there is a problem.
If it stays on or comes on while you
are driving, there may be a problem with one of the systems. Have
it checked as soon as possible.
Driving while this light is on could
drain your battery.
If you must drive a short distance
with the light on, turn off all your
accessories, such as the radio and
air conditioner.
If there is a problem with the
battery charging system, a
message will be displayed. See
"Driver Information Center
Messages" later in this section.
Section 1
–
Engine Coolant Temperature
Light
This light should come on briefly
as you start the engine, as a check
to show you it is working properly.
If it doesn't come on, then have it
fixed so it will be ready to warn
you if there is a problem.
If it stays on or comes on while you
are driving, there may be a problem with the cooling system.
Driving while this light is on could
cause the vehicle to overheat.
31 . . .
Page 32

AKENG45_STS Page 32 Monday, April 28, 2008 11:38 AM
Instrumentation and Controls
See Sections 4 and 5 for more
information on your vehicle's cooling system.
Also, see "Driver Information
Center Messages" later in this
section for more information.
Brake System Warning Light
Your vehicle has "dual" brake
systems. If one system fails, the
other system can still stop your
vehicle.
This light should come on briefly
as you start the engine, as a check
to show you it is working properly.
If it doesn't come on, then have it
fixed so it will be ready to warn
you if there is a problem.
If the light comes on while you are
driving, pull over and stop
carefully.
The brake pedal may be harder to
push or it may go closer to the
floor. It may take longer to stop.
If the light stays on, have the vehicle towed for service. The brake
system should be inspected right
away.
This light also comes on when you
set your parking brake while the
ignition is on.
If it stays on after the parking brake
is fully released, it means you may
have a brake problem.
Have it checked right away.
. . . 32
Page 33

AKENG45_STS Page 33 Monday, April 28, 2008 11:38 AM
Section 1
If the light does not come on when
the parking brake is set, have your
vehicle serviced.
CAUTION
Driving with the brake warning
light on can lead to an accident.
Have the brakes checked immediately if the brake warning
light stays on.
Have the vehicle towed for
service.
ABS
Antilock Brake System Warning
Light
This light will go on when you start
the engine and may stay on for a
few seconds. If it doesn't come on,
then have it fixed so it will be ready
to warn you if there is a problem.
If it stays on or comes on while you
are driving, there may be a problem with this system.
Stop as soon as possible and turn
the ignition off. Then start the
engine to reset the system.
If the light still stays on, or if it
comes on again while you're driving, your vehicle needs service.
Until you get it fixed, the brakes
will still work, but without the
antilock feature.
If the regular brake system warning light is also on, the vehicle
does not have antilock brakes and
there is a problem with the regular
brakes. Pull off the road and stop
carefully. Have the vehicle towed
for service.
See "Brake System Warning Light"
earlier in this section.
A text message may also appear in
the Driver Information Center
display.
See "Driver Information Center
Messages" later in this section for
more information.
–
33 . . .
Page 34

AKENG45_STS Page 34 Monday, April 28, 2008 11:38 AM
Instrumentation and Controls
Malfunction Indicator Light
This light monitors the fuel, ignition and emission control systems.
This light should come on as you
start the engine. If it doesn't come
on, then have it fixed so it will be
ready to warn you if there is a
problem.
If it stays on or comes on while you
are driving, there may be a problem with this system.
Problems with the system may be
detected before they are apparent.
Have it checked right away.
If the light stays on, you may be
able to correct the malfunction by
making sure the fuel cap is properly installed, if you have just refilled
the tank with fuel.
NOTICE
If you keep driving your vehicle
with this light on, after a while,
your emission controls may not
work as well, your fuel economy
may not be as good and your
engine may not run as smoothly. This could lead to costly
repairs that may not be covered
by your warranty.
. . . 34
Page 35

AKENG45_STS Page 35 Monday, April 28, 2008 11:38 AM
Section 1
NOTICE
Modifications made to the
engine, transmission, exhaust,
intake or fuel system of your
vehicle or the replacement of
the original tires with other
than those of the same Tire
Performance Criteria can affect
your vehicle's emission controls
and may cause this light to
come on. Modifications to
these systems could lead to
costly repairs not covered by
your warranty.
See "Accessories and Modifications" for more information.
In order for your vehicle to pass an
inspection of its emission control
equipment, the Malfunction Indicator Light must be working properly and must be off.
To check if the indicator light is
working properly, do the
following:
1. The keyless access transmitter
must be in the vehicle.
2. Press and hold the keyless
ignition off/accessory button
for 5 seconds to turn on the
ignition without starting the
engine.
The Malfunction Indicator
Light should illuminate.
After performing the bulb check,
make sure to press the keyless ignition off/accessory button again to
turn off the ignition.
NOTICE
Leaving the ignition on for an
extended period of time will
drain the battery.
If you have recently replaced the
battery in your vehicle, or if the
battery has run down, the vehicle's
on-board diagnostic system may
determine that the vehicle is not
ready for inspection. It may take
several days of routine driving in
order for the diagnostic system to
have enough data for the
inspection.
–
35 . . .
Page 36

AKENG45_STS Page 36 Monday, April 28, 2008 11:38 AM
Instrumentation and Controls
If the vehicle has been driven for
several days (with a fully charged
battery) prior to the inspection,
but the vehicle still does not pass
for lack of on-board diagnostic
system readiness, see your dealer
or a qualified service center to
prepare the vehicle for inspection.
Traction System Malfunction
Light
This light should come on briefly
as you start the engine, as a check
to show you it is working properly.
If it doesn't come on, then have it
fixed so it will be ready to warn
you if there is a problem.
Whenever this light is on, the traction control system is off and will
not limit wheel spin.
The traction control system may
have been turned off manually
using the traction control button.
If the light stays on, or if it comes
on while you're driving when you
have not turned off traction
control, there may be a problem
with this system.
Pull over and stop the vehicle as
soon as it is safe to do so.
Turn the ignition off, and then
restart the vehicle.
If the light still stays on, or if it
comes on again while you're driving, your vehicle needs service.
Have the traction control system
inspected as soon as possible.
See "Traction Control System"
later in this section.
Also, see "Competitive Driving
Mode" later in this section.
. . . 36
Page 37

AKENG45_STS Page 37 Monday, April 28, 2008 11:38 AM
Section 1
If there is a problem with the air
bag system, the SERVICE AIR BAG
message will appear on the Driver
Information Center display. See
"Driver Information Center
Messages" later in this section.
Restraint System Light
See "Safety Belts" in Section 2 for
information.
Air Bag Light
This light will go on when you start
the engine and may flash for a few
seconds.
If it doesn't come on, then have it
fixed so it will be ready to warn
you if there is a problem.
If it stays on or comes on while you
are driving, there may be a problem with this system.
Have the vehicle serviced right
away.
CAUTION
If the air bag light stays on or
comes on while you are driving,
there may be a problem with
this system. The air bags may
not inflate in a crash, or they
may inflate even when there
hasn't been a crash. To avoid
injury to yourself or others,
have the vehicle serviced right
away.
See Section 2 for more information
on the air bag system.
37 . . .
–
Page 38

AKENG45_STS Page 38 Monday, April 28, 2008 11:38 AM
Instrumentation and Controls
Passenger Air Bag On/Off
Indicator
See "Passenger Sensing System" in
Section 2.
. . . 38
Passenger Safety Belt Reminder
Light
See "Safety Belts" in Section 2 for
information.
Security System Light
See "Theft Deterrent System" in
Section 3 for information.
Page 39

AKENG45_STS Page 39 Monday, April 28, 2008 11:38 AM
Section 1
–
Fog Lamp Light
This light will come on when the
fog lights are turned on. See "Fog
Lights" later in this section for
more information.
Rear Fog Lamp Light
This light will come on when the
rear fog lights are turned on. See
"Rear Fog Lights" later in this
section for more information.
Lights On Reminder Light
This light turns on as a reminder
whenever the parking lights are
on.
For more information, see "Lights
On Reminder" later in this section.
39 . . .
Page 40

AKENG45_STS Page 40 Monday, April 28, 2008 11:38 AM
Instrumentation and Controls
Cruise Control Light
This light turns on whenever you
set the cruise control.
See "Cruise Control" later in this
section for more information.
Low Tire Pressure Light
This light comes on briefly as you
are starting your engine as a check
to show you it is working properly.
If it doesn't come on, then have it
fixed so it will be ready to warn
you if there is a problem.
After the initial bulb check, this
light appears when the Tire Pressure Monitor detects a low pressure condition in one or more of
the road tires.
The CHECK TIRE PRESSURE
message will also appear on the
driver information center display.
If you get the low tire pressure
warning, stop as soon as possible,
check all the tires for damage and
inflate them to the proper
pressure.
If a problem is detected, the indicator light will flash for about one
minute and then remain on for the
rest of the ignition cycle.
For more information, see "Tire
Pressure Monitor" under "Tires" in
Section 4.
Also, see "Driver Information
Center Messages" later in this
section for more information.
. . . 40
Page 41

AKENG45_STS Page 41 Monday, April 28, 2008 11:38 AM
Section 1
Lane Departure Warning System
Lights (If equipped)
There are two lights on the instrument cluster for the Lane Departure Warning System.
An amber light should come on
briefly as you start the engine, as a
check to show you the system is
working properly.
A green light in the instrument
cluster will turn on once the vehicle speed is greater than 56 km/h
and a left or right lane marker is
detected by the system.
The amber light will flash if you
cross a detected lane marking
without activating your turn
signal.
Three chimes will also sound.
For information on how to use this
system, see the separate navigation system manual.
DRIVER INFORMATION
CENTER
The Driver Information Center
gives you the status of many of
your vehicle's systems.
When the ignition is turned on,
the Driver Information Center will
turn on.
After a short delay, the Driver
Information Center will recall the
mode last displayed before the
engine was turned off.
The control buttons are located on
the instrument panel, near the
steering wheel.
The display is located at the
bottom of the instrument cluster.
The top line of the display shows
information about vehicle systems.
See the following under "Driver
Information Center Buttons" later
in this section:
• Information Button
–
41 . . .
Page 42

AKENG45_STS Page 42 Monday, April 28, 2008 11:38 AM
Instrumentation and Controls
The bottom line of the display
shows the following:
• odometer, trip odometer A or
trip odometer B
See the following for more
information:
-Trip Information Displays
- Driver Information Center
Buttons
Trip Information Button
• outside temperature
• shift lever position indicator
See "Automatic Transmission"
in Section 3 for information.
• S if sport mode is active, or M if
manual shift mode is active
See "Automatic Transmission
Driver-Controlled Shift Mode"
under "Automatic Transmission" in Section 3 for
information.
If the system senses a problem, a
message will appear on the
display.
See "Driver Information Center
Messages" later in this section for
more information.
Driver Information Center
Buttons
The control buttons are located on
the instrument panel, near the
steering wheel.
. . . 42
Page 43

AKENG45_STS Page 43 Monday, April 28, 2008 11:38 AM
Section 1
VEHICLES NOT EQUIPPED WITH
A HEAD-UP DISPLAY
This is your vehicle's driver information center control panel.
Information Button
Press the up or down arrow on the
information button to scroll
through the available information
displays:
• Digital Speed Display (If
equipped)
• Fuel Range
•Average Fuel Economy
• Instant Fuel Economy
• Fuel Used
•Average Speed
•Timer
• Battery Voltage
•Tire Pressure
• Engine Oil Life
• Blank Display
The following displays are only
available on the STS-V Model:
• Engine Boost
• Engine Oil Temperature
• Oil Pressure
•Transmission Fluid Temperature
See the following for more
information:
•Vehicle Information Displays
–
43 . . .
Page 44

AKENG45_STS Page 44 Monday, April 28, 2008 11:38 AM
Instrumentation and Controls
Note: Trip odometers A and B can
be used simultaneously.
See the following for more
information:
•Trip Information Displays
Reset Button
Press this button to reset Driver
Information Center features and to
turn off or acknowledge messages.
. . . 44
Trip Information Button
Press the top of this button to
show the trip odometer A or trip
odometer B reading in place of the
standard odometer reading.
To set a trip odometer to zero, first
display the desired trip odometer
and then press and hold the
bottom of the button.
Only the trip odometer that is
displayed will be reset.
Page 45

AKENG45_STS Page 45 Monday, April 28, 2008 11:38 AM
Section 1
–
English/Metric Unit Selection
Button
Press this button to switch your
displays between English and
metric units.
VEHICLES EQUIPPED WITH A
HEAD-UP DISPLAY
This is your vehicle's driver information center control panel.
Information Button
Press the up or down arrow on the
information button to scroll
through the available information
displays:
• Digital Speed Display (If
equipped)
• Fuel Range
•Average Fuel Economy
• Instant Fuel Economy
45 . . .
Page 46

AKENG45_STS Page 46 Monday, April 28, 2008 11:38 AM
Instrumentation and Controls
• Fuel Used
•Average Speed
•Timer
• Battery Voltage
•Tire Pressure
• Engine Oil Life
• Display Units
• Blank Display
See the following for more
information:
•Vehicle Information Displays
Reset Button
Press this button to reset Driver
Information Center features and to
turn off or acknowledge messages.
Head-Up Display Control
This button is part of the head-up
display system.
See the following for more
information:
• Head-Up Display
. . . 46
Page 47

AKENG45_STS Page 47 Monday, April 28, 2008 11:38 AM
Section 1
Trip Information Button
Press this button to show the trip
odometer A or trip odometer B
reading in place of the standard
odometer reading.
To set a trip odometer to zero, first
display the desired trip odometer
and then do either of the
following:
• Press the Reset button.
• Press and hold the Trip Information button.
Only the trip odometer that is
displayed will be reset.
Note: Trip odometers A and B can
be used simultaneously.
See the following for more
information:
•Trip Information Displays
Vehicle Information
Displays
Press the up or down arrow on the
information button to scroll
through the available information
displays:
• MPH/KM/H
In addition to the standard
analog speedometer, your
vehicle may be equipped with
this digital speed display.
–
47 . . .
Page 48

AKENG45_STS Page 48 Monday, April 28, 2008 11:38 AM
Instrumentation and Controls
• MILES RANGE/KM RANGE
This display shows how far the
computer thinks you can travel
with the fuel that's in the tank.
The fuel range estimate is
based on your current driving
conditions.
When the range drops below
approximately 64 km (40
miles), the display will show
LOW RANGE.
If the fuel level is low, the FUEL
LEVEL LOW message will
appear in the display. See
"Driver Information Center
Messages" later in this section.
• MPG AVG/L/100 KM AVG
This display shows the average
fuel economy since the last
time you reset the system.
To reset this reading to zero,
first select its display, then press
the Reset button.
• MPG INST/L/100 KM INST
This will show what the fuel
economy is at the instant the
display is viewed.
This item cannot be reset.
• GAL FUEL USED/L FUEL USED
This display shows how much
fuel has been used since you
last reset the system.
To reset this reading to zero,
first select its display, then press
the Reset button.
• AVG MPH/AVG KM/H
This display shows your average speed since you last reset
the system.
To reset this reading to zero,
first select its display, then press
the Reset button.
. . . 48
Page 49

AKENG45_STS Page 49 Monday, April 28, 2008 11:38 AM
Section 1
• 00:00:00 TIMER OFF
The timer function allows you
to time how long it takes to get
from one point to another.
To start the timer, first select its
display, then press the Reset
button.
00:00:00 TIMER ON will be
displayed.
The timer will start.
To stop the timer, select its display, then press the Reset button again.
When the timer is off, the display will show the timer value
and TIMER OFF.
If you press and release the
Reset button again, the timer
will resume.
To reset the timer to 00:00:00,
press and hold the Reset button after the timer has been
stopped.
• BATTERY VOLTS
This display lets you monitor
battery voltage to make sure it
is charging properly.
If the battery voltage is below
the normal range, BATTERY
VOLTS LOW will be displayed.
If the battery voltage is above
the normal range, BATTERY
VOLTS HIGH will be displayed.
You may see the reading fluctuate. This is normal.
See "Charging System Light"
under "Warning Lights" earlier
in this section for more
information.
If there is a problem with the
battery charging system, a
message will be displayed. See
"Driver Information Center
Messages" later in this section.
–
49 . . .
Page 50

AKENG45_STS Page 50 Monday, April 28, 2008 11:38 AM
Instrumentation and Controls
•Tire Pressure Monitor Displays
This display shows the air pressure for each of the vehicle's
tires.
Press the Information button to
scroll through the following
displays:
- LF TIRE: This display shows
the air pressure in the left
front tire.
- RF TIRE (right front tire): This
display shows the air pressure
in the right front tire.
- LR TIRE: This display shows
the air pressure in the left rear
tire.
- RR TIRE (right rear tire): This
display shows the air pressure
in the right rear tire.
The reading will be indicated in
metric units of kPa or in English
units of PSI.
If the tire pressure is low, LOW
will be displayed with the pressure reading.
If the tire pressure is high,
HIGH will be displayed with
the pressure reading.
If the display shows dashes
instead of a value, there may
be a problem with the system.
If this occurs consistently, see
your dealer for service.
• ENGINE OIL LIFE
This display shows the percentage of oil life remaining since
the system was last reset.
If, for example, you see 95%
ENGINE OIL LIFE, that means
that the way you are driving
your vehicle, 95% of the current oil life remains.
When the remaining oil life is
low, the CHANGE ENGINE OIL
SOON message will appear.
After the oil change message
comes on, change the engine
oil as soon as possible within
the next 1000 km (600 miles).
. . . 50
Page 51

AKENG45_STS Page 51 Monday, April 28, 2008 11:38 AM
Section 1
After you change the oil, the oil
life monitor will need to be
reset. See your dealer for
service.
See "Engine Oil" in Section 4
for more information.
Also see the Maintenance
Schedule booklet for more
information.
• ENGLISH DISPLAY UNITS or
METRIC DISPLAY UNITS
This item only appears in vehicles equipped with a head-up
display.
To switch your displays
between English and metric
units, first select this item, then
press the Reset button.
• Blank Display
The Driver Information Center's
Vehicle Information display is
off.
• ENGINE BOOST
(STS-V Model Only)
This display shows a graphic
that indicates the amount of
boost the engine is receiving
from the supercharger.
The reading will be indicated in
metric units of kPa or in English
units of PSI.
• ENGINE OIL TEMPERATURE
(STS-V Model Only)
This display shows the engine
oil temperature.
The reading will be indicated in
metric units of °C or in English
units of °F.
–
51 . . .
Page 52

AKENG45_STS Page 52 Monday, April 28, 2008 11:38 AM
Instrumentation and Controls
• OIL PRESSURE
(STS-V Model Only)
This display shows the engine
oil pressure.
The reading will be indicated in
metric units of kPa or in English
units of PSI.
• TRANS FLUID TEMP
(STS-V Model Only)
This display shows the transmission fluid temperature.
The reading will be indicated in
metric units of °C or in English
units of °F.
Trip Information Displays
Use the trip information button to
scroll through the following
displays:
• Odometer
The odometer shows how far
your vehicle has been driven.
•Trip Odometers:
- TRIP A
- TRIP B
Each trip odometer can tell you
how far your vehicle has been
driven since you last set the trip
odometer to zero.
Note: Trip odometers A and B
can be used simultaneously.
See "Driver Information Center
Buttons" earlier in this section
for more information.
The reading will be indicated in
metric units of kilometers or in
English units of miles.
. . . 52
Page 53

AKENG45_STS Page 53 Monday, April 28, 2008 11:38 AM
Section 1
Driver Information Center
Messages
These messages will appear if a
problem is sensed in one of your
vehicle's systems or to display
system information.
If there is more than one message,
the messages will appear one
behind the other.
A symbol may also appear.
The text messages are the same for
both the base sound system and
the navigation system unless
otherwise indicated.
To clear a message from the Driver
Information Center display, press
the Reset button.
Some messages may not be
cleared until the problem is fixed.
Clearing a message only makes the
message disappear. It does not
eliminate the problem. Be sure to
take messages seriously.
• AUTOMATIC LIGHTS OFF
Appears when the automatic
headlight system is turned off.
See "Lights" later in this section
for more information.
• AUTOMATIC LIGHTS ON
Appears when the automatic
headlight system is turned on.
See "Lights" later in this section
for more information.
–
• BATTERY NOT CHARGING
SERVICE CHARGING SYS
Appears if there is a problem
with the electrical charging system. Have the system checked
right away. Driving while this
message is on could drain your
battery.
53 . . .
Page 54

AKENG45_STS Page 54 Monday, April 28, 2008 11:38 AM
Instrumentation and Controls
• BATTERY SAVER ACTIVE
Appears if the vehicle detects
that the battery voltage is
dropping beyond a reasonable
point. When the battery voltage drops, the battery saver
system will start reducing
power to certain features that
may not be noticeable. If a feature must be disabled, this
message will be displayed to let
you know that the vehicle is
trying to save the charge in the
battery. Turn off any unneeded
accessories.
You can monitor battery voltage using the Driver Information Center. The normal range
is 11.5 to 15.5 volts when the
engine is running.
See the following, later in this
section, for more information:
- Battery Load Management
• BATTERY VOLTAGE HIGH
Appears if the electrical charging system is overcharging. The
message will appear when the
battery voltage is above 16
volts. You can reduce the
charging overload by using the
vehicle's accessories. You can
monitor battery voltage using
the Driver Information Center.
The normal range is 11.5 to
15.5 volts when the engine is
running.
. . . 54
Page 55

AKENG45_STS Page 55 Monday, April 28, 2008 11:38 AM
Section 1
• BATTERY VOLTAGE LOW
Appears when the electrical
system is charging less than 10
volts or if the battery has been
drained. If it appears immediately after starting, the battery
should recharge while you are
driving, but it may take a few
hours to do so.
Consider using an auxiliary
charger to boost the battery
after you arrive at your final
destination.
Be sure to follow the manufacturer's instructions when using
a battery charger.
If this message appears while
you are driving or comes on
after starting the vehicle and
stays on, have the electrical system checked immediately.
If you must drive a short distance, turn off all your accessories, such as the radio and air
conditioner.
You can monitor battery voltage using the Driver Information Center. The normal range
is 11.5 to 15.5 volts when the
engine is running.
• CHANGE ENGINE OIL SOON
Appears when the life of the
engine oil has expired and the
oil should be replaced.
After you change the oil, the oil
life monitor will need to be
reset. See your dealer for
service.
See your dealer for service.
See "Engine Oil" in Section 4
for more information.
Also see the Maintenance
Schedule booklet for more
information.
–
55 . . .
Page 56

AKENG45_STS Page 56 Monday, April 28, 2008 11:38 AM
Instrumentation and Controls
• CHECK BRAKE FLUID
Appears when the ignition is
on and the brake fluid level is
low. Have the vehicle serviced
as soon as possible.
See "Brake System Warning
Light" earlier in this section.
• CHECK GAS CAP
Appears when the gas cap has
not been properly installed.
Check the gas cap to be sure
that it is on properly.
See "Malfunction Indicator
Light" earlier in this section for
more information.
• CHECK TIRE PRESSURE
Appears when the tire pressure
in one of the vehicle tires needs
to be checked.
Stop as soon as possible and
have the tire pressures checked
and corrected.
See the following for more
information:
-Vehicle Information Displays
-Tire Pressure Monitor
- Low Tire Pressure Light
• CHECK WASHER FLUID
Appears when the washer fluid
level is low.
Add washer fluid.
See "Windshield Washer Fluid"
in Section 4 for information.
. . . 56
Page 57

AKENG45_STS Page 57 Monday, April 28, 2008 11:38 AM
• CLEAN RADAR
Note: This message may not be
available on all vehicles.
Appears when the adaptive
cruise control system is disabled because the radar is
blocked and cannot detect
vehicles in your path. This message may also appear during
heavy rain or due to road spray.
To clean the system, see "Adaptive Cruise Control" later in this
section.
• COMPETITIVE DRIVING
(STS-V Model Only)
Appears when the competitive
driving mode is selected.
The traction control system will
not be operating, so adjust
your driving accordingly.
See "Competitive Driving
Mode" later in this section.
• DRIVER DOOR AJAR
Appears when the driver's door
is open or ajar.
Make sure that there are no
obstructions in the way of the
door and close the door.
Section 1
–
• ENGINE COOLANT HOT/IDLE
ENGINE
Appears when the coolant temperature is too hot.
Pull over and stop the vehicle
as soon as it is safe to do so.
Let the engine idle until it is
cool.
See the following for more
information:
- Engine Coolant Temperature
Light
- Overheat Protection Mode
57 . . .
Page 58

AKENG45_STS Page 58 Monday, April 28, 2008 11:38 AM
Instrumentation and Controls
NOTICE
Continuing to drive your vehicle with an overheated engine
can result in severe engine
damage.
If you get an overheat warning,
stop as soon as possible.
Do not increase engine speed
above normal idle.
See "Engine Overheating" in
Section 5.
• ENGINE HOT -- AC OFF
Appears when the coolant temperature is over normal operating temperature. The air
conditioning will automatically
turn off until the coolant temperature turns back to normal.
The air conditioning will then
turn back on. You may continue to drive the vehicle.
If this message continues to
appear, have the system
repaired as soon as possible to
avoid engine damage.
• ENGINE POWER REDUCED
Appears when engine power is
being reduced to protect the
engine from damage.
There are several malfunctions
that might trigger this
message.
There may be a noticeable
reduction in the vehicle's
performance.
This also can affect the vehicle's
ability to accelerate.
If this message appears with no
reduction in vehicle performance, proceed to your destination. The next time the
vehicle is driven, acceleration
and speed may be reduced.
Drive at a reduced speed.
Have the vehicle serviced as
soon as possible.
. . . 58
Page 59

AKENG45_STS Page 59 Monday, April 28, 2008 11:38 AM
Section 1
• ENGINE PROTECTION
REDUCED RPM'S
Appears when the system has
entered the engine overheat
protection mode.
Continued operation of the
vehicle at the current engine
speed may cause the engine to
overheat.
Engine rpms will be limited to
prevent engine overheating.
While this message is displayed, the transmission may
upshift earlier than normal and
vehicle speed may be reduced.
This is normal. Your vehicle
does not need service.
When the engine oil temperature returns to a safe level, the
message will clear
automatically.
–
• FUEL LEVEL LOW
Warns that the fuel level in the
fuel tank is low. A single chime
will sound. Stop for fuel soon.
59 . . .
Page 60

AKENG45_STS Page 60 Monday, April 28, 2008 11:38 AM
Instrumentation and Controls
• HOOD AJAR
Appears if the hood is not completely closed.
• ICE POSSIBLE
Appears when the outside temperature is cold enough to create icy road conditions.
Adjust your driving
accordingly.
• KEY FOB BATTERY LOW
Appears if the keyless access
transmitter battery is low.
Replace the battery.
See the following in Section 3
for more information:
- Battery Replacement
• LANE DEPARTURE SYSTEM
UNAVAILABLE
Note: This message may not be
available on all vehicles.
Appears when the lane departure warning system will not
activate due to a temporary
condition.
Be sure to keep the windshield
free of mud, dirt, snow, ice and
slush.
For information on how to use
this system, see the separate
navigation system manual.
. . . 60
Page 61

AKENG45_STS Page 61 Monday, April 28, 2008 11:38 AM
• LEFT REAR DOOR AJAR
Appears when the left rear
door is open or ajar.
Make sure that there are no
obstructions in the way of the
door and close the door.
• NO FOBS DETECTED
Appears when the vehicle does
not detect the presence of a
keyless access transmitter when
you attempt to start the vehicle
or after a door is closed.
The keyless access transmitter
must be in the vehicle for the
ignition to work.
This message may appear
because something is causing
interference.
Section 1
Interference may be caused by
equipment plugged into the
accessory power outlet on the
center console. Examples of
such equipment include:
- cell phone
- cell phone charger
- two-way radio
- power inverter
Try moving the transmitter
away from the device when
starting the vehicle.
Personal Digital Assistant
devices and remote garage/
gate openers may generate
electromagnetic interference.
Do not carry the keyless access
transmitter in the same pocket
or bag as these devices.
–
61 . . .
Page 62

AKENG45_STS Page 62 Monday, April 28, 2008 11:38 AM
Instrumentation and Controls
There may also be interference
in areas where there is an electro-magnetic field, such as near
an airport, automatic toll
booth, or some gas stations.
Try moving the transmitter to
different locations within the
vehicle. If this does not help,
place the transmitter in the
console bin transmitter pocket
with the buttons facing to the
front and then start the vehicle.
This message may also appear
when the vehicle's battery is
low.
The battery charge must be
above 10 volts to detect the
transmitter.
• NO FOB - OFF OR RUN?
Appears when you turn off the
engine and the vehicle does
not detect a keyless access
transmitter in the vehicle.
The vehicle will remain in
accessory mode until one of
the following events has
occurred:
- the engine is restarted
- 10 minutes have passed
- the keyless ignition off button
is pressed to turn off the
ignition
While the vehicle is in accessory
mode, make sure that you have
the transmitter.
If the keyless ignition off button
is pressed, the vehicle cannot
be started again unless the
remote keyless access transmitter is in the vehicle.
The remote keyless access
transmitter must be in the vehicle for the ignition to work.
See "Starting Instructions" in
Section 3 for more information.
. . . 62
Page 63

AKENG45_STS Page 63 Monday, April 28, 2008 11:38 AM
Section 1
• OIL PRESSURE LOW/STOP
ENGINE
Appears when the engine oil
pressure is low.
If this message appears while
the engine is running, stop and
turn the engine off immediately. Do not use the vehicle
until the problem is fixed. A
multiple chime will also sound.
NOTICE
Do not keep driving with low oil
pressure. Severe engine
damage can result from driving
the vehicle with low oil pressure. Check the oil as soon as
possible and have your vehicle
serviced.
See "Engine Oil" in Section 4 for
more information.
• PASSENGER DOOR AJAR
Appears when the front passenger door is open or ajar.
Make sure that there are no
obstructions in the way of the
door and close the door.
• PRESS START AND BRAKE TO
START ENGINE
Appears to remind you that, in
order to start the vehicle, the
brake pedal must be applied
while pressing the keyless ignition start button.
See "Starting Instructions" in
Section 3 for more information.
–
63 . . .
Page 64

AKENG45_STS Page 64 Monday, April 28, 2008 11:38 AM
Instrumentation and Controls
• RADAR CRUISE NOT READY
Note: This message may not be
available on all vehicles.
Appears when adaptive cruise
control will not activate due to
a temporary condition. The
vehicle does not require service. Continue driving for several minutes and then try to
activate cruise control again.
This message will also appear
under the following conditions:
- The driver turns off the headup display while adaptive
cruise control is engaged.
- The driver tries to engage the
adaptive cruise control system while the head-up display is off.
• RIGHT REAR DOOR AJAR
Appears when the right rear
door is open or ajar.
Make sure that there are no
obstructions in the way of the
door and close the door.
• SERVICE AC SYSTEM
Appears when the electronic
sensors that control the air conditioning and heating systems
are no longer working. If you
notice a drop in heating and air
conditioning efficiency, have
the climate control system
serviced.
• SERVICE AIR BAG
Appears if there is a problem
with the air bag system. See
your dealer for service.
See "Air Bag Light" earlier in
this section for more
information.
. . . 64
Page 65

AKENG45_STS Page 65 Monday, April 28, 2008 11:38 AM
Section 1
• SERVICE BRAKE ASSIST
Appears if there is a problem
with the brake assist system.
See your dealer for service.
See "Brake Assist" in Section 3.
• SERVICE COLUMN LOCK
Appears when there is a problem with the system that controls the locking and unlocking
of the steering column. Have
the vehicle towed for service.
• SERVICE LANE DEPARTURE
SYSTEM
Note: This message may not be
available on all vehicles.
Appears if there is a problem
with the lane departure warning system.
If this message continues to
appear, have the system
repaired as soon as possible.
See your dealer for service.
For information on how to use
this system, see the separate
navigation system manual.
• SERVICE HEADLAMP LEVEL
Appears if there is a problem
with the automatic headlight
leveling control system.
See your dealer for service.
• SERVICE RADAR CRUISE
Note: This message may not be
available on all vehicles.
Appears if the adaptive cruise
control system is disabled.
See your dealer for service.
–
65 . . .
Page 66

AKENG45_STS Page 66 Monday, April 28, 2008 11:38 AM
Instrumentation and Controls
• SERVICE STABILITY SYS
Appears if your stability
enhancement system is
malfunctioning.
To reset the system, stop and
turn the ignition off and then
back on.
If the message still comes on,
see your dealer for service.
®
See "Stabilitrak
section for more information.
" later in this
• SERVICE STEERING SYS
Appears when there is a problem with the variable effort
steering system. Have it fixed.
When this message is displayed, you may notice the
effort required to steer the
vehicle increases, but you will
still be able to steer.
• SERVICE SUSPENSION SYS
Appears when the suspension
system is not working properly.
See your dealer for service.
• SERVICE THEFT SYSTEM
Appears when there is a problem with the hood open and
closed switches.
You may need to replace the
switches.
Until this problem is fixed, you
should note the following:
- The theft deterrent system
will still protect the interior of
the vehicle.
- The hood area will not be
protected by the theft deterrent system.
- The remote-starter will not
operate.
See your dealer for service.
. . . 66
Page 67

AKENG45_STS Page 67 Monday, April 28, 2008 11:38 AM
Section 1
• SERVICE TIRE MONITOR
Appears when the tire pressure
monitoring system is not working properly.
The Low Tire Pressure Light
may also appear on the instrument cluster. For more information, see "Low Tire Pressure
Light" under "Warning Lights"
earlier in this section.
See your dealer for service.
See "Tire Pressure Monitor"
under "Tires" in Section 4 for
more information.
• SERVICE TRANSMISSION
Appears if there is a problem
with the transmission.
See your dealer for service.
• SERVICE VEHICLE SOON
Appears when a non-emissions
related malfunction occurs.
Have the vehicle serviced as
soon as possible.
• SPEED LIMITED TO XXX KM/H
Appears when the vehicle is
limiting speed because there is
a problem in the steering or
suspension systems. Take your
vehicle in for service.
–
67 . . .
Page 68

AKENG45_STS Page 68 Monday, April 28, 2008 11:38 AM
Instrumentation and Controls
• STABILITY SYS ACTIVE
Appears if the vehicle begins to
go in a direction other than
that intended by the driver and
the Stabilitrak system activates. Adjustments are automatically made to try to regain
control of the vehicle.
Slippery road conditions may
exist.
Adjust your driving
accordingly.
The message may stay on for a
few seconds after Stabilitrak
has stopped assisting with
directional control of the vehicle. This is normal.
®
See "Stabilitrak
" later in this
section for more information.
• STABILITY SYS NOT READY
Appears if the Stabilitrak system is not ready.
- The sensors may need to be
centered.
To center the sensors, drive
the vehicle in a straight line.
- This message will also come
on while the Stabilitrak system warms up.
When the system is ready, the
STABILITY SYS READY mes-
®
sage will appear.
See "Stabilitrak
section for more information.
®
" later in this
• STABILITY SYS OFF
Appears when the traction control and Stabilitrak systems are
turned off. Adjust your driving
accordingly.
®
See "Stabilitrak
" later in this
section for more information.
• STABILITY SYS READY
Appears when the stability system is turned on using the traction on/off button and the
system is ready to activate if
needed.
®
See "Stabilitrak
" later in this
section for more information.
. . . 68
Page 69

AKENG45_STS Page 69 Monday, April 28, 2008 11:38 AM
Section 1
• STARTING DISABLED THEFT
PROBLEM
Appears if there is a problem
with the theft deterrent system.
See your dealer for service.
• STARTING DISABLED THROT-
TLE PROBLEM
Appears when there is a problem with the throttle system.
Have your vehicle serviced.
–
• THEFT ATTEMPTED
Appears if the theft system has
detected a break-in attempt
while you were away from the
vehicle.
69 . . .
Page 70

AKENG45_STS Page 70 Monday, April 28, 2008 11:38 AM
Instrumentation and Controls
• TRACTION ACTIVE
Appears when the Traction
Control system is limiting
wheel spin. Slippery road conditions may exist, so adjust
your driving accordingly.
See "Traction Control System"
later in this section for more
information.
• TRANS HOT IDLE ENGINE
Appears if the transmission
fluid is too hot. Stop and idle
the engine until the transmission cools or the message is
removed.
NOTICE
Continuing to drive your vehicle with overheated transmission fluid can result in severe
transmission damage.
The repairs would not be
covered by your warranty.
If you get an overheat warning,
stop as soon as possible.
• TRUNK OPEN
Appears when the trunk is
open.
• TURN SIGNAL ON
Appears to remind you that the
turn signal is on after approximately 1.6 km (1 mile).
A multiple chime will also
sound.
. . . 70
Page 71

AKENG45_STS Page 71 Monday, April 28, 2008 11:38 AM
Section 1
Other Miscellaneous Messages
• ACCESSORY ACTIVE
See "Keyless Ignition" in Section 3 for more information.
• DISABLE INTRUSION SYS?
See "Theft Deterrent System" in
Section 3 for more information.
• INTRUSION SYS OFF
See "Theft Deterrent System" in
Section 3 for more information.
• INTRUSION SYS READY
See "Theft Deterrent System" in
Section 3 for more information.
• KNOWN FOB
• MAX # FOBS LEARNED
• OFF/ACC TO LEARN
• READY FOR FOB X
• SHIFT TO PARK
See "Starting Instructions" in
Section 3 for more information.
• WAIT XX MIN
–
71 . . .
Page 72

AKENG45_STS Page 72 Monday, April 28, 2008 11:38 AM
Instrumentation and Controls
HEAD-UP DISPLAY (IF
EQUIPPED)
CAUTION
Make sure the head-up display
image is not too bright or too
high in your field of view.
The Head-Up Display allows you to
see the speedometer through the
windshield. It also shows:
• the Turn Signal Indicator lights
• the High-Beam Indicator
symbol
• the Check Gages icon
• Radio features
• the Adaptive Cruise Control
display
• the Forward Collision Alert System display
• Automatic Transmission DriverControlled Shift Mode Display
Make sure to continue scanning
your displays, controls and driving
environment just as you would if
you didn't have a head-up display.
Otherwise, you may overlook
some important information or
warnings.
CHECK GAGES will appear on the
display when there is an important
warning condition.
Check your Driver Information
Center display for more information on your vehicle's systems.
. . . 72
Page 73

AKENG45_STS Page 73 Monday, April 28, 2008 11:38 AM
Section 1
Head-Up Display Adjustment
The head-up display controls are
located to the left of the steering
wheel.
To adjust the display so you can
see it properly:
1. Adjust the driver's seat to the
way you want it.
2. Start the engine.
A
B
3. To center the head-up display
image in your field of view,
press the top or bottom of the
head-up display switch .
The image can only be adjusted up and down, not side to
side.
4. The instrument light dimmer
controls the brightness of
the head-up display.
Press lightly on the knob to
make it spring out.
Pull the knob until it is completely extended.
Rotate the knob to the right to
increase brightness or to the
left to decrease brightness.
The brightness of the display
image is determined by the
light conditions in front of the
vehicle and also by where the
head-up display is set.
You can use the Driver Information
Center to change your display's
readings between English and
metric units.
See "Driver Information Center"
earlier in this section for
information.
–
73 . . .
Page 74

AKENG45_STS Page 74 Monday, April 28, 2008 11:38 AM
Instrumentation and Controls
If the head-up display does not
come on, check to see if:
• something is covering the
head-up display unit
• the dimmer control is adjusted
properly
• the image is adjusted to the
proper height
• ambient light in front of the
vehicle is low
• the fuse in the fuse panel is
blown
See "Fuses and Circuit Breakers"
in Section 4 for additional
information.
If the vehicle is facing a dark object
or a heavily shaded area, the headup display may anticipate entering
a dark area and may begin to dim.
It is possible for sunlight to enter
the head-up display, causing all of
the graphics to light up. The
display will return to normal when
the sunlight is no longer entering
the head-up display.
Wearing polarized sunglasses
could make the head-up display
image more difficult to see.
B
To turn the head-up display off,
use the instrument light dimmer
:
1. Press lightly on the knob to
make it spring out.
2. Pull the knob until it is completely extended.
3. Rotate the knob all the way to
the left.
. . . 74
Page 75

AKENG45_STS Page 75 Monday, April 28, 2008 11:38 AM
Section 1
NOTICE
Keep the inside of the windshield clean to maintain the
sharpness and clarity of the
display image.
To clean the head-up display
lens, spray glass cleaner on a
soft, clean cloth and wipe the
lens gently. Do not spray cleaner directly on the lens.
Be careful not to scratch the
head-up display or camera lenses when cleaning.
Your windshield is part of the
head-up display system. If the
windshield must be replaced,
be sure to get one that is
compatible with this system.
Head-Up Display Adaptive
Cruise Control Message
The following message may
appear in the head-up display:
• PEDAL APPLIED ACC
OVERRIDE
This message indicates that you
are overriding the adaptive
cruise control system by pressing the accelerator pedal.
Adaptive cruise control will not
automatically apply the brakes.
When you take your foot off
the pedal, the vehicle will go
back down to your previously
chosen cruise control speed
and the adaptive cruise control
system will return to normal
operation.
The following adaptive cruise
control symbols may also appear
in the head-up display:
• "adaptive cruise control active"
symbol
• "alert" symbol
• "vehicle ahead" symbol
See "Adaptive Cruise Control" later
in this section for more
information.
–
75 . . .
Page 76

AKENG45_STS Page 76 Monday, April 28, 2008 11:38 AM
Instrumentation and Controls
LIGHTS
The exterior light controls are on
the multifunction lever.
The instrument light dimmer is on
the instrument panel.
See "Lights" and "Multifunction
Lever" later in this section for more
information.
HEATING AND AIR
CONDITIONING SYSTEM
Your vehicle is equipped with a
heating and air conditioning
system. See "Heating and Air
Conditioning" later in this section
for more information on how to
operate the system.
SOUND SYSTEM AND
CLOCK
See "Sound System and Clock",
later in this section, to find out
how to operate your vehicle's
radio.
NAVIGATION SYSTEM (IF
EQUIPPED)
See "Navigation System" later in
this section and see the separate
navigation system manual for
information.
HOOD RELEASE
Use the hood release handle,
located near the driver's door, to
open the hood. See Section 4 for
more information.
. . . 76
Page 77

AKENG45_STS Page 77 Monday, April 28, 2008 11:38 AM
Section 1
PARKING BRAKE
See "Parking Brake" in Section 3 for
information on how to properly
set and release the parking brake.
KEYLESS IGNITION
See Section 3 for information.
GEAR SHIFT LEVER
The shift lever is located on the
center console.
See "Automatic Transmission" in
Section 3 for information.
–
HAZARD WARNING
FLASHER
Use hazard warning flashers to
warn others of emergency conditions or when your vehicle is in a
traffic hazard.
The hazard warning flasher control
is located on the center console.
Press the flasher button in to make
your front and rear turn signal
lights flash on and off.
77 . . .
Page 78

AKENG45_STS Page 78 Monday, April 28, 2008 11:38 AM
Instrumentation and Controls
B A
To secure your vehicle even more
while this feature is on, lock the
glove box with your key.
Press to turn the valet lockout
off and re-enable these features.
To turn off the flashers, press the
button again.
When the flasher is on, the function of the turn signal lever is
cancelled.
. . . 78
VALET LOCKOUT SWITCH
This on/off switch is located inside
the glove box.
Press to turn on the valet lockout and disable the following
features:
• the remote keyless access transmitter's trunk release button
• the trunk release button
located on the driver's door
• the vehicle remote-start feature
Page 79

AKENG45_STS Page 79 Monday, April 28, 2008 11:38 AM
Section 1
■ TRACTION CONTROL
SYSTEM
This system automatically limits
wheel spin under slippery road
conditions.
On vehicles with rear-wheel drive,
when the system senses that one
or both of the rear wheels are spinning or beginning to lose traction,
it selectively applies the brakes
and/or reduces engine power to
limit wheel spin.
On vehicles with all-wheel drive,
when the system senses that any
of the wheels are spinning or
beginning to lose traction, it selectively applies the brakes and/or
reduces engine power to limit
wheel spin.
You may feel or hear the system
working, but this is normal.
The system comes on automatically when you start the engine.
To help limit wheel spin, you
should always leave this system
on.
However, you can turn this system
off if you need to.
–
The button is on the center
console.
NOTE:
Turning the traction control
system off on some surfaces,
such as deep snow and loose
gravel, will assist vehicle
motion at lower speeds.
79 . . .
Page 80

AKENG45_STS Page 80 Monday, April 28, 2008 11:38 AM
Instrumentation and Controls
NOTICE
Make sure to turn the system off
if the vehicle is stuck in mud,
sand or snow.
See "If Your Vehicle Gets Stuck"
in Section 5.
Press the TC button to turn the
system off. The traction system
malfunction light will come on
when the system is turned off.
When this warning light is on, the
traction control system will not
limit wheel spin.
Adjust your driving accordingly.
NOTICE
Do not brake repeatedly or
accelerate heavily when the
traction control system is off to
avoid damaging the driveline.
Press the button again to turn the
system back on.
If the system is on and the light
comes on and stays on, then the
system is not working, and you
should have it fixed.
See "Traction System Malfunction
Light" under "Warning Lights"
earlier in this section for more
information.
. . . 80
Page 81

AKENG45_STS Page 81 Monday, April 28, 2008 11:38 AM
Section 1
NOTE:
• The traction control button is
also used to control the Stabilitrak system.
®
See "Stabilitrak
section for more information.
• All-Wheel Drive Vehicles and
STS-V Models
You may still feel the traction
control system working even
after it has been turned off.
This is normal.
• Adding accessories to your
vehicle can affect your vehicle's
performance and safety.
See "Accessories and Modifications" for more information.
" later in this
■ COMPETITIVE
DRIVING MODE (STS-V
MODEL ONLY)
The competitive driving mode
allows the driver to have full
control of the rear wheels while
the Stabilitrak
the vehicle using selective brake
application.
Racing or other competitive driving may affect the warranty coverage of the vehicle.
See "Engine Oil" in Section 4 for
more information.
®
system helps steer
–
To activate this mode, press the
traction control button on the
center console twice quickly.
The COMPETITIVE DRIVING
message will appear on the Driver
Information Center display.
The Traction Control System will
be turned off.
81 . . .
Page 82

AKENG45_STS Page 82 Monday, April 28, 2008 11:38 AM
Instrumentation and Controls
The Traction Control System Light
will come on to remind you that
the system is off.
Adjust your driving accordingly.
Press the button again to turn the
system back on.
■ STABILITRAK® SYSTEM
This system selectively applies any
one of the brakes to help maintain
directional control in difficult driving conditions.
When the system senses that there
is a discrepancy between the
intended path and the direction
the vehicle is travelling, it selectively applies the brakes to help
steer the vehicle.
The system comes on automatically when you start the engine.
If the vehicle begins to go in a
direction other than that intended
by the driver and the Stabilitrak
system activates, the STABILITY
SYS ACTIVE message will appear.
See "Driver Information Center
Messages" earlier in this section for
more information.
When this message appears,
continue to steer in the direction
you want to go.
You may feel or hear the system
working, but this is normal.
To help maintain directional
control of your vehicle, you should
always leave this system on.
However, you can turn this system
off if you need to.
. . . 82
Page 83

AKENG45_STS Page 83 Monday, April 28, 2008 11:38 AM
Section 1
The button is on the center
console.
Press the TC button to turn the
system off. The traction system
malfunction light will come on
when the system is turned off.
The Traction Control System will
also be turned off.
The STABILITY SYS OFF will
appear on the Driver Information
Center. See "Driver Information
Center Messages" earlier in this
section for more information.
Press the button again to turn the
systems back on.
SERVICE STABILITY SYS will
appear on the Driver Information
Center if your stability enhancement system is malfunctioning.
See "Driver Information Center
Messages" earlier in this section for
more information.
When this message is displayed,
the system is not operational and
you should adjust your driving
accordingly.
NOTE:
If your vehicle is in cruise
control when the Stabilitrak
system activates, the cruise
control will automatically
disengage.
Once conditions are back to
normal, you may turn the cruise
control back on.
See "Cruise Control" later in this
section for more information.
–
83 . . .
Page 84

AKENG45_STS Page 84 Monday, April 28, 2008 11:38 AM
Instrumentation and Controls
■ ACCESSORY POWER
OUTLETS
Outlets can be used to plug in
electrical equipment such as a
cellular telephone, CB radio, etc.
Power outlets may be found in the
following locations:
• in front of the center console
• inside the center console
• on the rear of the center console (if equipped)
To use an outlet, remove the cap.
When not in use, always cover the
outlets with the protective caps (if
equipped).
NOTICE
Maximum load of any electrical
equipment should not exceed
20 amps.
Leaving electrical equipment
on for extended periods of time
can drain your battery.
Always turn off any electrical
equipment that is not in use.
NOTICE
Adding some electrical equipment to your vehicle can
damage it or keep other things
from working properly. This
damage wouldn't be covered
by your warranty. Check with
your dealer before adding electrical equipment.
When adding electrical equipment, be sure to follow the
proper installation instructions
included with the equipment.
. . . 84
Page 85

AKENG45_STS Page 85 Monday, April 28, 2008 11:38 AM
Section 1
Certain accessory power plugs
may not be compatible with the
power outlets in your vehicle. Use
of such plugs may result in blown
vehicle or adapter fuses. If you
experience a problem, see your
dealer for more information on the
accessory power outlets.
NOTICE
Power outlets are designed for
accessory plugs only. Do not
hang any type of accessory or
bracket from the plug. Improper use of the power outlet may
result in damage not covered
by your warranty.
■ LIGHTS
LIGHTS MAIN SWITCH
The main light switch controls
these light systems:
• Headlights
•Taillights
• Parking lights
• License lights
• Sidemarker lights
–
85 . . .
Page 86

AKENG45_STS Page 86 Monday, April 28, 2008 11:38 AM
Instrumentation and Controls
C
BA
Rotate the band to to turn on
your parking and other operating
lights. The headlights will not
come on.
Rotate the band to to turn on
your headlights. The parking and
other operating lights will also
come on.
To change the lights from low
beams to high beams, push the
multifunction lever toward the
front of the vehicle. To change the
lights back to low beams, pull the
lever back toward you. When the
high beams are on, an indicator
light on the instrument cluster will
also be on.
You can also flash your high beams
to signal other drivers when the
headlights are either off, in low
beam or in daytime running light
mode (if equipped).
To use it, pull the multi-function
lever toward you and release it.
If the headlights are in high beam
mode, they will switch to low
beam. Push the lever away from
you to turn the high beams back
on.
If you turn off the vehicle with the
high beams on, the low beams will
be on the next time the vehicle is
started.
Rotate the band to AUTO to activate the automatic headlight
system.
When activated, this automatic
headlight feature turns your headlights and other operating lights
on and off by sensing how dark it
is outside.
. . . 86
Page 87

AKENG45_STS Page 87 Monday, April 28, 2008 11:38 AM
Section 1
C
Rotate the band to to turn off
the exterior lights and automatic
lighting features.
The band will not stay in the off
position. It will bounce back to
AUTO.
To turn the automatic headlight
system back on, rotate the band to
the off position again, then release
it.
See "Automatic Headlight System"
later in this section for more
information.
Note:
The headlights are protected by
fuses in the fuse block. If there is
an electrical overload, the headlights will flicker on and off.
Have the headlight wiring
checked right away.
Lights On Reminder
If you open the driver's door while
the lights' manual control is in
or and the ignition is off, you
will hear a warning chime.
A warning light will also appear on
the instrument cluster.
See the following, earlier in this
section, for more information:
• Lights On Reminder Light
–
87 . . .
Page 88

AKENG45_STS Page 88 Monday, April 28, 2008 11:38 AM
Instrumentation and Controls
Automatic Headlight
System
When activated, this automatic
headlight feature turns your headlights and other operating lights
on and off by sensing how dark it
is outside.
In order for this feature to work
properly, be sure not to cover the
light sensor on the top of the
instrument panel.
Rotate the band to AUTO to activate this system.
The following message will appear
in the Driver Information Center
display:
• AUTOMATIC LIGHTS ON
If the band is already in the AUTO
position when you start your vehicle, the automatic headlight
system is automatically enabled.
If it is dark outside, your vehicle's
headlights and operating lights
will turn on automatically.
Once it is bright enough outside,
the headlights and operating
lights will automatically turn back
off.
The lights may also turn on when
you drive through a low-light area.
Once you leave the low-light area,
it may take about one minute
before the automatic headlights
turn off. During this brief delay,
the instrument cluster may not be
as bright as usual. Make sure the
instrument light dimmer is set to
full brightness. See "Instrument
Light Dimmer" later in this section.
To temporarily disable the automatic headlight system, rotate the
band to the off position.
The band will not stay in the off
position. It will bounce back to
AUTO.
The following message will appear
in the Driver Information Center
display:
• AUTOMATIC LIGHTS OFF
. . . 88
Page 89

AKENG45_STS Page 89 Monday, April 28, 2008 11:38 AM
Section 1
To turn the automatic headlight
system back on, rotate the band to
the off position again, then release
it.
If the automatic headlight system
has the headlights turned on and
you turn the ignition off, the exterior lights will stay on for a period
of delayed illumination while you
leave the vicinity of the vehicle.
See the following for more
information:
•Vehicle Programming and Personalization Features
Wiper Activated Headlights
If the automatic lights control is
on, the headlights and parking
lights will automatically come on
when the windshield wipers have
been in use for about six seconds.
The headlights will go off immediately if the ignition is turned off or
after the wipers have been turned
off.
–
Headlight Washers
To wash your headlights, activate
the windshield washer while the
headlights are on.
The windshield and headlights will
be washed.
After the first cycle, the headlight
washers will cycle once every fifth
time the windshield washer is
activated.
If the washer fluid is low, the headlight washers will not work.
See "Windshield Washer Fluid" in
Section 4 for more information.
89 . . .
Page 90

AKENG45_STS Page 90 Monday, April 28, 2008 11:38 AM
Instrumentation and Controls
Headlight Leveling Control
The headlight leveling is
controlled automatically, depending on the load the vehicle is
carrying.
Laws in some regions may require
that the headlights be on when
using the fog lights.
When the fog lights are on, the
Fog Lamp Light on the instrument
cluster will also be on.
Fog Lights
Use fog lights for better vision in
foggy or misty conditions.
Rotate the band up to align the
front fog light symbol with the
dot and then release it to turn your
fog lights on and off.
The band returns to its original
position when released.
Your vehicle's parking lights must
be on in order for the fog lights to
operate.
. . . 90
Page 91

AKENG45_STS Page 91 Monday, April 28, 2008 11:38 AM
Do not use the fog lights when
visibility is good because it may
bother other drivers. It is also not
recommended that rear fog lights
be used in city driving. Rear fog
lights should only be used in foggy
or misty conditions to allow the
drivers behind you to see your
vehicle.
Section 1
–
Rear Fog Lights
Rotate the band down to align the
rear fog light symbol with the
dot and then release it to turn your
rear fog lights on and off.
The band returns to its original
position when released.
The rear fog lights only operate if
the headlights are on.
INTERIOR LIGHTS
Instrument Light Dimmer
The instrument light dimmer
controls the brightness of the
instrument panel lights.
The knob is located on the instrument panel near the steering
wheel.
Press lightly on the knob to make
it spring out.
91 . . .
Page 92

AKENG45_STS Page 92 Monday, April 28, 2008 11:38 AM
Instrumentation and Controls
Then, rotate the knob to the right
to increase brightness and to the
left to decrease brightness. Rotate
the knob all the way to the right to
turn on the interior lights.
If the parking lights are on when it
is dark outside, make sure the
instrument panel brightness is set
high enough that you are able to
see all instrument panel readouts
clearly.
If the low beam headlights are
turned on when it is light outside,
the interior lights will not dim.
That way, the driver will still be
able to clearly see all instrument
panel readouts and radio and
climate control displays.
Illuminated Entry System
The interior lights will come on for
a while when you open any door
or press the unlock button on the
keyless access transmitter while it
is dark outside.
If the doors are unlocked using the
keyless access transmitter, the
lights will stay on for about 25
seconds.
To turn the lights off quickly, lock
the doors using the power door
locks or turn on the ignition.
Otherwise, the lights should turn
off about 25 seconds after all the
doors are closed.
Reading Lights
Your vehicle may have reading
lights.
These lights turn on whenever a
door is opened or unlocked while
it is dark outside.
Each reading light has an on/off
switch next to it.
To turn a reading light on or off,
press the on/off switch.
If the lights are left on, they will
turn off automatically ten minutes
after the ignition is turned off.
. . . 92
Page 93

AKENG45_STS Page 93 Monday, April 28, 2008 11:38 AM
Section 1
Battery Saver
Exterior Lights
If the manual light control is left on
when the ignition is turned off, the
exterior lights will turn off automatically after 10 minutes to keep
your battery from draining.
If the lights were left on intentionally, turn the manual light control
off then back on to reactivate the
exterior lights.
Interior Lights
Power to the interior lights and
accessories is automatically turned
off 10 minutes after the ignition is
turned off.
If the odometer on a new car
shows fewer than 25 km (16
miles), the interior lights will turn
off after only three minutes.
To restore power for an additional
10 minutes, open any door or the
trunk or turn the courtesy lights on
by using the switch.
■ HEATING AND AIR
CONDITIONING SYSTEM
For your comfort, your vehicle can
be programmed to automatically
activate certain climate control
functions when you use the vehicle's remote-starter.
See the following for more
information:
•Vehicle Programming and Personalization Features
–
93 . . .
Page 94

AKENG45_STS Page 94 Monday, April 28, 2008 11:38 AM
Instrumentation and Controls
Dual Zone Climate Control
System
The following pages describe how
to operate your dual zone climate
control system.
This electronic, automatic air
conditioning system allows the
driver and the front seat passenger
to independently select desired air
temperatures.
You can use the Driver Information
Center to change your display's
readings between English and
metric units.
I E IF
A H C G D H B
See "Driver Information Center"
earlier in this section for
information.
Power Control
Press the knob to turn the
system on or off.
. . . 94
Page 95

AKENG45_STS Page 95 Monday, April 28, 2008 11:38 AM
Section 1
AUTOMATIC MODE
In automatic mode, all you have to
do is select a desired temperature
setting.
The system will automatically
control the inside temperature, air
delivery mode and the fan speed
to achieve your set temperature as
quickly as possible.
The air conditioning compressor
and the recirculation mode will
turn on as needed.
Press AUTO to activate the automatic mode.
Note:
When full automatic operation
is active, the word AUTO
appears under the fan and air
delivery mode icons on the
display.
Adjust the temperature to a
comfortable setting. See "Temperature Control" later in this section.
In cold weather, the system will
start at a reduced fan speed to
avoid blowing cold air into the
vehicle.
It may take from 10 to 20 minutes
for the system to regulate.
Readjust the temperature as
needed.
In order for the automatic climate
control system to work properly,
be sure not to cover the sensors.
See "Sensors" later in this section.
–
95 . . .
Page 96

AKENG45_STS Page 96 Monday, April 28, 2008 11:38 AM
Instrumentation and Controls
TEMPERATURE CONTROL
Driver Temperature Control
Rotate the driver's side knob to
choose the temperature you want
inside the vehicle.
Rotate the knob clockwise to
increase or counterclockwise to
decrease the temperature.
If you would like to use the climate
control system's automatic operation you should adjust the temperature to a comfortable setting,
usually between 21°C (70°F) and
27°C (80°F).
Choosing the warmest or coldest
temperature setting will not cause
the system to heat or cool any
faster.
Passenger Temperature Control
Press to turn the passenger's
temperature control on and off.
Rotate the knob clockwise to
increase or counterclockwise to
decrease the temperature for the
front passenger zone.
If the passenger temperature
control is not activated, then the
driver temperature control regulates the temperature for the entire
vehicle.
MANUAL MODE
Fan Speed Selector
Use to manually control the fan
speed. Press the top part of the
switch to increase fan speed and
the bottom part of the switch to
decrease fan speed.
If there is a reduction in the airflow
coming through your climate
control system, the filter may need
to be replaced. See "Passenger
Compartment Air Filter" in Section
4 for more information.
. . . 96
Page 97

AKENG45_STS Page 97 Monday, April 28, 2008 11:38 AM
Air Outlet Selector
Press the up or down arrow on
switch to stop the automatic
operation and to manually select
one of the modes controlling the
direction of airflow. The display
shows the selected mode.
This mode directs airflow
through the instrument
panel outlets.
Section 1
I E IF
–
A H C G D H B
The blending mode directs
airflow through both the
instrument panel outlets
and the floor outlets. The
air coming from the floor
outlets will be warmer than
the air coming from the instrument panel outlets.
The heater mode directs
most of the airflow through
the floor outlets, with some
air going to the windshield
and side window defroster
vents.
97 . . .
Page 98

AKENG45_STS Page 98 Monday, April 28, 2008 11:38 AM
Instrumentation and Controls
The heating/defogging
mode divides airflow between the windshield defroster vents, the floor
outlets and the side window defroster vents.
Use this mode to remove
fog from the windshield or
side windows while also
heating the vehicle.
The A/C compressor will
operate in this mode if the
outside temperature is
above 0°C (32°F).
If the heating/defogging
mode is selected while the
recirculation feature is on,
the recirculation feature
will automatically turn off.
If the recirculation button is
pressed while the heating/
defogging mode is active,
the recirculation feature
will run for ten minutes and
turn off automatically.
Some air will continue to flow
through the outboard instrument
panel outlets no matter which
mode is chosen. If you do not
want air to flow from these outlets,
close the outlets.
See "Air Outlets" later in this
section.
Recirculation
Press the recirculation button to
recirculate the air in your vehicle.
This is useful for keeping dust and
odors out or when quick cooling is
desired.
This function will not work in
conjunction with a defrosting
mode.
If the heating/defogging mode is
selected while the recirculation
feature is on, the recirculation
feature will automatically turn off.
. . . 98
Page 99

AKENG45_STS Page 99 Monday, April 28, 2008 11:38 AM
Section 1
If the recirculation button is
pressed while the heating/defogging mode is active, the recirculation feature will run for ten
minutes and turn off
automatically.
If the recirculation feature is used
for a long period of time, the air in
the vehicle may become too dry.
Press again to turn off the recirculation feature and circulate
outside air into your vehicle.
Air Conditioning Mode
The air conditioning compressor
cools and dehumidifies the air
inside the vehicle.
Press to manually turn off the air
conditioning compressor.
Press again or press AUTO to
return to automatic operation.
The compressor cannot be turned
off while the system is in defrost
mode.
Defrosting
Press to get fog or ice off the
windshield and side windows.
Most of the air is directed through
the windshield defroster outlets,
with a small amount directed
through the side window defogger outlets.
The fan speed and temperature
may increase.
The A/C compressor will operate
in this mode if the outside temperature is above 0°C (32°F).
The recirculation function cannot
be activated in this mode.
Press the button again to turn this
feature off.
–
99 . . .
Page 100

AKENG45_STS Page 100 Monday, April 28, 2008 11:38 AM
Instrumentation and Controls
Heated Seats (If equipped)
Your vehicle may be equipped
with heated seats.
Use to control this feature.
The switch closest to the driver is
for the driver's seat.
The switch closest to the front
passenger is for the passenger's
seat.
See "Seat Controls" in Section 2 for
more information.
E F II
A H C G D H B
Ventilated Seats (If equipped)
Your vehicle may be equipped
with ventilated seats.
Use to control this feature.
The switch closest to the driver is
for the driver's seat.
The switch closest to the front
passenger is for the passenger's
seat.
See "Seat Controls" in Section 2 for
more information.
. . . 100
 Loading...