

Page 1

2008 Cadillac STS/STS-V Navigation System M
Overview
Overview
Features and Controls
Features and Controls
Navigation Audio System
Navigation Audio System
Voice Recognition
Voice Recognition
........................................................ 1-1
.................................................. 1-2
..................................... 2-1
........................................... 4-1
...................................... 4-2
................................ 2-2
................................ 3-1
............................ 3-2
Vehicle Customization
Vehicle Customization
Phone
Index
............................................................ 6-1
Phone
...................................................... 6-2
................................................................ 1
..................................... 5-1
................................. 5-2
Page 2
GENERAL MOTORS, GM, the GM Emblem, CADILLAC,
the CADILLAC Crest & Wreath, and the name STS are
registered trademarks of General Motors Corporation.
DTS and DTS Digital
Surround are registered
trademarks of Digital
Theater Systems, Inc.
®
Dolby
Laboratories. Dolby®and the double-D symbol
are trademarks of Dolby
is manufactured under license from Dolby
®
Laboratories.
®
The information in this manual supplements the owner
manual. This manual includes the latest information
available at the time it was printed. We reserve the
right to make changes in the product after that
time without notice. For vehicles first sold in Canada,
substitute the name General Motors of Canada Limited
for Cadillac Motor Car Division whenever it appears
in this manual.
Keep this manual with the owner manual in the vehicle,
so it will be there if it is needed. If the vehicle is sold,
leave this manual in the vehicle.
Litho in U.S.A.
Part No. 15905204 A First Printing
ii
©
2007 General Motors Corporation. All Rights Reserved.
Page 3

Canadian Owners
A French language copy of this manual can be
obtained from your dealer/retailer or from:
Helm, Incorporated
P.O. Box 07130
Detroit, MI 48207
1-800-551-4123
www.helminc.com
Propriétaires Canadiens
On peut obtenir un exemplaire de ce guide en français
auprès de concessionnaire ou à l’adresse suivante:
Helm Incorporated
P.O. Box 07130
Detroit, MI 48207
1-800-551-4123
www.helminc.com
iii
Page 4

✍ NOTES
iv
Page 5

Section 1 Overview
Overview .........................................................1-2
Navigation System Overview ............................1-2
Getting Started ...............................................1-4
Cleaning the Display .....................................1-12
1-1
Page 6
Overview
Navigation System Overview
1-2
Page 7

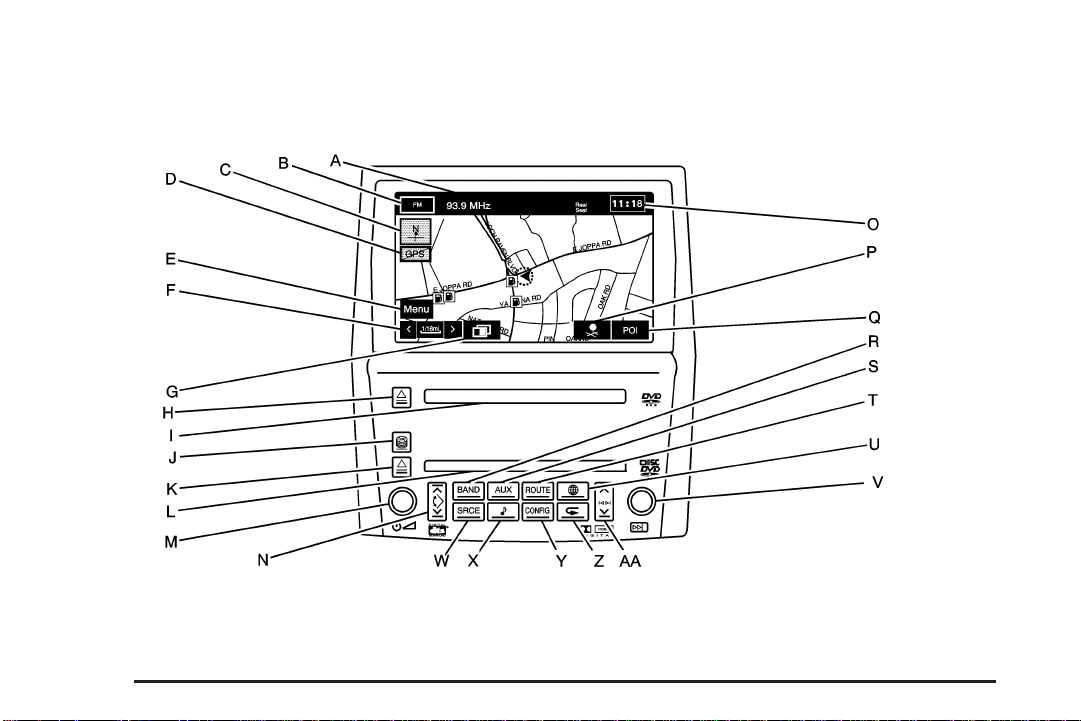
A. Audio Status Line.
B. Audio Source Screen Button. See Navigation Audio
System on page 3-2 for more information.
C. North Up/Heading Up Symbol. See Symbols on
page 2-8 for more information.
D. No GPS Symbol. See Symbols on page 2-8 for more
information.
E. Navigation Menu Symbol. See Navigation Menu on
page 2-19 for more information.
F. Map Scales. See “Map Scales” under Maps on
page 2-4 for more information.
G. Guidance Window Symbol. See Symbols on
page 2-8 for more information.
H.
Z (Map DVD Eject) Key. See “Hard Keys” under
Using the Navigation System on page 2-2 for
more information.
I. Map DVD Loading Slot.
J.
M (CD/DVD Changer Loading) Key. See Six-Disc
CD/DVD Changer on page 3-13 for more information.
Z (CD/DVD Changer Eject) Key. See Six-Disc
K.
CD/DVD Changer on page 3-13 for more information.
L. CD/DVD Changer Loading Slot.
M.
On (Power/Volume) Knob. See “Hard Keys”
under Using the Navigation System on page 2-2 for
more information.
N.
¦m ¥ (Navigation Screen Tilt) Key (in/out). See
“Hard Keys” under Using the Navigation System on
page 2-2 for more information.
O. Clock. See “Clock” under Configure Menu on
page 2-59 for more information.
P. Memory Point Symbol. See Symbols on page 2-8 for
more information.
Q. POI Symbol (Point of Interest). See Symbols on
page 2-8 for more information.
R. BAND Key. See Navigation Audio System on
page 3-2 for more information.
S. AUX (Auxiliary) Key. See “Hard Keys” under Using
the Navigation System on page 2-2 for more
information.
T. ROUTE Key. See Destination on page 2-40 for more
information.
U.
) (Map) Key. See “Hard Keys” under Using the
Navigation System on page 2-2 for more information.
w (Tune) Knob. See Navigation Audio System
V.
on page 3-2 for more information.
W. SRCE (Source) Key. See Navigation Audio System
on page 3-2 for more information.
X.
e (Audio) Key. See Navigation Audio System on
page 3-2 for more information.
1-3
Page 8

Y. CONFIG Key. See Configure Menu on page 2-59 for
more information.
k (Navigation Voice Prompt Repeat) Key. See
Z.
“Hard Keys” under Using the Navigation System on
page 2-2 for more information.
¦tu¥ (Seek/Scan) Key. See Navigation
AA.
Audio System on page 3-2 for more information.
Getting Started
Before you begin to operate the navigation system,
read this manual thoroughly to become familiar with it
and to understand how the system works.
Any route suggestions made by this navigation system
may never override local traffic regulations, your own
judgement, and/or knowledge of safe driving practices.
Disregard route suggestions made by the navigation
system if such suggestions would; cause you to
perform a hazardous or illegal maneuver, place you
in a hazardous situation, or route you into an area
you consider unsafe.
Keeping your mind on the drive is important for safe
driving. See “Defensive Driving” in the Index of your
vehicle’s owner manual for more information. Get familiar
with your vehicle’s navigation system so you can use it
with less effort and take full advantage of its features.
Your navigation system includes not only navigation,
but also audio functions. While your vehicle is parked:
• Familiarize yourself with all of its controls: hard keys
on the faceplate and touch-sensitive screen buttons.
• Familiarize yourself with its operation.
• Set up your audio by presetting your favorite stations,
setting the tone, and adjusting the speakers. Then,
when driving conditions permit, you can tune to your
favorite stations using the presets and steering wheel
controls (if equipped).
• Set up the navigation features that can only be done
before you begin driving, such as entering an
address or a preset destination.
Entering a destination or alphanumeric text requires
many steps, so you can only perform these operations
when the vehicle is in PARK (P). You will notice
that touch-sensitive screen buttons leading to the
alphanumeric keyboard are dimmed out while driving.
Other functions may also be locked out while driving and
they too will appear grayed out on the screen — but
all functions are available when parked. Some functions
can be performed while driving, as long as you can
do so without diverting too much of your attention from
your driving.
1-4
Page 9
{CAUTION:
This system provides you with a far greater
access to audio stations and song listings.
Giving extended attention to entertainment
tasks while driving can cause a crash and you
or others can be injured or killed. Always keep
your eyes on the road and your mind on the
drive — avoid engaging in extended searching
while driving.
{CAUTION:
Looking at the moving map on the navigation
screen frequently or for too long while driving
can cause a crash and you or others can be
injured or killed. Keep your eyes and mind on
the road and avoid looking too long or too
often at the moving map on the navigation
screen. Use the voice guidance directions
whenever possible.
The navigation system allows you to do the following:
• Plan a route with provided turn-by-turn route
and map guidance with voice prompts.
• Select a destination using various methods and
choices.
• Receive broadcast announcements on traffic and
emergency alert communications.
You should always be alert and obey traffic and roadway
laws and instructions, regardless of the guidance from
the navigation system. The navigation system uses
street map information that does not include all traffic
restrictions or the latest road changes, it may suggest
using a road that is now closed for construction or a turn
that is prohibited by signs at the intersection. The
system uses limited information, you must always
evaluate whether following the system’s directions is
safe and legal for the current conditions.
1-5
Page 10
When getting started you may set the navigation system
to your preference or delete information you may
have entered using various options. To do so, reference
the following topics:
• To adjust screen appearance, see “Screen
Appearance” under Configure Menu on page 2-59.
• To adjust the clock and other time options,
see “Clock” under Configure Menu on page 2-59.
• To plan a route, see Destination on page 2-40.
• To adjust the volume of voice guidance prompts or
voice recognition, see “Navigation Set Up” under
Configure Menu on page 2-59.
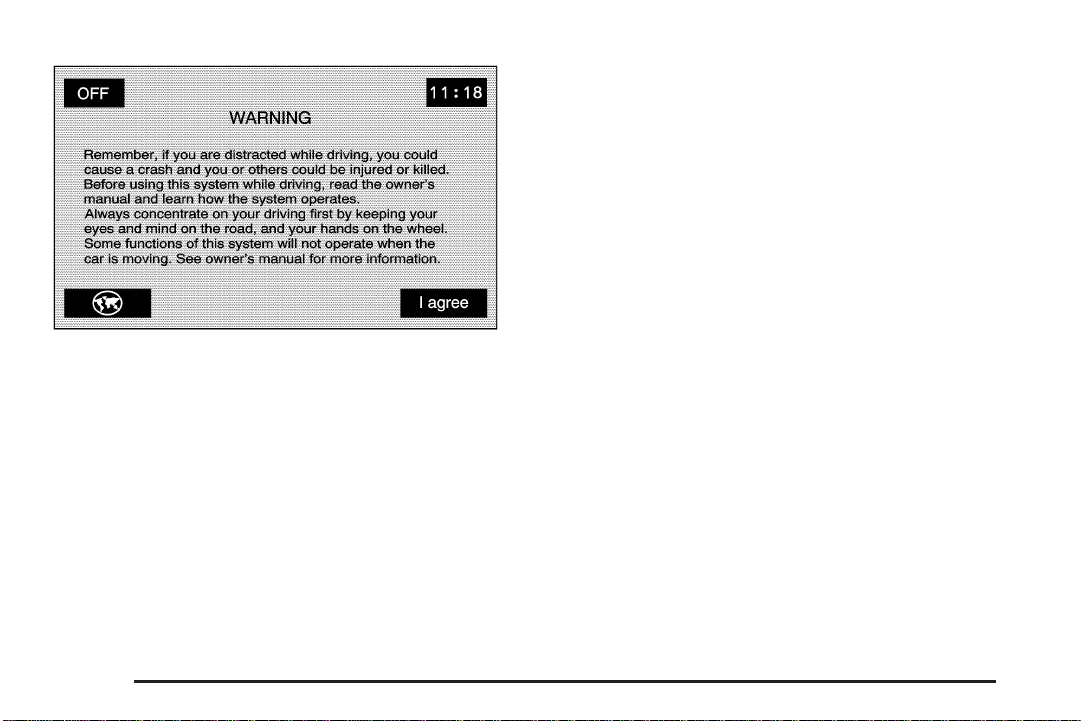
Each time you start your vehicle and turn on the
navigation system by touching the map hard key, you
will see this screen. You can touch I agree to proceed
into the system, or the globe symbol in the lower
left corner of the screen to change the language of
the system. For more information on changing the
language, see Personalization on page 5-2.
1-6
Deleting Personal Information
This navigation system can record and store destinations.
At times, such as when you are disposing of your vehicle,
you may want to delete these destinations. Refer to the
following sections to delete the destination information
that has been stored.
See “Memory Points” under Navigation Menu on
page 2-19 for deleting stored destinations.
Page 11

Storing Radio Station Presets
To set preset radio stations, do the following:
1. Press the power/volume knob to turn the
system on.
2. Press the BAND hard key.
3. Select the desired band (AM, FM1, FM2, XM1,
or XM2 (if equipped)).
4. Seek, scan, or tune to the desired stations
using the seek and scan hard key arrows or
the tuning knob.
5. Press and hold one of the six preset screen
buttons, at the bottom of the screen, until you
hear a beep or see the station displayed on the
selected preset button.
6. Repeat the steps for each preset.
See “Preset Stations” under Navigation Audio System
on page 3-2 for more information.
Setting the Time
To set the time, do the following:
1. Press the power/volume knob to turn the
system on.
2. Press the CONFIG hard key.
3. Press the
4. Select the 12hour or 24hour screen button to
display the time in standard or military time.
5. Select the AM or PM screen buttons.
6. Select the appropriate time zone screen button.
7. Select the Daylight Saving Time screen button,
if necessary.
8. Press and hold the hour and minute arrow buttons
to increase or to decrease the time or press the
GPS TIME screen button to reset radio time to
GPS time.
The radio will use the GPS satellite to set the time.
The vehicle needs to be in an open area to receive
the signal. See “Clock” under Configure Menu on
page 2-59 for more information.
H (clock) screen button.
1-7
Page 12

Setting the Region, Entering an
Address and Point of Interest,
and Storing a Home Destination
and Preset Destinations
Before entering an Address, Point of Interest, Home,
or Preset Destination, select the appropriate region
that contains the final destination. Your vehicle must
be stopped to perform this operation.
Setting the Region
To set the region, do the following:
1. Press the power/volume knob to turn the
system on.
2. Insert the DVD map disc. See “Installing the Map
DVD” under Maps on page 2-4 for more information.
A notice may appear. Touch the I agree screen
button to proceed.
3. Press the ROUTE hard key.
4. Press the Region screen button.
5. Select the appropriate region numbered screen
button that contains your final destination.
The system will return to the DESTINATION ENTRY
screen. See “Region” under Destination on page 2-40
for more information.
Entering an Address
To set a destination by entering a street address,
do the following:
1. Press the power/volume knob to turn the
system on.
2. Insert the DVD map disc. See “Installing the Map
DVD” under Maps on page 2-4 for more information.
A notice may appear. Touch the I agree screen
button to proceed.
3. Press the ROUTE hard key. Verify that the selected
Region is correct.
4. Press the
5. Enter the street name using the alpha keypad on
the screen.
Do not enter directional information or street type,
and use the space symbol screen button (
between street or city names. For example, the
street name N. Royal Oak Rd. should be entered as
royal
button if an incorrect character has been entered.
6. Select the desired street name with the correct
designation (Dr., Ln., St., etc.) from the list.
C Address screen button.
U)
Uoak. Use the backspace (V) screen
1-8
Page 13

7. If there is more than one city, the system will
display the list of cities that have a street with
that name. Select a city from the list.
8. Enter the house number using the numeric keypad
on the screen and touch the OK screen button.
A map screen will appear with the destination
marked.
9. Select the
10. Select the Guide screen button.
11. Once you begin driving you will hear an audio
prompt to “Proceed to the highlighted route.”
You are now in route guidance mode.
See “Address” under Destination on page 2-40 for
more information.
h (destination) symbol screen button.
Entering a Point of Interest (POI)
To set a destination by entering a Point of Interest (POI),
do the following:
1. Press the power/volume knob to turn the
system on.
2. Insert the DVD map disc. See “Installing the Map
DVD” under Maps on page 2-4 for more information.
A notice may appear. Touch the I agree screen
button to proceed.
3. Press the ROUTE hard key. Verify that the selected
Region is correct.
4. Press the
5. Enter the specific title of the POI in the name
space (i.e. Washington Monument) using the
alpha keypad on the screen.
6. Select the POI from the list.
7. If there is more than one city, the system will
display the list of cities that have a street with
that name. Select a city from the list or select the
Input Name screen button to input the city name.
A map screen will appear with the destination
marked.
8. Select the
9. Select the Guide screen button.
10. Once you begin driving you will hear an audio
prompt to “Proceed to the highlighted route.”
You are now in route guidance mode.
Using the Category or City selections will aid the system
in finding your POI by limiting the search options. See
“Point of Interest (POI)” under Destination on page 2-40
for more information.
i (POI) screen button.
h (destination) symbol screen button.
1-9
Page 14

Storing a Home Destination
1. Press the power/volume knob to turn the
system on.
2. Insert the DVD map disc. See “Installing the Map
DVD” under Maps on page 2-4 for more information.
A notice may appear. Touch the I agree screen
button to proceed.
3. Press the
4. Press the Menu screen button from the map
screen.
5. Press the
6. Press the
7. Press the Add screen button.
8. Press the Address screen button and enter all
address information.
9. Press the OK screen button.
The
DESTINATION ENTRY screen. See “Using Your
Home or Preset Destinations” later in this section
for more information.
See “Memory Points” under Navigation Menu on
page 2-19 for more information.
) (map) hard key.
N Memory Points screen button.
L Home screen button.
L Home icon will be highlighted on the
Storing a Preset Destination
1. Press the power/volume knob to turn the
system on.
2. Insert the DVD map disc. See “Installing the Map
DVD” under Maps on page 2-4 for more information.
A notice may appear. Touch the I agree screen
button to proceed.
3. Press the
4. Press the Menu screen button from the map
screen.
5. Press the
6. Press the
7. Press the Add screen button and select the
numbered preset row to store the destination as.
8. Press the Address screen button and enter all
address information.
9. Press the OK screen button.
The numbered preset destination will be
highlighted on the DESTINATION ENTRY screen.
See “Using Your Home or Preset Destinations”
later in this section for more information.
See “Memory Points” under Navigation Menu on
page 2-19 for more information.
) (map) hard key.
N Memory Points screen button.
A Preset Dests. screen button.
1-10
Page 15

Using Your Home or Preset
Destinations
These destinations are available for selection while
driving.
1. Press the power/volume knob to turn the
system on.
2. Insert the DVD map disc. See “Installing the
Map DVD” under Maps on page 2-4 for more
information.
A notice may appear. Touch the I agree screen
button to proceed.
3. Press the ROUTE hard key. Verify that the selected
Region is correct.
4. Select the
preset destination symbols. A map screen will
appear with the destination marked.
5. Select the
L(Home symbol) or one of the available
h (destination) symbol screen button.
6. Select the Guide screen button.
7. Once you begin driving you will hear an audio
prompt to “Proceed to the highlighted route.”
You are now in route guidance mode.
See “Preset Destination” or “Home” under
Destination on page 2-40 for more information.
Canceling Guidance
Guidance will be canceled once you arrive at your
final destination. To cancel guidance prior to arrival at
the final destination, do the following:
1. Press the
2. Press the Menu screen button from the map
screen.
3. Press the
4. Press the Cancel Guidance screen button.
5. Press the Yes screen button to confirm cancellation.
) (map) hard key.
E Change Route screen button.
1-11
Page 16

Guidance Volume
To adjust the volume of voice guidance prompts,
do the following:.
1. Press the CONFIG hard key.
2. Press the
3. Press the
4. Select the desired volume or select Off.
The system will play back the new volume level.
See “Volume” under Configure Menu on page 2-59
for more information.
3 (navigation set up) screen button.
> Volume screen button.
Cleaning the Display
If the panel or the display is stained, wipe it with a dry,
soft cloth, such as a silicon cloth.
Notice: If you use abrasive cleaners when cleaning
glass surfaces, you could scratch the glass.
When cleaning the glass, use only a soft cloth and
do not spray cleaner directly on the system.
Do not apply spray cleaner directly to the system, the
cleaner could affect the mechanical parts.
Do not wipe the panel with a hard cloth or use a volatile
liquid such as thinner or alcohol, it could scratch the
surface or erase the characters.
1-12
Page 17

Section 2 Features and Controls
Features and Controls ......................................2-2
Using the Navigation System ...........................2-2
Maps ............................................................2-4
Symbols ........................................................2-8
Head-Up Display (HUD)
(During Route Guidance) ............................2-18
Navigation Menu ...........................................2-19
Destination ..................................................2-40
Keyless Access System .................................2-57
®
OnStar
System ...........................................2-58
Configure Menu ............................................2-59
Side Blind Zone Alert ....................................2-70
Lane Departure Warning ................................2-72
Global Positioning System (GPS) ....................2-74
Vehicle Positioning ........................................2-75
Problems with Route Guidance .......................2-76
If the System Needs Service ..........................2-77
Ordering Map DVDs ......................................2-77
Database Coverage Explanations ....................2-77
2-1
Page 18

Features and Controls
Using the Navigation System
This section presents basic information you will need to
know to operate the navigation system.
Use the hard keys located on the navigation system
along with the available touch screen buttons on
the navigation screen to operate the system. See
Navigation System Overview on page 1-2 for more
information.
Once the vehicle is moving, various functions will be
disabled to reduce driver distractions.
Hard Keys
The following hard keys are located on the navigation
system:
Z(Map DVD Eject): Press the eject key located next
to the map DVD loading slot to eject the map DVD.
The map DVD slot is the slot directly below the display
screen.
M(Load): Press the CD/DVD changer loading key to
go to the loading screen and begin loading DVDs or
CDs. See Six-Disc CD/DVD Changer on page 3-13 for
more information.
Z(CD/DVD Eject): Press the eject key next to the
CD/DVD changer loading slot to begin ejecting DVDs or
CDs. See Six-Disc CD/DVD Changer on page 3-13
for more information.
On(Power/Volume): Press the power/volume knob
to turn the audio system on and off. Turn the knob to
increase or decrease the volume to the audio system.
ymz(Tilt): Press the up arrow on the tilt key to
tilt the navigation screen forward. Press the down arrow
on the tilt key to tilt the screen rearward. There are
three tilt positions to choose from.
BAND: Press the BAND key to access the audio
source screen. The press the BAND key to toggle
among the bands available, FM, AM, XM (if equipped),
and WX (weather). See Navigation Audio System on
page 3-2.
SRCE (Source): Press the source key to switch
between the audio sources. Pressing this key will switch
between the radio and the CD/DVD player. See
Navigation Audio System on page 3-2.
AUX (Auxiliary): Press the AUX key to access screens
from which you will operate Bluetooth
control video input. See Bluetooth®Phone on page 6-2,
®
OnStar
on page 3-26 for more information.
System on page 2-58, and Auxiliary Devices
®
, OnStar®,or
2-2
Page 19

e(Audio): Press the audio key to access the Audio
Adjust screen, to adjust bass, midrange, fade, balance,
and DSP (Digital Signal Processing) settings. See
Navigation Audio System on page 3-2.
ROUTE: Press the ROUTE key to access the
Destination Entry screen or the search area and begin
planning a destination. See Destination on page 2-40.
CONFIG (Configure): Press the CONFIG key to access
the SETTING Function screen. See Configure Menu
on page 2-59.
)(Map): Press the map key to access the map
screen.
k(Navigation Repeat): Press the navigation repeat
key to repeat the last voice guidance prompt, while on
a planned route.
y©¨z(Seek/Scan): Press the seek/scan arrows
to go to the next or previous radio station, or press
and hold to scan stations. See Navigation Audio System
on page 3-2.
w (Tune) Knob: Turn the tune knob to change
frequencies. See Navigation Audio System on page 3-2.
Alpha-Numeric Keypad
Letters of the alphabet, symbols, punctuation, and
numbers will be displayed on the navigation screen as
an alpha or numeric keypad. The alpha keypad will
be displayed when the system needs input of a city or
street name.
All characters are touch-sensitive screen buttons.
Touch a character to select it.
Sym. (Symbol): Touch this screen button to access the
numeric keypad, punctuation marks, and other
characters. There are two pages available. Use the right
and left arrow screen buttons to view the pages.
A - Z (Alphabet): Touch this screen button to display to
the alpha keypad.
Others: Touch this screen button to display special
characters. There are two pages of characters available.
Use the right and left arrow screen buttons to view
the pages.
U (Space): Touch this screen button to enter a
space between characters or the words of a name.
V (Back space): Touch this screen button if
an incorrect character has been selected.
2-3
Page 20
To make name selections easier, the system will only
allow you to select a character which can follow the
last one entered. For example, if a Z is entered, a T will
not be available to select. The system will highlight
the available characters.
If a name is not available after input, it may need to be
inputted differently, the map DVD database may not
contain that information, or the correct search area
has not been selected. See Database Coverage
Explanations on page 2-77 for more information.
Touch-Sensitive Screen Buttons
Touch-sensitive screen buttons are located on the
screen. When a screen button has been selected,
a beep will sound. These buttons will be highlighted
when a feature is available. There are also some
toggle screen buttons that will be light blue when
active and dark blue when inactive.
Maps
This section includes basic information about the map
database.
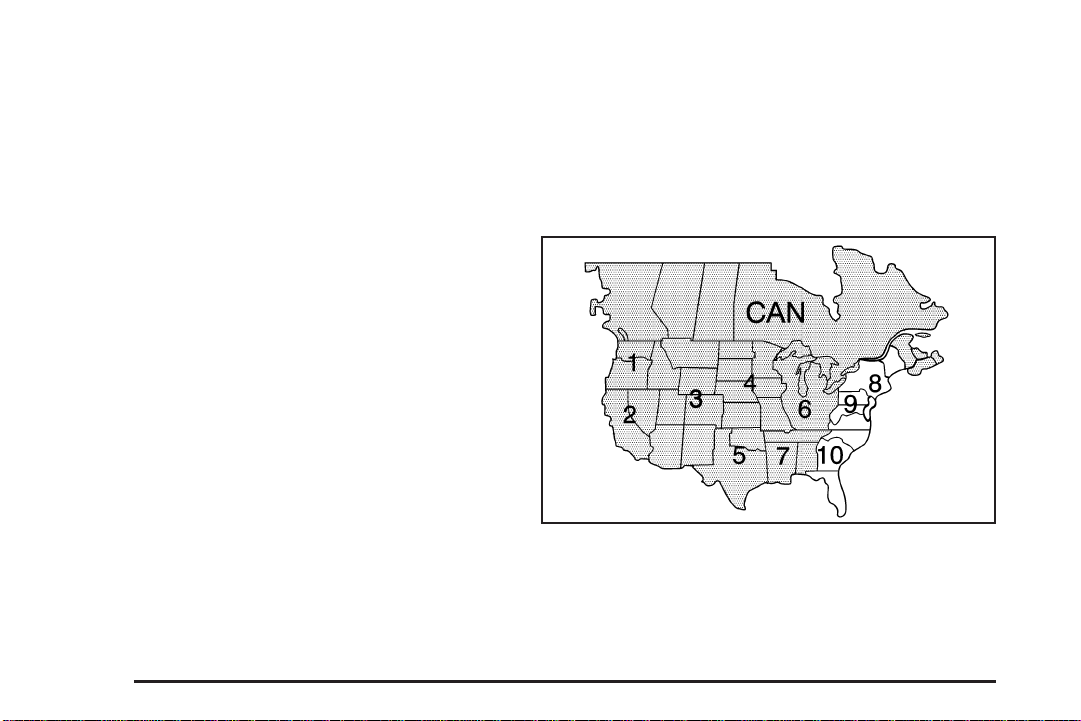
The maps are stored on a DVD-ROM. The 48 contiguous
United States and portions of Canada are contained on
two discs. To minimize the necessity of changing the
discs, both map discs cover US6, US7, and Canada.
West
2-4
Page 21
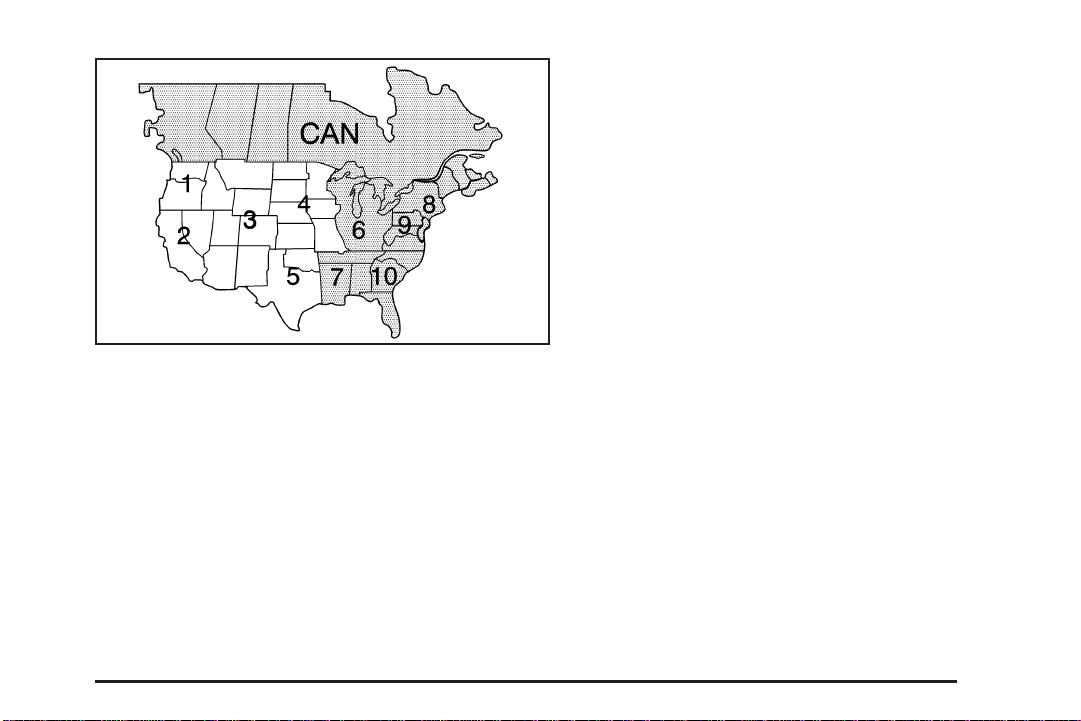
East
Detailed Areas
Road network attributes are contained in the map
database for detailed areas. Attributes include
information such as street names, street address,
turn restrictions, etc. A detailed area will include all
major highways, service roads, and residential roads.
The detailed areas include points of interest (POI)
such as: restaurants, airports, banks, hospitals,
police stations, gas stations, tourist attractions,
historical monuments, etc. The map database may
not include data for newly constructed areas or map
database corrections that are completed after the
production of the disc. The navigation system will
provide full route guidance in the detailed map areas.
Limited Guidance Areas
Any area that is not classified as detailed is a limited
guidance area. Limited guidance streets will be
displayed on the map display but route guidance may
not be given on these streets. Some POI categories,
such as the city center POI category, and some street
addresses are included in the limited guidance areas.
The navigation system will inform you by voice prompts
when you are traveling into a limited guidance area
where route guidance will not be available. The street
maps and the directional arrow displayed on the
navigation system can then be used to determine the
remaining route to your destination.
2-5
Page 22

Installing the DVD Map Disc
Your dealer/retailer may have installed the map DVD.
If the map DVD was not installed, do the following
to load it:
Read the following steps completely before operating
this feature.
1. Turn the ignition on.
2. Load the map DVD into the slot, located just
below the navigation system screen, by inserting
it partially until the system pulls it in.
Once the map DVD is inserted correctly, you will
have the following two choices:
I agree: Touch this screen button to proceed to
the navigation system.
^(Language): Touch this screen button to
change the language of the navigation system,
Driver Information Center (DIC), Head-Up Display
(HUD), etc. See “Language” under Personalization
on page 5-2 for more information.
Once a language has been selected, touch I agree
to enter the navigation system. The map will appear
showing your current vehicle position.
DVD Map Disc Messages
If an error appears on the display and/or the map disc
comes out, it could be for one of the following reasons:
• If the map disc was installed into the CD slot.
See “Installing the DVD Map Disc” previously.
• It is very hot, when the temperature returns to
normal, the map disc should play.
• You are driving on a very rough road. When the
road becomes smoother, the map disc should play.
• The map disc is dirty, scratched, wet,
or upside down.
If any error occurs repeatedly or if an error cannot
be corrected, contact your dealer/retailer.
Ejecting the DVD Map Disc
When the DVD map disc is not loaded, you will not
be able to use the navigation portion of the system.
Z (Map DVD Eject): Press the eject key, located
next to the map DVD loading slot, to eject the map disc.
Pull the disc out. The map DVD slot is the slot directly
below the display screen.
2-6
Page 23
Handling the DVD Map Disc
When handling the DVD map disc, be careful of the
following:
• Handle the disc very carefully to avoid
contamination or flaws. Signals may not read out
properly if the disc gets contaminated or flawed.
• If the disc gets soiled, use a soft cloth to gently
wipe it out from the center of the disc to the
outside. Do not use photographic record cleaner,
solvents, or other cleaners.
• Do not use the disc to rest on while writing or
drawing using any writing utensil or attach a
seal to any of the sides or the disc.
• Do not keep the disc in direct sunlight,
high temperatures, or humidity.
• After using the disc, place it back into the
original case.
Setting the Search Area
See Destination on page 2-40 for information on
changing the search area.
Map Adjustments
You can adjust the scale of view on the map.
As you drive, the map will scroll automatically based
on the direction you are traveling.
Map Scales
To view a larger or smaller
scale of the map, touch
the map scale arrows.
Change the level of map detail by either zooming in
or zooming out using the arrow screen buttons or
by touching the scale on the bar. The system will adjust
the map accordingly. The scale of a map can range
from 1/32 of a mile (50 m) to 128 miles (256 km).
2-7
Page 24
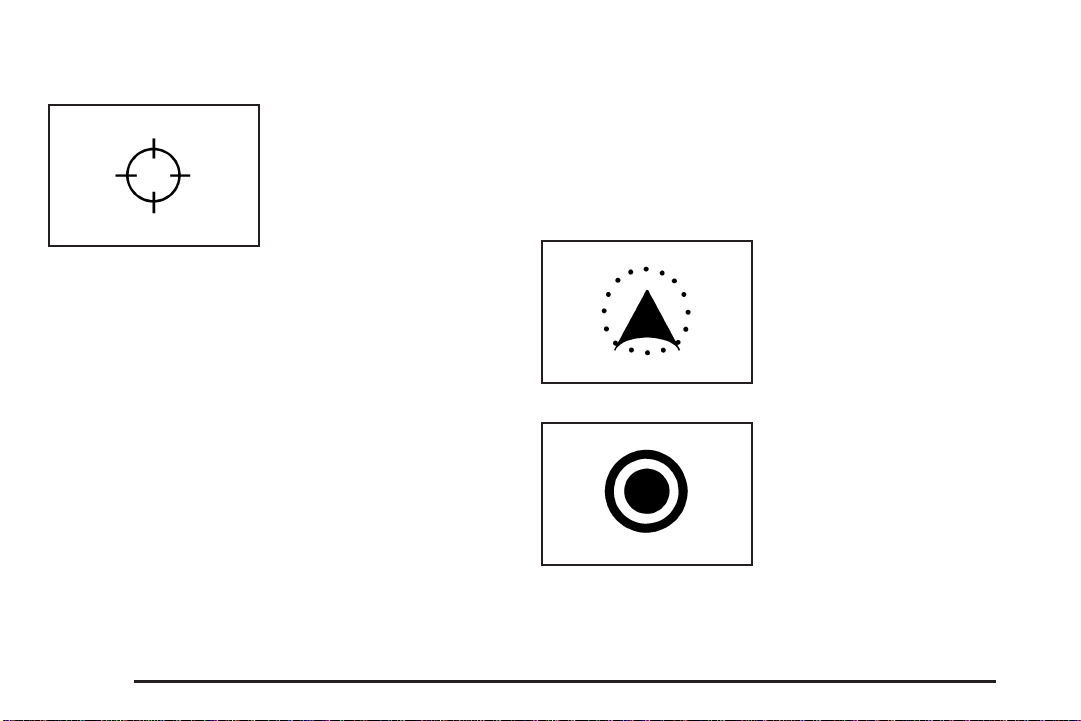
Scrolling the Map
Touch anywhere on the
map screen twice and the
scroll symbol will appear.
Use this feature to
scroll across the map.
Hold your finger in any direction outside of the scroll
symbol and the map will continue to scroll in that direction
until you remove your finger from the map screen.
If scrolling while your vehicle is in PARK (P), the system
will scroll initially at a slower rate. It will increase if
you continue touching the map screen.
If scrolling while your vehicle is in motion, you have
one scroll speed and a limited distance to scroll. Keep
touching the map screen to scroll for a longer distance.
If the scroll feature is used to scroll the map and your
vehicle icon becomes lost, press the map hard key to
return to the current vehicle location on the map.
When scrolling on the map, the system will display the
address of the scroll symbol location and the distance
from your vehicle’s current position to the scroll symbol
location.
Use the scroll feature on the map to set a destination.
See “Map” under Destination on page 2-40 for more
information.
Symbols
The following symbols are the most common symbols
that will appear on a map screen.
Your vehicle is shown as
this symbol. It indicates
the current position
and heading direction of
your vehicle on the map.
The destination symbol
will appear on the map
after a route has been
planned marking your
final destination.
2-8
Page 25
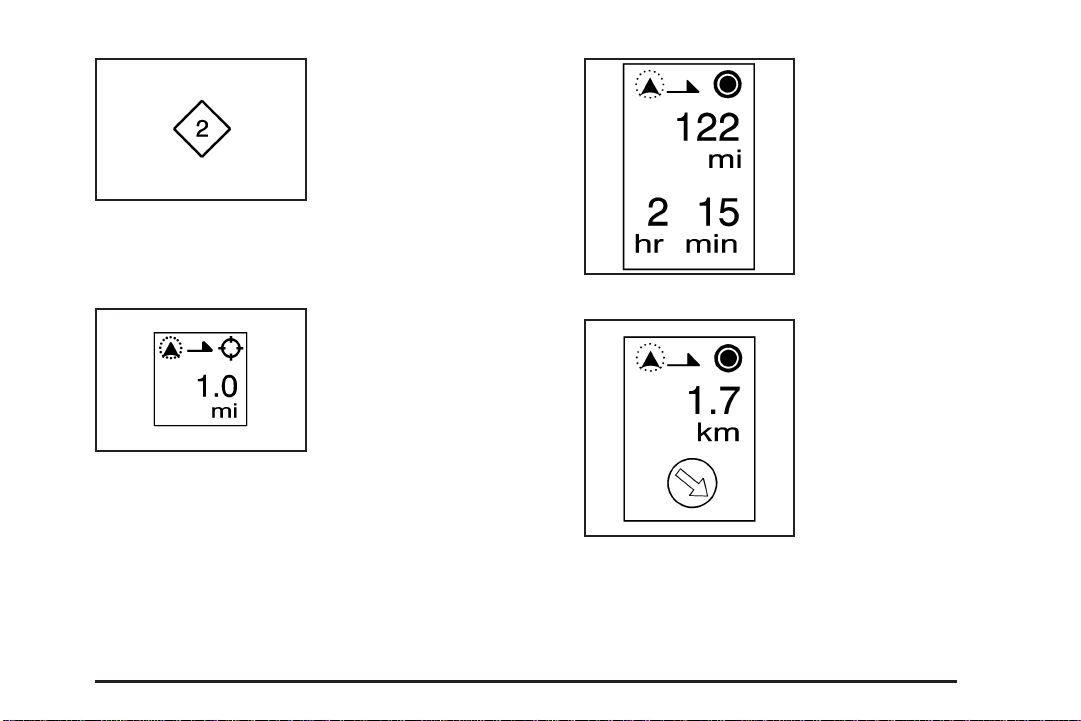
The waypoint symbol will
be displayed on the map
after a waypoint has
been added to your route.
The waypoint symbol will be numbered from
one through five depending on how many waypoints
have been set.
The distance and time
to destination symbol
indicates the distance
and the estimated
time remaining to your
final destination or arrival
time, depending on
the option selected.
See Configure Menu
on page 2-59.
The distance to destination
symbol indicates the
distance to your final
destination. It only appears
when time is not available
or when you are scrolling
on the map.
The straight line to
distance symbol shows
the straight-line distance
to your destination.
This symbol will appear before you start driving on
the route or if you are on a road where navigation
guidance cannot be given.
2-9
Page 26
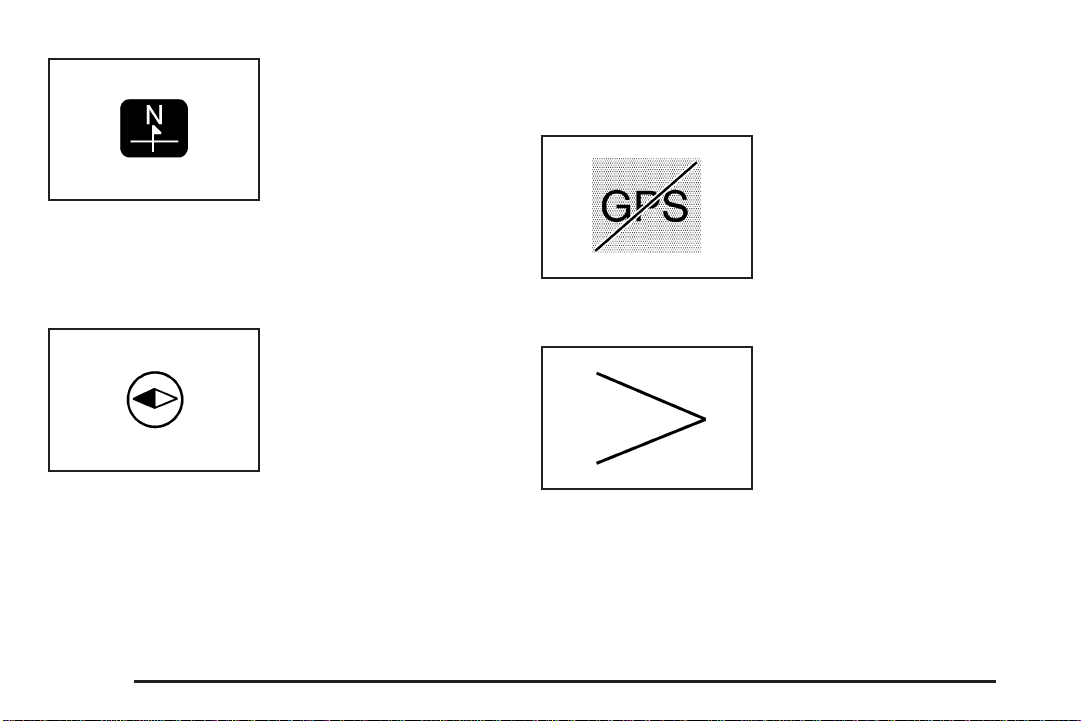
The north up symbol
indicates the map with
North Up, known as
North Up mode.
While in North Up mode, the vehicle icon will follow the
north direction on the map regardless of which direction
the vehicle is traveling. Select this screen symbol to
switch between North Up and Heading Up modes.
The heading up symbol
indicates the map
with the vehicle travel
direction up, known
as Heading Up mode.
The shaded triangle indicates the North direction.
While in Heading Up mode, the direction your vehicle is
traveling will always be at the top of the map screen.
The vehicle icon will always be headed in the direction
your vehicle is traveling. Select this screen symbol
to switch between Heading Up and North Up modes.
The No GPS symbol will
appear when your vehicle
is not receiving a Global
Positioning System (GPS)
satellite signal.
See Global Positioning System (GPS) on page 2-74.
When a name is too
long to be displayed, an
arrow symbol will appear.
Select the right or left
arrow screen button
to scroll through the
entire name.
2-10
Page 27
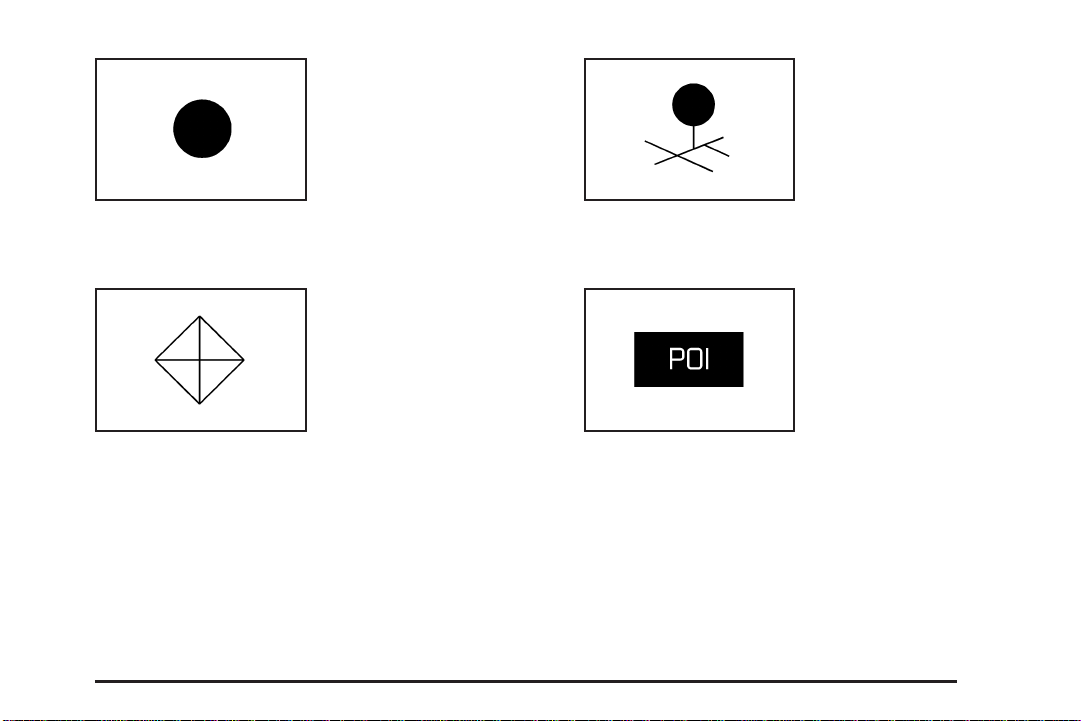
This symbol indicates
the position of the next
guidance maneuver.
Touch anywhere on
the map to display this
button. Select the memory
point symbol to store
the location on the screen
as a memory point.
The following symbols can also be found on
a map screen:
Select the waypoint
symbol to enter a waypoint
along the current route.
This allows you to have
more than one destination
planned at a time.
The system will automatically store the memory point
in the Marked Point folder/category.
Touch anywhere on
the map to display the
Point of Interest (POI)
screen button on the
bottom right corner of
the map screen.
2-11
Page 28
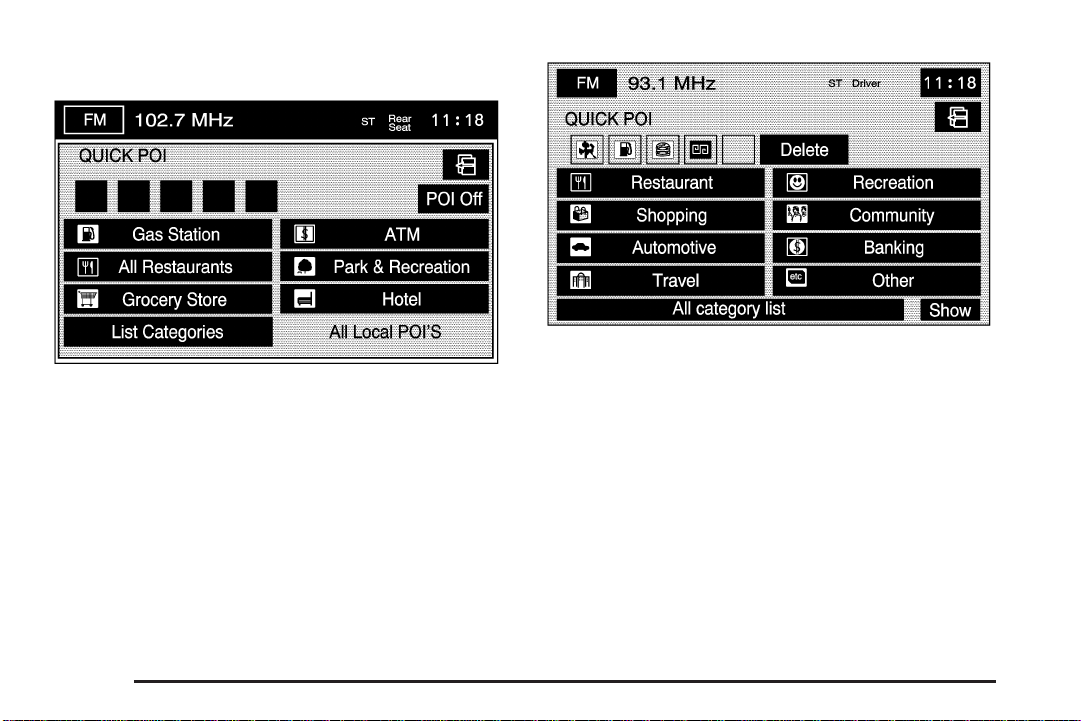
Select the POI screen button to display the following
screen:
Select one of the categories to display or to delete the
POI icons from the map. If the POI icons are currently
displayed on the map, the icons will be deleted from the
map and vice versa.
POI Off: Select this button to remove all of the POI
icons from the map.
List Categories: Select this screen button to display
more POI categories that are not part of the POI
categories listed. The following screen will be displayed
after List Categories has been selected. Then, select
the category and sub-category from the list. To display
the POI type on the map, select the POI or select
the Show screen button.
Show: Select this screen button to update the map
screen and the list, once a category has been selected.
Delete: To delete a category, do one of the following:
• To delete the last added POI category, select
the Delete screen button.
• To delete a specific POI category:
1. Select the category.
2. Select the subcategory that was added.
All Local POI’s: Select this screen button to display the
list of available POIs. This list is based on the added POI
categories. The list will contain the POIs within a 20 mile
(32 km) area from the current position of your vehicle.
2-12
Page 29
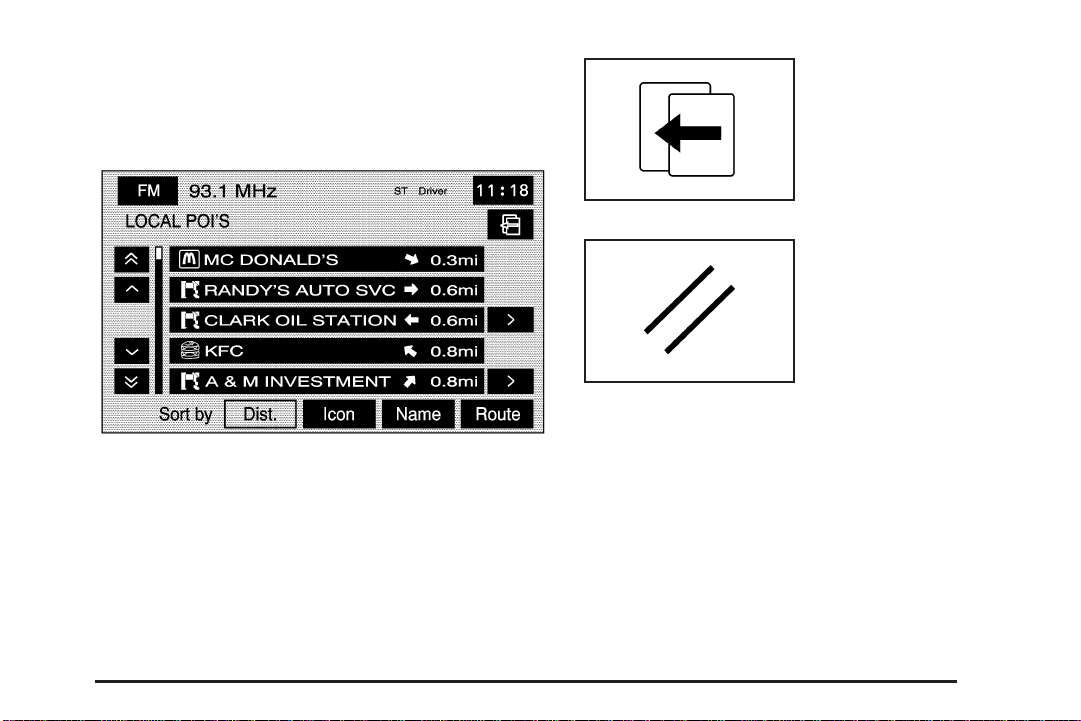
The list provides the POI icon, the name, the direction,
and the distance to the POI from your vehicles current
position. Use the scroll symbols to move up and down
the list. Use the Sort by DIST. (distance), Icon, Name,
and Route as desired.
Once a POI icon has been selected, the scroll symbol
will appear around the POI icon on the map and
the name of the POI will appear on the display.
Select the Info screen button to display more available
information about the specific point.
Select the back screen
button to return to the
previous page.
Select the cancel screen
button to return to the
first menu of the selected
option.
2-13
Page 30
Guidance Windows
Single Map Mode
Select the guidance
window symbol, from
the map, to display
the guidance window
options.
Select from one of the following six options that allow
you different views and information of the map screen.
Availability of these options depends on the current route.
2-14
Select the map view
symbol to display more
of the map with a window
that gives the direction
and distance to the
upcoming maneuver.
Page 31
Dual Map Mode
Turn List Mode
Select the dual view
symbol to display two map
screens that will allow
different scale levels
and heading directions
for each.
Touch anywhere inside the right map to change the
scale level, 2D and 3D view, and to turn the POIs
on and off. To change the heading direction in the
right map, touch the north up or heading up symbol.
Select the turn list
symbol to display the
next three upcoming
maneuvers.
Directional arrows, street name, and distance to the
next turn will be displayed. As you approach the
next turn, the system will automatically display a
zoomed-in view of the upcoming maneuver.
2-15
Page 32
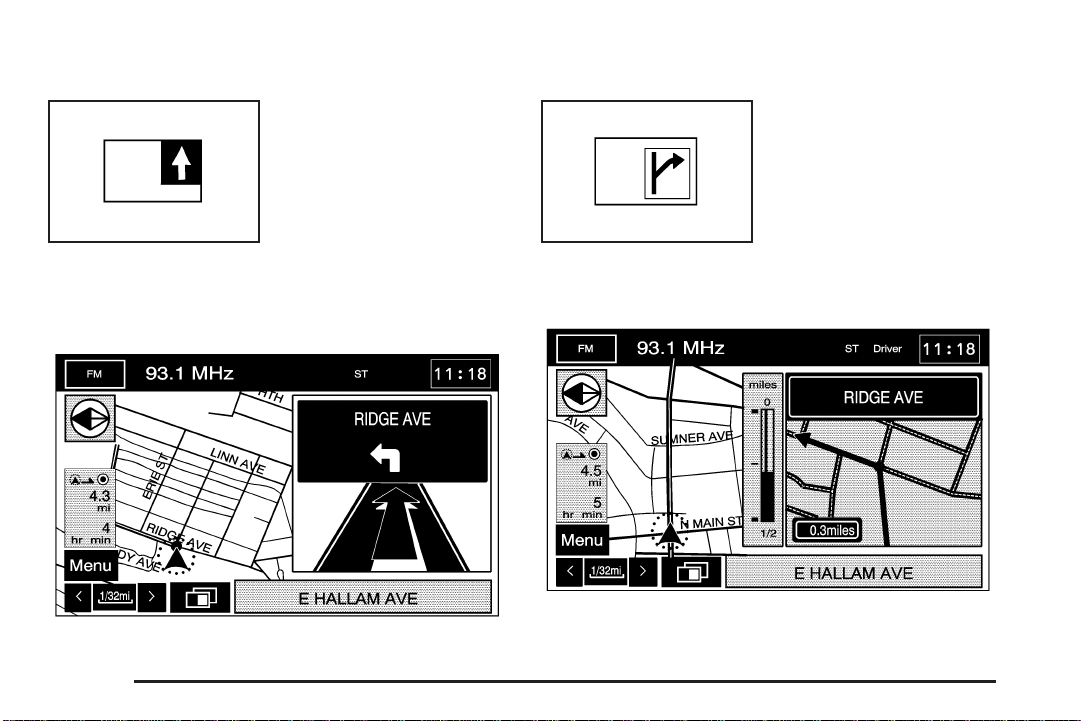
Next Turn Mode
Guidance Screen Mode
Select the arrow guidance
symbol to display the
next turn.
A directional arrow, the street name, and the distance
to the next turn will be displayed. As you approach
the next turn, the system will automatically display a
zoomed-in view of the upcoming maneuver.
2-16
Select the next maneuver
symbol to display only
the next maneuver.
When approaching the next maneuver, the navigation
system will automatically display this guidance window.
Page 33
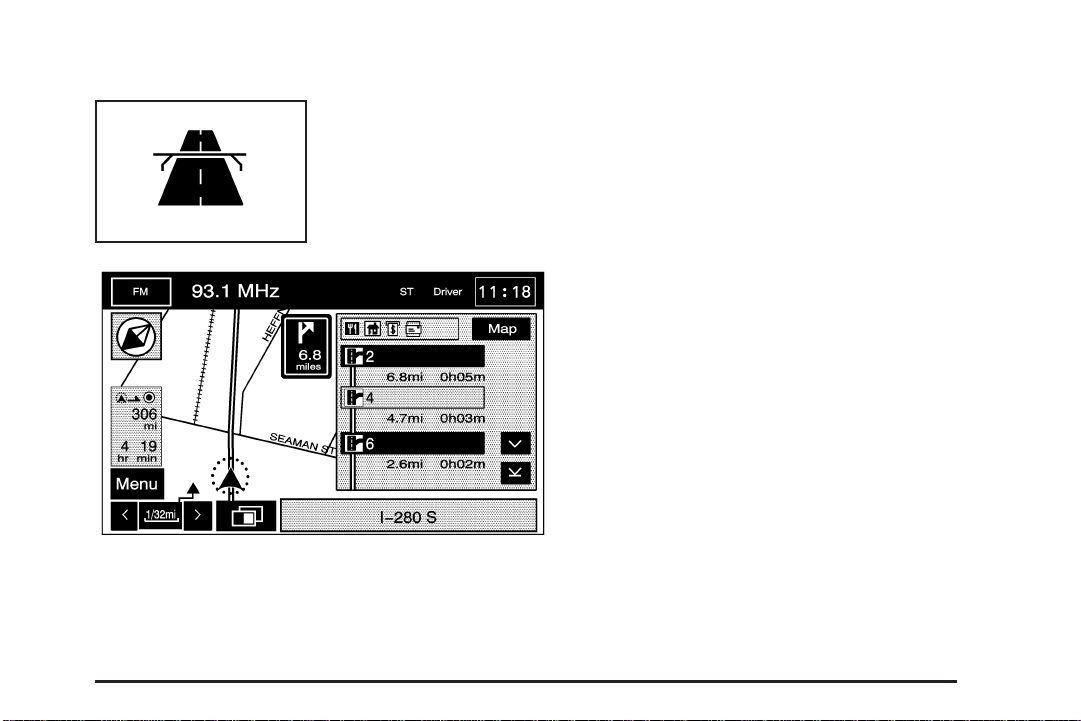
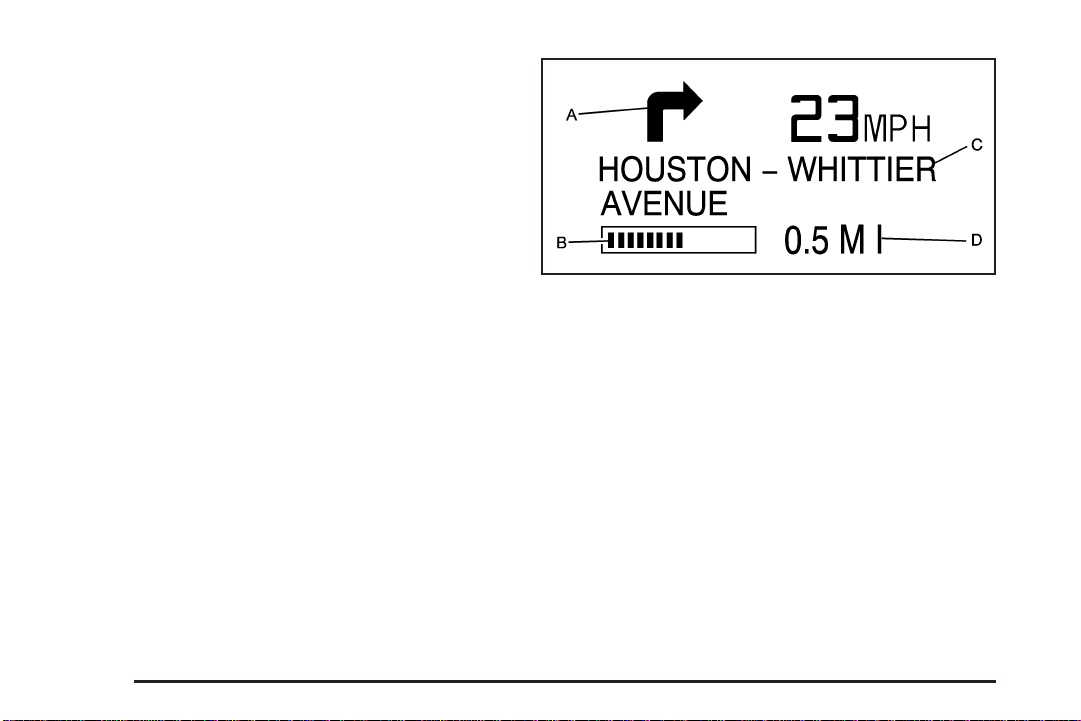
Freeway Mode
Select the highway
guidance symbol to
display the following
information.
The upcoming exit number, distance to the exit,
available POIs at the exit, and a window with direction
and distance to the next maneuver will appear.
Use the up and down arrows to scroll through the
displayed list. To view the available POIs for an exit,
select the exit, then select the Map screen button.
The navigation system will display highway guidance
any time you have a route on a highway or freeway
or you can select the symbol. To turn this feature
off, see “Navigation Set Up” under Configure Menu
on page 2-59.
Auto Reroute
When your destination is set and you are off the
planned route, the system will automatically plan a
new route and begin to reroute. You will see the
new route highlighted on the screen.
2-17
Page 34
Traveling Across Regions
If you plan to drive across many states, you may have
to change the region selected as you travel to your
destination. To do so, do one of the following:
• Change the selected region in the search area as
you get closer to your destination. See Destination
on page 2-40.
• Change the selected region in the search area
when entering your destination and route settings.
See Destination on page 2-40.
For example, if you were traveling from Michigan
to Florida, change the region currently selected
in the search area to Florida. Enter a destination in
Florida under the DESTINATION ENTRY menu.
Head-Up Display (HUD) (During Route Guidance)
When a route is planned the Head-Up Display (HUD)
will display information when the vehicle is approaching
a turn. This information display’s when the vehicle is
0.5 mi (0.80 km) away from a turn in residential areas
and 2.0 mi or 2.0 km away from a turn on freeways.
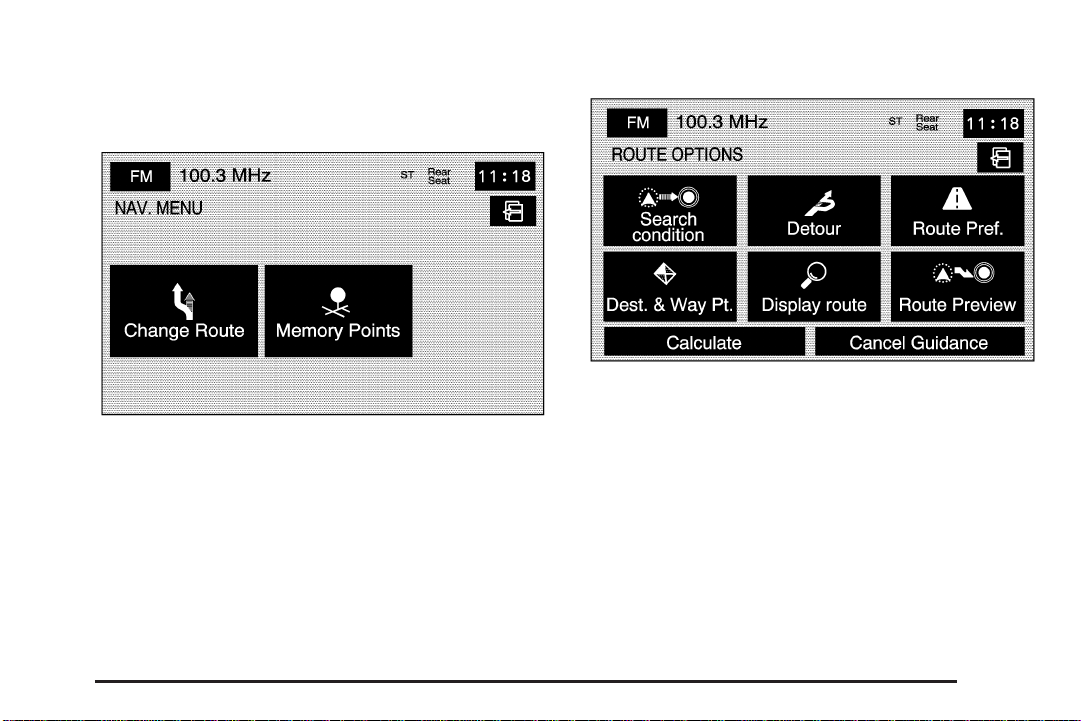
A. Directional Arrow — Displays the direction of
the next turn.
B. Distance Bar — This will decrease as the vehicle
approaches the turn.
C. Street Name Line — Displays the name of the
street that you will be turning on.
D. Mile/Kilometer Scale — Indicates the scale of
the distance bar. The scale is 0.5 mi (0.80 km) in
residential areas and 2.0 mi or 2.0 km on freeways.
This value will not change as you approach the turn.
After completing a turn, the HUD will display the name
and distance of the next street you will be turning on for
10 seconds. See Head-Up Display (HUD) in the Index
of your vehicle’s owner manual for more information.
2-18
Page 35
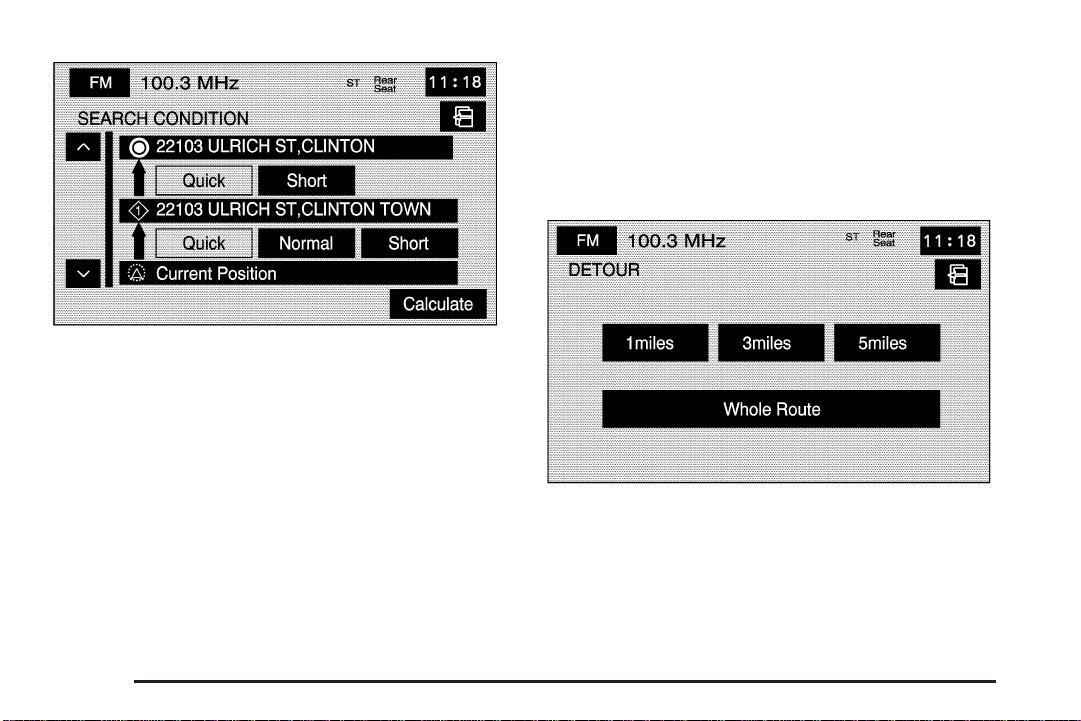
Navigation Menu
Select the Menu screen button, from the map screen,
to access the NAV. (Navigation) MENU.
From the NAV. MENU, select Change Route or
Memory Points.
Change Route
Select Change Route to access the ROUTE OPTIONS
menu. The availability of these screens depends on
if a route is planned or if you are driving a route. You
can perform the following functions from this menu:
H Search Condition
Select this screen button from the ROUTE OPTIONS
screen to access the SEARCH CONDITION screen.
2-19
Page 36
The search condition screen allows you to view your
current destination and to change the planning methods
between each destination. Each distance between
waypoints and final destination can have an individual
setting.
y / z(Scroll Arrows): Use the up and down arrows
to scroll through your route.
Quick/Normal/Short: Select one of the route
preference options to change the planning method.
Calculate: After selecting the new methods, select
Calculate to plan the route with the changes.
The map screen will display.
% Detour
Select this screen button from the ROUTE OPTIONS
screen to access the DETOUR screen.
From this screen, choose to detour 1 mile, 3 miles,
or 5 miles around the current route. You can detour the
whole route if necessary. This option is only available
while you are driving on a planned route.
2-20
Page 37
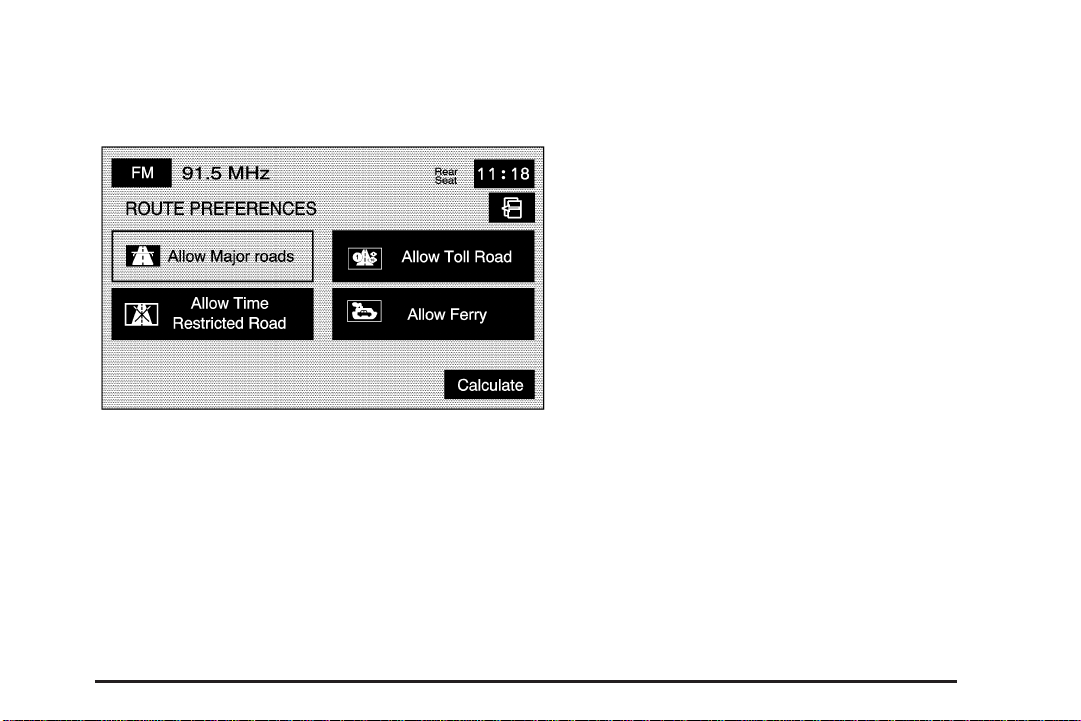
F Route Pref. (Route Preferences)
Select this screen button from the ROUTE OPTIONS
screen to access the ROUTE PREFERENCES screen.
c (Allow Major Roads): This feature allows the
system to use major roads when calculating a route.
l (Allow Time Restricted Road): This feature allows
the system to use time restricted roads when
calculating a route.
W (Allow Toll Road): This feature allows the system
to use toll roads when calculating a route.
b (Allow Ferry): This feature allows the system to
use ferries when calculating a route.
Touch any of the following options to turn them on and
off. The system will use the selected settings to plan
the route. The selected route preference settings
will appear when planning a route.
Calculate/
calculate the route if a destination has been inputted.
W (Back): Select either screen button to
2-21
Page 38
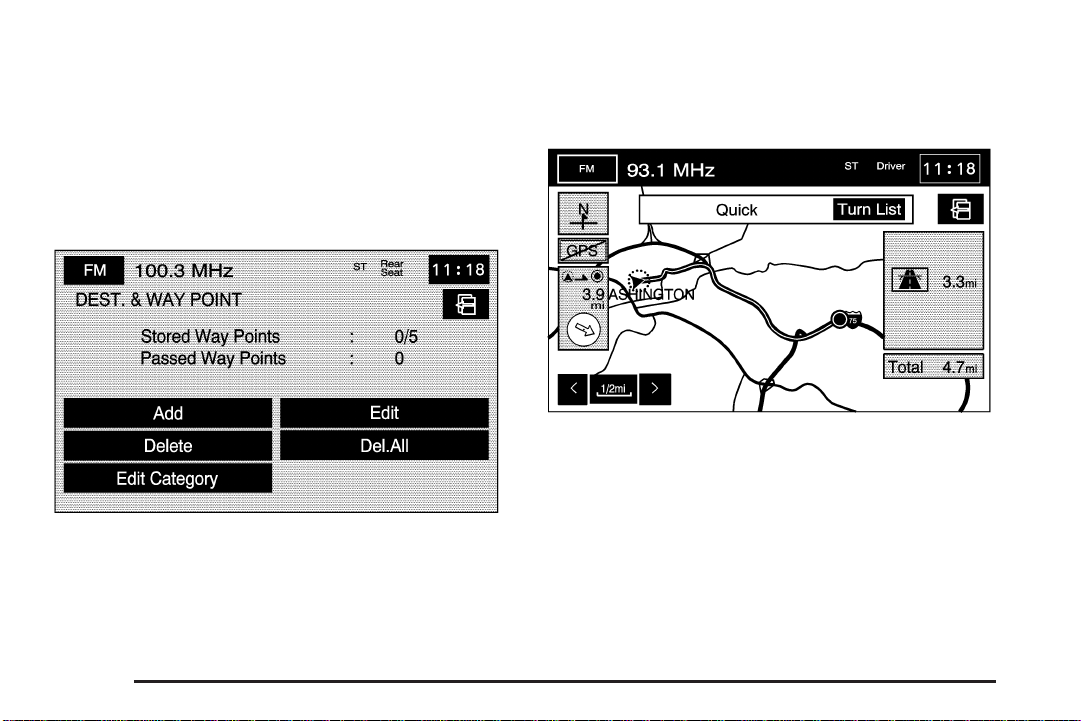
o Dest. & Way Pt. (Destination and Way Point)
Select this screen button from the ROUTE OPTIONS
screen to access the DEST. & WAY POINT screen.
Use this screen to plan a destination with way points.
Five way points and one destination can be entered.
See Dest. & Way Pt. under “Memory Points” later in
this section for more information on how to add,
edit, and delete.
Add: Select this button to add a waypoint or to change
the destination.
Edit: Select this button to change the order of the stops
in the route and to change the location of the stops.
Delete/Del. All: These buttons allow you to delete
waypoints on the route or to delete the entire route.
9 Display route
Select this screen button from the ROUTE OPTIONS
screen to view the entire planned route on the map
screen.
2-22
Page 39
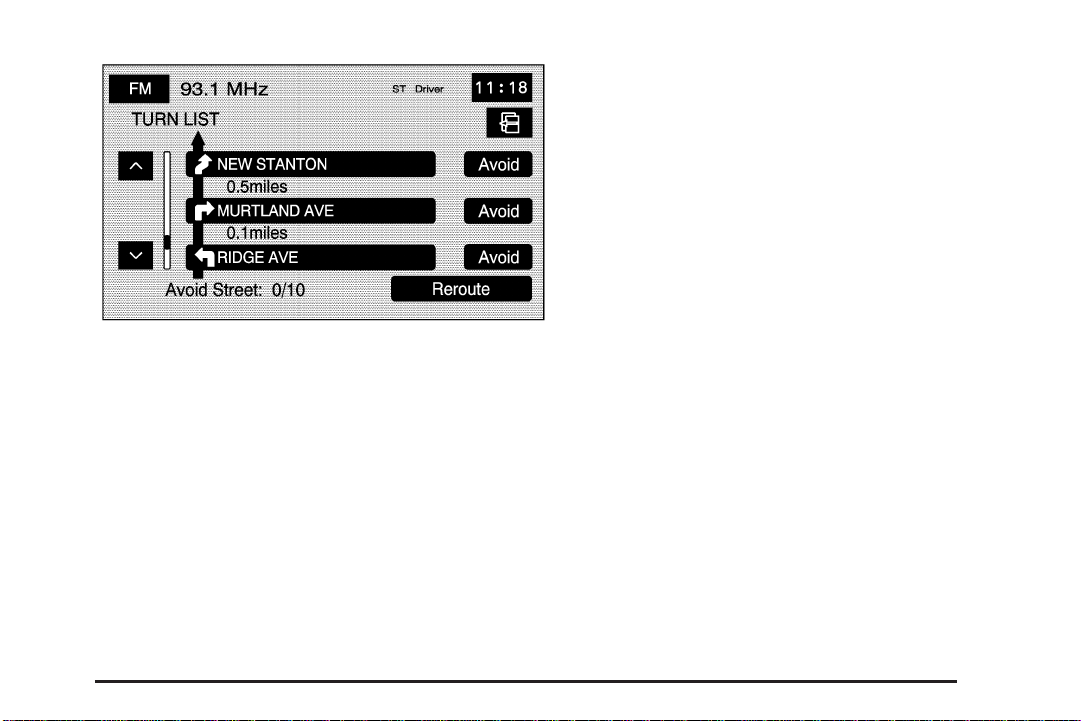
Turn List: Select this screen button to view or to edit
the list of upcoming maneuvers for the entire route. A list
of every turn on the route will display. With the turn
list displayed, you can select to avoid streets/turns on
the route.
y / z (Scroll Arrows): Select the up and down arrow
screen buttons to scroll through the list of maneuvers.
Avoid: To avoid a street, select the Avoid screen button
next to the turn. To cancel the avoided turn, select
Avoid again to deselect it.
Reroute/
calculate the route based on the selected avoided
maneuvers.
Delete: Press this screen button to cancel an avoided
turn after the route has been replanned. A list of all
of the avoided turns will display. Select the street that
you want to add back to the route. A confirmation
window will display. Select Yes to have the avoided
street added back to the route. The Turn List screen
will display.
Del. All (Delete All): Press this button to cancel all of
the avoided turns after the route has been replanned.
A list of all of the avoided turns will display. Select
the Del. All screen button. A confirmation window
will display. Select Yes to have all of the avoided
streets added back to the route. The Turn List screen
will display.
W (Back): Select either screen button to
G Route Preview
Select this screen button from the ROUTE OPTIONS
screen to access the route preview screen.
From this screen, you can preview the entire route in
either direction, as well as edit the route.
2-23
Page 40
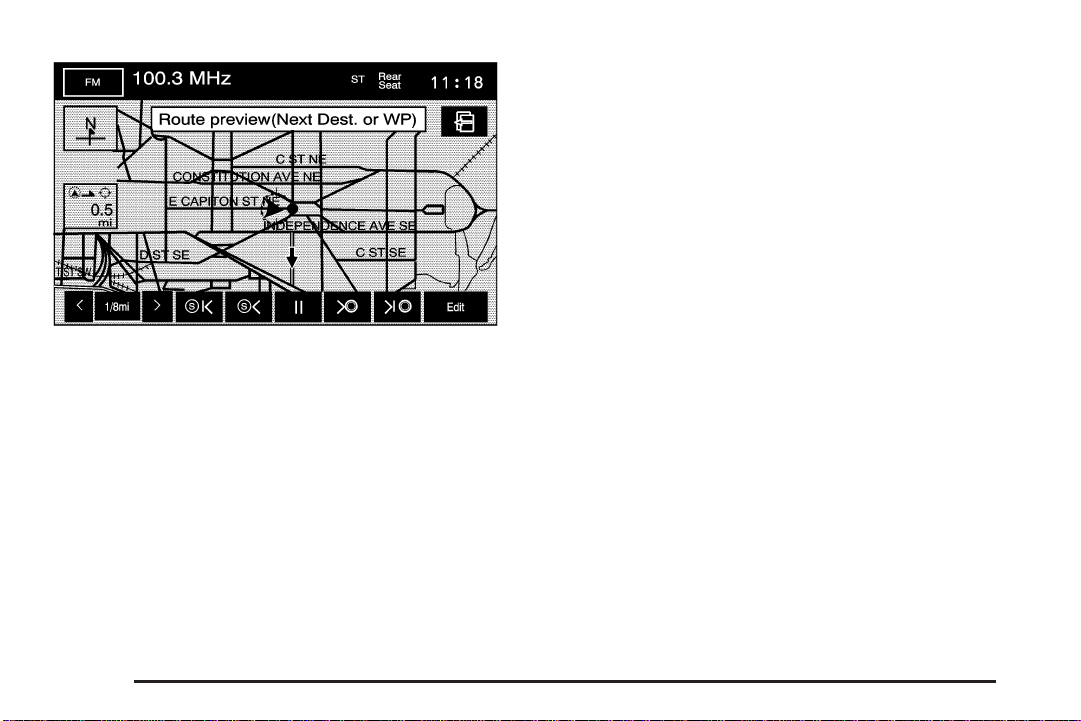
Use the screen buttons at the bottom of the screen to
move forward or backward through the route.
bs (Skip to Start): Select this screen button to
skip to the starting position, previous way point,
or previous POI depending on the mode selected.
bS / b { (Scroll to Start): Select this screen
button to scroll to the starting position, previous
way point, or previous POI depending on the mode
selected. This button will toggle between slow and
fast speed.
j (Pause): Select this screen button to pause the
route preview.
Th / | h (Scroll to Destination): Select this
screen button to scroll to the destination, next way point,
or next POI depending on the mode selected. This
button will toggle between slow and fast speed.
th (Skip to Destination): Select this screen button
to skip to the destination, next way point, or next
POI depending on the mode selected.
Info (Information): When the skip/scroll functions
are used and the cursor stops at a POI, this screen
button will appear. Press this screen button to provide
information regarding the POI; name, address, city,
and phone number.
Edit: Select this screen button to change the way the
skip/scroll functions operate. You can select to have
the skip/scroll go to the start point/destination or to the
next available POI or waypoint.
2-24
Page 41
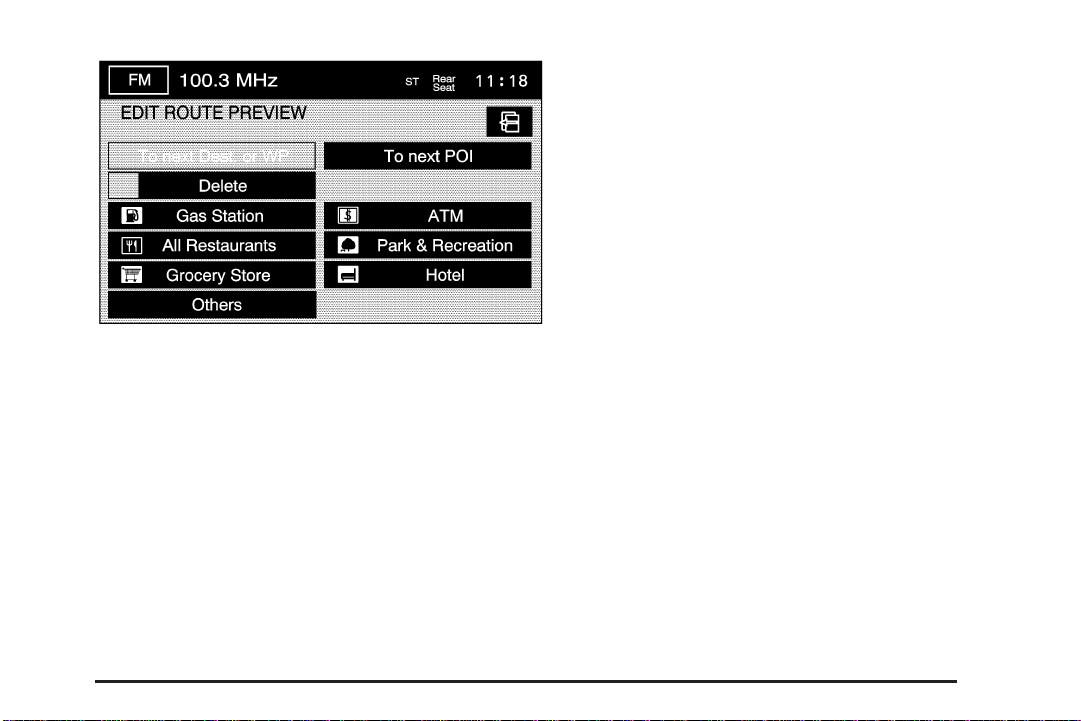
To next Dest. (destination) and WP (waypoint):
Selecting this option will cause the skip/scroll function
to skip/scroll to the next destination or waypoint.
To next POI: To make this button available, a POI
category must be selected. Select this option to
skip/scroll to the next available POI, on the route,
for the chosen category.
Delete: Select this screen button to delete the selected
POI category.
Category Selection: Select one of the categories from
the list to add or replace the current POI category.
Calculate
Select this screen button, from the ROUTE OPTIONS
screen, to calculate your route, after any changes
have been made.
Cancel Guidance
Select this screen button to cancel the current set
destination. A confirmation window will display.
Select Yes to cancel the destination; select No to
continue on the current route.
2-25
Page 42
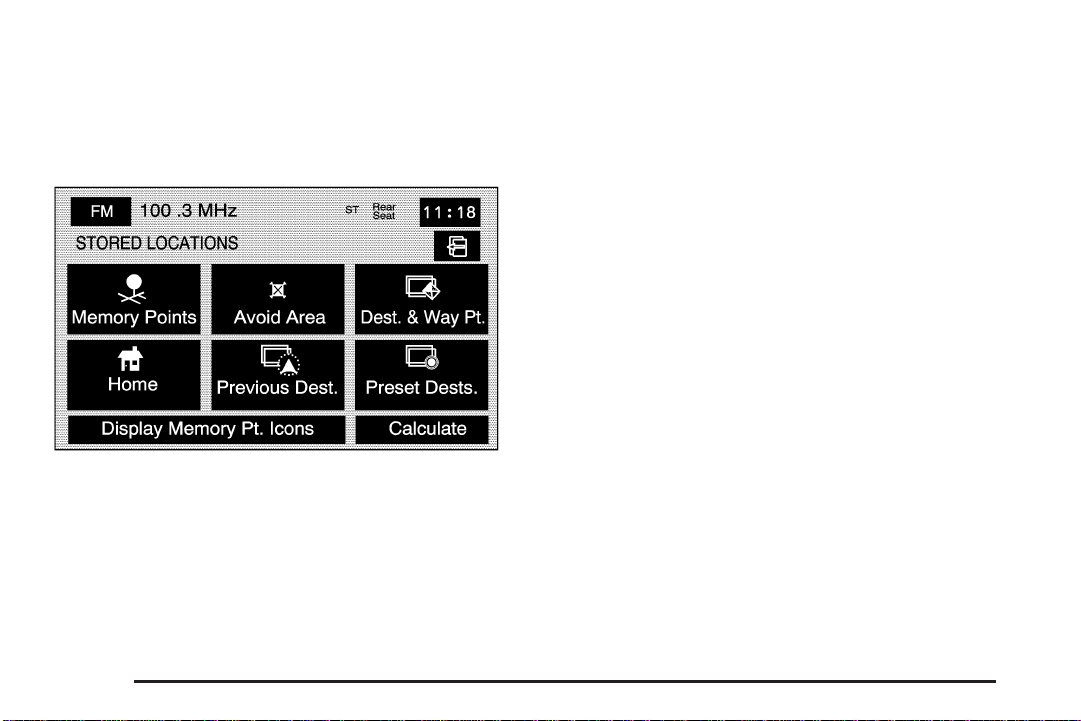
Memory Points
Selecting Memory Points from the NAV. MENU will take
you to the STORED LOCATIONS screen. From the
STORED LOCATIONS screen, you can access
the following options:
N Memory Points
Select this screen button from the STORED LOCATIONS
screen to access the MEMORY POINTS screen.
This feature allows you the ability to store memory
points. Storing memory points makes these points
easily available to set as a destination. See “Memory
Points” under Destination on page 2-40 for more
information. You can store memory points in the
four different categories listed. Once in a folder/category
you can store a point, edit a point, delete a point,
delete all points, or edit a category name. You can
store up to 60 memory points for each driver.
2-26
Page 43
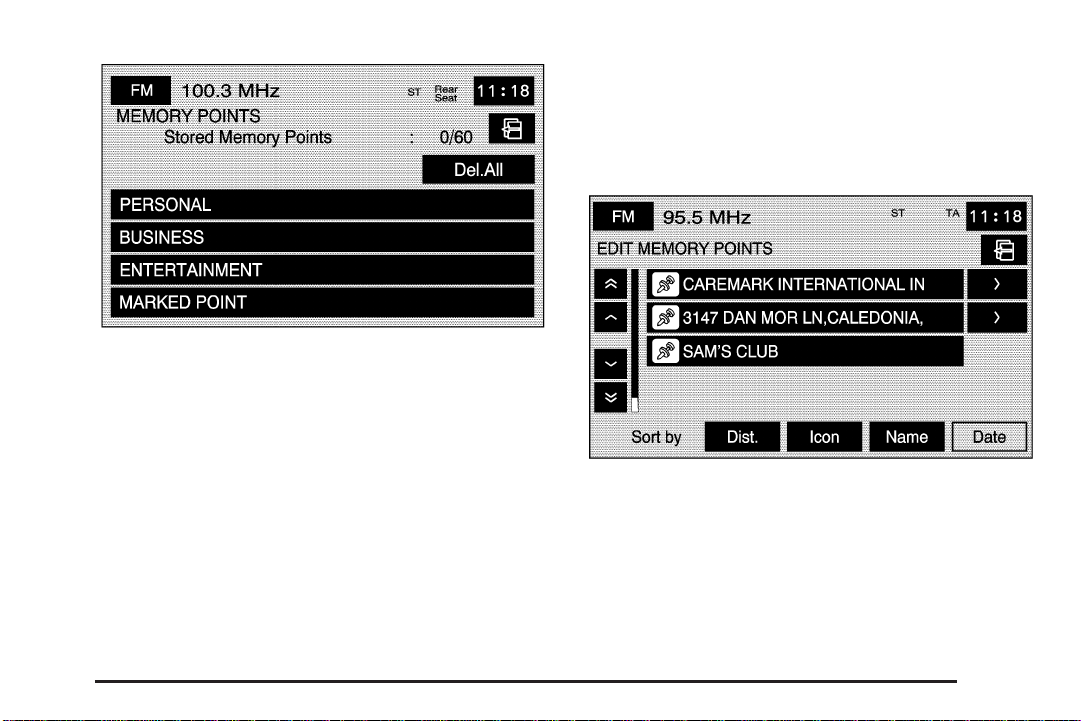
To store a point:
1. Select the Memory Points screen button from
the STORED LOCATIONS screen.
2. Select one of the folders/categories listed.
3. Select Add.
4. Select the desired method of entering a destination
to enter the memory point. See Destination on
page 2-40 for more information. A map screen
will appear displaying the selected memory point
location.
5. If available, touch the INFO button to view the
address information of the selected point.
6. Touch OK to store the point as a memory point.
To edit the name of a stored point:
1. Select the Memory Points screen button from the
STORED LOCATIONS screen.
2. Select one of the folders/categories listed.
3. Select the Edit screen button.
4. Select the memory point from the list.
Use the Dist. (distance), Icon, Name, and Date
screen buttons to change the sort methods.
2-27
Page 44
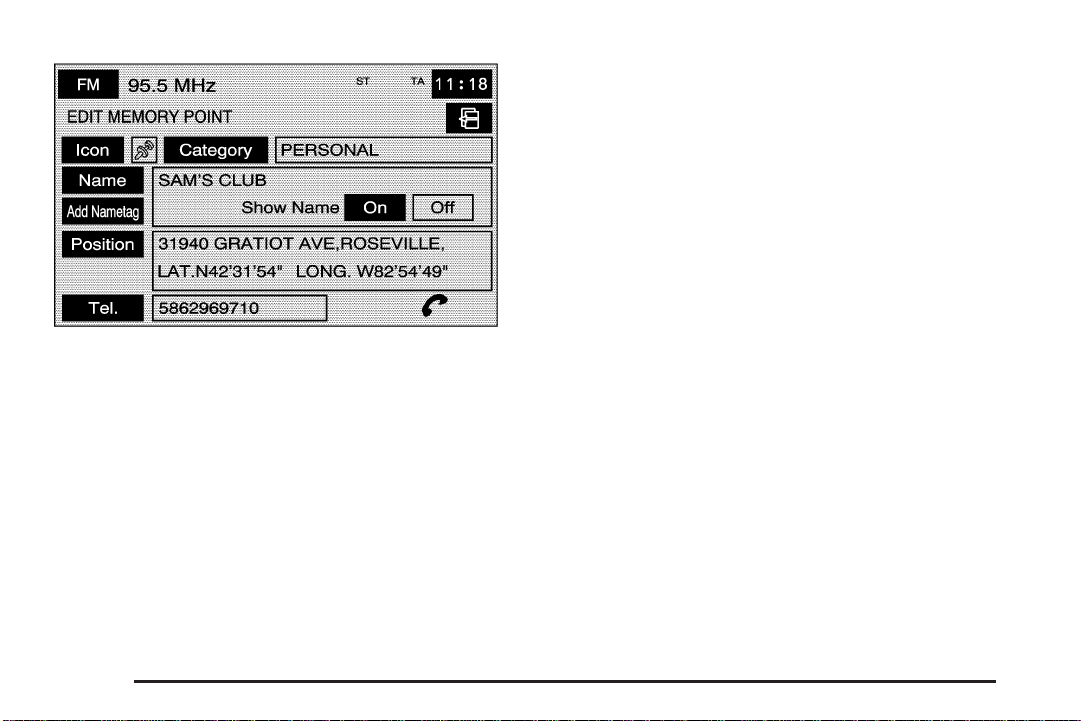
5. Select the Name screen button.
6. Use the backspace screen button to delete the
current name or use the alpha keypad to make
changes.
7. Select the OK screen button to store the change.
You can choose whether or not to have the name
show on the map screen, next to the POI icon,
by selecting the Show Name On or Off screen
buttons.
To move the memory point from one folder/category
to another:
1. Select the Memory Points screen button from
the STORED LOCATIONS screen.
2. Select the folder/category the memory point
is stored in.
3. Select the Edit screen button.
4. Select the memory point that you wish to edit.
5. Select the Category screen button.
6. Select the new folder/category button you want
to move the memory point to.
The system will display a message confirming
the move.
To store the point as a nametag:
1. Select the Memory Points screen button from
the STORED LOCATIONS screen.
2. Select the folder/category the memory point
is stored in.
3. Select the Edit screen button.
4. Select the memory point that you wish to edit.
2-28
Page 45

5. Select the Add Nametag screen button.
6. The system will say “Name please.” State what
you would like to call the memory point.
7. The system will play back what was recorded
and then will ask you to confirm the nametag.
State “Yes“ to confirm the nametag; state “No”
to cancel the nametag and to try again.
You can choose whether or not to have the name show
on the map screen, next to the POI icon, by selecting
the Show Name On or Off screen buttons.
Del Nametag (Delete): Once a nametag has been
added, the Add Nametag screen button will change
to Del Nametag.
To delete a nametag, press the Del Nametag screen
button. The nametag will be automatically deleted
from that memory point.
To modify the position of the stored point:
1. Select the Memory Points screen button from
the STORED LOCATIONS screen.
2. Select the folder/category the memory point
is stored in.
3. Select the Edit screen button.
4. Select the memory point from the list.
5. Select the Position screen button.
6. The system will display the map screen with the
destination marked. Touch the position on the
map to move the memory point to that location.
7. Select the OK screen button when the memory
point has been moved to the appropriate location.
8. The system will return to the EDIT MEMORY POINT
screen and will now display the new address,
longitude, and latitude for the memory point.
To change the icon associated with a memory point:
1. Select the Memory Points screen button from
the STORED LOCATIONS screen.
2. Select the folder/category the memory point
is stored in.
3. Select the Edit screen button.
4. Select the memory point from the list.
5. Select the Icon screen button.
6. Select the desired icon. There are two pages
of icons and a page of icons that have sounds
associated with them.
7. The new icon will be displayed in the EDIT
MEMORY POINT screen, next to the Icon
screen button on the map.
2-29
Page 46
To change the phone number of a memory point:
1. Select the Memory Points screen button from
the STORED LOCATIONS screen.
2. Select the folder/category the memory point
is stored in.
3. Select the Edit screen button.
4. Select the memory point from the list.
5. Select the Tel. (telephone) screen button.
6. Use the numeric keypad to change the
phone number.
7. Select the OK screen button to store the
changed phone number.
To delete a memory point:
1. Select the Memory Points screen button from
the STORED LOCATIONS screen.
2. Select the folder/category the memory point
is stored in.
3. Select the Delete screen button.
4. Select the memory point from the list. Use the
sort feature to sort by distance, icon, name,
or date as needed.
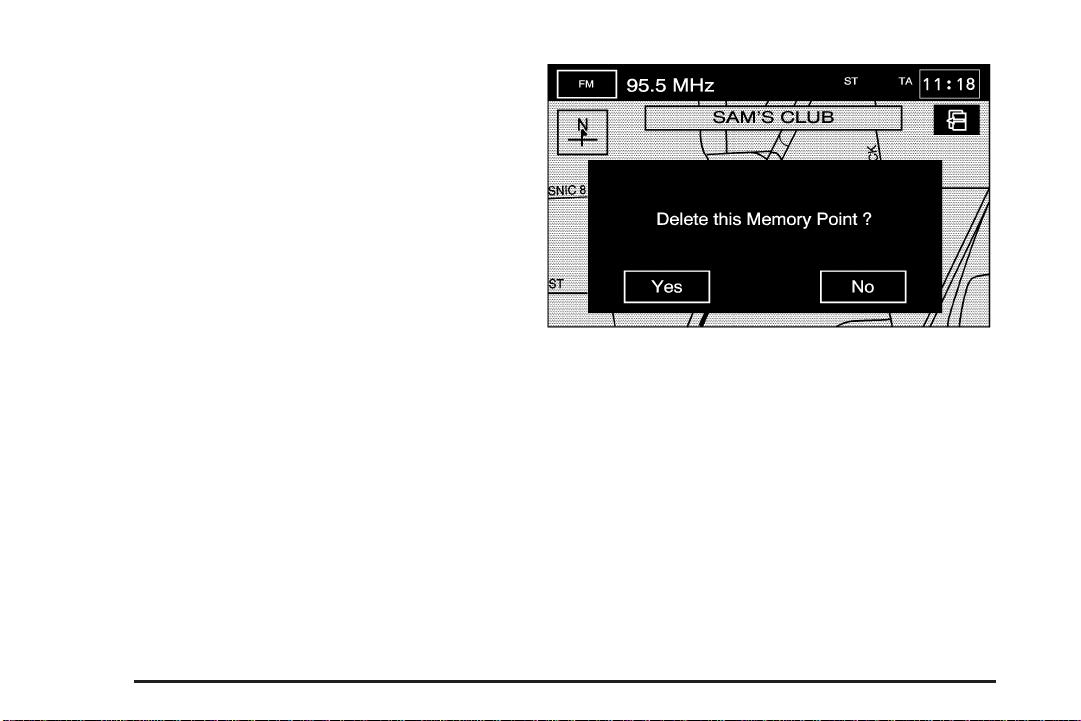
5. The system will show the map screen with the
position address and a pop-up confirmation
message. Select Yes to delete the point;
select No to not delete the point and to return
to the STORED LOCATIONS screen.
To delete all of the memory points in a folder/category:
1. Select the Memory Points screen button from
the STORED LOCATIONS screen.
2. Select the folder/category the memory points
are stored in.
2-30
Page 47
3. Select the Del.All screen button.
4. The system will display a pop-up confirmation
message. Select Yes to delete all the points in
the folder/category; select No to not delete
the points and to return to the DELETE POINTS
screen.
To change the name of the folder/category:
1. Select the Memory Points screen button from
the STORED LOCATIONS screen.
2. Select the folder/category you want to change
the name of.
3. Select the Edit Category screen button.
4. Use the
the displayed name.
5. Use the alpha keypad to input the name of the
folder/category.
6. Select the OK screen button to save your changes.
q (backspace) screen button to delete
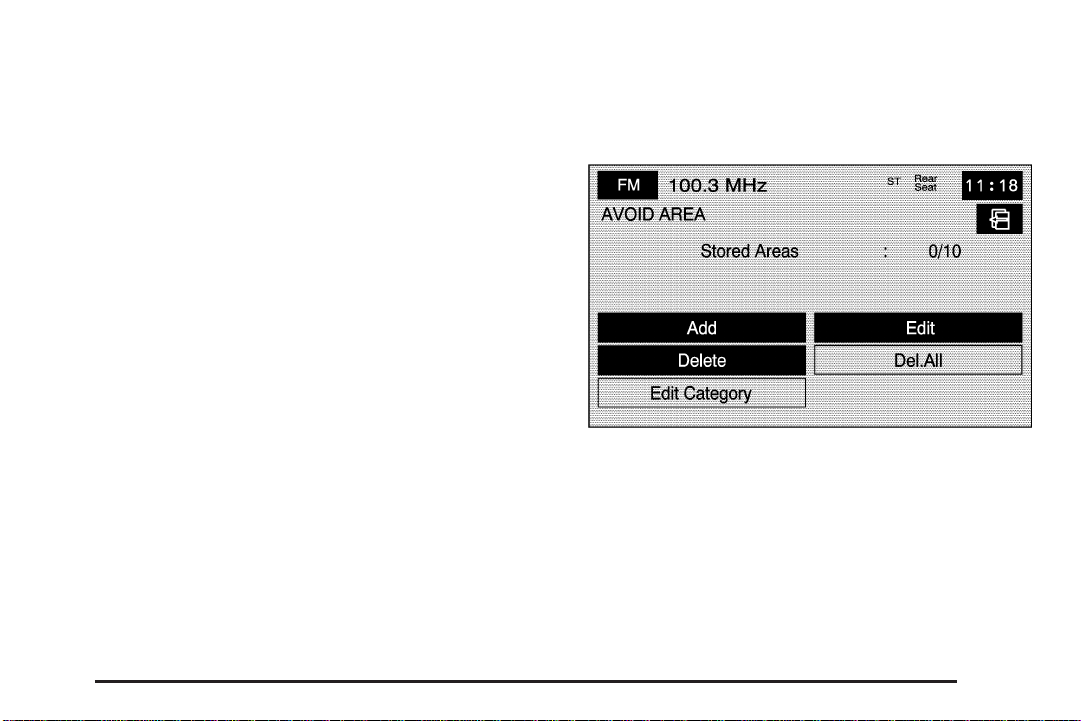
3 Avoid Area
This feature allows you to store or delete an area to be
avoided, while on a planned route. Up to 10 points
can be stored.
To store a point to be avoided:
1. Select the Avoid Area screen button from the
STORED LOCATIONS screen.
2. Select the Add screen button.
2-31
Page 48
3. Select the desired method of entering a destination
to enter the area to be avoided. See Destination on
page 2-40 for more information. A map screen
will appear displaying the selected location.
4. If desired, reduce or enlarge the area around the
point you want to avoid by using the reduce or
enlarge keys.
When avoiding locations on freeways, reduce
the avoid area to the minimum scale. This will
produce an X on the map, rather than a box.
This will ensure that the system knows to avoid
the freeway itself, not the area around the freeway.
5. Select the OK screen button to store the area.
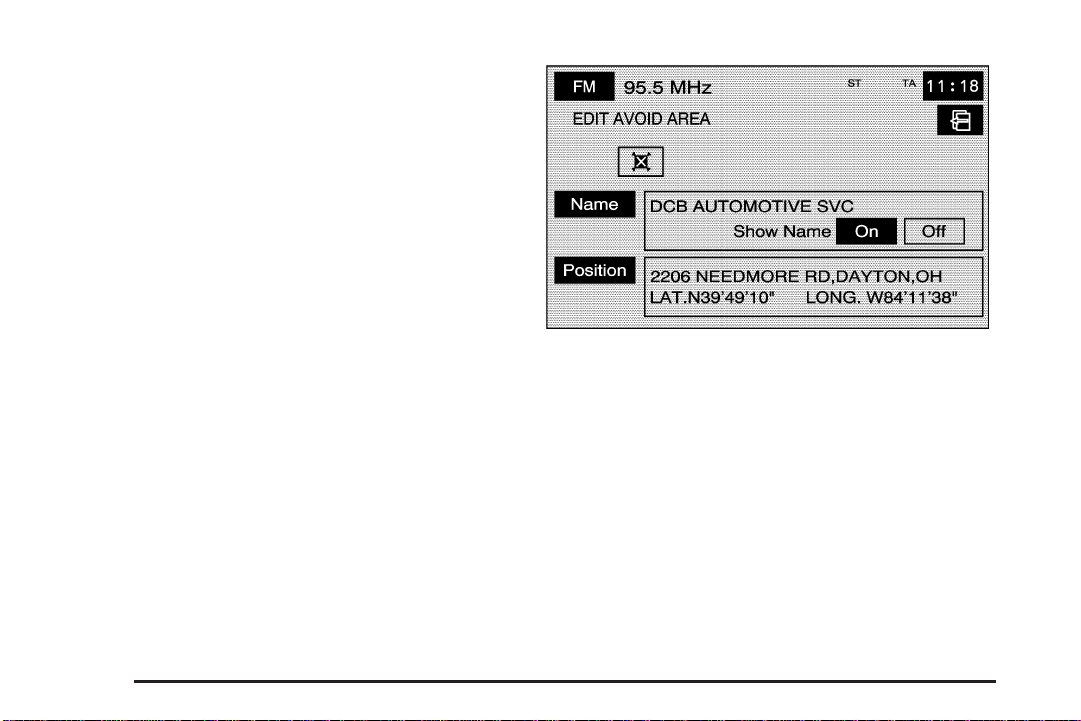
To edit the name of the point to be avoided:
1. Select the Avoid Area screen button from the
STORED LOCATIONS screen.
2. Select the Edit screen button.
3. Select the point to be changed from the list.
4. Select the Name screen button.
5. Use the alpha keypad to add or to change
the name.
2-32
Page 49

6. Select the OK screen button to save your changes.
You can choose whether or not to have the name
show on the map screen, next to the avoided
area, by selecting the Show Name On or Off
screen buttons.
To edit the position of the point to be avoided:
1. Select the Avoid Area screen button from the
STORED LOCATIONS screen.
2. Select the Edit screen button.
3. Select the point to be changed from the list.
4. Select the Position screen button.
5. Select the map to move the location.
6. If desired, reduce or enlarge the area around
the point you want to avoid by using the reduce
or enlarge keys.
7. Select the OK screen button to store the area.
To delete a point to be avoided:
1. Select the Avoid Area screen button from the
STORED LOCATIONS screen.
2. Select the Delete screen button.
3. Select the point you want to delete. Use the
scrolling arrows as needed.
4. The system will display the map screen with the
name of the point and a pop-up confirmation
message. Select Yes to have the point deleted;
select No to not delete the point.
To delete all of the points to be avoided:
1. Select the Avoid Area screen button from the
STORED LOCATIONS screen.
2. Select the Del.All screen button.
3. The system will display a pop-up confirmation
message. Select Yes to have all of the points
deleted; select No to not delete the points and
to return to the AVOID AREA screen.
2-33
Page 50
$ Dest. & Way Pt. (Destination and Way Point)
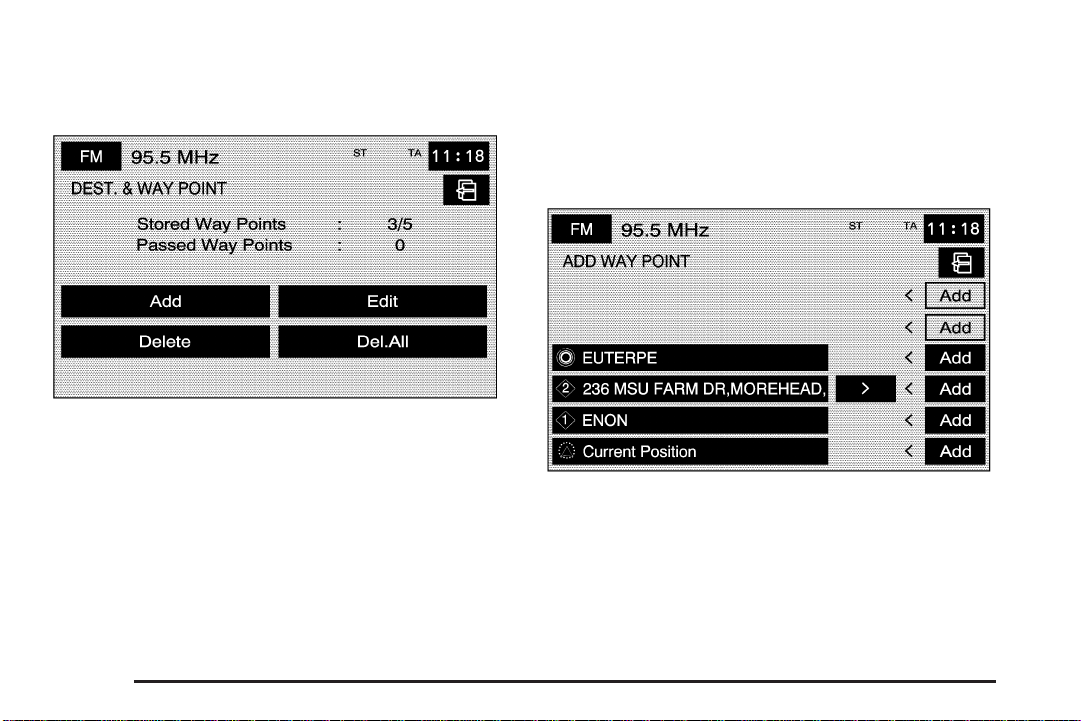
This feature allows you to store, up to five way points,
to the current route.
From this screen you can add, edit, or delete way points
to your route.
To add a way point:
1. Select the Dest. & Way Pt. screen button from the
STORED LOCATIONS screen.
2. Select the Add screen button.
3. Using the desired method of entering a destination,
enter the way point. See Destination on page 2-40
for more information.
A map screen will appear with the way point marked.
4. Select the
screen to save the way point.
5. Repeat Steps 1 - 4 to add up to five way points to
your route. For the second through the fifth way
points, the system will display the ADD WAYPOINT
screen.
6. Select the Add screen button, next to the
corresponding waypoint row, to add the waypoint.
o (Way point) symbol on the map
2-34
Page 51
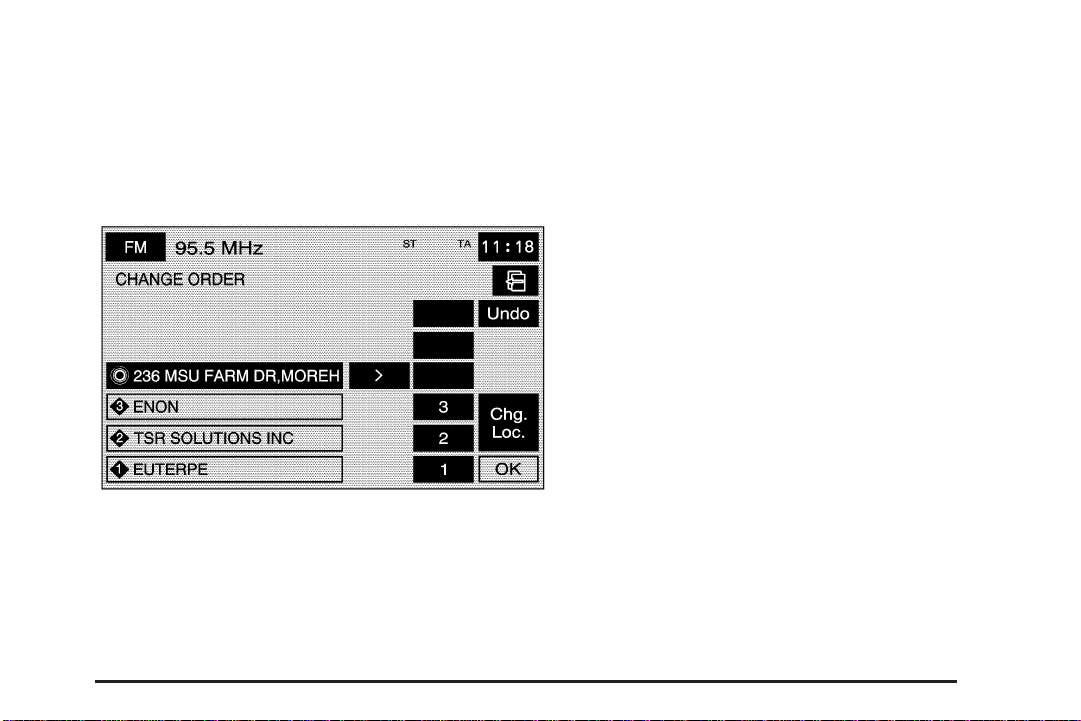
To change the order of the route:
1. Select the Dest. & Way Pt. screen button from the
STORED LOCATIONS screen.
2. Select the Edit screen button.
3. From the CHANGE ORDER screen, select the
names in the order you would like them to fall
on the route.
4. Select the OK screen button to save your changes.
To change the location of a way point:
1. Select the Dest. & Way Pt. screen button from
the STORED LOCATIONS screen.
2. Select the Edit screen button.
3. Select the Chg. Loc. screen button from the
CHANGE ORDER screen.
4. From the CHANGE LOCATION screen, select
the point whose location needs to change.
5. The system will display the map screen with
the destination marked. Touch the position on
the map, to move the way point to that location.
6. Select the OK screen button to save your changes.
The system will return to the STORED LOCATIONS
screen.
To delete a way point from your current route:
1. Select the Dest. & Way Point screen button from
the STORED LOCATIONS screen.
2. Select the Delete screen button.
3. Select the way point/destination you want to delete.
4. The system will display the map screen with a
pop-up confirmation message. Select Yes to
delete the way point; select No to not delete
the way point.
To delete all of the way points on your route:
1. Select the Dest. & Way Point screen button from
the STORED LOCATIONS screen.
2. Select the Del.All screen button.
3. The system will display a pop-up confirmation
message. Select Yes to delete all of the way
points; select No to not delete the way points.
2-35
Page 52
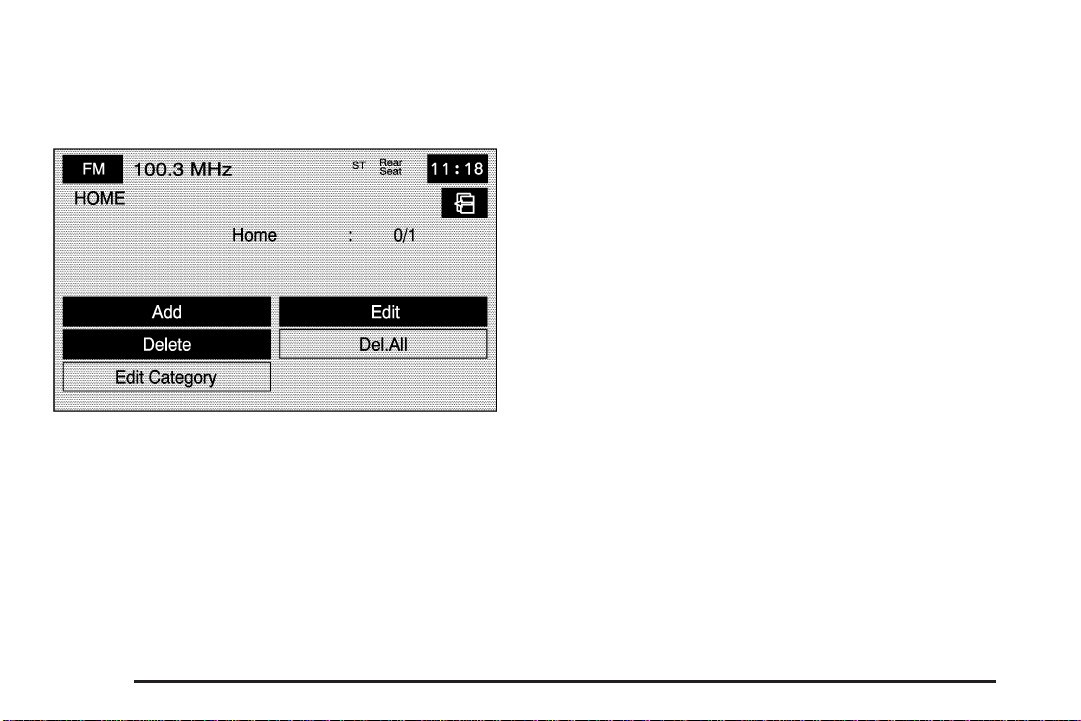
L Home
This feature allows you to add, delete, or edit a point
to be stored as your home destination.
To store your home destination:
1. Select the
STORED LOCATIONS screen.
2. Select the Add screen button.
L Home screen button from the
3. Select a destination entry method. See Destination
on page 2-40 for more information.
4. Select the OK screen button to store the destination.
The home icon will now be highlighted on the
DESTINATION ENTRY screen.
To edit your home destination:
1. Select the
STORED LOCATIONS screen.
2. Select the Edit screen button.
3. Touch the map to move the location of the point.
4. Select the OK screen button to save your changes.
To delete your home point:
1. Select the
STORED LOCATIONS screen.
2. Select the Delete screen button.
3. The system will display the map screen with a
pop-up confirmation message. Select Yes to
delete the home point; select No to not delete
the home point.
L Home screen button from the
L Home screen button from the
2-36
Page 53

& Previous Dest. (Destination)
This feature allows you to delete one or all previous
destinations that have been previously entered
and automatically stored.
To delete a specific destination:
1. Select the Previous Dest. screen button from
the STORED LOCATIONS screen.
2. Select the Delete screen button.
3. Select a destination from the list.
4. The system will display the map screen with a
pop-up confirmation message. Select Yes to
delete the destination; select No to not delete
the destination.
To delete all destinations:
1. Select the Previous Dest. screen button from
the STORED LOCATIONS screen.
2. Select the Del.All screen button.
3. The system will display a pop-up confirmation
message. Select Yes to delete all of the
destinations; select No to not delete all of
the destinations.
A Preset Dests. (Destinations)
This feature allows you to add, delete, or change one of
five preset destinations. Storing preset destinations
makes these destinations easily available to set as a
destination. See “Preset Destination” under Destination
on page 2-40 for more information
To store a preset destination:
1. Select the Preset Dests. screen button from the
STORED LOCATIONS screen.
2. Select the Add screen button to add a preset
destination.
3. Select the numbered preset row you would like it
to appear as.
4. Select a destination entry method. See Destination
on page 2-40 for more information.
5. Select the OK screen button to store the destination.
The destination will now be highlighted on the
DESTINATION ENTRY screen.
2-37
Page 54
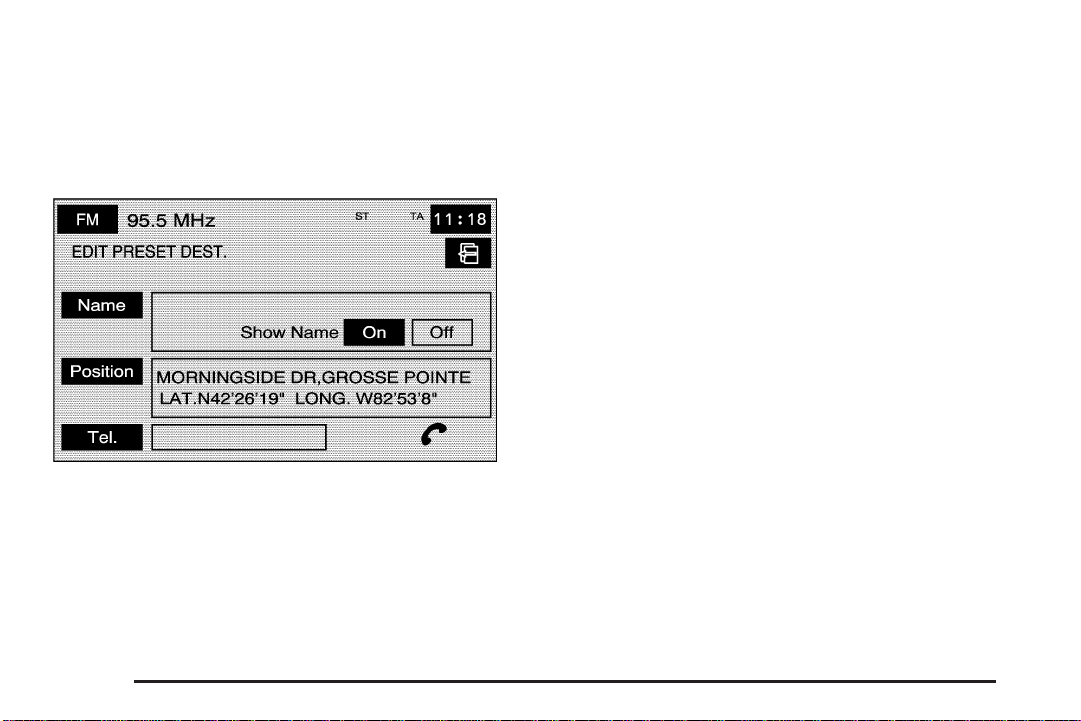
To edit the name of a preset destination:
1. Select the Preset Dests. screen button from the
STORED LOCATIONS screen.
2. Select the Edit screen button.
3. Select the preset destination you want to edit.
4. Select the Name screen button and use the alpha
keypad to edit or add the name.
5. Select the OK screen button to save your changes.
You can choose whether or not to have the name
show on the map screen, next to the preset
destination symbol, by selecting the Show Name
On or Off screen buttons.
To change the position of a preset destination:
1. Select the Preset Dests. screen button from the
STORED LOCATIONS screen.
2. Select the Edit screen button.
3. Select the preset destination you want to change.
4. Select the Position screen button.
5. Touch the position on the map, to move the
destination to that location.
6. Select the OK screen button to save your
changes.
To add or change the phone number of a preset
destination:
1. Select the Preset Dests. screen button from the
STORED LOCATIONS screen.
2. Select the Edit screen button.
3. Select the preset destination you want to change.
4. Select the Tel. screen button and use the numeric
keypad to input or change the phone number.
5. Select the OK screen button to save your
changes.
2-38
Page 55

If you have a Bluetooth®phone connected, you can
touch the
the system will call that number.
To delete a preset destination:
1. Select the Preset Dests. screen button from the
2. Select the Delete screen button.
3. Select the preset destination you want to delete.
4. The system will display the map screen with
To delete all preset destinations:
1. Select the Preset Dests. screen button from the
2. Select the Del. All screen button.
3. The system will display a pop-up confirmation
V (Send/End Call) screen button and
STORED LOCATIONS screen.
a pop-up confirmation message. Select Yes to
delete the destination; select No to not delete
the destination.
STORED LOCATIONS screen.
message. Select Yes to delete all destinations;
select No to not delete all destinations.
Display Memory Pt. Icons
When memory points have been stored, this screen
button will display. Select this screen button, from the
STORED LOCATIONS screen, to display memory
point icons on the map screen.
Calculate
Select this screen button, from the STORED
LOCATIONS screen, to calculate your route.
2-39
Page 56
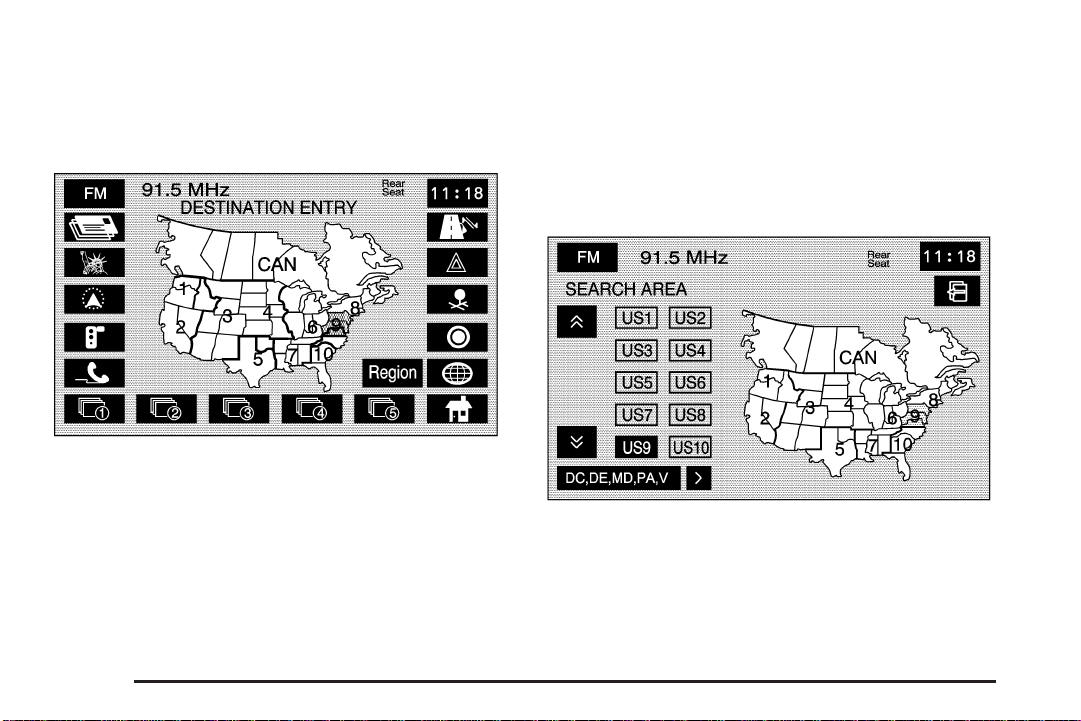
Destination
Press the ROUTE key to access the Destination Entry
screen. From this screen, you can choose from several
options to plan a route by entering destination points.
Once your destination entry is complete, regardless
of which method of entry you used, a map screen
with the destination previewed will be displayed.
You can change route preferences, route options,
map appearances, or add a way point at this time.
You may also set the destination without making any
further changes. See “Getting Started on Your Route”
following in this section for more information on your
choices once a destination has been entered.
Region
The DESTINATION ENTRY screen displays a map of
the 48 contiguous United States and a part of Canada
divided into 11 regions.
Before selecting a method of destination entry, review
the search area map to make sure your destination
is located in the highlighted region.
Touch the REGION screen button from the
DESTINATION ENTRY screen to see a list of states
included in the highlighted region, or to change
the region. The SEARCH AREA screen will display.
2-40
Page 57
Touch the numbered screen button to the left of the
search area map that corresponds with the numbered
region you wish to select or to view a list of states
included in the region. Touch the down arrow to select
CAN (Canada). Once the region has been selected,
the region will be highlighted on the map. Touch
the back key to return to the DESTINATION ENTRY
screen. The new selection will be stored once you
select the back screen button.
Address
The address destination entry method allows you
to input an address by providing the system with a
house number, street name, and city.
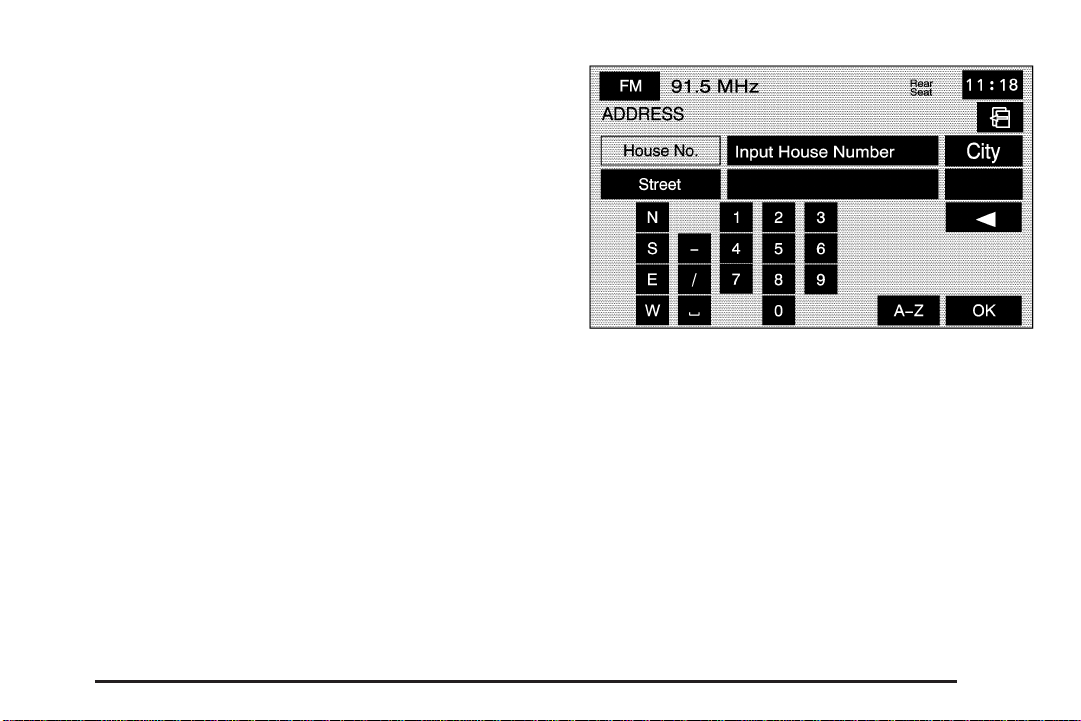
C (Address): Touch this screen button to access the
ADDRESS screen. At this point you can choose to enter
the address one of three ways, either house number first,
street first, or city first.
To use the house number first destination entry method,
do the following:
1. Touch the numeric keypad to input the house
number.
2. Touch the Street button to enter the street name
using the alpha keypad.
2-41
Page 58

3. A list of available street names will be displayed if
there are less than five items available. Select the
List screen button at any time to view the available
list. Select the correct street with the correct prefix
from the list.
4. The system will either display a list of available
cities or go to the map screen directly based on
the input.
5. Select the desired city name on the list.
A map screen will appear with the destination
marked.
6. Select the
to calculate the route.
7. Select the Guide screen button to start route
guidance.
See “Getting Started on Your Route” later in this
section for more information.
h (destination) symbol screen button
To use the street name first destination entry method,
do the following:
1. Touch the Street screen button from the address
menu and start entering the street name using the
alpha keypad. A list of available street names
will be displayed if there are less than five items
available. Select the List screen button at any time
to view the available list.
2. Select the desired street name with the correct
prefix from the list (Dr., Ln., St., etc.).
3. The system will display a list of available cities.
Select the correct city from the list.
4. The numeric keypad will be displayed, allowing
you to enter the house number.
5. Press OK.
A map screen will appear with the destination
marked.
6. Select the
to calculate the route.
7. Select the Guide screen button to start route
guidance.
See “Getting Started on Your Route” later in this
section for more information.
h (destination) symbol screen button
2-42
Page 59

To use the city name first destination entry method,
do the following:
1. Touch the City button.
2. Select from the choices shown on the city screen;
Any City, 5 near cities, Input City Name, or from
the Last 5 Cities used.
• Any City — The system will take you back to the
house number first entry method. Select a city
from the list.
• 5 near cities — The system will display the
5 cities nearest your current position. Select
a city from the list.
• Input City Name — The keypad will display for
inputting the city name. Input the city name
and then select the city from the list.
• Last 5 Cities — The city names of the last five
cities that were stored as a previous destination
will display. Select a city from the list.
3. If using the alpha keypad, finish entering the city
name and then touch the List screen button to
display a list of available cities. Choose a city from
the list. If choosing from one of the prior mentioned
lists, select the city from the list displayed.
4. The House number screen will be displayed.
Enter the house number using the numeric keypad.
5. Select the Street screen button from the address
menu and start entering the street name using
the alpha keypad. A list of available street names
will be displayed if there are less than five items
available. Select the List screen button at any
time to view the available list.
6. Select the desired street name with the correct
prefix (Dr., Ln, St., etc.) from the list
A map screen will appear with the destination
marked.
7. Select the
to calculate the route.
8. Select the Guide screen button to start route
guidance.
See “Getting Started on Your Route” later in this
section for more information.
h (destination) symbol screen button
2-43
Page 60
Point of Interest (POI)
The Point of Interest (POI) destination entry method
allows you to choose a destination from the POI list.
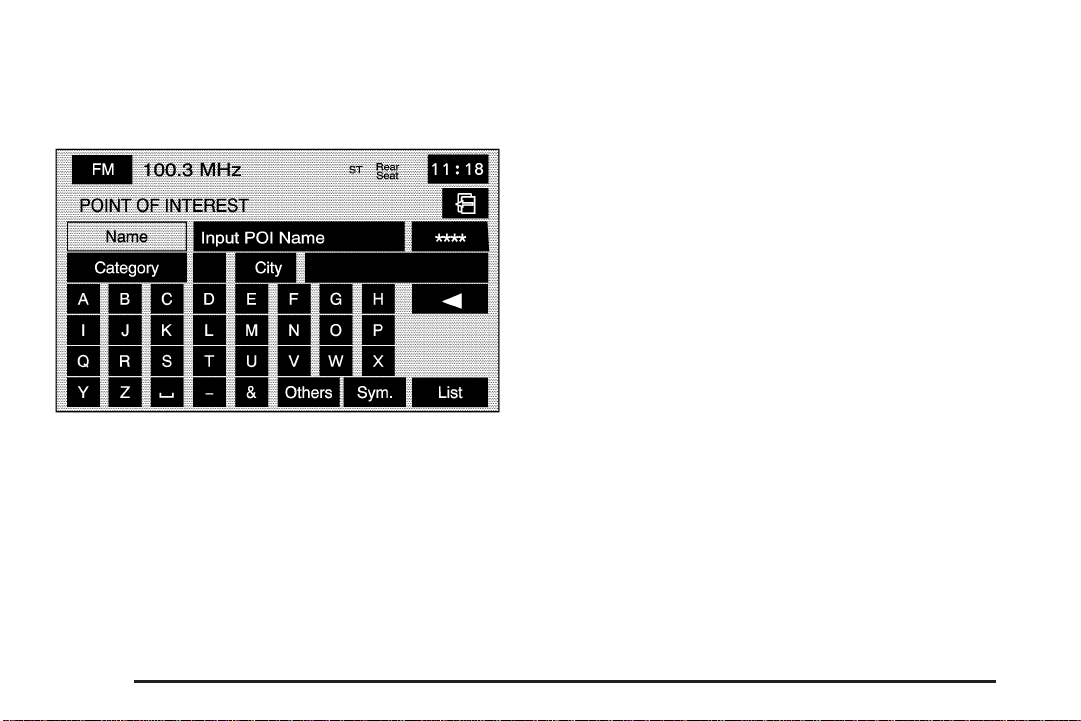
i (Point of Interest): Touch this screen button
to access the POINT OF INTEREST screen. From
this screen you have three options to select/enter your
destination. Either input the name using the keypad,
select a category from the category list, or select the
city by selecting the city screen button.
To input the POI name, do the following:
1. Use the alpha keypad to enter the POI name.
Touch Sym. (symbol) to select symbols and
numbers for the POI, touch Others to select
special characters for the POI, or touch A - Z to
return to the alpha keypad.
A list of POIs will appear using the information from
the alpha keypad input. A list of available POIs
will display if there are less than five POIs available.
Touch the List screen button at any time to view
the available POIs.
2. Select the desired POI from the list.
A map screen will appear with the destination
marked.
3. Select the
to calculate the route.
4. Select the Guide screen button to start route
guidance.
See “Getting Started on Your Route” later in this
section for more information.
h (destination) symbol screen button
2-44
Page 61

To select a POI from a category, do the following:
1. Touch the Category screen button from the
POINT OF INTEREST screen to view a list of
POI categories.
2. Select a category, and then a sub-category.
3. The system will display available POIs names in
the selected sub-category or if the list is too long
the system will display the alpha keypad.
4. If the alpha keypad is displayed, input the POI
name until a list of available POIs appear.
You may also select the List screen button
when it becomes available.
5. Select the POI from the list.
A map screen will then appear with the destination
marked.
6. Select the
to calculate the route.
7. Select the Guide screen button to start route
guidance.
See “Getting Started on Your Route” later in this
section for more information.
h (destination) symbol screen button
To select a POI by inputting a city name, do the
following:
1. Select the city screen button, then select;
Any City, 5 near cities, Input City Name, or
from the Last 5 Cities used.
• Any City — The system will take you back
to the house number first entry method.
Select a city from the list.
• 5 near cities — The system will display
the 5 cities nearest your current position.
Select a city from the list.
• Input City Name — The keypad will display
for inputting the city name. Input the city
name and then select the city from the list.
• Last 5 Cities — The city names of the last
five cities that were stored as a previous
destination will display. Select a city from the list.
2. Use the alpha keypad to enter the POI name.
Touch Sym. (symbol) to select symbols and
numbers for the POI, touch Others to select
special characters for the POI, or touch A - Z to
return to the alpha keypad.
2-45
Page 62
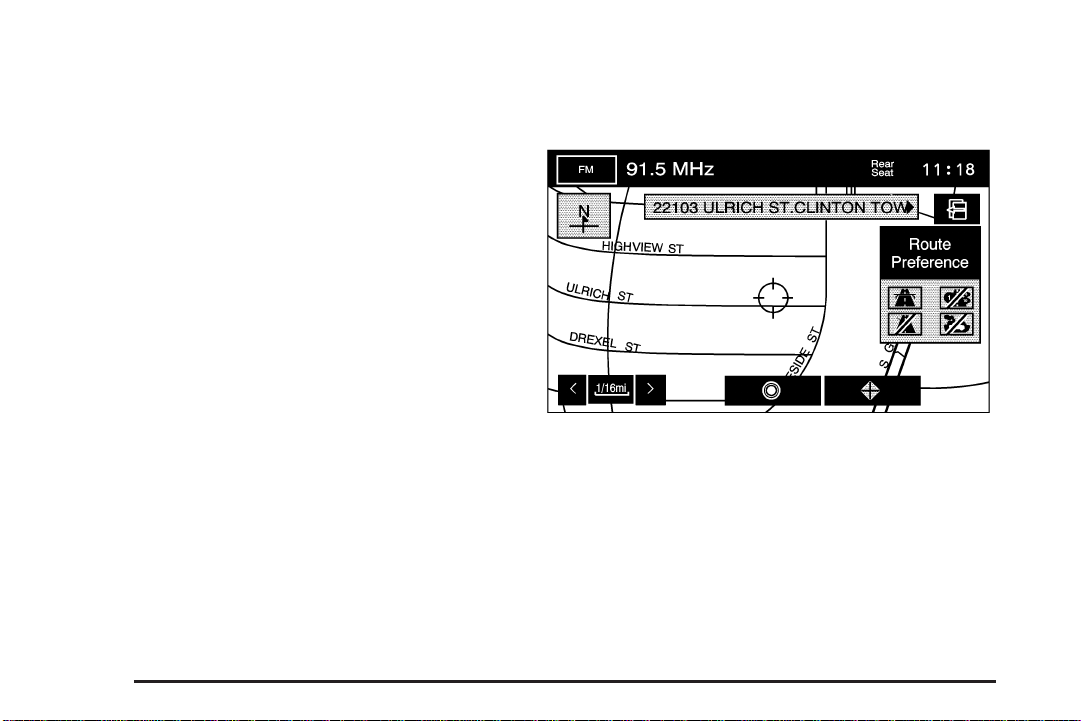
3. A list of POIs will appear using the information
from the alpha keypad input. A list of available
POIs will display when there are less then
five POIs available. Touch the List screen button
at any time to view available POIs.
4. Select the desired POI from the list.
A map screen will appear with the destination
marked.
5. Select the
to calculate the route.
6. Select the Guide screen button to start route
guidance.
See “Getting Started on Your Route” later in
this section for more information.
h (destination) symbol screen button
Map
The map destination entry method allows you to
choose a destination by scrolling on the map.
I (Map): Touch this screen button from the
DESTINATION ENTRY screen to enter the map
destination entry method, then do the following:
1. Touch the map for the desired area you wish to
set as your destination.
2. Use the zoom in/out function to view the direction
of the desired area.
2-46
Page 63
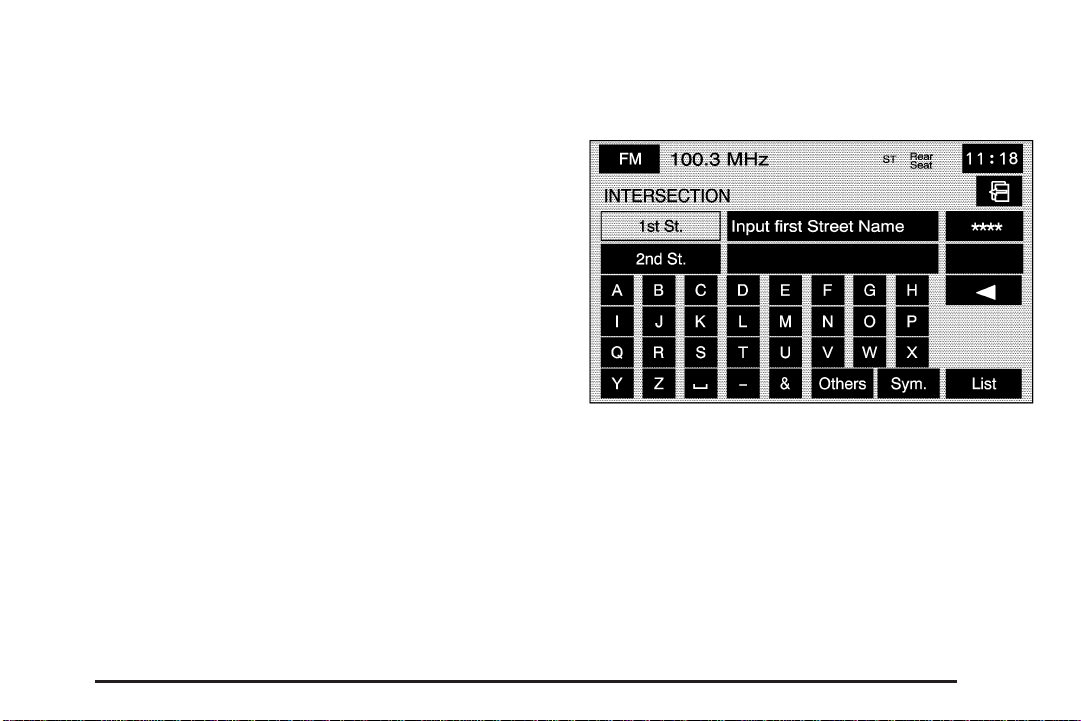
3. Pressing/holding and dragging on the map will
activate fast scrolling. Press/touch once on the
area to which you would like to move the current
position mark.
Once the scroll symbol is on the location,
the address information will display on the
map screen.
4. Touch the destination screen button or the way
point screen button to save the address as
a destination or way point.
• If select this position as a waypoint, the point
will be stored as a waypoint. The system will
display the STORED LOCATIONS screen.
See “Memory Points” under Navigation Menu
on page 2-19 for more information.
• If select the h (destination) symbol screen
button the system will calculate the route.
Select the Guide screen button to start route
guidance. See “Getting Started on Your Route”
later in this section for more information.
Intersection
The intersection destination entry method allows you to
set two intersecting streets as your destination.
M (Intersection): Touch this screen button to access
the INTERSECTION screen.
To use the intersection destination entry method,
do the following:
1. Enter the first of two streets in the intersection.
The List option may become available.
2. You may now choose a street from the list,
or continue to spell the street name to further
reduce the number of available items. Select the
street with the correct prefix (Dr., Ln., St., etc.).
2-47
Page 64
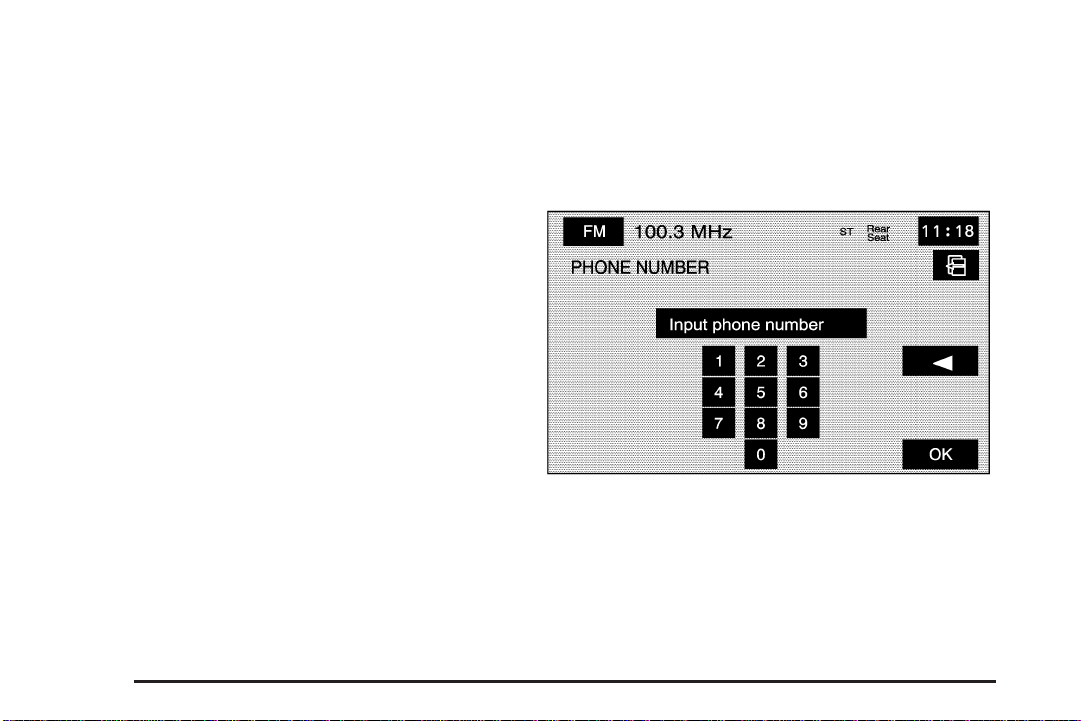
3. After the first street has been chosen, enter the
second street name. The List option may again
become available.
4. You may now choose the second street from
the list, or continue to spell the street name to
further reduce the number of available items.
Select the street with the correct prefix (Dr., Ln.,
St., etc.).
After both streets have been chosen, a map screen
will then appear with the destination marked.
5. Select the h (destination) symbol screen button
to calculate the route.
6. Select the Guide screen button to start route
guidance.
See “Getting Started on Your Route” later in
this section for more information.
Phone Number
The phone number destination entry method allows you
to choose a destination by entering a phone number.
The phone number must be in the list of POIs, that
is contained on the map DVD, in order for the system
to retrieve the destination.
U (Phone Number): Touch this screen button to
access the PHONE NUMBER screen.
2-48
Page 65
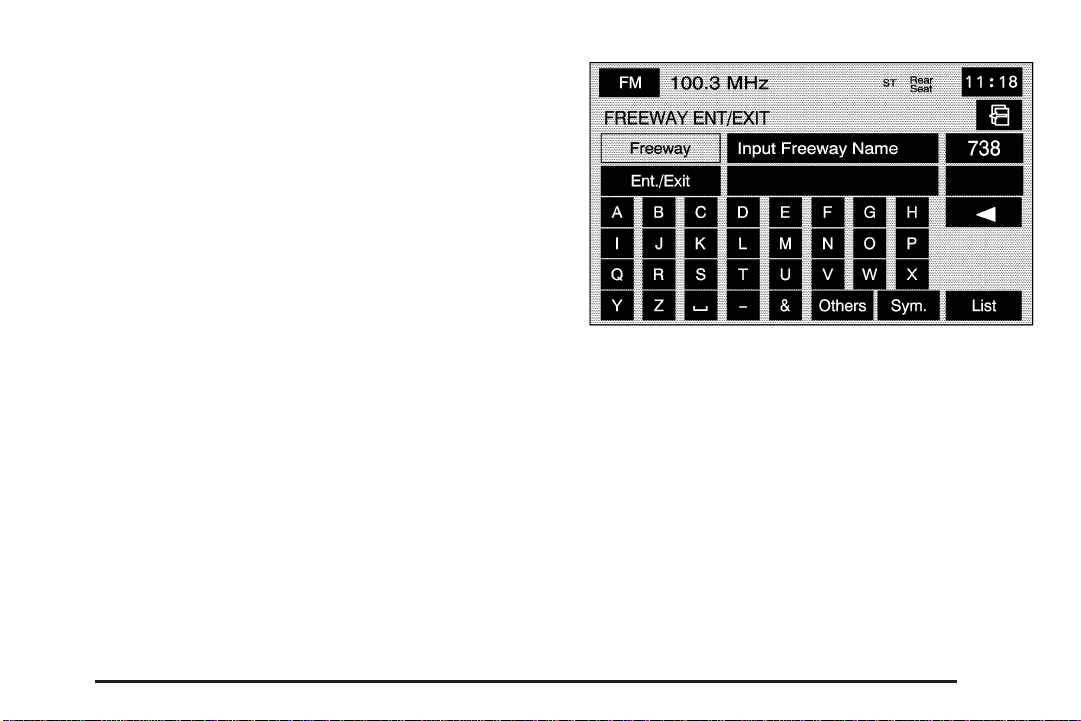
To use the phone number destination entry method,
do the following:
1. Input the area code and phone number of a
POI using the numeric keypad. Only business
phone numbers can be entered.
2. If the phone number can be found on the map
DVD, a map screen will then appear with the
destination marked.
3. Select the
to calculate the route.
4. Select the Guide screen button to start route
guidance.
See “Getting Started on Your Route” later in
this section for more information.
h (destination) symbol screen button
Freeway Entrance/Exit
The freeway entrance/exit destination entry method
allows you to choose a destination by entering a
freeway entrance or exit point.
K (Freeway Entrance/Exit): Touch this screen
button to access the FREEWAY ENT/EXIT screen.
To use the freeway entrance/exit destination entry
method, do the following:
1. Touch the Freeway screen button and enter the
freeway name. Be sure to use abbreviations,
such as I - 75, rather than spelling out Interstate.
Touch Sym. to view a list of symbols to add
when entering a freeway name, touch Others to
view a list of special characters you can choose
from, or touch A - Z to return to the alpha keypad.
A list of freeways will appear.
2-49
Page 66
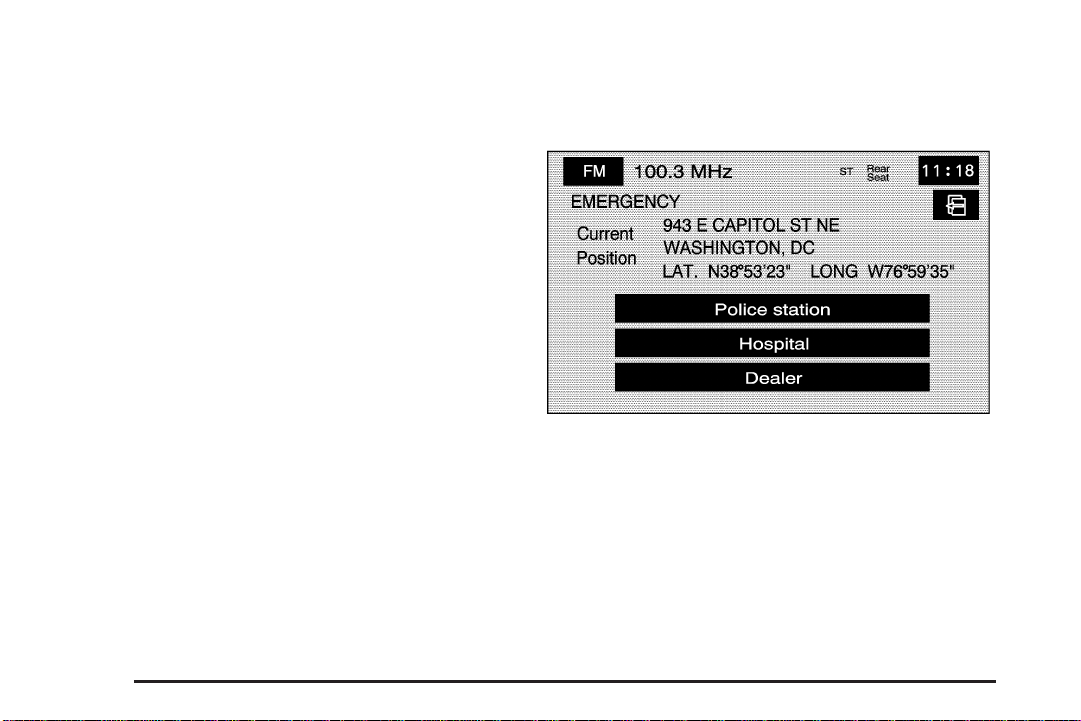
2. Choose a freeway from the list, and then touch the
Entrance or Exit screen button to choose a point.
You can choose an exit/entrance point from the
list of names that will appear.
You can input the exit/entrance by name. Touch
the Input Name screen button. If you choose to
input the freeway exit or entrance name, the alpha
keypad will be displayed. Touch the alpha keypad
to enter the freeway exit or entrance name.
You can sort the list by distance or name. Touch
the Name Sort screen button to sort the list by
name. Touch the Dist. Sort screen button to have
the list sorted by distance. The distance sort
list is based on the current position of your vehicle.
After choosing a point from the list, a map screen
will then appear with the destination marked.
3. Select the
to calculate the route.
4. Select the Guide screen button to start route
guidance.
See “Getting Started on Your Route” later in this
section for more information.
h (destination) symbol screen button
Emergency
The emergency destination entry method allows you to
enter a destination by choosing from three categories.
| (Emergency): Touch this screen button to access
the EMERGENCY screen. When in this screen, the
system will display your current position address and
the longitude and latitude information.
2-50
Page 67

To use the emergency destination entry method, when
no route has been planned, do the following:
1. Select a category.
2. Select a destination point from the list. Touch the
Name Sort screen button to sort the list by name,
or Dist Sort to sort the list by distance from the
vehicle’s current position.
After selecting a destination from the list, a map
screen will appear with the destination marked.
3. Select the
to calculate the route.
4. Select the Guide screen button to start route
guidance.
See “Getting Started on Your Route” later in this
section for more information.
To use the emergency destination entry method,
when a route has been planned, do the following:
1. Select a category.
2. The system will automatically change the current
planned route destination to include the nearest
emergency category that has been selected.
3. Select the
to calculate the route.
4. Select the Guide screen button to start route
guidance.
See “Getting Started on Your Route” later in this
section for more information.
h (destination) symbol screen button
h (destination) symbol screen button
Memory Points
The memory points destination entry method allows you
to choose a destination from a list of points that you
have previously stored.
N (Memory Point): Select this screen button from the
DESTINATION ENTRY screen to access the MEMORY
POINTS screen.
To use this destination entry method, do the following:
1. Select the category/folder in which the memory
point has been stored. Select from PERSONAL,
BUSINESS, ENTERTAINMENT, or MARKED
POINT folders.
Sort the list by distance, icon, name, or date stored.
2. Select the desired memory point.
A map screen will appear with the destination
marked.
3. Select the
to calculate the route.
4. Select the Guide screen button to start route
guidance.
See “Getting Started on Your Route” later in
this section for more information.
h (destination) symbol screen button
2-51
Page 68
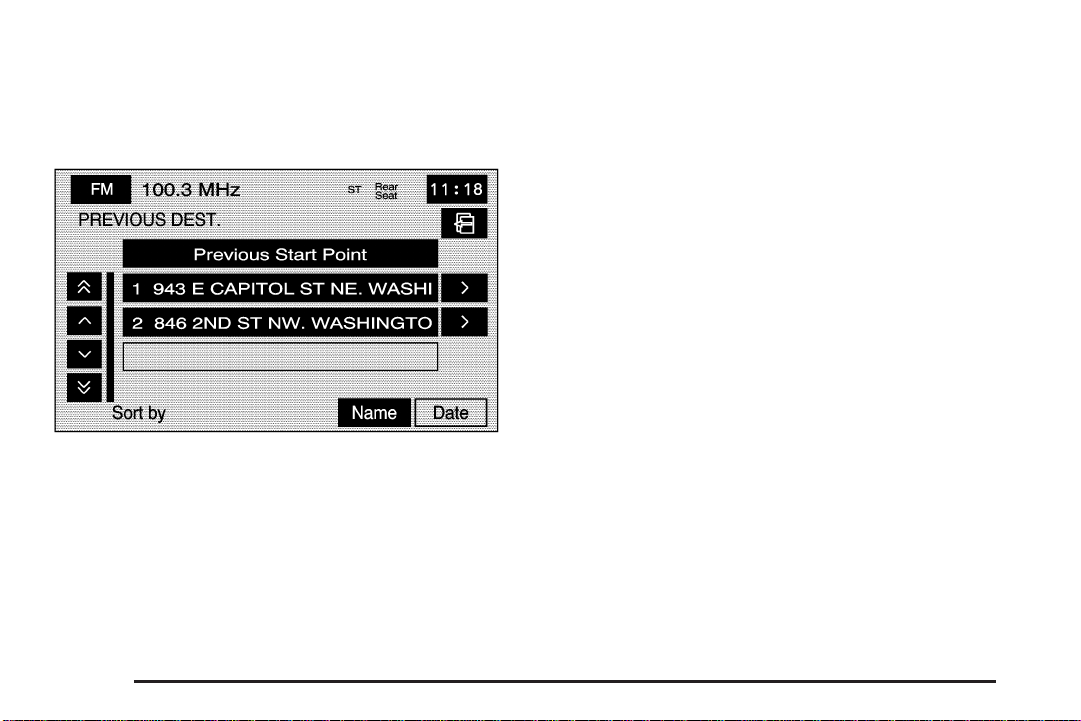
Previous Destination
The previous destination entry method allows you
to choose a destination from a list of previous
destination points.
h (Previous Destination): Touch this screen button
to access the PREVIOUS DEST. screen. The system
will store up to 100 points that have been previously
entered. As new destinations are entered, the system
will automatically delete the oldest destinations and
add the new destination.
To use the previous destination entry method,
do the following:
1. Choose a previous destination from the list.
Use the arrow to the right of the destination to
view the entire destination name as necessary.
A map screen will appear with the destination
marked.
2. Select the
to calculate the route.
3. Select the Guide screen button to start route
guidance.
See “Getting Started on Your Route” later in
this section for more information.
Name: Touch this screen button to sort the list by name.
Date: Touch this screen button to sort the list by the
date the destination has been entered. The list will
be in order by the latest to the oldest destinations
that have been entered.
Previous Start Point: Touch this screen button for
the system to plan a route to the previous point
you were at when a route was entered. This option
is available while the vehicle is moving.
h (destination) symbol screen button
2-52
Page 69
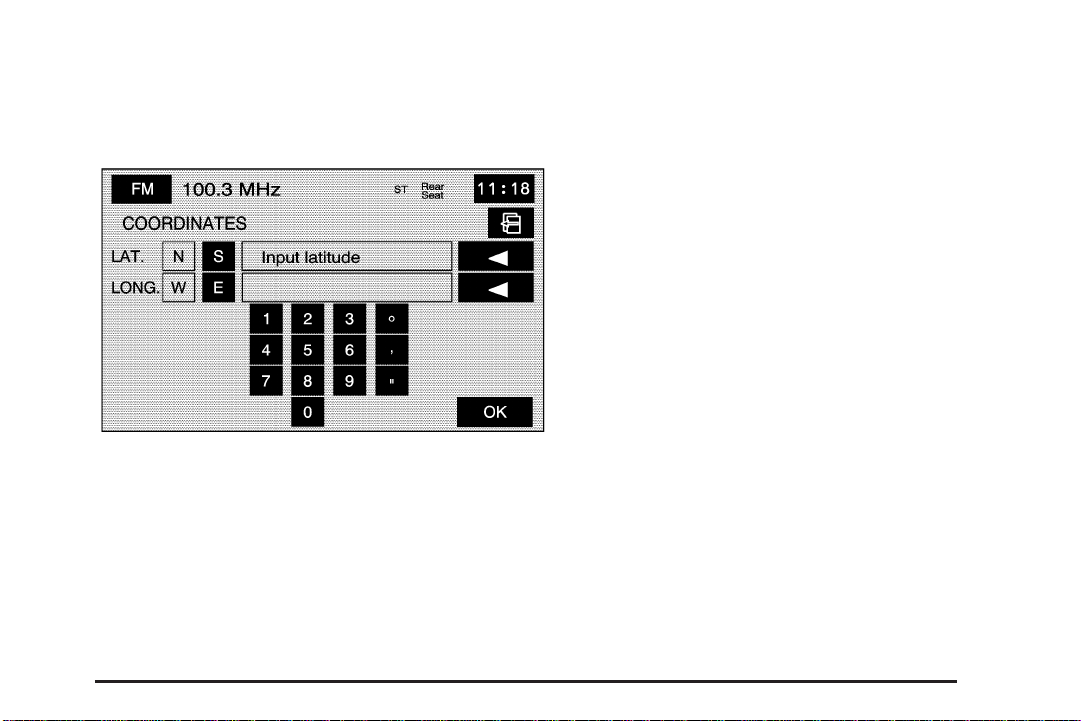
Coordinates
The coordinates destination entry method allows you to
choose a destination by entering latitude and longitude
coordinates.
) (Coordinates): Touch this screen button to access
the COORDINATES screen.
To use the coordinates destination entry method,
do the following:
1. Touch N or S next to LAT. to enter the direction
of the latitude coordinate.
2. Input the numeric portion of the latitude coordinate
using the keypad.
3. Touch E or W next to LONG. to enter the direction
of the longitude coordinate.
4. Input the numeric portion of the longitude coordinate
using the keypad.
5. Once both coordinates are entered, touch the OK
screen button.
A map screen will then appear with the destination
marked.
6. Select the
to calculate the route.
7. Select the Guide screen button to start route
guidance.
See “Getting Started on Your Route” later in
this section for more information.
h (destination) symbol screen button
2-53
Page 70
Preset Destination
(Preset Destination): The preset destination
j
entry method allows you to set a destination by
choosing from one of five previously stored destinations.
Besides home, these are the only destinations
available to set while the vehicle is moving or by
voice recognition. If a destination is not set for one of
the screen buttons, the button will be dimmed and
will not be available. See “Memory Points” under
Navigation Menu on page 2-19 for more information.
To use the preset destination entry method,
do the following:
1. Select the desired preset destination from the
DESTINATION ENTRY screen. The screen
buttons are numbered 1 - 5.
A map screen will appear with the destination
marked and the number of the preset destination.
2. Select the
to calculate the route.
h (destination) symbol screen button
3. Select the Guide screen button to start route
guidance.
See “Getting Started on Your Route” later in
this section for more information.
Home
L
(Home): This feature allows you to plan a route
to one previously stored destination that you have
selected as home. If a home destination is not stored,
the home button will not be available. In addition to
preset destinations one through five, this destination
is available to set while the vehicle is moving or by
voice recognition.
To use this destination entry method, do the following:
1. Select the home screen button from the
DESTINATION ENTRY screen.
A map screen will appear with the destination
marked.
2. Select the
to calculate the route.
3. Select the Guide screen button to start route
guidance.
See “Getting Started on Your Route” later in this
section for more information.
h (destination) symbol screen button
2-54
Page 71
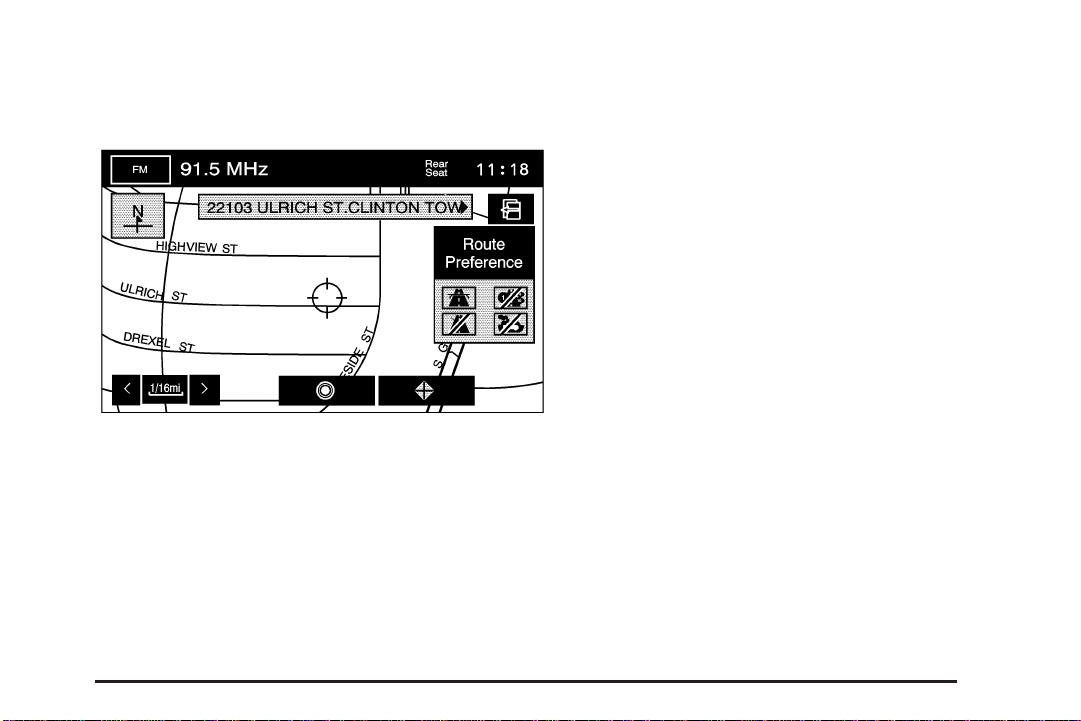
Getting Started on Your Route
Once you have entered a destination, you can perform
one of the following options:
h (Destination): Touch the destination symbol to set
the entered destination as it is, without further
adjustment.
o (Waypoint): Touch the way point symbol to
enter this point as a way point along the route.
See Dest. & Way Pt. under “Stored Locations” under
Navigation Menu on page 2-19 for more information.
Route Preference: Touch this screen button to
access the Route Preference screen and adjust the
route preferences. The current setting is displayed in
the Route Preference section of the Map screen.
See “Change Route” later in this section for more
information.
If any of these features are turned off, there will be a
diagonal red line through its icon.
Once the route preference has been set, select the
destination symbol and the system will automatically
calculate your route.
2-55
Page 72
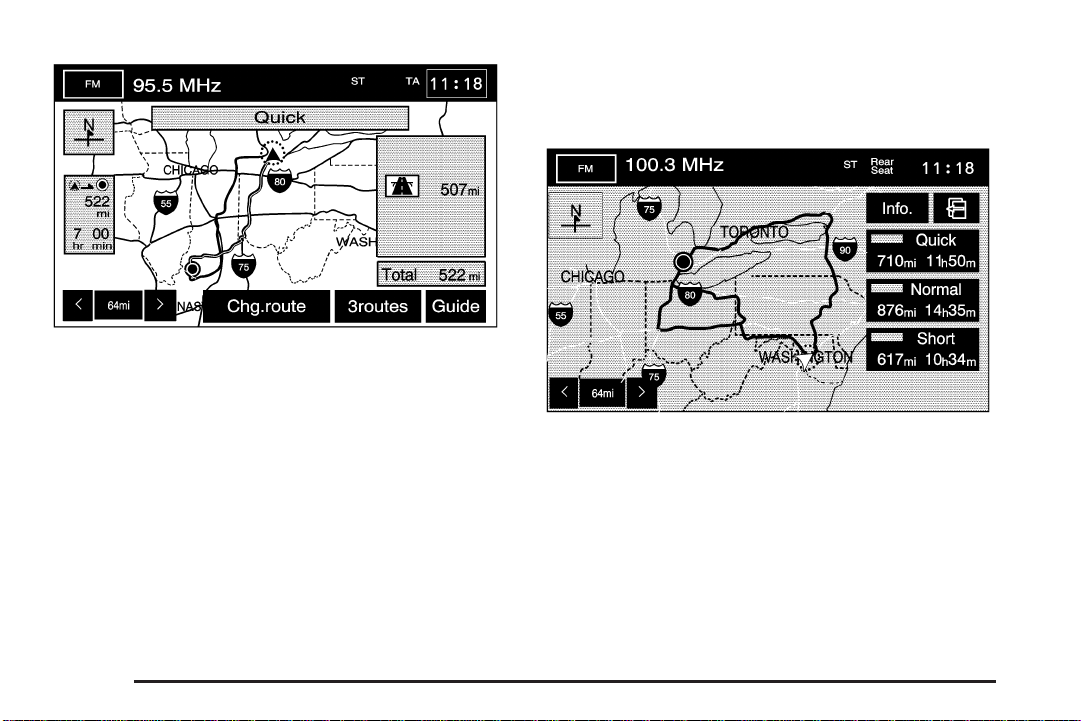
From this screen you can select Guide to start your
route guidance or select 3routes if available to
select between Quick, Normal, or Short route options.
You can also select the Chg. Route screen button to
go to the ROUTE OPTIONS menu and select from
the available options.
Three Routes
To access this screen, touch the 3routes button on
the map screen while planning a destination.
When applicable, the system will calculate up to
three different versions of your current route in
three different colors: Quick, Normal, and Short.
The routes are shown with distance to destination
and estimated travel time. The quickest route may
not be the shortest, and vice versa. When an optional
route is selected it is shown on the map in another color.
2-56
Page 73
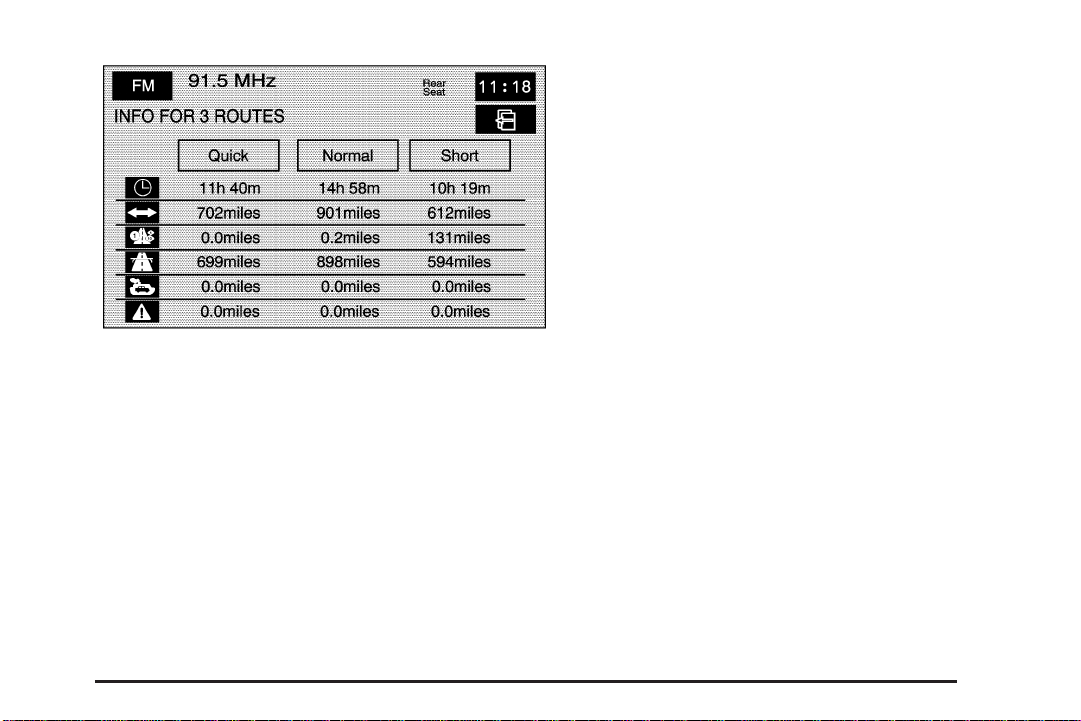
W (Toll Road): This icon shows the route’s toll road
distance information.
c (Freeway Travel): This icon shows the route’s
freeway distance information.
b (Ferry): This icon shows the route’s ferry distance
information.
{ (Time-Restricted Roads): This icon shows the
route’s time-restricted road information.
Keyless Access System
Touch Info on the three routes screen to access the
INFO FOR 3 ROUTES screen. From this screen,
you can view the following information for the different
planned routes:
G (Estimated Travel Time): This icon shows the
route’s estimated time of travel.
J (Straight-Line Distance): This icon shows the
route’s straight-line distance to destination.
When you start your vehicle, you will see Driver 1 or
Driver 2 displayed on the cluster. If personalization
is turned off in feature programming, a message will
not appear on the cluster. The number on the back
of the transmitter corresponds to driver 1 or driver 2.
The navigation system can store memory points
for driver 1 and 2 individually. See Personalization
on page 5-2 for more information.
2-57
Page 74
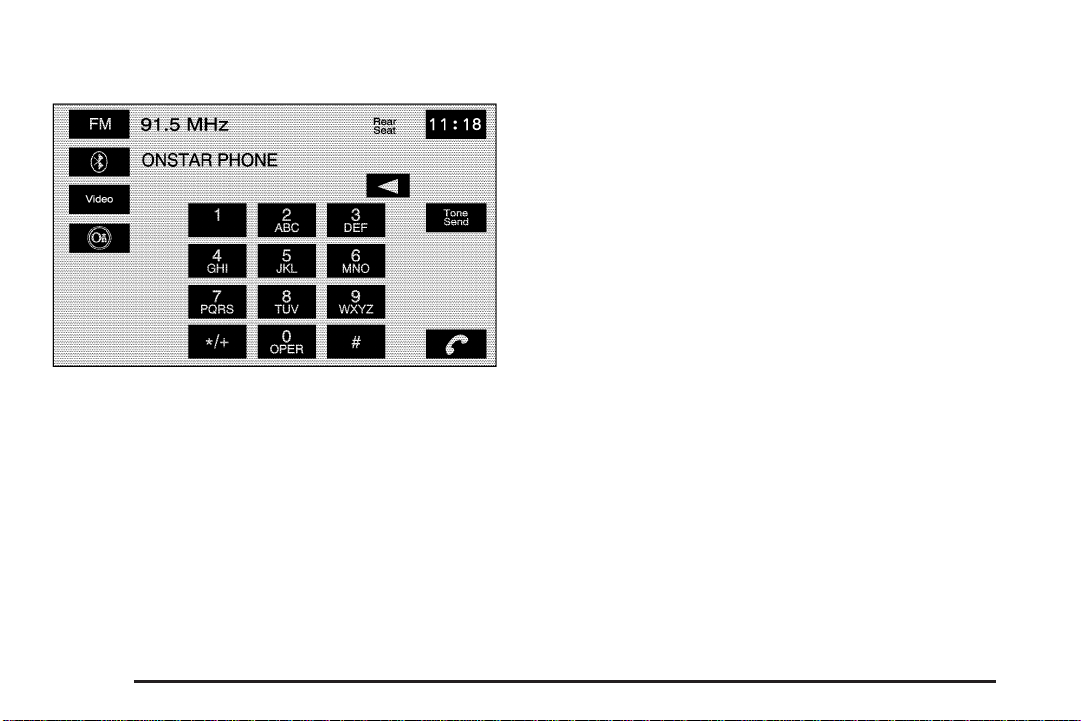
OnStar®System
With an active OnStar®subscription with personal
calling, you can make telephone calls from your vehicle,
using the navigation system screen to enter the numbers.
Q(OnStar): Touch the AUX hard key to access
this button. Touch this screen button to access
the OnStar
available while driving.
®
phone screen. This screen is not
V (Place/End Call): Touch this screen button to
place your phone call. While in a call, this button will
be red. Touch this button to end your call.
Tone Send: Touch this screen button to send touch
tone data. This button will become available during
a phone call. This function is used when you need to
enter numbers in response to an automated phone
request, such as when checking voice mail or you
are asked to choose menu items.
Incoming Call: When receiving an incoming call,
a pop-up message will display on the screen with
two place/end call screen buttons, one green and the
other red. Touch the green button to answer the
call. Touch the red button to reject the call.
When using the OnStar
mute. The volume of an OnStar
by using the steering wheel controls or the volume
knob on the navigation system. See “OnStar
in the Index of your vehicle’s owner manual for more
information.
®
system, the audio system will
®
call can be adjusted
®
System”
2-58
Page 75
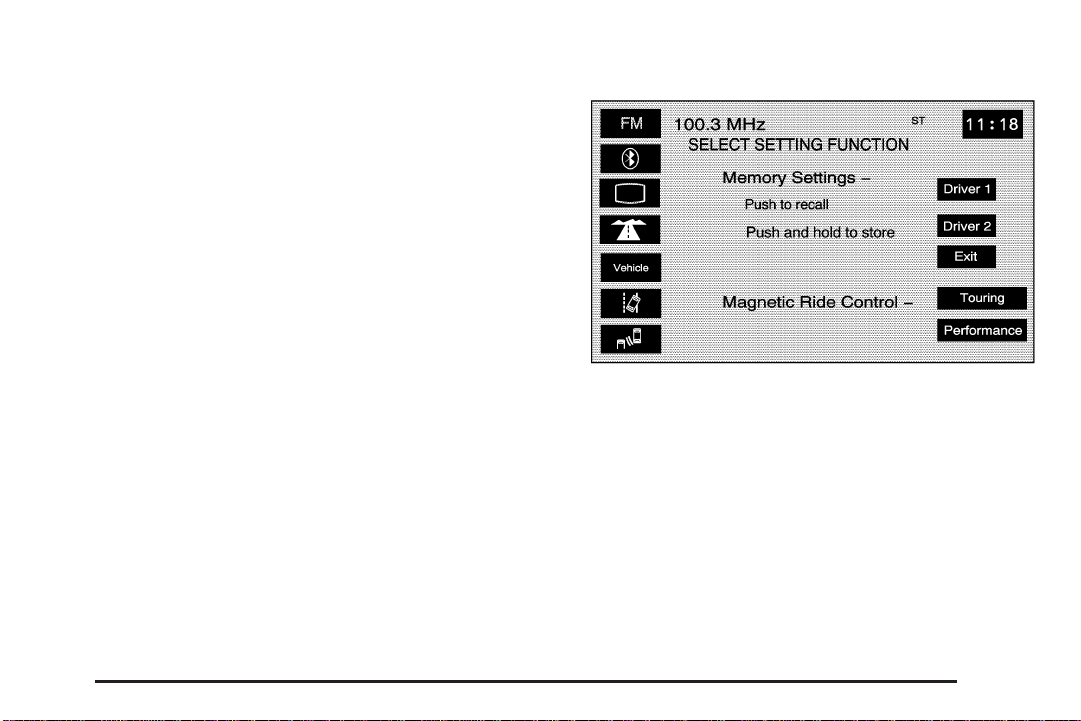
Using the OnStar®Screen to Make a
Phone Call
To make a phone call using the OnStar®screen
do the following:
1. Press the AUX hard key.
®
2. Touch the OnStar
3. Enter the phone number using the
numeric keypad.
4. Touch the place/end call screen button to place
the phone call.
5. If you need to use the tone send button for checking
voice mail or responding to an automated request,
enter the appropriate number(s) using the keypad
and then touch the tone send button. Once that set
of numbers has been sent, the tone send button
will dim until another set of numbers is entered
on the keypad.
6. To end the call, touch the place/end call screen
button. It will be red while you are on the call.
screen button.
Configure Menu
Press the CONFIG hard key to access this menu,
allowing adjustment of several of the systems features
and preferences.
Bluetooth
E (Bluetooth
the Bluetooth
on page 6-2 for more information on the Bluetooth
system.
®
®
): Touch this screen button to access
®
setup screen. See Bluetooth®Phone
®
2-59
Page 76
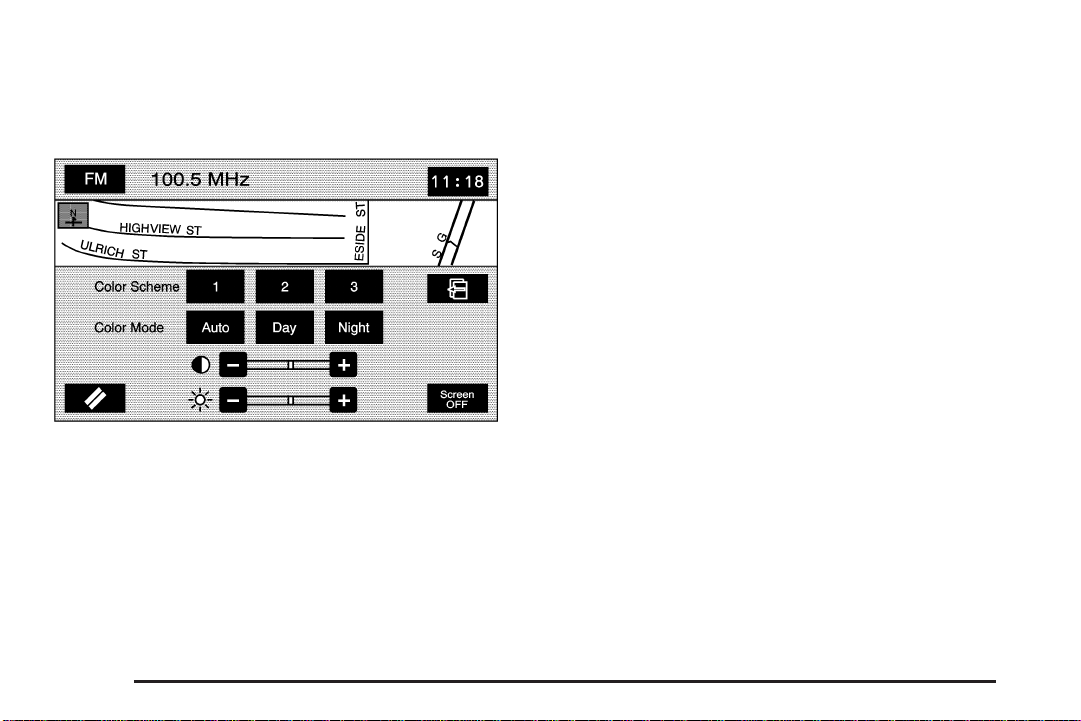
Screen Appearance
z
(Screen Appearance): Touch this screen button
to access the appearance screen menu.
From this menu, several options may be adjusted:
Color Scheme: This option allows you to choose
between three different screen color schemes
by touching 1 (blue), 2 (green), or 3 (brown).
Color Mode: This option allows you to adjust
your screen mode between Auto, Day, and Night.
Day mode will change the navigation system screen
to a lighter background for better viewing in the
daytime. Night mode will change the navigation system
screen to a darker background for better viewing at
night. Auto mode will adjust the screen automatically
depending on exterior lighting conditions.
_ (Contrast): This feature allows the adjustment of
contrast of the navigation screen. Touch the plus (+)
or minus (−) signs on either side of the contrast
bar graph to increase or decrease the contrast.
] (Brightness): This feature allows the adjustment
of brightness of the navigation screen. Touch the
plus (+) or minus (−) signs on either side of the
brightness bar graph to increase or decrease the
brightness.
Screen OFF: This feature allows you to turn the
navigation screen off. Touch any hard key to turn
the screen back on.
2-60
Page 77
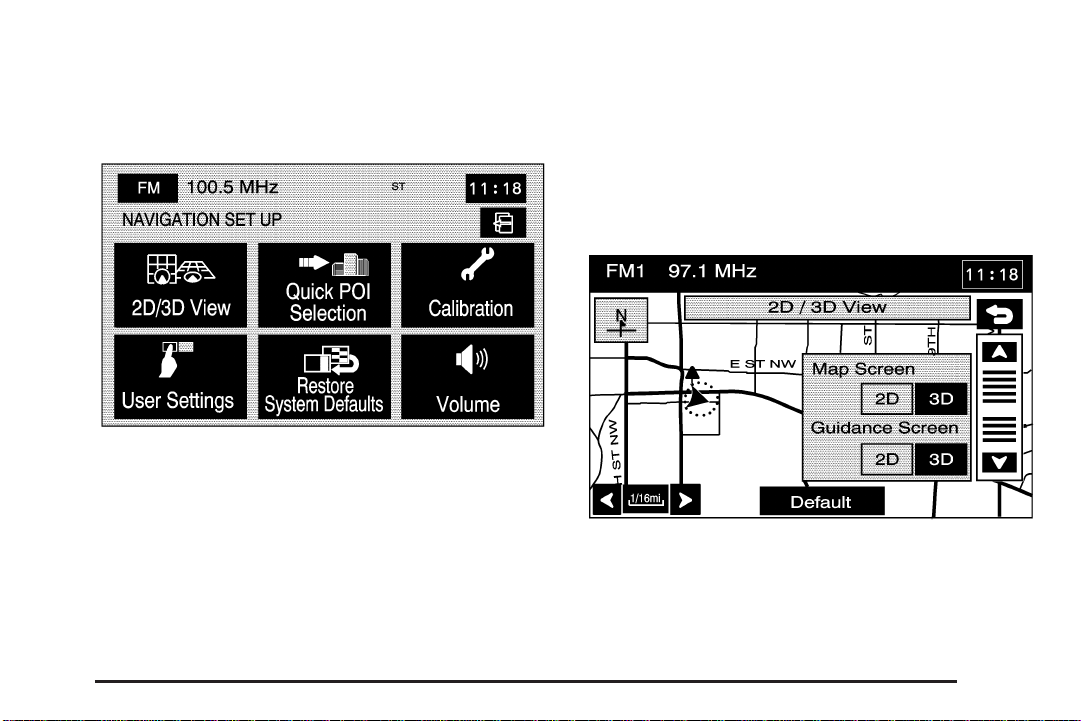
Navigation Set Up
3
(Navigation Set Up): Touch this screen button
to access the NAVIGATION SET UP screen.
From this menu, several options are available for
adjustment:
8 2D/3D View: This option allows you to change
the view of the map screen and the guidance screen
between a 2-dimensional and 3-dimensional view. When
changing the map to the 3-dimensional view, use the
up/down arrows to change the angle of the map. Select
Default to return to the factory settings (2-dimensional).
2-61
Page 78
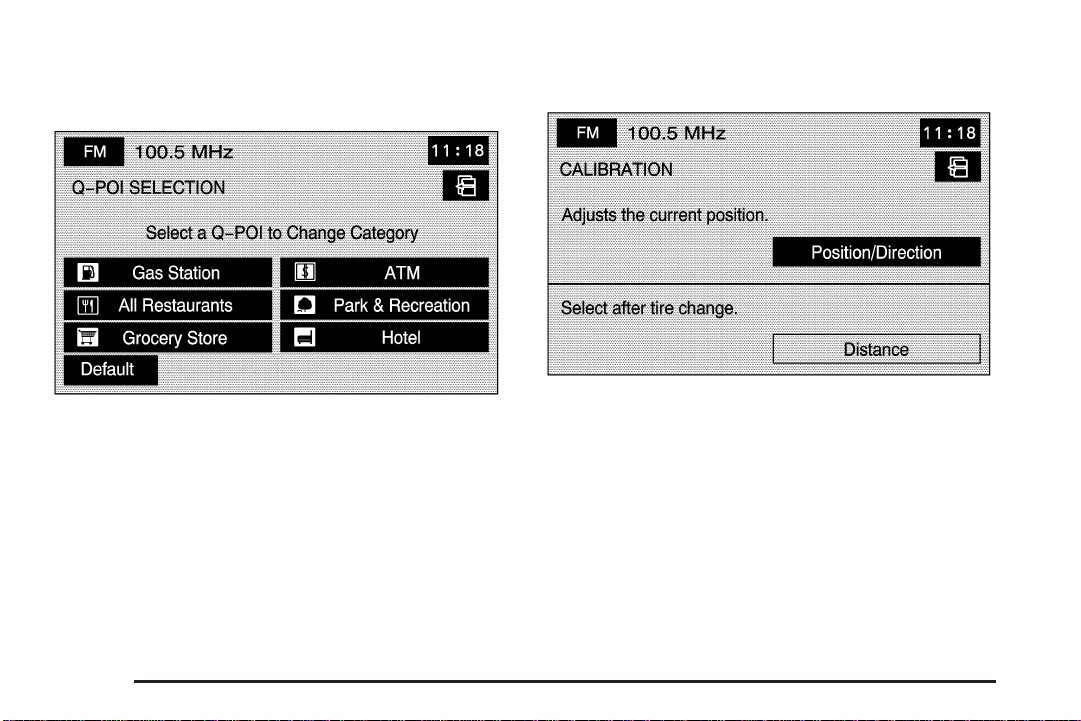
C Quick POI Selection: This option allows you
to set six Point of Interest (POI) categories that you can
select from while driving.
5 Calibration: This option allows you to recalibrate
the navigation system.
To set the Quick POI selection, do the following:
1. Select the Quick POI Selection screen button.
2. Select the sub-category you would like to replace.
3. Select a Quick POI category from the Quick
POI selection menu list.
4. Pick the subcategory from the list that appears.
The system automatically returns to the Quick POI
Selection screen. Your category changes are
now saved.
To change back to the system generated choices,
touch the Default screen key.
2-62
The Calibration screen, allows the adjustment of your
vehicle’s position or the vehicle speed signal.
To correct the position of your vehicle on the map
(for example, if your vehicle has been shipped) or
to change to the current position.
1. Select the Position/Direction screen button.
The map screen will display with your vehicle’s
current position.
2. To change your vehicle’s position, touch the
map screen.
Use the zoom in/out function to view the direction
of the desired area.
Page 79
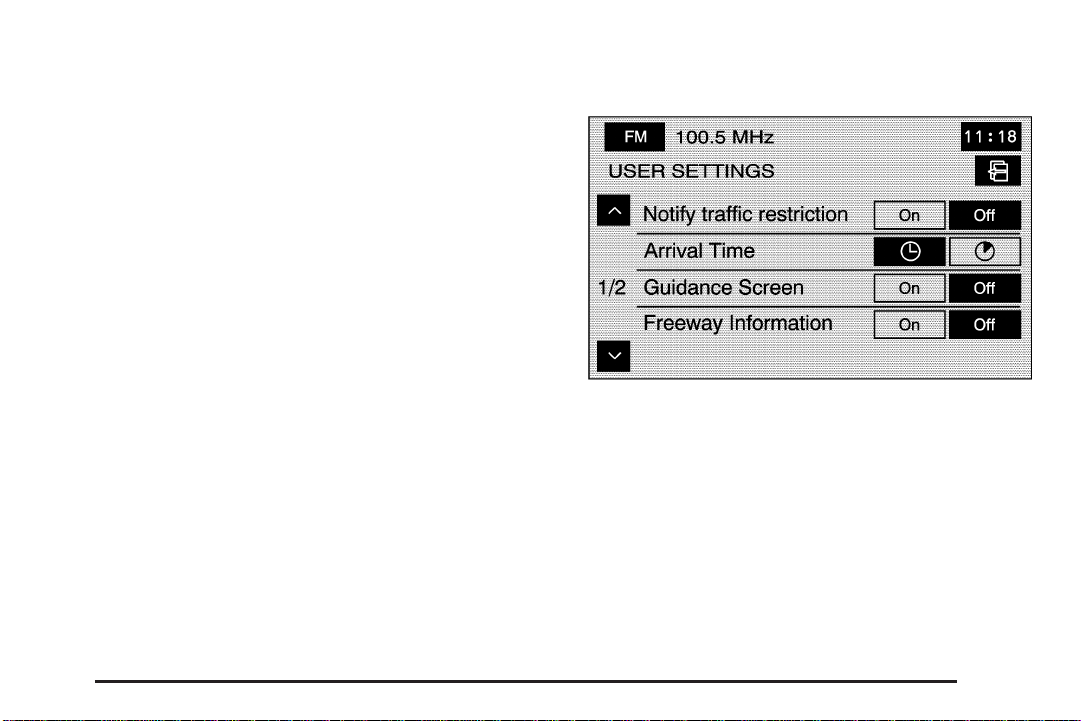
Pressing/holding and dragging on the map will
activate fast scrolling. Press/touch once on the
area to which you would like to move the current
position mark.
3. Touch the OK screen button once your vehicle
is in the current position.
If a route had already been set, the map screen
will display, select Guide to change your route
to your vehicle’s new position.
Once the process of changing your vehicle’s
current position is complete, the map screen will
display with rotate arrow screen buttons around
your vehicle.
4. To change the direction of your vehicle, press either
arrow screen button to rotate your vehicle to the
correct direction.
5. Once your vehicle is facing the correct direction,
select the OK screen button.
See Problems with Route Guidance on page 2-76 for
more information.
If there are tire pressure differences or a spare tire
is installed, the system will automatically re-calibrate
the system, but it may take longer. To calibrate
the vehicle speed signal, touch the Distance screen
key. See Vehicle Positioning on page 2-75 for
more information.
J User Settings: This option allows you to turn on
and off several other route guidance setting options.
From this screen, you can adjust the following:
Notify traffic restriction: This option instructs the
system to notify you when the current route has traffic
restrictions (e.g. winter time).
Arrival Time
display the estimated time of arrival to your destination.
Arrival Time
will display how much time remains to reach your
destination.
G (Time of Arrival): This option will
\ (Time to Destination): This option
2-63
Page 80
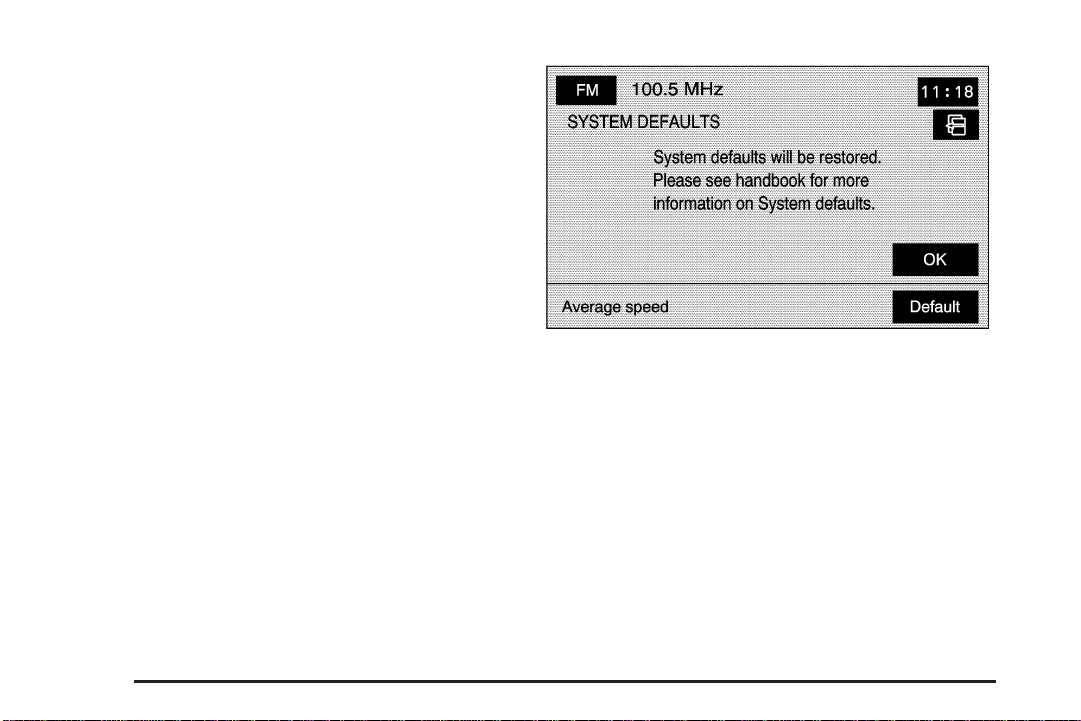
Guidance Screen: This option will turn the guidance
screen on and off. When the guidance screen option
is on, the guidance screen will pop-up when you
are approaching a turn.
Freeway Information: When on, this option will
automatically display freeway information in the
guidance window while on a freeway during route
guidance. Select the Off screen button to not display
this guidance window.
Text size on map: This option allows you to adjust
the text size on the map between Large, Medium,
and Small. This option is located on the second page
of the USER SETTINGS screen. Touch the down arrow
to access this option.
\ Restore System Defaults: Select this option
from the NAVIGATION SET UP screen to change
all adjustable system settings to factory defaults.
Average Speed: Select this option to set the average
speed to default. The system monitors the speed
on different roads and updates the average speed
the vehicle travels at. This average speed is used to
calculate the time it will take to reach the destination
when you set a route.
2-64
Page 81
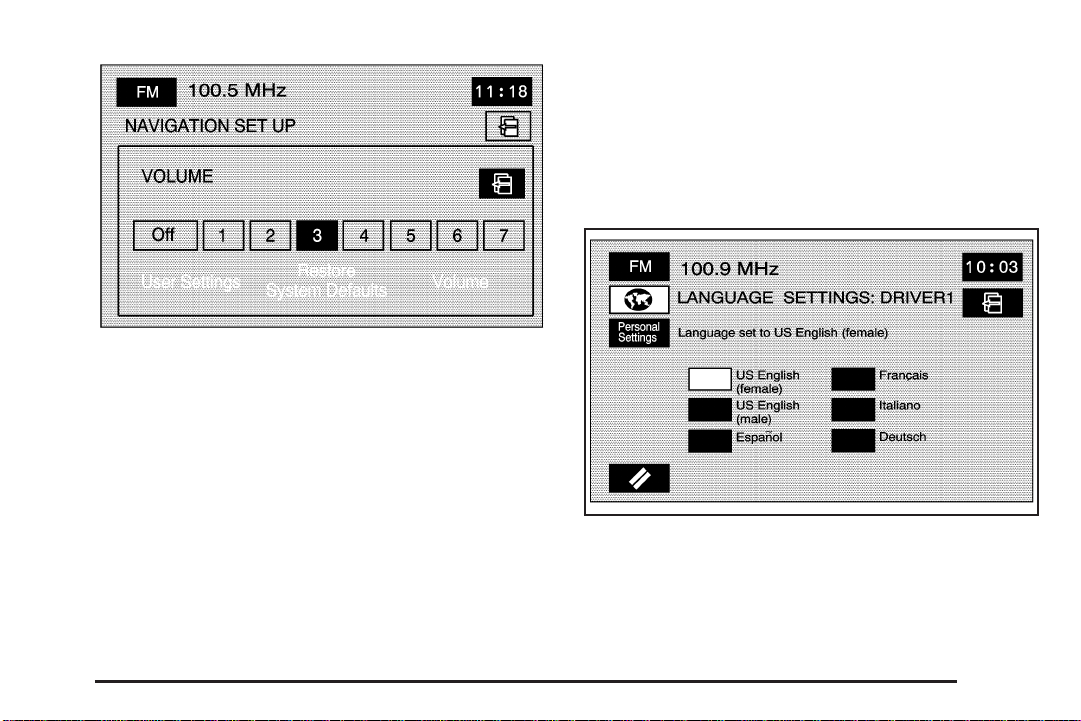
> Volume: This option allows you to adjust the volume
of voice guidance prompts and the voice recognition
system. You may also choose to turn voice guidance
prompts off.
Vehicle
Vehicle: Touch this screen button to access the vehicle
information menu. From this menu, you can adjust
such options as the language, personal settings, and
memory options. See Personalization on page 5-2
for more information on language and personal settings
and see “Memory Settings” later in this section.
2-65
Page 82
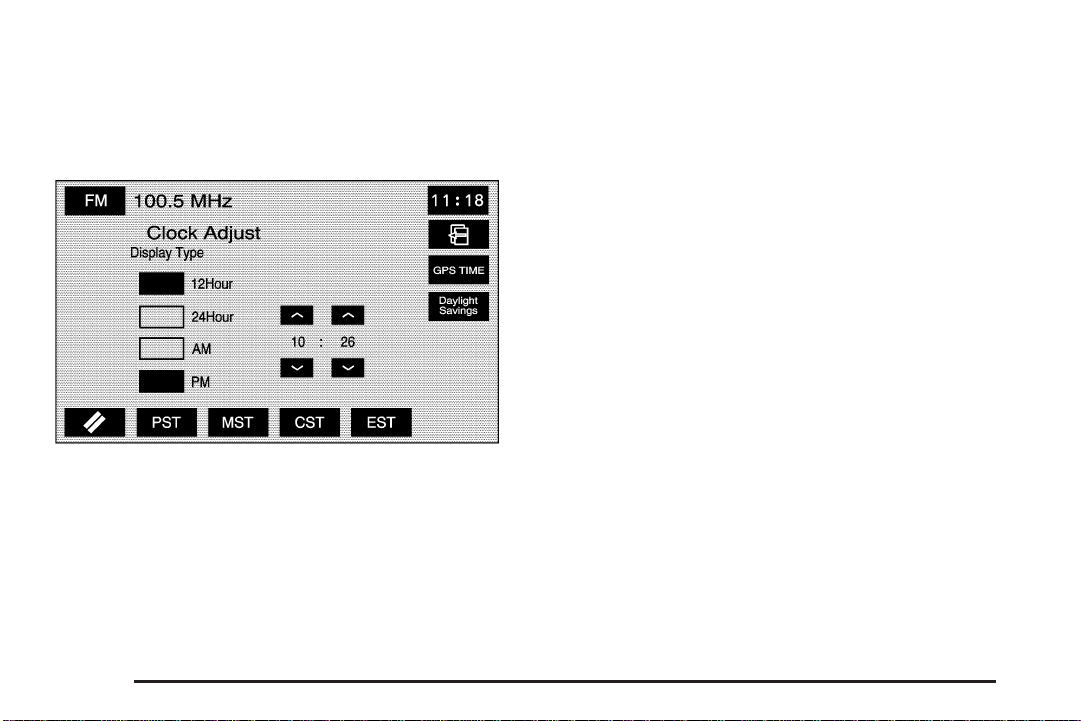
Clock
H
(Clock Adjust): Touch and hold the clock screen
button in the upper right corner of the screen to access
the Clock Adjust screen and adjust several time features.
From this screen, you can adjust the following:
12Hour: Touch this screen button to display the time
in standard AM/PM format.
24Hour: Touch this screen button to display the time
in military format.
AM: Touch this screen button when setting the time
in AM.
PM: Touch this screen button when setting the time
in PM.
PST, MST, CST, EST: Touch one of these screen
buttons to choose between Pacific Standard Time (PST),
Mountain Standard Time (MST), Central Standard
Time (CST), and Eastern Standard Time (EST).
GPS TIME: Touch this screen button to match the
navigation system’s time to GPS time.
Daylight Savings: Touch this screen button to increase
the time by one hour. Touch this screen button again
to turn this feature off and decrease the time by
one hour.
y/z: Touch the up arrow to increase the hour or
minutes. Touch the down arrow to decrease the hour
or minutes.
2-66
Page 83

Memory Settings
If your vehicle has the memory feature, memory
settings for the following features, for up to two drivers,
can be programmed and recalled:
• The driver’s seat position.
• The outside rearview mirrors position.
• The telescopic steering column position.
• The language, radio and XM™ presets, tone,
volume, playback mode (AM/FM or CD),
last displayed stations, and CD position are
set automatically.
• The last climate control setting is set automatically.
• The Head-Up Display (HUD) position, if equipped,
is set automatically.
• The navigation systems previous destinations,
stored memory points, nametags, paired phones,
navigation voice prompts, etc. are stored
automatically.
• Other personalization settings, for example,
remote start settings.
Memory Infotainment Settings
and Presets
These settings and presets are set automatically.
They include the following:
• Radio presets
• Navigation
• Address Book
• Language
• HUD display
• Climate control settings
For more information, see each item in the Index
of your vehicle’s owner manual.
Memory features are programmed and recalled
through the navigation system and the voice
recognition system.
2-67
Page 84
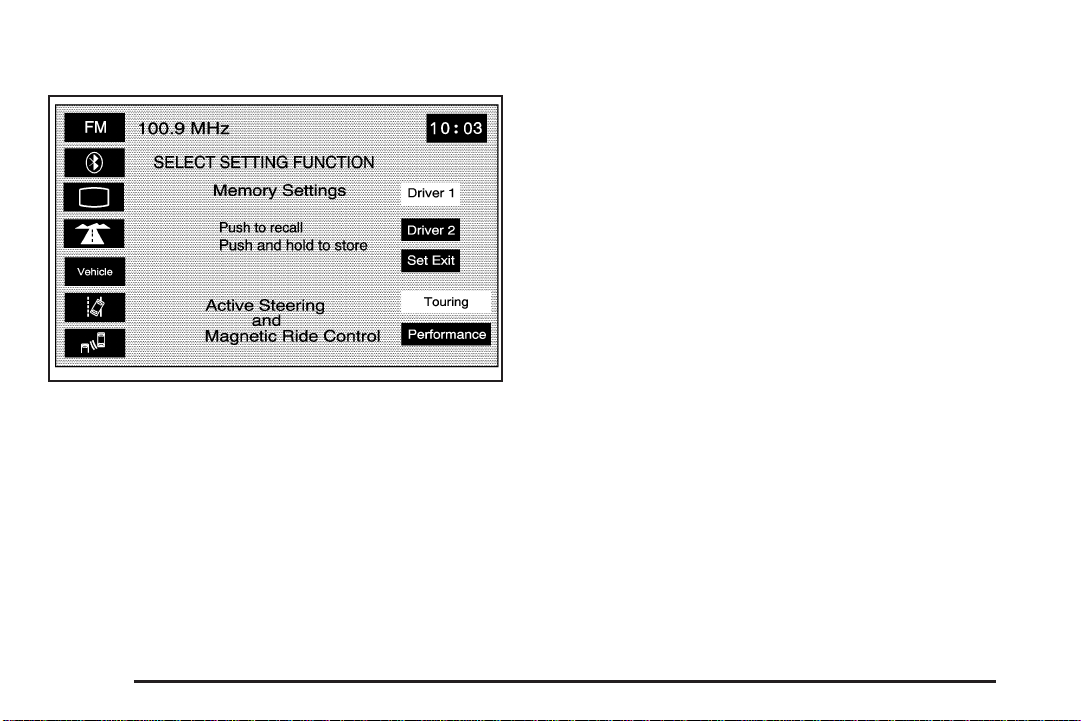
Store Memory Settings
Displayed on Configure Menu
To store memory settings, do the following:
1. Be sure the ignition is either on, in accessory mode,
or in RAP. The vehicle must be stopped and/or the
shift lever must be in PARK (P).
2. Press any button on the appropriate keyless access
transmitter to identify yourself as Driver 1 or Driver 2.
The numbers on the back of the keyless access
transmitters correspond to the driver number.
3. Press the CONFIG hard key.
4. Adjust your settings for the driver’s seat, the outside
mirrors, and the steering column to a comfortable
driving position or exit position.
5. Push and hold either the Driver 1 or Driver 2 screen
buttons to store the driving positions. Push and
hold the Set Exit screen button to store the
exit position.
Two beeps will sound to confirm that the driver or
exit position is stored.
The memory settings are now programmed.
Any changes that are made to the Head-Up
Display (HUD), navigation system, and climate
controls while driving will be automatically stored
when then ignition is turned off.
Recall Memory Settings
To recall memory settings, do the following:
1. Be sure the ignition is either on, in accessory mode,
or in RAP. The vehicle must be stopped and/or the
shift lever must be in PARK (P).
2. Press the CONFIG hard key.
2-68
Page 85

3. Push and release either the Driver 1 or Driver 2
screen buttons to recall the driving positions.
Push and release the Set Exit screen button to
recall the exit position.
If the vehicle is in PARK (P), a beep will sound and
your previously saved driving position or exit position
will then be recalled. If the vehicle is not in PARK (P),
three beeps will sound and your previously saved
driving position or exit position will not be recalled.
A memory recall can be stopped by pressing any
memory seat or mirror position button. If you would
like the stored driving positions to be recalled when
unlocking your vehicle with the keyless access
transmitter or when starting your vehicle, see
“Occupant Position” under Personalization on
page 5-2 for more information.
Magnetic Ride Control (Vehicles
®
without Enhanced StabiliTrak
If your vehicle has this feature, select between the
following screen buttons:
Touring: Select this screen button for normal city and
highway driving. This setting provides a smooth, soft ride.
Performance: Select this screen button when road
conditions or personal preference demand more control.
This setting provides more “feel” or response to road
conditions.
)
Active Steering and Magnetic Ride
Control (Vehicles with Enhanced
®
StabiliTrak
If your vehicle has this feature, select between the
following screen buttons:
Touring: Select this screen button for normal city
and highway driving. This setting provides a smooth,
soft ride with less sensitive steering and requires
lower steering efforts than the Performance Mode.
This mode is not available when the Enhanced
StabiliTrak
selected through the traction control button. See
“Enhanced StabiliTrak
owner manual for more information.
Performance: Select this screen button when road
conditions or personal preference demand more
control. This setting provides more “feel” or response
to road conditions and quicker steering response.
)
®
Stability Competitive mode has been
®
” in the Index of your vehicle’s
2-69
Page 86
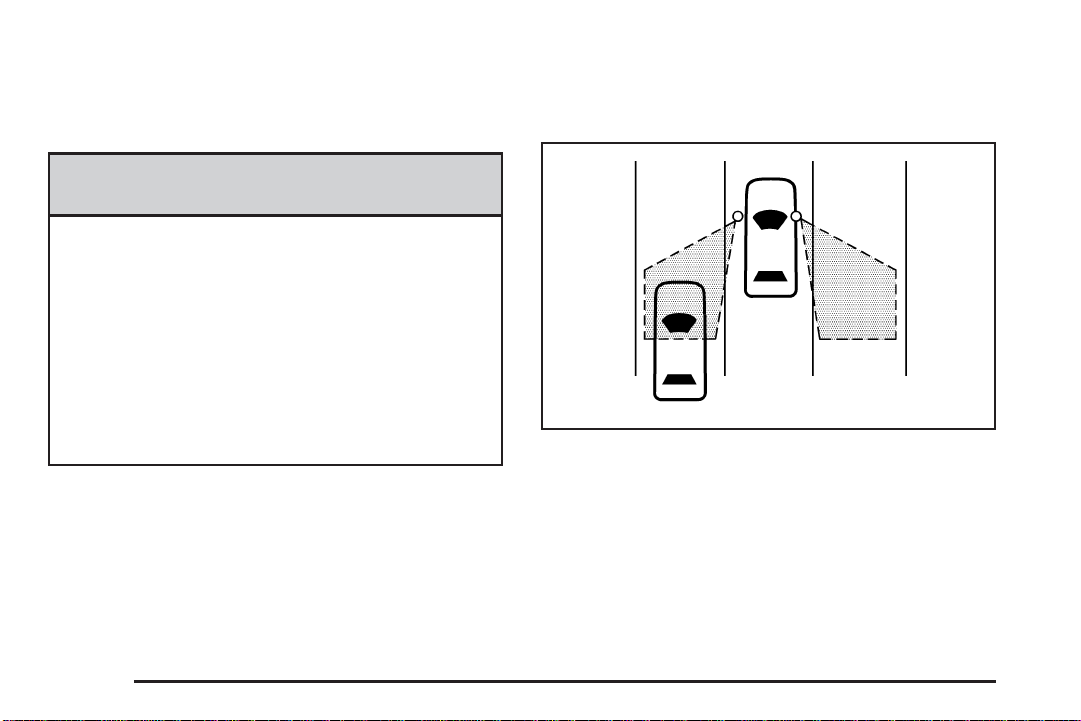
Side Blind Zone Alert
Your vehicle may have a Side Blind Zone Alert (SBZA)
system. Read this entire section before using the system.
{CAUTION:
The Side Blind Zone Alert (SBZA) system does
not detect vehicles outside the side blind zones,
which may be rapidly approaching. SBZA is not
designed to detect pedestrians, bicyclists, or
animals. SBZA is only a lane change aid. If you
do not use proper care before changing lanes,
vehicle damage, injury, or death could occur.
Even with SBZA, always check your vehicle’s
mirrors, glance over your shoulder, and start
your turn signal before changing lanes.
The SBZA system is an aid that may help you avoid
lane change crashes with vehicles in your side
blind spots (zones). When the system detects a
vehicle in the side blind zone, amber SBZA displays
will light up in your side mirrors. This indicates
that it may be unsafe for you to change lanes.
Before making a lane change, always check the
SBZA display, check the outside and rearview mirrors,
look over your shoulder for vehicles and hazards,
and start the turn signal.
SBZA Detection Zones
The SBZA sensor covers a zone of approximately one
lane over from both sides of the vehicle, 11 ft. or 3.5 m.
This zone starts at each side mirror and goes back
approximately 16 ft. (5.0 m). The height of the zone is
approximately between 1.5 ft. (0.5 m) and 6 ft. (2.0 m)
off the ground.
The SBZA detection zones do not change if your vehicle
is towing a trailer. So be extra careful when changing
lanes while towing a trailer.
2-70
Page 87
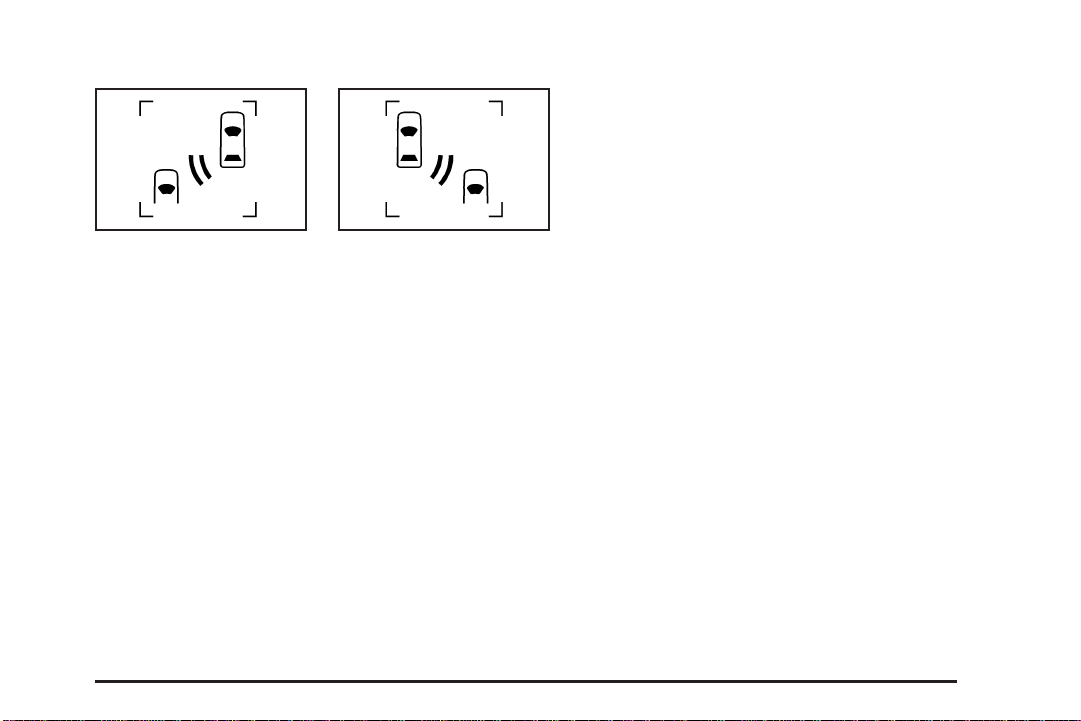
How the System Works
Left Side Mirror
Display
When the vehicle is started, both outside mirror displays
will briefly come on to indicate that the system is
operating. When you are driving forward, the left or
right side mirror SBZA display will light up if a vehicle
is detected in that blind zone. If you activate a turn
signal and a vehicle has been detected on the same
side, the SBZA display will flash to give you extra
warning not to change lanes.
SBZA displays do not come on while your vehicle is
approaching or passing other vehicles.
Right Side Mirror
Display
I (SBZA): To turn SBZA on and off, press the CONFIG
hard key. Press the symbol screen button to turn it on
and off. The symbol will be highlighted when the feature
is active. If SBZA is disabled by the driver, the SBZA
mirror displays will not light up.
When the System Does Not Seem
To Work Properly
If the SBZA displays do not light up when the system
is on and vehicles are in the blind zone, the system
needs service. Take your vehicle to your dealer/retailer.
SBZA displays may occasionally light up due to guard
rails, signs, trees, shrubs, and other stationary objects.
This is normal system operation, your vehicle does
not need service.
SBZA does not operate when the left or right corners
of the rear bumper are covered with mud, dirt, snow, ice,
or slush. For cleaning instructions, see “Washing Your
Vehicle” in the Index of your vehicle’s owner manual.
If the DIC still displays the CLEAN SIDE BLIND ZONE
ALERT SYSTEM message after cleaning the bumper,
see your dealer/retailer.
The SBZA displays may remain on if a trailer is attached
to your vehicle, or a bicycle or object is extending out
to either side of the vehicle.
When SBZA is disabled without the driver turning it
off and the driver attempts to turn SBZA back on
using the DIC, the SIDE ALERT ON option will not
be selectable if the necessary conditions for normal
system operation are not met.
2-71
Page 88
SBZA Error Messages
The following messages may appear in the DIC:
SIDE BLIND ZONE ALERT SYSTEM OFF:
This message indicates that the driver has turned
the system off.
CLEAN SIDE BLIND ZONE ALERT SYSTEM:
This message indicates that the SBZA system is
disabled because the sensor is blocked and cannot
detect vehicles in your blind zone. The sensor may
be blocked by mud, dirt, snow, ice, or slush. This
message may also activate during heavy rain or due
to road spray. Your vehicle does not need service.
For cleaning, see “Washing Your Vehicle” in the
Index of your vehicle’s owner manual.
SERVICE SIDE BLIND ZONE ALERT SYSTEM:
If this message appears, both SBZA displays will remain
on indicating there is a problem with the SBZA system.
If these displays remain on after continued driving,
the system needs service. Take your vehicle to
your dealer/retailer.
Lane Departure Warning
Your vehicle may have a Lane Departure Warning (LDW)
system. Read this entire section before using the system.
{CAUTION:
The Lane Departure Warning (LDW) system
does not steer the vehicle and is only an
aid to help you stay in your driving lane.
The LDW system may not:
• Provide you with enough time to avoid
a lane change collision.
• Be loud enough for you to hear the
warning beeps.
• Work properly under bad weather
conditions or if the windshield is not
kept clean.
• Detect lane markings and will not detect
road edges.
• Warn you that your vehicle is crossing
a lane marking if the system does not
detect the lane marking.
CAUTION: (Continued)
2-72
Page 89
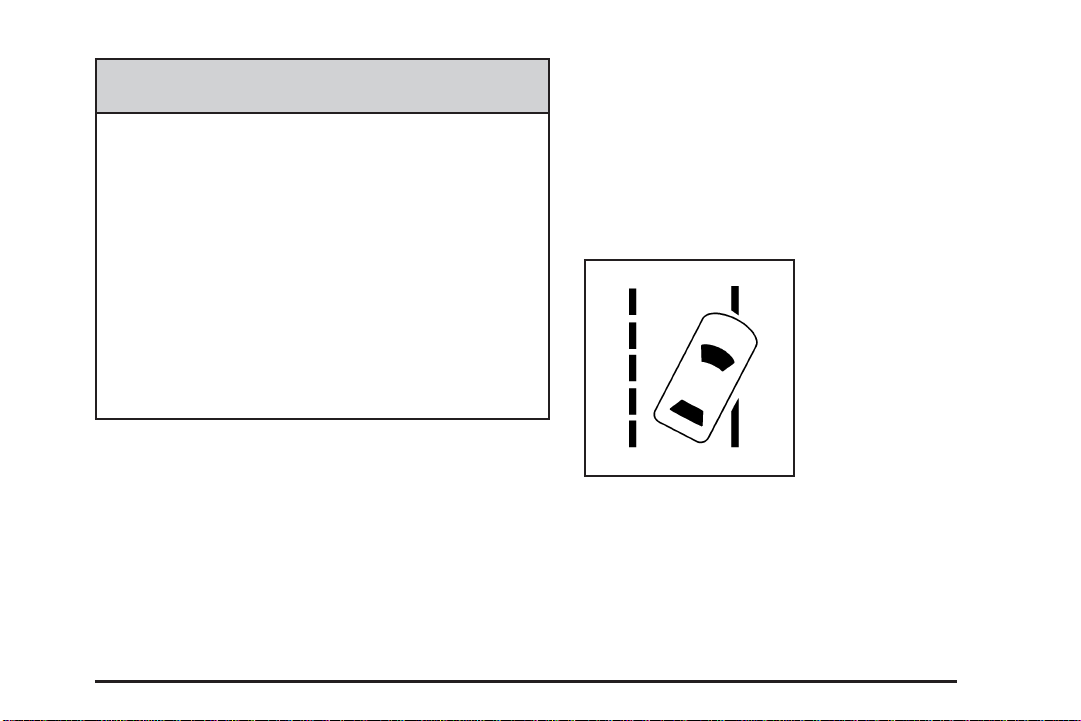
CAUTION: (Continued)
LDW will indicate the system is working
whenever it detects either the left or right lane
marking. So if you depart on the side of the
lane that LDW is not detecting, LDW will
not warn you.
If you do not carefully maintain your vehicle
position within the lane, vehicle damage,
injury, or death could occur. Even with LDW,
always keep your attention on the road and
maintain proper vehicle position within the
lane. Always keep the windshield clean and
do not use LDW in bad weather conditions.
When you cross a detected lane marking, the LDW
symbol will flash and you will hear three beeps.
LDW will not warn you if your turn signal is on or
if you make a sharp maneuver. Before making a lane
change, check your vehicle’s mirrors, glance over
your shoulder for vehicles and hazards, and start
your turn signal before changing lanes.
How the System Works
LDW uses a camera located between the inside
rearview mirror and the windshield to detect the
lane markings.
@ (Lane Departure Warning): To turn LDW on and
off, press the CONFIG hard key. Press the symbol
screen button to turn it on and off. The symbol will
be highlighted when the feature is active.
When the vehicle is started, the LDW symbol,
located in the instrument panel cluster, will briefly
come on to indicate that the light is operational.
2-73
Page 90

LDW only operates at speeds of 35 mph (56 km) or
greater. If LDW is turned on when traveling at these
speeds, the LDW symbol will appear green if the system
detects a left or right lane marking. This symbol will
change to amber and flash and three beeps will sound
if you cross a detected lane marking without using
your turn signal.
If the LDW symbol does not appear, LDW is not
currently operating and will not warn you.
When the System Does Not Seem
To Work Properly
The LDW symbol will not appear when the system
is having difficulty seeing the lines on the road or if
the view of the camera on the windshield is blocked
with mud, dirt, snow, ice, or slush, if the windshield
is damaged, or when weather limits visibility, such as
while driving in fog, rain, or snow conditions. This
is normal operation, your vehicle does not need service.
For cleaning instructions, see “Washing Your Vehicle”
in the Index of your vehicle’s owner manual.
LDW warnings may occasionally occur due to tar
marks, shadows, cracks in the road, or other road
imperfections. This is normal system operation,
your vehicle does not need service.
LDW Error Message
SERVICE LANE DEPARTURE SYSTEM:
This message may appear in the DIC to indicate
that LDW is not working properly. If this message
remains on after continued driving, the system needs
service. Take your vehicle to your dealer/retailer.
See “DIC Warnings and Messages” in the Index of
your vehicle’s owner manual for more information.
LANE DEPARTURE SYSTEM UNAVAILABLE:
This message may appear in the DIC if LDW does
not activate due to a temporary condition. See “DIC
Warnings and Messages” in the Index of your vehicle’s
owner manual for more information.
Global Positioning System (GPS)
The navigation system determines the position of
your vehicle by using satellite signals, various vehicle
signals, and map data.
At times, other interferences such as the satellite
condition, road configuration, the condition of the vehicle
and/or other circumstances can interfere with the
navigation system’s ability to determine the accurate
position of the vehicle.
2-74
Page 91

The GPS shows the current position of your vehicle
using signals sent by the GPS Satellites of the
United States Department of Defense. When your
vehicle is not receiving signals from the satellites,
a symbol will appear on the map screen. Refer to
Symbols on page 2-8.
This system may not be available or interferences
may occur if any of the following are true:
• Signals are obstructed by tall buildings, trees,
large trucks, or a tunnel.
• Objects are located on the rear shelf.
• Satellites are being repaired or improved.
• After-market glass tinting has been applied to
the vehicle’s rear windshield.
Notice: Do not apply after-market glass tinting to
the vehicle’s windows. Glass tinting will interfere
with the system’s ability to receive GPS signals
and cause the system to malfunction. You might
have to replace the window to correct the problem.
This would not be covered by your warranty.
For more information if you are experiencing a problem,
see If the System Needs Service on page 2-77 and
Problems with Route Guidance on page 2-76.
Vehicle Positioning
At times, the position of the vehicle on the map may be
inaccurate due to one or more of the following reasons:
• The road system has changed.
• The vehicle is driving on slippery road surfaces
such as in sand, gravel and/or snow.
• The vehicle is traveling on winding roads.
• The vehicle is on a long straight road.
• The vehicle is approaching a tall building or a
large vehicle.
• The surface streets run parallel to a freeway.
• The vehicle has just been transferred by a vehicle
carrier or a ferry.
• The current position calibration is set incorrectly.
• The vehicle is traveling at high speed.
• The vehicle changes directions more than once,
or when the vehicle is turning on a turn table in
a parking lot.
• The vehicle is entering and/or exiting a parking lot,
garage or a lot with a roof.
• The GPS signal is not received.
2-75
Page 92

• A roof carrier is installed on your vehicle.
• The vehicle is equipped with tire chains.
• The tires are replaced.
• The tire pressure for your tires is incorrect.
• The tires are worn.
• The first time the map DVD is inserted.
• The battery is disconnected for several days.
• The vehicle is driving in heavy trafficwhere driving
is at low speeds, and the vehicle is stopped and
started repeatedly.
If you experience problems with your system, you may
need to calibrate the system. This may be due to tire
pressure differences, or if a spare tire is installed. To
calibrate the system, see Configure Menu on page 2-59.
Problems with Route Guidance
Inappropriate route guidance may occur under one or
more of the following conditions:
• You have not turned onto the road indicated.
• Route guidance may not be available when using
automatic rerouting for the next right or left turn.
• The route may not be changed when using
automatic rerouting.
• There is no route guidance when turning at
an intersection.
• Plural names of places may be announced
occasionally.
• It may take a long time to operate automatic
rerouting during high-speed driving.
• Automatic rerouting may display a route returning to
the set waypoint if you are heading for a destination
without passing through a set waypoint.
• The route prohibits the entry of a vehicle due to a
regulation by time or season or any other regulation
which may be given.
• Some routes may not be searched.
• The route to the destination may not be shown
if there are new roads, if roads have recently
changed or if certain roads are not listed on the
map DVD. See Ordering Map DVDs on page 2-77.
To recalibrate the vehicle’s position on the map,
see Configure Menu on page 2-59.
2-76
Page 93

If the System Needs Service
If your system needs service and you have followed the
steps listed here and still are experiencing problems,
see your dealer/retailer for assistance.
Ordering Map DVDs
The map DVD in your vehicle is the most up-to-date
information available when your vehicle was produced.
The map DVD is updated periodically, provided that
the map information has changed.
If you have any questions about the operation of the
navigation system or the update process, contact
the GM Nav Disc Center toll-free phone number,
1-877-NAV-DISC (1-877-628-3472) or go to the
center’s website, www.gmnavdisc.com. If you need
any updates or a replacement disc, because the
current disc is lost, damaged, or needs to be updated,
call the GM Nav Disc Center or order a new disc online.
To order a disc, have your Vehicle Identification Number
(VIN) available. This helps the center make sure you
receive the correct and most up-to-date DVD map disc
for your vehicle. See “Vehicle Identification Number
(VIN)” in the Index of your vehicle’s owner manual for
more information.
After receiving the updated disc, replace the old disc
in the navigation system. See “Installing the DVD Map
Disc” and “Ejecting the DVD Map Disc” under Maps
on page 2-4. Dispose of the old disc to avoid confusion
about which disc is the most current.
Database Coverage Explanations
Coverage areas vary with respect to the level of map
detail available for any given area. Some areas will
feature greater levels of detail than others. If this
happens, it does not mean there is a problem with the
system. As the map DVD is updated, more detail
may become available for areas which previously had
limited detail. See Ordering Map DVDs on page 2-77.
2-77
Page 94

✍ NOTES
2-78
Page 95

Section 3 Navigation Audio System
Navigation Audio System ..................................3-2
Six-Disc CD/DVD Changer .............................3-13
Auxiliary Devices ..........................................3-26
Radio Personalization ....................................3-27
3-1
Page 96

Navigation Audio System
Notice: Before adding any sound equipment to
your vehicle, such as an audio system, CD player,
CB radio, mobile telephone, or two-way radio,
make sure that it can be added by checking with
your dealer/retailer. Also, check federal rules
covering mobile radio and telephone units. If sound
equipment can be added, it is very important to
do it properly. Added sound equipment can
interfere with the operation of your vehicle’s engine,
radio, or other systems, and even damage them.
Your vehicle’s systems can interfere with the
operation of sound equipment that has been added.
Notice: The chime signals related to seat belts,
parking brake, and other functions of your vehicle
operate through the navigation system. If that
equipment is replaced or additional equipment is
added to your vehicle, the chimes may not work.
Make sure that replacement or additional equipment
is compatible with your vehicle before installing
it. See “Accessories and Modifications” in the
Index of your vehicle’s owner manual.
Your vehicle has a feature called Retained Accessory
Power (RAP). With RAP, the audio system can
be played even after the ignition is turned off.
See “Retained Accessory Power (RAP)” in the Index
of your vehicle’s owner manual for more information.
The audio system is operated using navigation system
menus. The audio menus are explained in this section.
Playing the Radio
On
audio system on and off. Turn the knob to increase
or to decrease the volume to the audio system.
BAND: Press this key to access the audio source
screen. Then press this key to switch between AM,
FM, WX (weather), or XM (if equipped).
AUX (Auxiliary): Press this key to play the video and
audio devices connected to the auxiliary jacks. See
Auxiliary Devices on page 3-26 for more information.
SRCE (Source): Press this key to change the
audio source from the radio band to CD, audio DVD,
or video DVD, depending on what is loaded in the
six-disc DVD changer, or from DVD/CD to radio mode.
(Power/Volume): Press this knob to turn the
3-2
Page 97
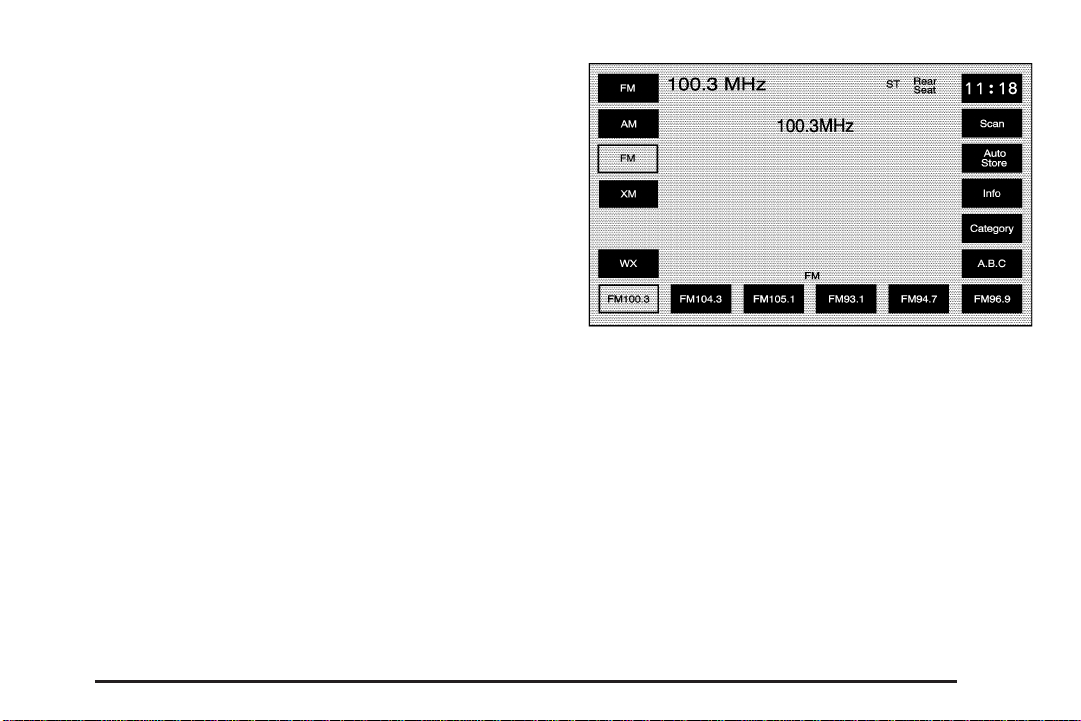
e (Audio): Press this key to view the AUDIO ADJUST
screen. See “Audio Adjust” screen later in this section.
ǻ(Seek/Scan): To seek stations, press the up
or down arrow to go to the next or previous station
and stay there.
To scan stations, press and hold either arrow for
less than 2 seconds. The radio will go to a station,
play for a few seconds, then go on to the next station.
To stop scanning, press either arrow again or touch
the scan screen button.
Tuning Knob: Turn this knob to change frequencies.
Finding a Station
Press the band/source screen button, located in the
top left corner (AM, FM, CD, etc.), from any screen
to access the audio source screen. Once this screen
is displayed, press the BAND hard key to toggle
between the bands or touch the desired band
screen button, to select it.
FM source shown, other sources similar
Scan: To scan stations, touch the Scan screen button.
The radio will go to a station, play for a few seconds,
then go on to the next station. Touch Scan again to
stop scanning.
To scan preset stations, touch and hold Scan for
two seconds. The radio will go to the next preset station,
play for a few seconds, then go on to the next preset
station. Touch Scan again to stop scanning.
While in A.B.C mode, the system will change bands
and screens to the current band.
If available on your vehicle, you can also use the
1 - 6 (preset seek) steering wheel control. Each press
of this button will take you to the next preset station.
3-3
Page 98

Auto Store (Automatic): Select this screen button to
automatically create a preset station list of the strongest
stations available in the local area. Once this button
is selected, the system will start storing stations in
sequential order, starting from the station currently
selected. Select this button again to return to the original
preset stations. This is not available for XM™ Satellite
Radio Stations or when A.B.C. has been selected on.
Info (Information): See “Radio Data System (RDS)”
later in this section.
Category: See “Radio Data System (RDS)” later in
this section.
Preset Stations
Storing Preset Stations
This feature allows you to store up to 24 preset stations.
You can store six AM, six FM, six WX (weather), and
six XM™, if equipped. To store presets, do the following:
1. Turn the audio system on or select the BAND
hard key.
2. Select the audio band.
3. Seek, scan, or tune to the desired station.
4. Press and hold one of the six preset screen buttons
for more than two seconds or until you hear a beep.
5. Press the
tone, Digital Signal Processing (DSP), fade, and
balance. The screen will time out and the changes
will be stored to the preset station.
6. Repeat the steps for each preset.
e (audio adjust) hard key to adjust the
A.B.C Preset Stations
A.B.C: This feature allows you to store up to
42 presets, six stations in seven different lists.
The presets within each list can be mixed: AM, FM,
or XM™, if equipped. The list names are A - G.
Press the A.B.C screen button to enter this feature.
Press the left/right arrow buttons to scroll through the
lists. The name of the list is displayed between the
two arrows and the presets for each list are displayed
on the preset buttons. These presets are in addition
to any preset stations that may already be stored.
To exit this feature, press the A.B.C screen button.
3-4
Page 99
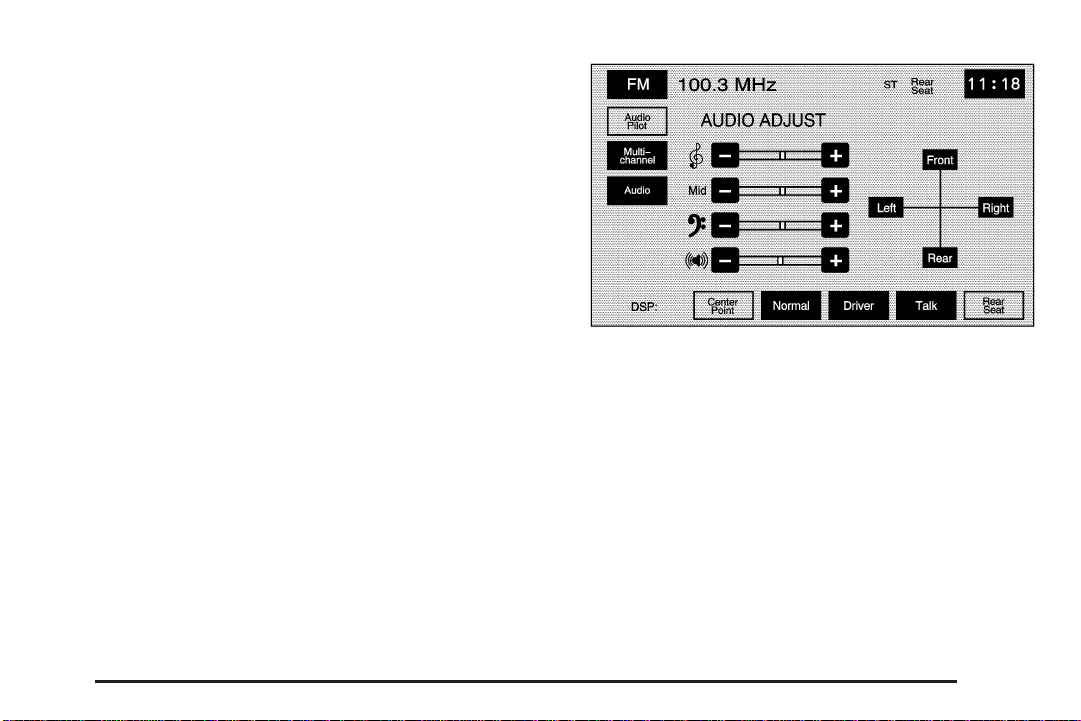
To store the A.B.C presets, do the following:
1. Turn the audio system on or select the BAND
hard key.
2. Select the A.B.C screen button.
3. Scroll to the desired list (A - G).
4. Select the audio band. The presets within each list
can be mixed: AM, FM, or XM™, if equipped.
5. Seek, scan, or tune to the desired station.
6. Press and hold one of the six preset screen buttons
for more than two seconds or until you hear a beep.
7. Press the
the tone, Digital Signal Processing (DSP), fade,
and balance. The screen will time out and the
changes will be stored to the preset station.
8. Repeat the steps for each preset and list.
e (audio adjust) hard key to adjust
Audio Adjust
e
(Audio Adjust): Touch this hard key to access
the AUDIO ADJUST menu and to adjust the tone,
Digital Signal Processing (DSP), fade, and balance
for all sources. The system automatically stores
audio adjustment settings as changes are made to
a preset station.
Audio Pilot (Noise Compensation Technology):
Your vehicle has Bose AudioPilot
technology.
To use this feature, touch the Audio Pilot screen button.
To turn it off, touch the screen button again. The
button will be highlighted when this feature is on.
®
When on, AudioPilot
system equalization, to compensate for background
noise, so that your music always sounds the same at
the set volume level.
continuously adjusts the audio
®
noise compensation
3-5
Page 100

This feature is most effective at lower volume settings
where background noise can affect how well you
hear the music being played through your vehicle’s
audio system. At higher volume settings, where
the music is much louder then the background noise,
there may be little or no adjustments by AudioPilot
For more information on AudioPilot
www.bose.com/audiopilot.
Multi-channel: When available, touch this screen
button to play the DVD Audio source in surround
mode. Touch this screen button again to have the
audio play in 2-channel mode. The system will play
®
Dolby
feature depends on the media in the DVD changer.
and DTS tracks in surround sound. This
®
, please visit
®
.
Setting the Tone
P (Treble): Touch the plus (+) or minus (−) sign next to
this symbol to increase or decrease the treble. Touch
the center position to adjust the setting to the center.
Mid (Mid-range): Touch the plus (+) or minus (−)
sign next to this symbol to increase or decrease the
mid-range. Touch the center position to adjust the
setting to the center.
D (Bass): Touch the plus (+) or minus (−) sign next
to this symbol to increase or decrease the bass. Touch
the center position to adjust the setting to the center.
Z (Speaker): Touch the plus (+) or minus (−) sign next
to this symbol to increase or decrease the speaker
when in surround mode or Center Point DSP setting is
selected. This feature allows you to increase or
decrease the amount of surround sound. Touch the
center position to adjust the setting to the center.
Adjusting the Speakers
Left/Right (Balance): To adjust the balance between
the right and the left speakers, touch and hold the Left or
Right screen buttons. To center the balance and the
fade, touch the center, where the two lines meet.
Front/Rear (Fade): To adjust the fade between the
front and the rear speakers, touch and hold the Front
or Rear screen buttons. To center the balance and
the fade, touch the center, where the two lines meet.
3-6
 Loading...