

Cabela's GS-2001Gun Dog Series Quick Start Manual
Remote Trainer
GS-2001

+ — +
—
+ —
Cabela’s®Gun Dog®— Owner’s Manual
3
Cabela’s
®
Gun Dog®— Owner’s Manual
2
Cabela’s®Gun Dog
®
Remote Trainer Kit
Quick Start Guide
Step 1 Charging the Batteries
1. Plug the AC Adapter into a
120VAC electric outlet.
2. Connect the AC Adapter to
the Charge Cradle.
3. Put the Collar Receiver on
the Charge Cradle as
shown in figure 3. The light
on the Collar Receiver
glows red while charging,
and glows green when fully
charged. If the light does
not come on, check Collar
Receiver orientation on
the Cradle.
4. Install Transmitter Batteries:
• Remove the battery cover
from the back of the
Transmitter.
• Insert 3 AAA alkaline
batteries (oriented as shown
in battery compartment).
• Replace the battery cover.
• When the batteries are put
in, the Transmitter is in
battery conservation mode;
press any button to activate
the transmitter.
AC Adapter
1
2
4
FIRST THINGS FIRST
Your Gun Dog®Collar Receiver needs to
charge its batteries before you can use it.
While your Gun Dog Collar Receiver is
charging, read this manual to become
familiar with the devices.
Gun Dog Hardware
includes Antenna,Test Light, Lanyard,
Long Contacts, and 3-AAA batteries.
Kit Contents
Quick Start Guide
GS-2001
Transmitter
Charge Cradle
AC Adapter
GS-2001
Charging System
CHARGE CRADLE INDICATOR LIGHT
OPERATIONAL MODE
LIGHT COLOR
LIGHT FUNCTION
No Collar Receiver on
the Charging Cradle but
charger is connected
Green
Light is solid in color
Unit is charging
Red
Light is solid in color
while charging
Unit is fully charged
(Collar Receiver on
Charging Cradle)
Green
Light flashes once per
second once the battery
is completely charged
Collar Receiver
Charge Cradle
3
Receiver
Light
THE TRANSMITTER
The Transmitter signals the electronic
Collar Receiver to produce a
harmless, yet effective stimulation
and/or tone. The no-slip grip feels
comfortable in your hand for
extended periods of training time or
field time.
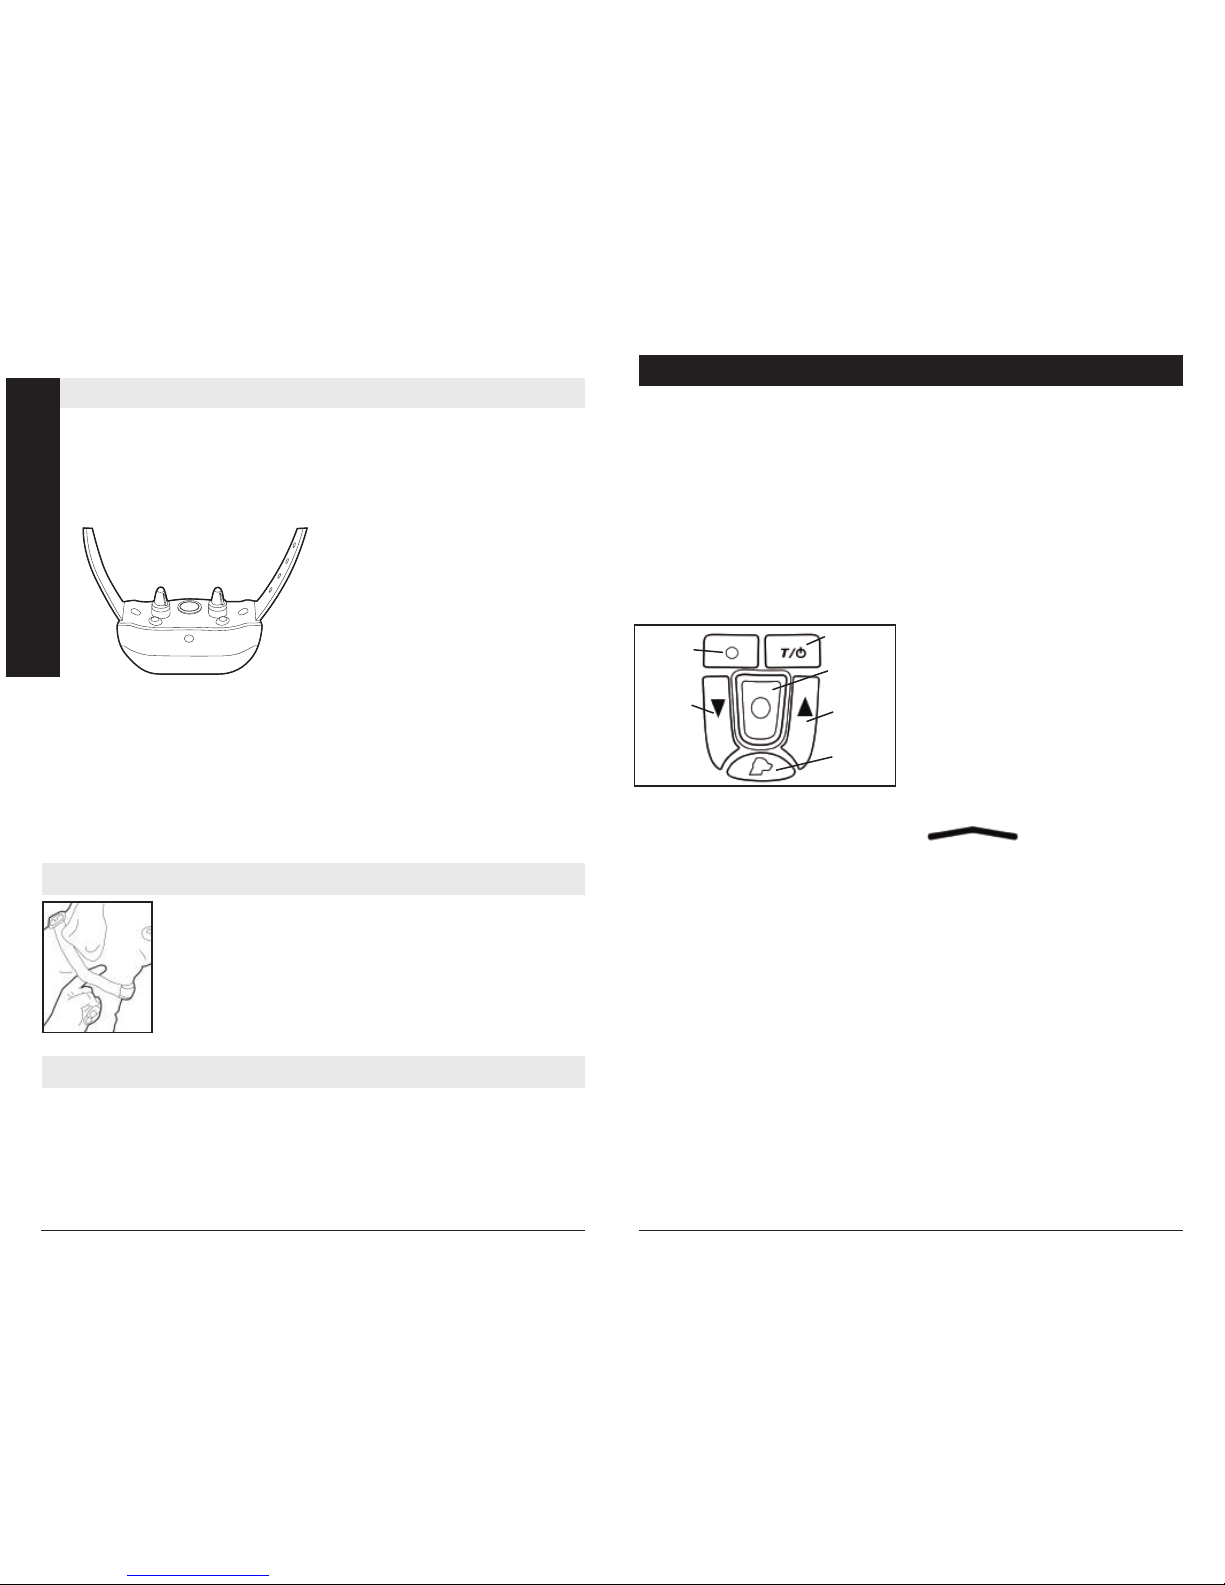
Explaining the
Transmitter Keypad Buttons:
Above keypad buttons are explained
as follows:
Tone – When pressed, causes the
Collar Receiver to produce a tone. No
stimulation is delivered.
Stimulation – also called the “Stim
Button,” when pressed, this sends
continuous stimulation signal to the
Collar Receiver at the intensity shown
in the display for as long as you hold
down the button (See “Over
Stimulation Protection” on page 11).
Button features one raised bump to
easily locate by touch, even with
gloves on!
Stimulation Level Up & Stimulation
Level Down – adjusts the stimulation
intensity through a range of levels.
(from 1 low to 15 high).
Exclusive feature: Hold either stim
level up or stim level down button for
half a second for the Rapid Ramp
™
feature to start — The Transmitter
display scrolls through stim levels
more quickly.
Dog Select – Switches Transmitter
control from Dog (Collar) 1 to Dog
(Collar) 2, for training two dogs. You
can purchase a second collar to
expand the system for training two
dogs.
Alternate Stimulation (Alt Stim)–
(top left red button) – When you
press the Alt Stim button, the
symbol displays.
Program this preset button to the
desired stimulation level. (See
Alternate Stimulation (Alt Stim) on
page 7).
Cabela’s®Gun Dog®— Owner’s Manual
5
Cabela’s
®
Gun Dog®— Owner’s Manual
4
Put the collar around your dog’s neck and adjust to find
the proper fit. Fasten the collar so the fit is snug, yet loose
enough to allow one finger to fit between the strap and
the dog’s neck. Fit is important because a loose collar
may cause inconsistent performance.
Step 3 Fit the Collar Receiver on Your Dog
Step 4 Begin Training
Read the information in the Training section on pages 11-12. Though your dog
may show good initial response to the training, be sure to continue training for
several weeks. The convenience that your new remote training system offers is
well worth the time invested.
Quick Start Guide
Step 2 Turning the Collar Receiver ON and OFF
Quick Start Guide
Tone
Dog Select
Alternate
Stimulation
Stimulation
Level Down
Stimulation
Level Up
Stimulation
To Turn the Collar Receiver ON:
Press and release the On/Off Button
when the Collar Receiver Indicator
Light comes on. The Collar Receiver
will emit a start up tone.
To Turn the Collar Receiver OFF:
Press and release the On/Off Button
when the Collar Receiver Indicator
Light comes on solid (red) and the
Collar Receiver will emit an off tone.
To extend the life between charging
cycles, turn the Collar Receiver off
when it is not in use.
NOTE: Approximate battery life
between charges is 40 to 60 hours,
depending on frequency of use.

Cabela’s®Gun Dog®— Owner’s Manual
7
Cabela’s
®
Gun Dog®— Owner’s Manual
6
Double Reward
Double Reward is the term used
when a stimulation is followed by a
half-second delay and a half-second
tone.
GS-2001 Transmitter:
1. Choose desired dog using
the Dog Select button.
2. Press up the arrow and
at the same time until the PROG
symbol appears in the Transmitter
display.
3. Press to switch between
Stim without Tone and Double
Reward. (Flashing tone symbol
in display means Double Reward,
no tone symbol means Stim
without Tone.) Repeatedly
pressing the Tone button switches
between these two choices.
4. Press the down arrow to save
setting and exit programming.
Alternate Stimulation (Alt Stim)
Some trainers depend upon instant
access to a higher stimulation setting
for circumstances where the dog may
not respond to lower levels, such as a
high distraction environment. Your
Transmitter features a red, preset Alt
Stim button that you can use to
deliver an alternate (higher) level of
stimulation. The GS-2001 transmitter
Alt Stim buttons are factory-set to
level 10.
Battery Indicator
When the Battery Indicator shows the
low battery symbol (1/6 capacity),
replace the Transmitter batteries
soon. When only the battery outline is
displayed, the Transmitter’s battery is
too low to send transmissions to the
Collar Receiver. Transmitter batteries
must be replaced to regain operation.
Battery Cautions
Do not charge batteries every night.
To maximize battery life, use the
Collar Receiver until the LED light
blinks red.
• Do not disassemble batteries
• Do not short circuit batteries
• Do not expose to high temperature:
60°C/140°F
• Do not incinerate batteries
• Keep batteries out of reach of
children
Batteries must be recycled or
disposed of properly. Batteries should
NEVER be discarded in municipal
waste.
Transmitter Display Symbols:
The display stays on for 30 minutes
after a button press. After 30 minutes
with no button presses, the display
shuts off. Pressing any button will
make the display turn back on.
Various symbols you might see in
the Transmitter display are explained
as follows:
(Numeric readout) – Appears
in the middle of the display, this
shows the chosen stimulation level.
Adjust with the Stim level up / Stim
level down (arrow) buttons.
– The left symbol
displays when the Transmitter is
controlling Dog Collar Receiver 1. You
can purchase a second collar to
expand the system for training two
dogs. The right symbol displays when
controlling Dog Collar Receiver 2.
Switch between Collar Receivers by
pressing the Dog Select button.
– This symbol appears
whenever Tone is part of the
Stimulation type chosen. (See
Transmitter Default Settings in
following column).
– The battery indicator
provides constant awareness of your
battery’s power level. (See Battery
Indicator on page 7).
USING THE TRANSMITTER
Turning ON the Transmitter
Power up the Transmitter by pressing
any button. You will see the display
turn on when you press any button.
Reset All Programmable Settings
Press and at the same time to
reset all programmable settings to the
default settings. The Transmitter
Display shows all symbols for two
seconds during reset.
Transmitter Default Settings
Dog 1&2 Stim Type:
(Continuous) Stim Only
Dog 1&2 Primary Stim Level: 5
Dog 1&2 Alt Stim Level: 10
You can program the above options
for your Transmitter, except for the
Alt Stim level.
Set Stim Button Intensity Level
To change the intensity level for the
Stim button:
Press or until the desired
stimulation level is displayed. When
the Stim button is pressed, the Collar
Receiver will deliver a stimulation at
this setting.
Battery is at 2/3 to Full capacity.
Transmitter is fully functional.
Battery is at 1/3 capacity.
Transmitter is still fully functional.
Battery is at 1/6 capacity.
Transmitter will operate the Collar
Receiver, but replace Transmitter
batteries as soon as possible.
Battery is almost dead.
Transmitter is unable to operate
the Collar Receiver. Replace batteries
to use again.
 Loading...