

Page 1
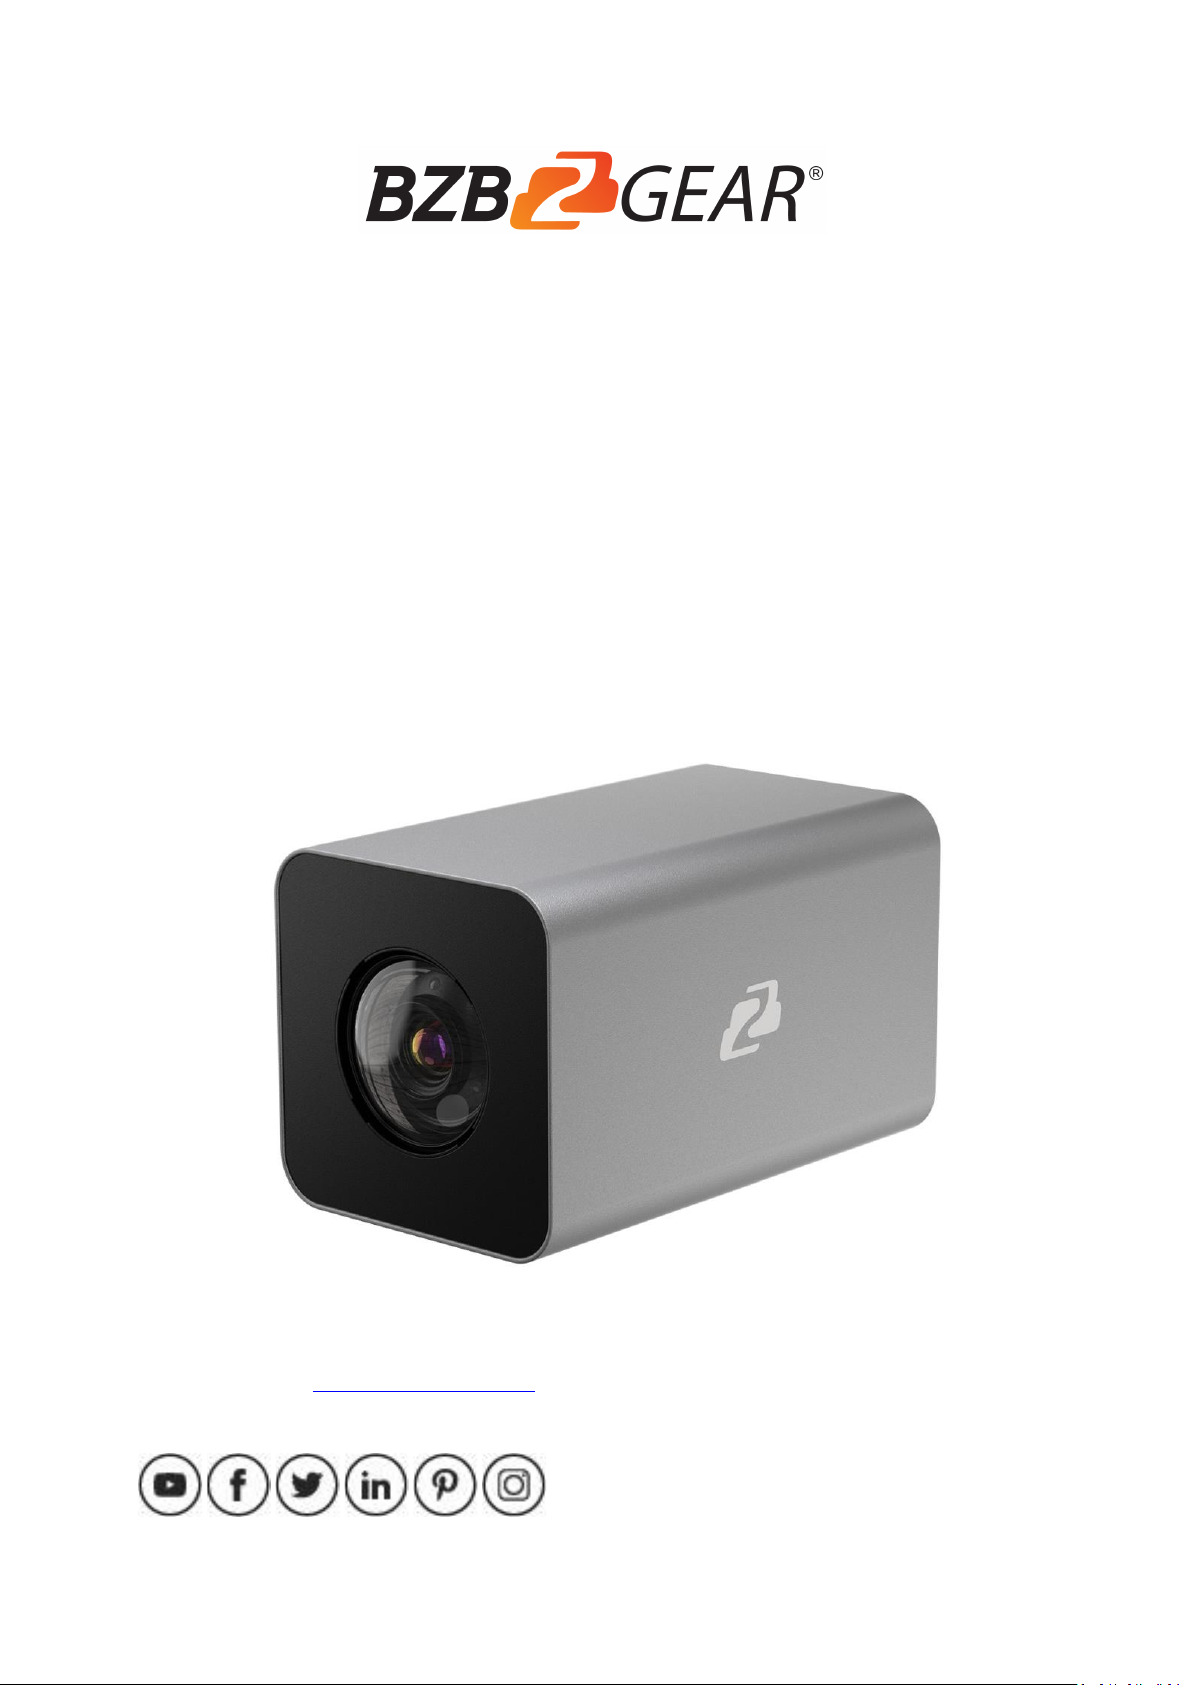
BG-B20SHA
HD Integrated Camera
User Manual
CONTACT
1.888.499.9906 | [email protected] | bzbgear.com
FOLLOW US
Page 2

1
Contents
1. Precautions............................................................................................................................. 2
2. Functions .............................................................................................................................. 3
2.1 Technical Parameters ............................................................................................................ 3
2.2 Camera Parameters .............................................................................................................. 3
2.3 Technical Specification ........................................................................................................... 4
3.1 Camera Interface Instruction ..................................................................................................5
3.2 Camera Dimensions ...............................................................................................................5
4. Camera Menu Settings ............................................................................................................6
4.1 Exposure ............................................................................................................................... 6
4.2 Color ...................................................................................................................................... 7
4.3 Picture ................................................................................................................................... 7
4.4 P/T/Z ..................................................................................................................................... 8
4.5 Noise Reduction ..................................................................................................................... 8
4.6 Video Format .......................................................................................................................... 8
4.7 System ................................ ................................................................................................ .... 9
4.8 Restore Default ....................................................................................................................... 9
5. Network Connection ................................................................................................ ................ 9
5.1 Camera Web Interface .......................................................................................................... 11
6. Tech Support .......................................................................................................................... 14
7. Warranty ................................................................................................................................ 15
8. Mission Statement .................................................................................................................. 15
Page 3

2
1.
Precautions
Electronic
The electrical safety standards of the country and region must be strictly observed in the
installation and use of this product.
There is no power switch in the body of this product. If there is an equipment failure
immediately disconnect the power supply. The video cable and control cable should be
shielded and wired independently and cannot be mixed with other cables.
Transportation
During transportation, storage, and installation it is necessary to prevent damage caused
by heavy pressure, severe vibration, immersion, etc.
Installation
Please refer to the user installation manual carefully during installation. Handle the
camera components gently to avoid damage to the camera. The camera lens is an advanced
optical product - protect the lens from contact to avoid scratching and affecting image quality..
Maintenance
All installation and maintenance work on this unit should be performed by a qualified service
technician or system installer.
Disassembly
Do not disassemble the camera or protective cover. There are no user-serviceable parts
in the product. It should be repaired by professional maintenance personnel.
Working Environment
Environment Temperature : -10 ℃ ~ +50 ℃ Humidity : <95% Input
Voltage:DC12V±2V Max Power consumption:12W
Don’t aim the camera directly at bright objects.
Do not aim the camera at a bright object. Whether powered on or not, never aim at the sun or
other bright objects as this can damage the sensors and cause blurred or haloed images.
Page 4
3
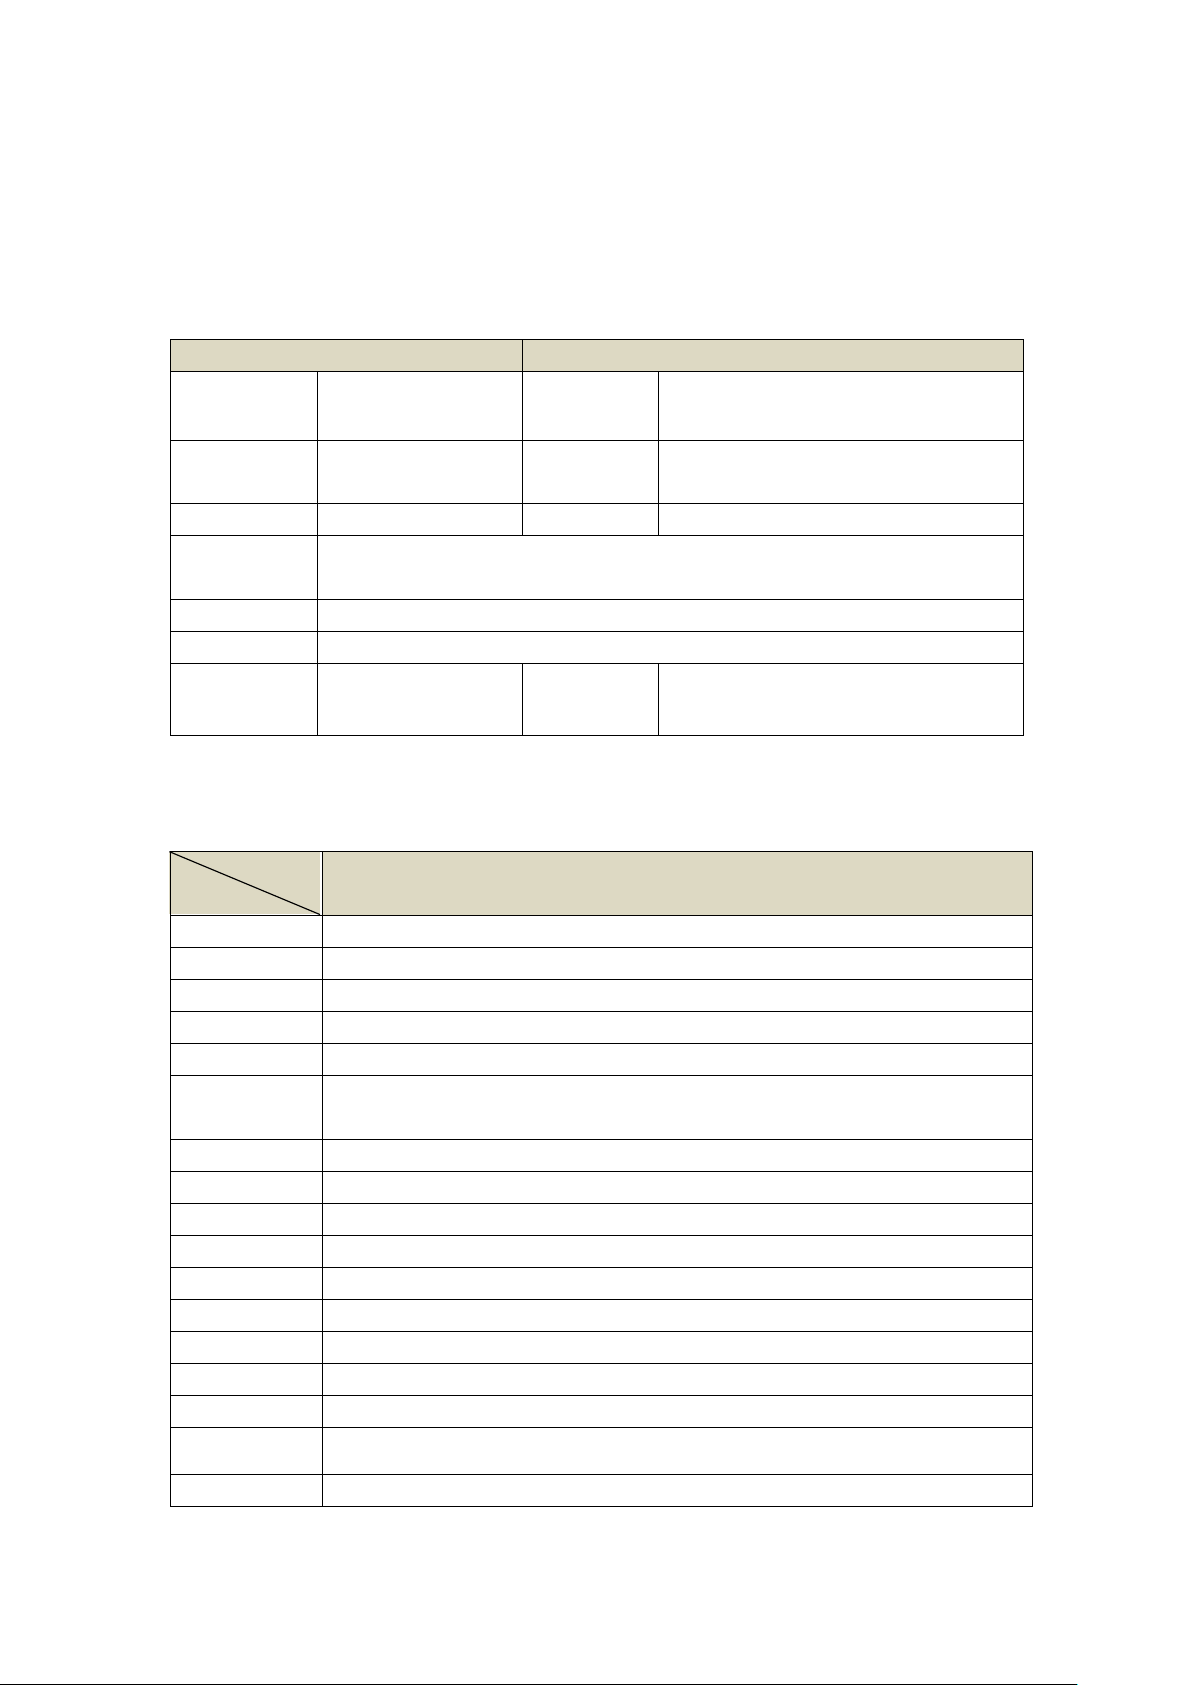
2. Functions
Electronics
Communication
Constant
Voltage
DC12V
Baud
rate
4800/9600/19200/38400bps
Power
Consumption
12W
Protocol
VISCA /Pelco - D/Pelco - P/ONVIF
Encoding
Built-in
ID
1 ~255
Operation
Environment
-10°~+50°
Humidity
0~95%
Installation
Desk, Top-down
Presets 255
N.W
1.2kg
Model
Spec
20X
Senser
1/2.8″ Progressive CMOS
Effect Pixel
2. 3 Megapixel
Zoom
20X Optical Zoom, 12X Digital Zoom
Lens
f=4.7mm-94.0mm
Iris
F1.6(W)-F3.5(T)
Horizontal of
view
3.2°(T) ~ 57.4°(W)
Min. Distance
30CM
Min. Illumination
0.5Lux(Day),0.1Lux(Night),0.005Lux(DSS)
Gain
Auto/Manual
Focus
Auto/Manual
S/N Radio
≥50dB
Shutter
1/25(1/30)s - 1/ 30000s
Presets
255 presets
Communication
RS-232/RS-485/ ONVIF
Protocol
VISCA,PELCO-D,PELCO-P, ONVIF
Video Format
1080P60/59.94/50/30/29.97/25,
1080I 60/59.94/50/30/25, 720P 60/59.94/50/30/29.97
Video Output
3G- SDI HDMI IP Streaming (RTMP/RTSP/RTMPS)
2.1
Technical Parameters
2.2
Camera Parameters
Page 5

4
2.3
Technical Specification
Input/Output Interface
Video Output: 3G-SDI / HDMI / IP Streaming
Audio Input: 3.5mm Audio Input
Input/Output Control Interface: 2PIN Terminal,3.50mm
Power Interface:2PIN Terminal,3.50mm or POE+
Features
Supports RS232C or RS485 protocols, allowing a PTZ Controller or PC to control the camera.
Improved image quality from the newly developed digital signal processor (DSP).
Built-in attenuation filter that physically removes IR (infrared). This filter can be turned on or off
automatically, providing high quality images for shooting environments of different brightness.
The five-direction button on the back of the camera allows users to quickly and easily change any
parameters of the camera.
Default IP Address: 192.168.1.162
Built-in Audio Input, Audio encode standard support G.711,G.722,G.722.1,
G.728,G.722.1C, ACC
Supports multiple interface SDI/HDMI/IP Streaming simultaneous video output
Supports POE
Page 6
5
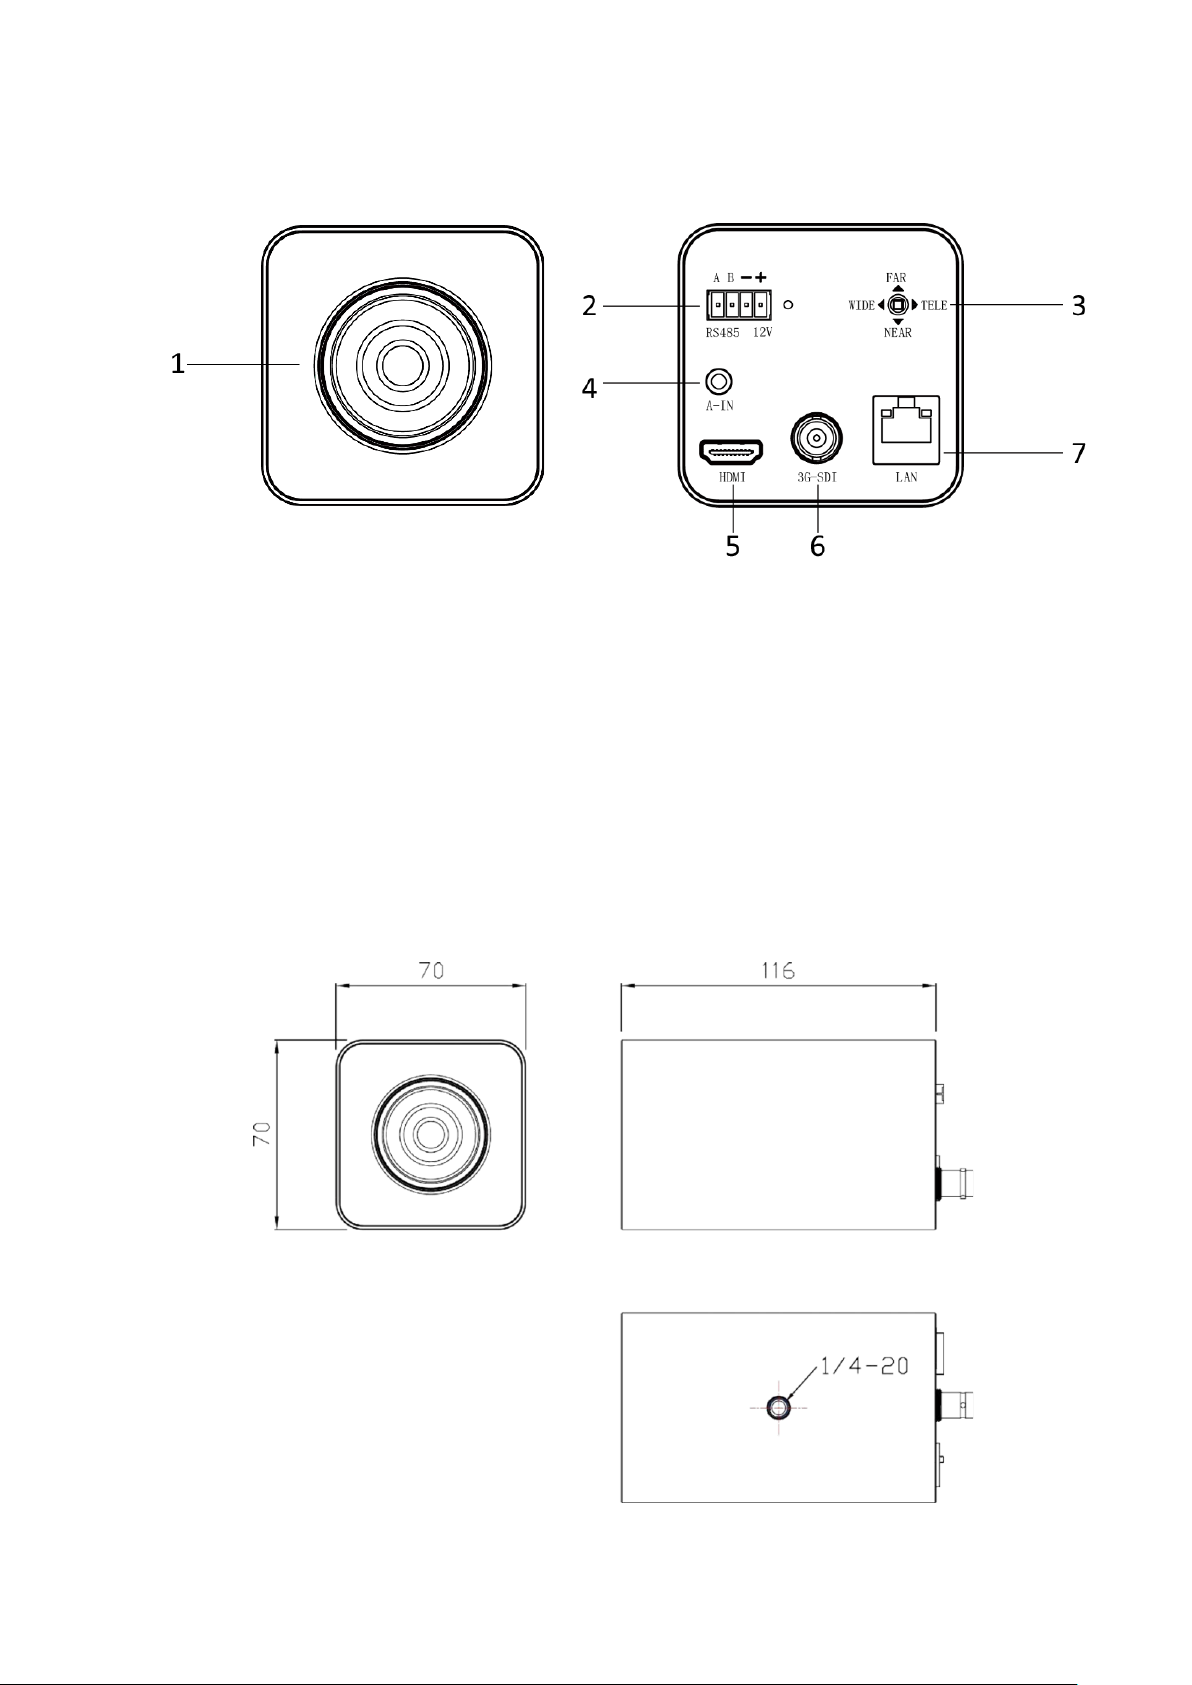
3.1 Camera Interface instruction
1. Lens
2. Terminal Pin Interface A: RS485+ B: RS485-
-/+: DC12V Power Interface
3.2 Dimensions (mm)
3. Five-direction Button
4. Audio-IN
5. HDMI
6. 3G-SDI
7. LAN
Page 7
6
4. Camera Menu Settings
AUTO
N/A
EXCOMP:
OFF
BACKLIGHT
OFF
EXIT
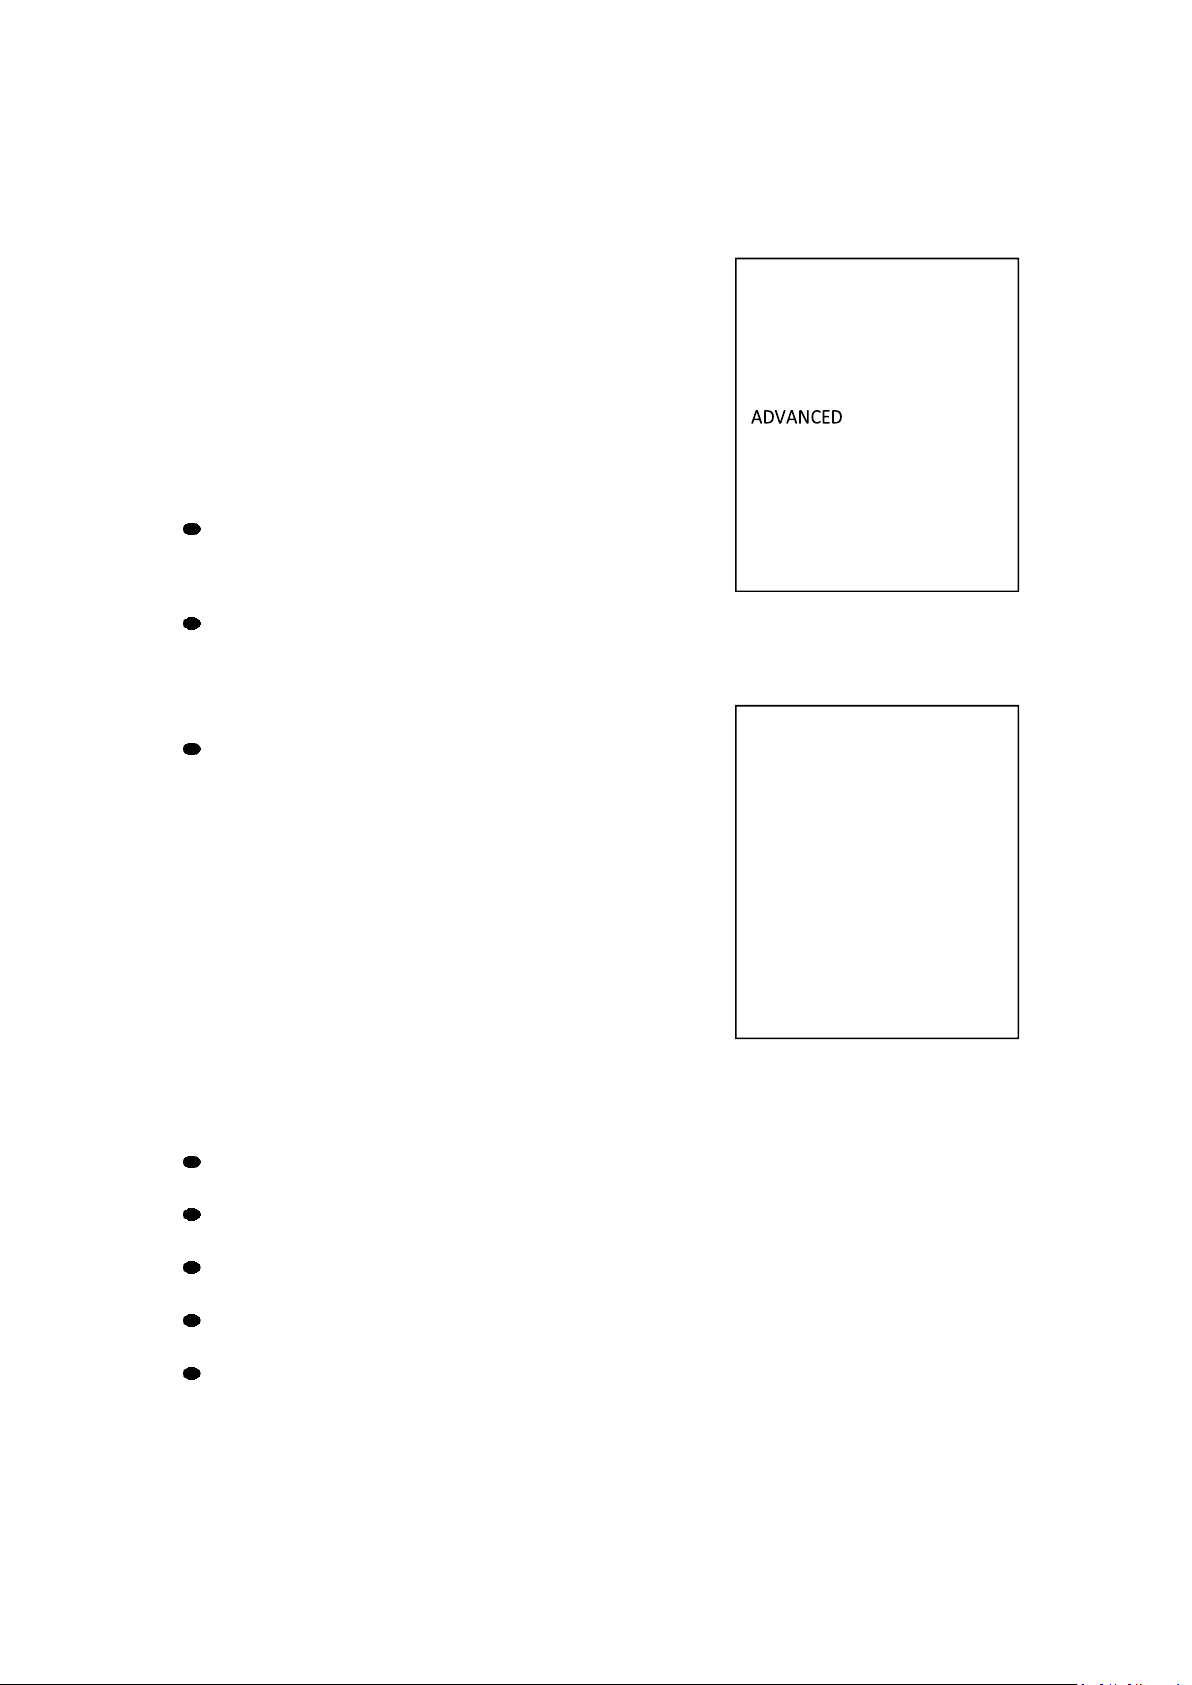
1. Press and hold the center button for 3 seconds to enter the
Main Menu
2. Use the directional keys to navigate the menu and settings.
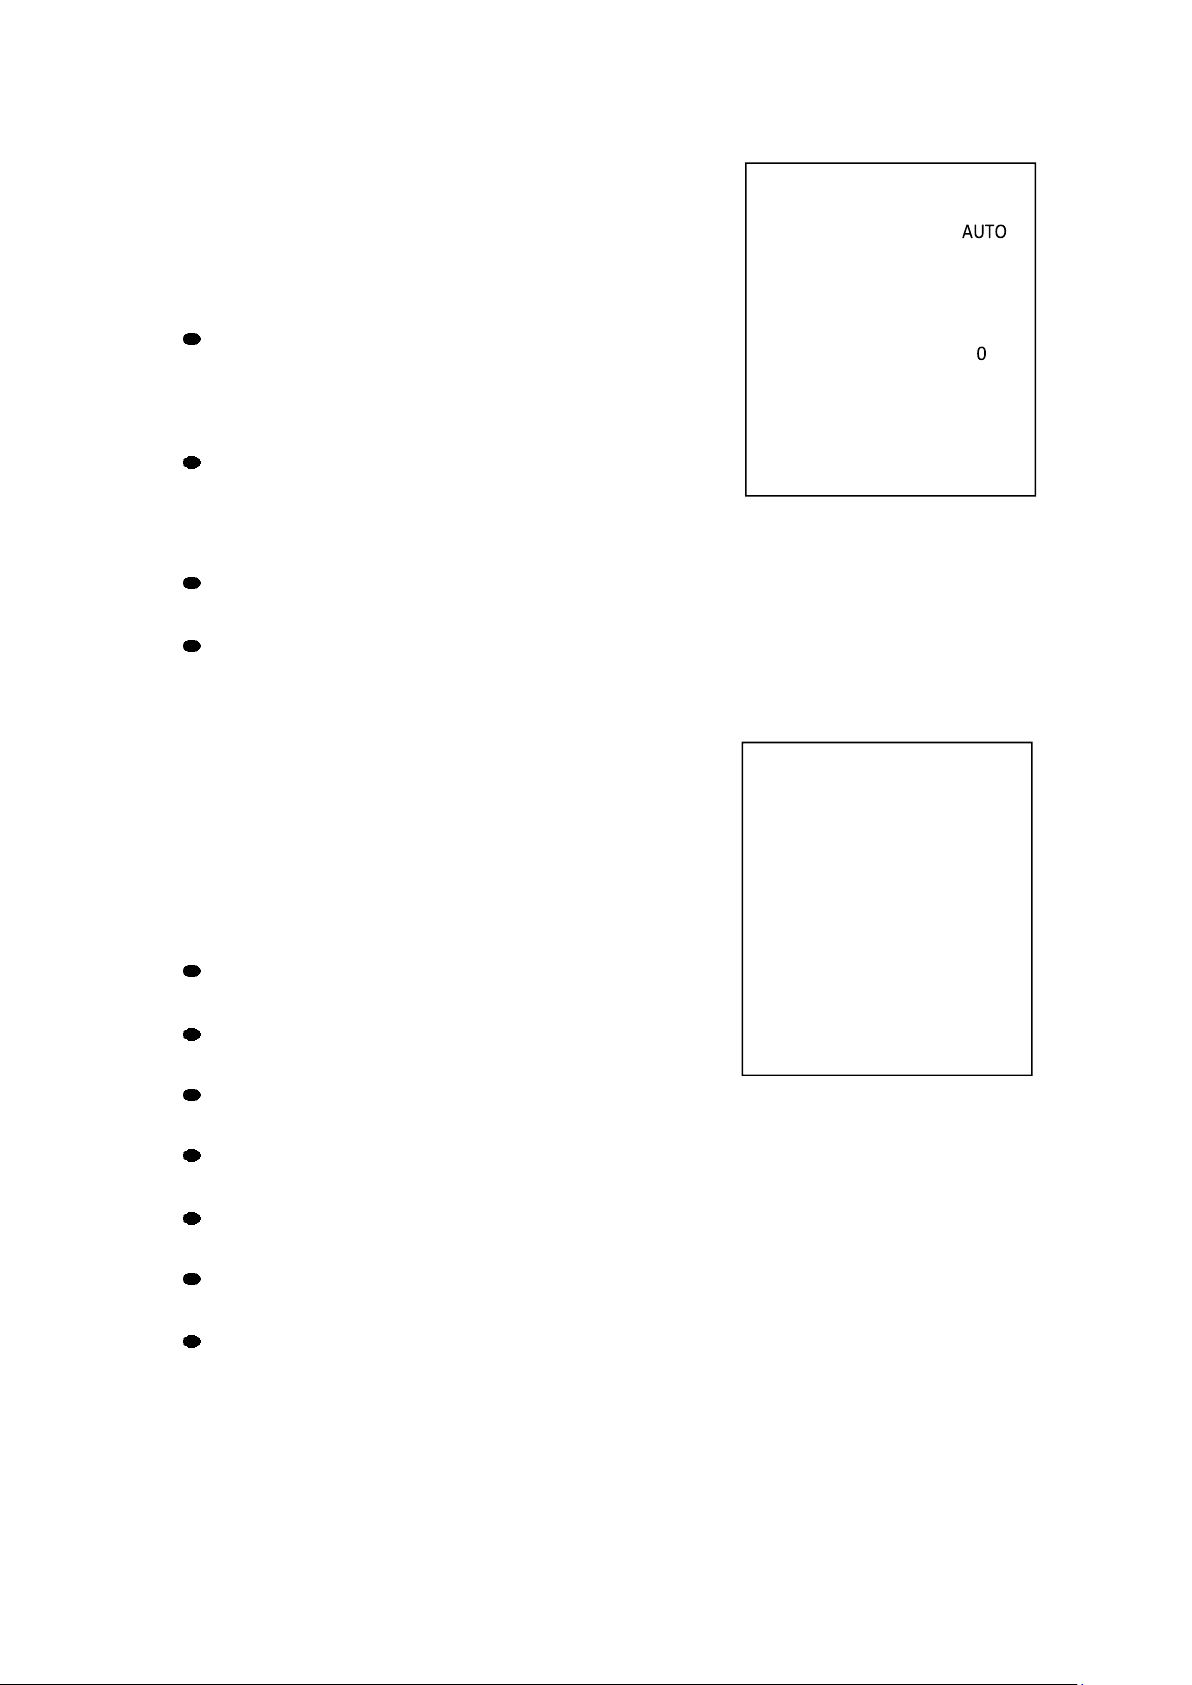
4.1 EXPOSURE
Enter the main menu and navigate to【EXPOSURE】. Press
right to enter the sub-menu.
【AE MODE】
Options: AUTO/SHUTTER/IRIS/BRIGHT
【
SHUTTER/IRIS/BRIGHT】
Different auto exposure parameters can be
modified depending on the selected mode. The
range of settings are as follows:
Shutter: 1/1-1/10000
MAIN MENU
EXPOSURE
COLOR
PICTURE
PRIVACY
SYSTEM
EXIT
EXPOSURE
AE MODE:
AE LEVEL:
:
HLC: 8
FLICKER: OFF
GAMMA: 6
BACK
IRIS:F1.6-F14
Bright:F14/0DB-F1.6/28DB
【EXCOMP】 ON/OFF
【BACKLIGHT】 Backlight Compensation ON/OFF
【HLC】 Highlight Compensation 0 - 15
【FLICKER】 Anti-Flicker 50Hz/60Hz/OFF
【GAMMA】 Gamma Adjustment 0 – 9
Page 8
7
4.2 COLOR
EXIT
COLOR
WB MODE
R GAIN
B GAIN
COLOR GAIN
COLOR HUE
BACK
EXIT
N/A
N/A
100
:
Enter Main Menu, navigate to【COLOR】, press right
to enter sub-menu.
:
:
【WB MODE】
Options: AUTO, INDOOR, OUTDOOR, ATW, OPW, MANUAL
【R GAIN/B GAIN】
When the WB MODE is set to MANUAL the R Gain\B Gain values can be independently adjusted.
【COLOR GAIN】 Setting Valued range:60 - 200
【COLOR HUE】 Setting Valued range:-14 - 14
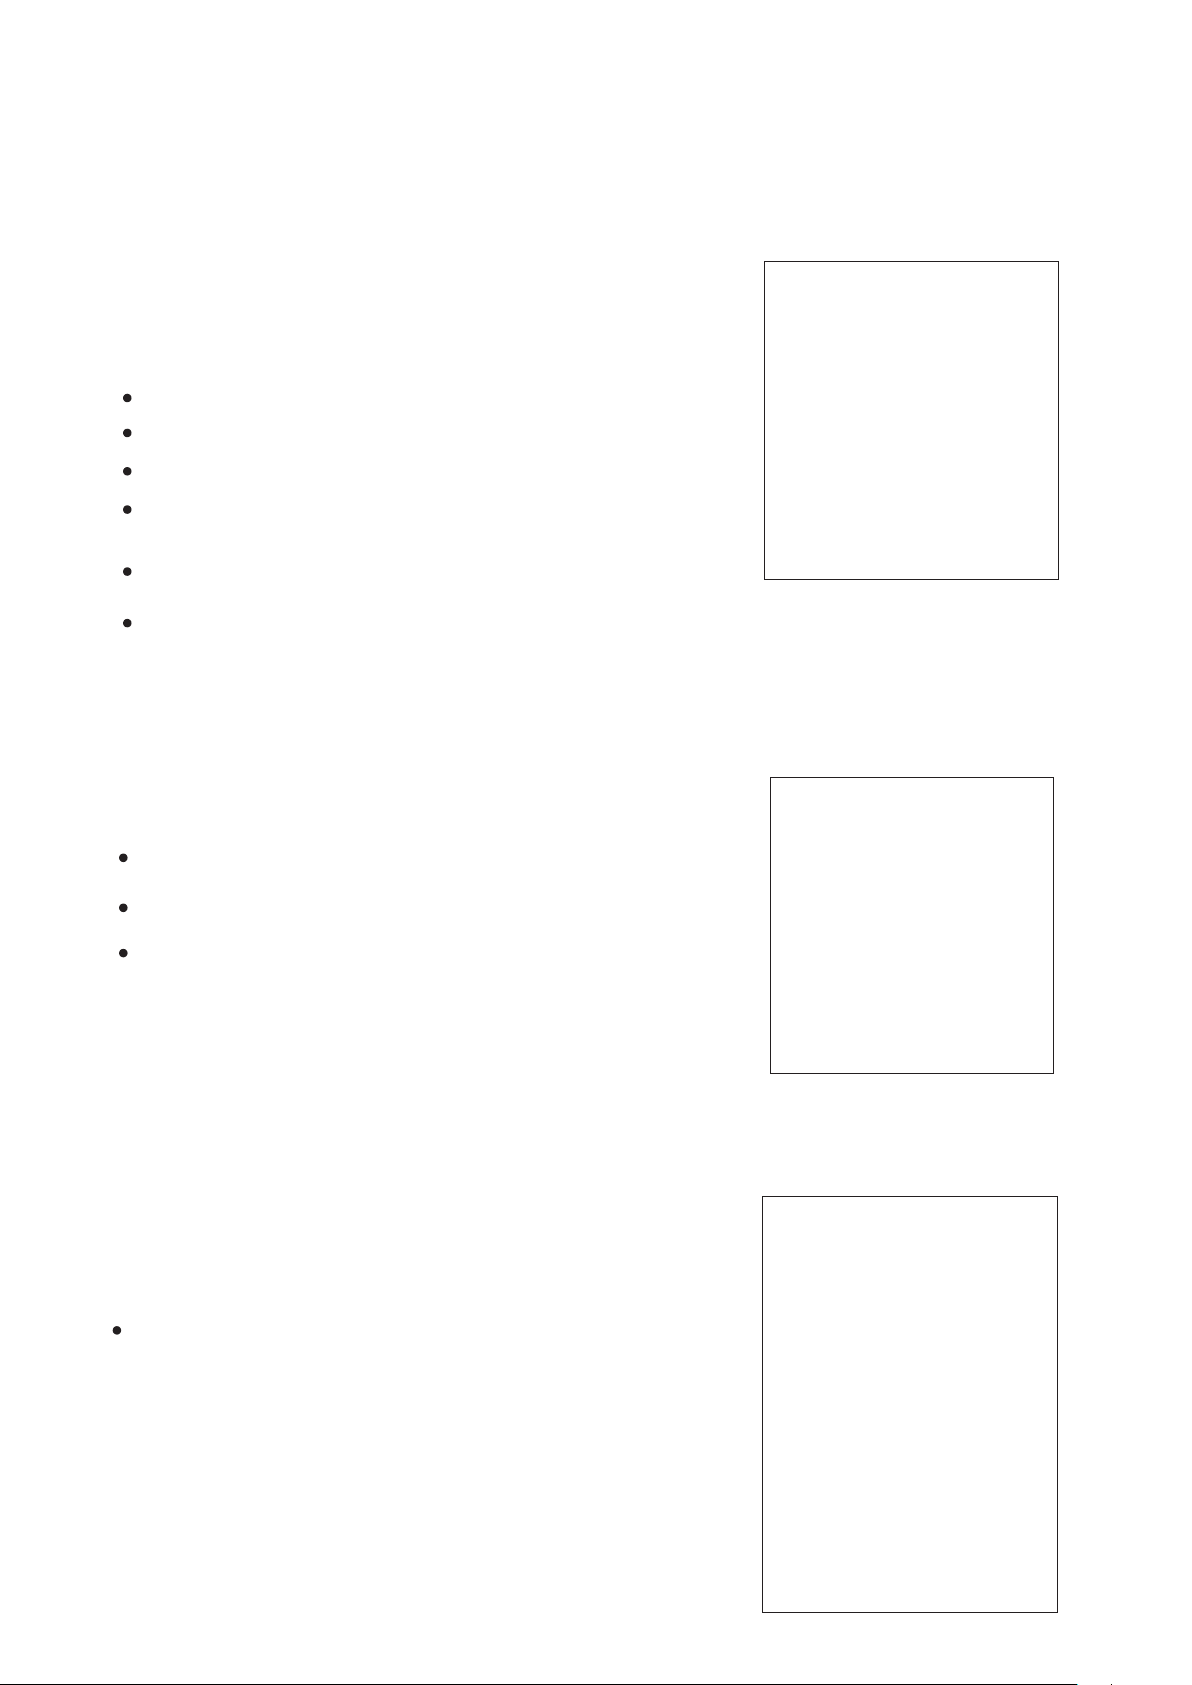
4.3 PICTURE
PICTURE
Enter Main Menu, navigate to【PICTURE】, press
Right Button to enter sub-menu.
【FREEZE】 Setting: ON/OFF
【APERTURE】 Setting Value range:0-15
【2D NR】 Setting Value range:0-5
【FLIP 】 Setting: ON/OFF
【ICR 】 Setting: AUTO, B&W, COLOR
【
GAMMA 】
【BLC 】 Setting: ON/OFF
Setting Value range:0-4
FREEZE: OFF
APERTURE: 5
2D NR: OFF
FLIP: OFF
ICR: AUTO
GAMMA: NORMAL
BLC: OFF
BACK
Page 9
4.4 P/T/Z
P / T / Z
FLIP:
L/R DIRECTION: AF
MODE:
AF SENS:
PRESET FREEZE:
D ZOOM:
BACK
EXIT
OFF
NORMAL
NOISE REDUCE
2D NR: 2
3D NR: 3
DYN HOT PIXEL: OFF
BACK
EXIT
VIDEO OUT
VIDEO OUT: 720P50
720P60
1080I25
1080I30
1080I50
1080I59.94
1080I60
1080P25
1080P29.97
1080P30
1080P50
1080P59.94
1080P60
BACK
Press the [MENU] button to display the OSD menu, then press the
arrow keys to highlight [P/T/Z] and press right to enter the sub-
menu.
[FILP]: ON/OFF
[L/R DIRECTION]: ON/OF
[AF MODE]: AUTO/MANUAL/ZOOM
[AF SENS]: HIGH/NORMAL/LOW
[PRESET FREEZE]: ON/OFF
[D ZOOM]: ON/OFF
4.5 Noise Reduction
Press the [MENU] button to display the OSD menu, press the arrow
keys to highlight [NOISE REDUCTION], then press right to enter the
sub-menu.
[2D NR]: 0-5 / OFF
[3D NR]: 0-5 / OFF
OFF
AUTO
OFF
ON
[DYN HOT PIXEL]: ON/OFF
4.6 Video Format
Press the [MENU] button to display the OSD menu, press the
arrow keys to highlight [VIDEO OUT], then press right to enter the
sub-menu.
[VIDEO OUT]:
1080P60/59.9 4/50/30/29.97/25
1080I60/59.94/50/30/25
720P/60/50
8
Page 10
9
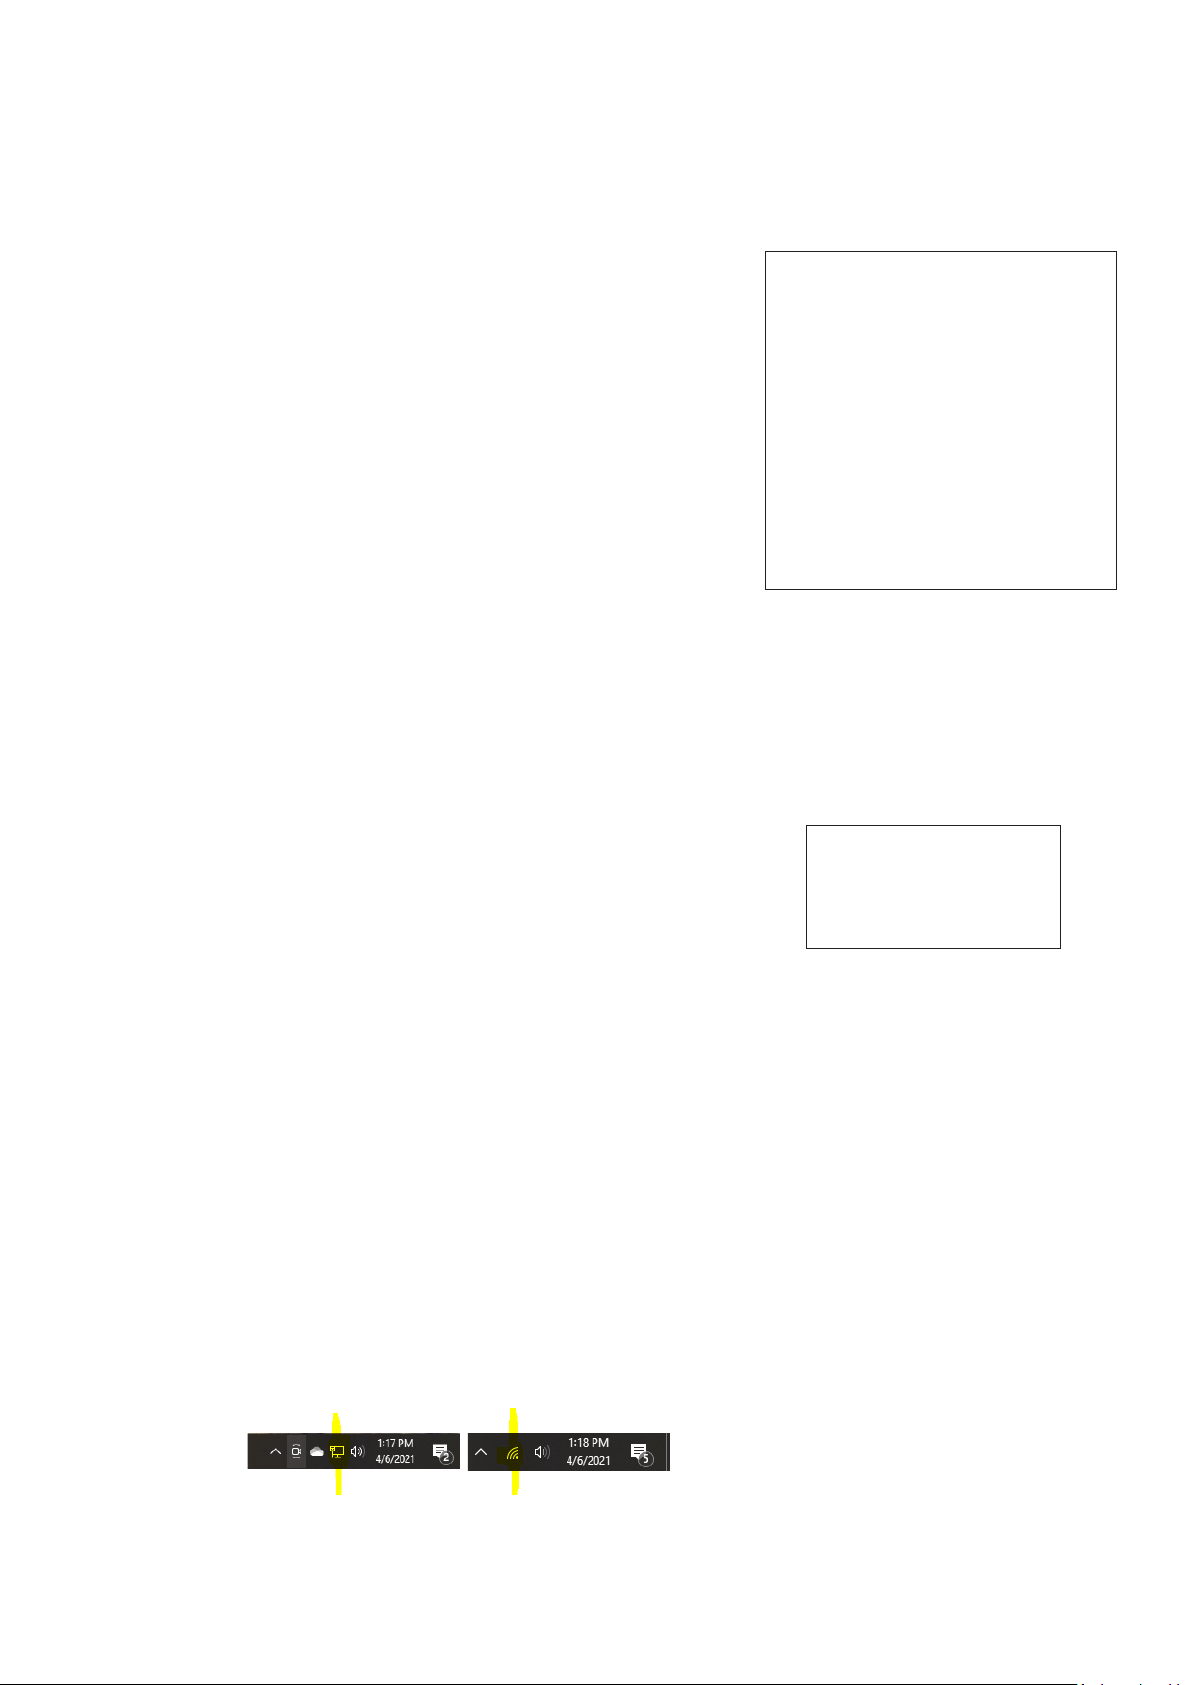
4.7 SYSTEM
SYSTEM SETUP
SYSTEM INFO
LANGUAGE:
ZOOM LEVEL:
PROTOCOL:
ADDRESS:
BAUDRATE: BACK
EXIT
CHINESE
DEFAULT SETUP
FACTORY
DEFAULT
Press the [MENU] button to display the OSD menu, press the
arrow keys to highlight [SYSTEM SETTING], then press right to enter
the sub-menu.
• [SYSTEM INFO]: press right button to enter the sub menu
• [LANGUAGE]: CHINESE/ENGLISH
• [ZOOM LEVEL]: ON/OFF
• [PROTOCOL]: VISCA/PELCO-D/PELCO-P
• [ADDRESS]: 1-255
• [BAUDRATE]:2400/4800/9600/19200/38400
4.8 Restore Default
Press the [MENU] button to display the OSD menu, press the
arrow keys to move to [DEFAULT], press right button to make the
OSD parameters return to default.
ON
VISCA
AUTO
9600
5.
Network Connection
To successfully complete this process, you will need several pieces of information. The first is the IP address of your computer.
You will also need to select an unused IP address on your local network (This is the address you will set the camera to). The
third piece is the default IP address of your camera. Finally, you will need the IP address of your Default Gateway/Router.
All versions of the BZBGEAR VPTZ Series cameras have the following default IP address:
192.168.1.162
The computer must be on the same subnet as the camera to connect successfully, therefore the computer must be connected
to the 192.168.1.x subnet. If your network is already using this IP address pool, simply enter the cameras IP address to connect.
If it is not this can be achieved via the Local Area Network Properties on the computer.
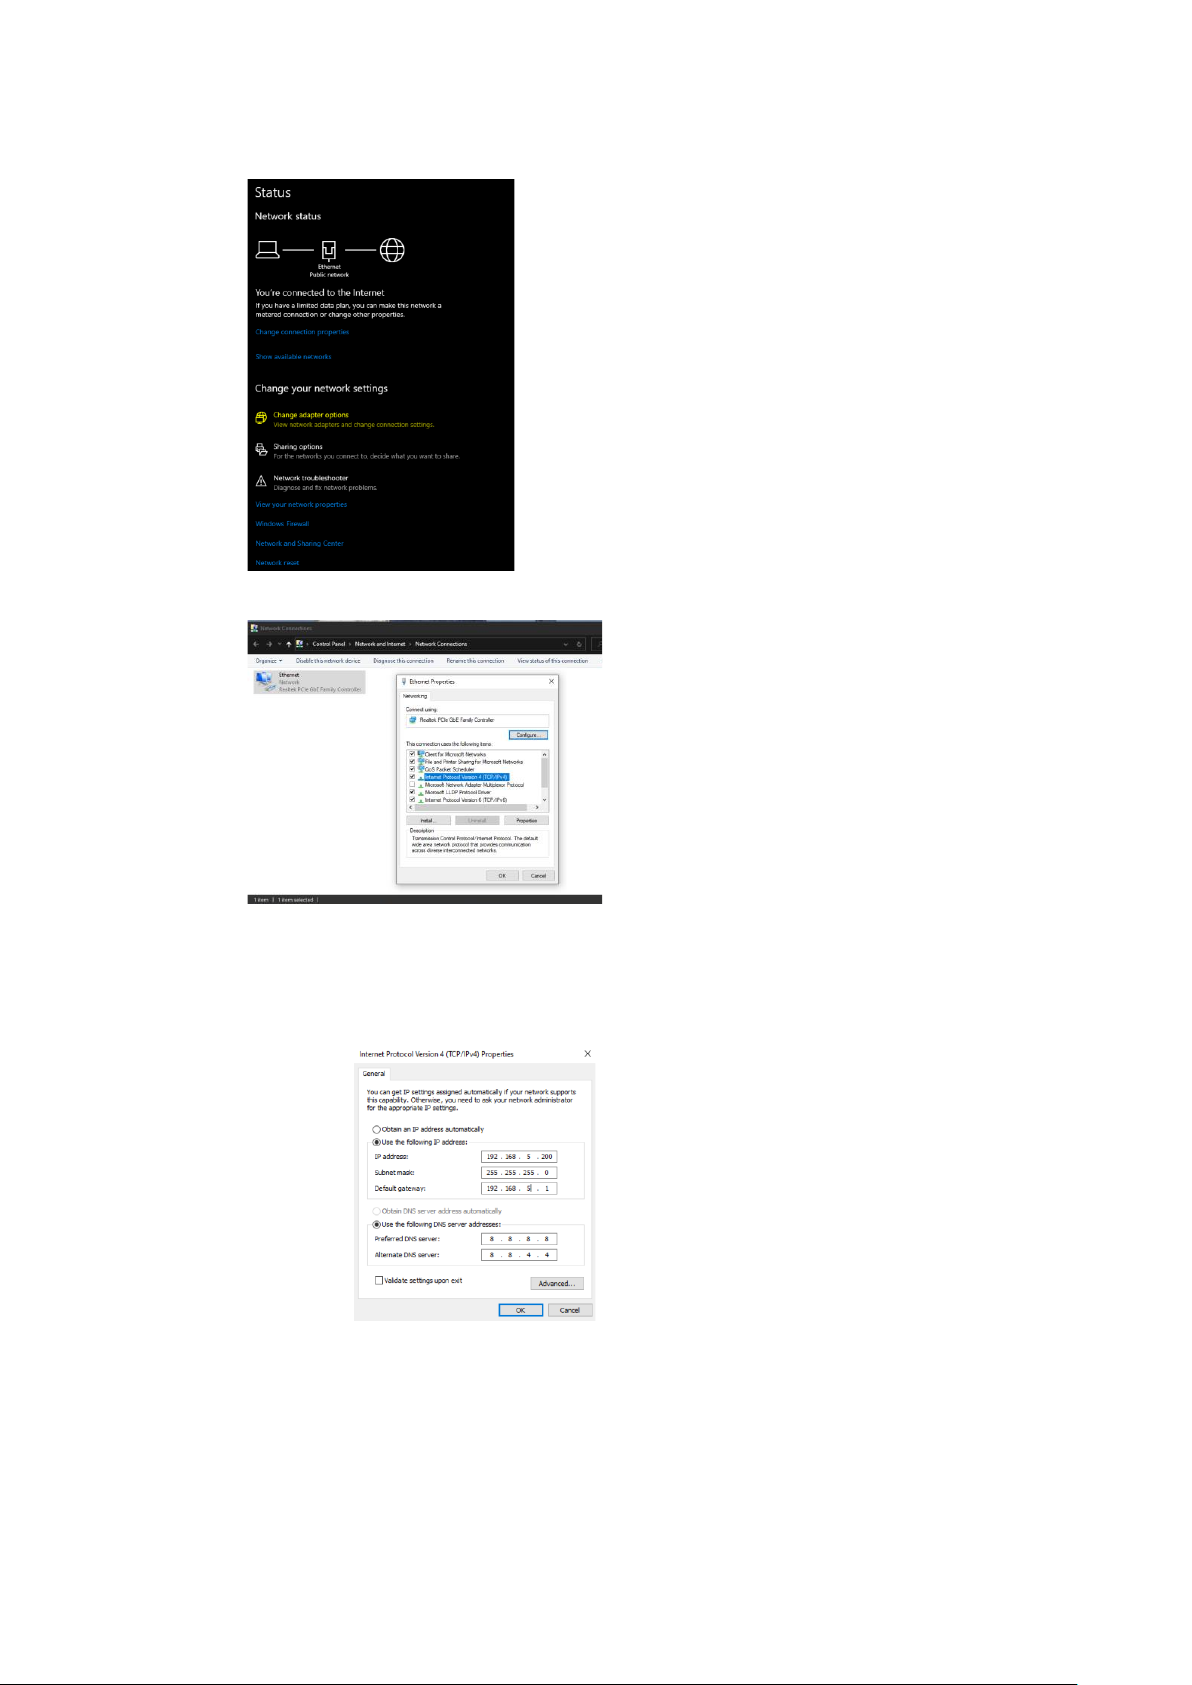
• Right-click on the internet connection in the lower right corner of the desktop and select “Open Network &
Internet Settings”.
• Select “Change Adapter Options”.
Page 11
10
• Right-click on your connection (Wi-Fi or Ethernet) and select “Properties”.
• Select “Internet protocol version 4 (TCP/IPv4)” as shown below and click “Properties”.
• For the following steps refer to the diagram below. Click on the bubble for “Use the following IP address”
• In the IP address field enter a non-conflicting IP address on the same subnet as the camera. If there is another
device with the same IP address you will not be able to connect. In the example below we are using
192.168.1.200
• In the Subnet mask field enter 255.255.255.0 In the Default gateway field type 192.168.1.1 You can leave the
DNS fields blank.
NOTE: When you are finished configuring the camera you will need to return to this screen and click the bubbles for “Obtain an
IP address automatically” and “Obtain DNS server automatically” to restore internet connectivity to your computer. Also make
sure to reconnect any ethernet cables you may have unplugged.
• Click OK to apply your settings.
• Click OK to close the network properties screen.
• Once you have applied your settings open your web browser and enter the IP address of your camera.
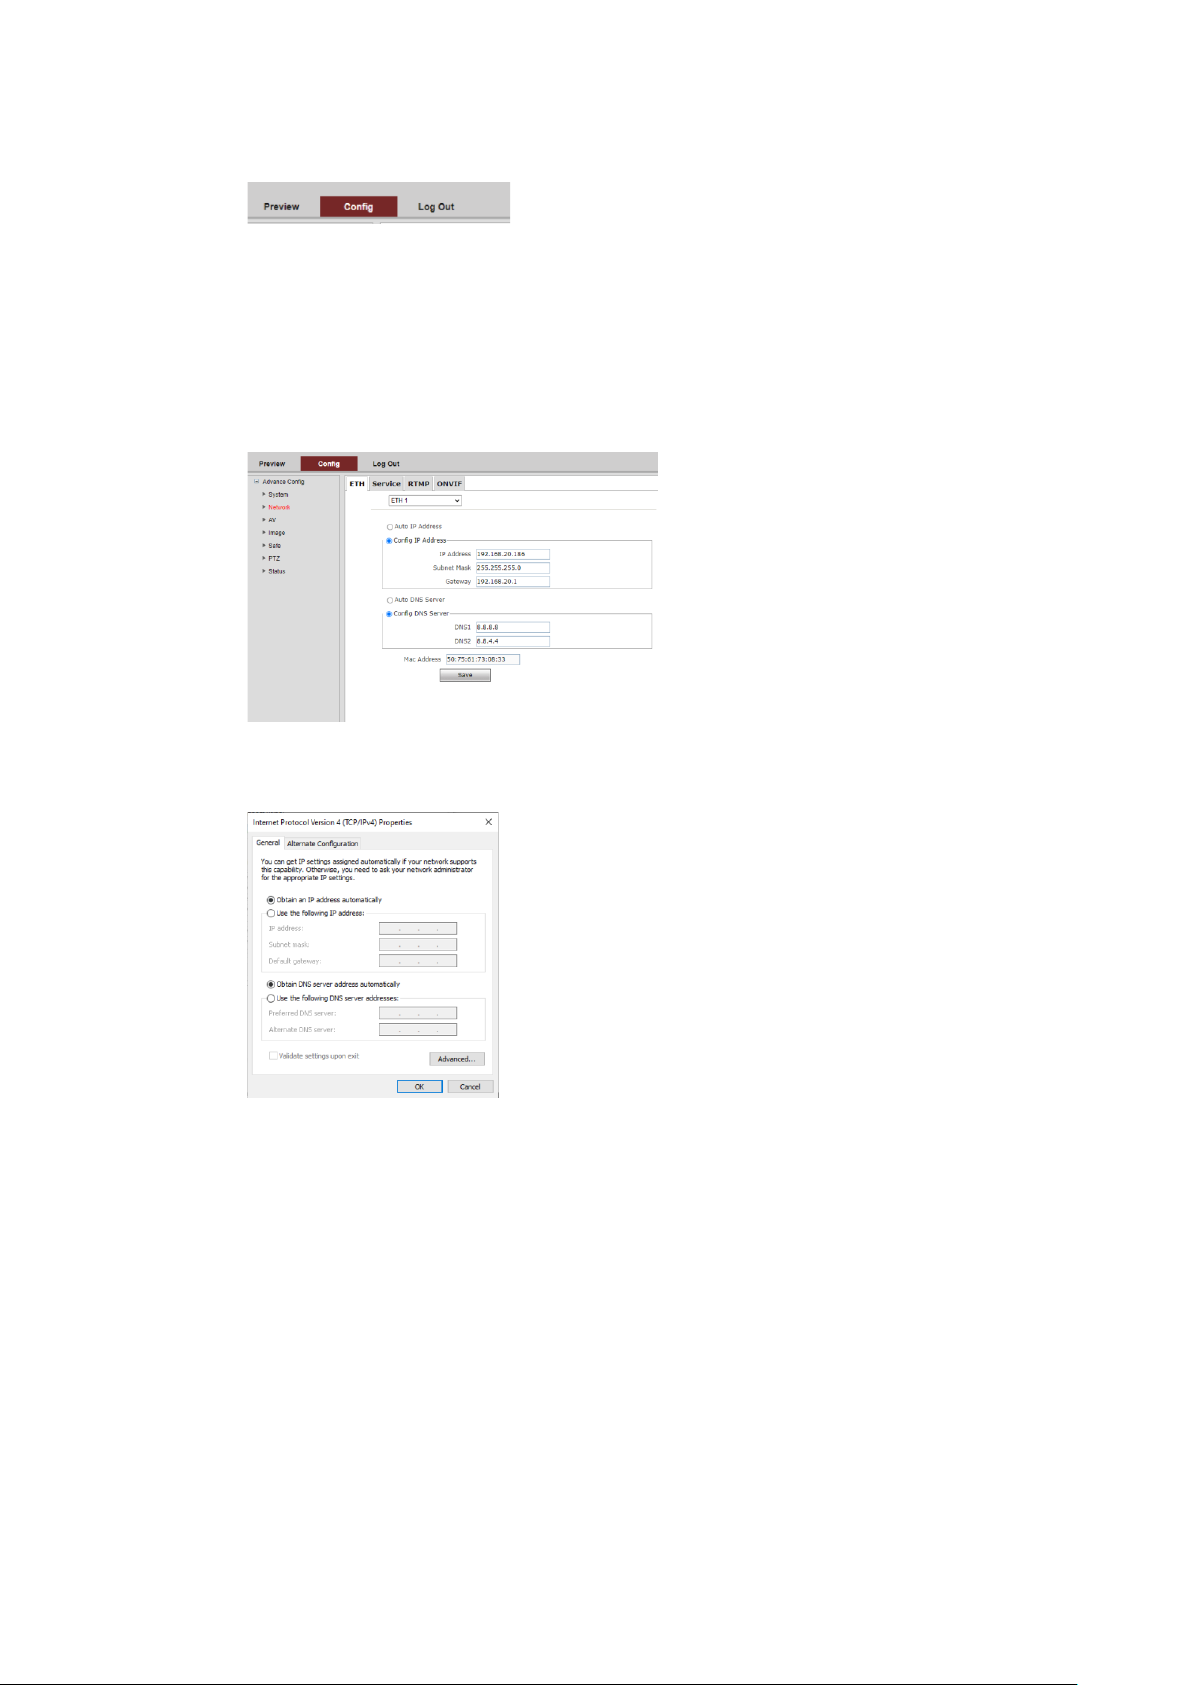
• Enter the login information to access the interface. The username and password should both be admin for a
default camera. You will now be looking at the camera preview window. At the top left of your screen select
Config.
Page 12
11
• On the left side of your screen select Network. In the IP address field, you will enter the unused IP address you
selected at the beginning. Our example will use an address of 192.168.20.186.
*This address MUST NOT be in use by any other device on your network or you will create an IP conflict and be unable to
access your camera. *
• In the Subnet Mask field enter 255.255.255.0 the enter the IP address of your Default Gateway in the field
below. Double-check your values and click the Save Button.
• Unless you are given different information by your network administrator you should enter 8.8.8.8 for DNS1 and
8.8.4.4 for DNS2. Click Save.
• Once you complete the camera setup, repeat the steps on your computer to adjust "Internet Protocol Version 4
(TCP/IPV4) Properties" and click the bubbles for "Obtain IP address automatically" and "Obtain DNS server
address automatically". Click OK to close all network-related screens.
• Your computer and camera should now be on your network. Open your web browser and enter the IP address
you assigned to your camera and your setup is complete.
5.1 Camera Web Interface
From the Web Interface you can control the camera, view the video feed, and adjust various camera settings and functions.
Preview Screen
From the preview screen you can view the live video feed, preview the embedded audio, and adjust PTZ, Focus, and Iris
controls.
Directional Arrows: Use the Up/Down/Left/Right/Diagonal buttons to rotate the camera.
Home Button: Use the Home button to return the camera to the Home position.
Zoom In/Out: Use the Zoom buttons to adjust the zoom level of the camera.
Focus In/Out: Use the Focus buttons to manually adjust the camera’s focus.
Speed Control: Use the slider to adjust the PTZ speed of the camera.
Page 13

12
Preset Tab: Use the Preset tabs to Set, Recall, and Delete Preset positions. To record a preset, adjust the camera to the desired
location and zoom level. Highlight the preset number you wish to record and click the “Set” button. To recall a preset, highlight
the preset number you wish to recall and click the ”Call” button. To delete a preset, highlight the preset number you with to
recall and click “Delete”.
Configuration Screen
From the configuration screen you can set and adjust all the functions and parameters of the camera.
System Page
The system page contains information regarding the camera, time settings, firmware, and main video output resolution.
Version Tab: The version tab contains camera information including model number, serial number, firmware and hardware
versions, and MAC address.
Time Tab: The time tab allows you to adjust time, date, and time zone settings.
Maintain Tab: This tab allows you to reboot, restore factory default settings, and update the firmware.
Config Tab: Name the camera, select menu language, select Video Standard (not used), set output resolution, and
enable/disable UVC (USB) video output.
Network Page
The network page includes network settings, port settings, and streaming settings.
ETH Tab: Select static (Config IP Address) or DHCP (Auto IP Address), select Auto or Manual DNS settings.
Service Tab
MSG Port: default 8080
RTSP Port: default 554
HTTP Port: default 80
VISCA Port: default 52381
WebSocket Port: default 8880
Note: Changing the port number requires restarting the camera to valid. In order to avoid port conflicts, please
be careful to modify.
RTMP Tab
Enable RTMP: (Check box)
Server: Enter the server URL and Stream Key of your streaming platform in the format of : rtmp://serverURL/StreamKey.
(Ex. rtmp://a.rtmp.youtube.com/live2/du36-z46c-1p31-4kxw-29yx)
Port: Set according to your streaming platform (YouTube=1935, Facebook=443)
Stream Type: Select desired stream
ONVIF Configuration Tab
ONVIF Authentication: Authentication enable, default disable.
ONVIF Server Port: default 8554.
ONVIF RTSP Authentication: Authentication enable, default disable.
RTSP Port: ONVIF RTSP Port, default 8554.
AV Page
The AV page is where you will find all the audio and video settings for stream encoding.
Stream Type: Use the pull-down to select which of the 3 streams you wish to adjust. When you select a stream, all options and
settings on the page affect the selected stream.
Stream Key: This shows the address information for your streaming output. This is not adjustable and should be added to the
Page 14

13
end of your camera’s IP address as shown below:
Default Main Stream: rtsp://192.168.1.162:554/0/0/0 Default Sub-Stream:
rtsp://192.168.1.162:554/0/0/1
Frame Rate: Specify frame rate (1-30). Frame Rate Priority prioritizes frame rate over image quality when
VBR mode is enabled.
GOP: Frame interval (1-60). Default is 30.
Bitrate: Video Bit Rate (1-10240). Default is 4096
Resolution: Set streaming video resolution
Stream Mix Type: Select Complex or Video Stream. Complex Stream includes audio.
Encode Type: Select video encoding format.
Bitrate Type: CBR (Coded Bit Rate), VBR (Variable Bit Rate), Fix QP (Fixed Bit Rate).
-When CBR is selected stream quality, IFrame, and PFrame settings are unavailable.
-When VBR is selected IFrame and PFrame settings are unavailable.
-When Fix QP is selected stream quality setting is unavailable.
Audio Encode Type: Select audio encoding format. AAC is recommended for most streaming platforms.
Audio Input Mode: Select Mic Level or Line Level
Audio Input Gain: Set the audio input gain level (1-10, mute)
Audio Quality: Select High or Low
Image Page
On the image page you will find all the image, iris, and focus settings for adjusting the camera’s picture.
Display TabBrightness: Brightness adjustment slider
Contrast: Contrast adjustment slider
Hue: Hue adjustment slider
Saturation: Color saturations adjustment slider
Sharpness: Video sharpness adjustment slider
Mirror: Horizontal image reverse
Flip: Vertical image reverse
Flicker: Lighting flicker compensation
AWB Mode: Auto White Balance Mode settings
BLC: Backlight Compensation adjustment
DNR(3D): 3D Digital Noise Reduction Control
Camera TabFocus Mode: Change camera focusing mode
Near Limit: Set the distance from the lens for auto focusing. The camera will not focus on anything closer
than the set value.
Page 15

14
Sensitivity: Auto focus sensitivity level
ICR Mode: Infrared Cutfilter Removal Mode
AE Mode: Auto Exposure Mode
AE Level: Auto Exposure Level adjustment
HLC: Highlight Compensation Level
DNR(2D): 2D Digital Noise Reduction adjustment
Gamma: Gamma adjustment
Safety Page
From this screen you can modify the login information
PTZ Page
From this screen you can view and modify the PTZ control settings of the camera.
PTZ Address: Set the PTZ control address of the camera
Protocol: Set the serial control protocol
Baud Rate: Set the serial control baud rate
LR-Direction: Reverse the left and right controls
Veritcal Axis: Reverse the up and down controls
Display Mag: Display current magnification (zoom) level
Status Page
On this screen you can view the current bit rates of the 3 IP streams.
6. Tech Support
Before contacting tech support, we may have answered your question already! Visit our BZBGEAR support
page at bzbgear.com/support for valuable information on our products.
Here you will find our Knowledge Base (bzbgear.com/knowledge-base) consisting of tutorials, quick start
guides, and step-by-step troubleshooting instructions. Also visit our YouTube channel BZB TV at
youtube.com/c/BZBTVchannel for help setting up, connecting, and other how-to videos regarding our
products.
If you still need answers, please call 1.888.499.9906, email [email protected], or chat at bzbgear.com
Page 16
15
7. Warranty
BZBGEAR Pro AV products and Cameras come with a three-year warranty. An extended two-year warranty is
available for our Cameras upon registration for a total of five years.
For an extended two-year warranty on our Cameras, follow these steps:
1. Register your Camera within 90 days of purchase by visiting bzbgear.com/warranty.
2. Complete the registration form. Provide all necessary proof of purchase details, including serial number
and a copy of your sales receipt.
For complete warranty information, please visit bzbgear.com/warranty or scan the QR code below.
8. Mission Statement
BZBGEAR manifests from the competitive nature of the audiovisual and live streaming industry to
innovate while keeping the customer in mind. AV solutions can cost a pretty penny, and new
technology only adds to it. We believe everyone deserves to see, hear, and feel the advancements
made in today’s AV world without having to break the bank. BZBGEAR is your answer for applications
requiring the latest pro AV and live streaming solutions.
You’ll notice comparably lower prices with BZBGEAR while the performance and quality are on par
with the top brands in the industry. Our team offers system design consultation and expert tech
support seven days a week for all BZBGEAR products. Our unparalleled support is our way of showing
we care for every one of our customers. Whether you’re an integrator, home theater enthusiast, or a
do-it-yourselfer, BZBGEAR offers solutions allowing you to focus on your project and not your budget.
 Loading...