

Page 1

B&W Loudspeakers Ltd. re s e rves the right to amend details of the specification without notice in line with
technical developments. Copyright © B&W Loudspeakers Ltd. Printed in England. B&W Loudspeakers Ltd,
Meadow Road, Wo rthing, BN11 2RX, England Tel: +44 (0) 1903 524801 Fax: +44 (0) 1903 524725
B&W Loudspeakers of America, 54 Concord Street, North Reading, MA 01864-2699, USA
Tel: (1978) 664 2870 Fax: (1978) 664 4109 http://www. b w s p e a k e r s . c o m
Page 2
CASA Keypad Unit
I N S T A L L A T I O N N O T E S
Page 3

CASA KEYPAD UNIT
I N S TA L L ATION NOTES
THESE NOTES MUST BE READ IN
CONJUCTION WITH THE CASA
I N S TA L L ATION MANUAL.
U n p a c k i n g
Check the contents:
1 x Keypad unit
8 x Auxiliary source buttons
3 x Blank black buttons
2 x Blank white buttons
1 x Mounting frame assembly
2 x spacers
1 x Double J box fascia
1 x Keypad frame edge
4 x Self tapping screws (to hold mounting
frame assembly into double J box)
4 x Small self tapping screws (to hold keypad
into mounting frame assembly)
NOTE: THERE ARE PROTECTED STATIC
DEVICES ON THE CIRCUIT BOARD SO
IT SHOULD BE HANDLED BY THE EDGES
O N LY.
Installing the buttons
P ress home (the buttons simply click into
place) the appropriate source buttons in the
two holes immediately adjacent to the CD
s o u rce button.
If a local source is going to be used click the
LOCAL button into the empty hole on the far
right of the keypad above the volume contro l .
If either of these third or fourth sources or the
local source are not going to be used push a
blank black button in the unused hole.
If a Tuner that is being used supports either
D i rect Access to the station presets or a
“Favourite Station” function click the FAV. S T N
button into the hole next to the OFF button.
If a CD Player being used supports a
“Random Play” function click the RANDOM
button into the hole next to the MUTE button.
If either of these two functions are not going
to be used push a blank white button in the
unused hole.
Note: If the keys need to be removed from the
keypad for any reason they can be prised out
f rom behind by first removing the circuit board
and the 4 screws that hold the board and
keypad together.
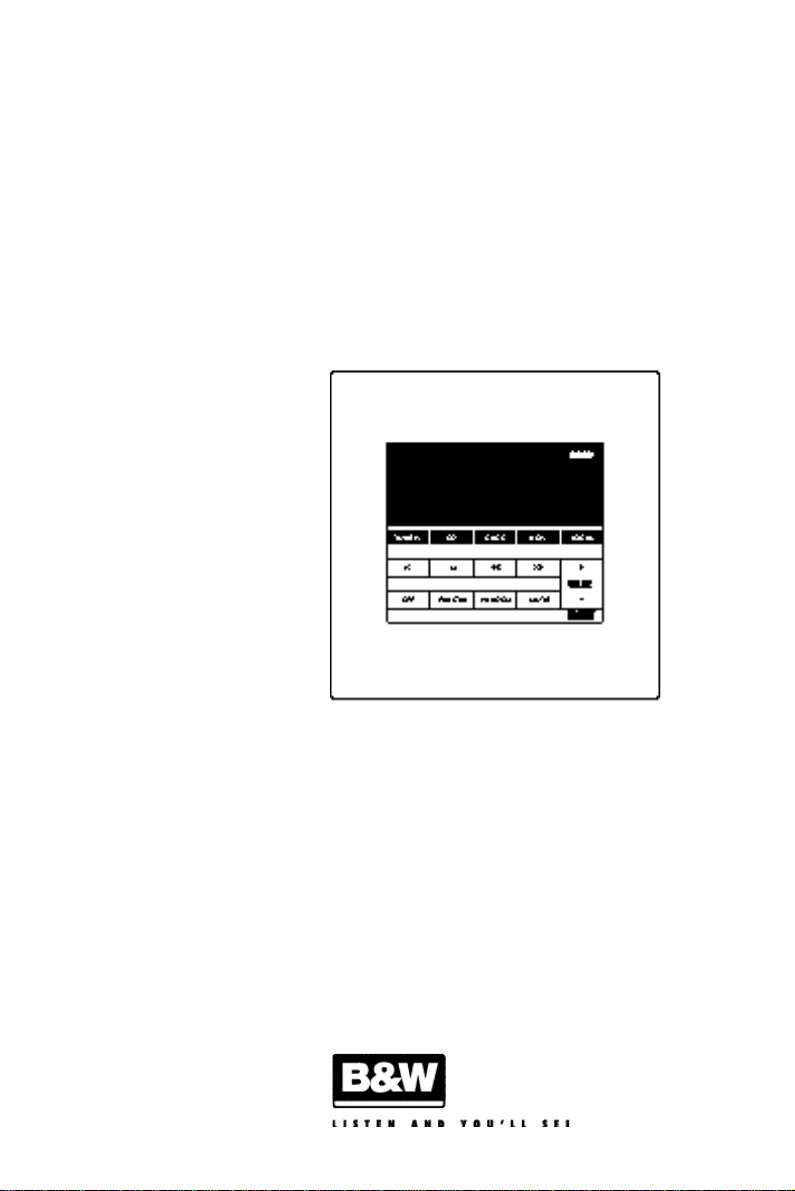
Installing the keypad ( F i g u re 1)
Use the 4 screws provided to mount the
mounting frame assembly into the double
J box.
Use the spacers provided, if necessary, to sit
under the keypad (to bring it flush with the
wall frame). Offer up the unit to the mounting
frame and attach the cables as described in
the CASA Installation Manual.
Using the 4 small screws provided attach the
keypad to the mounting frame.
Gently press the supplied fascia home in
place around the keypad.
Fitting an alternative fascia
Cut out the centre section of the double J box
fascia that you wish to use, cleaning off any
rough edges. Screw the fascia loosely in position around the keypad and press home the
supplied frame edge on the inside edge of
the fascia. Finally, tighten the screws to hold
the fascia in position.
Page 4

F i g u re 1
To be used with non B&W fascia.
Page 5

B&W Loudspeakers Ltd. re s e rves the right to amend details of the specification without notice in line with
technical developments. Copyright © B&W Loudspeakers Ltd. Printed in England. B&W Loudspeakers Ltd,
Meadow Road, Wo rthing, BN11 2RX, England Tel: +44 (0) 1903 524801 Fax: +44 (0) 1903 524725
B&W Loudspeakers of America, 54 Concord Street, North Reading, MA 01864-2699, USA
Tel: (1978) 664 2870 Fax: (1978) 664 4109 http://www. b w s p e a k e r s . c o m
 Loading...