


OLAP Intelligence XI
Installation Guide
OLAP Intelligence Installation Guide XI

Patents
Business Objects owns the following U.S. patents, which may cover products that are offered
and sold by Business Objects: 5,555,403, 6,247,008 B1, 6,578,027 B2, 6,490,593 and
6,289,352.
Trademarks
Copyright
Business Objects, the Business Objects logo, Crystal Reports, and Crystal Enterprise are
trademarks or registered trademarks of Business Objects SA or its affiliated companies in the
United States and other countries. All other names mentioned herein may be trademarks of
their respective owners.
Copyright © 2004 Business Objects. All rights reserved.

Contents
Chapter 1 Introduction to OLAP Intelligence 7
About this guide . . . . . . . . . . . . . . . . . . . . . . . . . . . . . . . . . . . . . . . . . . . . . . 8
Who should read this guide . . . . . . . . . . . . . . . . . . . . . . . . . . . . . . . . . . 8
Business Objects information resources . . . . . . . . . . . . . . . . . . . . . . . . 8
Chapter 2 About OLAP Intelligence 9
OLAP Intelligence components . . . . . . . . . . . . . . . . . . . . . . . . . . . . . . . . . 10
Client components described . . . . . . . . . . . . . . . . . . . . . . . . . . . . . . . . 10
Server components described . . . . . . . . . . . . . . . . . . . . . . . . . . . . . . . 10
Component installation configurations . . . . . . . . . . . . . . . . . . . . . . . . . . . . 11
Scenario 1: Viewing and creating OLAP reports in a browser . . . . . . . 11
Scenario 2: Viewing OLAP reports on the desktop . . . . . . . . . . . . . . . 12
Scenario 3: Designing OLAP reports on the desktop . . . . . . . . . . . . . 12
Scenario 4: Designing and publishing OLAP reports . . . . . . . . . . . . . . 12
Chapter 3 Installing OLAP Intelligence on Windows 15
Overview . . . . . . . . . . . . . . . . . . . . . . . . . . . . . . . . . . . . . . . . . . . . . . . . . . 16
Main installation types . . . . . . . . . . . . . . . . . . . . . . . . . . . . . . . . . . . . . 16
Before you install . . . . . . . . . . . . . . . . . . . . . . . . . . . . . . . . . . . . . . . . . . . . 17
Installing OLAP Intelligence . . . . . . . . . . . . . . . . . . . . . . . . . . . . . . . . . . . . 18
Desktop Client installation . . . . . . . . . . . . . . . . . . . . . . . . . . . . . . . . . . 18
Web Components installation . . . . . . . . . . . . . . . . . . . . . . . . . . . . . . . 20
Complete installation . . . . . . . . . . . . . . . . . . . . . . . . . . . . . . . . . . . . . . 22
Custom installation . . . . . . . . . . . . . . . . . . . . . . . . . . . . . . . . . . . . . . . . 24
Modifying Essbase and DB2 support for the ActiveX Interactive Viewer . . 28
Prerequisites for contextual report linking . . . . . . . . . . . . . . . . . . . . . . . . . 29
Registering OLAP Intelligence . . . . . . . . . . . . . . . . . . . . . . . . . . . . . . . . . . 30
OLAP Intelligence Installation Guide 3

Contents
Chapter 4 Installing OLAP Intelligence on UNIX 31
Installing OLAP Intelligence on UNIX . . . . . . . . . . . . . . . . . . . . . . . . . . . . . 32
Prerequisites . . . . . . . . . . . . . . . . . . . . . . . . . . . . . . . . . . . . . . . . . . . . . 32
Supported databases and application servers . . . . . . . . . . . . . . . . . . . 32
Running the install script . . . . . . . . . . . . . . . . . . . . . . . . . . . . . . . . . . . . . . . 33
Setting up the web application server . . . . . . . . . . . . . . . . . . . . . . . . . . . . . 34
Uninstalling OLAP Intelligence . . . . . . . . . . . . . . . . . . . . . . . . . . . . . . . . . . 37
Chapter 5 Enabling the DHTML Interactive Viewer in Java InfoView 39
Overview . . . . . . . . . . . . . . . . . . . . . . . . . . . . . . . . . . . . . . . . . . . . . . . . . . . 40
Prerequisites . . . . . . . . . . . . . . . . . . . . . . . . . . . . . . . . . . . . . . . . . . . . . 40
Apache Tomcat . . . . . . . . . . . . . . . . . . . . . . . . . . . . . . . . . . . . . . . . . . . . . . 41
Setting up the Tomcat application server as a service . . . . . . . . . . . . . 42
Setting up the Tomcat application server as a process . . . . . . . . . . . . 42
Deploying styles and help . . . . . . . . . . . . . . . . . . . . . . . . . . . . . . . . . . . 43
IBM WebSphere Application Server . . . . . . . . . . . . . . . . . . . . . . . . . . . . . . 44
Adding generic JVM arguments . . . . . . . . . . . . . . . . . . . . . . . . . . . . . . 44
Restarting the application server . . . . . . . . . . . . . . . . . . . . . . . . . . . . . . 45
Deploying the WAR files . . . . . . . . . . . . . . . . . . . . . . . . . . . . . . . . . . . . 45
BEA WebLogic Server . . . . . . . . . . . . . . . . . . . . . . . . . . . . . . . . . . . . . . . . . 46
Setting up WebLogic . . . . . . . . . . . . . . . . . . . . . . . . . . . . . . . . . . . . . . . 46
Restarting the application server . . . . . . . . . . . . . . . . . . . . . . . . . . . . . . 47
Deploying styles and help . . . . . . . . . . . . . . . . . . . . . . . . . . . . . . . . . . . 47
Chapter 6 Adding or Removing Components 49
Overview . . . . . . . . . . . . . . . . . . . . . . . . . . . . . . . . . . . . . . . . . . . . . . . . . . . 50
Adding components . . . . . . . . . . . . . . . . . . . . . . . . . . . . . . . . . . . . . . . . . . . 50
Removing components . . . . . . . . . . . . . . . . . . . . . . . . . . . . . . . . . . . . . . . . 51
Repairing OLAP Intelligence . . . . . . . . . . . . . . . . . . . . . . . . . . . . . . . . . . . . 52
Uninstalling OLAP Intelligence . . . . . . . . . . . . . . . . . . . . . . . . . . . . . . . . . . 53
Chapter 7 Command Line Installation 55
Prerequisites . . . . . . . . . . . . . . . . . . . . . . . . . . . . . . . . . . . . . . . . . . . . . . . . 56
Installation types . . . . . . . . . . . . . . . . . . . . . . . . . . . . . . . . . . . . . . . . . . . . . 56
4 OLAP Intelligence Installation Guide

Contents
Installing . . . . . . . . . . . . . . . . . . . . . . . . . . . . . . . . . . . . . . . . . . . . . . . . . . . 56
Examples . . . . . . . . . . . . . . . . . . . . . . . . . . . . . . . . . . . . . . . . . . . . . . . . . . 58
Appendix A Business Objects Information Resources 59
Documentation and information services . . . . . . . . . . . . . . . . . . . . . . . . . . 60
Documentation . . . . . . . . . . . . . . . . . . . . . . . . . . . . . . . . . . . . . . . . . . . . . . 60
What’s in the documentation set? . . . . . . . . . . . . . . . . . . . . . . . . . . . . 60
Where is the documentation? . . . . . . . . . . . . . . . . . . . . . . . . . . . . . . . 60
Send us your feedback . . . . . . . . . . . . . . . . . . . . . . . . . . . . . . . . . . . . 61
Customer support, consulting and training . . . . . . . . . . . . . . . . . . . . . . . . . 61
How can we support you? . . . . . . . . . . . . . . . . . . . . . . . . . . . . . . . . . . 61
Looking for the best deployment solution for your company? . . . . . . . 62
Looking for training options? . . . . . . . . . . . . . . . . . . . . . . . . . . . . . . . . 62
Useful addresses at a glance . . . . . . . . . . . . . . . . . . . . . . . . . . . . . . . . . . . 62
Index 63
OLAP Intelligence Installation Guide 5

Contents
6 OLAP Intelligence Installation Guide

Introduction to OLAP Intelligence
chapter

Introduction to OLAP Intelligence
1
About this guide
About this guide
This guide provides you with information about installing OLAP Intelligence,
including detailed descriptions of the installation modes.
This guide also explains how to extend an existing BusinessObjects
Enterprise installation to enable it to distribute OLAP reports. You must install
some server components to enable BusinessObjects Enterprise to distribute
OLAP reports.
You do not need to install BusinessObjects Enterprise on the local machine to
distribute OLAP reports. You can use BusinessObjects Enterprise on any
computer in the network, as long as you have installed the server
components to that computer.
In this guide we assume that you have already installed BusinessObjects
Enterprise. For a description of the BusinessObjects Enterprise components
and installation instructions, see the BusinessObjects Enterprise Installation
Guide.
The main product CD also includes some sample data for the tutorials.
Who should read this guide
This guide is intended for the designers of OLAP reports. You need
administrator rights to install OLAP Intelligence and BusinessObjects Enterprise.
Business Objects information resources
For more information and assistance, see Appendix A: Business Objects
Information Resources. This appendix describes the Business Objects
documentation, customer support, training, and consulting services, with links
to online resources.
8 OLAP Intelligence Installation Guide

About OLAP Intelligence
chapter

About OLAP Intelligence
2
OLAP Intelligence components
OLAP Intelligence components
A full OLAP Intelligence installation consists of the following components:
• OLAP Intelligence
• OLAP Intelligence Add-In
• Central Management Server (CMS) Add-on
• Web Component Adapter (WCA) Add-on
• ActiveX Interactive Viewer
• Web Server Support
The first two are client components. The remaining four are server
components, although the ActiveX Interactive Viewer is a special case; it is an
ActiveX control that is copied from server to client computers when a user first
tries to view an OLAP report that has been configured to use it. Most of the
server components extend an existing BusinessObjects Enterprise
installation so that you can publish OLAP reports to the Web.
Client components described
OLAP Intelligence
OLAP Intelligence enables you to design OLAP reports. If you distribute these
reports as CAR files, users will require OLAP Intelligence to view them.
Alternatively, you can publish OLAP reports using BusinessObjects
Enterprise. Users can then view them in a Web browser.
Four OLAP Intelligence Experts are also included to help you create some
standard business OLAP reports. You choose the type of OLAP report to create,
then the Expert guides you through the steps involved in creating the report.
OLAP Intelligence Add-In
The OLAP Intelligence Add-In is a component that allows you to use
Microsoft Excel to view and analyze OLAP data. If you choose to install the
Add-In, it automatically becomes available for use when you next start Excel.
Server components described
These components extend an existing BusinessObjects Enterprise
installation so that you can publish OLAP reports to the Web. The complexity
of the installation depends on the BusinessObjects Enterprise installation.
10 OLAP Intelligence Installation Guide

For a description of the BusinessObjects Enterprise components and installation
instructions, see the BusinessObjects Enterprise Installation Guide.
Web Component Adapter Add-on
This add-on enables the BusinessObjects Enterprise Web Component
Adapter to distribute OLAP reports. You must install this on the server(s) on
which the Web Component Adapter is installed.
CMS Add-on
This add-on enables OLAP reports to be published to the BusinessObjects
Enterprise CMS. You must install this on the server on which the CMS is
installed.
ActiveX Interactive Viewer
The ActiveX Interactive Viewer is automatically copied to users’ computers
when they first try to view an OLAP report that has been configured to use the
ActiveX Interactive Viewer. It provides an alternative to the DHTML
Interactive Viewer when viewing OLAP reports over the Web. You must install
the ActiveX Interactive Viewer on the web server computer.
About OLAP Intelligence
Component installation configurations
2
Web Server support
This add-on provides a BusinessObjects Enterprise Web Connector for OLAP
reports. You must install this on the server on which the Web server is installed.
Component installation configurations
Here are some scenarios to help you choose the configuration that is best for
your organization.
Scenario 1: Viewing and creating OLAP reports in a browser
Users can view and create OLAP reports in a Web browser, using either the
DHTML Interactive Viewer or the ActiveX Interactive Viewer (Windows only).
For this scenario, users do not have to run the OLAP Intelligence Setup
program; they may, however, be prompted to download and install the
appropriate viewer software for the ActiveX Interactive Viewer.
OLAP Intelligence Installation Guide 11

About OLAP Intelligence
2
Component installation configurations
Scenario 2: Viewing OLAP reports on the desktop
Users can view OLAP reports on the desktop. You must install OLAP Intelligence
on each user’s computer. A “Desktop Client” installation installs all the client
components on one computer. See “Desktop Client installation” on page 18.
Note: “Desktop Client installation” on page 18Users also need access rights
to the cubes used in the OLAP reports and to PivotTable Services, if
connecting to MS OLAP.
Scenario 3: Designing OLAP reports on the desktop
Users can design OLAP reports on their local computers. You must perform a
“Desktop Client” installation to install all the client components on each user’s
computer. See “Desktop Client installation” on page 18.
Scenario 4: Designing and publishing OLAP reports
Users can design OLAP reports on their local computers and publish them to
the Web. You must install all the OLAP Intelligence client components on
each user’s computer and extend an existing BusinessObjects Enterprise
installation by adding the server components.
To extend an existing BusinessObjects Enterprise Express installation, install
the server components on the BusinessObjects Enterprise Express computer.
BusinessObjects Enterprise Express installs all of its components on one
computer.
Because BusinessObjects Enterprise Professional enables you to perform a
Custom installation, the CMS, WCS and Web connectors may be installed on
different computers. To extend an existing BusinessObjects Enterprise
Professional installation, install each server component (CMS Add-on, WCS
Add-on and Web server support) to the corresponding server(s).
Note: The WCS computer also needs access rights to the cubes used in the
OLAP reports.
OLAP Intelligence and BusinessObjects Enterprise Express on
one computer
If you want to install OLAP Intelligence on the same computer as
BusinessObjects Enterprise Express, do one of the following:
• Carry out a Complete installation.
• Carry out a full Custom installation.
12 OLAP Intelligence Installation Guide

About OLAP Intelligence
Component installation configurations
• If a Desktop Client installation has already been carried out, add the
server components. See “Adding or Removing Components” on page 49.
OLAP Intelligence and BusinessObjects Enterprise Express on
different computers
If you want to install OLAP Intelligence on a different computer to
BusinessObjects Enterprise Express, do the following:
• On the OLAP Intelligence computer, perform a “Desktop Client”
installation to install the client components.
• On the BusinessObjects Enterprise Express computer, perform a “Web
Components” installation to install the server components.
OLAP Intelligence and BusinessObjects Enterprise Professional
To install OLAP Intelligence to work with a custom BusinessObjects Enterprise
Professional installation, you may need to perform several installations:
• On the OLAP Intelligence computer, perform a Desktop Client installation
to install the client components.
• On each computer that has BusinessObjects Enterprise Professional
components installed, perform a Custom installation to install the relevant
server components.
Note: You can also use a Custom installation to install the components that
you need. For example, if you want to install OLAP Intelligence to a computer
that has the WCS installed, you do not need to perform a Desktop Client
installation. Instead, you can use a Custom installation to install OLAP
Intelligence and the WCS Add-on at the same time.
See “Desktop Client installation” on page 18, “Web Components installation”
on page 20 and “Custom installation” on page 24.
2
OLAP Intelligence Installation Guide 13

About OLAP Intelligence
2
Component installation configurations
14 OLAP Intelligence Installation Guide

Installing OLAP Intelligence on Windows
chapter

Installing OLAP Intelligence on Windows
3
Overview
Overview
This section gives you general information on the types of installations
available under Windows. To start installing OLAP Intelligence, see “Installing
OLAP Intelligence” on page 18. This chapter also provides information on
changing your Essbase and DB2 support and registering OLAP Intelligence.
chapter
Related topics:
• “Installing OLAP Intelligence” on page 18
• “Modifying Essbase and DB2 support for the ActiveX Interactive Viewer”
on page 28
• “Registering OLAP Intelligence” on page 30
Main installation types
The OLAP Intelligence Setup program offers a number of options for installing
and configuring the software to meet your company’s needs. The installation
consists of four installation types: Desktop Client, Web Components,
Complete, and Custom. These options all install OLAP Intelligence
components under Windows.
• Desktop Client
This option installs only the client components necessary for running OLAP
Intelligence. This installation type does not install any server components. For
steps on installing the client components, see “Desktop Client installation” on
page 18.
• Web Components
This option adds all the OLAP Intelligence server components to an existing
BusinessObjects Enterprise implementation. For steps on installing server
components, see “Web Components installation” on page 20.
16 OLAP Intelligence Installation Guide

Installing OLAP Intelligence on Windows
Before you install
• Complete
This option adds all the OLAP Intelligence components (server and client) to
one computer. The computer must already have a complete BusinessObjects
Enterprise installation. For steps on running a complete installation, see
“Complete installation” on page 22.
• Custom
This option lets you choose from a list of OLAP Intelligence components, both
client and server. You can customize your installation to meet specific site or
resource requirements. To add OLAP Intelligence components to a custom
BusinessObjects Enterprise Professional installation, you may need to
perform a Custom installation on each computer that has BusinessObjects
Enterprise Professional components installed. For steps on running a custom
installation, see “Custom installation” on page 24.
Note:
• If you have a BusinessObjects Enterprise Professional installation in
which the CMS, WCS, and web server are on separate computers, use
the Custom option to install the server components separately.
• If you plan to use the DHTML Interactive Viewer in Java InfoView, you
need to use either the Web Components or Complete installation type.
3
Before you install
If you plan to use Microsoft Analysis Services, Hyperion Essbase, or IBM DB2
OLAP Server, you may need to install other software components to enable
the full functionality of OLAP Intelligence.
• Microsoft Analysis Services: requires Microsoft SQL Server 2000
PivotTable Services.
• Hyperion Essbase: requires the Hyperion Essbase runtime module.
• IBM DB2 OLAP Server: requires the IBM DB2 OLAP Server runtime
module.
For more information, refer to the documentation for those products.
OLAP Intelligence Installation Guide 17

Installing OLAP Intelligence on Windows
3
Installing OLAP Intelligence
Installing OLAP Intelligence
This section details the steps required for installing OLAP Intelligence. There are
four installation types you can choose from: Desktop Client, Web Components,
Complete, and Custom. Determine which installation type you want to run.
Click the appropriate link to jump to that section:
• “Desktop Client installation” on page 18
• “Web Components installation” on page 20
• “Complete installation” on page 22
• “Custom installation” on page 24
Desktop Client installation
This option installs the client components necessary for running OLAP
Intelligence. This installation type does not install any server components for
publishing OLAP reports to BusinessObjects Enterprise, as these have to be
installed on the BusinessObjects Enterprise computer. To install the client and
server components on one computer, use the Complete option.
Note:
• You can publish OLAP reports using any BusinessObjects Enterprise
installation that has the OLAP Intelligence server components installed.
You also need publishing rights in BusinessObjects Enterprise.
• You may need to restart your machine after running the Setup program.
The following items are installed when this type is selected:
• OLAP Intelligence
• OLAP Intelligence Add-In
• Help files
For a description of each component, see “OLAP Intelligence components”
on page 10.
18 OLAP Intelligence Installation Guide

Installing OLAP Intelligence on Windows
Installing OLAP Intelligence
To install client components
1. Unless Autoplay is enabled for your CD-ROM drive, run setup.exe from
your product distribution.
2. Proceed through the Setup program’s dialog boxes and follow the
instructions displayed on your screen until you reach the Installation Type
dialog box:
3
3. If you want to select a different folder to install to, click Browse.
Search for, or create, the new folder on your computer.
Note:
• The folder you specify can be on a non-system drive. You may want
to specify a non-system drive if there is limited free space on your
system drive.
• If you have already installed BusinessObjects Enterprise or Crystal
Reports, then you can install OLAP Intelligence to the default location.
(You can install the program only to the specified default location.)
4. Select Desktop Client and then click Next.
5. In the Desktop Clients dialog box, ensure that the Designer check box is
selected.
OLAP Intelligence Installation Guide 19

Installing OLAP Intelligence on Windows
3
Installing OLAP Intelligence
6. Select the OLAP Intelligence XI Add-in check box if you want to use
Excel to view and analyze OLAP data.
Note:
• If you choose to install the Add-In, it automatically becomes available
• If you do not have Excel installed on your system, this check box is
7. Click Next.
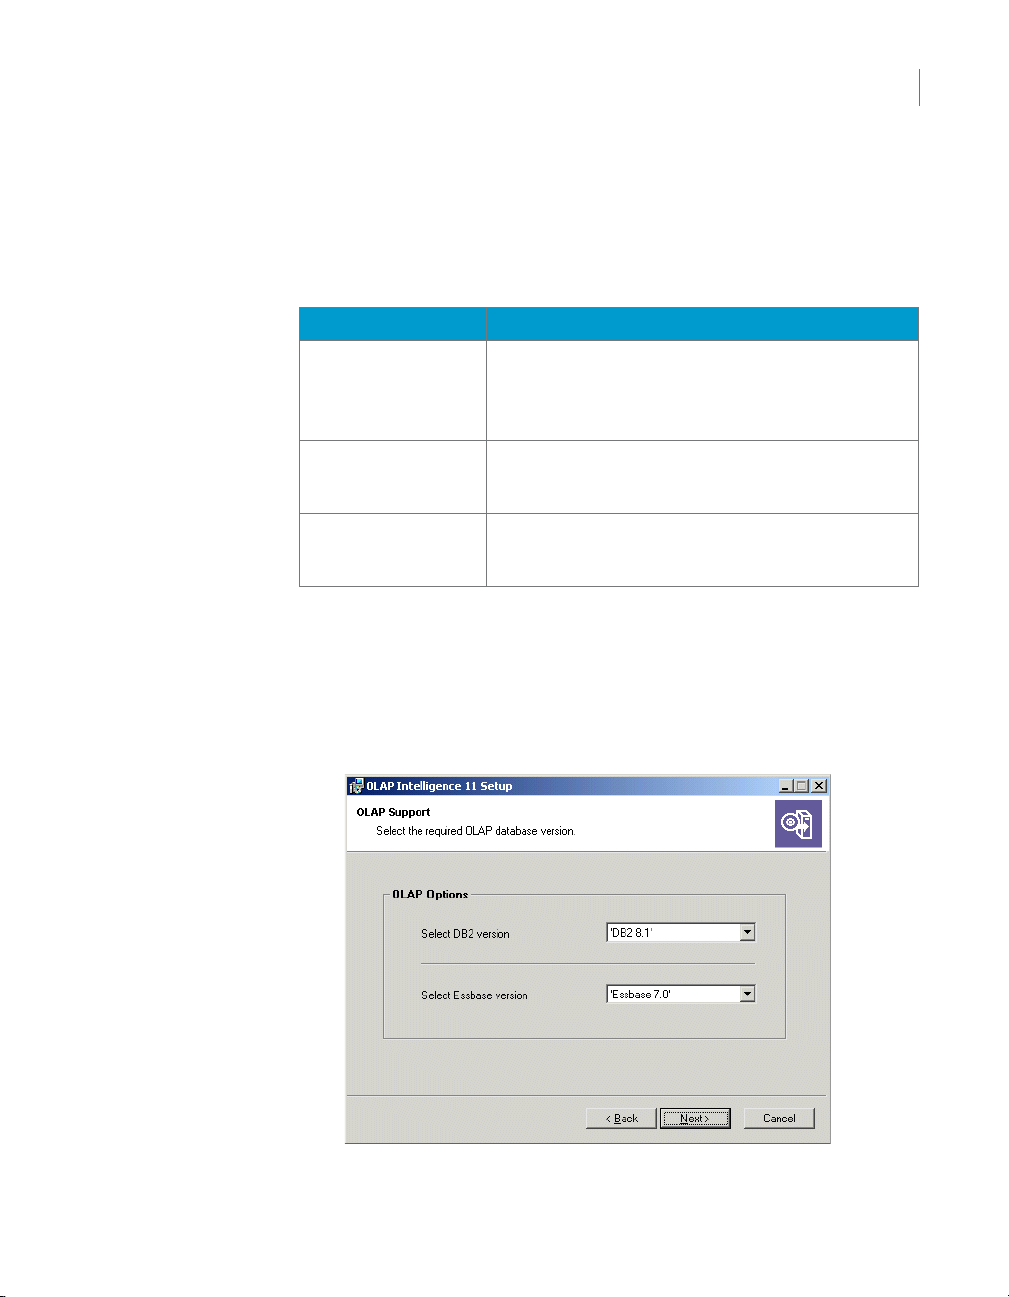
8. In the OLAP Support dialog box, select the required DB2 or Essbase
driver from the lists:
for use when you next start Excel.
disabled.
9. Click Next.
10. In the Start Installation dialog box, click Next.
11. Click Finish.
Note: You may need to restart your machine after running the Setup program.
Web Components installation
This option adds all the OLAP Intelligence server components to an existing
BusinessObjects Enterprise implementation. If you have a BusinessObjects
Enterprise Professional installation in which the CMS, WCS, and web server
are on separate computers, use the Custom option to install the server
components separately.
20 OLAP Intelligence Installation Guide

Installing OLAP Intelligence on Windows
Installing OLAP Intelligence
The following items are installed when this type is selected:
• Web Component Adapter (WCA) Add-on
• Central Management Server (CMS) Add-on
• ActiveX Interactive Viewer
• Web Server support
• Custom Web chart files
For a description of each component, see “OLAP Intelligence components”
on page 10.
Note: You may need to restart your machine after running the Setup program.
To install web components
1. Unless Autoplay is enabled for your CD-ROM drive, run setup.exe from
your product distribution.
2. Proceed through the Setup program’s dialog boxes and follow the
instructions displayed on your screen until you reach the Installation Type
dialog box:
3
3. Select Web Components and then click Next.
OLAP Intelligence Installation Guide 21

Installing OLAP Intelligence on Windows
3
Installing OLAP Intelligence
4. In the OLAP Support dialog box, select the required DB2 or Essbase
driver from the lists.
5. Click Next.
6. In the Start Installation dialog box, click Next.
7. Click Finish.
Note:
• You may need to restart your machine after running the Setup
• If you plan to use the DHTML Interactive Viewer in Java InfoView,
program.
you need to complete additional configuration steps to enable the
viewer. For details, see Chapter 5: Enabling the DHTML Interactive
Viewer in Java InfoView.
Complete installation
This option adds all the OLAP Intelligence components (server and client) to
one computer. The computer must already have a complete BusinessObjects
Enterprise installation.
A Complete installation can be used to both design OLAP reports and publish
them to BusinessObjects Enterprise.
22 OLAP Intelligence Installation Guide

Installing OLAP Intelligence on Windows
Installing OLAP Intelligence
The following items are installed when this type is selected:
• OLAP Intelligence
• OLAP Intelligence Add-In
• Central Management Server (CMS) Add-on
• Web Component Adapter (WCA) Add-on
• ActiveX Interactive Viewer
• Web Server support
• Help files.
For a description of each component, see “OLAP Intelligence components”
on page 10.
Note: You may need to restart your machine after running the Setup
program.
To run a complete installation
1. Unless Autoplay is enabled for your CD-ROM drive, run setup.exe from
your product distribution.
2. Proceed through the Setup program’s dialog boxes and follow the
instructions displayed on your screen until you reach the Installation Type
dialog box:
3
3. Select Complete and then click Next.
OLAP Intelligence Installation Guide 23

Installing OLAP Intelligence on Windows
3
Installing OLAP Intelligence
4. In the OLAP Support dialog box, select the required DB2 or Essbase
driver from the lists.
5. Click Next.
6. In the Start Installation dialog box, click Next.
7. Click Finish.
Note:
• You may need to restart your machine after running the Setup
• If you plan to use the DHTML Interactive Viewer in Java InfoView,
program.
you need to complete additional configuration steps to enable the
viewer. For details, see Chapter 5: Enabling the DHTML Interactive
Viewer in Java InfoView.
Custom installation
This option lets you choose from a list of OLAP Intelligence components, both
client and server. You can customize your installation to meet specific site or
resource requirements. To add OLAP Intelligence components to a custom
BusinessObjects Enterprise Professional installation, you may need to
perform a Custom installation on each computer that has BusinessObjects
Enterprise Professional components installed.
24 OLAP Intelligence Installation Guide

Installing OLAP Intelligence on Windows
Installing OLAP Intelligence
The following items are installed when this type is selected:
• OLAP Intelligence
• OLAP Intelligence Add-In
• Help files
• Web Component Adapter (WCA) Add-on
Install this component on the computer that is running the WCS.
• Central Management Server (CMS) Add-on
Install this component on the computer that is running the CMS.
• Web Server support
Install this component on the computer that is running the web server.
• Web help files
Install this component on the computer that is running the web server.
For a description of each component, see “OLAP Intelligence components”
on page 10.
You can independently control the location of three sets of components when
you perform a Custom installation:
• Common files shared with BusinessObjects Enterprise, including chart
support.
• Shared components, such as the BusinessObjects Enterprise SDK.
• All other files, including the web and desktop components.
These can be installed in any location, including to a non-system drive. A
small number of files remains on the system drive, regardless of the locations
that you choose.
Note:
• If you have already installed BusinessObjects Enterprise or Crystal
Reports, then you can install OLAP Intelligence to the default location.
(You can install the program only to the specified default location.)
• You may need to restart your machine after running the Setup program.
3
To run a custom installation
1. Unless Autoplay is enabled for your CD-ROM drive, run setup.exe from
your product distribution.
2. Proceed through the Setup program’s dialog boxes and follow the
instructions displayed on your screen until you reach the Installation Type
dialog box.
OLAP Intelligence Installation Guide 25

Installing OLAP Intelligence on Windows
3
Installing OLAP Intelligence
3. Select Custom and then click Next.
The Select Features dialog box appears with a list of the OLAP Intelligence
components. The list of server components depends on the BusinessObjects
Enterprise components that are already installed on the computer.
4. If you want to select a different folder to install to, click Browse.
Search for, or create, the new folder on your computer.
Note:
• The folder you specify can be on a non-system drive. You may want
to specify a non-system drive if there is limited free space on your
system drive.
26 OLAP Intelligence Installation Guide
Installing OLAP Intelligence on Windows
Installing OLAP Intelligence
• If you have already installed BusinessObjects Enterprise or Crystal
Reports, then you can install OLAP Intelligence to the default
location. (You can install the program only to the specified default
location.) In this case, the Browse button will not appear.
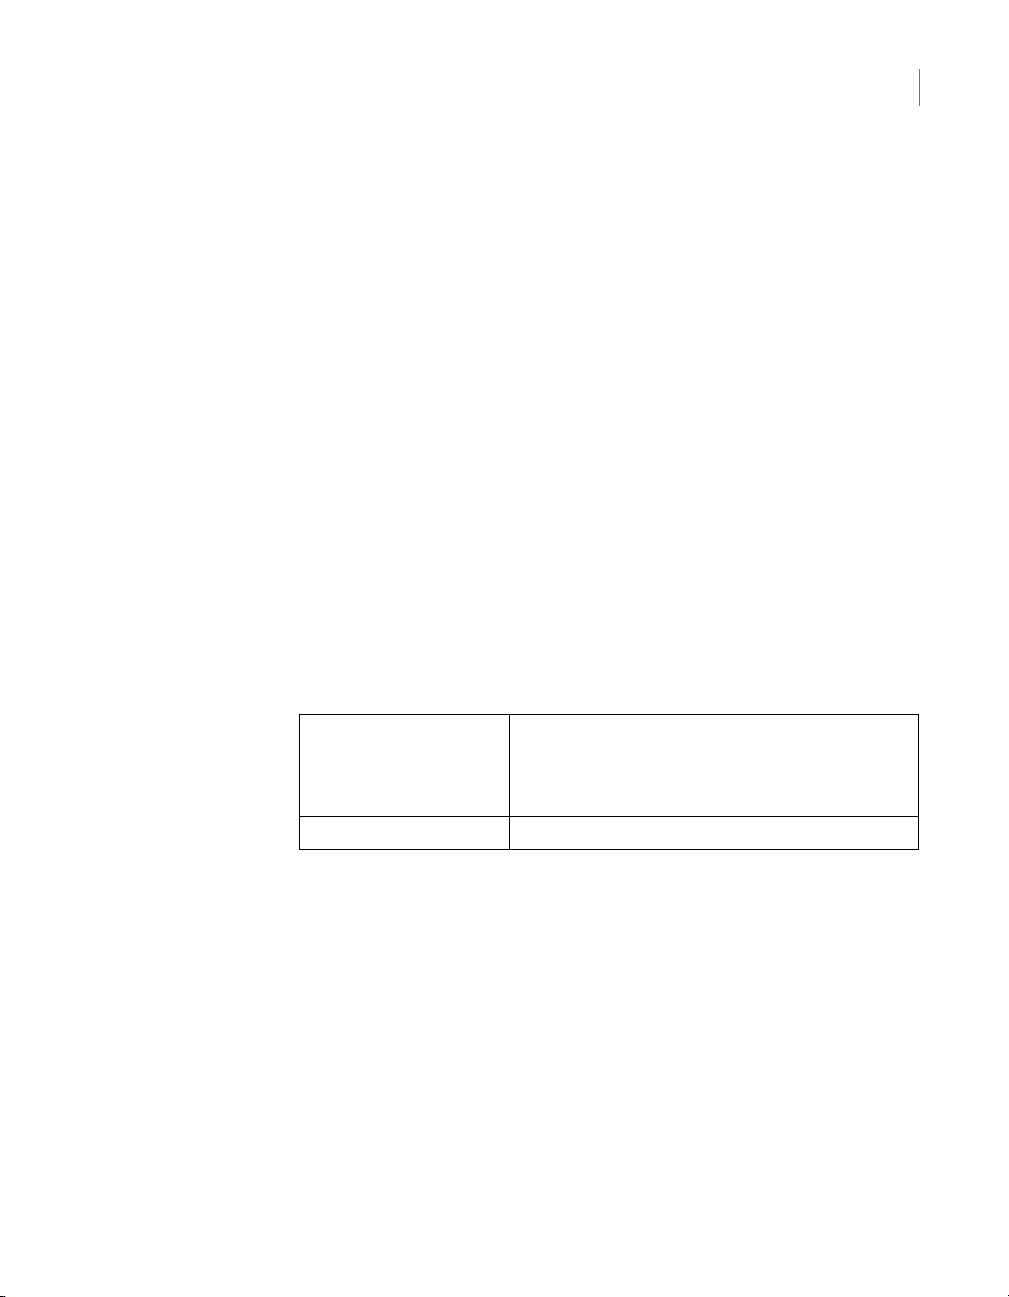
5. Select an installation type for each feature that you want to install.
Installation type What is installed
Will be installed on
local hard drive
Select this menu item if you want the feature to be
installed on the local hard drive. Subcomponents
of the feature will not be installed.
3
Entire feature will be
installed on local
hard drive
Entire feature will be
unavailable
6. To see how much disk space your configuration requires, click Disk Cost.
7. If you want to restart and select which features you would like to install, or
if you want to go back to the default installation location, click Reset.
8. Click Next.
9. In the OLAP Support dialog box, select the required DB2 or Essbase
driver from the lists.
Select this menu item if you want the feature to be
installed on the local hard drive. All
subcomponents of the feature will be installed.
Select this menu item if you do not want this
feature to be available. Subcomponents of the
feature will not be available.
OLAP Intelligence Installation Guide 27

Installing OLAP Intelligence on Windows
3
Modifying Essbase and DB2 support for the ActiveX Interactive Viewer
10. Click Next.
11. In the Start Installation dialog box, click Next.
12. Click Finish.
Note: You may need to restart your machine after running the Setup program.
Modifying Essbase and DB2 support for the
ActiveX Interactive Viewer
OLAP Intelligence has several DLLs for connection to Hyperion Essbase and
IBM DB2 OLAP Server data sources. These DLLs support different versions
of Essbase and DB2.
When you view an OLAP report for the first time in BusinessObjects
Enterprise, and the ActiveX Interactive Viewer is selected as your chosen
viewer, the ActiveX Interactive Viewer is installed on your computer. All the
Essbase and DB2 support DLLs are installed, but only the most recent
versions are active.
If you want to use a previous version, you must delete the active version and
then copy and rename the correct version.
To change to an older version of Essbase
1. Navigate to the following directory:
InstallPath\OLAP Intelligence 11\Bin
where InstallPath is the location to which OLAP Intelligence was
installed.
2. Delete the file
The following files are required for the data sources listed:
File name Data sources supported
essbhapi_70.dll
essbhapi_65.dll
3. Rename the DLL that you require to
For example, if you require support for Essbase 6.1.2, delete essbhapi.dll
and then rename essbhapi_610.dll to essbhapi.dll.
28 OLAP Intelligence Installation Guide
essbhapi.dll.
Essbase 7.0
Essbase 6.5.4 and above
essbhapi.dll.

Installing OLAP Intelligence on Windows
Prerequisites for contextual report linking
To change to an older version of DB2 OLAP
1. Navigate to the following directory:
InstallPath\OLAP Intelligence 11\Bin
where InstallPath is the location to which OLAP Intelligence was
installed.
2. Delete the file
The following files are required for the data sources listed:
File name Data sources supported
db2hapi_81.dll
db2hapi_71.dll
db2hapi.dll.
DB2 OLAP Server 8.1
DB2 OLAP Server 7.1.7, 7.1.6, 7.1.5, and 7.1.4
3
3. Rename your required DLL to
For example, if you require support for DB2 OLAP 7.1.5, delete
and then rename
db2hapi_71.dll to db2bhapi.dll.
db2bhapi.dll.
Prerequisites for contextual report linking
Contextual report linking allows report designers to associate OLAP
Intelligence, Crystal Reports, and Web Intelligence documents. This feature
enables you to invoke documents of one type from a document of a different
type or the same type.
You can create contextual links to and from the following types of documents:
• OLAP Intelligence designer-created reports (*.car)
• Crystal Reports (*.rpt)
• Web Intelligence documents (*.wid)
Use the openDocument function to create these hyperlinks in OLAP
Intelligence.
For users to view target documents and reports, they must have appropriate
rights on the target system. For details on granting user rights, refer to the
BusinessObjects Enterprise Administrator's Guide.
db2hapi.dll
OLAP Intelligence Installation Guide 29

Installing OLAP Intelligence on Windows
3
Registering OLAP Intelligence
To embed hyperlinks to OLAP Intelligence reports in documents on the
BusinessObjects Enterprise system in a distributed ASP.NET configuration,
use the Custom Install to install the Central Configuration Manager (look
under BusinessObjects Enterprise, then Client Components in the Custom
Install) on the node on which the InfoView web application is deployed.
Configure this component to point to the location of the Web Component
Server. Refer to the BusinessObjects Enterprise Installation Guide for details
on deploying in a distributed configuration.
Registering OLAP Intelligence
The Registration Wizard lets you create a user profile that you can mail, fax,
email, or submit over the web to register your implementation of OLAP
Intelligence.
To register OLAP Intelligence
1. On the Registration Wizard, click Next.
2. Select the method by which you want to register:
• Web (allows you to submit your user profile via the web).
• E-mail (allows you to submit your user profile via email).
• Fax or Mail (allows you to print your user profile to fax or mail).
3. If you’ve registered before and have received a registration number, enter
that number.
When you enter an existing registration number, the wizard updates the
appropriate files and then closes.
4. Click Next.
5. Enter your user profile information and click Next.
• If you register via the web, your web browser directs you to the
Business Objects registration site. Fill out all necessary fields and
click Done. You receive a registration number immediately; enter it in
the Registration Wizard and click Finish.
• If you register via email, fill out all necessary fields and click Done.
Your user profile is sent to Business Objects. A registration number is
returned by email or fax.
• If you register by fax or mail, fill out all necessary fields and click OK
when the Print dialog box appears. A registration number is sent to
you after you fax or mail your registration form.
30 OLAP Intelligence Installation Guide

33
Installing OLAP Intelligence on UNIX
chapter

Installing OLAP Intelligence on UNIX
4
Installing OLAP Intelligence on UNIX
Installing OLAP Intelligence on UNIX
This section describes how to install the Web Component Adapter (WCA) and
the Central Management Server (CMS) for OLAP Intelligence XI on Solaris or
AIX. It also specifies how to configure your server to integrate with OLAP
Intelligence XI.
Note: If you choose to use the version of Tomcat that is shipped with
BusinessObjects Enterprise, you do not need to configure your web
application server. The installation will set up your Java environment
variables, append your path, and deploy the WAR files.
Prerequisites
BusinessObjects Enterprise XI is a prerequisite for OLAP Intelligence XI.
Before you begin your installation, be sure the prerequisites have been met:
• BusinessObjects Enterprise XI is installed on the machine where you will
install OLAP Intelligence XI.
• Database clients are installed to access your source databases.
See the BusinessObjects Enterprise Installation Guide for details.
Supported databases and application servers
The following databases are supported with OLAP Intelligence:
• Essbase
• DB2
• Holos
The following web application servers are supported with OLAP Intelligence:
• Tom c at
• WebSphere
• WebLogic
• SunOne
• Oracle
• SAP NetWeaver
For a list of the specific versions of web servers and supported UNIX
platforms, see the file
distribution.
32 OLAP Intelligence Installation Guide
Platforms.txt on the OLAP Intelligence product

Running the install script
To install OLAP Intelligence on UNIX:
1. Go to the directoy where BusinessObjects Enerprise is installed and stop
the servers:
./stopservers
2. Mount the installation product distribution.
3. Go to the directory that corresponds with the version you want to install.
Installing OLAP Intelligence on UNIX
Running the install script
4
4. Execute the
./install.sh
5. Press Enter to continue.
6. Type the number that corresponds with the language version you want to
install, and then press Enter.
Number Language
1Dutch
2 English
3 French
4German
5Italian
6 Korean
7 Japanese
8 Simplified Chinese
9 Spanish
10 Traditional Chinese
7. Specify the directory where BusinessObjects Enterprise XI is installed,
followed by
8. Select the type of installation you want to perform; type the number that
corresponds with your choice:
install.sh script to begin the installation:
/bobje.
• To install the Central Management Server (CMS), enter 1.
• To install the Web Component Adaptor (WCA), enter 2.
• To install both, enter 3.
OLAP Intelligence Installation Guide 33

Installing OLAP Intelligence on UNIX
4
Setting up the web application server
9. Specify whether you require Essbase or DB2 support.
• For Essbase support, enter 1.
• For DB2 support, enter 2.
• For both, enter 3.
• For neither, enter 4.
10. If you require Essbase support, indicate what version of Essbase drivers
you need:
• For version 6.5, enter 1.
• For version 7.0, enter 2.
• For neither version, enter 3.
11. If you require DB2 support, indicate the version of DB2 drivers you need:
• For version 7.1, enter 1.
• For version 8.1, enter 2.
• For neither version, enter 3.
12. To start the extraction of files and the registration of keys, enter 1.
When the installation is complete, you will receive the message
"installation successful."
13. Start the BusinessObjects servers:
./startservers
Setting up the web application server
These instructions explain the tasks required to have OLAP Intelligence XI
work with WebSphere, WebLogic, SunOne, or Oracle. For specific
information on how to accomplish these tasks on your web application server,
consult the documentation for your web application server.
Note: If you choose to install Tomcat during your installation of
BusinessObjects Enterprise, no further action is required to integrate your
web application server with OLAP Intelligence.
Before you use OLAP Intelligence XI on the web application server, the WAR
files must be deployed and the server configured:
34 OLAP Intelligence Installation Guide

Installing OLAP Intelligence on UNIX
Setting up the web application server
• Deploy the WAR files that contain the specific style sheets and help files.
WAR file location Context Root
boe _install_ dir/bobje/enterprise11/
java/applications/olap/styles.war
boe _install_ dir/bobje/enterprise11/
java/applications/olap/
AnalysisHelp.war
/styles
/AnalysisHelp
• Append the path so your web application server knows where OLAP
Intelligence is installed. Open your web application server’s configuration
scripts, or use the administration console and add the required
information where
where BusinessObjects Enterprise is installed.
boe _install_ dir is replaced with the directory
4
UNIX
Version
Solaris
AIX
Variable Values
LD_LIBRARY_PATH /boe _install_ dir/bobje/
enterprise11/solaris_sparc/
olap/bin:/boe_install_dir/
bobje/enterprise11/
solaris_sparc/plugins/
desktop/
CrystalEnterprise.Analysis
LIBPATH /boe_install_dir/bobje/
enterprise11/aix_rs6000/
olap/bin:/boe_install_dir/
bobje/enterprise11/
aix_rs6000/plugins/desktop/
CrystalEnterprise.Analysis
• Set the java options / arguments.
Note: When you enter the variables, replace boe_install_dir and
essbase_ client_dir with the paths where BusinessObjects Enterprise XI
and Essbase are installed.
OLAP Intelligence Installation Guide 35

Installing OLAP Intelligence on UNIX
4
Setting up the web application server
Platform Java options / arguments
Solaris
AIX
-Dbusinessobjects.olap.home=/boe _install_ dir/
bobje/enterprise11/solaris_sparc/olap
-Dbusinessobjects.olap.xslt.TransformerFactory=
org.apache.xalan.processor.TransformerFactor
yImpl
-Dbusinessobjects.olap.env=LD_LIBRARY_PATH
=/boe _install_ dir/bobje/enterprise11/
solaris_sparc/olap/bin:/boe _install_ dir/
bobje/enterprise11/solaris_sparc/:/essbase_
client_dir/bin,holos_language=/boe _install_
dir/bobje/enterprise11/solaris_sparc/olap/
bin,ARBORPATH=/essbase_ client_dir,HOME=/boe
_install_ dir/bobje/enterprise11/
solaris_sparc/olap,BOE_REGISTRYHOME=/
boe_install_ dir/bobje/data/.bobj/registry
-Dbusinessobjects.olap.home=/boe _install_ dir/
bobje/enterprise11/aix_rs6000/olap
-Dbusinessobjects.olap.xslt.TransformerFactory=
org.apache.xalan.processor.
TransformerFactoryImpl
-Dbusinessobjects.olap.env=LIBPATH
=/boe _install_ dir/bobje/enterprise11/
aix_rs6000/olap/bin:/boe _install_ dir/
bobje/enterprise11/aix_rs6000/:/essbase
_client_dir/bin,holos_language=/boe
_install_ dir/bobje/enterprise11/aix_rs6000/
olap/bin,ARBORPATH=/essbase_
client_dir,HOME=/boe _install_ dir/bobje/
enterprise11/aix_rs6000/
olap,BOE_REGISTRYHOME=/boe _install_ dir/
bobje/data/.bobj/registry
• Close the configuration file or apply the changes made in the
administration console.
• Restart the web application server.
36 OLAP Intelligence Installation Guide

Uninstalling OLAP Intelligence
To uninstallOLAP Intelligence on UNIX:
1. Go to the directory where OLAP Intelligence is installed.
boe _install_ dir/bobje
2. Execute the uninstall script . Type ./uninstallOLAP.sh, and press
Enter.
3. Enter 0 to confirm you want to uninstall.
The OLAP Intelligence program files will be removed but any data files
will not be deleted.
Installing OLAP Intelligence on UNIX
Uninstalling OLAP Intelligence
4
OLAP Intelligence Installation Guide 37

Installing OLAP Intelligence on UNIX
4
Uninstalling OLAP Intelligence
38 OLAP Intelligence Installation Guide

OLAP Intelligence Installation Guide
Enabling the DHTML Interactive Viewer in Java InfoView
chapter

Enabling the DHTML Interactive Viewer in Java InfoView
5
Overview
Overview
OLAP Intelligence gives you the option of using either a DHTML version or an
ActiveX version of the Interactive Viewer. BusinessObjects Enterprise gives
you the option of using either a .NET version or a Java version of InfoView. If
you plan to use the DHTML Interactive Viewer in Java InfoView, you need to
complete additional configuration steps to enable the viewer.
Note: If you always use only the ActiveX Interactive Viewer or if you always
use only .NET InfoView, you do not need to perform any of the procedures in
this chapter.
The following steps are required to enable the DHTML Interactive Viewer in
Java InfoView:
• Stop the application server
• Define required Java options for the application server
• Restart the application server
• Deploy two new WAR files
The following sections describe the steps required to configure the DHTML
Interactive Viewer for these supported web application servers:
• Apache Tomcat 5.0.27
• IBM WebSphere Application Server 5
• BEA WebLogic Server 8.1
To configure the DHTML Interactive Viewer on other supported web
application servers, use the steps outlined in this chapter as a general guide.
For detailed instructions on how to configure Java options and how to deploy
WAR files, consult the vendor documentation for your web application server.
Prerequisites
The following components must be installed and working before you can
configure the OLAP Intelligence DHTML Interactive Viewer:
• A supported version of the Java SDK
• A supported Java application server
• BusinessObjects Enterprise Java SDK
• BusinessObjects Enterprise Java InfoView and Admin Launchpads
• A Complete or Web Components installation of OLAP Intelligence
40 OLAP Intelligence Installation Guide

Enabling the DHTML Interactive Viewer in Java InfoView
Apache Tomcat
Consult the Platforms.txt file included with your BusinessObjects
Enterprise product for a complete list of supported third-party products. You
must install a version of the Java SDK that is compatible both with your Java
application server and with the BusinessObjects Java SDK.
Ensure that the
directory where the Java SDK has been installed. For example,
C:\j2sdk1.4.1_02.
OLAP Intelligence components, by default, are installed to the directory
C:\Program Files\Business Objects\OLAP Intelligence 11\. If you
choose to install to a different location, substitute your install path for the
default in the generic JVM arguments. The instructions in this chapter
assume that you have installed to the default location. You must use the
shortened directory naming convention shown (that is,
C:\Program Files\) to ensure that no spaces are entered in the
than
argument line. Spaces can be misinterpreted as an additional argument and
can cause errors.
Ensure that the system
machine includes the following path:
drive:\Program Files\Business Objects\OLAP Intelligence
11\DHTML Components
Replace drive with the appropriate drive letter.
Connectivity to the back end OLAP database must be provided on the Java
application server machine for the DHTML Interactive Viewer to work. This
may include the installation of any necessary database client software and
the configuration of any environment variables.
JAVA_HOME environment variable has been set to the
C:\Progra~1\ rather
PATH environment variable on the application server
5
Apache Tomcat
If you have previously installed Tomcat 5.0.27 during the BusinessObjects
Enterprise installation procedure, then that installation will perform all the
necessary configuration steps automatically. You do not need to perform any
of the procedures in this chapter.
The manual configuration described in this section is required only if you are
using an application server that you installed prior to the BusinessObjects
Enterprise installation.
OLAP Intelligence Installation Guide 41

Enabling the DHTML Interactive Viewer in Java InfoView
5
Apache Tomcat
Setting up the Tomcat application server as a service
If you choose to install Tomcat 5.0.27 with the BusinessObjects Enterprise
product, no additional configuration is required to enable the DHTML
Interactive Viewer for Java InfoView. BusinessObjects Enterprise installs
Tomcat as a Windows service. When Tomcat is run as a Windows service, the
Tomcat application server retrieves its configuration parameters from the
Windows registry. The OLAP Intelligence installer automatically configures
the Tomcat server by modifying the registry entries.
To verify that the installation procedure has configured Tomcat settings
correctly, start the Windows Registry Editor (
the following path:
HKEY_LOCAL_MACHINE\SOFTWARE\Apache Software
Foundation\Procrun 2.0\BOBJTomcat\Parameters\Java
Note: It is strongly advised that you make a backup copy of the registry files
before you edit the registry.
In the right pane, select the multi-string value Options. Ensure that the
following entries are present:
-Dbusinessobjects.olap.bin= C:\Program Files\Business
Objects\OLAP Intelligence 11\DHTML Components
-Dbusinessobjects.olap.stylesheets=C:\Program Files\Business
Objects\OLAP Intelligence 11\stylesheets
Ensure that the path C:\Program Files\Business Objects\OLAP
Intelligence 11\DHTML Components has been appended to the option
-Djava.library.path.
If you do not install the Tomcat application server during the BusinessObjects
Enterprise installation, and if you want to run Tomcat as a Windows service,
consult the Tomcat documentation for instructions on how to configure these
options properly.
regedit.exe) and navigate to
Setting up the Tomcat application server as a process
If you do not install the Tomcat application server during the BusinessObjects
Enterprise installation, and if you want to start the application server as a
Windows process from the command line, you will need to configure Tomcat
manually. Set the
where Tomcat has been installed. For example,
Software Foundation\Tomcat 5.0\
42 OLAP Intelligence Installation Guide
CATALINA_HOME environment variable to the directory
C:\Program Files\Apache
.

To set up the Tomcat application server as a process
1. Shut down Tomcat by typing %CATALINA_HOME%\bin\shutdown in the
Command Prompt window.
2. Open the
This file is located in
3. Add the following lines to set the Java environment variables:
set JAVA_OPTS=%JAVA_OPTS%
-Dbusinessobjects.olap.bin=C:\PROGRA~1\BUSINE~1\OLAPIN~1
\DHTMLC~1
set JAVA_OPTS=%JAVA_OPTS%
-Dbusinessobjects.olap.stylesheets=C:\PROGRA~1\BUSINE~1\
OLAPIN~1\styles~1
set JAVA_OPTS=%JAVA_OPTS% -Djava.library.path=
C:\PROGRA~1\BUSINE~1\OLAPIN~1\DHTMLC~1
If the option for Djava.library.path has already been defined, append the
path to the DHTML Components directory to the existing one.
4. Save the file.
catalina.bat file for editing.
Deploying styles and help
Enabling the DHTML Interactive Viewer in Java InfoView
Apache Tomcat
%CATALINA_HOME%\bin\.
5
To deploy styles and help
1. Navigate to the Tomcat conf directory and open the file server.xml for
editing. For example:
5.0\conf\
2. Add the following lines above the line
<!-- Tomcat Examples Context -->:
<Context path=”/styles" docBase="C:\Program
Files\Business Objects\BusinessObjects Enterprise
11\java\applications\Styles.war" debug="0"
reloadable="false" />
<Context path="/AnalysisHelp" docBase="C:\Program
Files\Business Objects\BusinessObjects Enterprise
11\java\applications\AnalysisHelp.war" debug="0"
reloadable="false" />
Note: If you install BusinessObjects Enterprise in a location other than
the default installation directory, adjust the path descriptions to match
your actual install directories.
3. Save the file.
4. Restart Tomcat by typing
the command prompt.
.
C:\Program Files\Apache Group\Tomcat
%CATALINA_HOME%\bin\catalina start at
OLAP Intelligence Installation Guide 43

Enabling the DHTML Interactive Viewer in Java InfoView
5
IBM WebSphere Application Server
IBM WebSphere Application Server
Adding generic JVM arguments
You change the generic JVM arguments using the web-based administration
console.
To add generic JVM arguments
1. Access the administration console by using the following URL:
http://appserver.domain.com:9090/admin
Replace appserver.domain.com with the name and domain name of
your application server. By default, WebSphere starts the administration
console on port 9090. If you configured your application server to use a
different port number, substitute that port number in the URL.
If security is enabled on your application server, you will need the
administrator's ID and password to access the console. If security is
disabled, enter an arbitrary ID.
2. Click Servers in the left hand navigation panel to display your list of
application servers.
3. Click the Application Servers link.
4. Select the appropriate application server (called server1 in a default
installation) by clicking the hyperlinked name in the right hand upper panel.
5. Choose the Process Definition option located under the details screen
in the right hand upper panel.
6. Choose the Java Virtual Machine option located under the details
screen in the right hand upper panel.
7. Enter this line in the Generic JVM Arguments option of the details
screen in the right hand upper panel:
-Dbusinessobjects.olap.bin=C:\PROGRA~1\BUSINE~1\OLAPIN~1
\DHTMLC~1
-Dbusinessobjects.olap.stylesheets=C:\PROGRA~1\BUSINE~1\
OLAPIN~1\styles~1
-Djava.library.path=C:\PROGRA~1\BUSINE~1\OLAPIN~1\DHTMLC~1
Note: The text is displayed over three lines here, but it should be entered as
a single line, with a space separating the arguments (denoted by the "
If the option for Djava.library.path has already been defined, append the path
to the DHTML Components directory to the existing one.
-D").
44 OLAP Intelligence Installation Guide
Enabling the DHTML Interactive Viewer in Java InfoView
Restarting the application server
For the new arguments to take effect, the application server must be restarted.
Ensure that no users are active on the server and shut it down using the
standard procedures. If the application server has been created as a Windows
service, you can shut down and restart the application server using Services.
Alternatively, you can use the
command files located in the
directory. If you use the latter, you must pass in the server name as a parameter.
stopServer.bat and startServer.bat
bin directory of the application server's home
Deploying the WAR files
When the application server has restarted, you must deploy the Java web
(WAR) applications required by the OLAP Intelligence DHTML Interactive
Viewer.
To deploy the Java web applications
1. Access the administration console.
2. Click the Applications link in the left hand navigation panel, followed by
the Install New Application sub menu item.
This displays an installation dialog in the right hand details panel.
3. Specify the location of the
IBM WebSphere Application Server
styles.war file and provide the context path.
5
Server or Local path
Context Root
4. Click Next.
5. The next screen has a check box with the label "Generate Default
Bindings". Leave the defaults on this screen and click Next.
6. For the screen "Step 1: Provide options to perform the installation", leave
the defaults and click Next.
7. For the screen "Step 2: Map virtual hosts for web modules", leave the
defaults and click Next.
8. For the screen "Step 3: Map modules to application servers", leave the
defaults and click Next.
9. For the screen "Step 4: Summary", leave the defaults and click Finish.
10. Click the link to Save to Master Configuration.
C:\Program Files\Business
Objects\BusinessObjects Enterprise
11\
java\applications\Styles.war
/styles
OLAP Intelligence Installation Guide 45
(default)

Enabling the DHTML Interactive Viewer in Java InfoView
5
BEA WebLogic Server
11. Click the Save button.
Repeat this procedure for
Server or Local path C:\Program Files\Business
Context Root /AnalysisHelp
BEA WebLogic Server
Setting up WebLogic
To use the OLAP Intelligence components, you must configure the WebLogic
application server to start up with specific Java runtime options.
To set up WebLogic
1. Shut down the WebLogic application server.
2. Open the file that configures the start up environment for your application
server.
WebLogic provides a generic environment script file,
located in the
directory. You can also create your own custom environment script file to
set the runtime options.
Note: Ensure that the command script file that actually starts the
application server also executes the correct environment script file.
Otherwise, the Java runtime options will not be applied when the
application server starts up.
3. Add the following lines to the
set JAVA_OPTIONS=%JAVA_OPTIONS%
-Dbusinessobjects.olap.bin=C:\PROGRA~1\BUSINE~1\
OLAPIN~1\DHTMLC~1
set JAVA_OPTIONS=%JAVA_OPTIONS%
-Dbusinessobjects.olap.stylesheets=C:\PROGRA~1\
BUSINE~1\OLAPIN~1\styles~1
set JAVA_OPTIONS=%JAVA_OPTIONS% -Djava.library.path=
C:\PROGRA~1\BUSINE~1\OLAPIN~1\DHTMLC~1
If the option for Djava.library.path has already been defined, append the
path to the DHTML Components directory to the existing one.
C:\bea\user_projects\domains\userdomain\
AnalysisHelp.war with the following settings:
Objects\BusinessObjects Enterprise
11\
java\applications\AnalysisHelp.war
(default)
setenv.cmd,
JAVA_OPTIONS variable:
46 OLAP Intelligence Installation Guide

Enabling the DHTML Interactive Viewer in Java InfoView
4. Save the file.
Restarting the application server
For the new environment variables to take effect, restart the application server.
Deploying styles and help
To deploy styles and help
1. Open a web browser and type http://servername:7001/console in
its address bar to open the BEA WebLogic Administrative Console.
Replace servername with the name of the machine where you installed
BEA WebLogic.
By default, BEA WebLogic uses port 7001. If you configured your
application server to use a different port number, substitute that port
number in the URL.
2. Deploy the file
files\Business Objects\BusinessObjects Enterprise
11\java\applications\ directory as a new web application module.
The context root is
3. Deploy the file
files\Business Objects\BusinessObjects Enterprise
11\java\applications\ directory.
The context root is
styles.war, found in the C:\program
/styles.
AnalysisHelp.war, found in the C:\program
/AnalysisHelp.
BEA WebLogic Server
5
OLAP Intelligence Installation Guide 47

Enabling the DHTML Interactive Viewer in Java InfoView
5
BEA WebLogic Server
48 OLAP Intelligence Installation Guide

Adding or Removing Components
chapter

Adding or Removing Components
6
Overview
Overview
Components can be added or removed as necessary to suit your company’s
implementation of OLAP Intelligence. When you first install, you can also
specify components individually using the Custom installation type. See
“Custom installation” on page 24.
Once you have installed OLAP Intelligence, there are several ways to add or
remove components:
• By running setup.exe from the main product CD on the target computer.
• By running setup.exe from the main product CD from a shared network
drive.
• By running Add/Remove Programs from the Windows Control Panel.
Adding components
Adding components uses the same selection interface as the Custom
installation type—you choose the components and the installation location
from a list.
To add components to OLAP Intelligence
1. In Windows, click Start, point to Settings, and then select Control
Panel.
Alternatively, from your product distribution, run
Application Maintenance dialog box.
2. Double-click Add/Remove Programs.
3. Find OLAP Intelligence and select it. Depending on the version of
Windows that you are running, click the button that is labelled either
Change or Add/Remove.
After searching for existing components, the installation program displays
the Application Maintenance dialog box.
50 OLAP Intelligence Installation Guide
setup.exe to access the

Adding or Removing Components
Removing components
4. Click Modify.
5. Select the components that you want to add. Click Next.
For more information about selecting components, see “Custom
installation” on page 24.
6. Click Next, and then Next again to install the files.
Wait while the appropriate files are installed and the necessary
configuration is carried out.
7. Click Finish.
6
Removing components
Removing components uses the same selection interface as the Custom
installation type—you choose the components to remove from a list.
To remove components from OLAP Intelligence
1. In Windows, click Start, point to Settings, and then select Control Panel.
Alternatively, from your product distribution, run
Application Maintenance dialog box.
2. Double-click Add/Remove Programs.
setup.exe to access the
OLAP Intelligence Installation Guide 51

Adding or Removing Components
6
Repairing OLAP Intelligence
3. Find OLAP Intelligence and select it. Depending on the version of Windows
4. Click Modify.
5. Select the components that you want to remove.Click Next.
6. Click Next. Click Next again when you want to begin removing files.
7. Click Finish.
that you are running, click the button that is labelled either Change or Add/
Remove.
After searching for existing components, the installation program displays
the Application Maintenance dialog box.
For more information about selecting components, see “Custom
installation” on page 24.
Wait while the appropriate files are removed and the necessary
configuration is carried out.
Repairing OLAP Intelligence
The Repair option reinstalls missing or corrupt files, registry keys, and
shortcuts. In the process of reinstalling, any preferences stored in the registry
may be set to the default values.
1. In Windows, click Start, point to Settings, and then select Control Panel.
Alternatively, from your product distribution, run
Application Maintenance dialog box.
2. Double-click Add/Remove Programs.
52 OLAP Intelligence Installation Guide
setup.exe to access the

Adding or Removing Components
Uninstalling OLAP Intelligence
3. Find OLAP Intelligence and select it. Depending on the version of
Windows that you are running, click the button that is labelled either
Change or Add/Remove.
After searching for existing components, the installation program displays
the Application Maintenance dialog box.
4. Click Repair.
6
You are prompted to confirm that you want to install OLAP Intelligence.
5. Click Next.
Please wait while the appropriate files are installed and the necessary
configuration is carried out.
6. Click Finish.
Uninstalling OLAP Intelligence
This option removes OLAP Intelligence from your computer.
1. In Windows, click Start, point to Settings, and then select Control Panel.
Alternatively, from your product distribution, run
Application Maintenance dialog box.
2. Double-click Add/Remove Programs.
3. Find OLAP Intelligence and select it. Depending on the version of Windows
that you are running, click the button that is labelled either Remove or
Add/Remove.
OLAP Intelligence Installation Guide 53
setup.exe to access the

Adding or Removing Components
6
Uninstalling OLAP Intelligence
4. Click Remove and then Next.
5. Click Next.
6. Click Finish.
After searching for existing components, the installation program displays
the Application Maintenance dialog box.
You are prompted to confirm that you want to uninstall OLAP Intelligence.
Please wait while the appropriate files are removed and the necessary
configuration is carried out.
54 OLAP Intelligence Installation Guide

Command Line Installation
chapter

Command Line Installation
7
Prerequisites
Prerequisites
For a command line installation to work, Microsoft Installer 2.0 (MSI2) must be
installed on the computer. If this is not the case, you can install it from the
main OLAP Intelligence product CD.
To install Microsoft Installer 2.0
1. On the product CD, navigate to the directory win32.
2. Run the file instmsiw.exe.
Installation types
The command line installation can be used to perform several standard types
of installation:
• To perform a Desktop Client installation, omit all component flags. The
desktop client components are installed by default.
• To perform a Web Components installation, set SERVERCOMPONENTS=1
and
• To perform a Complete installation, set SERVERCOMPONENTS=1. The
desktop client components are installed by default.
You cannot use the command line installation to perform a Custom installation.
NOCLIENTCOMPONENTS=1.
Installing
You install OLAP Intelligence by running the Microsoft installer, msiexec, at
the command line and specifying the appropriate MSI file
olapintelligence.msi, in this case).
(
The syntax for installing OLAP Intelligence from the command line is as
follows (values in square brackets are optional):
msiexec /i /x msifile
[/qn] [/qr]
[PIDKEY=IDKey]
[DESKTOPDESIGNER=n]
[DESKTOPWIZARD=n]
[SERVERCOMPONENTS=n]
[NOCLIENTCOMPONENTS=n]
[OO_db2=Db2Version]
[OO_ESSB=EssVersion]
[/l*v LogFile]
56 OLAP Intelligence Installation Guide

where:
Command Line Installation
Installing
7
/i
/x
msifile Gives the MSI file, including its path.
/qn
/qr
IDKey Specifies a product keycode. Not required if the
DESKTOPDESIGNER=n Specifies OLAP Intelligence. Specifying 1 (the
DESKTOPEXCEL=n Specifies the OLAP Intelligence Add-In.
SERVERCOMPONENTS=n Specifies the server components. Specifying 1
NOCLIENTCOMPONENTS
n
=
Specifies an installation.
Removes an installation.
Specifies that no user interface is displayed. If
omitted, the normal interface is displayed, and
you must enter any details that were not given in
the command line.
Specifies that only progress dialog boxes are
displayed. You can still see and respond to error
messages.
product is being removed. The case of the
product keycode does not matter.
default) installs OLAP Intelligence. Specifying 0
installs no OLAP Intelligence.
Combining
DESKTOPEXCEL=0 produces the same result as
NOCLIENTCOMPONENTS=1.
Specifying 1 installs the Add-in. Specifying 0 (the
default) installs no Add-in.
installs the server components. Specifying 0 (the
default)
Specifies client components.
client components, while specifying 1 (the default)
installs no client components. If you specify
NOCLIENTCOMPONENTS=1, you must also specify
SERVERCOMPONENTS=1.
DESKTOPDESIGNER=0 and
installs no server components.
Specifying 0 installs
OLAP Intelligence Installation Guide 57

Command Line Installation
7
Examples
Examples
OO_DB2=
OO_ESSB=EssVersio
n
/l*v
When the command line installation runs without any user interface, the user
is not prompted if any of the options are incorrect. We recommend that you
carefully check the options that you are using before performing a command
line installation, and that you specify a log file.
The installer restarts the computer when it has completed the installation.
The following examples show some common installation combinations.
Db2Version Specifies the version of the DB2 driver to install.
Valid versions are 81 and 71. You can only specify
one version. If omitted, no DB2 driver is
configured.
Specifies the version of the Essbase driver to
install. Valid versions are 70 and 65. You can only
specify one version. If omitted, no Essbase driver
is configured.
LogFile Specifies verbose logging. LogFile is the full
name of the log file, including its path.
Installing desktop components
This installs the desktop features and produces a log file. The desktop client
components are installed by default.
msiexec /i olapintelligence.msi PIDKEY=xxxxx-xxxxxxx-xxxxxxx
/qn /l*v c:\installlog.txt
Installing server components
This installs the server components:
msiexec /i olapintelligence.msi PIDKEY=xxxxx-xxxxxxx-xxxxxxx
SERVERCOMPONENTS=1 NOCLIENTCOMPONENTS=1
Installing complete product
This installs the complete product. The desktop client components are
installed by default.
msiexec /i olapintelligence.msi PIDKEY=xxxxx-xxxxxxx-xxxxxxx
SERVERCOMPONENTS=1
Uninstalling
This removes the product, with no user interface or progress dialog boxes.
Progress is written to a log file.
msiexec /x olapintelligence.msi /qn /l*v
c:\temp\removelog.txt
58 OLAP Intelligence Installation Guide

Business Objects Information Resources
appendix

Business Objects Information Resources
A
Documentation and information services
Documentation and information services
Business Objects offers a full documentation set covering its products and
their deployment. Additional support and services are also available to help
maximize the return on your business intelligence investment. The following
sections detail where to get Business Objects documentation and how to use
the resources at Business Objects to meet your needs for technical support,
education, and consulting.
Documentation
You can find answers to your questions on how to install, configure, deploy,
and use Business Objects products from the documentation.
What’s in the documentation set?
View or download the Business Objects Documentation Roadmap, available
with the product documentation at http://www.businessobjects.com/support/.
The Documentation Roadmap references all Business Objects guides and
lets you see at a glance what information is available, from where, and in
what format.
Where is the documentation?
You can access electronic documentation at any time from the product
interface, the web, or from your product CD.
Documentation from the products
Online help and guides in Adobe PDF format are available from the product
Help menus. Where only online help is provided, the online help file contains
the entire contents of the PDF version of the guide.
Documentation on the web
The full electronic documentation set is available to customers on the web
from support web site at: http://www.businessobjects.com/support/.
Documentation on the product CD
Look in the docs directory of your product CD for versions of guides in Adobe
PDF format.
60 OLAP Intelligence Add-In Help

Business Objects Information Resources
Customer support, consulting and training
Send us your feedback
Do you have a suggestion on how we can improve our documentation? Is
there something you particularly like or have found useful? Drop us a line,
and we will do our best to ensure that your suggestion is included in the next
release of our documentation: documentation@businessobjects.com.
Note: If your issue concerns a Business Objects product and not the
documentation, please contact our Customer Support experts. For
information about Customer Support visit: http://www.businessobjects.com/
support/.
Customer support, consulting and training
A global network of Business Objects technology experts provides customer
support, education, and consulting to ensure maximum business intelligence
benefit to your business.
How can we support you?
Business Objects offers customer support plans to best suit the size and
requirements of your deployment. We operate customer support centers in
the following countries:
• USA
• Australia
• Canada
• United Kingdom
• Japan
A
Online Customer Support
The Business Objects Customer Support web site contains information about
Customer Support programs and services. It also has links to a wide range of
technical information including knowledgebase articles, downloads, and
support forums.
http://www.businessobjects.com/support/
OLAP Intelligence Add-In Help 61

Business Objects Information Resources
A
Useful addresses at a glance
Looking for the best deployment solution for your company?
Business Objects consultants can accompany you from the initial analysis
stage to the delivery of your deployment project. Expertise is available in
relational and multidimensional databases, in connectivities, database design
tools, customized embedding technology, and more.
For more information, contact your local sales office, or contact us at:
http://www.businessobjects.com/services/consulting/
Looking for training options?
From traditional classroom learning to targeted e-learning seminars, we can
offer a training package to suit your learning needs and preferred learning
style. Find more information on the Business Objects Education web site:
http://www.businessobjects.com/services/training
Useful addresses at a glance
Address Content
Business Objects product information
http://www.businessobjects.com
Product documentation
http://www.businessobjects.com/support
Business Objects Documentation mailbox
documentation@businessobjects.com
Online Customer Support
http://www.businessobjects.com/support/
Business Objects Consulting Services
http://www.businessobjects.com/services/
consulting/
Business Objects Education Services
http://www.businessobjects.com/services/training
62 OLAP Intelligence Add-In Help
Information about the full range of
Business Objects products.
Business Objects product documentation,
including the Business Objects
Documentation Roadmap.
Send us feedback or questions about
documentation.
Information on Customer Support
programs, as well as links to technical
articles, downloads, and online forums.
Information on how Business Objects can
help maximize your business intelligence
investment.
Information on Business Objects training
options and modules.

Index
A
adding, components 50
AIX
Java options /arguments 36
LIBPATH 35
Apache Tomcat 32, 41
application server setup 40
B
BEA WebLogic Server 46
Business Objects
consulting services 62, 62
support services 61
training services 62, 62
C
Component installation configurations 11
components
adding 50
removing 51
consultants, Business Objects 62
contextual report linking 29
customer support 61
D
DB2 32
documentation
feedback on 61
on product CD 60
on the web 60
roadmap 60
E
education. See training
Essbase 28, 32
Expand, installation type 16, 20
F
feedback, on documentation 61
H
Holos 32
I
IBM WebSphere Application Server 44
information resources 60
InfoView, Java 40
installation
component configurations 11
procedure 18
types
Expand 16, 20
New 16, 18
UNIX 33
Interactive Viewer 40
J
Java application server 40
L
linking reports 29
N
New, installation type 16, 18
O
Online Customer Support 61
Oracle 32
R
Registration Wizard 30
removing components 51
OLAP Intelligence Installation Guide 63

Index
Repairing
report linking 29
resources 60
S
SAP NetWeaver 32
Solaris
java options / arguments 36
LD_LIBRARY_PATH 35
SunOne 32
support
customer 61
locations 61
technical 61
web site 61
T
technical support 61
Tomcat 41
training, on Business Objects products 62
U
Uninstalling OLAP Intelligence
Unix 37
Windows 53
uninstalling OLAP Intelligence
UNIX
install script 33
Java options / arguments 36
Prerequisites 32
running the install script 33
Setting up web application server 34
uninstall OLAP Intelligence 37
WAR files 35
Unix
uninstall script 37
support 61
training 62
WebLogic 32, 46
WebSphere 32, 44
W
web
customer support 61
getting documentation via 60
useful addresses 62
web sites
64 OLAP Intelligence Installation Guide
 Loading...