

Page 1

Label Studio
User’s Guide
Label Studio 7.83c
February 2008
Page 2

Contact information Contact us on the Web at http://technicalsupport.businessobjects.com
If you find any problem with this documentation, please report it to Business Objects
in writing at
Copyright © 2008 Business Objects. All rights reserved.
Patents Business Objects owns the following U.S. patents, which may cover products that are
documentation@businessobjects.com
.
offered and licensed by Business Objects: 5,555,403; 5,857,205; 6,289,352;
6,247,008; 6,490,593; 6,578,027; 6,831,668; 6,768,986; 6,772,409; 6,882,998;
7,139,766; 7,299,419; 7,194,465; 7,222,130; 7,181,440 and 7,181,435.
Trademarks Business Objects and the Business Objects logo, BusinessObjects, Business Objects
Crystal Vision, Business Process On Demand, BusinessQuery, Crystal Analysis,
Crystal Applications, Crystal Decisions, Crystal Enterprise, Crystal Insider, Crystal
Reports, Desktop Intelligence, Inxight, the Inxight Logo, LinguistX, Star Tree, Table
Lens, ThingFinder, Timewall, Let there be light, Metify, NSite, Rapid Marts,
RapidMarts, the Spectrum Design, Web Intelligence, Workmail and Xcelsius are
trademarks or registered trademarks in the United States and/or other countries of
Business Objects and/or affiliated companies. All other names mentioned herein may
be trademarks of their respective owners.
Third-party contributors Business Objects products in this release may contain redistributions of software
licensed from third-party contributors. Some of these individual components may
also be available under alternative licenses. A partial listing of third-party
contributors that have requested or permitted acknowledgments, as well as required
notices, can be found at: http://www.businessobjects.com/thirdparty
2
Label Studio User’s Guide
Page 3

Contents
Preface .............................................................................................................5
Chapter 1:
Overview ........................................................................................................ 9
Welcome to Label Studio!..............................................................................10
Label types .....................................................................................................11
Windows drivers ............................................................................................14
Inkjet printers and drivers ..............................................................................15
PCL Data Stream drivers................................................................................16
Generic Text driver ........................................................................................17
Quick tour of Label Studio.............................................................................18
Chapter 2:
Set up your job............................................................................................. 19
Introduction to job files ..................................................................................20
Before setting up new jobs .............................................................................22
Quick ways to set up jobs...............................................................................24
Assign your input files ...................................................................................25
Design labels and set up your printer.............................................................26
Verify your job ...............................................................................................27
Generate labels and reports ............................................................................28
Remote Views ................................................................................................29
Create a tray label design file with the Label Toolbox Wizard .....................30
Create an address label job with the Job Editor .............................................31
Chapter 3:
Printer setup ................................................................................................ 33
Setting up your printers ..................................................................................34
Define your printer settings............................................................................39
Barcode printing with the Generic Text driver ..............................................41
Chapter 4:
Design labels................................................................................................. 45
Label requirements.........................................................................................46
Get started designing labels............................................................................49
Define your page settings...............................................................................52
The Designer window in Label Toolbox........................................................53
The Layout window .......................................................................................55
Layers .............................................................................................................57
Lines...............................................................................................................58
Frames ............................................................................................................59
Fields ..............................................................................................................61
Barcodes .........................................................................................................63
Break marks....................................................................................................65
Images ............................................................................................................68
Other miscellaneous objects...........................................................................70
Verify labels ...................................................................................................71
Contents
3
Page 4

Preview labels................................................................................................ 72
Page templates ............................................................................................... 74
Layout templates............................................................................................ 75
Chapter 5:
Reports......................................................................................................... 77
Available reports............................................................................................ 78
Print reports.................................................................................................... 79
Format reports................................................................................................ 81
Job Summary ................................................................................................. 82
Print Log report.............................................................................................. 84
Banner pages.................................................................................................. 85
Chapter 6:
Output .......................................................................................................... 87
Output destinations ........................................................................................ 88
Create multiple output files............................................................................ 89
Set up units..................................................................................................... 90
Set up subunits............................................................................................... 92
File masks ......................................................................................................94
Output file sizes ............................................................................................. 96
Appendix A:
Creating expressions and filters ................................................................. 97
Expressions and filters ...................................................................................98
Filter Builder................................................................................................ 100
Examples of value expressions and conditional filters................................ 102
Appendix B:
Command line options...............................................................................105
Appendix C:
Predefined design files, templates, and printer files ............................... 107
USPS address label design files................................................................... 108
USPS sack label design files........................................................................109
USPS tray label design files......................................................................... 111
USPS pallet placard design files.................................................................. 112
Generic label design files.............................................................................113
USPS address label layout templates........................................................... 114
USPS sack label layout templates................................................................116
USPS tray label layout templates................................................................. 117
USPS pallet placard layout templates.......................................................... 118
Generic label layout templates.....................................................................119
USPS address label page templates ............................................................. 120
USPS sack label page templates .................................................................. 122
USPS tray label page templates...................................................................123
USPS pallet placard page templates ............................................................ 124
Generic label page templates .......................................................................125
Printer files................................................................................................... 126
Glossary ...................................................................................................... 129
Index............................................................................................................ 131
4
Label Studio User’s Guide
Page 5

Preface
About Label Studio Label Studio is a design tool that takes your input files and then outputs
customized labels. It is a perfect fit with our other database and mailing-list
management and production products.
With Label Studio, set up your job file, set up your printers, design and print your
labels (address, container, pallet, or generic), and print your reports. In addition,
you can split your output into multiple output files by creating unit and/or subunit
breaks.
Label Studio works with many different Windows printer drivers, inkjet printer
drivers, and PCL Data Stream printer drivers, or you can use a Generic Text
driver.
About this guide This guide explains what Label Studio can do and how you can apply it in
common situations.
This guide does not explain the following concepts. You should already be
familiar with:
Your operating system
Text editors
Your printing equipment
Input files
USPS mailing regulations
Preface
5
Page 6

Documentation
Complete documentation set
Access the latest documentation
Your complete Label Studio documentation set includes the following:
Label Studio User’s Guide
Label Studio Inkjet Reference
Quick Reference for Views and Job-File Products
System Administrator’s Guide
Edjob User’s Guide
Database Prep
You can access product documentation in several places:
On your computer. Release notes, manuals, and other documents for each
product that you have installed are available in the Documentation folder.
Choose Start > Programs > Firstlogic Applications > Documentation.
On the Customer Portal. Go to
http://technicalsupport.businessobjects.com
Documentation link to access all the latest product documentation. You can
view the PDFs online or save them to your computer for viewing or printing.
Conventions This document follows these conventions:
Convention Description
, and then click the
Bold
Italics
> in menu
commands
!
Highlights file names, paths, and text that you should type exactly as
shown. For example, “Type
cd\dirs
.”
Both emphasizes text and indicates text for which you should substitute your own data or values. For example, “Type a name for your file,
and the
.txt
extension (
testfile
.txt
).”
Indicates commands that you choose from menus in the following format: Menu Name > Command Name. For example, “Choose File >
New.”
Alerts you to important information and potential problems.
Points out special cases that you should know about.
Draws your attention to tips that may be useful to you.
6
Label Studio User’s Guide
Page 7

Resources for the mailing industry
Producing labels requires some familiarity with USPS rules and mailing-industry
practices. If you are new to the industry, refer to these sources:
U.S. Postal Service. The U.S. Postal Service offers many helpful
publications. Ask your postmaster or USPS account representative about
these publications.
Domestic Mail Manual (DMM). We recommend that you purchase a
subscription to the Domestic Mail Manual (DMM), the official source of
mailing rules. You don’t have to read the DMM to run Label Studio, but if
you ever have a problem in mail acceptance, or otherwise need to know the
mailing rules, you will be glad to have your DMM handy.
USPS Bulletins. You may also want to subscribe to the USPS Postal Bulletin
and the Mailroom Companion.
Postal Explorer. Visit the Postal Explorer web site at http://pe.usps.gov. This
web site is a virtual library of postal information provided by the USPS. It
includes an electronic copy of the DMM.
Preface
7
Page 8

8
Label Studio User’s Guide
Page 9

Chapter 1:
Overview
This chapter offers an overview of Label Studio features and a steps explaining
where Label Studio fits in the mailing process. It also provides examples of the
types of labels you can generate and the types of printer drivers you can use.
Finally, a quick tour on the last page can help get you started.
Chapter 1: Overview
9
Page 10

Welcome to Label Studio!
What is Label Studio? Label Studio is a powerful tool that links your input files and label designs with
your printing system. You can create address labels, sack and tray labels, pallet
placards, and generic labels, and output them on your printing system.
Label Studio’s place in the mail process
Although you can use Label Studio on input files that haven’t been presorted,
most customers use input files that they presorted either with Business Objects’
Presort program or with another presort program. If you use Label Studio with
presorted files, you may follow a process like this:
1. Clean up the name and firm data in each record with DataRight IQ.
2. Correct and encode address information in each record with ACE.
3. Delete or consolidate duplicate records using Match/Consolidate.
4. Presort your records according to USPS regulations to receive postage
discounts.
5. Generate your address and shipping (sack, tray, or pallet) labels with Label
Studio.
Label Studio’s parts You set up your Label Studio jobs in the main, Job Editor window. However,
there is more to Label Studio than what you initially see. The following is a list of
Label Studio’s parts:
Label Toolbox: Choose Tools > Design Labels to open this drag-and-drop
label designing tool. You set up your label designs and printers here. See
Chapter 3 for more information.
Label Studio Print: Run your jobs right from your Windows command
prompt or UNIX command line. See Appendix B for more information.
10
Filter Builder: To print objects or text conditionally on your labels, you will
use Filter Builder to create value expressions or conditional filters. Access
Filter Builder in Label Toolbox from your object’s properties window. See
Appendix A for more information.
Label Studio User’s Guide
Page 11

Label types
You can design and print many types of labels with Label Studio, including USPS
Address labels, USPS Container labels, USPS Pallet placards, and generic-type
labels.
Sack, tray, pallet Intelligent Mail labels not final. The USPS has not
!
finalized the requirements or designs for sack, tray, and pallet Intelligent
Mail labels. You may use Intelligent Mail sack, tray, and pallet labels for
experimentation purposes only. Do not use them for mailings until the USPS
finalizes requirements and designs.
We will continue to work with the USPS to provide you with updated sack,
tray, and pallet templates, in a timely manner, that will meet the finalized
requirements for these labels.
Address labels Address labels indicate where the mail piece is destined. The USPS regulates the
placement and appearance of some elements on this label type. The following is
an example of a typical address label.
#1125********************CAR-RT-SORT**C-054
#114A/868736/DOE4#
JOHN SMITH P395 ###
BUSINESS OBJECTS T39 ###
100 HARBORVIEW PLAZA ###
LA CROSSE WI 54601-4071
Container labels Container labels, which are for sacks and trays, indicate where the container is
destined, its contents, and where it originated. Automation-rate mailings require a
barcode. The USPS mandates the appearance and placement of most elements on
these label types. The following are examples of typical container labels.
Chapter 1: Overview
11
Page 12

Tray label example
Sack label example
12
Label Studio User’s Guide
Page 13

Pallet placards A pallet placard indicates where the pallet is destined and where it originated. The
USPS mandates the appearance and placement of most elements on this label
type. The following is an example of a typical pallet placard.
Generic labels Label Studio also provides a generic label type. You can use this label type as a
blank slate to create all sorts of labels, such as disk labels, name tags, or file
folder labels. You could also use the generic label type to print addresses from
your database on index cards, post cards, or form letters.
Index card example
USPS verification You can use the generic label type to print your address, sack, tray, or pallet
labels, if you want. But they will not be verified for the USPS mailing
requirements.
Chapter 1: Overview
13
Page 14

Windows drivers
If you run Label Studio on a Windows operating system, you may want to use a
Windows printer driver to generate your labels and reports. Label Studio supports
all kinds of Windows printer drivers.
Features Windows drivers provide the most robust features and creativity when designing
your labels, such as:
Using a variety of fonts, including barcode fonts
Using images in your designs
Using frames to control the appearance of your designs
Dragging and dropping objects onto your label designs
Printing creative banner pages
Printing test labels
The ability to print to a .pdf file using a PDF printer driver. See the Label
Toolbox help topic, “How to print to a .pdf.”
Creating conditional filters and value expressions to control printing of
certain objects on your labels
See “Design labels” on page 45.
Printing performance Because Windows printer drivers provide so many features, it is easy to overload
your labels with objects and to slow down printing. As a general rule, the more
complex the label design (multiple frames or conditional filters, for example), the
more time it will take to evaluate and process your label design.
To improve printing performance:
Limit the use of multiple frames on the label design.
Limit the use of filters on the label design.
When using value expressions, try to reduce the complexity (nested "if"
statements, for example) of those expressions.
Assign your Windows printer to your job
Choose from and set up your printers in Label Toolbox. See “Define your printer
settings” on page 39 for more information.
14
Label Studio User’s Guide
Page 15

Inkjet printers and drivers
Inkjet printer drivers are available on all supported Windows and UNIX operating
systems.
What are inkjet printers?
Why use inkjet printers?
Label Studio inkjet documentation
Inkjet printers are large, high-speed printers that, from a high-pressure jet of ink,
precisely deflect ink droplets as “dots” toward the print target. The dots form the
characters that make up the address and message content. These inkjet printers
need a different set of instructions than regular printers do.
For our purposes, bubble jet printers do not qualify as inkjet printers.
If you want to print address information directly on a mail piece, you need to use
an inkjet printer. Some inkjet systems support messaging. If you use such an
inkjet printer, you can add messages to your mail pieces. Some inkjets allow
messaging, which can change according to the specific mail piece or remain the
same for all mail pieces. Some inkjet users can also use demographic codes to
control the bindery line.
Details about inkjet printers and how Label Studio interacts with them are
available in the Label Studio Inkjet Reference.
Chapter 1: Overview
15
Page 16

PCL Data Stream drivers
The PCL Data Stream driver outputs in PCL4 format and is available on all
supported Windows and UNIX operating systems.
Features The PCL Data Stream driver supports many advanced features, such as:
The PLANET, POSTNET, Intelligent Mail, Interleaved 2 of 5, Code 128, and
3 of 9 barcode objects on your label designs
Multiple Data Stream fonts on your label designs
Varying page and margin settings and multiple labels per page
Test labels and banner pages
The ability to create your own layers in your design
Predefined design files
Predefined design files are included with Label Studio to use with your PCL Data
Stream printer driver. These design files are samples and are read-only. To use
one of these files with your job, you must save the file with a different name.
See “Predefined design files, templates, and printer files” on page 107.
Data Stream fonts When you use a Data Stream printer driver, you must use Data Stream fonts on
your label designs. These type of fonts require a separate font file for each font
size and style. The following PCL Data Stream fonts are shipped with Label
Studio. Each font file is located in the Fonts folder of your Label Studio
installation directory.
Font Sizes
Arial 6, 10, 12, 14, 18, 48, 60
Courier New 6, 8, 10, 12
USPS PLANET barcode 9
USPS POSTNET barcode 9
Code 128 barcode 22
3 of 9 barcode 22
16
Interleaved 2 of 5 barcode 22, 47, 51
Intelligent Mail barcode
If you do not want to use one of the provided fonts, you can create your own Data
Stream fonts in Label Studio; choose Tools > Create Data Stream Fonts. See the
Label Studio help topic, “Create Data Stream Fonts window” for instructions.
Label Studio User’s Guide
Page 17

Generic Text driver
The Generic Text driver is available for all supported Windows or UNIX
operating systems. The Generic Text driver can be set up for use with any printer.
Generic Text design files
Label Studio comes with three Generic Text design files installed for your
convenience: Text 1-up.ltd, Text 2-up.ltd, and Text 4-up.ltd. Use these design
files as a basis for your text printer design files.
Generic Text printer files
Label Studio also includes printer files (.ltr) for use with the Generic Text driver.
These printer files contain suggested POSTNET escape codes for a variety of
printers, such as the Tally, Rena, Okidata, and Genicom printers. See the entire
list of printer files in Appendix D.
Assign one of these printers to your job from the Label Toolbox, Design Settings
window (File > Design Settings). Click the More button to access the printer
settings.
See also See “Barcode printing with the Generic Text driver” on page 41.
Chapter 1: Overview
17
Page 18

Quick tour of Label Studio
This quick tour introduces you to the basics of running a job in Label Studio. A
ready-made job is already provided in your Samples folder, so you can easily
move around Label Studio and learn about its features.
Open the sample job Choose File > Open and double-click Quikjob.lsj. The job-editor window
displays the job-file blocks to the left and the parameters to the right.
Define your parameters
Double-click each job-file block to edit the parameters
of your job. For example, double-click Report Defaults
to define how and where to print your reports.
If you make changes in a job-file block, the icon shows
the letter C. This icon signifies the parameters have
changed but are not yet saved.
Create a design file A design file defines the layout and page size of your label. There are many
predefined design files available, or you can create your own. In this example, we
will modify a sample design file:
1. Choose Tools > Design Labels, or click the Design Labels button on
the toolbar to open Label Toolbox.
2. Select the QuikDesign.ltd design file, and click Edit. Drag and drop fields or
objects onto your layout from the Objects window, as necessary.
3. Choose File > Save As, and rename your design file (if you want to keep
your changes). Choose File > Exit.
4. Click Select. This opens the Labels block of your job and assigns your design
file to your job.
Preview labels Choose Tools > Preview Labels, or click the Preview Labels button to see
what your labels will look like.
Verify your job Choose File > Verify Job, or click the Verify Job button. If you have set up
your job incorrectly, the Browse Job Problems window appears. Doubleclick an error or warning to fix it.
Print labels and reports
1. Choose File > Run Job, or click the Run Job button. Save your file, if
prompted.
2. Verify that the Print Labels and Create Reports options are selected in the
Execution Options window, and click OK. Click OK once more to run your
job.
18
Label Studio User’s Guide
Page 19

Chapter 2:
Set up your job
This chapter walks you through some of the steps to setting up your Label Studio
job. It also provides examples for creating a label job with the Wizard and an
address label job with the Job Editor.
Chapter 2: Set up your job
19
Page 20

Introduction to job files
A job file is filled with instructions to process your Label Studio job. The job file
tells Label Studio how to generate labels from input files that you provide.
Job files are organized into groups of parameters called blocks. Each parameter
and its value instruct Label Studio as to which records to generate labels for,
which reports to generate, where to put the generated labels and reports, and so
on.
Job Editor window When you work on a job file, Label Studio displays the job in a two-part window,
called the Job Editor window. On the left, there’s a diagram of all the blocks in
the job file. You can select any one, and Label Studio displays to the right, each
parameter associated with that block and its setting. For example, the Execution
Options block is selected and its parameters appear on the right.
Job file blocks When you double-click a block, Label Studio provides an interface to define your
parameters. There is no need to pay attention to what the job file actually looks
like.
When you open an
existing job file, its settings appear in the Job
Editor window.
BEGIN Input File===========================
Input File Name (path & file).................... = C:\PW\input\prntadr.txt
Starting Record Number........................... = 1
Ending Record Number............................. =
When you set up a
job, Label Studio
automatically saves
it for you in a job
file.
Process Deleted Records (Y/N).............. ....= N
Input Filter (to 1023 chars)....................... =
Nth Select (1.0 to ?)................................ = 1.0
Maximum Number of Records to Use.......... =
END
20
Label Studio User’s Guide
Page 21

Job diagram In the job diagram, Label Studio uses a set of symbols to indicate the block status.
With these cues you can see immediately which blocks are complete and which
need work. Here’s a legend to help you interpret the symbols:
Symbol Description
Some individual job blocks are gathered into sensible groups. You can
click a folder to expand a group to see all the blocks in it, or collapse the
group to see only the group name.
When a block has not yet been set up, the symbol is an open, empty box.
A red exclamation mark is added if the block is mandatory.
When a block is complete, it looks like a closed, green box with a blue
check mark.
A red C indicates that there are unsaved changes in this block.
When you want to temporarily deactivate a block (that is, make the software ignore it), you can “comment it out” by choosing Edit > Comment
Block. Then you’ll see a “balloon” added, like cartoonists use.
The combination of the red C and the balloon indicates that there are
unsaved changes, and the block is commented out.
The sparkle indicates a way to add a new
block. Double-click this block to add a
new block to the job.
Parameter descriptions
Tips
On the right side of the Job Editor window, Label Studio displays the parameters
associated with each block and each parameter’s settings. This window gives you
a quick glimpse at your job file settings. You can double-click one of the
parameters to open that block.
While working in the Job Editor window, periodically save your job file.
Your settings are not permanently recorded in the job file until you save it.
In the Job Editor window, you can comment out a block or deactivate it (Edit
> Comment block). However, to edit anything in that block, you have to
uncomment it first (Edit > Uncomment block). After editing, you may want
to deactivate the block again.
When you name job files, you may use long file names. However, you must
use the usual extension (.lsj).
Chapter 2: Set up your job
21
Page 22

Before setting up new jobs
Before you start creating job files, you need to:
Set up your auxiliary files.
Assign your auxiliary files to your job.
Set your defaults.
Set up your auxiliary files
Assign auxiliary files to your job
To process a database, Label Studio uses certain supporting files, called the
definition file (.def) and format file (.fmt). You can read about them in your
Database Prep guide.
To create your definition files, you can use a handy tool, DefMap, which is
provided in Label Studio (Tools > DefMap). DefMap comes with its own online
help. Choose Help > DefMap Help Index from the DefMap menu to find more
information about this tool.
To create your format files, you must use a text editor, such as Notepad. Set up
your format files before you start any work on the job file in Label Studio.
You do not need to assign your auxiliary files to your job if they are located in the
same directory as your input file and have the same name. For example, suppose
your input file is named Adr.dat and your auxiliary files are named Adr.def and
Adr.fmt. If all three of these files are located in the same directory, for example
C:\pw\ls\samples\, then Label Studio automatically uses these definition and
format files in your job.
If your auxiliary files and input files are not located in the same folder or have
different names. Assign your auxiliary files to your job in one of two ways:
In your default settings (Tools > Options > Defaults)
In the Auxiliary Files block (these settings override your default settings)
Set your defaults After you install Label Studio, you should do one thing right away: set your
defaults. Label Studio uses your default settings for each new job you create.
To set your defaults:
1. Open Label Studio.
2. Choose Tools > Options > Defaults.
3. Set the default settings for your file locations, auxiliary files, file mask
definitions, report settings, and Filter Builder database location.
File locations Label Studio needs to know where you want your work, report, output, and log
files placed after it generates them. If you want these files placed in the same
locations for every job, fill out this information.
Auxiliary files Label Studio needs to know where your format (.fmt) and definition (.def) files
are located. Enter this information once, and you will seldom have to think about
it again. Your defaults for auxiliary files will be used whenever you create a new
job.
22
Label Studio User’s Guide
Page 23

File mask definitions If you split your output and want to use file mask characters, you can set up your
default characters here. See “File masks” on page 94 for more information. The
default file mask settings will be used whenever you create a new job.
Reports Set up default header lines and printer codes. The header lines are printed at the
top of every report. The default report settings will be used whenever you create a
new job. See Chapter 4 on page 77 for more information about reports.
Filter Builder database You can specify the location of your Filter Builder database. Use Filter Builder to
create your filters and expressions. Store this database locally or on a file server,
for sharing.
Chapter 2: Set up your job
23
Page 24

Quick ways to set up jobs
There are two ways to set up your jobs:
The Wizard
The Job Editor
Wizard Label Studio offers a step-by-step wizard (File > New > Wizard). It’s great for
simpler jobs or new users. When you’re more familiar with Label Studio, you can
get started in the Wizard, and then switch to the Job Editor to fine-tune your
settings or add more features. Use the Wizard for creating new jobs. See “Create a
tray label design file with the Label Toolbox Wizard” on page 30.
Job Editor The Job Editor (File > New > Job Editor) gives you access to all of the features
and options available in Label Studio. Therefore, it is more appropriate for users
with some experience in Label Studio. Use the Job Editor when you want to reuse
an existing job file, or alter one of our sample jobs. See “Create an address label
job with the Job Editor” on page 31.
Sample jobs To help you start preparing your own Label Studio jobs, we provide a set of
sample job files. We even include a sample database, and the format and
definition files, too. We designed these sample jobs so you can:
Ensure that Label Studio is installed correctly.
Familiarize yourself with running a completed Label Studio job file.
For now, we invite you to edit one of the sample job files that we provide. The
Samples folder, containing the sample job files and auxiliary files is located in
your installation directory.
24
Label Studio User’s Guide
Page 25

Assign your input files
Each Label Studio job must have at least one input file assigned to it. Your input
file is your database that contains the names, addresses, and other data that you
may want on your labels.
See the Database Prep manual for more specific information about setting up
your input files.
Input File Setup From the Job Editor window, expand the Input
File Setup folder to display the Input File, Input
File New, and Input File blocks.
Specify which input files to use and define your
record options from the Input File block and the
Input File New block.
Set up your copies expressions, unit breaks, and break levels from the Input
Options block. See “Set up units” on page 90 and “Set up subunits” on page 92
for more information about unit breaks and break levels.
Copies If you want to create multiple labels per record, there are two ways you can set
this up. Use the designated PW.Copies field to hold your copies data or from the
Input Options block, set up a Copies expression.
Caution: If your presort program already created copies of your records,
!
you do not need to set up copies in Label Studio. For example, if your
program created 5 copies of a record, and you set up Label Studio to
create 5 copies, you would get 25 copies of the label.
Copies field You will have to provide a database field containing the number of copies. It
might be a numeric or a character-type field. Label Studio provides a PW.Copies
field.Your definition file entry might look something like this:
PW.Copies = DB.Num_Copies
or
PW.Copies = DB.Students
Copies expression In the Input Options block create an expression to control the number of copies
These two fields would be from
your own database and would
contain the number of copies
that you wanted.
per record. This expression overrides any value that may be present in the
PW.Copies field of your definition file.
See Appendix A for more information about creating expressions.
Chapter 2: Set up your job
25
Page 26

Design labels and set up your printer
Design your labels To design your labels, use Label Toolbox, Label Studio’s label designing tool.
Drag and drop fields, barcodes, and other objects onto your label design. The
following image is Label Toolbox with a sample, address label design opened.
Design files and printer settings
All of your label design information is stored in a design file. Every Label Studio
job needs a design file. Before you can choose a design file, the following blocks
must be completed:
Execution Options
Auxiliary files
Input Options
Input File
Each design file has a printer assigned to it. You can define your printer settings
and assign a printer to your job in Label Toolbox. For more information, see:
“Printer setup” on page 33
“Design labels” on page 45
26
Label Studio User’s Guide
Page 27

Verify your job
It is important to verify that your job is free of problems. Label Studio checks
your job setup in three different ways to ensure accuracy:
Automatically when defining parameters in the job file blocks.
When you choose the Verify Job option.
Automatically when running your job.
Parameters and blocks
If you set a parameter in a way that is clearly wrong, Label Studio either beeps or
displays an error message. When you click OK to close a window, Label Studio
checks the whole window for any errors or conflicts. So you get instant feedback
and you can fix the problem.
Verify Job option Before processing, you should check the whole job for possible conflicts between
blocks by choosing File > Verify Job.
Label Studio will present a list of problems in a Browse Job Problems window.
When you select a problem to address, Label Studio can help you go to the
problem area in the job file. Label Studio will try to detect and report as many
problems as it can find. Fix each problem in the order listed. Sometimes, fixing
one problem will make the following ones nonexistent. To avoid any confusion or
wasted time, click Re-Verify after correcting each problem. See the following
image for an example of the Browse Job Problems window.
Errors and Fatal Errors
are separated for the
benefit of users who run
on a network.
Warnings indicate
possible problems.
Errors indicate
problems that prevent running the
job on the current
computer.
Fatal Errors indicate serious problems that mean
the job won’t run
on any computer.
Run time When you run your job, Label Studio will first verify your whole job all over
again. A key reason for this final check is that some job errors might not have
been detected earlier. This is possible especially if you use Label Studio in a
network setting.
Chapter 2: Set up your job
27
Page 28

Generate labels and reports
Once you have designed your labels and finished setting up your job (including
setting up your reports). You can generate your labels and reports from two
different ways.
Type a command at your Windows command prompt or UNIX command
line; see Appendix B for more information.
Choose File > Run Job in Label Studio
See Chapter 4 on page 77 for more information about the types of reports
available in Label Studio and how to set them up.
Run your job In Label Studio, choose File > Run Job when you are ready to generate your
labels and reports. Label Studio lets you set your Execution Options again
(overriding anything you may have previously set in this block). Select the Print
Labels and/or Create Reports checkboxes, and click OK.
If printing your labels,
you may want to print
only specific labels
within a unit or
subunit. In the Print
Options window, you
can select to print all of
your labels or ranges
of labels to print.
Change your printer at run time
When you are finished
defining your settings,
click OK. Your job will
run and generate your
labels and any defined
reports.
For more information
about setting up your
output, see Chapter 5
on page 87.
If you need to change your printer at the last minute, you can change your printer
at run time through the Execution Options window or with the prt command line
switch. You do not need to go into Label Toolbox. For more information about
how to do this, see the “Change your printer at run time” topic in the Label Studio
online help (Help > Label Studio Help).
28
Label Studio User’s Guide
Page 29

Remote Views
To set up your jobs and design your labels on a UNIX server, you must use Label
Studio Remote Views.
What is Remote Views Remote Views is a product for networks. You use a Windows client to design
your labels and set up your jobs, which are stored on a UNIX server. Remote
Views works similarly to the way Label Studio works on a Windows PC.
However, there are some differences:
When you launch Remote Views, you must give a user name and password to
log in to the UNIX server.
When you open, save, or browse files, you see the file system on your UNIX
server.
When you launch job processing, it occurs on the server. Work files, reports,
and output files are created on the server. You monitor job progress from your
Windows client.
Set the number to transfer for previewing
Record Options settings
When you choose Tools > Design Labels or Tools > Preview Labels, a portion of
the first input file and its format and definition files are temporarily copied to the
(local) Windows client machine. When you preview your labels, these are the
records that you view.
To control the number of records available for previewing in Remote Views:
1. In Label Studio, double-click the Input File block.
2. In the Set Input File window, type the number of records you want to be able
to preview in the Number of records to transfer box.
Your settings in the Record Options section apply to the records you’re
transferring for previewing. For example, if you type 1000 in the Number of
records to transfer box, and you enter a Starting record number of 1 and an
Ending record number of 10, only 10 records will be transferred and available for
previewing in Remote Views.
Likewise, any input filter or Nth select value that you enter will be applied to the
records transferred.
The more records you transfer, the longer it may take to open Label
!
Toolbox or Label Preview.
Chapter 2: Set up your job
29
Page 30

Create a tray label design file with the Label Toolbox Wizard
This example shows you how to set up a tray label design using the Wizard. After
completing the Wizard, you will have a complete design.
How to use the wizard To begin creating your new tray label job with the Wizard:
1. Choose Tools > Design Labels, or click the Design Labels button on
the toolbar to open Label Toolbox.
2. From the Preview window, click the Wizard button.
3. Choose the printer class and the printer that you want to use, for example
select Windows and then a list of available Windows printers are shown.
Click Next.
4. Select the paper stock that you want to use, such as USPS Tray 1-up
Continuous and then click Next.
5. Verify the look on the Summary window. If you would like to make further
changes such as including other fields, select Yes to further modify your
design in Label Toolbox. If you don’t need to make changes, select No. Click
Finish.
6. If you selected No in the previous step, type the name of your new design
file, such as Tray_sample.ltd. If you selected Ye s in the previous step, make
your additional changes in Label Toolbox, and then save your file.
7. In the Design File Preview, select the design file you just created and then
click Select.
30
Label Studio User’s Guide
Page 31

Create an address label job with the Job Editor
This example shows you how to set up an address label job using the Job Editor.
The Job Editor is another starting point for creating a new job.
Create the job To begin creating a new job with the job editor:
1. Choose File > New > Job Editor.
2. Enter a job description, job
owner, mailer name, and
choose USPS Address
from the Label Type dropdown list. Click OK.
3. Choose File > Save As,
navigate to the folder you
want to save your jobs in,
type a name for your new
job, such as
address_sample.lsj, and click Save.
Set up your job file blocks You can now open and edit your job’s blocks to
finish creating your new job. Blocks with a icon
and in some cases icon next to it are required.
For example, your job must have at least one input
file:
1. Double-click the Input File New block, and
click the File Browse button next to the Input
File box.
2. Navigate to the Samples folder in your
installation directory, select the file adr.dat, and
click Open. Click OK.
Select a design file Your job needs a design file. Before you can begin designing your address labels,
you must have the following blocks completed:
Execution Options
Auxiliary Files
Input Options
Input File
Chapter 2: Set up your job
31
Page 32

After you have completed the necessary blocks:
1. Choose Tools > Design Labels.
2. In the Address Label Preview window, click Label Toolbox.
3. In the Printer and Measurement Units window, choose a printer class and
printer name from the drop-down lists. Select a measurement option, if
applicable, and click Next.
4. Choose a page
template appropriate
for your printer, by
reading the template
description at the
bottom of the
window. Click Next.
5. Choose a layout
template for your
address label, and
click Finish.
6. After your design file
opens, choose File > Save As, (click Ye s if you receive a message about
errors in your design file), type a name for your new design file, and click
Save.
7. Drag and drop the fields and other objects you want onto your design.
8. Choose File > Save, and then choose File > Exit.
9. In the Design File Preview window, click Select.
The Labels window opens and shows that your design file is assigned to the job.
After you click OK, you can finish any incomplete blocks, verify your job, and
then run it.
32
Label Studio User’s Guide
Page 33

Chapter 3:
Printer setup
In this chapter, you’ll learn how to set up your printers for use with Label Studio.
Chapter 3: Printer setup
33
Page 34

Setting up your printers
Label Studio supports many printer drivers. The features that are present in each
driver vary from one driver to the other. Consult your printer’s documentation for
information about supported features.
Printer settings Label Studio provides easy access to your printer settings from within Label
Toolbox. The printer settings you choose are used every time you use that printer.
The settings populate the control line or control the output for your printer.
In Label Toolbox, choose To ol s > Pr i nt e r S e tu p to open the Printer Setup
window.
Modifying printer settings
34
Label Studio Inkjet Reference
You can modify the printer settings for any printer, no matter what printer the
open design file is currently using. For example, if the design file you’re currently
working on is using a laser printer, you can still modify the settings for an inkjet
printer.
1. Choose Tools > Printer Setup.
2. Select your printer and click Modify.
In the Modify Printer window, you can view your printer’s settings by
selecting a category on the left side of the window and then editing the values
that appears on the right side of the window.
Page 35

Option Description
DeviceName Use the DeviceName option when the output is sent directly to the
printer. Enter the name of a Windows printer driver here. The name you
type at the DeviceName option must match the name of your printer
exactly
(spelling, case, and so on). We suggest copying and pasting.
For a network printer, you must also specify the path (for example,
\\server name
PadLines This option determines how the driver treats end-of-line situations. Set
to True to pad each line with spaces to the width of the label stock.
When you set PadLines to False, each line ends at the last character or
escape code.
PadPages You may find this setting useful if you are experiencing problems with
blank lines at the end of your label page. When the value is set to False,
these blank lines are removed.
InitCode If you want a printer initialization sequence, enter it here. The contents
of this option are output at the beginning of the print run.
ResetCode Use this option to set the printer reset sequence. The contents of this
option are output at the end of a print run.
LineFeedCode Use this option to override the default line feed sequence. This
sequence will be output at the end of each line of text. Label Toolbox
has a default LineFeedCode of \x0d\x0a.
or
path\printer name
).
PageFeedCode Use this option to send a page feed sequence. If setup, this sequence
will be output at the end of each page.
3. When you have finished editing your printer settings, click OK.
Copy a printer To save time, you can create multiple instances of your printer. An instance of a
printer is essentially the same printer with different settings. Thus, you can save
different printer-specific settings in different instances of your printer.
For example, suppose you use the Cheshire System 4000 printer. With some jobs
you want to handle a maximum block size of 8192, and for other jobs you want to
handle a maximum block sizes up to 4096. You can set up a printer instance for
each and name the printer whatever you want.
1. Select the printer you want to copy.
2. Click the Copy button.
3. In the Copy Printer window, type a name for the new printer.
4. Click OK.
Show limited set of printers
You can limit the displayed printers to certain types.To limit the displayed
printers, in the Show Printer Type box, select the types of printers you want to see
(Text, Inkjet, and/or Data Stream).
Note: You cannot turn off the active type of printer. For example, if the
design specifies a generic text printer, you cannot hide generic text printers.
Chapter 3: Printer setup
35
Page 36
Defining escape codes for Generic Text drivers
In Label Toolbox, you can easily enter, store, and use your escape codes to
control your printer. If you do not use one of the available printer files with the
POSTNET escape codes defined for you, your printer’s documentation should list
the escape codes available. You need to transfer those codes into Label Toolbox.
1. With a Generic Text driver design file open in Label Toolbox, choose Tool s >
Printer setup.
2. Select your printer, and click Modify.
3. Select Escapes, and click the New button that appears at the bottom of the
window.
4. Enter a name for your escape code in the Value Name field and a value for
the escape code in the Value field. For example, enter a name such as
BoldOn and a value of \027\nnn or \xlb\xnn where \nnn or \xnn represent
the values your printer uses to turn bold on. Click OK.
5. Click OK, and click Close in the Printer Setup window.
These escape codes are now available as objects to drag and drop on your design
or use them to define the LineBeginning and LineEnding values in the Line
Properties window, see “Lines” on page 58.
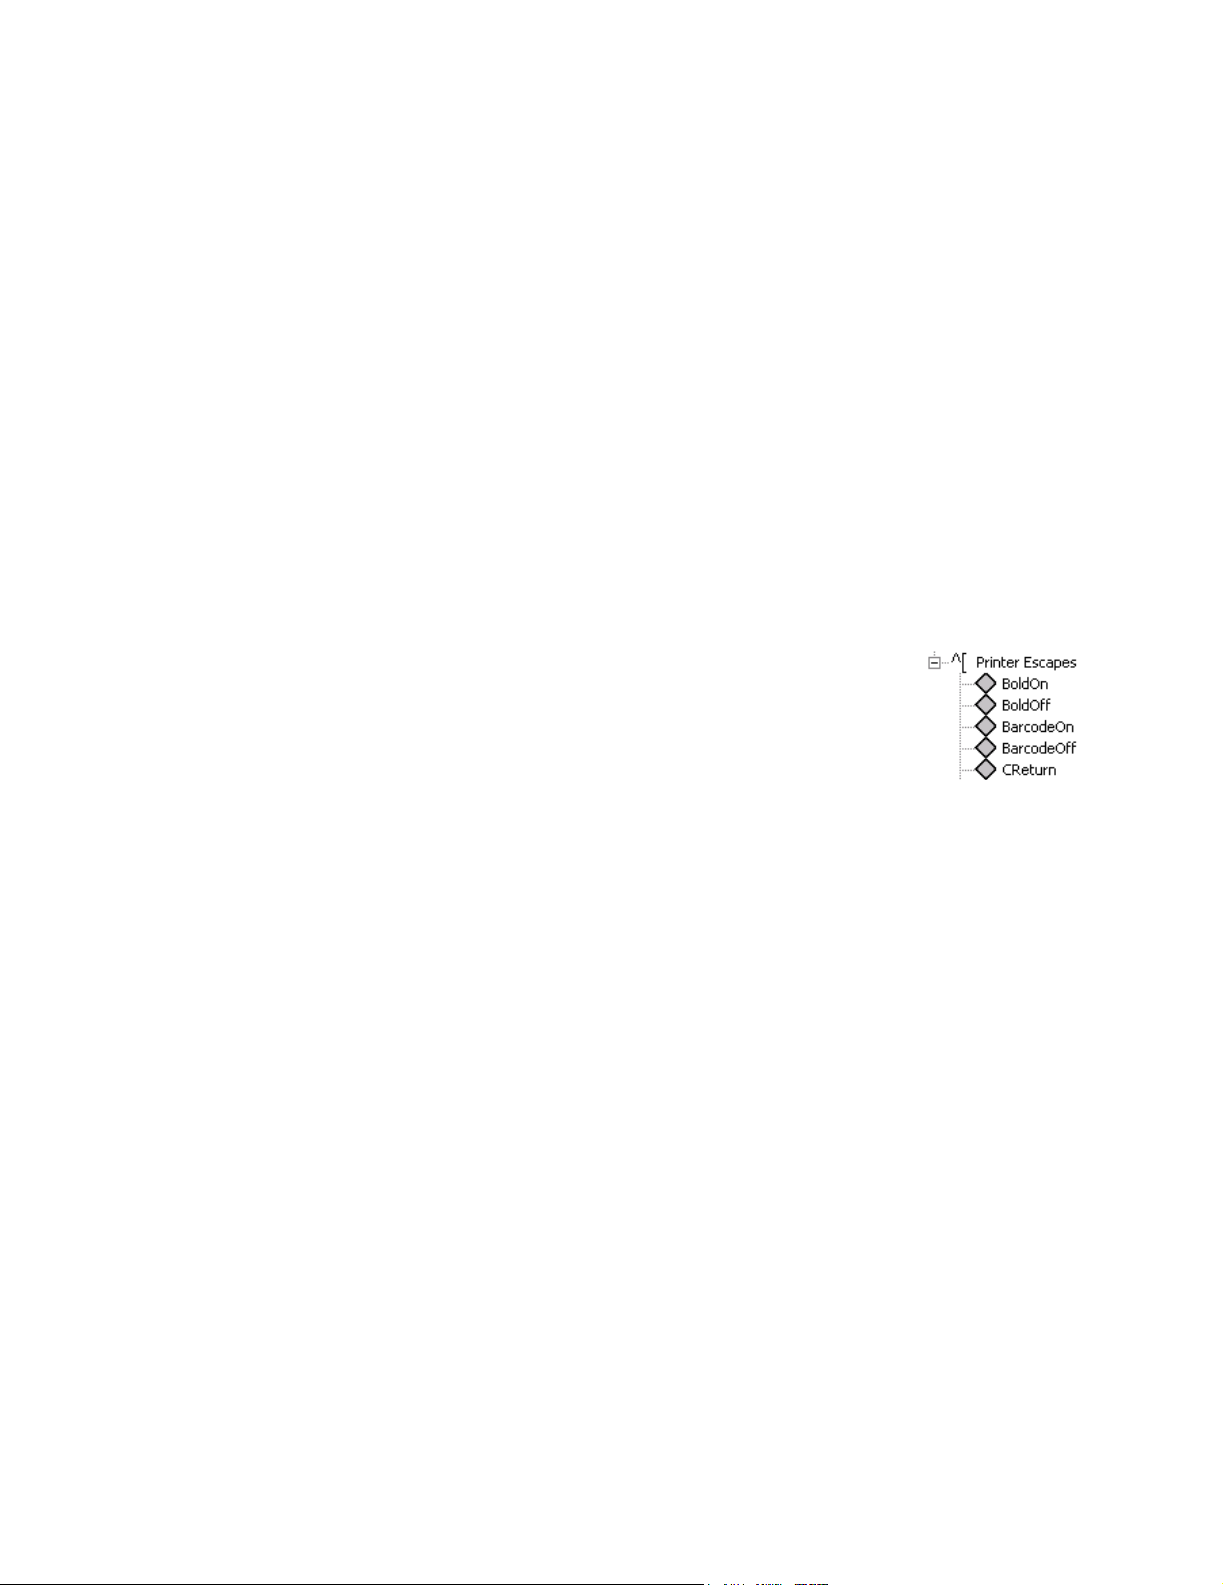
Printer escape objects After you define your printer escape codes, they appear in
the Objects window. You can drag and drop these onto your
layout to activate printer commands.
Adding comments to printers
For example, let’s suppose you want to make the customer’s
name appear in bold text on your address labels. You would
create printer escape objects for turning the bold text on and
off and then drop them onto your layout in the appropriate positions.
1. From the objects window, click and drag the BoldOn escape object to the
position before the DB.Name field.
2. Click and drag the BoldOff escape object and drag it to the position
immediately after the DB.Name field.
If you do not include the BoldOff escape object, every field on every label after
the BoldOn object will have bolded text. You must send a command to the printer
to tell it to stop printing bolded text.
When you create or modify a Generic Text, Data Stream, or Inkjet printer, you
can add some comments or a description about the printer.
1. Choose Tools > Printer Setup.
2. Select your printer, and click Modify.
3. Type a comment and click OK.
You can also enter a comment when you create a new printer.
You’ll be able to see the comment in the following windows:
36
Design Settings within Label Toolbox.
Printer selection on the first window in the Label Toolbox Design File
Wizard.
Execution Options when running a job.
Label Studio Inkjet Reference
Page 37

Specifying a default printer
You can set a default printer for each printer type: Generic Text, Data Stream and
Inkjet. The default printer is automatically selected when the design printer
doesn’t exist or was deleted and in the Wizard Printer Setup window when
changing printer classes.
Windows printer. Label Toolbox uses the default Windows printer as
specified for the system.
1. Choose Tools > Printer Setup.
2. Highlight a printer and then click Set Default.
3. Click Close.
Aligning barcodes using tabs
If you use the Generic Text driver and print multi-up labels, you may want to use
tab stops to ensure that your barcodes are properly aligned with the address
information, or to decrease the output file size.
Using tab stops works only for printers that support the ANSI commands
!
related to clearing, setting, and outputting tabs and also support the values
for setting the tab stops in character format (for example, columns 41 and
81).
To set the tab stops:
1. From Label Toolbox, select Too ls > P ri n t er S et u p.
2. Highlight the Generic Text printer that you want to use and then click
Modify.
3. From the Modify Printer window, select Horizontal Tabs.
4. Set UseTabs to True.
5. Read your printer documentation to set the appropriate ClearTabCode and
StartTabCode settings. These settings clear any previously set tab stops, and
then specifies the new location of the tab stops. The tab stop values are
automatically calculated based on the page width and number of columns
specified in the design file. For example, if you create a 3-up label with a
page width of 120 columns, the tab stops are automatically set at columns 41
and 81.
Printing Intelligent Mail barcode with VIP-NT , Heidelberg, or generic text driver
6. Choose the code or symbol that separates the tab stop values and enter it in
the CodeBetweenTabs option, for example, a semi-colon (;).
7. Choose the code or symbol that indicates that there are no further tab stops
and enter it in the EndTabCode option. For example, if you have 3-up labels,
the code includes 2 tab stop symbols (;) and one end symbol (u).
You can print Intelligent Mail barcodes using the Donnelley VIP-NT driver.
The Heidelberg SE-163 Rev K, generic text, and Donnelley VIP-NT printer
drivers include the AlternateCase parameter.
To set up the Intelligent Mail barcode for the Donnelley VIP-NT, Heidelberg
SE-163 Rev K, or generic text driver:
1. Choose the appropriate Intelligent Mail barcode font on your printer.
2. In Label Toolbox, choose To ol s > P r in t er S e tu p .
Chapter 3: Printer setup
37
Page 38

3. Select the Donnelley VIP-NT, Heidelberg SE-163 Rev K, or a generic text
printer.
4. Click the Modify button.
5. In the Modify Printer window, select IMB in the panel on the left.
6. In the panel on the right, at the AlternateCase setting, select True if needed.
The AlternateCase settings allows certain printers to create narrower
characters so that they can meet the Intelligent Mail barcode requirements.
7. If you’re using a generic text driver, set ConvertDigitsToBars to Tr ue .
8. Click OK to close the Modify Printer window, and continue setting up your
job as usual.
38
Label Studio Inkjet Reference
Page 39

Define your printer settings
Design file printer settings
Assigning a printer to your design file
Each design file must have a printer associated with it, and each design file
contains editable printer settings.. Label Toolbox saves these settings within the
If you don't assign a printer, you can not print your labels.To assign a printer to
your design file:
1. In Label Toolbox, choose File > Design Settings.
2. Select a printer from the Printer Name drop-down list, and type a description
of your design file.
For Windows drivers, the printers available in the drop-down list are
determined by the printers defined on your system. For Generic Text, Inkjet,
and Data Stream drivers, the printers available are taken from Label
Toolbox’s Printer Setup window (Tools > Printer Setup).
Change your printer at run time
Modifying design file settings
3. Click OK.
Your printer is now assigned to the design file. This design file will use this
printer every time unless you change it.
If you need to change your printer at the last minute before run time, you can
change your printer through the Execution Options window or with a command
line switch. You do not need to go into the Design Settings window in Label
Toolbox.
This change affects the current print run only. The settings are not saved in your
job or design file. For more information, see the topic “Change your printer at run
time” in the Label Studio online help (Help > Label Studio Help).
1. In Label Toolbox, choose File > Design Settings, and click the More button
to access the printer settings for your design file.
2. Edit your settings as necessary for this design file, and click OK.
Design-file printer settings affect only jobs that use that particular design file, and
not the particular printer
Chapter 3: Printer setup
39
Page 40

The categories below
change based on the
printer chosen here.
This button toggles
between More and Less.
Clicking More makes the
design-file printer settings
appear. Clicking Less hides
the design-file printer settings.
Tips for modifying printer settings
Layout line printer settings
Modifying layout line
printer settings
Not all printer settings are available for design files. Some settings are
available only in the printer settings. If a setting is available in both places,
the design file setting overrides the printer setting.
If this symbol is next to a setting, you cannot edit that setting.
We have populated some of the settings with default values. Be sure to
consult your inkjet printer’s documentation for information about these
values.
If you use a Heidelberg printer, there is one other location where you can modify
printer settings: on the lines of your layout. You modify these settings for very
specific uses, such as messaging.
1. Open a design file in Label Toolbox.
2. Place your cursor on the line whose settings you want to modify and rightclick.
3. Choose Line Properties from the pop-up menu.
4. Click the More button to open and modify the settings for that line.
40
Label Studio Inkjet Reference
Page 41

Barcode printing with the Generic Text driver
You can generate the POSTNET, PLANET, and Intelligent Mail barcodes in
Label Toolbox with the Generic Text driver by using the barcode objects. You can
also print the POSTNET and PLANET barcodes with printer escape objects.
POSTNET and PLANET barcode widths
Set up your design file
and printer
Save your design file, and
assign it to your job file
If you want to use the POSTNET or PLANET barcode objects, you need to
determine the width of the barcode in characters, and enter this information into
the appropriate parameters within the POSTNET or PLANET section of the
Modify Printer window. To do this, follow the steps below.
1. In the Design File Preview window, select Testing POSTNET width.ltd or
Testing PLANET width.ltd design file, and click Edit.
2. Choose Tools > Printer Setup, select your Generic Text printer, and click
Modify.
3. Select Settings, and enter the necessary information for your printer, if you
haven’t already done so.
4. Select POSTNET or PLANET, and enter the Start and Stop codes for the
barcode. Your printer's documentation should provide this information.
5. Click OK, and click Close.
6. Choose File > Design Settings, and choose your Generic Text printer from
the drop-down list. Click OK.
1. Choose File > Save As to save your design file with a different name. This
design file should only be used to determine barcode length; it should not be
used for production purposes.
Count the number of
characters, and enter the
data
2. Choose File > Exit.
3. In the Design File Preview window, click Select to assign this design file to
your job file.
4. In Label Studio, verify your job, and then choose File > Run Job. You will
only need to print one label. In the Print Options window, enter your print
range of 1 to 1 and click OK.
Your output should look similar to this:
1. Using the top row of numbers as a guide, count how many spaces
(characters) the barcode bars occupy. In the example given above, the
number of spaces for the 5-digit barcode is 16.
2. After you have determined the number of characters for your 5-, 9-, and 11-
digit POSTNET barcodes or 11- and 13-digit PLANET barcodes, follow the
steps in “Use the barcode objects” on page 43. Be sure to use the design file
that you want for production purposes, not the sample design files.
Chapter 3: Printer setup
41
Page 42

Intelligent Mail barcode width
If you want to use the Intelligent Mail barcode object on your Generic Text
design, you need to determine the width of the barcode in characters and enter
this information into the appropriate parameters within the Intelligent Mail
section of the Modify Printer window. To do this:
Set up the margins of
your label
1. In Label Toolbox, choose File > Page Setup.
2. From the Label Page tab, set the left margin to 0. On the Label Page N-up
tab, set the horizontal number of labels per page to 1. Click OK.
Set up your layout 1. Drag and drop a Text object onto the first (top) line of your layout. Double-
click the Text object, and type the following sequence of numbers:
1234567890123456789012345678901234567890 (This is 1-0, four times.)
2. Drag the Intelligent Mail barcode object onto the second line of the layout.
3. In the value expression field, enter “12345678901234567890” including
quotation marks. This represents 20 digits.
4. Click OK to close the Properties window.
5. Drag and drop a Text object next to the barcode object, and type a few
characters in the Text object.
Save your design file, and
assign it to your job file
1. Choose File > Save As to save your design file with a different name. This
design file should only be used to determine the barcode length; the design
file and the Intelligent Mail barcode should not be used for production
purposes.
2. Choose File > Exit.
Count the number of
characters, and enter the
data
3. In the Design File Preview window, click Select to assign this design file to
your job file.
4. In Label Studio, verify your job, and then choose File > Run Job. You will
only need to print a few labels, so in the Print Options window, enter a small
print range (1 to 1, for example), and click OK.
1. Now with the sample label, you can count the number of characters your
barcode occupies. Using the top row of numbers as a guide, count how many
spaces (characters) the barcode digits use until you reach the first letter in the
string of letters.
2. The first letter on the second line signifies the end of the barcode digits. The
space immediately to the left of the letter is the last space in the barcode.
Above this space is the number that tells you the number of spaces your
barcode will take.
3. After you have determine the number of spaces, choose Too l s > Pr in t er
Setup and click More. Enter these values in the respective fields.
Your printer is now set up to use the Intelligent Mail barcode object.
Note: The number of spaces the barcode uses is different depending on the
CPI setting of your printer. Be sure to take this into account when
determining the width of your barcode.
42
Label Studio Inkjet Reference
Page 43

Use the barcode objects
Label Studio provides a POSTNET, PLANET, and Intelligent Mail barcode
object in Label Toolbox for use with the Generic Text driver. We recommend
using this method of printing for your POSTNET and PLANET barcodes on
address labels, rather than using the escape objects.
To do this:
1. Drag and drop the POSTNET, PLANET, or Intelligent Mail barcode object
onto your layout. The Barcode Properties window opens.
2. In the Barcode Properties window, type the value expression that you want to
use, or click the Filter Builder button to choose one. Repeat this step for the
conditional filter (if necessary).
3. Define the leading character settings (if necessary). Click OK.
4. Choose Too l s > Pr in t er setup, select the Generic Text printer, and click
Modify.
5. Choose POSTNET, PLANET, or Intelligent Mail from the list to enter the
barcode settings information.Your printer’s documentation will have the data
for the start and stop codes. See the following “Check digit” and “Convert
digit to bars’ sections for information about those settings.
6. If you are printing the POSTNET or PLANET barcode, you will need to
determine whether you want Label Toolbox to generate the check digit for
you. Enter the value for the WidthXDigit parameter (which you previously
determined, see “POSTNET and PLANET barcode widths” on page 41).
7. If you are printing the Intelligent Mail barcode, you also need to enter the
value for the barcode width (which you previously determined, “Intelligent
Mail barcode width” on page 42).
8. Click OK.
Check digit If your printer does not automatically generate the check digit for the POSTNET
or PLANET barcode, set the Check Digit parameter to True in the Modify Printer
window (Tools > Printer Setup and select your printer). If your printer
automatically generates the check digit, set this parameter to False. Otherwise,
your barcodes will not print or will print incorrectly.
Convert digits to bars If your printer requires digit conversion to
print the POSTNET, PLANET, or Intelligent
Mail barcodes, set the ConvertDigitsToBars
parameter to True. You must also enter the
appropriate conversion values for the
TallTall, ShortShort, TallShort and ShortTall
parameters (POSTNET/PLANET) or the
Ascender, Descender, Tracker, and Full
parameters (Intelligent Mail). The
POSTNET and PLANET values are entered
in the same way as printer escapes (for example, \nnn or \xnn).
Note: If you set the ConvertDigitsToBars parameter to True, you should
also set the GenerateCheckDigit Feature to True (for POSTNET and
PLANET barcodes).
Chapter 3: Printer setup
43
Page 44

How to use printer escape objects for the POSTNET and PLANET
We recommend using this method only if your printer handles the barcode
alignment by itself. You don’t have to define the POSTNET or PLANET values
in the Modify Printer window if you are using escape code objects to generate
your barcodes.
To use escape codes for printing your barcodes:
1. Define your printer escape codes (see “Defining escape codes for Generic
Text drivers” on page 36).
2. Create two printer escape objects: one to turn on the printing of the barcode
and one to turn it off (for example, BarcodeOn and BarcodeOff).
3. Drag the BarcodeOn escape object onto your layout.
4. Drag the AP.Adr_BC_Dgt field object to the right of the BarcodeOn escape
object. Click OK.
5. If necessary, drag the AP.Adr_Chk_Digit field to the right of
AP.Adr_BC_Dgt.
6. Drag the BarcodeOff escape object to the right of the AP.Adr_BC_Dgt (or
AP.Adr_Chk_Dgt) field.
Caution: If you use escape codes to print your barcodes, and you use any
!
other escape codes that move the printer head horizontally (for example, a
tab escape code), the output will be incorrect. If you need to use a tab, use
Label Toolbox’s tab object, available from the objects window.
44
Label Studio Inkjet Reference
Page 45

Chapter 4:
Design labels
In this chapter, we give you an overview of Label Toolbox, Label Studio’s label
designing tool, and its features. We also provide an overview of address and
container (sack and tray) labels, pallet placards, and information on how to design
them.
Chapter 4: Design labels
45
Page 46

Label requirements
The USPS has strict requirements for address, container, and pallet labels. This
section shows typical label arrangements in Label Toolbox and points out items to
consider when preparing your input files.
Sack, tray, pallet Intelligent Mail labels not final. The USPS has not
!
finalized the requirements or designs for sack, tray, and pallet Intelligent
Mail labels. You may use Intelligent Mail sack, tray, and pallet labels for
experimentation purposes only. Do not use them for mailings until the USPS
finalizes requirements and designs.
We will continue to work with the USPS to provide you with updated sack,
tray, and pallet templates, in a timely manner, that will meet the finalized
requirements for these labels.
Address labels
Input file details Your input file should include data for each of the fields that you want to include
on your address label.
Inkjet drivers only: If you want to personalize your forms or labels by
including first names or family names in greetings or messages, you should
keep the FirstName and LastName fields separate in your input file.
If you plan on splitting your address output into separate files, you should
also include the fields that define the file separation, such as PW.Unt_Brk1.
Label design Below is a typical address label arrangement in Label Toolbox. Refer to the
DMM for address label requirements. The USPS mandates the placement and
appearance of some elements.
Barcodes: Starting on 1 January 2009, the USPS will grant the best
automation discounts only if you use Intelligent Mail barcodes on your
mailings; you will not receive any discounts on mailings that use the
POSTNET barcode. The example below shows a POSTNET barcode.
Break marksBarcodeEndorsement
ACS Keyline
Name
Address
46
City State ZIP ZIP+4
Label Studio User’s Guide
Page 47

Container labels Container labels are sack labels and tray labels.
Input file details Your input file should include data for each of the fields you want to include on
your container label.
Barcodes and fonts Label Studio works with your Windows or PCL Data Stream printer drivers to
generate barcodes and multiple fonts. Barcode fonts are available, as well as a
narrow font, LTNarrow, which is useful on sack labels for automated-rate
mailings. You could use one of your system’s narrow fonts, if you prefer, such as
Arial Narrow.
PCL Data Stream drivers must use a PCL Data Stream font. You can use one of
the provided fonts located in the Fonts folder of your Label Studio installation
directory, or create your own font in Label Studio (Tools > Create Data Stream
fonts).
Sack label design Below is a typical sack label arrangement in Label Toolbox. Refer to the DMM
for sack label requirements. The USPS mandates the placement and appearance
of most elements.
Destination ZIP
Mail processing
code
Destination city
Barcode field
Contents informationBarcode Origin city and state
and state
Tray label design Below is a typical tray label arrangement in Label Toolbox. Refer to the DMM
for tray label requirements. The USPS mandates the placement and appearance of
most elements.
Destination city
and state
Contents
information
Barcode
Barcode field
Destination ZIP
Mail processing
code
Origin city and
state
Chapter 4: Design labels
47
Page 48

Pallet placards A pallet placard indicates where the pallet is destined and where it originated.
Attach at least two of these placards to every pallet you submit to the USPS.
Input file details Your input file should include data for each of the fields that you want to include
on your pallet placard.
Label design Below is a typical pallet placard layout in Label Toolbox. Refer to the DMM for
pallet label data and format requirements. The USPS mandates the placement and
appearance of most elements.
Destination city
and state
Contents
information
Origin city and
state
Destination ZIP
Mail processing
code
48
Label Studio User’s Guide
Page 49

Get started designing labels
Pick a design file Design files (.ltd) contain all of the information Label Studio needs to know
about your labels and the printer you will use. Your Label Studio job must have a
design file assigned to it in order to print your labels. You can edit design files in
Label Toolbox.
Which design file should you use?
Assign a design file to your job
Click Edit to
make changes to
a design file. See
the section “Edit
a design file” on
the next page.
You can create your own design file by combining a page and layout template or
you can use one of the predefined design files installed with Label Studio. These
predefined design files will need some customization to generate valid labels.
Choose or create a design file based on your label requirements and printer
capabilities.
Note: All predefined design files and their components (page and layout
templates) are read-only, sample files. If you modify them, you need to
rename them in order to save your changes.
Choose Tools > Design Labels to open the Design File Preview window. In this
window, you can select a design file to use with your job, view the description of
the design file, and see a preview of the design file (the page and layout setup).
You have two options for creating a new design. Choose Label Toolbox
to create the design in Label Toolbox. Select Wizard to use steps to
complete the label. At the end of the Wizard, you will have a complete
label. You can enter Label Toolbox later to make further modifications.
Note: You cannot use the Wizard to create a design file if you chose
Generic as the label type in the Label Studio General Information block.
Chapter 4: Design labels
Click Select to assign the
highlighted design file to
the current job.
49
Page 50

To assign a design file
to your Label Studio
job, choose your
design file from the
list, and click Select.
The Design File
preview window closes
and the Labels block
opens, shown at right.
This window shows
the name and location
of the design file and
your printer
information. Click OK
and the design file is
assigned to your job.
Edit a design file When you first set up a Label Studio job, you do not need to design a label from
scratch. Instead, you can pick a design file that is close to what you need, and then
edit it as appropriate. To do this:
1. In Label Studio, choose Tools > Design Labels.
Create a new design file
2. In the Design File Preview window, select a design file and click Edit.
The design file opens in Label Toolbox where you can make any necessary
adjustments to the page and layout setup.
3. Choose File > Save to save the design file or File > Save As to save the
design as a new file. You may also want to choose File > Design Settings to
edit the description of your design file.
If you save the design file with a new name, you must exit Label Toolbox (File >
Exit), choose the design file from the list and click Select. In the Labels window,
click OK. This process assigns the design file to your job.
To create a new design file using Label Toolbox, you must first combine existing
page and layout templates. The following table defines these templates.
Template Description
Page (
.ltp
) This template contains attributes of the paper that you are printing on,
including the paper size, number of labels per page, and margins.
Layout (
.ltl
) This template contains the layout of your labels, including the posi-
tion of your fields, barcodes, and other objects.
Use the wizard. You can use the wizard to create a design file. This will help
you choose a page template, and you don’t have to think about the layout
template. See “Create a tray label design file with the Label Toolbox
Wizard” on page 30 for more information.
50
To create a new design file:
1. In Label Studio, choose Tools > Design Labels.
Label Studio User’s Guide
Page 51

2. In the Design File Preview window, click Label Toolbox.
3. Choose a printer, printer class, and unit of measure. Click Next.
4. Choose a page template that matches closely to what you want, and click
Next.
For more information about page templates, see “Page templates” on
page 74.
5. Choose a layout template that matches closely to what you want, and click
Finish. Your new design file opens in Label Toolbox.
For more information about layout templates, see “Layout templates” on
page 75.
6. Choose File > Design Settings, enter a description of your design file, and
click OK.
7. Choose File > Save As to name your design file.
You can now make modifications to the setup of your design file.
Chapter 4: Design labels
51
Page 52

Define your page settings
What are page settings?
Your design file’s page settings define the properties of the paper you are printing
on. These properties include the paper size, the amount of labels per page, and the
page margins. In Label Toolbox, choose File > Page Setup to access your page
settings.
Page setting information can be saved in a page template. For more information
about page templates, see “Page templates” on page 74.
Label Page Click the Label Page tab in the Page Setup window, you can choose the size and
layout of the page that your labels will be printed on. Most of the sizes you will
need are listed in the Paper Size drop-down list. If you can't find the size you
need, you can enter your own custom page size and orientation.
Be sure to check your printer's documentation to find out if your printer supports
the desired page size.
For designs using an Inkjet printer driver, you can control the number of lines and
characters in your label design from the Label Page tab.
Click Apply to assign your changes to the current design.
Label Page N-Up Click the Label Page N-
Up tab in the Page Setup
window to set up the total
number of labels per page.
The label height and width
are automatically
recalculated.
You can also set the space
between labels. In the
image to the right, the
vertical area of the page
was altered.
Click Apply to assign any
changes to the current
design.
52
Label Studio User’s Guide
Page 53
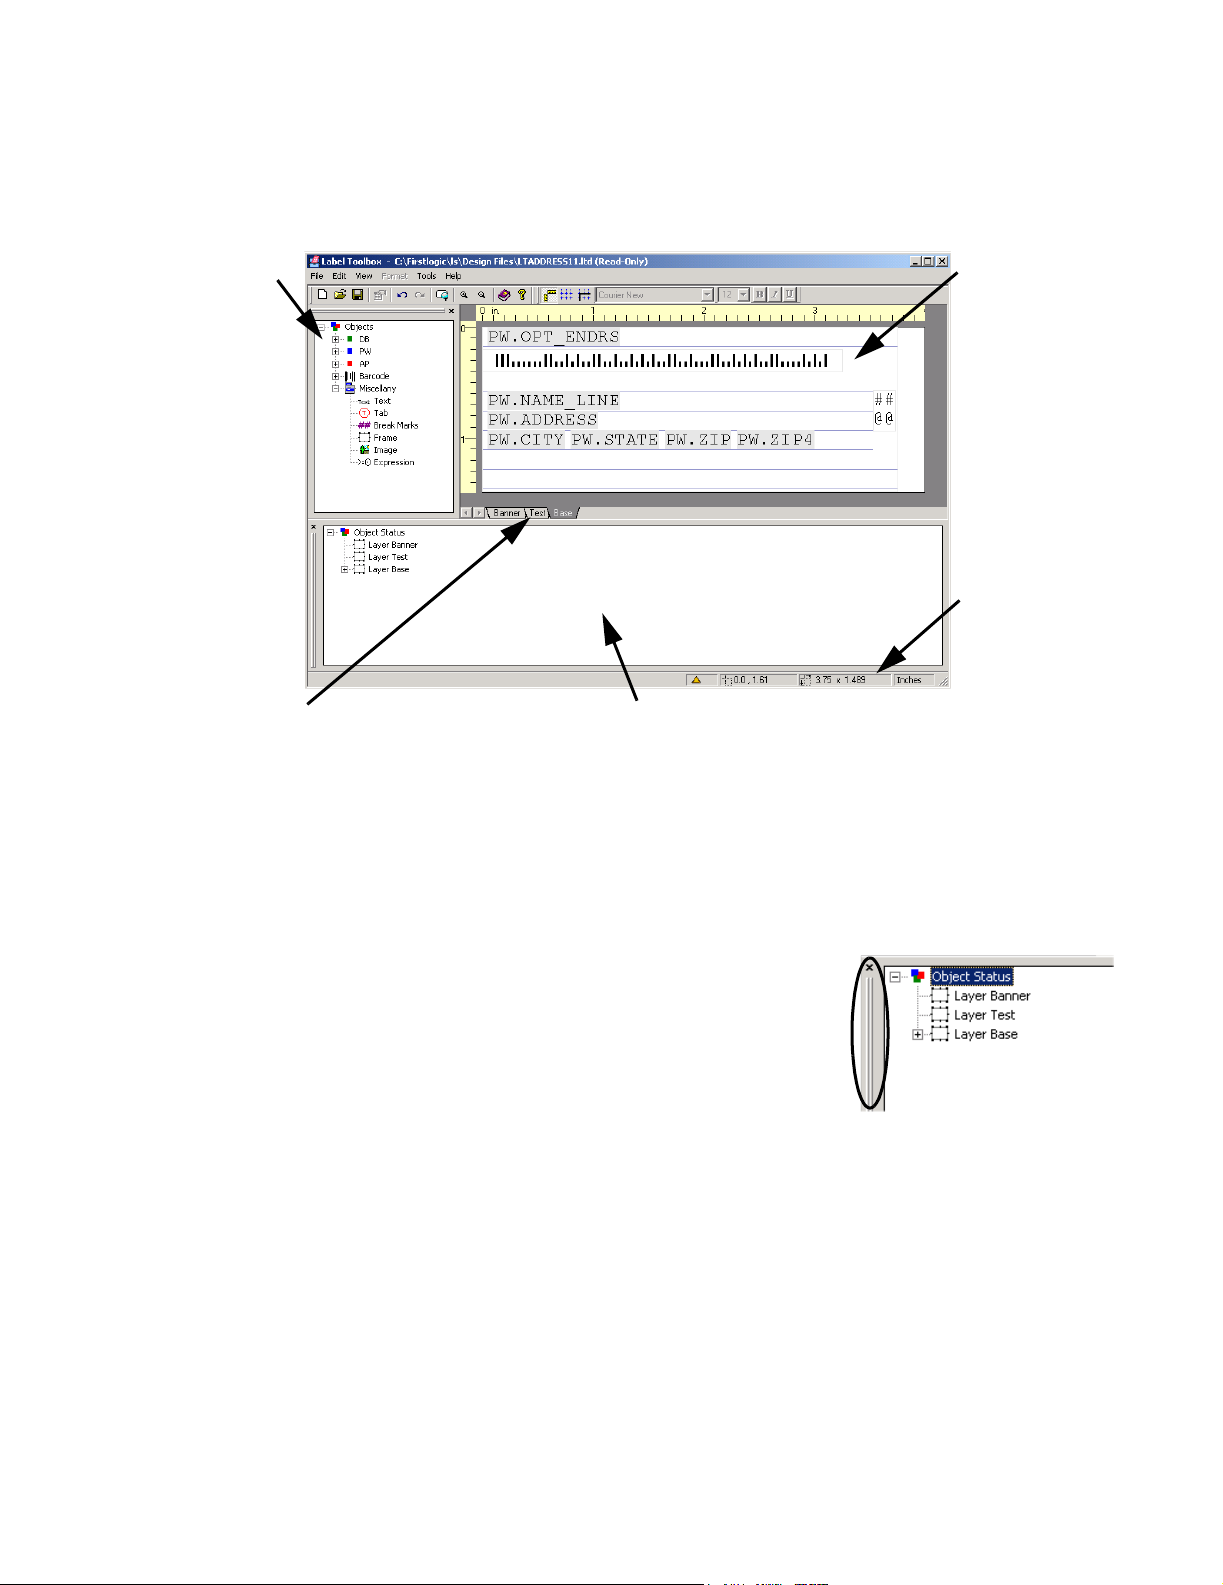
The Designer window in Label Toolbox
Overview When you open Label Toolbox, you first see the Designer window. This area
offers everything you need to create your label design.
Objects window:
This window contains all of the components available to
this design file currently shown. These
include fields, barcodes, and other
miscellaneous items.
You can switch this
window on and off in
the View menu.
Layer tabs:
Every design file has a base layer.
Windows, Data Stream, and Generic
Text drivers offer the ability to create
banner page and test label layers.
Inkjet drivers offer the ability to create test label layers. You cannot
delete, move, or rename these, but
you can add new layers if you want.
Status window: This window
shows all of the errors or warnings that exist in the current
design file and to which component the errors are assigned.
You can switch this window on
and off in the View menu.
Layout window:
This window contains the label design
for the current
design file. You can
change the look of
the design by deleting items from the
label or by dragging
fields or objects from
the Objects window
and dropping them
onto the label.
Status bar: This
area gives you the
exact coordinates of
your cursor on the
layout window, the
current units of measure, and alerts you
to any errors or
warnings that may
exist in your layout.
This feature is especially helpful if the
Status window is
closed.
Objects and Status windows
The Objects window and the Status window can be resized and “undocked” to
provide custom viewing of your design. There are two ways to undock a window:
• Place the cursor over the docking bar of
the window you want to move. Click and
drag it to the desired position.
• Double-click the docking bar of the
window.
Both the Objects and Status windows appear in the default view of the design
window. To remove either window, choose View from the menu. Click either
Objects or Status to control the appearance of these windows.
You can also remove either of these windows by clicking the X in the upper right
corner.
See “Verify labels” on page 71 for more information about the Status window.
Object properties Drag objects (fields, images, barcodes, and so on) from the Objects window onto
your label design. Each object that you drop on your design has its own
properties. To view the properties of any object, select the object you want (field,
image, barcode, and so on) and do one of the following:
Chapter 4: Design labels
53
Page 54

Choose Format > Properties.
Click the Properties button on the toolbar.
Right-click and choose Properties.
Double-click the object.
Depending on the type of object, in its Properties window you may be able to set
up a value expression or conditional filter, define leading or trailing characters, or
suppress clear zones. See the sections in this chapter about each specific object
for more information about its properties.
Font properties With an object selected in your label design, choose Format > Font. In this
window, define a font for the selected object. For example, if you select a field
and change the font in this window, you will see the change on your layout. You
can also select a frame, change the font in this window, and then see the fonts for
all objects with font properties change in the frame.
PCL Data Stream drivers must use a PCL Data Stream font. You can use one of
the provided fonts located in the Fonts folder of your Label Studio installation
directory, or create your own font in Label Studio (Tools > Create Data Stream
fonts).
Driver specific: Font properties are only available for design files using a
Windows or Data Stream driver.
View options Label Toolbox comes with several handy features to
help you view your label designs better. Choose View
from the menubar to:
Preview your labels, see “Preview labels” on
page 72 for more information.
Turn the Grid on/off.
Turn the Ruler on/off.
See more/less toolbar options.
Zoom the label design in/out.
54
Label Studio User’s Guide
Page 55

The Layout window
Placing the fields and objects you need onto your layout is as easy as dragging
and dropping from the Objects window. There are a few things, however, that you
first need to know when you are working in the Layout window.
Base layer vs. Label area
Insertion point cross hair
Notice, in the
example at right
Base layer (printable area)
Distance
between labels
that there is
white space at
the far right
edge of the
label. This
represents the
distance
between labels.
The lined
portion of the
Label area (size of the label)
layout is the
base layer. Your label elements will not print outside of the base layer. For more
information about base layers and other layers, see “Layers” on page 57.
When moving or placing a field object (or any other linebased object) on your layout, a red cross hair appears in
the upper left corner of the object. This can help you to
more accurately place your field.
Place the cross hair anywhere between the top and bottom
borders of a line to move the object to that line.
Viewing hidden information on your layout
Sometimes your layout may contain a lot of fields or objects; so many, in fact,
that the base layer or frame you are working in cannot show you everything on
your layout. Any information that may have been squeezed out of view may still
print on your label. It all depends on the size of the data in your fields or objects
and the line suppression of the layer or frame.
Label Toolbox signifies this “hidden” information with an arrow that points in the
direction of the missing information.
indicator
arrows
Chapter 4: Design labels
55
Page 56

To simply resize your fields, see “How to resize field objects in the layout” on
page 62. To view the hidden information on your base layer, you will need to
temporarily change the size of your labels. To do this:
1. Choose File > Page Setup, and click the Label Page tab to increase the label
area, or click the Label Page N-up tab to decrease the number of horizontal
or vertical labels.
2. Click OK to save your changes.
3. Resize the base layer to view the hidden information.
4. Choose File > Page Setup to change your page setup back to its original
dimensions.
You may want to choose View > Label Preview to make sure your labels are still
set up to your original settings.
56
Label Studio User’s Guide
Page 57
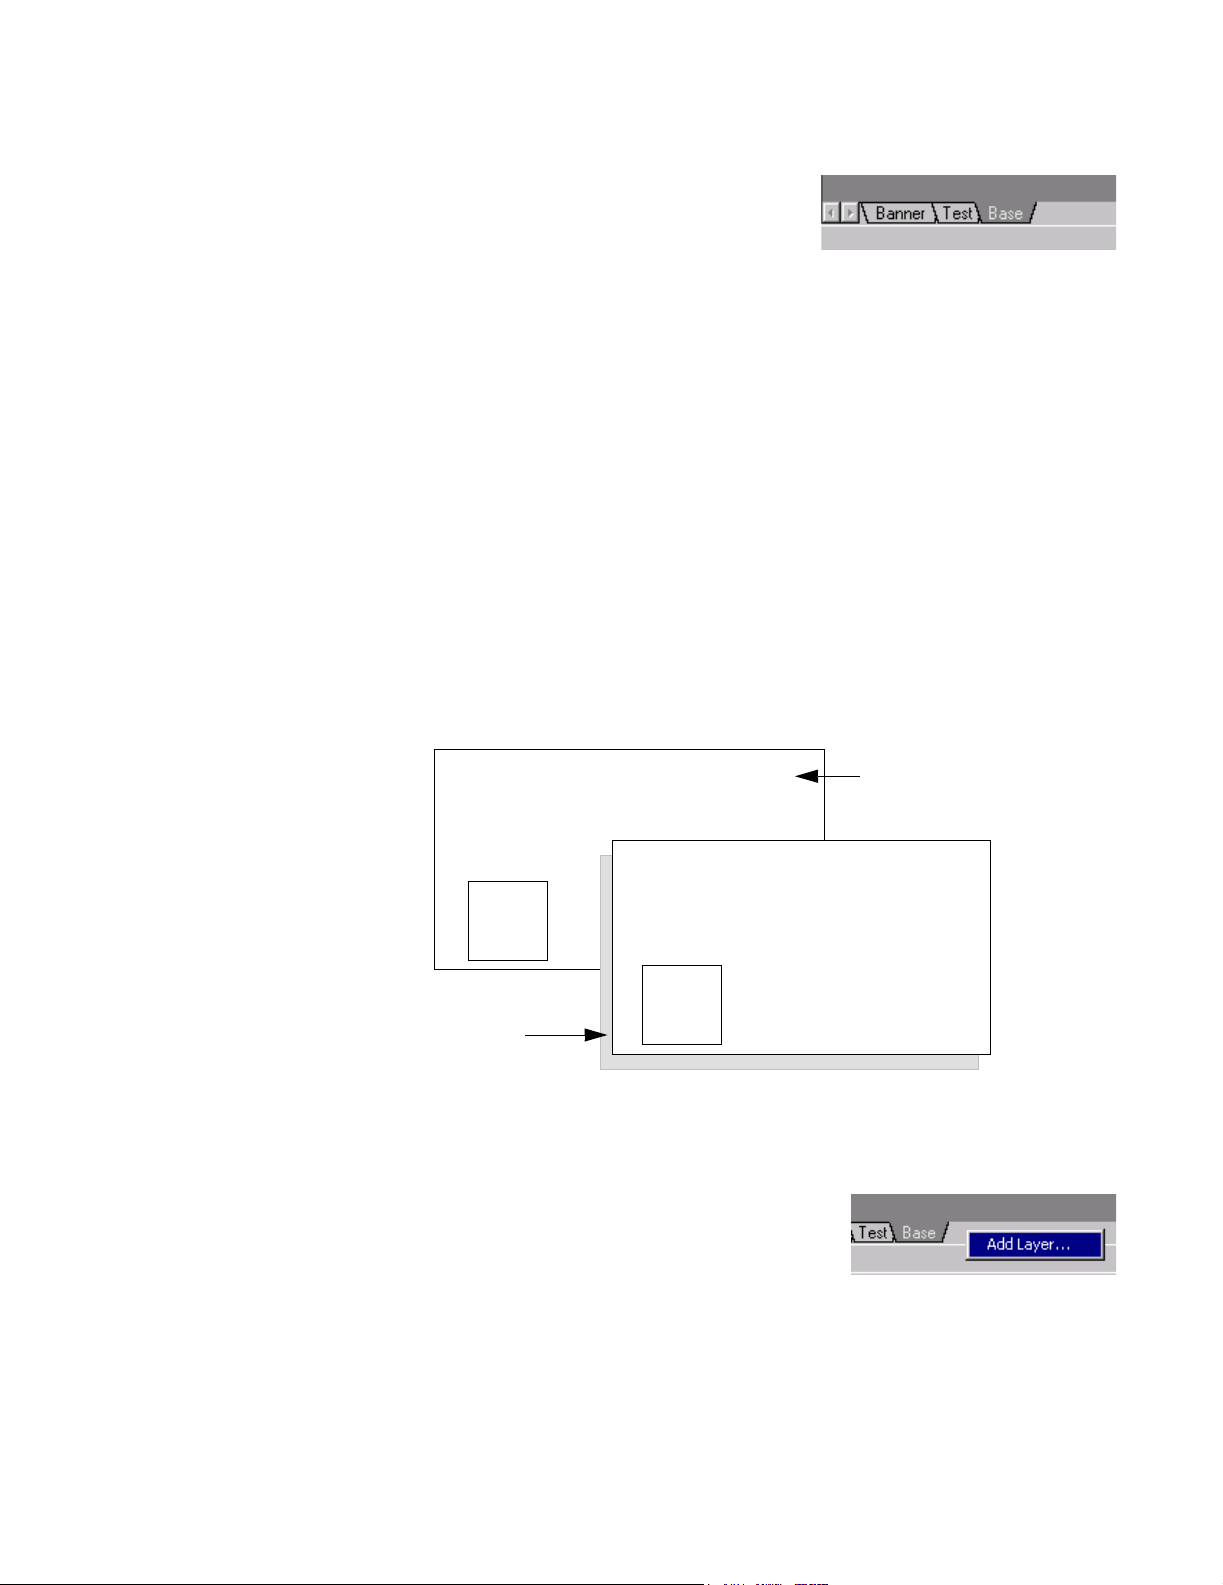
Layers
If you use a Windows, PCL Data Stream, or
Generic Text driver, three different layers
are automatically assigned to each design
file: Banner, Test, and Base. Inkjet drivers
offer the Base and Test layer. They cannot
be deleted or renamed.
Banner: Click the Banner tab to design the layout of your banner pages.
Tes t: Click the Test tab to design your test labels.
Base: Click the Base tab to design your labels. This is the default view of the
layout window.
Additional layers Here are two examples of ways you may want to use an additional layer:
• You can set up a layer to print an indicia.
• Dropping an Image object onto your layout is the best way to
conditionally print two or more images. Using an expression field is a
good way to print conditional text. What if you want to print an image on
some labels and text in the same position on others? Layers are a great
way to do this. For example:
Base layer
DB.NAME
DB.LINE1
PW.CITY PW.STATE
e
ag
Im
Text
Layer 2
How to add a layer If you use a Windows or PCL Data Stream printer driver, you can add a layer to
your design. To do this:
1. Place the cursor on one of the layer tabs or
on the space to the right of them.
2. Right-click, and then click Add Layer.
3. At the Add Layer window, name your layer and create a conditional filter for
it. If you do not set up a conditional filter, the layer will always be printed.
Right-clicking the tab of a layer you create and choosing Properties allows you to
change the name or conditional filter of the layer.
Chapter 4: Design labels
57
Page 58

Lines
When you drag and drop fields onto
your layout, you drop the fields into
lines. Lines on your label layout cannot
be “selected” or moved by clicking and
dragging.
To insert or delete a line or to view a
line’s properties:
1. Place the cursor on a line or any object on that line.
2. Right-click, and choose the appropriate action from the popup menu.
Line properties In the Line Properties
window control your
line spacing options and
justification. You can
select the Permanent
option to exempt the
line from the effects of
blank line suppression.
When this option is selected, a blank line will not be removed when suppression
is turned on.
Line
Line-based objects Fields and expressions are considered line-based objects and follow the properties
of the line in which they reside.
Heidelberg printer drivers For Heidelberg printer drivers, click the More button to access the line-level
printer settings. Here you control the line properties of your design, including
|800, orientation, line linking, message indentation, and so on. See the Label
Studio Inkjet Reference for more information.
Generic Text drivers Click the More button to access the line beginning and line ending escape code
options. These can be set to include an escape code at the beginning
and/or ending of a line. These settings are applied to the specific line and are not
affected by blank line suppression. This can be especially useful for creating
multiple N-up labels. For more information about adding escape codes to your
printer, see “Defining escape codes for Generic Text drivers” on page 36.
58
Label Studio User’s Guide
Page 59

Frames
Frames can be used for many things: address verification, field placement on a
layout, printing an indicia, and so on. The base layer of a design file is considered
a frame, with most of the same properties as a frame that you drop onto your
layout.
Label Toolbox lets you have as many frames in your design file as you want, each
with its own properties, such as blank line suppression. Frames cannot be placed
inside other frames, except the base layer.
Non-line based objects
Frames are considered non-line based objects because they do not follow the
properties of a line. Other non-line based objects include barcodes, images, and
break marks. Many of the following features apply to all non-line based objects.
USPS Address blocks Address blocks are those that Label Toolbox recognizes as the frames that contain
fields in need of verification. Label Toolbox will not attempt to verify any address
information placed outside of a USPS address block.
Note: Most of the predefined design files in Label Toolbox already have
either the base layer or a frame designated as a USPS address block.
Making a frame a USPS
address block
To assign a frame as the USPS address block:
1. Drag and drop a Frame object onto your label.
2. Select the desired frame, and choose Format > Properties.
3. On the Miscellany tab, select the USPS Address Block checkbox.
Set the position Select a frame on your label design
and choose Format > Position from
the menubar in Label Toolbox. The
Position window opens. This is
true for all non-line based objects.
In the Position window you can
precisely position and size an
object on your label. Simply
clicking and dragging or stretching
your object might not be accurate
enough. For an example, see “How
to indent objects” on page 60.
Text flow You can set your text flow in the Position window. The text flow determines how
line-based objects wrap around non-line-based objects.
For example, if you drag a frame object onto your layout, you can set the text
flow to wrap around the image on either side (Left, Right, Largest Side), or you
can have no other objects on the same lines that the image occupies (Skip).
Chapter 4: Design labels
59
Page 60

Blank line suppression
You can delete blank lines from your final
printed label by choosing either Up or Down
from the Suppress Blank Lines drop-down list
in the Frame properties window (Miscellany
tab).
Choosing Up moves the objects up with
blank lines below.
Choosing Down moves the objects down with blank lives above.
To exclude a non-line based object from being affected by blank line suppression:
1. Select the object on your design.
2. Choose Format > Position.
3. Select the Anchored option, and click OK.
How to indent objects Use frames to indent objects on your layout. For example, suppose you want to
indent a field 1 inch (or indent to column 6 for inkjet printers). To do this:
1. Choose View > Rulers from the menu, if necessary.
2. From Miscellany in the Object window, drag a Frame object and drop it onto
your layout. Watch the red line on the ruler to determine the exact position of
the frame.
3. While the Frame is selected, choose Format > Position from the menu and
enter the exact position requirements, if necessary. Click OK.
4. Drag the object into your frame. You may need to resize your frame to view
the entire object.
Heidelberg drivers Frames can be used with a Heidelberg driver to specify a line’s indent and length.
To do so, you need to make sure that each frame’s Text Flow option is set to Skip.
While the frame is selected, choose Format > Position to set the Text Flow option.
You can also set an indent or length setting manually with the following line-level
settings:
LineIndentOverride
LineLengthOverride
Access these settings from the Line Properties window in Label Toolbox. Enter
an integer from 0 to 999 depending on what you want.
60
Label Studio User’s Guide
Page 61

Fields
The fields available in the objects window are the
fields defined in your input file (DB fields), the fields
that you defined in your DEF file (PW fields), as well
as some that Label Studio generates (AP fields).
For more information about specific fields, their uses,
and any limitations, refer to the Quick Reference.
Drag fields from the Objects wind onto your label
design. Each field that you drop on your design has its
own properties.
Field properties To access a field’s properties,
select the desired field in your
label design and choose
Format > Properties. The
window at right appears.
In the Field Properties window
control each specific field’s
settings. You can assign a
filter, you can designate
leading or trailing characters,
or you can designate
truncation.
Leading and Trailing characters
In the Field Properties window, you can set the number of characters that appear
before or after the specified data in the field. Spaces are considered characters.
You can use this feature to line up your fields in any way you want.
Note: If you have only one field on a line and the field is empty for a
particular record, Label Toolbox considers the field blank even if the field
contains a leading space. Label Toolbox suppresses the line in this case if you
have selected Blank line suppression. See “Blank line suppression” on
page 60.
Truncation The Field Properties window allows you to truncate a field if the output on a line
is too long to print on the label. Most fields are truncated from the right if the
Allow Truncation option is selected, and a minimum of four characters will
always remain. This feature handles two specific fields differently from others.
PW.City: When you select the Allow Truncation option for this field, the
directional is reduced to one letter first, then vowels are removed from the
city name, from the right, until it fits, and then, if the field is still too long, the
field is truncated from the right. The minimum remaining length is 4
characters.
Chapter 4: Design labels
61
Page 62

PW.Dest_City: Only the city portion of this field will be truncated. The state
portion will be ignored, if it’s there. Label Toolbox ignores the destination
facility prefix (ADC, BMC, and so on), and reduces the directional to one
letter first. The minimum remaining length is 12 characters.
Trim spaces In the Field Properties window designate how (extra) spaces in the field should be
removed. You can choose to have spaces removed on the right, left, or both sides
of the data in the field.
The Trim Spaces option does not affect leading or trailing characters set in this
window. It only affects data from within the field.
How to resize field objects in the layout
You can view the fields on your
layout in a normal or collapsed
state. When fields are collapsed,
you can fit more fields onto a line
of your layout.
This does not affect your output.
You cannot fit more data on your
label than the length of the label
will allow. If the data in your
fields is longer than the length of
your label, it will be cut off.
To ensure that you have enough
room on your label for the fields
you want, choose View > Label Preview. See “Preview labels” on page 72.
To collapse or expand a field:
1. Select a field on your layout.
2. Right-click, and choose Collapse Field or Expand Field.
Tips A red arrow appears to the right of the first letter of a collapsed field.
62
If you aren’t sure what the collapsed field contains, place your cursor over
the collapsed field, and the name of the field appears.
Label Studio User’s Guide
Page 63

Barcodes
Windows and PCL Data Stream drivers can use any of the barcodes listed in the
Objects window, which include:
POSTNET PLANET
I 2 of 5 3 of 9
Code 128 Zebra
Intelligent Mail
For more information about barcodes and the Generic Text driver, see “Barcode
printing with the Generic Text driver” on page 41.
Define the value expression
After you drag a barcode onto your layout, the barcode properties window
automatically opens. In this window, you must define the barcode’s value
expression. See Appendix A for more information about value expressions.
Set the position Barcodes are considered non-line based objects because they do not follow the
properties of a line. For information about setting the barcode’s position on the
label, see the Frame object topic “Set the position” on page 59.
Barcode clear zones The USPS requires clear zones around your barcode. However, you may be able
to suppress some of these under the right circumstances.
Important: You are ultimately responsible for complying with USPS
!
regulations. Refer to the DMM for clear-zone specifications.
Why suppress clear
zones?
You might want to suppress clear zones to align your fields properly. If you want
to line up the left side of your labels, you might suppress the left clear zone. Be
careful that the right edge of the barcode is not cut off by the end of the label. Or,
if you have a blank line above or below the barcode, you could suppress the top or
bottom clear zone to reduce the amount of white space on your label.
How to suppress barcode
clear zones
1. Drag a barcode object onto your layout.
2. Choose Format > Properties.
Intelligent Mail barcode
3. Select the Suppress Clear Zone option that you want.
4. Click OK.
You can print the Intelligent Mail barcode by dragging and dropping the object
onto your design.
Starting on 1 January 2009, the USPS will grant the best automation
discounts only if you use Intelligent Mail barcodes on your mailings; you
will not receive any discounts on mailings that use the POSTNET barcode.
For more information, see http://ribbs.usps.gov/onecodesolution/
Chapter 4: Design labels
63
Page 64

Intelligent Mail barcode
data
The Intelligent Mail barcode supports 20, 25, 29, or 31 character digits of data.
Label Studio encodes the data into the Descender, Ascender, Tracker, and Full
barcode characters. The following table outlines the data layout.
Data Digits Description
Application ID 2 Identifies the barcode for internal USPS use only. The
second digit must be a number between 0
–
4.
Service 3 Identifies the type of service or product. Use any of the
the current 2-digit Confirm Service codes with the addition of a preceding zero.
Subscriber ID 6 The Confirm identification number assigned to you by
the USPS. This number was expanded to 6-digits to
accommodate growth. Append your current subscriber
ID with a preceding zero.
Unique ID 9 Any number that you use for unique identification.
Routing ZIP None, 5,
9, or 11
The Delivery Point ZIP Code for the addressee. This
data is the same as used for the current POSTNET code.
64
Label Studio User’s Guide
Page 65
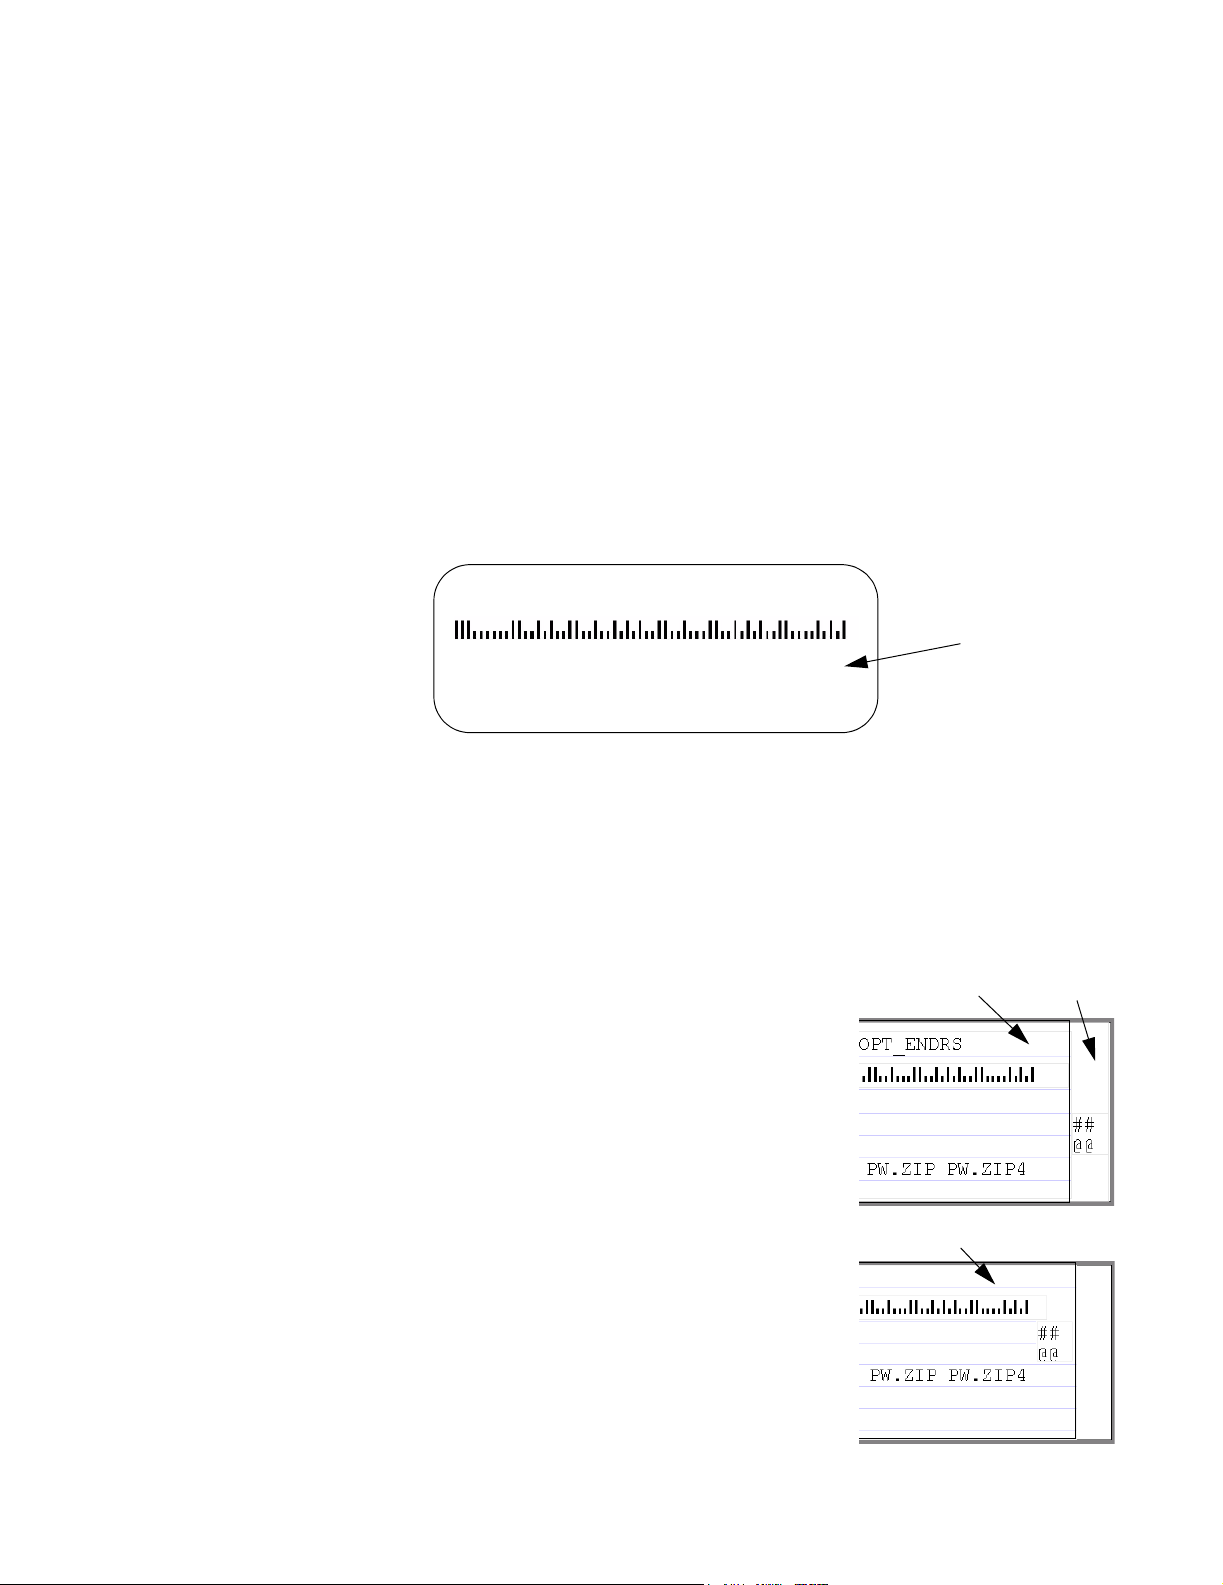
Break marks
Break marks are character-based objects that you print on a label. They signal
your mail room staff to, for example, start a new package, container (sack or
tray), or pallet.
Levels of break marks When your mailroom staff sees a label with break marks on it, they have to
determine which kind of break it signifies. Label Studio allows three levels of
break marks: level 1, level 2, and level 3.
For example, you may want to use these to signify the beginning or end of a
package, container (sack or tray), and pallet.
You can denote the level of break by either choosing a different character for each
level of break (for example, $ for pallet breaks, % for container breaks, and @ for
package breaks) or by choosing a different layout for each level of break. You can
also use a combination of those methods.
#1125********************CAR-RT-SORT**C-054
#114A/868736/DOE4#
JOHN SMITH P395 ###
BUSINESS OBJECTS T39 ###
100 HARBORVIEW PLAZA ###
LA CROSSE WI 54601-4071
One break mark
Types of break marks Many of the predefined design files come with a break mark placed in the layout.
There are two types of break marks: Clear Channel and Gated Scan. Which one of
these you use depends on what kind of machinery you might use to read your
break marks. These break marks can look exactly the same; however, the
placement of the break mark is different.
Clear Channel
A clear channel break mark is usually placed
outside the USPS address block. This ensures
Frame & USPS
Address block
Base layer
that the reader for reading the break mark has a
“clear channel” for looking for the break mark.
No address information is above or below the
break mark. You will need to put the address
information into its own frame to accomplish
this.
Base layer & USPS Address block
Chapter 4: Design labels
65
Page 66

Gated Scan A gated scan reader looks at a predetermined area on the label for the break mark.
This type of reader does not require a clear channel to read the break mark.
Note: If you do not use machinery to read break marks, it does not matter
what type of break mark you use.
Setting up break marks When you set up your break marks, there are essentially four things you need to
do:
Select the number of levels you want. For example, do you only want to
break on the last record in a package (one level), or do you want to break on
the last record in a package and the last record in a container (two levels)?
Choose the characters you want to represent the break mark.
Assign a field to determine when a break mark is printed.
Create the look you want the break mark to have by selecting the orientation
and the width in characters.
For this example, we will create a simple break mark for the last record in each
package, the last record in each container, and for the last record in each pallet.
To create your break marks:
1. Drag and drop a break
mark from the Objects
window onto your layout, if
there is not one there
already.
2. Select the break mark and
choose Format >
Properties.
3. In the Break mark properties
window, select the Level 1,
Level 2, and Level 3 options
4. Choose the character that
you want for each level. In
this example we will use the
pound sign for all levels.
5. For Level 1, choose AP.Brk_Lvl1_L from the Field drop-down list. For
Level 2, choose AP.Brk_Lvl2_L. For Level 3, choose AP.Brk_Lvl3_L.
6. Select Horizontal for the Orientation and Three for the Width in
Characters.At this point, the Break mark properties window should look like
the one above.
7. Click OK.
Your break marks appear on your labels in the following ways:
Last record of new package
66
Last record of new container
Label Studio User’s Guide
Page 67

Last record of new pallet
Piece position Not only can you set up how you want the break marks to look, you can tell Label
Studio to print the break marks on specific mail pieces. Label Studio does not
limit you in what you can or can’t break on. You can print break marks on:
The first piece in a package/container/pallet.
The last piece of a package/container/pallet.
Both the first and last pieces of a package/container/pallet.
Your choice should depend on the data in your input file and on your mailroom
equipment and procedures. However, the input file data does not necessarily limit
your choice of options. Label Studio can interpret the break field data and use
break mark options set by the Label Studio user to identify those pieces upon
which to print the break mark.
Input file Your input file must contain a field that holds data indicating whether or not a
break mark should appear on that piece. For example, our Presort program
generates a field that holds the container break information. If the current mail
piece is the first piece of the container, data appears in that field. If the current
mail piece isn’t the first piece in the container, the field is empty.
If you plan on using break marks, your input file must contain a break mark field,
and you must map the field to the appropriate PW field in your definition file:
PW.Brk_Lvl1 for package break marks.
PW.Brk_Lvl2 for container break marks.
PW.Brk_Lvl3 for pallet break marks.
In addition, you should define the break level in the Input Options window of
your job. For information about break levels, see “End subunits based on level
boundaries” on page 92.
Chapter 4: Design labels
67
Page 68

Images
You can add any number of images to any number of your labels (Windows
printer drivers only). For a list of supported image file formats, see the Label
Toolbox help topic “Image Formats.”
Add images to your design
You must complete a few steps before your image will appear on the labels the
way you want it to:
Choose your image(s) from your Image Files folder (set up in Tools >
Options > File location tab).
Assign a value to the image(s).
Create a value expression for the image(s).
Create a conditional expression for the image (optional).
The following example walks you through some of these steps.
.
Note: Images are not saved to the design file. Only the file path is stored in
the design file. You can set up an Image file directory by choosing Tools >
Options > File Locations tab. The directory you assign here becomes the
default directory.
Example To help illustrate how to add images to your label, we have the following
scenario: A company is sending out a mailing to customers in Wisconsin and
Minnesota. To grab their attention, they are going to place an image on the
labels—a map of the state for Minnesota customers and a wheel of cheese for
Wisconsin customers.
To add these images to the appropriate labels:
1. From the Objects
window, under
Miscellany, drag and
PW.State
drop the Image object
onto your layout. The
Image Properties
window appears (if
not, choose Format >
Properties).
2. Next, enter or build the
value expression in
Filter Builder that tells
Label Toolbox what
field needs to be
populated to print the
necessary image.
Because we are differentiating by state, we chose the field PW.State.
Now we need to choose our images and give them values to tell Label
Toolbox what to print and when.
3. Click the Add button in the Image Properties window to choose the image
you want.
68
Label Studio User’s Guide
Page 69

4. Select the Minnesota image and enter the value MN. Then select the
Wisconsin image and give it a value of WI. These values tell Label Toolbox
that when the PW.State field is populated with MN, print the minnesota.bmp
image. The same goes for WI; when WI appears in the PW.State field, print
the cheese.bmp image.
Chapter 4: Design labels
69
Page 70

Other miscellaneous objects
Text Drop a Text field onto a layout to add any text you want
onto your labels.
For example, you could type a greeting or a short message
right onto the label design. Be sure to check USPS
requirements for your other label elements’ placement and
position.
Tab Adding a tab to your layout can help you in designing your label. For example,
you can use it to make a field start at any position on a line. It can be used as a
right tab or a left tab.
Expression With the Expression field you can do a number of things you cannot do with other
Label Toolbox fields and objects. For example, use the Expression field to:
Conditionally print text
Create printer codes for Windows printer designs
Combine data from multiple fields
Before you can print an Expression field, you must create a value expression. You
can also name your Expression field by typing the name you want into the Field
Name text box in the Field Properties window. See Appendix A for more
information about value expressions.
70
Label Studio User’s Guide
Page 71

Verify labels
The USPS has specific rules about which elements you can print on your labels
and where they should be positioned. Label Toolbox checks your label layout for
you to ensure that it does not violate basic USPS rules.
Label Toolbox catches several obvious errors, but it does not enforce all
!
USPS rules on your label layout. Even if Label Toolbox finds no errors in
your layout, we can’t guarantee USPS acceptance. For details on USPS
rules, see the DMM.
Status window The Status window (View > Status) shows the elements in your layout and their
status. If Label Toolbox finds something wrong with one of the elements of your
layout, it will display either an error or a warning related to the current design.
They are marked by the following symbols:
Error: This sign signifies that there is a severe problem. If the problem is
not corrected, your mailing could be rejected.
War ning: This is not usually as severe as an error; however, it is
recommended that you research the problem and attempt to fix it.
How to fix your errors By right-clicking an error or warning in the Status window, you may be able to:
View a help topic that gives you a description and possible solution to your
problem.
Go to the location of the problem in question.
Note: When you are preparing labels that won’t be used for mailing
purposes, you may still get warning or error messages. Under these
circumstances, it may not be necessary to fix these problems.
Turn off verification There may be times when you do not want to verify your labels as you design
them. There are several ways to turn off verification.
You can remove the Status window from view by choosing View and
deselecting Status. In this case you would not see any of the error or warning
messages, not just the USPS verification.
You can turn off the USPS address block option in the base layer or frame
that your address information is in by selecting the base layer or frame,
choosing Format > Properties, and deselecting the USPS address block
option.
A more general way of avoiding USPS verification entirely is to design your
address, container, and pallet labels using the Generic label type in your job,
not the USPS address, USPS sack, USPS tray, or USPS pallet label types.
Chapter 4: Design labels
71
Page 72

Preview labels
There are two ways to preview labels. You can either preview them through Label
Studio or through Label Toolbox.
Label Studio To view your labels before you print, choose Tools > Preview Labels. This will
only work if there is a design file assigned to the current job file and the required
blocks are completed.
Label Toolbox When you are in the Design window of Label Toolbox, you can preview your
labels as you design them by choosing View > Label Preview.
Test and Banner pages: The preview does not include any test or
banner pages that you may have.
Tip: By resizing the print preview window and the design window, it is
possible to have both on your screen at the same time. This feature
allows you to see the changes you make to your labels instantly.
Toggle button In the preview mode, there is a Toggle Label/Page View button that
allows you to change between viewing a single label or an entire page
of labels.
Preview flow There are four radio buttons at the bottom of the Label preview window that
allow you to adjust the viewing order of your labels (East/West, North/South,
North/South Page or North/South stacked). The default option is based on the
print direction setting from the Label Options window within the Output Setup
block in Label Studio.
To activate the preview flow buttons, you must choose page view with the toggle
button.
72
Label Studio User’s Guide
Page 73

By selecting a radio button and clicking the Reverse Label Order button, it
reverses the order the labels are displayed in.
For more information about each feature in the Label Preview window, see the
Label Toolbox or Label Studio help file.
Chapter 4: Design labels
73
Page 74

Page templates
When you create a new design file, you must pick a page template (.ltp) to use.
Page templates contain the physical information about the page of labels that you
are using. This information includes the size of the page, the number of labels per
page, the size of the margins, and so on.
When working in Label Toolbox, you can create and save your own page
templates, as well as load existing page templates in the current design.
Create a new page template
If you often use the same page setup but different label designs, then you may
want to create a page template. For example, if a lot of your printing is done on a
custom label or paper size, rather than modifying your page setup each time, you
could save your page settings as a page template. To do this:
1. In Label Toolbox, create
and save a design with
your desired page
settings.
2. Choose File > Page
Setup, and then click
the Page Template tab.
If necessary, click the
folder icon to navigate
to a different folder, and
then click OK.
3. Choose Save New
Tem pl at e from the list,
and enter a Name and
Description for the
template and then select
Label or Envelope.
Assign a different page template to the design file
74
Label Studio User’s Guide
4. Click Save, and then click OK.
After you have created and saved this page template, you can use it when creating
new design files or you can load it into an existing design file.
Perhaps you know that there already is a page template with the setting you want,
to assign a different page template to the current design:
1. Choose File > Page Setup and click the Page Template tab.
2. If necessary, click the folder icon to navigate to a different folder, and click
OK.
3. Choose a page template from the list, and click Load.
4. Click OK.
Page 75

Layout templates
When you create a new design file, you must pick a layout template (.ltl). Layout
templates contain information about what fields, barcodes, break marks, or other
objects appear on your labels, banner pages, or test labels.
When working in Label Toolbox, you can create and save your own layout
templates, as well as load existing layout templates in the current design.
Create a new layout template
Assign a different layout to the design file
If you often use the same label design but different page settings, you could create
different layout templates. Then, you wouldn’t have to change your label design
each time you create a new design. To do this:
1. Create and save (File > Save) your label design.
2. Choose File > Layout Template > Save.
3. If necessary, navigate to a different folder, and name your new layout
template. Click Save.
After you have created and saved this layout template, you can use it when
creating new design files or you can load it into an existing design file.
Perhaps you know that there is a layout template with the settings that you want.
To assign a different layout to the current design:
1. Choose File > Layout
Temp l at e > Lo ad .
2. If necessary, click the folder
icon to navigate to a different
folder, and click OK.
3. Choose a layout template
from the list, and click Finish.
Banner pages and test labels
If you often use a common setup for your banner pages or test labels, but not your
label design, you may want to create and save a layout template. This template
could contain your desired banner and/or test layer information but a blank base
layer. You could then use this layout template when creating a new design.
Chapter 4: Design labels
75
Page 76

76
Label Studio User’s Guide
Page 77

Chapter 5:
Reports
Label Studio provides reports for your own management, for clients, or for other
bureaus or vendors.
This chapter introduces you to Label Studio reports. You will become familiar
with the available reports and learn the basics about working with them.
Chapter 5: Reports
77
Page 78

Available reports
Job Summary The Job Summary reports lists the settings of your job file that affect label
printing.
Print Log The Print Log shows what units were formed and why. The Print Log also shows
any breaks that you make during printing. It lists starting and ending record
numbers and the total number of records in each unit.
The Print Log is especially useful if you split your Label Studio output.
Inkjet Format Summary
The Inkjet Format Summary gives the bindery line operator pertinent information
about the inkjet setup. This report is printer specific, and only shows information
that relates to your printer. The Inkjet Format Summary is available for inkjet
drivers only.
Inkjet Simulation The Inkjet Simulation lets you view and verify your label design, even if your
inkjet printer is not ready. By printing this report, you can make sure that you
have set up your address and message information correctly. The Inkjet
Simulation is available for inkjet drivers only.
78
Label Studio User’s Guide
Page 79

Print reports
You can print your reports directly to your printer, or you may prefer to print your
reports to a file. If you print to a file, you can preview your reports before printing
them. You may decide to write all of your reports into one file, or write each type
of report to a separate file.
Send the reports directly to the printer
Enter the port address of the printer (for example, Lpt1) in the Output Destination
parameter. Follow the guidelines for setting this as a default for all reports, or
setting it in the individual report setup.
The printer must be ready and waiting when Label Studio reaches the reportwriting stage of your job!
One report file To send all of your reports to one file:
1. Expand the Report Setup folder, and double-click the Report Defaults
block.
2. Enter a file name in the Output Destination box, such as $job.out. Do not
name any specific report that you are printing. For example, if printing the
Job Summary, leave the Output Destination parameter blank in that report’s
job file block.
3. For the first report being printed, select Replace in its job file block, and
select Append for all others. Reports are printed in the order that they appear
in the job diagram.
For example, if you are printing the Job Summary and the Print Log. In the
Job Summary block select Replace. The Job Summary report is the first
report printed and overwrites any existing reports by the same name. In the
Print Log block, select Append. The new Print Log information is added to
the file.
Separate file per report type
This file can be quite large, but Label Studio offers options that can help you
organize and print it conveniently. For example, you can insert banner pages
between the reports. Select this option in the Report Defaults block.
This approach gives you more files to handle, but they are smaller and you can
more easily find a particular report.
Leave the Output Destination box blank in the Report Defaults block. Instead,
enter a file name at this parameter in each of the individual report blocks. To
distinguish one report file from another, use the following file-naming method.
Chapter 5: Reports
79
Page 80

File names based on the
job
To save time and keep files manageable, Label Studio offers a shortcut for
naming report files. It’s called $job (“dollar job”). Here is an example of how it
works:
Job file Report type
speedy.lsj
Job Summary
Job Print Log
Inkjet Simulation
Inkjet Format Summary
Report file name, as
entered in job file
$job.ljs speedy.ljs
$job.lpl speedy.lpl
$job.lis speedy.lis
$job.lfs speedy.lfs
Report file actually produced
80
Label Studio User’s Guide
Page 81

Format reports
Before printing reports, you set up several options for their appearance:
Basics: File name, number of copies, what to do if the file already exists, and
so on.
Page layout: Page size, margins, headers, and capitalization.
Printer setup: Control codes that switch your printer into a different font,
size, print direction, and so on.
Defining your report format
General features of reports
You can control your report-printing options at several levels:
Universal: You can create “universal” report settings if you plan to use them
for most jobs. To set these, choose Tools > Options > Defaults, and then click
the Report Defaults tab. Your settings here will be used as defaults whenever
you create a new job.
Job: Within a particular job, you can override the “universal” report settings,
and set defaults that will apply to all reports in that job. Expand the Report
Setup folder and double-click the Report Defaults block. These settings
override your Universal settings.
Report: Finally, you can customize the settings for one report within a
particular job. Expand the Report Setup folder and double-click the specific
report’s block (for example, the Job Summary block). These settings override
the Job settings.
Most reports have the following features:
The report name is shown in the upper left-hand corner of each page.
Normally, the software name and version number are shown. You have the
option to suppress this information in the Report Defaults block.
You can define up to four header lines. You can enter them once, to appear
the same on all reports, or set up a different header for a particular report
type. Label Studio will print all four lines at the top of each report.
Printer control Some printers let you select fonts, lines per inch, and other options from their
control panel. However, then you have to set up the printer every time you print.
A better way is to embed printer-control codes (also known as escape sequences)
in your Label Studio reports. These parameters send control signals to your
printer to switch fonts, set line spacing, use condensed fonts, and so on. You can
set up these codes in your Label Studio job, using the Printer Init and Printer
Reset parameters. Find these parameters in each of the three report setting
locations (Universal, Job, and Report).
For a list of codes your printer recognizes, see your printer manual.
Chapter 5: Reports
81
Page 82
Job Summary
The Job Summary report lists the settings in your job-file blocks that control
Label Studio output. We recommend that you generate a Job Summary report in
every job. This printed report is then available for reference if the results of your
Label Studio job are not what you expected. For example, check the setup shown
on your Job Summary if labels don’t appear to have been output with the correct
breaks.
You can produce the Job Summary report by selecting the Create Reports option
in the Execution Options block. Be sure that the Job Summary block is not
commented out.
Job Summary Report Label Studio 7.71 [c01] Page 1
Address label job
Business Objects
02-Aug-2006
05:55:57pm
--------------------------------------------------------------------------------------------------------------
General Information ------------------------------------------------------------------------------------------
Job Name: D:\Label Studio\ls\samples\address_sample.lsj
Job Description: Job file created by the Label Studio Wizard
Job Owner: Business Objects
Mailer Name: The mailer
Label Type: USPS Address
Warn Before Overwrite: Yes
Work File Directory D:\LABEL STUDIO\LS\SAMPLES
Input Options ------------------------------------------------------------------------------------------------
Copies Expression:
Copies Labeling: All
Level 1 Break Definition: Ignore
Level 2 Break Definition: Ignore
Level 3 Break Definition: Ignore
Default Unit Break Description:
Unit Break at End of File: No
Input Files --------------------------------------------------------------------------------------------------
Total Number Input Files: 1
Input File Name: D:\Label Studio\ls\samples\Adr.dat
Starting Record: 1
Ending Record:
Process Deleted Records: No
Input Filter:
Nth Select: 1.000000
Maximum Records to Use:
Input File Totals:
----------Records dropped due to:---------- File Name Database Start & Input Nth Max Input Net
Date Records End Nums Deleted Filter Select Records Records Labels
------------------------- -------- -------- -------- -------- -------- -------- -------- ------- D:\Label Studio\ls\samples\Adr.dat
03-Feb-2006 04:18:54pm 50 0 0 0 0 0 50 50
-------- -------- -------- -------- -------- -------- -------- ------- 50 0 0 0 0 0 50 50
82
Label Studio User’s Guide
Page 83

Job Summary Report Label Studio 7.71 [c01] Page 2
Address label job
Business Objects
02-Aug-2006
05:55:57pm
----------------------------------------------------------------------------------------------------------------
Labels -------------------------------------------------------------------------------------------------------- Design File: D:\Label Studio\ls\design files\sample_address.ltd
Design Description: Address Label: OEL on 1st line, Postnet on 2nd line, Gated-Scan breakmark
Printer Name: \\2KPRINTSRV\HP LaserJet 2200 TP
Print To File: Yes
Output File Name: D:\LABEL STUDIO\LS\SAMPLES\reports
Label Options --------------------------------------------------------------------------------------------------
Print in Reverse Order: No
Print Direction: East/West
Subunits -------------------------------------------------------------------------------------------------------
Divide Units into Subunits: No
Max Pieces Per Subunit:
End Subunits at Level 1 Boundaries: No
End Subunits at Level 2 Boundaries: No
End Subunits at Level 3 Boundaries: No
Chapter 5: Reports
83
Page 84

Print Log report
The Print Log is especially useful to those who split their Label Studio output. It
includes these items:
What units were formed and why.
Any breaks that you make during printing (if you interrupt printing).
The starting and ending label numbers.
The total number of labels in each unit.
Caution: Be sure to print this report only after you have printed your
!
labels. Because this report reflects printing output, the report file will be
empty if you try to print the report before printing labels. In the Output
Order block, select to print Labels first.
Print Log Report Label Studio 7.71 [c01] Page 1
Address label job
Business Objects
26-Mar-2006
06:08:48pm
--------------------------------------------------------------------------------------------------------------
Label Studio Print Run ---------------------------------------------------------------------------------------
Start: 26-Mar-2006 06:08:53pm
End: 26-Mar-2006 06:08:56pm
File Name: reports
Volume ID: 000001
Date & Time: 26-Mar-2006 06:08:56pm
Unit: (1)
Subunit: (1)
Break Reason: End of job
Record Label
Input File Record Range Total Label Range Total
---------------------------------------- ----------------- -------- ----------------- ------- (1) D:\Label Studio\ls\samples\Adr.dat 1-50 50 1-50 50
84
Label Studio User’s Guide
Page 85
Banner pages
A banner page announces the beginning of a report in large letters and makes it
easier to find your way in a thick stack of reports.
#### ##### #### ### #### ##### ###
# # # # # # # # # # # #
# # # # # # # # # # #
#### ##### #### # # #### # ###
# # # # # # # # # #
# # # # # # # # # # #
# # ##### # ### # # # ###
### ##### ### ### ### ###
# # # # # # # # # # # # #
# # # # # # # # # #
### # #### # # # # # # # # ###
# # # # # # # # # #
# # # # # # # # # # # # #
### ### ##### ### ### ###
Job File : D:\Label Studio\ls\samples\address_sample.lsj
Job Owner : Business Objects
Job Description : A sample job
Print banner pages Select the Print Banner Pages option in the Report Defaults block to print banner
pages between your reports.
Chapter 5: Reports
85
Page 86

86
Label Studio User’s Guide
Page 87

Chapter 6:
Output
Rather than send your label output to one file, you can split up the output into
several files. This chapter discusses the reasons for wanting to split Label Studio
output, and shows you how to do it.
For information about the Inkjet Output Summary file, see the Label Studio Inkjet
Reference.
Chapter 6: Output
87
Page 88

Output destinations
When you run your job, you can send your output (labels and reports) directly to
the printer assigned to your design file, or to one or multiple output files.
To print your output to a file, select Print to File in the Labels block. If you do not
select this checkbox, your output is sent directly to your printer. Inkjet and PCL
Data Stream printer drivers can only print to a file; they cannot print directly to a
printer.
Printers If you decide to send your output directly to a
printer, printing can begin right away— as soon as
the first label is composed, it is printed.
However, sending directly to a printer might be
slower than printing to a file because Label Studio
may compose faster than your printer can print.
For certain printers, it may be faster to print to file.
To use the direct-printing option safely, you must be guaranteed exclusive
!
access to the printer throughout the print run. If you share the target
printer with other work groups, make sure to alert others that you will
need exclusive use of the printer before you begin printing. Otherwise, if
someone else tries to use the printer during your print run, their job may
be mixed with yours and some labels may be ruined. The effects depend
upon your equipment setup.
Files If you decide to print to a file, Label Studio stores your labels in a print-image
file. Later, you can transfer the file to your printer. If you want to split your
output, see “Create multiple output files” on page 89 for more information.
One file name and the
$job macro
If you output to one file, then specify the one file name. In the Labels block,
either type a specific name for your file or use the $job macro. The macro is
automatically converted to the base name of the job file (without path or
extension). For example, if your job file was named myjob.lsj, your output file
would be name myjob (you need to specify your own extension, for example,
$job.out).
If you use the $job macro in more than one place in your job (for example,
naming your reports), avoid file-naming conflicts by giving the files different
extensions or placing them in different directories. So, in the previous example,
you could specify, $job.prn and your output file would be named myjob.prn.
88
Label Studio User’s Guide
Page 89

Create multiple output files
If you create just one output file, it could be quite a large file and it could only be
sent to one printer. However, if you create unit and/or subunit breaks, you can
create multiple output files. You create unit breaks according to values in your
input file and/or subunit breaks based on the number of records. See “Set up
units” on page 90 and “Set up subunits” on page 92 for more information.
Why create multiple output files?
Label Studio generates labels in the order of your input file. If you want to keep
the same output file structure as existed in your input files, you should split your
output into multiple files using your defined units or any field that you choose.
Note: Keep in mind that you can’t reorder the records in your input files.
Instead, you tell Label Studio to create a new file when the pertinent data
signals the start of a new unit.
Example The box at right shows the
result of setting up unit
breaks by entry point,
segment, and then scheme
and creating multiple
output files: 13 output files
or 13 units.
Banner pages and test labels
You can have Label Studio print banner pages or test labels between units or
subunits. Then when the mailroom staff assembles the mailing, the banner pages
or test labels signal the start of new jobs, units, and subunits.
Entry point, segment, and scheme as units
1. Phoenix ASF, English Edition, Auto Flats
2. Phoenix ASF, English Edition, Regular Flats
3. Phoenix ASF, Spanish Edition, Auto Flats
4. Phoenix ASF, Spanish Edition, Regular Flats
5. Denver BMC, English Edition, Auto Flats
6. Denver BMC, English Edition, Regular Flats
7. Denver BMC, Spanish Edition, Auto Flats
8. Denver BMC, Spanish Edition, Regular Flats
9. Phoenix ASF, English Edition, Qualified Nonpresort
10. Phoenix ASF, Spanish Edition, Qualified Nonpresort
11. Denver BMC, English Edition, Qualified Nonpresort
12. Denver BMC, Spanish Edition, Qualified Nonpresort
13. default entry point, no segment, Unqualified
Set up the appearance of your banner pages and test labels in Label Toolbox. In
the Label Options block, choose from the Banner Pages and Test Labels dropdown menus when (if at all) they should print.
Chapter 6: Output
89
Page 90

Set up units
You can tell Label Studio to read values from certain fields in your input file and
then group the output files accordingly. Label Studio calls these groups of records
with common input file values units. Define your unit breaks in the Input Options
window.
The following examples show how to set up your Unit Break Definition and Unit
Break Description parameters for one description or multiple descriptions.
One Unit Break Description
Even if you want multiple unit breaks, you only need to set up one Unit Break
Definition and Description. However, each unit must use the same value in the
Unit Break Definition, meaning that each field must change according to the
same principal (for example, first, last, or change).
For example, suppose you want to create unit breaks based on Entry Point and
then Segment.
To do t h is:
1. Define the following in your .def file:
PW.Unt_Brk1 = DB.Seg_No & DB.Ent_Pt_No
2. Open the Input Options block, click the Definition & Description button.
3. Define only one of the following in the Unit Break Description box (they
both work similarly):
alltrim(DB.Seg_No)
90
4. Choose from the drop-down list the Unit Break Definition according to how
each field changes, the example above is defined as Change.
Note: Each component of PW.Unt_Brk1 must change according to the
same principle (first, last, or change) because you can only define it once
from the drop-down menu.
Label Studio User’s Guide
Page 91

Multiple Unit Break Descriptions
You can have up to 10 Unit Break Description and Unit Break Definition
parameters defined for each component of the unit.
In the Unit Break Definition window, just define each break separately. For
example, if you were splitting by entry point then segment (where you have fields
DB.Ent_Pt_No and DB.Seg_No defined in your .fmt file):
With this setup, each specified unit
can change differently (different Unit
Break Definition parameters).
Chapter 6: Output
91
Page 92

Set up subunits
Subunit breaks divide your output based on the number of records. You do not
need to have units defined in order to create subunits.
Limit the number of records per output file
If you want to limit the number of records per output file, set up subunit breaks.
Each file would contain the number of records (or less) that you set.
To do t h is:
1. Expand the Output folder, and
double-click the Subunits block.
2. Select Divide Units Into Subunits.
3. Enter the number of records that you
want in each output file. For
example, type 5000 if you want each
output file to have 5000 records or
less.
4. Click OK.
End subunits based on level boundaries
Set up level boundaries You define level boundaries by using the PW.Brk_Lvln field (where n is number
To end your subunit breaks at level boundaries, you first must set up level
boundaries in your definition file and in the Input Options block.
1, 2, or 3). For example, your .def file entry might resemble:
This field is from your database
PW.Brk_Lvl1 = DB.Pkg_Brk_F
and identifies when to create a
level based on the first records.
Then, in the Input Options block, choose First from the Level 1 Break Definition
drop-down list. Choose this value based on what your database field identifies
(First, Last, Change, Value, or Ignore).
End on level boundaries If you want to end a subunit break at a boundary level, you must check the
appropriate options. For example, to end a subunit break based on the example
above:
1. Expand the Output folder, and double-click the Subunits block.
2. Select Divide Units into Subunits, and enter the appropriate number.
3. Select End Subunit At Level 1 Boundaries.
4. Click OK.
End on level boundaries and Maximum Number of Pieces per Subunit
Label Studio considers the value of the Maximum Number of Pieces Per Subunit,
when ending subunits at a level boundary. This feature is useful if you want to
split your output into separate files for multiple bindery lines.
For example, rather than having a pallet or a container split between two output
files, you can select End Subunit at Level 2 boundaries (container) and End
92
Label Studio User’s Guide
Page 93

Subunit at Level 3 boundaries (pallet). This setup will end your output files at the
last full container and/or pallet before exceeding your desired maximum number
of pieces, 240,500. To do this:
1. Open the Subunits block, and
select Divide Units into
Subunits.
2. Type 240500 in the Maximum
Number of Pieces Per Subunit
field.
3. Select End Subunits at Level 2
Boundaries and End Subunits
at Level 3 Boundaries, assuming
that you have defined these level
boundary breaks.
Label Studio creates a new output file when it reaches the level 2 and/or 3
boundaries, but without going over 240,500 labels.
Chapter 6: Output
93
Page 94

File masks
When printing your output to multiple files, you must specify a name for each
file. To keep the files from having the same name and overwriting each other, you
must include a variable, or file mask, in the name. At print time the file mask is
replaced, resulting in a unique file name.
How it works You associate a file mask character with a data field (input or output) that
identifies the unit or subunit. For example, if your units are formed based on
segments, you may want to associate a mask character with the output field
DB.Seg_No. To successfully create your file masks, you must use the same fields
used to define your breaks.
Label Studio has two default file masks. If you don't define your own file masks,
Label Studio uses these default file masks:
Split output by Mask character Syntax
Unit number ^ ^,ap.unit_no
Subunit number % %,ap.subunit_no
The number of characters specified translates into the minimum number of
characters to print. For example, if ^,ap.unt_no was defined, the output file setup
as jobname^^^.out would translate into jobname001.out if
ap.unt_no = 1, and jobname1000.out if ap.unt_no = 1000. The amount of
characters can grow but not shrink.
Characters You can use any character for file masks except for Windows reserved characters:
:\/ . “
?<> | $
We recommend that you use “special” characters and not just any letter or number
as a file mask. That is because if the file mask character you choose is also
present in the file name, it will get replaced. Here are some characters that you
could use:
^@% ! ~ & #
94
Label Studio User’s Guide
Page 95

Guidelines When you use file masking to name output files, follow these guidelines:
You need to only define one mask character for all of the file names to be
generated. For example, if you are splitting by segment and you have defined
115 segments in your job, then you only need to include one character for the
segment number; test@ would be a valid mask. The files created would be
name test1 - test115.
You cannot use mask characters in the file extension. For example,
test.@@@ is invalid.
Use multiple mask character to create static length filenames. For example, in
the example in the first bullet, test@@@ would create the files test001 test115.
Chapter 6: Output
95
Page 96

Output file sizes
If you define unit or subunit breaks, the sizes of your output files may differ.
That’s because Label Studio forms a new subunit whenever it reaches the number
of specified labels or the end of a unit, whichever comes first.
For example, let’s suppose you need to prepare a large national mailing. You
choose to group your records by changing entry point (DB.Ent_Pt_No) values
because your West-Coast-bound trucks leave first.
Because you also have two bindery
lines ready to generate the labels,
you limit the output files to, for
example, 2,000 pieces. That way
each bindery line can handle pieces
from the same job.
Within the large units, Label
Studio forms many subunits, each
subunit containing 2,000 pieces—
except possibly the last subunit in
each unit. The last unit varies
because Label Studio must end the
subunit when the unit ends (see the Flagstaff entry point). For a unit that has
fewer than the specified 2,000 pieces, Label Studio ends the subunit when the unit
ends. Consequently, that smaller subunit never reaches 2,000 pieces in size (see
the Prescott entry point).
96
Label Studio User’s Guide
Denver
9,231 pcs.
(5 subunits)
Subunit 1
2,000 pcs
Flagstaff
7,762 pcs.
Subunit 2
2,000 pcs
Subunit 3
2,000 pcs
Phoenix
10,436 pcs.
(6 subunits)
Subunit 4
1,762 pcs
Subunit 1
641 pcs
Note: We don’t show the subunit breakdown for the Denver or Phoenix
entry points. The program would create them similarly to the Flagstaff
subunits.
.
Prescott
641 pcs.
Page 97

Appendix A:
Creating expressions and filters
This appendix explains what expressions and filters are and how to set them up in
Label Studio.
Most of this information is also available in Filter Builder’s online help. You can
access this help by pressing F1 when you are in Filter Builder.
Appendix A: Creating expressions and filters
97
Page 98

Expressions and filters
When you drop certain objects onto your layout, you may need to create a value
expression or conditional filter for that object. Label Toolbox provides a utility
for creating and editing your filters and expressions.
To access this utility, select the object and choose Format > Properties from
the Label Toolbox menubar. Click the Filter Browser button.
Value expressions A value expression tells Label Toolbox to print the value of the specified field or
data. For example, PW, AP, and DB fields automatically contain a value
expression telling Label Toolbox to print the specified information.
When Label Toolbox looks at a record, it retrieves the data for this value
expression and applies it to the record. For example, a value expression,
alltrim(ap.adr_bc_dgt) + alltrim(ap.adr_chk_digit), would return the value of
ap.adr_bc_dgt + ap.adr_chk_digit for each record.
Barcodes always require a value expression.
Conditional filter A conditional filter allows you to designate under what conditions an element of
your label or the data contained in the element will appear or not appear.
For example, a conditional filter, alltrim(pw.mail_type) = “ATM”, would return
a “T” or “F” for each record depending on the outcome of this function.
Objects that do not have a conditional filter assigned to them will always print.
Predefined expressions and filters
Label Toolbox contains a number of predefined expressions and filters. These
cover some of the most fundamental expressions for the various elements of your
mailing. The table below gives descriptions of what they do and how they are
used.
Note: If you change a predefined
filter or expression, you are
prompted to do one of three
things, shown at right.
Filter Description Usage
AP.Adr_BC_Dgt
PW.Adr_BC_Dgt
AP.Ctn_BC_Dgt
PW.Ctn_BC_Dgt
Ctn BC Required Conditional filter for container label barcodes
Last in Pkg Conditional filter indicating the label as the last
Value expression for address label barcodes Used by the POSTNET barcode in labels (not con-
tainer labels)
Value expression for container label barcodes Used by container labels
Used only on presorted labels
in a package
First or Last in Pkg Conditional filter indicating the label as the first
or last in a package
98
Label Studio User’s Guide
Used only on presorted labels
Page 99

Filter Description Usage
Last in Ctn Conditional filter indicating the label as the last
in the container
First or Last in Ctn Conditional filter indicating the label as the first
or last in a container
Last in Plt Conditional filter indicating the label as the last
in a pallet
First or Last in Plt Conditional filter indicating the label as the first
or last in a pallet
BC on ATM only Conditional filter indicating the label should
have a barcode if it is of the mail type, ATM
Letter D Value expression defined as letter “D”
Used only on presorted labels
Used only on presorted labels
Used only on presorted labels
Used only on presorted labels
Appendix A: Creating expressions and filters
99
Page 100

Filter Builder
Label Toolbox contains a utility
that you can use for the creation,
verification, and selection of
filters and expressions.
If you click the Filter Browser
button, it opens the Filter
Browser window. From this
window, you can access Filter
Builder to edit or create new
filters and expressions.
Example Here is a quick tour of the Filter Browser windows.
Filter Browser window The first window
you come to, after
clicking the Filter
Browser button, is
the Filter Browser
window.
Filter Browser buttons
The Available
Filters box lists all
of the predefined
filters that came
with Label Toolbox
and any of your own
filters.
The Filter Syntax
box contains the
syntax that makes
up the filter you select.
At this point, you can click Edit to change the filter, or you can click New to
create a new filter. Either way, you end up at the Filter Builder window.
Note: This is the only place where you may delete any existing filters or
expressions. To delete an item, right click on the one you want to delete and
click delete in the pop-up menu.
100
Label Studio User’s Guide
 Loading...