


InfoView User’s Guide
InfoView 6.5
Windows and UNIX

2 InfoView User’s Guide
Copyright
Trademarks
Use restrictions
Patents
Part Number
Copyright © 2004 Business Objects. All rights reserved.
If you find any problems with this documentation, please report them to Business Objects in
writing at documentation@businessobjects.com.
Business Objects, the Business Objects logo, Crystal Reports, and Crystal Enterprise are
trademarks or registered trademarks of Business Objects SA or its affiliated companies in the
United States and other countries. All other names mentioned herein may be trademarks of
their respective owners.
Contains IBM Runtime Environment for AIX(R), Java(TM) 2 Technology Edition Runtime
Modules (c) Copyright IBM Corporation 1999, 2000. All Rights Reserved.
This product includes code licensed from RSA Security, Inc. Some portions licensed from IBM
are available at http://oss.software.ibm.com/icu4j.
This software and documentation is commercial computer software under Federal Acquisition
regulations, and is provided only under the Restricted Rights of the Federal Acquisition
Regulations applicable to commercial computer software provided at private expense. The use,
duplication, or disclosure by the U.S. Government is subject to restrictions set forth in
subdivision (c)(1)(ii) of the Rights in Technical Data and Computer Software clause at 252.227-
7013.
Business Objects owns the following U.S. patents, which may cover products that are offered
and sold by Business Objects: 5,555,403, 6,247,008 B1, 6,578,027 B2, 6,490,593 and
6,289,352.
384-50-650-01

Broadcast Agent Administrator’s Guide 3
Contents
Contents 3
Preface Maximizing Your Information Resources 7
Information resources . . . . . . . . . . . . . . . . . . . . . . . . . . . . . . . . . . . . . . . . . . 9
Services . . . . . . . . . . . . . . . . . . . . . . . . . . . . . . . . . . . . . . . . . . . . . . . . . . . . 11
Useful addresses at a glance . . . . . . . . . . . . . . . . . . . . . . . . . . . . . . . . . . . . 12
About this guide . . . . . . . . . . . . . . . . . . . . . . . . . . . . . . . . . . . . . . . . . . . . . . 14
Chapter 1 Introduction to InfoView 15
What is InfoView? . . . . . . . . . . . . . . . . . . . . . . . . . . . . . . . . . . . . . . . . . . . . 17
What can you do with InfoView? . . . . . . . . . . . . . . . . . . . . . . . . . . . . . . . . . 19
How are documents created? . . . . . . . . . . . . . . . . . . . . . . . . . . . . . . . . . . . 21
What is new in InfoView? . . . . . . . . . . . . . . . . . . . . . . . . . . . . . . . . . . . . . . . 22
Chapter 2 Getting Up and Running 25
Checking your browser configuration . . . . . . . . . . . . . . . . . . . . . . . . . . . . . . 27
Logging into InfoView . . . . . . . . . . . . . . . . . . . . . . . . . . . . . . . . . . . . . . . . . . 31
Logging out of InfoView . . . . . . . . . . . . . . . . . . . . . . . . . . . . . . . . . . . . . . . . 34
Getting help . . . . . . . . . . . . . . . . . . . . . . . . . . . . . . . . . . . . . . . . . . . . . . . . . 36
Chapter 3 InfoView Page Layout 37
The InfoView toolbar . . . . . . . . . . . . . . . . . . . . . . . . . . . . . . . . . . . . . . . . . . 39
The page contents . . . . . . . . . . . . . . . . . . . . . . . . . . . . . . . . . . . . . . . . . . . . 49
Chapter 4 Getting to the Documents You Need 53
Navigating in InfoView . . . . . . . . . . . . . . . . . . . . . . . . . . . . . . . . . . . . . . . . . 55
Accessing documents . . . . . . . . . . . . . . . . . . . . . . . . . . . . . . . . . . . . . . . . . 59
Searching for documents . . . . . . . . . . . . . . . . . . . . . . . . . . . . . . . . . . . . . . . 63
Contents

4 Broadcast Agent Administrator’s Guide
Chapter 5 Customizing InfoView 67
Changing the appearance of InfoView . . . . . . . . . . . . . . . . . . . . . . . . . . . . 69
Specifying your document list settings . . . . . . . . . . . . . . . . . . . . . . . . . . . . 72
Specifying your document viewing format . . . . . . . . . . . . . . . . . . . . . . . . . . 76
Specifying your user settings . . . . . . . . . . . . . . . . . . . . . . . . . . . . . . . . . . . 80
Changing your password . . . . . . . . . . . . . . . . . . . . . . . . . . . . . . . . . . . . . . . 82
Customizing My InfoView . . . . . . . . . . . . . . . . . . . . . . . . . . . . . . . . . . . . . . 83
Working with portlets . . . . . . . . . . . . . . . . . . . . . . . . . . . . . . . . . . . . . . . . . . 85
Adding documents to My InfoView . . . . . . . . . . . . . . . . . . . . . . . . . . . . . . . 92
Adding document lists to My InfoView . . . . . . . . . . . . . . . . . . . . . . . . . . . . . 93
Chapter 6 Viewing and Refreshing Documents 95
Viewing WebIntelligence documents . . . . . . . . . . . . . . . . . . . . . . . . . . . . . . 97
Viewing BusinessObjects documents . . . . . . . . . . . . . . . . . . . . . . . . . . . . 100
Viewing non-Business Objects documents . . . . . . . . . . . . . . . . . . . . . . . . 107
Refreshing documents . . . . . . . . . . . . . . . . . . . . . . . . . . . . . . . . . . . . . . . 108
Prompts . . . . . . . . . . . . . . . . . . . . . . . . . . . . . . . . . . . . . . . . . . . . . . . . . . . 110
Contents
Chapter 7 Creating and Editing Documents 113
Creating new WebIntelligence documents . . . . . . . . . . . . . . . . . . . . . . . . 115
Creating new WebIntelligence OLAP documents . . . . . . . . . . . . . . . . . . . 117
Editing WebIntelligence documents . . . . . . . . . . . . . . . . . . . . . . . . . . . . . 119
Creating new BusinessObjects documents . . . . . . . . . . . . . . . . . . . . . . . . 120
Editing BusinessObjects documents . . . . . . . . . . . . . . . . . . . . . . . . . . . . . 121
Chapter 8 Managing Documents 123
Document types . . . . . . . . . . . . . . . . . . . . . . . . . . . . . . . . . . . . . . . . . . . . 125
Adding a document to InfoView . . . . . . . . . . . . . . . . . . . . . . . . . . . . . . . . . 127
Deleting documents . . . . . . . . . . . . . . . . . . . . . . . . . . . . . . . . . . . . . . . . . . 133
Viewing document properties . . . . . . . . . . . . . . . . . . . . . . . . . . . . . . . . . . 136

Broadcast Agent Administrator’s Guide 5
Chapter 9 Managing Categories 139
What are categories? . . . . . . . . . . . . . . . . . . . . . . . . . . . . . . . . . . . . . . . . . 141
Managing corporate categories . . . . . . . . . . . . . . . . . . . . . . . . . . . . . . . . . 143
Managing personal categories . . . . . . . . . . . . . . . . . . . . . . . . . . . . . . . . . . 149
Chapter 10 Saving, Sending, and Scheduling Documents 153
Saving documents . . . . . . . . . . . . . . . . . . . . . . . . . . . . . . . . . . . . . . . . . . . 155
Sending documents . . . . . . . . . . . . . . . . . . . . . . . . . . . . . . . . . . . . . . . . . . 164
Scheduling documents . . . . . . . . . . . . . . . . . . . . . . . . . . . . . . . . . . . . . . . . 167
Chapter 11 Using Dashboards 173
Getting started with Application Foundation . . . . . . . . . . . . . . . . . . . . . . . . 176
Using Application Foundation with InfoView . . . . . . . . . . . . . . . . . . . . . . . 182
Appendix A Keyboard Shortcuts for Accessibility 183
General Information . . . . . . . . . . . . . . . . . . . . . . . . . . . . . . . . . . . . . . . . . . 185
Navigation Options in InfoView . . . . . . . . . . . . . . . . . . . . . . . . . . . . . . . . . 186
Navigating from frame-to-frame . . . . . . . . . . . . . . . . . . . . . . . . . . . . . . . . . 188
Configuring JAWS . . . . . . . . . . . . . . . . . . . . . . . . . . . . . . . . . . . . . . . . . . . 189
Third Party Shortcuts . . . . . . . . . . . . . . . . . . . . . . . . . . . . . . . . . . . . . . . . . 190
Index 191
Contents

6 Broadcast Agent Administrator’s Guide
Contents

Maximizing Your Information Resources
preface

8 InfoView User’s Guide
Overview
Information, services, and solutions
The Business Objects business intelligence solution is supported by thousands
of pages of documentation, available from the products, on the Internet, on CD,
and by extensive online help systems and multimedia.
Packed with in-depth technical information, business examples, and advice on
troubleshooting and best practices, this comprehensive documentation set
provides concrete solutions to your business problems.
Business Objects also offers a complete range of support and services to help
maximize the return on your business intelligence investment. See in the
following sections how Business Objects can help you plan for and successfully
meet your specific technical support, education, and consulting requirements.
Maximizing Your Information Resources

Information resources
Whatever your Business Objects profile, we can help you quickly access the
documentation and other information you need.
Where do I start?
Below are a few suggested starting points; there is a summary of useful web
addresses on page 12.
Documentation Roadmap
The Documentation Roadmap references all Business Objects guides and
multimedia, and lets you see at a glance what information is available, from
where, and in what format.
View or download the Business Objects Documentation Roadmap at
www.businessobjects.com/services/documentation.htm
Documentation from the products
You can access electronic documentation at any time from the product you are
using. Online help, multimedia, and guides in Adobe PDF format are available
from the product Help menus.
InfoView User’s Guide 9
Documentation on the web
The full electronic documentation set is available to customers with a valid
maintenance agreement on the Online Customer Support (OCS) website at
www.businessobjects.com/services/support.htm
Buy printed documentation
You can order printed documentation through your local sales office, or from the
online Business Objects Documentation Supply Store at
www.businessobjects.com/services/documentation.htm
Search the Documentation CD
Search across the entire documentation set on the Business Objects
Documentation CD shipped with our products. This CD brings together the full set
of documentation, plus tips, tricks, multimedia tutorials, and demo materials.
Order the Documentation CD online, from the Business Objects Documentation
Supply Store, or from your local sales office.
Information resources

10 InfoView User’s Guide
How can I get the most recent documentation?
Multimedia
Are you new to Business Objects? Are you upgrading from a previous release or
expanding, for example, from our desktop to our web solution? Try one of our
multimedia quick tours or Getting Started tutorials. All are available via the Online
Customer Support (OCS) website or on the Documentation CD.
You can get our most up-to-date documentation via the web. Regularly check the
sites listed below for the latest documentation, samples, and tips.
Tips & Tricks
Open to everyone, this is a regularly updated source of creative solutions to any
number of business questions. You can even contribute by sending us your own
tips.
www.businessobjects.com/forms/tipsandtricks_login.asp
Product documentation
We regularly update and expand our documentation and multimedia offerings.
With a valid maintenance agreement, you can get the latest documentation – in
seven languages – on the Online Customer Support (OCS) website.
Developer Suite Online
Developer Suite Online provides documentation, samples, and tips to those
customers with a valid maintenance agreement and a Developer Suite license
via the Online Customer Support (OCS) website.
Send us your feedback
Do you have a suggestion on how we can improve our documentation? Is there
something you particularly like or have found useful? Drop us a line, and we will
do our best to ensure that your suggestion is included in the next release of our
documentation: documentation@businessobjects.com
NOTE
If your issue concerns a Business Objects product and not the documentation,
please contact our Customer Support experts. For information about Customer
Support visit: www.businessobjects.com/services/support.htm
Maximizing Your Information Resources

Services
A global network of Business Objects technology experts provides customer
support, education, and consulting to ensure maximum business intelligence
benefit to your business.
How we can support you?
Business Objects offers customer support plans to best suit the size and
requirements of your deployment. We operate three global customer support
centers:
• Americas: San Jose, California and Atlanta, Georgia
• Europe: Maidenhead, United Kingdom
• Asia: Tokyo, Japan and Sydney, Australia
Online Customer Support
Our Customer Support website is open to all direct customers with a current
maintenance agreement, and provides the most up-to-date Business Objects
product and technical information. You can log, update, and track cases from this
site using the Business Objects Knowledge Base.
Having an issue with the product?
Have you exhausted the troubleshooting resources at your disposal and still not
found a solution to a specific issue?
For support in deploying Business Objects products, contact Worldwide
Customer Support at: www.businessobjects.com/services/support.htm
InfoView User’s Guide 11
Looking for the best deployment solution for your company?
Business Objects consultants can accompany you from the initial analysis stage
to the delivery of your deployment project. Expertise is available in relational and
multidimensional databases, in connectivities, database design tools,
customized embedding technology, and more.
For more information, contact your local sales office, or contact us at:
www.businessobjects.com/services/consulting.htm
Looking for training options?
From traditional classroom learning to targeted e-learning seminars, we can offer
a training package to suit your learning needs and preferred learning style. Find
more information on the Business Objects Education website:
www.businessobjects.com/services/education.htm
Services
12 InfoView User’s Guide
Useful addresses at a glance
Address Content
Business Objects Documentation
www.businessobjects.com/services/
documentation.htm
Business Objects Documentation
mailbox
documentation@businessobjects.com
Product documentation
www.businessobjects.com/services/
support.htm
Business Objects product information
Overview of Business Objects documentation. Links
to Online Customer Support, Documentation Supply
Store, Documentation Roadmap, Tips & Tricks,
Documentation mailbox.
Feedback or questions about documentation.
The latest Business Objects product
documentation, to download or view online.
Information about the full range of Business
Objects products.
www.businessobjects.com
Developer Suite Online
www.techsupport.businessobjects.com
Knowledge Base (KB)
www.techsupport.businessobjects.com
Tips & Tricks
www.businessobjects.com/forms/
tipsandtricks_login.asp
Maximizing Your Information Resources
Available to customers with a valid maintenance
agreement and a Developer Suite license via the
Online Customer Support (OCS) website. Provides
all the documentation, latest samples, kits and tips.
Technical articles, documents, case resolutions.
Also, use the Knowledge Exchange to learn what
challenges other users – both customers and
employees – face and what strategies they find to
address complex issues. From the Knowledge
Base, click the Knowledge Exchange link.
Practical business-focused examples.
Address Content
Online Customer Support
InfoView User’s Guide 13
www.techsupport.businessobjects.com
www.businessobjects.com/services
Business Objects Education Services
www.businessobjects.com/services/
education.htm
Business Objects Consulting Services
www.businessobjects.com/services/
consulting.htm
Starting point for answering questions, resolving
issues.
Information about registering with Worldwide
Customer Support.
The range of Business Objects training options and
modules.
Information on how Business Objects can help
maximize your business intelligence investment.
Useful addresses at a glance

14 InfoView User’s Guide
About this guide
Audience
Conventions used in this guide
This guide describes InfoView, the Business Objects product that provides an
overview of all the documents that you can access in the corporate repository. It
also allows you to view, manage, and distribute these documents. You use
InfoView in a web browser.
This guide is intended for users who want to view and distribute documents using
InfoView.
The conventions used in this guide are described in the table below.
Convention Indicates
This font Code, SQL syntax, computer programs. For
example: @Select(Country\Country Id).
This font is also used for all paths, directories,
scripts, commands and files for UNIX.
Some code
more code
$DIRECTORYPATHNAME The path to a directory in the Business Objects
Placed at the end of a line of code, the symbol ()
indicates that the next line should be entered
continuously with no carriage return.
installation/configuration directory structure. For
example:
• $INSTALLDIR refers to the Business Objects
installation directory.
• $LOCDATADIR refers to a subdirectory of the
BusinessObjects installation directory called
locData.
Maximizing Your Information Resources

Introduction to InfoView
chapter

16 InfoView User’s Guide
Overview
InfoView is a business intelligence portal that collects and consolidates your
company's Business Intelligence information and presents it in a secure,
organized, and personalized view to users inside and outside your organization.
With InfoView you can customize the look of your interface, manage, save,
distribute, print and schedule documents for automated processing by Broadcast
Agent. You can do all this from your office, home, or around the world, using your
corporate intranet, extranet, or the World Wide Web. It is both a stand-alone
business intelligence portal (BIP), and a BI-content provider for enterprise
information portals (EIPs).
InfoView enables you to access business information created using
BusinessObjects and WebIntelligence.
Introduction to InfoView

What is InfoView?
InfoView is your personal gateway to your corporate information capital. It allows
you to access documents generated from your corporate data storage, from your
office, home, or around the world, using your corporate intranet, extranet, or the
World Wide Web.
To use InfoView, you do not need to install any additional software on your
computer. All you need is a standard Internet browser.
At the core of InfoView are the document lists that give you an instant overview
of all the documents available to you in the corporate database.
InfoView User’s Guide 17
InfoView includes two document areas:
• The Corporate Documents page is a catalog of all the documents that you are
allowed to access in the corporate repository, the centralized
BusinessObjects storage and distribution mechanism that manages
universes, user information and document exchange.
• The Personal Documents page lists the documents you have saved for your
own personal use.
Within this page, the Inbox stores the documents that other users have sent
you.
What is InfoView?

18 InfoView User’s Guide
These lists not only keep you up to date with all the documents likely to impact
your work, but provide you with the means to view, update and manage those
documents. You can save documents for your personal use, send them to other
users, and save them to the corporate repository for broader circulation.
Introduction to InfoView

What can you do with InfoView?
You can use InfoView as your common entry point for viewing, managing,
distributing, and downloading documents in your corporate repository.
InfoView allows you to access documents that have been created using either
WebIntelligence or BusinessObjects, and any other documents that are
uploaded to the repository, such as Word documents, Excel spreadsheets, and
PDF files. For information about how WebIntelligence and BusinessObjects
documents are created, refer to “Creating and Editing Documents” on page 113.
The documents you view may be simple ones containing tables or charts, or
more complex ones containing hyperlinked indexes, created in WebIntelligence,
which allow you to navigate instantly between sections.
InfoView User’s Guide 19
This image shows an example of a document containing tables.
Because you are using a web browser, you can also read documents containing
hyperlinked images and sound or video objects. For example, by clicking the
name of a model in an imported car catalog, a document could launch a video
showing a 360° view of the car, as well as its interior features.
Depending on your user rights, you can also install BusinessObjects from your
browser to view, create and edit documents.
What can you do with InfoView?

20 InfoView User’s Guide
User rights
New look InfoView
The actions you can perform on a particular document or document type depend
on your user rights.
If you can see a document area in your interface, such as the Corporate
Documents area in the Home page, you have the rights to view these documents.
You may also have editing rights.
If you have a question regarding your user rights, ask your system administrator
or Business Objects supervisor.
If your InfoView pages do not look like the images in this guide, your system
administrator may have chosen a different skin, or customized the interface for
use in your company or organization. For more information, refer to “Selecting
your default skin” on page 70.
Introduction to InfoView

How are documents created?
WebIntelligence and BusinessObjects users use the same BusinessObjects
technology to query a database or data warehouse for the purpose of generating
documents.
The two basic mechanisms in this technology are:
• Universes used to build queries.
• Queries used to retrieve information from data storage.
Universes
A universe is the business-intelligent semantic layer that isolates users from the
technical aspects of the database.
Universes are made up of objects and classes:
• Objects are elements that map to a set of data from a relational database in
terms that pertain to your business situation.
For example, the objects in a human resources universe might include
Names, Addresses and Salaries.
• Classes are logical groupings of objects.
For example, the objects listed above might belong to a class called
Employees.
In your company or organization, universes are created by a universe designer,
using BusinessObjects Designer. WebIntelligence and BusinessObjects users
then use these universes to access the data they need from the database
through an intuitive, user-friendly interface.
InfoView User’s Guide 21
Queries
If you have the right to create documents, you can build queries by adding objects
from a universe to a document editor and organizing the objects so that the data
is clearly displayed. When the users run the query, the data mapped to the
objects in the query is retrieved from the database. A document is then generated
using the data and formatting defined by the designer.
For information, refer to “Creating and Editing Documents” on page 113.
How are documents created?

22 InfoView User’s Guide
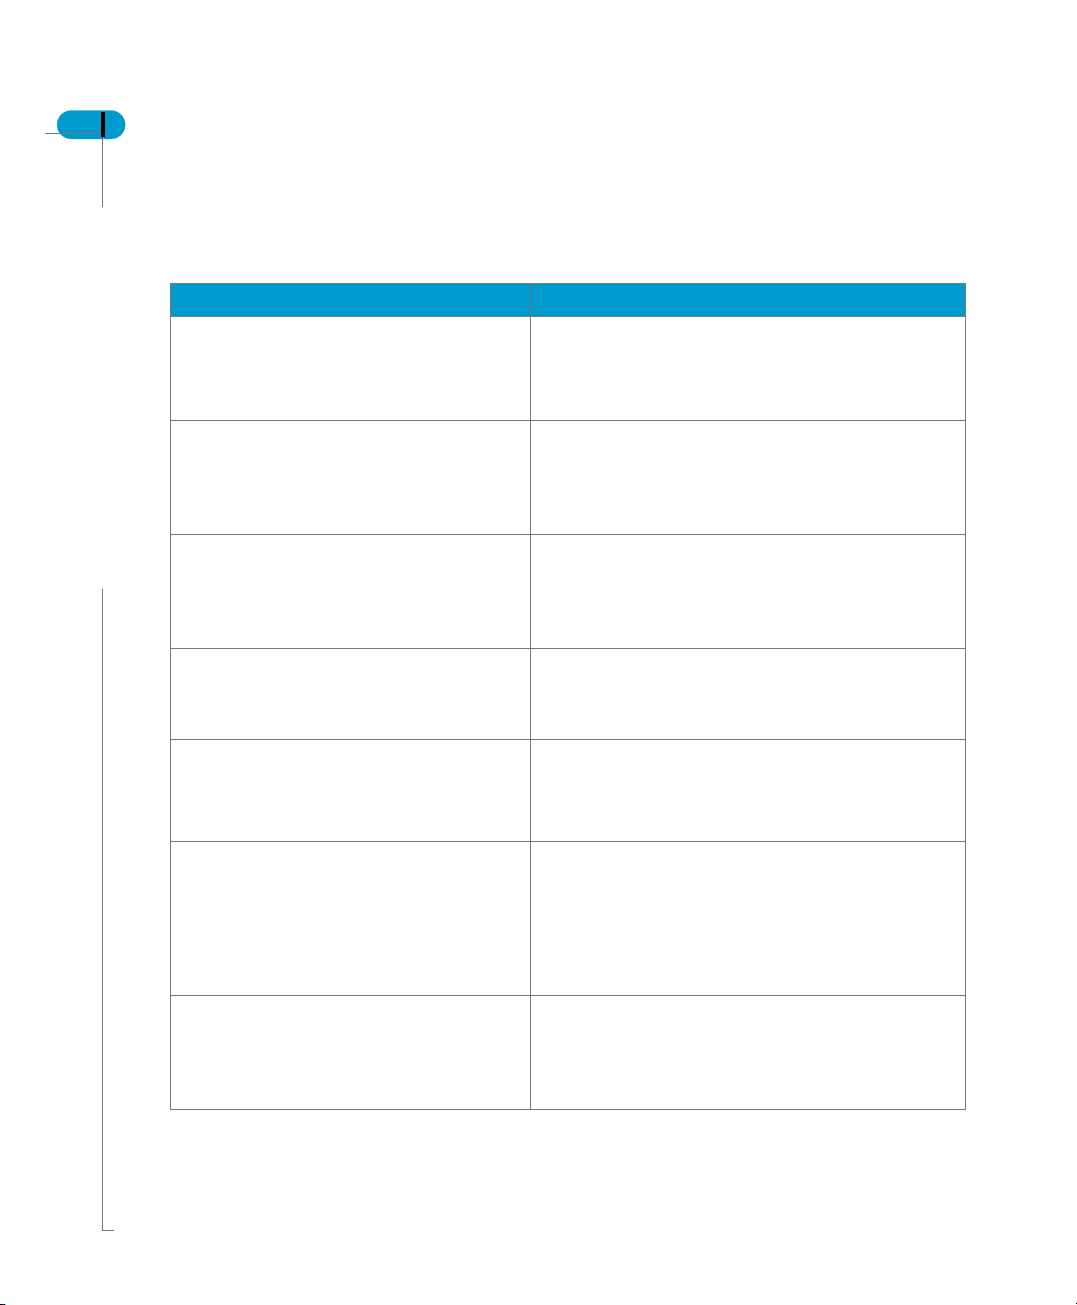
What is new in InfoView?
If you have used a previous version of InfoView, the table below gives you an
overview of the changes made in this release.
What has changed What it is now
New interface InfoView has a new streamlined web interface
that provides easy navigation and quick access
to WebIntelligence, BusinessObjects, and other
documents. The redesigned InfoView Home
page provides an overview of all the documents
to which you have access in the corporate
repository and in your personal document
storage areas. From the Home page, you can
also add documents to InfoView from your own
computer, or launch WebIntelligence or
BusinessObjects to create new reports.
Personalization using
skins
My InfoView
personalization using inline editing
With this release, InfoView comes with a set of
skins to let you customize InfoView’s look and
feel without any programming. Skins are sets of
images and styles that alter the interface’s
colors, fonts, graphics, icons, and toolbars. You
can use any of the sample skins provided by
Business Objects simply by choosing one in the
Options page. A company administrator can go
one step further by creating a custom company
skin to make InfoView adhere to a company’s
corporate standards. For more information, refer
to “Selecting your default skin” on page 70.
You can now move and delete portlets directly in
My InfoView instead of having to go through
wizards. It’s faster and more straightforward to
use. For more information, refer to “Working with
portlets” on page 85.
Introduction to InfoView

InfoView User’s Guide 23
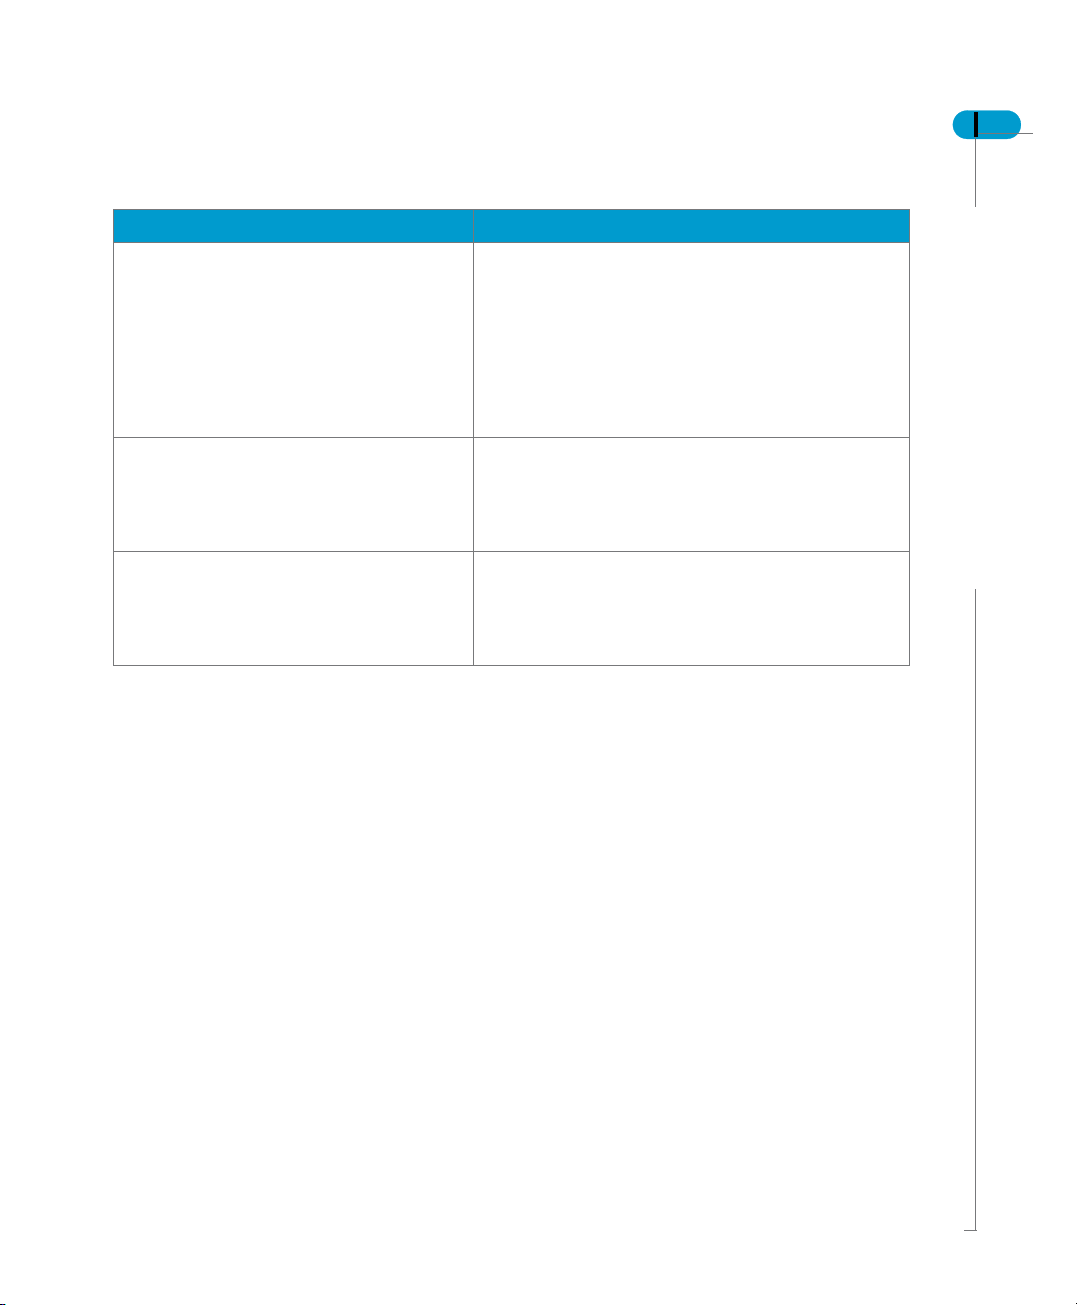
What has changed What it is now
Streamlined document
actions
Working with documents has never been easier.
Document exchange has been streamlined into
two actions, Save and Send.
Send still transmits documents to one or more
other InfoView users.
Publish, Save and Download have been grouped
together as Save, meaning that you now
respectively:
• Save a document to the Corporate
Documents page, a storage area.
• Save a document to your Personal
Documents page.
• Save a document to the file system on your
computer, outside of InfoView.
This option allows you to save the document in
formats such as Microsoft
® Excel.
For more information, refer to “Saving
documents” on page 155.
Interactive report viewing InfoView now provides for the interactive viewing
of WebIntelligence reports. Users with no
knowledge of how to build or modify a report can
now change the structure and properties of a
report without having to use a document editor.
When this feature is enabled, you can filter and
sort the data in a report. You enable and disable
this feature in the InfoView Options page.
The availability of this feature depends on how
InfoView was installed and what user rights you
have. Ask your administrator if you have the
rights to this feature.
What is new in InfoView?

24 InfoView User’s Guide
What has changed What it is now
Corporate hierarchical
categories
In previous versions of InfoView, users could
associate documents in the Corporate
Documents page with one or more categories.
With this version, you can create subcategories
within categories, and so, create hierarchical
categories. You can then associate a document
with one or more of these categories or
subcategories. In InfoView, these categories can
be displayed either as links at the top of the page,
or as a standard, collapsible tree in a
navigational panel to the left of the page. To see
the documents associated with a given category,
simply click the category’s name. If you want, you
can save documents to one or more categories
simultaneously.
For more information, refer to “Introducing
hierarchical categories” on page 143.
Introduction to InfoView

Getting Up and Running
chapter

26 InfoView User’s Guide
Overview
This chapter explains how to:
• check your browser settings
• log into InfoView
• log out of InfoView
• get help
Getting Up and Running

Checking your browser configuration
For InfoView to run correctly, you need to make sure your browser configuration
is adapted to InfoView use.
Before you log into InfoView for the first time you should run an automatic check
for any potential configuration problems. To do this, ensure that your browser is:
• enabled for JavaScript
• enabled for cookies
• supported by Business Objects
The following sections explain how to do this.
Is your browser JavaScript-enabled?
If your browser is not JavaScript-enabled, it cannot run the Check Browser
feature, and an error message appears. Click Online Help for instructions on
where to find a list of supported browsers.
The Browser Check cannot work without JavaScript. You must Java enable your
browser before checking your browser settings.
To enable an Internet Explorer browser for JavaScript:
1. From the Tools menu, select Internet Options.
The Internet Options dialog box appears.
2. Click the Security tab.
3. Click Internet.
4. Click Custom Level.
The Security Settings dialog box appears.
InfoView User’s Guide 27
Checking your browser configuration

28 InfoView User’s Guide
Enabling your browser for cookies
5. Scroll down to the Microsoft VM - Java permissions heading and select the
safety level you want.
If Java permissions are not available as an option, you must install a more
recent version of the browser.
6. Click OK.
A confirmation window appears.
7. Click Yes.
Your browser is now JavaScript-enabled.
8. Click OK to save your settings and close the Internet Options dialog box.
To cookies enable a Microsoft Internet Explorer 5.5 browser:
1. On the browser window click Tools.
An Internet Options dialogue box appears.
2. Select the Security tab.
3. Click Custom Level.
A security Settings dialog box appears.
4. Scroll down to the section called Cookies.
5. Select one of the following options:
- Prompt—if you want a message to appear before each time it writes
something to your environment.
- Select Enable—if you do not want to see a message appear each time
cookies are about to be downloaded.
6. Go back to the Browser Check page and run the browser check again.
Checking your browser configuration
The Browser Check option verifies whether your browser is correctly configured
for InfoView. It does not indicate whether or not the browser you are using is one
that is supported by Business Objects.
You must compare your configuration with the list of supported browsers that we
provide.
Getting Up and Running
InfoView User’s Guide 29
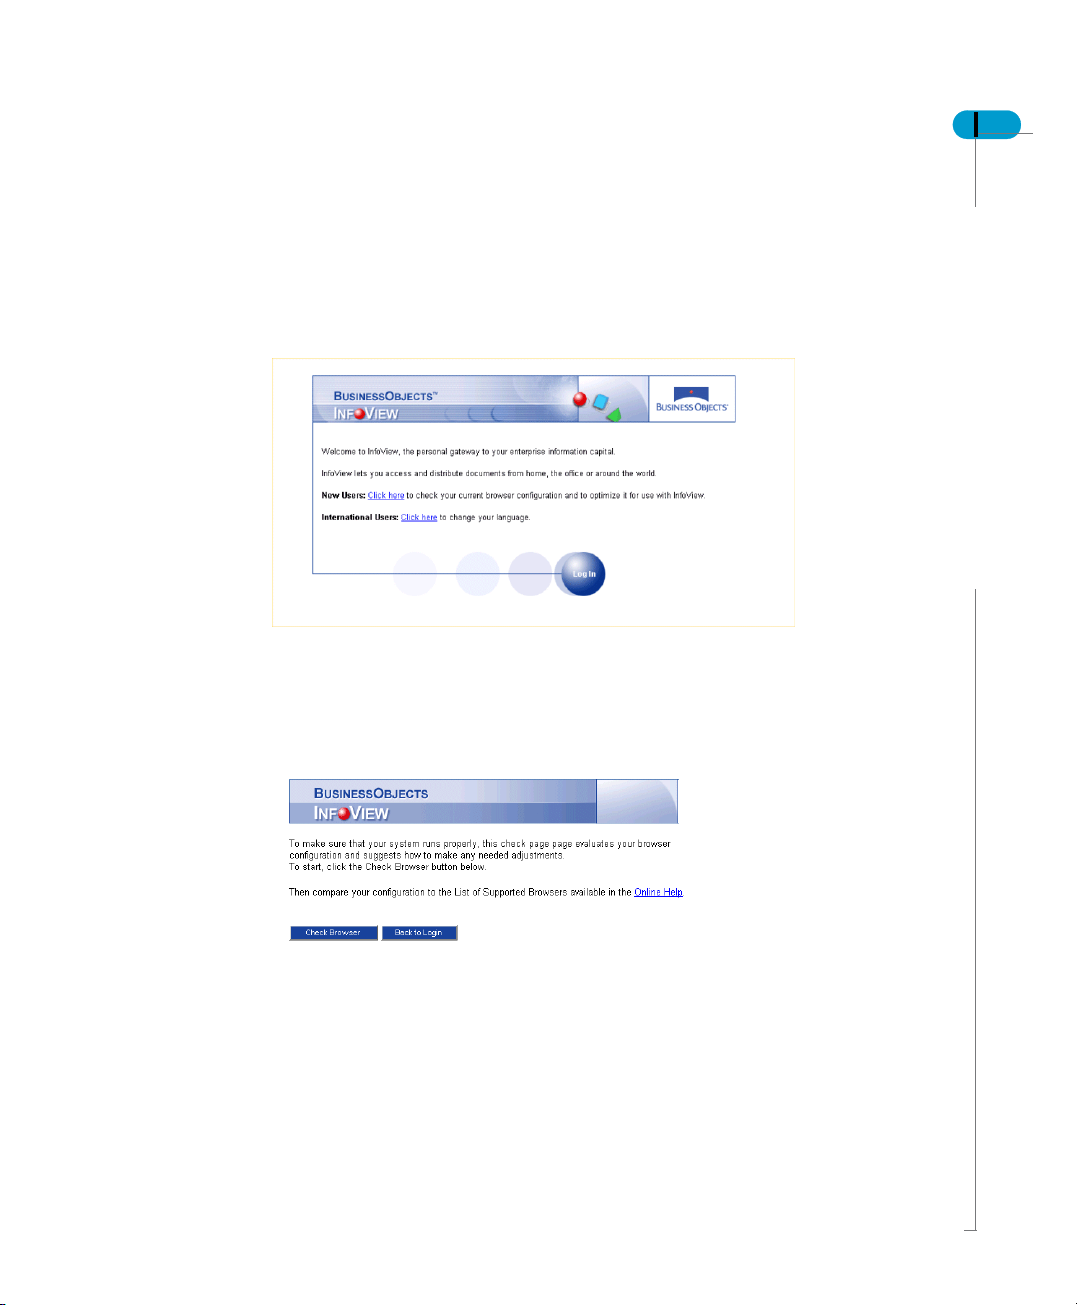
To check your browser settings:
1. Start your Internet browser.
2. Point your browser to InfoView using either the bookmark or the URL your
InfoView system administrator has given you.
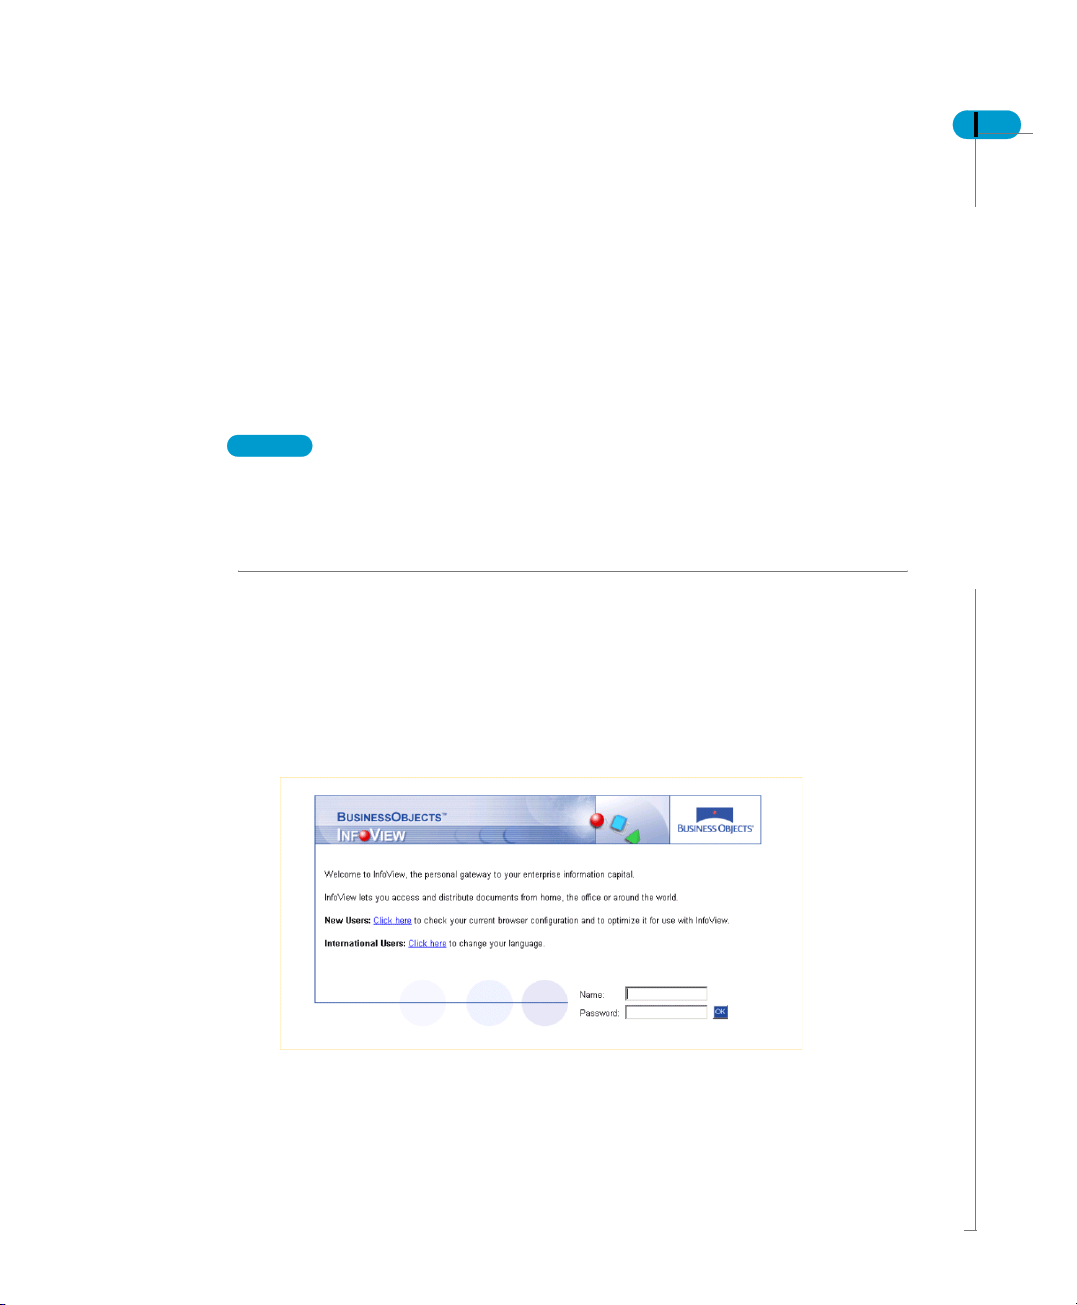
The InfoView login page appears.
If your login page does not look like this, your system administrator may have
customized it for use in your company or organization.
3. Click Click here to check your browser’s configuration.
The Browser Check page opens.
Checking your browser configuration
30 InfoView User’s Guide
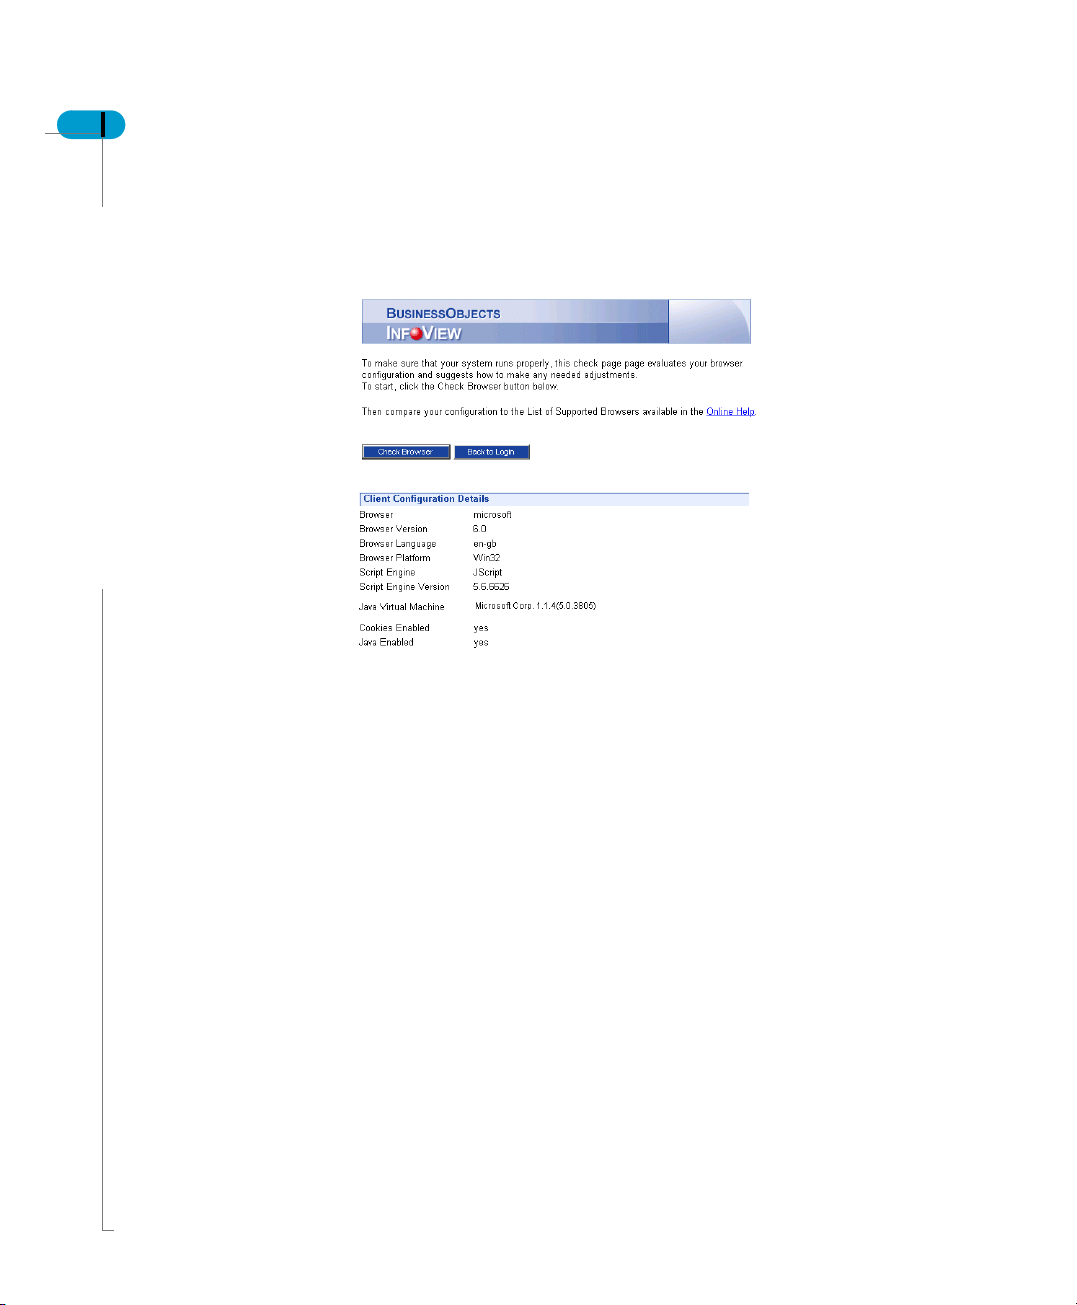
4. Click Check Browser.
After a few seconds, InfoView displays information about the browser you are
currently using in the Client Configuration Details section of the page.
However, you are not told if this browser is supported. For information on
supported browsers, refer to the Online Help.
5. Click Back to Login to return to the InfoView login page.
Getting Up and Running
Logging into InfoView
To log into InfoView, you need the following from your InfoView system
administrator:
• Your user name and password
If you are already a BusinessObjects user, you can use your BusinessObjects
user ID and password to log into InfoView
• The URL or a bookmark which allows you to access InfoView
NOTE
Depending on how your system administrator has set up your account, the pages
giving you access to InfoView may not resemble the pages displayed below. You
may not even be prompted for a user name and password. If you need help
launching InfoView, contact your system administrator.
To log in:
1. Start your Internet browser.
2. Point your browser to InfoView using either the bookmark or the URL your
system administrator has given you.
The InfoView login page opens.
3. Click Log In.
The Name and Password fields appear.
InfoView User’s Guide 31
Logging into InfoView

32 InfoView User’s Guide
Using the multilingual feature
4. Enter your user name and password.
5. Click OK.
Your InfoView start page appears and you can begin working in InfoView.
NOTE
To work in multiple windows at the same time, log into InfoView again in a
separate browser window.
InfoView now lets you log into InfoView using your preferred language of choice.
International users wishing to use a language other than the default language
(browser or cluster locale) may now do so at the login level.
To log in to InfoView using your language of choice:
1. Start your Internet browser.
2. Point your browser to InfoView using either the bookmark or the URL your
Getting Up and Running
system administrator has given you.
The InfoView login page opens.

InfoView User’s Guide 33
3. In the International Users section, click the link.
The following page appears.
4. Select the language from the list and click on it.
5. InfoView automatically returns to the login page displayed in the desired
language.
Only languages that are currently supported localized languages and are
installed are available. To return to the original user locale language, select
Automatic from the list of languages.
NOTE
The user preferred language can still be set in the Options page. For more
information on this feature, please see The Options page on page 42.
Logging into InfoView

34 InfoView User’s Guide
Logging out of InfoView
You log out of InfoView by clicking the Logout button in the InfoView toolbar.
If you leave InfoView inactive longer than the maximum time period defined by
your system administrator, your session is closed automatically, and you must
log in again.
NOTE
When you have finished using InfoView, log out of the product instead of just
closing your browser. This enables you to save any settings you may have
changed, and it helps InfoView system administrators keep track of which users
are logged into the system and active at any given time. This allows them to
configure the system to handle transaction loads more efficiently.
To log out:
1. Click the Logout button in the InfoView toolbar.
A confirmation window appears.
Getting Up and Running

InfoView User’s Guide 35
2. Click Logout.
If you have made any changes to your user options, and have not saved
them, a Keep my settings option appears.
3. By default, your settings are retained. To revert to your previous settings,
select No.
4. Click Logout.
The Login page appears. You have logged out.
If you decide not to log out, click Cancel. You are returned to the last page
you visited, but any changes you made to your settings are not saved.
Logging out of InfoView

36 InfoView User’s Guide
Getting help
The context-sensitive InfoView online help provides you with a detailed
description of both InfoView and the concepts behind it, as well as complete
instructions for using the product, every step of the way.
To access the InfoView and WebIntelligence online help:
• From the InfoView Login page, click the Online Help link.
• From the Home page, click the Online Help link.
• From anywhere within the product, click the Help icon on the InfoView toolbar.
The InfoView and WebIntelligence Online Help page is displayed.
The InfoView Help window has two frames, making navigation easy no matter
where you are.
The navigation frame is resizable, and consists of:
• an expandable and collapsible table of contents
• a multi-level index with keyword search functionality
• a search facility
When you launch the help, it displays the content of individual help topics that
relate to the actions you are performing. Where relevant, it also contains links to
related help topics, to online guides in PDF format, or to multimedia
demonstrations.
Getting Up and Running

InfoView Page Layout
chapter
38 InfoView User’s Guide
Overview
This chapter provides an introduction to the new InfoView page layout. It gives a
brief description of each area of InfoView, with links to other chapters where the
features are explained in more detail and instructions given on how to use them.
InfoView pages have two parts:
• The InfoView toolbar with links to other pages and the online help.
• The page contents with links to document lists, and the navigation bar with
links to the other principle pages in InfoView:
The page contents
The InfoView toolbar
InfoView Page Layout
This image shows the standard InfoView page containing a toolbar and page contents.

The InfoView toolbar
The InfoView toolbar appears throughout the product. It does not change as you
navigate through different pages.
It includes links to the following pages:
• Home
• My InfoView
• Options
• Help
• Logout
This image shows the InfoView toolbar.
The rest of this chapter provides a brief introduction to each of these pages, and
explains where you can find more information.
The Home page
The Home page is the main page of InfoView. It gives you direct access,
depending on your rights, to:
• Corporate Documents
• Personal Documents
• New Documents
• Scheduled Documents
Unless your system administrator has created a default page, the Home page is
the first page to open when you log into InfoView. The Home page is your base
for viewing, managing, and distributing the documents in your corporate
database, including WebIntelligence and BusinessObjects documents.
InfoView User’s Guide 39
The InfoView toolbar

40 InfoView User’s Guide
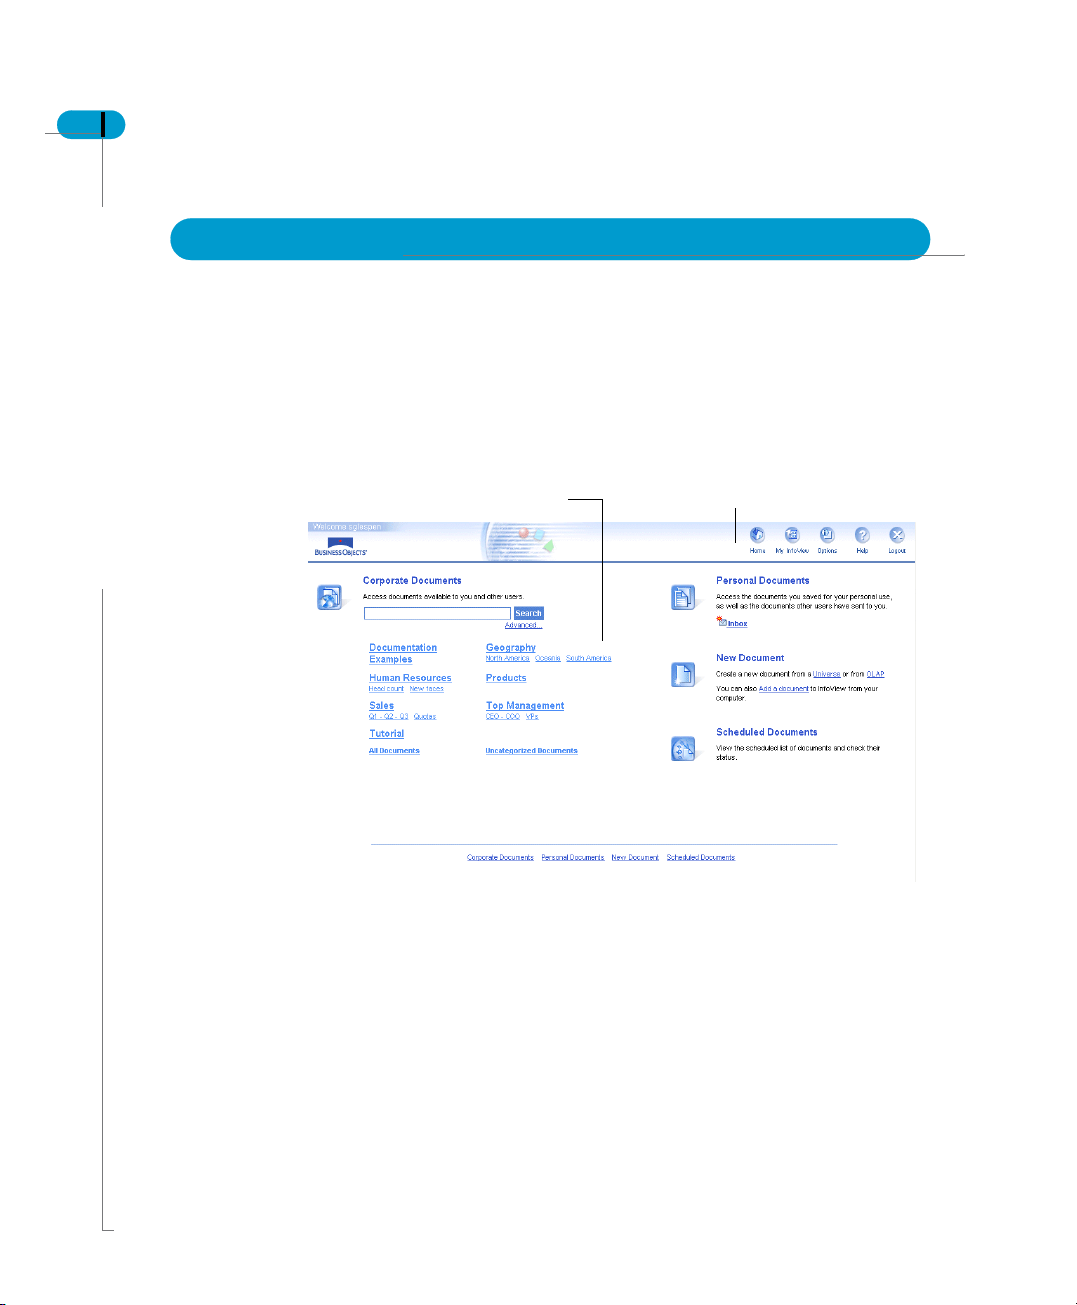
An example Home page is shown below:
This image shows an example of the Home page.
REMINDER
You only see the document areas you have rights to access and manage.
If you have a question regarding your user rights, ask your system administrator.
InfoView Page Layout
You can define a different start page by simply selecting the default page you
want from the list in the Options page:
This image shows the Options page.
For more information, refer to Selecting your default start page on page 69.

My InfoView
InfoView User’s Guide 41
My InfoView can display data from a variety of sources in a single web page. You
can set up InfoView to display the information most important to you by adding
portlets. A portlet is a part of a browser page; each one can display different
content. In this way, you can view information from different sources at the same
time in your browser window.
You can add as many portlets as you like to My InfoView.
The image below shows My InfoView set up with four portlets, with the left column
as medium size.
This image shows MyInfoView set up with four portlets, with the left column as medium size.
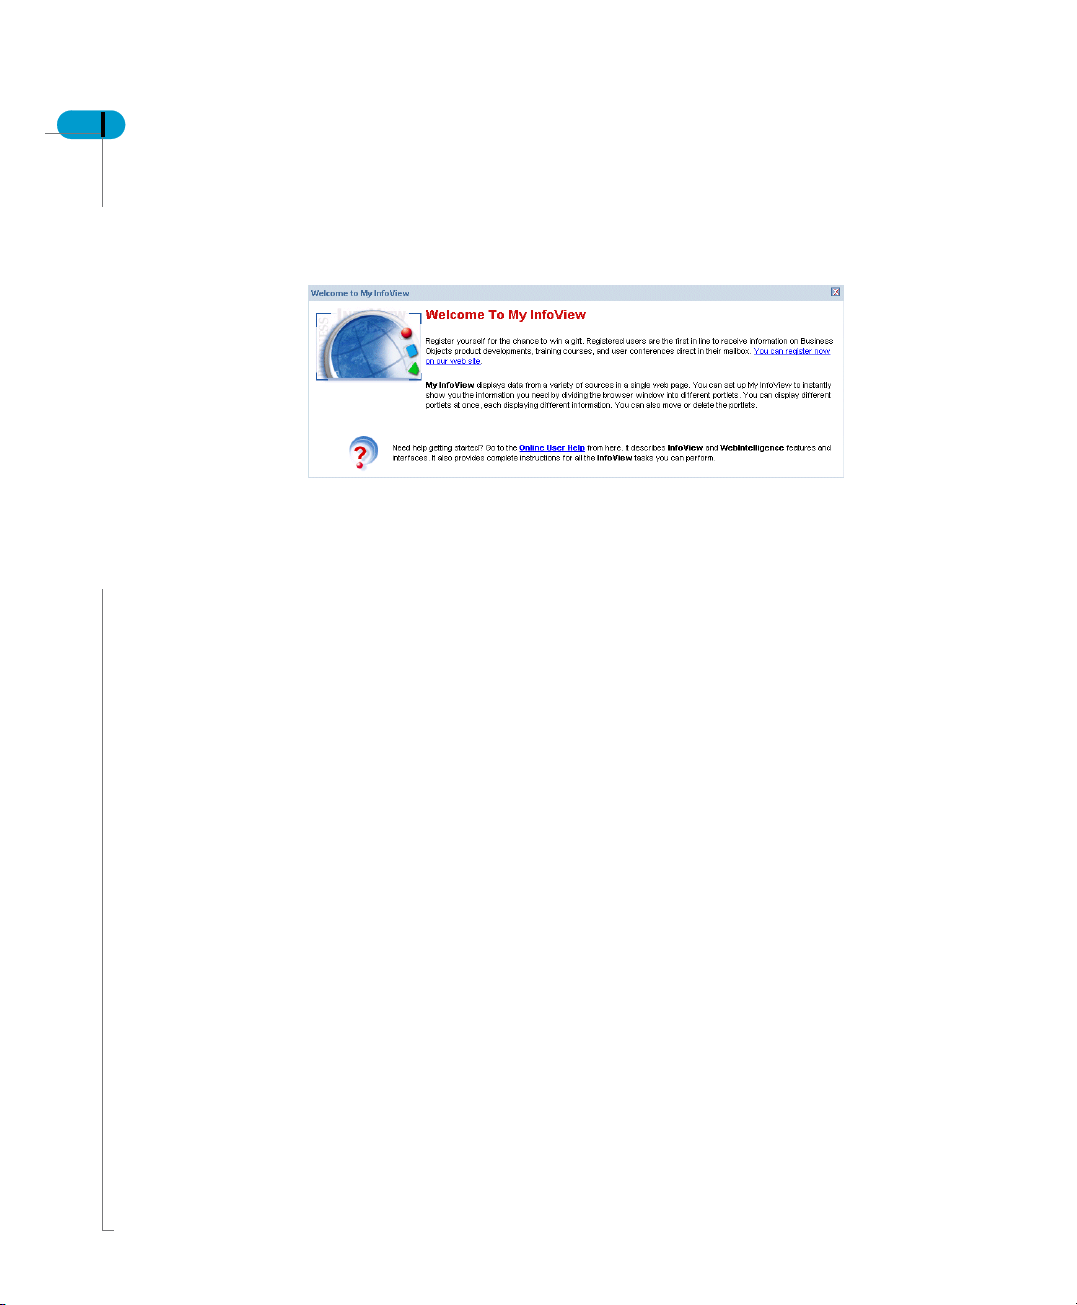
The default My InfoView page welcomes you to the product and gives you a quick
introduction to InfoView.
The InfoView toolbar
42 InfoView User’s Guide
The Options page
It also contains links to the online help, where you are introduced to the basic
concepts of InfoView:
For more information about My InfoView and how to customize it, refer to Adding
documents to My InfoView on page 92.
The Options page is where you define all your InfoView settings. The available
tabs are:
• Display
• List
• View
• Create/Edit
• Password
• About
InfoView Page Layout

Display
The Display tab options enable you to:
• Select your default start page.
• Select the default skin you want to use.
• Select the language you want to use.
• Specify the width of the left column in My InfoView.
• Add a portlet to My InfoView.
InfoView User’s Guide 43
This image shows the Display tab in the Options page.
For more information, refer to Customizing InfoView on page 67.
The InfoView toolbar

44 InfoView User’s Guide
List
The List tab options enable you to:
• Specify how you want to refresh your document lists.
• Choose a default category for your Corporate Documents and Personal
Documents lists.
InfoView Page Layout
This image shows the List tab in the Options page.
For more information, refer to Refreshing documents on page 108.

InfoView User’s Guide 45
View
The View tab options enable you to select the format in which you want to view
your WebIntelligence and BusinessObjects documents:
• For WebIntelligence, you can also choose your drill options.
• For BusinessObjects, you can also choose to download BusinessObjects if it
is not already installed on your local machine.
This image shows the View tab in the Options page.
For more information, refer to Viewing and Refreshing Documents on page 95.
The InfoView toolbar
46 InfoView User’s Guide
Create/Edit
The Create/Edit tab options are displayed if you have the rights to create and edit
documents. This tab enables you to:
• Select the default type of document you want to create.
• Select the report panel to use to create and edit your WebIntelligence
documents.
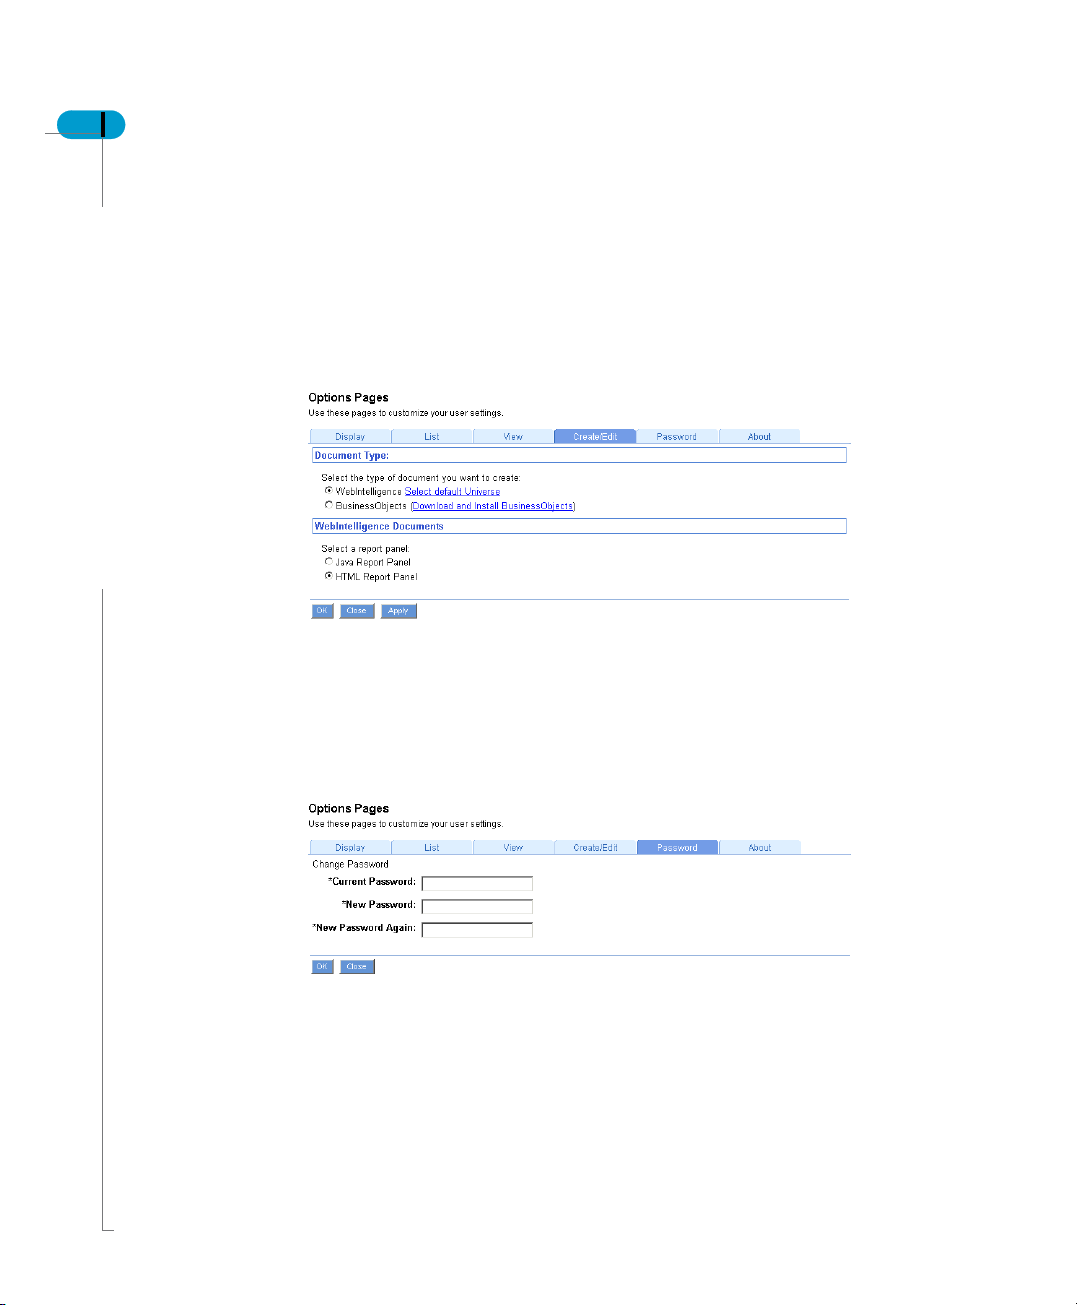
This image shows the Create/Edit tab in the Options page.
For more information, refer to Creating and Editing Documents on page 113.
InfoView Page Layout
Password
The Password tab is displayed if you have the rights to change your password.
This image shows the Password tab in the Options page.
For more information, refer to Changing your password on page 82.
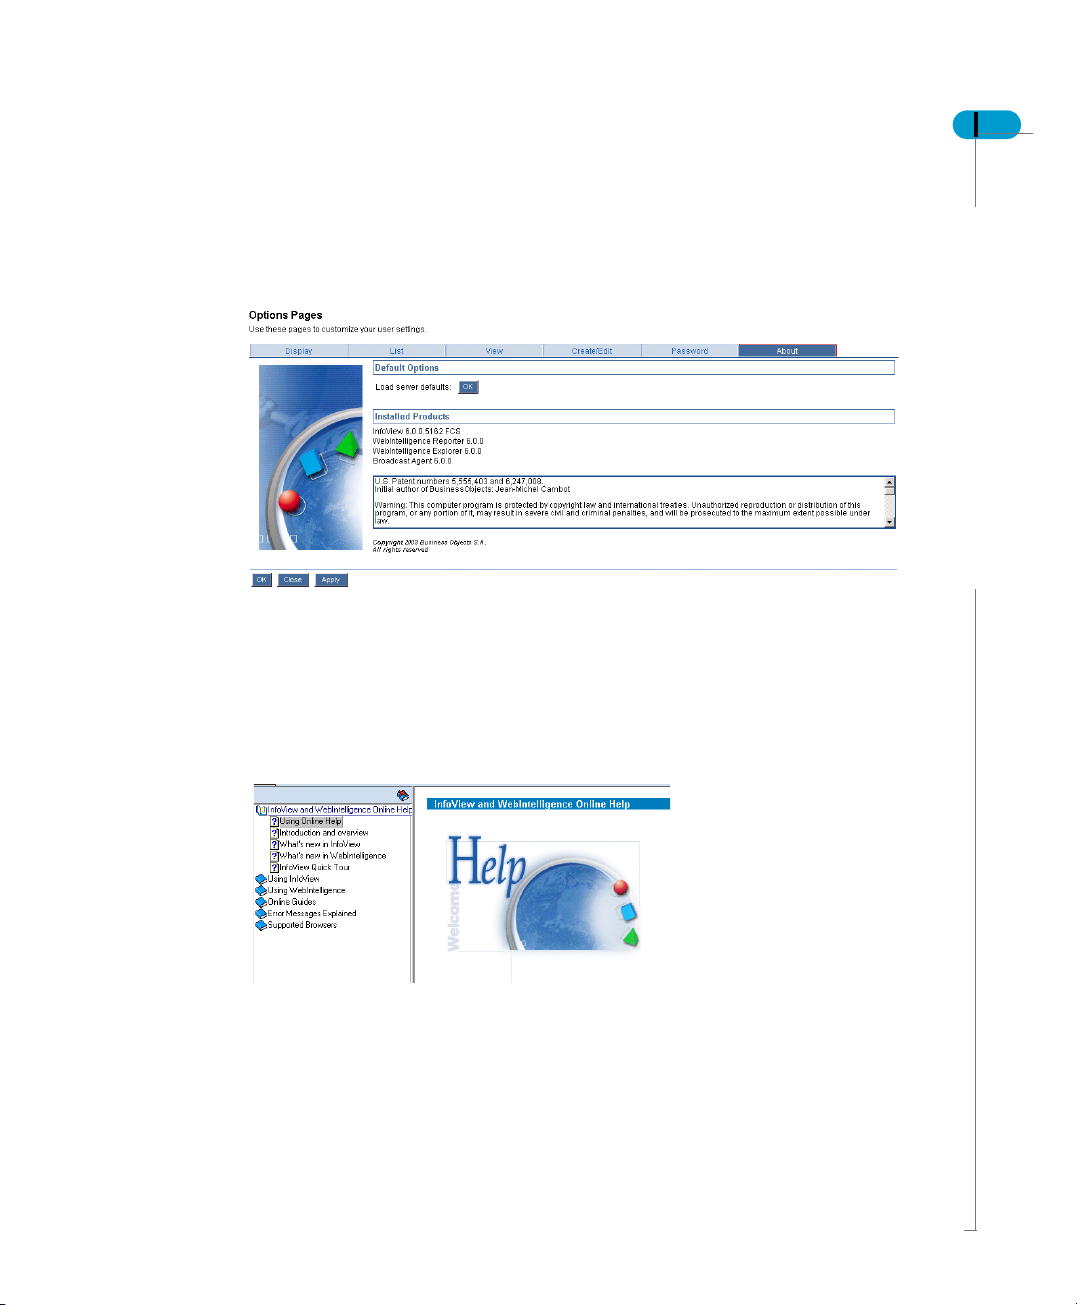
The About tab shows you the products you have installed, and their version
numbers.
This image shows the About tab in the Options page.
The Help pages
From anywhere within InfoView, click the Help icon on the InfoView toolbar and
the context-sensitive InfoView and WebIntelligence Online Help page is
displayed.
InfoView User’s Guide 47
About
This image shows the InfoView online help.
For more information, refer to Getting help on page 36.
The InfoView toolbar

48 InfoView User’s Guide
The Logout icon
You can also log out of InfoView anytime you like by clicking the Logout icon in
the InfoView toolbar.
For more information, refer to Logging out of InfoView on page 34.
InfoView Page Layout
The page contents
The page contents occupy the largest frame in the browser window. The contents
change as you navigate from page to page.
The Home page is the main page of your portal and gives you direct access to
the main areas of InfoView. The following section describes the contents of the
Home page.
Corporate Documents
The Corporate Documents page is a catalog of all the documents to which you
are allowed access in the corporate repository, the centralized BusinessObjects
storage and distribution mechanism that manages universes, user information,
and document exchange. As long as you have the right to view a single corporate
document, InfoView contains a Corporate Documents page.
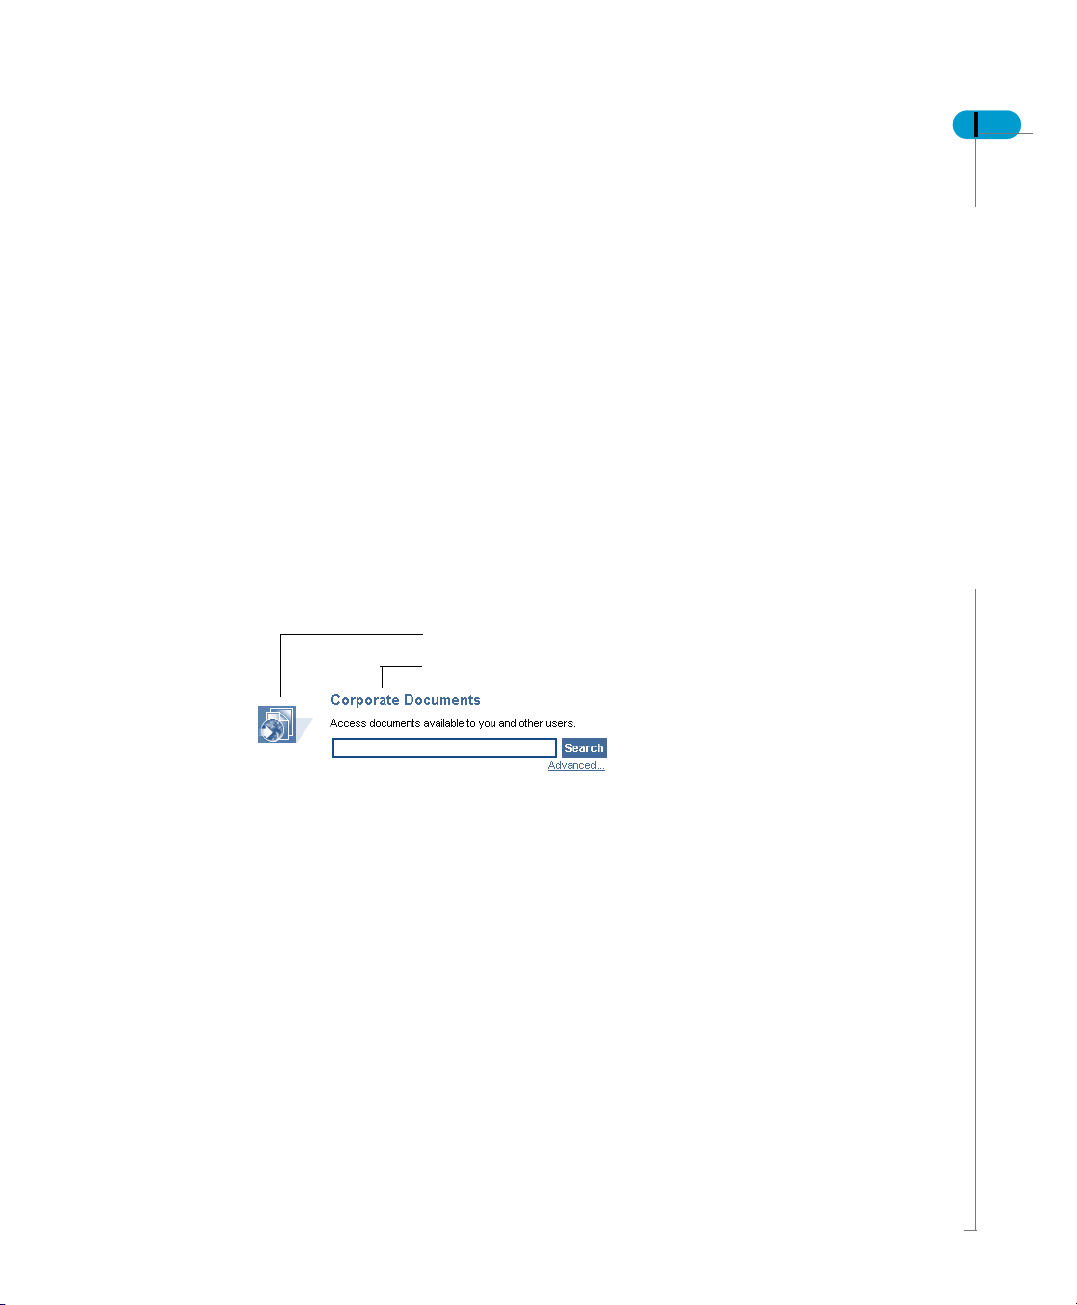
To access the Corporate Documents page, click either the Corporate Documents
title or its icon.
InfoView User’s Guide 49
Corporate Documents icon
Corporate Documents title
This image shows the Corporate Documents title and icon.
For more information, refer to Accessing documents on page 59 and Document
types on page 125.
The page contents

50 InfoView User’s Guide
Search
InfoView manages a large number of documents. To make it easy to find the
document you need, you can search for documents by name.
For more information, refer to Searching for documents on page 63.
Advanced Search
The advanced search allows you to search using the document name, sender/
publisher name, keywords, date of last modification, and document location
(Corporate Documents, Personal Documents and your Inbox).
You can even combine two or more of these search criteria to fine-tune your
search and return a more accurate set of search results.
For more information, refer to Searching for documents on page 63.
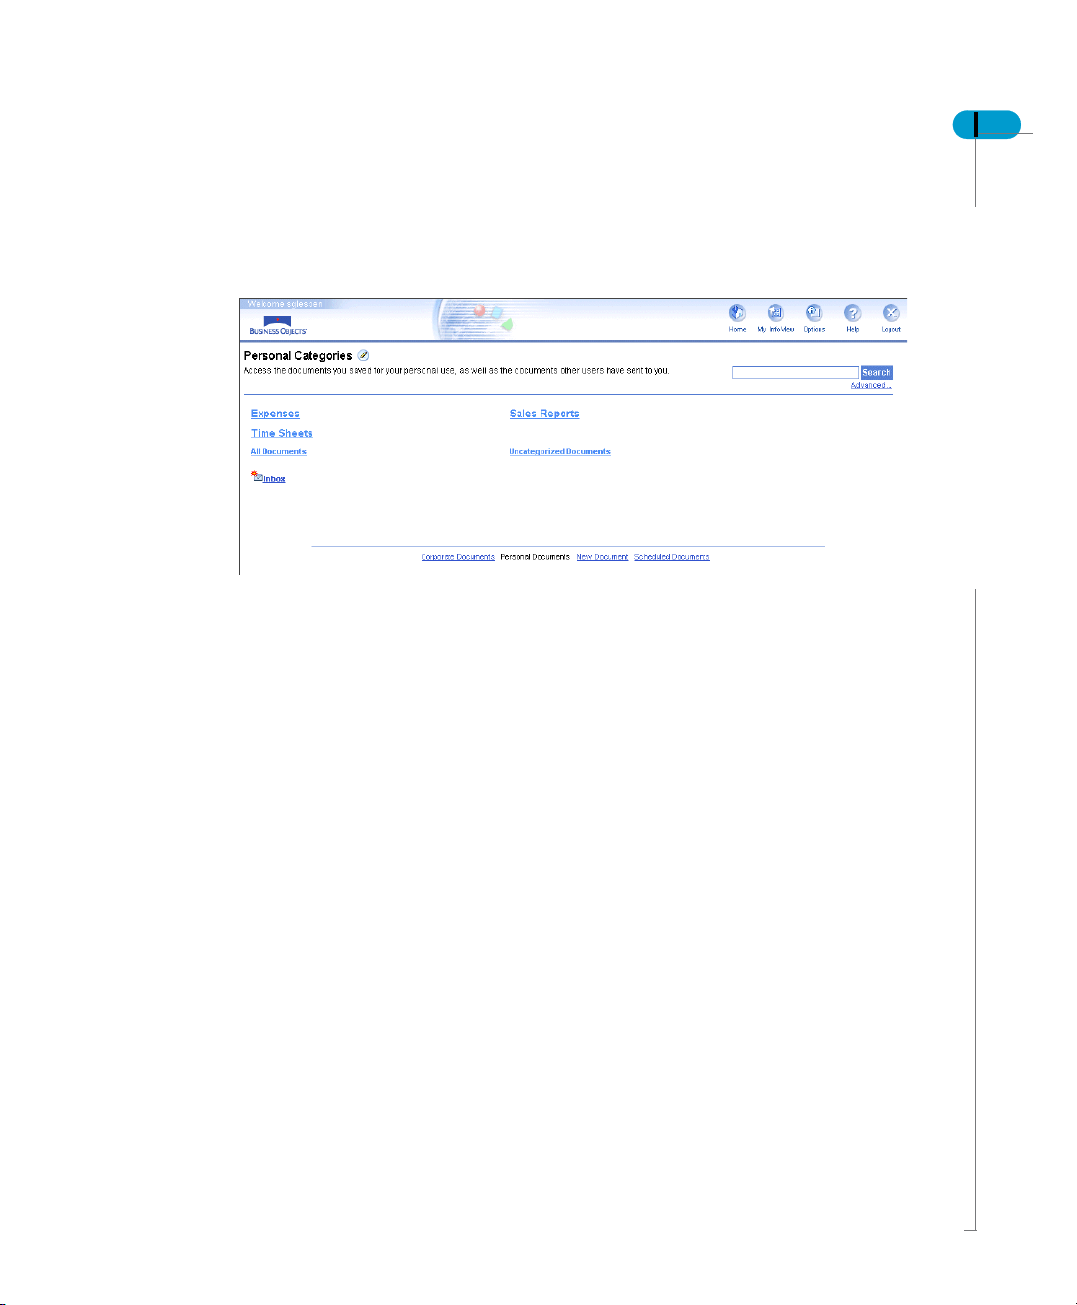
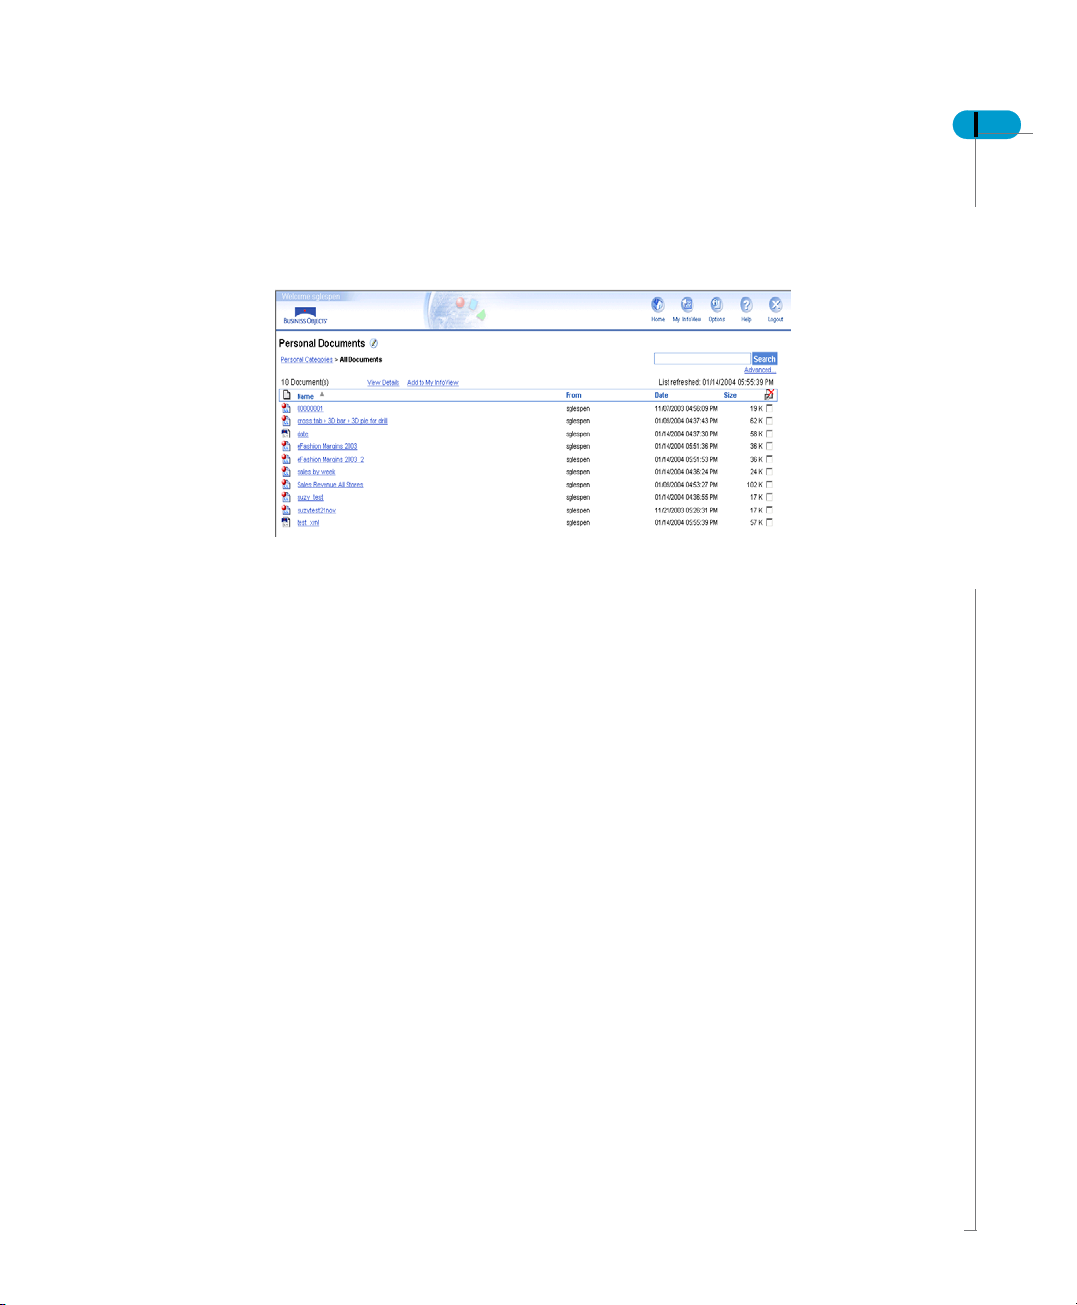
Personal Documents
The Personal Documents page lists the documents you have saved for your own
personal use.
To access the Personal Documents page, from the Home page, click either the
Personal Documents title or its icon:
Personal Documents icon
Personal Documents title
InfoView Page Layout
This image shows the Personal Documents title and icon.
For more information, refer to Accessing documents on page 59 and Document
types on page 125.
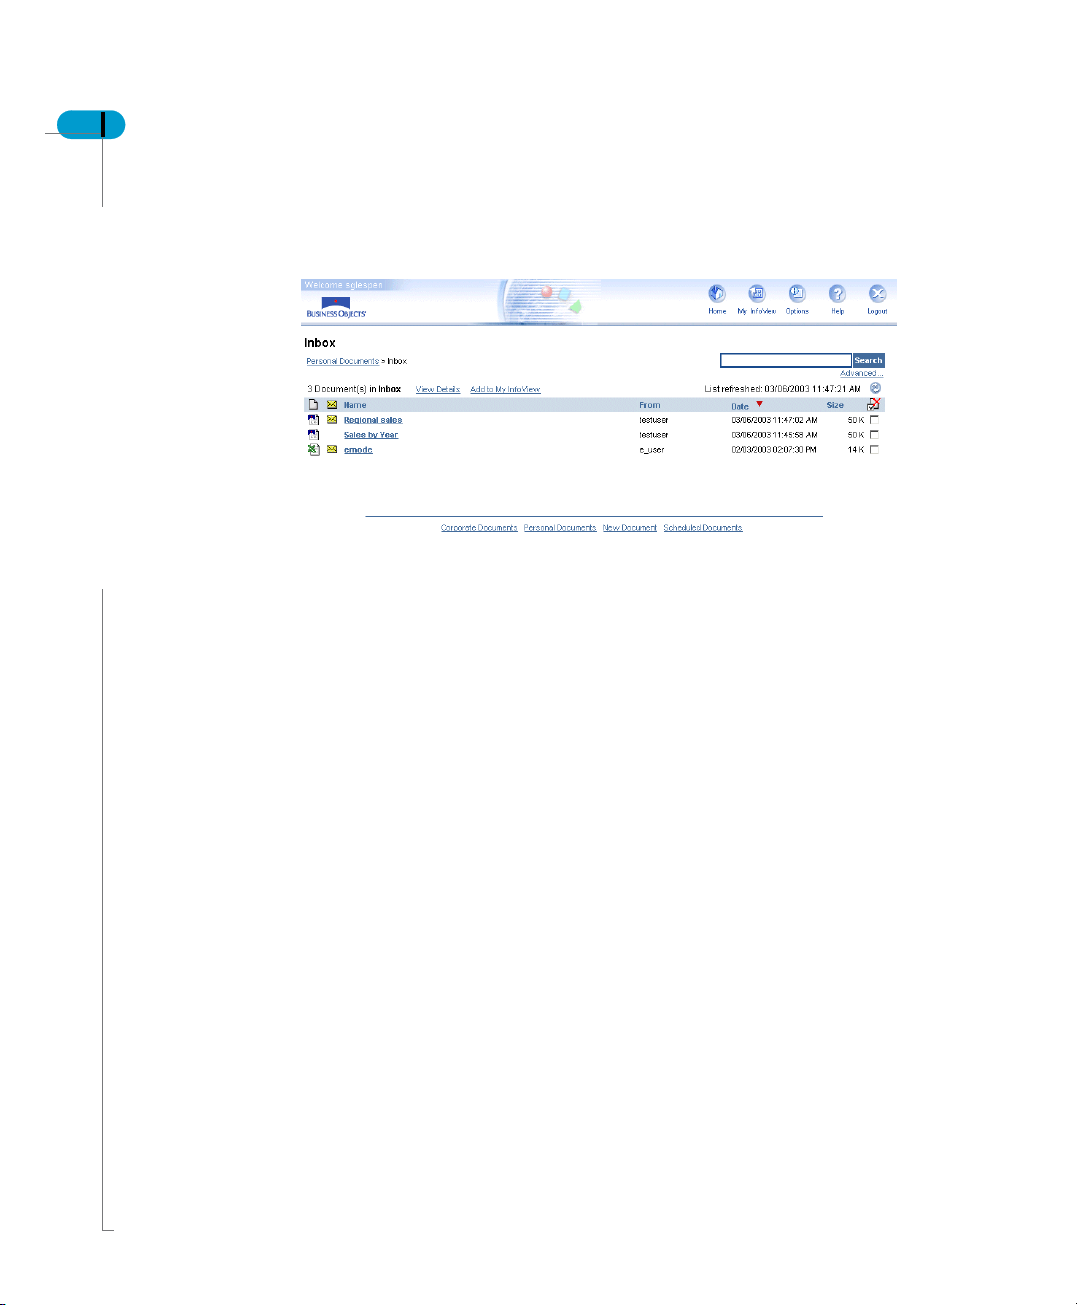
Inbox
The Inbox page contains the documents that other users have sent you. Unread
documents are marked with a closed envelope. Click the envelope or the
document name to open the document.
For more information, refer to Document types on page 125.

InfoView User’s Guide 51
New Document
The New Document option enables you to:
• create documents directly from a universe—for BusinessObjects and
WebIntelligence documents, or from an OLAP data source—for
WebIntelligence OLAP documents.
For more information, refer to Creating and Editing Documents on page 113.
• Add documents other than WebIntelligence or BusinessObjects documents to
your portal from your computer.
For more information, refer to Adding a document to InfoView on page 127.
To access these options, click the appropriate link in the New Documents
section:
This image shows the New Documents section and its available links.
Scheduled Documents
From the Scheduled Documents option, you can view the list of documents that
you have scheduled in Broadcast Agent, and check their status.
To access this list, click either the Scheduled Documents title or its icon:
Scheduled Documents icon
Scheduled Documents title
This image shows the Scheduled Documents title and icon.
For more information, refer to Scheduling documents on page 167.
The page contents

52 InfoView User’s Guide
Navigation bar
The navigation bar at the bottom of the page allows quick and easy access to the
different areas of the Home page while you are navigating in InfoView:
This image shows the Navigation bar.
The navigation bar is available:
• in the Home Page
• when viewing document lists
• in the Corporate Documents and Personal Documents pages
• in data source lists
• in the Scheduled Documents page
The navigation bar is not available:
• when using the Document Viewer
• in My InfoView
• when saving documents
• when sending documents
• in the Options pages
• when using the search page
• when adding documents
• when logging out
InfoView Page Layout
NOTE
If the page contains too much data, you may need to scroll down to see the
navigation bar.

Getting to the Documents You Need
chapter

54 InfoView User’s Guide
Overview
This chapter explains how you can quickly navigate in InfoView to find the
documents you need to work with. It explains how to access other parts of
InfoView from the Home page, describes the different InfoView document types,
and introduces the concept of categories.
By default, the Home page is the first page that opens when you open InfoView.
However, you can change your default page to one of your choice, as explained
in Chapter 5 Customizing InfoView.
The Home page gives you direct access to the main areas of the InfoView portal.
It provides links to the different document lists. These are:
• Corporate Documents
Takes you to a list of documents in the Corporate Documents page.
• Personal Documents
Takes you to a list of documents in your Personal Documents page.
• New Documents
Lets you create documents.
• Scheduled Documents
Shows documents that have been sent to Broadcast Agent.
To access one of these lists, click either the icon and title of the list you want.
Getting to the Documents You Need

Navigating in InfoView
You can access existing documents from document lists in the Corporate
Documents page and Personal Documents page. You can access your inbox
documents from the Personal Documents page. The documents in your inbox
are the documents that other users have sent you.
All users have the rights to access their own Personal, Corporate and Inbox
Document pages; this depends on whether you have been granted the rights by
your system administrator.
Document lists can include WebIntelligence and BusinessObjects documents, as
well as any other documents that have been saved to the system. You can
recognize each type of document by the icon preceding the document in the list.
You can sort the order in which document lists are displayed. To find out how to
do this, refer to Managing Documents on page 123.
Document lists display the following information:
• the document name and type
• the name of the document sender/publisher (for corporate documents)
• the date the document was last updated
• the file size
InfoView User’s Guide 55
Navigating in InfoView

56 InfoView User’s Guide
The Corporate Documents page
The Corporate Documents link takes you to the list of documents you are allowed
to access in the corporate repository.
All categories are shown, as well as:
• a link to a list of all documents in the corporate repository, regardless of the
categories to which they have been assigned
• a link to the list of documents that have not been categorized
If you have the rights you can rename, add, edit and delete documents in this
category list. For more information, refer to The Corporate Documents page on
page 56.
You can search for documents in your Corporate Documents area. Refer to
Searching for documents on page 63 for more information.
Getting to the Documents You Need
Your Personal Documents page
The Personal Documents link takes you to the lists of documents you have saved
for your personal use.
These can be documents you have created, corporate documents of which you
have saved a personal copy, or documents sent to you by other users that you
have saved.
As with the Corporate Documents page, this page displays all the categories you
have created, and a link to the list of documents that you have not categorized.
From here you can view:
• individual categories that you have created
• all the documents in your personal document list, regardless of the categories
to which you have assigned them
• the documents in your inbox
InfoView User’s Guide 57
Navigating in InfoView
58 InfoView User’s Guide
Inbox documents
To access the list of documents in your inbox, click the Inbox link.
Unread documents are indicated by a closed envelope. To open a document,
click the document name.
Getting to the Documents You Need

Accessing documents
This section describes how you access documents from:
• the Corporate Documents page
• your Personal Documents page
• your inbox
For information on viewing scheduled documents, refer to Scheduling documents
on page 167.
Accessing documents from the Corporate Documents page
Corporate documents are stored in InfoView and are accessible to groups of
users across your enterprise.
NOTE
Before you select a document, check that your viewing options are set to the
format you want. For more information, refer to Specifying your document
viewing format on page 76.
To open a document from Corporate Documents:
1. From the Home page, click Corporate Documents.
The InfoView Corporate Documents page appears.
2. The next step depends on whether you want to select a document from the
list of documents in Corporate Documents, or whether you want to search for
the document using a particular word:
InfoView User’s Guide 59
If you want to... then...
select a document from
the list of documents in
Corporate Documents,
search for a document in
Corporate Documents,
click the name of the category in which the
document is stored, or All Documents.
type the name of the document, or part of the name,
in the Search box, then click Search.
For information about advanced search options,
refer to Searching for documents on page 63.
Accessing documents

60 InfoView User’s Guide
If you clicked a category name, the documents in that category are listed.
For each document, the list displays:
- the document title
- the name of the document’s sender/publisher
- the date on which the document was created
- the document size
3. Click the title of the document you want to view.
The document either opens directly or, if the document contains prompts, you
are prompted to enter values before you can view the contents.
For information on prompts and information on filling in prompt values, refer
to Prompts on page 110.
Accessing documents from your Personal Documents page
Your Personal Documents page is your personal storage space in InfoView. Only
you can access documents stored here. You can access documents in two
places on your Personal Documents page:
• Personal Documents—your personal file storage space.
• Inbox—the documents other users have sent you.
The following section tells you how to access both.
Opening a document in your Personal Documents page
To open a document in your Personal Documents page:
1. From the Home page, click Personal Documents.
Your InfoView Personal Documents page appears.
Getting to the Documents You Need
InfoView User’s Guide 61
2. Click the name of the category in which the document is stored, or All
Documents.
Your personal documents are listed.
3. Click the title of the document you want to view.
The document either opens directly or, if the document contains prompts, you
are prompted to enter values before you can view the contents.
For information about filling in prompt values before displaying documents,
refer to Viewing documents with prompts on page 110.
Accessing documents

62 InfoView User’s Guide
Accessing new documents in your inbox
To access the documents other users have sent you:
1. From the Home page, click Personal Documents.
Your InfoView Personal Documents page appears. If you have documents
waiting in your Inbox, the Inbox link changes to an open envelope with a
yellow arrow as shown here on the left.
2. Click the Inbox link:
If... then the link looks like this...
you have no new mail waiting,
you have new mail waiting,
The list of documents in your Inbox appears.
NOTE
The envelope does not change to indicate that you have received a new
document in your Inbox while you are logged in. To see any documents that you
receive while you are logged in, you must refresh the Inbox list.
InfoView does not automatically delete inbox documents once you have read
them. To prevent this page from becoming difficult to manage, save documents
you have read to your Personal Documents page, and delete the documents that
you do not need.
TIP
You can also access your inbox direct from the InfoView Home page by clicking the
Inbox link in the Personal Documents area of the page.
Getting to the Documents You Need

Searching for documents
InfoView manages a large number of documents. To make it easy to find the
information you need, you can search for documents in two ways:
• based on a document’s name
• using advanced search criteria, such as sender/publisher name, keywords,
and date of last modification
You cannot search more than one storage area at a time. That is, you cannot
search through the corporate documents in the repository and your personal
documents stored on the InfoView server at the same time.
Name-based search
If you know at least part of the document’s name, you can use the Search feature.
This feature allows you to search for document names.
To use the search:
1. Select the area in which you want to search; Corporate Documents, Personal
Documents, or Inbox.
2. The search option is displayed.
InfoView User’s Guide 63
3. Type the name, or part of the name of the document you want to search for.
4. Click Search.
InfoView returns a list of documents whose names contains the text you
searched for.
Searching for documents

64 InfoView User’s Guide
Advanced search based on multiple criteria
The advanced search allows you to search using the document name, sender/
publisher name, keywords, date of last modification, and document location.
To use the advanced search:
1. Select the area in which you want to search; Corporate Documents, Personal
Documents, or Inbox.
2. Click the Advanced link under the Search box.
The Search Documents page appears.
3. Select the area in which you want to search: Corporate Documents, Personal
Documents, or Inbox Documents.
Getting to the Documents You Need

InfoView User’s Guide 65
4. Enter values for one or all of the fields, as described in the table below.
Field name Description
Document name
contains
When searching, you do not need to enter the entire
document name. For example, if you want to search
for a document entitled “Revenue by quarter and
sales district,” just enter the word “Revenue”.
However, if you use too common a word, the search
may take a long time, or return too many document
names to be useful.
Sender/Publisher Name
contains
Enter some or all of the name you want to search for.
You can launch a search either by entering the entire
name, or a partial name.
Keywords contains Enter keywords that may be associated with the
document that you are looking for. Select how you
want the results shown or sorted. This can be by
document name, sender/publisher name, size, or
type.
5. Indicate how you want to sort results.
6. If you want, you can also specify a range of dates for the search. These dates
relate to the last time the document was last modified. If you enter start and
end dates in the boxes (Month/Day/ Year), only documents that were last
modified on or between the dates you specify are returned as a result of the
search.
NOTE
A pop-up calendar is now available to make date selection easier. However,
when viewing a WebIntelligence report, if you choose a list of values with a date
object, a traditional down-down box appears. The pop-up calendar appears if you
uncheck this option.
7. Click OK.
Once InfoView returns a list of matching documents, you can view any of them
by clicking the document’s name in the list.
Searching for documents

66 InfoView User’s Guide
Tips for using the advanced search
• The keywords field in BusinessObjects documents is treated as one field,
which means that order in which the words are entered in this field, and any
punctuation you include in your search, affect your search results. However,
Business Objects recommends searching for one key word at a time.
• The creation, first publication, and first saved dates are not taken into account
in this search. The only date that is matched is the date on which the
document was last saved to the selected storage area.
Getting to the Documents You Need

Customizing InfoView
chapter

68 InfoView User’s Guide
Overview
This chapter explains how to customize InfoView so that it is tailored to meet your
needs. You do this via the Options pages.
The options are divided into six tabs:
• Display
• List
• View
• Create/Edit
• Password
• About
These tabs contain the settings that allow you define what InfoView looks like,
what type of documents you create, and how you view documents. The options
available to you depend on the rights that your system administrator gives you.
You do not have to set your options each time you log into InfoView. Your settings
apply until you change them again.
NOTE
For every change in the Options pages, you can choose to:
• Click Apply to confirm your choice and stay on the Options pages to make
more changes.
• Click OK to save your changes and exit the Options pages.
• Click Close to exit the Options pages and cancel your changes, as long as
you have not already clicked Apply.
Customizing InfoView

Changing the appearance of InfoView
The Display tab lets you:
• select your default start page
• select your default skin
• specify the width of the left column of My InfoView
• add a portlet to My InfoView
For more information, refer to Customizing My InfoView on page 83.
Selecting your default start page
You can set any of the following pages as your default start page:
• Home
• My InfoView
• Corporate Documents
• Personal Documents
• Inbox Documents
To select your default start page:
1. Click the Options icon on the InfoView toolbar.
The Options page appears.
2. Click the Display tab.
The Display tab appears.
3. Select your default start page from the options:
InfoView User’s Guide 69
This image shows the Default start page options.
4. Click Apply.
Changing the appearance of InfoView

70 InfoView User’s Guide
Selecting your default skin
InfoView comes with a set of skins that enable you to change the look and feel of
your portal without any programming. Skins are sets of images and styles that
alter the interface’s colors, fonts, graphics, icons, and the toolbars that determine
the interface’s functionality.
Your company administrator can also create a custom company skin to make
InfoView appear to be designed specifically for your company. For more
information, refer to the
Customizing Enterprise 6 without Programming guide.
To select the skin for your default start page:
1. Click the Options icon on the InfoView toolbar.
The Options page appears.
2. Click the Display tab.
The Display tab appears.
3. Select the skin you want from the list of options:
Customizing InfoView
This image shows the three skins available in the Options page.
4. Click Apply to confirm your choice and stay on the Options page to make
more changes.

Resizing the left pane of My InfoView
You can specify the width of the left pane in My InfoView.
To do this:
1. Click the Options icon on the InfoView toolbar.
The Options page appears.
2. Click the Display tab.
The Display tab appears.
3. Select the width of the pane you want from the list of options:
This image shows the three left column width options available in the Option page.
4. Click Apply.
5. For more information about how this changes the look of InfoView, refer to
Working with portlets on page 85.
InfoView User’s Guide 71
Changing the appearance of InfoView

72 InfoView User’s Guide
Specifying your document list settings
Setting default categories
The List tab lets you:
• set the default category for the Corporate Documents and Personal
Documents list
• specify how you want to refresh the Corporate Documents page, your
Universe list, and your Inbox
For information about refreshing individual documents, refer to Refreshing
documents on page 108.
You can specify default categories for both the Corporate Documents page and
your Personal Documents page. If you do so, the category you choose is
displayed instead of the list of all of the categories in the storage area.
To specify a default category:
1. From your Home page, under Corporate Documents, click the category that
you want to make your default category, for example, sales.
Customizing InfoView
The page containing that category opens.
2. With that page open, click the Options icon in the InfoView toolbar.
The Options page appears.
3. Click the List tab.
The List tab appears.
4. To specify a default category for the Corporate Documents page, select the
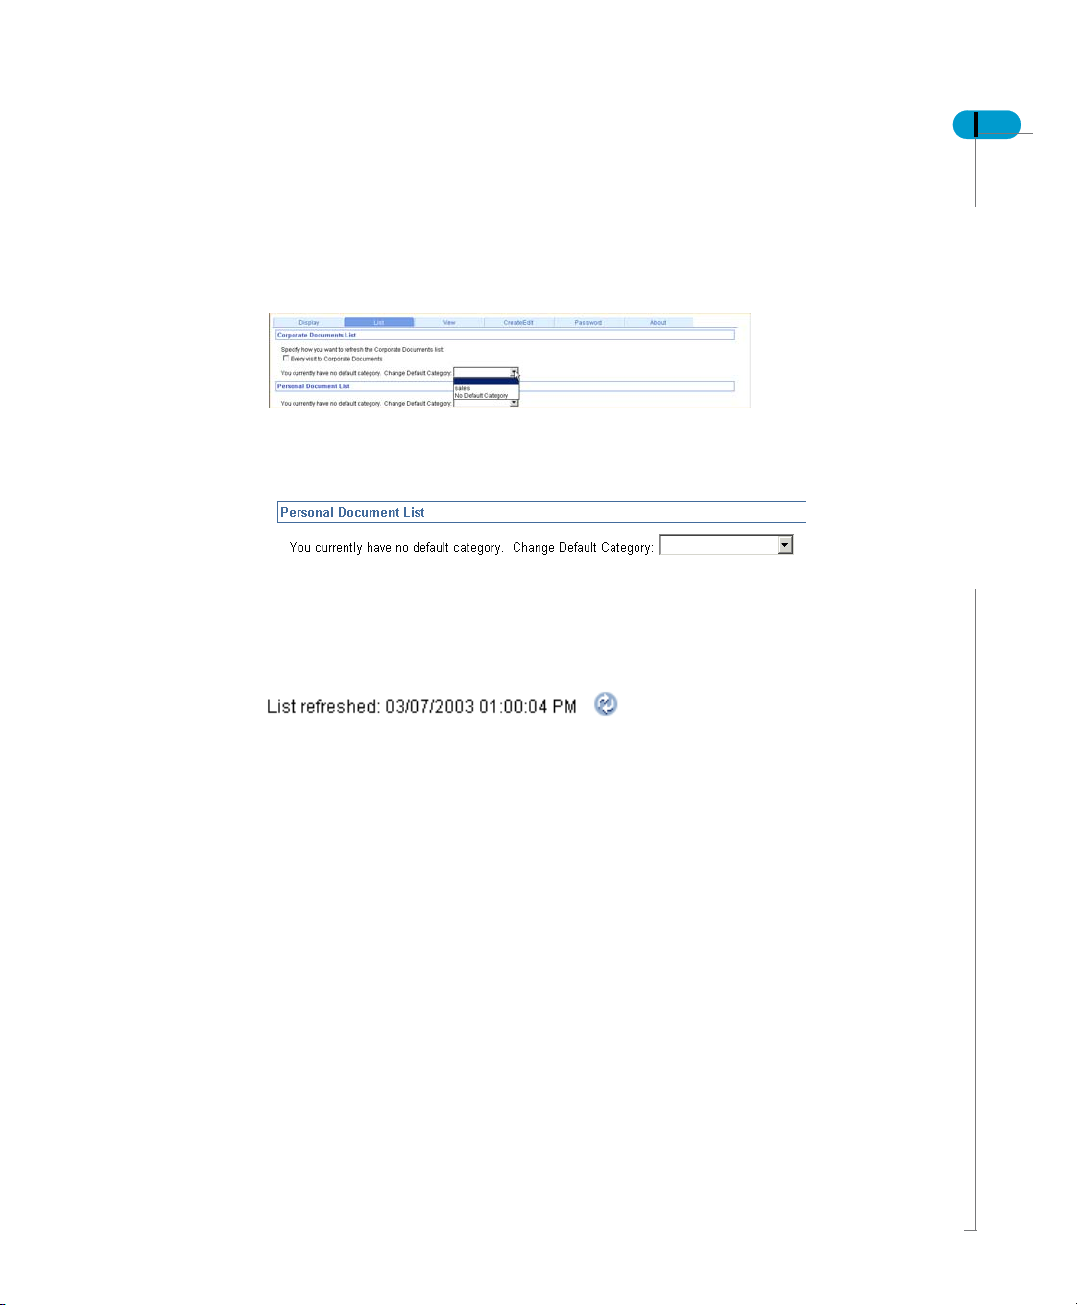
category you want from the Change Default Category drop-down list in the
Corporate Documents List section. You can select one of the following:
- No Default Category
- The category corresponding to the open page, in this case, sales.
5. To specify a default category for your Personal Documents page, select the
category you want from the Change Default Category drop-down list in the
Corporate Documents List section.
6. Click Apply.
Specifying document list refresh options
Each document list displays the last time it was refreshed.
InfoView User’s Guide 73
You can define when you want to refresh:
• the Corporate Documents page
• your Inbox
• your universe list
To define your refresh options:
1. Click the Options icon in the InfoView toolbar.
The Options page appears.
2. Click the List tab.
The List tab appears.
3. Use the Every visit to Corporate Documents option to indicate how to refresh
Specifying your document list settings

74 InfoView User’s Guide
the Corporate Documents page.
By default, this option is not selected, which means that the Corporate
Documents page is refreshed with the same frequency as the InfoView
server.
The login process is generally faster if you keep the default setting.
4. To specify a refresh option for your inbox, select either At login only or Every
visit to inbox in the Inbox Document List section.
Customizing InfoView

InfoView User’s Guide 75
5. To specify a refresh option for your universe list, select either At login only or
Every visit to inbox in the Universe List section:
6. Click Apply.
Specifying your document list settings

76 InfoView User’s Guide
Specifying your document viewing format
Setting WebIntelligence view and drill options
The View tab lets you choose the format in which to view your documents.
For WebIntelligence documents, you can specify:
• the view format
• drill options
To specify these:
1. Click the Options icon in the InfoView toolbar.
The Options page appears.
2. Click the View tab.
The View tab appears.
Customizing InfoView
3. Select the format in which you want to view your documents: HTML, HTML
(Interactive), or PDF.
For more information about these formats, refer to Viewing WebIntelligence
documents on page 97.
NOTE
If you want to use the drilling options, you must select either HTML or HTML
Interactive.
4. Specify the drill options you want to use.
Drilling enables you to view additional data that is not initially displayed when
InfoView User’s Guide 77
you view a document—it takes you to the next level of information.
The table below explains the difference between the viewing options.
If you select... in drill mode, you can... in view mode, you can...
HTML drill. N/A
HTML (Interactive) drill and sort. filter and sort.
NOTE
These viewing options do not apply for WebIntelligence 2.x documents. You view
these in HTML.
Specifying your document viewing format
78 InfoView User’s Guide
5. Select the appropriate drill options, as explained in the following table:
If you want WebIntelligence to... then...
make a copy of an existing report and
click Start drill on duplicate report.
then drill on the duplicate
drill on the existing report without
click Start drill on existing report.
making a copy
prompt you if a drill action requires a
new query to extend the scope of
analysis
select the Prompt if drill requires
additional data check box.
By default, InfoView does not prompt
you when running a new query.
synchronize drilling on all report blocks select the Synchronize drill on report
blocks check box.
By default, InfoView drills only on the
current table or chart.
hide the Drill toolbar when you switch
to drill mode
select the Hide drill bar check box.
By default, InfoView displays the Drill
toolbar when you switch to drill mode.
Customizing InfoView
6. Click Apply.
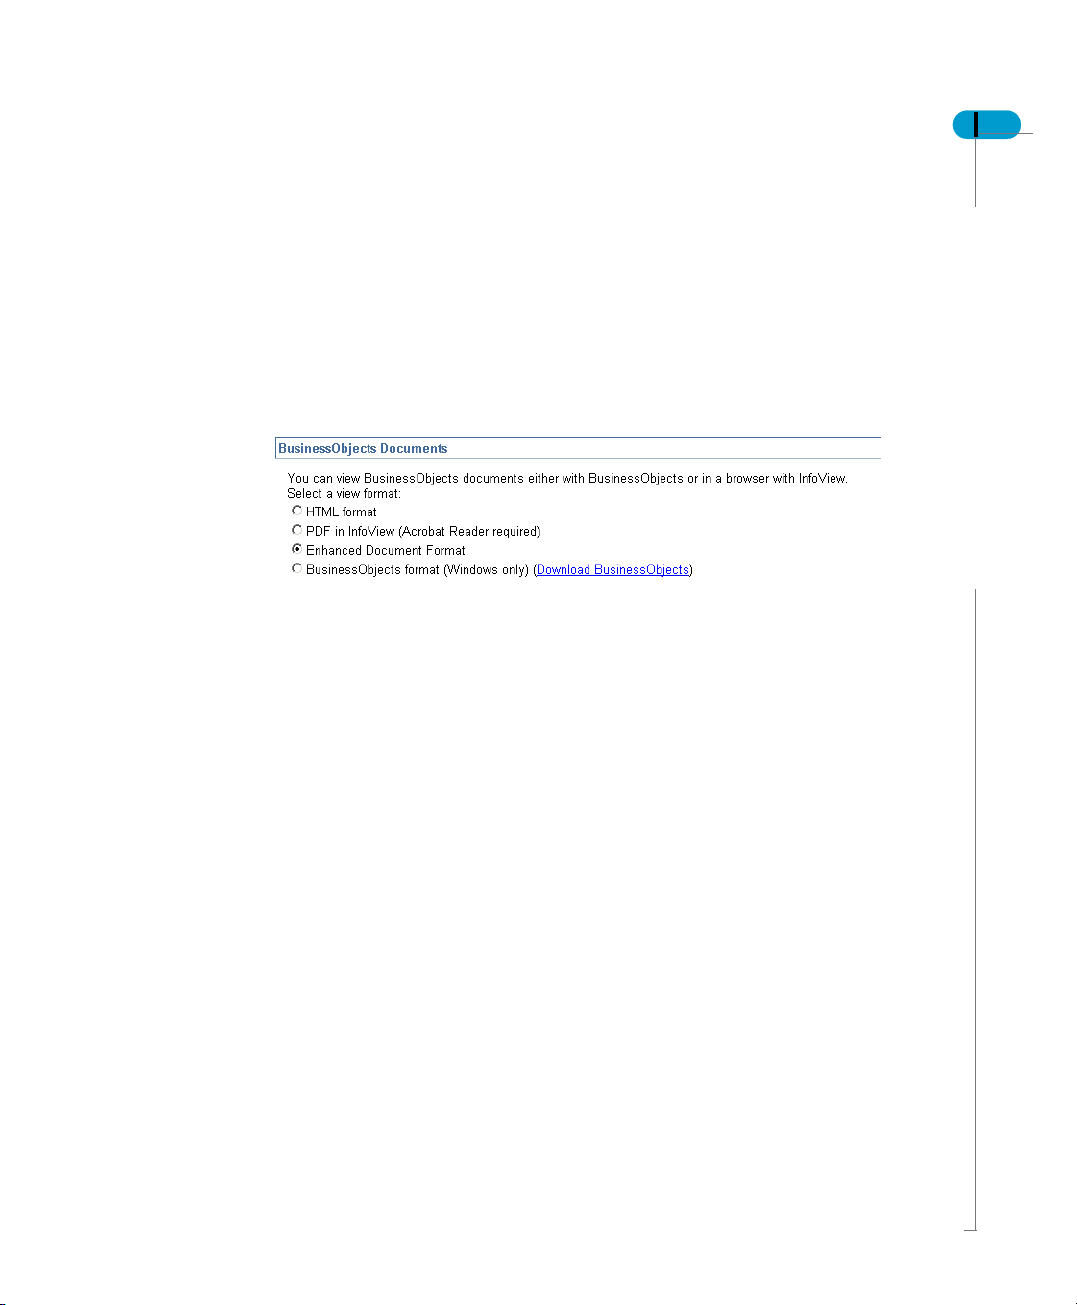
Specifying how to view BusinessObjects documents
You can view BusinessObjects documents either with BusinessObjects or in a
browser with InfoView.
To select a view format:
1. Click the Options icon in the InfoView toolbar.
The Options page appears.
2. Click the View tab.
The View tab appears.
3. Select a view format: HTML, PDF in InfoView, Enhanced Document Format,
or BusinessObjects format.
For more information about these formats, refer to Viewing WebIntelligence
documents on page 97.
4. If you do not have BusinessObjects installed you can install it now.
5. For more information, refer to Installing BusinessObjects when viewing a
document on page 105.
6. Click Apply.
InfoView User’s Guide 79
Specifying your document viewing format
80 InfoView User’s Guide
Specifying your user settings
Selecting the type of document you want to create
The Create/Edit page lets you define options for creating reports. You can select
the type of document you want to create—WebIntelligence or BusinessObjects.
By default, the document type is WebIntelligence and the report panel is Java.
You can choose to create a WebIntelligence, WebIntelligence OLAP or a
BusinessObjects document.
Creating a WebIntelligence document
You create and edit WebIntelligence documents by launching a WebIntelligence
report panel from InfoView.
Each report panel is designed for different query and reporting needs. To decide
which panel to choose, refer to the Getting Started with WebIntelligence Guide.
To select the report panel from InfoView:
1. Click the Options icon in the InfoView toolbar.
The Options page appears.
2. Click the Create/Edit tab.
The Create/Edit tab appears.
3. Select WebIntelligence.
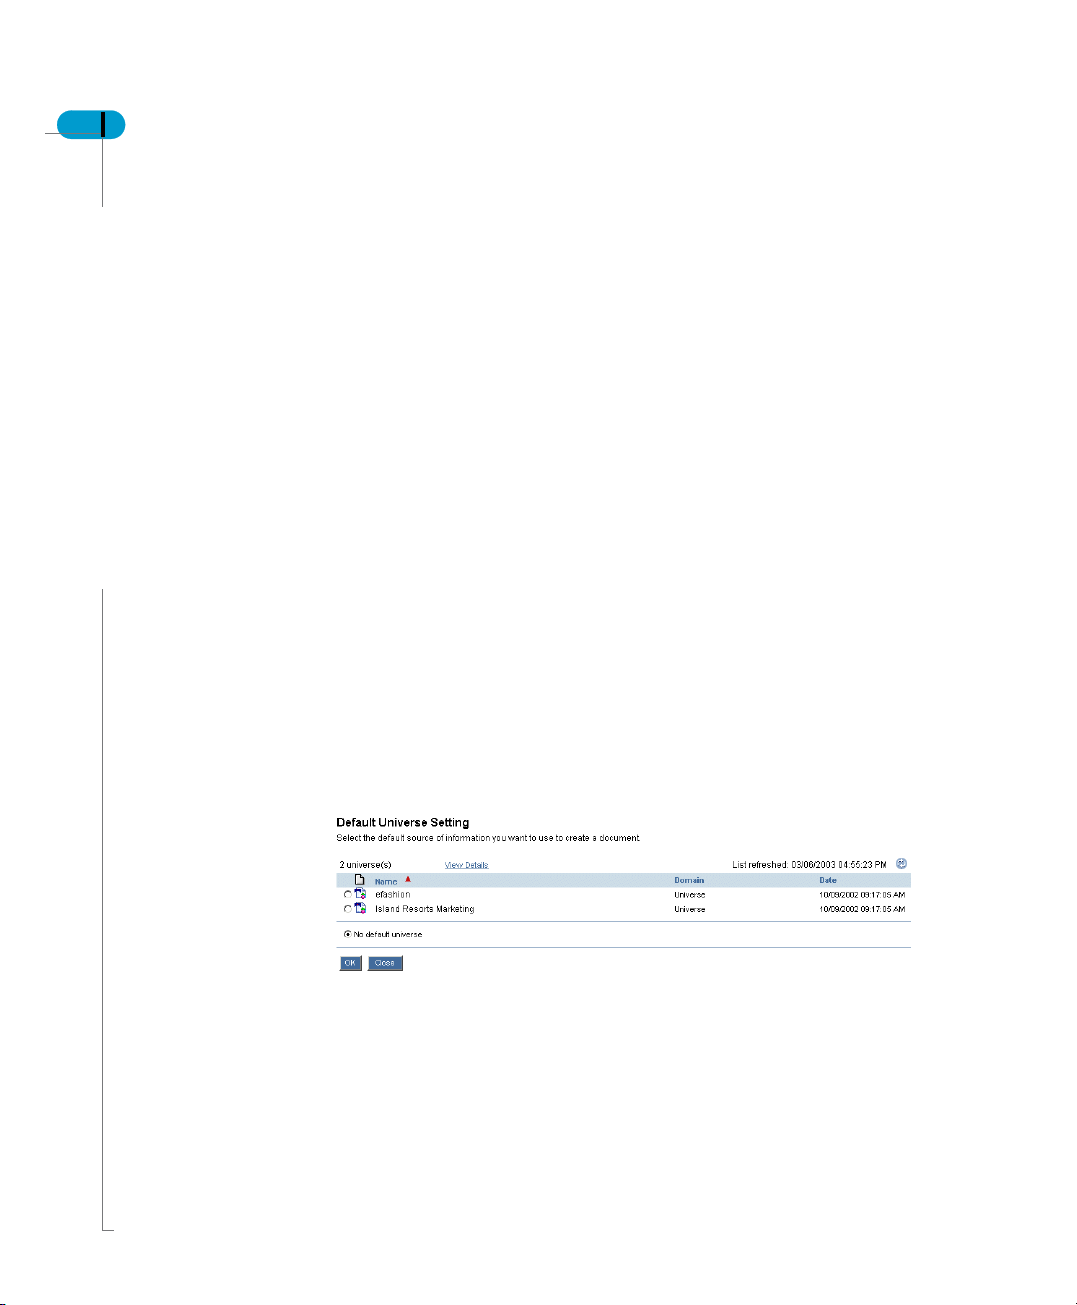
4. If you want to set a default universe, click Select Default Universe.
The Default Universe Setting page appears.
Customizing InfoView
5. Select the universe you want to set as your default.
6. Click OK.
7. Select a report panel to use.
8. Click Apply.

InfoView User’s Guide 81
Creating a WebIntelligence OLAP document
You build reports on multidimensional data sources using WebIntelligence for
OLAP Data Sources.
To select the report panel from InfoView:
1. Click the Options icon in the InfoView toolbar.
The Options page appears.
2. Click the Create/Edit tab.
The Create/Edit tab appears.
3. Select WebIntelligence OLAP.
4. Click Apply.
For more information, refer to the
Creating a BusinessObjects document
WebIntelligence for OLAP User’s Guide.
To select BusinessObjects as your default report editor, from InfoView:
1. Click the Options icon in the InfoView toolbar.
The Options page appears.
2. Click the Create/Edit tab.
The Create/Edit tab appears.
3. Select BusinessObjects.
4. If you do not have BusinessObjects installed, you can install it now.
If you choose not to do so, the installation process launches automatically the
first you need BusinessObjects for viewing a document.
For more information, refer to Installing BusinessObjects when viewing a
document on page 105
.
5. Click Apply.
Specifying your user settings

82 InfoView User’s Guide
Changing your password
Your initial InfoView password is created by the system administrator who
defined your user profile. Once you have logged into InfoView you can change
your password to one of your choice, if you have the rights to do so. If your
system administrator did not give you the rights to change your password, the
Password tab is not displayed in the Options page.
If you change your password in InfoView, your BusinessObjects password is also
changed.
To change your password:
1. Click the Options icon in the InfoView toolbar.
The Options page appears.
2. Click the Password tab.
The Password tab appears.
Customizing InfoView
3. Type your current password in the Current Password box.
4. Type your new password in the New Password box.
This is case-sensitive.
5. Confirm the new password by typing it again in the New Password again box.
6. Click Apply.

Customizing My InfoView
This section describes My InfoView and how to use it.
My InfoView can display data from a variety of sources in a single page. You can
set up My InfoView to instantly show you the information you need by dividing the
browser window into three panes, each displaying different information.This
allows you to view information from different sources at the same time in your
browser window.
You can access My InfoView by clicking the My InfoView button in InfoView
toolbar or by selecting My InfoView as your default start page in your user
options. The Default My InfoView page.
The default My InfoView page is a welcome page. This page gives a brief
overview of My InfoView, plus links to the rest of the portal, and the online help.
However, your company administrator can customize this page.
InfoView User’s Guide 83
From the My InfoView welcome page, you can divide your browser window into
several panes. You can display up to three panes at once to include:
• Your Inbox documents list—displays the documents you have received from
other users in your Inbox.
• Your Corporate Documents page—displays the documents in the Corporate
Documents page that you have the rights to view.
• Corporate documents—lets you choose specific documents to display from
the Corporate Documents list.
Customizing My InfoView

84 InfoView User’s Guide
• Your Personal Documents page—displays the documents in your Personal
Documents page.
• Personal documents—lets you choose specific documents to display from
your Personal Documents page.
• A web page—lets you select a website to display.
What I can do with My InfoView?
With My InfoView you can:
• choose My InfoView as your default start page
For more information, refer to Selecting your default start page on page 69.
• resize the left pane in My InfoView
For more information, refer to Resizing the left pane of My InfoView on
page 71.
• add portlets to My InfoView
For more information, refer to Working with portlets on page 85.
• add documents to My InfoView
For more information, refer to Adding documents to My InfoView on page 92.
• add document lists to My InfoView
For more information, refer to Adding document lists to My InfoView on
page 93.
Customizing InfoView
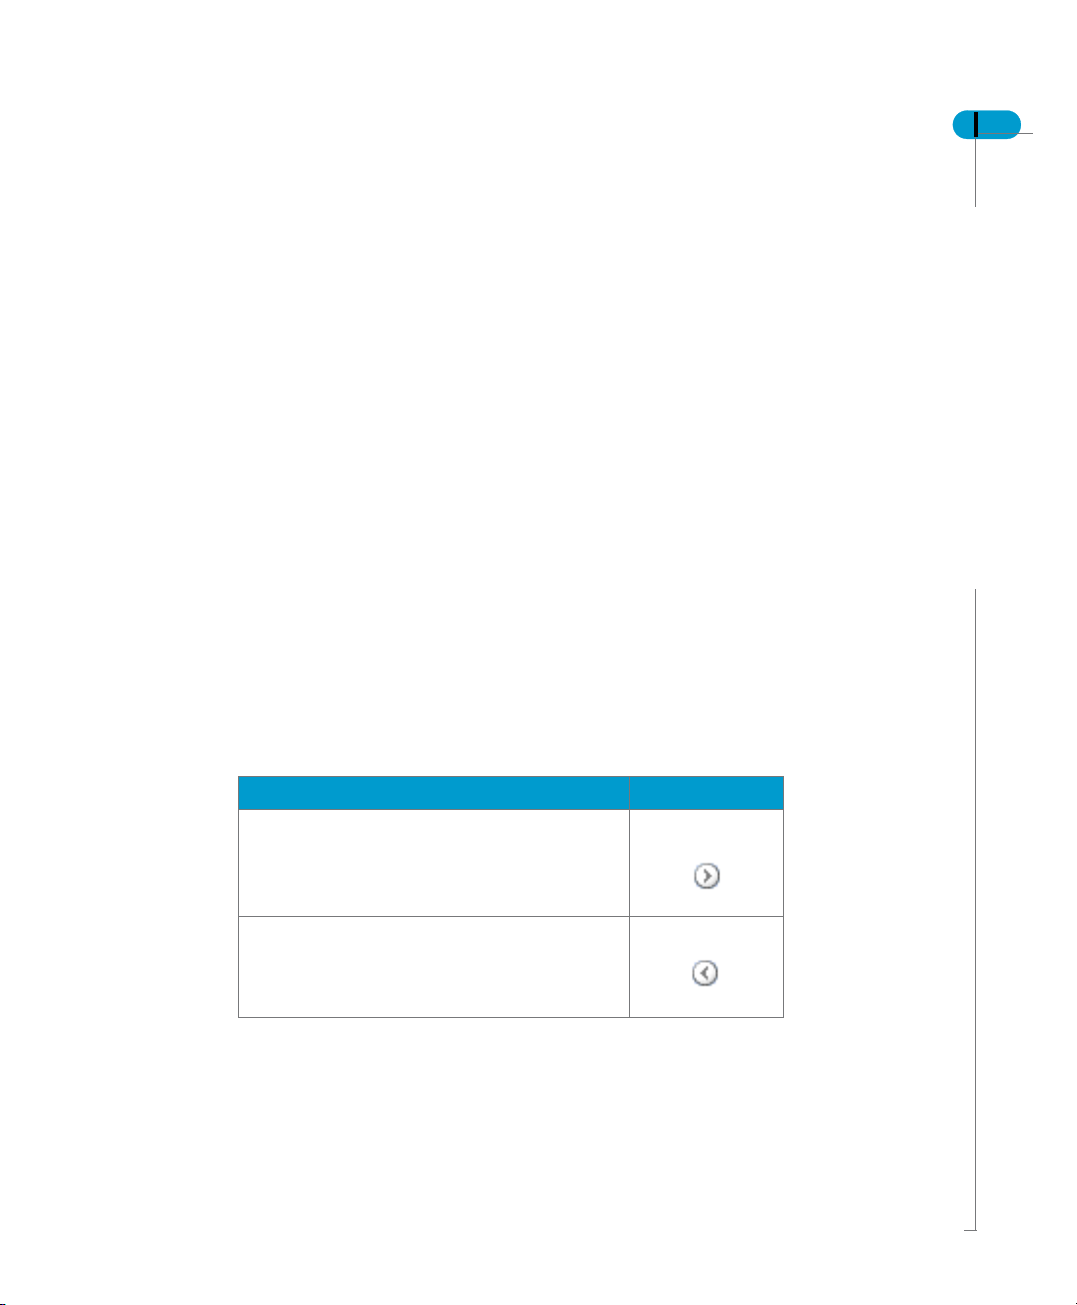
Working with portlets
A portlet is a part of the browser page. In My InfoView you can set aside a section
of the browser page to display a portlet of your choice. To do so, you add a web
page to My InfoView.
This section explains how:
• panes are displayed
• to add a new portlet
• to move portlets
• to delete portlets
How panes are displayed
My InfoView can display up to three vertical panes. You can specify the size of
the left pane in the Options pages.
The choices are:
• Small (25% of the available display space)
• Medium (30% of the available display space)
• Large (as much space as possible)
The center pane is the main pane, and is always the largest. By default, the left
pane is set to small.
You can show and hide portlets as follows:
InfoView User’s Guide 85
To... Click...
show a portlet that is not currently on display,
hide a portlet that is currently on display,
Working with portlets

86 InfoView User’s Guide
Adding a new portlet to My InfoView
If a pane does not contain a portlet, the arrow is not displayed and this option is
unavailable. If this is the case, you can move or add a portlet to the hidden pane.
When you do so, the pane is displayed:
This image shows a customized My InfoView page featuring four portlets with the pane displayed.
In addition to the documents and document lists described earlier in this chapter,
you can add the following pages to My InfoView:
• My InfoView Welcome page
• A web page
Customizing InfoView

Adding a portlet to My InfoView
To do this:
1. Click the Options icon.
The Options page opens.
2. Click the Display tab.
The Display tab appears.
InfoView User’s Guide 87
Add a Portlet to My InfoView
3. Click Add a Portlet to My InfoView.
The Add Portlet page appears.
Working with portlets

88 InfoView User’s Guide
4. Select Welcome to My InfoView from the drop-down menu.
The following page appears:
This image shows the Add Portlet: Welcome to My InfoView page.
The portlet name appears automatically and is not editable.
5. Click Create.
My InfoView opens with the Welcome to My InfoView Portlet showing.
To return to the Display tab without adding the portlet, click Cancel.
Adding a web page as a portlet
To add a web page as a portlet:
1. Click the Options icon in the InfoView toolbar.
The Options page opens.
2. Click the Display tab.
The Display tab appears.
3. Click Add a Portlet to My InfoView, as illustrated above.
The Add Portlet page appears.
4. Select Web Page from the drop-down menu.
The following page appears:
Customizing InfoView
This image shows the Add Portlet: Web Page.
5. Enter a name for the portlet in the Portlet Name text box.
By default, the portlet name is Web Page. Portlet names do not have to be

InfoView User’s Guide 89
unique.
6. Enter the full URL for the web page in the Enter a URL text box.
An example of a full URL is: http://www.businessobjects.com.
7. Click Create.
My InfoView opens with the web page showing.
To return to the Display tab without adding the portlet, click Cancel.
Working with portlets

90 InfoView User’s Guide
Moving portlets in My InfoView
Each portlet has a toolbar with one or more of the buttons shown below:
Move the portlet in the direction of the arrow
Delete the portlet
Maximize the portlet in the page
This image shows a portlet toolbar containing buttons to move, delete or maximize the portlet.
• The up arrow moves the portlet so it is displayed further up in the pane.
• The down arrow moves the portlet so it is displayed further down in the pane.
• The right arrow moves the portlet so it is displayed in the pane on the right.
• The left arrow moves the portlet so it is displayed in the pane on the left of the
screen.
• The maximize button either expands the portlet to its largest possible size, or
opens it in a new web browser, depending on the portlet type.
• The delete button removes the portlet from My InfoView.
To move a portlet to another place in your My InfoView page
• In the toolbar that belongs to the portlet you want to move, click the arrow that
corresponds to the direction you want to move it.
If a portlet cannot be moved in a specific direction, the corresponding arrow
does not appear.
Customizing InfoView
To delete a portlet from My InfoView
1. Click the Delete Portlet button.
You are asked to confirm that you want to delete the portlet.
2. Click OK.
The portlet disappears. If you delete the last portlet, or if there was only one,
the background becomes blank.
To maximize the portlet size
• To maximize a portlet, click the Maximize this page button.
You can maximize any portlet except the My InfoView welcome page.

InfoView User’s Guide 91
EXAMPLE
Customizing your My InfoView page
If your job centers around sales strategy, analysis of the latest sales figures from
your company’s branches throughout the country is crucial to your work. You may
want to set My InfoView to display a web page showing you:
• how your company is doing in the stock market
• a particular document from the Corporate Documents list showing the sales
figures that are updated daily
• your Inbox Documents list so you can quickly access the documents sent to
you by other people in your company
Working with portlets

92 InfoView User’s Guide
Adding documents to My InfoView
If you can view a document in InfoView, you can also add it to My InfoView and
view it in your personalized portal. You can add documents from the Corporate
Documents, and Personal Documents pages, including non-Business Objects
documents.
The Add to My InfoView option is also available in any document viewed with the
Enhanced Document Viewer.
To add a document to My InfoView:
1. Open a document.
2. Click Add to My InfoView.
Click this link
Customizing InfoView
The document is displayed in My InfoView.
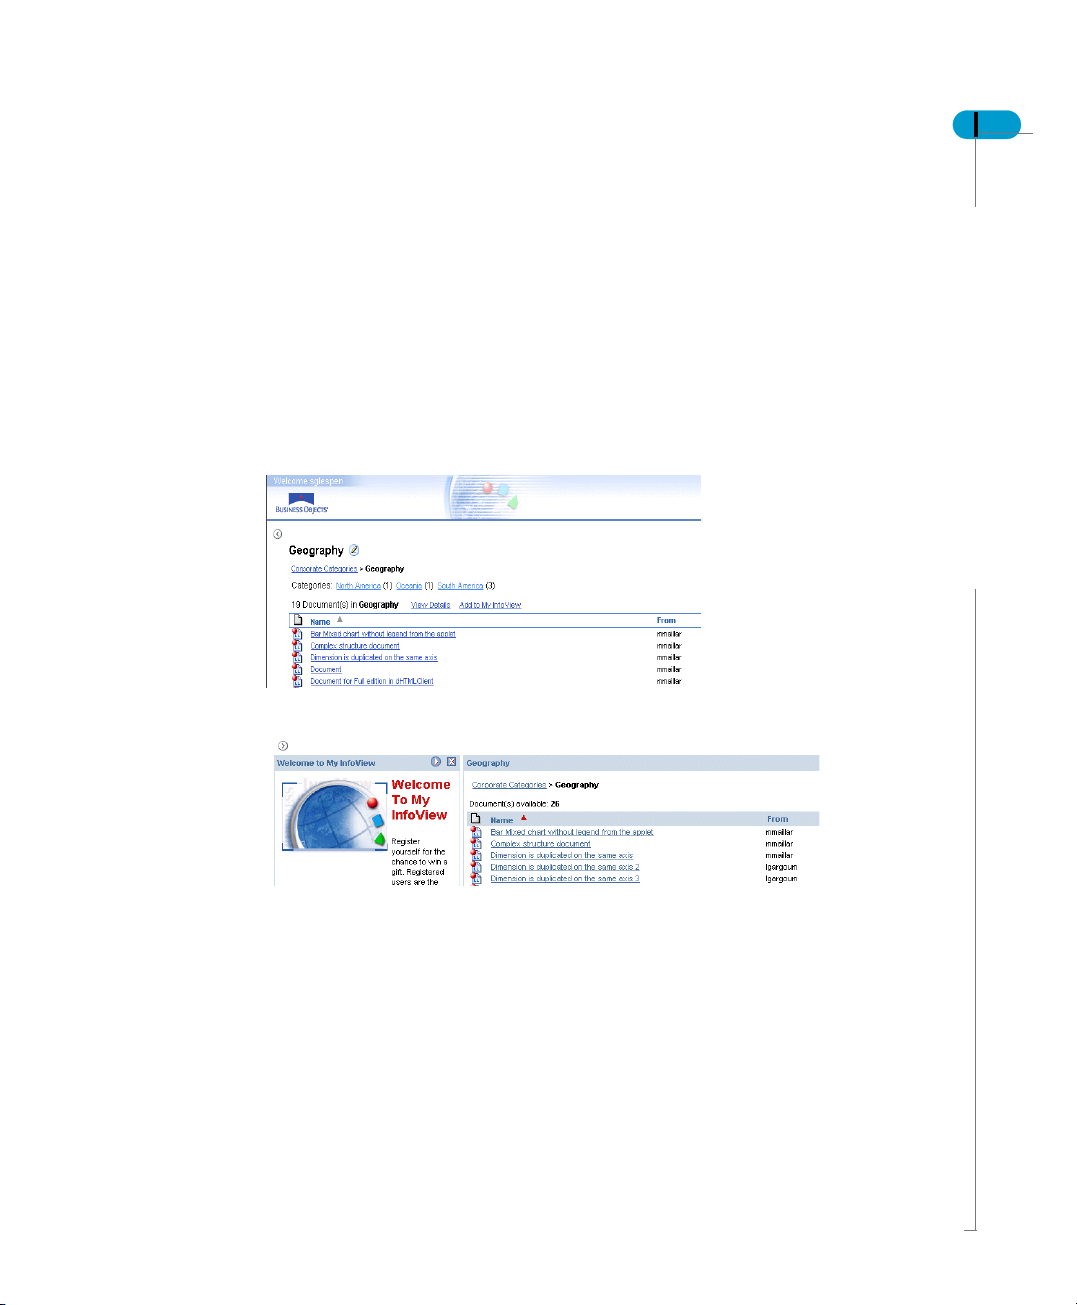
Adding document lists to My InfoView
In addition to individual documents, you can also add lists of documents to My
InfoView.
In the Corporate Documents, Personal Documents, and Inbox pages, the Add to
My InfoView option adds the current category to My InfoView.
To add a document list to My InfoView:
1. Open a document list.
2. Click Add to My InfoView.
InfoView User’s Guide 93
The document list is displayed in My InfoView.
Adding document lists to My InfoView

94 InfoView User’s Guide
Customizing InfoView
Viewing and Refreshing Documents
chapter

96 InfoView User’s Guide
Overview
This chapter describes how to view and refresh different document types in
InfoView.
The Home page gives you direct access to the document viewing areas of the
InfoView portal. It provides links to the pages where the different groups of
document lists are stored. Depending on your user rights, the following may be
available:
• Corporate Documents
• Personal Documents
• Inbox Documents
• Scheduled Documents
To view an existing WebIntelligence or BusinessObjects document, or a nonBusiness Objects document, just click the document’s name. If the document
was created in WebIntelligence or BusinessObjects, it may contain a user
prompt.
To open more than one window simultaneously to view more than one document,
launch a second browser and log in for a second time.
Viewing and Refreshing Documents

Viewing WebIntelligence documents
You can view WebIntelligence documents in the following formats:
• HTML
• HTML (Interactive)
• PDF
Viewing WebIntelligence documents in HTML format
Depending on whether you want to simply view results or interact with the results
you view, you can select one of two HTML options:
• HTML – use if you simply want to navigate reports to view results, and refresh
the report data to see the latest figures. The values displayed in the report
tables and charts are static, but can be refreshed.
• HTML (Interactive) – use if you want to filter or sort the values displayed in the
reports, or perform drill analysis. When you rest your mouse pointer on a
report value, a contextual menu appears with the sort and filter options and/
or the drill button:
InfoView User’s Guide 97
Drill button
This image shows the Drill button and the filter and sort contextual menu for an opened document.
Filter and sort contextual menu
Viewing WebIntelligence documents

98 InfoView User’s Guide
NOTE
The drill feature is available in both HTML (Interactive) and in static HTML.
When you view WebIntelligence documents in HTML (Interactive) format, you
can:
• filter report values
• sort report values
• drill report values to analyze the related detail and summary data
Available actions vary according to the graphical element being clicked and its
content. Just click elsewhere in the document to make the menu disappear.
For more information, refer to the Getting Started with WebIntelligence Guide.
NOTE
You need the appropriate security profile to use the filter, sort, and drill features.
You can cancel the opening or refreshing of a WebIntelligence document by
clicking Cancel.
Viewing and Refreshing Documents
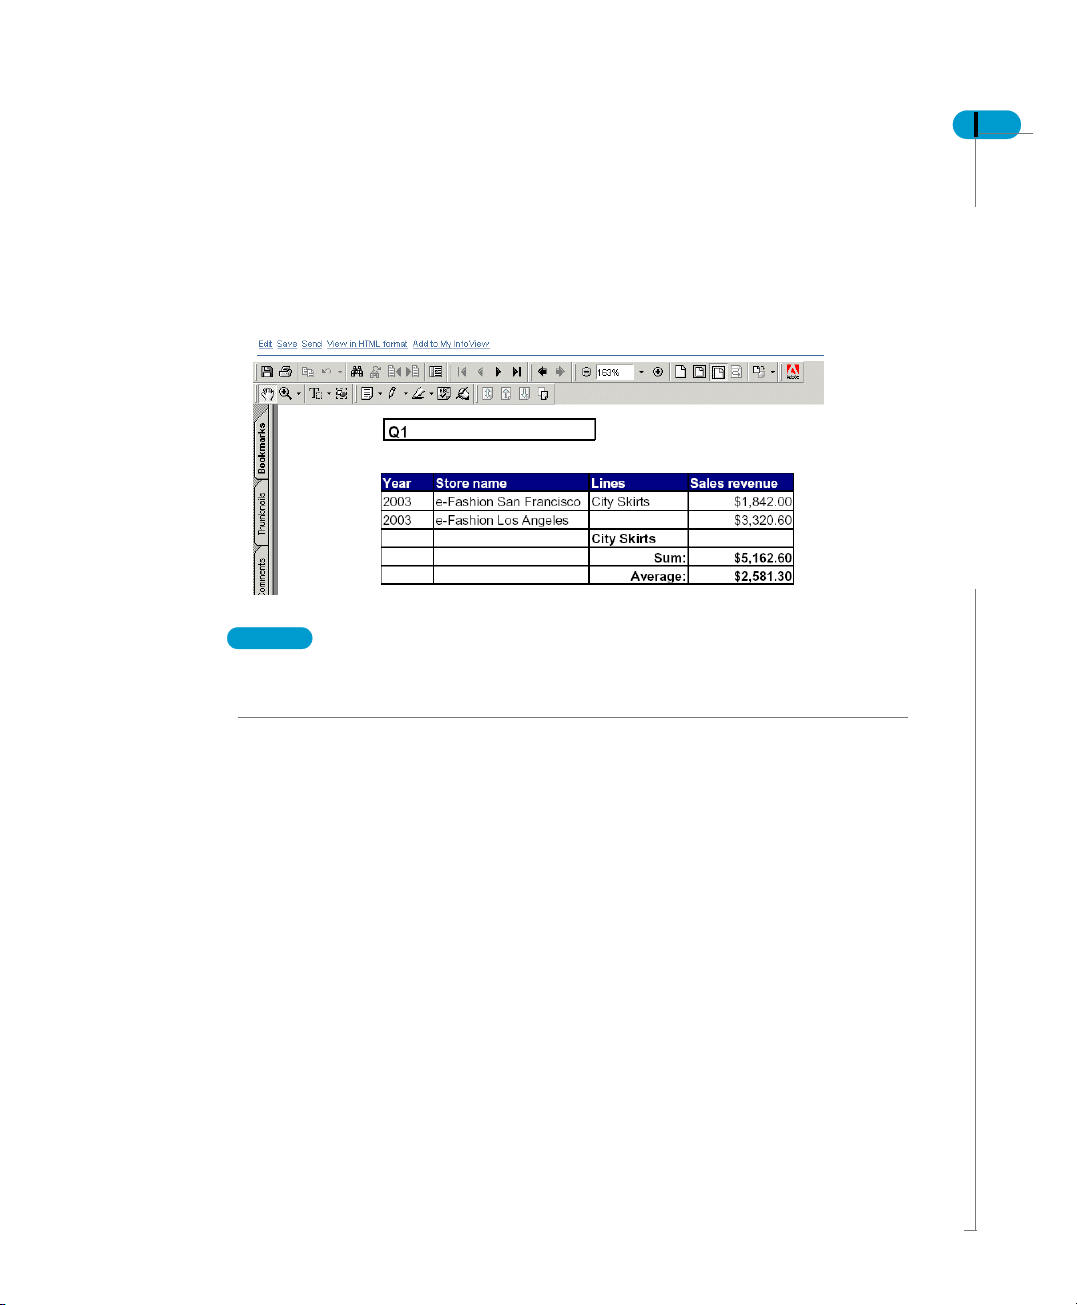
Viewing WebIntelligence documents in PDF
Viewing documents in PDF is useful if you want to print documents or if you want
to send documents to business contacts who do not have access to
WebIntelligence.
NOTE
To open files in PDF, you need Adobe Reader installed on your computer. You
can download this from http://www.adobe.com.
InfoView User’s Guide 99
Viewing WebIntelligence documents

100 InfoView User’s Guide
Viewing BusinessObjects documents
You can view BusinessObjects documents either with BusinessObjects or in a
browser with InfoView. The default format in which you view BusinessObjects
documents depends on the browser and the operating system you use.
You must select the format in which you want to view your document. You do this
in the View tab of the Options page. For more information, refer to Specifying
your document viewing format on page 76.
There are four document formats to choose from:
• HTML format
• PDF format
• Enhanced document format
• BusinessObjects (for Windows only)
Choosing a view format
The default format in which you view BusinessObjects documents depends on
the browser and the operating system you use. If you want to be able to view
BusinessObjects documents as they appear in BusinessObjects, but do not have
access to BusinessObjects yourself, you can choose either Enhanced document
format or PDF format. Alternatively you can also choose to view BusinessObjects
documents in standard HTML format.
Viewing and Refreshing Documents
 Loading...