


Business Edition User’s Guide
Business Edition 7.90c
November 2008

Contact information Contact us on the Web at http://service.sap.com
If you find any problem with this documentation, please report it to Business Objects
in writing at
Copyright © 2008 Business Objects. All rights reserved.
Patents Business Objects owns the following U.S. patents, which may cover products that are
documentation@businessobjects.com
.
offered and licensed by Business Objects: 5,555,403; 5,857,205; 6,289,352;
6,247,008; 6,490,593; 6,578,027; 6,831,668; 6,768,986; 6,772,409; 6,882,998;
7,139,766; 7,299,419; 7,194,465; 7,222,130; 7,181,440 and 7,181,435.
Trademarks Business Objects and the Business Objects logo, BusinessObjects, Business Objects
Crystal Vision, Business Process On Demand, BusinessQuery, Crystal Analysis,
Crystal Applications, Crystal Decisions, Crystal Enterprise, Crystal Insider, Crystal
Reports, Desktop Intelligence, Inxight, the Inxight Logo, LinguistX, Star Tree, Table
Lens, ThingFinder, Timewall, Let there be light, Metify, NSite, Rapid Marts,
RapidMarts, the Spectrum Design, Web Intelligence, Workmail and Xcelsius are
trademarks or registered trademarks in the United States and/or other countries of
Business Objects and/or affiliated companies. All other names mentioned herein may
be trademarks of their respective owners.
Third-party contributors Business Objects products in this release may contain redistributions of software
licensed from third-party contributors. Some of these individual compo nents may
also be available under alternative licenses. A partial listing of third-party
contributors that have requested or permitted acknowledgments, as well as required
notices, can be found at:
http://www.businessobjects.com/thirdparty
2
Business Edition User’s Guide

Contents
Preface.............................................................................................................9
Documentation...............................................................................................10
Postalsoft Business Edition options ...............................................................11
Chapter 1:
Get started........................................................................... .... ..... ................ 13
System requirements......................................................................................14
Install Postalsoft...................... .... ..... ........................................................... ...15
Install directories............................................................................................17
Postal directories ................................................... ..... .... ..... ..........................19
Directory release schedule .............................................................................21
Prepare for printing ........................................................................................23
Chapter 2:
Postalsoft files .............................................................................................. 25
Mailing description file (.mdf) ..................................................................26
Database permissions ....................................................................................27
Chapter 3:
Create a mailing list ................................................................................... 29
Plan your layout ............................................................................................30
Field properties .............................................................................................31
The default layout ........................................................... ..... .... ......................33
Fine-tune your layout ....................................................................................35
Chapter 4:
Import and export data............................................................................... 37
Introduction....................................................................................................38
Import and export considerations ..................................................................39
Associate fields .............................................................................................41
Settings Library..............................................................................................44
Access a dBase file ........................................................................................45
Import an Access table...................................................................................46
The enhanced import process ........................................................................48
Chapter 5:
Manage your mailing list............................ ..... .... ..... .................................. 53
Database location ...........................................................................................54
Enter data in your file .......................................................... .... ......................55
Manage your data...........................................................................................56
Index your database........................................................................................59
How to work with several lists.......................................................................61
Import and export Settings Library components ..........................................62
Chapter 6:
Address correction ...................................................................................... 65
Introduction....................................................................................................66
Contents
3

Terms for address components .....................................................................67
What is address correction?...........................................................................68
How address correction works.......................................................................70
Standardized fields ........................................................................................71
Correction options .........................................................................................72
Suggestion lists .............................................................................................73
Delivery Point Validation.................................... ..........................................76
DPV locking ..................................................................................................77
DPV performance..........................................................................................78
Perform DPV processing...............................................................................79
LACSLink......................................................................................................8 0
LACSLink locking.........................................................................................81
LACSLink performance ................................................................................82
Perform LACSLink processing .....................................................................83
GeoCensus ....................................................................................................84
GeoCensus: Assign codes..............................................................................85
GeoCensus: Select records by location .........................................................86
Status and error codes ...................................................................................87
Parse names and assign prefixes, gender codes, and greetings .....................88
Internet Services: International address correction........................................91
Chapter 7:
Find duplicate records................................................................................ 97
Before you Merge/Purge .............................................................................98
Set up files for Merge/Purge..........................................................................99
Choose the comparison method of your records .........................................101
Prequalifiers ...............................................................................................102
Rulebooks ....................................................................................................105
Choose the action(s) to perform on duplicate records.................................108
Post dupe-group numbers to input file(s) ....................................................110
Generate reports...........................................................................................111
Associate fields for output...........................................................................112
Judge undecided records for yourself..........................................................113
View a summary of duplicates found ..........................................................114
Run Merge/Purge.........................................................................................115
Scoring and weighting.................................................................................116
Customize a rulebook ..................................................................................121
Advanced matching options.........................................................................123
Customized fields for duplicate detection ..................................................131
Under the hood.............................................................................................132
Chapter 8:
Extended Services.......................................... ........................................... 135
Extended Services........................................................................................136
Lorton Data..................................................................................................136
Preparing for Extended Services..................................................................137
Extended Services fields..............................................................................138
Processing your data with Extended Services .............................................140
While your job is at Lorton Data .............................................................. ...144
Extended Services processing speed............................................................145
Changing your Lorton Data password.........................................................146
4
Business Edition User’s Guide

Chapter 9:
Move-update................................................ ..... ......................................... 147
Move-updating.............................................................................................148
NCOALink export........................................................................................149
ACS move-update........................................................................................153
What is ACSpeed®? ....................................................................................156
ACSpeed fields.............................................................................................158
Prepare for an ACSpeed mailing..................................................................159
Merge your ACS file using ACSpeed..........................................................162
Behind the scenes of an ACS merge............................................................166
ACS: Combine spanned diskettes from USPS.............................................167
Mover ID introduction .................................................................................168
Fields............................................................................................................170
Becoming NCOALink certified......................................................... .... ..... .171
NCOALink certification and audit procedures ............................................172
Overview of NCOALink processing............................................................174
Install the NCOALink directories and files..................................................175
Prepare and back up your database..............................................................176
Set up NCOALink defaults..........................................................................177
Enable NCOALink and set remaining options.............................................185
Perform address correction, including NCOALink......................................189
NCOALink Mover ID Summary report.......................................................190
NCOALink PAF Information report............................................................192
NCOALink log files.....................................................................................193
Chapter 10:
Presort................................................. ..... .................................................. 195
Introduction..................................................................................................196
Mail piece.....................................................................................................198
Sortation.......................................................................................................199
Periodicals mail piece information...............................................................200
Mailing information .....................................................................................201
Entry point....................................................................................................202
Schemes........................................................................................................204
Mailing fletters.............................................................................................206
Mixing simplified mail with non-simplified mail........................................207
Scheme options: General........................................................................ ..... .209
Scheme options: package and container size ...............................................210
Scheme options: sortation control................................................................214
Scheme options: flats ...................................................................................216
Scheme options: walk-sequence...................................................................217
Scheme options: single pieces......................................................................219
Scheme options: co-packaging.....................................................................220
USPS Confirm® program............................................................................221
Palletization..................................................................................................225
Standard Mail letter trays on pallets.............................................................226
Prepare Standard Mail flats in letter trays on pallets ...................................227
Intelligent Mail® barcode......................... .... ..... ..........................................228
Chapter 11:
Mail.dat ...................................................................... .... ............................ 231
Mail.dat ........................................................................................................232
Preparing for Mail.dat file generation..........................................................234
Contents
5

Generating Mail.dat files .............................................................................237
Chapter 12:
Multiple entry points................................................................................ 239
Drop-shipping your mail..............................................................................240
Selecting your facilities ...............................................................................241
Facility sequence..........................................................................................242
Entry point details........................................................................................244
Multiple entry point reports.........................................................................246
Chapter 13:
Reports................................................................ ..... .... .............................. 249
Choose printers for reports .........................................................................250
Choose fonts for reports...............................................................................251
Format reports..............................................................................................252
Batch print....................................................................................................253
Access report files........................................................................................254
General reports.............................................................................................256
Address-correction reports...........................................................................258
Merge/Purge reports ....................................................................................262
Move-update report......................................................................................264
Presort reports..............................................................................................265
USPS Postage Statements............................................................................275
Extended Services reports ...........................................................................281
Chapter 14:
Design and print labels............................................................................. 289
Print methods...............................................................................................290
Label Toolbox wizard..................................................................................291
Get started designing labels.........................................................................293
The Designer window..................................................................................296
Define your page settings ............................................................................298
Define your printer settings .........................................................................299
The Layout window.....................................................................................300
Lines.............................................................................................................302
Objects.........................................................................................................303
Frames..........................................................................................................304
Fields............................................................................................................306
Barcodes.......................................................................................................311
Break marks.................................................................................................312
Images..........................................................................................................314
Other miscellaneous objects ........................................................................315
Container labels ...........................................................................................316
Verify labels.................................................................................................318
Preview labels..............................................................................................319
Page templates .............................................................................................321
Layout templates..........................................................................................322
Printers.........................................................................................................323
Inkjet printers...............................................................................................324
Generic Text driver......................................................................................326
Barcode printing with the Generic Text driver............................................329
Print labels ...................................................................................................332
Print labels for selected presorted records...................................................333
6
Business Edition User’s Guide

Printing labels for firm packages .................................................................334
Expressions and filters .................................................................................335
Expression and Filter Builder.......................................................................337
Examples of value expressions and conditional filters ................................339
Appendix A:
Fields............................................................................................................341
Appendix B:
Index field attributes..................................................................................353
List of index field attributes.........................................................................354
Appendix C:
Error and status codes .............................................................................359
Error codes ..................................................................................................360
Status codes ................................................................................................ .364
International address error codes..................................................................367
Appendix D:
Operators and functions for Label Toolbox expressions........................369
Operator words for combining functions.....................................................370
Other operators.............................................................................................371
List of functions ...........................................................................................372
Summary of functions by purpose ...............................................................379
Appendix E:
Predefined design files, templates, and printer files ...............................381
Design files........................................................................... .... ....................382
Page templates..............................................................................................384
Layout templates................................................ .... ......................................385
Printer files...................................................................................................386
Appendix F:
Utilities.........................................................................................................387
Chkread ........................................................................................................388
Extract ..........................................................................................................389
Index............................................................................................................393
Contents
7

8
Business Edition User’s Guide

Preface
About Postalsoft Business Edition
Postalsoft Business Edition is a cost-effective mailing and database-management
software solution. It offers complete database management, combining address
correction and standardization, merge/purge processing, presorting, customprinting options, and other valuable features in one easy-to-use software solution.
Postalsoft’s address standardization engine (ACE) is CASS-certified, which
means that it meets USPS regulations for applying correct postal codes and
standardizing addresses, cities, and states. This gives you maximum postage
discounts and fast, accurate delivery of your mail.
Postalsoft Business Edition offers options to increase productivity, revenue, and
cost savings. See
License agreement You can read the license agreement on-screen during installation, and you can
“Postalsoft Business Edition options” on page 11 for details.
also access it after installing by choosing Help > License Agreement. The
license agreement explains the terms of owning the software.
Conventions This document adheres to the following documentation conventions:
Convention Description
Bold We use bold type for file names, paths, emphasis, and text that you
should type exactly as shown. For example, “Type
Italics W e use italics for emphasis and text for which you should substitute
your own data or values. For example, “Type a name for your job,
and the
.job
extension (
jobname
.job
).”
cd\dirs
.”
Menu commands We indicate commands that you choose from menus in the follow-
ing format: Menu Name > Command Name. For example, “Choose
File > New.”
We use this symbol to alert you to important information and potential problems.
We use this symbol to point out special cases that you should know
about.
Preface
9

Documentation
Your complete documentation set
Access the latest documentation
The complete documentation set for Postalsoft:
User’s Guide (this guide)
Release Notes
Text-Based Printing Guide
Online help, available within the software (see “Online help” on page 10)
You can access documentation in several places:
Your computer. Choose Start > Programs > Postalsoft Business Edition and
choose the document you’d like to view.
On the Customer Portal. Go to http://help.sap.com, click Business Objects,
select Postalsoft, and find the document you’d like to view. You can view
PDFs online or save them to your computer.
Online help Online help contains detailed explanations of every software feature and step-by-
step “how-to” instruction. While working in the software, you can access help
several different ways:
Click the “?” icon in the upper-right corner of the screen, and then click the
item you want to learn more about.
For help on a whole window, press F1.
Choose Help > Postalsoft Help Topics. Use the Contents, Index, and Search
tabs to find the topic you want to learn more about.
Related guides For essential mailing information from the USPS, see:
USPS Domestic Mail Manual (DMM)
USPS Quick Service Guide
10
Business Edition User’s Guide

Postalsoft Business Edition options
Postalsoft Business Edition offers the following for-sale options:
Delivery Point Validation. DPV helps you to validate the accuracy of your
address information. DPV identifies addresses that are undeliverable as
addressed and whether or not an address is a Commercial Mail Receiving
Agency (CMRA).
LACS
Link
. LACS
addresses. These “911” conversions make it easier for police, fire,
ambulance, and postal personnel to locate a rural address. LACS
converts addresses when streets are renamed or post office boxes
renumbered.
GeoCensus. With the GeoCensus option, during address correction
Postalsoft Business Edition compares each record to a directory containing
U.S. Census Bureau TIGER data. Using this data, you can append latitude,
longitude, FIPS codes, and Census tract and BNA codes.
Mover ID (NCOA
correction Postalsoft Business Edition looks in the NCOALink directories for
move-updated addresses for your records.
Multiple entry points. With this option, Postalsoft Business Edition can
presort your job to earn postage discou nts on drop-shi ppin g to multi pl e entry
points.
Link
updates rural-route addresses to street-name
Link
). With the Mover ID option, during address
Link
also
Package Services (PSVC) Bound Printed Matter. With this option,
Postalsoft Business Edition can presort Package Services Bound Printed
Matter flats, irregular parcels, and machinable parcels.
Pallet preparation. With this option, Postalsoft Business Edition can build
pallets for Standard Mail flats and letters; Periodicals flats; Package Services
Bound Printed Matter machinable parcels and flats.
For more information or to purchase an add-on option, contact Business
Objects at
http://www.postalsoft.com.
Preface
11

12
Business Edition User’s Guide

Chapter 1:
Get started
This chapter gets you started using your software by explaining:
System requirements
Installation instructions
How to prepare for printing
How to use the online help
Postalsoft Business Edition’s for-sale options
Chapter 1: Get started
13

System requirements
Minimum system requirements
You need the following to run Postalsoft:
A computer with a supported operating system (Windows XP Professional,
Windows 2000, Windows 2003 Server, or Windows Vista Professional).
Note: Postalsoft has been tested on Windows Vista (Business version).
Continued testing and full support fo r Vista (Business) will follow in the near
future, but you should be able to use Postalsoft on Vista if you need to.
Ensure that your printer manufacturer has added support for your printer as
well, as many manufacturers have not developed Vista drivers yet.
A CD-ROM drive, properly installed for use with Windows.
A printer, properly installed for use with Windows. Make sure you have fully
configured and tested your printer with Windows. You won’t be able to print
with this software until you have properly set up your printer with the
Printers control panel, including choosing a port.
1305 megabytes (MB) of free hard disk space. You wil l need more disk space
later, when you create or import list files. On average, the amount need ed is
about 1 MB per 4,000 records.
A minimum of 256 MB of memory. We recommend 1 gigabytes (GB) of
memory if you will run other programs while running the sof tware or you
will be processing files with more than 200,000 records.
Minimum screen resolution of 1024 x 768.
Requirements for the DPV for-sale option
Requirements for the
Link
LACS
for-sale
option
Requirements for the
Mover ID NCOA
Link
for-sale option
You need the following to run Delivery Point Validation (DPV):
600 MB disk space for the DPV directory files.
35 MB of memory, or at least 1.0 GB if you plan to cache the directories. We
recommend 1.5-2 GB if you’re caching directories and want to significantly
reduce processing time.
You need the following to run LACS
450 MB disk space for the LACS
150 MB of memory if you will load the LACS
Link
:
Link
directory files.
Link
directories to memory to
improve processing speed (optional).
You need the following to run Mover ID NCOA
2 gigabytes (GB) of memory (For optimal processing speed, your compu ter
Link
:
should have 3 GB of RAM.)
60 GB of available disk space
DVD drive (NCOA
Link
directories are shipped to you on DVD, from the
USPS.)
14
Business Edition User’s Guide

Install Postalsoft
Install Postalsoft You can install from downloaded files or from a software CD that you ordered.
Before you install Postalsoft, close any open programs, especially antivirus
programs, which can interfere with installation. To install the software, you need
full administrator rights.
To install the software from a downloaded file:
If you downloaded your software from the SAP Service Marketplace (SMP) or
Electronic Software Delivery (ESD) site, you must unzip the downloaded files
first, before you can install the software. While you’re downloading, make note
of the file name and the location that you download so that you can easily locate
the file.
1. Locate the downloaded file.
2. Double-click the file that you downloaded to unzip the downloaded files.
Unzip them to a new folder named Postalsoft790.
3. Go to the Postalsoft790 folder and double-click setup.exe to install the
software.
To install th e software fr om CD:
When you insert the Postalsoft program CD in your CD-ROM drive, the
installation program should start automatically. If it doesn’t, follow these steps:
Automatically install revisions and hot fixes
1. Access your Windows Start menu and choose Run.
2. In the Run window, type x:\setup (where x is the letter of your CD-ROM
drive) and click OK.
During installation, please note:
Keycodes. If this is your first time installing Postalsoft, type your product
keycode(s), also known as license keys, when you are prompted to do so.
Enter a keycode for each add-on option that you ow n. If you ne ed to enter or
edit your keycodes after installation, you can access the keycode program,
License Manager, from the Start menu. Ch oose Start > Programs > Postalsoft
Business Edition > License Manager. You need to enter your keycodes just
once, not each time you install an up date. You can obtain your keycodes from
SAP Service Marketplace (http://service.sap.com).
.Net. A delay may occur while the Microsoft .NET Framework is installed.
Please be patient and allow installation to finish.
When installation is complete, the installation program restarts your computer.
Software revisions and hot fixes for the version you have installed are available to
you by automatic download via the internet. You won’t have to go to the
corporate web site to download these hot fixes and revisions.
To choose how often you want the software to check for updates.
1. Choose Tools > O ptions.
2. In the Options window, click the Software Updates button.
3. In the Software Update Options window, enter your S User ID, which is
necessary for verification of your account when checking to see if any
Chapter 1: Get started
15

updates are available for your software. If you entered your S User ID during
installation, the number is automatically filled in here for you.
4. Choose how often you want Postalsoft to check for software updates:
Option Description
Always Check Every time you open Postalsoft, Postalsoft checks online to see if
there is an update available.
Prompt Before
Checking
Every time you open Postalsoft, you are prompted to look for software updates. You can choose to check at that time or dismiss the
prompt without checking.
Never Check Postalsoft does not automatically check for software updates. You
can check for updates manually.
5. Click OK to save your settings and close the window.
Manually check for
updates
If you didn’t choose to have the software automatically check for updates, you
can manually check for updates yourself. Even if you did choose to automatically
check at startup, you can manually check at any time by following this step:
1. Choose Help > Check for Updates.
The Available Updates window opens in the following cases:
When you choose Help > Check for Updates.
When the software automatically checks for updates, if updates are available.
Updates At the Updates tab, you can see information about available software updates,
and you can choose to download or install the updates now.
Action Description
Download Click the Download button if you want to retrieve the software update from
the server now (copying it to your hard disk) and install it from your hard
disk later.
You will be prompted for a location in which to place the downloaded software. That is the location you’ll need to access later when you want to
install the update.
Install Click the Install button to install the updated software on your computer
now.
Messages At the Messages tab, you can view announcements about your product and other
news.
16
Business Edition User’s Guide

Install directories
Install Diversified,
eLOT, DPV, and/or
Link
LACS
directories
Directories are available separately from your software. Before you install
directories, you must install Postalsoft. To install directories, you need full
administrator rights.
The process for installing directories may change in the coming months. For the
latest installation instructions, refer t o the instruc tions pro vided in the HTML fil e
that comes with your directories.
To download and extract directory files to your computer:
1. Download the self-extracting directory file fro m the Business Objects ESD
site and specify where you would like to save the file.
2. Locate and double-click the .exe file that you downloaded.
3. When you’re prompted for the location in which to place the zipped directory
file, browse to the folder where you want to place the file and click Install.
4. Repeat steps 1 through 3 for each self-extracting .exe file that you’re
downloading. If you’re installing ZIP+4, eLOT, DPV, and LACSLink, you
will have four files total.
To load the directories:
1. Open Postalsoft and choose File > Load Directories.
2. In the Load Directories window , select the directories that you want to install.
Diversified directories include ZIP4US and other directories needed for
presorting and address correction.
eLOT directory is used when assigning Line-of-Travel codes for carrier-
route discounts.
DPV directories are used during Delivery Point Validation processing.
DPV is required for CASS certification.
LACS
Link
directories are used during Locatable Address Conversion
System processing (converting rural route addresses to street addresses,
Link
and other types of renaming. LACS
is required for CASS
certification.
3. Click OK.
A Loading Options window appears for each directory that you chose to
install. When you finish loading one directory, the next Loading Options
window appears.
4. If you’re installing from CD, insert the corresponding directory CD as
needed. For example, when the Diversified Director y L oad in g Op tions
window appears, insert the Diversified Directory CD.
5. In the Loading Options window, specify whether you’re loading the directory
from a Downloaded File or from File Folder / CD. Specify the Source
Location (where you’re loading from), the Destination Location (where
you want the directories installed to), and click Load. Repeat this step for
each type of directory that you're loading.
Chapter 1: Get started
17

You can click Browse to search for the location that you’re loading from and to.
You can also click Skip if you do not want to load a particular directory now.
When you load the Diversified directories, the ZIP4US directory is installed to
the destination that you specify. Other smaller directories installed with ZIP4US
are automatically installed to your default directory installation folder.
Labeling list changes The USPS frequently updates labeling lists, and th ose updat es are reflected in the
directories that you receive for use with Postalsoft. To read about labeling-list
changes, see the USPS Postal Bulletins, available at
http://www.usps.com/cpim/ftp/bulletin/pb.htm.
Install GeoCensus directories
Set GeoCensus directory locations
You don’t need to install all of the TIGER data. Install only the directories
with the ZIP Code ranges that you use. Refer to the readme.txt files on the
CDs to learn which directories contain the ZIP Code ranges that you need.
T o install the directories, simply copy the directory that you want from the CD
and paste it onto your hard drive or server. You can install the files in any
location. If you install more than one directory, they do not need to reside in
the same place.
For example, to install the TAgeo6.dir file into a folder named GeoDirs in:
1. Place the TIGER Data CD with the TAgeo6.dir file into your CD-ROM
drive.
2. Open the Windows Explorer program by right-clicking My Computer
and choosing Explore from the menu.
3. Under Folders, expand My Computer, and choo se your CD-ROM drive.
Select and copy the TAgeo6.dir file.
4. Navigate to your Postalsoft directory and cre a te a ne w folder, GeoDirs.
Open this folder, and paste the TAgeo6.dir file into it.
For each GeoCensus directory that you install, indicate its location by
following these steps:
18
1. Choose Tools > Options.
2. Click File Locations under Address Correction, and click the GeoCensus
File Locations tab.
3. Click the Browse button, and navigate to the directory where you
installed the directory file. Click Open.
4. Click OK, and click Close.
Business Edition User’s Guide

Postal directories
To correct addresses, assign codes, and presort your mail, the software uses
databases called postal directories. These directories are based on data from the
USPS. Business Objects receives the USPS data, sorts it, and compresses it into a
smaller format to fit on your computer.
Because directory data changes and grows all the time, the USPS requires
directory updates at least every other month.
The following directories are available for use with Postalsoft.
The “x” in a directory’ s file name re presents a number that changes when the
directory format changes
City (city0x.dir) The City directory contains city names, states, and ZIP Codes, organized by state
and city. This directory is relatively small because it contains one record per
possible combination of city, state, and ZIP Code.
DPV (dpvx.dir) DPV directories are available with the purchase of the Delivery Point Validation
option.
DPV directories require 600MB of writable hard drive space. Do not rename any
of the files. DPV will not run if the file names are changed. DPV directories are
shipped monthly or bimonthly, your choice. The DPV directories expire in 105
days and must be the same month as the National ZIP+4 directory.
Delivery Statistics File (DSF.dir)
eLOT (elot.dir) Enhanced Line-of-Travel (eLOT) data is used to prepare carrier-route mailings
The DSF directory is used for presorting to verify compliance with walk
sequence saturation and high density rate requirements.
for Periodicals and Standard Mail. Postalsoft searches the eLOT directory when
you correct addresses that contain the CRRT and LOT or LOT_Order fields. You
need to use the eLOT directory only when you prepare carrier-route mail.
Enhanced Street Lookup (zip4us.rev and zip4us.shs)
These two directories enhance Postalsoft’s street-name lookup process. These
new directories make it possible for Postalsoft to find the mat ching street name in
the directories even when it can’t match the begi nning portion of the st reet n ame.
With the new directories, Postal soft can compare the last le tters of the street name
to find a match.
These directories are includ ed on your Diversified Directories CD and are
installed to the NatlDirs folder.
Facility (facility.dir) The Facility directory contains information a bout USPS dro p-ship faciliti es, such
as drop-site keys, drop-site names, and drop-site delivery addresses.
GeoCensus (TAgeox.dir)
GeoCensus directories are available with purchase of the GeoCensus option.
Chapter 1: Get started
19

To assign GeoCensus codes, Postalsoft uses the U.S. Census Bureau’s TIGER
data during address correction. TIGER data is stored in 10 directory files that
total 1.5 gigabytes.
Link
LACS
Mail Direction (maildirect.dir)
Mail Processing Center (MPCxx.dir)
(llk*.*) LACS
Link
directories are available with the purchase of the LACS
Link
LACS
any of the files. LACS
directories require 450MB of writable hard drive space . Do not rename
Link
will not run if the file names are changed. LACS
directories are shipped monthly or bimonthly, your choice. The LACS
Link
option.
Link
Link
directories expire in 105 days and must be the same month as the National ZIP+4
directory.
The Mail Direction directory contains information about where and when mail
pieces should be dropped in order to receive discounts based on class and shape.
The USPS requires mailers who claim entry discounts to use FAST data to choose
entry points. However, in certain cases, the USPS allows exceptions. If your local
facility is granting exceptions, you may use an alternate facility directory
(maildirect_def.dir) to bypass the FAST data.
Do not use the maildirect_def.dir file if you are using the multiple entry point
feature. Bypassing FAST data is allowed only when dropping at a single entry
point.
The MPC directory is used to form and label containers and pallets. This file
contains information regarding the servic e areas (SCFs, ADCs, BMCs, and so on)
and is used for all mailings.
National ZIP+4 (zip4us.dir)
The National ZIP+4 directory contains street names, ranges of house numbers,
and postal and other codes, organized by ZIP Code. This directory is very large
(680 MB) because it contains one record per city block, building, or company. It
contains over 30 million records, representing a total of over 130 million places
where mail is delivered.
Reverse ZIP+4 (revzip4.dir)
ZIP City File (zcf0x.dir*)
The revzip4.dir directory helps the softw are to assign more po stal codes when the
address contains a unique ZIP and a valid ZIP+4.
The ZCF directory contains city names, states, and ZIP Codes, organized by ZIP
Code. This directory is relatively small because it contains one record per
possible combination of city, state, and ZIP Code.
Zone (zone.dir) The Zone directory is used for presorting to calculate postage based on the
distance between entry and delivery offices. This file is used for Periodicals and
Package Services BPM mailings.
20
Business Edition User’s Guide

Directory release schedule
Because directory data changes and grows all the time, the USPS requires
directory updates at least every other month.
USPS release date User receipt date 20-day warning begins Expiration date
February 15 February 28 May 12 May 31
April 15 April 30 July 12 July 31
June 15 June 30 September 11 September 30
August 15 August 31 November 11 November 30
October 15 October 31 January 12 January 31
December 15 December 31 March 12 March 31
Monthly updates If you purchase monthly directory updates, your monthly update includes
directories that were updated within the last month. This includes:
ZIP4US directory
DSF directory
MPC directory
Facility and Mail Direction directories
DPV directories (if you own this option)
LACSLink directories (if you own this option)
Other directories that may or may not have been updated since the last bi-
monthly release
Downloads You can download updated directories from
https://businessobjects.subscribenet.com/control/bobj/login.
Facility and Mail Direction directories
The facility.dir and maildirect.dir directories are included in your bi-monthly or
monthly directory download and are loaded appropriately during the directory
installation process. However, the USPS updates FAST data continually, and you
may want access to this updated data more frequently. Therefore, updated FAST
directories are posted on the second Thursday of each month. If the second
Thursday falls on a holiday, then the directories are available the day before.
T o download the directories:
1. Go to https://websmp209.sap-ag.de.
2. Click the SAP Support Portal link.
3. Enter your user name and password.
4. At the top of the window, click Downloads and then Business Objects
Downloads.
5. In the left pane, click US Postal Service and Data Quality Supplemental
Files and then Mail Direction File.
6. Select the maildirection.zip file to download.
Chapter 1: Get started
21

7. When prompted, save the .zip file to a temporary area (for example, c:\temp\
dirs). The .zip file contains both facility.dir and maildirect.dir. The .zip file
also includes .upd files, which you can ignore.
8. After the file is downloaded, double-click the .zip file and unzip the
facility.dir and maildirect.dir files into the location where the Postalsoft
directories are currently installed (by default, c:\Postalsoft\NatlDirs).
22
Business Edition User’s Guide

Prepare for printing
Your printer Before you can print with this software, you need to connect printer cables, load
paper, and set controls on your printer. Refer to your printer’s manual for details.
Printer drivers You must install a printer driver to enable commu nication between yo ur computer
and your printer. If your printer’s manufacturer or Windows itself supplies the
driver for your printer , install that driver following the instructions in your prin ter
or Windows manual.
If your printer’s manufacturer or Windows does not supply a driver, consult your
printer manual to see if the printer emulates another printer whose driver is
supplied by Windows. If so, install that driver. You may need to set some frontpanel controls on your printer to enable this emulation. Refer to your printer’s
manual for details.
Generic Text driver Some printers require a text-only printer driver. Label Toolbox offers a Generic
T ext d river, which comes installed with your Postalsoft software (there is no need
to do a separate installation). To setup and use the Generic Text driver, see
“Design and print labels” on page 289.
Chapter 1: Get started
23

24
Business Edition User’s Guide

Chapter 2:
Postalsoft files
This chapter describes the three files that Postalsoft uses to store your
information:
Mailing description file (.mdf)
Database file (.dbf)
Index file (.cdx)
Chapter 2: Postalsoft files
25

Mailing description file (.mdf)
The file you create and work in is called the mailing description file. It has the
extension of .mdf (for example, customer.mdf). Think of the mailing description
file as a tool you use to view and manipulate the information in the database. In
the mailing description file, you can perform certain tasks with the information
stored in the database file (such as correcting addresses).
The mailing description file contains many of your settings. These settings stay
with your mailing description file and will not change until you change them.
Two or more users cannot access the same mailing description file
simultaneously. For example, if user A is working in the customer.mdf file on
computer A, user B cannot open and work in the customer.mdf file on computer
B at the same time. User B can, however, create a brand new .mdf file and access
the same database file that is associated with the customer.mdf file.
Database file (.dbf) The database file (.dbf) contains data for every field in every record and is dBase-
compatible. Typically the data includes name and address information. However,
you can create your own non-address fields.
As you add information via the mailing d escription file, the data is plac ed into the
database file. When you add a new record, other users sharing the same database
file will then have access to that new record.
The database file doesn’t have to be named with the same root name as your
mailing description file. And you can have more than one .mdf file associated
with a .dbf file. For example, you could have a database file cal led main.dbf, and
it could be associated with customer.mdf, fallsale.mdf, and select.mdf. This
relationship is illustrated below.
customer.mdf
fallsale.mdf
Relationship between the
MDF, DB F, and CD X f iles .
main.dbf
main.cdx
select.mdf
Index file (.cdx) The index file keeps track of which fields are indexed—that is, which fields yo u
can sort by (last name, ZIP Code, and so on). The index file is connected to the
database file and is updated each time yo u add or change data. It has the extension
of .cdx (for example, main.cdx).
26
The index file’s root name will always be the same as the database (.dbf) file’s
root name.
Business Edition User’s Guide

Database permissions
You can share a single database file simultaneously with other users. In fact, there
can be several mailing description files associated with one database file, and
more than one user can work in a database file at a time.
An advantage to database sharing is that you can perform an operation without
locking up the whole database file for long periods of time. Instead, the
processing can take place allowing other users access to the database file at the
same time. For example, you can add records to the database while others are
adding to the database.
Database permissions control the access other users have to the database file
you’re using, and control the access you have as the user while you have the file
open.
You set database permissions when you create a new file. To change permissions
later, choose File > Properties > Document, Database Permissions tab.
Your access These database permissions control your access to the database file:
Database permission Description
Read Only Allows you to view the database file, but you cannot make
any changes or perform any procedures such as address
correction. Use this setting if you only need to refer to the
file and want to ensure you don’t inadvertently make any
changes.
Read/Write Gives you full access to the database file.
Chapter 2: Postalsoft files
27

Others’ access These database permissions control other users’ access:
Database permission Description
None
(Exclusive mode)
Read Only
(Read Shared mode)
Read and Write
(Write Shared mode)
Prevents other users from accessing the database file while you’re using it.
The illustration below shows a mailing description file called
Exclusive mode. This file uses the
ing description file called
fallsale.mdf
main.dbf
as its database file. Another user has a mail-
which also uses the main
customer.mdf
.dbf
as its database file.
opened in
Operations that require Exclusive mode:
Changing fields’ properties (File > Properties > Database). Exception: Y ou may change
a field’s kind, and coded and hidden attributes without exclusive access.
Removing deleted records (Tools > Remove Deleted Records).
Reindexing (Tools > Reindex).
Restoring the database file (File > Restore Database).
All operations on multiple records run faster in Exclusive mode, especially:
Assigning addresses (Tools > Correct Address > Multi-record).
Presorting (Tools > Presort > Sort).
Printing address labels (Print > Labels).
Processing duplicate records (Tools > Merg e/Purge).
Allows other users access to the database file you’re using. However, they can only
view
the records. They will not be able to make any changes or additions to the file.
Allows other users access to the database file while you’re using it. Other users cannot
have exclusive access while you have the file open, however.
While in this mode, the individual record you’re working on is locked so other users can-
not alter that record. When you leave the record, it becomes available again. If someone
else is altering a record that you try to access, you will get a message stating that the
record is currently locked. You can choose Retry to keep trying to access the record. You
will gain access as soon as the other user goes on to another record.
Important:
Postalsoft does not support the Universal Naming Convention path to specify
the database file. In order to use a database from a remote machine, you must use a
mapped drive to the database file.
28
Business Edition User’s Guide
customer.mdf
in Exclusive
mode
fallsale.mdf
No access now!
main.dbf

Chapter 3:
Create a mailing list
Before you can arrange your file’s layout, you must understand the elements that
make up an effective layout. This chapter describes those elements and special
features in designing your file’s layout, including:
Planning your layout
Understanding field properties
Using the default layout
Using the Settings Library
Fine-tuning your layo ut
Chapter 3: Create a mailing list
29

Plan your layout
What is layout? A layout consists of a combination of fields in a record and the characteristics of
those fields. Fields are the components that make up your record.
For example, your record may contain a name, which can be broken down into
first name, middle name, and last name fields.
FIRST MID LAST
What fields should you use?
Robert J Abbott
Robert J Abbott
Choosing the right fields for your layout is important. You should include in your
layout all fields that you might need, even if you don’t need them right away or
only need them for a few records. However, choosing a layout with unnecessary
fields or fields larger than necessary wastes disk space and slows performance.
Ask yourself what kind of information you’ll want to ke ep track of. What data
will you want to maintain for each or most records? What data will you add
through Postalsoft processing?
Incoming record:
Robert J Abbott
Friendly Co
353 Glencoe Ct
Sherwood OR 97140
(541)234-5678
#2834101158
Keep:
Name
Company
Address
Add through Postalsoft
processing:
4-digit ZIP Code add-on
DP2
CRRT
LOT
LOT Order
Resulting record:
Robert J Abbott
Friendly Co
353 Glencoe Ct
Sherwood OR 97140-9213
35 R006 0017 D
30
After you establish a list of fields, compare them to Postalsoft’s default list of
fields. You can add or su btract fields from the default layout to match the fields
you have selected. Y ou can also create your own fields to match special fields you
may have.
See “The default layout” on page 33.
Business Edition User’s Guide
Discarded information:
Phone
Account number

Field properties
To access field properties, choose File > Properties > Database.
Name A field’s name tells you what information that field holds. You can name fields
anything you want. What’s important is that you name your fields so they make
sense to you and other people using the file.
The field name must be 1 to 10 characters long and must start with a letter.
Remaining characters may be letters, numbers, or the underscore character.
Kind A field’s kind tells Postalsoft what to expect in that field. This way, regardless of
the field’s name, Postalsoft knows where to look for the information it needs
when assigning addresses and searching for duplicate records, for example.
A field containing a record’s ZIP Code could be named ZIP, or Postalcode, but its
kind can only be ZIP (5-digit), ZIP/ZIP+4 (12345-6789), or ZIP/ZIP+4 No Dash
(123456789). These are the established Postalsoft field kinds for a ZIP Code
field.
Fields that don’t have any special mailing significance and unique fields you
create must have a field kind of Normal.
Type A field’s type tells Postalsoft what type of information to expect in the field. For
example, Postalsoft expects to find letters, numbers, or punctuation marks in a
character field. Most fields are character-type fields.
Type Description
Character A character field holds any characters, such as letters, numbers, punctuation
marks, and so on.
Number A number field holds a numeric quantity. Don’t use for ZIP Codes, Social
Security numbers or other numbers that aren’t meant to be calculated mathe
matically. May have zero or more decimal places specified.
Note:
A number field in Data Sheet view is displayed right justified for eas-
ier viewing of numeric data.
Logical Accepted data includes only T, F, Y, N, (for “true,” “false,” “yes,” or “no”).
Date Date fields contain date data. V alues must be in the format mm/dd/yyyy (08/
13/1999) or yyyymmdd (19990813).
Memo The memo field may be present in the layout for compatibility with other
applications using FoxPro compatible memos (
always hidden, and memo data cannot be accessed. We recommend that you
do not select this type. Postalsoft cannot open or create files with dBase
memo fields (
.dbt
file).
.fpt
file). Memo fields are
-
Length This is the maximum number of characters allowed in the field. For example, the
State field’s maximum length is 2. The maximum length for any field is 254. You
shouldn’t set a field length longer than necessary because it will slow
performance and waste disk space.
Chapter 3: Create a mailing list
31

Decimal places This field property applies only to fields that are true decimal numbers. It defines
the number of decimal places, often zero, in the field. You need to state the
number of decimal places in a number field.
Indexed If a field is indexed, you can view and print records in order by this fi eld. For
example, if you choose the ZIP Code field to be an indexed field, Postalsoft can
arrange your file in ZIP Code order, which is useful during address correction.
This type of index is called a simple index. Having man y indexed fiel ds will slow
your program somewhat and use additional disk space and memory.
Coded Coded fields accept only certain words or terms that you designate in a separate
file. For example, you could use a coded field to define regions. Then you can
select Eastern, Midwest, or Western as possible choices for the coded field. Refer
to the online help for instructions on how to create a coded field and a code
profile.
Hidden Hidden fields are not displayed on screen. Most of the time, you will want to be
able to see fields on screen. However, you may want a hidden field to protect the
confidentiality of information in your records.
32
Business Edition User’s Guide

The default layout
When you create a new database (File > New), Postalsoft automatically includes
the most commonly used fields in the layout. You can alter these fields or delete
them from the layout if you want. You can also add other fields to the layout if
you need to.
Note: If you create a new file using an existing database, Postalsoft uses th e
fields that exist in the database. If you crea te a new file an d choose to c reate a
new database, Postalsoft uses the default layout.
The table below shows the fields included in Postalsoft’s default layout. See
“Fields” on page 341 for details about these and other Postalsoft fields.
Field Description
FIRST First name
LAST Last name
COMPANY Company name
ADDRESS_1 First line of the street address
ADDRESS_2 Second line of the street address
CITY City name
STATE State name
ZIP ZIP Code (5 or 9 digit)
DP2 Delivery-point barcode
CRRT Carrier route
LOT Line of travel
LOT_Ord Line of travel order
ERR_ST AT Error and status codes from address assignment
PST_SEQNUM
LACS_CODE LACS
LACS_REQ Indicates whether a record requires Locatable Address Conver-
LACS Locatable Address Conversion System conversion status.
DPV_STATUS
DPV_CMRA
The presorted piece number for the job. You can index this
field, but it is read-only.
Link
match status.
sion System conversion.
Indicates whether the address is a valid delivery point.
Indicates whether the address is a Commercial Mail Receiv-
ing Agency or triggered DPV locking.
DPV_NOSTAT Indicates whether the address is a vacant property, it receives
mail as a part of a drop, or it does not have an established
delivery yet.
Chapter 3: Create a mailing list
33

Create your own default layout
Postalsoft’s default layout provides a good starting point for you. If our default
layout has everything you need, you won’t need to change a thing! However, if
you find that you consistently have to change Postalsoft’s default layout, you can
create your own. Once you create your own, Postalsoft uses your default layout
for new files.
To set up your default layout, click the Default Database Properties button under
Tools > Options.
34
Business Edition User’s Guide

Fine-tune your layout
Postalsoft makes it easy to design your layout exactly the way you want. Y ou can
even go back and change your layout after you initially create it. Consult the
online help for complete step-by-step instructions for all of the tasks below.
To edit an existing layout, choose File > Properties > Database.
Make custom fields If you need a field in your layout that is not one of the default or predefined fields,
you can create it by choosing the Normal Field kind and giving the field a name
and other properties of your choice. See the online hel p top ic, “Add a field to the
layout of new .mdf file.”
Copy another file’s layout
Add fields to your layout
Delete fields from your layout
You can adopt another file’s layo ut if it fi ts in with how you want to manage your
new file. When you copy another file’s layout, you are only copying the other
file’s fiel d properties, not the contents of those fields. Afte r copying anot her file’s
layout, you can make any necessary changes, such as adding or deleting fields.
The following elements are copied from the other file’s layout:
Settings in Print > Printing Options, including options in the Printers and
Printer Fonts tabs
Presort settings in Tools > Presort > Sort Settings
Data form design
Field components (such as length, type, kind, and so on)
CASS mailer information
Database options set in File > Properties > Document > Database input
You can have up to 255 fields in your layout. You can add predefined fields or
your own fields (custom fields) to the beginning, middle, or end of the layout. See
“Fields” on page 341.
You can remove predefined or custom fields from the layout if you know that you
won’t need or use those fields. For example, you may not need the Phone field,
which is included in the default layout.
Change a field’s properties
Reuse job settings with a different database
Caution: If you delete a field from your layout and the database file already
!
contains records with information in that field, you will permane ntly lose all
information in that field.
Y ou can change the property of a field that is already in your layout. For example,
if you discover you have given a character-type field a numeric-type property,
you can go back to your layout and change the type to character. See the online
help for complete instructions.
If you would like to use the same job settings but wi th a different database, you
can choose a different database file for the current mailing description file. This
database file must have the exact layout as the current layout; you will no t be able
to switch databases unless the layout is exactly the same.
Chapter 3: Create a mailing list
35

To choose a different database file, choose File > Properties > Document, and
click Browse.
Run your settings again When you change databases, you must perform all processes again, such as
address correction, Merge/Purge, and presorting, with the new database file. You
also need to create new reports. Any reports that were created with the previous
database will be overwritten.
36
Business Edition User’s Guide

Chapter 4:
Import and export data
In this chapter you will learn:
How Postalsoft interprets information laid out for import and export
Components that are important to the process
The strategy behind choosing these components
Consult the online help for complete instructions on how to import and export
files.
Chapter 4: Import and e xport data
37

Introduction
Definitions Import: Add records from a separate file to your mailing list.
Export: Create a separate file of records from your mailing list.
Reasons to import and export files
You can import files into Postalsoft so that you can perform a variety of tasks on
those incoming records. For example, you can:
Parse name and address data
Correct addresses
Assign gender codes, prefixes, and greetings
Find and process duplicate records
Presort and calculate postage
Print address labels in presort order
Print container labels
Generate USPS and other reports
You may, in turn, export these processed files. For e xample, yo u may want to sel l
the list to other companies, export to Microsoft Word Mail Merge documents, or
Link
export to Lorton Data for NCOA
processing.
Import You can import an entire file or just certain records; choose File > Import. With
Postalsoft you can import data even though the incoming list may differ in its
layout. The list you import may have:
Different field names, sizes, or types
Additional or fewer fields than your Postalsoft data file
Fields in a diff erent order
First and last names in one field
City, state, and ZIP Code in one field
ZIP Code and ZIP+4 extension in separate fields
Separate fields for each address component
Export You can export all or just some records from your database to another file. To
access the Export option, choose File > Export.
If you want to export a file for use with a specific program, check the
documentation for that program to find out what formats it can read.
Caution: Never attempt to read or modify Postalsoft files directly with a
!
word processor or text editor. Doing so may corrupt the file.
38
Business Edition User’s Guide

Import and export considerations
Consider the following factors before you decide to import or export files.
Check available drive space
Before you import or export , you must make sure yo u have en ough avai lable disk
space. To check available space on your local drive, choose Help > About
Postalsoft.
You can estimate the number of kilobytes (KB) required for importing or
exporting a file by dividing the number of records by two. A file of 1,000 records
would require at least 500 KB of free hard disk space.
File size Postalsoft does not support importing or exporting files lar g er than 2 gigab yt es
(GB).
Media compatibility To transfer data between computers, the computers on each end of the import/
export process must use the same media types (CD ROM or ZIP disks, for
example).
When exporting data, if your computer supports several different media, you may
want to ask the person receiving the data what format they require.
Foreign characters Postalsoft does not support importing or exporting databases that contain foreign
characters.
File format Postalsoft makes an educated guess and chooses a file format for you when you
import a file. In some cases you know the imported file’s format. Postalsoft
allows you to change its guess, but will let you know if it determines that your
choice is wrong.
When exporting, you must choose the file format.
Format Description Import Export
Microsoft Access
97/2000/2002
(
.mdb
)
Microsoft Excel
2000/2002 (
dBase compatible
(
.dbf
Data Interchange
Format (
)
.dif
.xls
)
Microsoft Access files contain one or more tables. Each table can represent the
same database with different types of information, or completely different data
bases.
Postalsoft can import from a single Access table at a time. You cannot choose
to import certain portions of different tables within an Access file.
Microsoft Excel files contain one or more spreadsheets. Postalsoft can import a
single spreadsheet at a time.
)
Many database and spreadsheet programs can read and produce dBase files.
With Postalsoft, you can use a whole dBase file or you can import it if you only
want certain records or certain fields from the incoming file.
Some spreadsheet and database files can produce
starts with a line that reads “T A B LE” and has fields stored in two-line group
ings.
.dif
files. The file normally
yes 2000/2002
-
yes no
yes yes
yes yes
-
only
Chapter 4: Import and e xport data
39

Format Description Import Export
ASCII delimited Many mailing list and database programs produce this kind of file, which is
also referred to as Comma-Separated Values file (CSV) or a Commas-andQuotes file. Some ASCII delimited files don’t have quotes, and some have a tab
space instead of a comma. Each record ends with a carriage return and line feed
(CR/LF). An ASCII-delimited format looks like this:
“Jane”,”Doe”,”44 Coulee Rd”,”LaCrosse”,”WI”,”54601”
Note:
If the target program expects a comma-delimited ASCII file with names
of the fields in the first record, export in Microsoft Word format.
ASCII fixedlength
Mainframes and minicomputers often use this format. Each record has exactly
the same number of characters. Fields are a fixed size and are padded with
spaces. Often there’s no separator between records, but there may be a CR/LF.
Microsoft Word
mail-merge
Link
NCOA
You can export your data in the required format for NCOA
Microsoft Word is a word processing program. For example, you could export
in this format for the purpose of merging a personalized form letter.
Link
Link
processing.
processing and
then send it to Lorton Data, an NCOA
Link
processor, for them to update it. Then
you can merge (not import) the data back into your software. See Chapter 8 for
more information about exporting your data for NCOA
yes yes
yes yes
no yes
no yes
40
Business Edition User’s Guide

Associate fields
Postalsoft needs to know what fields you want to import or export and where to
place them. Postalsoft displays the field associating window automatically when
you import or export files as part of the Import or Export wizard (File > Import or
File > Export).
When exporting Associating fields for export is simple: Choose the fields you want to export and
then map them to numbered fields (Field1, Field2, and so on).
When importing When importing, associating incoming fields tells Postalsoft what to expect when
it receives the incoming data. Then Postalsoft can correctly arrange the incoming
fields according to your layout. There is some strategy involved in the import
process. Let’s look at some examples.
Import example An incoming file contains name data in a Name field. The information varies in
the Name field—sometimes it contains a last name, first name, and middle initial,
sometimes it doesn’t have a middle initial.
ABBASSI, SAHIR 6709 HORNWOOD #32 HOUSTON TX 770740000
ABBOTT, ROBERT J 535 GLENCOE CT SHERWOOD OR 971400000
Field association
Imported data
ABEL, KELLY 1706 STACY DR LONGVIEW TX 756050000
ABRAMS, DAVID G 410 DENNYWOOD DRIV NASHVILLE TN 372140000
We must tell Postalsoft what to expect from the incoming file. Here, we would
tell Postalsoft that the incoming Name field is in the format “Last+First+ Middle.”
(The Last, First, and Mid fields must be present in your layout for Postalsoft to
import these fields correctly.) Even though some of the incoming records don’t
contain middle initials, you still should associate using the middle initial or else
you would lose the middle initial from the records containing them.
Incoming file field name Postalsoft associated field name
Name Last + First + Middle
Incoming file Postalsoft layout
Name First Middle Last
Abbassi, Sahir Sahir Abbassi
Abbott, Robert J Robert J Abbott
Abel, Kelly Kelly Abel
Abrams, David G David G Abrams
Chapter 4: Import and e xport data
41

Import example 2 You associate fields for address elements, as well. Your incoming file may
contain a ZIP Code in a field called ZIP, and that ZIP Code includes the four-digit
add-on with no dash.
You could set up your layout in your Postalsoft file to have a ZIP/ZIP+4 field
kind, and then associate the incoming ZIP field with the Postalsoft ZIP field (with
a field kind of ZIP/ZIP+4).
Incoming file Postalsoft layout
ZIP ZIP Code (field kind = ZIP/ZIP+4)
188333392 18833-3392
Remember, the name of the field is arbitrary. The important element is the field
kind.
Concatenate fields on import
Incoming file
The imported file contains a separate
field for each address element
Sometimes your database has separate fields for addr ess el emen ts. If you want to
import the elements into one field, it’s called concatenating fields.
Sample data
213 NW Badger Street
South Suite 52
Postalsoft Destination Fields
Postalsoft places all of these add ress elements into one fie ld called
Address_1.
Pre Directional NW Pre-directional part of address
Post Directional South Post-directional part of address
Primary Name Badger Primary name part of address
Primary Range 213 Primary range part of address
Street Suffix Street Street suffix part of address
Unit Designator Suite Unit designator part of address
Secondary Range 52 Secondary range part of address
Concatenate fields on export
You can also concatenate fields
during the export process in the
Export Fields window. For
example, you may want to
export one field that contains the
data, “Last, First” instead of two
separate name fields.
42
Each concatenated field that you
save is automatically loaded in
the Postalsoft fields list during
export, if it contains valid
database fields. You can edit and
delete any of the concatenated
fields you create; click the Edit
field or Remove field button.
Business Edition User’s Guide

Click the New field button t o create your own concatenated field. In the Custom
Field Export window:
1. Click the Field/Constant drop-down list, and choose a field or a constant,
such as a comma or a dash, or type your own constant text. For this example,
choose the field, Last.
2. Click the Concatenation drop-down list, and choose & (one space) or
+ (no space) between the fields or constants. For this example, choose
+ (no space).
3. Repeat steps 2 - 3 until you have created your concatenated field. See the
following image to complete this example.
4. In the Field Name box, enter a descriptive name.
5. Click OK, and complete your export.
Chapter 4: Import and e xport data
43
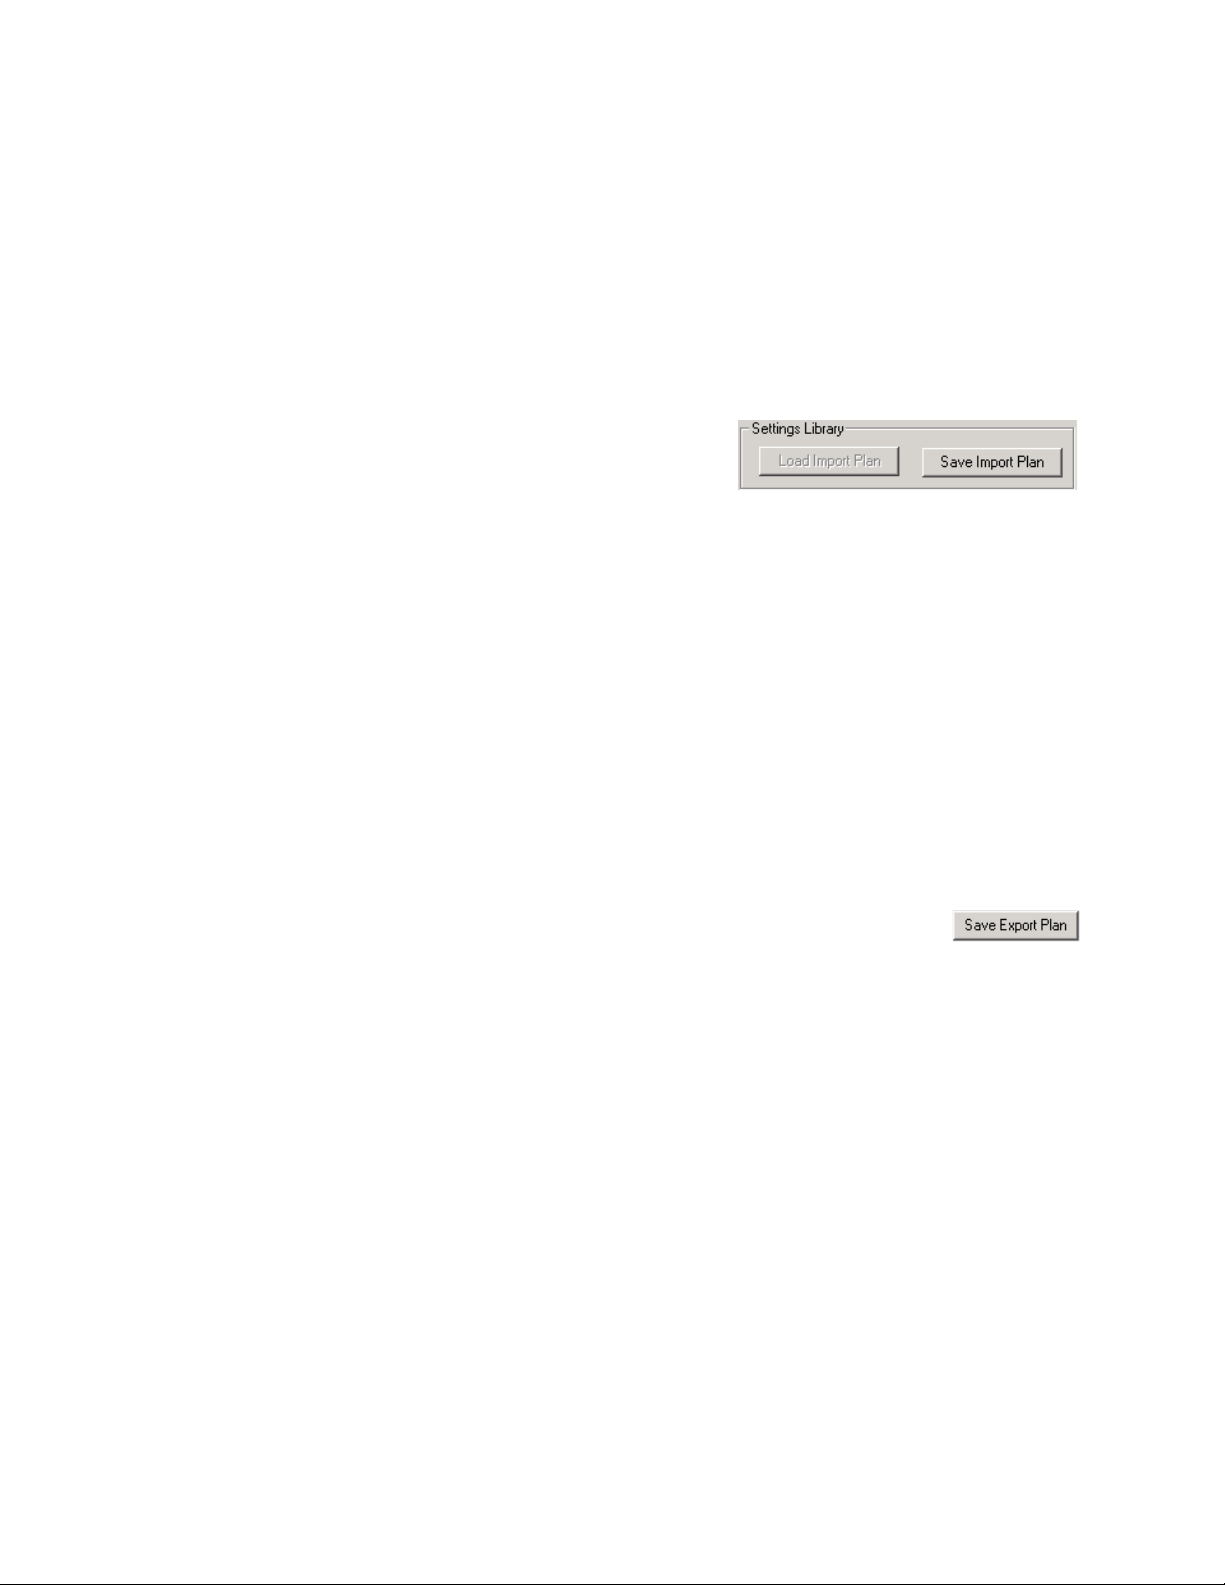
Settings Library
If you often import and export file s, you may find it useful to save your setting s in
the Settings Library. The Settings Library stores groups of settings as single
components. After you save a component, you can load it into Postalsoft to help
save you time when importing or exporting.
Import settings You can save all settings from the import wizard as an Import Plan component,
except the imported file name. To save a component:
1. Choose File > Import, and complete each step of the wizard as you want.
2. In the last window, Associate
Imported Fields, click the Save
Import Plan button.
3. In the Settings Library, complete the Name and Description fields. Review
the component’s details to make sure that your settings are correct.
4. Click Save.
After you save components, you can load one from the Import File Format
window. To do so, click the Load Import Plan button, choose a component
appropriate for the current job, and click Load.
Export settings You can save the entire export wizard as an Export Plan component, except the
exported file name.
The Settings Library is not available for NCOA
Link
exports.
To save an export plan:
1. Choose File > Export, and complete each step of the wizard as you want.
2. In the last window of the export wizard, click the Save
Export Plan button.
3. In the Settings Library, complete the Name and Description fields. Review
the component’s details to make sure that your settings are correct.
4. Click Save.
After you save a component, you can load it into the export wizard from the
Export File Format window. To do so, click the Load Export Plan button, choose
a component appropriate for the current job, and click Load.
44
Business Edition User’s Guide
Access a dBase file
If you have a dBase file that you’d like to use in Posta lsoft , you can e ither i mport
all or part of the file or use the whole dBase file.
Use the whole dBase file if:
You want to use all the records in the dBase file.
You don’t want to append the data to an existing Postalsoft file.
To use a whole dBase file, choose File > New, enter the dBase file’s name in the
File Name box and select Use Existing Data File. Then enter an .mdf name.
Import the dBase file if:
You want to append all or part of the dBase file to an existing Postalsoft
Your dBase file doesn’t have fields you’ll need for presorting (for example, if
The file contains fields that you want parsed (for example, if first and last
mailing list.
city, state, and ZIP Code information is all in a single field).
name are in the same field, and you want them in separate fields).
Copy Postalsoft’s .dbf file
The dBase file has memo fields using a FoxPro memo file (.fpt extension). If
the .fpt file is not present, you won’t be able to import the file.
If you want to use the .dbf file from Postalsoft with another program, we
recommend this: Make a copy of the file in the other program’s directory and use
the copy instead of the original .dbf file.
Some programs claiming to be dBase-compatible do not write files that are fully
dBase-compatible. If another program writes erroneous or incompatibl e data into
the .dbf file, your entire mailing list could be corrupted or unreadable when you
open it with Postalsoft.
Some programs claim to export dBase-compatible files, but their field names are
not actually dBase-compatible. Make sure your field names are 1 to 10 characters
long; start with a letter; and contain only letters, digits, and the underscore
character.
Important: Do not use a word processor to open or modify a Postalsoft
!
file (.mdf, .dbf, or .cdx). Doing so may cause file corruption, loss of
data, errors, or system crashes.
Chapter 4: Import and e xport data
45

Import an Access table
To successfully import Microsoft Access data, plan ahead. Microsoft Access
tables have many field types that don’t have a corresponding field type in
Postalsoft. (Postalsoft uses the dBase/FoxPro file format.)
below when importing Access tables.
After you import the file, check your data to make sure that the fi elds imported as
you expected. If you have lost data, or some fields imported incorrectly, you may
want to try importing again after making field adjustments in Postalsoft.
One table at a time You can import one table at a time from Access. If you want to import more than
one table from the Access file, you can perform the import process multiple times
until you have included all of the tables you need.
Keep in mind that when you import multiple tables from one Access file, any
subsequent table imported will result in additional records. Do not expect data
related to the records already imported to be added to the existing records.
Example Let’s say you want to import two tables from an Access file. Table A con tai ns
names and companies for 1000 records. Table B contains addresses for the same
1000 records, but does not contain the names. The results from importing both
tables will equal 2000 records: 1000 with na mes but no ad dresse s, and 10 00 wit h
addresses, but no names.
Follow the guidelines
Decide which fields to import
How to avoid truncated and lost data
Import the same field types
Before you import, examine the fields and data types in the Access table and
decide which fields you want to import.
If you import to an existing Postalsoft file, decide how you will match the
Access fields to the existing fields in Postalsoft. Adjust Postalsoft field
lengths whenever possible to avoid losing data.
If you import to a new Postalsoft file, set up your Postalsoft fields and field
types with the Access field types in mind.
When importing text- and memo-type Access fields to character-type fields
in Postalsoft, data will be truncated (lost) if it exceeds the target field length.
When importing date/time data, time data will be lost.
When importing Currency, AutoNumber, and Number data types to number-
type fields in Postalsoft, imported data may not correctly reflect the original
number or value.
For more information on what could happen if you import field types that are
incompatible with Postalsoft fields, see the table on page
47.
Avoid importing fields that don’t have the same field type in Postal soft. Match
non-text type fields to None in the Associate Fields window. When you do this,
those fields don’t import.
46
If you decide to import non-text Access fields (like numbers) into Postalsoft, see
“Field association” on page 47 for a list of non-text Microsoft Access fields and
the field types you should match them to in Postalsoft.
Business Edition User’s Guide

Field association The chart below shows non-text Access fields (and one text fi eld type) and the
field types that you should match them to in Postalsoft. The Conversion results
column lists the limitations you should be aware of.
Microsoft Access field Postalsoft field
Data type Field size prop-
erty
AutoNumber Long integer Num
Data type Conversion results
0 decimal places
Results are undefined if the value is too large for
the target field length. Postalsoft won’t add num
bers or verify uniqueness.
Currency Currency Num
2 decimal places
Results are undefined if the value is too large for
the target field length.
Date/Time N/A Date Only the date portion is imported.
Memo N/A Char Data is truncated if it exceeds the target field
length. This field can only be imported to Char-
type fields because displaying or editing Memo
fields is not supported in Postalsoft.
Number Long integer Num
Number Double Num
0 decimal places
2 decimal places
Results are undefined if the value is too large for
the target field length.
Results are undefined if the value is too large for
the target field length or if the value has decimal
places set at a number other than 2.
Number Integer Num
Number Single Num
0 decimal places
2 decimal places
Results are undefined if the value is too large for
the target field length.
Results are undefined if the value is too large for
the target field length or if the value has decimal
places set at a number other than 2.
-
Text N/A Char Data is truncated if it exceeds the targeted field
length.
Yes/No N/A Logical Imports with no problems.
Byte
Replication ID
Cannot import.
OLE objects
Link
Chapter 4: Import and e xport data
47

The enhanced import process
Postalsoft’s importing process has the ability to intelligently parse (identify and
isolate) data. You may find this en hanced importing useful in many ways,
especially if the file that you import is not fo rmatted consistently or has multi-line
fields (for example, city, state, and ZIP Code data in one field).
Know the basics Before you import a file using the enhanced import process, it is important to
understand the basics of importing into Postalsoft. With the enhanced import
process, you must set up your record layout appropriately before importing, and
you still need to associate fields.
Parsed fields Postalsoft can identify the following data in discrete or multi-line fi elds:
Names and title of people
Company names
Street addresses
City names
State abbreviations
State names (only in discrete fields)
ZIP and ZIP+4 Codes
How the enhanced import works
When Postalsoft processes your import file, it breaks certain fields into words.
Postalsoft looks these words up in parsing dictionaries. These dictionaries help
Postalsoft determine what type of data each word might be.
For example, if the City fie ld incorrectly
contains both city and state data such as
Chicago, IL, the dictionary tells Postalsoft
that the word Chicago is a city name and that
IL is a state abbreviation.
Chicago, IL
one import field
After Postalsoft determines what the word
might be, it populates the designated field
with that data. For the Chicago, IL example,
parsed to separate fields
the City field is still populated with Chicago,
but IL is moved to the State field. The
Chicago
IL
punctuation is deleted.
You can say that Postalsoft “overrides” your
input mappings.
48
Business Edition User’s Guide

Add fields to your layout
The following table lists new field kinds to support the enhanced importing
process. Before you import your data, you need to add these fields to you r record
layout. Choose File > Properties > Database to add these fields.
Field kinds Description Length
Start the enhanced import process
Import Error A one-character error code.
E
The record has unidentifiable data that cannot be
imported into Postalsoft. The Extra 1-3 fields are
populated with the unidentifiable data.
F
More than three unidentifiable fields were found
in the original import file. Only the first three of
those fields are saved in the Extra 1-3 fields.
blank
Importing was successful.
Import Extra 1 - 3 Unidentifiable data from the original file. 30
1
After you add the necessary fields to your layout, you can start to import your
data using the enhanced import process. To start, follow these instructions:
1. Choose File > Import.
2. Navigate to and select the file that you want to import. Click OK.
3. Choose the file format from the list, if necessary. Select Override Input
Mapping for Naming and Address Data in Wrong Fields, and keep Save
Unidentifiable Data in the Fields Extra 1, Extra 2, and Extra 3 selected if
these fields are in your layout (recommended). Click Next.
4. If necessary, define any other import settings such as your ASCII text format.
Click Next until you reach the Associate Imported Fields window.
Map your fields In the Associate Imported Fields window, map your imported fields to one of the
following expected destination field kinds or split/merge fields.
Field kinds Split fields Merge fields
Company name Name (to be parsed) 5-digit part of ZIP Code
Street address line 1 City + State + ZIP Code 4-digit part of ZIP Code
Street address line 2 City + State
City City + ZIP Code
State State + ZIP Code
ZIP/ZIP+4 (98765-4321)
ZIP/ZIP+4 no dash (987654321)
ZIP 5-digit part only
ZIP 4-digit add-on part
When you map an imported field to one listed in the Field Kinds column,
Postalsoft can identify any data not appropriate for that field. See
“How the
enhanced import works” on page 48. Also see “Examples of unidentifiable data”
on page 50.
Chapter 4: Import and e xport data
49

The split and merge fields have special actions when you map to them.
Split fields The split fields break up data in multi-l ine fields into discrete fi elds. For example,
if you have one field in your imported file that conta ins city, state, and ZIP Code,
you can map this field to the City+State+ZIP Code field. Postalsoft parses this
data into the discrete city, state, and ZIP Code fields that you set up in your
Record Layout.
Last line:
La Crosse, WI 54601
City+State+ZIP
City: La Crosse
State: WI
ZIP: 54601
Merge fields The merge fields combine the discrete 5-digit ZIP Code field and the discrete 4-
digit ZIP Code field from your imported file into one ZIP/ZIP+4 field in your
Postalsoft file.
5-digit: 54601
4-digit: 4071
5-digit part of ZIP Code
4-digit part of ZIP Code
Cannot map fields twice The same importing rules still apply for the enhanced import as the basic import
ZIP/ZIP+4:
54601-4071
process. Therefore, you cannot map two different imported fields to the same
destination field, even when using a split or merge field.
Finish your import After you have set up your field mappings, click the Finish button. Postalsoft
processes your import file. Large files may take longer with the enhanced import
process than they would with the basic importing process. You can view the
progress bar during processing.
When the import is complete, choose View > Data Sheet to see all the work that
Postalsoft did to your input file, and to scan for any errors. You may have to fix
certain records yourself if Postalsoft could not identify the data.
Examples of unidentifiable data
50
Business Edition User’s Guide
The following example data shows common cases of unidentifiable data.
For this example, these records are marked with an error after processing:
Record #5 has unidentifiable data. The 6457 could be a typo or a customer ID
in the wrong field. Postalsoft cannot recognize it as a ZIP+4 Code without the
5-digit ZIP Code.
Record #6 has a title in front of a person’s name. Postalsoft recognizes the
whole field as a title, “Professor T om Smith.” Record #5 is identified be cause

the title is located after the name. Record #2 is identified because “Dr.” is
considered a prefix.
Record #8 has street address, city, and state combined in one field. The
address and city cannot be identified separately when combined in one field.
Notice that record #3, #4, and #5 will parse correctly.
Record #9 has a city name and state name, instead of an abbreviation.
Postalsoft can identify state names only in discrete fields. Postalsoft can
recognize state abbreviations in multi-line fields.
Chapter 4: Import and e xport data
51

52
Business Edition User’s Guide

Chapter 5:
Manage your mailing list
This chapter explains the importance of:
Backing up your data
Entering data
Managing your data
Indexing the database
Importing and exporting Settings Library components
Chapter 5: Manage your mailing list
53

Database location
It is a good practice to keep your data files in a d ata directory that is sepa rate from
Postalsoft’s directory. In this way, when you perform a backup of your data files,
they are all in one location.
You can change the location where Postalsoft looks for files when you use File >
Open or click the Open icon
on the toolbar.
Change the default location
Choose Tools > Options > Main File Locations button, and enter the new default
location in the Data section, or click Browse to search for or create the location.
After this is set, the next time you open a file usi ng File > Ope n o r the Open icon
on the toolbar, Postalsoft opens the new directory you have set, and the Open
window lists all the files in the location you specified.
54
Business Edition User’s Guide
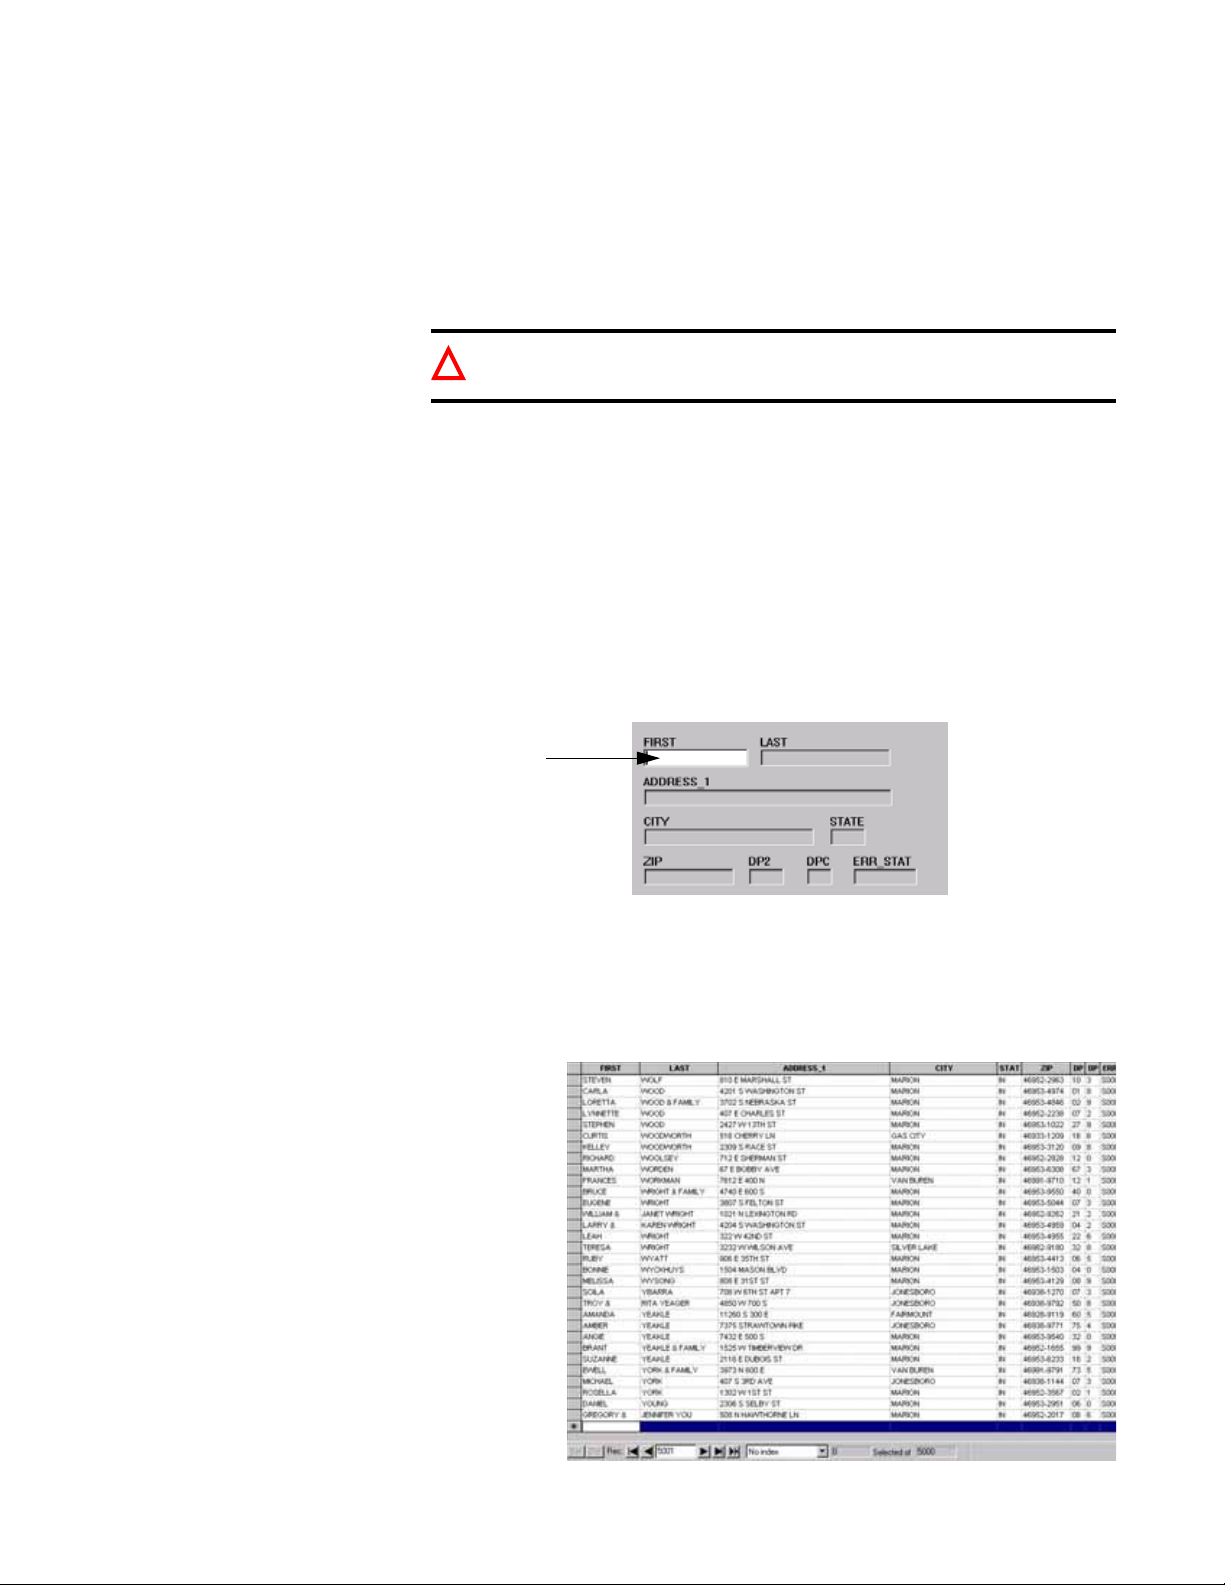
Enter data in your file
This sh
When you open your mailing description file, you ar e also opening the database
file. As you enter information into your mailing description file (adding and
editing records), you are entering data into your database file. If other users are
sharing the database file through their mailing description files, they will also
share the new information you are adding.
Caution: You can permanently delete shared information from the
!
database file by eliminating d at a in fields or deleting fields in th e lay ou t.
There are two ways to view your database file.
The Data Form view offers a view of your database one record at a time.
The Data Sheet view shows records in a spreadsheet-like format.
Data Form view To access the View Data Form option, choose View > Data Form.
As you enter data in your mailing list, you can move from field to field by
pressing the Tab key. The fields are highlighted as you tab through the record.
You enter data in the highlighted field.
ows an empty
record in Data Form
view.
Data Sheet view To access Data Sheet view, select View > Data Sheet. See multiple records and
use the scroll bars to view additional records in Data Sheet view. You can resize,
rearrange, and hide columns without switching to a separate design window.
Click on a cell to edit or change the information in that cell.
In Data Sheet
view, you can see
many records at
once.
Chapter 5: Manage your mailing list
55

Manage your data
Postalsoft provides many techniques and shortcuts for managing your data.
Whether you want to add repetitive data or delete a specific group of records,
Postalsoft provides the tools you need.
Consult Postalsoft’s online help for complete instructions. Search the online
help’s index with keywords: default, field, coded, notes, and indexed.
Use default data To work with default fields, use these commands:
Edit > Set Default Field
Edit > Get Default Field
Edit > Get All Default Fields
Edit > Remove Default Field
If you need to enter numerous records that have the same data for one or more
fields (for example, the same city and state), you can save a default value for
these fields. Then you can enter the saved values very quickly, without having to
retype them. You can set one or more default fields and then recall them one at a
time or all at once.
First you save the default data (the data that is the same in e ach record). Then you
recall the default data to paste it into another record.
You can also clear, or remove, a default field to make Postalsoft “forget” the
default value for the selected field.
Enter data in coded fields
Entering data into a coded field is the same as entering data in any other field,
except that when you leave a coded field, Postalsoft checks the data entered
against a list of valid codes you created (called a code profile). This means that
the coded field can only contain certain defined data. To see if a field is coded,
choose File > Properties > Database.
You can add codes to the list of valid codes while you are working in Postalsoft.
When you leave a coded field, if the code entered isn’t a valid code, Postalsoft
lets you add it or cancel. You can remove entries from your code profile.
Save notes You ca n save note s with ea ch mailin g descrip tion file. Not es are detai ls about th e
database, such as when it was created and changed, or whatever you like. T o enter
notes, choose File > Properties > Document, File Information tab.
Select records Before performing any action on your mailing list, you can select certain records.
To select certain records, choose Records > Select. Then, you can perform the
action on just the selected records.
For example, you may need to perform address correction for only a certain
geographical area, such as Wisconsin, Minnesota, and Iowa. To do this, before
beginning the address correction, you could select records whose State fields
contain WI, MN, or IA. Then, when you correct addresses, you would choose to
include only the selected records.
56
Business Edition User’s Guide

Search for a record There are several ways that you can search through your records in Postalsoft
(Search > Find or Search > Go To Page Up or Page Down). You can search for a
specific record or casually browse through your records.
Delete records You can delete records one at a time or in a group (Edit > Delete Record or
Records > Delete Selected).
Deleted records still reside in the database and are available to you in case you
need to access them again. You can even display deleted records (View > Deleted
Records). If you want to include deleted records in an operation, you must
include deleted records in your current view.
You can un-delete deleted records too. Once they are un-deleted, they can be
viewed with the non-deleted records (View > Non-Deleted Records).
Deleted records are not truly deleted. They’re simply marked for deletion. To
permanently purge them from your database, you must “remov e” the m (see
“Remove deleted records” on page 57).
Recover records You can undelete records one at a time or in a group (Edit > Undelete Record or
Records > Undelete Selected). When you un-delete records, you make them an
active part of your mailing list again.
To undelete records, follow these steps:
Remove deleted records
1. Choose View > Deleted Records.
2. Choose Records > Select > All Records (or use selection criteria).
3. Choose Records > Un-Delete Selected.
4. Choose View > Non-deleted Records.
5. Choose Records > Un-Select All Records.
This process will only work if you have not deleted records via Tools >
Remove Deleted Records
Postalsoft does not physically remove records that you dele te in case you need to
access them again in the future. To permanently purge deleted records from your
database, you must remove them (Exclusive mo de only: Tools > Remove Deleted
Records).
When you remove deleted records from your mailing list, Postalsoft assigns each
remaining record a new record number.
Important: If you export to NCOA
!
must not remove deleted record s until you have mer ged the NCOA
Link
or perform an ACS mailing, you
Link
or
ACS data back into your database. Postalsoft will warn you if you try to
remove deleted records when you shouldn’t.
Change capitalization You can convert the data in your records or just certain fields in your records to
UPPERCASE, lowercase, or Mixed Case. To change casing, choose Records >
Change Case. You can perform this case conversion on all records, the current
record, or just certain records that you select.
Chapter 5: Manage your mailing list
57

You can also convert the capitalization of your address data or all fields during
address correction.
If there are unusual names that require special capitalization treatment, you can
add them to the mixed case table (mixcase.tbl), which is located in the System
subdirectory where Postalsoft is located. Use Notepad or other text editor to open
the file. After you add the words, save and close the file.
Replace text in fields You can replace text in a field in selected records (Records > Replace). This is
useful if you want to make your records more consistent. For example, you co uld
replace all occurrences of “Incorporated” with “Inc.” in a Company field.
It’s a good idea to make a backup of your file before replacing text in fields, in
case you change something you didn’t intend to change.
Change the characteristics of your fields
Change the characteristics of your fields in the database file by goin g to the
Record Layout window (File > Properties > Database), where you can:
Add fields to the layout
Delete fields from the layout
Edit field properties
Rearrange field order
The changes you make here affect your database file.
Change the data entry sequence
Change the position of the fields on your screen or the data entry sequence in
your .mdf file. Changes you make here affect only the .mdf file and won’t affect
your database file.
In Data Form view, switch to Data Form Design (View > Data Form design) and
drag and drop the fields in the order you prefer.
In Data Sheet view (View > Data Sheet), drag and drop the columns in the order
you prefer.
Save your work You do not have to constantly save your file as you work because Postalsoft
automatically updates the database file as each record is changed. Postalsoft saves
the mailing description file (.mdf) each time you exit the program and each time
you save.
58
Tip: You can make backup copies of your files and store them in a separate
folder. Use Windows Explorer, select the file’s .mdf, .dbf, and .cdx and
choose Edit > Copy. Then paste them in a different location.
Business Edition User’s Guide

Index your database
Simple and complex indexes
Description Function
Simple
Complex
Contains one field
Is named after the field it represents
Is case insensitive (upper case)
Is arranged in ascending order
Contains one or more fields, whole or partial
Is named uniquely following dBase naming conventions
Is case sensitive (or insensitive)
Is arranged in ascending to descending order
There are two types of indexes that you can use to arrange your mailing lists:
Simple: Arrange your records in order by any field that is indexed. For
example, if the last-name field is indexed, you c an arrange your mailing lists
by last name. Likewise, if the ZIP field is indexed, you can sort records by
ZIP Code. This type of indexing is called simple indexing.
Complex: Arrange your records in a specified order by using more than one
field. Not only can you use multiple fields, but you can choose specific parts
of the field. For example, arrange your records by last name, then ZIP Code.
When you arrange your file based on an index, it affects the or der in which
records are viewed in Data Sheet and Data Form views. You can also export and
print non-presorted labels in order by an index.
Here’s a more detailed comparison of the two types of indexes.
Postalsoft converts all elements in the field to
upper case and arranges the records based on
the index field chosen in ascending order.
Postalsoft arranges the database in the order
specified in the complex index, according to
all specified field attributes.
How to index a field To index a field:
1. Choose File > Properties > Database.
2. Select the Indexed option in the field’s row.
3. Click OK when finished.
Chapter 5: Manage your mailing list
59

Complex index e s If you want to use complex indexing, you need to first understand expressions.
Expressions When you create a complex index, you are joining expressions together. An index
expression translates an index to dBase language so Postalsoft knows how to
interpret your index. Postalsoft creates the expression based on the choices you
make when you create a complex index. Here is a sample expression:
UPPER(ZIP) + UPPER(LAST)
Example of a complex index
Shifts the ZIP Code
field to upper case and
arranges them in
ascending order.
The plus sign joins the two fields
together. There can also be a minus
sign here. A minus sign moves all extr a
spaces in the previous field to the end.
Shifts the Last Name field
to upper case and
arranges them in ascending order.
Here is sample data arranged using the complex index expression above. The
index arranges the data first in ZIP Code order, then ascending alphabetical order
by last name.
Expression:(UPPER)ZIP + (UPPER)LAST
ZIP Code Last Notes
44017-2130
Wolanski
Wolanski
44017-2153
“W”
is at the end of the alphabet yet
with this index it comes before “
H
”
(Harrison) because of the ZIP Codes.
Harrison
All of these names are in alphabetical
44017-2184
order, but only in each ZIP Code range.
Poyer
Snow
44017-2407
Tramba
Tramba
These two names are listed last, even
though they begin with the letter “
T
.”
How to use your index
60
Business Edition User’s Guide
T o use a simple or complex index, sele ct it from the Index
drop-down list, or choose Records > Indexed By.
If the field you want to use isn’t present in the Index By
drop-down list, you must make the field indexed. Then
when you access the Index By list, your field will be
present.

How to work with several lists
You can have up to eight mailing description files open at once. Arrange the files
side-by-side (Windows > Tile Horizontally, or Windows > Tile Vertically) or in
an overlapping pattern (Windows > Cascade).
Copy records between files
You can copy records (Edit > Copy Record) from one Postalsoft file to another,
either one record at a time, or as part of a group. Postalsoft uses the Windows
clipboard to store records that you copy or cut. After copying or cutting a record,
you can paste (Edit > Paste Record) it into another Postalsoft file; you can even
paste it into a word-processing document, if you lik e.
When you copy records from one Postalso ft file to another, the records are
appended to the target list. The order in which Postalsoft appends the records is
the current index order of the source file.
Tip: If you need to copy a lot of records to another file, it may be faster for
you to export those records by criteria (in the dBase format), and then open
the exported file in Postalsoft if you’re creating a new mailing lists. Or you
could import the file you exported into an existing database.
Chapter 5: Manage your mailing list
61

Import and export Settings Library components
Postalsoft includes an import and export feature for the Settings Library. If you
run Postalsoft on more than one computer or if you update to a new computer,
you can transfer components from one computer to another.
For example, perhaps you have two computers in your office that run Postalsoft.
Instead of starting a new job on one computer, you can now share Settings
Library components, such as the presort or record layout components. Importing
and exporting components between computers can save you a lot of setup time.
How to export components
To export a Settings Library component:
1. Choose Tools > O ptions, and click the Settings Library button under
General.
2. In the Manage Settings Library window,
select the component(s) you want to export.
For example, if you need to start a new job on
another computer, you can select a record
layout component to export. Then, you w ould
not have to set up your record layout from
scratch on the new computer.
3. Click the Export button.
4. Navigate to the location you want to save the
component. This location can be directly on a
disk or anywhere that is easy for you to
access.
5. Type the file name for the component, and click Save. All selected
components are saved in one .xml file.
6. Click OK to close the successful export message.
Transfer your components
62
Business Edition User’s Guide
After you export component(s) from Postalsoft, you can transfer the saved .xml
file to the new computer . You can copy the file onto a CD, or whatever works best
for you to transfer files between your computers.
On the new computer, copy the .xml file into a directory that is easy for you to
access. You do not need to store it in the Postalsoft directory.
The settings.xsl file: When you export your component(s) a settings.xsl file
is saved in the same location as th e .xml file . This file is there so tha t you c an
open the .xml file in your web browser, such as Internet Explorer, to view the
component details.
If you want to open the .xml file on the new computer, you must transfer this
settings.xsl file along with your .xml file.

View the details To view the details of your exported component, open the .xml file in your web
browser, such as Internet Explorer or Netscape. The following image is an
example of a record layout component.
How to import components
To import a Settings Library component into Postalsoft:
1. Choose Tools > O ptions, and click the Settings Library button near the
bottom of the window.
2. In the Manage Settings Library window, click the Import button.
3. Navigate to the location that you previously placed the .xml file—your
exported component(s).
4. In this location, choose the .xml file you want to import. Click Open.
5. Click OK to close the successful import message. The component now
appears in the Component listing.
Chapter 5: Manage your mailing list
63

64
Business Edition User’s Guide

Chapter 6:
Address correction
Postalsoft can correct address data and assign codes for postal automation, data
enrichment, and other purposes. When Postalsoft corrects addresses, it is
standardizing them to USPS (United States Postal Service) standards.
This chapter explains Postalsoft’s address-correction features and options and
how you can apply them in common situations.
This chapter also explains the for-sale options: Delivery Point Validation,
Link
LACS
, and Geocensus.
Chapter 6: Address correction
65

Introduction
CASS certification Postalsoft’s assignment engine, ACE, is certified by the USPS under its Coding
Accuracy Support System (CASS) program. This recognition gives Postalsoft
users the highest possible confidence in Postalsoft’s address correction.
References USPS Publication 28, Postal Addressing Standards, lists most of the
guidelines that Postalsoft must follow when it corrects addresses.
Domestic Mail Manual (DMM), the official source of USPS mailing rules,
lists rules regarding CASS certification, the 3553 form, and more.
Other helpful USPS publications. Ask your postmaster or USPS account
representative about them.
Extract utility Extract is a tool to make a geographical subset of your ZIP+4 directory files. This
is a handy tool if most of the addresses you process are in a particular state or
region.
Refer to “Extract” on page 389 for more information about the Extract utility.
66
Business Edition User’s Guide

Terms for address components
When referring to the components that make up an address, we use same terms
that the USPS uses, with one exception:.We call the line that contains the name of
a company “Company;” the USPS calls it “Firm.”
See the following example for a listing of each address component.
Postal barcode
Company
Dual address
Assigned address
Last line
|546504331019|
John Dough, President
North American Bakery Supply
PO Box 9175
2001 West Harbor Drive North Suite 152
Onalaska, WI 54650-4331
City
State
Postal codes
54650-4331 01 9
DP2
(T ogether, these four numbers are the basis for the postal barcode.
Usually, only the ZIP and ZIP4 are printed in numeric form.)
check-digitZIP+4 (ZIP Code and 4-digit add-on)
Address-line components
Primary address
Secondary addr ess
2001 West Harbor Drive North Suite 152
Primary range
Primary name Postdirectional
Suffix
Secondary
Unit designatorPredirectional
range
Chapter 6: Address correction
67

What is address correction?
When Postalsoft corrects or standardizes an address, it gives you back a
corrected, complete form of that address. At the same time, Postalsoft can give
you useful codes for postal automation and other purposes. To correct your
addresses, choose Tools > Correct Address.
Address hygiene Most Postalsoft users want to make sure that their address data is correct and
complete. To deliver this, Postalsoft relies on USPS directories of addresses.
Postalsoft verifies that the city, state, and ZIP Code agree with one another. If
you have only a city and state, Postalsoft usually can add the ZIP Code, and
vice versa.
Postalsoft can standardize the address line, too. For example, Postalsoft can
correct a misspelled street name, fill in missing information, and delete
unnecessary punctuation.
If your address list contains any undeliverable addresses (vacant lots or
condemned buildings, for example), Postalsoft identifies these for you.
Postalsoft can also assign error and status codes to help you find out why
addresses were not assigned or how they had to be corrected.
Before standardization After standardization
Preparation for matching
Address = 1390 valhalla
City = deltona pines
State = fl
ZIP = 32738
Many Postalsoft users perform duplicate detection (see “Find duplicate records”
on page 97) after standardizing addresses. When comparing two addresses to see
Address = 1390 Valhalla Street
City = Deltona
State = FL
ZIP = 32725-1732
if they match, it’s important to have standardized data—otherwise, the smallest
typographical error might keep you from findin g matches you should find.
Data enrichment With Postalsoft you can append many useful codes to your records, such as the
county number and congressional district number.
Before standardization After standardization
Address
City
State
=
route 1 box 44a
=
=
stodard
wi
Address
City
State
ZIP
------------------------County Code
Congressional Code
=
RR 1 Box 44A
=
Stoddard
=
WI
=
54658-9610
---
----------------------
=
123
=
3
Postal automation Some companies use Postalsoft to help them qualify for discounted postage on
their mailings. There are several postal automation codes, including the carrierroute number, delivery-point code, and line-of-travel number. Postalsoft can
assign all of these codes to help you qualify mailings for the lowest po ssible rates.
68
Business Edition User’s Guide

Before standardization After standardization
Address
City
State
ZIP
=
1070 shorewood dr
=
la crose
=
wi
=
S4601
Address
City
State
ZIP
-------------------------Delivery Point Code
Carrier Route Number
LOT Number
LOT Order
=
1070 Shorewood Drive
=
La Crosse
=
WI
=
54601-7019
--
---------------------------
=
70
=
C026
=
0120
=
A
Chapter 6: Address correction
69

How address correction works
Postalsoft follows these steps when it processes an address:
1. Input. Whether you’re standardizing one record’s address or many addresses
in a file, Postalsoft processes one record at a time.
2. Parse. Postalsoft breaks down the address into its components: postal code,
city, state or province, house number, street name, and so on.
3. Pre-standardize. Postalsoft pre-standardizes the parsed components to
match to the patterns of the postal directories. For example, Postalsoft
converts the data to full capitals, corrects any nonstandard abbrev iations, and
strips out punctuation and extra spaces.
4. Match last line. Postalsoft reads the city, state, and postal code. Then
Postalsoft searches for matching data in the City and ZCF directories.
Postalsoft looks up the city and state, to find all postal codes for the city.
Then it looks up the postal code, to find all possible cities for that postal
code. By comparing the results of these two look-ups, Postalsoft can verify
that the last-line components agree with each other. Postalsoft may also
correct the spelling of the c ity a nd st ate. If successful, the address is called a
last-line match.
5. Match address line. Postalsoft searches the National ZIP+4 directory,
looking for records that might match the input address line, secondary
address, and company.
Postalsoft evaluates all potential matches and assigns a confidence score to
each one. Postalsoft then selects the record with the h ighest confidence score.
To be chosen, a record must have a high confidence score, and score
distinctly higher than any other possible matches. If successful, the address is
called an address-line match.
Once Postalsoft has chosen a matching record, it can finalize the postal code
and assign other codes.
6. Results. Postalsoft offers two types of resulting data:
Corrected data for the address-related fields in your records.
Additional codes and components generated during look-up.
70
Business Edition User’s Guide

Standardized fields
The fields listed below are the only fields affected when you standardize
addresses. Other fields, such as a phone number field or a last name field, remai n
unchanged.
See Appendix A for details about how Postalsoft updates these fields.
Field Description
Address_1 Street address line 1
Address_2 Street address line 2
City City name
Congr_CD Congressional district code
County County name
County_CD County code
CRRT Carrier-route code
Note: You can select options to not standardize some of the fields listed
below, even if you are standardizing others.
DP2 Delivery-point 2-digit add-on code
DPC Delivery-point check-digit
Err_Stat Status code (if the record is found) or error code (if the record
is not found)
LACS Move update data from NCOA
address conversion
LOT Line-of-travel number
LOT_Ord Line-of-travel order
Plus4 4-digit add-on to the ZIP Code (only use with ZIP5 field)
Rec_Type USPS record-type code
State Two-character state abbreviation
URB PR Urbanization code is a place name that denotes a neighbor-
hood or subdivision
ZIP 5- or 9-digit ZIP Code (with a hyphen)
ZIP5 5-digit ZIP Code
ZIP9 5- or 9-digit ZIP Code with no hyphen
ZIP_Move ZIP Move realignment indicator
Link
that identifies the type of
Postalsoft assigns ZIP+4 codes only to DPV-confirmed addresses —
addresses that have a DPV status of Y, S, or D. These values are held in
Postalsoft’s DPV Status field.
Chapter 6: Address correction
71

Correction options
By default, Postalsoft’s correction options are set so that your mailing will
conform with the USPS-preferred standardization style. However, you can
change these settings if you need to (Tools > Correct Addr ess > Correction
Settings).
Here’s an exampl e of how Po stal soft up dat es a record, usin g th e defaul t setti ng s:
Before standardization After standardization
Change the settings to meet your needs
Address =1070 shorewood drive
City =la crose
State =wi
ZIP =S46Ol
Address = 1070 SHOREVIEW DR
City = LA CROSSE
State = WI
ZIP = 54601-7019
By default, Postalsoft corrects all address components and converts them to
capital letters. Postalsoft also adds the 4-digit ZIP Code extensio n if the address is
DPV-confirmed.
You can set the correction optio ns to meet your needs. For instance, you may
choose not to update some of the address components, or to convert the data to a
mix of upper and lowercase.
Refer to Postalsoft’s online help for details about address correction options.
72
Business Edition User’s Guide

Suggestion lists
Ideally, when Postalsoft looks up an address in the postal directories, it finds
exactly one matching record. When the original data is good, Postalsoft should be
able to determine exactly one matching record—one combination of city, state,
and ZIP—in the City and ZCF directories. Then, during the lookup in the
National ZIP+4 directory, Postalsoft should find exactly one record that matches
the address.
T o enable suggestions, choose Tools > Correct Address > Correction Settings and
select Suggest Changes for Records Not Found on the applicable tab.
Many times, Postalsoft can do this even when the original data is not complete. In
many cases, all Postalsoft really needs to standardize an address is the right ZIP
Code, house number, and some of the street name.
Before standardization After standardization
Address = 1000 vin
ZIP = 54603
Breaking ties Sometimes it’s impossible to pinpoint one matching record in the directory.
Address =1000 Vine Street
City =La Crosse
State = WI
ZIP =54601-3474
Postalsoft may find several directory records that are near matches.
When Postalsoft gets close to a match, but not quite close enough, it assembles a
list of the near matches—the suggestions. Postalsoft presents its suggestions, you
pick one, and Postalsoft tries again to assign the address.
For example, given the incomplete last line below, Postalsoft could not reliably
choose one of the four cities. Bu t if you choo se o ne, Post alsoft c an go a head with
the rest of the assignment process.
Original record Possible matches in the City/ZCF directories
Address = 1000 vine
City =
State =
lac
wi
La Crosse, WI 54601
Lac du Flambeau, WI 54538
Lac Courte Oreilles Indian Reservation, WI 54806
Lac du Flambeau Reservation, WI 54806
The same can happen with address lines. A common problem is a missing
directional. In the example below, there is an equal chance that the directional
could be North or South. Postalsoft has no basis for guessing one way or the
other.
Original record Possible matches in the National ZIP+4
directory
Address =
ZIP = 54601
615 losey blvd
600-699 Losey Blvd
600-699 Losey Blvd
Chapter 6: Address correction
North
South
73

A missing suffix would cause the same problem.
Original record Possible matches in the National ZIP+4
directory
You’ll need more information
This is not a guessing game
Address =
ZIP = 54601
121 dorn
100-199 Dorn
100-199 Dorn
Place
Street
A badly misspelled street name could also cause a “tie.”
Original record Possible matches in the National ZIP+4
directory
Address =
City = minneapolis
State = mn
4101 mar
3900-4199 Marschall 55379
4000-4199 Maryland 55427
When Postalsoft produces a suggestion list, you need some basis for selecting one
of the possible matches. Perhaps you can come up with some additional or better
data. For example, perhaps you are using Postalsoft to capture a ddress data while
the customer is still on the phone. Or you might be taking data from a consumer
coupon, a little smudged—but if Postalsoft gives you a clue what information is
needed, perhaps you could figure out the address.
If you guess, what’s the price of guessing wrong? Consider this address, which
needs a directional:
Unresolved suggestions
When to turn on suggestion lists
Suggestion lists and CASS certification
Original record Possible matches in the National ZIP+4 dir.
Address =
City =minneapolis
State =mn
5231 penn ave
5200-5299 Penn Ave
5200-5299 Penn Ave
North
South
(ZIP 55430)
(ZIP 55419)
If you were to guess the directional, and guess wrong, then your information for
that customer will be incorrect. If you’re doing a mailing, your mail to this
customer would go through the wrong post office, about 10 miles away. At a
minimum, it’s going to be badly delayed. But, it might never be delivered.
If Postalsoft produces a suggestion list, but you have already given all the data
available to you, then you may need to accept that the address simply cannot be
assigned. Or perhaps it can be assigned only at the ZIP level.
Suggestion lists are useful tools when you’re processing one address at a time.
When you process large groups of records with suggestion lists enabled, the
process may be too slow to be useful (if many record s bring up a sugg esti on li st).
There’s a strong incentive to use Postalsoft to assign every possible address. The
USPS requires complete separation of the automation mail stream from other
mail. So mailers have two incentives to barcode every possible piece:
74
Business Edition User’s Guide

Postage discounts for barcoding are very attractive.
Splitting the mail into automation and non-automation st reams causes hassles
and inefficiency in mail preparation. To keep your operation running
smoothly, you should cut down the non-automated portion as much as you
can.
CASS rule The USPS does not permit us to generate a 3553 form when suggestion lists are
used in address correction. The USPS suspects that users may be tempted to
guess. Misrouted mail is expensive for the USPS to handle.
Therefore, when you use Postalsoft to assign a single record at a time or multiple
records with the suggestion list turned on, you cannot get a 3553 form covering
the addresses that you assign. The form is available only when you perform
address correction for groups of records without suggestion lists enabled.
Tips for using the suggestion lists
Because of the CASS rule explained above, you must standardize the whole
mailing list again to get a 3553 form that covers your entire database.
Some customers prefer to have Postalsoft perform the bare minimum of
processing during that second batch run. That minimum is that Postalsoft must
update the ZIP Code. All other fields can go untouched, but Postalsoft must
update the ZIP Code or it will not generate the 3553 form.
Chapter 6: Address correction
75

Delivery Point Validation
What is DPV? Deliv ery Point Validation (D PV) is a USPS technology that helps valid ate the
accuracy of address information. With DPV, you can identify addresses that are
Undeliverable As Addressed (UAA) and determine whether or not an address is a
Commercial Mail Receiving Agency (CMRA), a private business that acts as a
mail receiving agent. DPV uses data that the USPS provides to CASS vendors,
such as Business Objects.
DPV can be useful in the following areas:
Mailing: DPV assists in screening out undeliverable-as-addressed (UAA)
mail and cuts down on mailing costs.
Information quality: DPV's ability to verify an address down to the
individual house, suite, or apartment rather than block face increases the
data's level of accuracy.
Increased assignment rate: DPV resolves ties when other tie-breaking
methods are not conclusive. This may increase assignment rates.
Preventing mail-order-fraud: DPV can assist merchants by verifying valid
delivery addresses and Commercial Mail Receiving Agencies (CMRA). This
can eliminate shipping of merchandise to individuals placing fraudulent
orders.
USPS goals and requirements
Postalsoft’s DPV option
The USPS is trying to remove UAA mail from the system. It costs millions of
dollars every year to mail and handle UAA mail. Thus, as part of CASS Cycle L,
which begins August 1, 2007, the USPS requires DPV.
Starting with CASS Cycle L:
The CASS report will be produced only when you perform DPV and
ZIP+4 codes will be assigned only for addresses in which the primary
LACS
Link
processing.
address (for example, the house number) is DPV-confirmed. This means that
postage discounts will be possible only for those mail pieces with a DPVconfirmed primary address.
For more information about DPV’s effect on postage discounts and reducing
undeliverable-as-addressed mail, see:
http://www.usps.com/mailerscompanion/_pdf/novdec06.pdf
DPV is available in Business Edition as a for-sale option. If you do not already
own the DPV option, and you'd like to maintain CASS certification for CASS
Cycle L and reduce UAA mail by using DPV, contact your local reseller, or
contact Business Objects at http://www.postalsoft.com.
76
Business Edition User’s Guide

DPV locking
False-positive addresses are included with DPV directories as a security
precaution. If DPV detects one of these false-positive addresses during
processing, Postalsoft marks the record as a false-positive address and
discontinues DPV processing. This action is referred to as DPV locking.
Each company that purchases the DPV functionality is required to sign a legal
agreement stating that it will not attempt to abuse the DPV product. If a user
abuses the DPV product, the USPS has the right to prohibit the user from using
DPV in the future.
Lock codes If you encounter a false-positive address during processing, Postalsoft displays an
Alert message. It contains your DPV Lock Code and DPV Locking Address
Information. This information is also added to your Job Summary report.
If you turn off DPV and run address correction again, the original Job Summary
report containing your locking information is lo st. Be sure to keep a copy of this
information.
How to unlock DPV When DPV is locked, you cannot run DPV again without unlocking it. To unlock
DPV:
1. Locate your DPV Lock Code and your DPV Locking Address Information.
You can locate this information in the Processing Alert, which appears onscreen during processing, or in the Summary Information report.
2. Go to http://technicalsupport.businessobjects.com and log in.
3. Click Unlock Codes.
4. Click Retrieve DPV/LACSLink Unlock Codes.
5. Enter the Locking Address Information.
6. Enter the Lock Code.
7. Click Submit.
If you do not have web access, you can contact Customer Support and they will
guide you through the steps to unlock DPV.
Chapter 6: Address correction
77

DPV performance
DPV processing speed depends on your operating system, computer
configuration, and what other processes you are running at the same time.
If you are performing DPV processing for multiple records, you may load the
DPV directories to memory, which can significantly improve DPV performance.
Loading to memory requires at least 1.0 GB of memory, becaus e the directories
require 550 MB of continuous free memory and your operating system and other
applications will use additional memory. Therefore, we strongly recommend that
you install at least 1.5 to 2.0 GB of memory, especially if you are running
Link
LACS
If you do not load the directories to memory, then only 35 MB of memory are
required to read the DPV directories. Make sure you have enough memory
available before performing DPV processing.
Memory options To set the memory options:
1. Choose Tools > Correct Address > Correction Settings (Multi-Record tab)
2. Select the Load to Memory option to improve processing speed when you’re
processing at the same time.
or Tools > Correct Address > Multi-Record.
processing a large database.
3. Select the Stop Assigning If Out of Memory option to quit address
assignment if your system doesn't have adequate memory (at least 150 MB
free). If you do not select this option and your system doesn't have enough
Link
memory available, LACS
processing will continue, but at a sl ow er spe ed .
4. Select other options, as desired, and perform address correction as usual.
You can also set the memory options as default for all new jobs. Choose Tools >
Options, Address Correction, Default Settings.
78
Business Edition User’s Guide

Perform DPV processing
Prepare your database
If the DPV fields aren't already in your layout, follow these steps to add them:
1. Choose File > Properties > Database.
2. In the Record Layout window, click Multiple Fields.
3. Select DPV (Select All).
4. Click OK.
Load the DPV directories
Perform DPV processing as part of address correction
For details about the DPV directories and how to install them, see “Postal
directories” on page 19.
1. Choose Tools > Correct Address > Multi-Record.
2. Select the Perform DPV Processing option.
3. Click OK.
View results After processing, you may want to view the Summary Informatio n report to see
DPV processing results. To print the Summary Information report:
1. Choose Print > Reports.
2. Select the Summary Information report.
3. Click Print.
Chapter 6: Address correction
79

LACS
Link
What is LACS
Link
LACS
Link
in Postalsoft Postalsoft Business Edition offers LACS
Example of LACS
conversion
? The USPS LACS
addresses. These “911” conversions make it easier for police, fire, ambulance,
and postal personnel to locate a rural address. LACS
when streets are renamed or post office boxes renumbered.
To obtain the new addresses, you must already have the old address data.
Link
LACS
replaces the USPS's Locatable Address Conversion System (LACS).
As part of CASS Cycle L, which begins August 1, 2007, the USPS requires
Link
LACS
. Starting with CASS Cycle L, the CASS report will be produced only
when you perform DPV and LACS
maintain CASS certification for CASS Cycle L, you will need to perfo rm
Link
LACS
processing on your data. Contact your local reseller, or contact
Business Objects at
Link
LACS
is an integrated part of address processing. It is not an extra step. If a
match is found in the LACS
database with the LACS
information.
Link
This example shows a LACS
name addresses.
Link
product updates rural-route addresses to street-name
Link
also converts addresses
Link
processing.
Link
as a for-sale option. If you'd like to
http://www.postalsoft.com to order the LACS
Link
directories, Postalsoft updates the address in your
Link
-converted address and provides other LACS
Link
conversion of a rural-route address to a street-
Link
option.
Link
Original address LACSLink-converted address
RR 2 BOX 204
DU BOIS PA 15801
463 SHOWERS RD
DU BOIS PA 15801-6667
80
Business Edition User’s Guide

LACS
Link
locking
Unlocking LACS
Link
False-positive addresses are included in the LACS
Link
precaution. If LACS
detects a false-positive addresses during processing, the
Link
directories as a security
following will occur:
The record is flagged as false-positive (LACS
LACS
Locking information is added to the Summary Information report.
When LACS
To unlock LACS
1. Locate your LACS
Link
processing stops.
Link
is locked, you cannot run LACS
Link
through the Customer Portal:
Link
Lock Code and your LACS
Link
Indicator field is set to F).
Link
again without unlocking it.
Link
Locking Address
Information. You can locate this information in the Processing Alert, which
appears on-screen during processing, or in the Summary Information report.
2. Go to http://technicalsupport.businessobjects.com and log in.
3. Click Unlock Codes.
4. Click Retrieve DPV/LACSLink Unlock Codes.
5. Enter the Locking Address Information.
6. Enter the Lock Code.
7. Click Submit.
If you do not have web access, you can contact Customer Support and they will
guide you through the steps to unlock LACSLink.
Chapter 6: Address correction
81

LACS
Link
performance
LACS
Link
processing increases the time it takes to perform address correction.
Processing time varies with the LACS
system configuration, and other variables that are unique to your operating
environment.
If you are performing LACS
Link
the LACS
directories to memory, which may make LACS
faster. Loading to memory takes several minutes and requires at least 150 MB of
free memory.
Memory options To set the memory options:
1. Choose Tools > Correct Address > Correction Settings (Multi-Record tab)
or Tools > Correct Address > Multi-Record.
2. Select the Load to Memory option to improve processing speed when you’re
processing a large database.
3. Select the Stop Assigning If Out of Memory option to quit address
assignment if your system doesn't have adequate memory (at least 150 MB
free). If you do not select this option and your system doesn't have enough
memory available, LACS
Link
feature based on operating system,
Link
processing for multiple records, you may load
Link
processing will continue, but at a sl ow er spe ed .
Link
processing
4. Select other options, as desired, and perform address correction as usual.
You can also set the memory options as default for all new jobs. Choose Tools >
Options, Address Correction, Default Settings.
82
Business Edition User’s Guide

Perform LACS
Link
processing
Prepare your database
If the LACS
them now:
Link
fields aren't already in your layout, follow these steps to add
1. Choose File > Properties > Database.
2. In the Record Layout window, click Multiple Fields.
3. Select LACSLink (Select All).
4. Click OK.
Load the LACS
directories
Perform LACS
processing as part of
address correction
Link
Link
For details about the LACS
directories” on page 19.
1. Choose Tools > Correct Address > Multi-Record.
2. Select the Perform LACSLink Processing option.
Link
directories and how to install them, see “Postal
3. Click OK.
View results The Summary Information report and the Qualitative Statistical Summary section
of the 3553 CASS form show LACS
Link
processing results. To print these reports:
1. Choose Print > Reports.
2. Select the report you want to print.
3. Click Print.
Chapter 6: Address correction
83

GeoCensus
During address correction, Postalsoft offers you the ability to compare each
record to a directory containing geographical data gathered by the U.S. Census
Bureau, called TIGER® (Topologically Integrated Geographic Encoding and
Referencing) data. Using this data, you can append latitude, longitude, Federal
Information Processing Standards (FIPS) codes, and the U.S. Census tract and
Block Number Area (BNA) codes for each record to your database.
GeoCensus is available as a for-sale option in Postalsoft Business Edition.
Finding latitude and longitude
Census Bureau web site
To find the latitude and longitude of a specific location, the U.S. Census Bureau
provides a lookup server
http://www.census.gov/cgi-bin/gazetteer. From this web
site, you can enter a city and state. The server provides you with a single latitude
and longitude location.
You could also use a software mapping tool or a personal global positioning
system (GPS).
The U.S. Census Bureau web site http://www.census.gov provides more
information about the TIGER data, FIPS codes, and U.S. Census tract and BNA
codes.
84
Business Edition User’s Guide

GeoCensus: Assign codes
Prepare your database
Field name Data in this field Field kind Size
LATITUDE The latitude (degrees from the equator) associated with the
You must include both the Latitude and Longitude fields in order to perform
address correction with the GeoCensus directories.
Fields for the GeoCensus option
Latitude 10
record’s address. North American latitude values are always
positive.
LONGITUDE The longitude (degrees from the Greenwich Meridian) associ-
Longitude 11
ated with the record’s address. North American longitude values are always negative.
FIPS_STAT The FIPS State code. FIPS State Code 2
FIPS_CTY The FIPS County code. FIPS County Code 3
FIPS_PLA The FIPS Place code, which is a number assigned by the U.S.
FIPS Place Name Code 5
government to each incorporated municipality (city, village,
town, and so on).
CENSUS_BLK The U.S. Census tract and block numbering area (BNA) code U.S. Census tract BNA 10
Turn on the GeoCensus option
Before performing address correction, you must turn on the GeoCen sus option.
To do this:
Perform address correction
1. Choose Tools > Correct Address > Correction Settings, and click either the
Single Record or Multi-Record tab. You can also choose Tools > Options >
Address Correction Default Settings to turn this option on for every job
that you run.
2. Select the Assign GeoCensus Codes option.
3. Click OK.
When you have added the new field kinds to your database and
defined your correction settings, click either the Correct Record or
Correct Multiple Records icon in the Toolbar. Postalsoft runs address
correction and posts data to your GeoCensus field kinds.
Chapter 6: Address correction
85

GeoCensus: Select records by location
The GeoCensus option offers the a bility t o selec t or dese lect c ertain record s from
your database by location criteria. You must perform address correction with the
GeoCensus option first, to select records by location.
How to select records by location
For example, suppose you want to send flyers or an email to customers in a
specific region. You want to choose certain records from your database that have
addresses 20 miles and less from the latitude 43.827° and longitude of -91.234°.
Y ou know that your database contains data with addresses outside this region, and
you want to exclude them from your mailing or emailing.
To select records by location in a database with corrected addresses:
1. Choose Records > Select > By Criteria.
2. Choose Distance from the Field list.
3. Choose <= less or equal from the Match list.
4. Type 20 in the Compare to field, and type the latitude and longitude values
in the appropriate fields.
5. Click Insert Condition, and the condition appears in the list at the top of the
window.
6. Click OK.
Latitude values must
range between 0 and
90. Longitude values
must range between
-180 and 0. Type values with a decimal
point.
86
Set Default saves the
current Latitude and
Longitude settings for
future use. Use
Default loads your
saved default Latitude and Longitude
settings.
Business Edition User’s Guide

Status and error codes
If your layout includes a field for error and status codes, Postalsoft assigns a
status code when it assigns an address, or an error code if it could not assign an
address. These codes can help you understand why Postalsoft couldn ’t assign an
address or what it changed if it successfully assigned the address.
The field must have a field kind of Error or Status. If you accepted this field as
part of the default layout, and did not rename the field, the field’s name would be
Err_Stat.
What does each code represent?
See “Error and status codes” on page 359 for an explanation of what each error
and status code represents.
Chapter 6: Address correction
87

Parse names and assign prefixes, gender codes, and greetings
The following features are available only when you perform address correction.
Define your settings by choosing Tools > Correct Address > Correction Settings,
and click the Name/Gender/Greeting tab. To run address correction and any of the
following processes, choose Tools > Correct Address > Current Record or MultiRecord.
Parse names Postalsoft can parse (ident ify and isolate) name data. For example, Postalsoft can
break up name fields into individual parts (first, middle, last, and suffix) and
populate these fields in your database. You must add these separate fields to your
database before parsing.
This option is not selected by default.
Postalsoft can parse two full names per record. See “Field kinds” on page 89.
When you parse names, the address correction proce ss will take longer , e specially
for large files.
Assign gender codes and prefixes
Knowing genders can help you more accurately target a mailing to the correct
group of people. Postalsoft can assign a precise gender code to each name when
you add the Gender field kind to your record layout. The gender codes represent:
Strong male, such as John or Robert
Weak male, such as Terry or Shawn
Strong female, such as Mary or Jane
Weak female, such as Robin or Kim
Ambiguous, such as Pat, Kelly, or an initial
Unassigned (a gender could not be determined based on the name data)
When Postalsoft can assign a strong gender
code, it can also assign a prefix, Mr., Ms., or
Mrs. This feature will help you address your
mail pieces appropriately.
If you already have prefixes in your database,
deselect the Assign Prefix option. Postalsoft
refers to the record’s prefix when assigning a
The Assign Prefix and Assign Gender
options are selected by default.
gender code.
An inaccurate prefix can affect your results. For example, a record may contain
something similar to Mrr. John Smith. If you parse names, assign prefixes, and
select the Overwrite Existing Prefix option, your data ends up as Mr. John S Mrr.
Assign a greeting If you want to personalize mail pieces, you can assign an overall greeting to each
record in a formal or casual style.
To assign a greeting to each record, you should parse your name data into
separate name fields. Then, Postalsoft knows which part of the name to use in the
greeting. You can parse names and assign a greeting during the same process.
88
Business Edition User’s Guide

To assign a greeting to each record:
1. Choose File > Properties > Database to make sure that you added the
Greeting field kind. See
“Field kinds” on page 89 for details.
2. Choose Tools > Correct Address > Correction Settings, and click the Name/
Gender/Greeting tab.
3. Select the Assign Greeting option.
4. Leave the default initiator Dear, or enter your own. For example, if you
would like a more casual greeting, enter Hello.
5. Leave the default punctuation as a comma, or enter your own. For example, if
you are using the casual initiator Hello, you may want to end with an
exclamation point.
6. Choose the multiple-person connector, and or & from the drop-down list.
7. Choose both the single-person and multiple-perso n greeting style that you
want.
Single person/Formal: This option uses the prefix and last name
whenever possible. If the gender is weak, ambiguous, or unassigned,
then Postalsoft uses the first name instead (Dear Robin, for example).
Single person/Casual: This option uses the first name. If no first name
exists, Postalsoft uses the prefix and last name (Dear Mr. Smith, for
example).
Multiple person/Full: This option uses both names without any prefix,
for example Dear John and Mary Smith, or Dear John Smith and Mary
Peterson.
Multiple person/Short: This option is always Dear Sirs, Dear Madams,
or Dear Sirs and Madams.
8. Click OK when you finish.
Field kinds This table lists the Na me/G en de r/ Greeting field kinds that you should add before
parsing or assigning new data (File > Properties > Database).
Chapter 6: Address correction
89

Field kinds Description Length
Prefix 1
A name prefix such as Mr., Ms., or Mrs. 4
Prefix 2
First name 1
A first name such as John or Mary 12
First name 2
Middle name or initial 1
A middle name or initial such as J or C 1
Middle name or initial 2
Last name 1
A last name such as Smith or Miller 16
Last name 2
Suffix 1
A name suffix such as S r., Jr., II, or Ph.D . 6
Suffix 2
Title 1
A professional name such as Attorney or President 30
Title 2
Gender 1
Gender 2
Gender code for First name 1 or First name 2
M
M?
F
F?
?
blank
Strong male
Weak male
Strong female
Weak female
Ambiguous
Unassigned
Greeting The initiator with the corresponding name fol-
lowed by the punctuation. Specify your greeting
style in Tools > Correct Address > Correction Set
tings.
2
60
-
90
Business Edition User’s Guide

Internet Services: International address correction
Introduction Postalsoft offers you the ability to correct C anadian, Australi an, United Kingdom
(UK), and other International addresses through our Internet Services program.
After signing up for the program, you have access to the internet se rvic e that wil l
process your records, correct them (if possible), and alert you to any errors in
your addresses.
Notes on the Internet
services
To sign up for Internet Services, contact Business Objects at
http://technicalsupport.businessobjects.com.
There is a per-record charge for use of the service.
The internet service processes your records at a rate of approximately one
record per second via a 56K modem. If you plan to process a large number of
records, you may want to consider using a broadband internet connection.
Get started To access the Postalsoft internet service, you need to do three things:
Open the new sample file included with your softwa re (or open a .mdf file of
your own that contains international addresses).
Set up your user ID and password within Postalsoft.
Define your HTTP proxy settings (if required).
Open the sample file We have included a file for you to use that already contains a few sample
international addresses. We encourage you to use your own international
addresses, but this file is a good starting p oint for you t o become familiar with the
way Postalsoft and the internet service handles international addresses.
To open this file:
1. Choose File > Open.
2. Select the Sample_International.mdf file, and click Open.
Chapter 6: Address correction
91
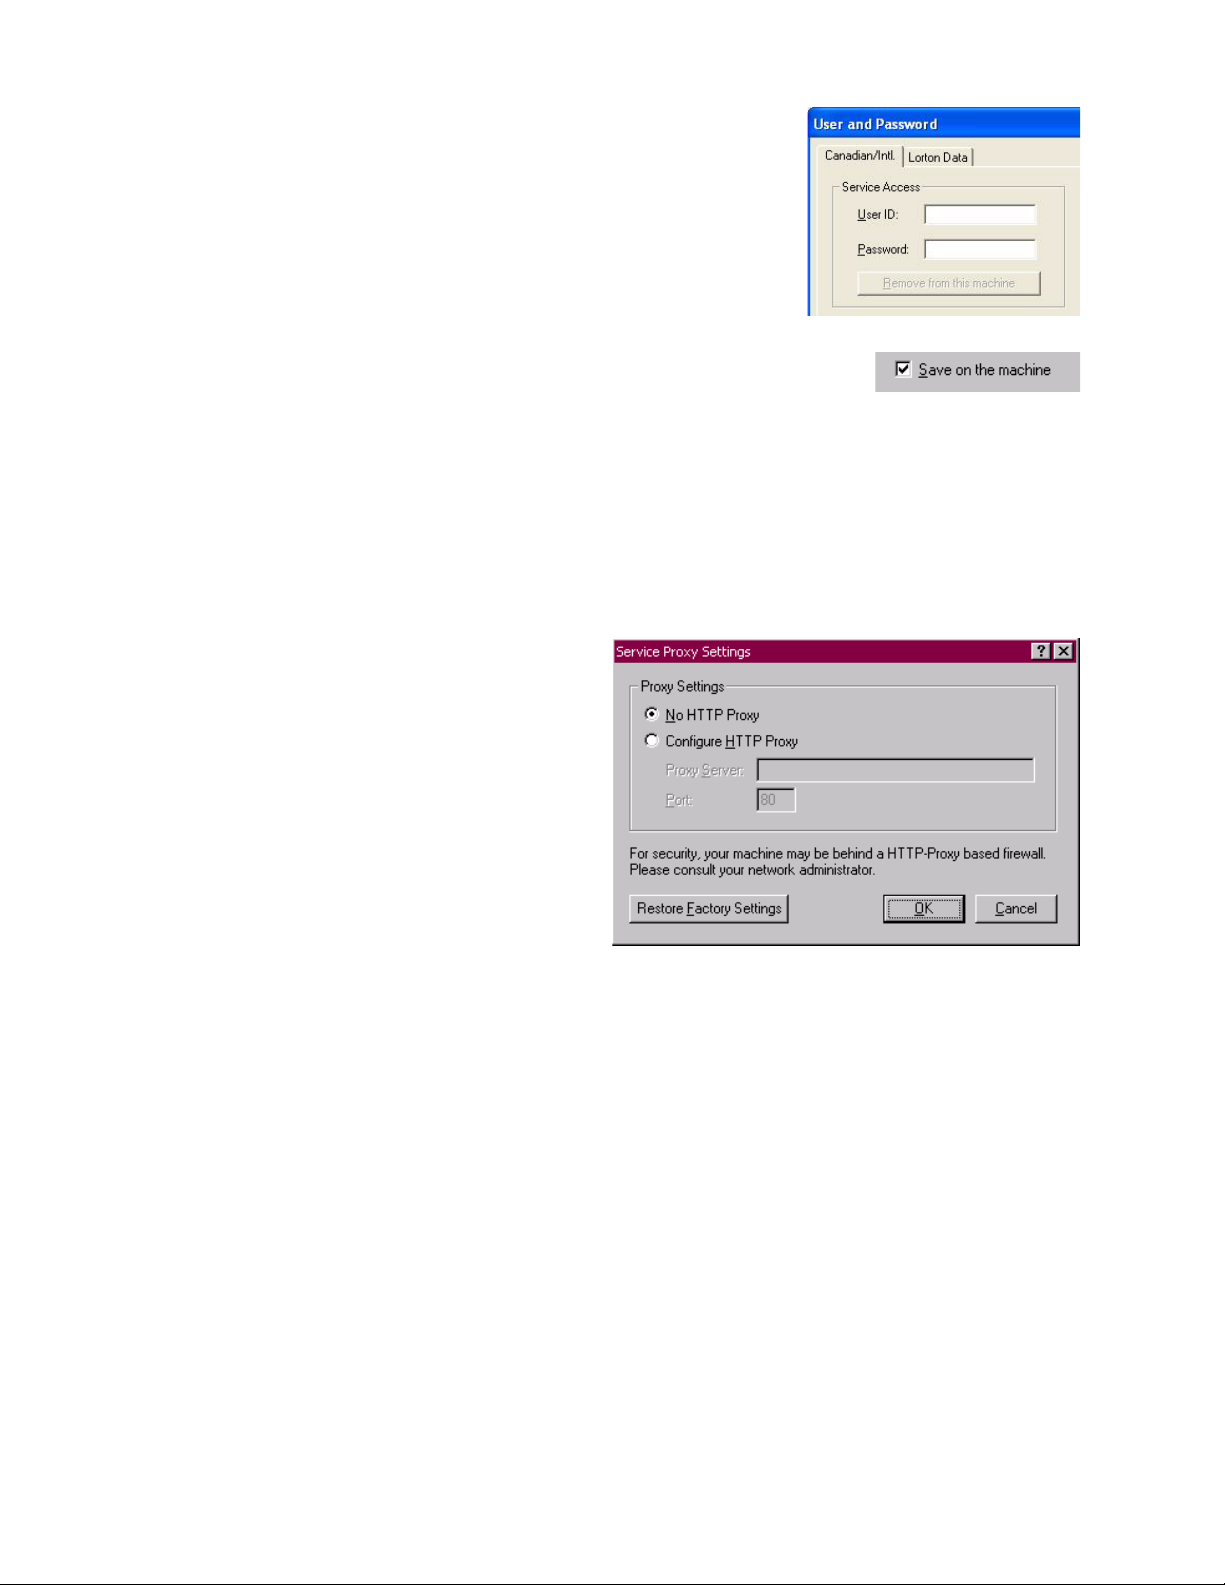
Set up your user ID and password
When you sign up, you’ll receive a u ser ID and
a password to access the internet service.
To enter your default user ID and password:
1. Choose Tools > O ptions.
2. Click User and Password.
3. Enter your user ID and password, and
click OK.
If you do not enter this information using the process
described above, you must provide the information
when you access the Postalsoft Internet Service. At that
time, you can enter your ID and password and choose to have Postalsoft
remember your information by selecting the Save on the Machine option. This
option lets you skip entering your information every time you access the service.
If you are concerned about unauthorized use of your Postalsoft Internet Service
account, we recommend that you do not save your user ID and password to your
machine.
Define your HTTP proxy
settings
If your computer is
connected to the
internet through a proxy
server, you may need to
define your HTTP
proxy settings in order
to access the Postalsoft
internet service. If you
do not use a proxy
server to connect to the
internet, you can keep
the default (No HTTP
Proxy) setting.
To define your proxy settings:
1. Choose Tools > O ptions, and click the Proxy Settings button.
2. Select Configure HTTP Proxy.
3. Contact your network administrator to help define your proxy settings.
Postalsoft customer support cannot help you define your proxy settings.
4. Click OK.
Prepare your database
Field kinds Field kinds are available to accommodate international addresses. Shown below
Because different countries have different addressing standards, you need to
include the required fields in your database to process your records.
is a table of these field kinds and their descriptions.
92
Business Edition User’s Guide

Field kind Field name Description
Province/Region Region This field is a specific field for Canadian or international addresses. You
can only use the State abbreviation field kind in conjunction with this field
kind.
State abbreviation/Province/
Region
State_Reg This is a generic field kind used as State abbreviation (US), Province (Can-
ada), or Region (international). You cannot use the State abbreviation or
Province/Region field kinds when this field kind exists in the database.
Postalcode Postalcode This is a specific field kind used only for Canadian or international
addresses. This field must be used in conjunction with one of the existing
US ZIP field kinds. It cannot be used with any of the generic ZIP/Postal
code field kinds.
ZIP/ZIP+4 no dash or Postalcode
ZIP This is a generic field kind for US, Canadian, and international addresses.
You cannot use this field with any other ZIP/Postalcode field kinds.
ZIP/ZIP+4 or Postalcode ZIP This is a generic field kind for US, Canadian, and international addresses.
You cannot use this field with any other ZIP/Postalcode field kinds.
Serviced Serviced
Postalsoft
checks this field (data sheet view) or populates the field with a
T (data form view) in the records that have been processed through the
internet service.
Locality2 Locality2 Optional for some countries, such as the UK. This is an official field name
in the UK.
Locality3 Locality3 Optional for some countries, such as the UK. This is an official field name
in the UK.
Required field kinds The following field kinds must be present in your layout in order to use the
Postalsoft internet service:
-
Serviced
Street address line 1
City
Province/Region or State abbreviation/Province/Region
Postalcode or ZIP/ZIP+4 no dash, or Postalcode or ZIP/ZIP+4, or Postalcode
Country (All foreign country names must be spelled out in their entirety.)
Chapter 6: Address correction
93

Optional fields The following field kinds are optional in your database:
Locality2
Locality3
Err_Stat (This field is recommended, but not required.)
Locality2 and Locality3 field kinds may aid in assi gnin g some foreig n add resse s,
such as UK addresses.
Canadian address correction settings
Postalsoft gives you control over how your Canadian addresses are handled. The
options you have are similar to your U.S. address correction options.
To choose your Canadian address settings for the current job, choose Tools >
Services > Canadian Address Correction Settings. To choose your default settings
for all future jobs, choose Tools > Options > Canadian Address Correction
Settings.
For more information about the specifics of these parameters, refer to Postalsoft’ s
context-sensitive help by clicking the “?” button in the upper right corner and
then clicking the parameter you want more information about.
Processing your records
Correct your U.S.
addresses first
After you have populated your database with th e proper field kinds, you can
begin processing your records.
If your database contains both U.S. and international addresses, we recommend
you correct your U.S. addresses before you send your international addresses to
the internet service.
If your database contains any unknown foreign records, an error code of E501
appears in the Err_Stat field. You can now select those records and access the
internet service.
Prompts During the international address correction process, various windows appear,
prompting you to choose certain optio ns. You can choose to not view these in th e
future by selecting the Don’t Ask This Again option, and continuing with the
process.
If you later decide that you would like to be reminded of these options, you can
choose Tools > Options, and click the Prompts button. This window gives you
control over certain prompts you may receive when correcting international
addresses, as well as other prompts in Postalsoft.
Selecting records As with correcting U.S. address es, yo u can choose to correct selected records or
all non-deleted records. If you plan on correcting selected records, select the
records you want sent to the internet service before you access the service.
Access the Internet
service
To access the internet service:
1. Choose Tools > Services > Correct International Addresses.
2. Click Yes in the window explaining the per-record charge.
3. Back up your database by clicking Yes and choosing a location for your
backup file.
94
Business Edition User’s Guide

4. Choose which records you want processed, and click OK.
Important: You will be charged for any records sent to the internet service
that have already been processed. To view the records that have already been
processed, refer to the Serviced field in your database.
5. Verify that the number of records you want sent to the service is correct, and
click Yes.
Summary information
After your records are sent to
the service, the summary
information window appears
giving you the address
correction success rate and
the error codes for
uncorrected errors.
The Summary Information
window is essentially the
same as the one that appears
when correcting U.S.
addresses.
Chapter 6: Address correction
95

96
Business Edition User’s Guide

Chapter 7:
Find duplicate records
With Postalsoft you ca n find dupli cate records in one file or in mu ltiple files. You
define what constitutes a duplicate record. When Postalsoft find s the duplicates, it
processes them according to your instructions—d eletin g them, sel ectin g them, or
copying them to another file, for example.
In this chapter, we ’l l take a look at the choices Postalsoft offers for Merge/Purge
processing.
Note: Merge/Pur ge is the p rocess of identifying duplicate records in a file and
processing them in some way.
Chapter 7: Find duplicate records
97

Before you Merge/Purge
Back up your files! Depending on the options you choose and how many duplicate records Postalsoft
finds in your file(s), Postalsoft may delete many records from your file(s). For
that reason, we recommend that you make a backup of any file before using it in a
Merge/Purge proces s.
To create a backup, choose File > Backup Database.
Open files All files in which you want to search for duplicate records must be open before
you begin the Merge/Purge process. If you want to write the duplicate records to
an output file, that file must also be open. In a ll, up to eigh t files can particip ate in
the Merge/Purge process.
Set up fields, if necessary
If you want to compare custom fields, such as a Social Security field, you must
assign that field a Dupe-Compare field kind in your record layout before you
begin the Merge/Purge. See
“Customized fields for duplicate detection” on
page 131.
Also, you can post “dupe-group” numbers to a Dupe_Group field, if you have
that field in your record layout. Dupe groups are groups of records that Postalsoft
judges to be duplicates, based on the comparison criteria that you speci fy. For
more information about dupe groups, see
“Post dupe-group numbers to input
file(s)” on page 110.
Correct addresses To help Postalsoft find duplicate records, you should correct your addresses
before performing a Merge/Purge. See
“Address correction” on page 65 for
details.
Select a reference file You must designate one of the files that you’ll use for Merge/Purge processing as
a reference file.
The reference file determines the name and location of Merge/Purge files. The
report files will have the same root names as the reference file, with report
extensions. Postalsoft writes the reports to the same direct ory where the refere nce
file is stored. In addition, Postalsoft saves your Merge/Purge settings with the
reference file for future use.
98
To select a reference file, click the window for that file before starting the Merge/
Purge.
Business Edition User’s Guide

Set up files for Merge/Purge
To start the Merge/Purge wizard, choose Tools > Merge/Purge.
You must designate how each open file will participate in the Merge/Purge. You
choose the usage and priority for each file.
Each open file
is listed in the
File Name column.
Your settings
in the Priority
column tell
Postalsoft
which duplicates it should
keep—those
from File A or
File B, for
example.
Your selection
in the File
Usage dropdown lists tell
Postalsoft how
to process
each file.
File usage To help you decide which file usage to choose for each open file, first ask
yourself, “Do I want to use this file in the Merge/Pur ge proce ss?” If the answer is
“no,” you can choose None from the File Usage drop-down list for that file.
If you do want to use the file in the Merge/Purge process, then determine if the
file is an input file or an output file. Here’s the difference:
File usage Description
Input file A file in which Postalsoft searches for duplicate records.
Output file A file into which Postalsoft copies the processed records, based on
options you select. Postalsoft may copy the duplicates or records
that are not duplicates, for example.
There are two kinds of input files: normal lists and suppression lists. At least one
file in each Merge/Purge operation must be a “normal” list. “Normal,” in this
case, means that the input file is not a suppression list.
Chapter 7: Find duplicate records
99

Suppression lists A suppression list is a list of records that you do not want to include in your
mailing. Postalsoft does not delete records from suppression li sts, but it can delete
records that match suppression-list records.
Let’s say yo u want to limit a maili ng to prospect iv e customers only, and you rent
a mailing list for this purpose. You do not want to mail to current customers. In
this case, you would make your list of current customers a suppression list. Then,
when Postalsoft compares the two files, if Postalsoft encounters any records in
your “normal” file that match records in your suppression list, Postalsoft can
suppress the duplicates from the final list.
Note: You may process more than one suppression list at a time.
Current customers
(suppression list)
Ann Anderson
Bill Brooks
Chad Carter
Dana Dobson
Evelyn Evenson
Priority Postalsoft uses priority to determine which duplicate records to keep when it
Rented list Prospective customers
only
Suzy Gable
Ann Anderson
Evelyn Evenson
Fred Stone
Mike Whitman
Suzy Gable
Fred Stone
Mike Whitman
finds duplicates in two or more files. You must assign a priority to each “normal”
file.
The highest priority is 0, the next is 1, then 2, and so on. Only suppression lists
can have a priority of 0; Postalsoft assigns a 0 priority to suppression lists
automatically, and you cannot change it. If you’re not processing a suppression
list, then the highest possible priority is 1.
The following table shows the duplicates that would be kept and those that would
be discarded when using two “normal” files and one suppression list with the
priorities shown below.
File Usage Priority Dupes Dupes Dupes Dupes
100
File A Suppression 0 Sue Jones Ed Walters Mary Frank
File B Normal 1 Sue Jones Joe Smith Mary Frank
File C Normal 2 Joe Smith Ed Walters Mary Frank
Priorities you assign must start at 1 and be sequential: 1, 2, 3, and so on. You
cannot, for example, assign priorities of 1, 3, and 5; or 2, 3, and 4.
Business Edition User’s Guide
 Loading...