

Bush WQP8-9347, WQP12-9348 Installation & User's Instructions
BUSH –
Integrated Dishwasher
Installation & User Instructions – Please keep for future reference 478
/
7130
These instructions contain important information which will help you get the best from your
appliance and ensure safe and correct installation, use and maintenance.
If you need help or have damaged or missing parts, call the
Customer Helpline: 0845 600 4632
Important – Please read these instructions fully before installing or using
Issue 1 – 07/09/10
Contents
Safety Information 2
Parts 3
Installation 4-9
Aesthetic panel installation 4-6
Water supply connection 7
Drain hose connection 7
Position the appliance 7
Water pressure 8
Electrical connection 9
User Instructions 10-17
Before first use 10-12
Loading your dishwasher 13-15
Wash cycle table 16
Using your appliance 17
Care and Maintenance 18
General 18
Trouble Shooting 19
Error codes 19
Technical Specifications 20
Product codes
WQP8-9347
1

Safet
y
Information
Important – Please read these instructions full
y
before installation
Before use During use
The installation of this appliance is best carried out
by 2 people.
y Dispose of all packaging carefully and
responsibly.
y The appliance is designed for indoor use only
and must be protected from rain, moisture and
extreme temperature variations.
y This appliance is designed for household use.
Do not use the appliance for industrial and
commercial use, or any other purpose.
y The appliance MUST be positioned on a firm
level base.
y Do not place the appliance near a heat source or
in direct sunlight.
y Only suitable household utensils should be
placed in the dishwasher. Avoid utensils that are
non-heat-resistant, metal decorated, etc.
y Do not use detergent not designed for
dishwasher. This may damage the appliance.
y Do not spray water on the appliance. It may
cause electrical parts failure or electric shock.
y Do not stand or sit on the door when it is open. It
may cause deformation or failure of your
dishwasher. The appliance could tip forward.
y Do not put any heavy objects on top of the
appliance. It will damage the appliance.
y This appliance is fitted with a safety function that
automatically stops the operation of the
dishwasher when it is exposed to heavy
disturbance on its mains.
y The appliance is to be connected to the water
supply using new hose set and that old hose set
should not be used.
y The door should not be left in open position since
this could present a tripping hazard.
y This appliance must be positioned so that the
plug is accessible.
y This appliance is not intended for use by persons
(including children) with reduced physical,
sensory or mental capabilities, or lack of
experience and knowledge, unless they have
been given supervision or instruction concerning
use of the appliance by a person responsible for
their safety. Children should be supervised to
ensure that they do not play with the appliance.
y This appliance is not intended for use by young
children or infirm persons unless they have been
adequately supervised by a responsible person to
ensure that they can use the appliance safely.
Young children should be supervised to ensure
that they do not play with the appliance.
y Do not touch the visual heating element during or
immediately after use.
y
Do not operate your dishwasher unless all enclosure
panels are properly in place. Open the door carefully
if the dishwasher is operating, there is a risk of water
squirting out.
y WARNING: Knives and other utensils with sharp
points must be loaded in basket with their points
down or placed in a horizontal position. Avoid
damage to the door seal.
y Load plastic items so that they do not come into
contact with the visible heating element.
y Dishwasher detergents are strongly alkaline, they
can be extremely dangerous if swallowed. Avoid
contact with skin and eyes and keep children
away from the dishwasher when the door is open.
y The door should not be left open, since this could
increase the risk of tripping.
y Keep detergents away from children.
y Do not attempt to repair the appliance yourself.
Contact the Customer Helpline: 0845 600 4632.
2
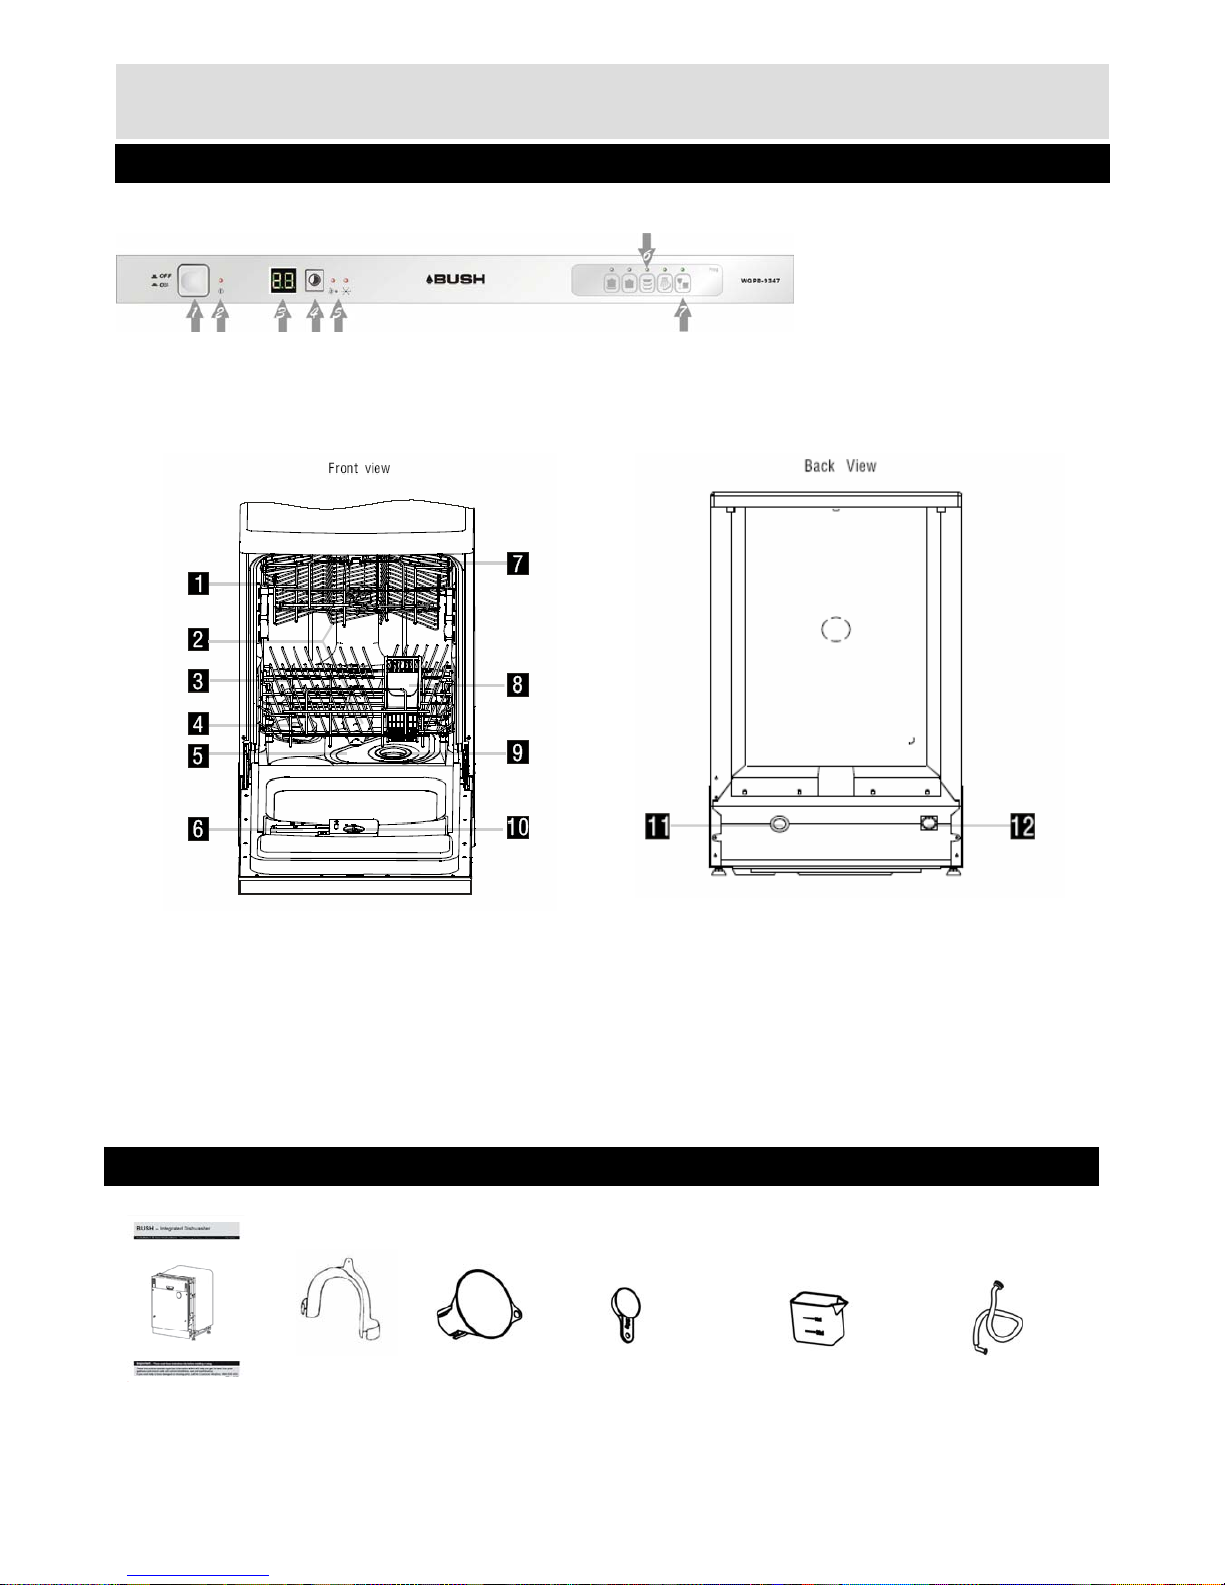
Part
Please familiarize yourself with the parts and accessories listed below
1. Upper basket
2. Spray arms
3. Lower basket
4. Salt container
5. Main filter
6. Detergent dispenser
7. Cup shelf
8. Cutlery basket
9. Coarse basket
10. Rinse aid dispenser
11. Drain pipe connector
12. Inlet pipe connector
If you have damaged or missing parts,
call the Customer Helpline: 0845 600 4632
Accessories included
3
1. ON/OFF button
2. Power on light
3. Display
4.
Delayed Start Button
5. Salt and Rinse Aid Warning
Light
6. Program indicator light
7. Program Key-press
Instructions x 1 Hose x 1 Salt Filler x 1 Measuring Spoon x 1 Measuring Cup x 1
Inlet Hose x 1
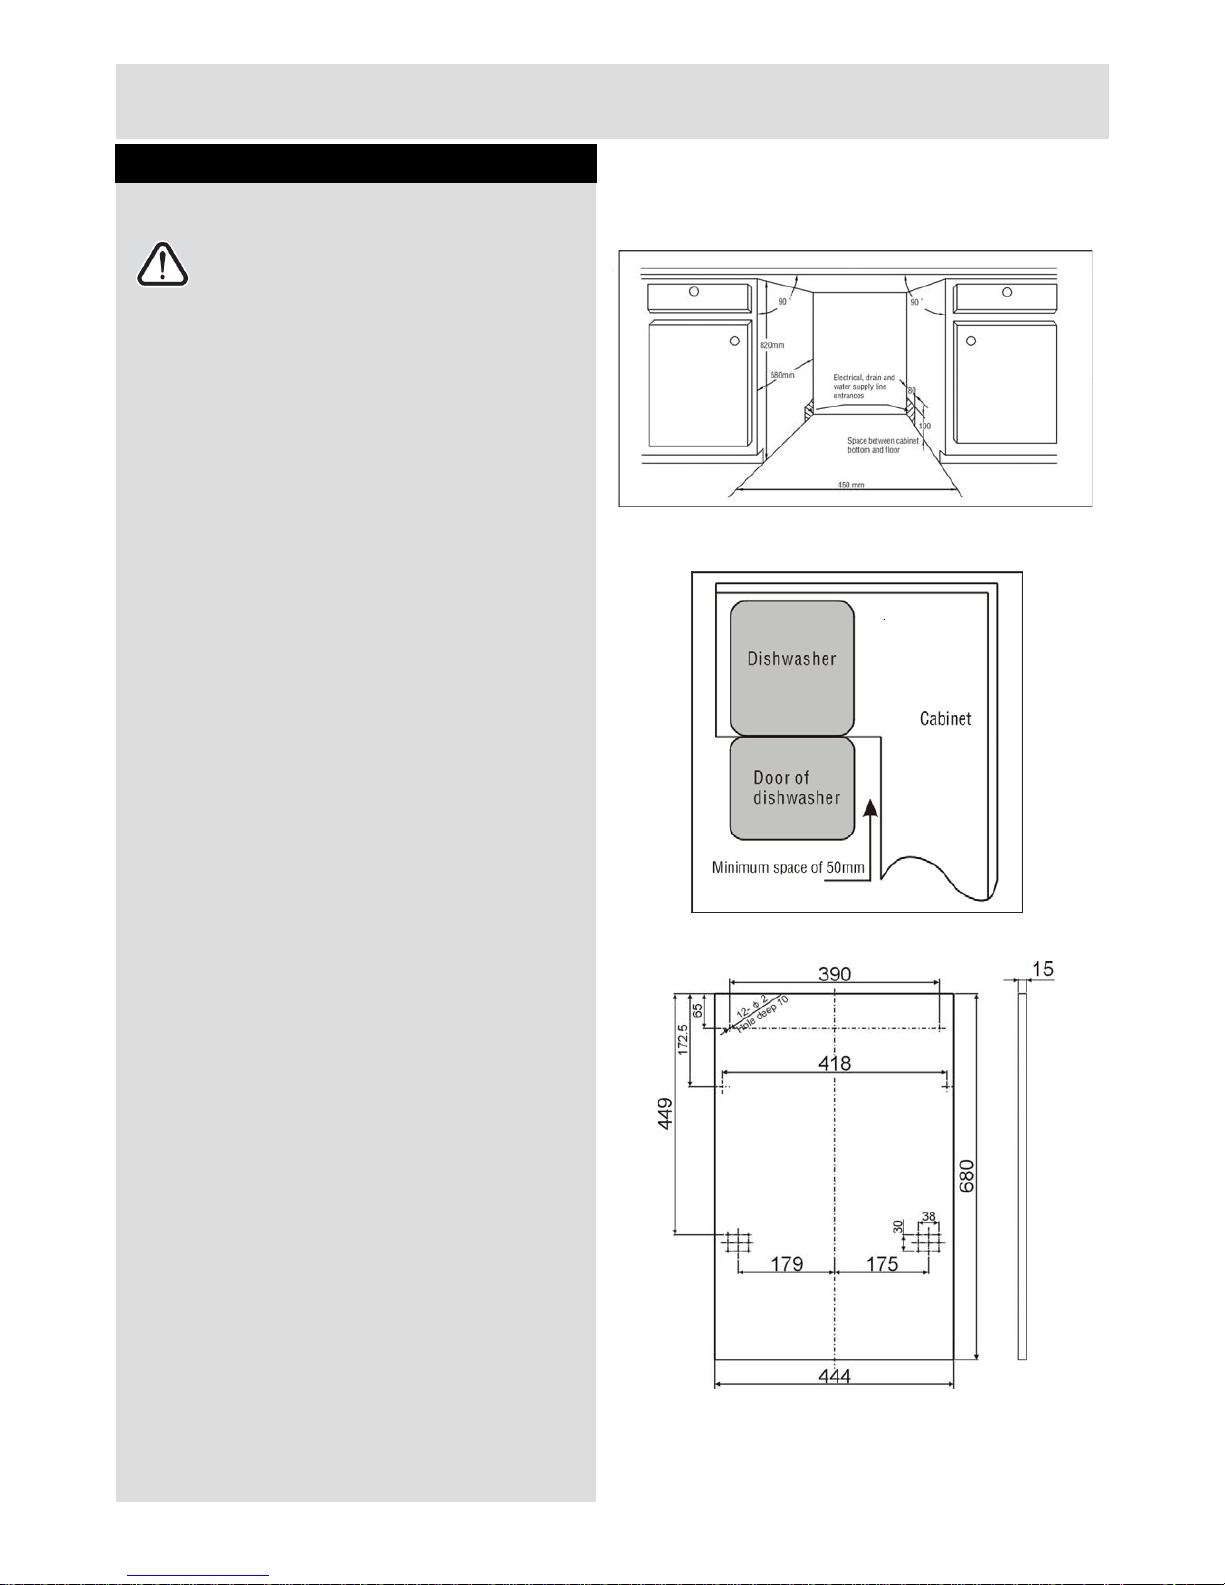
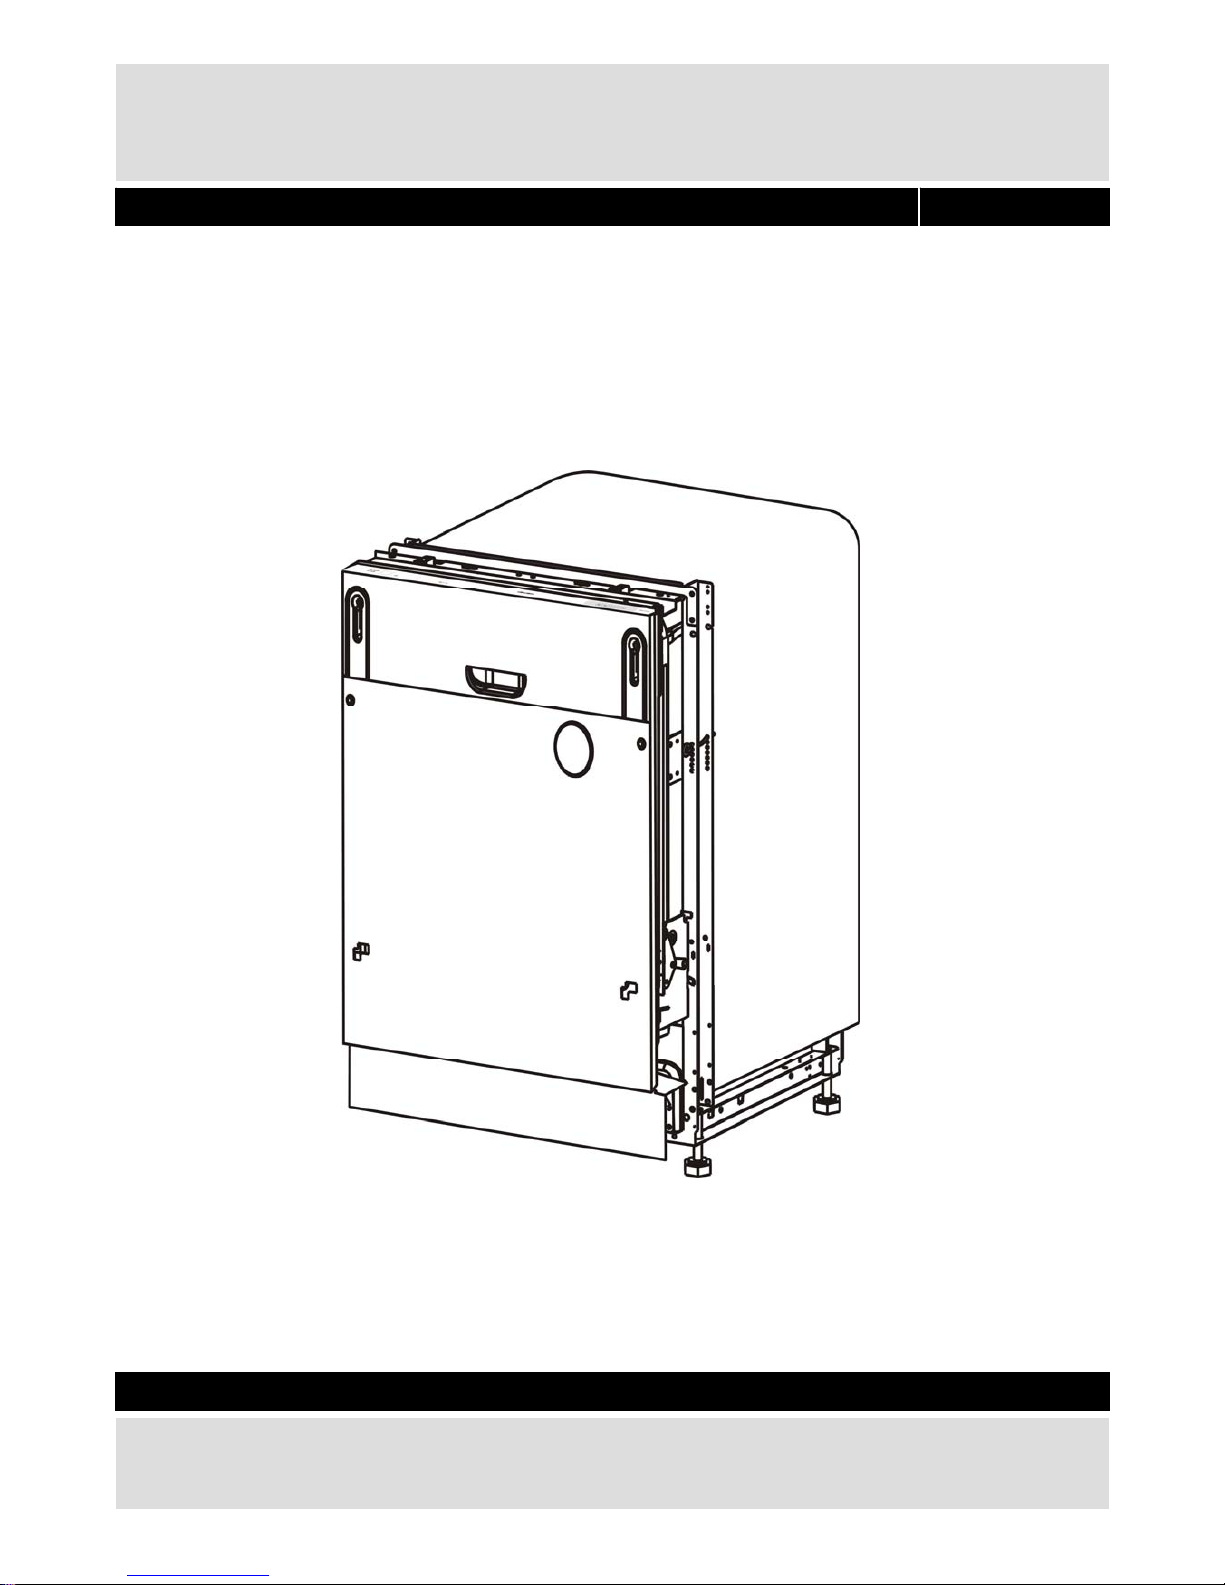
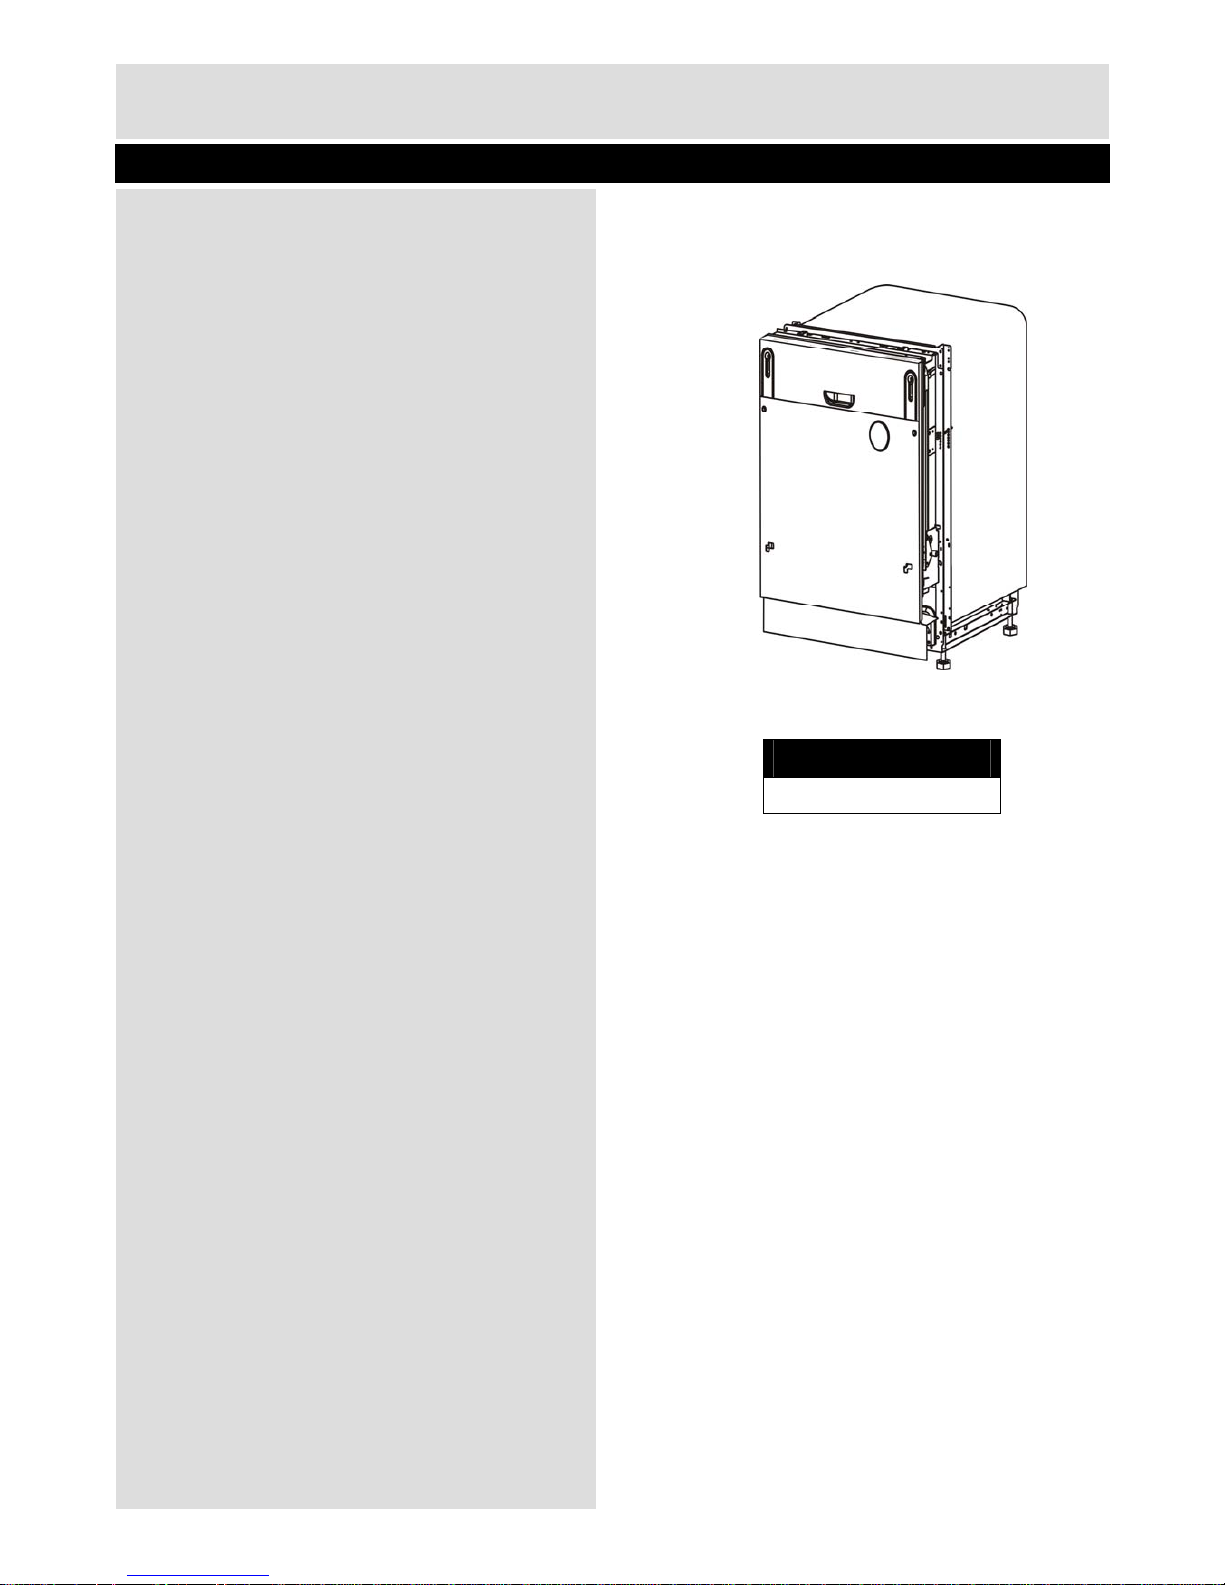
Installation
Aesthetic panel installation
Cabinet dimensions
Note: Less than 5mm between the top of
dishwasher and cabinet and the outer door
aligned to cabinet.
50mm minimum space when door is opened.
The aesthetic panel should be processed in
accordance with the illustrated dimensions
(unit: mm)
4
Installation
Aesthetic panel installation
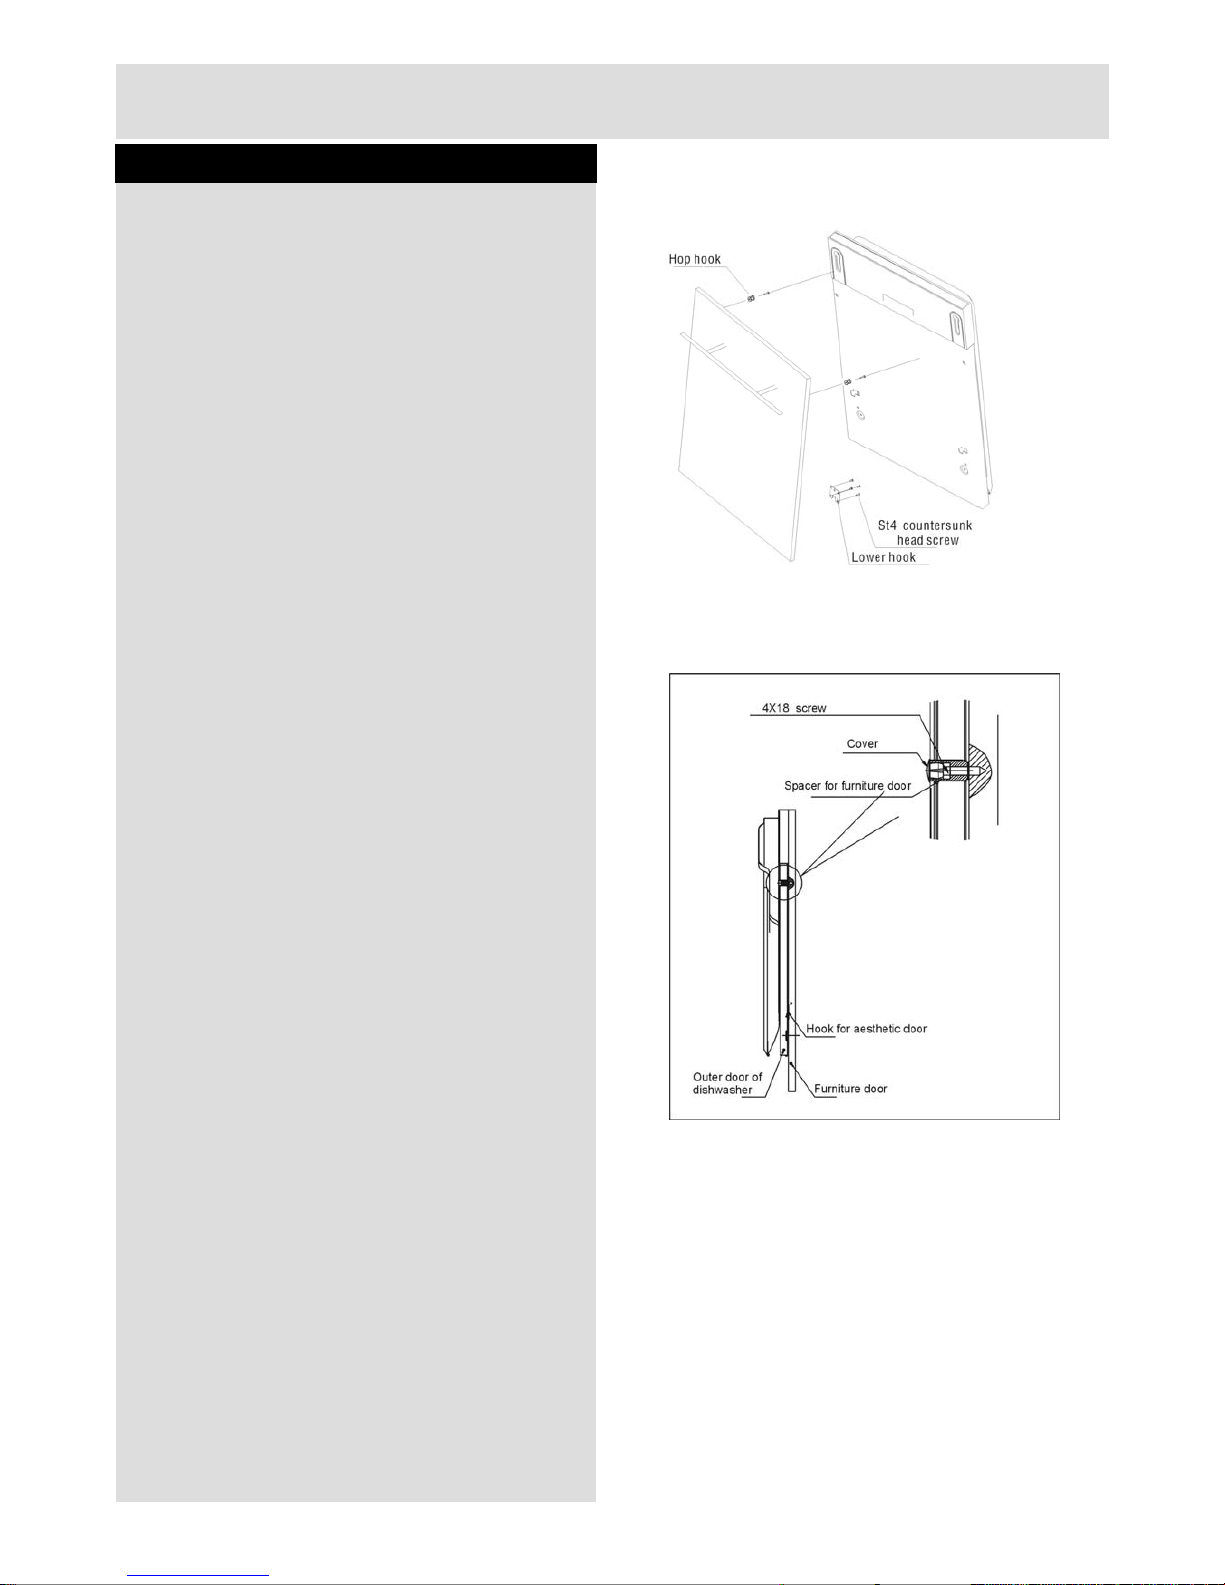
1. Install the hook on the aesthetic wooden
panel and put the hook into the slot of the
outer door of dishwasher.
2. After positioning of the panel, fix the panel
onto the outer door by screws and bolts.
a. Take away the cover
b. Pin up the screw
c. Get back the cover
5
Installation
A
esthetic panel installation
1. Install the furniture door to the outer door of the dishwasher using the brackets provided. Refer to the
template for positioning of the brackets.
2. Adjust the tension of the door springs by using an Allen key turning in a clockwise motion to tighten
the left and right door springs. Failure to do this could cause damage to your dishwasher
(Illustration 2).
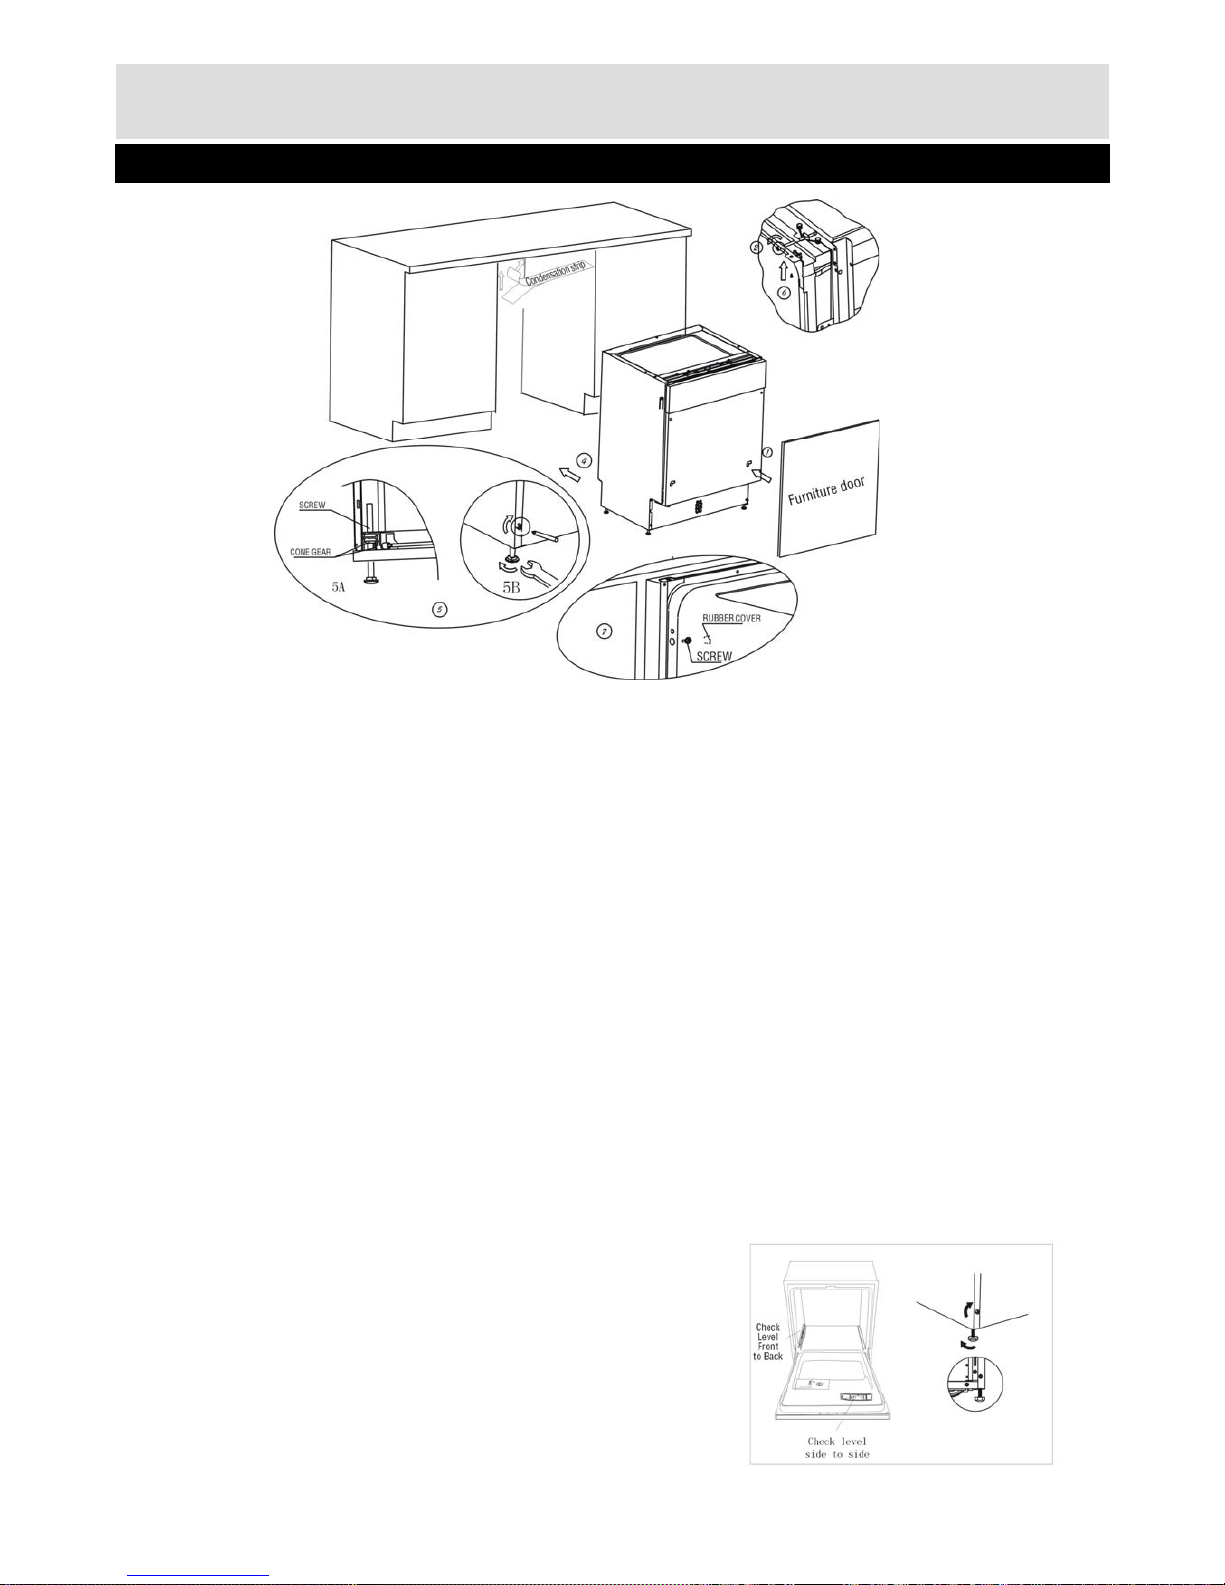
3. Connect the inlet hose to the cold water supply .
4. Connect the drain hose. Refer section "Water supply connection" at page 7.
5. Connect the power cord.
6. Affix the condensation strip under the work surface of cabinet. Please ensure the condensation strip is
flush with edge of work surface.
7. Place the dishwasher into position.
8. Level the dishwasher. The rear feet can be adjusted from the front of the dishwasher by turning the
screws on the left and right hand side of the cabinet (Illustration 5A). To adjust the front feet, use a
wrench and turn the front feet until the dishwasher is level (Illustration 5B).
9. The dishwasher must be secured in place. There are two ways to do this:
a. Normal work surface-secure to the work surface by using two woodscrews ensuring the
dishwasher weight is not being hit by the surface (Illustration 6).
b. Marble or granite work top-secure the bracket to the side panel of the dishwasher and secure
the dishwasher to the furniture housing. Put the rubber
cap over the screw (Illustration 7).
Note: When level the dishwasher, please pay attention
not to let the dishwasher tip over.
6
 Loading...