

Page 1
Instruction Manual
Q5W
Page 2
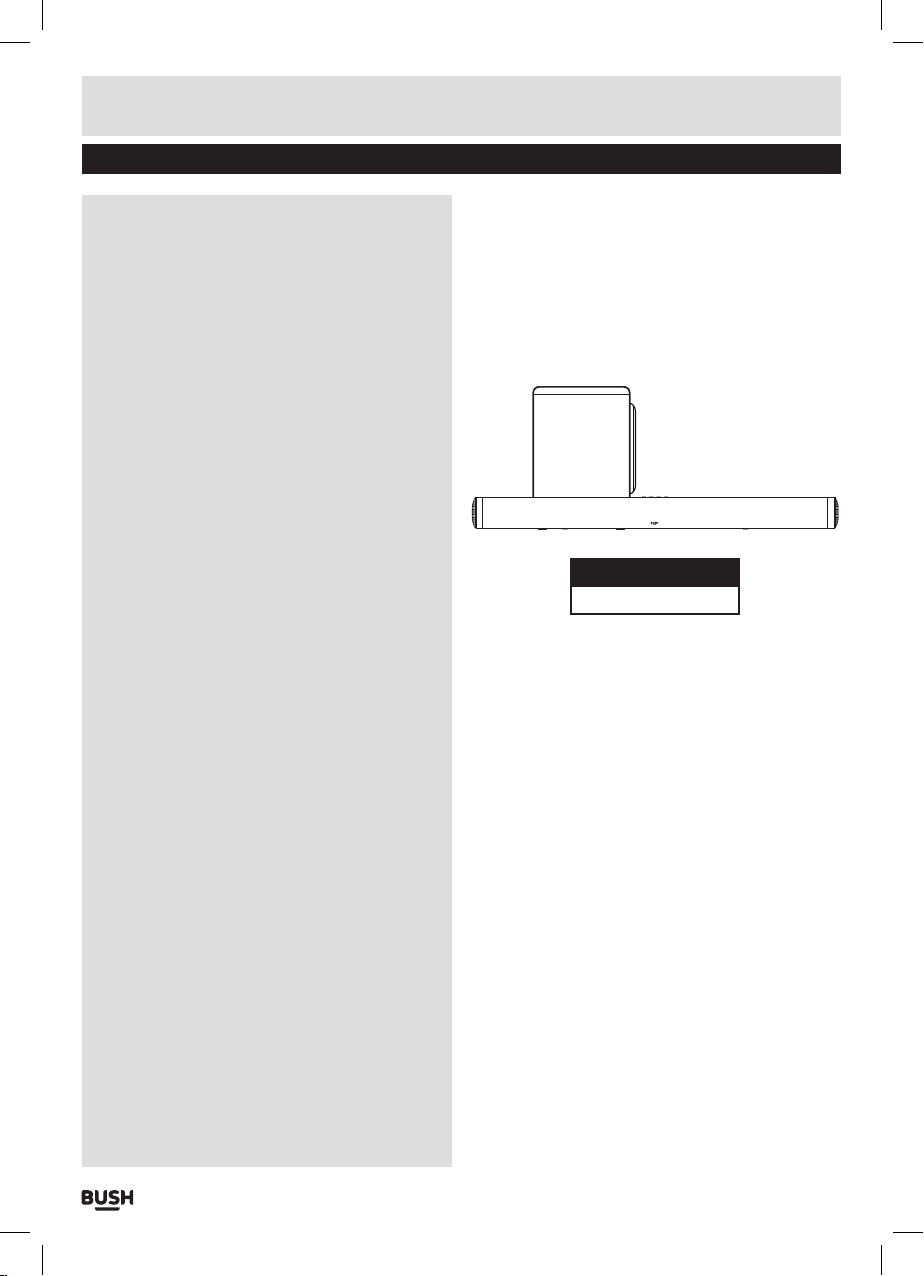
Table of contents
Accessories included ........................... 3
Overview of controls ............................ 3
Overview of remote control ..................... 4
Remote control battery ......................4
Making the connections ..................... 5
Mains connection ........................... 6
Wireless sub woofer ........................ 6
Standby mode .............................. 6
Pairing the sub woofer with the sound bar ...... 6
General operation .......................... 7
Switching inputs ............................... 7
Status LED table ............................... 7
Adjusting the volume level. . . . . . . . . . . . . . . . . . . . . . 7
Sound effect presets ........................... 7
Bass enhancement ............................7
Mute function .................................. 7
Pairing a Bluetooth device ................... 8
Bluetooth status table ...................... 8
Controlling a paired device .................. 8
Bluetooth notes ............................8
Wall mounting the sound bar ................9
Wall mounting advice ..........................9
Care & maintenance ....................... 10
Troubleshooting ...........................10
Technical specifications .................... 11
Disposal information .......................11
Product Codes
Q5W
Page 1
Page 3

Safety information
Important – Please read these instructions fully before installation
CAUTION: TO REDUCE THE RISK OF ELECTRIC SHOCK,
DO NOT REMOVE ANY COVER. NO USER-SERVICEABLE
PARTS INSIDE, REFER ANY SERVICING TO QUALIFIED
SERVICE PERSONNEL.
• Please read this owner’s guide
• Please take the time to follow the instructions in
this owner’s guide carefully. It will help you set up
and operate your system properly and enjoy all of its
advanced features.
• Please save this owner’s guide for future reference.
• The product label is located on the back of the
product.
• Heed all warnings - on the product and in the
owner’s guide.
• This product must be used indoors. It is neither
designed nor tested for use outdoors, in recreation
vehicles, or on boats.
• The apparatus shall not be exposed to dripping or
splashing and that no objects filled with liquids,
such as vases, shall be placed on the apparatus.
• Do not use this product near a bathtub, washbowl,
kitchen sink, and laundry tub, in a wet basement,
near a swimming pool, or anywhere else that water
or moisture is present.
• Batteries, shall not be exposed to excessive heat
such as sunshine, fire or the like.
• Only use attachments/accessories specified by the
manufacturer.
• Unplug this apparatus during lightning storms or
when unused for long periods of time - to prevent
damage to this product.
• Refer all servicing to qualified service personnel
• Servicing is required when the apparatus has
been damaged in any way: such as liquid has been
spilled or objects have fallen into the apparatus; the
apparatus has been exposed to rain or moisture,
does not operate normally, or has been dropped -
Do not attempt to service this product yourself.
Opening or removing covers may expose you to
dangerous voltages or other hazards.
• To prevent risk of fire or electric shock, avoid
overloading wall outlets, extension cords, or integral
convenience receptacles.
• Use proper power sources - Plug the product into a
proper power source, as described in the operating
instructions or as marked on the product.
• The mains plug is used as the disconnect device, the
disconnect device shall remain readily accessible.
The Bluetooth® word mark and logos are registered
trademarks owned by Bluetooth SIG, Inc. and any
use of such marks is under license
Page 2
Page 4
Functions & controls
Please familiarize yourself with the parts and accessories listed below
Accessories included
• 1 x Q5W sound bar
• 1 x Wireless Subwoofer
• 1 x Remote control
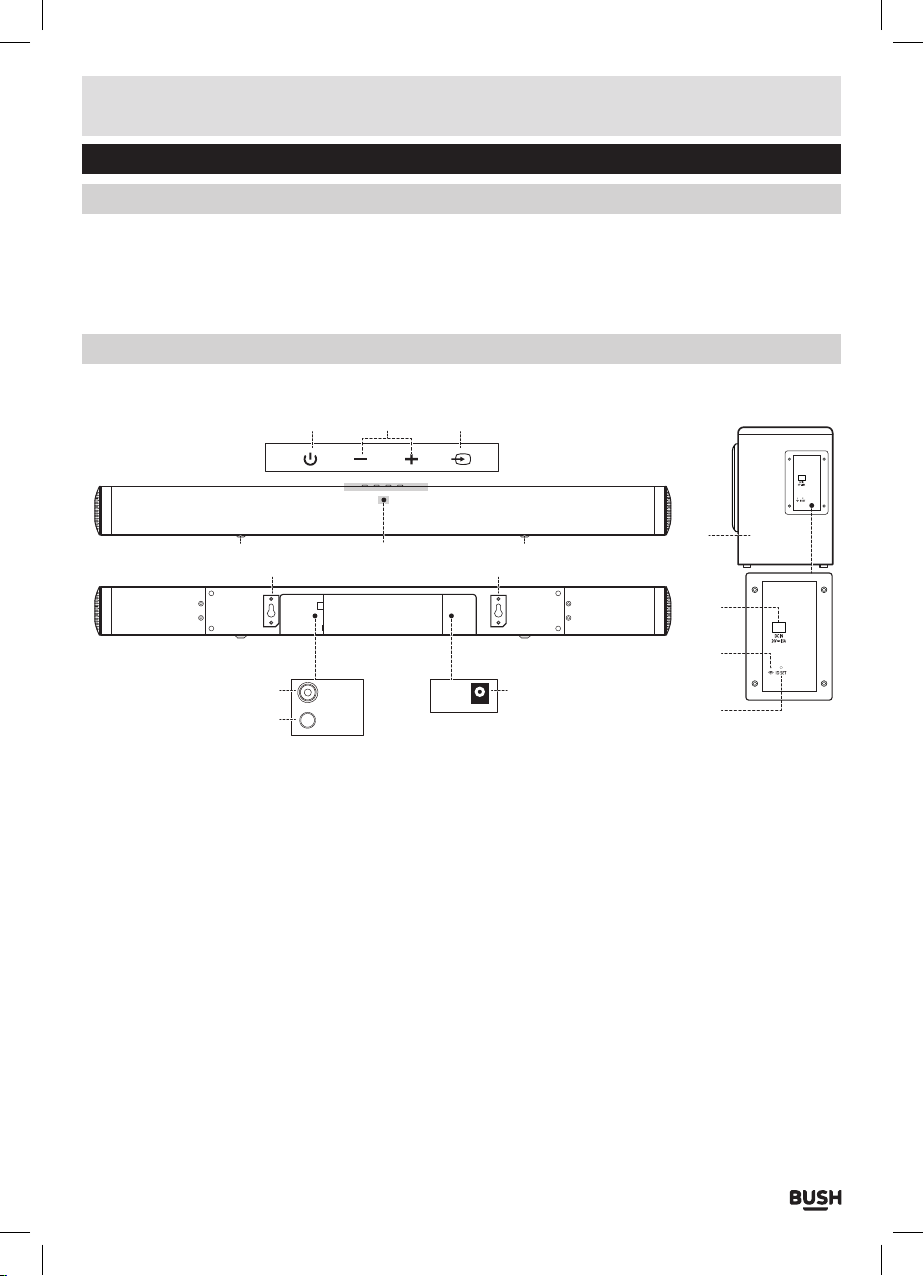
Overview of controls
• 1 x CR2032 battery
• 1 x Audio cable (3.5-3.5mm)
• 1 x Audio cable (Coaxial)
• 2 x mains adapters
• 1 x Instruction manual
1
6
7
COAX DC IN
8
AUX
1: STANDBY button: Switch on the Sound bar or switch
to STANDBY mode.
2: VOLUME + / - buttons: Increase or decrease the
output volume.
3: SOURCE touch button: Select an audio source from
AUX, COAX or BT inputs.
4: STATUS LED: Input mode and standby status.
5: NON SKID PADS
6: WALL-MOUNT BRACKETS Use these brackets to fix
the Sound bar to a wall.
7: COAXIAL AUDIO INPUT (RCA): Connect the digital
audio output from a TV, DVD or Blu-ray player.
8: AUX AUDIO INPUT (3.5mm) Connect the analogue
audio output from an MP3 player or similar using a
3.5mm audio cable.
2 3
45 5
10
6
11
12
9
13
9: MAINS POWER DC INPUT: Connect the supplied
power adapter.
10: WIRELESS SUB WOOFER
11: SUB WOOFER MAINS POWER DC INPUT: Connect
the supplied power adapter.
12: SUB INDICATOR: Indicates the current working
status of the wireless sub woofer.
13: ID SET BUTTON: Press to enter pairing mode to
connect the sound bar to the sub woofer.
Page 3
Page 5

User instructions
Overview of remote control
14
15
16
15
17
18 18
Remote control battery
Installing batteries in the remote
22
21
20
19
14: STANDBY: Switch on the Sound bar or switch to
STANDBY mode.
15: VOLUME - / +: Increase or decrease the volume
output.
16: SKIP
playback.
17: SOURCE: Select an audio source from AUX,
BLUETOOTH or COAXIAL inputs.
18: BASS - / +: Increase or decrease the bass output.
19: SOUND EQ MODES: Press repeatedly to assign
different sound EQ modes: STANDARD or MOVIE.
20:
playback. In AUX mode press and hold for 3 seconds
to pair the wireless subwoofer with the sound bar.
21: SKIP
22: MUTE: Press to mute the sound output.
: Skip to previous track for Bluetooth
PLAY/PAUSE: STAR T or PAUSE Bluetooth
: Skip to next track for Bluetooth playback.
1: Turn the battery cover counter clockwise using a coin
to open the battery compartment.
2: Insert the CR2032 battery into the battery
compartment with the + symbol facing upwards.
3: Replace the battery compartment cover and turn
clockwise using the a coing to close.
Disposal of batteries
Dispose of used batteries with regard to the recycling
regulations in your area.
Do NOT short circuit batteries or throw them into water,
the general rubbish or in a fire. Weak batteries can leak
and damage the remote control. Replace them in good
time!
Page 4
Page 6

User instructions
COAX
AUX
COAX
AUX
COAX
AUX
COAX
AUX
COAX
AUX
COAX
AUX
Making the connections
Connecting a TV using the supplied 3.5mm
-3.5mm audio cable
The below diagram shows the connection to a TV using
a 3.5mm audio cable (supplied).
COAX
AUX
1: Connect one end of the 3.5mm audio cable (supplied)
to the headphone output of your TV.
2: Connect the other end to the AUX input (3.5mm
socket) on the back of the Sound bar (8).
NOTE: In some cases when using the AUX input
the Sound bar volume output is effected by the
volume level on the TV. In this case adjust the TV
volume to increase the audio output from the
sound bar. If no sound can be heard from the
sound bar using this connection, you may need to
check your TV settings to enable the headphone
socket output.
Connection to a TV, DVD or GAMES console
using an RCA-3.5mm audio cable
NOTE: Ensure that the TV PHONO connectors are
audio OUTPUTS and not audio INPUTS. If they are
INPUTS then use a 3.5mm-3.5mm audio cable
(not supplied) and connect to the TV’s headphone
output socket.
COAX
AUX
1: Connect the 3.5mm (small) end of the cable
(supplied) to the AUX 3.5mm audio input socket (8)
on the back of the sound bar.
2: Connect the other RED & WHITE ends to the TV, DVD
or CONSOLE audio output RCA sockets, taking care
to match the RED plug to the RED socket and the
WHITE plug to the WHITE socket.
Connecting an MP3 player using the supplied
3.5mm -3.5mm audio cable
DIGITAL connection to a TV, DVD or Blu-ray
player using the supplied COAXIAL cable
COAX
AUX
1: Connect one end of the RCA COAX cable (supplied) to
the TV, DVD or Blu-ray COAXIAL digital audio output
RCA socket.
2: Connect the other end to the COAX input on the back
of the Sound bar (7).
NOTE: You may need to activate PCM (Downmix)
on your source device EG:- TV, DVD or Blu-ray
player.
Page 5
The below diagram shows the connection to an MP3
player, using a 3.5mm audio cable.
COAX
AUX
1: Connect one end of the 3.5mm audio cable (not
supplied) to the headphone output of your MP3
player.
2: Connect the other end to the AUX input (3.5mm
socket) on the back of the Sound bar (8).
NOTE: In some cases when using the AUX input
the Sound bar volume output is effected by the
volume level on the MP3. In this case adjust the
MP3 volume to increase the audio output from
the sound bar.
Page 7

User instructions
Mains connection
1: Insert a DC mains plug into each of the DC input
sockets on the sound bar (9) and wireless sub woofer
(11) as shown below.
2: Connect both mains adapters to UK mains power
supply outlets and switch on.
Wireless sub woofer
Position
For the best audio performance place the wireless sub
woofer as follows:
• At least 1 metre (3 feet) away from the sound bar either
to the left or right, but no more than 5 metres (15 feet)
away.
• 10 centimetres (4 inches) away from the wall.
Standby mode
1: Press the STANDBY button (1 Unit & 14 Remote) to
wake the unit from STANDBY mode.
2: To enter STANDBY mode press either STANDBY
buttons (1 Unit & 14 Remote).
NOTE: As part of the power saving mode the unit
will enter STANDBY mode automatically after 20
minutes (approx) of no audio output.
Pairing the sub woofer with the sound bar
1: Power the unit ON using the STANDBY button (see
standby mode above).
2: If the connection between the sub woofer and the
sound bar is lost, the indicator on the back of the sub
woofer (12) will blink slowly.
3: Press the ID SET button (13) on the back of the sub
woofer with a small pointed object for 3 seconds
to enter pairing mode. The indicator will now blink
quickly.
4: Press the SOURCE button (3, 17) repeatedly until
you reach AUX mode (status indicator colour green),
then press and hold the PLAY/PAUSE button for 3
seconds.
If the pairing succeeds the indicator on the back
of the sub woofer will stop blinking and remain
solid.
If the pairing failed the indicator on the back of
the sub woofer will blink slowly.
Repeat steps 3-4 again to attempt pairing once
more.
Page 6
Page 8

User instructions
General operation
Switching inputs
Follow the below steps to switch inputs between : TV,
Auxilliary, Bluetooth or Coaxial.
1: Ensure the Sound bar is powered ON. If not press the
STANDBY button (1) or remote (14).
2: Press the SOURCE button (3, 17) repeatedly until you
reach the required input mode.
Auxilliary input: GREEN
Coaxial input: WHITE
Bluetooth input: BLUE
NOTE: When switching inputs there will be a 2
second pause after selecting BT while the unit
scans for paired devices.
Status LED table
Operation Description Action
STANDBY Standby RED (solid)
AUX GREEN (solid)
Bluetooth ready
SOURCE
VOL +/- Adjust sound
Bass +/- Adjust bass level Current input
SOUND EQ Assign sound
MUTE Mute sound RED (flash)
for pairing
Bluetooth paired BLUE (solid)
Coaxial WHITE (solid)
volume
EQ: Standard or
Movie
BLUE (flash)
Current input
source colour
(blink once)
source colour
(blink once)
Current input
source colour
(blink once)
Adjusting the volume level
1:To increase the volume level press the VOLUME +
button (2 Unit or 15 Remote) repeatedly or press and
hold for fast adjustment. The STATUS led will blink.
2: To decrease the volume level press the VOLUME -
button (2 Unit or 15 Remote) repeatedly or press and
hold for fast adjustment. The STATUS led will blink.
Sound effect presets
1: During playback pressing the SOUND EQ button on
the remote control (19) repeatedly cycles through the
available sound modes. The STATUS led will blink.
Choose between :- STANDARD (STD) or MOVIE.
Bass enhancement
1: To increase the bass level press the BASS + button
on the remote control (18) repeatedly. The STATUS led
will blink.
2: To decrease the bass level press the BASS - button
on the remote control (18) repeatedly. The STATUS led
will blink.
NOTE: The BASS levels range from -3 to +3.
Mute function
1: Pressing the MUTE button (22) on the remote will
temporarily silence the audio output. The STATUS led
will blink RED to indicate MUTE is active.
2: Press the MUTE button again to resume the audio
output.
Page 7
Page 9

User instructions
Pairing a Bluetooth device
Before you can use the sound bar with your phone or
other bluetooth capable device you will need to pair the
device to the sound bar.
1: Press the SOURCE button (3, 17) repeatedly until the
STATUS led turns BLUE.
2: When selected the STATUS led will flash while the
unit tries to connect to previously paired devices. If no
devices are found the STATUS led will remain flashing
to indicate it is ready for pairing a new device.
3: Enable the Bluetooth function on your audio device
and search for a device labelled ‘BUSH Q5W’ in the
available list.
4: Select and enable pairing for the ‘BUSH Q5W’ device.
If prompted for a password enter ‘0000’.
5: If pairing is successful the sound bar will beep and
the STATUS led will stop flashing.
6: If the connected device goes out of range, the sound
bar will attempt to connect for 2 minutes. When the
device comes into range the sound bar will reconnect
again automatically.
7: To remove a paired device using only the sound bar,
press and hold the PLAY/PAUSE button (20) on the
remote control for 5 seconds. The STATUS led will
begin flashing once more.
Bluetooth status table
Status LED Reason
Solid blue (no flash) • Connected
Blue flashing • Auto re-connecting with last
paired device.
• Pairing mode
Controlling a paired device
Once connected you can either use the controls on
the audio device to begin playback, skip tracks etc.
Or you can use the control buttons on the sound bar &
remote.
1: The PLAY/PAUSE button (20) when pressed will begin
playback of the selected track on the audio device.
Press again to pause playback.
2: To skip to the next track press the
3: To skip to the previous track press the
4: Any further operations must be done from the audio
device.
NOTE: the volume output is effected by the
volume level on the audio source EG: Phone or
laptop, so make sure that is set to about 70-80% (
not too loud to avoid distortion).
Bluetooth notes
• The operation range of bluetooth is approximately 10
meters (30 Feet). Any obstacles in the path between
devices may reduce this range.
• Only one Bluetooth device can be paired at a time.
• Not all Bluetooth devices are compatible.
button (21).
button (16).
Page 8
Page 10

Wall mounting the sound bar
1: Align the Sound bar in the
chosen location. Use a
pencil to mark the drilling
positions 287mm (11.3”)
apart.
NOTE: The Sound bar should be located at least
75mm (3”) below the bottom of the TV.
287mm/11.3"
TV
3 inches (7.5 cm) or more
2: Drill holes as marked in
step 1.
NOTE: You will need to ensure the screws are long
enough to sufficiently grip the wall while allowing
5mm between screw head & wall.
4: Hook the Sound bar into the screws. For secure
mounting ensure the screw heads slide firmly into the
narrow part of the brackets.
Wall mounting advice
• In order to avoid damage to the equipment and
personal injury you should get a qualified person to
drill the fixing surface and fit the appropriate wall
fixings.
• Take care not to allow the main unit to fall while
attempting to hook onto the wall mount brackets.
• Before mounting, check the wall strength, if it is not
clear then consult relevant qualified personnel.
• When drilling into walls, always check that there are no
hidden wires or pipes etc.
• Make sure the screws & wall plugs are suitable for
supporting the unit.
3: Insert 2 screws (not
supplied) into the holes
and tighten. Take care to
leave 5mm between the
screw heads and the wall.
Page 9
Page 11

User instructions
Care & maintenance
•
Important: Always unplug the appliance from
the power socket during cleaning and maintenance .
• Ensure the unit is switched off and unpluggedfrom
any electrical outlet
• Wipe the case with a slightly moist lint free cloth
• Do not use any cleaning fluids containing alcohol,
ammonia or abrasives
• Do not spray an aerosol at or near the object
• Do not allow liquids to spill or objects to drop into
any openings
• Do not insert sharp items into speaker grills or any
other openings
Troubleshooting
In the unlikely event of difficulties with your appliance please follow the trouble shooting guide below.
If the problem persists, visit the technical support website: www.argos-support.co.uk
PROBLEM POSSIBLE SOLUTION
No Power • Ensure the mains adaptors are connected to a power supply, and are
No Sound • Make sure if playing from the AUX input, the external source has the
No response from the unit • Unplug the power cable for 1 minute then plug back in again.
Remote control does not work • Reduce the distance between the remote and main unit
Unit powers off after 20 minutes • This unit is designed to enter STANDBY mode automatically after 20
switched ON.
• Make sure there is power to the mains socket.
volume turned up and is playing a track.
• Make sure the volume is turned up.
• If using the digital coaxial cable connection ensure the source DIGITAL
output is set to PCM, LPCM, PCM 2Ch stereo or PCM downmix. And
the cable is connected to a DIGITAL COAXIAL output and not one of
the RED, WHITE or YELLOW analogue output sockets.
• Bluetooth device not paired. Check ‘Bluetooth operation’.
• Check the batteries are installed correctly.
• Replace the batteries
• Aim the remote directly at the Sound bar
MINUTES of inactivity. Press the STANDBY button to wake the unit.
• Always us the original packaging if it is necessary to
transport the unit at any time
• If the unit is used in a dusty environment, it may be
necessary to have the unit serviced at your local
dealer periodically. It is not advisable to allow large
deposits of dust to accumulate within the unit as
it may prevent adequate cooling. Similarly dust
deposits which become damp can sometimes lead
to electrical problems which may cause severe
damage to the delicate electronics within this unit.
Page 10
Page 12

User instructions
Technical specifications
Amplifier
Power Output • 80W MAX
Frequency response • 20Hz - 20KHz ± 3dB
Input sensitivity • 550 mV
Main unit
Power supply Sub woofer &
Sound bar
Power consumption • 45W
Standby power consumption • ≤ 0.5W
Full range speaker drivers
Subwoofer
Dimensions • Soundbar: 730 x 60 x 62mm
Mains cable length • 1.5m
Remote control
Battery • 1 x CR2032
Bluetooth
Bluetooth compatibility • EDR, A2DP, AVRCP
Bluetooth version • 2 .1
• INPUT: 100-240V ~ 50-60Hz
• OUTPUT: 24V
• Impedance: 8 Ohm, 52mm (2”)
• Frequency response: 250Hz ~ 20KHz
• Impedance: 8 Ohm, 116mm (5.25”)
• Frequency response: 35~200Hz
• Sub woofer: 190 x 262 x 195mm
1.5A
We apologise for any inconvenience caused by any minor inconsistencies in these instructions,
which may occur as a result of product improvements and development.
This appliance complies with the following EEC directives:
2006/95/EEC Low voltage directive
2004/108/EEC EMC directive
Disposal information
The symbol on the product or its packaging indicates that this product may not be treated as household waste.
Instead it should be handed over to the applicable collection point for the recycling of electrical and electronic
equipment. By ensuring this product is disposed of correctly, you will help prevent potential negative consequences
for the environment and human health, which could otherwise be caused by inappropriate waste handling of this
product. For more detailed information about recycling this product, please contact your local council office, your
household waste disposal service or the shop where the product was purchased.
Page 11
Page 13

Guarantee
PRODUCT GUARANTEE
This product is guaranteed against manufacturing defects for a period of
Year
This product is guaranteed for twelve months from the date of original purchase.
Any defect that arises due to faulty materials or workmanship will either be replaced,
refunded or repaired free of charge where possible during this period by the dealer from
whom you purchased the unit.
The guarantee is subject to the following provisions:
The guarantee does not cover accidental damage, misuse, cabinet parts, knobs or
consumable items.
The product must be correctly installed and operated in accordance with the instructions
contained in this manual.
It must be used solely for domestic purpose.
The guarantee will be rendered invalided if the product is re-sold or has been damaged by
inexpert repair.
Specifications are subject to change without notice.
The manufacturer disclaims any liability for the incidental or consequential damages.
The guarantee is in addition to, and does not diminish your statutory or legal rights.
Guarantor: Argos Limited
489 - 499 Avebury Boulevard
Central Milton Keynes
MK9 2NW
Page 12
 Loading...