

Page 1
MPK4230BUK
USER MANUAL
Page 2

What's in the box?
Operating Unit
User Manual
Quick Start Guide
USB Cable
Earphone
Battery Charger
2
Page 3

Content
Buttons Location and Usages
Basic Operation
Operation of Music Mode
Operation of Video Mode
Operation of Photo Mode
Operation of eBook Mode
Operation of Explorer Mode
Operation of Record Mode
Operation of Other Mode
Operation of Settings Mode
Technical Specification
Trouble Shooting
9-13
13-14
15
16-17
17
17-18
18-19
19-20
3
Page 4
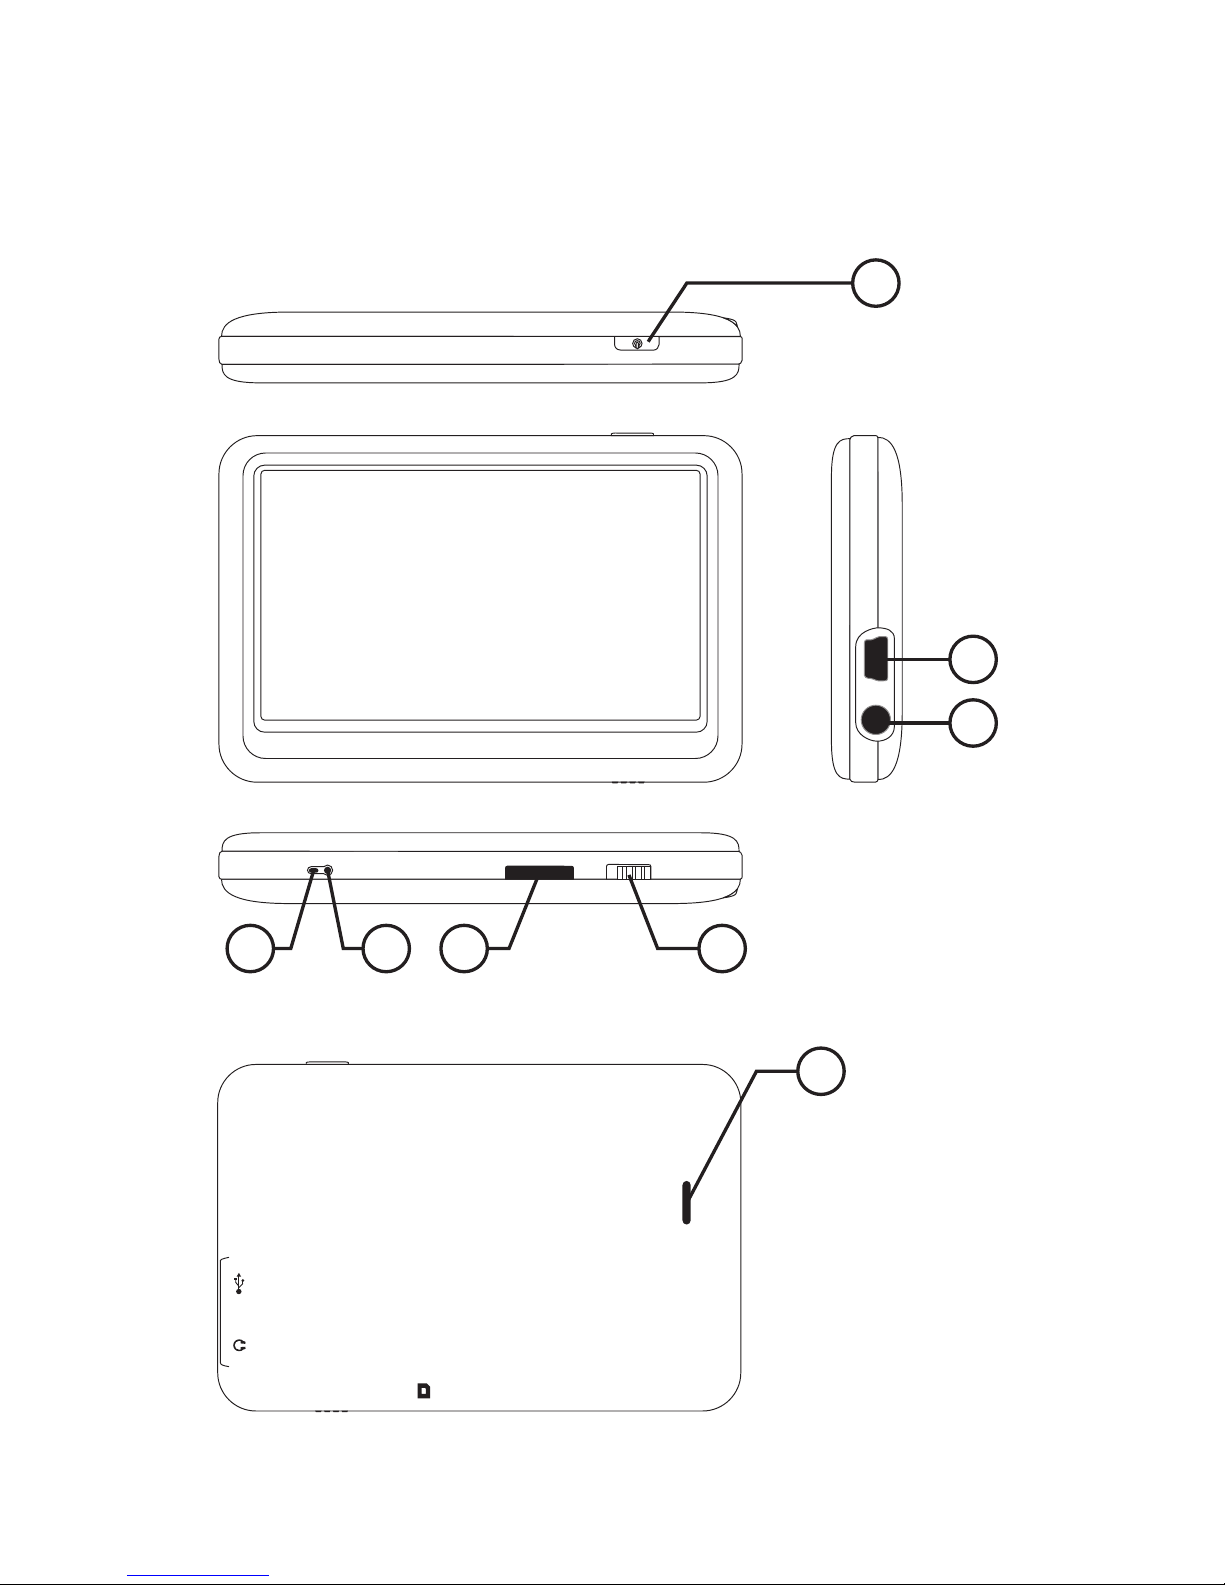
Buttons Location and Usages
RESET
HOLD
MIC
1.ON/OFF
2.USB PORT
3.Earphone Jack
4.HOLD
5.MICRO SD CARD SLOT
6.RESET
7.MIC
8.SPEAKER
1
2
3
4567
8
4
Page 5

Basic Operation
Power on/off and Enter function
Press the Power button and hold for 3 seconds to
switch on the device and hold for 3 seconds to switch
off.
When using this device, Power button also act as a
ENTER function for selecting options.
Lock
Slide the Lock button toward the Micro SD card slot
position to key-lock the player and slide for opposite
position for unlock.
Reset
If the player encounters dead halt during use, press
RESET button to restart the player.
How to insert and pull out Micro SD card
How to insert: with the front (the side with characters)
of the Micro SD card up (towards the screen of the
player), slightly push to insert into the card holder of
the player to connect. After the card is inserted, the
player can play the files in the Micro SD card.
How to pull out: slightly push the Micro SD card and
the Micro SD card will partly come out, and then pull
the card out.
Note: please insert or pull out the card when the player
is off, or the internal files of the player will be lost or
damaged.
5
Page 6

Connection to PC and Data Exchange
Connect the player to PC with the USB cable, and the
player will enter “U disk” mode. Press MENU button or
safely remove U disk, and the player will be under
USB charging mode. In USB charging mode, touch the
screen or press MENU to enter the main applications
interface.
6
Page 7

The above screen would appear. (Apply only to
Window XP) Choose Take no action and click OK to
close the window. Double click My Computer on your
desktop and the above window would appear. Look for
the Removable Disk Icon.
Double click the Removable Disk icon. Note: Do not
disconnect the USB cable once you click into the
removable disk window. Such action may cause data
loss or problems to the player.
Drag and drop your media files into the removable
disk. You can create any folder or directory in the
removable disk. Close the removable disk window and
disconnect the player from your PC after the data
transfer.
Charging
This player has high capacity lithium battery. For
charging, connect the player to the USB port of the PC
or to a charger. When the charger is used for charging,
the battery blue bar will keep moving; when battery is
fully charged, it will stop moving.
Low Power
When battery power is low, the player will prompt and
power off and enter Standby mode automatically. Do
not power on and charge the player instead.
7
Page 8

Touch Calibration
Initial setup or if you cannot select objects accurately
with your finger or a stylus, You may need to
recalibrate the touch screen:
- Enter the calibration setting screen by short key: In
the main menu interface, press power button of the
player to enter touch calibration screen directly.
- Or press “Settings” option on the main menu, enter
into submenu. Choose “Touch Panel Calibration” to
enter the setting mode.
- After the player enters this mode, touch the center
of calibration sign + three times by stylus (optional)
or your finger to calibrate.
Notes: Never use sharp, hard, or abrasive tools on the
touch screen, they will damage the screen. If the touch
screen has been contaminated by chemicals, it must
be cleaned immediately with a soft and clean cloth.
The cloth can be dry or dampened with neutral
detergent or alcohol.
8
Page 9
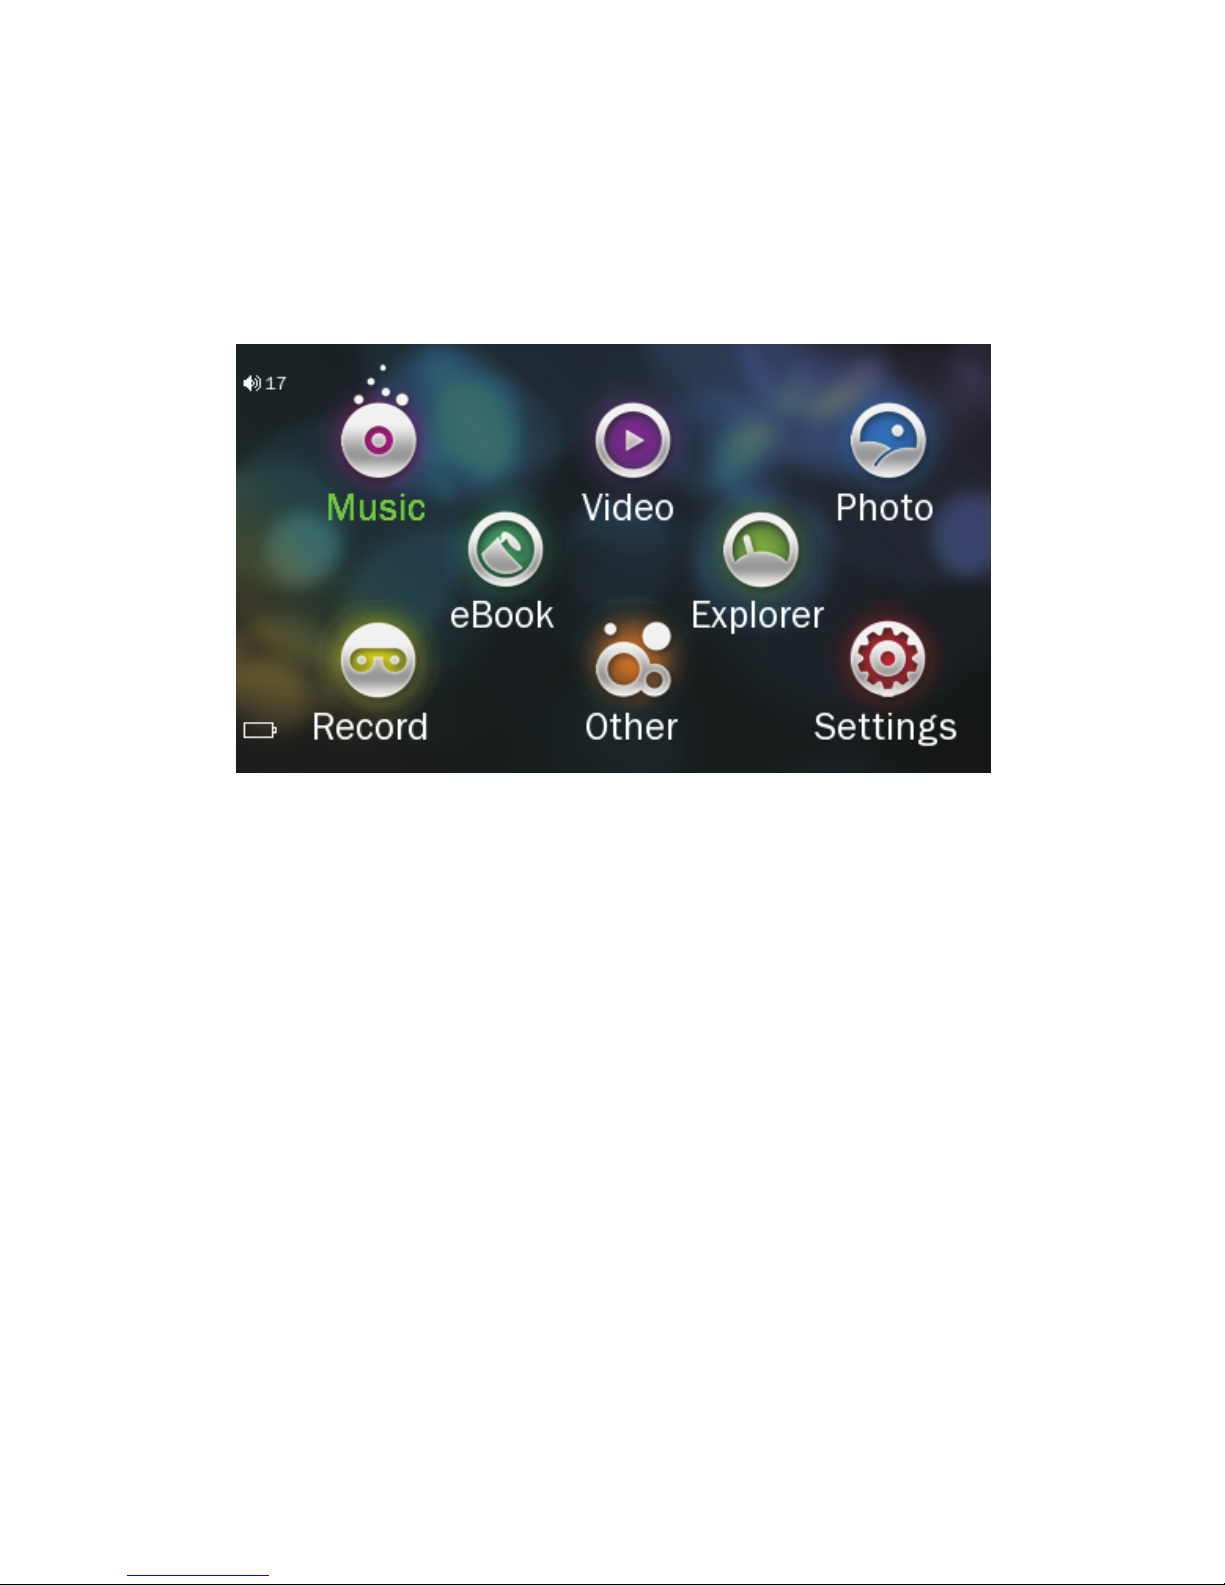
Main interface
Once you switch the player on you'll reach to the main
interface as below.
Operation of Music Mode
Double click the Music icon on the main menu to enter
the music mode. Once you've entered the music
mode, the following screen would show up.
Current play
Double click the Current Play icon to resume playing
the current song.
All Music
Double Click the All Music icon to show your library of
music, double click any particular song to start
playing.
9
Page 10

Artist
Double Click the Artist icon to show all of your artists,
double click any particular artist to show the songs of
that artist. Double click a song to start playing.
Album
Double Click the Album icon to browse all of your
albums, double click any particular album to browse
the songs of that album. Double click a song to start
playing.
Genre
Double Click the Genre icon to browse all of your
genres, double click any particular genres to browse
the songs of that album. Double click a song to start
playing.
My Favorite
Double Click the My Favorite icon to browse all songs
that you've added to be your favorite. Double click a
song to start playing.
Record
Double Click the Record icon to browse all recorded
files. Double click a file to start playing.
Dir List
Double Click the Dir List icon to browse all folders of
the directory. Double click a folder for select file to
open.
MediaLib Update
Double Click the MediaLib Update icon to update all
songs information and details.
Click to jump back to the main menu.
10
Page 11
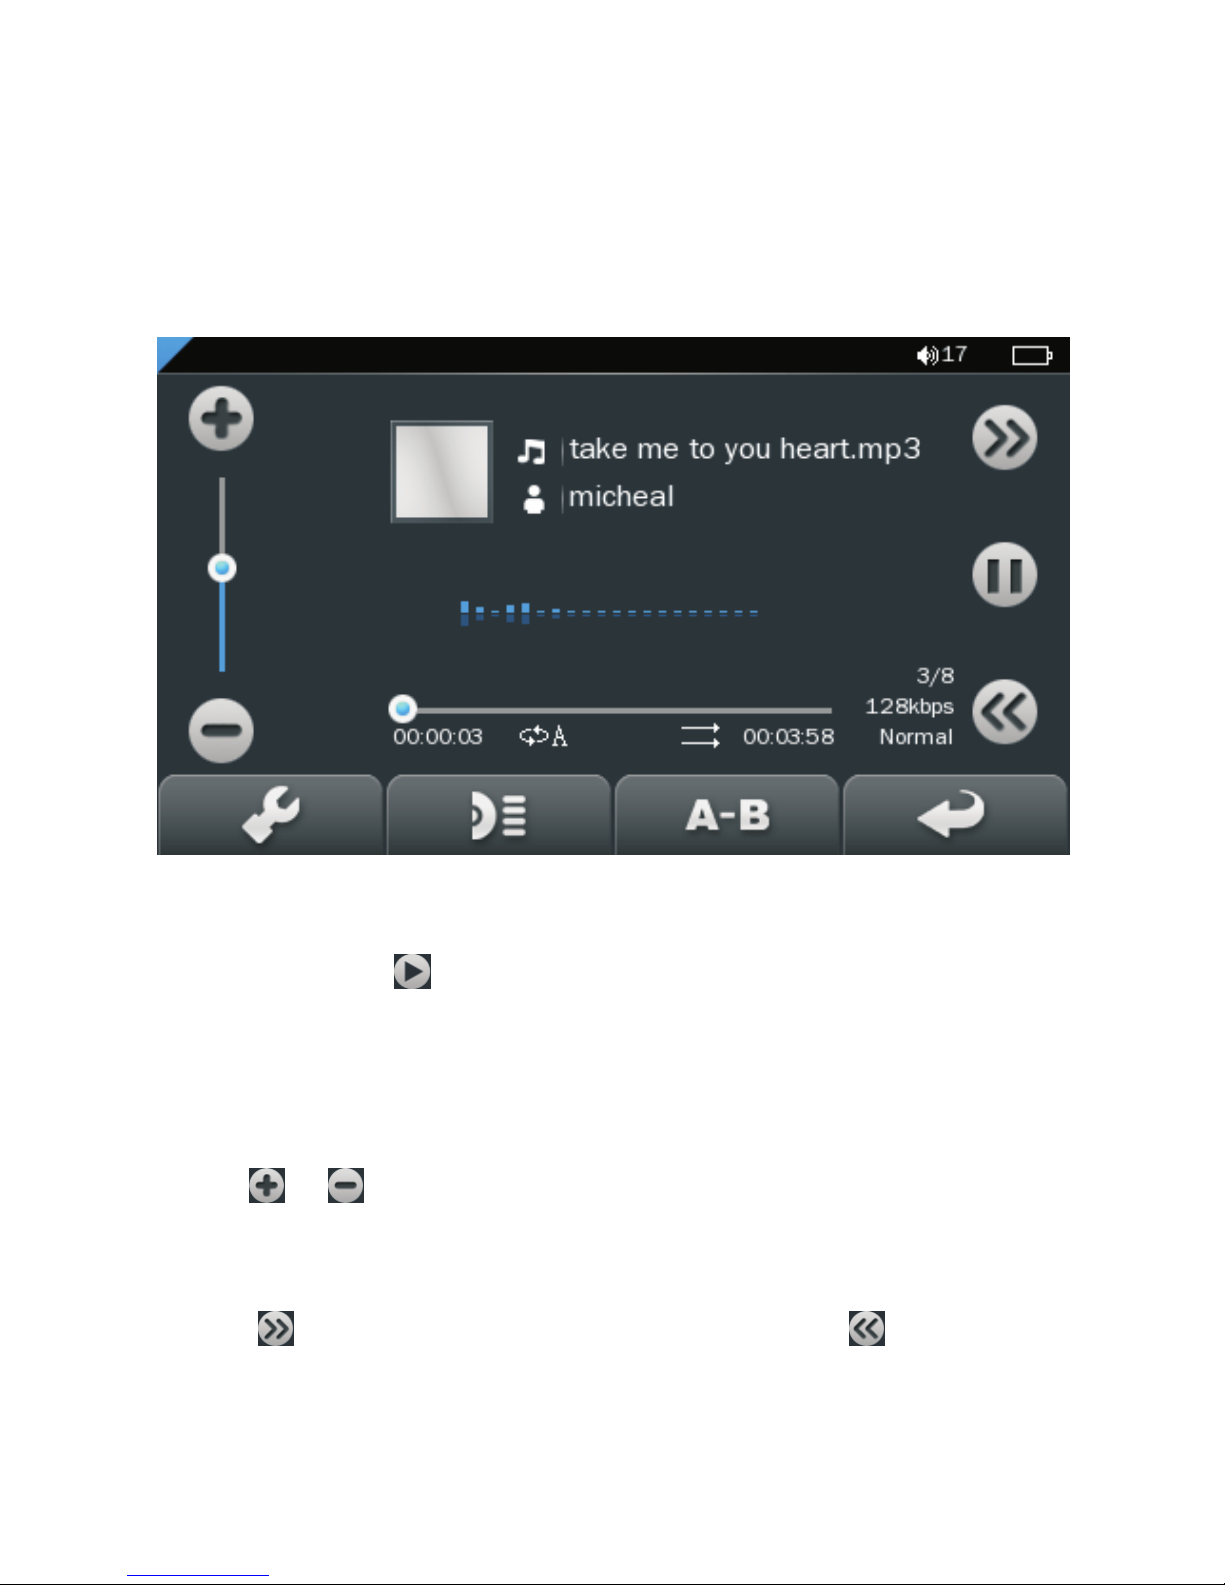
Music Player interface
Whenever you start playing a song you'll reach the
Music Player Interface as below.
Play Music
Click the Play button to start playing, click again to
pause. Drag the horizontal bar to adjust playing
progress with specified time slot.
Volume
Click or to adjust the volume.
Previous / Next
Click jump to the next song, and click to jump
back to the previous song.
11
Page 12
Add songs into Favorite List
Open a playlist and choose the selected song and
then click to add song into favorite list. Click
Yes to confirm once the window pop-up.
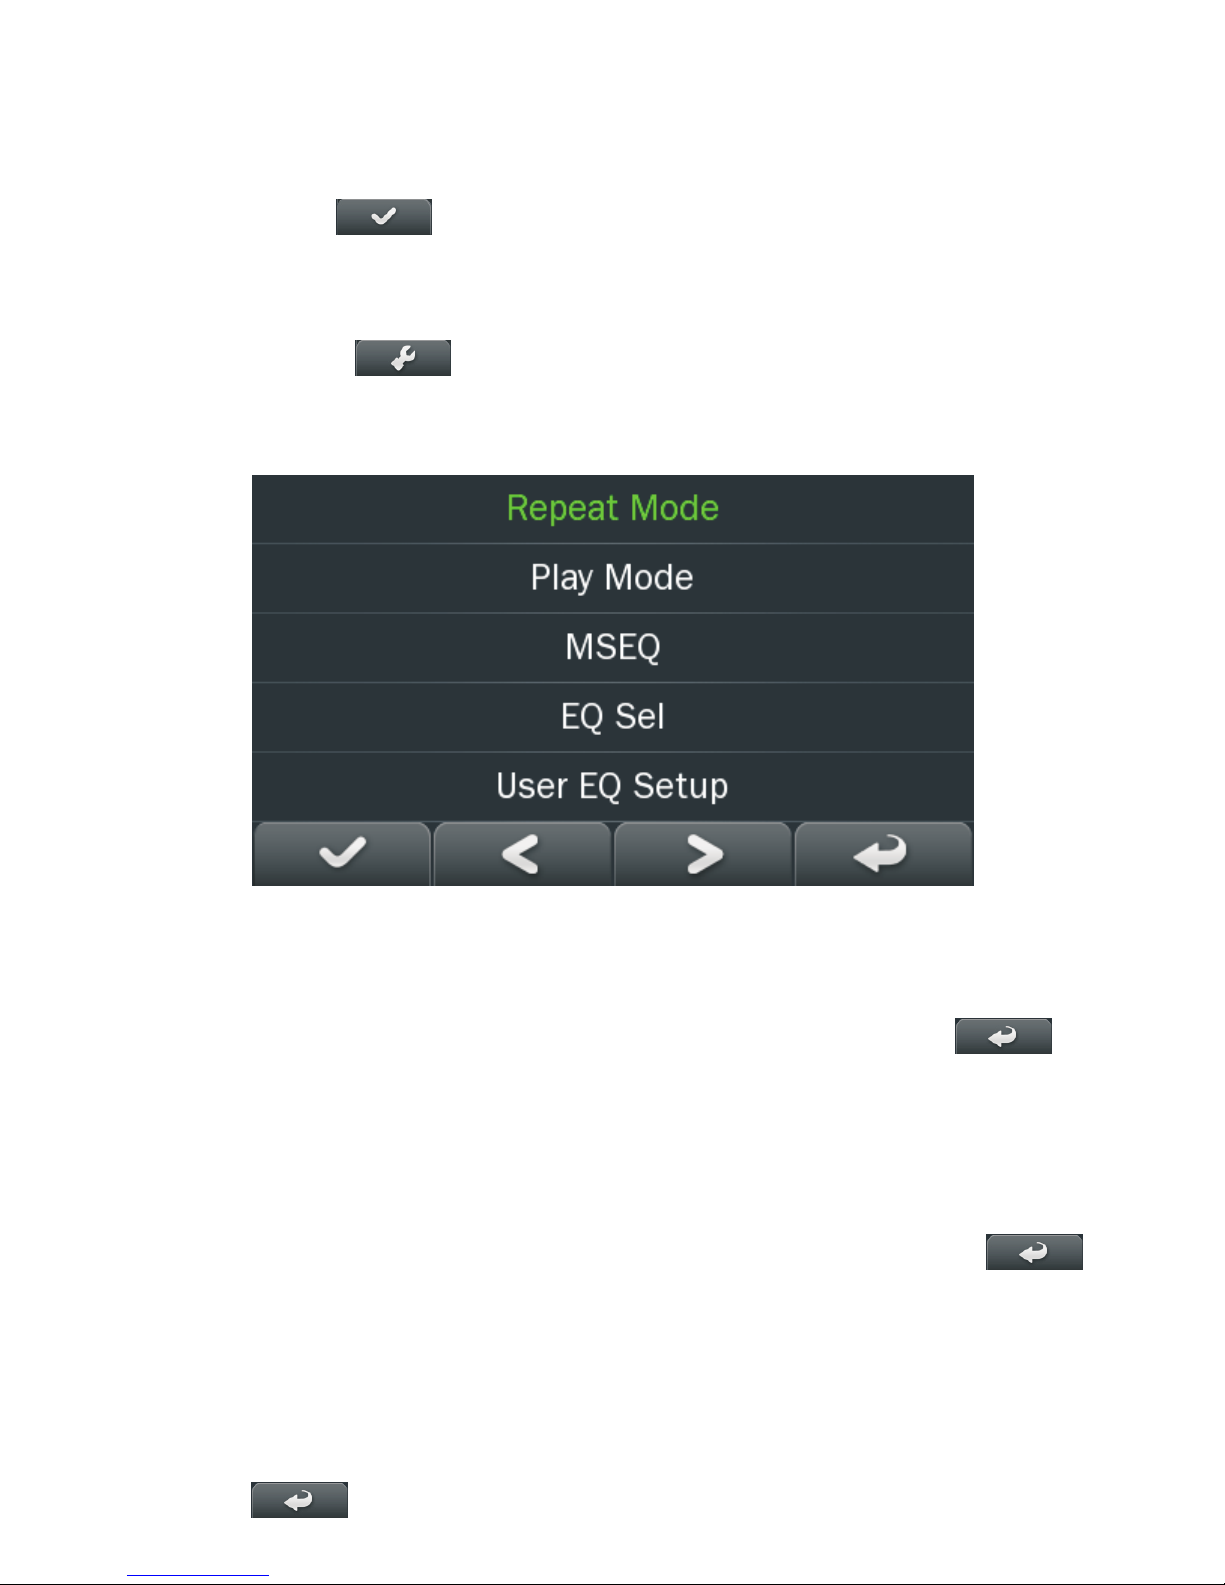
Play Option
Click the to enter the Play Option Menu. You
can set your preference in Repeat Mode / Play Mode /
MSEQ / EQ Setting / User EQ Setup.
Repeat Mode
Double click Repeat Mode to choose from Repeat /
All / All Repeat / Intro. Double click selected options
to confirm setting. Once you've selected, click
return to sub-menu.
Play Mode
Double click Play Mode to choose from In Order or
Shuffle. Double click selected options to confirm
setting. Once you've selected your choice, click
to return to sub-menu.
MSEQ
Double click MSEQ to choose different sound effect
from 3D / Bass / LEQ. Double click selected options to
confirm setting. Once you've selected your choice,
click to return to sub-menu.
12
Page 13
EQ Sel
Double click EQ Sel to choose different EQ from
Normal / MSEQ / Rock / Pop / Classic / Bass / Jazz /
UserEQ. Double click selected options to confirm
setting. Once you've selected your choice, click
to return to sub-menu.
USER EQ Setup
Double click User EQ Setup to adjust your own EQ
Setting. Double click selected options to confirm
setting. Once you've selected your choice, click
to return to sub-menu.
Operation of Video Mode
Double click the Video icon on the main menu to enter
the Video mode. Once you've entered the video mode,
the following screen would show up.
A – B Repeat
Click once to set the starting point of the A-B
Repeat, then click again to set the ending point.
The A-B repeat setting is done. To cancel A-B repeat
mode, click again.
Lyrics
Click to choose to display lyrics.
*The player only supports .LRC lyric.
13
Page 14
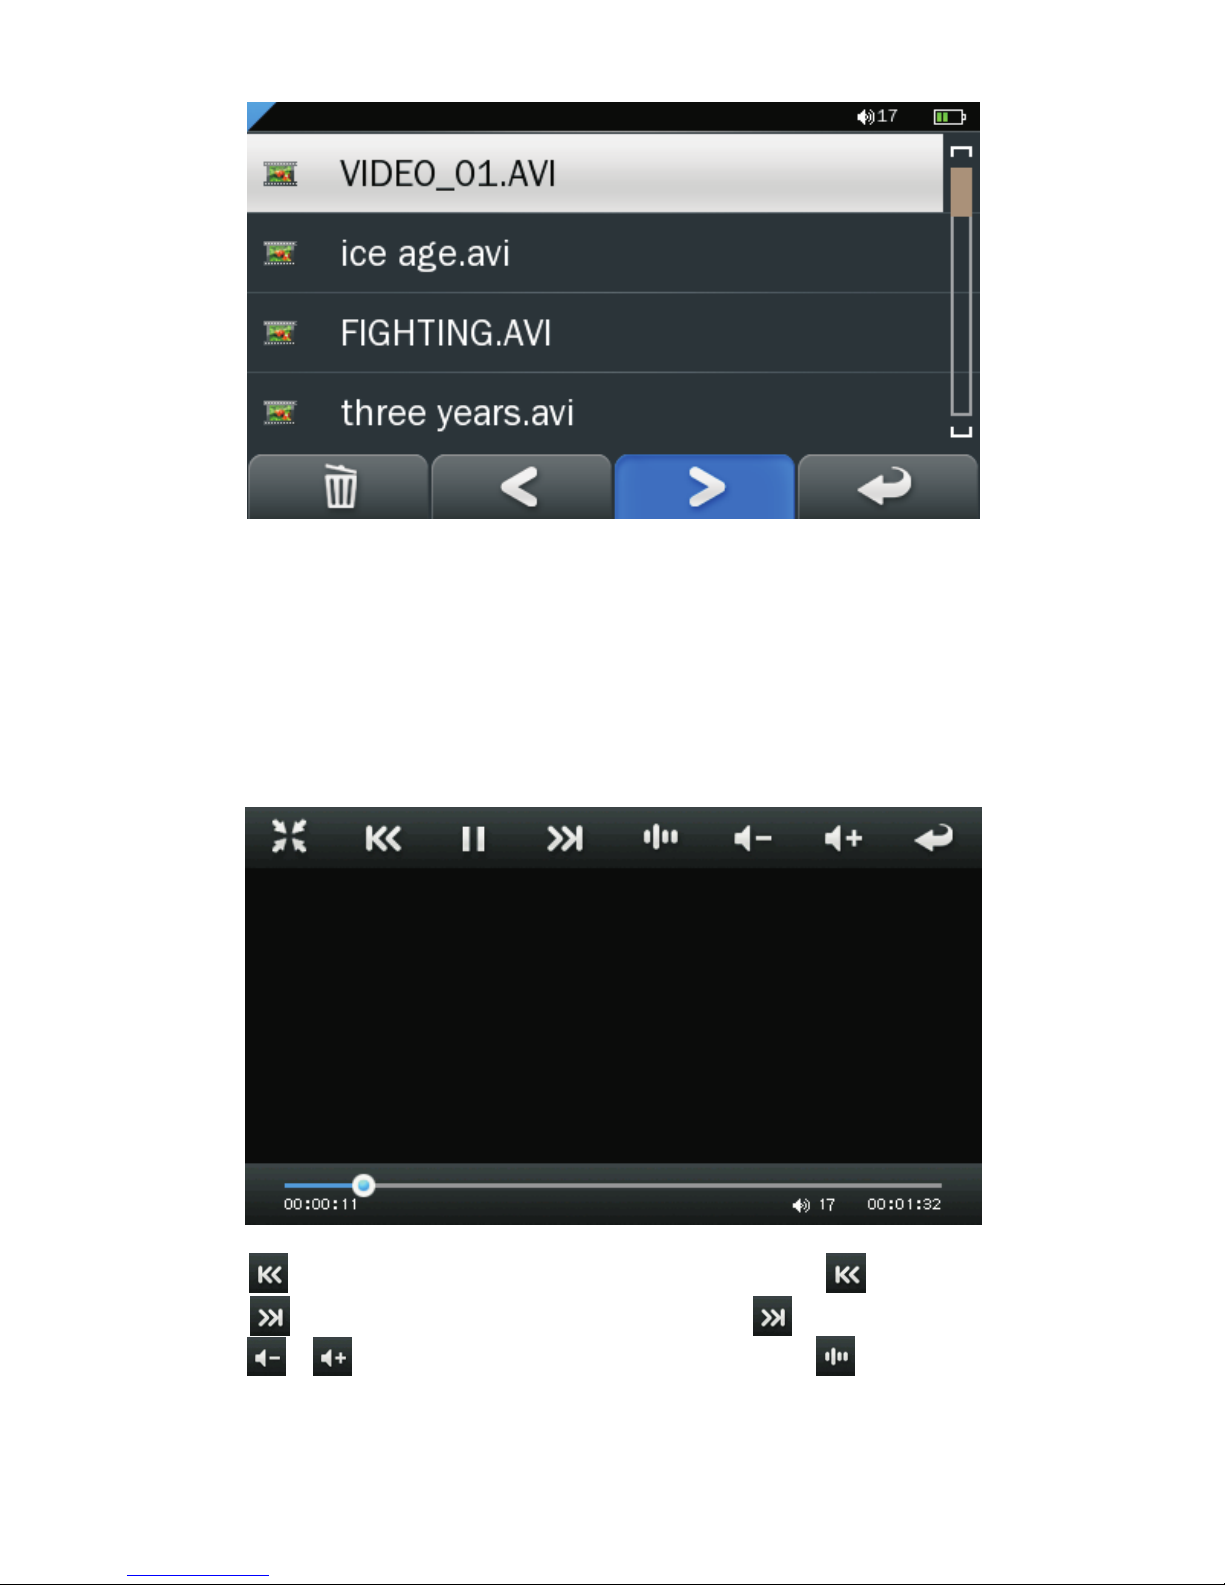
Click any particular movie in the list to start playing.
Basic Video Control
The following control panel will show up when a video
start playing.
Click to choose previous movie, hold to rewind.
Click to choose next movie, hold to fast-forward.
Click / to adjust the volume. Click to resume
playing from where the video stopped last time.
14
Page 15
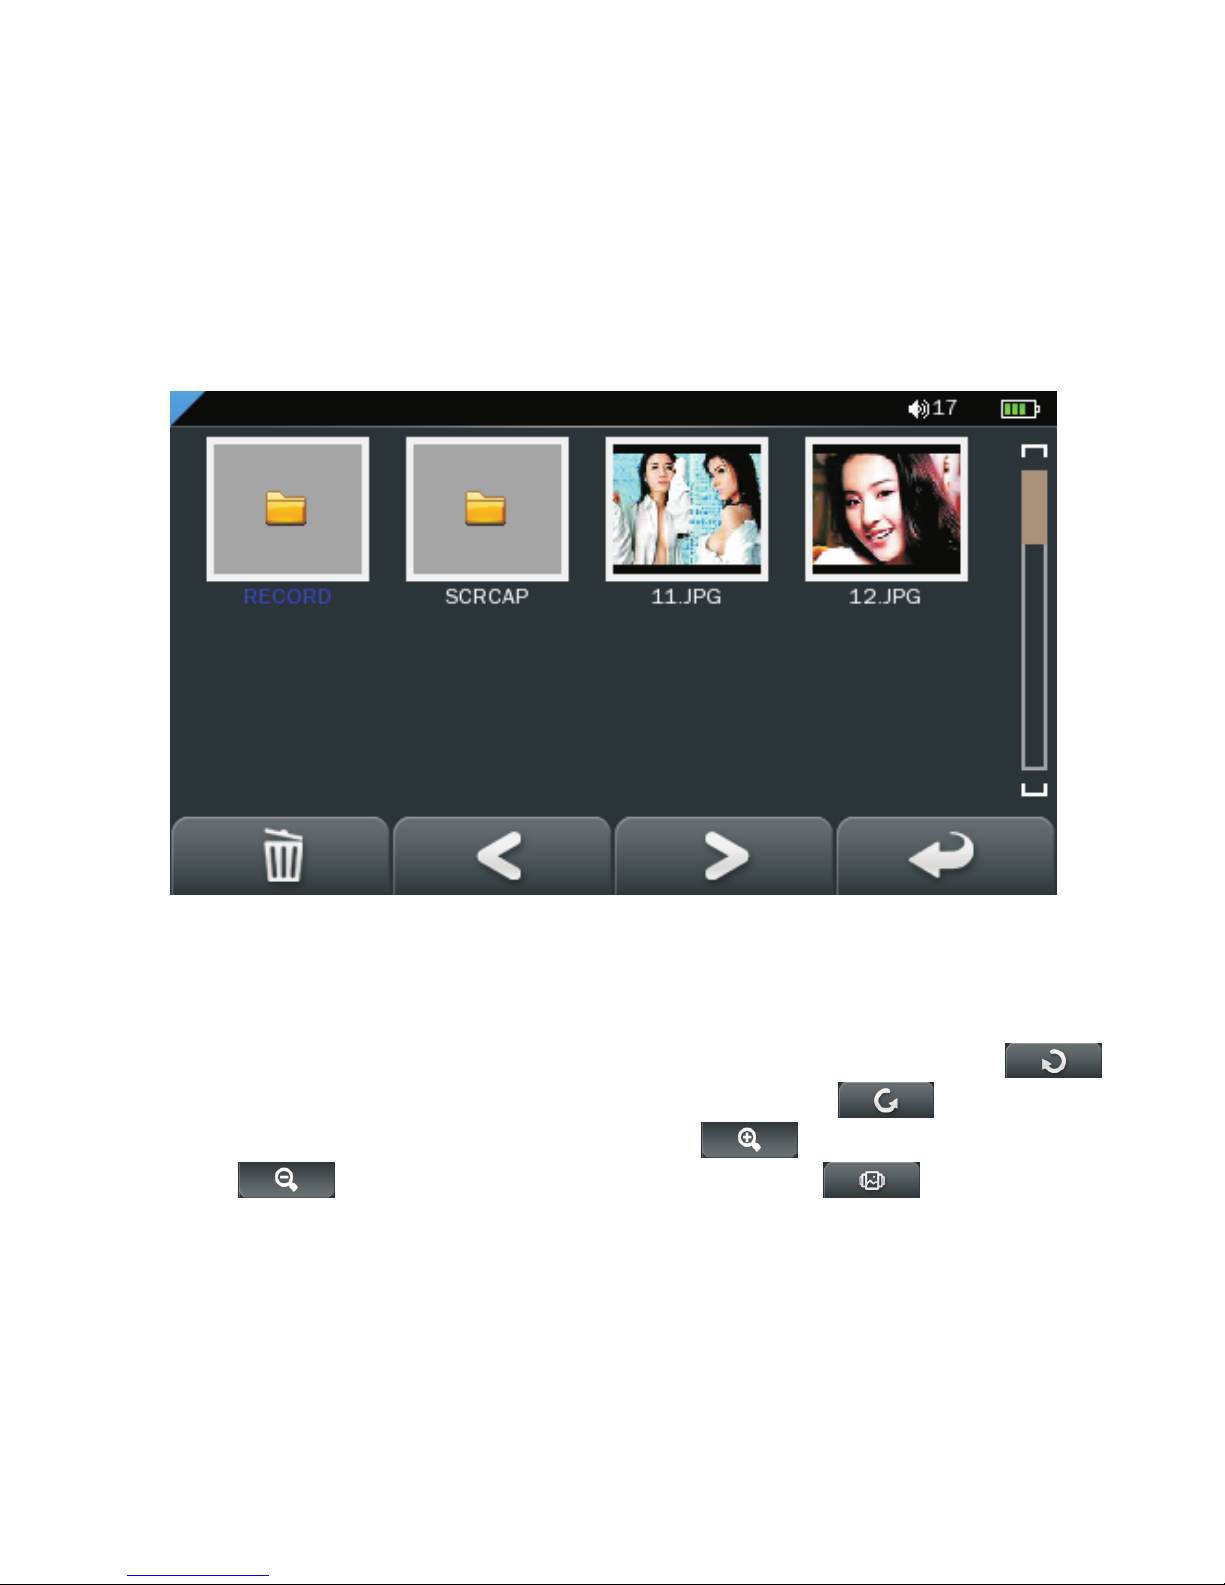
Operation of Photo Mode
Double click the Photo icon on the main menu to enter
the Photo mode. Once you've entered the photo
mode, the following screen would show up.
Basic photo control
Double click on a particular photo to open it. Click
to rotate 90 degree clockwise, and click to rotate
90 degree anti-clockwise. Click to zoom in and
click to zoom out the photo. Click to play
photo in slide show.
15
Page 16
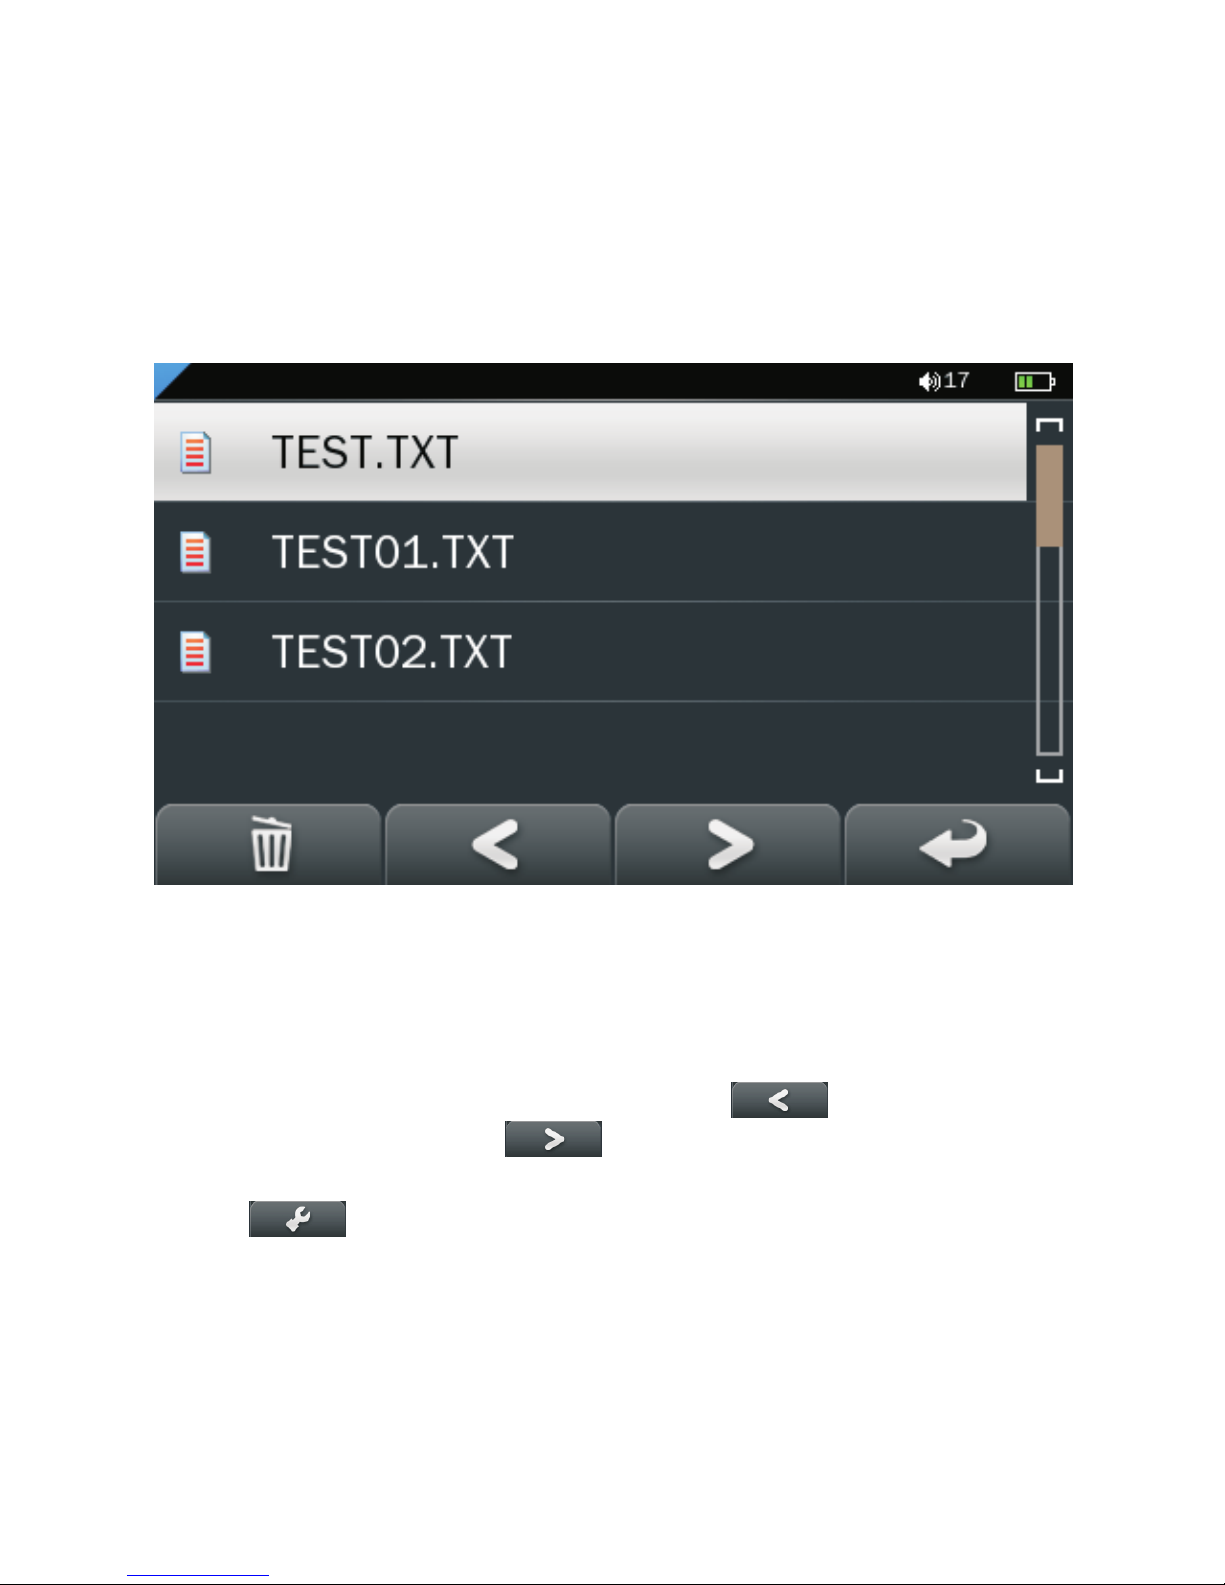
Operation of eBook
Double click the eBook icon on the main menu to enter
the Record mode. Once you've entered the e-book
menu, the following screen would show up.
Basic eBook control
Double click on a particular .txt file to open the eBook.
When opened an eBook file, click to go back to
previous page, click to skip to the next page.
Click to enter the E-book Option Menu. You can
set your preference with followings:
16
Page 17

E-book Option Menu
Page Jump: Input the page number that you'd like to
jump to.
SaveMark: Choose any empty slot to save your
bookmark to.
LoadMark: Load any previously saved bookmarks.
DelMark: Delete any unwanted bookmark from slots.
SetFont: Set the font size from Small, Middle to Big
SetColor: Set the font color
Browser Mode: Choose from automatic flipping and
manual flipping
FlipTime: Choose from the time interval between
every auto flip, from 10 sec to 30 sec.
Operation of Explorer Mode
Click on “Explorer” to enter the file managing mode.
An additional folder “TF Card” will be shown after
inserting a SD card. To delete a file, click a file to
highlight it, and then click to delete it.
Operation of Record Mode
Double click the Record icon on the main menu to
enter the Record mode. Once you've entered the
record mode, the following screen would show up.
17
Page 18
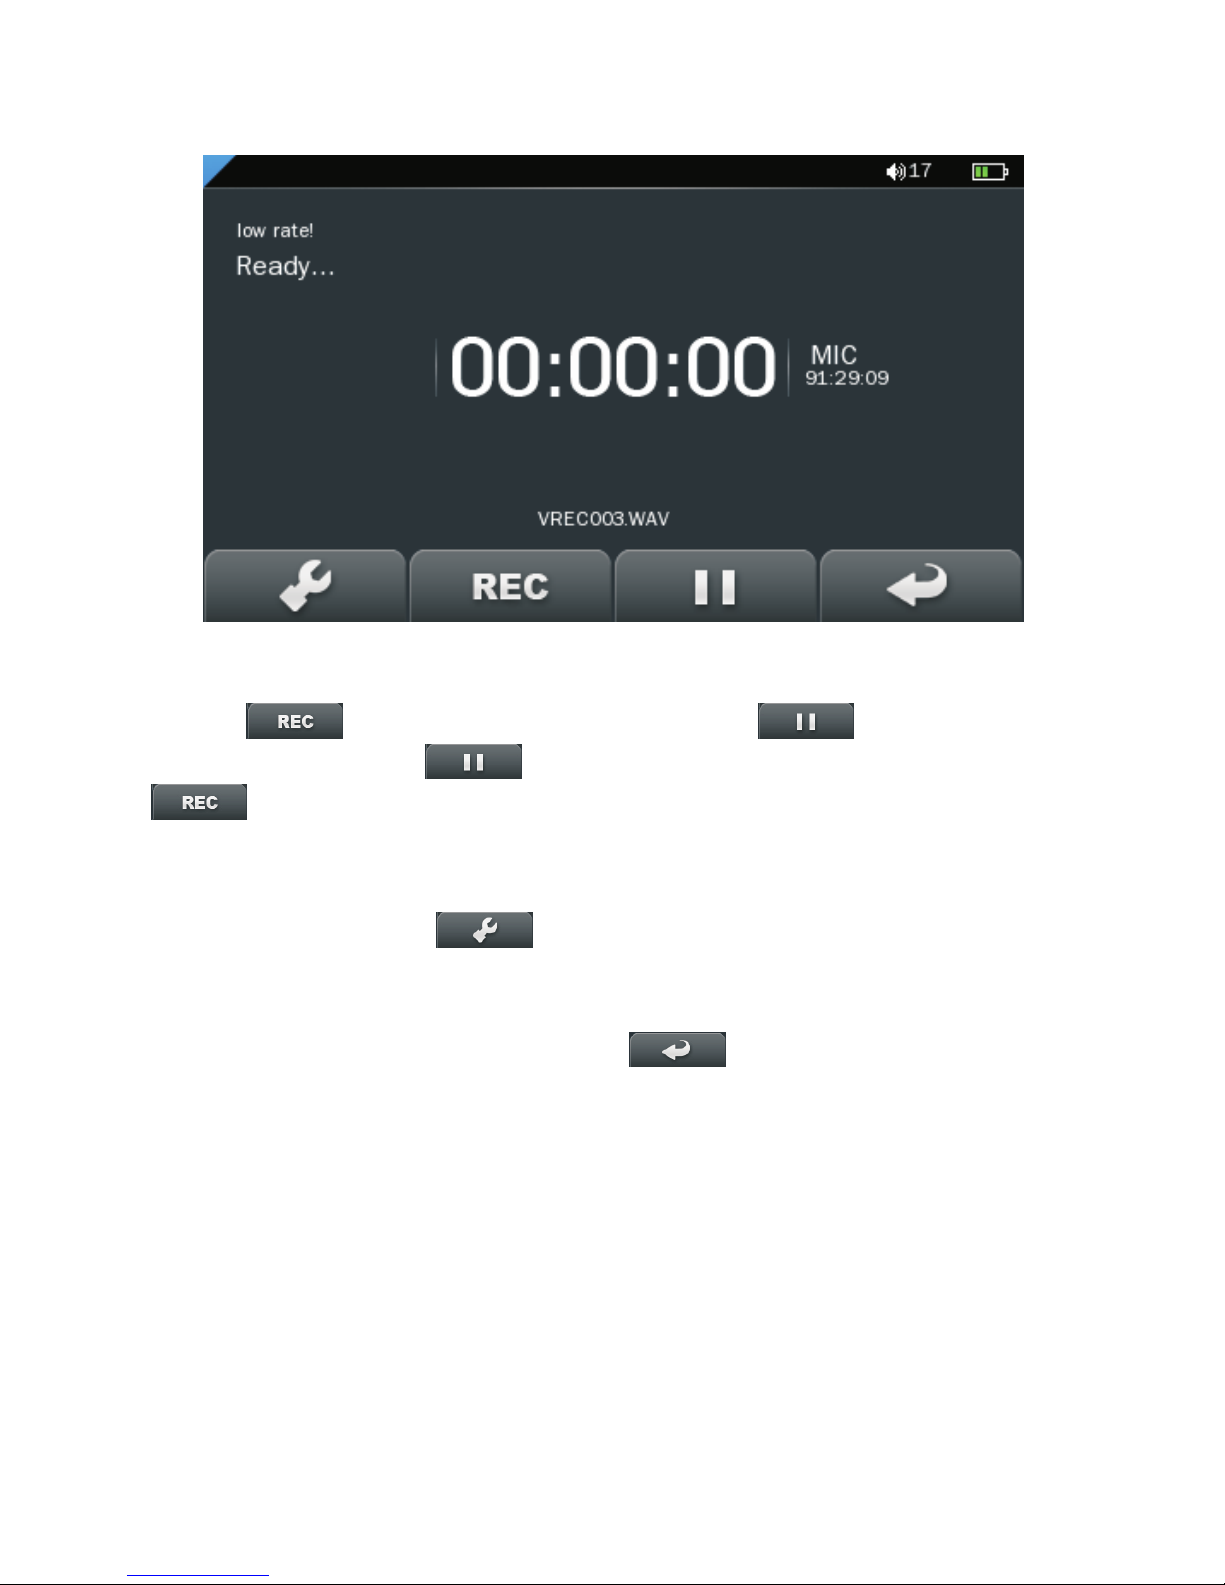
Basic record control
Click to start recording. Click to pause
recording, click again to resume recording. Click
to stop recording and then click “Yes” to save the
record file.
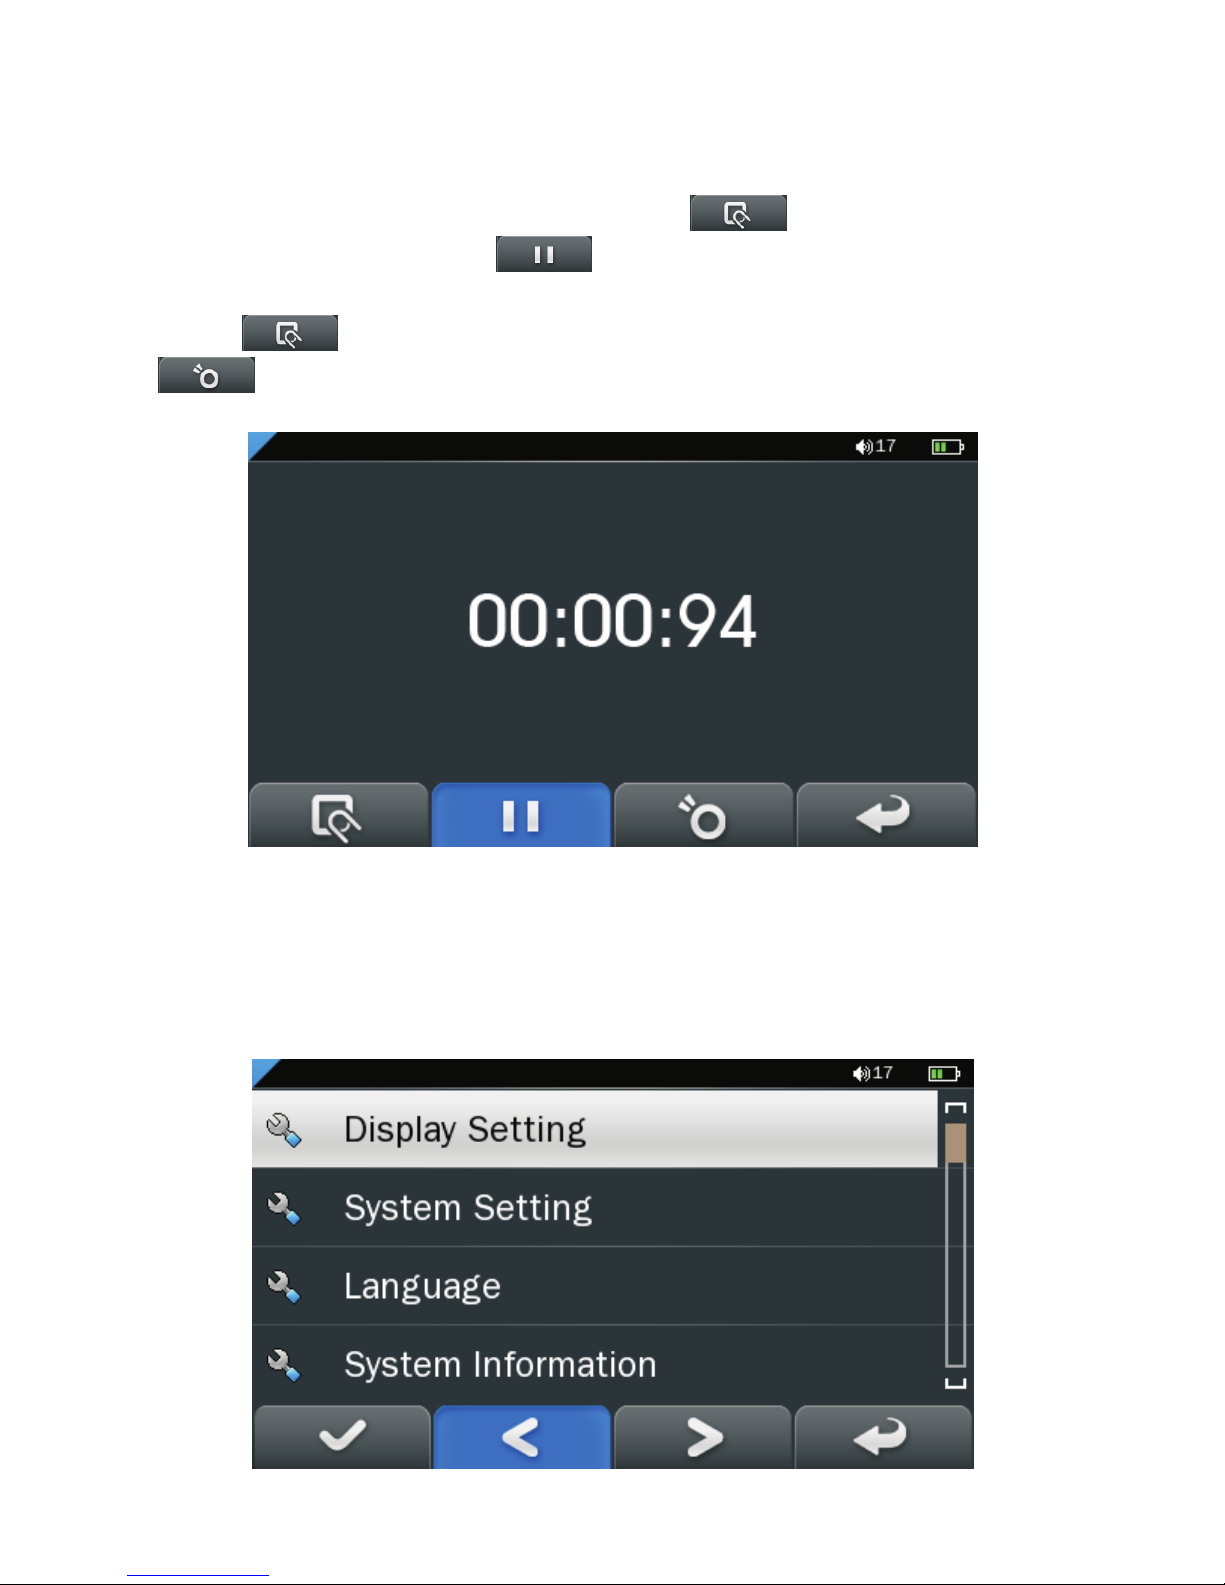
Operation of Other Mode
Double click the Other icon on the main menu to enter
the Other mode. Once you've entered the Other mode,
the Stopwatch option could be double clicked to
select.
Double click the to enter the Record Option
Menu. You can set your preference in quality of record
file. There are two options : Low rate and High rate.
Once you've selected, click to return to submenu.
18
Page 19
Operation of Settings Mode
Double click the Settings icon on the main menu to
enter the Settings mode. Once you've entered the
settings menu, the following screen would show up.
Stopwatch
Click on the “Stopwatch” to enter the stopwatch mode.
Press the power button or click once to start
counting time, click to pause it and click once
again to resume counting. Press the power button or
click once again to finish the time counting. Click
to reset the current time count to be zero.
19
Page 20

Display Setting
Click in to adjust Light Time, Brightness, Light Mode.
System Setting
Click in to upgrade firmware, to restore to default
setting or to calibrate your screen.
Language
Click in to choose your desired language.
System Information
Click into system information to check the firmware
version, the memory size and card memory size.
Slide Show
Click into select from 5 to 20 sec for the slideshow for
reviewing photo.
AutoShut Time
Click into AutoShut Time to set the auto shut down
time of the player, from 3 minutes to No Automatic
Shutdown.
20
Page 21
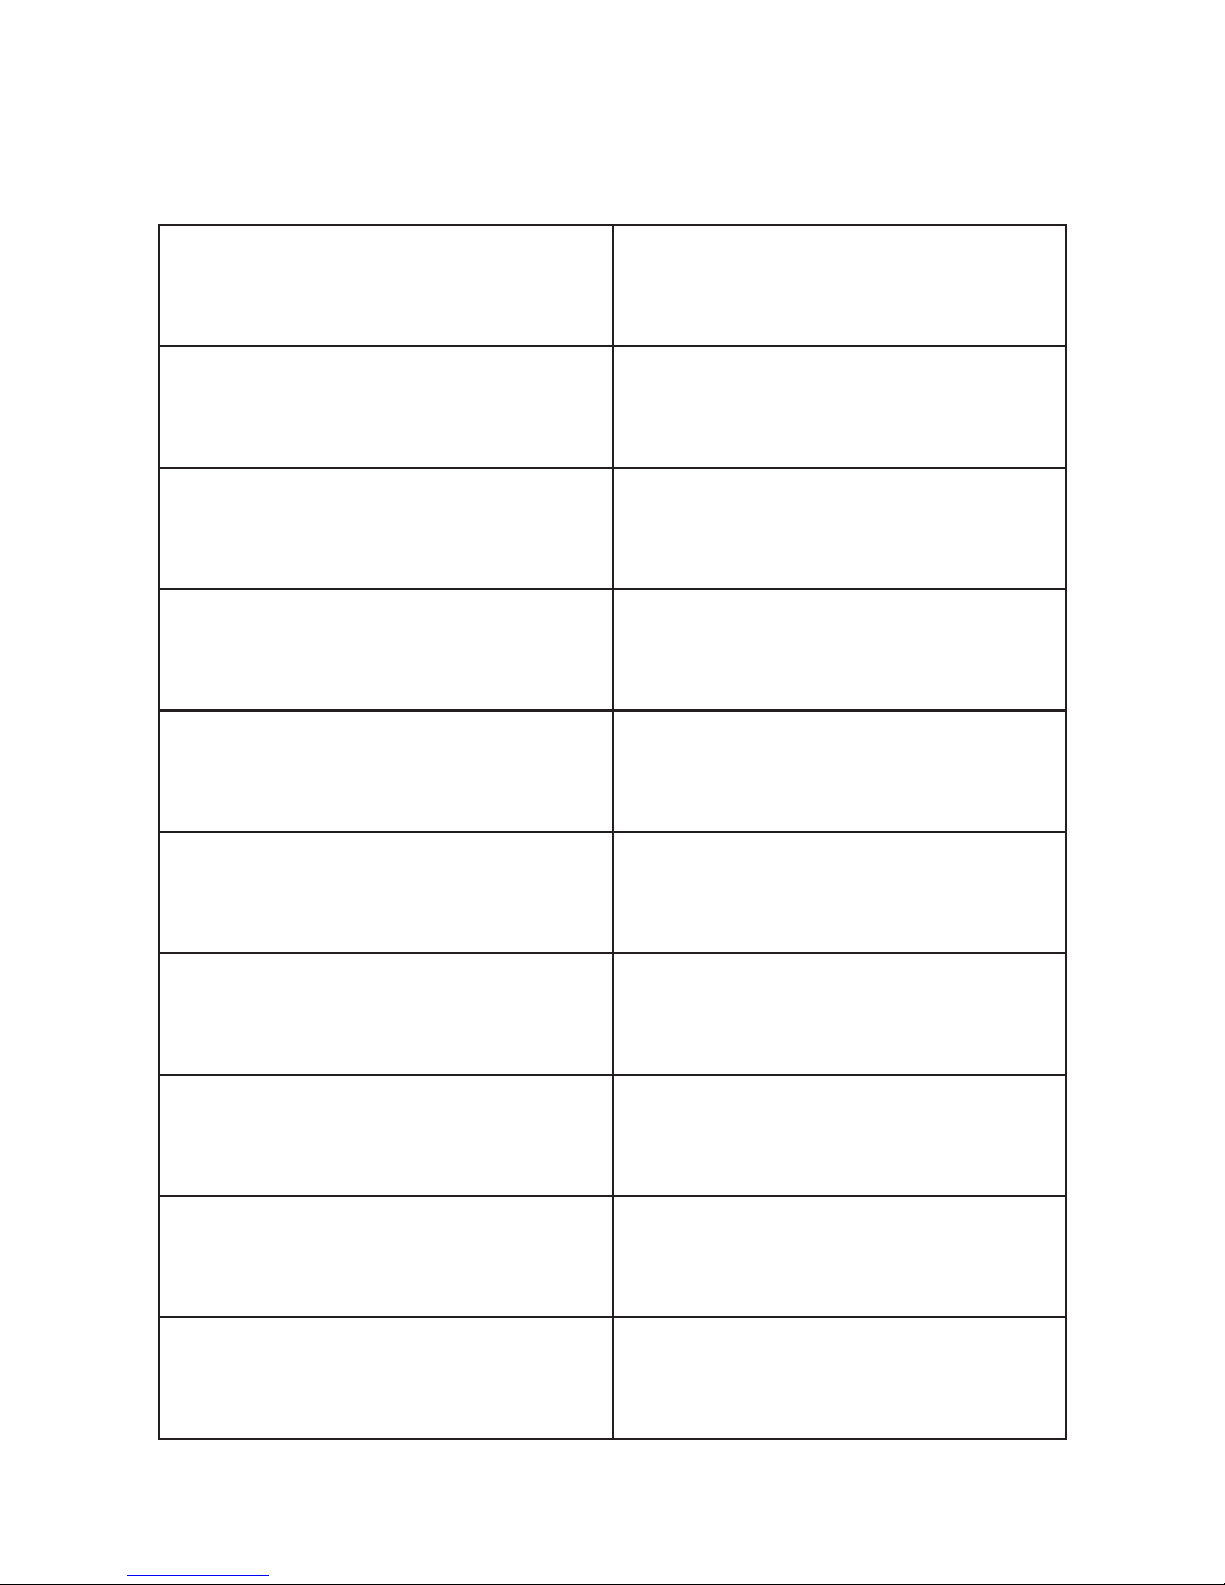
Technical Specification
Flash Memory
MP3 Format Supported
Video Format Supported
Photo Format
Supported
Battery
Interface
Display
Speaker Output
Weight
Dimensions
128MB / 256MB / 512MB
/ 1GB / 2GB / 4GB / 8GB
MP3/WMA/FLAC/WAV
RM/RMVB/AVI/WMV
JPG/BMP/GIF
Lithium Rechargeable
Battery
USB2.0 High Speed
3.6” Color TFT Touch
Screen
8ohm1W
75g
96(W) x 63.6(D) x
12.7(H) mm
21
Page 22

Trouble Shooting
What should I do if there's no sound when playing?
You should check the volume first. If the volume has been
turned up, maybe the memory format of the device is
incorrect..
Cannot select objects accurately with your finger or a
stylus (optional)
You may need to recalibrate the touch screen.
Specifications are subject to change without notice.
No part of this document may be reproduced or transmitted in
any form or by any mean, electronics or mechanical including
photocopying and recording
or translated to another language for any purpose
We trust you are completely satisfied with this product from Argos Ltd,
however please feel free to contact us if you experience any difficulties,
or if you would like to express your views regarding our products.
Please write to:
Customer Services
Argos Ltd
489-499 Avebury Boulevard
Saxon Gate West
Central Milton Keynes
MK9 2NW
Telephone: 0870 600 3030
Through the process of continuous improvement, Argos Ltd. reserves
the right to change or alter specifications without prior notice. E&OE
22
 Loading...