

Bush DVD9957BUK User Manual
DVD9957BUK

Table Of Contents
Safety Precaution 1
Package 2
Main Features 2
Main Unit Controls 3
System Connection 4
The Remote Control 9
Basic operation 11
System Setup 20
Specification 24
Troubleshooting 24
Safety Precaution
Warning: To reduce the risk of fire or electric shock, do not expose this
apparatus to rain or moisture.
1) Please read the instruction manual carefully and follow all the
requirements of safe operation to operate the device.
2) Do not use this unit near water. Do not place over the unit any container
with liquid inside.
3) Do not install near any heat sources such as radiators, heat registers,
stoves, or other apparatus (including amplifiers) that produce heat.
4) Unplug this unit during lightning storms or when unused for long time.
5) About Cleaning: Unplug the system, use only wet cloth to clean. Do not
use liquid detergent or aerosol.
6) Only use accessories specified by the manufacturer.
7) Refer all servicing to qualified service personnel, servicing is required
when the unit has been damaged in any way, such as power supply cord
or plug is damaged, liquid has been spilled or objects have fallen into the
unit, exposed to moisture, does not operate normally. Don't try to repair
the machine by yourself because of the danger of high voltage and
electric shock.
8) Do not use irregular shaped discs such as heart or star-shaped discs as
they may cause the unit to malfunction.
1
Package
Main Unit Controls
9 '' LCD Monitor & DVD Player
Remote Control with battery
Audio/Video Cable
AC/DC Power Adapter
Cigarette Lighter Adapter
User Manual
Earphone
DC+Audio/Video Cable
Straps
Main Features
High brightness color 9" LCD screen
Compatible with disc of DVD, MP3, XVID , CD, JPEG, etc.
Built-in stereo speaker
Support PAL or NTSC system
Support speed forward/backward, repeat function
Zoom in/out function
1
1
1
1
1
1
1 2
9
DC OUT
10
AV OUT
11
12
13
14
15
2
16
5
3
678
1
2
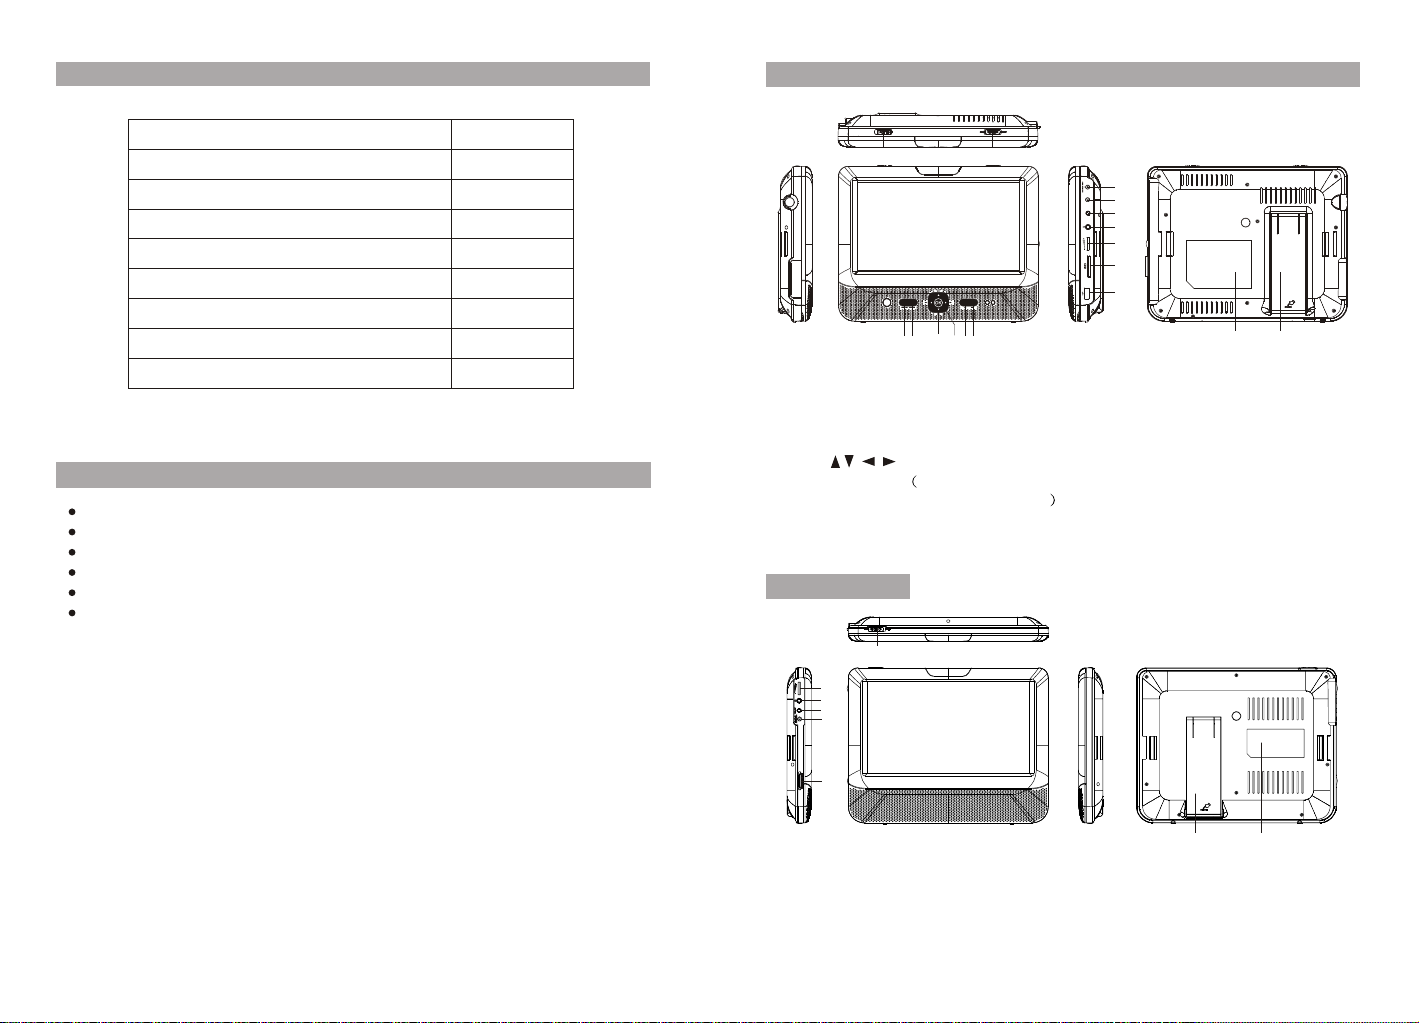
1. Open knob
2. Power ON/OFF switch
3.SETUP button
4. MODE button
5.
6.OK button Function same as
“ ENTER ”on Remote control
7. Play/Pause
8. STOP button
Monitor View
4
9. DC IN 9-12V
10.DC OUT
11. AV OUT
12. Earphone jack
13. Volume knob
14. SD card slot
15. USB Port
16. Rating Label Position
17. Bracket
17
1
2
3
4
5
6
8
1. Power ON/OFF
2. Volume knob
3. Earphone jack
4. AV I N
2
3
5. DC IN 9-12V
6. Brightness Knob
7. Rating Label Position
8. Bracket
7
System Connection
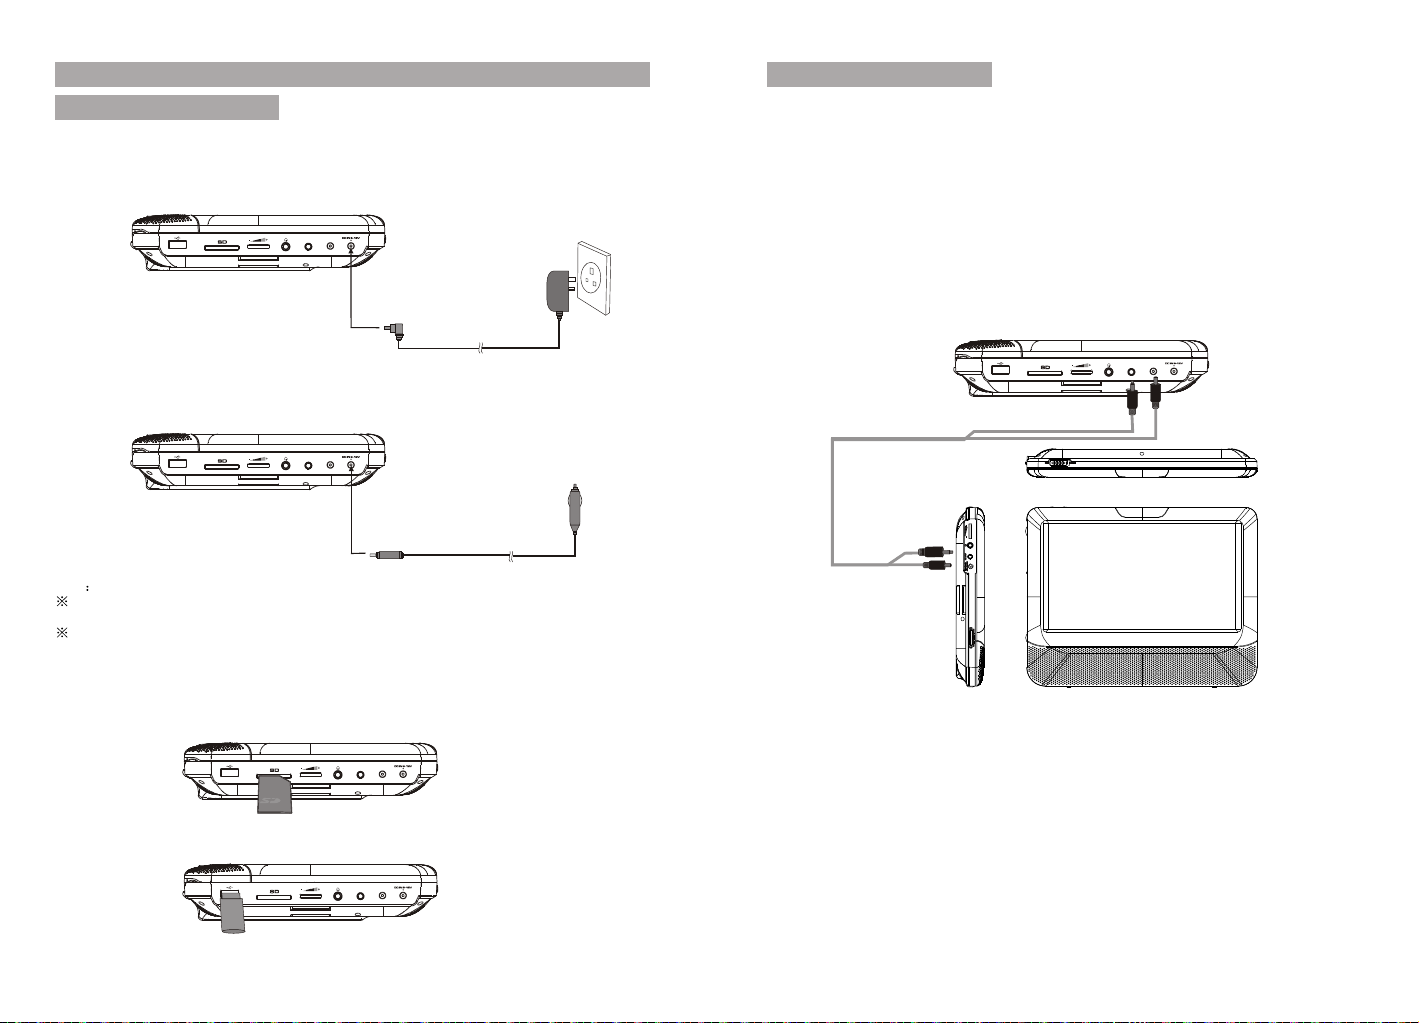
Powering and installation
Plug one end of the AC/DC power adaptor into the DC IN 9-12V jack on the right of the
main unit, then plug the other end into the AC power receptacle. Please refer to the
following illustration.
DC OUT
AV OUT
If using car cigarette lighter adaptor to connect to the power:
Plug one end of the cigarette lighter adaptor into the DC IN 9-12V jack on the unit, plug
the other end into the car cigarette lighter socket. See illustration below.
DC OUT
AV OUT
Note
Car cigarette lighter adaptor is available to use only when the car cigarette lighter with DC
12V negative grounding.
The mains plug is used as the disconnect device, the disconnect device should remain
readily operable.
Using SD/MMC card
Upon using an SD or MMC card, insert it into the corresponding slot flatly with the label
side frontward until you hear a click.
Connecting to the monitor
The unit can also be connected to the external LCD monitor.
Connect the unit to power by AC/DC adapter or cigarette lighter adapter.
Then connect the unit DC OUT jack to DC IN 9-12V Jack of the LCD Monitor by a DC/AV
cable. Also use this DC/AV cable to connect the AV OUT jack of the unit to AV IN
jack of the Monitor.
Please refer to the illustration below.
DC OUT
AV OUT
DC OUT
AV OUT
Using USB
Upon using an USB, insert it into the USB slot directly.
DC OUT
AV OUT
4
Note: You're advised to supply both units the power by the cigarette lighter adapter
only. The AC/DC adapter is used to supply power of one unit only and as the charger
to charge the main unit if it's with built-in battery.
5
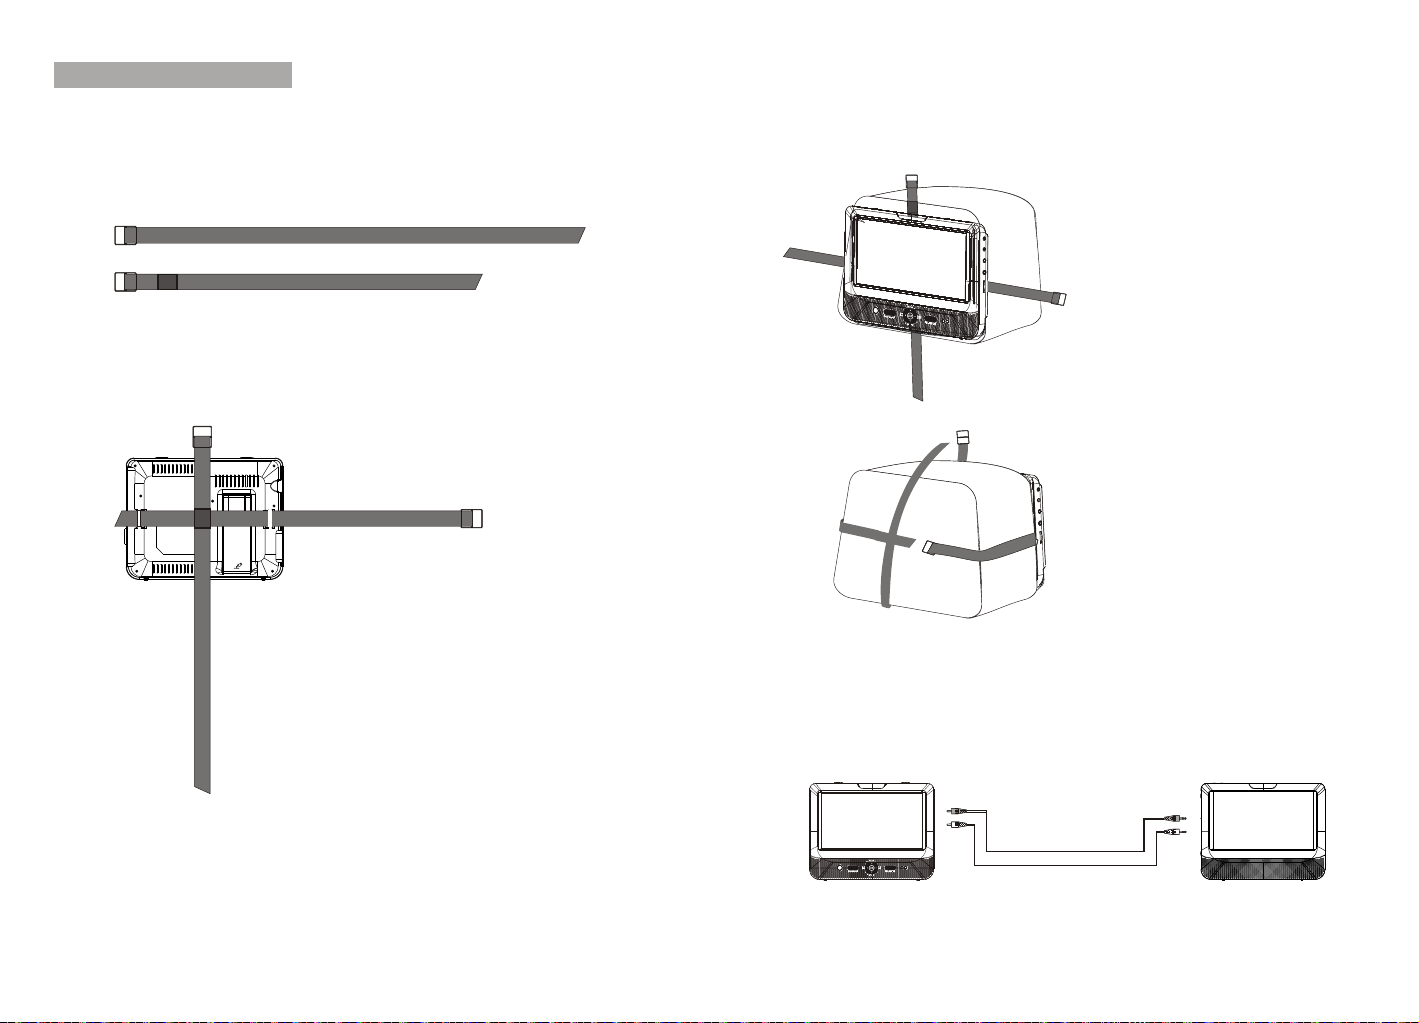
In Car Installation
1. Fit the straps to the DVD Player / Monitor as required.
The DVD player will fit to the mount in this
position, as shown below.
A
B
Turn the player around so the backs are facing you.
B
Turn the player around, slide the strap a through
the strap lock upon the right bottom of the DVD
player, then slide the strap through the strap B
and the left bottom player as shown. Enter the
strap B mounted centrally.
2. Fitting the straps to the headrest.
a. Fitting the straps to the headrest.
Fit the straps around the headrest and
engage the 2 trident clips.
Ensure clips are securely fastened.
Pull the straps tight using the adjustment.
A
NOTE:
Be sure to complete the installation then use DVD9957BUK in the car.
For DVD9957BUK installation is recommended that the DVD Player
is on the LEFT headrest, to ensure a neat cable run to the monitor,
as shown below:
Tuck the loose ends into the strap tidy.
6
7
 Loading...