

Bush DS-A332B Quick Manual
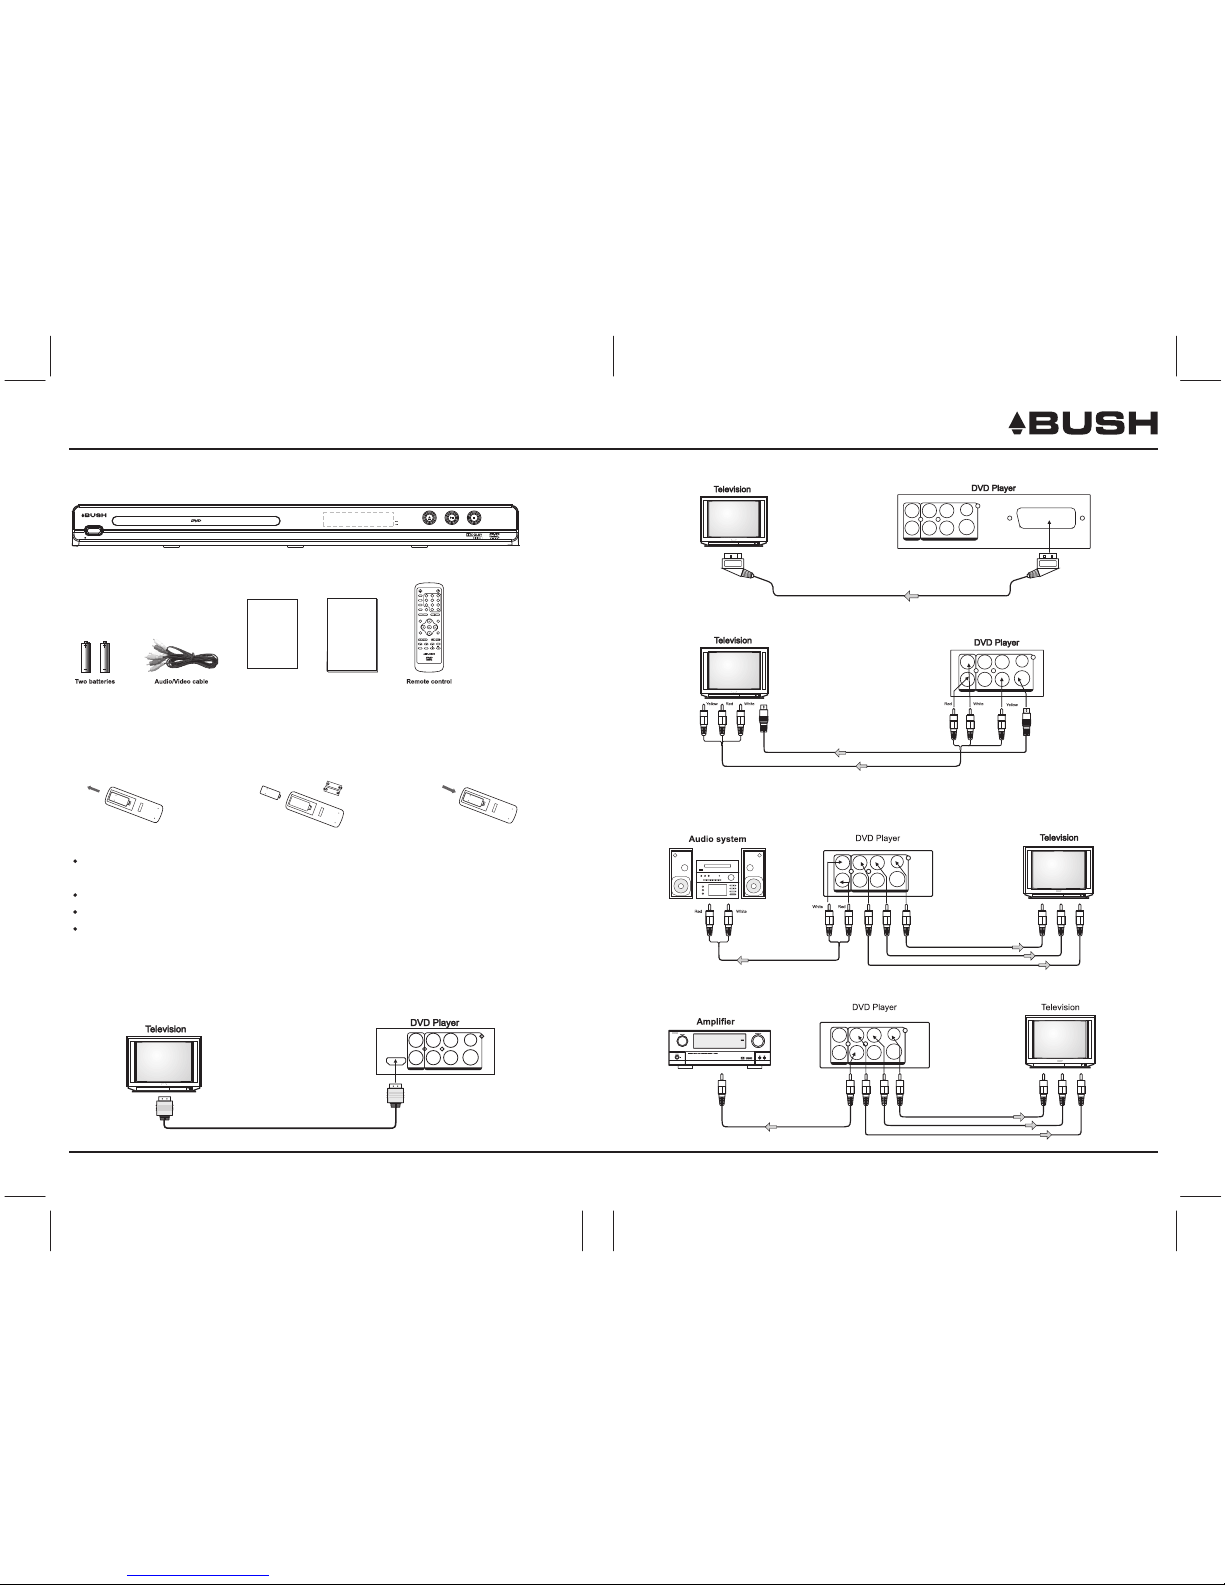
3.Make connections
2.Insert remote control batteries
1.Unpack your DVD Player
STANDBY/ON
ACCESSORIES:
User manual
USER
MANUAL
SEARCH
REPEAT A-B RPT
MENU
CLEAR
STOPSTEPPAUSE
VOLUME
PAL/NTSC
ANGLE
MUTE
AUDIO
F.FWDF.REV NEXTPREV
ZOOM
SETUP
1 2
3
4
5
6
7 8 9
0 10+
SUBTITLE
OSD
V.MODE
PROG
TITLE
Quick Guide
Quick Guide
2) Insert two AAA batteries. 3) Close the cover.1) Open the cover.
Notes:
Do not insert batteries into the remote control in the wrong direction.
Do not charge, heat, open, or short-circuit the batteries. Do not throw batteries into a fire.
Do not use different types of batteries together, or mix old and new batteries.
If the remote control does not function correctly or if the operating range becomes reduced, replace all
batteries with new ones.
Make sure to match the + and - on
the batteries to the marks inside the battery compartment.
Quick Guide
3) Connecting to a TV with Audio/Video cable
DIGITAL AUDIO OUT / VIDEO OUT
COAXIAL
S-VIDEO
L
R
VIDEO
Y
CB / PB
CR / PR
2-CH AUDIO OUT
If the TV has an S-video input, connect the DVD player with an S-video cable .
When using an S-video cable, do not connect the yellow video cable.
(not supplied)
To video input(yellow)
To audio inputs(red, white)
To S-video input
To S-video output
1) Connecting to a devices with HDMI faucet (not supplied)
DIGITAL AUDIO OUT / VIDEO OUT
COAXIAL
S-VIDEO
L
R VIDEO
Y CB / PB
CR / PR
2-CH AUDIO OUT
HDMI
2) Connecting to a TV with Scart cable (not supplied)
To Scart input
To Scart output
SCART OUTPUT
DIGITAL AUDIO OUT / VIDEO OUT
COAXIAL
S-VIDEO
L
R
VIDEO
Y
CB / PB
CR / PR
2-CH AUDIO OUT
4) Connecting to a audio system and TV equipped with YUV video input
To audio inputs of the amplifier
To Y video input
To CB/PB video input
To CR/PR video input
To Y video output
To CB/PB video output
To CR/PR video output
DIGITAL AUDIO OUT / VIDEO OUT
COAXIAL
S-VIDEO
L
R VIDEO
Y CB / PB
CR / PR
2-CH AUDIO OUT
5) Connecting to an amplifier equipped with a digital audio input and TV
DIGITAL AUDIO OUT / VIDEO OUT
COAXIAL
S-VIDEO
L
R VIDEO
Y CB / PB
CR / PR
2-CH AUDIO OUT
Coaxial cable
To COAXIAL
type digital
audio input
To Y video input
To CB/PB video input
To CR/PR video input
To Y video output
To CB/PB video output
To CR/PR video output
DS-A332B
HELPLINE: 0870 600 3030
4.Basic playback
Stop playback
1. Press STOP button to go to stop mode, the TV
screen will show the start logo.
2. Press ENTER/PLAY to playback to resume play-
-back from the location where playback is stopped
or from the beginning of the disc.
3. Press STOP twice to stop completely.
Previous and Next
During playing, press PREV key can back to
start of this chapter, then each press this key will skip
a chapter still the start of the disc.
Each press of NEXT during playing will skip
the current chapter and play the next one.
key
Single step playback
1. Press STEP continuous to single step forward
to the next frame in the video.
2. Press ENTER/PLAY to resume normal playback.
Pause playback
1. Press PAUSE to pause playback (still mode).
The sound will be muted during still mode.
2. Press ENTER/PLAY or PAUSE to resume normal
playback.
Preparations
When you want to view a disc, turn on the TV and
select the video input connected to the DVD player.
Fast forward and Fast reverse
1. Press F.FWD to fast forward through the disc.
Each time the F.FWD button is pressed, the
fast forward motion speed changes.
2. Press ENTER/PLAY to resume normal playback.
3. Press F.REV to fast reverse through the disc.
Each time the F.REV button is pressed, the
fast reverse motion speed changes.
4. Press ENTER/PLAY to resume normal playback.
Basic playback
1. Press STANDBY/ON in the front panel, the DVD
player turns on and the TV screen will display
the start logo. If a disc is already in the tray, it
will begin to play once the power is on.
2. Press OPEN/CLOSE to open the disc tray,
place a disc on the disc tray.
3. Press OPEN/CLOSE to close the disc tray,
the playback will automatically start.
4. Some discs may start playback with a menu,
use the cursor button on the remote control to
select menu options and press ENTER/PLAY to
start, or press digits to select a menu options
directly.
Quick Guide
DS-A332B
HELPLINE: 0870 600 3030
STANDBY/ON
USER MANUAL
MODEL: DS-A332B

18
TROUBLE SHOOTING
SPECIFICATIONS
19
CONTACT DETAILS
20
TABLE OF CONTENTS
01
SAFETY PRECAUTIONS
IMPORTANT SAFETY INSTRUCTIONS
04
NOTICE
05
07
ACCESSORIES and PANEL
08
BASIC CONNECTION
10
REMOTE CONTROL
11
BASIC PLAYBACK
12
ADVANCED PLAYBACK
13
SPECIAL FUNCTION PLAYBACK
14
SYSTEM SETUP
PLAYABLE DISCS
06
SAFETY PRECAUTIONS
01
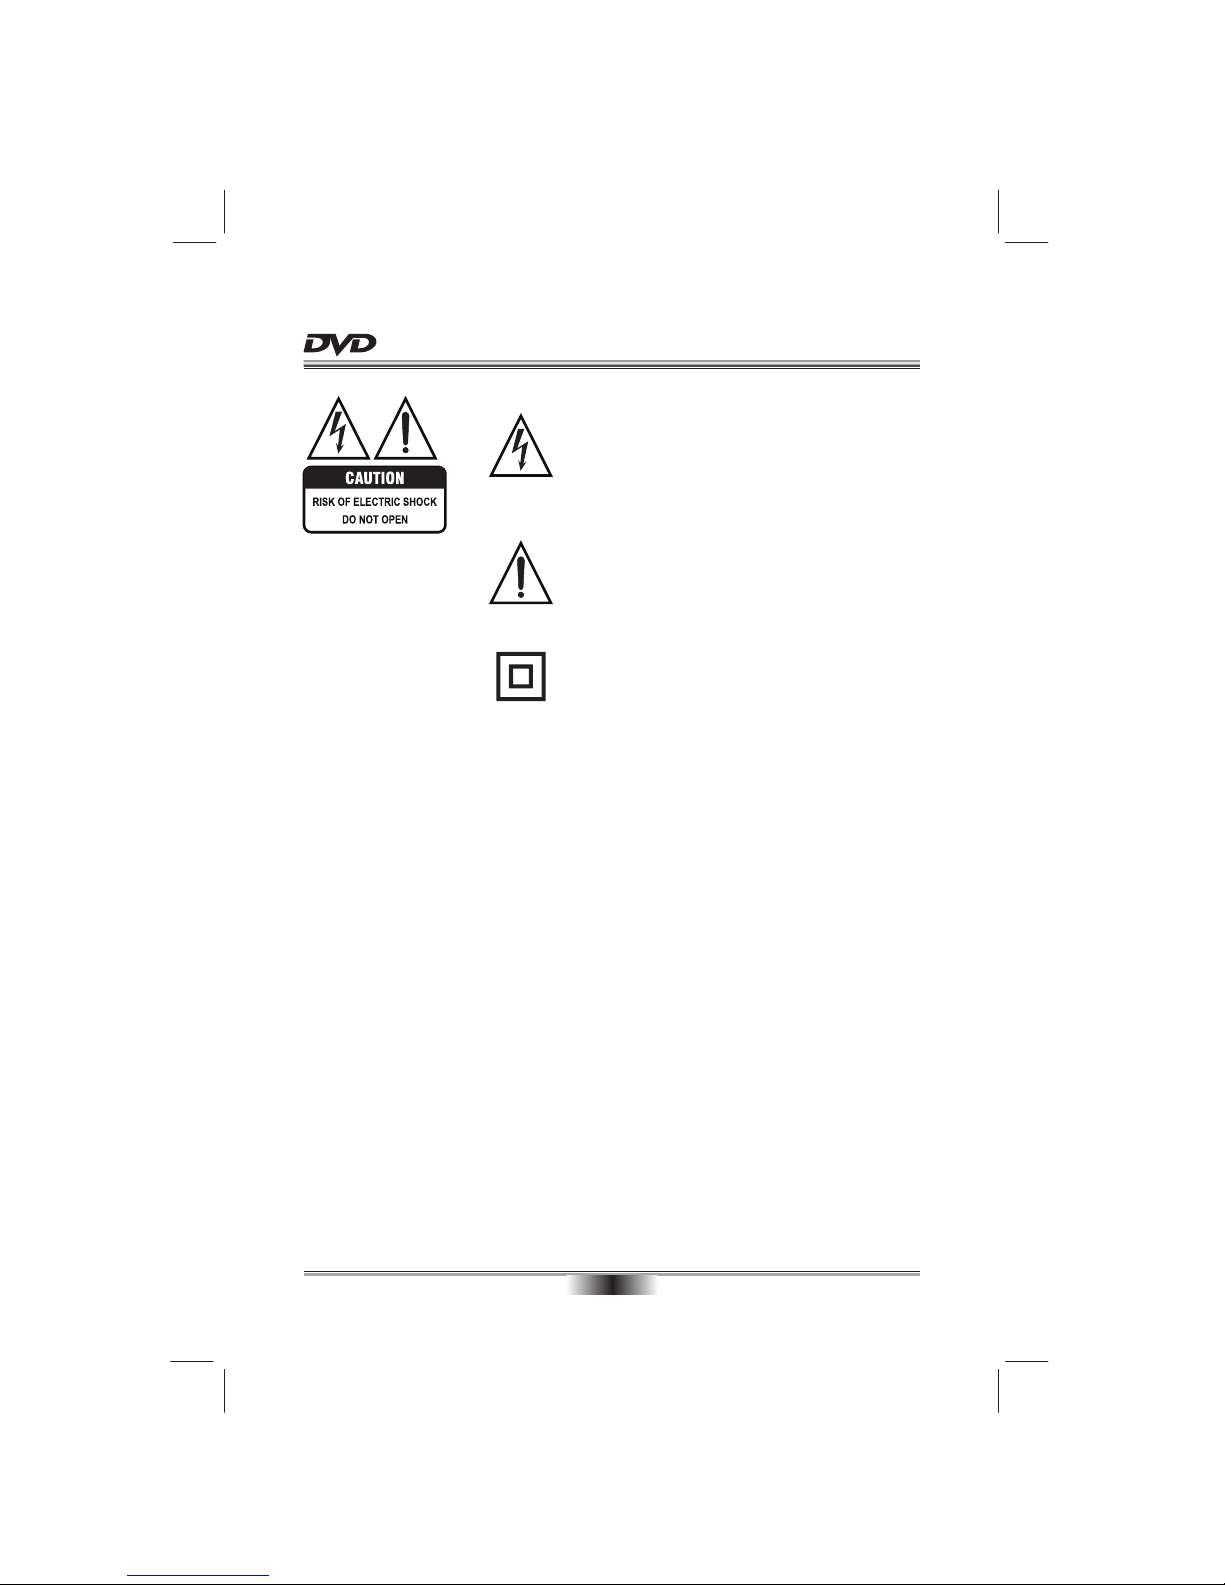
The lightning flash with arrowhead symbol, within an equila-
teral triangle, is intended to alert the user to the presence
of uninsulated "dangerous voltage " within the product's en-
closure that may be of sufficient magnitude to constitute a
risk of electric shock to persons.
The exclamation point within an equilateral triangle is
intended to alert the user to the presence of important
operating and maintenance (servicing) instructions in the
literature accompanying the appliance.
The symbol for CLASS II (Double Insulation).
TO REDUCE THE RISK OF FIRE OR ELECTRIC SHOCK, DO NOT EXPOSE THIS
APPLIANCE TO RAIN OR MOISTURE, DANGEROUS HIGH VOLTAGES ARE
PRESENT INSIDE THE ENCLOSURE. DO NOT OPEN THE CABINET, REFER
SERVICING TO QUALIFIED PERSONNEL ONLY.
WARNING:
When replace the direct plug in power supply or a separable, cord-connected power
supply, the replacement must be exact duplicate, or one recommended by the manu-
facturer.
CAUTION:
This product utilizes a laser.
Use of controls or adjustments or performance of procedures other than those
specified here in may result in hazardous radiation exposure.
Do not open the cover and do not repair yourself. Refer servicing to
qualified personnel.
DANGER: Visible and invisible laser radiation when open and interlock failed or
defeated. Avoid direct exposure to beam.
SAFETY PRECAUTIONS
02
CONNECTION TO POWER
Before connecting, check that the voltage indicated on the appliance (bottom of the appliance) corresponds
with the main voltage in your home. If this is not the case, consult your dealer and do not use.
This appliance may be fitted with a non-rewirable plug. If you need to change the fuse in a non-rewirable plug,
the fuse cover must be refitted. If the fuse cover is lost or damaged, the plug must not be used until a replacement is obtained (available from the appliance manufacturer).
If the plug has to be changed because it is not suitable for your socket, or becomes damaged, it should be cut
off and appropriate plug fitted following the wiring instructions. The plug removed must be disposed of safely
as insertion into a mains socket is likely to cause an electrical hazard.
This equipment must be disconnected from the mains when not in use.
Do not allow this unit to be exposed to rain or moisture.
For your own safety read the following instructions carefully before
attempting to connect this unit to the mains.
You should only plug the appliance into a 230V-240V AC, 50Hz supply. Connecting it to other power sources
may damage the appliance.
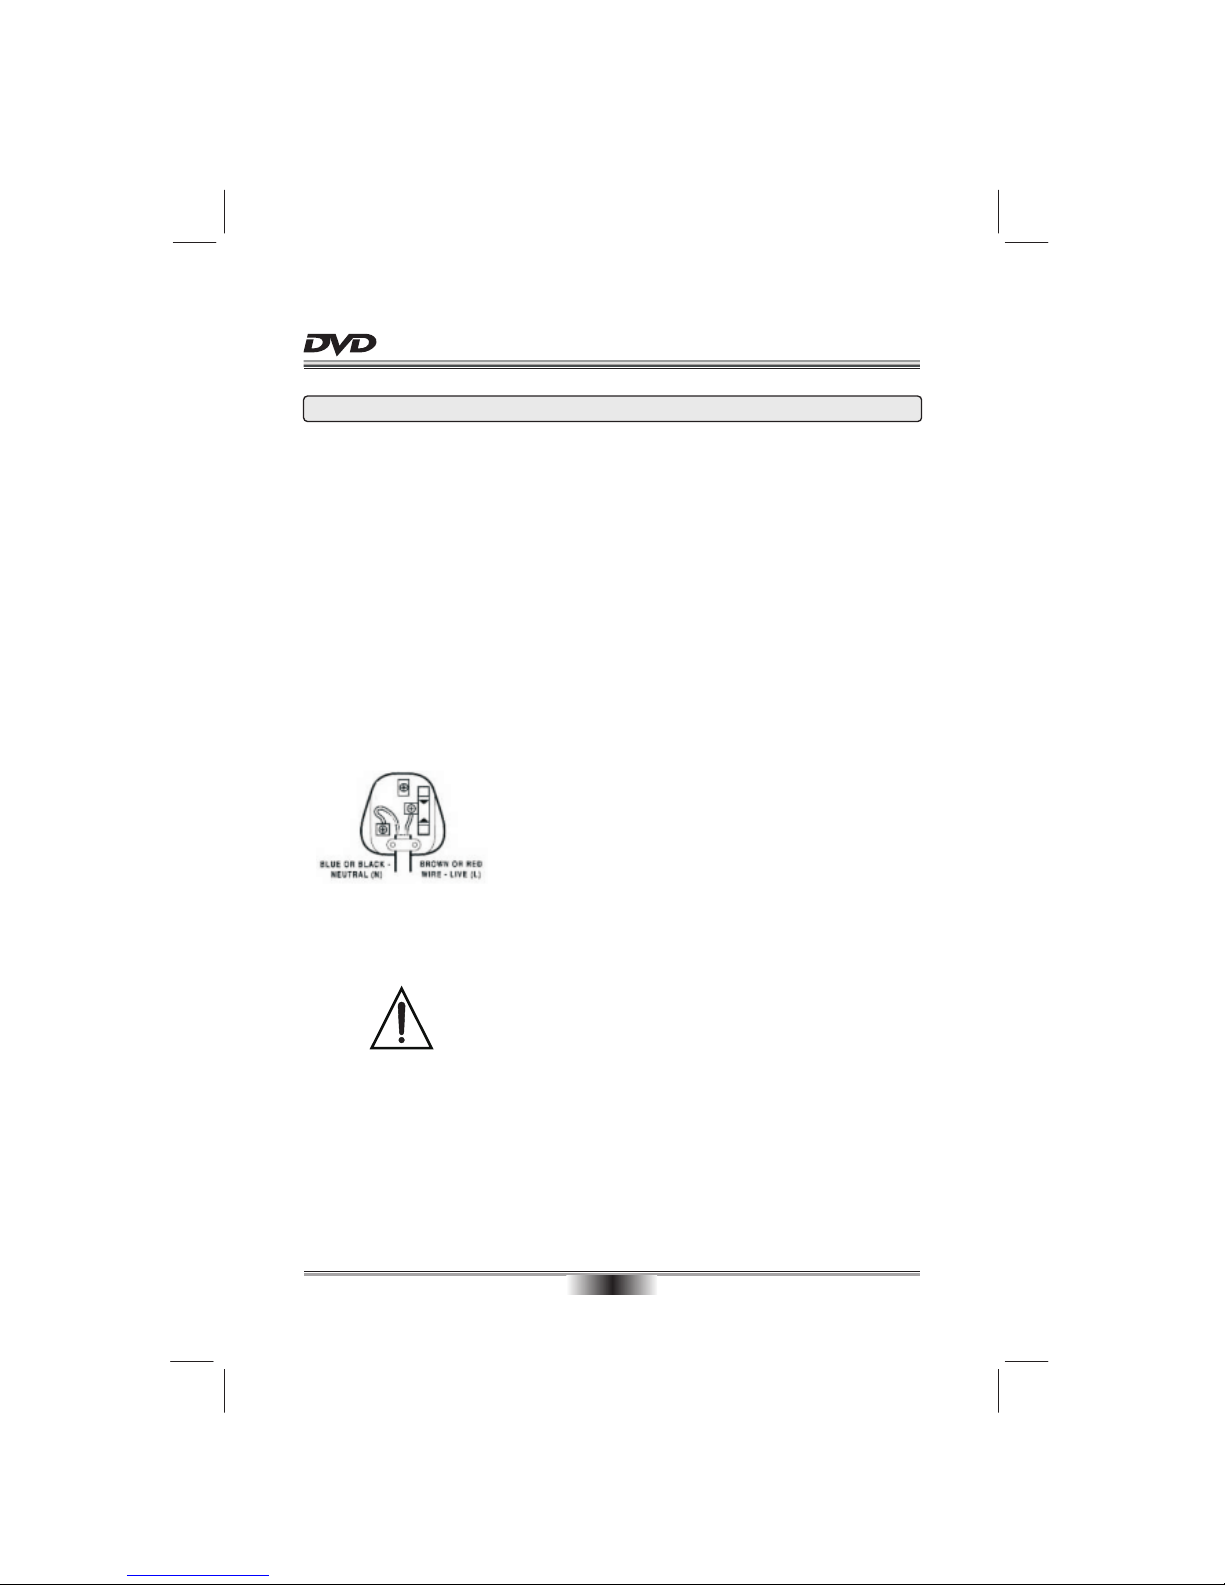
The wires in this mains lead are coloured in
accordance with the following code:
BLUE OR BLACK = NEUTRAL
BROWN OR RED = LIVE
IMPORTANT
The colours of the wires in the mains lead of this appliance may not correspond with the coloured markings
identifying the terminals in your plug, proceed as follows:
Caution
To prevent electric shock disconnect
from the mains before removing the cover
The blue wire must be connected to the terminal marked with the letter N or coloured black.
The brown wire must be connected to the terminal marked with the letter L or coloured red.
If a 13 Amp (BS1363) fused plug is used it must be fitted with a 13A fuse conforming to BS1362 and be ASTA
approved.
If in doubt contact a qualified electrician
SAFETY PRECAUTIONS
03
Disposal of your old appliance
1. When this crossed-out wheeled bin symbol is attached to a product, it means the
product is covered by the European Directive 2002/96/EC.
2. All electrical and electronic products should be disposed of separately from the
municipal waste stream via designated collection facilities appointed by the government
or the local authorities.
3. The correct disposal of your old appliance will help prevent potential negative
consequences for the environment and human health.
4. For more detailed information about disposal of your old appliance, please contact
your city office, waste disposal service or the shop where you purchased the product.
This product incorporates copyright protection technology that is protected by U.S.
patents and other intellectual property rights. Use of this copyright protection technology
must be authorized by Macrovision, and is intended for home and other limited viewing
uses only unless otherwise authorized by Macrovision. Reverse engineering or
disassembly is prohibited.
Manufactured under license from Dolby Laboratories. Dolby and the double-D symbol are
trademarks of Dolby Laboratories.
04
CAUTION: PLEASE READ AND OBSERVE ALL WARNINGS AND INSTRUCTIONS GIVEN IN THIS MANUAL AND
THOSE MARKED ON THE UNIT. RETAIN THIS BOOKLET FOR FUTURE REFERENCE.
This set has been designed and manufactured to assure personal safety. Improper use can result in electric shock or fire
hazard. The safeguards incorporated in this unit will protect you if you observe the following procedures for installation,
use and servicing. This unit is fully transistorized and does not contain any parts that can be repaired by the user.
DO NOT REMOVE THE CABINET COVER OR YOU MAY BE EXPOSED TO DANGEROUS VOLTAGE. REFER
SERVICING TO QUALIFIED SERVICE PERSONNEL ONLY.
on a bed,
and
 Loading...