

Bush DFTA47HDR Quick Start Manual
Quick Start Infor mation:
1.Connect your aerial cable to your unit.
2.Connect Power Supply to your unit & wall outlet.
3.Connect the supplied composite & audio cable
(Yellow, Red, Wh ite) betwee n the STB & Television
4.Insert batteries in the remote control.
5.Switch on and follow on screen instructions.
High Definition
Digital Set Top Box
www.bushaustralia.com.au
DFTA47HDR

2
DFTA47HDR

Contents
Introduction…………………………………………......
Main features and functions……………………............
Features……………………………………………........
Remote control.....................................................
Battery installation................................................
Programming your learning remote control…….......
Front and rear panels……………………………............
Rear panel............................................................
Front panel...........................................................
Installation…………………………………………...........
Connecting the receiver……………………................
Installation guide…………………………………............
Basic operation……………………………………...........
Program settings...................................................
Picture setting......................................................
Channel search.....................................................
Time setting..........................................................
Option..................................................................
System setting......................................................24
USB.....................................................................25
Specifications………………………………………......... 34
Product warranty…………………………………........... 37
...
3
4
4
4
5
8
8
9
9
10
10
10
14
15
16
17
19
21
23
DFTA47HDR

Introduction
This user manual is intended to guide you through the operation
for the Bush DFTA47HDR High Definition DVBT Terrestrial
Receiver.
.
Main features and functions
This product is a high definition digital set top box. It fully complies
with DVB-T receiver requirement specifications. It provides users
with free to air high definition and standard definition digital terrestrial
television and radio signals being broadcast.
Features:
1. Fully compatible with DVB-T FTA digital standard
2. Fully compatible with MPEG-4 H.264/AVC High Definition
Digital TV
3. Fully compatible with MPEG-2 High Definition and
Standard Definition Output
4. Fully compatible with MPEG-1 Layer I & II, Dolby Digital Audio
5. Complies with Australian Standards and MEPS requirements
6. Universal Remote Control - capable of operating the set top box
7.
8. VHF & UHF Input and Loop Out
9. Fully supported 7 Day Electronic Program Guide(EPG)
10. Automatic and Manual search
11. Parental Control
12. Plug and Play installation with an easy to use Menu System
13. Coaxial SPDIF Digital audio output interface
14. 576i, 576P, 720P, 1080i Video Resolution supported
4
The password may be required when you attempt to
modify some advanced settings. The default password is“000000”.
DFTA47HDR
Record digital television FTA program to a USB Flash Drive or an external
USB portable hard disk and playback via USB2.0 compatible.
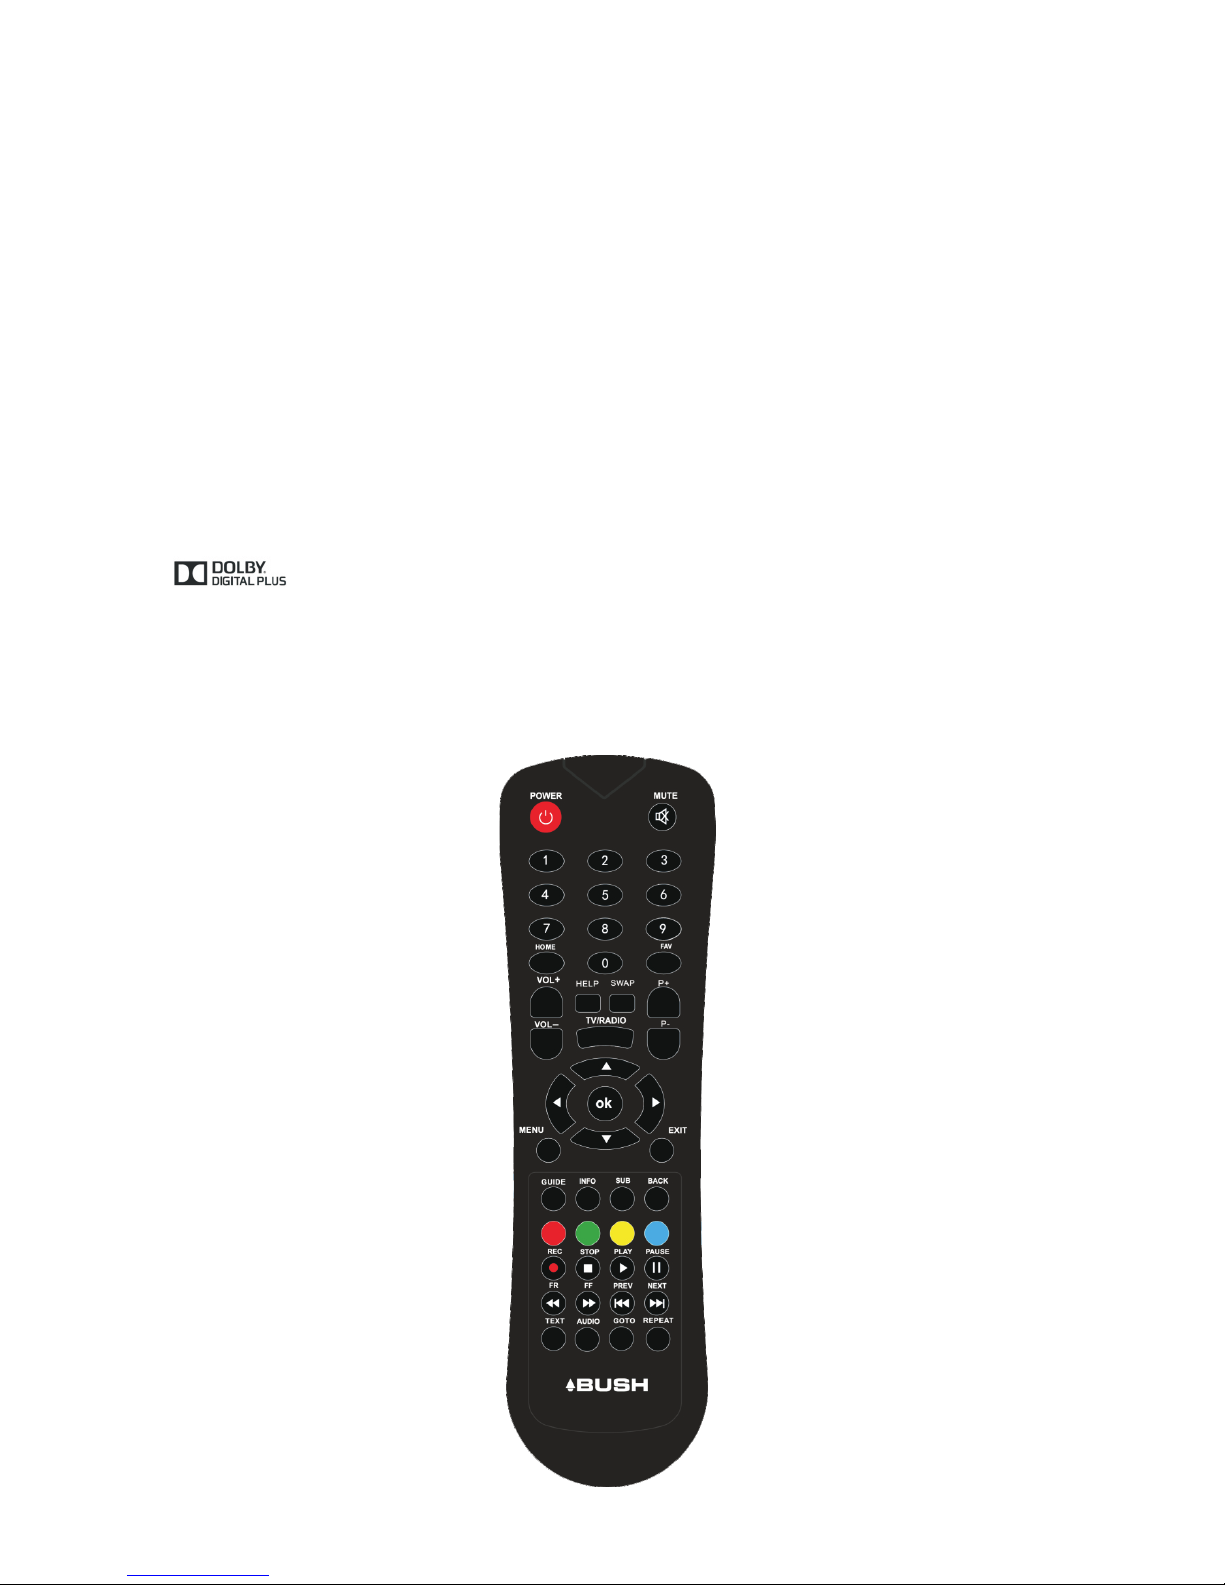
Remote control
The remote control is shown below and the button functions are listed
in the table on page 6.
15. Supports 4:3 and 16:9 Aspect Ratios
16. Supports Teletext (where broadcast)
17. Subtitles supported based upon availability on the network
18. Channel editing functions (Favorites, Move, Lock, Delete)
19. Supports HDMI High Definition Multimedia Interface(HDMI 1.3 )
20. USB 2.0 Input supports mp3, wma, jpeg and bmp media
playback and Software Upgrade.
5
21.Audible feedback supported.
Manu factured un der license f rom Dolby Lab oratories .
Dolby and the double-D symbol are trademarks of Dolby Laboratories.
DFTA47HDR
Key legend Description
Home Press at any time to return to the first scanned in Channel
TV/Radio Switch between TV and Radio mode
Swap Reverts to the previously viewed channel
Repeat Switch between repeat off,repeat one,repeat random,repeat
the folder.
Vol + / Vol - Increases/Decreases the set top box volume
P+ /P-
Changes the channel up/down
Moves the cursor up/left/right/down and scrolls through menus
OK Press to confirm selection
Guide Accesses Electronic Programme Guide
Back When accessing the menu, returns to previously displayed screen
Info Displays information of the current channel being viewed
Exit Exits the item being viewed
Help Press to display basic remote control function information
Text Displays teletext (where available)
Menu Accesses the set top box menu
Press to Mute all audio
To select different options in the menu
ColourButtons
(red, green,
yellow, blue)
For direct channel input, or selection of sub menus in the menu
Numbers
(0-9)
FAV Press to display the list of selected favourite TV channels
SUB Turns subtitles on or off
6
Power
Switches the Set Top Box between On and Standby
DFTA47HDR

REC
Press REC key to record the current program
while watching TV program
PREV/
NEXT
Previous/Next track
FR/FF
Press these keys to fast forward or rewind during playback
STOP
Press STOP key to stop recording program or stop a
program during playback
PLAY/
PAUSE
Play or pause the program during playback
GOTO
select the time for multimedia playingGoto
TIME
SHIFT
AUDIO
Changes the audio language when available
DFTA47HDR
7
Press to start timeshifted Television.Please note you will need a
USB driver or HDD Plugged into the unit
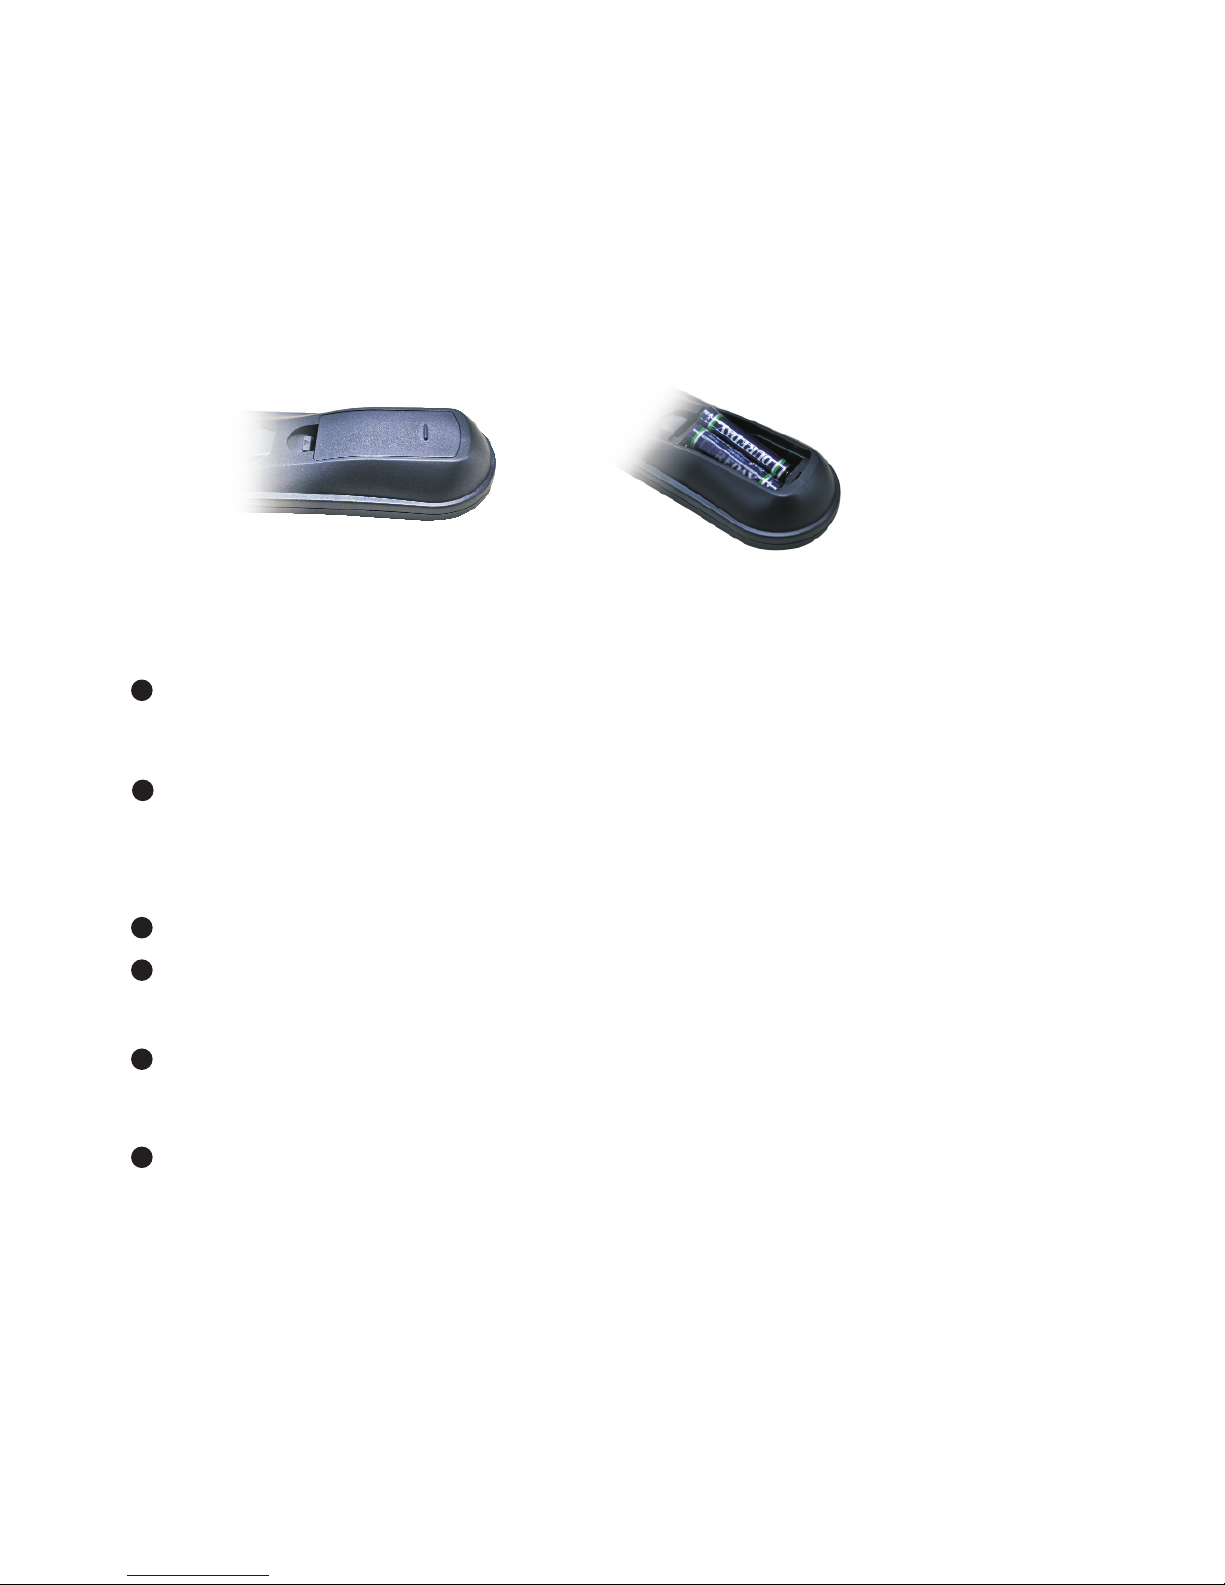
Battery installation
Insert the batteries while observing the correct (+) and (-)
polarities as illustrated below:
About the batteries:
Notes:
Caution: Keep batteries out of children s reach. If batteries
are swallowed, contact a physician immediately.
,
If the remote control unit fails to work even when it is
operated near the set top box, please replace the batteries.
Use size 2 x (AAA) batteries.
Do not use rechargeable batteries.
Do not place the batteries near a heat source such as a
heater or fireplace.
Do not mix old and new batteries.
If the remote control unit is not going to be used for a long
time, remove the batteries.
DFTA47HDR
8
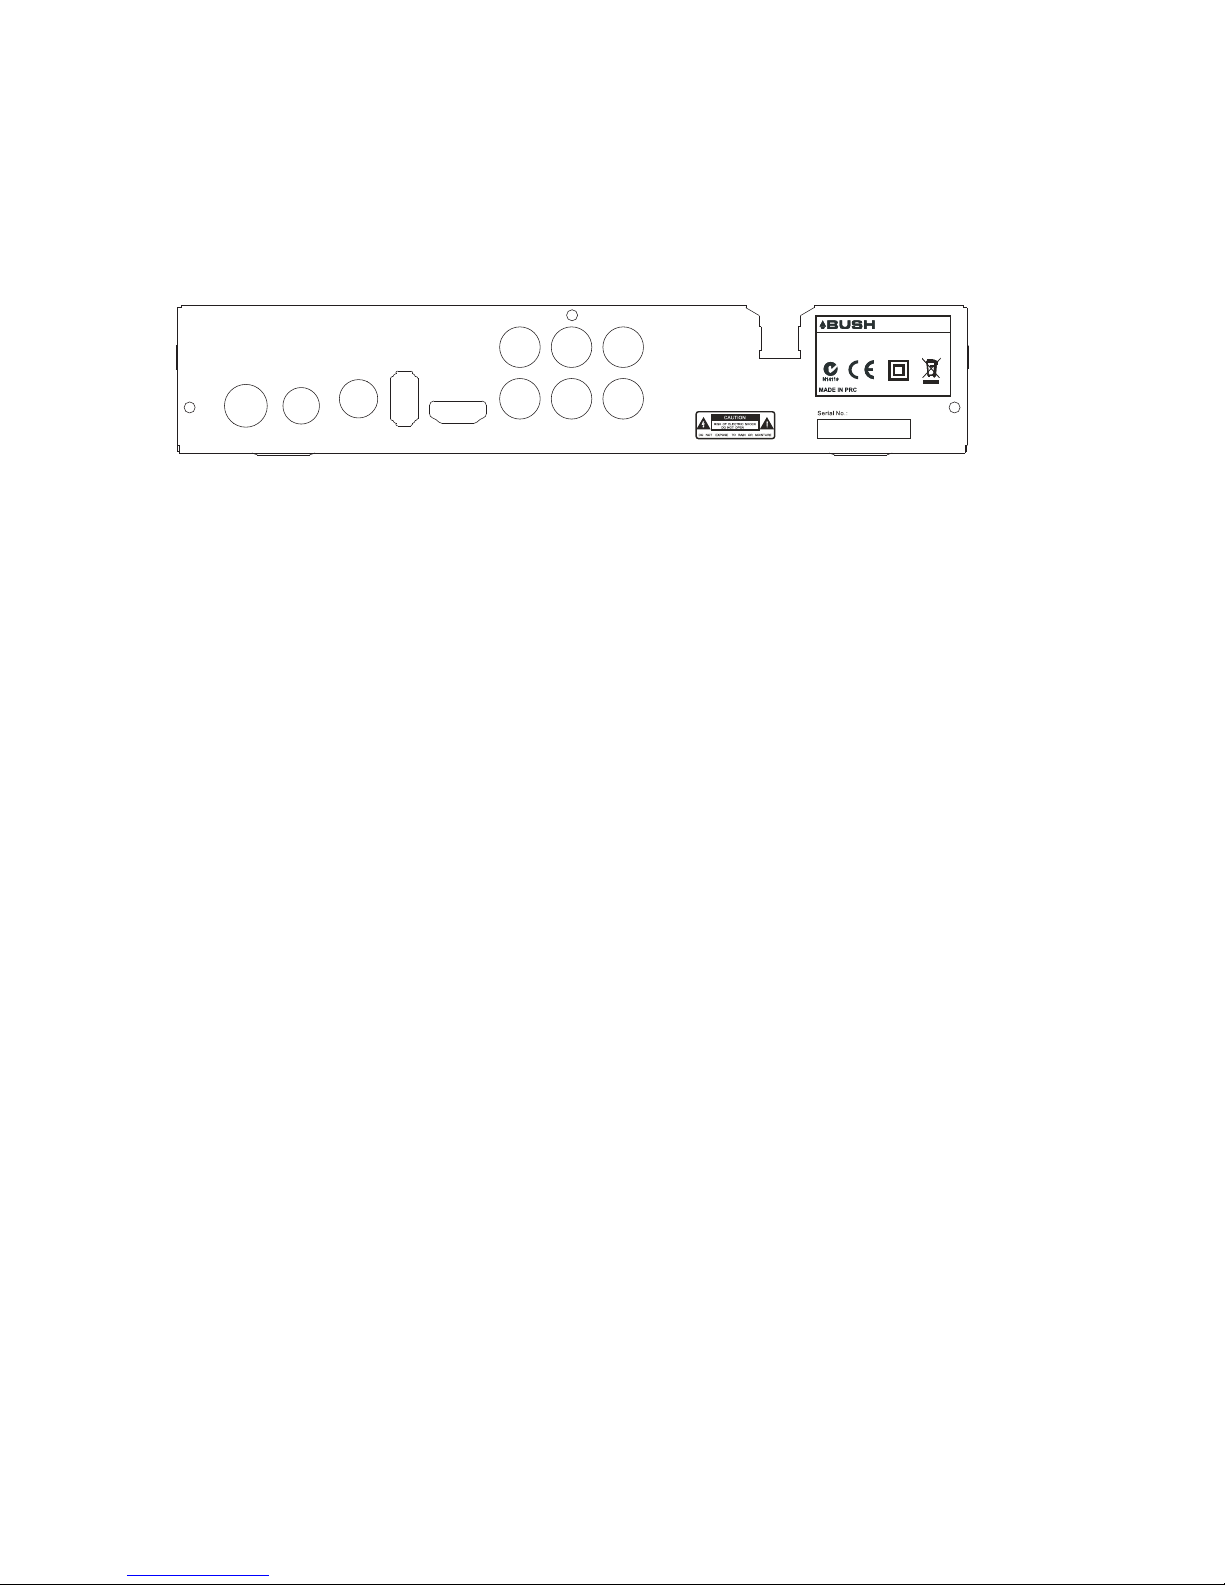
Front and rear panels
Rear panel
RF IN Aerial Input
LOOP OUT Output of Digital Terrestrial TV Broadcast signal
- e.g. to VCR/DVD Recorder
USB
HDMI
CVBS
YPbPr High Definition Component video output
S/PDIF
R (Audio)
L (Audio)
AC
230V/50Hz
televisions with a HDMI input. HDMI version 1.3
CVBS video output or YPbPr video output is used
CVBS video output or YPbPr video output is used
USB 2.0 Port for media playback and firmware upgrade
High Definition Digital video and audio output for use with
Composite Video signal output
Digital audio output
Audio Output for the right speaker, to be used when either
Audio Output for the left speaker, to be used when either
Power Cable: 230V AC, 50Hz
RF IN
LOOP OUT
SPDIF
HDMI
USB
Y Pb Pr
CVBS
R
AUDIO
L
DFTA47HDR
High Definition Digital Set Top Box
POWER SUPPLY:AC 230V~50Hz
MAX POWER CONSUMPTION:8WATTS
DFTA47HDR
9
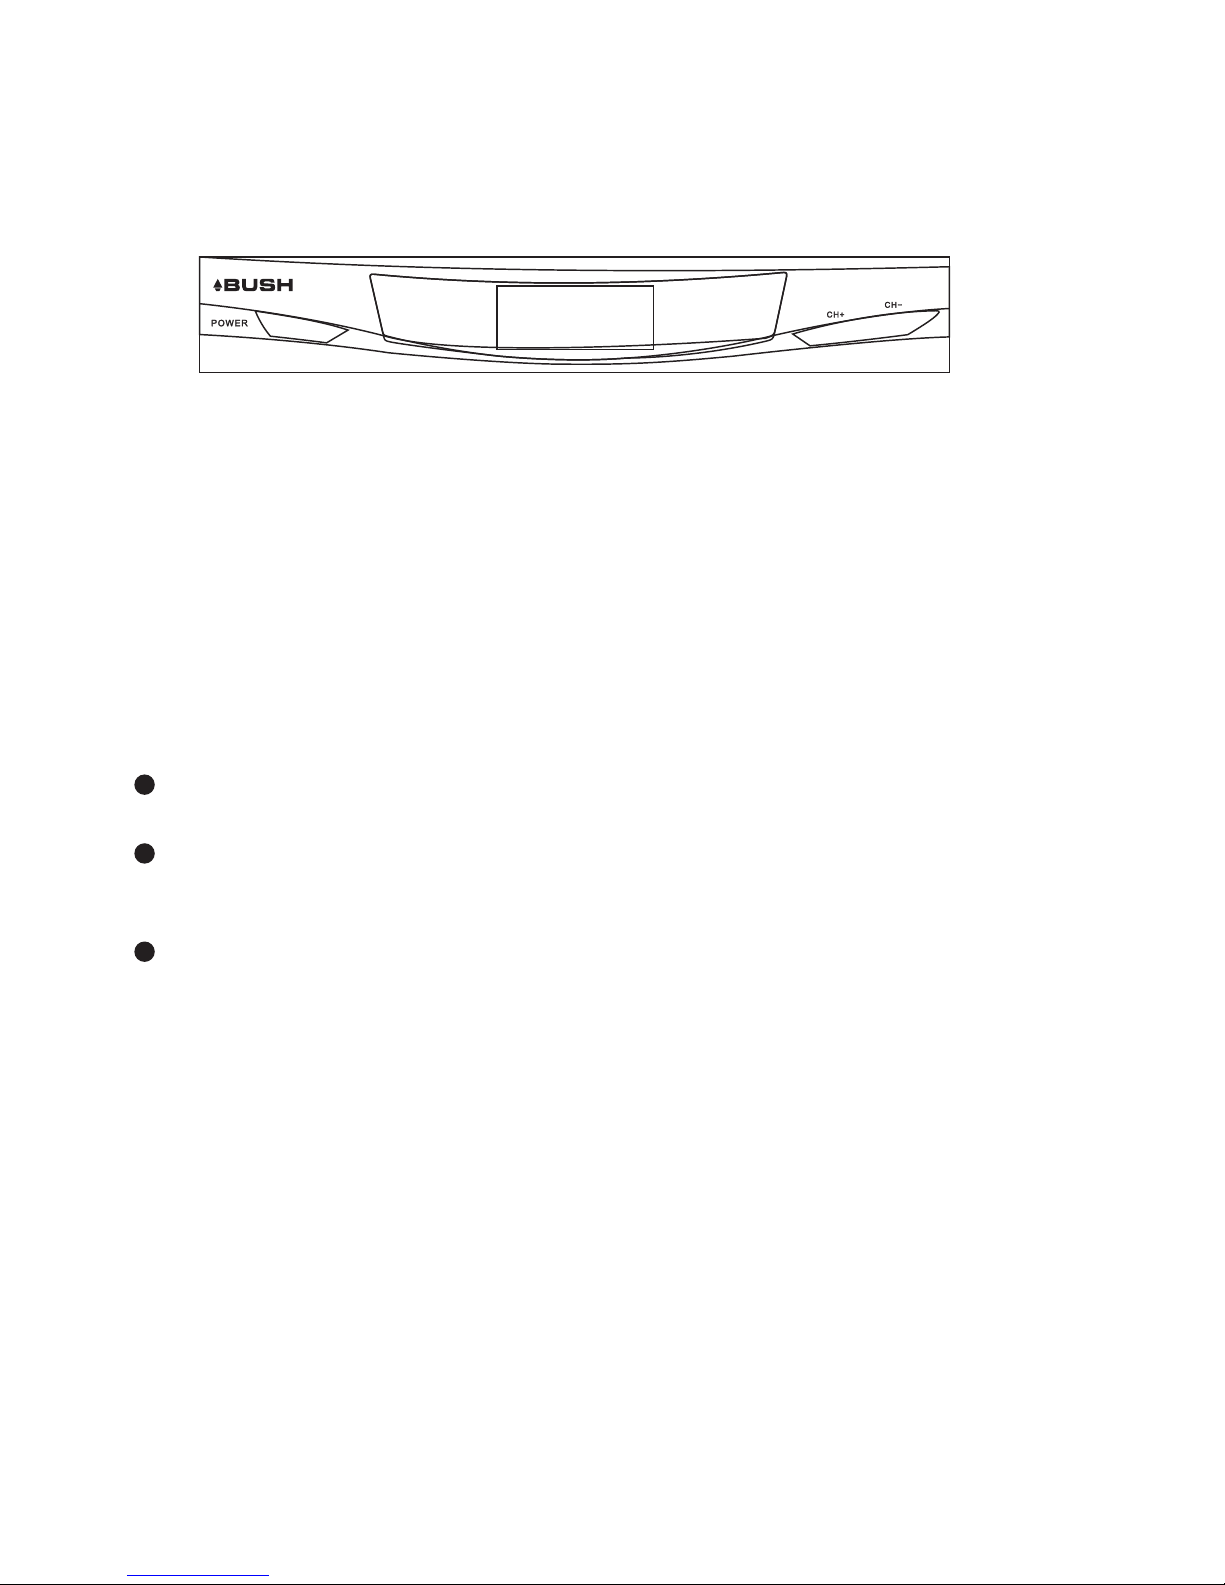
Front panel
green LED with a channel number is an indication that the set top
box is operational.
You can access basic functions via these keys including:
Power, CH-, CH+.
Installation
Connecting the receiver
How to get good reception
If your antenna is not in good condition, you should consider
replacing it to ensure uninterrupted digital television viewing.
Viewers in areas of poor analogue reception may require a
specialist's advice about antenna requirements for digital
reception in their area.
The antenna to the television.
Connections to a TV
and TV must be either YPbPr Component or HDMI.
Warning: Please switch OFF the mains power before plugging
or unplugging connected cables otherwise it may damage the
receiver.
A red LED indicator on the front panel with the clock displaying the
time will indicate if the set top box is in standby mode whilst the
It is recommended that viewers use quad shielded cable from
There are several ways of connecting your STB receiver to a television.
For High Definition viewing your TV must support either 576p, 720p
or 1080i resolution. Also the connection between the STB receiver
Other connections will provide Standard Definition viewing.
DFTA47HDR
10
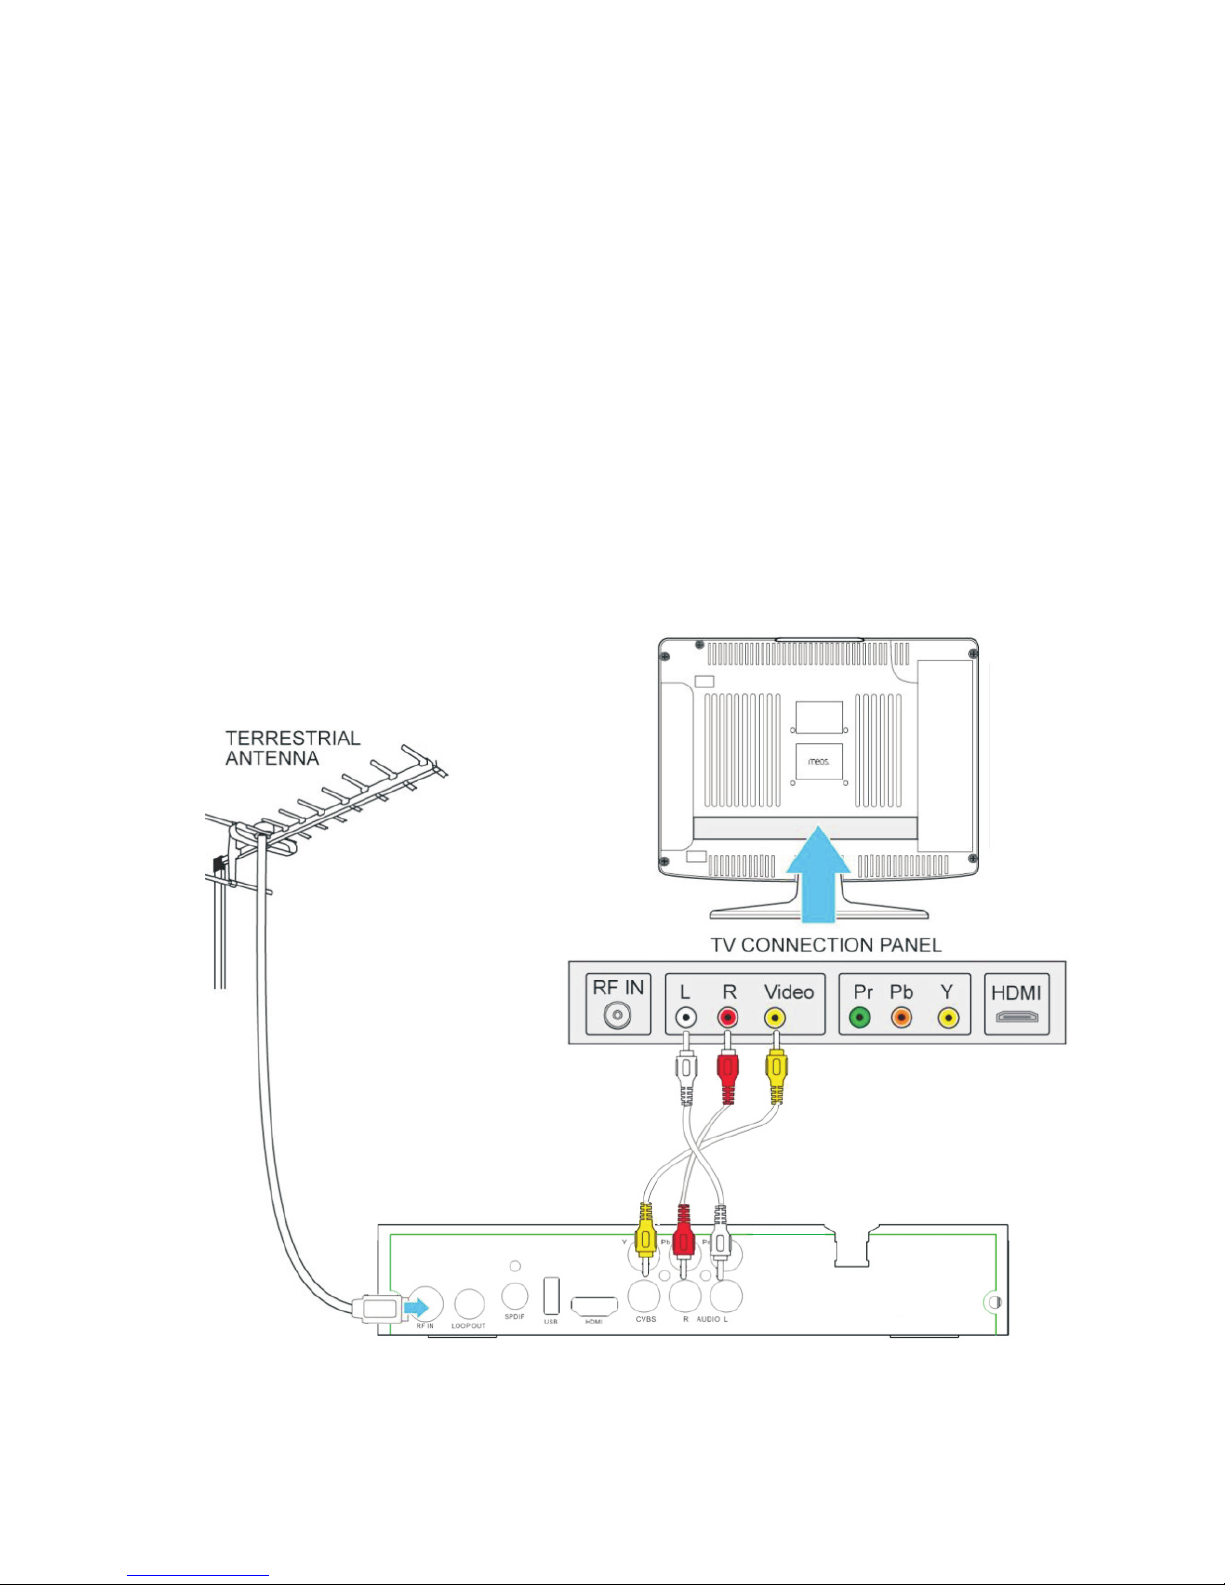
Connect the STB receiver via composite video and audio
(For standard definition viewing)
1. Connect the antenna to the RF IN socket on the receiver.
2. Connect the receiver to the TV set via the red, white and
yellow composite AV cables.
AC 230 V
~50H Z
OPTION 1
DFTA47HDR
11
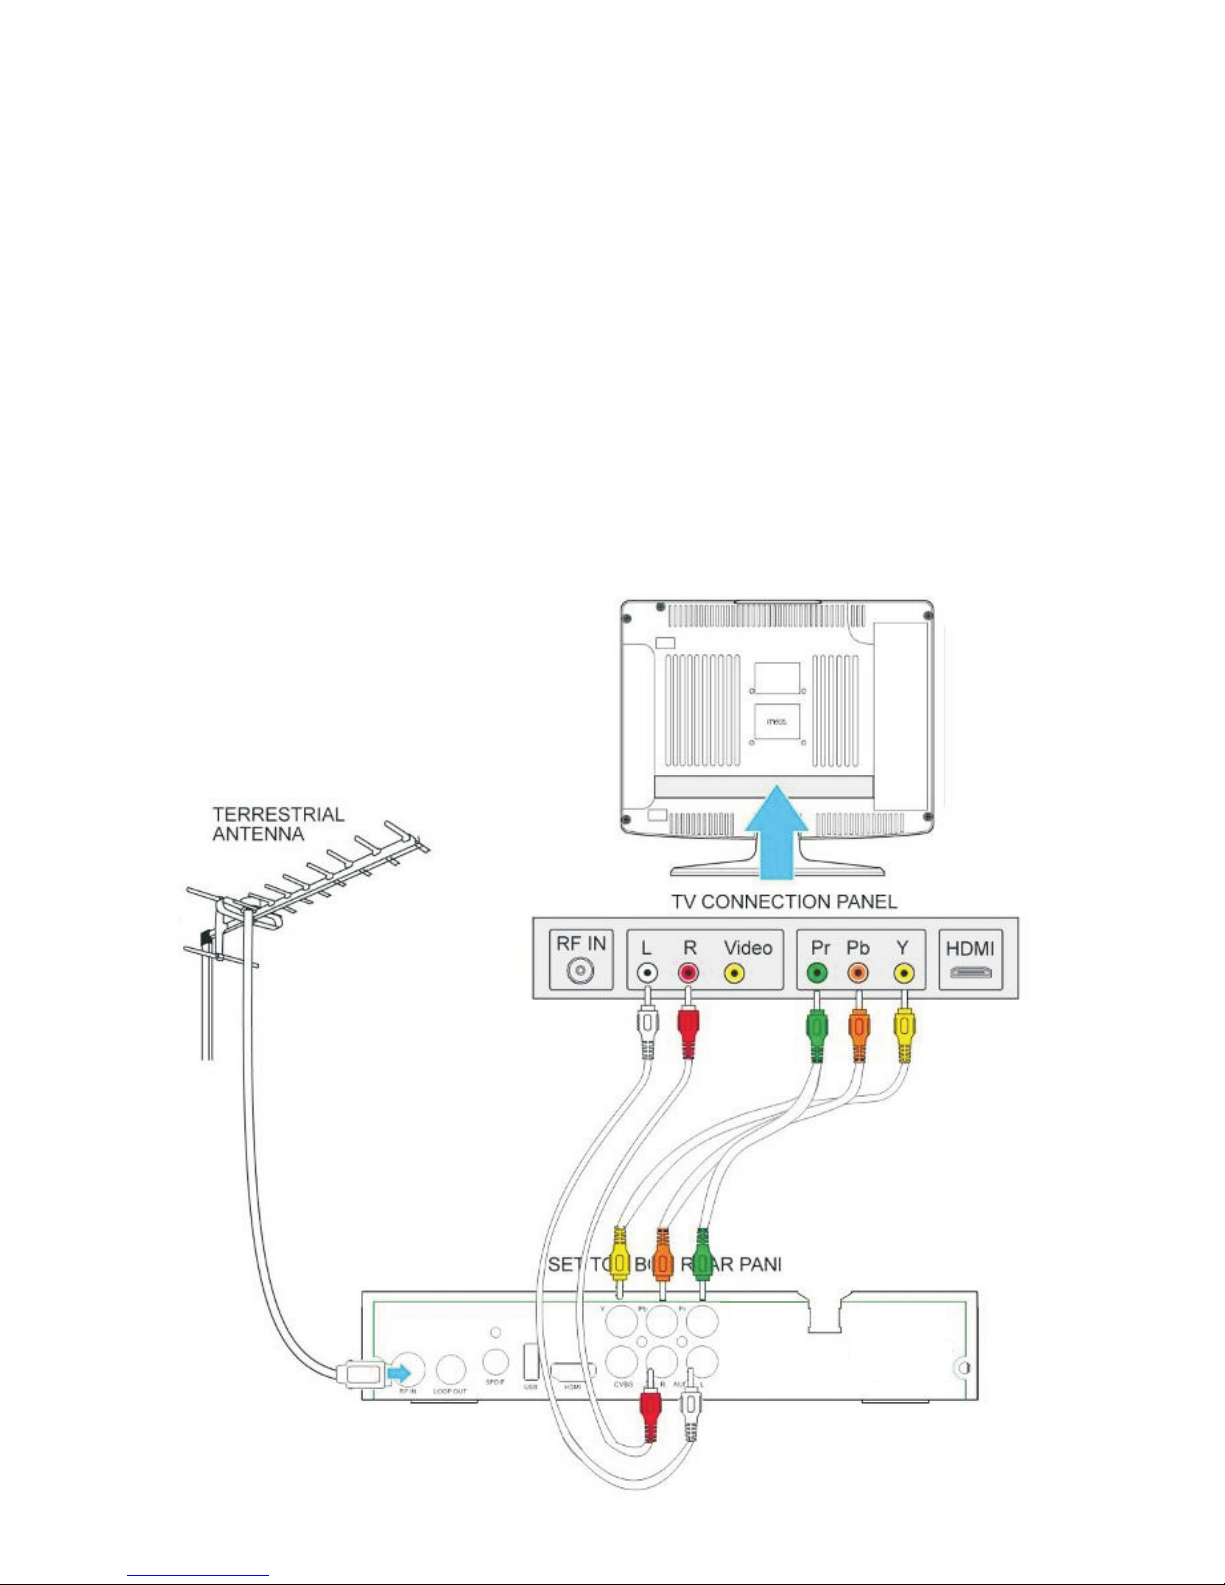
Connect the STB receiver via YPbPr output and audio output
(For standard definition viewing)
1.
2.
AC 230 V
~50H Z
OPTION 2
Connect the receiver to the TV set via the green, red and blue
component AV cables (this will provide video), and the
composite red and white cables (which will provide audio).
Connect the antenna to the ANT IN socket on the receiver.
DFTA47HDR
12
 Loading...