

Page 1

Troubleshooting
4
Help is always at hand
Help and assistance
If you require any technical guidance or find that your <enter product name> is not operating as
intended, a simple solution can often be found in the Troubleshooting section of the instruction
manual or online at www.bush-support.com
If you still require further assistance, call one of our experts on 0345 257 7271*. To help us give
you a fast and efficient service please have the following information ready:
You can find these
Model Ref.
Serial number
Date of purchase
on the rating plate - a
small information
panel (usually a
sticker or metal plate)
on the rear of your
appliance
This will be shown
on your receipt
Local call rates applies*
Lines open 8am-7pm Monday to Saturday and 10am-4pm Sunday.
*Calls to Bush enquiry lines may attract a charge and set up fee from residential lines depending
on your call plan/tari. Mobile and other providers costs may vary, see www.bt.com/pricing for
details.
For security and training purposes, telephone calls to and from customer service centres may be
recorded and monitored. Calls from Republic of Ireland will attract international call charges.
section of the Instruction manual or online at www.bush-support.com If you still require further assistance, call one of our experts on 0345 257 7271
Page 2

Contact:
www.bush-support.com
Helpline: 0345 257 7271
52297337
Page 3

Quick start guide
Electric Cooker
BIDIOS
Page 4
Unpacking
1
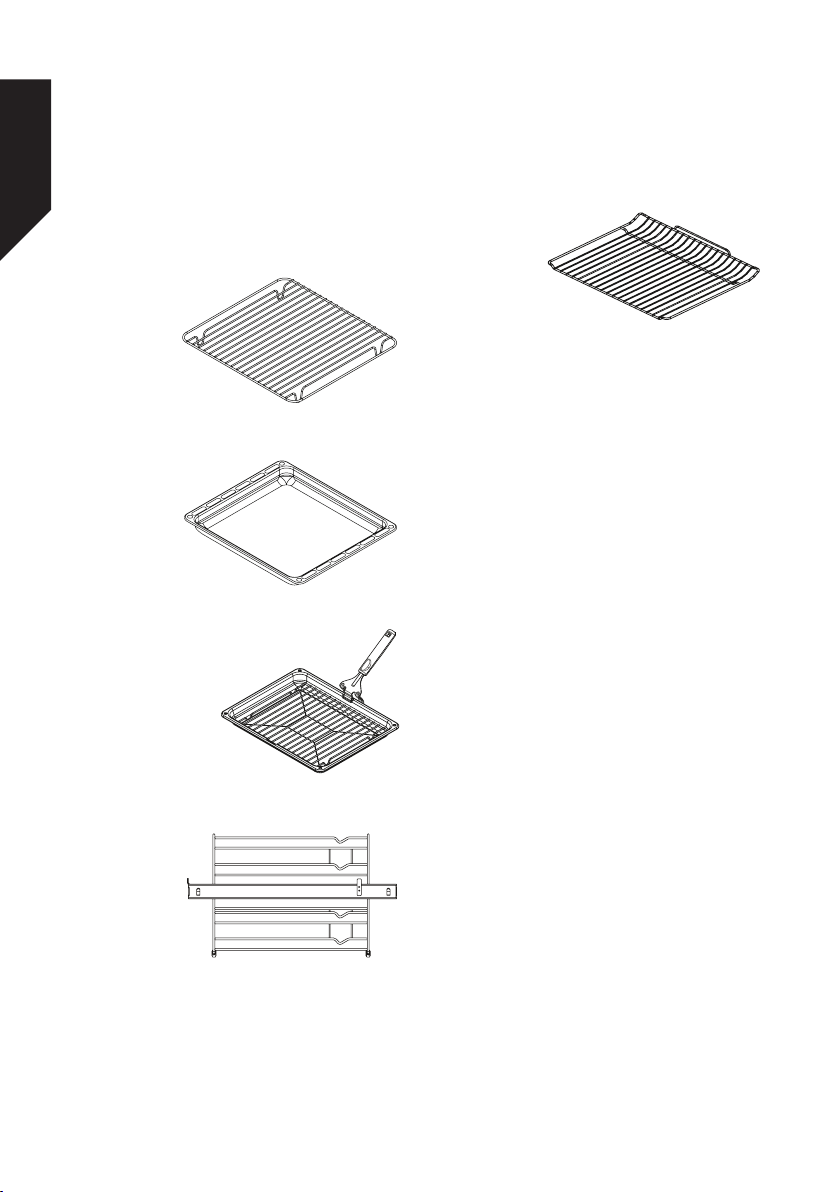
Accessories
The Wire Grid for Deep Trays
The Deep Tray
The Grill Pan and Handle Set
You’’ll soon be enjoying your new appliance
The Wire Rack with a Half
Telescopic Rail
The Wire Grid
If you require any technical guidance or find that your product is not operating as intended, a simple solution can often be found in the Troubleshooting
Page 5
Installing your cooker
2
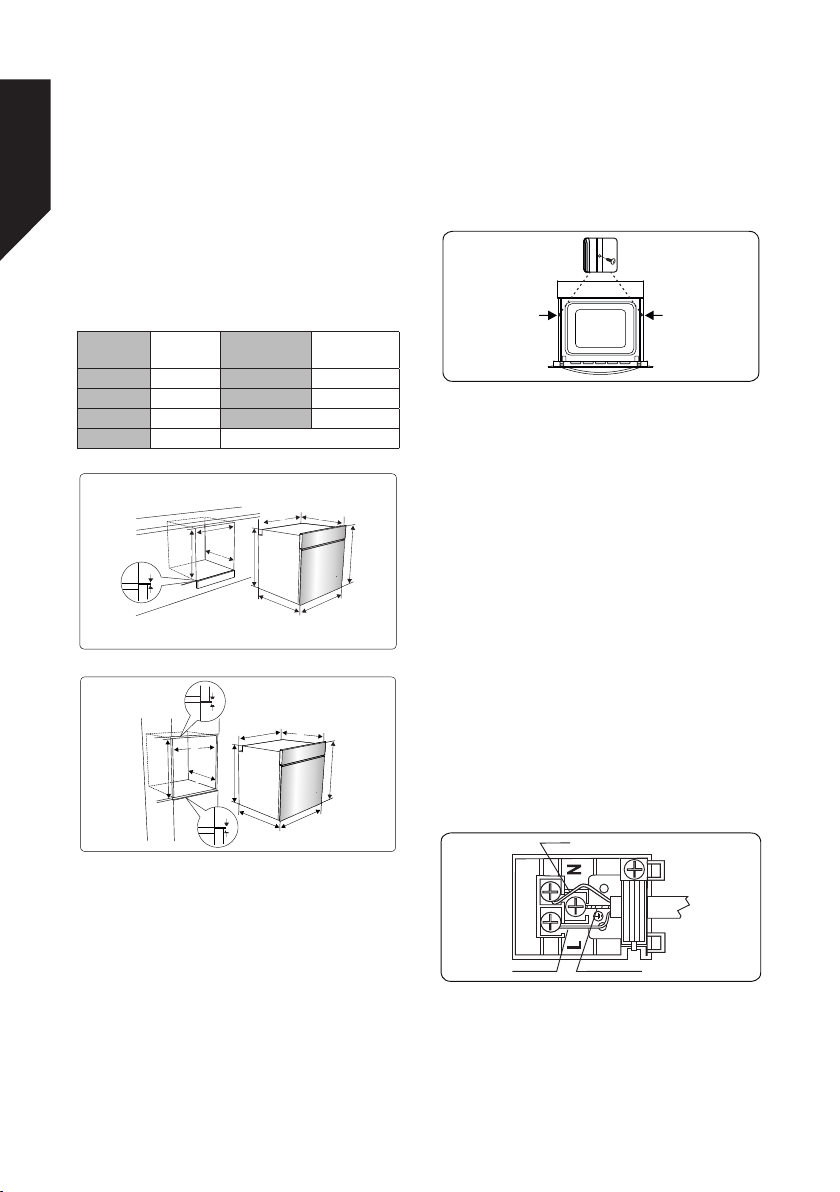
Bringing it all together
The appliances are supplied with installation
kits and can be installed in a worktop with
the appropriate dimensions. The dimensions
for hob and oven installation are given below.
H
F
F
G
K
G
min./max. F
(mm)
E
A
E
D
J
560/580
B
A
C
C
D
B
C
C
A (mm) 557
B (mm) 550 min. G (mm) 555
C (mm) 595 min. H/I (mm) 600/590
D (mm) 575 min. J/K (mm) 5/10
E (mm) 574
Installation under a worktop
J
Installation in a wall unit
I
Electrical Connection and Safety
The appliance is designed for a power supply
of 220-240V ~ and 380-415V 3N~. If your
supply is different, contact the authorised
service person or a qualified electrician.
The power cable (H05VV-F) must be long
enough to be connected to the appliance,
even if the appliance stands on the front of
its cabinet.
Ensure all connections are adequately
tightened.
Fix the supply cable in the cable clamp and
then close the cover.
The terminal box connection is placed on
the terminal box.
Blue
1. After making the electrical connections,
insert the oven into the cabinet by
pushing it forward. Open the oven door
and insert 2 screws in the holes located
Brown
Yellow+Green
on the oven frame. While the product
frame touches the wooden surface of
the cabinet, tighten the screws.
section of the Instruction manual or online at www.bush-support.com If you still require further assistance, call one of our experts on 0345 257 7271
Page 6
Using your cooker for the first time
3
Let’s get started
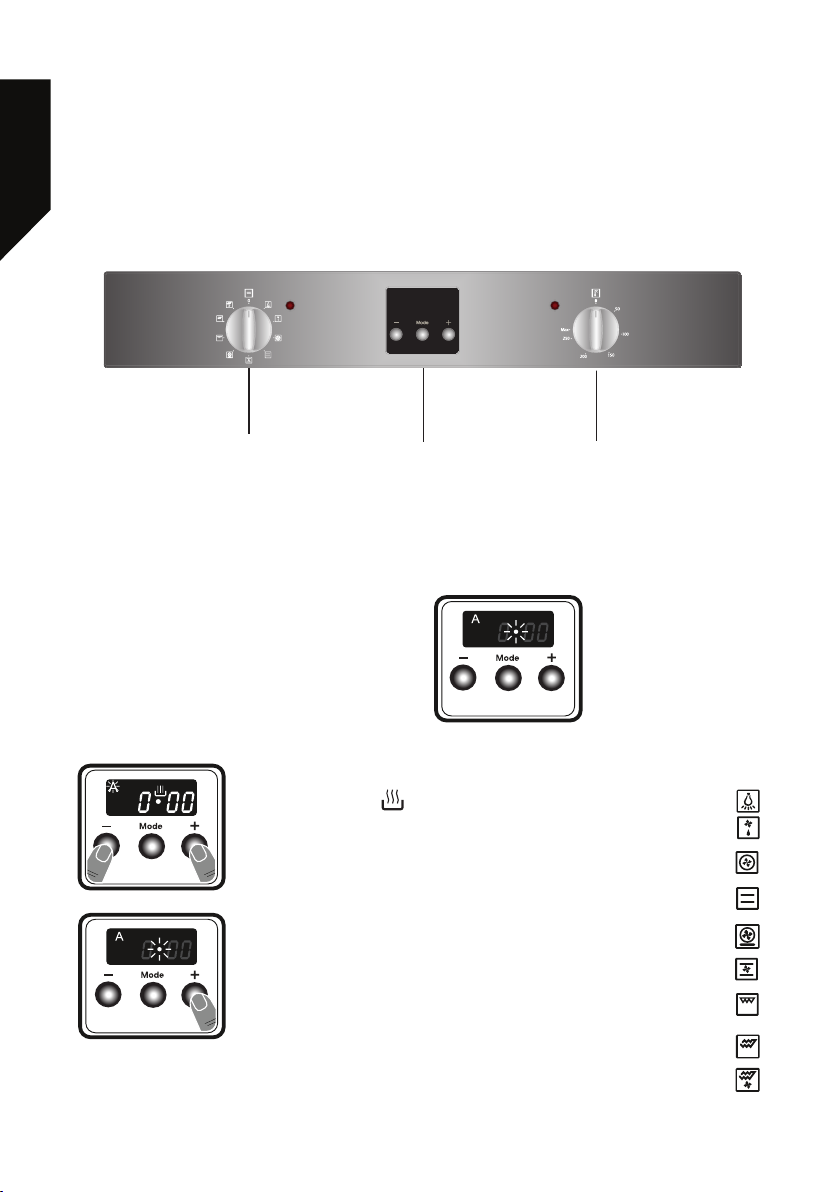
Control panel
1
1. Oven Function Control Knob
2. Digital Timer
3. Oven Thermostat Control Knob
Use of the Digital Timer
Time adjustment
The time must be set before you start using
the oven. Following the power connection,
the symbol “A” and “000” will flash on the
display.
1. Press the “+” and “-”
keys simultaneously.
Symbol will appear, and
the dot in the middle
of the screen will start
to flash.
2. Adjust the time while
the dot is flashing using
the “+” and “-” keys.
2
Function
1. Oven Lamp
2. Defrost Function
3. Turbo Function
4. Static Cooking Function
5. Pizza Function
6. Fan Function
3
3. After a few seconds,
the dot will stop
flashing and will remain
illuminated.
7. Grilling Function
8. Faster Grilling Function
9. Double Grill and Fan Function
If you require any technical guidance or find that your product is not operating as intended, a simple solution can often be found in the Troubleshooting
 Loading...