

Page 1
Eliminator™LaserScope User’s Guide
he Eliminator LaserScope is the most innovative and effective hunting
T
riflescope in the world. Combining outstanding optics with pinpoint
laser rangefinding and precision trajectory compensation with the
xact ammunition you choose for your hunt, it eliminates most of the
e
variables and guesswork that often cause hunters to go home
empty-handed. In one fast sequence the Eliminator determines the
distance to your target, factors in your trajectory and illuminates the
perfect holdover. It’s that simple.
Mounting & Sighting-In
Mounting The Eliminator™LaserScope
he Eliminator significantly extends the range and accuracy of
T
virtually any gun and any load. It is the perfect optic for centerfire
and rimfire rifles, muzzleloaders and slug guns. No other riflescope
ombines this level of quality, technology, accuracy, repeatability and
c
effectiveness. It will greatly increase the distance at which you can
make an ethical shot.
Congratulations and thank you for choosing the Eliminator LaserScope
by Burris.
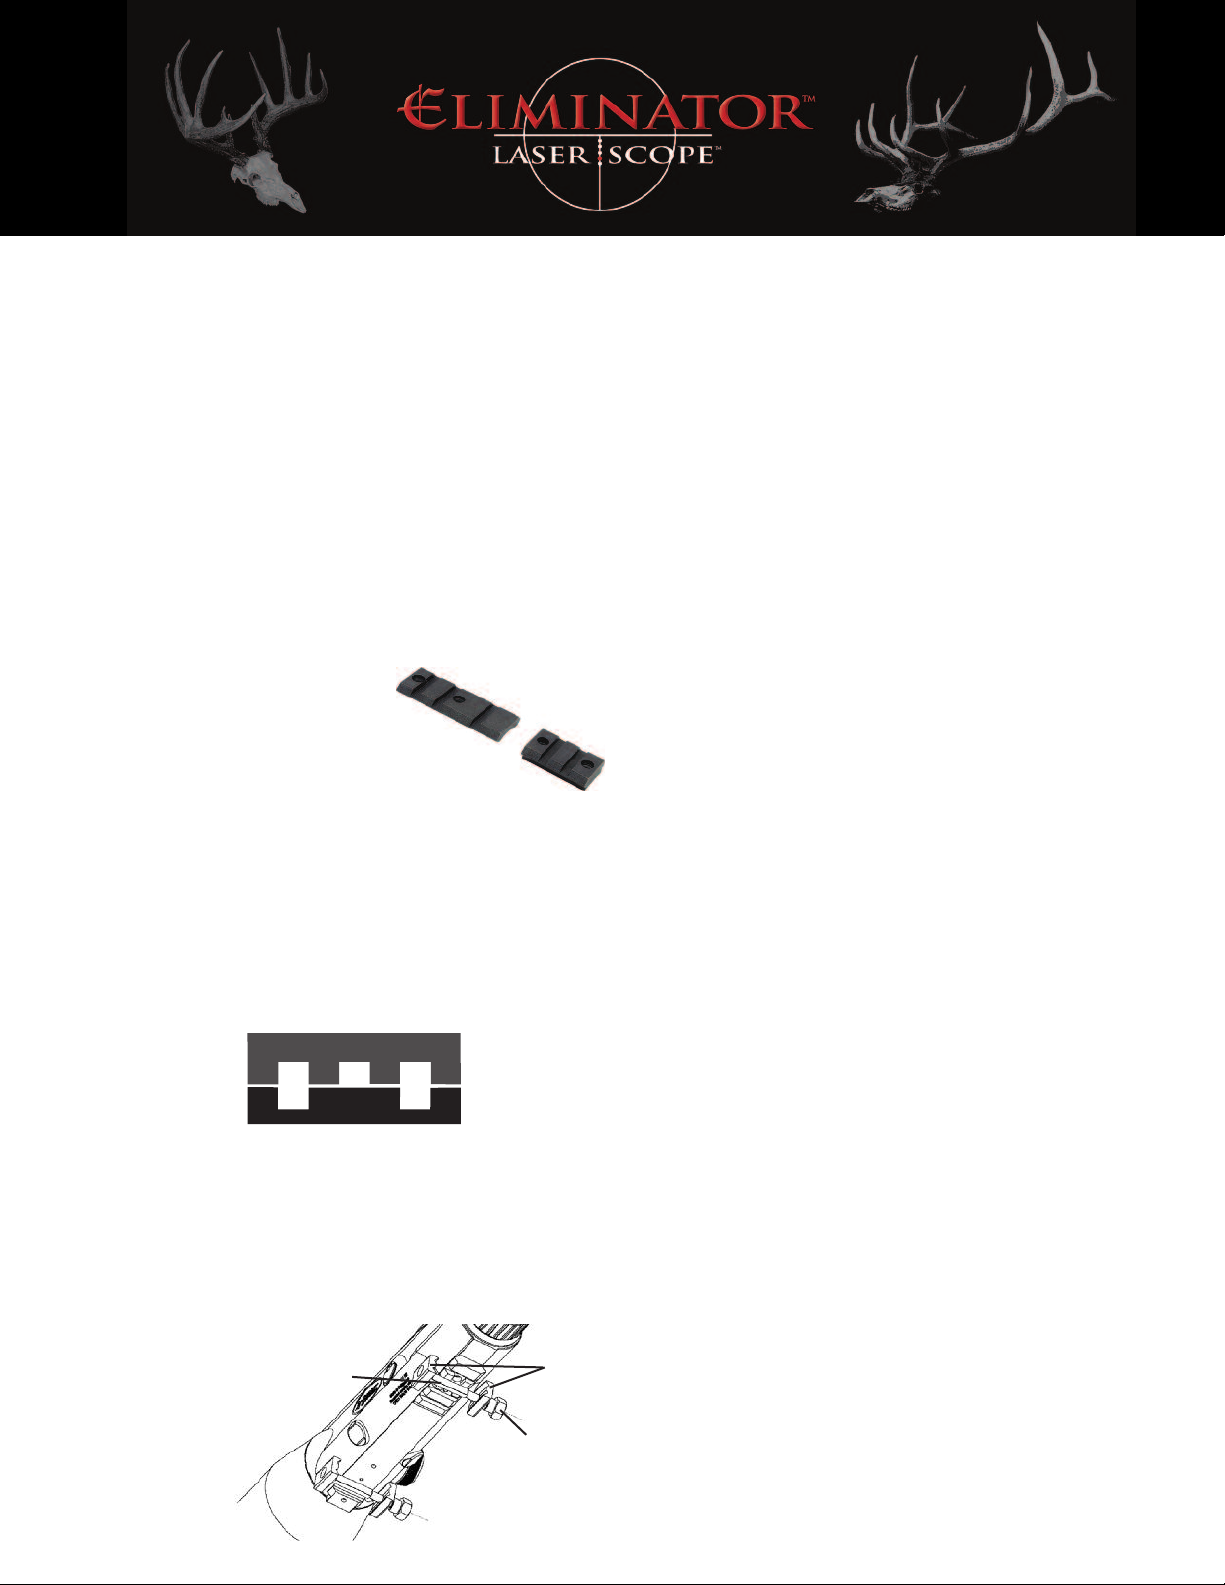
1. Select a Weaver-style or Picatinny-style mounting base. If a two-piece
base is selected for a long action bolt rifle, the front base should be a
reversible (extension) base which will need
to be mounted with the extension
directed rearward. We recommend the
use of Burris XTB Bases (Xtreme Tactical Bases)
as they were also designed with the special mounting
considerations of the Eliminator LaserScope.
2. Read the manufacturer’s directions regarding the installation of mounts
before beginning.
3. Clean the mounting area of the rifle with a chemical that removes grease
and oil. Pay special attention to screw holes. Using the same chemical,
clean the mounts. Do not allow the cleaning chemical to come in contact
with the stock or scope lenses.
4. After installing the base(s), position the scope so it offers the proper
eye relief. To do this, shoulder the rifle as you would in the field. Position
the scope as far forward as possible while achieving a full field of view.
LaserScopeTMRail (rear)
Rear Mount
Base
5. Note the two base slots you will use to attach the scope, and with the
mount clamps open fully, place the Mount Bolts into those slots on the
base. Now match up the Eliminator scope slots and place over the two
mount bolts - rocking the scope side to side until the scope is flush
with the base and mount clamps gripping from the lip of the base to the
lip of the rail on the underside of the scope. Finger tighten only.
6. In completing step #5, position the hex nuts on the side of the rifle
opposite the side you will mount the remote transmitter. There must be
clear line of sight between the
transmitter and the remote
control receiver.
Mount Bolt
Mount
Clamp
7. With hex nuts slightly loosened, push the scope forward and then
firmly tighten both hex nuts to 50 to 70 inch/pounds.
Eyepiece Focusing
1. Aim the Eliminator LaserScope in a safe direction toward the sky or a
light colored wall. Glance through the scope and notice if the reticle is
sharply focused. Most users will find that no adjustment is necessary.
If the reticle is not in sharp focus, rotate the eyepiece focus ring until the
reticle appears in sharp focus. Double check your focus by taking quick
glances through the scope and make any fine tuning adjustments as
necessary.
Sighting In
Do all shooting in a safe, authorized area. Use proper eye and hearing
protection and follow all safe shooting rules. Select the ammunition you
intend to use in the field and use it to sight in the firearm.
1. Bore sight your scope, OR place a target about two feet square at 25
yards. Fire a shot at the bullseye. Make the necessary adjustments to
the Windage and Elevation knobs. Remember, a scope with a click
adjustment value of 1/4 inch at 100 yards will require four clicks to
move the same 1/4 inch distance at 25 yards. Burris scopes have the
click value indicated on a label under one of the adjustment caps.
2. Make adjustments on the scope by turning the adjusting screws the
necessary number of clicks. NOTE: The reticle (crosshair) is centered at
the factory. This permits adjusting the reticle equally in all directions
from the center position. Three shot groups are suggested to determine
the actual point of impact.
3. After the first group is fired, adjust the scope again. This adjustment
should bring the approximate center of the group to coincide with the
bullseye. Shoot additional groups as necessary.
4. Place the target at recommended sight-in distance of 50, 100 or 200
yards. Refer to the Cartridge List to determine the proper range(s) for
your load or cartridge. Make the necessary adjustments so your group
coincides with the bullseye.
Hex
Nut
5. Align the dial to read “0” without allowing the silver knob to turn.
6. After making the adjustments, replace the adjustment caps. They protect
your scope from dust and moisture.
1
Page 2

ELIMINATOR™LASERSCOPE OPERATION
Elevation Adjustment
Battery Cover
Windage Adjustment
1. Battery Installation or Replacement
Unload the gun. Use a coin or screwdriver to unscrew the battery cap
screw on the top, rear of the scope, just in front of the eye piece. Install a
lithium CR2 battery. Reinstall the battery cover. NOTE: A sticker on the
underside of the battery contains basic set-up instructions.
Battery Cover
Eyepiece Focus Ring
Main Switch
Elevation Adjustment
Windage Adjustment
Setup Button (detail below)
The range displayed is the horizontal distance to the target. The Eliminator
LaserScope has a built-in angle sensor and it converts the actual distance
to horizontal distance. The horizontal distance is mostly what affects a
bullet’s trajectory so no matter what the uphill or downhill angle, the
Eliminator automatically converts the distance to use for determining the
aiming point.
CR2 Battery
2. LaserScope Battery Life:
Battery life is nominally rated at 5000 cycles. This will vary depending on
the quality of the battery and the temperatures at which the unit is
operated. Batteries lose a good deal of their power potential in colder
temperatures.
Battery: Full
Battery: Half
Carry a spare
Battery: Low -
Replace the battery
3. Start the electronics
Press the main switch button on the
left side of the scope, just behind the
Burris logo. Look through the scope. It
should show two things: the yards(Y) or
meters(M) indication illuminated along
with the battery status indicator. The
indicators will stay on for 8 seconds.
If the scope fails to get an accurate range reading, it will display a line of three flashing bars
.
5. Set Up the Eliminator For Your Specific Cartridge
First decision - What Units do you want to work in, Yards or Meters? Y/M
Second decision - Do you want or need to zero at 50, 100 or 200 Yards /
Meters?
Info Needed - For long-range cartridges: the drop in inches at 500 yards
if you zero at 100. For intermediate range loads, you’ll need the drop in
inches at 200 yards if you zero at 50 yards. This figure will be your Drop
Number.
4. Electronic Basics
Start the electronics and aim at a
target. Press either the left side button
again or the Remote Activation Switch.
The scope will display the horizontal
range to your target at the top and also
display an illuminated dot on the
crosshair.
2
Page 3

There are several ways to determine your Drop Number:
M
1. For factory loads, the Cartridge List that came with your scope will
show the drop number for most of the currently available factory ammo.
2. Factory ammo web sites sometimes provide this information.
3. The drop number may appear on the ammo box.
4. Ballistics Software Programs.
5. Measure your actual bullet drop at 200 or 500 yards, when sighted in
at 50 or 100 yards, as needed.
6. Use the Cartridge List to estimate your drop number by finding similar
loads or cartridges with the same muzzle velocity and BC number.
7. Burris website-www.burrisoptics.com.
Note: the actual correct drop number will be affected by your gun and
shooting altitude unless you actually measure your drop. All other methods
provide approximate numbers, typically correct ±3 inches at 500Y.
No matter what units you chose to work in (yards or meters) or distance
you intend to Zero at, the Cartridge Lists are selected based on drop at
either 200 Yards when zeroed at 50 Yards (for intermediate range
cartridges) or 500 Yards when zeroed at 100 Yards (for modern long- range
cartridges).
Your 3-digit Cartridge List will begin with a “0” if you need to sight-in at 50
Yards/Meters, a “1” for 100 Yards/Meters sight in, or a “2” if you intend to
sight-in at 200 Yards/Meters. This number is followed by your Drop
Number which will vary between 5 and 90. (See the Cartridge List to
determine what zero ranges and drop numbers are available and
appropriate for your cartridge.)
There are four arrows on the Setup button
on the right side of the scope. These are
used only for programming. They have no
function during normal use of the scope.
Enter Set-Up Mode
1. Push the Main Button to turn on the scope. Push the Main Button once
more to get the three dashes display (— — —) in the range area.
3. With the currently selected table displayed you have 30 seconds to
click the Forward Arrow button to enter the Cartridge List Set-up mode.
The “T” (for Table Select) is lit steady; the
Unit (Y or M) is flashing when you enter
Table Select mode. Press the Up Arrow
to select Y (yards) or the Down Arrow to
Select or Change Meters
select M (meters). When you have the
measurement unit you want flashing,
press and release the Forward Arrow
button to load your choice.
Select or Change Yards
4. The “T” is still on steady, your (Y or M) is on and steady, your first
numeric digit is flashing, and the other two are now out. Enter your
selected Zero Distance: 0 = 50 Yards/Meters; 1 = 100 Yards/Meters; or
2 = 200 Yards/Meters. Press the Up
Arrow to increase the number or the
Down Arrow to decrease it. When your
selected sight-in distance is displayed
(flashing), press and release the Forward
Set Zero Distance (1 or 2)
Arrow button.
5. The last two numbers (Drop Number
from the Cartridge List ) should be flashing. Press the Up Arrow to increase the
Complete the Ballistic Table
with your Drop Number
number, or the Down Arrow to decrease it. When the Drop Number you
want is displayed (flashing), press and release the Back Arrow button
to exit the Set-up mode.
6. You are ready to go shooting. Re-zero the gun if necessary at your
selected sight-in distance. For optimum accuracy, verify point of impact by actual shooting. Depending on the exact ammo performance,
your gun’s barrel length, the elevation, and any extreme temperatures,
you might need to increase or decrease your Drop number by a couple
of digits for exacting performance.
Your programming is stored in the scope no matter the condition of your
battery and the scope will still remember your programming if the battery
is removed and reinstalled.
2. Push the Forward Arrow (right side
of scope) first, then the Main Switch
(left side of scope) and hold them
both down simultaneously for 6
seconds. Release the two buttons
when display changes. This is called
“Set-up Mode.” The first number
that appears for two seconds is the
firmware version. Next, the display
shows the currently selected (Y)ards
or (M)eters and Cartridge List . On
new scopes the reading will be “Y
145” (the factory shipped table).
If a table from the Cartridge List
has been previously selected,
the designation for that table is
displayed.
Firmware version
Default setting
Last setting
Understanding The Cartridge List Display:
Cartridge List M234 means: (M)eters, 200 Meter Zero, a cartridge with 34
inches of drop at 500 yard when zeroed at 100 yards.
Cartridge List Y157 means: (Y)ards, 100 Yard Zero, a cartridge with 57
inches of drop at 500 yards when zeroed at 100 yards.
Cartridge List Y014 means: (Y)ards, 50 Yard Zero, a load with 14 inches
of drop at 200 yards when zeroed at 50 yards.
Verifying your drop number:
For long-range cartridges (All cartridges zeroed at 100 or 200 units).
Verify the actual drop at 500 Yards/Meters. If your group is low, increase
the Drop Number by the number of inches it is low. If the group is high,
decrease the Drop Number. (The change needed will be measured in
inches regardless of the units set.)
3
Page 4

For most intermediate-range loads. For loads with 50 Yards/Meters
ero, verify the drop and adjust drop number at 200 Y/M.
z
For intermediate-range loads (Drop Numbers from 037-060). These
oads with drop numbers equal or greater than M031 or Y036 will reach
l
their range limit at less than 200 Y/M. To confirm your drop, verify at
150 Yards/Meters and adjust your drop number 1" for every ¾" of
ertical error.
v
Ballistics software programs are of great benefit to get you close, but
othing
n
eats firing five shot groups with the actual ammo at 500 yards
b
to provide you with the most precise information possible in order to
perfectly program your Eliminator LaserScope.
Extreme Range Shooting (Beyond 500 yards)
The factors that influence a bullet in flight at extreme range are many
nd their relationships are complex.
a
For slow intermediate-range loads with Meter units (Drop Numbers
bove M050). These loads with will reach their range limit at less than
a
150 M. To confirm your drop, verify at 100 Meters and adjust your drop
number 1” for every ½” of vertical error.
When verifying your Drop Number, if your group can not be covered by a
paper plate, you may wish to re consider your rifle/ammo combination
in determining its suitability for long-range shooting at game.
Eliminator Essentials
1. The trajectory compensation feature is calibrated for use only
on 12x magnification.
2. The crosshair center must be used for ranging.
3. An illuminated aiming dot will remain lit for approximately 90
seconds. If you fail to shoot before the dot goes out, you will need
to re-range using the center crosshair.
4. There can be several possible causes that result in the Eliminator’s
inability to determine the distance to a target including: Nearby
obstacles between the scope and the target such as grass, twigs,
or leaves; Rain, snow, mist or other airborne debris; Dirty objective
lens; Poor target quality for reflecting the laser back to the scope,
coupled with an unsteady hold and long distances; or Low battery.
5. If you have programmed the scope for a particular cartridge, and
the range to the target cannot be determined, the scope will display
three horizontal lines in the yards/meters area, and (usually) five
illuminated dots that serve as a ‘custom’ Ballistic Plex that is
accurately calibrated to your cartridge.
6. If the Eliminator ever seems to be working improperly, there is a
good chance that it needs a new battery. First, simply disconnect
the existing battery and reinstall and check for function. If this
doesn’t solve the issue, install a new battery.
The BC (Ballistic Coefficient) of your bullet is a factor that describes
ow fast the bullet slows down. The ACTUAL BC of a bullet and the
h
PUBLISHED BC can be different and can affect your bullet drop. In
developing the simple-to-use programming, Burris leaned more towards
he premium ammunition with premium bullets. For all practical
t
purposes, from 100 to drop number distance, the way the Eliminator
LaserScope works, there is very little bullet flight error from one bullet
to another. The BC values of most available bullets are on our website
and in the Cartridge List. However, going beyond 500 yards, there can
be sizable differences in actual point of impact depending on the BC
of the bullet you are using. The chart on
page 4 lists the actual BC numbers used
for each Cartridge List. To take full and
simple advantage of The Eliminator LaserScope for shooting beyond 500 yards, one
would be wise to use a bullet that closely
matches the values we represent in the chart.
Also, when the Eliminator LaserScope
gets a distance reading that is beyond
the capability of the reticle’s drop
compensation, the bottom four dots will
light up signifying to you that the target
is beyond the reticle’s capability.
Operating Temperature:
o
+14
to +122oFahrenheit
o
to +50oCelsius
-10
Effective Range:
Deer: 50 yards to 550 yards
Reflective Target: 50 yards to
Ranging Accuracy:
Less than 100 yards: +/-1 yard
100 - 550 yards: +/-2 yards
More than 550 yards: +/-3 yards
Angle Ranging Compensation:
+ 45° / -45°
800 yards
Technical Notes
Fine Tuning and Altitude
Ammo makers generally state their bullet drop numbers at sea level.
Very generally, big game hunting bullets drop at 500 yards about ½
inch less for each additional 1000 feet of elevation. If you going to hunt
at 6,000 feet elevation and your ammo box indicates 40 inches of drop
at 500 yards with a 100 yard zero, then you would select Drop Number
37 instead of 40. Our website www.burrisoptics.com contains charts
showing more specific altitude adjustments for each cartridge. Other
ballistics software programs can also provide you even more precise
information. Depending on the exact ammo performance, your gun’s
barrel length, the elevation, and any extreme temperatures, you might
need to increase or decrease your Cartridge List by a couple of digits
for exacting performance.
Storage Temperature:
o
-13
to +158ofahrenheit
o
-25
to +70odegrees celsius
Table Numbers “No Range” Display Dots for ranges of:
Y or M 225 to 263 5 Dots 200, 300, 400, 500, &600 Y/M
Y 125 to 190 5 Dots 100, 200, 300, 400, & 500 Y”
M 125 to 179 5 Dots 100, 200, 300, 400, & 500 M
M 180 to 190 4 Dots 100, 200, 300, & 400 M
Y 005 to 009 & M 005 to 006 4 Dots
Y 010 to Y023 & M 007 to M 019 5 Dots 50, 100, 150, 200, & 250 Y/M
Y 024 to Y035 & M 020 to M 030 4 Dots 50, 100, 150, & 200 Y/M
Y 036 to Y058 & M 031 to M 052 3 Dots 50, 100, & 150 Y/M
Y 059 & Y060 & M 053 to M 060 2 Dots 50, & 100 Y/M
Top Dot 50 & 100 Y/M Then 150, 200, & 250 Y/M
4
Page 5

or long range cartridges (1xx and 2xx tables)
F
For intermediate range cartridges (0xx tables)
Ballistic Reticle Holdover Capability based on the chosen Ballistic Table
Muzzle Muzzle
Ballistic Vel. Vel. BC
Table m/s f/s Used
0 719 2360 .350
9
9 721 2365 .354
8
8 723 2372 .357
8
87 725 2377 .361
86 727 2384 .364
85 728 2390 .368
4 730 2396 .372
8
3 733 2404 .375
8
2 735 2411 .379
8
1 737 2419 .382
8
80 740 2427 .386
79 742 2434 .390
78 745 2443 .393
7 747 2451 .397
7
6 750 2461 .400
7
5 753 2470 .404
7
74 756 2480 .407
73 759 2489 .411
72 762 2500 .415
1 765 2510 .418
7
70 768 2520 .422
69 772 2532 .425
68 775 2542 .429
67 778 2554 .433
6 782 2566 .436
6
5 786 2578 .440
6
64 790 2591 .443
63 808 2650 .447
62 813 2668 .447
61 819 2687 .447
60 825 2706 .447
59 831 2725 .447
58 837 2745 .447
57 843 2765 .447
56 849 2786 .447
55 856 2807 .447
54 862 2829 .447
53 869 2851 .447
52 876 2874 .447
51 883 2897 .447
50 890 2921 .447
49 898 2946 .447
48 906 2971 .447
47 913 2997 .447
46 922 3024 .447
45 930 3052 .447
44 942 3090 .447
43 948 3110 .447
42 972 3190 .407
41 982 3221 .407
40 992 3254 .407
39 1002 3288 .407
38 1013 3322 .407
37 1064 3490 .334
36 1076 3530 .334
35 1088 3570 .334
34 1101 3612 .334
33 1114 3655 .334
32 1180 3870 .276
31 1195 3920 .276
30 1210 3970 .276
29 1227 4025 .276
28 1244 4080 .276
27 1250 4100 .276
26 --.276
25 --.276
500 600 700 800
Intermediate Cartridge Range Limits
Muzzle Muzzle
Ballistic Vel. Vel. BC
Table f/s m/s Used
060 997 304 0.125
59 1006 307 0.126
0
58 1015 309 0.127
0
57 1025 312 0.128
0
56 1035 315 0.129
0
055 1045 319 0.13
054 1056 322 0.131
053 1067 325 0.132
52 1079 329 0.133
0
51 1091 333 0.134
0
50 1103 336 0.135
0
049 1117 340 0.136
048 1130 344 0.137
047 1145 349 0.138
046 1160 354 0.139
45 1175 358 0.14
0
44 1192 363 0.141
0
43 1203 367 0.142
0
042 1220 372 0.143
41 1238 377 0.144
0
40 1257 383 0.145
0
039 1275 389 0.146
038 1293 394 0.147
037 1313 400 0.148
036 1333 406 0.149
35 1353 412 0.15
0
034 1373 418 0.151
033 1395 425 0.152
032 1416 432 0.153
031 1438 438 0.154
030 1460 445 0.155
029 1485 453 0.156
028 1508 460 0.157
027 1532 467 0.158
026 1557 475 0.159
025 1582 482 0.16
024 1608 490 0.161
023 1635 498 0.162
022 1663 507 0.163
021 1693 516 0.164
020 1725 526 0.165
019 1758 536 0.166
018 1790 546 0.167
017 1825 556 0.168
016 1865 568 0.169
015 1905 581 0.17
014 1930 588 0.178
013 1960 597 0.186
012 1995 608 0.194
011 2035 620 0.202
010 2080 634 0.210
009 2130 649 0.218
008 2190 668 0.266
007 2255 687 0.234
006 2340 713 0.242
005 2415 736 0.250
0 100 200 300 400 500
Maximum Reticle Distance with 50 yard zero
Distance (Yards)
Maximum Reticle Distance with 100 yard zero Maximum Reticle Distance with 200 yard zero
5
Page 6

Checklist before returning a scope
A significant number of scopes are returned to Burris each year that are
found to function perfectly. To avoid unnecessary delays and expenses we
encourage you to check for the following conditions.
Insufficient windage adjustment
1. Base mounting holes drilled out of alignment with center of bore
2. Barrel threaded into receiver at an angle
Insufficient elevation adjustment
1. Receiver diameter out of specification
2. Barrel threaded in at an angle
Grouping or accuracy
1. Barrel or chamber throat erosion
2. Stock warpage
3. Stock Bedding problem
4. Loose mount
5. Heavy trigger pull Solution - Consult with a gunsmith
Focus or image not clear
1. Object too close
2. Eyepiece out of focus
When returning the scope be sure to include:
1. Make yourself a note of your scope’s serial number for use when calling
to check on your in-service scope.
2. Complete name and full address.
3. A short note describing the nature of the problem as accurately as
possible.
4. Ship the scope prepaid and Insured by mail, UPS, or other parcel
service. Burris can’t be responsible for your scope until we physically
receive it. Burris pays for shipping back to you.
5. Insure the shipment against loss.
Send the scope to the following address:
Burris Company, Inc.
331 E. 8th Street
Greeley, Colorado 80631
For additional information about riflescope operations, go to the
‘Burris University’ section of our website: www.burrisoptics.com
Storage:
As with any electronic device, it is always a good idea to remove the
battery when storing for a long period of time. During storage or trans-
portation, be sure that the Main Switch on the Eliminator and the button on
the Remote Transmitter are not inadvertently depressed thereby running
the battery down when not in use.
cope Use, Service, & Care
S
Your Burris scope will provide a lifetime of service if given the reasonable
care and treatment it deserves. The only maintenance required is occasional
cleaning of the outside of the scope and the exterior lenses.
All moving assemblies are permanently lubricated. Use lens covers to
protect the scope from dirt, dust, lint, and moisture. The adjustment system
is waterproof even without the turret caps in place, but keep these caps
tight to keep dust and dirt out of the mechanical system. Before cleaning
the lenses, brush them with a photographer’s brush or blow them clean,
ideally with “canned air”. This removes large particles which can scratch
the surface if wiped under pressure. Never disassemble your scope.
Disassembly by anyone other than our factory will void the warranty.
Burris Warranty
If your LaserScope’s optics or mechanical systems are ever found to have
defects in materials or workmanship, Burris will, at our option, repair or
replace it at no charge. The ranging system and electronics are warranted
for 3 years from the date of purchase. If a repair is needed, send the
product to Burris Company, 331 East 8th Street, Greeley, Colorado, 80631.
Shipping charges to Burris must be prepaid by the owner. Insure the ship-
ment. Burris can’t be responsible for your product until we receive it. There are
no other warranties, either expressed or implied, contained herein except for
such that may arise under certain state laws. In that event, said implied
warranties are limited in scope and duration to the terms of this warranty.
Burris is not liable for incidental or consequential damages including but not
limited to lost profits or other economic or commercial losses. This
warranty gives the owner certain legal rights, and possibly other rights
which may vary from state to state. Under the guidelines of the Consumer
Protection Agency, this is considered a limited warranty.
Burris, Eliminator, Ballistic Plex and LaserScope are trademarks of Burris
Company Inc. Patents Pending. All specifications are subject to change
without notice.
© Copyright 2011 Burris Company. U.S. Patent Number 7,703,679.
6
INSTR-1033
 Loading...