

Bunn HB Owner's Manual
OWNER’S MANUAL
Model HB: 10 cup Programmable Coffeemaker
Congratulations on the purchase of this Golden Cup home coffeemaker as certied by the Specialty Coffee
Association (SCA).
Only coffeemakers that pass rigorous testing and requirements receive SCA certication and BUNN is
no stranger to these standards of coffee brewing. For over 60 years, BUNN commercial coffee brewing
equipment has consistently delivered Golden Cup standards for restaurants and cafés around the world. This
makes BUNN the ideal manufacturer to offer a home coffeemaker that meets these same standards.
Building on our commercial brewing experience and scientic knowledge of coffee, BUNN has designed an
exclusive brewing process that properly heats all water to the ideal brewing temperature of 200° F before it is
showered over the coffee grounds. In contrast, the average drip coffeemaker inconsistently heats water and
then slowly “burps” or “spits” the water over the grounds, often resulting in a bitter tasting cup of coffee. This
new home brewer consistently delivers optimal avor extraction in a full carafe of exceptional tasting coffee in
about 10 minutes.
From that single cup at home to a stadium full of people, BUNN keeps it simple when engineering brewing
solutions: respond to what a customer needs for a specic serving situation and deliver the best quality in the
cup for that occassion. Just as you would enjoy great tasting coffee at your favorite restaurant that chooses
BUNN equipment, we hope you enjoy this Golden Cup coffee in your home.
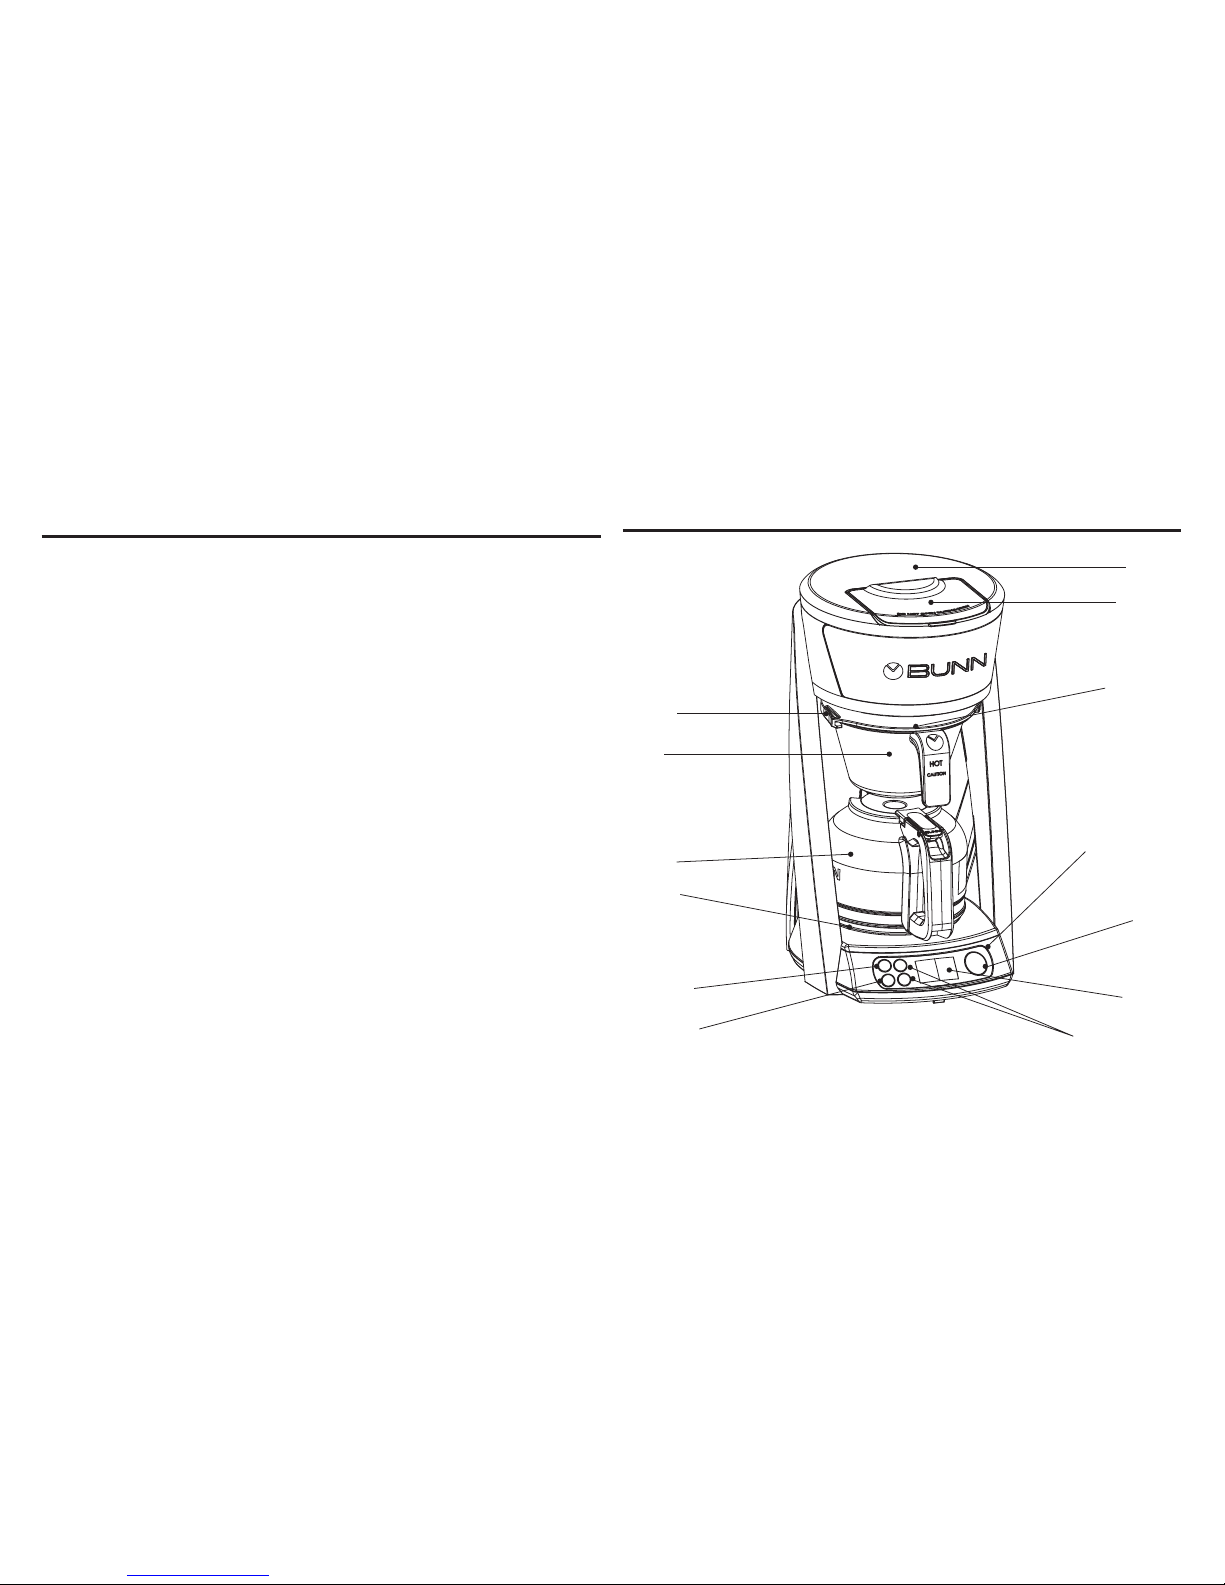
GET TO KNOW YOUR BREWER
electrical: UL and C-UL Listed for Household Use Only. This brewer has an
attached, 3-prong grounded cord set and requires 2-wire service with ground,
rated 120 volts AC, 11 amps, single phase, 60Hz, 1300 watts.
brew capacity: 4 – 10 cups per batch (20 – 50oz).
Not designed for High Altitude locations above 4,000 feet. High Altitude
units are available.
See Bunn.com for details.
specifications
TABLE OF CONTENTS
Get To Know Your Coffeemaker ......1
Important Safeguards .....................2
Programming Your Coffeemaker .....3
How To Brew ...................................4
Care & Cleaning ..............................5
Troubleshooting ..............................6
Customer Support ...........................7
Warranty .......................................... 8
TOP TANK
SPR AYHE AD
AUTO-STAR T
BUTTON
WARMER
PL ATE
CARAFE
NOTE: Carafe lid is packed separately from the brewer and carafe.
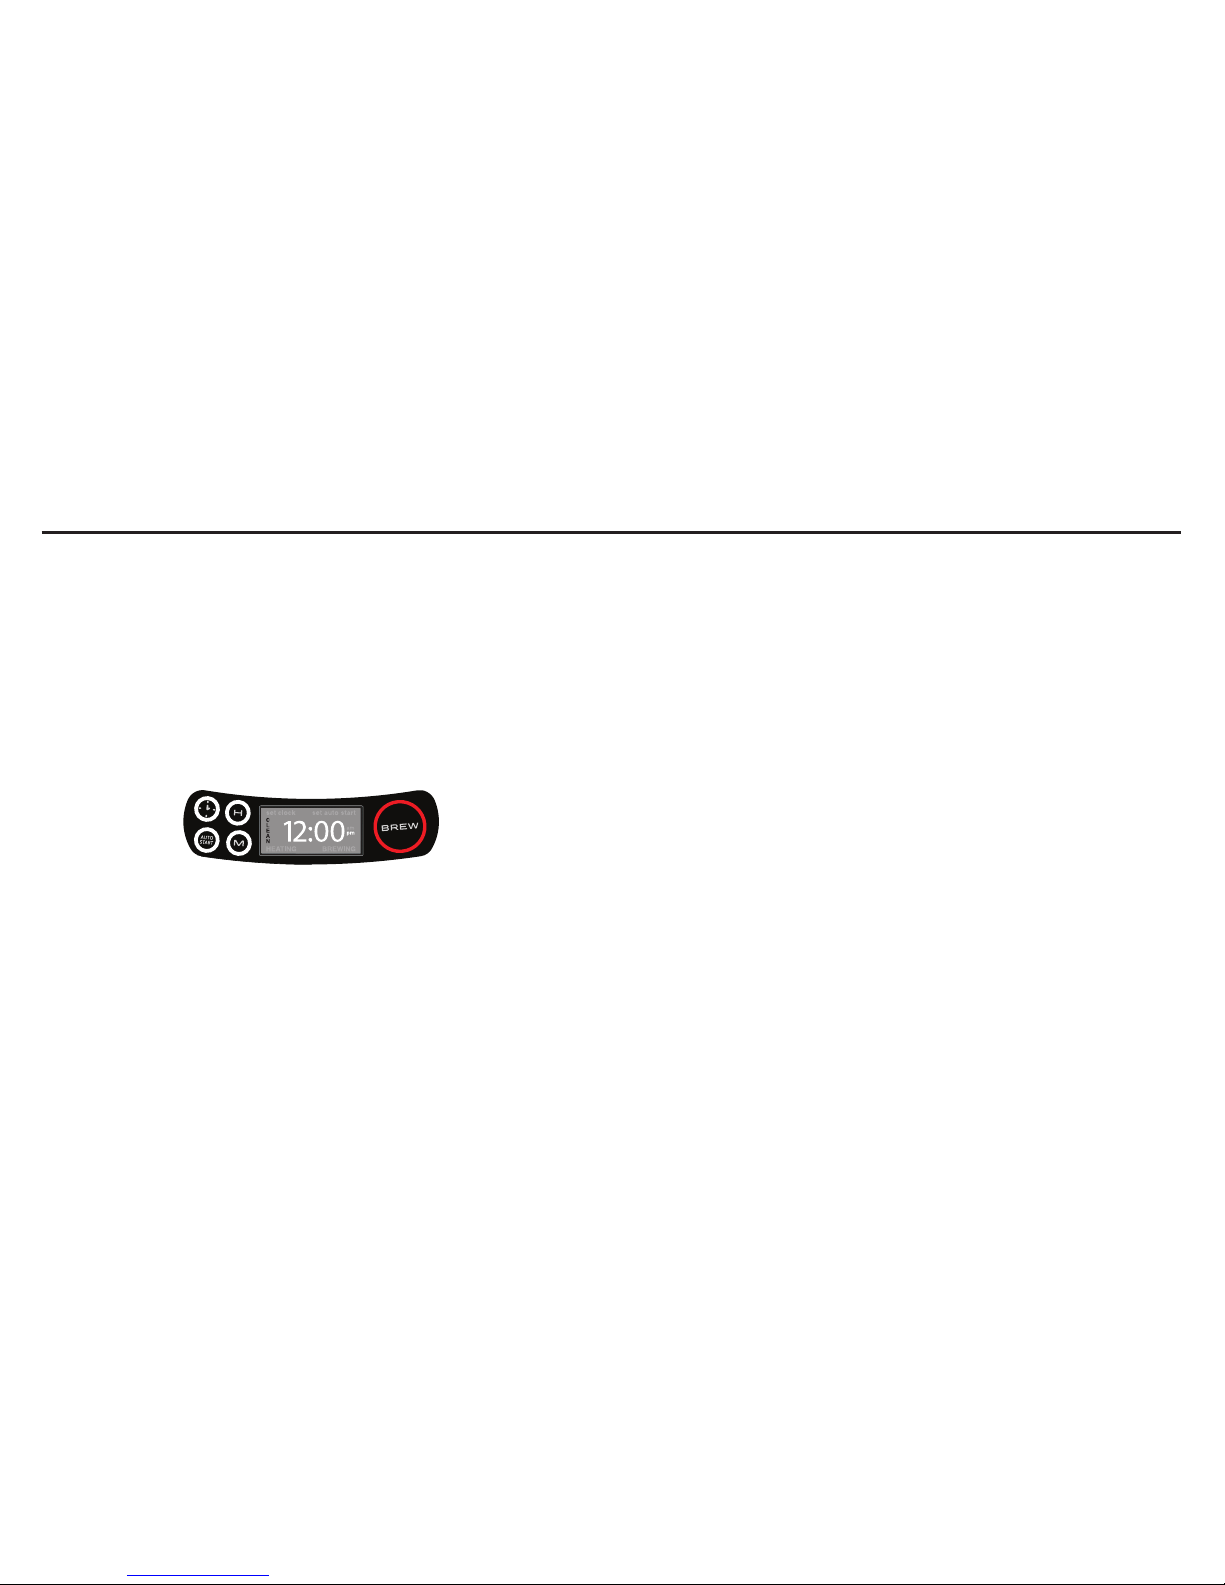
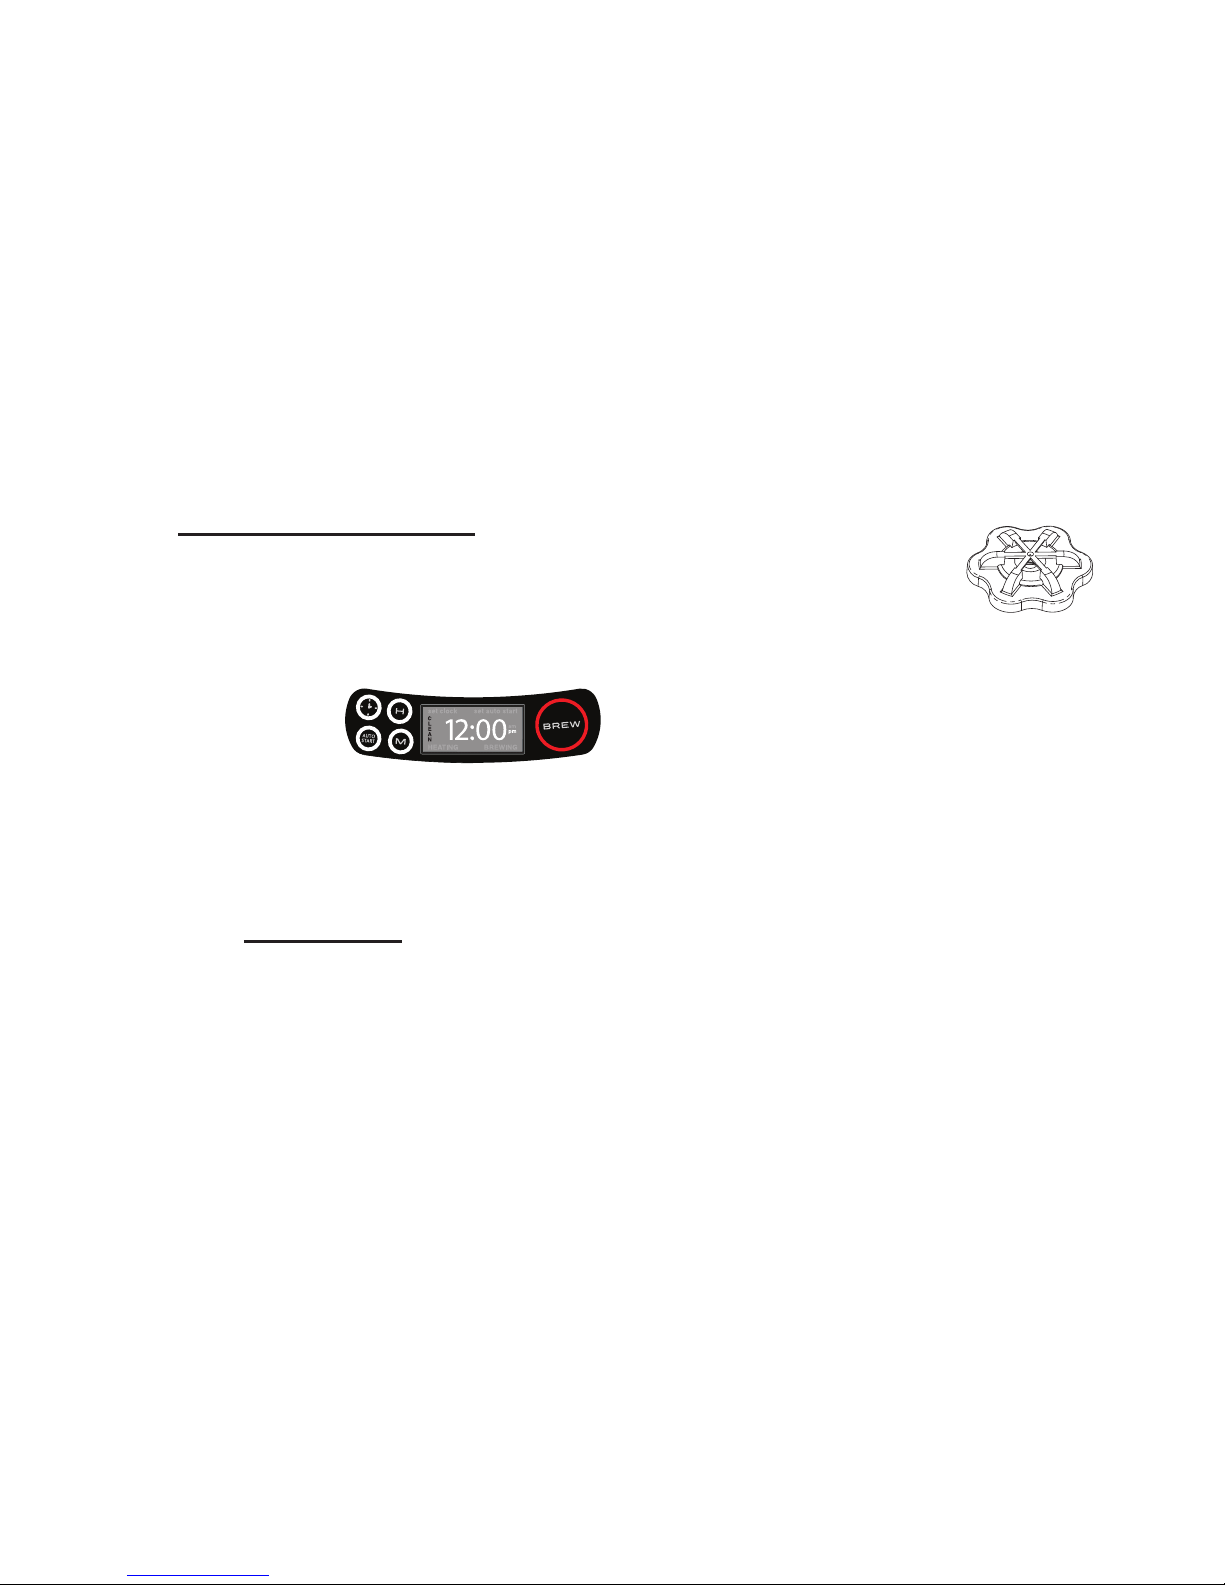
DIGITA L
DISPLAY
BREW
FUNNEL
CONTROL PANEL
SET CLOCK
BUTTON
BREW
BUTTON
HOUR AND
MINUTE
BUTTONS
FLIP LID
FUNNEL
GUIDES
1
• READ ALL INSTRUCTIONS.
• Do not touch hot surfaces. Use handles.
• To protect from electric shock, do not
place cord, plugs, or brewer in water or
other liquids.
• Do not open lid during heating or
brewing.
• Close supervision is necessary when
brewer is used by or around children.
• Unplug from outlet when not in use and
before cleaning. Let brewer cool before
removing or
replacing parts, and before cleaning.
• Do not operate brewer with a damaged
cord or plug or if the brewer malfunctions
or is damaged in any way. Contact
Customer Support (see page 7)
• Using an accessory not evaluated for use
with this brewer may cause injury.
• Do not use outdoors.
• Do not let cord hang over edge of table
or counter or touch hot surfaces.
• Do not place brewer on or near a hot gas
or electric burner or in a heated oven.
• Do not use brewer for any purpose other
than its intended use.
• Do not remove brew funnel or carafe
while brewing.
• The carafe is designed for use with this
appliance. Do not use carafe on a range
top
or in a microwave.
• Do not set a hot carafe on a wet or cold
surface.
• Do not use a cracked carafe or a carafe
with a loose or weakened handle.
• Do not pour any liquid into the water tank
other than water or vinegar for cleaning,
as specied in this manual.
• Do not clean carafe with cleansers, steel
wool pads, or other abrasive materials.
• When brewer is not in use, keep lid in the
closed position.
IMPORTANT SAFEGUARDS
SAVE THESE INSTRUCTIONS
Record the Model and Date code before
using: The model is located on the lower
back of your brewer. The date code
is located on the metal prongs of your
power cord - 4 digits are
etched on each side of the metal prongs
(Ex. 9999 99CH).
Questions?
Visit www.bunn.com or call USA 1-800-352-2866 Canada 1-800-263-2256
model:
date code:
Follow basic safety precautions when using electrical appliances to reduce the risk of
re, electric shock, and/or personal injury:
NOTE: Heating water to the ideal brewing temperatures naturally generates
some steam. BUNN suggests using your Brewer in an open area, and never
under cabinets that may be damaged over time by exposure to steam.
NOTE: The short power-supply cord supplied reduces the risk of becoming
entangled in or tripping over a longer cord. Extension cords are available and
may be used if care is exercised in their use. If an extension cord is used, its
marked electrical rating must be at least as great as the electrical rating of the
brewer. The longer cord should be arranged so it will not hang over the edge
of a table or counter and that it cannot be pulled on by children or tripped
over. The extension cord must be a 3-wire cord of the 3-prong, 3-socketed,
grounding type (including grounding conductor).
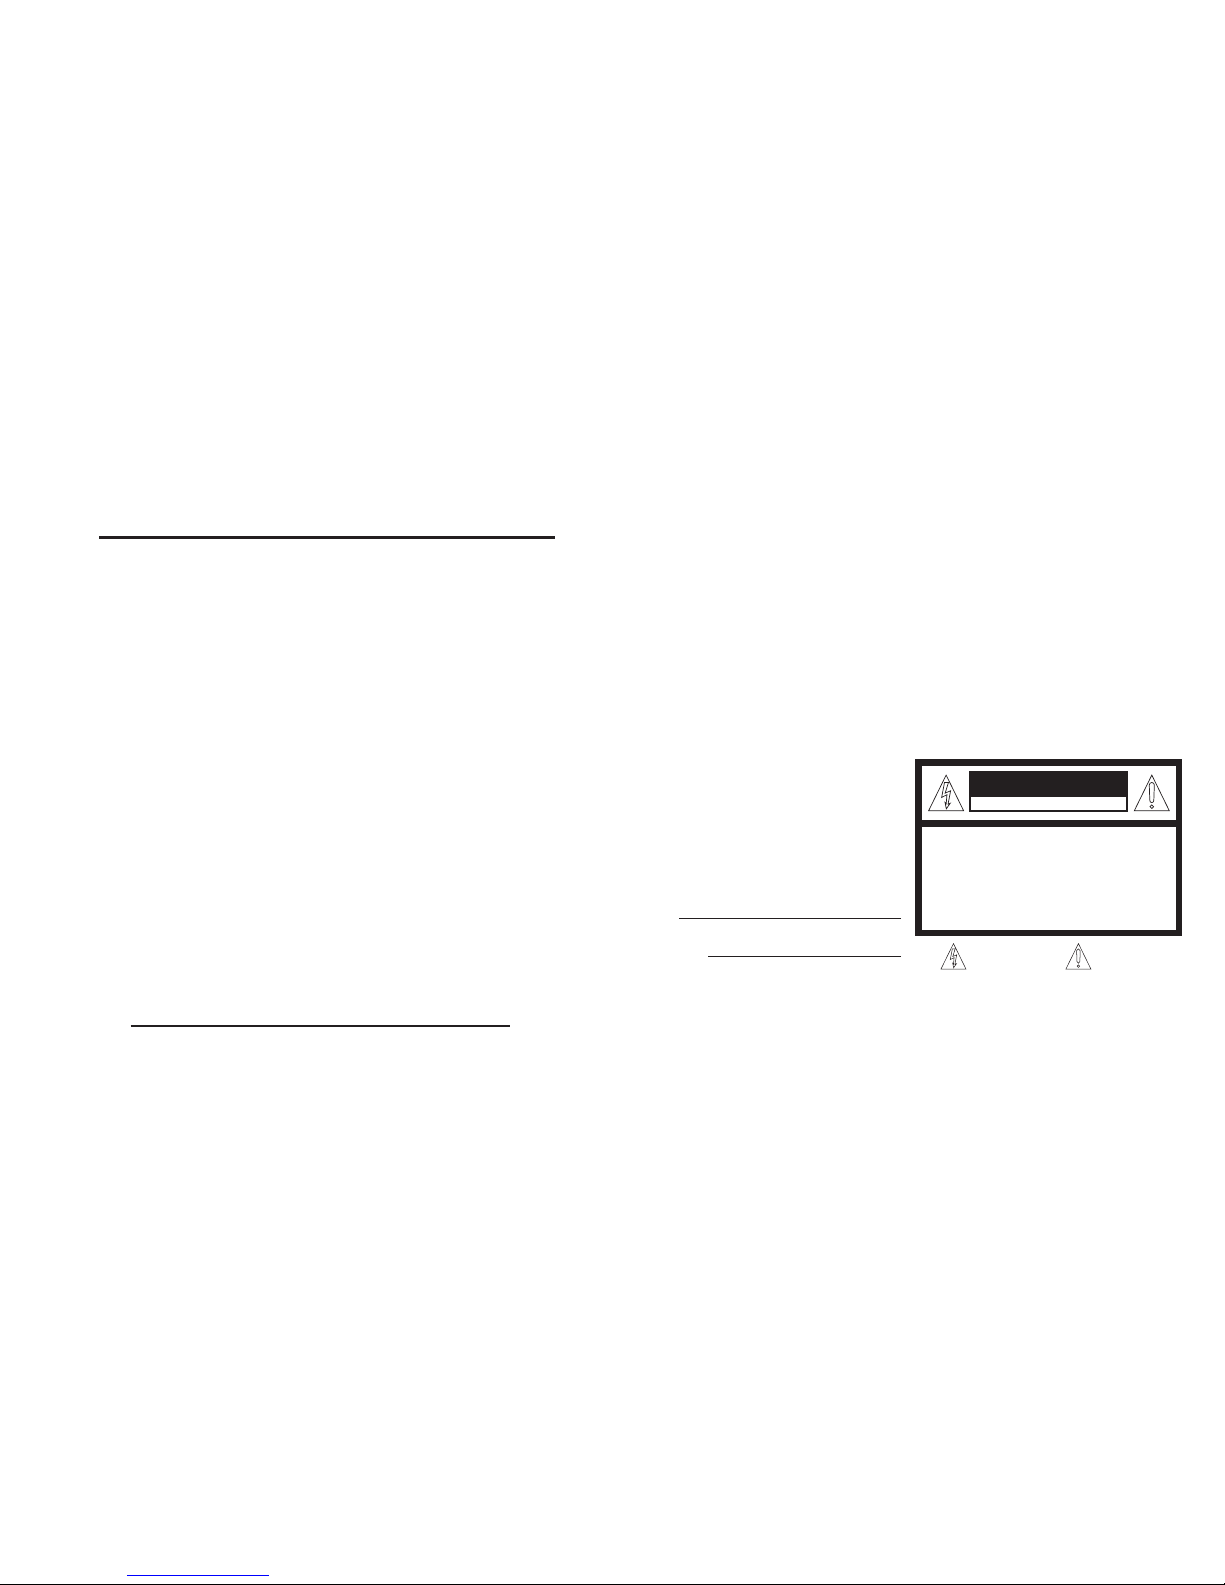
This symbol
alert s you to
important
operating
and service
instructions.
This symbol alerts
you to the risk of re
or electric shock in
the accompanying
message.
TO REDUCE RI SK OF FIRE OR ELECTRI C SHOCK
DO NOT DISA SSEMBLE THE BREWE R
NO USER-SER VICEABLE PARTS I NSIDE
REPAIR SHOUL D BE DONE BY AUTHORIZ ED SERVICE
PERSONNEL ONLY
WARNING
Please have your Model and Date Code
ready when calling for service.
HB
RISK OF FIRE OR E LECTRICAL SHO CK
2
PROGRAMMING YOUR COFFEEMAKER
NOTE: You must set the clock to use the Auto-Start function. Remember to
reset the clock for time changes and power outages.
set clock
auto-start
(
optional
)
1. Plug power cord into standard
electrical outlet.
2. Display will ash for 10 seconds
before setting automatically. (If not
set, 12:00 AM becomes default
time.)
3. Set time using H (hour) and M (minute) buttons.
4. Numbers scroll forward only.
5. Take care to select correct AM/PM
time.
6. Press Clock button again to set
time.
1. Press Auto-Start button. H (hour)
and M (minute) buttons will light
up, time will ash on digital display.
2. Set time using H (hour) and M
(minute) buttons. Numbers scroll
forward only. Stop at desired AutoStart time. Take care to select cor-
rect AM/PM time.
3. When desired time is on the digital
display, press Auto Start button to
activate. It will be set and AutoStart will activate or wait 10 seconds and it will set automatically.
Once activated, Auto-Start button
will illuminate white.
4. Place BUNN coffee lter and coffee
grounds into the Brew Funnel and
slide into the Funnel Guides.
5. Fill coffeemaker with the desired
amount of water and place Carafe
on base of coffeemaker (failure to
follow
steps 4 and 5 may result in prop-
erty damage).
3
NOTE: The Auto-Start function must be activated each time you want to schedule a brew. If the Auto-Start button is not illuminated, the Auto-Start function is
not activated.
NOTE: To check your Auto-Start setting at idle, press the Auto-Start button
twice and the digital display will ash the programmed time. The ashing time
will remain the set time unless you change it. After 10 seconds with no buttons
pushed, the Auto-Start button will illuminate and Auto-Start is set. To cancel,
press Auto Start again.
H
M
auto
start
clock
BREW
HEATING BREWING
H
M
auto
start
clock
BREW
HEATING BREWING
H
M
auto
start
clock
BREW
HEATING BREWING
H
M
auto
start
clock
BREW
HEATING BREWING
H
M
auto
start
clock
BREW
HEATING BREWING
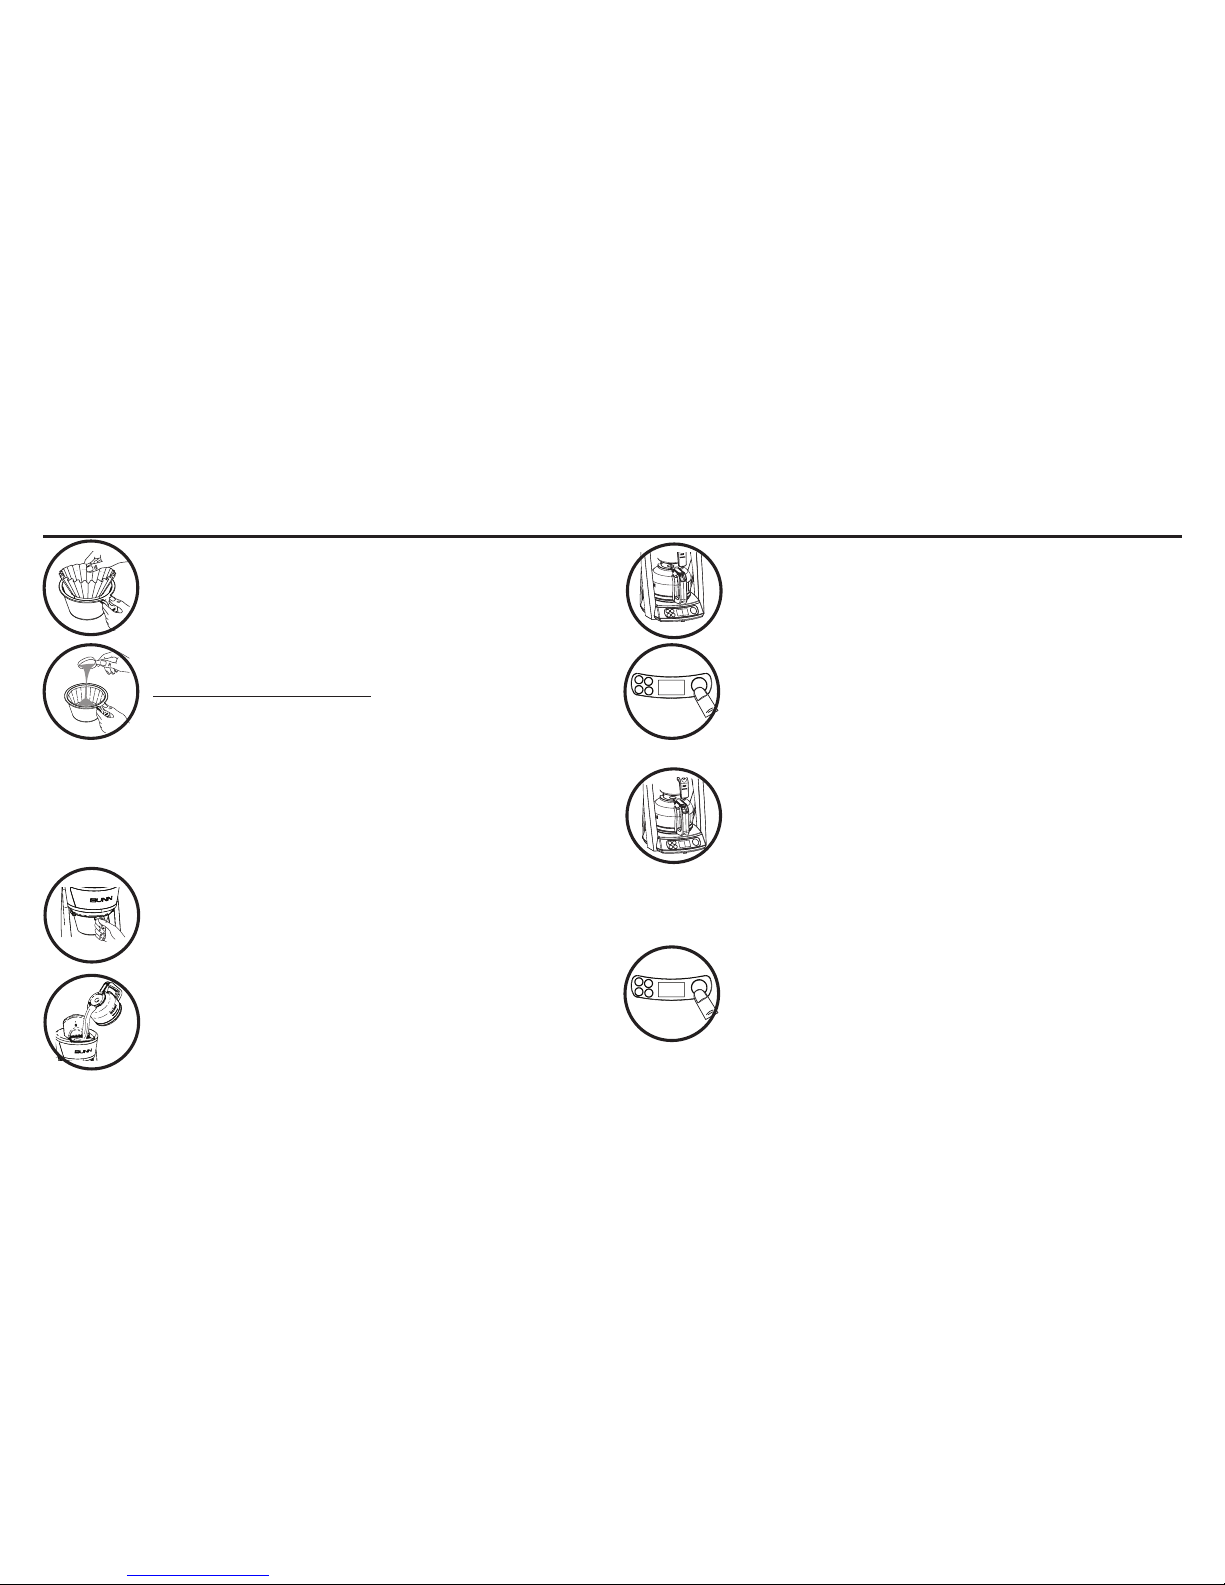
8. Turning the Warmer Plate back ON.
Warmer plate will automatically shut off after 2 hours. Press
& hold Brew Button for 5 seconds to turn back on.
1. Place BUNN coffee lter into the Brew Funnel.
2. Measure fresh coffee into the lter, shaking gently to
level the grounds.
3. Slide Brew Funnel into Funnel Guides.
4. Fill Carafe with water – minimum 4 cups (20oz),
maximum 10 cups (50oz).
Open Flip Lid on top of brewer; pour water into Top Tank.
Close Flip Lid. Do not open lid during heating or brewing.
TIP: Pour in warm or hot water to decrease heating time.
5. Position Drip Free carafe on base under Brew Funnel.
6. Press Brew button to begin (~6 minute) Heating.
Brewer is on when the red light around the Brew Button is
illuminated.
Digital display will read ‘Heating’.
7. Brewing begins immediately after Heating is complete.
Digital display will read ‘Brewing’.
The Warmer Plate will turn on – and will automatically shut
off after 2 hours.
After nal drip out, remove Brew Funnel and discard lter
and grounds. Do not touch hot grounds.
To turn the Warmer Plate off when brewing completes, push
the Brew Button (no red light visible).
HOW TO BREW
4
How to get your Golden Cup
Water Coffee
4 Cups/20 oz 32.5 grams ~4-5 tbsp
6 Cups/30 oz 48.7 grams ~6-7 tbsp
8 Cups/40 oz 64.9 grams ~8-9 tbsp
10 Cups/50 oz 81.3 grams ~10-11 tbsp
GOLDEN RATIO: 1part coffee to 18 parts water
Note: if you are using whole beans, for better precision, weigh
the coffee before it is ground. To more accurately ll the brewer,
make sure the water meets (and not exceeds) the measuring step
in the Top Tank.
bunn accessories
BUNN offers a complete line of accessories including paper lters, glass carafes,
thermal carafes, replacement funnels, and more.
Visit www.bunn.com to order parts and accessories, or call the BU NN Home
Products Team at 1-800-352-2866.
CARE & CLEANING
Wash the brew funnel and glass carafe after each use – both are top rack
dishwasher safe.
Occasionally wipe the outside of your coffeemaker, including the area above the
funnel, with a mild, non-citrus detergent and a damp cloth. While cleaning your
coffeemaker, check the glass carafe handle and tighten with a phillips screwdriver
if it’s loose.
This unique brewing system is sensitive to mineral build-up from the water
you use. Therefore, it is very important
to clean the internal system at least
every 3 months or whenever the digital
displays shows
“CLEAN” after a brew cycle is done. The
higher the mineral content in the water you use, the more often you should
clean. Regular internal system cleaning will prolong the life of your coffeemaker
and help guarantee an optimal brew result.
1. Remove the Sprayhead located
above the Brew Funnel by turning
with your ngertips.
2. Check the Sprayhead. If plugged
with
mineral deposits or white akes,
use a
toothpick to remove. Clean the
Sprayhead with a cloth and mild
detergent. Rinse the Sprayhead
with water.
3. Slide empty Brew Funnel into the
Funnel Guides under the Sprayhead.
4. Open the Flip Lid on top of the
coffeemaker and ll coffeemaker
with equal parts of water and white
vinegar solution (25 oz each).
5. Close the Flip Lid.
6. Place empty Carafe on the base
Warmer Plate of coffeemaker.
7. Let solution set for a few minutes.
8. Press the Brew button to cycle the
vinegar solution through the coffeemaker.
9. Empty carafe at end of cycle.
10. Run 3 or more additional cycles
with full carafes of water to ush
remaining vinegar solution from the
coffeemaker.
11. Reinstall Sprayhead.
12. To reset the “CLEAN” indicator,
press and hold the “H” and “M”
buttons for 5 seconds.
Note: For a stronger clean, 100% white vinegar (50oz) can be used. Press the
Brew button and let the machine heat for 4 minutes. Then press the Brew button
to pause the machine. Let the vinegar soak for 30 minutes. Press the Brew
button to restart the machine and nish brew cycle. Run 3 or more cycles with
full carafes of water to ush remaining vinegar from coffeemaker.
5
 Loading...