

Page 1

35011218 ver.01 1-01
Hard Drive Replacement Procedure
Hard Drive Replacement Procedure
Drive Failures
If one of the TeraStation’s drives fails, the error LED will glow red and the status LED to the right of the
failed drive will blink red. While its status LED is blinking red, the drive may be hot-swapped. It may
be replaced without powering down the TeraStation.
Notes:
Only replace drives with genuine Bualo OP-HD series hard drives of the same size.
Hot-swapping is optional. You may always shut the TeraStation down before swapping drives if
desired.
Hot-swapping is only allowed for a failed drive with a ashing red LED. Before removing a good drive,
shut down the TeraStation.
Error LED
Status LEDs
1 - 4
Replacing a Damaged or Failed Drive
∙ Handle the TeraStation carefully. Don’t drop any parts.
∙ Before removing any drives, touch the metal back of the TeraStation to dissipate any static electricity.
∙ Replace failed drives with new Bualo OP-HD series drives only. Replacement disks may be the same size.
∙ Do not replace a failed drive with a drive that has previously been used in another TeraStation or a computer. If you do, you may lose all data on
your other drives. Use a new OP-HD disk only.
∙ Do not change the order of the hard disks. If two disks are reversed, all data on arrays may be lost.
∙ The boot drive (C:) is mirrored on drives 1 and 2. Do not replace them both at once.
Steps 1 - 7 are to replace a failed drive while the TeraStation is
turned on. If your TeraStation is o, start with step 8 on the other
side of the page.
Launch NAS Navigator2.
1
For a PC, double-click the [BUFFALO NAS Navigator2] icon on the
desktop. For a Mac, click the [NAS Navigator2] icon in the Dock.
4
Remote Desktop
5
Double-click [Bualo Tool].
Click on [RAID Builder].
2
Windows PC
3
Remote Desktop
Windows Storage Server Management will open.*
*It can also be opened by clicking [Start] - [All programs] -
[Administrative Tools] - [Windows Storage Server Management] from the Windows desktop.
For a PC, right-click your
TeraStation’s icon and choose
[Open Remote Desktop].
For a Mac, hold down [control],
click you TeraStation’s icon, and
choose [Open Remote Desktop].
Enter your username and password,then click [OK].
The default password settings are:
User name: Administrator
Password: password
Remote Desktop
Remote Desktop
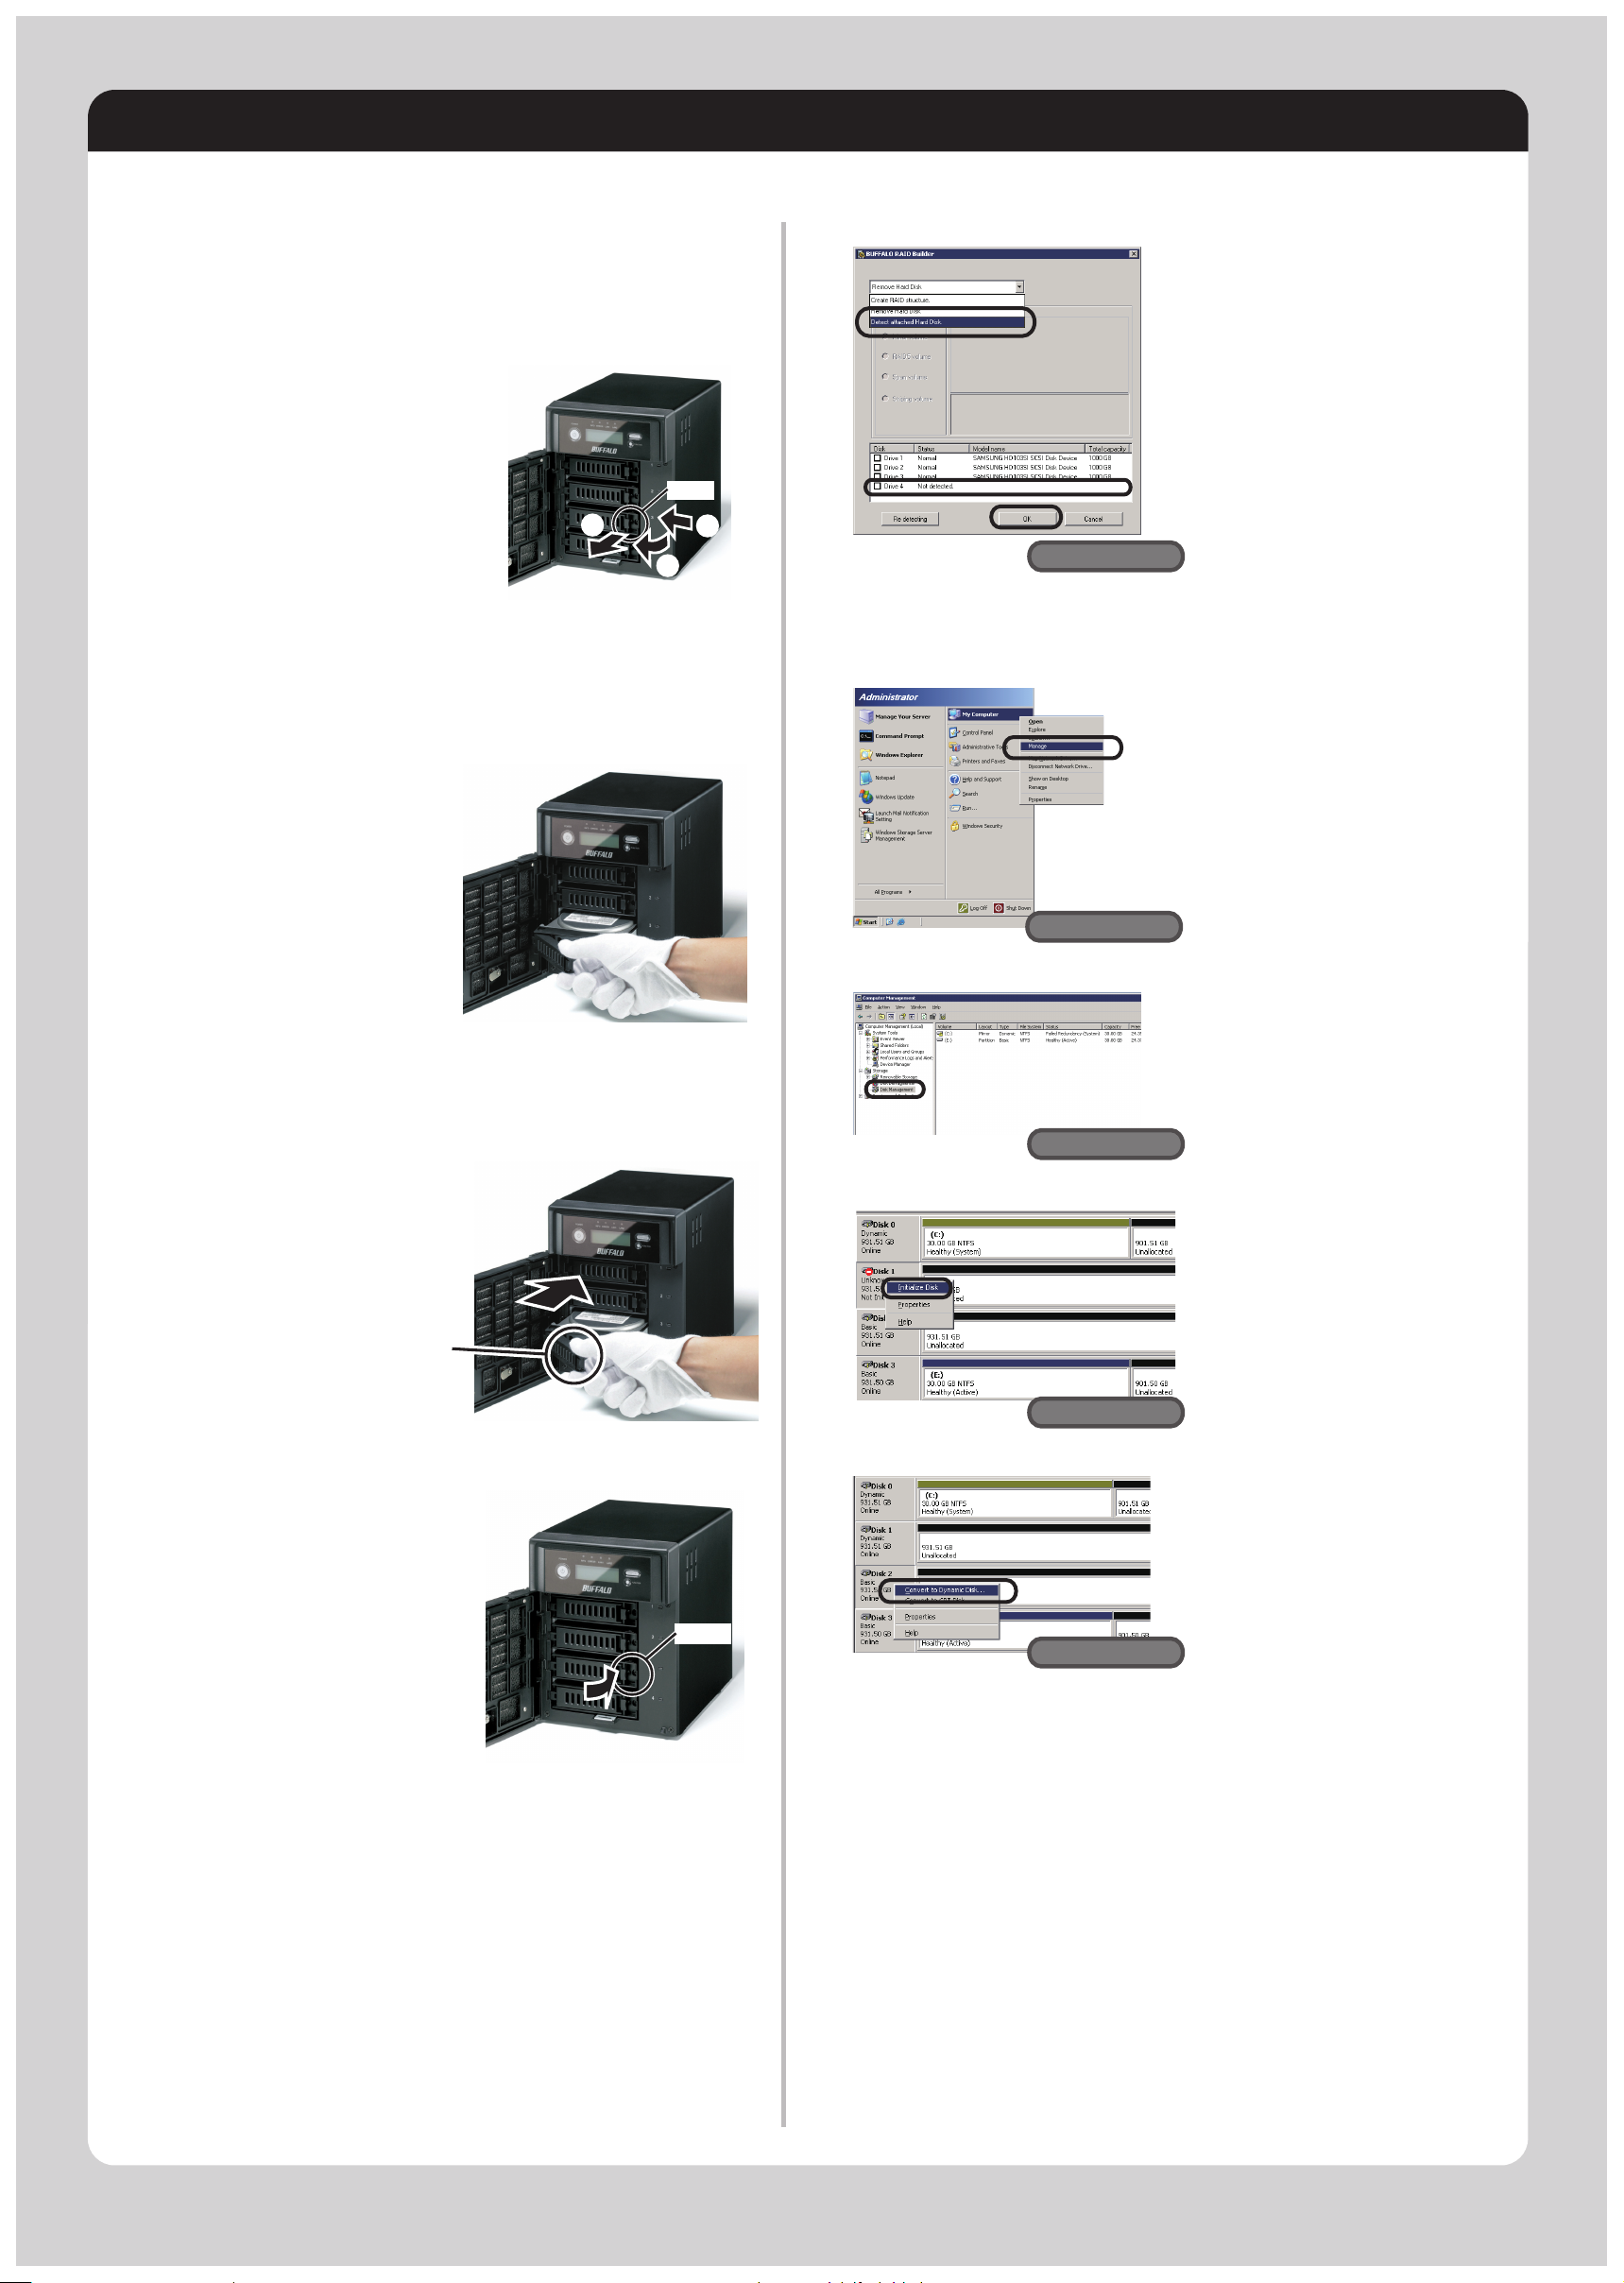
Open the front cover with your key.
6
7
Select [Remove Hard Disk] from
the dropdown menu. Select the
hard disk to remove* and click
[OK].
*The damaged drive’s status
LED blinks red.
Remote Desktop
>> Continued on other side
Page 2
>> Continued from the other side
Replacing a Hard Drive
8
9
10
When “hard disk is removed” is displayed, click [OK]. The
blinking red LED will now glow a solid red.
Squeeze the latch to the left
and then swing the lock out
to the left.
latch
latch
3
3
2
2
Once the lock has swung
out 45°, slide the drive
cartridge out.
15
1
1
When “Hard disk is recognized” is displayed, click [OK].
16
リモー クトップの画面
Remote Desktop
Choose [Detect Attached Hard
Disk].
Select the installed hard disk
and click OK.
Note: Previously recognized
drives are greyed out.
17
Right click on [My Computer] and
select [Manage].
11
Insert the replacement drive
with the lock open.
Insert the drive
with the lock open.
18
19
Remote Desktop
リモートデスクトップの画
Remote Desktop
Remote Desktop
リモー 面
Select [Disk Management].
Right-click on the new drive
and select [Initialize Disk].
Step through the wizard to
initialize the drive.
12
13
14
Press the latch until it clicks.
latch
latch
Close the front cover. If the TeraStation was o, press the
power button to turn it on.
Start the “RAID Builder” as in steps 1-5.
20
21
Right-click on the new drive
and select [Convert to Dynamic
Disk].
You may now congure RAID
arrays with this disk.
Remote Desktop
Create a new volume
Right click on the dynamic disk and select [New Volume]. Step
through the wizard to create a new volume.
To restore a RAID volume (RAID resynchronization)
1 Right-click on the volume labeled “Redundancy Failure”, then
click on [Restore Volume] from the displayed menu.
2 When “Select the disk from the following list” is displayed,
select the new disk and click [OK].
3 Right-click on the volume labeled “Insucient” and select
[Delete Disk].
This completes the procedure of replacing a hard disk.
 Loading...