

Buffalo TeraNavigator none, TS-0.6TGL, TS-1.0TGL, TS-1.6TGL, TS-2.0TGL Quick Setup Manual
...Page 1
Package Contents:
Main Unit (TeraStation)
Ethernet Cable
Power Cable
TeraNavigator Installation CD
Quick Setup Guide (this manual)
Warranty Card
www.buffalotech.com
Quick Setup Guide
TeraStation Pro
v1.2
Page 2
2
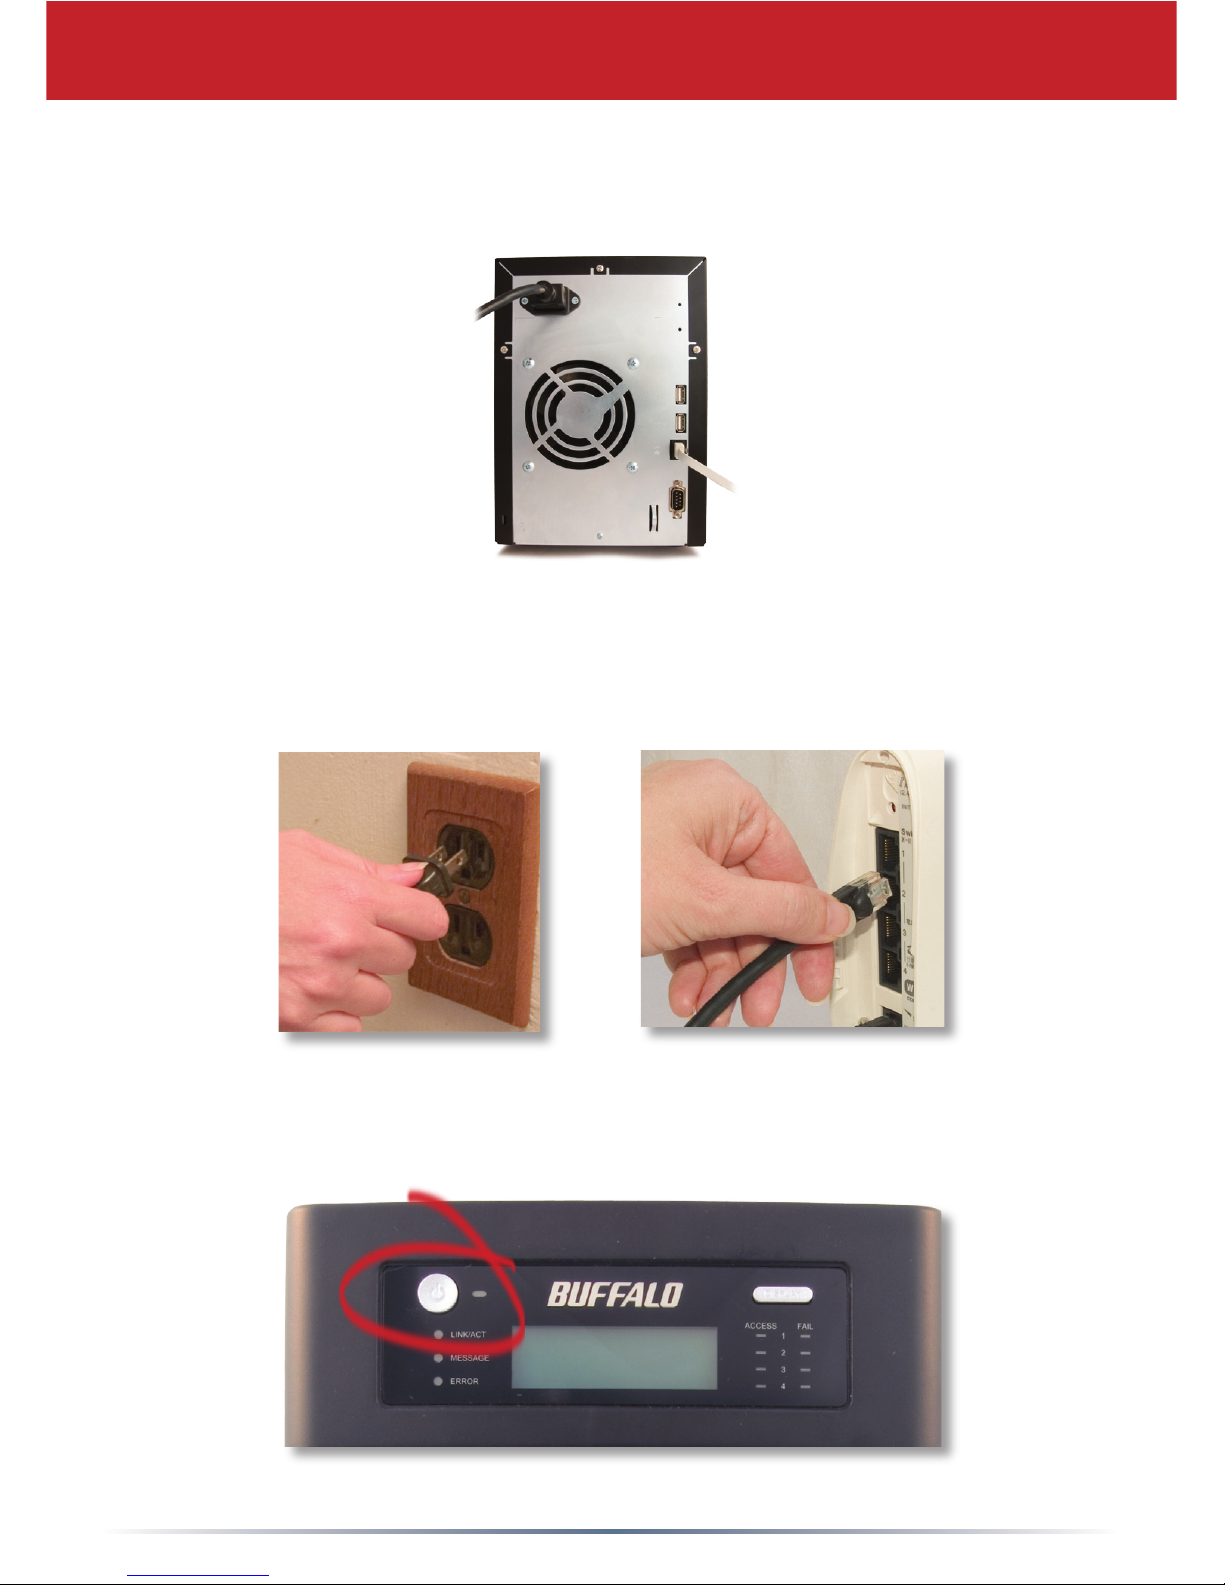
Step 1: Connect your Cables
Plug TeraStation’s power cord and Ethernet cable into the back of
the TeraStation.
Connect the power plug to a power outlet. Plug the other end of
the Ethernet cable into a hub, switch, or router on the network.
Press the power button on the front panel to turn your
TeraStation on.
Page 3

3
Check the LINK/ACT LED on the front of the TeraStation. If it’s
lit, then your TeraStation is connected to your network. Please
turn to
page 4
to continue setup.
If the LINK/ACT LED on the front of TeraStation is
not
lit, your
TeraStation is not properly connected to your network. Make sure
that:
If problems persist, contact our technical support. Refer to page
9 for more details.
• both TeraStation and the hub, switch, or PC are powered on,
• the Ethernet cable is securely fastened to both devices, and
• the Ethernet cable is not damaged. To verify, try using another
Ethernet cable.
Step 2: Check your Connection
Page 4

4
Insert the TeraNavigator
CD into a PC’s CD-ROM
drive. If Setup doesn’t
launch automatically, you
can launch it manually by
clicking Start, then Run....
When the Run dialog
opens, type d:\setup.exe
(where “d” is the drive letter
of the CD-ROM drive).
Press OK to continue.
Each TeraStation on
the network will have a
tab in the client utility.
Make sure that your
Terastation’s tab is
selected, click Setup
from the pull down menu
and choose Browser
Management.
Step 3: Using the Client Utility
TeraNavigator should now
be running.
Press the Install Client
Utility button, and then
press the Start button.
Once the installation
has completed, press the
Launch button.
Page 5

5
This login prompt will appear.
The user name is admin.
The password is password, until you
change it.
Press OK when nished.
You’re now logged in. Bookmark
this page in your browser for
easy future access. For detailed
explanations of each menu and
setting, refer to your TeraStation
manual, available on your
TeraNavigator CD.
Click on the Basic button on the
left side.
Step 4: TeraStation Conguration Utility
Here on the Basic page, begin
by changing the name of your
TeraStation in the TeraStation
Hostname eld. A friendly,
easy-to-remember name
is recommended, such as
“TeraStation”. The name cannot
contain any spaces or special
characters.
Enter a short description of your
TeraStation in the TeraStation
Description eld. You’ll then
see this description in Network
Neighborhood.
Make sure that the date and time are correct in Date and time
setup. To synchronize clock settings with your computer, press Use
Local time.
Press Apply at the bottom of the page when the desired elds are
completed.
Page 6

6
To access your TeraStation’s data, it’s
convenient to map your TeraStation
to a drive letter. Begin by clicking
Start and then Run.... In the dialog
box, type \\TeraStation_Name where
TeraStation_Name is the friendly, easyto-remember name that you entered into
the TeraStation Hostname eld on page 5. Press OK to continue.
TeraStation’s root directory
will appear. You’ll see all
of the congured shared
folders, including share, the
precongured shared folder that
we’re going to map a drive letter
to. From the pull-down menu,
click Tools, and then Map
Network Drive. Note: If you
cannot access the TeraStation,
please disable or recongure your
software rewalls.
Select the drive letter you
want to map share to from the
Drive: list box. In the Folder:
eld, enter
\\TeraStation_Name\share,
where TeraStation_Name is
the friendly, easy-to-remember
name you gave your TeraStation
on page 5. If you set up other
shares on your TeraStation, you
may map them by substituting
their share name for “share” in the Folder: eld. You can also
browse for a shared folder by pressing the Browse button and
searching through the Entire Network and then the Microsoft
Windows Network. Check the Reconnect at logon checkbox to
have Windows connect to your mapped drive every time it starts.
Press Finish.
Step 6: Map a Driveletter to your Share
Page 7

7
Congratulations! Your TeraStation is set up. Please see the
TeraStation User Manual for more help and conguration options.
Note on RAID arrays:
TeraStation uses RAID (“Redundant Array of Independent Disks”)
technology to control the four hard drives in your TeraStation. RAID
may be congured several ways:
RAID Spanning - All four drives are combined into one large drive,
giving the maximum capacity for your TeraStation. RAID Spanning is
efcient, but has no redundancy. If one hard drive fails, all data on
the TeraStation is lost.
RAID 1 (mirroring) - Hard drives (or spanned pairs of hard drives) are
arranged in mirrored pairs. Each half of the pair reads and writes
exactly the same data. This costs you half of the total capacity of your
TeraStation, but provides excellent redundancy. If a hard drive fails,
the mirror set continues to operate, allowing you to work normally.
You may replace the damaged or defective drive at any time, and
normal RAID 1 mirroring will then be automatically restored.
RAID 5 (parity) - All drives in a RAID 5 array reserve part of their
data space for parity information, allowing all data to be recovered
if a single drive fails. The parity information takes up about one
hard drive’s worth of space, so if you set up all four drives in the
TeraStation as a RAID 5 array, your usable capacity will be about
3/4 of the total capacity of the TeraStation. RAID 5 is an excellent
compromise between efciency and security. If a single drive fails,
no data is lost. After the damaged or defective drive is replaced, your
TeraStation will automatically restore all data on the new drive and
resume normal RAID 5 operation. This is how your TeraStation is set
up out of the box.
Out of the box, your TeraStation is congured with RAID 5. This
means that you’ll only be able to use about 3/4 of the total capacity
of your TeraStation, but your data will be much safer than it would
be without fault tolerance. If you wish to use a different type of RAID,
instructions for changing your RAID settings are in the TeraStation
manual, available on your TeraNavigator CD.
It is important to replace broken drives as soon as possible, as the
TeraStation may not be fault tolerant after a drive fails.
Page 8

8
Technical Support
Buffalo Technology offers free technical support. See the back
page of this quick start guide for contact information. Please also
visit the web site at http://www.buffalotech.com.
FCC Warning
This device complies with part 15 of the FCC Rules. Operation
is subject to the following two conditions: (1) This device may
not cause harmful interference, and (2) this device must accept
any interference received, including interference that may cause
undesired operation.
Technical Specications
LAN Standards: IEEE 802.3u 100BASE-TX; IEEE 802.3 10BASE-T
Transmission: 1000/100Mbps/10 Mbps, 1000BASE-T: 8B1Q4,
PAM5, X 4B/5B, MLT-3; 10BASE-T Manchester Coding
Access Media: CSMA/CD
Media Interface: RJ-45
USB Standard: USB 2.0
Hi-Speed (HS)
Full-Speed (FS)
Low-Speed (LS)
USB Connector: USB A Connector (2)
Data Transmission Speed: Max: 480 Mbps (HS Mode)
Max: 12 Mbps (FS Mode)
Electric Current: 120V A/C
Power Consumption: ~17W (Varies based on size)
Dimensions: 6.7“ x 9.3“ x 12.2“ (170 x 235 x 310 mm.)
Weight: ~15.8 LB. (Weight varies based on size)
Operating Temperature: 32-95˚ F; 20-80% non-condensing
Page 9

USA/Canada Technical Support is available 24 hours a day, 7 days a week
Toll-Free: 866-752-6210
email: info@buffalotech.com
Europe Technical Support is available between 9am-6pm (Monday-Thursday) (GMT)
and 9am-4:30pm on Fridays.
email: helpdesk@buffalo-technology.ie
©2005, Buffalo Technology (USA), Inc.
http://www.buffalotech.com
 Loading...