

Buffalo NFinity WLI-UC-G300HP, NFinity WLI-UC-G300HP-V1 User Manual
User Manual
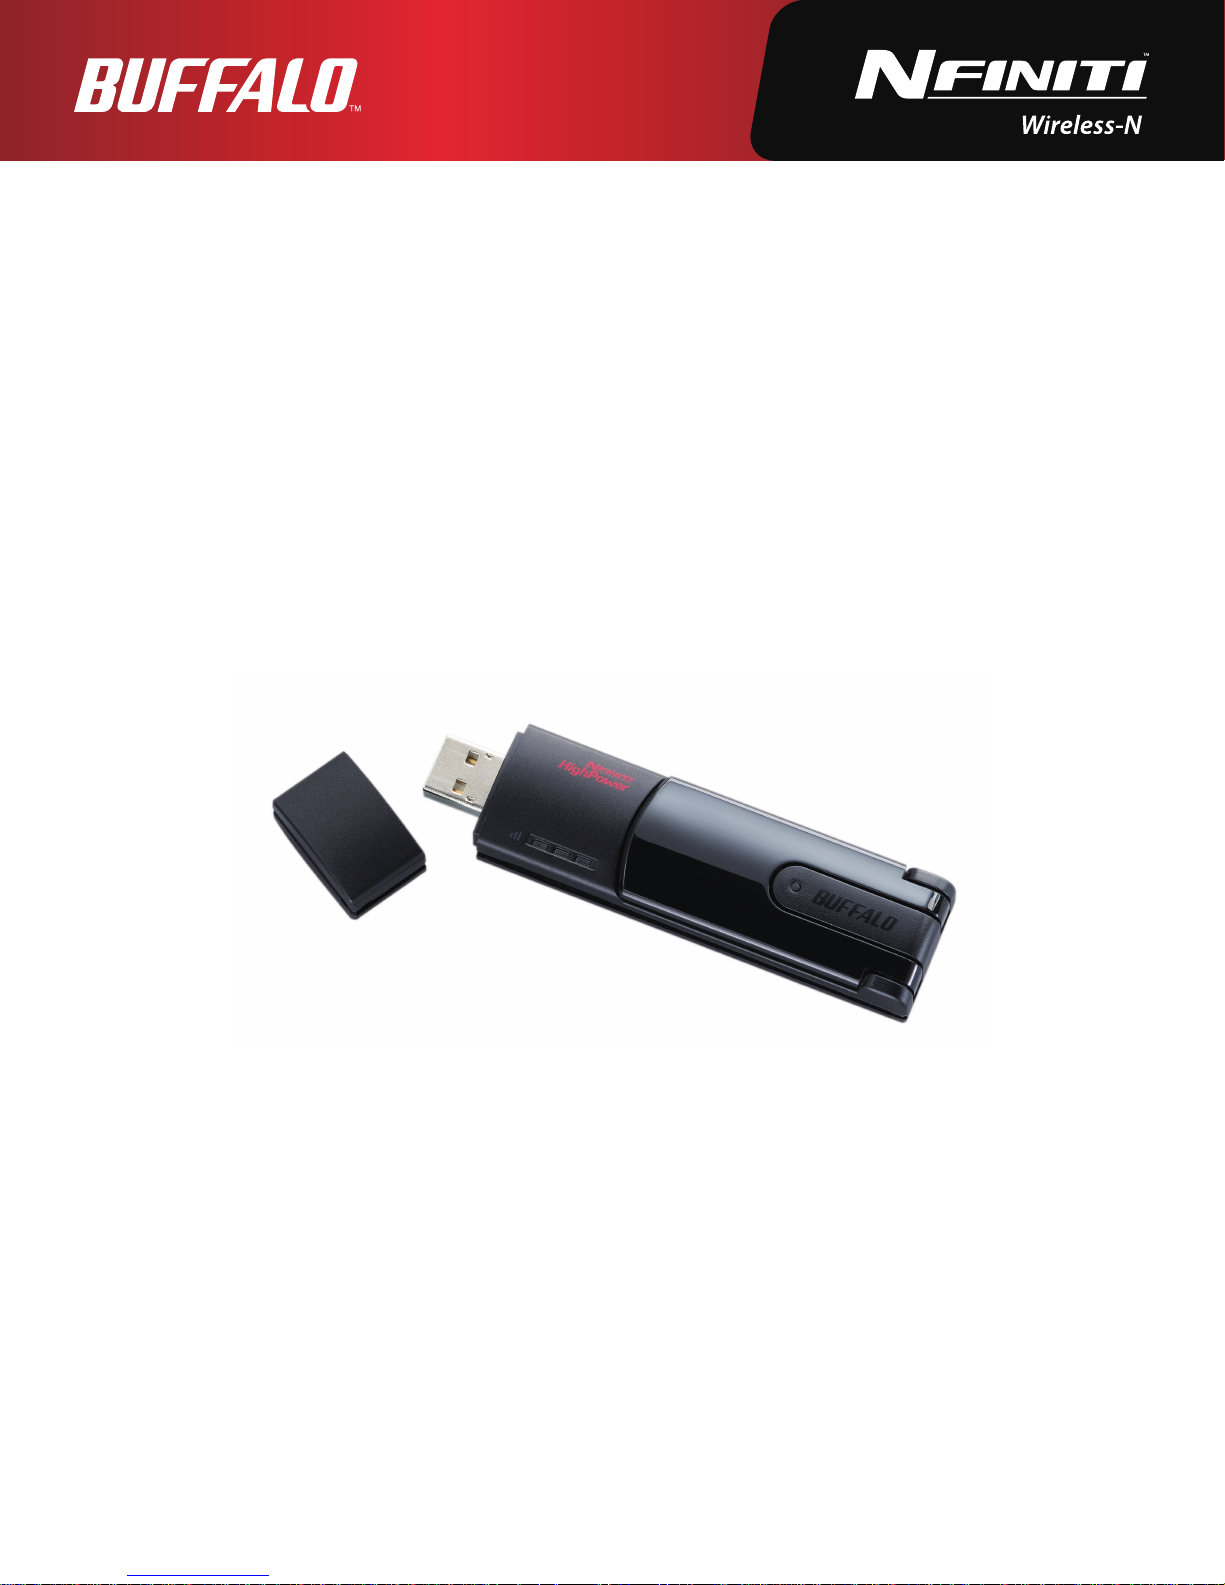
Wireless N High Power USB Adapter
WLI-UC-G300HP / WLI-UC-G300HP-V1
www.buffalotech.com
35010989 ver.02

Contents
Chapter 1 - Product Overview .........................................4
Features .................................................................................. 4
300 Mbps High Speed Mode ................................................... 4
System Requirements ............................................................. 5
Package Contents ................................................................... 5
Hardware Overview ................................................................. 5
Chapter 2 - Installation ..................................................... 6
Installing Wireless Drivers ....................................................... 6
Installing Utility ........................................................................ 10
Chapter 3 - Connect to a Wireless Network ................... 13
Automatic Secure Setup (AOSS/WPS) ................................... 13
Windows 7/Vista (Client Manager V) ............................................. 14
Windows XP/2000 (Client Manager 3) ........................................... 15
Automatic Secure Setup with WPS (PIN Method) .................. 16
Windows 7/Vista (Client Manager V) ............................................. 16
Windows XP (Client Manager 3) .................................................... 20
Manual Setup (Client Manager) .............................................. 22
Windows 7/Vista (Client Manager V) ............................................. 22
Windows XP/2000 (Client Manager 3) ........................................... 25
Windows Vista (WLAN AutoCong) ............................................... 27
Windows XP (Wireless Zero Conguration) ................................... 30
WLI-UC-G300HP / WLI-UC-G300HP-V1 User Manual 1

Chapter 4 - Client Manager .............................................. 31
Software Overview .................................................................. 31
Using Client Manager V for Windows 7/Vista ......................... 31
Opening and Closing Client Manager ............................................ 31
Main Screen ................................................................................... 32
Automatic Secure Setup and Advanced Setup .............................. 33
SSID / WPS-PIN selection ............................................................. 34
Searching Wireless Access Points ................................................. 35
Wireless Network Information ........................................................ 36
WPS-PBC / AOSS selection .......................................................... 37
Wireless Status .............................................................................. 38
Wireless LAN Diagnostic ............................................................... 40
Prole List ...................................................................................... 41
Wireless Properties ........................................................................ 42
Network Properties ........................................................................ 43
Browser Properties ........................................................................ 44
Printer Properties ........................................................................... 45
Using Client Manager 3 with Windows XP / 2000 ................... 46
Status ............................................................................................. 47
Scan ............................................................................................... 49
Connect .......................................................................................... 50
Proles ........................................................................................... 51
Prole Information (Basic) .............................................................. 52
Prole Information (Network) ......................................................... 54
Prole Information (Browser) ......................................................... 55
Prole Information (Printers) .......................................................... 56
System Tray Menu ......................................................................... 57
Option Menu .................................................................................. 58
WLI-UC-G300HP / WLI-UC-G300HP-V1 User Manual 2

Chapter 5 - Troubleshooting ............................................60
The computer does not recognize the wireless adapter.......... 60
Cannot connect to the Network wirelessly. ............................. 60
You forgot the AP's SSID, Encryption key, or password. ........ 60
The link speed is slower than 300 Mbps (Maximum link speed is
only 144 Mbps). ....................................................................... 61
Other Tips ................................................................................ 61
Appendix .....................................................................64
300 Mbps Mode settings ......................................................... 64
Specications .......................................................................... 65
Removing the device from the computer ................................ 66
Windows 7, Vista, and Windows XP .............................................. 66
Windows 2000 ............................................................................... 66
Uninstalling the Software ........................................................ 66
Uninstalling the Drivers ........................................................... 66
TCP/IP Settings in Windows ................................................... 67
Windows 7 ..................................................................................... 67
Windows Vista ............................................................................... 68
Windows XP ................................................................................... 69
Antenna ................................................................................... 70
FCC / CE / R&TTE Information ............................................... 71
Environmental Information ...................................................... 77
Warranty .................................................................................. 78
WLI-UC-G300HP / WLI-UC-G300HP-V1 User Manual 3

Chapter 1 - Product Overview
Features
With support for current Wireless-N, Wireless-G, and Wireless-B standards, the AirStation can transfer
data to and from all standard 2.4 GHz wireless network devices.
AOSS (AirStation One-touch Secure System) and WPA (Wi-Fi Protected Setup) make connection with
wireless devices easier.
The AirStation supports the following types of encryption:
• WPA-PSK (TKIP/AES)
• WPA2-PSK (TKIP/AES)
• WEP (128/64 bit)
The movable antenna can be adjusted for the best signal strength.
The LED display shows wireless signal strength.
300 Mbps High Speed Mode
300 Mbps is the link speed when using 2 channel Wireless-N mode. It represents actual wireless
data speeds, including overhead. Because the overhead is not available for user data transfer, usable
wireless throughput will be substantially slower.
WLI-UC-G300HP / WLI-UC-G300HP-V1 User Manual 4
Chapter 1 Product Overview
System Requirements
Computer should be IBM/PC compatible (OADG specication) with a USB 2.0 port and a CD-ROM drive.
This product does not support computers equipped with dual processors (computers with two
physical CPUs). Computers with dual-core CPU's are supported.
The AirStation does not support standby mode in Windows Vista.
Compatible Operating Systems: Windows 7 (32 bit and 64 bit), Vista (32 bit), XP (32 bit), 2000
Windows XP requires Service Pack 2 or later.
Windows 2000 requires Service Pack 4 and Internet Explorer 5.5 or later.
*
Package Contents
The following items are included with your AirStation. If any of the items are missing, please contact
your vender.
• WLI-UC-G300HP ........................................................................................................................... 1
• USB cable ........................................................................................................................................ 1
• Air Navigator CD ........................................................................................................................... 1
• Quick Setup Guide....................................................................................................................... 1
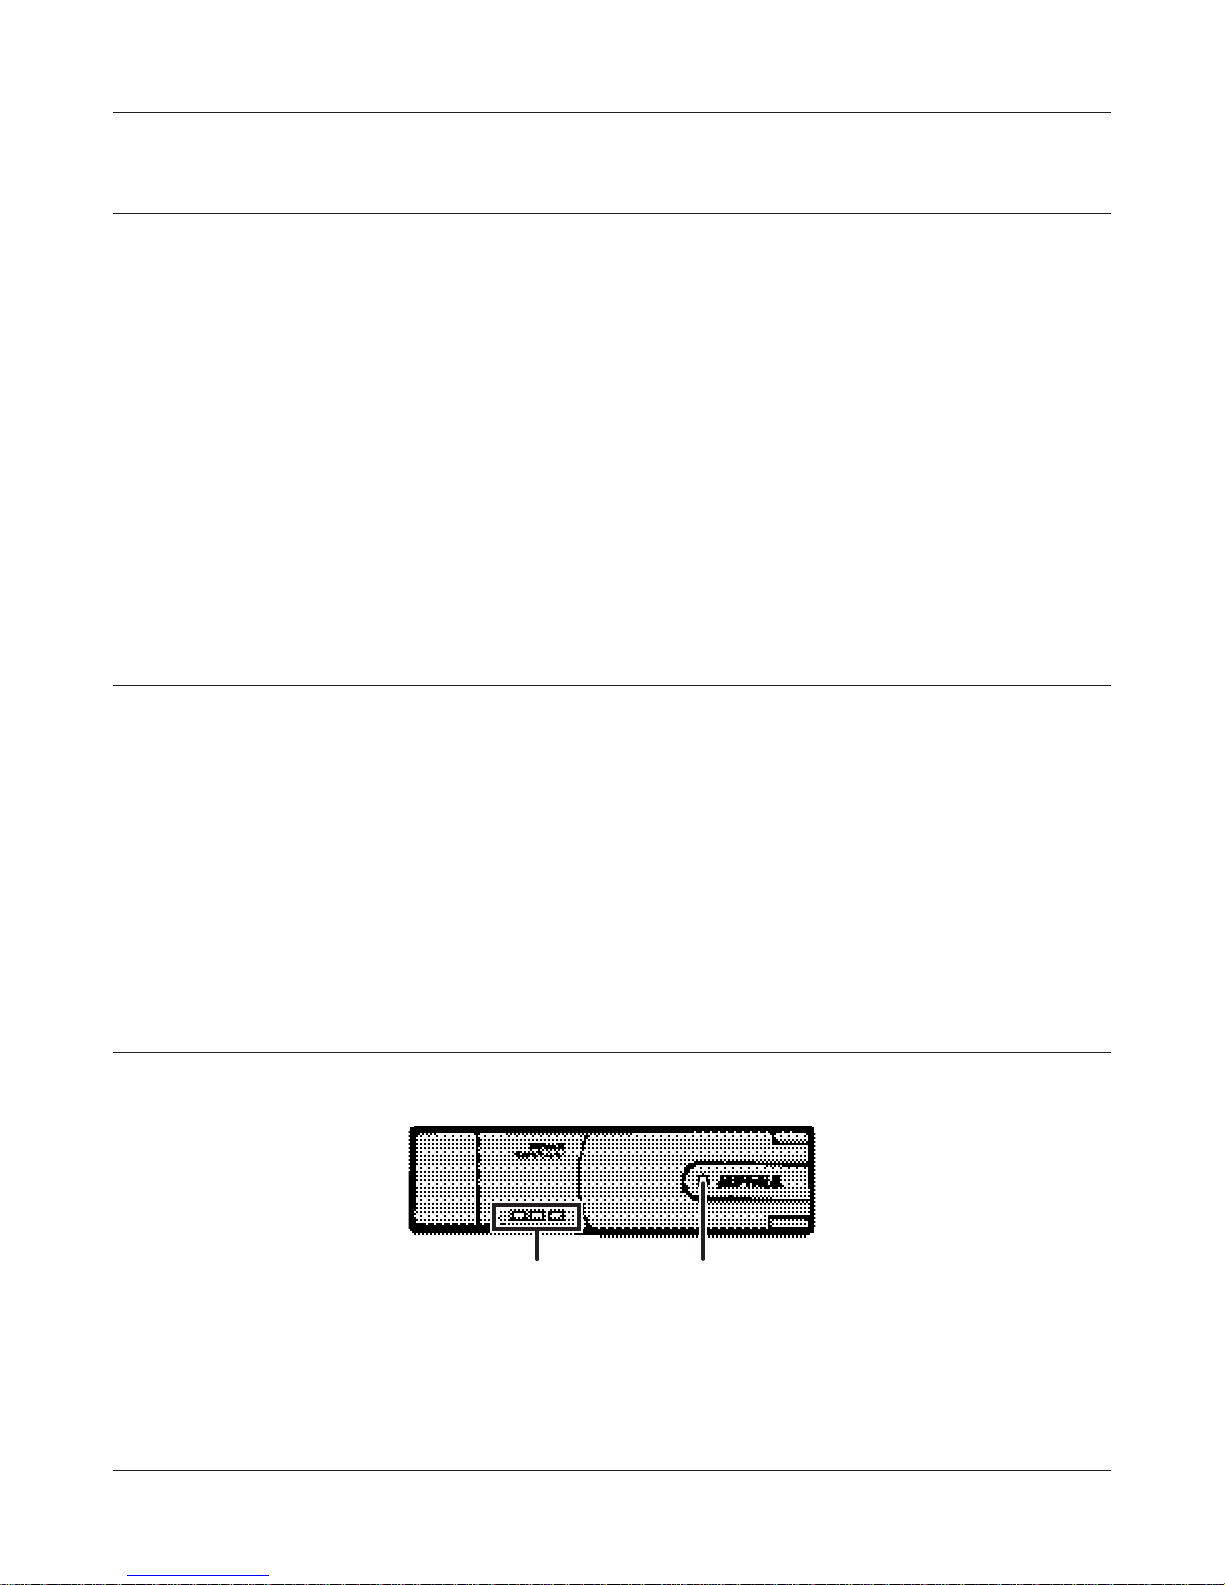
Hardware Overview
1 2
Signal LED (Green) One to three LEDs light up to show the strength of the wireless signal.
1
ACT LED (Blue) Flashes when sending/receiving data.
2
WLI-UC-G300HP / WLI-UC-G300HP-V1 User Manual 5
Chapter 2 - Installation
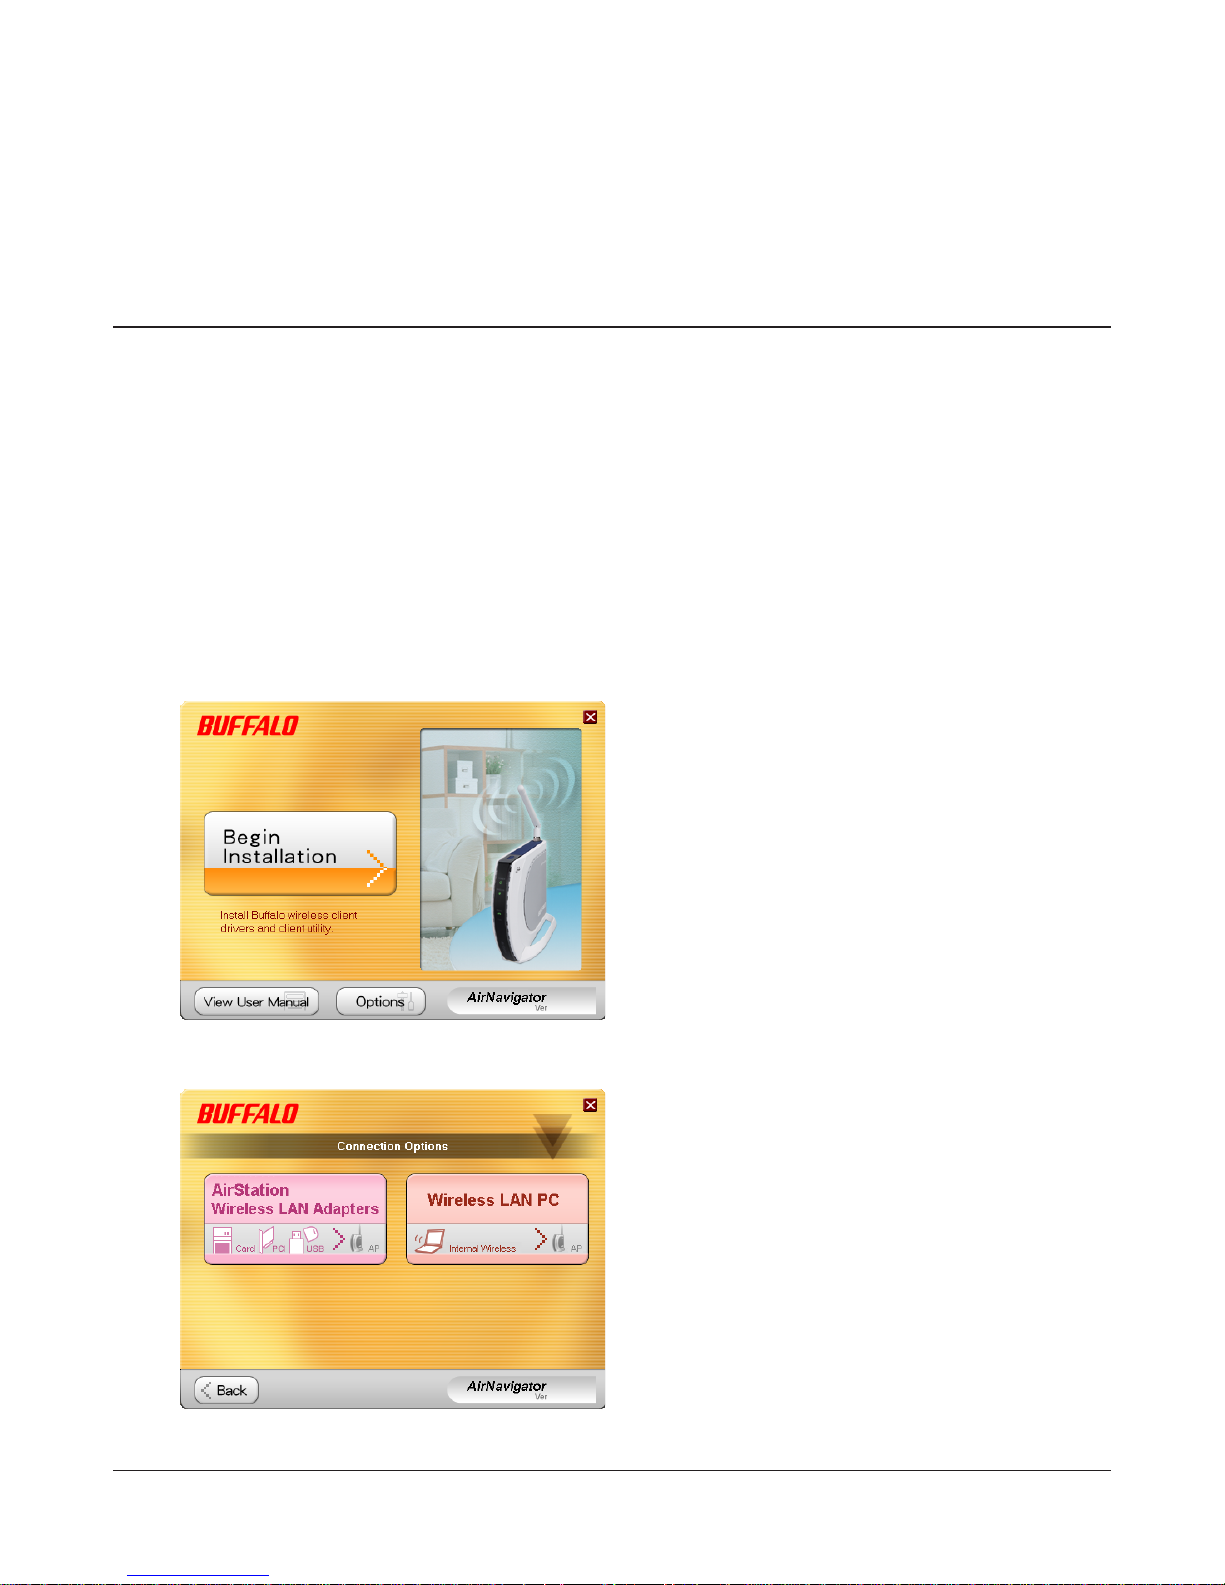
Installing Wireless Drivers
Follow the instructions below to install drivers. Do not connect the unit to your computer yet.
1
2
Boot your computer and insert the AirNavigator CD. The AirNavigator Setup Wizard will
launch automatically.
Note: If the AirNavigator Setup Wizard doesn’t launch, double-click [My Computer] > CD-ROM drive icon >
[AirNavi.exe] to launch manually.
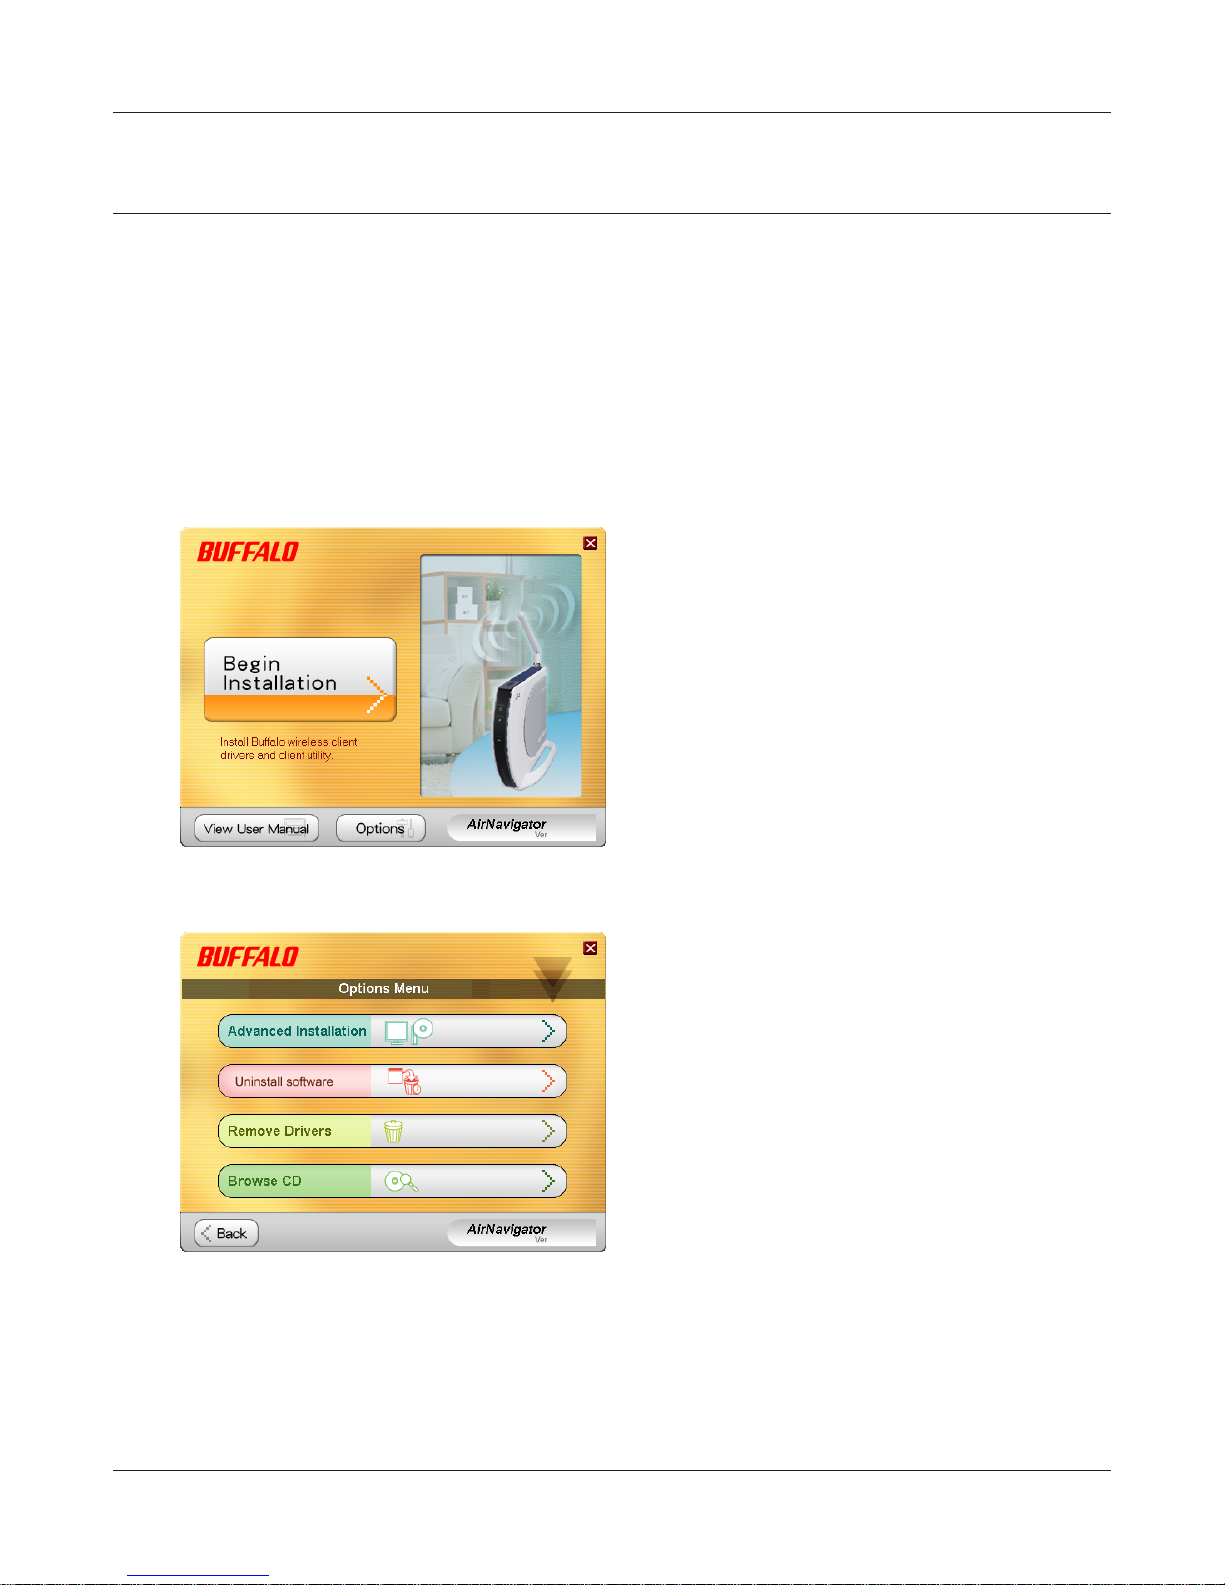
Click [Begin Installation].
3
WLI-UC-G300HP / WLI-UC-G300HP-V1 User Manual 6
Click [AirStation Wireless LAN Adapters].
Chapter 2 Installation
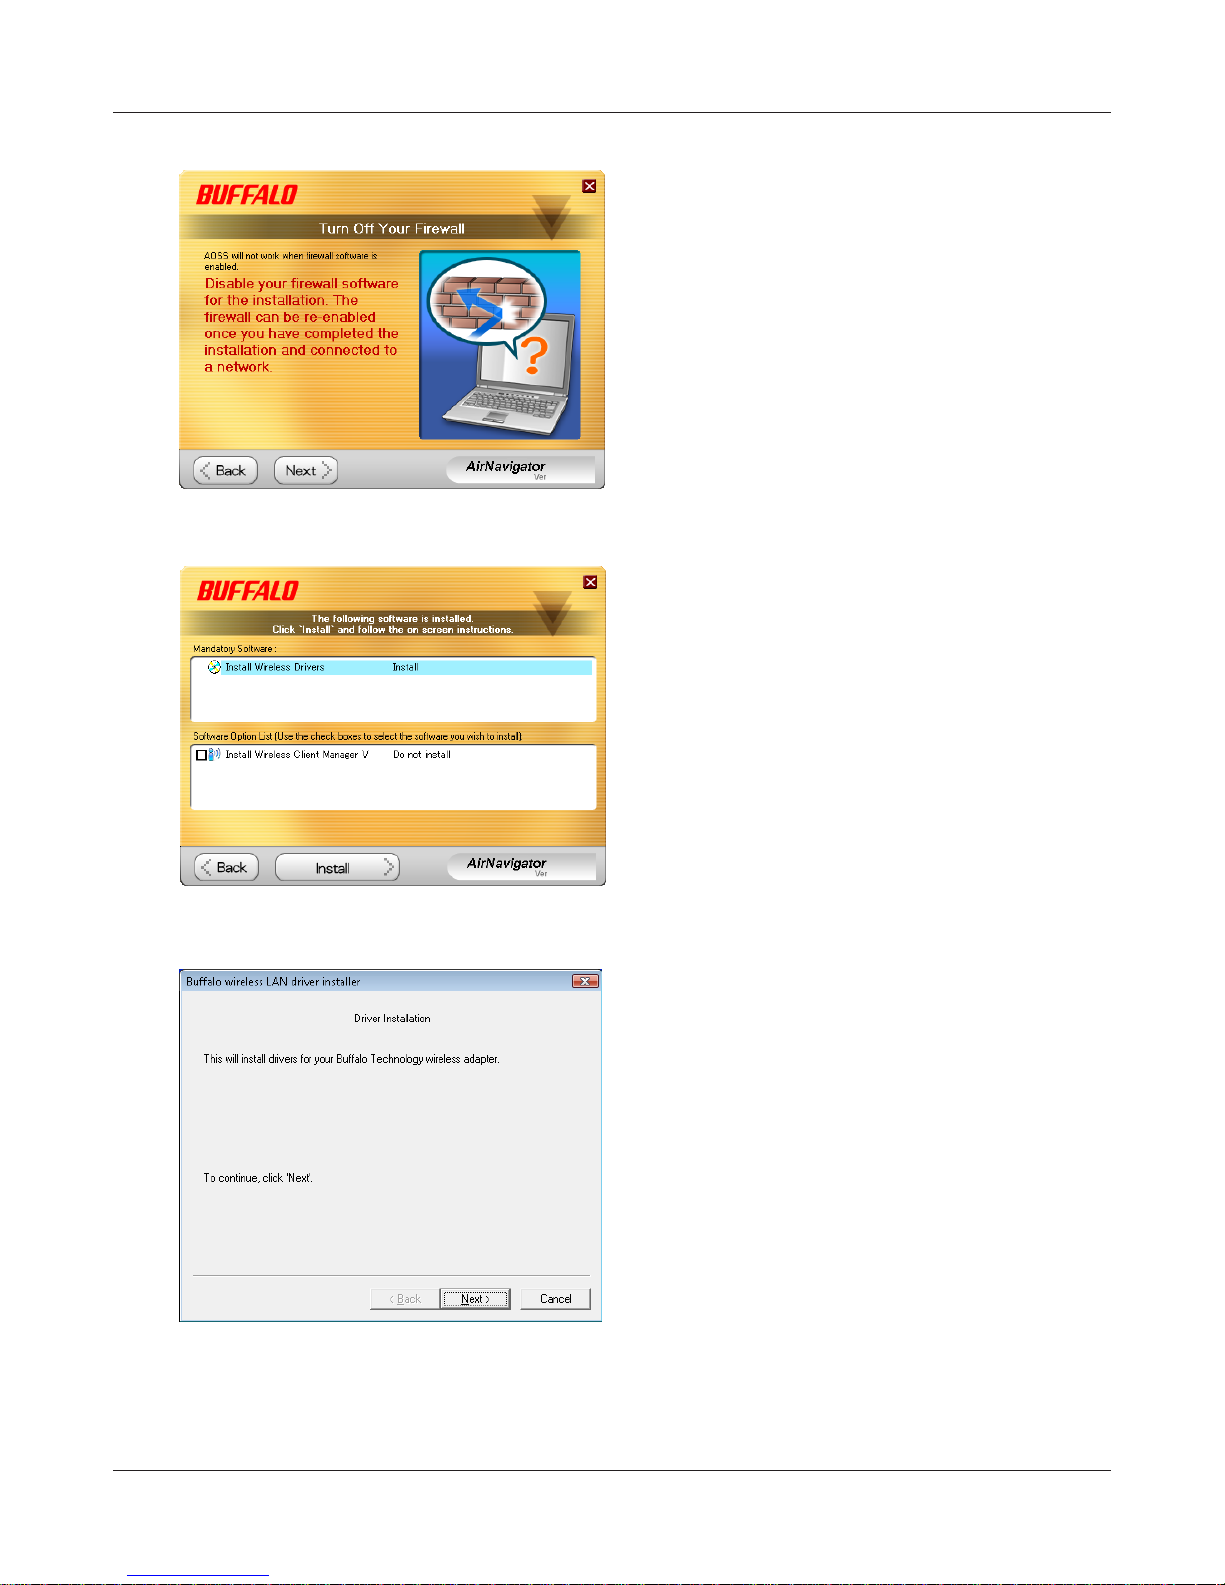
4
5
Disable any rewalls, then click [Next].
Click [Install].
Notes: To install Client Manager, check the box in
the lower window.
To install Client Manager at a later time, refer
to the instructions on page 10.
6
WLI-UC-G300HP / WLI-UC-G300HP-V1 User Manual 7
Click [Next].
Chapter 2 Installation
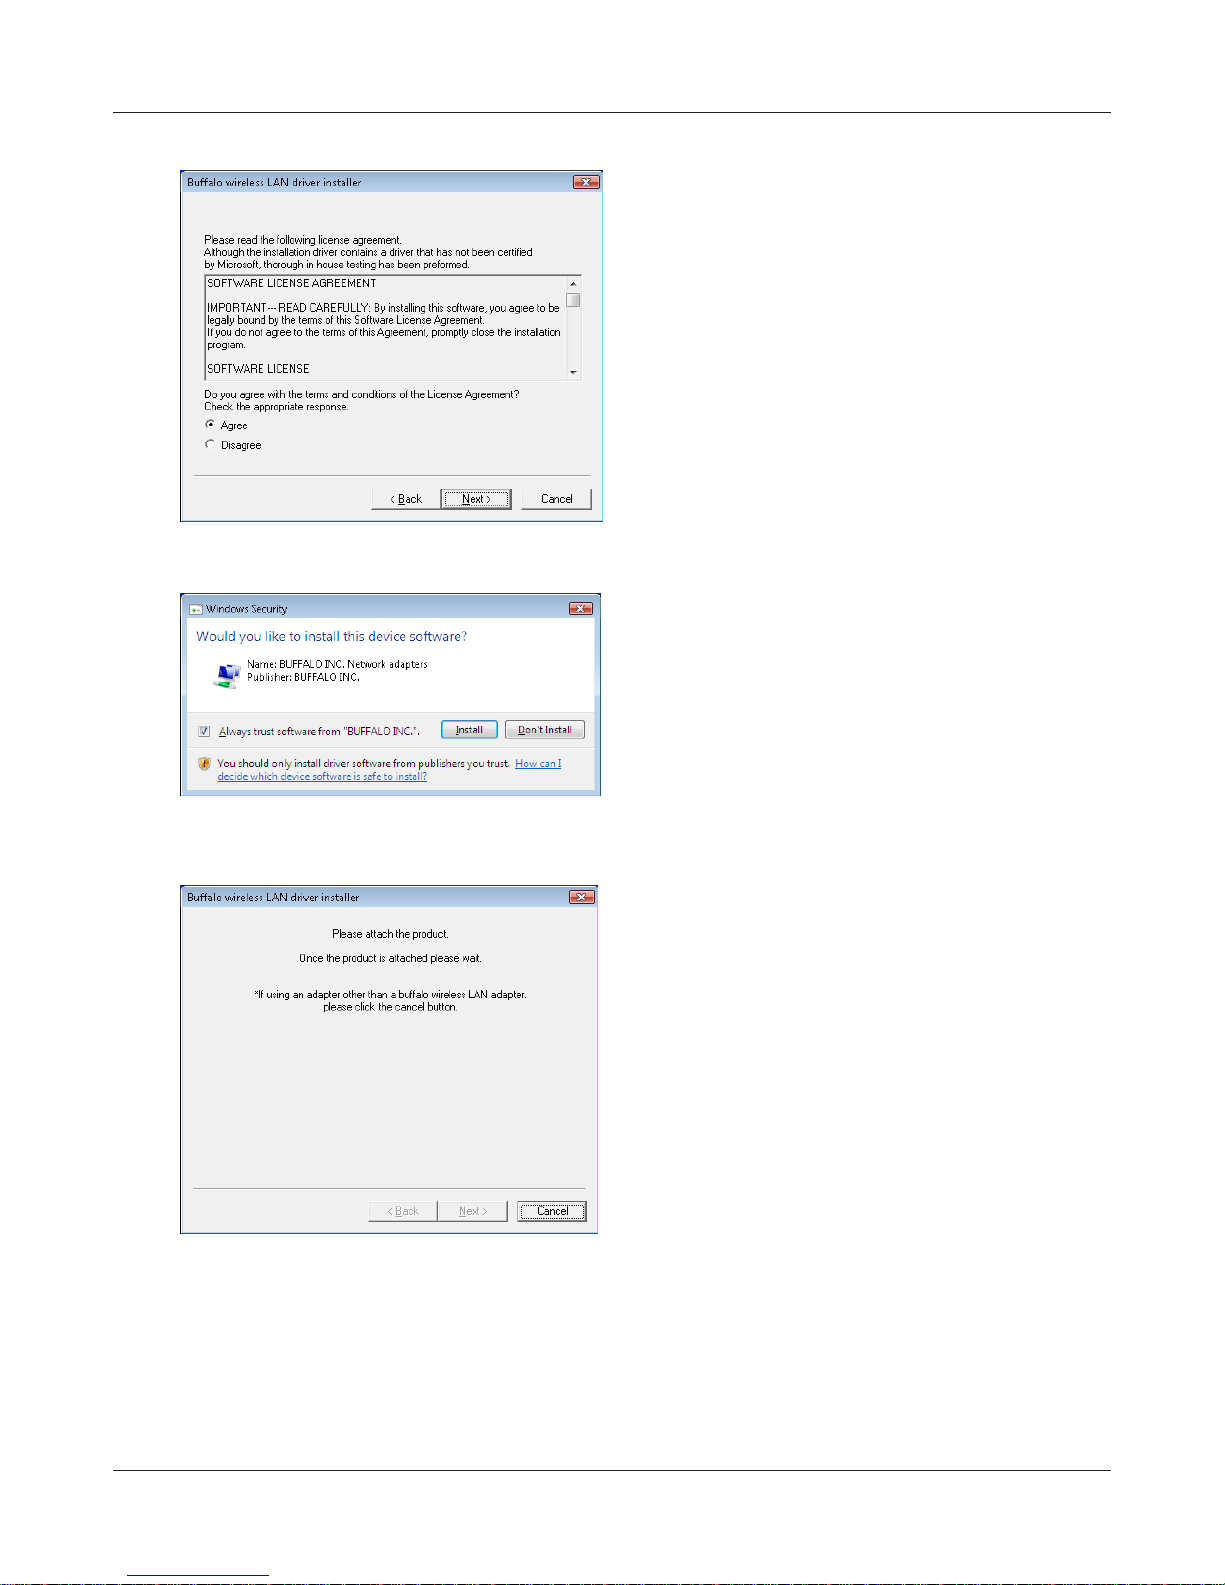
7
8
Read the license agreement, select [Agree],
then click [Next].
When the screen to the left is displayed, put
a check mark next to “Always trust software
from BUFFALO INC.", and click [Install].
9
When the screen to the left is displayed, attach
the AirStation to your computer. Drivers will
be installed automatically.
WLI-UC-G300HP / WLI-UC-G300HP-V1 User Manual 8

Chapter 2 Installation
10
11
Click [OK].
After the drivers are installed, the screen at
left will be displayed. Click [Finish].
Note: If you checked the box to Install Wireless Client
Manager (page 8), then the installation screen
for Client Manager will be displayed after this
screen. Follow the instructions on the screen to
install Client Manager.
Drivers are now installed.
WLI-UC-G300HP / WLI-UC-G300HP-V1 User Manual 9
Chapter 2 Installation
Installing Utility
Follow the procedure below to install Client Manager.
1
2
Boot your computer and insert the AirNavigator CD. The AirNavigator Setup Wizard will
launch automatically.
Note: If the AirNavigator Setup Wizard doesn’t open, double-click [My Computer] > CD-ROM drive icon >
[AirNavi.exe] to launch it manually.
Click [Options].
3
WLI-UC-G300HP / WLI-UC-G300HP-V1 User Manual 10
Click [Advanced Installation].

Chapter 2 Installation
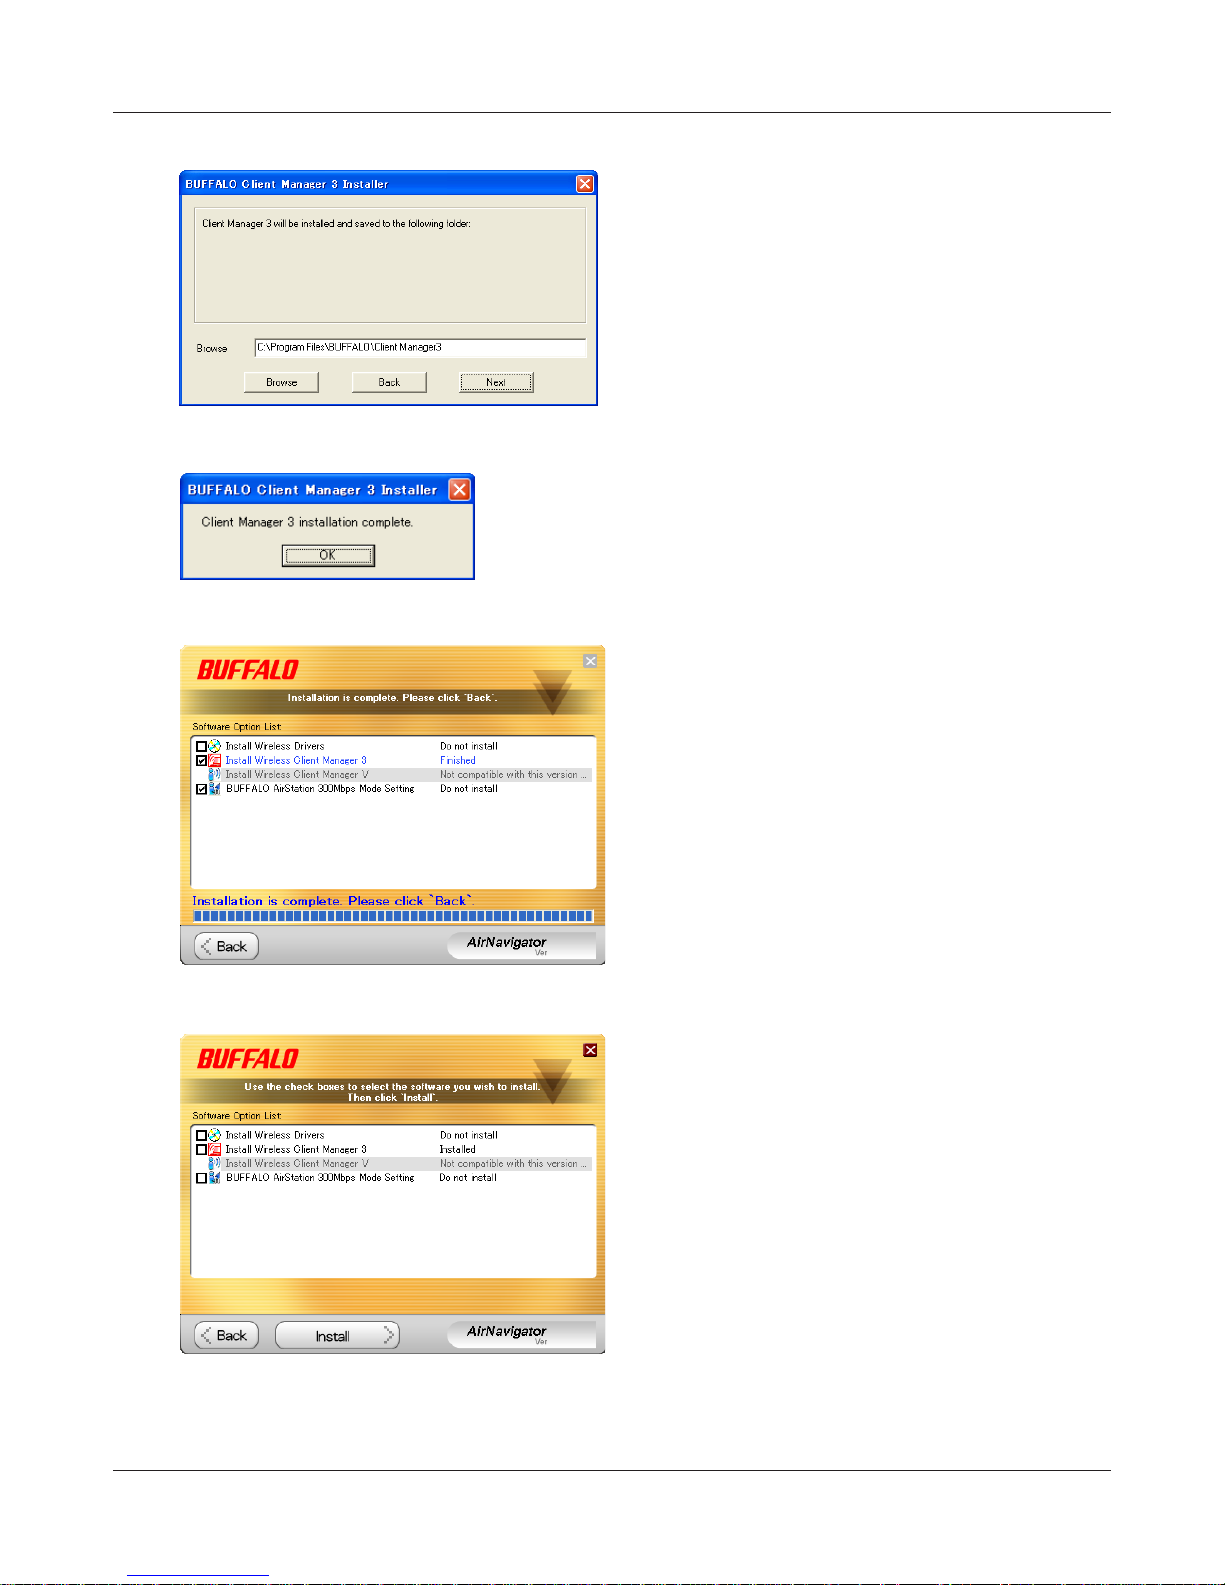
4
5
Check the box for [Install Wireless Client
Manager] and click [Install].
Note: Use Client Manager V with Windows Vista or
Client Manager 3 with Windows XP or 2000.
Click [Next].
6
WLI-UC-G300HP / WLI-UC-G300HP-V1 User Manual 11
Read the license agreement and select [Agree].
Chapter 2 Installation
7
8
9
Click [Next].
Click [OK].
Click [Back].
10
Client Manager is now installed.
WLI-UC-G300HP / WLI-UC-G300HP-V1 User Manual 12
Click [X] at the top right corner of the window
to close it.
Chapter 3 - Connect to a Wireless Network
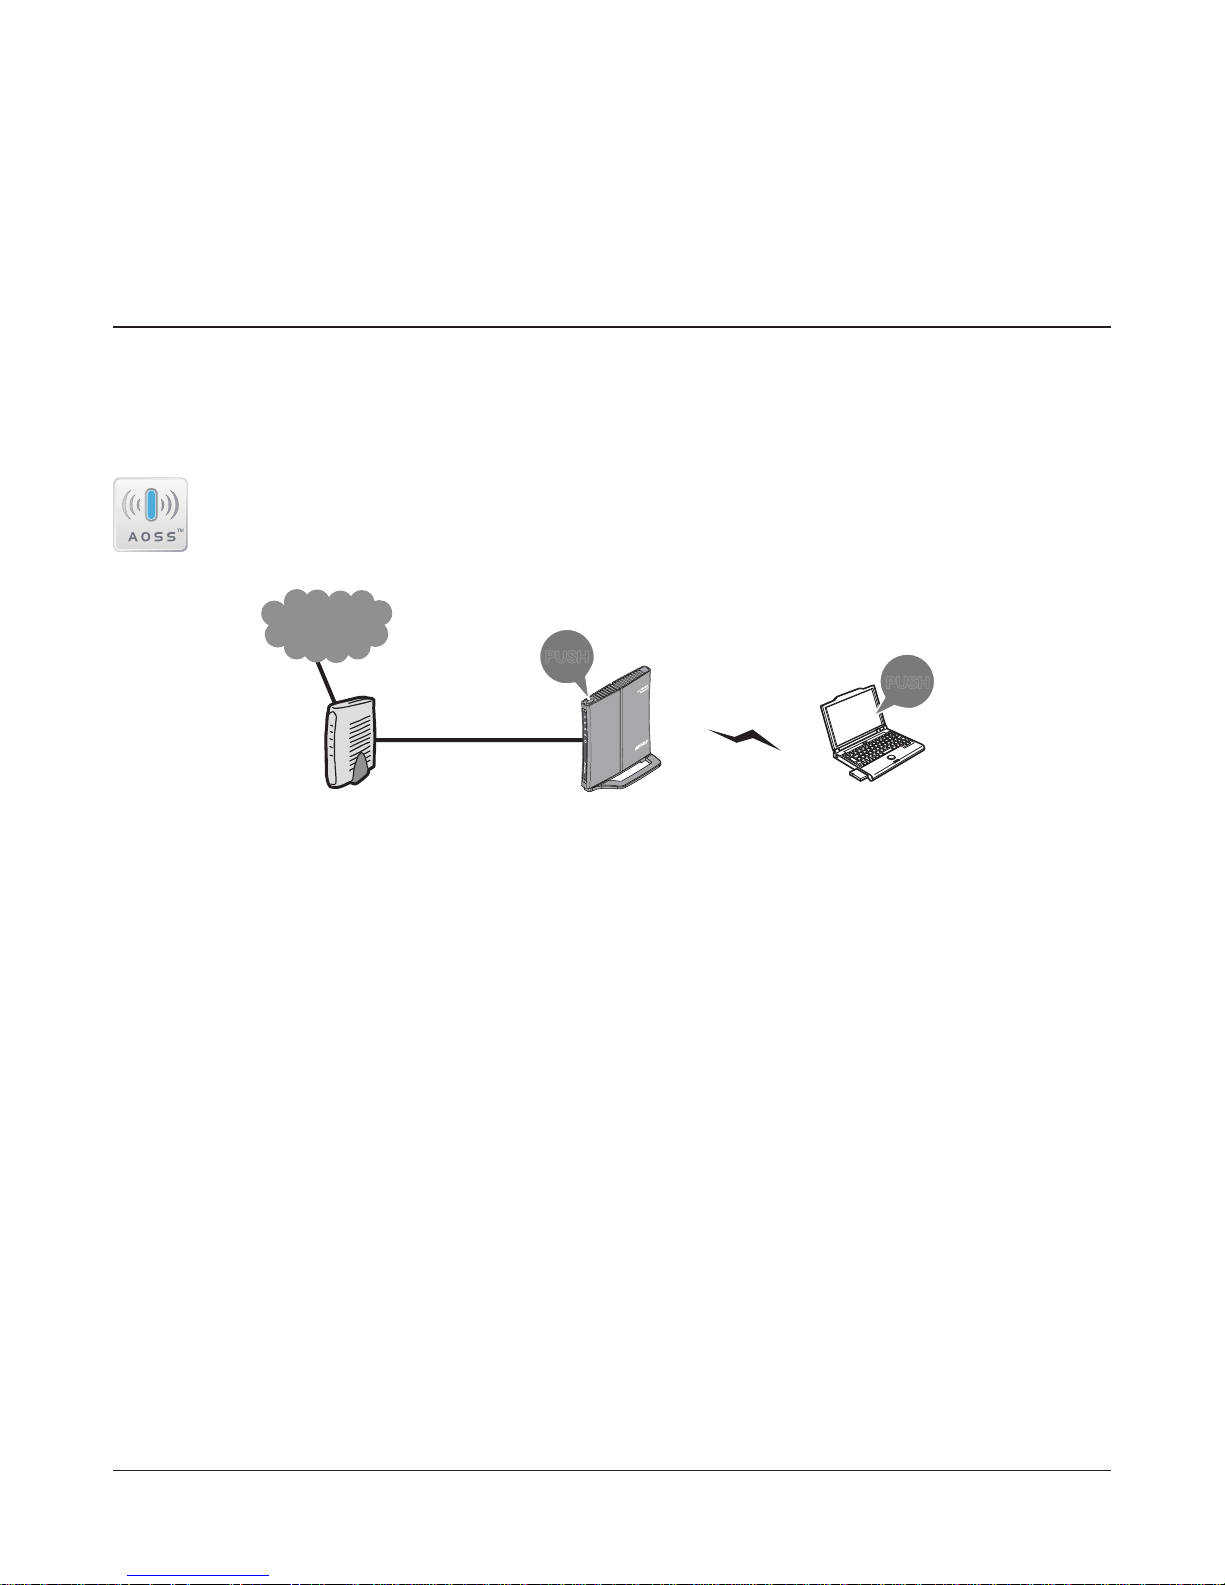
Automatic Secure Setup (AOSS/WPS)
AOSS and WPS are systems for automatically conguring wireless LAN settings. Just pressing the
buttons will connect wireless devices and complete security settings. Utilize this system to connect to
wireless devices, computers, or game machines which support AOSS or WPS.
AOSS (AirStation One-Touch Secure System) is technology developed by BUFFALO. WPS was
created by the Wi-Fi Alliance.
Internet
őŖŔʼn
őŖŔʼn
РПЧЕТ
УЕГХТЙФЩ
ЧЕЙТЕМЕУУ
ТПХФЕТ
ÄÉÁÇ
Modem
AirStation PC or
Game console
(AOSS Devices)
Before using AOSS or WPS, rst install Client Manager from the CD. See page 10 for instructions.
Note: In addition to the push-button method, WPS also supports automatic conguration using a
PIN. Turn to page 16 for instructions on using WPS with a PIN>
WLI-UC-G300HP / WLI-UC-G300HP-V1 User Manual 13
Chapter 3 Connect to a Wireless Network
Windows 7/Vista (Client Manager V)
If you are using Windows 7 or Vista, use the included Client Manager V software to connect wirelessly
with AOSS or WPS.
1
2
3
4
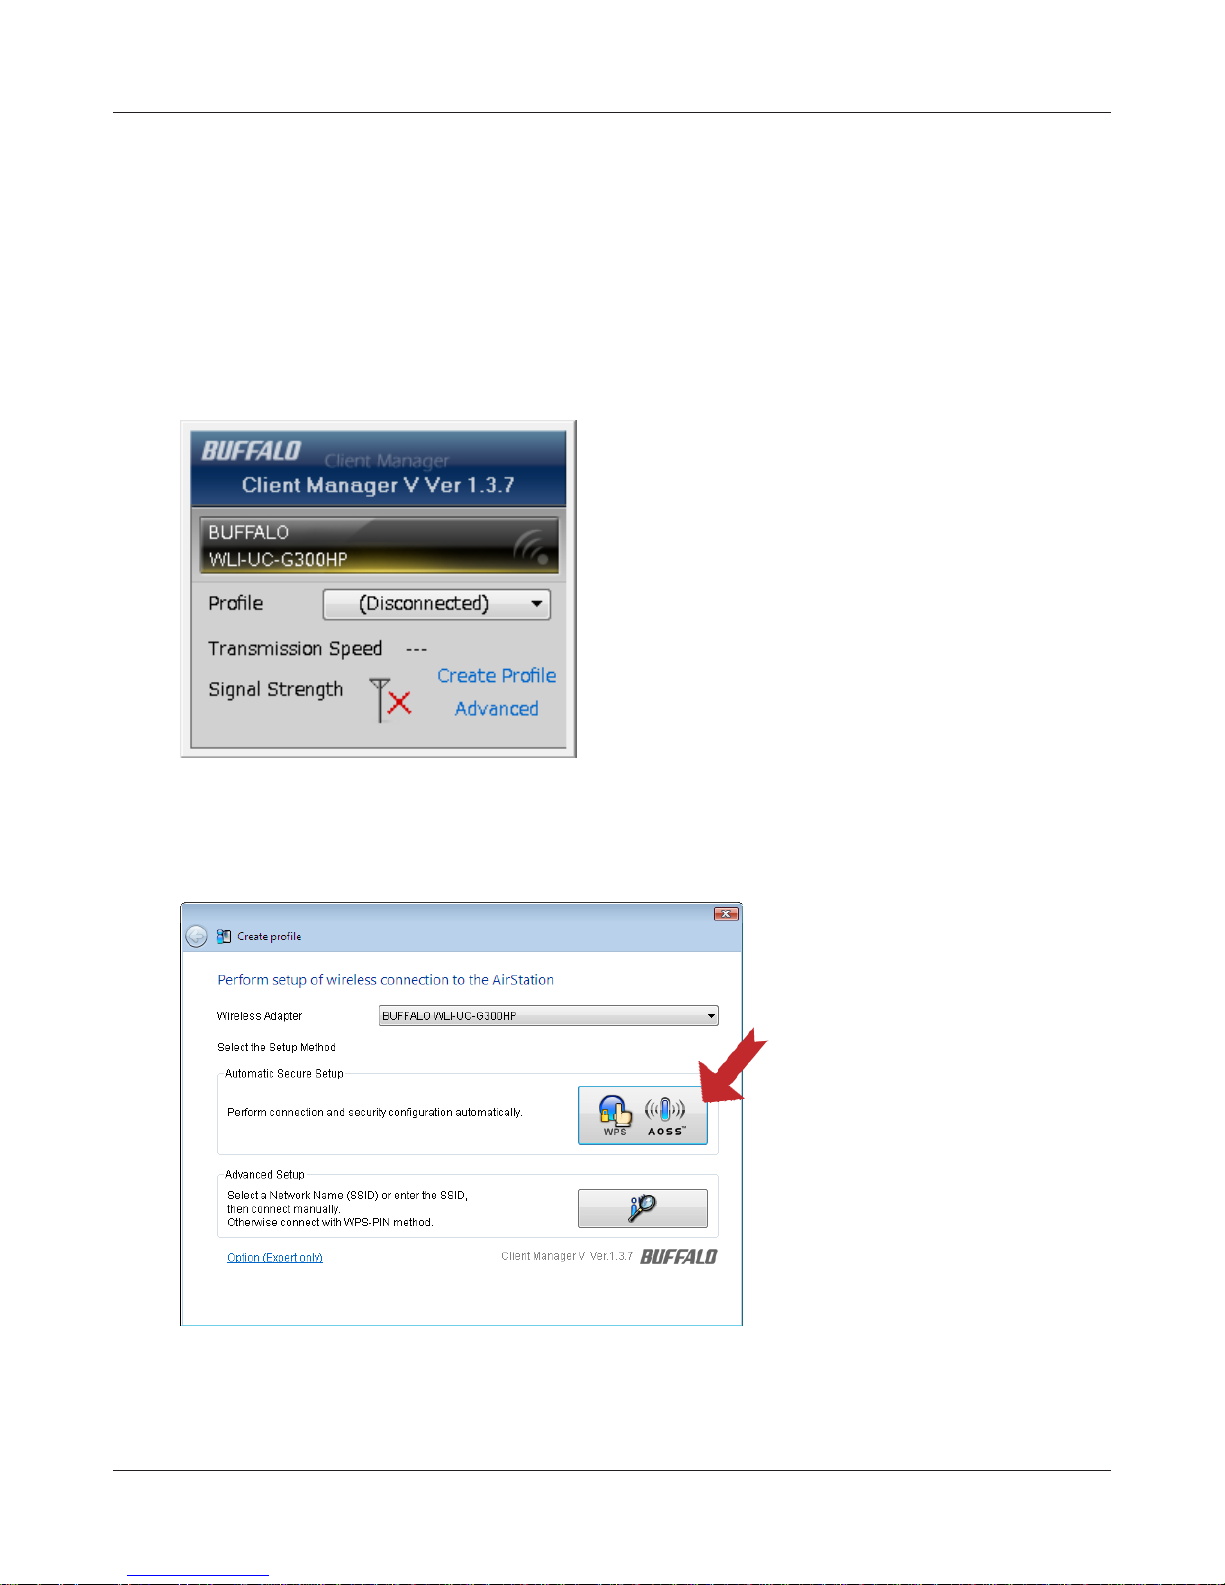
Click [Start] > [All Programs] > [BUFFALO] > [AirStation Utility] > [Client Manager V].
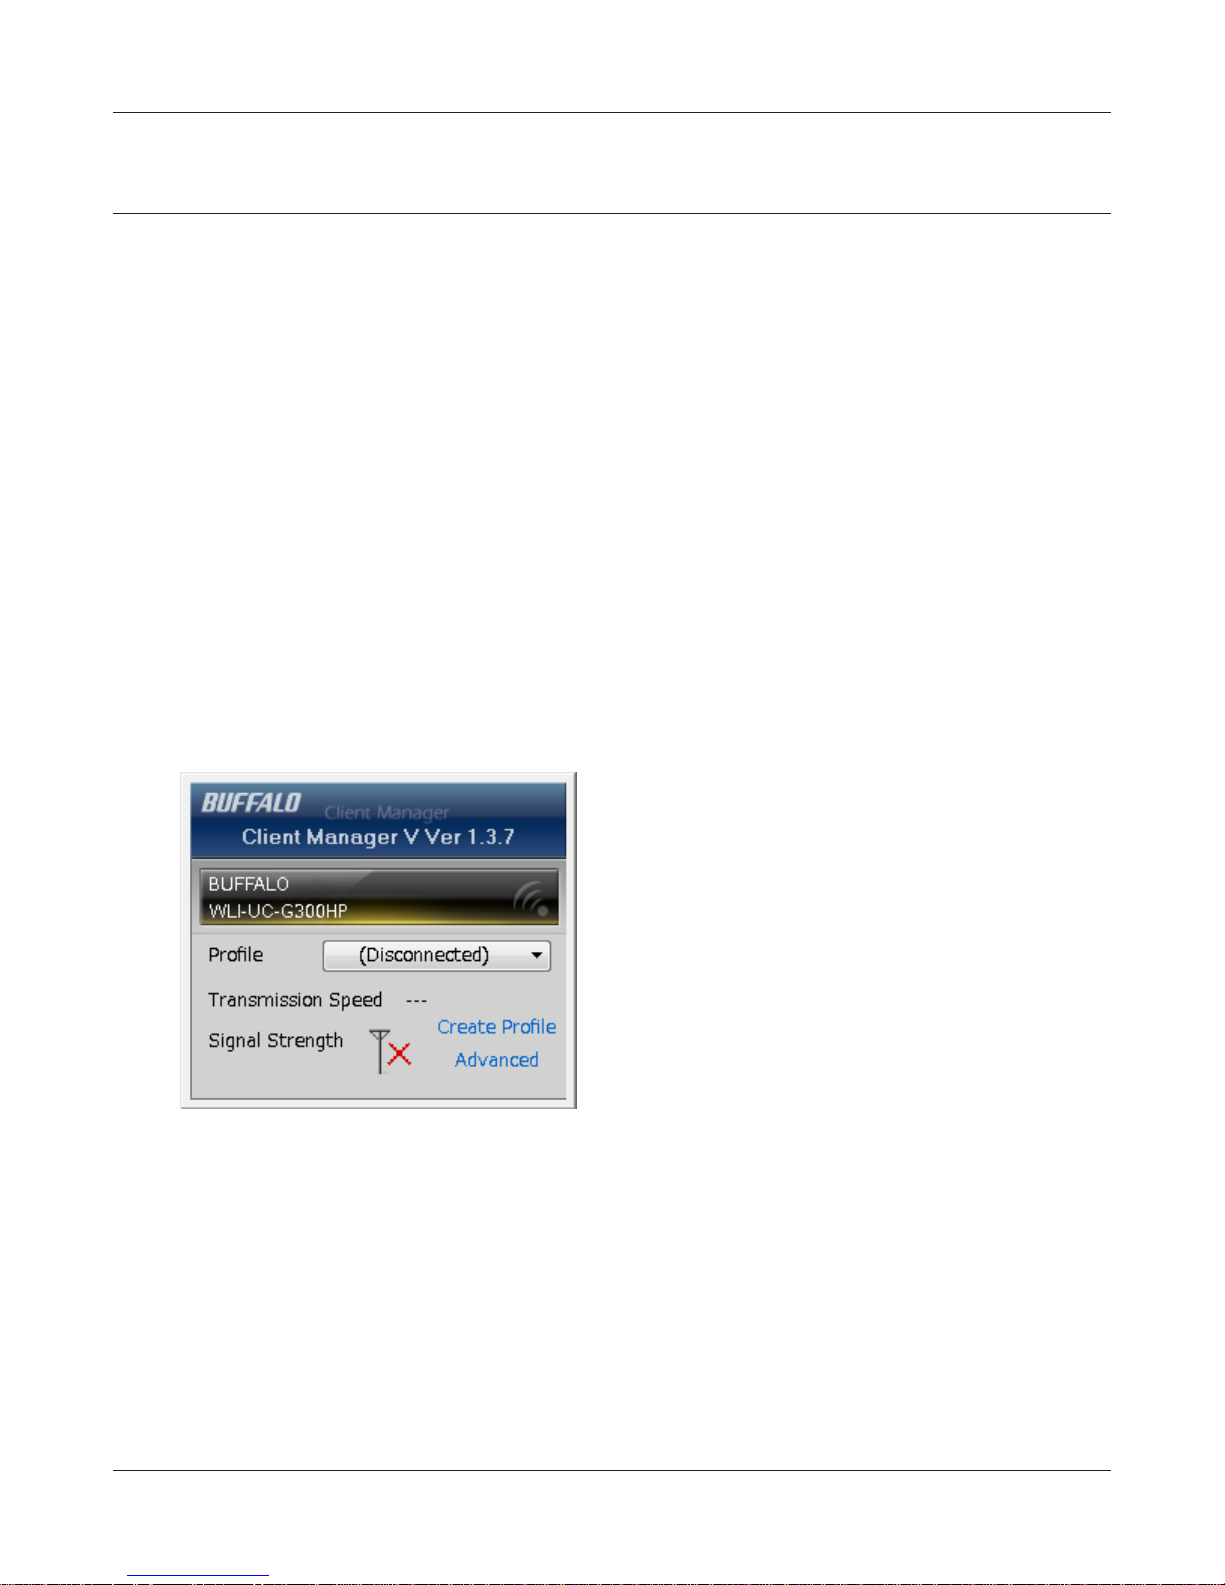
When the screen at left is displayed, click [Create
Prole].
When the message “A Program needs your permission to continue” appears, click [Continue].
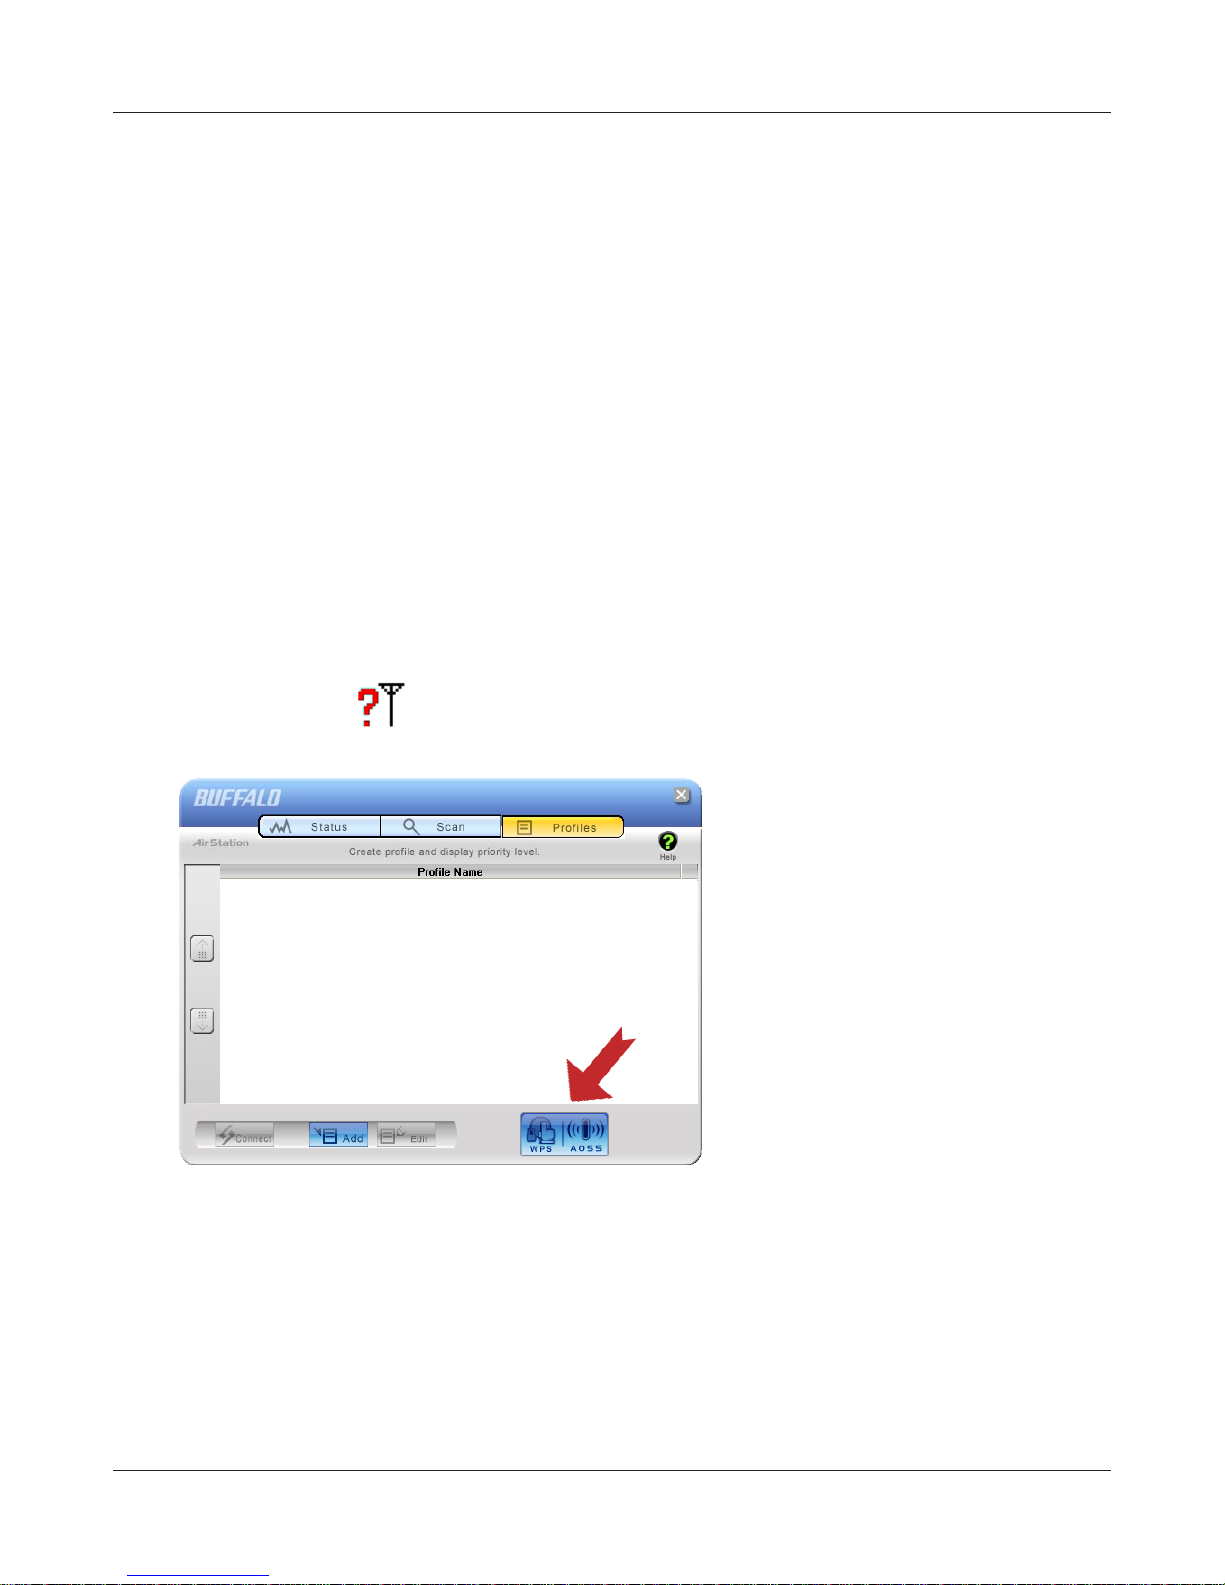
When the screen shown at left is
displayed, click the [ WPS AOSS]
button.
WLI-UC-G300HP / WLI-UC-G300HP-V1 User Manual 14
Chapter 3 Connect to a Wireless Network
When WPS/AOSS is complete, the message "Connection has been Completed" is displayed.
If the “Set Network Location” wizard opens, select “Home”, “Work”, or “Public location” depending
on the environment in which the AirStation will be used.
Windows XP/2000 (Client Manager 3)
If you are using Windows XP, use the included Client Manager 3 software to connect wirelessly with
AOSS or WPS.
Note: Windows 2000 does not support WPS. AOSS is supported however.
1
Right click on the icon in the system tray and select [Prole].
2
When this screen is displayed, click
[WPS AOSS].
When WPS/AOSS is complete, the message “Security setup and connection have been completed” is
displayed.
WLI-UC-G300HP / WLI-UC-G300HP-V1 User Manual 15
Chapter 3 Connect to a Wireless Network
Automatic Secure Setup with WPS (PIN Method)
WPS (Personal Identication Number Method) uses a unique number generated by the Client
Manager utility program to automatically connect to an access point that supports WPS.
Before using WPS, install Client Manager from the CD. See page 10 for instructions.
Windows 7/Vista (Client Manager V)
If you are using Windows 7 or Vista, use Client Manager V to connect wirelessly with a WPS PIN.
1
2
3
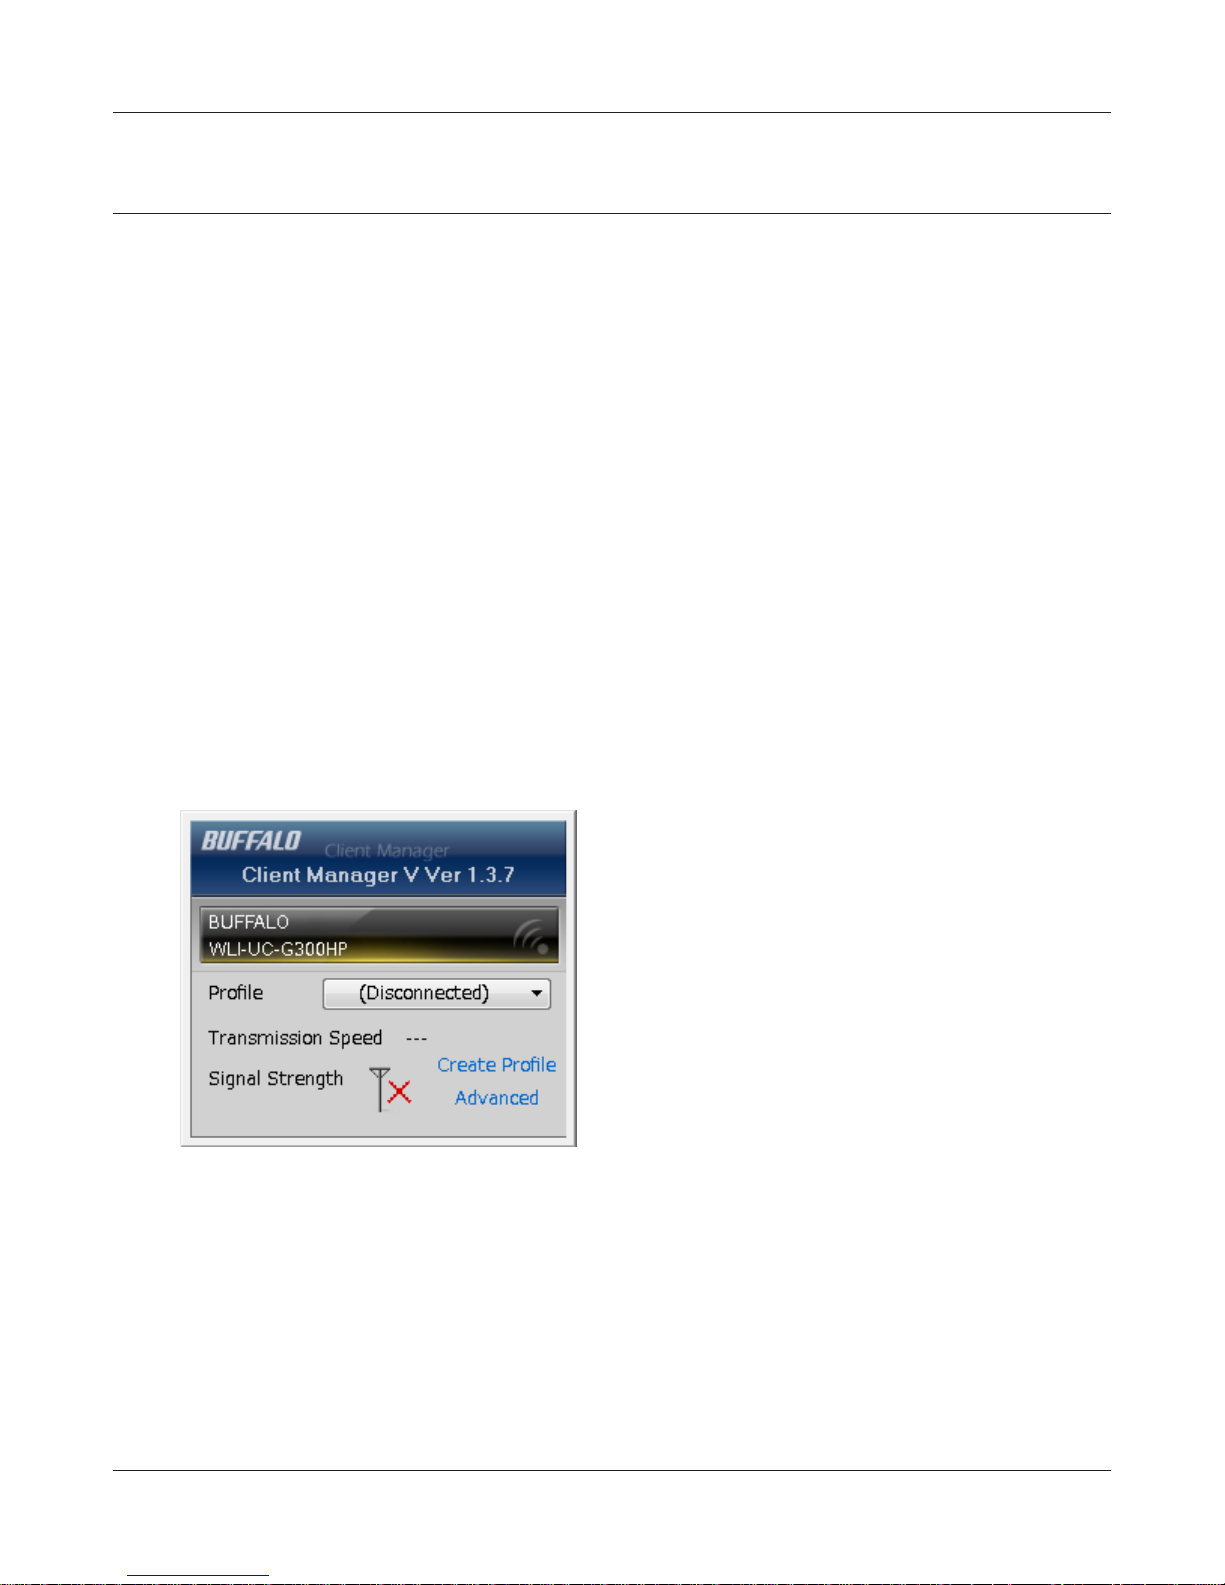
Click [Start] > [All Programs] > [BUFFALO] > [AirStation Utility] > [Client Manager V].
When this screen displayed, click [Create Prole].
When the message "A program needs your permission to continue" appears, click [Continue].
WLI-UC-G300HP / WLI-UC-G300HP-V1 User Manual 16
Chapter 3 Connect to a Wireless Network
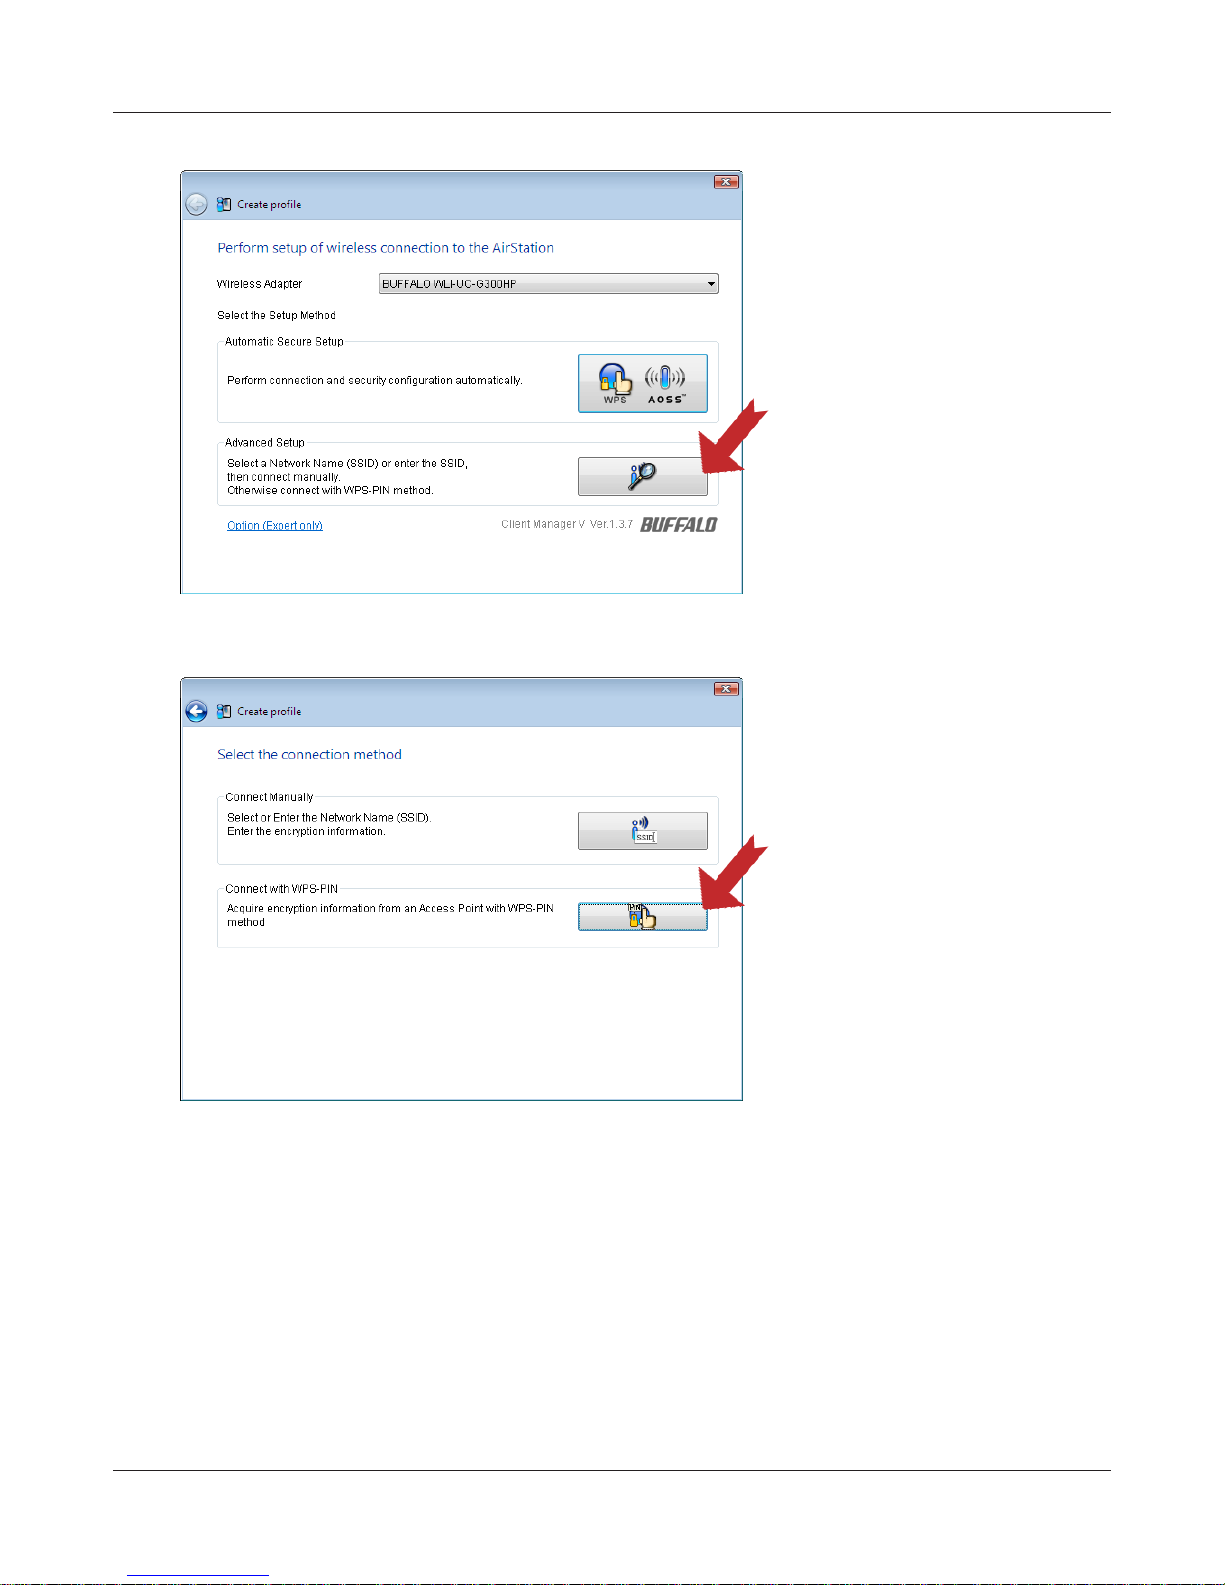
4
When this screen opens, click
[Advanced Setup].
5
Then click [WPS-PIN].
WLI-UC-G300HP / WLI-UC-G300HP-V1 User Manual 17
Chapter 3 Connect to a Wireless Network
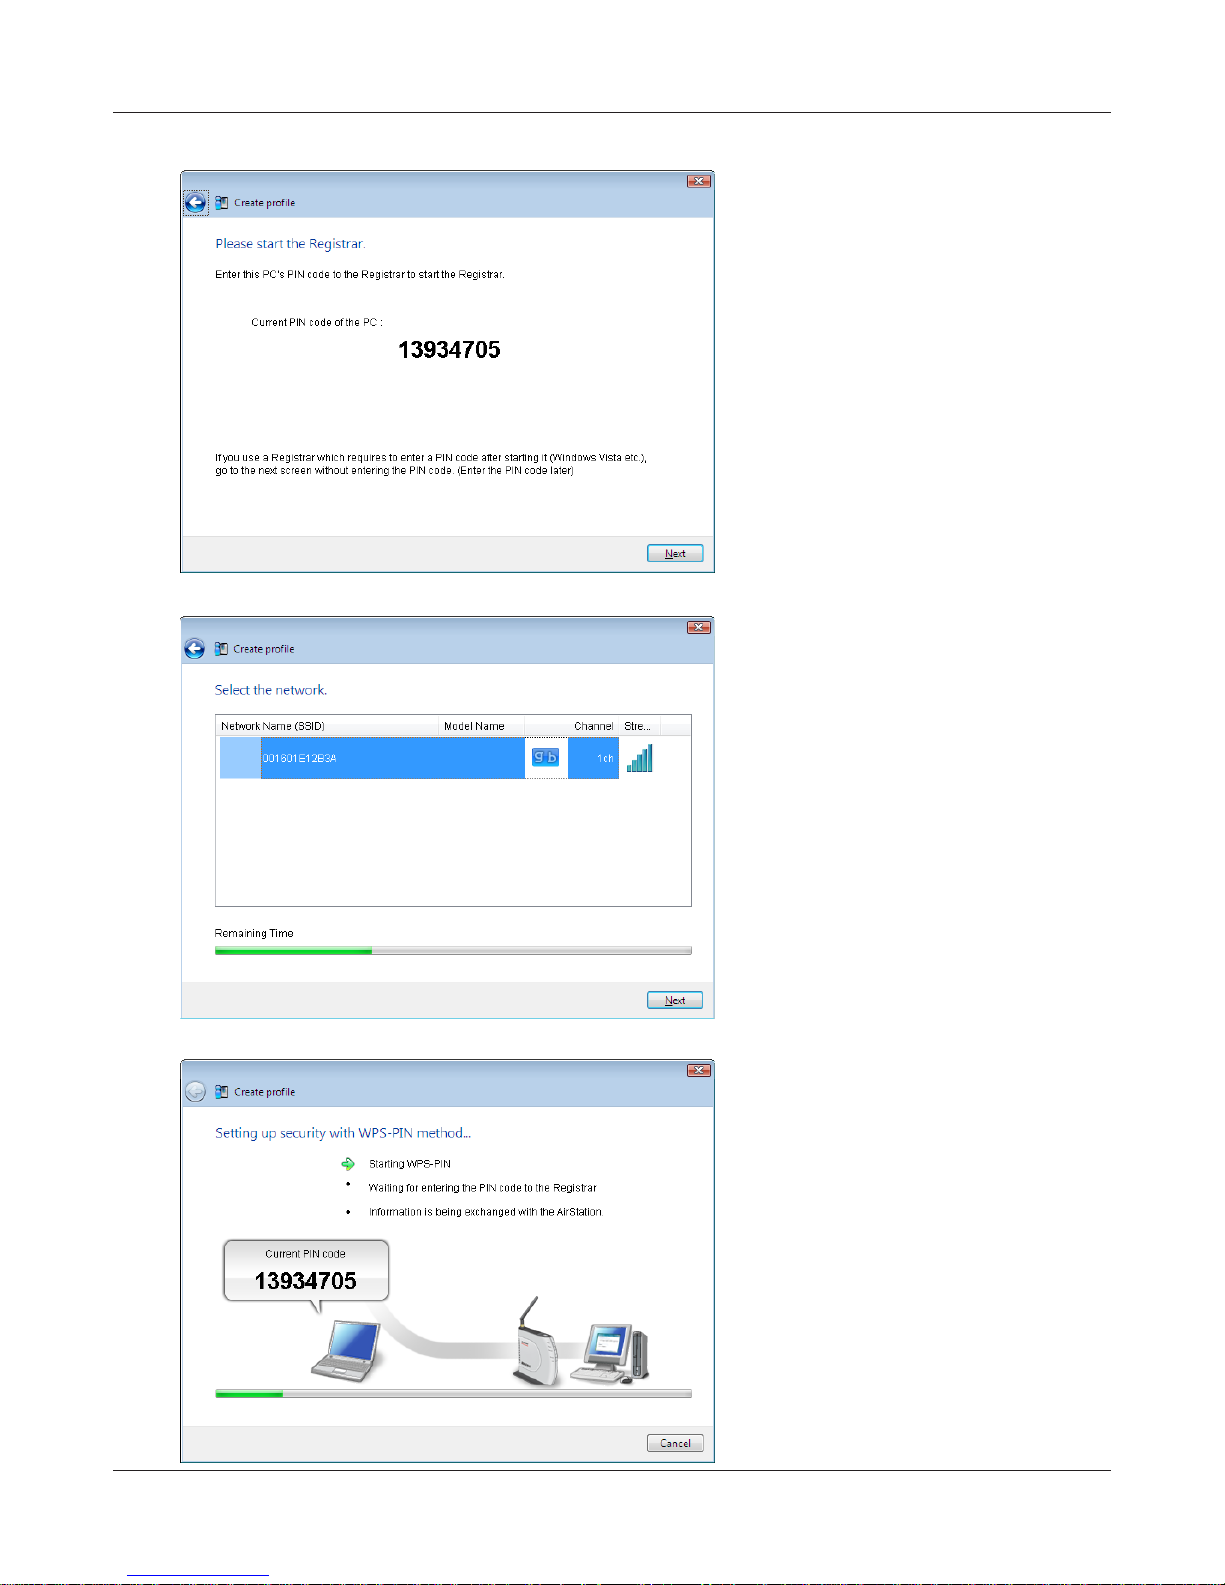
6
7
Write down the PIN code from this
screen, then click [Next].
Select your access point, then click
[Next].
This screen will be displayed.
WLI-UC-G300HP / WLI-UC-G300HP-V1 User Manual 18
Chapter 3 Connect to a Wireless Network
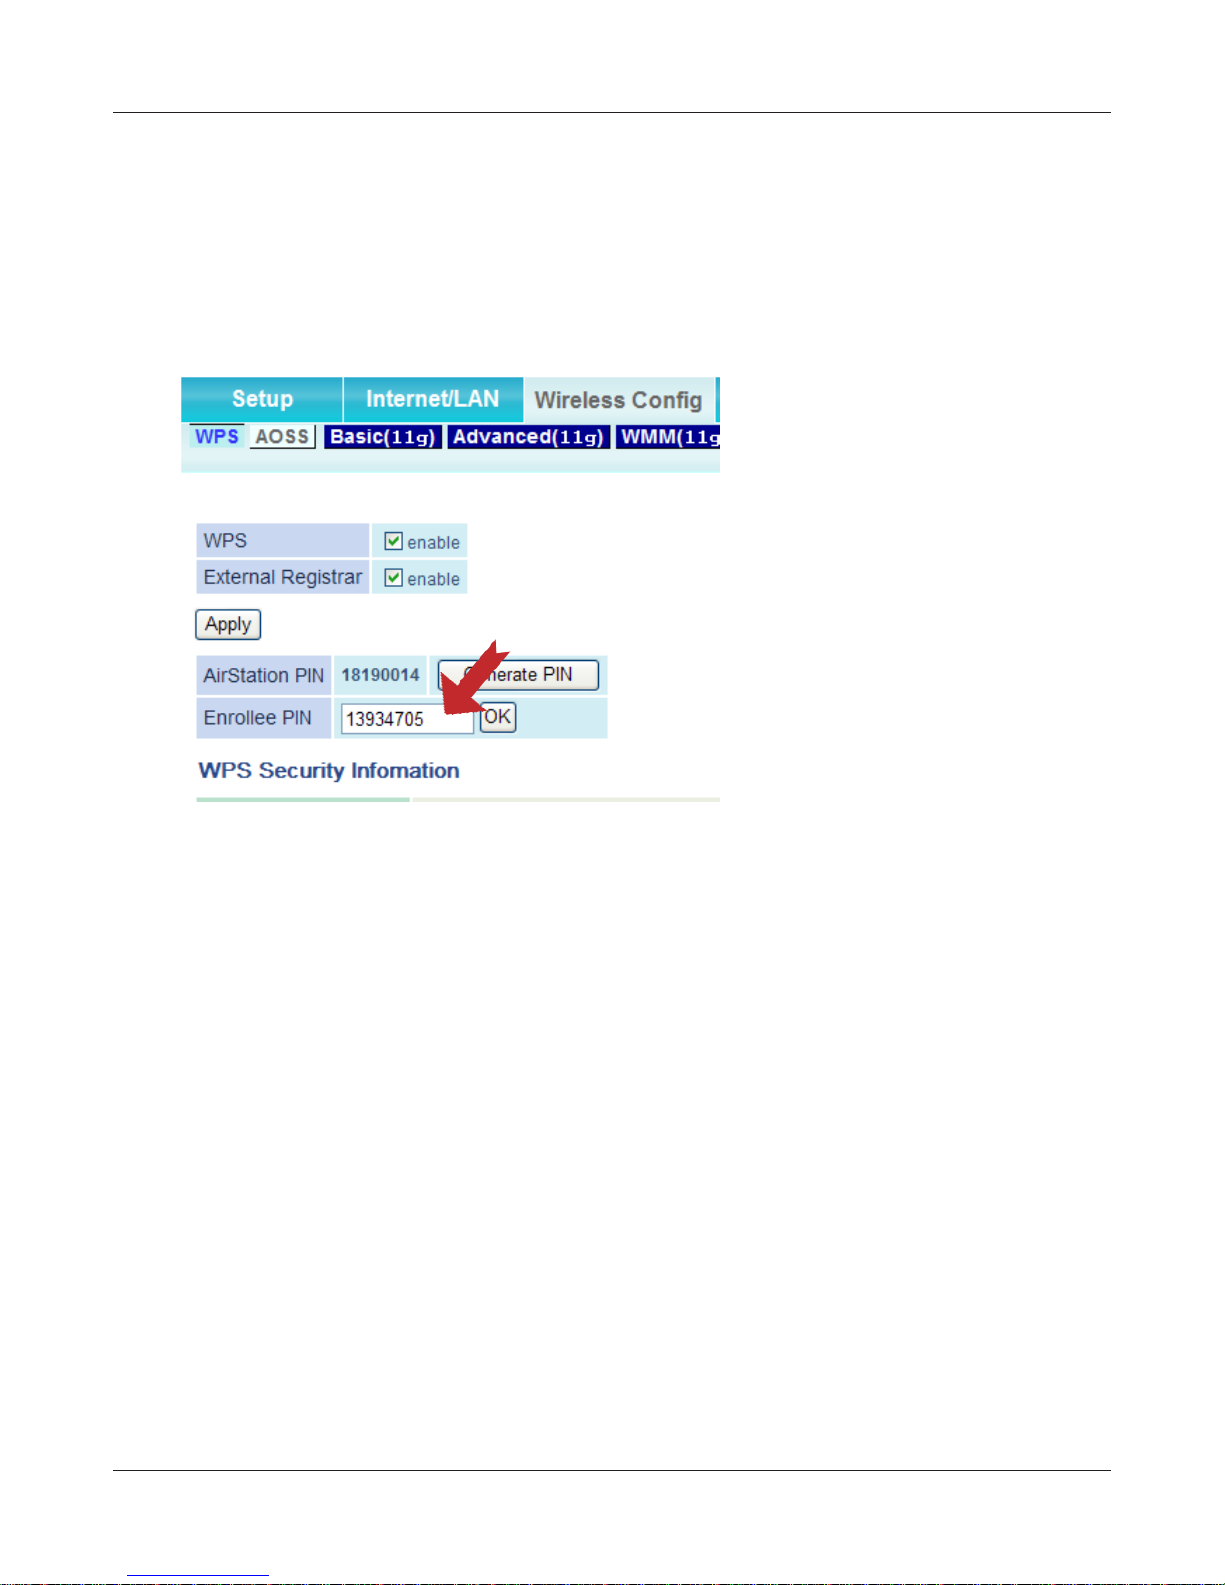
8
9
Use a computer with a wired connection to the access point to log in to the access point.
Navigate to the WPS PIN page.
Note: If the access point is a Bualo AirStation, navigate to [Wireless Cong]> [WPS] to enter the PIN.
Enter the PIN that you wrote
down in step 6.
Note: For a Bualo AirStation, enter
the PIN in [Enrollee PIN] and
click [OK].
Setup will take several seconds. When the connection is complete, the message "Connection has
been Completed" is displayed in Client Manager V. If the “Set Network Location” wizard opens, select
“Home”, “Work”, or “Public location” depending on the environment in which the AirStation will be
used.
WLI-UC-G300HP / WLI-UC-G300HP-V1 User Manual 19

Chapter 3 Connect to a Wireless Network
Windows XP (Client Manager 3)
If you are using Windows XP, use Client Manager 3 which comes with this package and follow the
procedure below to connect wirelessly with WPS (PIN).
Note: Windows 2000 does not support WPS (PIN).
1
2
Right-click on the icon in the system tray and select [Easy Connection] > [WPS PIN Code
type].
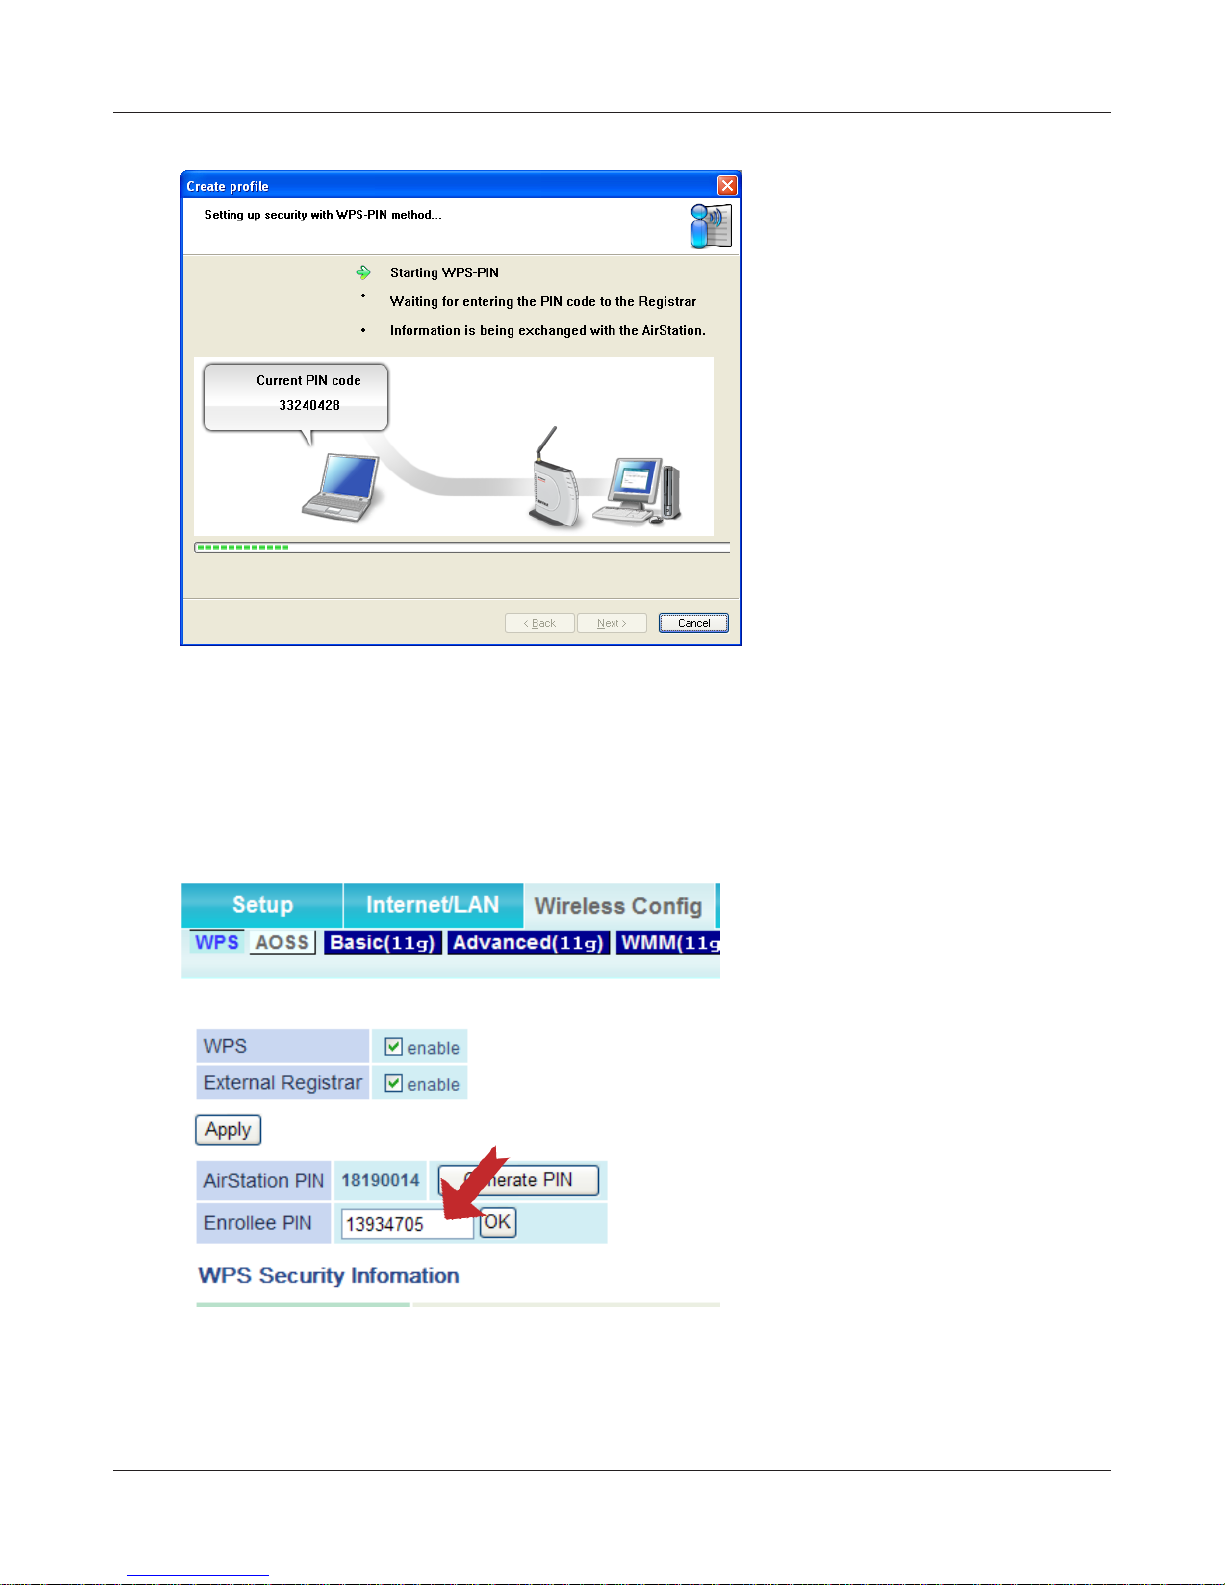
When the PIN code is displayed,
write it down. Then, click [Next].
3
WLI-UC-G300HP / WLI-UC-G300HP-V1 User Manual 20
Select your access point and click
[Next].
Chapter 3 Connect to a Wireless Network
This screen will be displayed.
4
5
Use a computer with a wired connection to the access point to log in to the access point.
Navigate to the WPS PIN page.
Note: If the access point is a Bualo AirStation, navigate to [Wireless Cong]> [WPS] to enter the PIN.
On the conguration screen of
the access point, enter the PIN
code you wrote down in step 2.
Note: For a Bualo AirStation, enter
the PIN in [Enrollee PIN] and
click [OK].
Conguration will take several seconds. When "Connection has been completed" is displayed, you
are connected.
WLI-UC-G300HP / WLI-UC-G300HP-V1 User Manual 21
Chapter 3 Connect to a Wireless Network
Manual Setup (Client Manager)
You may also connect to an access point manually, without using AOSS or WPS. The procedure
varies depending on the version of Windows used.
First, install Client Manager from the CD. See page 10 for instructions.
Windows 7/Vista (Client Manager V)
With Windows 7 or Vista, use Client Manager V to congure your wireless network.
1
2
3
Click [Start] > [All Programs] > [BUFFALO] > [AirStation Utility] > [Client Manager V].
When this screen is displayed, click [Create Prole].
When the message "A Program needs your permission to continue", click [Continue].
WLI-UC-G300HP / WLI-UC-G300HP-V1 User Manual 22
Chapter 3 Connect to a Wireless Network
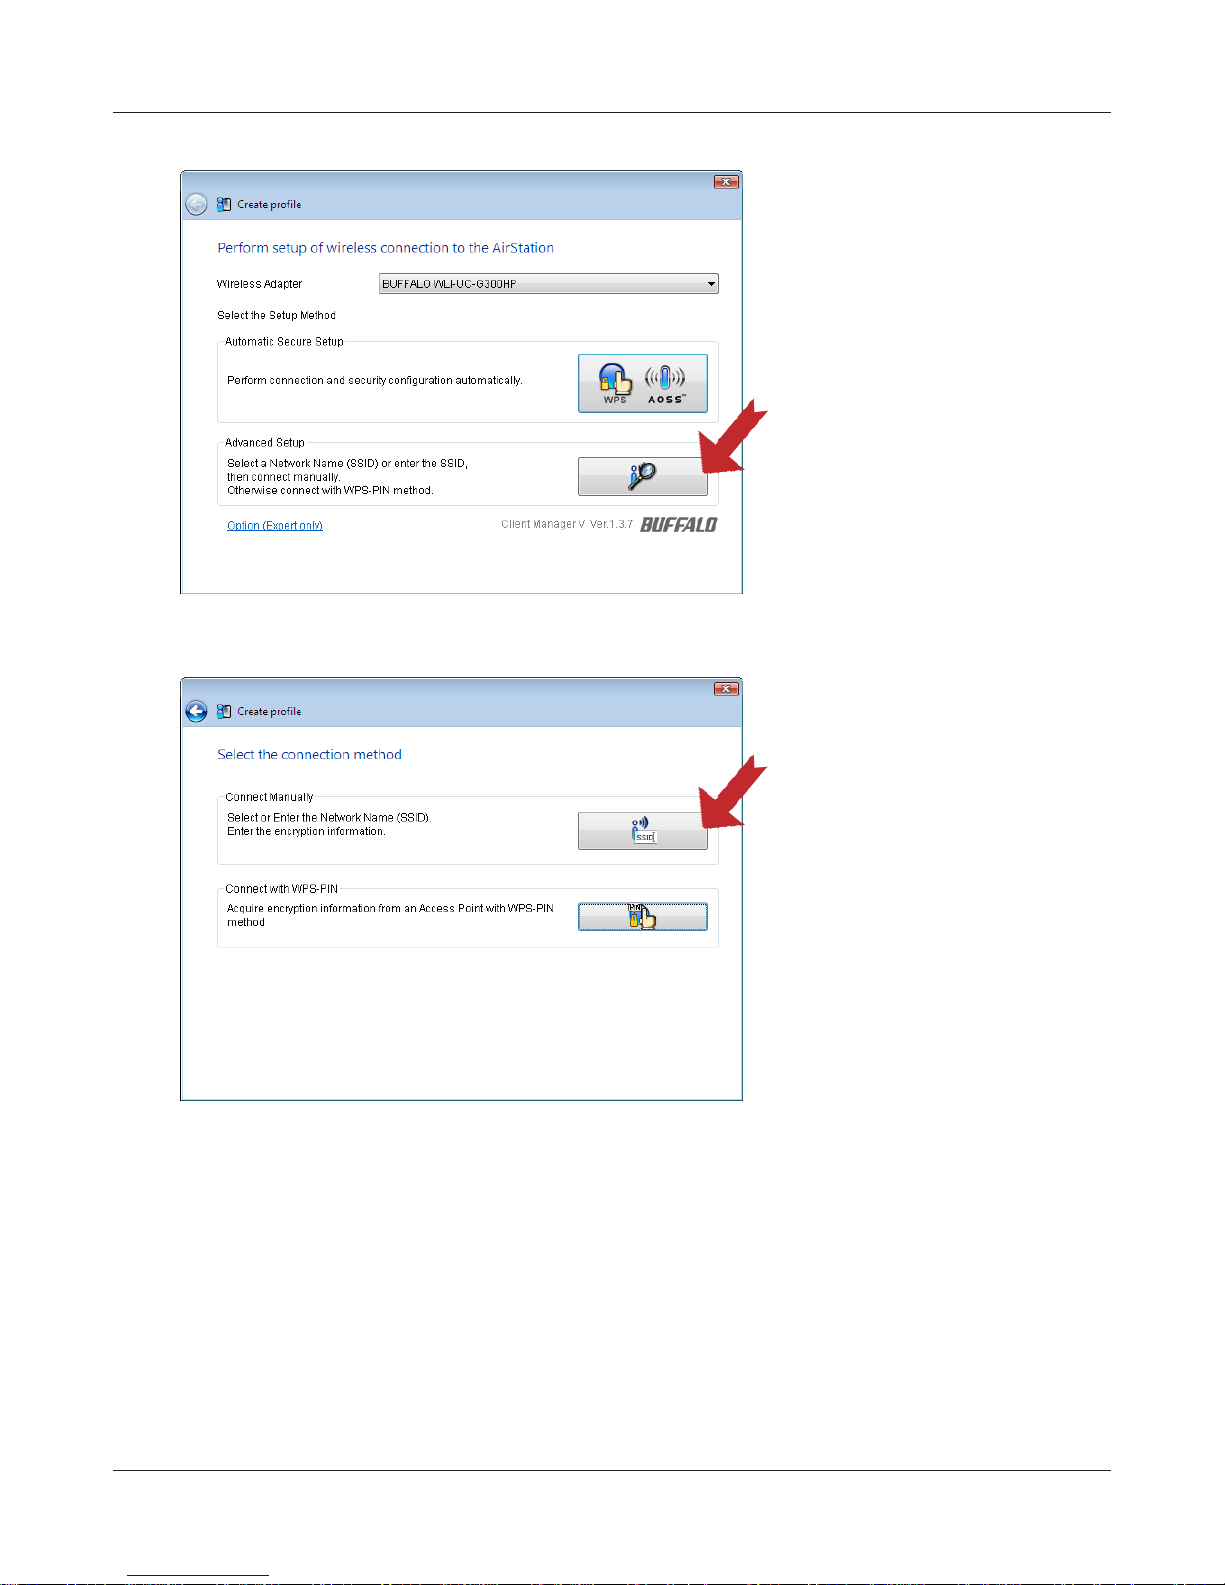
4
Click [Advanced Setup].
5
Click [Connect Manually].
WLI-UC-G300HP / WLI-UC-G300HP-V1 User Manual 23
 Loading...