


344400 - 344401
Video Display
User guide
03/11-01 PC
2

Video Display
3
User guide
1 Introduction and basic functions 6
1.1 General information 6
1.2 Your Video Display: use it now! 6
1.2.1 Video door entry function keys 7
1.2.2 Navigation keys 7
1.3 Menu functions 8
1.3.1 Volume adjustment 10
1.3.2 Monitor adjustment (day/night) 11
1.3.3 Camera swing 12
1.3.4 Bells adjustment 13
1.3.5 Paging 14
2 Trouble shooting 16
2.1 Push to Talk mode 16
3 CCTV functions 20
3.1 Activation 20
3.2 Intercommunication 20
3.3 Camera 21
3.4 Cycle cameras 21
3.5 Staircase lights 22
3.6 Call exclusion 22
4 House automation functions 24
4.1 Scenarios 24
4.2 Alarms 25
4.3 Sound system 26
4.4 Temperature control 27
4.5 Multimedia menu 29
5 Services 32
5.1 The “Settings” menu 32
5.2 Services 33
5.2.1 Professional studio 33
5.2.2 Hands free 33
5.2.3 Door state 34
5.2.4 Alarm messages 34
5.3 Messages 35

4

Video Display
5
User guide
Introduction and basic functions
1.1 General information 6
1.2 Your Video Display: use it now! 6
1.3 Menu functions 8
6
Incorrect use of the Video Display and of all the devices connected to it excludes any guarantee!
For cleaning only use a damp or antistatic cloth. Avoid the use of
alcohol or chemical detergents.
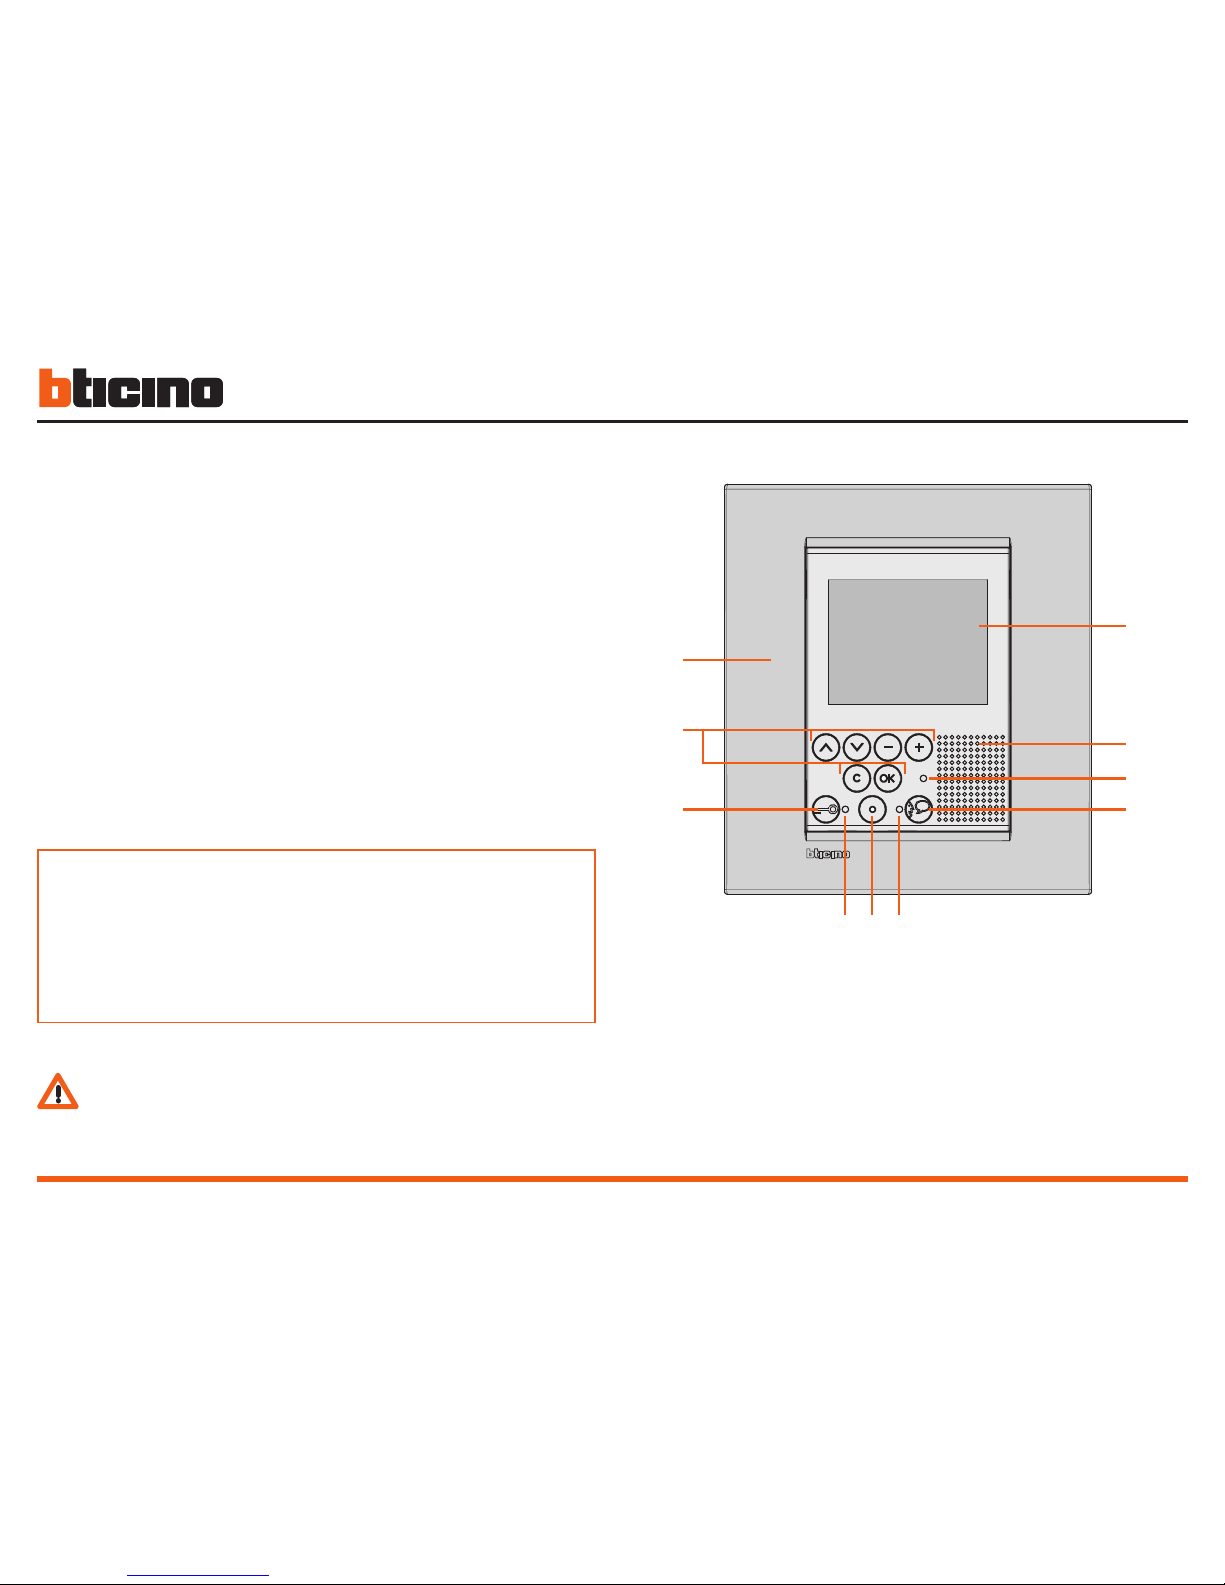
1 - LCD 2,5” colour display
2 - Loudspeaker
3 - Call exclusion LED*
4 - Connection key
5 - Connection LED
6 - Entrance panel and cycling
switching ON key
7 - Door lock LED
8 - Door lock key
9 - Navigation keys
10 - Microphone
* It lights up when the bell volume is set to 0.
1.1 General information 1.2 Your Video Display: use it now!
1 Introduction and basic functions
The Video Display offers the normal video door entry and CCTV functions and can also interact with your My home system.
Fitting in with My Home
• Scenarios:
Runs the scenarios saved in the Scenario module.
• Alarms:
Signals the last alarm events which have occurred and the division
of the system.
• Sound system:
Manages the BTicino digital sound system.
• Temperature control:
Displays and adjusts the temperature in the various zones of the
home and the state of the control unit.
LCD screen note
The LCD screen has been manufactured using advanced high
precision technology. It is however possible that sometimes up
to 5 small black or coloured dots (red, blue, green) may appear
on the LCD screen. This is an absolutely normal result of the
manufacturing process and is not indicative of a malfunction
and/or fault.
1
2
3
48
9
10
567
Video Display
7
User guide
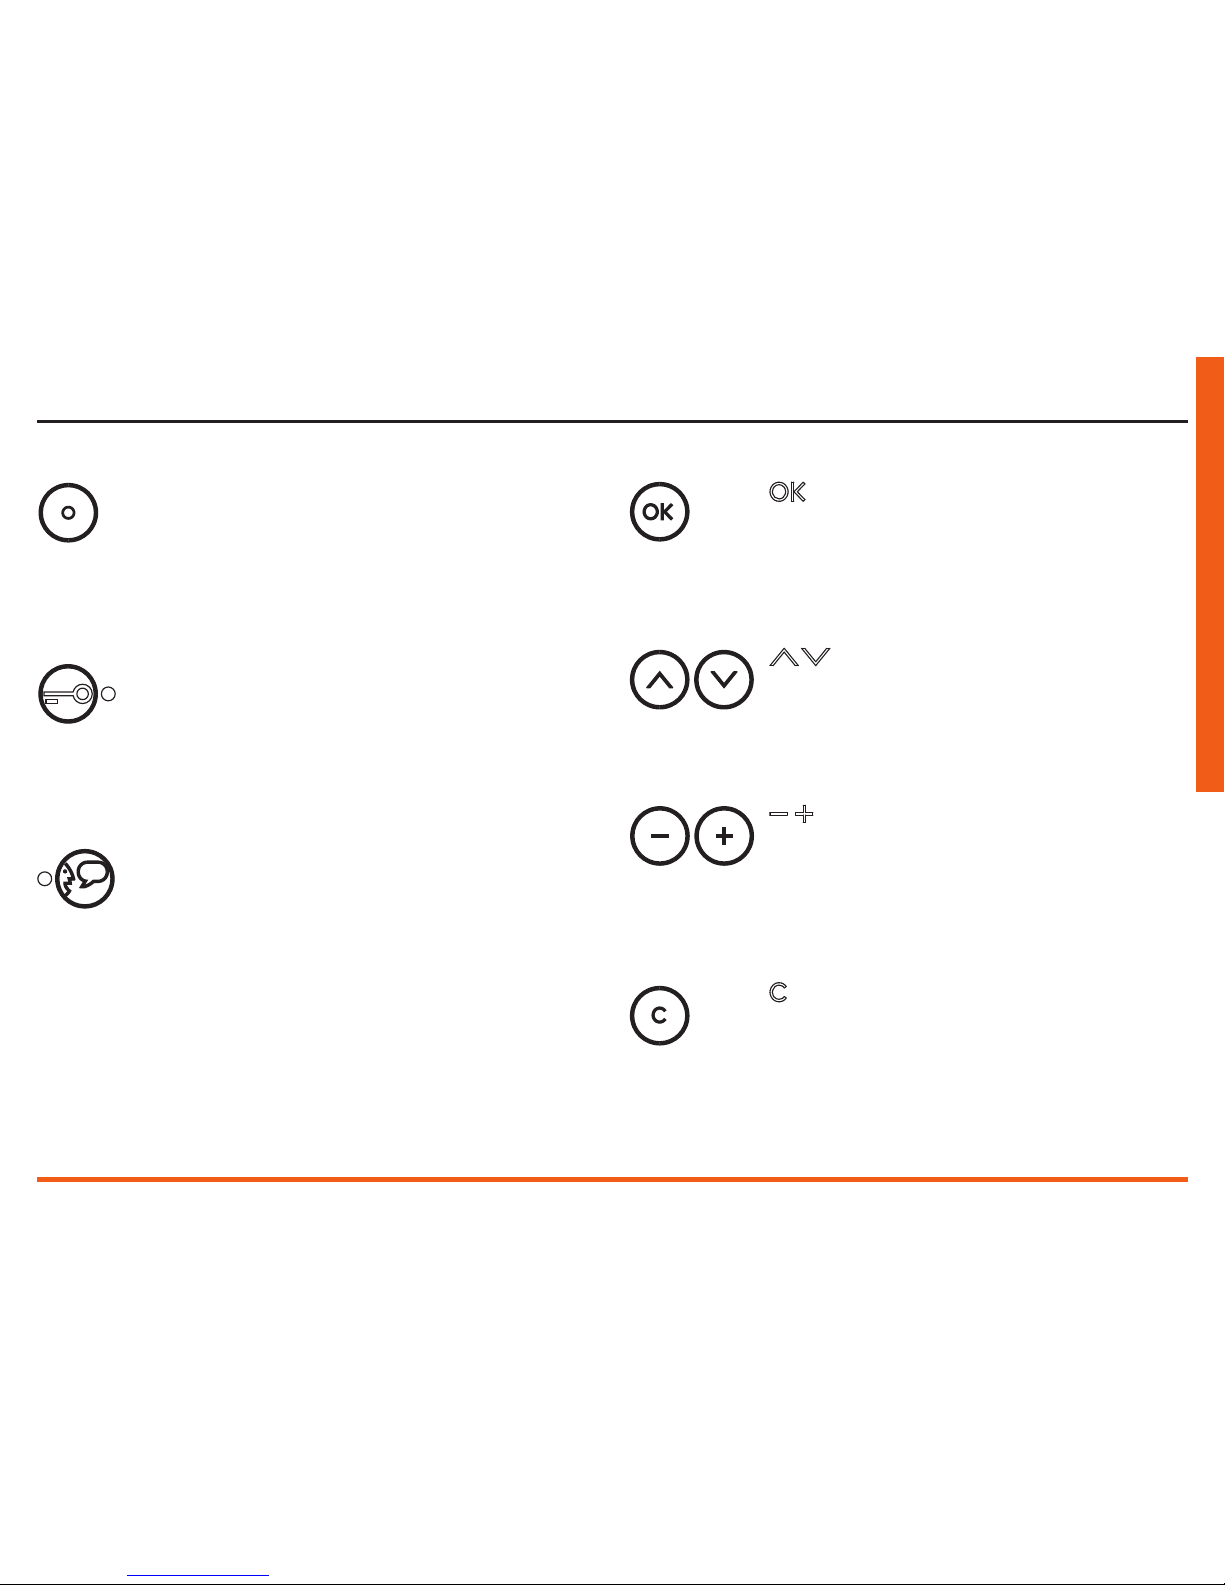
Activation Entrance Panel/Cycling
It activates the switching on of the associated Entrance Panel and, if present, allows the cycling display of the other Entrance Panels/cameras.
Connection key
Activates/deactivates the audio connection.
When a call has been received the LED flashes; press
once to answer: the LED shines steadily.
At rest activates the paging function (if enabled).
Door lock key
When there is a call it opens the door lock of the
Entrance Panel from which the call was made, at
rest that of the associated Entrance Panel. The LED
signals that it is activated.
1.2.1 Video door entry function keys 1.2.2 Navigation keys
key
Allows access to the menu; confirms the selection
made.
keys
Inside the menu they select the previous or next item.
keys
Inside the menu they change the value set.
In audio/video connection they allow rapid access to
the volume and monitor settings.
keys
Returns to the previous screen, if already on the first
screen, it can be used to turn the display off; during a
call, it can be used to switch from day to night mode,
and vice versa (see the relevant section).

8
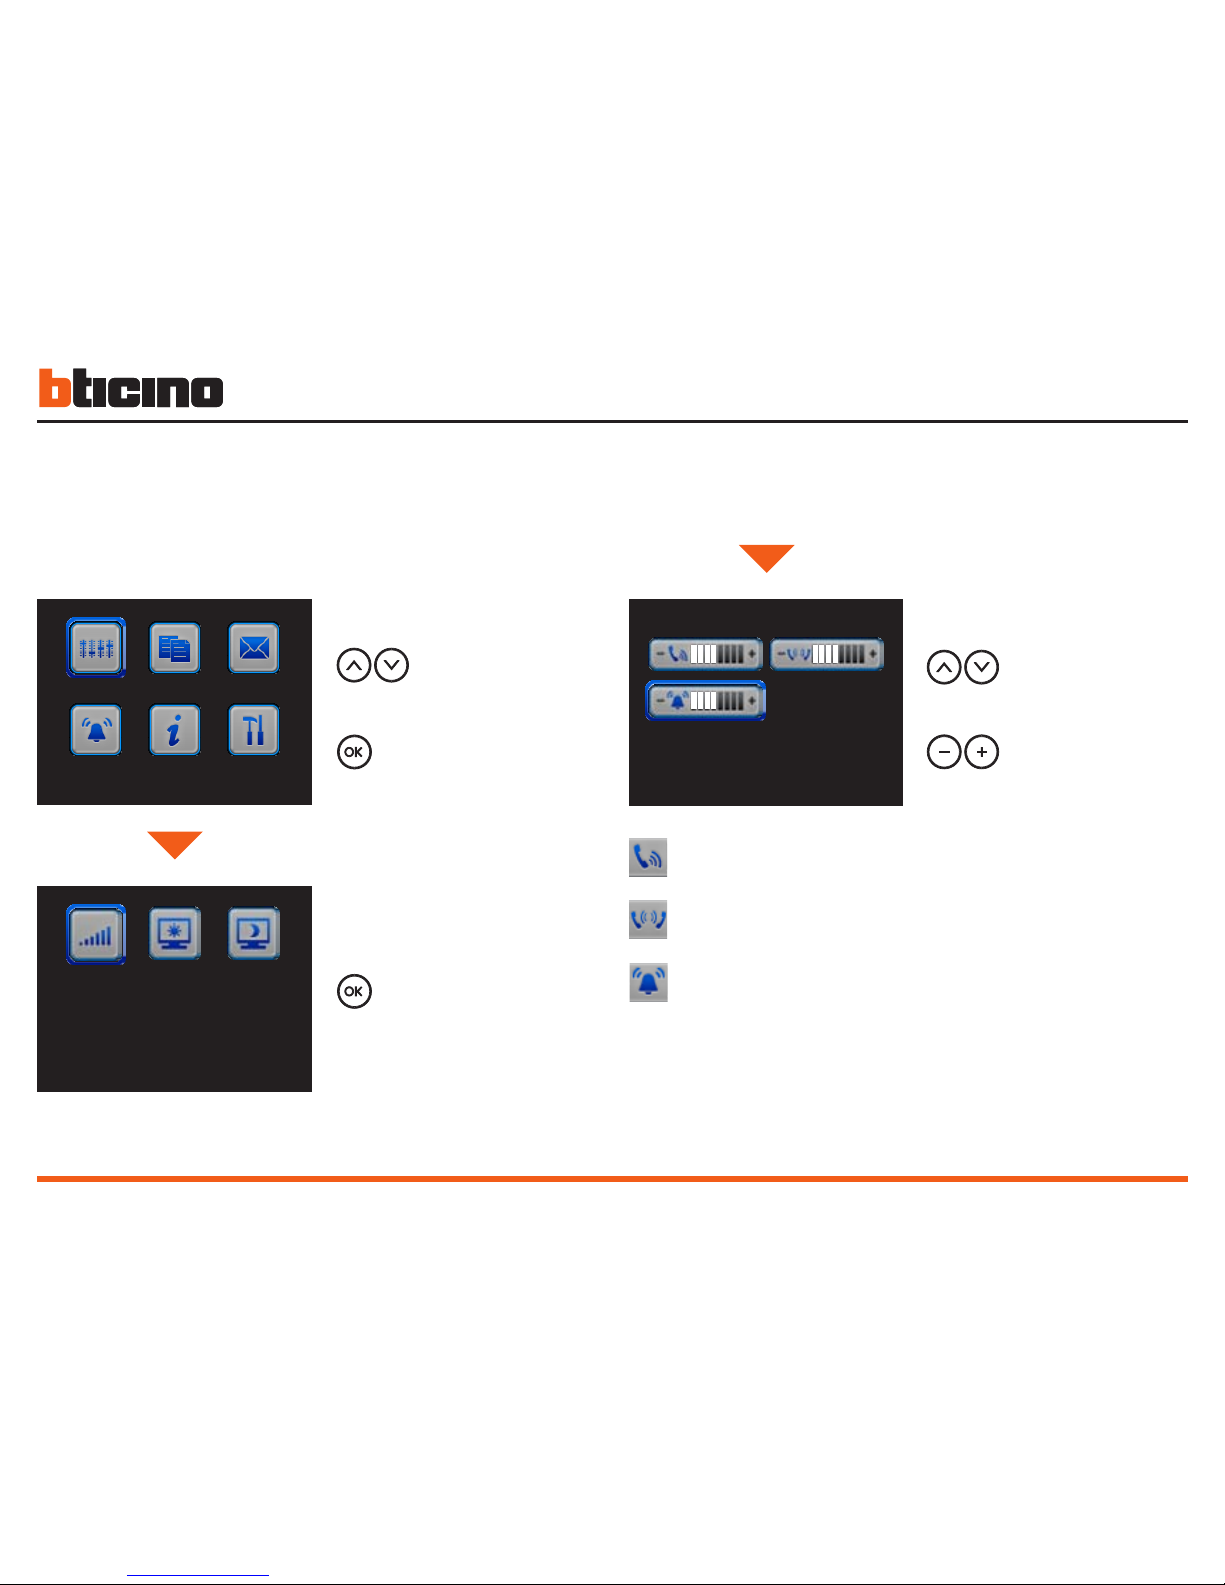
Three possible solutions for drawing up the main menu are given below:
• menu with COMMUNICATION functions;
• menu with HOME AUTOMATION functions;
• CUSTOMISED menu.
Use the
keys to select the functions from those available:
1 - Submenu and commands
2 - Use the settings icon to access a series of adjustments/services de-
scribed below
1 1 1
1 1 2
COMMUNICATION
Main menu example with programming of just the COMMUNICATION
commands.
HOUSE AUTOMATION
Main menu example with communication and house-automation submenu.
Use the OK key to access the main menu:
1 2 3
3 4 5
1 2 3
4 5 6
1 - Activation
2 - Intercommunication
3 - Camera
4 - Cycle cameras
5 - Settings
1 - Communication
2 - Scenarios
3 - Alarms
4 - Sound system
5 - Temperature control
6 - Settings
1 Introduction and basic functions
1.3 Menu functions
SCENARIOS
ACTIVATION I
SETTINGS

Video Display
9
User guide
COMMUNICATION
FUNCTIONS DESCRIPTION
HOUSE AUTOMATION
SUB-MENU SYSTEM FOUND
SCENARIOS
ALARMS
SOUND SYSTEM
TEMPERATURE CONTROL
MULTIMEDIA INTERFACE
The installer has given the exact configuration of your Video Display the
tables below; if he has not filled it in ask for it.
CUSTOMISED MENU
The customised menu allows more intuitive use of the Video Display
functions. In fact the menu only displays the functions in your My Home
system and the text of each command can be customised in the installation phase.
Using the customised menu also lets you:
• Have the PROFESSIONAL STUDIO, HANDS FREE, PAGING and MULTIMEDIA functions, which otherwise can only be called from the SETTINGS menu, in the main page or in another page.
1 2 3
4 5 6
1 - Communication
2 - Professional studio
3 - Hands free
4 - Paging
5 - Multimedia
6 - Settings
SETTINGS
10
1 Introduction and basic functions
1.3.1 Volume adjustment
NOTE: During a video door entry call you can access the Adjustments
menu directly by pressing the
-
or + key.
Select
Adjustments
Press OK to access
the menu
Inside the menu
select one of the
items
(e.g. Bells)
Adjust the volume
to the level
required.
Press OK
to confirm
EP SOUND = sound volume when talking to the entrance panel.
INTERCOM = sound volume when holding an intercom conversation.
BELLS = volume level for all the bells.
ADJUSTMENTS
VOLUME
BELLS
Video Display
11
User guide
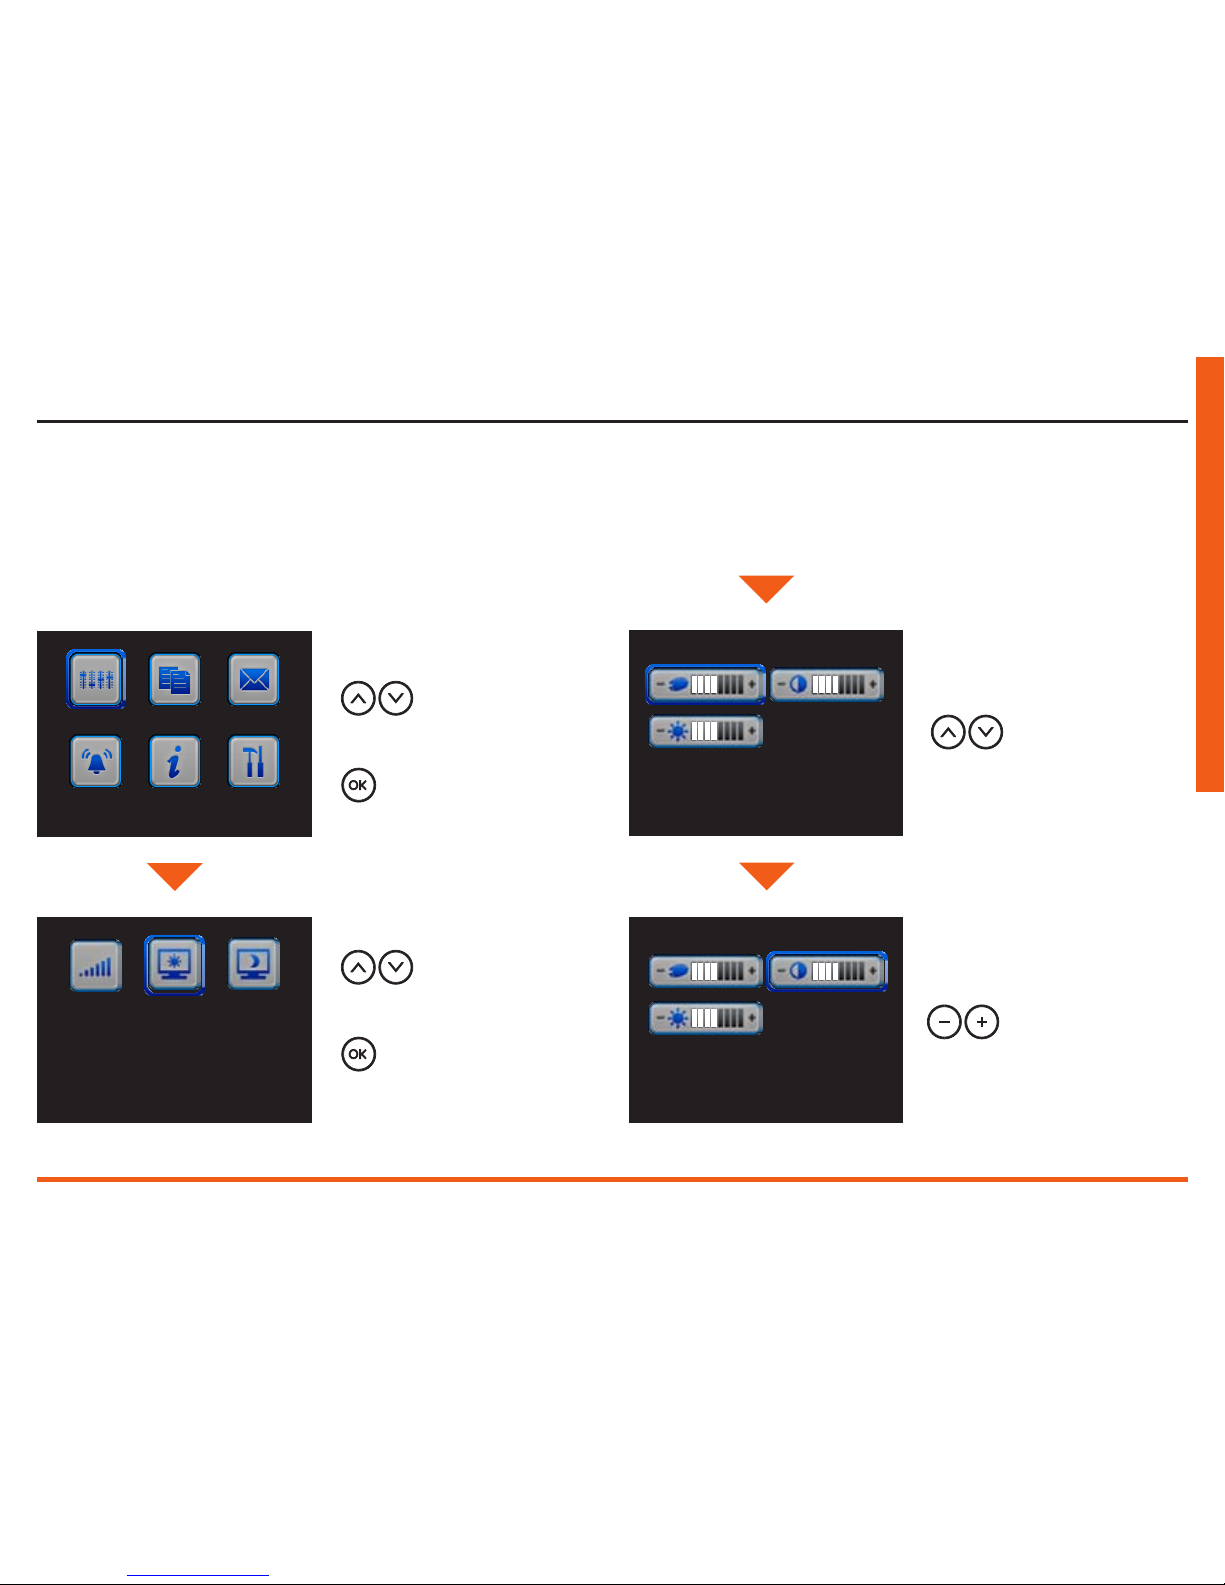
It is possible to select two different adjustments, one for day viewing
and one for night viewing; to switch from one mode to the other press
C during the video door entry call.
NOTE: During a video door entry call you can access the Adjustments
menu directly by pressing th
-
or + key.
Select
Adjustments
Press OK to access
the menu
Select
Day monitor
Press OK
to confirm
Inside the menu
select one of the
items
(e.g. Contrast)
Make
the adjustment
1.3.2 Monitor adjustment (day/night)
ADJUSTMENTS
COLOUR
CONTRAST
DAY MONITOR
 Loading...