

Page 1
FOR CALLER DISPLAY AND CALL
SIGN YOU MUST SUBSCRIBE TO
BT’S CALLER DISPLAY AND
CALL SIGN SERVICES.
IS PAYABLE
Textphone
A QUARTERLY FEE
User Guide
This product is only suitable for use with the BT Network. It can be connected to private
compatible switchboards in the United Kingdom.
Page 2
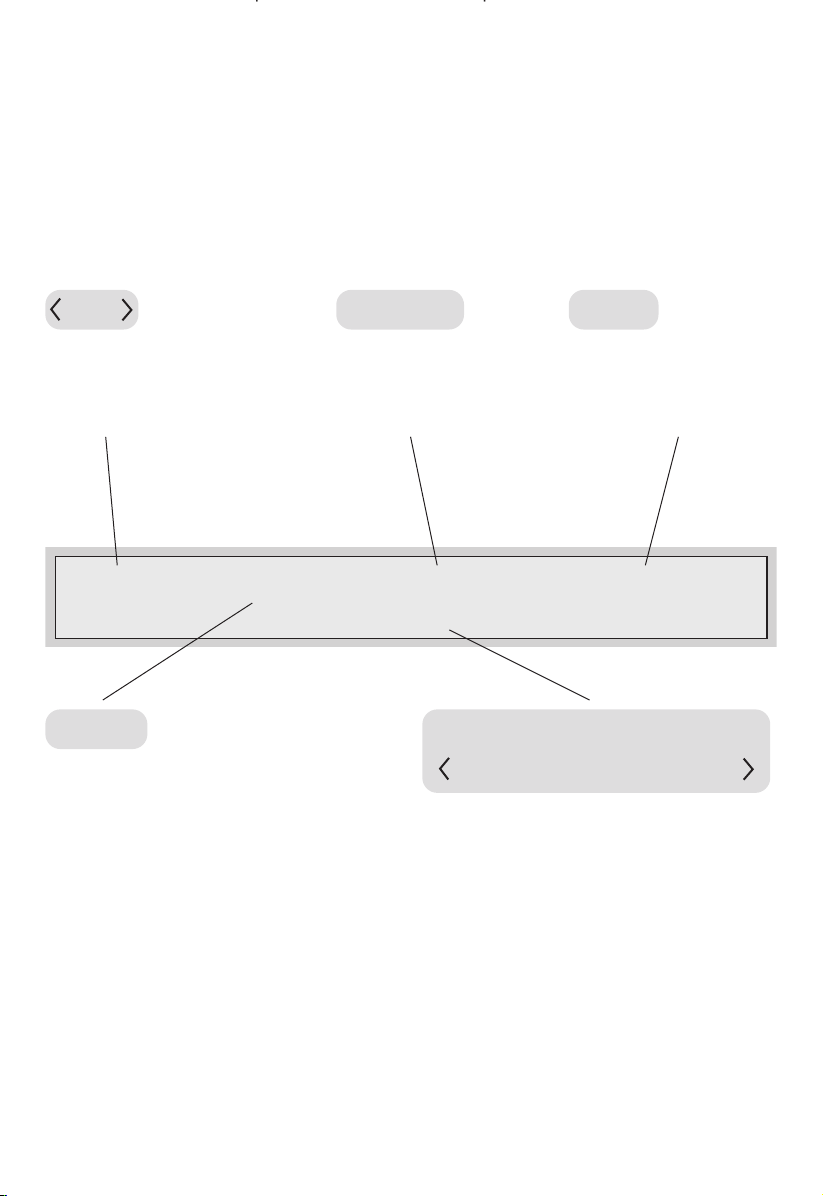
Standby Screen
(when the Textphone is not in use)
V.18
Ready for automatic
communication with
other text phones
<V.18> Prefix:On Answer:Off Calls:0
Prefix
When ON the Textphone
automatically connects calls to
voice phones via the TextDirect
service.
Answer
Text answering
machine
is ON or OFF.
<Please dial)
Press Menu for options
Calls
Number of new
answering machine
messages unread.
Alternates with
The Text Direct prefix is
preprogrammed into the
Textphone.
4
Page 3
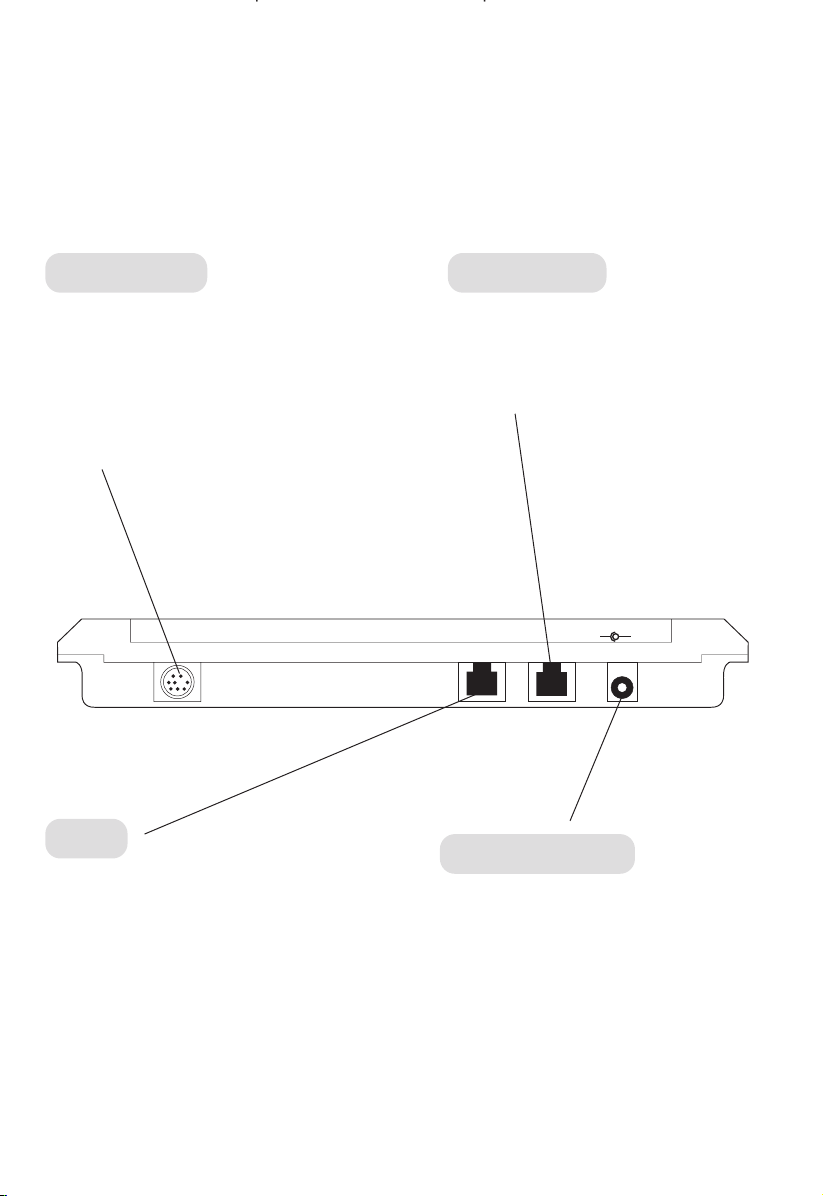
Serial port
Telephone
For connecting to a printer
or PC.You will need a special
cable. Ring the helpdesk for
details regarding where it
can be purchased.
Serial port Line Telephone
Line
For connection of the
telephone line cord.
For connecting additional
telephone equipment (use the
adaptor socket provided).
7.5V DC
–
+
Power socket
For connecting the Textphone
mains adaptor. Only the adaptor
supplied should be used.
5
Page 4
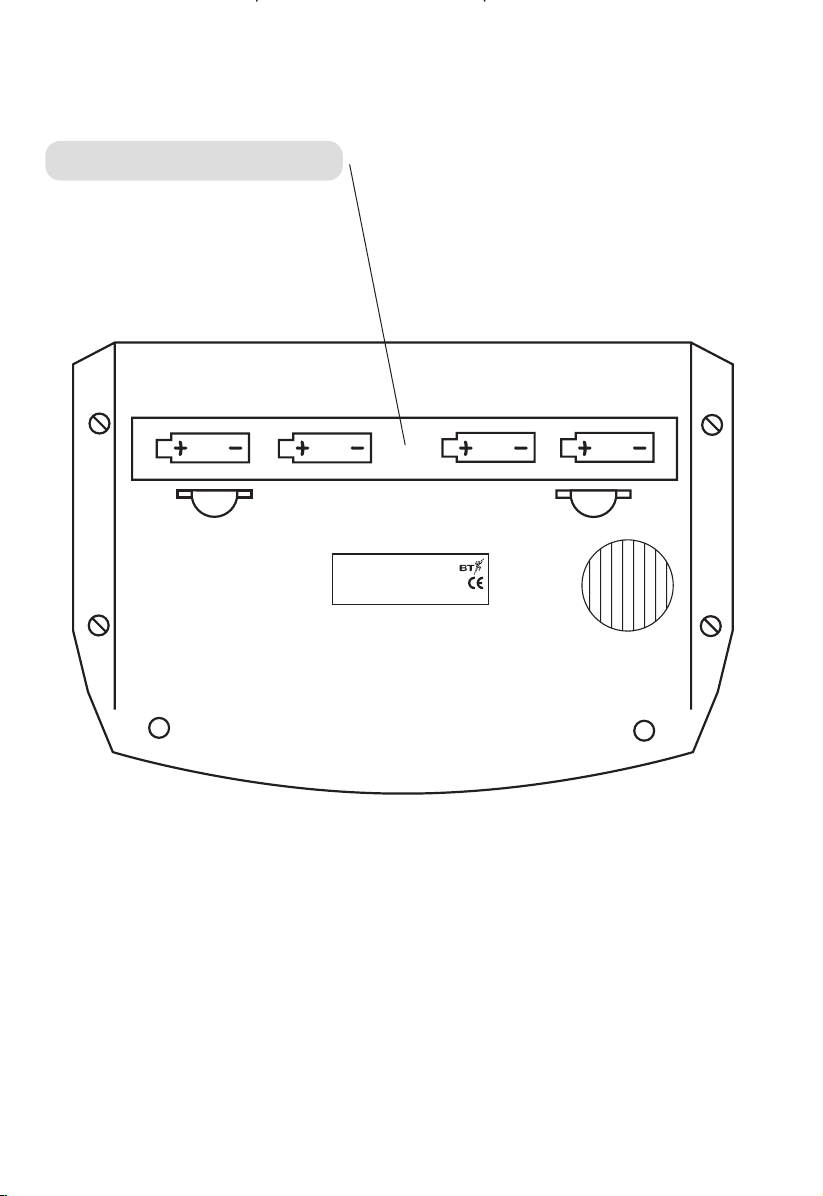
Battery compartment
Textphone
Helpdesk phone number 0845 601 1545.
Only to be used with the power supply included with the product.
Warning! Disconnect from mains power before opening the battery cover.
Item code 872077 REN1 Made in UK
4 x Alkaline AA batteries
6
Page 5

In this guide
At a glance 2
Key features 8
Introduction 10
General information 11
Setting up 12
Using your Textphone 16
Answering text calls 21
Using the
answering machine 27
Using the Voice
announcer 36
Using VCO/Voice
Through 37
Additional features 64
Emergency number 64
Emergency memo 66
Optional settings 68
To adjust the contrast 68
To adjust the backlight
settings 69
To set your Textphone to
make outgoing calls only 71
To view the memory capacity 72
Using your Textphone
with BT Call Sign 74
Connecting your
Textphone to a printer
or PC 78
Automatic Shutdown 79
Using the phone book 38
Using the Call Lists 45
Textphone prefix 52
Using the
Function buttons 55
Menu Structure 81
Help 83
Resetting your Textphone 84
Textphone codes 88
Index 91
7
Page 6
Key features
F8
VCO
Text memory
The memory stores up to 10,500
characters so that you can review
your text conversations after the
call has finished.
Phone book
Stores up to 127 names and
numbers. Use the search facility
to find entries by keying in the
first letter of the name you’re
looking for.
Answering machine
Takes text messages when you
are unable to answer the phone.
E
Emergency button
Gives you a one-touch dialling of
an emergency number to call for
help. There is also an automatic
text message which when the
emergency button is pressed,
will send your details if you are
unable to type out your own
message.
If you have connected a telephone
or fax machine with a handset to
your Textphone, the VCO button
lets you switch between voice and
text communication during a call.
8
Page 7

User optional
F1
function buttons
You can set the F1-F8 buttons to
work in the way that suits your
needs best, e.g.:
Quick menu – instantly selects a
commonly used menu option.
Call lists
Holds details of time and date (if
the clock is set) and the number
of the last 24 calls made (if you
subscribe to BT Caller Display
you can also see details of the last
24 calls received).
V.18 technology
Quick memo – stores a standard
text message and then sends it by
pressing a single button.
Quick dialling – lets you use a
function button to instantly dial
a number.
Allows you to communicate with
most textphones without having
to reset communication codes.
9
Page 8
Introduction
Please read the User Guide carefully before using your Textphone.
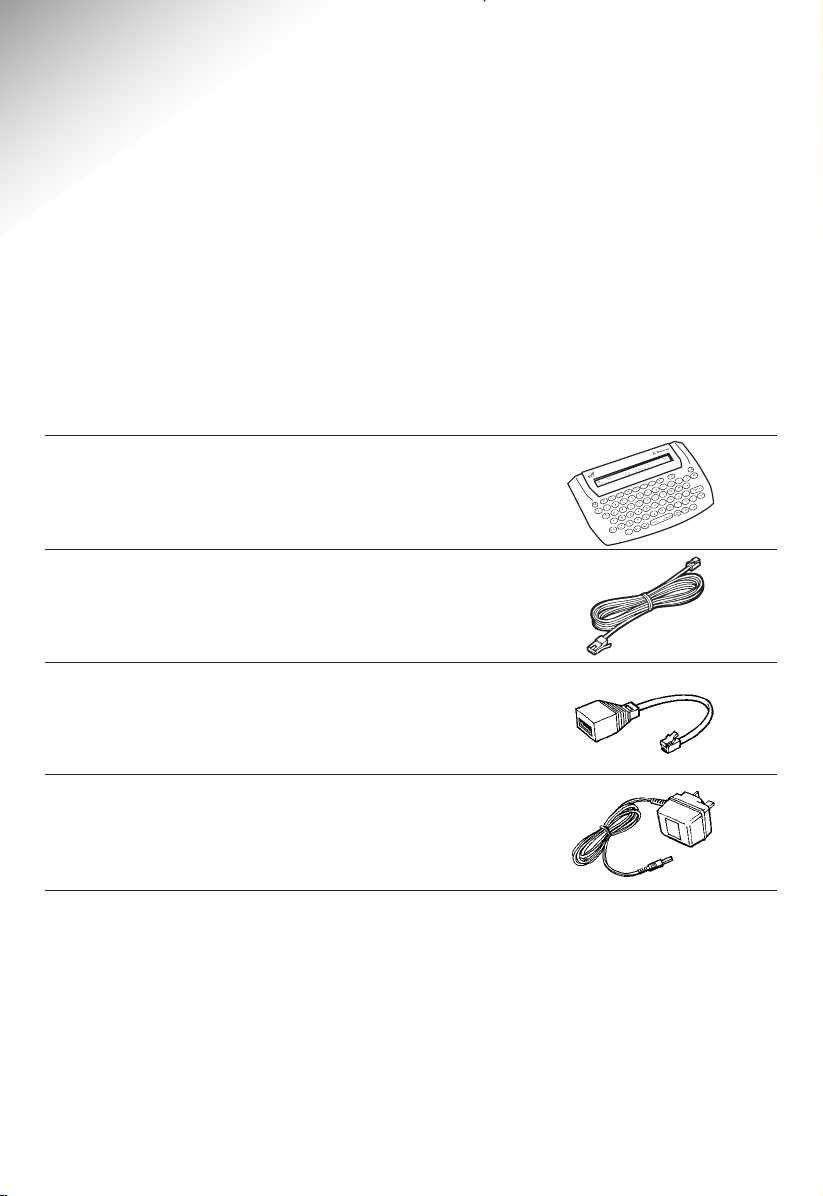
When you have unpacked your Textphone you should have:
• Textphone
• Telephone line cord
• Adaptor socket for connecting
additional telephone equipment.
• 3-pin mains power adaptor
If anything is missing, please contact your Textphone supplier.
You may also wish to buy 4 AA alkaline batteries if you want to use
your Textphone without mains power.
10
Page 9

General information
General
Simply clean your Textphone with a damp (not wet) cloth, or an
antistatic wipe. Never use household polish as this may damage the
Textphone. Never use a dry cloth as this may cause static shock.
Only use the power supply included with the Textphone. Using an
unauthorised power supply unit will invalidate your guarantee and
may damage the Textphone.
Never dispose of batteries in a fire. There is a serious risk of
explosion and/or the release of highly toxic chemicals.
Environmental
• Do not leave flat batteries in the Textphone. Batteries should be
replaced after 2 years even if they have not been used.
• Apart from the batteries, there are no customer replaceable parts.
• Do not expose to direct sunlight.
• Do not stand your Textphone on carpets or other surfaces which
generate fibres, or place it in locations preventing free flow of air
over its surfaces.
• Do not submerge any part of your Textphone in water and do not
use it in damp or humid conditions, such as in bathrooms.
• Do not expose your Textphone to fire, explosive or other hazardous
conditions.
• There is a slight chance that your Textphone could be damaged by
an electrical storm. We recommend that you unplug the power and
telephone line cord for the duration of the storm.
11
Page 10

Setting up
Telephone
7.5V DC
–
+
Planning the location of your Textphone
Situate your Textphone close enough to the telephone and mains
power sockets so that the cables will reach.
1. Install the back-up batteries.
If the power fails, the back up batteries will
ensure you can still make and receive calls.
Press down on the two tabs on the bottom
of your Textphone with the thumb and
first finger of one hand. With the other
hand, flip open the battery compartment
cover. Insert 4 x Alkaline AA batteries the
right way around (as shown in the battery
compartment). Clip the cover back into
place.
Please note
Typical battery life if using without mains
is 25 hours.
<Warning! Low battery!>
Will be displayed on the screen to indicate
that the batteries require charging.
2. Connect the mains power adaptor
to the Textphone and mains socket.
12
Page 11
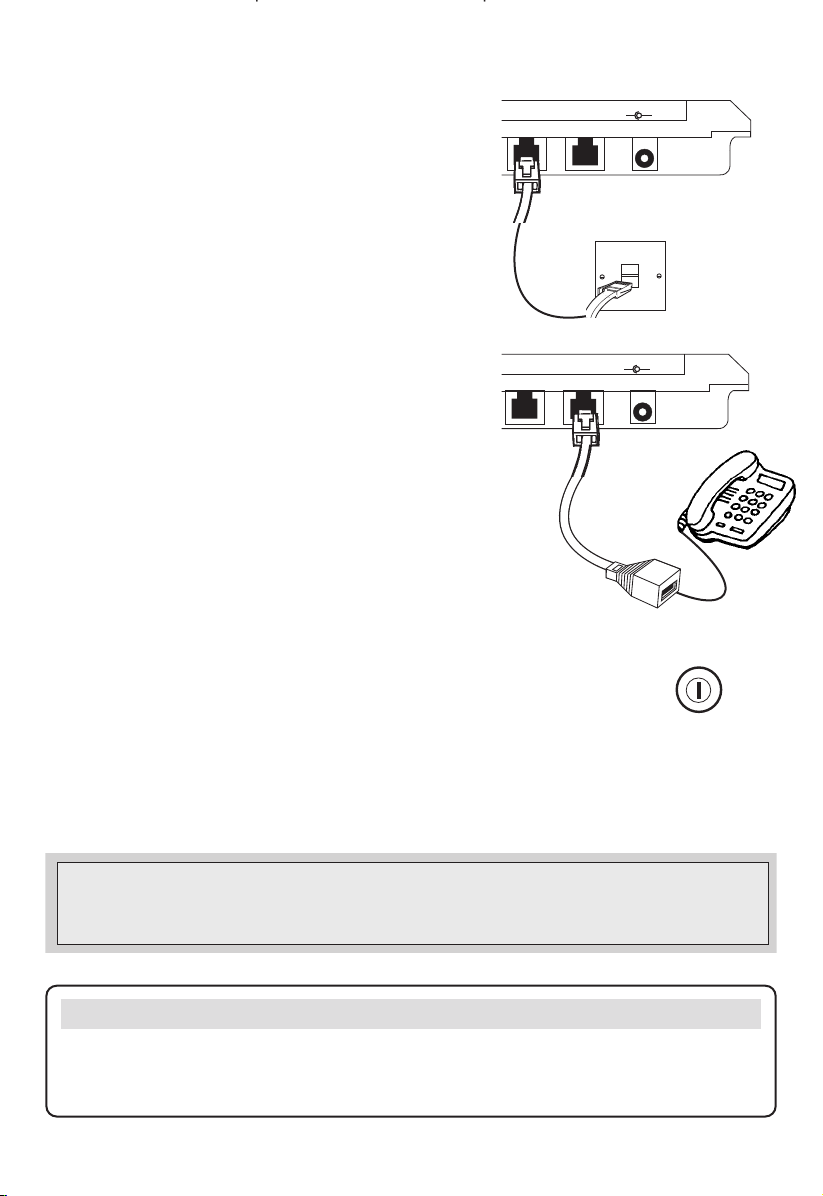
3. Connect telephone line cord
Line Telephone
7.5V DC
–
+
Line Telephone
7.5V DC
–
+
Plug the telephone line cord
into the back of your Textphone.
Plug the other end into the
telephone line wall socket.
4. Connecting a telephone or
fax machine
If required, connect telephone
equipment into the Telephone socket
on the back of your Textphone (use the
adaptor socket provided).
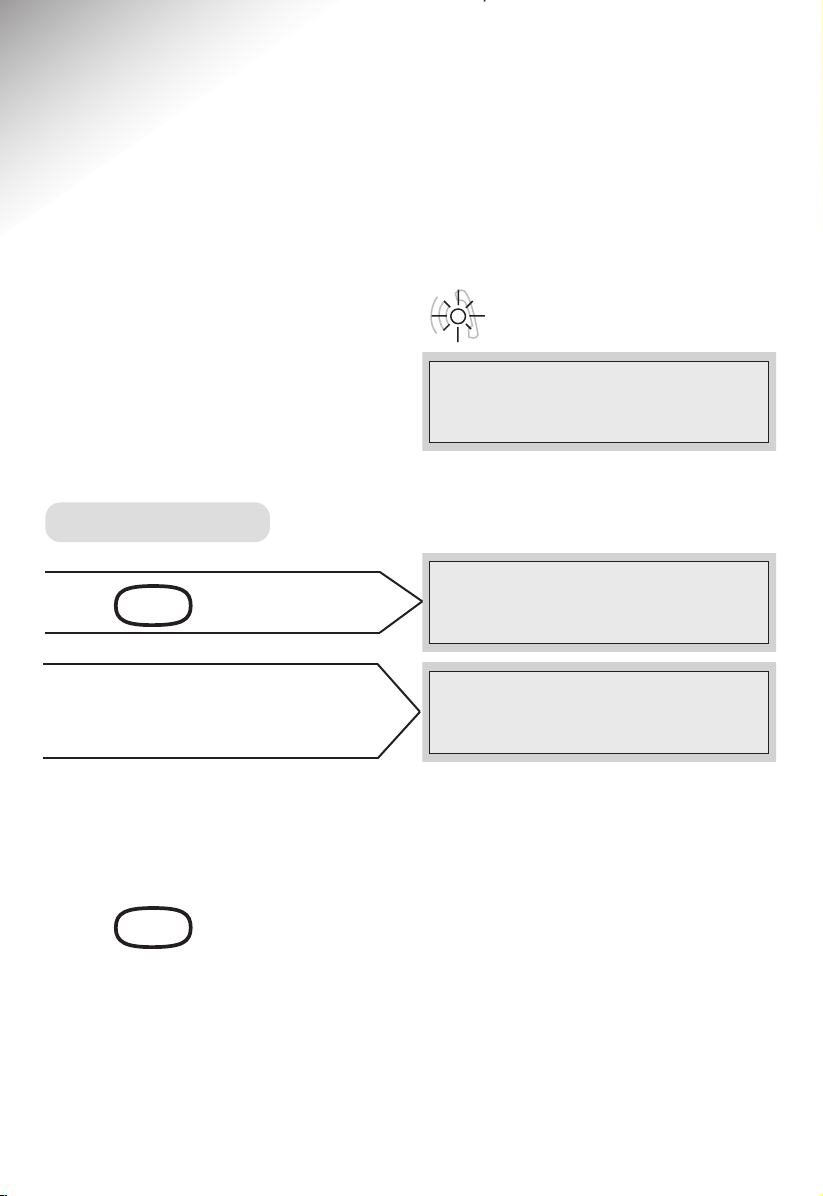
5. To turn the Textphone On, press and hold the
button for 2 seconds.
Your Textphone switches on and the display shows the
standby screen.
<V.18> Prefix:On Answer:Off Calls:0
<Please dial)
Please note
If you subscribe to the BT Caller Display service, you should leave
your Textphone switched on in order to receive the caller information.
13
Page 12
6. To turn the Textphone Off, press and hold the
button for 2 seconds.
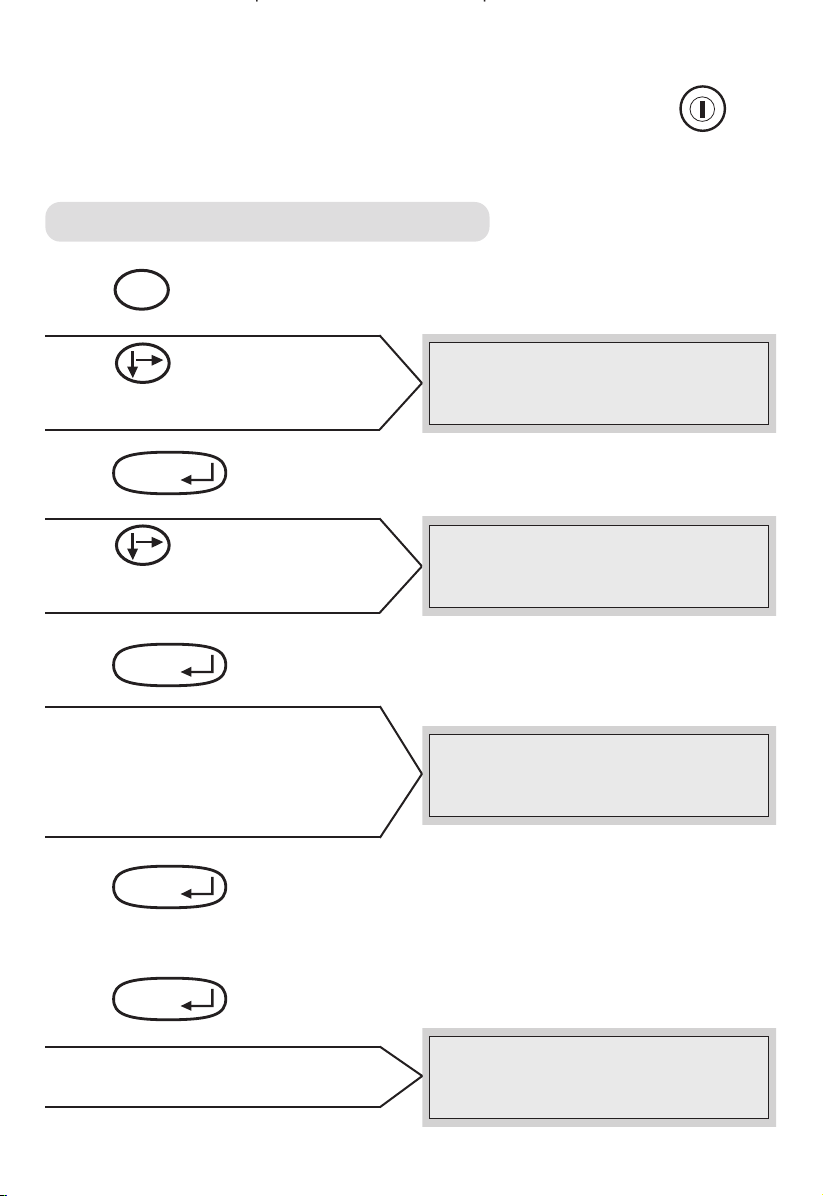
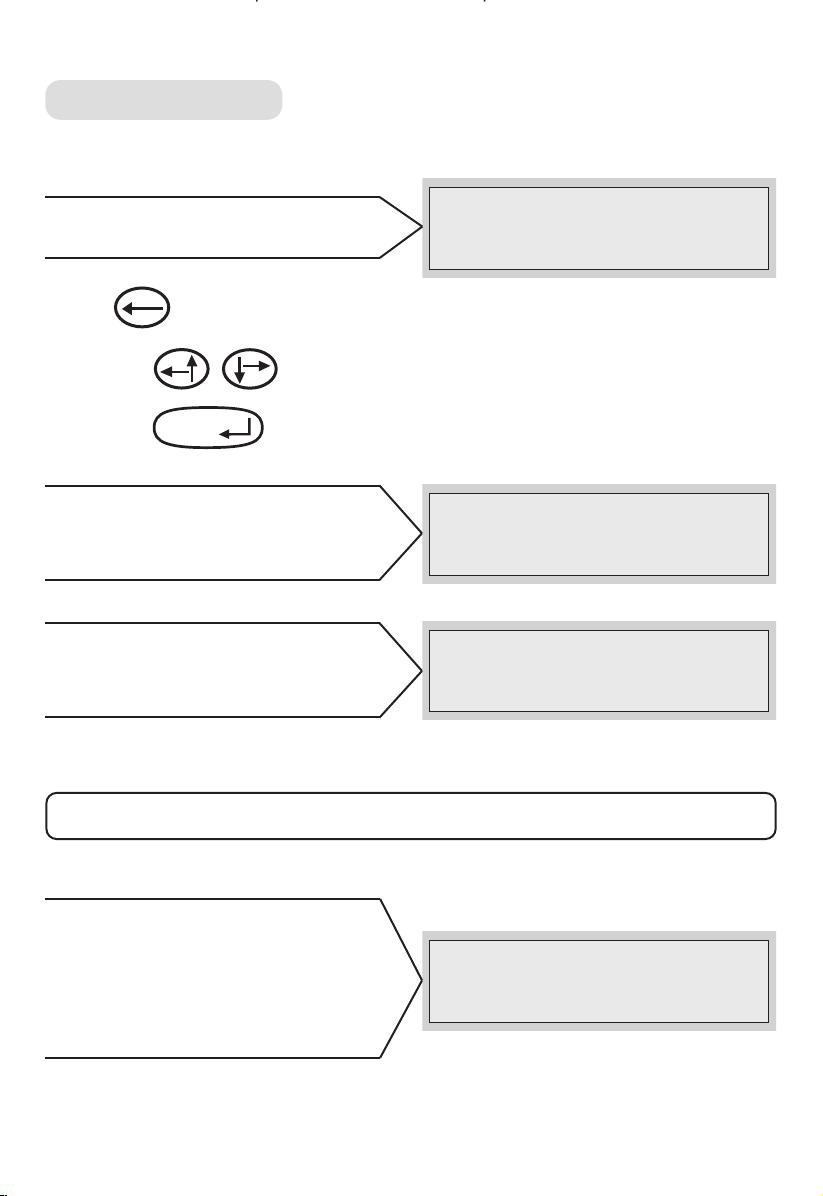
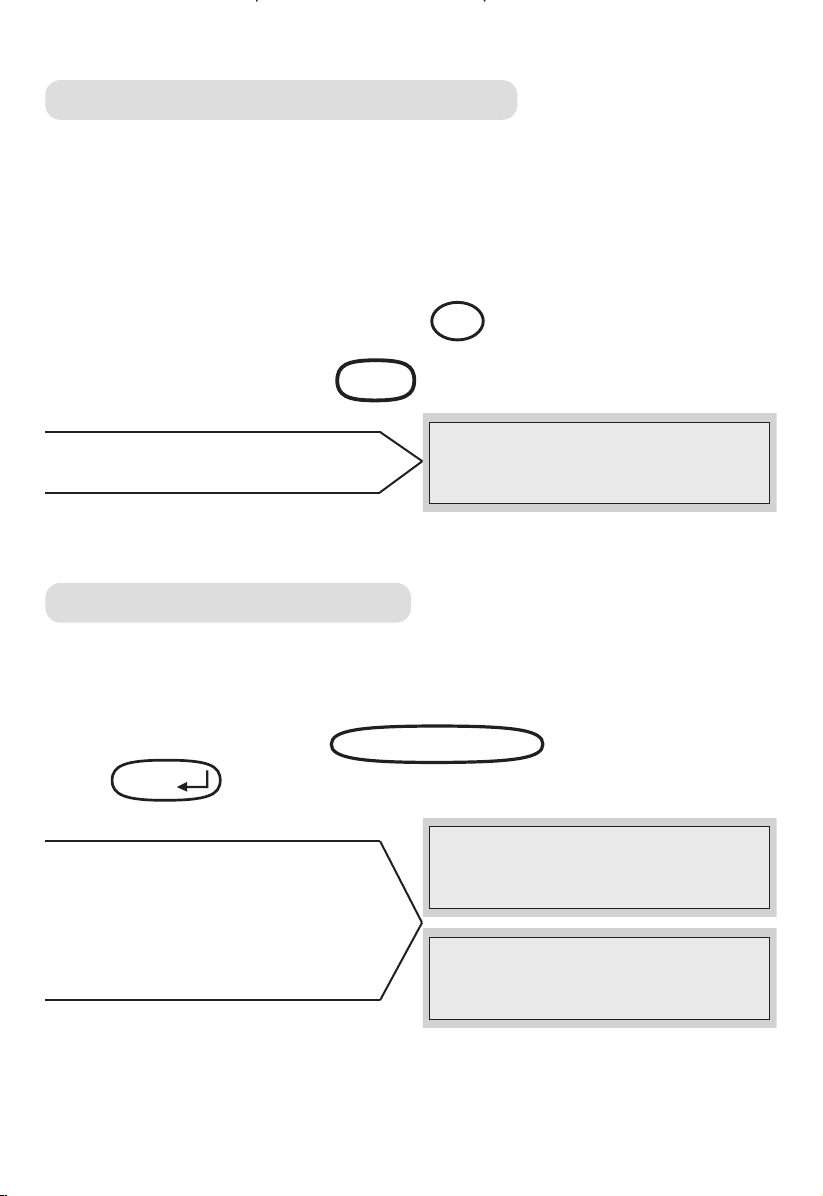
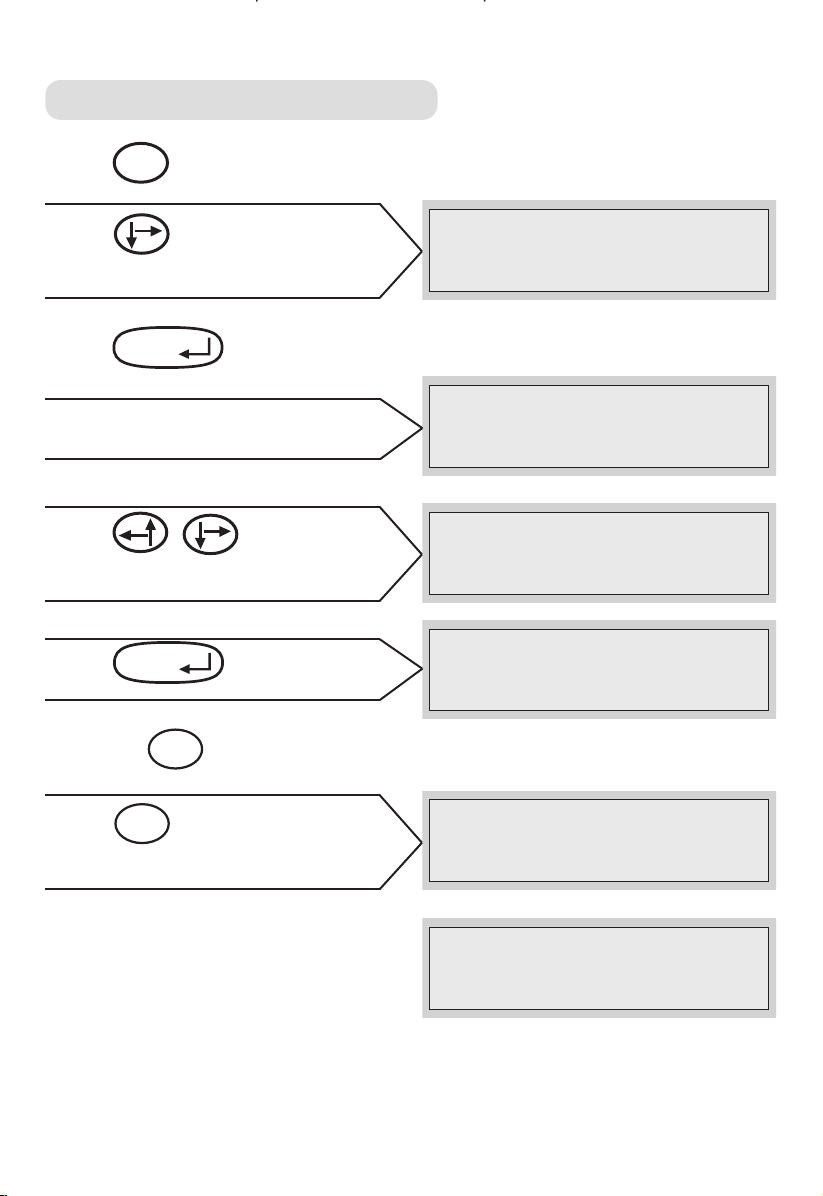
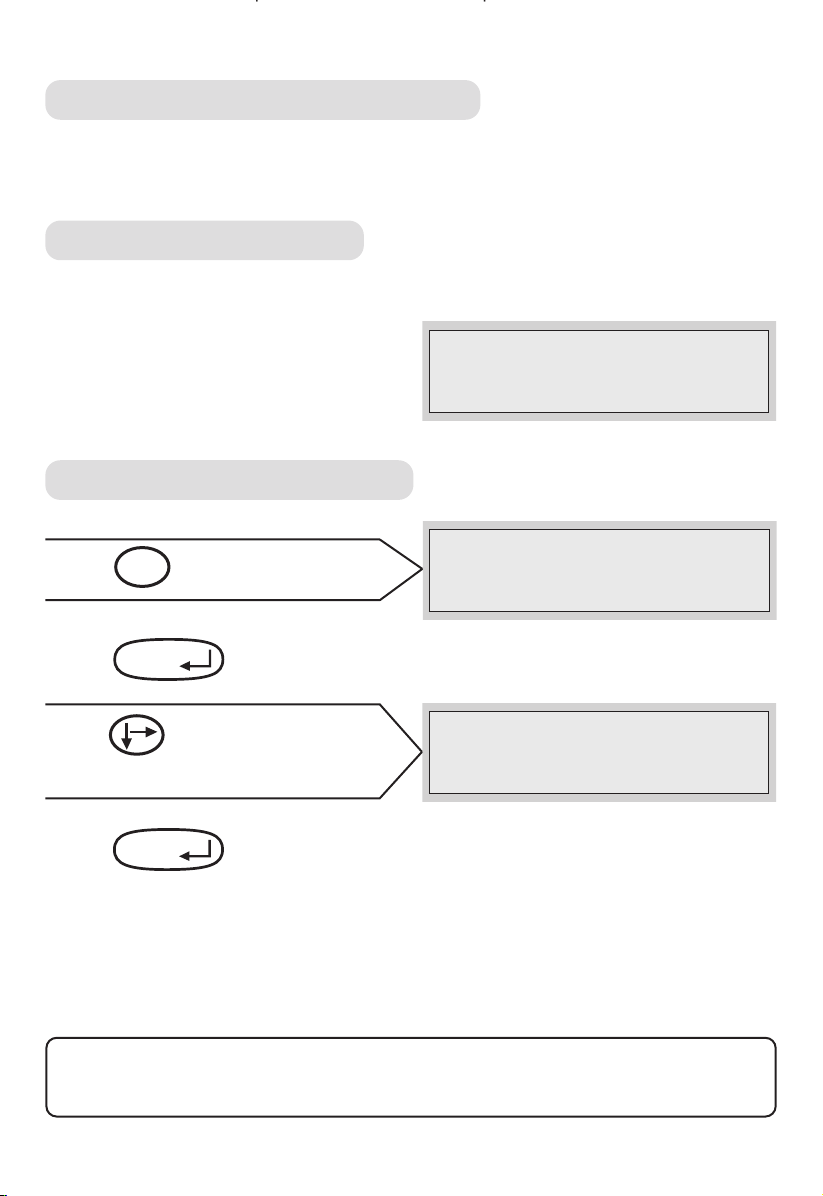
To set the time and date yourself
Press .
Menu
Press until the arrow
points to
Press .
>5.Settings
Enter
.
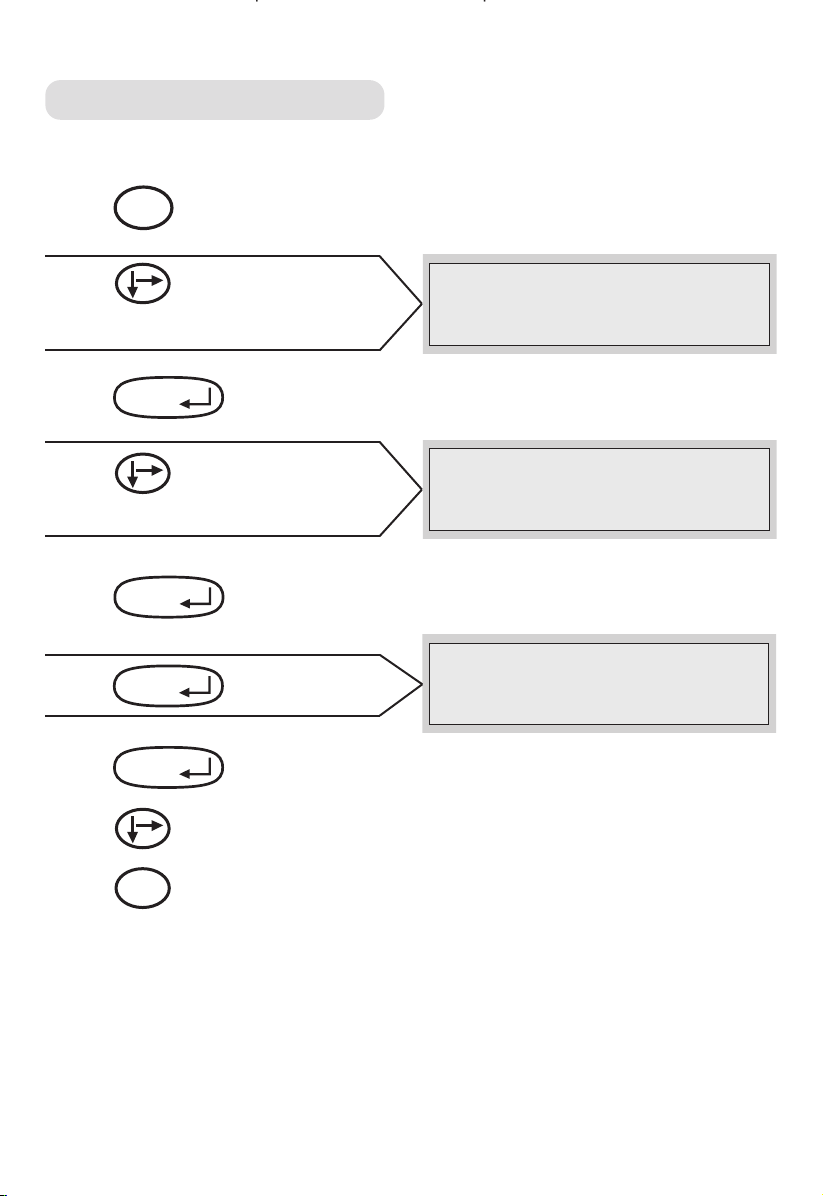
Press until the arrow
points to
Press .
>6.Clock
Enter
.
Enter the correct time using the
12 hour clock Press 1 or 2 to select
AM or PM.
Main menu > 5.Settings
6.Function keys
5.Settings >6.Clock
7.Auto shutdown
Clock > 1.AM
2.PM
Press .
Enter
Enter the correct date (ddmmyy e.g. 19 November 2005 = 191105)
Press .
Display shows
14
Enter
<Clock is set.>
Page 13
Do you need to set the time and date?
If you have subscribed to BT’s Caller Display service, the time and
date are set automatically when your Textphone receives its first call.
If you do not set the time and date it simply means that the Textphone
will not record the times of calls.
If you do not have Caller Display, you can set the time and date yourself.
Please note
If the mains power fails and the back-up batteries in your Textphone
run out, the time and date will be lost and you will have to enter the
time and date again. But if you subscribe to Caller Display the time
and date will be set automatically when you receive your next call.
You are now ready to make and receive calls
If you experience difficulties in setting up your Textphone please
contact the BT Textphone Helpline on 0845 6011545 for assistance.
The Helpline is open 09:00 to 17:30 Monday to Friday, 09:00 to 12:00
Saturdays, except for public holidays.
15
Page 14

Using your Textphone
Making text calls
When you make a call through BT TextDirect (using the necessary
prefix), you will receive messages on the display of your BT
Textphone telling you whether the person you are calling is busy, or
their phone is ringing.
The service also recognises whether the call is to another textphone
or a voice phone.
If the call is to a voice phone, it will automatically be connected
through a Typetalk operator. They will type what is said by the other
person and speak your reply.
If the call is to another textphone, the Typetalk operator will not be
connected.
To use the BT TextDirect service simply switch on the Prefix as
described on page 52.
For more information on BT TextDirect and Typetalk dial
0800 500 888.
16
Page 15
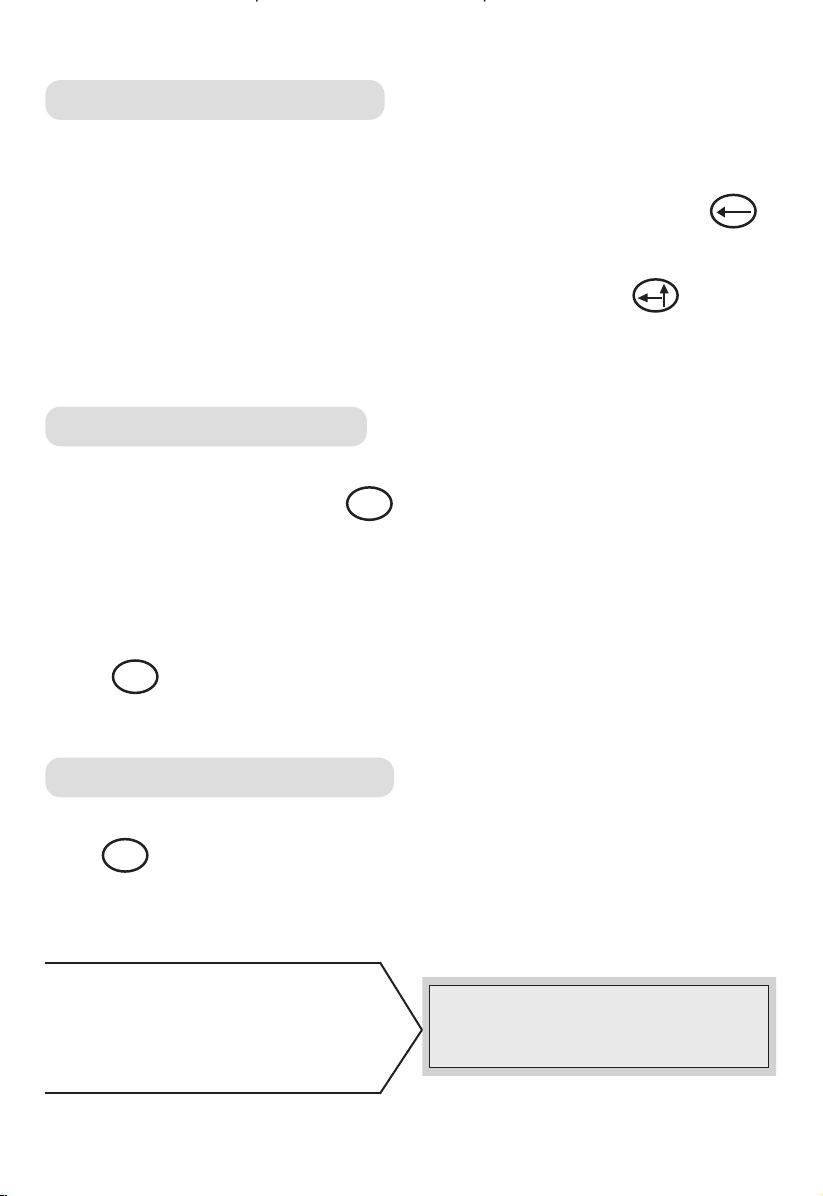
To dial a number
Type the phone number you want.
Display shows
<Please dial then press Enter.>
Press to delete the last digit.
Press the to move the cursor.
Press the . The number is dialled.
Display shows
Enter
<Dialling...>
and
the number you have dialled.
When the call is answered, the
<Trying to connect>
Textphone will display
<Dialling...>
XXXX XXXXXXX
<
▫▫▫
>
It may take up to a minute to establish a connection.
When the connection is made,
display shows
established>
mode it has used, e.g.
<Connection
and the communication
<V21>
.
<Connection established> <V21>
17
Page 16
Textphone conversations
Shift
When you call out you must wait for the other person to type first.
They will usually type
“Hello.GA”
. You can then type back what you
would like to say. If you type something incorrectly, you can press
to delete the text.
If you wish to review what has been said, you can press to look
at previous text. If you then type, or the other person types, the text
will go back to the bottom.
Typing in capital letters
During a call it is possible to use lower case and capital letters. To use
capital letters press and hold and at the same time press the letter
you wish to use in capital. This method also allows you to use the
symbols above the number keys.
You can also use the sticky key function:
Press twice, only the next key you press will appear as a capital
Shift
or as the symbol above the number keys.
Using menus during a call
It is possible to access the menu during a call. To do so, press and
hold . You can access the telephone directory, previous calls
and change settings during a call. There are certain settings you
cannot change during a call.
The message
during a call>
try to use forbidden functions.
18
Menu
<Not possible
will appear if you
<Not possible during a call>
Page 17
To end a call
Enter
End
Press .
Dial
Call
To dial a number stored in the phone book, see page 39.
To dial a number stored in the incoming Call lists, see page 47.
Dialling by Name
Instead of dialling by entering their phone number, it is possible to call
someone by entering their name. For this to be possible, their name
and telephone number must be in the telephone book. See page 38 on
adding telephone entries. For example if you type the persons name
and press (you do not have to type all their name, just the first
few letters).
The following message will
appear:
If you press the number will be called .
Do you wish to call (Y/N)?
Y
If it is not the correct person press to return to the main screen
Do you wish
to call (Y/N)?
N
Name
Number
XXXXXXX
XXXXXXX
or press to move to the nearest entries in the phone book.
To redial the last number
Press . The last number you called is redialled.
Enter
19
Page 18

To enter a ‘pause’ when dialling
A phone number is dialled only when you press the .
Enter
If your Textphone is connected to a switchboard or if you are using a
chargecard, you may need to put a ‘pause’ into the phone number.
For example:
To enter a pause, press the so it displays ,.
\
,
Calling an Outside Line via a switchboard
You may need to dial 9then pause to dial an outside line.
For example:
To do this type
9,020 1234 5678
.
The Textphone will then pause for
two seconds between dialling the
9
and the 0.
9,020 1234 5678
20
Page 19
Answering text calls
When your Textphone receives a
call, the calls indicator flashes and
the display shows
and BT Caller Display
information if you have subscribed
to the service.
To answer a call
<Incoming call>
<Incoming call>
End
Press . Display shows
Dial
Call
You are connected when the
display shows
<Connection established><(Communication mode)>
(This can take up to one minute).
Type your greeting and your conversation.
End
Press to end the call.
Dial
Call
<Trying to connect>
<
▫▫▫
>
21
Page 20
Answering a call with a voice phone
Dial
End
Call
If you have a voice phone connected to the Telephone socket at the
back of your Textphone, you can answer the call with the voice phone.
If you then find that the person is using a textphone it may be
necessary to switch to text.
To do this:
From the Textphone press and hold .
and at the same time press .
Shift
This message will appear.
<Trying to connect>
Put down the phone.
Dialling with a voice phone
If you dial using the voicephone and decide you wish to change to text
you need to:
From the Textphone press twice and then
press .
Enter
Put down the phone and the
message
<Dialling...>
will appear
soon afterwards the message
<Trying to connect>
will appear.
Space Announce
<Dialling...>
<Trying to connect>
22
Page 21
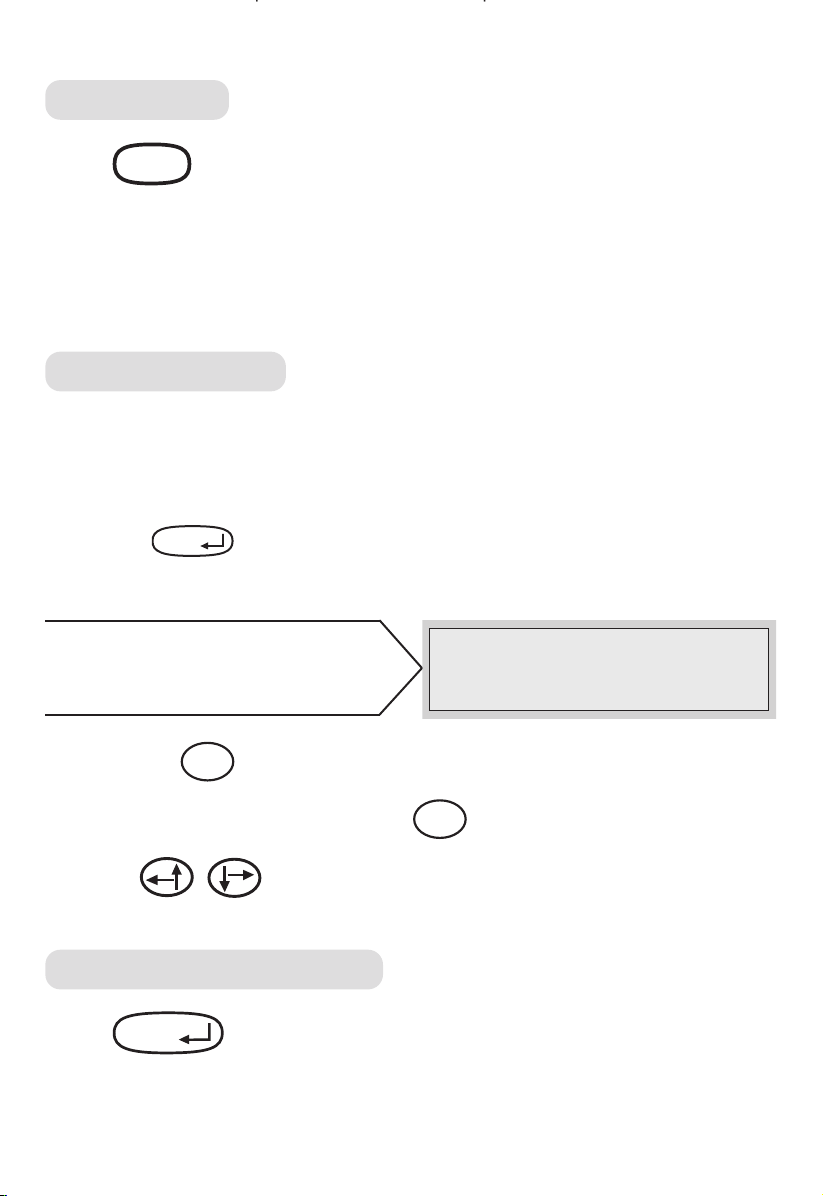
To review a conversation
You can replay your text conversation.
Press . The menu is displayed.
Press until the arrow
points to
Press .
Press until the arrow
points to
Press . The details of the last conversation are shown.
Press . Display shows
Press .
Menu
>4.Conversation
Enter
>2.Last conversation
Enter
Enter
Enter
Main menu > 4.Conversation
5.Settings
4.Conversation > 2.Last conversation
3.Delete all
Options > 1 .Read
2.Delete
Press to scroll through the conversation.
Press to return to standby screen.
Esc
23
Page 22
To delete an old conversation
Press . The menu is displayed.
Press until the arrow
points to
Press .
Display shows
Menu
>4.Conversation
Enter
Main menu > 4.Conversation
.
5.Settings
4.Conversation > 1 .Read conversations
2.Last conversation
Press
Enter
.
Press to display the conversation you want.
Press .
Display shows the
Enter
Options menu
.
Press .The arrow points to
>2.Delete
Press . Display
.
Enter
confirms that the entry is deleted.
24
Options >2.Delete
3.Call
<Conversation removed>
Page 23
To delete all old conversations
Press . The menu is displayed.
Menu
Press until the arrow
points to
Press .
>4.Conversation
Enter
.
Display shows
Press until the
arrow points to
Press . Display shows
Enter
>3.Delete all
.
Main menu > 4.Conversation
5.Settings
4.Conversation > 1 .Read conversations
2.Last conversation
4.Conversation > 3.Delete all
1.
Read conversations
Are you sure? (Y/N)
Or press to cancel deletion.
Press to delete.
N
Y
Display shows
then
<Removing entries>
<Memory empty>
25
Page 24
Quickword buttons
SKSKSK
SK
GA
Your Textphone has two buttons on the bottom right hand corner
which are used frequently.
means “Go ahead”. Press once to let the other
person know you are waiting for a response.
means “Stop keying”. Press once to give the
other person a chance to send any last words
before ending the conversation.
means “Goodbye”.
Press three times to indicate you are about
to end the call.
Useful abbreviations
You may also find these short words handy in speeding up
your conversation.
Quickword Meaning Quickword Meaning
BIBI
CD
CUL
COS
HD
MTG
NBR
OIC
OPR
PLS
26
Bye Bye
Q
question mark
could – saves you
see you later typing in a
because whole question
hold, please
meeting
number
oh, I see
operator
please
R
SHD
THX
TMW
U
UR
are
should
thanks
tomorrow
you
your
Page 25

Using the answering
machine
If you are going out or cannot take a call, turn on the answering machine.
Your Textphone will answer any text calls with a short message.
The caller can then leave a text message for you to read later.
The pre-set outgoing message (OGM) is “Hello, please leave a
message. GA”
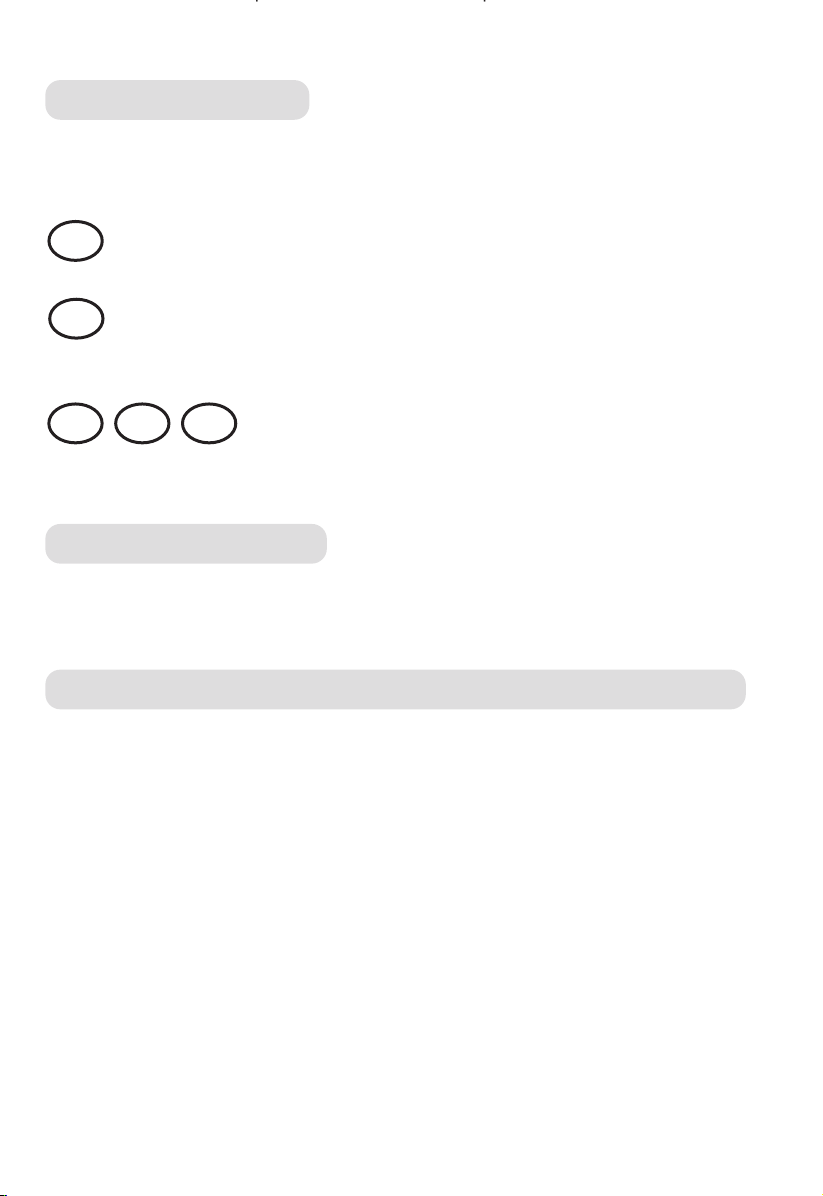
To write your own outgoing message (OGM
This will replace the pre-set OGM.
Press . Display shows
Press .
Display shows
Press until the arrow
points to
Press .
Menu
Enter
>4.Answer message
Enter
Main menu
1.Answer machine > 1.Answer On/Off
1.Answer machine > 4.Answer message
)
>1
.Answer machine
2.Phone book
2.Read
5.Ring length
27
Page 26
Display shows
your answer message...”
“Please edit
and
Please edit your answer message...
the current OGM.
Press to delete the message.
Or press to move the cursor to the letters you wish to
change.
Or press
Shift
and
to move the cursor to the beginning of
the text.
Or press
Shift
and
to move the cursor to the end of the text.
Type your new OGM.
Press to save.
Display shows
Enter
<Typing has been saved>
Or
Press to retain the previous OGM.
Esc
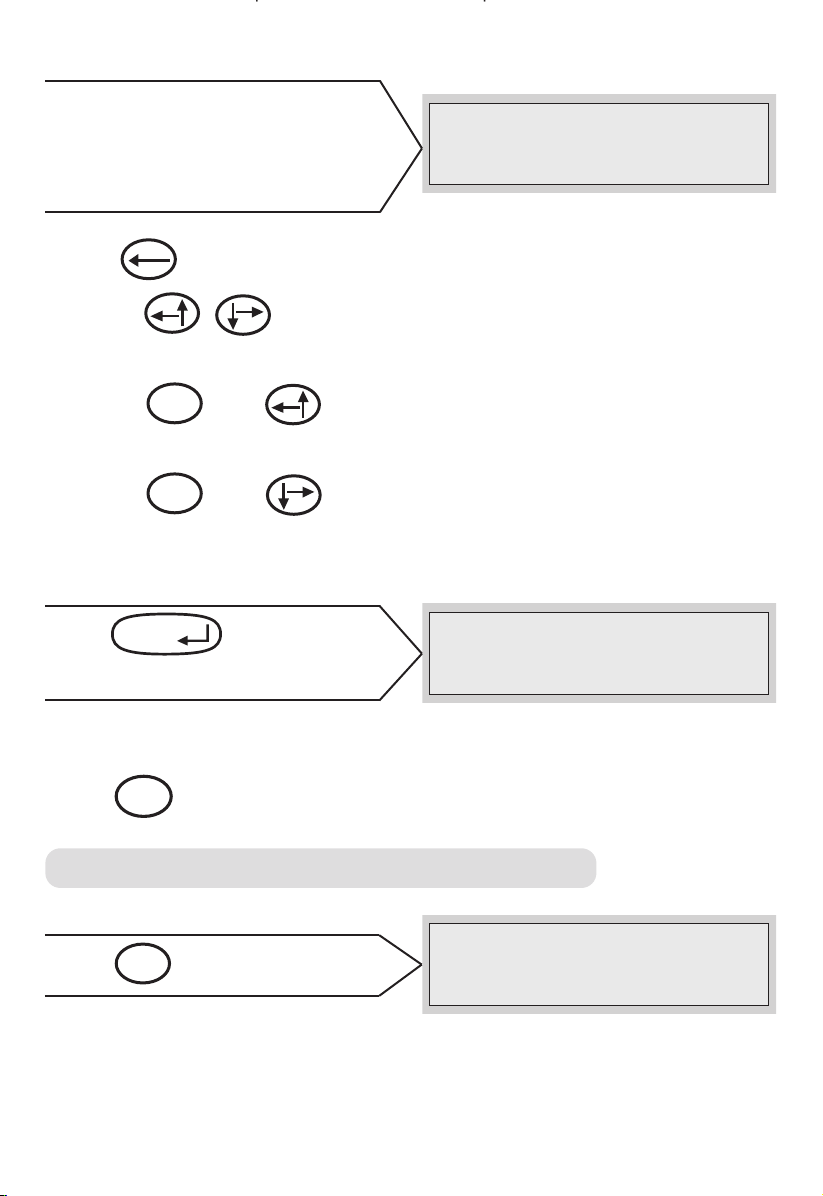
To switch your text answering machine on
Press . Display shows
Menu
Main menu > 1.Answer machine
2.Phone book
28
Page 27
Press .
Enter
Display shows
Press
Enter
The display shows
.
1.Answer machine > 1.Answer On/Off
<Answer machine On>
The machine is now switched on.
To switch your answering machine off
Press . Display shows
Press .
Menu
Enter
Display shows
Main menu > 1.Answer machine
1.Answer machine > 1.Answer On/Off
2.Read
2.Phone book
2.Read
Press .
Enter
The display shows
The machine is now switched off.
<Answer machine Off>
29
Page 28
To interrupt the answer machine
Simply start typing to answer a call that is coming in when the
answering machine is on.
New message indicator
When you have new messages on your answering machine
• the incoming calls indicator
flashes every four seconds
• display shows the number of
<V.18> Prefix:On Answer:Off Calls:2
<Please dial>
new messages, e.g 2.
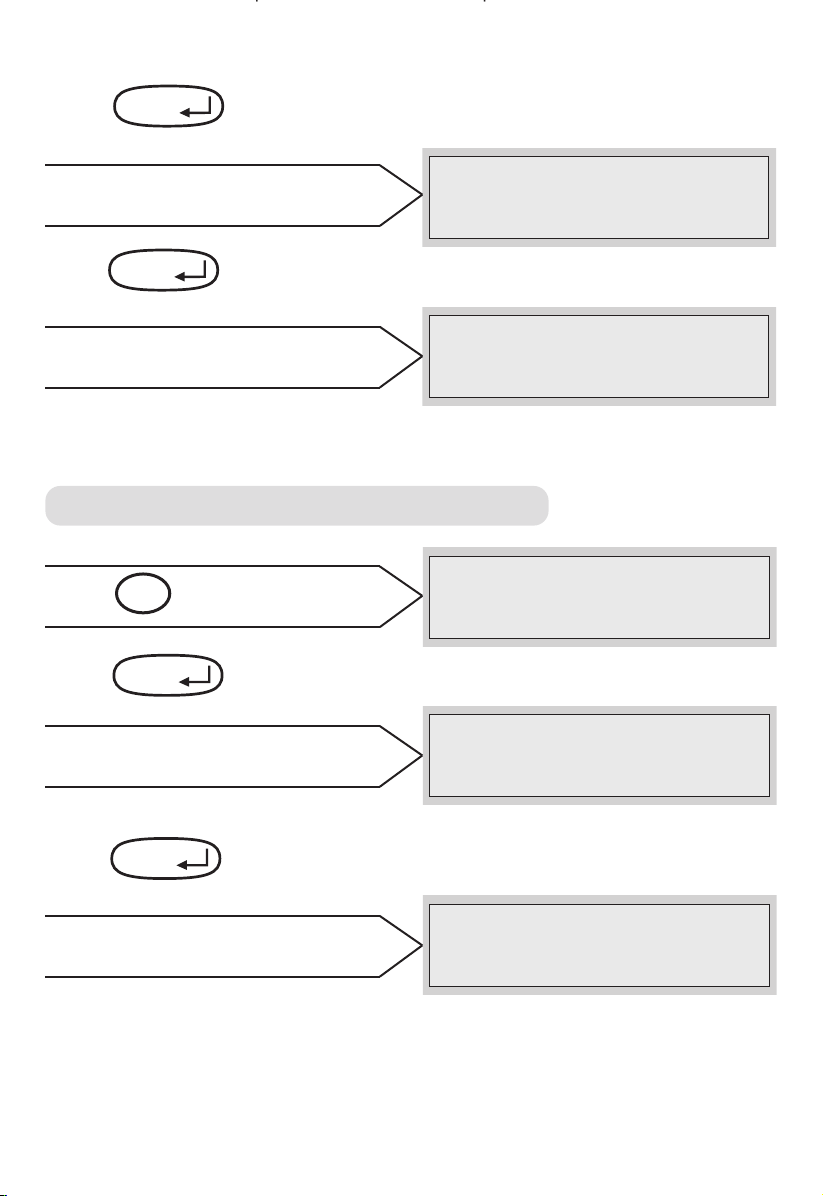
To read your text messages
Press . Display shows
Menu
Main menu > 1.Answer machine
2.Phone book
Press .
Press until the arrow
points to
Press .
Enter
>2.Read
Enter
1.Answer machine > 2.Read
.
3.Delete all
Display shows how many new messages you have, then the summary
details of the most recent unread message.
If there are no new messages, the screen shows
<No new messages>
then the most recent message is displayed.
When you have no messages, the display shows
followed by
<Memory empty>
<You have 0 new messages>
.
30
Page 29

If you have subscribed to BT Caller Display, this includes the phone
number of the caller if available.
The date and time of the call is shown if the clock has been set.
Press to scroll through your message summaries.
When the display shows the message you want
Press .
Display shows
Enter
Options
>1.
Read
2.Delete
Press the button to read the message. If the caller did not
leave a message,
Enter
<No message was left>
is displayed.
Display shows the first line.
Press to scroll through the message.
Press to return to your message summaries.
Esc
Press to view the next message summary.
To delete a single text message
Press . Display shows
Menu
Main menu > 1.Answer machine
2.Phone book
Press .
Enter
Press until the arrow
points to
>2.Read
.
1.Answer machine > 2.Read
3.Delete all
31
Page 30

Press .
Enter
Display shows you the summary of the most recent message.
This includes:
• date and time of the call (if you
have set the clock).
• length of the call.
Call:01234-678901 Duration:0s
03:25 PM 6th Feb
• caller’s number if available.
Press to scroll to the message summary you want.
Press . Display shows
Enter
Press until the arrow
points to
Press to confirm.
Display shows
removed>
>2.Delete
Enter
.
<Conversation
. The message has now
been deleted.
If this is your only message this
will be followed by the message
<Memory empty>
.
Options
>1.
Read
2.Delete
Options
>2.
Delete
3.Call
<Conversation removed>
<Memory empty>
Press until you return to the standby screen.
32
Esc
Page 31

To delete all text messages
To keep your Textphone memory free for new messages, delete your
messages regularly.
Press . Display shows
Menu
Main menu > 1.Answer machine
2.Phone book
Press .
Press until the arrow
points to
Press . Display asks
“Are you sure? (Y/N)”
Press to cancel. You will be returned to the standby screen.
Enter
>3.Delete all
Enter
N
1.Answer machine > 3.Delete all
4.Answer message
.
Are you sure? (Y/N)
Or
Press to delete.
Display shows
Y
<Removing entries>
Followed by.
<Memory empty>.
<Memory empty>
33
Page 32

Text and phone book memory capacity
Your Textphone can store up to 10,500 characters. The memory is
shared between the answer messages and the conversation memory.
Remember to delete text regularly.
If you do not delete messages when the memory is full, your
Textphone will overwrite old messages with new ones.
To view the current amount of free memory,
see page 72.
Permanent memory
Even if your Textphone is unplugged from the mains and the
batteries are removed, all your settings, phone book entries and
stored text messages will be retained.
To adjust the ring delay
The ring delay is the number of rings before your Textphone
answers a call.
The pre-set number of rings is 6. Choose from 2, 3, 4, 6 or 10 rings.
Press . Display shows
Press .
Menu
Enter
Main menu > 1.Answer machine
2.Phone book
Press until the arrow
points to
34
>5.Ring length
1.Answer machine > 5.Ring length
1.Answer On/Off
Page 33

Press . Cursor indicates the current setting.
Enter
Press to move the cursor to the ring delay setting you
want.
Press .
Display confirms
Enter
<Ring length set>
To switch on your answering machine from another phone
If you forget to switch on your answering machine when you go out.
Ring your Textphone number. The answering machine will switch on
after approximately one minute and start to play your outgoing
message.
Hang up. Your answering machine is now on.
35
Page 34

Using the
Voice announcer
Your Textphone has a pre-recorded voice announcement for voice
callers who accidentally ring your number.
When you answer the call,
a message will appear on your
display
The bar beneath is the signal strength indicator. It shows how loud
the signal is. When a Textphone calls, the signal strength will remain
steady and your Textphone will connect to the other Textphone. If a
voice caller speaks, the signal strength will move when they speak.
You can therefore recognise a voice caller.
<Trying to connect>
<
▫▫▫
>
Press .
Screen shows
Your caller will hear “Textphone, please use TextDirect”.
36
Space Announce
<Announcing...>
Page 35

F8
VCO
Using VCO/
Voice Through
Voice Carry Over/Voice Through lets you talk or listen during a call,
providing you have a telephone (or fax machine with a telephone
handset) connected to the Ext. Telephone socket on the back of your
Textphone.
To switch between a text and voice conversation
During a call:
First lift the handset of the telephone or fax machine connected to
your Textphone.
Then press the .
Display tells you to speak.
You are now in voice (VCO) mode. If the other person also goes into
VCO mode you can hold a voice conversation.
To return to text conversation, press on your
Textphone before replacing the handset.
If your caller switches from text to voice during a call your Textphone
will detect this and ask you to either switch to VCO so you can have a
voice conversation or hang up.
Space Announce
<Speak now,
press Space for text>
37
Page 36

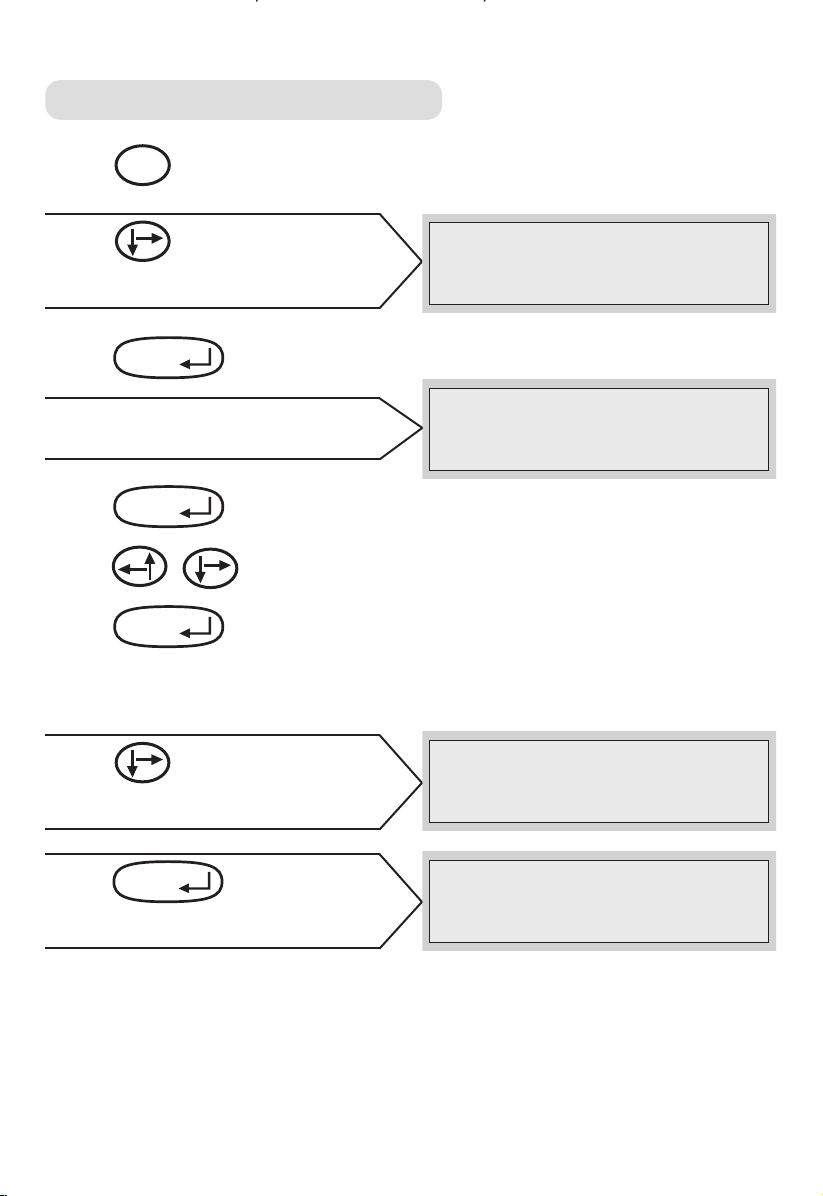
Using the phone book
You can store up to 127 names and numbers in your Textphone’s
phone book.
To store a name and number
Press . The menu is displayed.
Press until the arrow
points to
Press .
Display shows
Press until the arrow
points to
Press .
Display shows
Menu
>2.Phone book
Enter
>3.Add entry
Enter
.
Main menu > 2.Phone book
3.Call lists
2.Phone book > 1.View
2.Search
2.Phone book > 3.Add entry
4.Edit prefix
Phone book
Name-->
Number-->
38
Page 37

Type in the name of the person.
Press .
Enter
Type the telephone number.
Press at any time if you do not wish to save an entry.
Press .
The display confirms
Add another entry or press until your Textphone returns to
Esc
Enter
<Entry saved>
.
Esc
<Entry saved>
standby.
To display and dial an entry in the phone book
Press . The menu is displayed.
Menu
Press until the arrow
points to
Press .
>2.Phone book
Enter
Display shows
Press .
Enter
Main menu > 2.Phone book
3.Call lists
2.Phone book > 1.View
2.Search
Display shows the first entry (alphabetically) in the phone book.
39
Page 38

Press keys to scroll to the entry you want.
Or
To move to entry in the phone book more quickly, press the first
letter of the person’s name.
Press
Display shows
Enter
.
Phone book > 1.Call
2.Remove entry
Press
Enter
.
The number is dialled.
To search for an entry
Use search to find entries by typing in the first letter(s) of the name
you are looking for.
Press . The menu is displayed.
Press until the arrow
points to
Menu
>2.Phone book.
Main menu > 2.Phone book
3.Call lists
Press .
Enter
Display shows
40
2.Phone book > 1.View
2.Search
Page 39

Press until the arrow
points to
>2.Search
2.Phone book > 2.Search
3.Add entry
Press .
Display shows
Enter
Enter name to call.Press Enter to view
Type the name you want. You do not have to type the full name.
For example, to find the entry for Fred Jones, you only have to type ‘fr’.
Press . Display shows the nearest matching entry.
Enter
If more than one entry matches the letter(s) you have typed you may
need to press the to scroll to the other entries.
To edit an entry
Press . The menu is displayed.
Press until the arrow
points to
Menu
>2.Phone book
Main menu > 2.Phone book
3.Call lists
Press .
Enter
Display shows
2.Phone book > 1.View
2.Search
41
Page 40

Press until the arrow
points to
>2.Search.
2.Phone book > 2.Search
3.Add entry
Press .
Display shows
Enter
Enter name to call.Press Enter to view
Type the first letter(s) of the name you want.
Press .
Enter
Display shows the nearest matching entry.
If more than one entry matches the letter(s) you have typed you may
need to press the to scroll to the other entries.
When you find the entry you require press .
Press until the arrow
points to
>3.Edit entry
.
Phone book > 3.Edit entry
Enter
4.Add entry
Press . The name is displayed.
Enter
If you want to change the name use the button to delete letters
or press to move the cursor to the letter you want.
Press . You may now edit the phone number.
Enter
If you want to change the number, use the button to delete
characters and then type in the correct number.
42
Page 41

To cancel at anytime during editing, press the .
Esc
Press .
The screen confirms
Press to return to standby screen.
Enter
<Entry saved>
Esc
To delete an entry
Press . The menu is displayed.
Press until the arrow
points to
Press .
Menu
Main menu > 2.Phone book
>2.Phone book.
Enter
<Entry saved>
3.Call lists
Display shows
Press until the arrow
points to
Press button.
>2.Search.
Enter
Display shows
2.Phone book > 1.View
2.Search
2.Phone book > 2.Search
3.Add entry
Enter name to call. Press Enter to view.
43
Page 42

Type the name you want.
Press . Display shows the entry.
Press to display the Phone book menu.
Press until the arrow
points to
Press .
Display shows
Press to cancel and go back to the Phone book entry.
Enter
Enter
>2.Remove entry
Enter
N
Phone book
2.
>2.Remove entry
3.Edit entry
Are you sure? (Y/N)
Or
Press .
Display shows
Y
<Entry removed>
then goes back to the Phone book.
44
<Entry removed>
Page 43

Using the Call Lists
Your Textphone can show you details of the last 24 calls made and,
providing you have subscribed to BT Caller Display the number, date
and time of the last 24 calls you have received even if no message has
been left.
Please note
The calls displayed on the standby screen relate to the answer machine
messages only, not calls received.
To view details of calls made
You can scroll through details of the last 24 calls.
Press . The menu is displayed.
Press until the arrow
points to
Press .
Display shows
Press .
Menu
>3.Call lists.
Enter
Enter
Main menu > 3.Call lists
4.Conversation
3.Call lists > 1 .Outgoing
2.Incoming
45
Page 44

Display shows details of the two most recent calls made.
Press to scroll through the list of outgoing calls.
To view details of calls received
You must subscribe to the BT Caller Display service offered by your
network provider to display this information.
You can scroll through the last 24 calls received
Press .
The menu is displayed.
Menu
Press until the arrow
points to
Press .
>3.Call lists.
Enter
Display shows
Main menu > 3.Call lists
4.Conversation
3.Call lists > 1 .Outgoing
2.Incoming
Press until the arrow
points to
Press .
>2.Incoming.
Enter
3.Call lists > 2.Incoming
1 .Outgoing
Display shows the details of the two most recent calls made.
Press to scroll through the incoming calls.
46
Page 45

To dial a number from the Call lists
When you have displayed a number in the Call lists, you can dial it.
Press . The menu is displayed.
Menu
Press until the arrow
points to
Press .
Display shows
>3.Call lists.
Enter
>1.Outgoing.
These are phone numbers of the
calls you have made.
For the phone numbers of
callers who have rung you, press
so that the arrow points to
>2.Incoming.
Main menu > 3.Call lists
4.Conversation
3.Call lists > 1 .Outgoing
2.Incoming
3.Call lists > 2.Incoming
1 .Outgoing
Press .
Enter
Display shows the details of the two most recent calls.
Press until the arrow points to the call you want. Calls
delivered without number information will be displayed as
Press .
Display shows
Enter
Call options > 1 .Call
N/A
.
2.Store
47
Page 46

Press again. The number is displayed and dialled.
Enter
If no number is registered the following will appear on the display
<No number available>
.
To copy a number to the phone book
Please note
This is only possible on the incoming Call lists if you have subscribed
to BT Caller Display.
Press . The menu is displayed.
Menu
Press until the arrow
points to
Press .
>3.Call lists.
Enter
Display shows
Or to display the phone
numbers of callers who have rung
you, press so that the arrow
points to
Press .
>2.Incoming.
Enter
Main menu > 3.Call lists
4.Conversation
3.Call lists > 1 .Outgoing
2.Incoming
3.Call lists > 2.Incoming
1 .Outgoing
Display shows the details of the two most recent calls.
48
Page 47

Press until the pointer reaches the number you want.
Press . Display shows the Call options menu.
Press until the arrow
points to
Press . Display shows the number selected.
Enter
>2.Store
Enter
Call options > 2.Store
3.Delete all
Type the name.
Press .
Enter
If necessary, edit the number.
Press to save.
Display shows
Press until the display returns to standby.
Enter
<Entry saved>
Esc
To delete the Call lists
Press . The menu is displayed.
Press until the arrow
points to
Press .
Menu
>3.Call lists.
Enter
Main menu > 3.Call lists
4.Conversation
49
Page 48

Display shows
>1.Outgoing
.
This lets you delete the list of calls
you have made.
If you want to delete the list of
calls you have received, press
so that the arrow points to:
>2.Incoming.
3.Call lists > 1 .Outgoing
2.Incoming
3.Call lists > 2.Incoming
1 .Outgoing
Press .
Enter
Display shows the details of the two most recent calls.
Press .
Press until the arrow
points to
Press .
Enter
Call options > 3.Delete all
>3.Delete all
Enter
<Removing entries>
Display shows
then
<Memory empty>
<Removing entries>
,
.
<Memory empty>
The list is deleted.
1.Call
Please note
You can only delete the entire list.
50
Page 49

BT Caller Display messages
If you have subscribed to Caller Display, you will see a text message
if the number of your caller is not available.
The text message will be one of the following:
WITHHELD
The caller has stopped their number from being sent.
INTERNATIONAL
The call received was from outside the UK.
UNAVAILABLE
The caller’s exchange/network does not offer a
Caller Display Service.
OPERATOR
The call has come via the network operator.
PAYPHONE
The caller is ringing from a payphone.
RINGBACK
The exchange is ringing to let you know that a previously engaged
number is free.
NO NUMBER
If your Textphone does not recognise the information contained
within the caller display message, it will not show a number.
51
Page 50

Textphone prefix
What is TextDirect?
TextDirect is a new service from BT that will connect a Typetalk relay
operator into your phone call if it is answered by someone without a
textphone. Calls to other textphone users will not involve a relay
operator. There is no additional charge for this service. For more
information contact Typetalk on 0800 500 888.
Please note
To use TextDirect prefix all your calls with 18001. This Textphone
comes preprogrammed with the TextDirect prefix.
Please note
You need to insert 9, 141, 1470 or 144 in front of the TextDirect
prefix for these network services to work.
To switch the TextDirect prefix on/off
Please note
If the TextDirect prefix is switched on, all calls will go through the
TextDirect system.
52
Page 51

Press . The menu is displayed.
Menu
Press until the arrow
points to
Press .
>2.Phone book
Enter
Press until the arrow
points to
Press .
>5.Prefix mode
Enter
Press until the arrow
points to
>1.Off
or
>2.On
Main menu > 2.Phone book
3.Call lists
2.Phone book > 5.Prefix mode
1.View
2.Phone book > 1.Off
> 5.Edit prefix 2.On
2.Phone book > 2.On
> 5.Edit prefix 1.Off
Press to confirm your selection.
Display shows
Enter
<Prefix mode set>
then returns to the standby menu.
The On/Off status is displayed.
<Prefix mode set>
53
Page 52

To change the Textphone prefix
In some instances, when your Textphone is connected to a
switchboard, it may be necessary to dial a digit e.g. 9 to access the
network. See below for details of how to add or delete this digit.
Press . The menu is displayed.
Press until the arrow
points to
Press .
Press until the arrow
points to
Press .
Menu
>2.Phone book
Enter
>4.Edit prefix
Enter
Main menu > 2.Phone book
3.Call lists
2.Phone book > 4.Edit prefix
5.Prefix mode
Press to delete the existing prefix or use the to
move the cursor to the place you want.
Type the new prefix number.
Press . Display shows
Enter
<Typing has been saved>
Press to return to standby screen.
Esc
Please note
You can use a shortcut to switch the prefix off for individual calls by
inserting a ‘ -’ in front of the number you require, or an ‘&’ to turn
the prefix on.
54
Page 53

Using the Function
F8
VCO
F7
F6
F5
F4
F3
F2
F1
buttons
Pre-set one-touch functions
The F1 - F8 buttons give you shortcuts to different functions.
When you receive your Textphone, the F1-F6 and F8 buttons are
preprogrammed to do the following actions at a single touch.
Press Action
Switch Answer machine On/Off
Read Answer machine messages
Phone book
Incoming Call lists.
Review Last conversation
(Quick memo) “Hello, GA”
Quick dial Textphone Helpdesk number 0845 6011545
55
Page 54

You can also set the F1-F8 buttons to work in the way that suits your
needs best.
There are three basic alternatives that the Function buttons can do:
Quick menu – instantly selects a commonly used menu option.
Quick memo – stores a standard text message. You can send it by
pressing a single button.
Quick dialling – lets you dial a number by pressing one button.
To set a Function button as a Quick memo
Please note
You cannot change the F8 button into a Quick memo.
Press . The menu is displayed.
Menu
Press until the arrow
points to
Press .
>6.Function keys.
Enter
Display shows the Function
keys menu and
Press .
Enter
>1.Edit keys.
Display shows
56
Main menu > 6.Function keys
7.Communications
6.Function keys > 1 .Edit keys
2.Emergency num
6.Function keys > 1 .Edit F1
>1.Edit keys 2.Edit F2
Page 55

Press until the arrow points to the Function button
you want.
Press .
Press .
Press until the arrow
points to
Press .
Display shows:
memo for function key...
Enter
Menu
>2.Quick memo
Enter
Enter new quick
.
and the
Function options > 2.Quick memo
(3 options) 3.Quick menu
Enter new quick memo for function key
current setting of the function key.
Press to delete the current setting.
Type the text message you want to store.
Press to confirm.
Enter
The screen displays
Press to return to standby.
Esc
<Function saved>
57
Page 56

To send a Quick memo
During a text conversation:
Press the F1-F8 button under which the Quick memo message
is stored.
To set a Function button as a Quick dial
Press . The menu is displayed.
Press until the arrow
points to
Press .
Display shows
Menu
>6.Function keys
Enter
Main menu > 6.Function keys
7.Communications
6.Function keys > 1 .Edit keys
2.Emergency num
Press .
Display shows
Enter
6.Function keys > 1 .Edit F1
> 1.Edit keys 2.Edit F2
Press until the arrow points to the Function button
you want.
Press .
Press .
Enter
Menu
Press until the arrow
points to
58
>1.Quick dial
Function options > 1.Quick dial
(3 options) 2.Quick memo
Page 57

Press .
Then
function key...”
Enter
“Enter new quick dial for
and the current
Enter new quick dial for function key...
function of that button.
Press to delete the current setting.
Type the telephone number you want to store.
Press .
Display shows
Press to return to standby.
Enter
<Function saved>
Esc
To dial a one touch Quick dial number
Press the F1-F8 button under which you have stored the Quick dial
phone number. Display shows “Please dial then press”
followed by
<Dialling....>
and the number.
To set a Function button as Quick menu
If you want to change or restore a function key to its original setting
or change it to another Quick menu setting, follow these steps to
enter the appropriate code.
59
Page 58

Press . The menu is displayed.
Menu
Press until the arrow
points to
Press .
>6.Function keys.
Enter
Display shows
Press .
Enter
Display shows
Main menu > 6.Function keys
7.Communications
6.Function keys > 1 .Edit keys
2.Emergency num
6.Function keys > 1 .Edit F1
> 1.Edit keys 2.Edit F2
Press until the arrow points to the Function button you
want.
Press . The screen shows the current entry.
Enter
Press .
Menu
Press until the arrow
points to
Press .
60
>3.Quick menu.
Enter
Function options > 3.Quick menu
(3 options) 1.Quick dial
Page 59

Display shows
menu for function key.”
current setting for that button.
If required press to delete the current setting.
“Enter new quick
and the
Enter new quick menu for function key
Enter new setting number e.g. 21 for
Go to phone book
.
To type the Quick menu code you want
These are the most commonly used codes.
Quick menu code Action
11 Switch Answer machine On/Off
12 Read messages
13 Delete messages
21 Go to Phone book
22 Search for Phone book entry
251 Switch Prefix mode Off
252 Switch Prefix mode On
31 Display Outgoing call list
32 Display Incoming call list
41 Read conversations
42 Displays Last conversation
For the complete menu structure and code list, see page 81.
61
Page 60

Press .
Enter
Display shows
The Quick menu code is stored.
Press to return to standby.
Esc
<Function saved>
.
<Function saved>
Write here what you have changed the F1-F8 function buttons to:
F1
F2
F3
F4
F5
F6
F7
F8
To use the F1-F8 buttons stored as Quick menu options
When you want to go straight to the menu option you have stored as
a Quick menu
Press the F1-F8 function button you want. Your Textphone sets the
menu option stored.
For the original settings,
62
see page 63.
Page 61

To restore the F1-F8 buttons to their original settings
Press .
Menu
Enter the code 64
The display shows
N
returns you to the standby
screen.
Press or .
Enter
Y
Display shows
Screen then returns to standby.
Are you sure? (Y/N)
<Resetting function keys>
63
Page 62

Additional features
Emergency button
The Emergency button lets you call the emergency services via BT
TextDirect. This will automatically connect a Typetalk operator into
the call. The phone number has already been stored.
E
To use the Emergency button
Press and hold the red Emergency button until the incoming
calls/new message indicator light flashes.
The number is automatically dialled.
Either answer the text questions from the operator, or, if you do not
type anything within 4 seconds of receiving an answer, your
Textphone will send your Emergency memo providing one is stored.
(See Emergency memo on page 66.)
E
64
Page 63

To change the Emergency number
Please note
Although you can set a different number, BT strongly recommend
that you do not change the pre-set Emergency number of 18000 for
the Typetalk emergency services.
Press . The menu is displayed.
Press until the arrow
points to
Press . Display shows
Press until the arrow
points to
Press . The current setting is displayed.
Menu
>6.Function keys.
Enter
>2.Emergency num
Enter
Main menu > 6.Function keys
6.Function keys > 1 .Edit keys
6.Function keys > 2.Emergency num
If necessary, press delete the current number.
Type the emergency phone number you want.
7.Communications
2.Emergency num
3.Emergency memo
Press .
Enter
Display shows
Your Emergency Number is now set.
<Function saved>
65
Page 64

Emergency memo
E
When you press the to call the emergency services, but are
unable to type your own message, your Textphone will automatically
send information 4 seconds after your call is answered.
The Emergency memo is blank when you receive your Textphone so
you must store your details.
These should include:
– your name
– your phone number.
To use the Emergency memo
Press and hold the red until the light flashes.
E
The number is dialled.
Do not press any other button. 4 seconds after your call is answered,
your Emergency memo will be sent automatically.
To write your Emergency memo
Your memo can be up to 64 characters long.
Press . The menu is displayed.
Press until the arrow
points to
Press .
Display shows
Menu
>6.Function keys.
Enter
Main menu > 6.Function keys
7.Communications
6.Function keys > 1 .Edit keys
2.Emergency num
66
Page 65

Press until the arrow
points to
>3.Emergency memo.
6.Function keys > 3.Emergency memo
4.Reset keys
Press .
Display shows
your emergency message...”
Enter
“Please edit
Please edit your emergency message...
and the current message.
If necessary, press to delete the existing memo.
Type your emergency message. It should contain your name and
phone number.
Press to delete letters.
Press to move the cursor.
Press .
Enter
Display shows
Your Emergency Memo is now set.
Press to return to standby.
Esc
<Typing has been saved>
67
Page 66

Optional settings
You can adjust a number of settings on your Textphone.
To adjust the contrast
The contrast can be adjusted to give you the clearest possible screen
under different lighting conditions.
Press . The menu is displayed.
Press until the arrow
points to
Press .
Display shows
Press again.
Display shows
Press to make the display darker.
Press to make the display lighter.
Menu
Main menu > 5.Settings
>5.Settings.
Enter
5.Settings > 1 .Contrast
Enter
Use the arrow keys to adjust contrast.
6.Function keys
2.Backlight
<
▫▫▫
>
Press .
68
Enter
Page 67

Display shows
<Contrast set>
Press to return to the standby screen.
Esc
To adjust the backlight settings
Choose from:
Always ON
On for 5 Mins - backlight switches off 5 minutes after the last
button press.
On for 2 Mins - backlight switches off 2 minutes after the last
button press.
Disabled
Press . The menu is displayed.
Press until the arrow
points to
Menu
>5.Settings.
Main menu > 5.Settings
6.Function keys
Press .
Enter
Display shows
Press until the arrow
points to
>2.Backlight.
5.Settings > 1 .Contrast
2.Backlight
5.Settings > 2.Backlight
3.Printer On/Off
69
Page 68

Press .
Enter
Press until the arrow points to the setting you want.
>1.Always On
>2.On for 5 mins
>3.On for 2 mins
>4.Always Off
Press .
Enter
Display shows
5.Settings > 1 .Always On
>2.Backlight 2.On for 5 mins
5.Settings > 2.On for 5 mins
>2.Backlight 3.On for 2 mins
5.Settings > 3.On for 2 mins
>2.Backlight 4.Always Off
5.Settings > 4.Always Off
>2.Backlight 1.Always On
<Backlight enabled>
Or
If Always Off
70
<Backlight Off>
Page 69

To set your Textphone to make outgoing calls only
Important
This turns the ringer off and means your Textphone will not be
notified of incoming calls, answering machine messages or Caller
Display information
Press . The menu is displayed.
Menu
Press until the arrow
points to
Press .
>5.Settings.
Enter
Press until the arrow
points to
Press .
>4.Ringer
Enter
Display shows
Or to switch the ringer OFF
Main menu > 5.Settings
6.Function keys
5.Settings > 4.Ringer
5.Call Sign
5.Settings > 1 .Ringer On
>4.Ringer 2.Ringer Off
Press until the arrow
points to
>2.Ringer Off.
5.Settings > 2.Ringer Off
>4.Ringer 1 .Ringer On
71
Page 70

Press .
Enter
<Ringer On>
Display shows the setting you
have selected
<Ringer Off>
To view the memory capacity
You can see how much free memory your Textphone has.
Maximum capacity = 10500 characters.
There are separate memories for the phone book and the
conversation and answer machine memory.
If the conversation memory becomes full, old text is deleted by new
incoming messages.
Press . The menu is displayed.
Menu
Press until the arrow
points to
Press .
>5.Settings.
Enter
Press until the arrow
points to
72
>8.Memory.
Main menu > 5.Settings
6.Function keys
5.Settings > 8.Memory
9.Factory reset
Page 71

Press .
Enter
The display shows:
Conversation and answer memory X% full
Phone book memory X% full
Press to return to the standby screen.
Esc
73
Page 72

Using your Textphone
with BT Call Sign
BT Call Sign enables you to have two separate phone numbers on the
same telephone line.
Depending on the number dialled, Call Sign delivers a different ringing
pattern which will enable the call to be directed to the phone/fax
machine or Textphone accordingly.
Call Sign is a subscription service.
Calls to your Call Sign (new) number result in a series of long, single
rings =
Calls to your Normal (original) number result in a series of double
rings =
You can set your Textphone to answer just one of these numbers.
If you have a fax machine or voice telephone connected in the
telephone socket at the back of the Textphone, you can separate your
calls between the two.
RIIIIIIING ....RIIIIIIING. This is the Alternate ring melody.
RING RING ....RING RING. This is the Normal ring melody.
Please note
Products not connected through the Textphone will ring regardless of
the Call Sign settings selected on the Textphone.
Please note
When ringing the Textphone from a normal phone, with a phone
plugged into the extension socket, the extension phone only rings twice
before switching over to the Textphone. At this point it is not possible
to intercept the call with the handset.
74
Page 73

To adjust your Call Sign settings
Press button. The menu is displayed.
Press until the arrow
points to
Press .
Press until the arrow
points to
Press .
Menu
Main menu > 5.Settings
>5.Settings.
Enter
5.Settings > 5.Call Sign
>5.Call Sign
Enter
Press arrow to select one of the following:
1. Ignore Call Sign
- Textphone rings for all incoming calls and
allows another phone or fax connected in
the telephone adaptor socket to ring as well.
6.Function keys
6.Clock
2. Normal to text
- Textphone only rings when the call is to
the Normal ring number. Whilst your
other fax/phone/voice answer machine,
connected to the telephone socket at the
back of the Textphone, receives rings
when on the Alternate ring number.
The Normal ring to the connected phone
will be stopped by the Textphone after the
first ring cycles/flashes.
75
Page 74

When a call comes in on the Alternate number, your Textphone call
indicator will not flash but the display shows
‘<Incoming call to
other phone>’
3. Normal to both
- Calls received on the Normal ring number
are received by both the Textphone and
other fax/phone.
Calls on the
Alternate ring number are
received by the attached fax/phone only.
When a call comes in on the Alternate number, your Textphone call
indicator will not flash but the display shows
‘<Incoming call to
other phone>’
4. Alternate to text
- Textphone only receives calls to the
Alternate ring number whilst your other
fax/phone/voice answer machine,
connected in the telephone socket at the
back of the Textphone, receives calls on
the Normal ring number. The Alternate
ring to the connected phone will be
stopped by the Textphone, after the first
ring cycles/flashes.
When a call comes in on the Normal number, your Textphone call
indicator will not flash but the display shows
‘<Incoming call to
other phone>’
5. Alternate to both
- Calls received on the Alternate ring
number are received by both the Textphone
and other fax/phone.
76
Page 75

Calls on the Normal ring number are
received by the attached fax/phone only.
When a call comes in on the Normal number, your Textphone
call indicator will not flash but the display shows
‘<Incoming call to
other phone>’
Press . Display shows
Enter
<Call Sign set>
77
Page 76

Connecting your
Textphone to a printer
or PC
Connecting your Textphone to a printer
To find out more details of where you can buy a compatible printer
and printer cable, please call the Helpline.
Connecting your Textphone to a PC
You can connect your Textphone to a PC so that you can use the PC’s
larger screen and a full size keyboard.
To find out more details of where you can buy a compatible PC cable
and software, please call the Helpline.
78
Textphone Helpline number
0845 6011545
Page 77

Automatic shutdown
To switch automatic shutdown on/off
You can set your Textphone to switch off automatically 5 minutes or
25 minutes after the last button press. The original setting is cancelled.
Press . The menu is displayed.
Press until the arrow
points to
Press .
Press until the arrow
points to
Press .
Press to choose between
>1.Cancelled
Menu
>5.Settings.
Enter
>7.Auto shutdown
Enter
Main menu > 5.Settings
6.Function keys
5.Settings > 7.Auto shutdown
8.Memory
5.Settings > 1.Cancelled
>7.Auto shutdown 2.Shutdown 25 mins
>2.Shutdown 25 mins
5.Settings > 2.Shutdown 25 mins
>7.Auto shutdown 3.Shutdown 5 mins
79
Page 78

>3.Shutdown 5 Mins
5.Settings > 3.Shutdown 5 mins
>7.Auto shutdown 1.Cancelled
Press . Display shows
Or if you select
the display shows
Enter
>1.Cancelled
,
<Auto shutdown is enabled>
<Auto shutdown is cancelled>
Please note
If you subscribe to Caller Display and you use
Auto shutdown
not receive call information when the Textphone is shut down.
, you will
80
Page 79

Menu structure
Main menu
1. Answer machine menu
1 1. Answer On/Off
1 2. Read
1 3. Delete all
1 4. Answer message
1 5. Ring length
1. Two rings
2. Three rings
3. Four rings
4. Six rings
5. Ten rings
2. Phone book menu
2 1. View
2 2. Search
2 3. Add entry
2 4. Edit prefix
2 5. Prefix mode
1. Off
2. On
3. Call lists menu
3 1. Outgoing
3 2. Incoming
4. Conversation menu
4 1. Read conversations
4 2. Last conversation
4 3. Delete all
5. Settings menu
5 1. Contrast
5 2. Backlight
1. Always On
2. On for 5 mins
3. On for 2 mins
4. Always Off
5 3. Printer On/Off
5 4. Ringer
1. Ringer On
2. Ringer Off
5 5. Call Sign
1. Ignore Call Sign
2. Normal to text
3. Normal to both
4. Alternate to text
5. Alternate to both
5 6. Clock
5 7. Auto shutdown
1. Cancelled
2. Shutdown 25 mins
3. Shutdown 5 mins
5 8. Memory
5 9. Factory reset
81
Page 80

6. Function keys menu
6 1. Edit keys
1. Edit F1
2. Edit F2
3. Edit F3
4. Edit F4
5. Edit F5
6. Edit F6
7. Edit F7
8. Edit F8
6 2. Emergency num.
6 3. Emergency memo
6 4. Reset keys
7. Communications menu
7 1. Automatic (V.18)
7 2. V. 21
7 3. EDT
7 4. Baudot
7 5. V.23
7 6. Bell 103
7 7. DTMF
7 8. Direction mode
1. Originate
2. Answer
7 9. Parity mode
1. 8N1
2. 7O1
3. 7E1
82
Page 81

Help
If your BT Textphone does not receive BT Caller Display
messages or BT Call Sign
To receive and display messages you must subscribe to the BT Caller
Display service.
To receive Call Sign you must subscribe to the BT Call Sign services
on your phone.
For further information on BT Caller Display and BT Call Sign call
BT on Freefone 0800 800150 (residential customers) or Freefone 0800
800152 (business customers).
Remember to use the Text Direct prefix of 18001 for these calls. If you
have the prefix switched on, your Textphone will dial it automatically.
Caller Display is not available when your Textphone is connected to
a switchboard. See your switchboard user guide for instructions on
using the Recall, Pause,
features.
# and ✱ buttons to access the switchboard’s
83
Page 82

If your Textphone does not switch on
Check that the mains power is switched on.
Check that the batteries are installed correctly.
After checking the mains power and batteries, press the button again.
If your Textphone incoming calls/new messages indicator
does not flash
Check that the ringer is on, see page 71.
Check that no other phones on the same line have been left off the hook.
You may have too many phones in your home (see
information’ ). How many phones can you have?’ see page 88.
‘Connection
If your Textphone screen does not work properly
Check the mains power has been connected correctly.
Resetting your Textphone
If your Textphone has power but is not working properly, you may be
able to correct the problem by resetting it to its original factory settings.
Warning
If you do this you will lose all entries in the call lists, conversation
memory and the date and time settings.You are given the option to
save the phone book memory.
84
Page 83

To reset your Textphone to its factory settings
Press . The menu is displayed.
Menu
Press until the arrow
points to
Press .
>5.Settings
Enter
Press until the arrow
points to:
Press .
>9.Factory reset.
Enter
Display shows
Either
Main menu > 5.Settings
6.Function keys
5.Settings > 9.Factory reset
1.Contrast
Are you sure? (Y/N)
Press to cancel. Display returns to the Settings menu with the
N
settings unchanged.
Or
Press . Display shows
Y
Reset phone book? (Y/N)
85
Page 84

If you press or
the display shows
<Reset in
NY
<Reset in progress...>
progress...>
<Memory empty>
you to the settings menu.
and then confirms
before returning
<Memory empty>
The factory settings are:
Answer machine Off
Answer machine message: “Hello, please leave a message. GA”
Ring delay on answer machine 6 rings
Prefix On
Prefix number 18001
Emergency number 18000
Contrast 50%
Backlight 2 mins On
Autoshutdown Cancelled
Printer Off
Callsign Ignore
Communications V.18
Parity 8N1
Direction Originate
86
Page 85

If you still have a problem with your Textphone
Call the BT Textphone Helpline on 0845 6011545.
Lines open: 09:00 to 17:30 Monday to Friday 09:00 to 12:00 Saturdays,
except for public holidays.
Help is also available via email to the following address Bthelp@texthelpline.co.uk
Calls are charged at local call rates.
For rental contract issues contact your local BT service by calling:
0800 800150 (residential customers)
Or
0800 800152 (business customers)
Remember to use the Text Direct prefix of 18001 for these calls. If you
have the prefix switched on, your Textphone will dial it automatically.
Connection Information
Your Textphone may be connected to public networks in the UK.
It may be connected to compatible switchboards. If you are in doubt,
contact your switchboard supplier.
87
Page 86

How many phones can you have?
All items of telephone equipment have a Ringer Equivalence Number
(REN), which is used to calculate the number of items that may be
connected to any one telephone line. Your Textphone has a REN of 1.
A total REN of 4 is allowed. If the total REN of 4 is exceeded, the
telephones may not ring. With different telephone types there is no
guarantee of ringing, even when the REN is less than 4.
Adjusting the Textphone codes
Your Textphone uses special communication codes to send the text
messages to another phone. Both phones need to be set to the same
code in order to communicate properly.
The pre-set code is V.18
This is the automatic mode and enables your Textphone to connect to
any other textphone and automatically select the right code setting.
However, if you have problems communicating with textphones in
other countries, you can try setting your Textphone to a specific code.
See page 89 for a list of codes and countries and page 90 for
instructions to set the code.
88
Page 87

Textphone Codes
EDT code
Austria
Bosnia - Herzegovina
Croatia
Czech.Rep.
Estonia
Germany
Italy
Latvia
Malta
Portugal
Slovakia
Slovenia
Spain
Switzerland
V.21 CCITT
Greece
Finland
Norway
Great Britain
Sweden
Republic of Ireland
Sometimes in Denmark
V.23
France
Great Britain
Bell 103
USA
Baudot code
Australia
Canada
Great Britain
New Zealand
Republic of Ireland
South Africa
South America
USA
DTMF
Denmark
Direction mode
Do not attempt to change this
setting. It is only very rarely used
in modern textphones. If you
need further details, contact the
BT Textphone Helpline
0845 6011545.
Parity mode
Do not attempt to change this
setting. It is to do with a form of
error detection and modern
equipment like your BT Textphone
adjusts automatically. In very rare
cases, you may need to change
the parity mode for text messages
you send. If you need further
details, contact the BT Textphone
Helpline 0845 6011545.
89
Page 88

To select a specific code/return to the pre-set code V.18
Press the button. The menu is displayed.
Press until the arrow
points to
Press . Display shows the code menu.
Menu
>7.Communications
Enter
Main menu > 7.Communications
1.Answer machine
Either:
Press to select
Display shows
Enter
>1. Automatic(V.18)
<V.18 mode set>
Or
Press until the arrow points to the code you want.
Press to select the code.
Enter
Display shows the code which
you have selected.
90
<(Code) mode set>
Page 89

Index
Answering machine
adjust ring delay 34
delete all text messages 33
delete single text messages 31
interrupt answer machine 30
new message indicator 30
permanent memory 34
read text messages 30
switch on/off 28-29
switch on from
another phone 35
text and phone book
memory capacity 34
write own outgoing
message 27
Answering
a call with a voice phone 22
text calls 21
Automatic shutdown 79
Backlight settings 69
dial number 47
view details of calls made 45
view details of calls
received 46
Call sign 74
BT Caller Display messages 51
Calls
answering 21
dial a number 17
end a call 19
enter a pause 20
redial 19
using menus 18
make outgoing calls only 71
Contrast – adjust 68
Conversation
delete all old 25
delete an old 24
review 23
Batteries
install 12
Call Lists
copy number to phonebook 48
delete 49
Date and time – set 14
Dial
a name 19
a number 17
with a voicephone 22
91
Page 90

Delete
all old conversations 25
all text messages 33
call lists 49
one old conversation 24
phonebook entry 43
single text message 31
Emergency button 64
Emergency memo 66
Emergency number 65
End a call 19
Fax machine
connecting 13
Function buttons
pre-set one-touch 55
restore to original settings 63
send a Quick memo 58
set as a Quick dial 58
set as a Quick memo 56
set as a Quick menu 59
Help 83
Helpline 87
Making text calls 16
Memory capacity
permanent memory 34
text and phonebook 34
view 72
Menu structure 81
Phonebook
delete entry 43
display and dial entry 39
edit entry 41
search for an entry 40
store name and number 38
Power supply adaptor 12
Printer 78
Quick dial number
dial a one-touch 59
set a function number
as a Quick dial 58
Quick menu code 61
Quickword
buttons 26
meanings 26
Redial a number 19
Resetting your textphone 85
Review a conversation 23
Ring delay 34
Setting up 12
Switch on/off 13
Telephone line cord 13
Telephone socket 13
Textphone prefix 52
change 54
switch on/off 52
Textphone codes 89
Time and date 14
PC78
Pause 20
92
VCO/Voice through 37
Voice announcer 36
Page 91

Offices worldwide
The telecommunications services described in this publication
are subject to availability and may be modified from time to time. Services
and equipment are provided subject to British Telecommunications plc’s
respective standard conditions of contract. Nothing in this publication
forms any part of any contract.
This product is intended to be connected to analogue networks and
private switching systems in the United Kingdom.
© British Telecommunications plc 2001.
Registered Office: 81 Newgate Street, London EC1A 7AJ.
Registered in England No. 1800000.
TEXTPHONE 1 (4/01) 6
Designed by The Art & Design Partnership Limited.
Printed in the UK.
This equipment complies with the essential
requirements of the Radio Equipment and
Telecommunications Terminal Equipment
Directive, 1999/5/EC
 Loading...