

Page 1

BT Relate 3000 ~ Issue 3 ~ Edition 02 ~ 12.08.04 ~ 6346
User Guide
BT RELATE 3000
6346 Relate 3000 UG [2] 12/8/04 11:19 am Page 1
Page 2
BT Relate 3000 ~ Issue 3 ~ Edition 02 ~ 12.08.04 ~ 6346
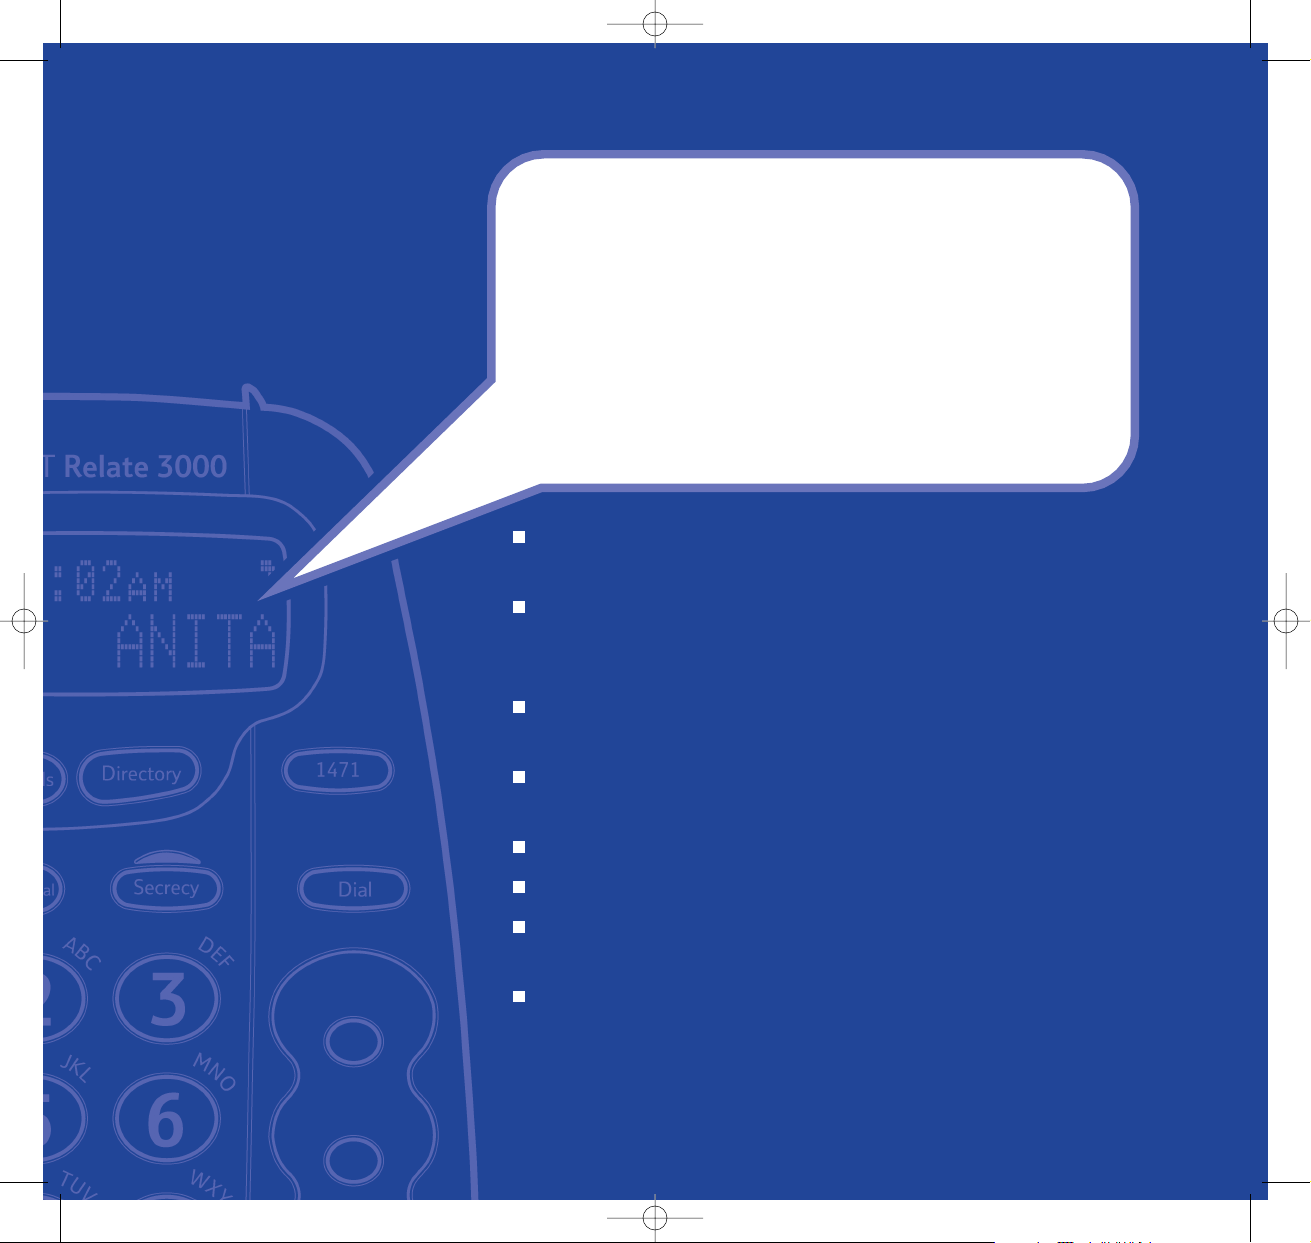
Caller Display* lets you see who’s calling and keep track of
the calls you’ve received.
Quickdial memory buttons let you store numbers and dial
them with a single press. A further 10 names and numbers
can be stored in the directory.
1471 & 1571 dedicated buttons let you hear who called
you last and dial your network’s answering service.
Handsfree function allows you to make and receive calls
over the built-in loudspeaker, without lifting the handset
Amplify incoming or outgoing call volume.
Voice prompts help you use the phone’s features.
VIP ringer - lets you select a different ring tone for
important callers.
Wall or desktop mountable – lets you place your phone
where it’s most convenient.
*You must subscribe to your network provider’s Caller Display service for this feature
to work. A quarterly fee is payable.
Welcome…
to your BT Relate 3000 Telephone
with Caller Display
*
6346 Relate 3000 UG [2] 12/8/04 11:19 am Page 2
Page 3

BT Relate 3000 ~ Issue 3 ~ Edition 02 ~ 12.08.04 ~ 6346
This User Guide provides you with all
the information you need to get the
most from your phone.
Before you make your first call you will
need to set up your phone. Follow the
simple instructions in ‘Getting Started’,
on the next few pages.
Need help?
If you have any problems setting up or using your
BT Relate 3000 please refer to the ‘Help’ section
on page 27 of this guide.
Got everything?
BT Relate 3000
telephone
4 x AA batteries
Mains power adaptor
Telephone line cord
Screw & wall plugs for
wall-mounting
Base stand
6346 Relate 3000 UG [2] 12/8/04 11:19 am Page 3
Page 4

Getting started
Location . . . . . . . . . . . . . . . . . . . . . . . 6
Install the batteries . . . . . . . . . . . . . . . 6
Connect the mains power adaptor . . . . . 6
Connect the telephone line . . . . . . . . . . 7
Setting the time . . . . . . . . . . . . . . . . . . 7
Setting the ringer volume . . . . . . . . . . . 8
Attach the base stand (optional). . . . . . . 8
Raised on a flat surface . . . . . . . . . . . . . 8
Wall-mounted. . . . . . . . . . . . . . . . . . . . 9
Getting to know your phone . . . . . . . . 10
Using the phone
Making and ending calls . . . . . . . . . . . . 12
Preparatory dialling . . . . . . . . . . . . . . . 12
Receiving calls . . . . . . . . . . . . . . . . . . . 12
Make a handsfree call . . . . . . . . . . . . . . 12
Answer a call handsfree . . . . . . . . . . . . 13
Secrecy . . . . . . . . . . . . . . . . . . . . . . . . 13
Redial the last number . . . . . . . . . . . . . 13
Redial one of the last 5 numbers . . . . . . 14
Copy a redial number to the directory . . 14
1471 button . . . . . . . . . . . . . . . . . . . . 14
1571 button . . . . . . . . . . . . . . . . . . . . 15
M1 – M3 Quickdial memory buttons. . . . 15
Storing Quickdial numbers . . . . . . . . . . 15
Dialling Quickdial numbers . . . . . . . . . . 16
Deleting Quickdial numbers. . . . . . . . . . 16
Data port . . . . . . . . . . . . . . . . . . . . . . 16
Headset . . . . . . . . . . . . . . . . . . . . . . . 17
Directory
Store name and number . . . . . . . . . . . . 18
Dial from the directory . . . . . . . . . . . . . 19
Delete entries . . . . . . . . . . . . . . . . . . . 19
Caller Display and the calls list
Caller Display . . . . . . . . . . . . . . . . . . . . 20
Calls list . . . . . . . . . . . . . . . . . . . . . . . . 20
View list . . . . . . . . . . . . . . . . . . . . . . . 21
Dial a number in the list . . . . . . . . . . . . 21
Copy a number to the directory . . . . . . . 21
Personalise your phone
Setting your preferences . . . . . . . . . . . . 22
Ringer tone . . . . . . . . . . . . . . . . . . . . . 23
LCD contrast . . . . . . . . . . . . . . . . . . . . 23
Amplify lock . . . . . . . . . . . . . . . . . . . . 23
VIP ringer . . . . . . . . . . . . . . . . . . . . . . 24
Voice prompts . . . . . . . . . . . . . . . . . . . 24
Beeps tones . . . . . . . . . . . . . . . . . . . . . 24
Call amplifier . . . . . . . . . . . . . . . . . . . . 24
Key lock . . . . . . . . . . . . . . . . . . . . . . . 25
Recall/M3 . . . . . . . . . . . . . . . . . . . . . . 25
Factory settings . . . . . . . . . . . . . . . . . . 26
Re-setting the phone to its
original settings . . . . . . . . . . . . . . . . . . 26
4
BT Relate 3000 ~ Issue 3 ~ Edition 02 ~ 12.08.04 ~ 6346
In this guide
6346 Relate 3000 UG [2] 12/8/04 11:19 am Page 4
Page 5

In this guide 5
BT Relate 3000 ~ Issue 3 ~ Edition 02 ~ 12.08.04 ~ 6346
Help . . . . . . . . . . . . . . . . . . . . . . . . . . 27
General information
Safety . . . . . . . . . . . . . . . . . . . . . . . . . 28
General . . . . . . . . . . . . . . . . . . . . . . . . 28
Cleaning . . . . . . . . . . . . . . . . . . . . . . . 28
Environmental . . . . . . . . . . . . . . . . . . . 28
Technical information . . . . . . . . . . . . . . 29
How many telephones can you have? . . 29
Switchboard compatibility . . . . . . . . . . 30
Recall . . . . . . . . . . . . . . . . . . . . . . . . . 30
Guarantee . . . . . . . . . . . . . . . . . . . . . . 31
Returning your phone . . . . . . . . . . . . . . 32
R&TTE . . . . . . . . . . . . . . . . . . . . . . . . 33
Declaration of Conformance . . . . . . . . . 33
6346 Relate 3000 UG [2] 12/8/04 11:19 am Page 5
Page 6

Getting started
WARNING
Do not place your BT Relate 3000 in
the bathroom or other humid areas.
Location
Make sure your BT Relate 3000 is close enough to a
telephone socket so that the cable will reach.
Install the batteries
1. Turn the phone over, remove the battery compartment
cover, then insert the 4 AA alkaline batteries as indicated.
2. Replace the battery cover.
Connect the mains power adaptor
1. Plug the mains power adaptor into the POWER socket on
the base of your BT Relate 3000.
6
BT Relate 3000 ~ Issue 3 ~ Edition 02 ~ 12.08.04 ~ 6346
Battery low warning
When your batteries need replacing
the battery low icon is displayed.
Replace the batteries by following
the steps for battery installation.
Battery performance
New batteries will power your
BT Relate 3000 display for approx.
18 months provided you are also
using the mains adaptor to power
your BT Relate 3000. If you do not
use the power supply then the
battery life is approximately 6 months.
Even if your batteries run out or are
removed, your BT Relate 3000 will
retain any personalised settings for:
One-touch Quickdial memories
Display contrast
Voice prompt
VIP ringer
Loudspeaker volume
Ring tone
6346 Relate 3000 UG [2] 12/8/04 11:19 am Page 6
Page 7

2. Plug the other end into the mains power wall socket.
Connect the telephone line
1. Plug the telephone line cord into the telephone wall socket.
Setting the time
1. Press . Display shows WHERE?. Now press
(located between the and memory buttons). The
display briefly shows SETUP MODE then HOLD STORE TO
EXIT before moving to the first option RINGER TONE.
2. Press repeatedly until the display shows 12:00AM or
the currently set time.
3. Use the keypad to enter the time, e.g. 0907 = 9:07.
The clock is 12 hour format.
4. Use the buttons to select AM or PM, then press
to save the settings and return to standby.
Getting started 7
BT Relate 3000 ~ Issue 3 ~ Edition 02 ~ 12.08.04 ~ 6346
If you have subscribed to your
network’s Caller Display service, the
time will be set automatically when
you receive your first call.
Holding the button down will
save any settings changed and exit
the set-up mode.
batteries
The voice prompts will not work if
the mains power is not connected
and switched on.
6346 Relate 3000 UG [2] 12/8/04 11:19 am Page 7
WARNING
Please disconnect
the telephone line cord
before opening this cover
UM-30R "AA" SIZE
Page 8
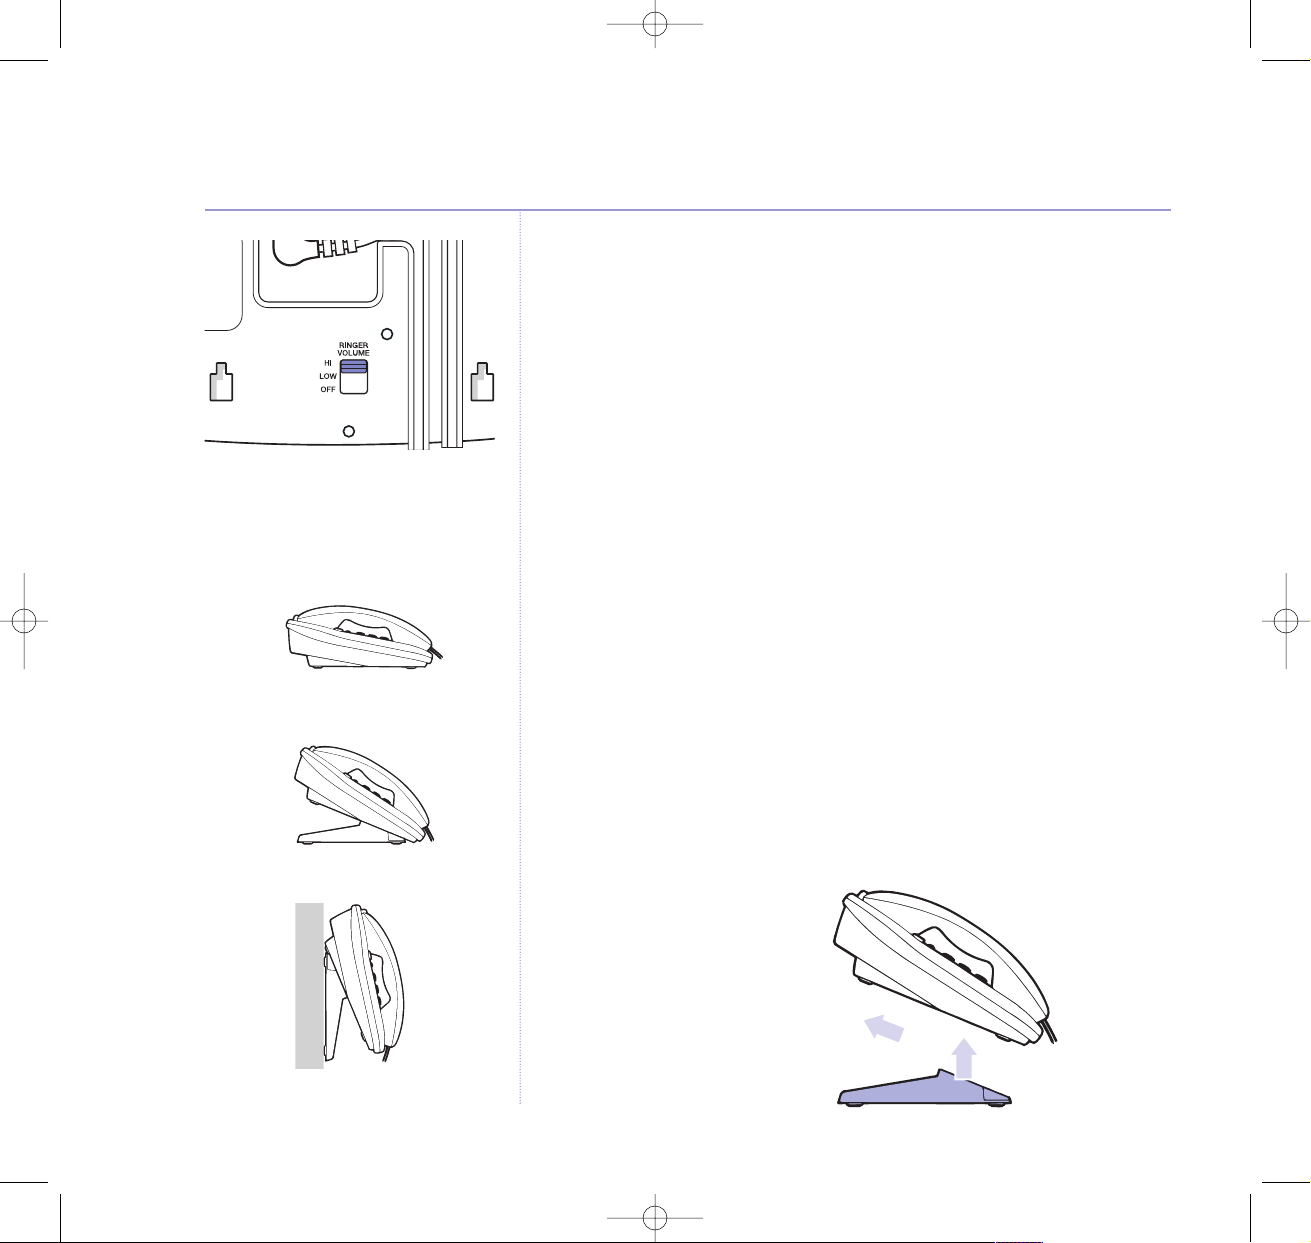
Setting the ringer volume
The ringer switch is located on the underside of your
Relate 3000. There are 3 volume levels: OFF, LOW and HI.
Your BT Relate 3000 is now ready to use.
You may wish to make additional personalised settings.
Turn to page 22 to read about the options.
Attach the base stand (optional)
Your BT Relate 3000 can be positioned in 3 different ways;
either on a flat surface, in a raised position or wall-mounted
using the screws and wall plugs provided.
Raised on a flat surface
1. Make sure all the cables on the underside of the base are
pressed into the cable channels and not in the way.
2. Insert the clips on the base stand into the holes in the base
of your phone marked
RAISED POSITION.
You may need to be
quite firm to fix it
securely.
Getting started8
BT Relate 3000 ~ Issue 3 ~ Edition 02 ~ 12.08.04 ~ 6346
Position in 3 different ways
Flat
Raised
Wall mounted
6346 Relate 3000 UG [2] 12/8/04 11:19 am Page 8
Page 9
Before you wall-mount your BT
Relate 3000 check that:
The wall can support the weight of
the phone.
The position you choose leaves
sufficient space so that the phone
is clear of any obstruction on the
wall, such as a shelf or a cupboard.
The power cable and telephone
line cord will reach their correct
wall points.
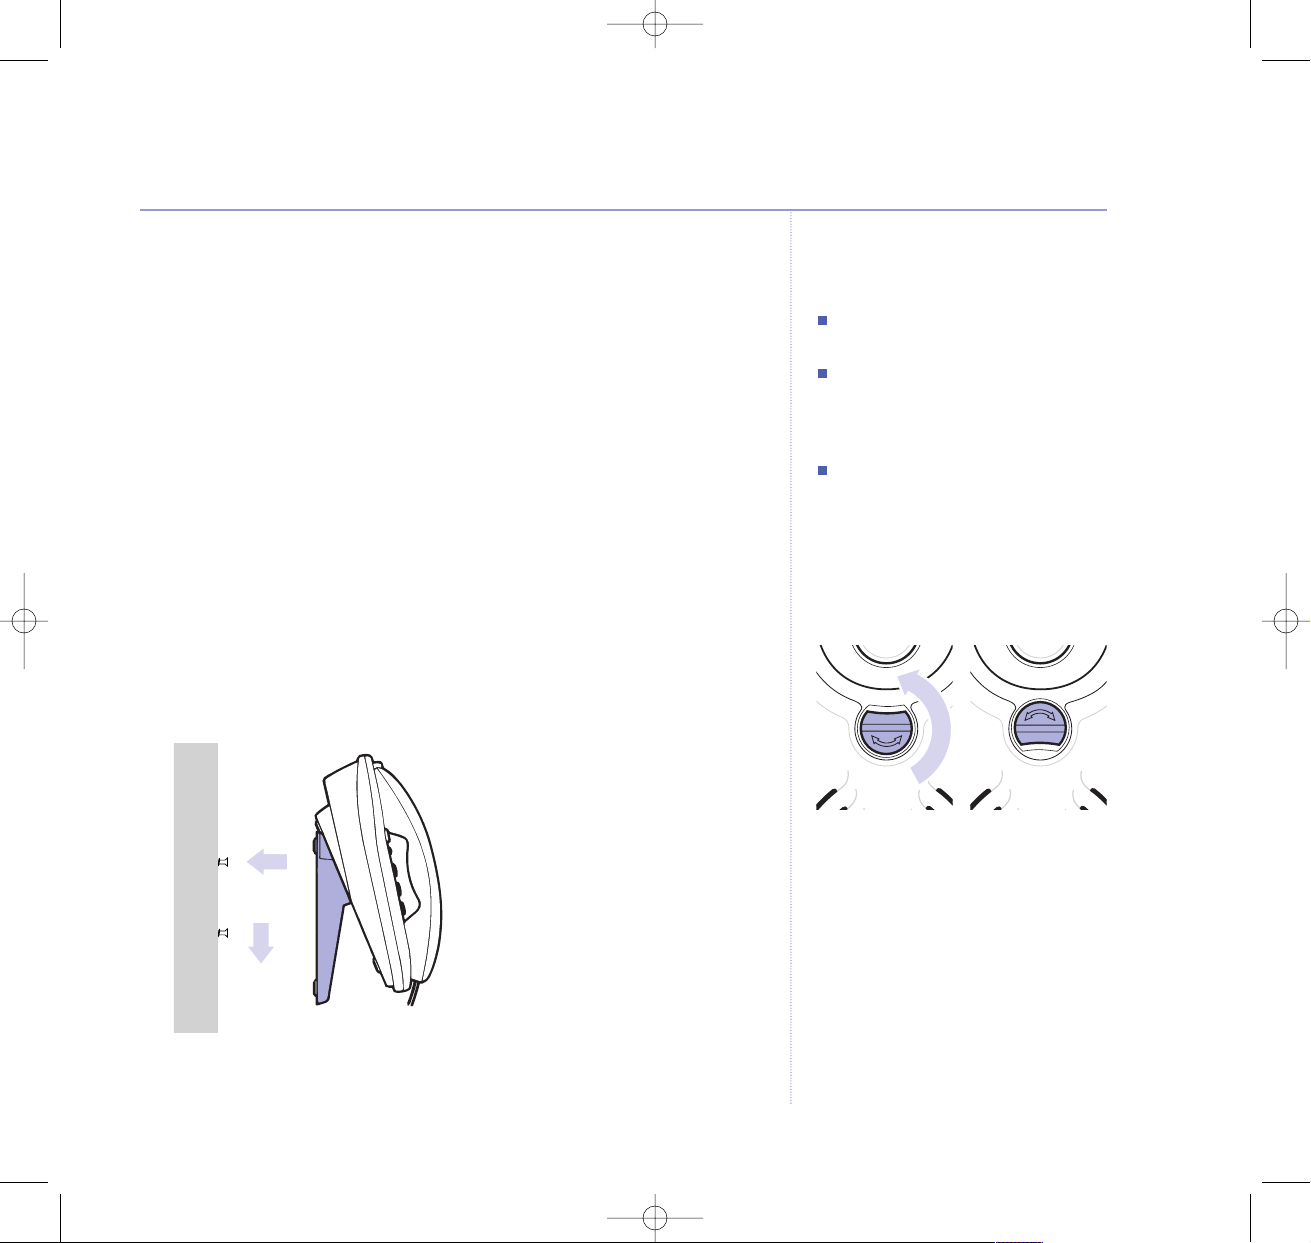
Handset hook
Rotate the handset hook 180˚ so
that the handset will stay in position
when the phone is wall-mounted.
Wall-mounted
Use the base stand provided as a template to pencil on the
wall where the drill holes should go.
1. Drill the holes for the screws using a 8mm drill bit.
Then insert the wall plugs provided.
2. Insert the screws, leaving about 5mm sticking out.
3. Insert the clips on the base stand into the holes in the base
of your phone marked WALL MOUNT. You may need to be
quite firm to fix it securely.
4. Position the wall-mounting slots in the base stand over the
screw heads and gently pull the phone downward to make
sure it is securely in place. You will need to rotate the
handset hook to stop the handset from falling off.
Getting started 9
BT Relate 3000 ~ Issue 3 ~ Edition 02 ~ 12.08.04 ~ 6346
6346 Relate 3000 UG [2] 12/8/04 11:19 am Page 9
Page 10

Display
Displays time,call and set up information.
Headset button (and light)
Used in conjunction with a headset, page 17.
Redial button
Press to redial any of the last 5 numbers dialled, page 13.
Store button
Use when setting the time, page 7,
Use to store numbers in the Quickdial memories, page 15,
and entries in the directory, page 18.
Handset hook
When the phone has been wall-mounted, it keeps the handset in place, page 8.
Speaker
When in handsfree, your caller’s voice will be heard through the speaker.
UNDERSIDE OF BASE
Ringer volume switch
Set this to adjust between HI, LOW or OFF, page 8.
Data port
For connecting a modem or other telephony equipment, page 16.
Headset socket
Lets you connect a headset, page 17.
Telephone line socket
Amplification lock (and light)
Use to start a call with the volume level as set last time used, page 23.
Volume button
Use to adjust the headset and handsfree (loudspeaker) volume, page 13.
Handsfree button
Allows you to use the phone without lifting the handset, page 12.
Getting to know your phone10
BT Relate 3000 ~ Issue 3 ~ Edition 02 ~ 12.08.04 ~ 6346
6346 Relate 3000 UG [2] 12/8/04 11:19 am Page 10
Page 11

Handset park (only required when base is wall-mounted)
If you leave the phone during a conversation, you can place the
handset on here, page 8.
Calls button
Press to access the Calls List (the list of numbers that have called you), page 21.
Directory button
Use to access numbers stored in the directory, page 18.
1471 button
Call return used to access information on the last call received, page 14.
Dial button
Press to dial a number shown in the display, page 12.
Secrecy button
Allows you to speak to someone in the same room without the other end
hearing your conversation, page 13.
Reset button (under the label, between the M1 & M2 buttons)
Use to reset telephone to default settings, page 26.
3 Quickdial memories (M1 and M2)
Press to quickdial stored numbers, page 15.
Set-up button
To set up your phones features, page 22.
Quickdial memory 3 or Recall
Acts as the quickdial button M3 or Recall, depending upon set up, page 25.
1571 button/ringer light/Message waiting light
One-touch access to network based answering services, page 15.
Flashes when you receive an incoming call.
Microphone
Use in handsfree conversation.
11
BT Relate 3000 ~ Issue 3 ~ Edition 02 ~ 12.08.04 ~ 6346
M1
M2
M3
6346 Relate 3000 UG [2] 12/8/04 11:19 am Page 11
Page 12

Making and ending calls
1. Lift the handset and dial.
2. Replace the handset to end the call.
Preparatory dialling
See the number displayed before you dial.
1. Enter the number first. Lift the handset – or press –
or press then press .
Receiving calls
When you receive a call the phone will ring and the ringer
light will flash. The display shows the number of the caller
(providing you have subscribed to your network’s Caller
Display service. See page 20).
1. Lift the handset and speak.
Handsfree
By using the loudspeaker and microphone built into the base,
you can make and receive calls without picking up the handset.
Make a handsfree call
1. Press . The handsfree light comes on and you can
hear the dialling tone.
12
BT Relate 3000 ~ Issue 3 ~ Edition 02 ~ 12.08.04 ~ 6346
Using the phone
Dialling numbers quickly
Numbers can also be dialled using
the Quickdial buttons (page 15), the
directory (page 18), from the redial
list (page 13) and from the calls list
(page 20).
If you make a mistake, lift and
replace the handset and dial again.
Please note
During a handsfree conversation,
you can pick up and use the handset,
or use a headset, at any time.
HEARING AID COMPATIBILITY
As this telephone is fitted
with an Inductive Coupler,
hearing aid wearers may
benefit from switching their hearing
aid to the middle ‘T’ position and
holding the earpiece up to the aid,
not their ear.
6346 Relate 3000 UG [2] 12/8/04 11:19 am Page 12
Page 13

Adjust loudspeaker volume
Use the button to increase
or decrease the volume. The display
shows the volume level.
2. Dial the number and speak.
3. To end the call, press .
Answer a call handsfree
1. When the phone rings, press and speak.
Secrecy
During a call, you can talk to someone nearby without your
caller hearing you.
1. During the call press . The secrecy light comes on.
Your caller cannot hear you.
2. Press again to return to your caller.
Redial
Your BT Relate 3000 stores the last five numbers dialled in
a redial list.
Redial the last number
1. Lift handset – or press then press and .
The last number is re-dialled.
Using the phone 13
BT Relate 3000 ~ Issue 3 ~ Edition 02 ~ 12.08.04 ~ 6346
13
6346 Relate 3000 UG [2] 12/8/04 11:19 am Page 13
Page 14

Return the call
Press 3 after the announcement to
return the call.
Redial one of the last 5 numbers.
1. Press until the number you want is displayed.
2. Lift handset and press or press in handsfree
mode. The selected number is redialled.
Copy a redial number to the directory
1. Press . Display shows WHERE? Now press .
Display shows LOCATION 1-0.
2. Select a keypad number between and under which
you want to store the entry. Display shows ENTER NUMBER…
then STORE.
3. Press repeatedly to find the number you want and
press . Display shows ENTER NAME… then STORE.
4. Use the keypad to enter the name then press to
confirm.
1471
Pressing automatically connects you to your
network’s 1471 service. You will hear an announcement
telling you the number (if available), date and time of the
last person to call you.
1. Lift handset, then press or, just press to dial
in handsfree.
Using the phone14
BT Relate 3000 ~ Issue 3 ~ Edition 02 ~ 12.08.04 ~ 6346
See page 15 for help with entering
names.
6346 Relate 3000 UG [2] 12/8/04 11:19 am Page 14
Page 15

1571
If you subscribe to your network’s answering service, for
example BT Call Minder, the button gives you easy,
one-touch access.
When you have a message waiting the button will
flash. The button may also flash, e.g. if you are using
Call Diversion.
1. Lift handset and press to dial your network’s answering
service.
Or, just press to dial in handsfree.
M1–M3 Quickdial buttons
You can store a phone number and name under each of the
three Quickdial buttons – (M1), (M2) and (M3).
Storing
1. Press . Display shows WHERE?.
2. Press a Quickdial button (M1, M2 or M3) under which you
want to store the entry. Display shows ENTER NUMBER…
then STORE.
3. Enter the phone number and press . Display shows
ENTER NAME… then STORE.
Using the phone 15
BT Relate 3000 ~ Issue 3 ~ Edition 02 ~ 12.08.04 ~ 6346
IMPORTANT
To use 1571 you must first subscribe
to the service from your network
provider. You may be charged a fee.
For more information on BT’s
answering services and other BT
Calling Features, call BT on Freefone
0800 800 150.
You may choose to turn the
detection off, see page 25.
It is possible to store a number under
each of the 3 Quickdial buttons,
unless M3 = Recall, see page 25.
Names can be up to 12 characters
long and numbers up to 21 digits.
Quickdial Memory label
Keep a note of stored numbers on
the quickdial memory label.
Entering names
Use the keypad letters to enter
names, e.g. to store TOM:
Press 8 once to enter T.
Press 6 three times to enter O.
Press 6 once to enter M.
To edit or delete letters or numbers
you can use the or button to
scroll between the letters and
numbers.
6346 Relate 3000 UG [2] 12/8/04 11:19 am Page 15
Page 16

4. Use the keypad to enter the name and press .
Display shows STORED.
Dial
1. Lift the handset – or press – then press Quickdial
number M1– M3 button you want.
Delete
1. Press
.
Display shows WHERE?.
2. Press the Quickdial number you want to delete (M1, M2 or
M3). Display shows STORE TO DELETE or TRY AGAIN.
3. Press to confirm you want to delete.
Data port
Your BT Relate 3000 has a data socket for easy connection
to another product such as a modem.
1. Plug the other product into the socket marked DATA.
Using the phone16
BT Relate 3000 ~ Issue 3 ~ Edition 02 ~ 12.08.04 ~ 6346
Cable from data device
Store number only
You do not have to enter a name.
When prompted to enter a name,
simply press to save the
number only.
6346 Relate 3000 UG [2] 12/8/04 11:19 am Page 16
Page 17

Where can I buy a headset?
Compatible telephone headsets are
available from
or call 0870 240 5522.
Headset
You can make and receive calls via a headset.
The headset should be plugged in to the socket marked
HEADSET on the underside of the base.
Making and ending a call
1. Press and dial.
2. Press again to end the call.
Using the phone 17
BT Relate 3000 ~ Issue 3 ~ Edition 02 ~ 12.08.04 ~ 6346
Headset cable
6346 Relate 3000 UG [2] 12/8/04 11:19 am Page 17
Page 18

You can store up to 10 names and numbers in the
Directory. Names can be up to 12 characters long and
numbers up to 21 digits.
Store a name and number
1. Press . Display shows WHERE?. Now press .
Display shows LOCATION 1-0.
2. Select a keypad number between and under which
you want to store the entry. Display shows ENTER NUMBER…
then STORE.
3. Enter a number using the keypad.
Or
Press repeatedly to scroll to the number you want.
4. Press . Display shows ENTER NAME… then STORE.
5. Use the keypad to enter a name then press to confirm.
If the position is already in use, the display shows STORE
TO DELETE or LOCATION ALREADY IN USE. Select an
alternative location by pressing LOCATION 0-9.
18
BT Relate 3000 ~ Issue 3 ~ Edition 02 ~ 12.08.04 ~ 6346
Directory
Inserting a Pause
When storing a number in the
directory you can insert a pause in
the dialling sequence by pressing .
This can be useful if your phone is
connected to an internal switchboard.
You cannot enter a pause as the first
digit of a number.
See page 15 for help with entering
names.
6346 Relate 3000 UG [2] 12/8/04 11:19 am Page 18
Page 19

Dial from the directory
1. Press until the entry you want is displayed.
Or press and enter the directory location where the
number is stored e.g. .
2. Press .
Delete entries
1. Press . Display shows WHERE? Now press .
Display shows LOCATION 1-0.
2. Select the keypad number between and that you
want to delete. Display shows STORE TO DELETE or
TRY AGAIN.
3. Press to delete. Display confirms DELETED!.
Directory 19
BT Relate 3000 ~ Issue 3 ~ Edition 02 ~ 12.08.04 ~ 6346
6346 Relate 3000 UG [2] 12/8/04 11:19 am Page 19
Page 20

IMPORTANT
To use Caller Display you must first
subscribe to the relevant service
from your network provider.
A quarterly fee is payable.
For more information on BT’s Calling
Features, call BT on Freefone 0800
800 150.
Caller Display
If you subscribe to a Caller Display service you can see who
is calling you on the display.
If the caller’s number matches an entry stored in the
phonebook, the name will be displayed as well.
Caller Display information contains the full telephone
number, including the area code. So when storing numbers
in the directory or memory remember to include the area
code, otherwise the caller’s number may not match.
Calls list
Whether you answer a call or not, the caller’s number and
the date and time of the call are stored in the calls list.
The calls list stores the details of your last 30 callers.
You can display, scroll through and dial numbers in the list
and copy them into the directory.
If a call is received when the Calls list is full, the oldest entry
will be deleted automatically.
Caller Display and the calls list20
BT Relate 3000 ~ Issue 3 ~ Edition 02 ~ 12.08.04 ~ 6346
Caller information not available
With some incoming calls, the
telephone number of the caller is not
available and cannot therefore be
displayed.
In this case your BT Relate 3000
provides you with some explanatory
information.
UNAVAILABLE
The number is unavailable.
WITHHELD
The caller has withheld their number.
RINGBACK
Ringback call.
OPERATOR
The call has been made via the
operator.
PAYPHONE
The caller is ringing from a
payphone.
INT’L
International call.
6346 Relate 3000 UG [2] 12/8/04 11:19 am Page 20
Page 21

New calls indicator
New calls are entries in the calls list
that have not yet been viewed.
For example, if someone calls while
you are out that call will be added to
the calls list as a ‘new call’.
The number of new calls you have
received is shown in the top righthand corner of the display.
View the Calls list
1. Press . Display shows details of the most recently
received call.
2. Press again to see the next call or hold down to
scroll through the list.
Or
To scroll up through the list, press or press and
hold down to quick scroll.
Dial a number in the list
1. Press and hold down or, repeatedly press
,
until the
number you want is displayed then press .
Copy a number to the directory
1. Press . Display shows WHERE? Now press .
Display shows LOCATION 1-0.
2. Select a keypad number between and under which
you want to store the entry. Display shows ENTER
NUMBER… then STORE.
3. Press and hold or, repeatedly press
,
to scroll to the
number you want and press . Display shows ENTER
NAME… then STORE.
4. Use the keypad to enter the name then press to
confirm.
Caller Display and the calls list 21
BT Relate 3000 ~ Issue 3 ~ Edition 02 ~ 12.08.04 ~ 6346
See page 15 for help with entering
names.
6346 Relate 3000 UG [2] 12/8/04 11:19 am Page 21
Page 22

Setting your preferences
Using the button located between the (M2) and
(M3) buttons, you can adjust some of the settings on
your BT Relate 3000 to suit your personal preferences.
1. Press . Display shows WHERE?. Now press .
The display shows SETUP MODE then HOLD STORE TO EXIT.
2. Press repeatedly to display (in the following order):
Ringer tone – R1, R2, R3
LCD contrast – 1,2,3,4,5
Amplify lock is on/off
VIP ringer is on/off
Voice prompt is off/on
Beep tone is on/off
Amplify is incoming/outgoing
Key lock is on/off
Memory 3 is not/is recall
1571 Detection on/off
Time – 12:00AM
3. When the setting you want to personalise is displayed,
press to switch between the options. The option
that is flashing will be the one that is stored.
Personalise your phone22
BT Relate 3000 ~ Issue 3 ~ Edition 02 ~ 12.08.04 ~ 6346
The selected option will be shown
flashing.
For setting the time, see the
instructions on page 7.
Holding the button down will
save any settings changed and exit
the set-up mode.
6346 Relate 3000 UG [2] 12/8/04 11:19 am Page 22
M1
M2
M3
Page 23

4. Press to save the option selected.
5. Repeat the actions described in point three for any other
settings you wish to change.
6. Press and hold to exit the set-up mode and return to
stand-by.
Ringer tone
Choose from three ring tones – R1, R2, R3.
LCD contrast
Select between 5 contrast levels for the display screen.
Amplify lock
Your BT Relate 3000 will remember the last selected
volume level for incoming or outgoing calls when amplify
lock is switched on.
You can switch between ON and OFF for this setting.
When OFF is selected your phone will revert to the factory
setting after use. These are:
Handset: Normal volume (setting one)
Handsfree: Mid-volume (setting three)
Headset: Normal volume (setting one)
Personalise your phone 23
BT Relate 3000 ~ Issue 3 ~ Edition 02 ~ 12.08.04 ~ 6346
WARNING
If Amplify lock is set to on, the
volume may be very loud. All users of
your BT Relate 3000 should be made
aware when the amplify lock is set
to on.
6346 Relate 3000 UG [2] 12/8/04 11:19 am Page 23
Page 24

VIP ringer
This lets you switch ON or OFF a different ring tone that
sounds whenever you receive calls from one of the
names/numbers stored in the directory or quickdial
memories, see page 18. The factory setting is off.
Voice prompts
Your BT Relate 3000 has voice prompts to help you use
your phone’s features more easily. You can switch these
voice prompts ON or OFF. The factory setting is OFF.
Beeps tones
Your phone beeps when you press a button. You can switch
these beeps ON or OFF. The factory setting is On.
Call amplifier
Your can either adjust the volume of your caller’s voice in
the earpiece (incoming) or the volume of your voice
(outgoing) so that your caller can hear you more clearly.
The factory setting is to adjust the volume of INCOMING calls.
Personalise your phone24
BT Relate 3000 ~ Issue 3 ~ Edition 02 ~ 12.08.04 ~ 6346
When in handsfree mode you will
only be able to adjust the volume
level of the caller’s voice.
We suggest you set the call amplifier
to the lowest audible level to avoid
the amplified volume being too loud.
Voice prompts will not be heard if
the mains power is not connected
and switched on. If you do not
intend to use mains power with the
telephone, ensure voice prompts
are switched off to prolong the
battery life.
6346 Relate 3000 UG [2] 12/8/04 11:19 am Page 24
Page 25

Key lock
You can lock your keypad so that only the following, basic
functions can be used:
, &
Quickdial memory buttons
Directory dialling
button
button
999 & 112 emergency numbers
9112
18000
918000
button
button
Once enabled, the key lock is switched ON or OFF by
pressing and together.
Recall/M3
You can set the third Quickdial button (M3) to be used as
a Recall button. Recall is used when connected to a
switchboard and with certain BT Calling Features.
Personalise your phone 25
BT Relate 3000 ~ Issue 3 ~ Edition 02 ~ 12.08.04 ~ 6346
To avoid accidental operation it is
recommended that you do not
enable this feature through SETUP if
you do not wish to use it.
The default setting is OFF (Disabled).
The default setting is for the button
to be used as the third Quickdial
memory button and not as Recall.
6346 Relate 3000 UG [2] 12/8/04 11:19 am Page 25
Page 26

1571
Your phone periodically checks the line to see if any
messages have been left. You can turn the detection
process off, if you do not use this service.
Factory settings
The original settings on your BT Relate 3000 are:
Ringer Level
. . . . . . . . . . . . . . . . . . . Hi
Ringer Tone
. . . . . . . . . . . . . . . . . . . R1
Handset volume level
. . . . . . . . . . Setting 1
Headset volume level
. . . . . . . . . . Setting 1
Handsfree volume level
. . . . . . . . Setting 3
LCD Contrast
. . . . . . . . . . . . . . . . . .
Level 3
Amplify Lock
. . . . . . . . . . . . . . . . . . . Off
VIP Ring
. . . . . . . . . . . . . . . . . . . . . . . Off
Voice prompts
. . . . . . . . . . . . . . . . . Off
Beep Tones
. . . . . . . . . . . . . . . . . . . . On
Amplifier
. . . . . . . . . . . . . . . . . . . . . . . Incoming
Key Lock
. . . . . . . . . . . . . . . . . . . . . . . Off
M3 = Quickdial or Recall
. . . . . . Quickdial
1571 Detection
. . . . . . . . . . . . . . . . On
To reset your phone to its original settings
1. Remove the Quickdial memory label.
2. Press the button.
Personalise your phone26
BT Relate 3000 ~ Issue 3 ~ Edition 02 ~ 12.08.04 ~ 6346
The button is located underneath
the quickdial memory label.
M1
6346 Relate 3000 UG [2] 12/8/04 11:19 am Page 26
M2
Page 27

27
BT Relate 3000 ~ Issue 3 ~ Edition 02 ~ 12.08.04 ~ 6346
Help
Many common problems are caused by the telephone cord or
the mains power being incorrectly connected or the batteries
being installed incorrectly or not being installed at all.
If you do experience any problems, please check that your
BT Relate 3000 has been correctly set up, see page 6.
No display
The batteries may be dead. Replace the batteries.
See page 6.
Mains power adaptor may not be connected. See page 6.
No dial tone
Check that the telephone line cord is correctly plugged into
the phone socket and the underside of the base.
No Caller Display
Have you subscribed to the service from your network
provider and is it switched on?
No ring tone
Have you switched the ringer volume to Off? See page 8.
No voice prompts
Is the mains power connected and switched on? See page 6.
27
6346 Relate 3000 UG [2] 12/8/04 11:19 am Page 27
Page 28

BT Relate 3000 ~ Issue 3 ~ Edition 02 ~ 12.08.04 ~ 6346
Safety
General
Use only approved Alkaline batteries. Using the wrong type
of batteries may damage your BT Relate 3000 and
invalidate your warranty.
Do not attempt to open the casing.
Never dispose of batteries in a fire. There is a serious risk
of explosion.
Cleaning
Simply clean the handset and base with a damp (not wet)
cloth, or an anti-static wipe. Do not use household polish as
this may damage the product. Do not use a dry cloth as this
may cause a static shock.
Environmental
Do not expose to direct sunlight.
Try not to position your product on carpets or other
surfaces which generate fibres, or place it in locations
preventing the free flow of air over its surfaces.
Do not submerge any part of your product in water and do
not use it in damp conditions, such as bathrooms.
General information28
6346 Relate 3000 UG [2] 12/8/04 11:19 am Page 28
Page 29

Do not expose your product to fire, explosive or other
hazardous conditions.
There is a slight chance that your phone could be damaged
by an electrical storm. We recommend that you unplug the
telephone line cord for the duration of the storm.
Technical information
How many telephones can you have?
All items of telephone equipment have a Ringer Equivalence
Number (REN), which is used to calculate the number of
items which may be connected to any other telephone line.
Your BT Relate 3000 has a REN of 1.5. A total REN of 4 is
allowed. If the total REN of 4 is exceeded, the telephone
may not ring.
With different telephone types there is no guarantee of
ringing, even when the REN is less than 4.
General information 29
BT Relate 3000 ~ Issue 3 ~ Edition 02 ~ 12.08.04 ~ 6346
6346 Relate 3000 UG [2] 12/8/04 11:19 am Page 29
Page 30

Switchboard compatibility
This product is intended for use within the UK for connection
to public telephone network and compatible switchboards,
which support tone dialling and timed break recall. If in doubt
please consult your network service provider.
Recall
The Recall ( )button is used when connected to certain
switchboards and for some BT Calling Features or
equivalent services available via your network provider.
To set the third Quickdial memory button (M3) to be used
as a Recall button, see page 25.
General information30
BT Relate 3000 ~ Issue 3 ~ Edition 02 ~ 12.08.04 ~ 6346
Quickdial
memory
button (M3)
For more information on BT’s Calling
Features, call BT on Freefone 0800
800 150.
Alternatively, if you are not with BT,
contact your service provider for
more information.
6346 Relate 3000 UG [2] 12/8/04 11:19 am Page 30
M2
M3
Page 31

For your records
Date of purchase:
Place of purchase:
Serial number:
For guarantee purposes proof of
purchase is required so please keep
your receipt.
Guarantee
Your BT Relate 3000 telephone is guaranteed for a period
of 12 months from the date of purchase.
Subject to the terms listed below, the guarantee will provide
for the repair of, or at BT’s or its agent’s discretion the
option to replace the BT Relate, or any component thereof,
(other than batteries), which is identified as faulty or below
standard, or as a result of inferior workmanship of materials.
Products over 28 days old from the date of purchase may be
replaced with a refurbished or repaired product.
The conditions of this guarantee are:
The guarantee shall only apply to defects that occur within
the 12 month guarantee period.
Proof of purchase is required.
The equipment is returned to BT or its agent as instructed.
This guarantee does not cover any faults or defects caused
by accidents, misuse, fair wear and tear, neglect, tampering
with the equipment, or any attempt at adjustment or repair
other than through approved agents.
This guarantee does not affect your statutory rights.
General information 31
BT Relate 3000 ~ Issue 3 ~ Edition 02 ~ 12.08.04 ~ 6346
6346 Relate 3000 UG [2] 12/8/04 11:19 am Page 31
Page 32

Within the 12 month guarantee period:
If you experience difficulty using the product, prior to
returning it, please read the ‘Help’ section beginning on
page 27.
Outside of the 12 month guarantee period:
If your product needs repair after the guarantee period has
ended, the repair must meet the approval requirements for
connection to the telephone network. We recommend that
you contact BT’s approved repair agent, TecLogic on 01672
564 444 or a local qualified repairer.
Returning your phone
Where possible, pack the product in its original packaging.
Please remember to include all parts, including the line
cords, power supply units and the original batteries. (Please
note that we cannot take responsibility for goods damaged
in transit.) Please obtain and keep proof of posting from
the sender.
General information32
BT Relate 3000 ~ Issue 3 ~ Edition 02 ~ 12.08.04 ~ 6346
6346 Relate 3000 UG [2] 12/8/04 11:19 am Page 32
Page 33

R&TTE
This product is intended for use within the UK for
connection to the public telephone network and compatible
switchboards.
This equipment complies with the essential requirements
for the Radio Equipment and Telecommunications Terminal
Equipment Directive 1999/5/EC.
Declaration of Conformance
Hereby, TMX, declares that this BT Relate 3000 is in
compliance with the essential requirements and other
relevant provisions of Directive 1999/5/EC.
The Declaration of Conformance for the BT Relate 3000 is
available from TMX, Alpha Business Park, 28 White House
Road, Ipswich, IP1 5LT.
General information 33
BT Relate 3000 ~ Issue 3 ~ Edition 02 ~ 12.08.04 ~ 6346
BT accessories and
replacement items
For a full range of accessories
and replacement items for
BT products, please call
0870 240 5522, or visit:
6346 Relate 3000 UG [2] 12/8/04 11:19 am Page 33
Page 34

BT Relate 3000 ~ Issue 3 ~ Edition 02 ~ 12.08.04 ~ 6346
Offices worldwide
The telecommunications services described in this publication
are subject to availability and may be modified from time to time.
Services and equipment are provided subject to British
Telecommunications plc’s respective standard conditions of
contract. Nothing in this publication forms any part of any contract.
© British Telecommunications plc 2004.
Registered Office: 81 Newgate Street, London EC1A 7AJ.
Registered in England No. 1800000.
BT Relate 3000 Issue 3 (08/04) 2
Designed and produced by The Art & Design Partnership Ltd.
Printed in China
Visit us at www.bt.com
6346 Relate 3000 UG [2] 12/8/04 11:19 am Page 34
 Loading...