

Page 1
IT • communications • support
BT Hosted VoIP
BT Hosted VoIP – Quick Start Guide
Getting started
Your BT Falcon Mk 2 IP
pack contains:
• BT Falcon phone
• BT Falcon User Guide
• Ethernet cable
• Power supply
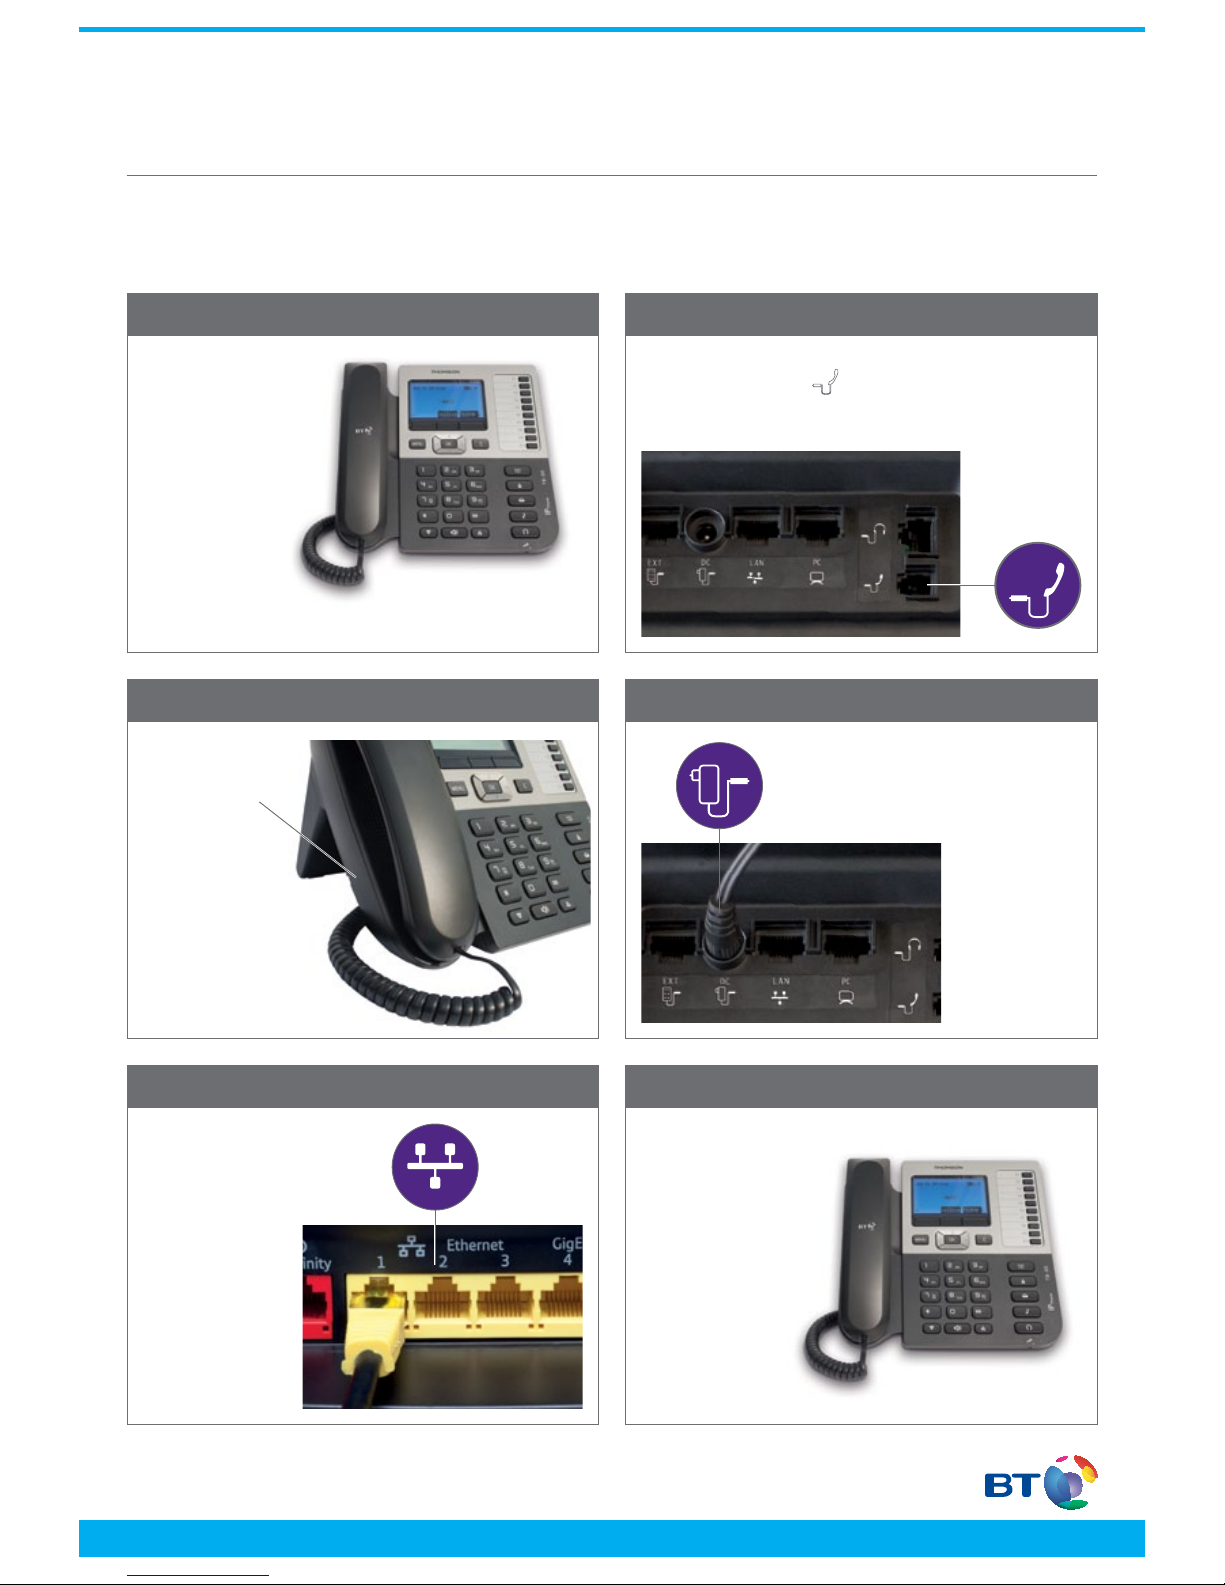
Your BT Falcon phone
stand clips into the
bottom of the phone.
Plug the power adapter into your mains
power socket and then insert the plug
into the back of the BT Falcon phone in
the socket labelled DC.
Using the ethernet
cable provided, plug
one end of the cable
into the ethernet
socket on the back
of your BT Business
Hub and plug the
other end of the
cable into the socket
on the back of the
BT Falcon phone,
labelled LAN.
On your BT Falcon
phone red lights
will ash while the
phone provisions
your service (this will
take two minutes).
Once this has
taken place your
phone will display
‘Broadband Voice’
and you will be
ready to make calls.
Plug your handset into the BT Falcon phone in the bottom
socket, labelled with the
icon.
1. Getting started
3. Insert stand
5. Connect to hub
2. Plug in handset
4. Plug in power
6. Provision service
Please ensure that you have a broadband connection on your
BT Business Hub
Bringing it all together
Page 2

IT • communications • support
BT Hosted VoIP
For more information please visit www.bt.com
Offices Worldwide
The services described in this publication are subject to availability and may be modified from time to time. Services and equipment are provided subject to British
Telecommunications plc’s respective standard conditions of contract. Nothing in this publication forms any part of any contract.
© British Telecommunications plc 2012. Registered office: 81 Newgate Street, London EC1A 7AJ. Registered in England No. 1800000.
Setting up your service
Log into the VoIP portal
https://service.btbroadbandvoice.bt.com/selfcare/
businessYourAccount
7. Setting up your lines
Note: As the Administrator, you can use the VoIP portal to add more lines,
add geographic numbers and change your calling plan.
Use the
password that
was emailed to
you, this is your
administration
password for the
VoIP portal.
Click on “Manage your lines” in the “add or activate services”
tab, then select each line, making the following changes:
1. Select “Password” and then enter a new password for each
of the lines, this is the password they will use to access the
online portal (remember the 056xxx line number would be the
username). Email these details to the intended user of this line
and also ensure you keep a record of these.
2. Select “Line name” to change the display name of each line,
normally the name of the user of this line.
3. Select “Administrator privileges” to give a user advanced
online portal privileges.
8. Manage your lines
You can manage the calling features from the “Manage My
Services” tab.
As an Administrator you can now manage the calling features
available to your users, as well as conguring:
– The lines included in the Multi Access Directory Number
(MADN)
– The lines included in the Multiline Hunt Group (MLHG)
– Call Barring for your lines.
As a line user you can now manage your calling features
including your Find-me-Follow-me settings.
9. Set up calling features
Bringing it all together
 Loading...