

Page 1
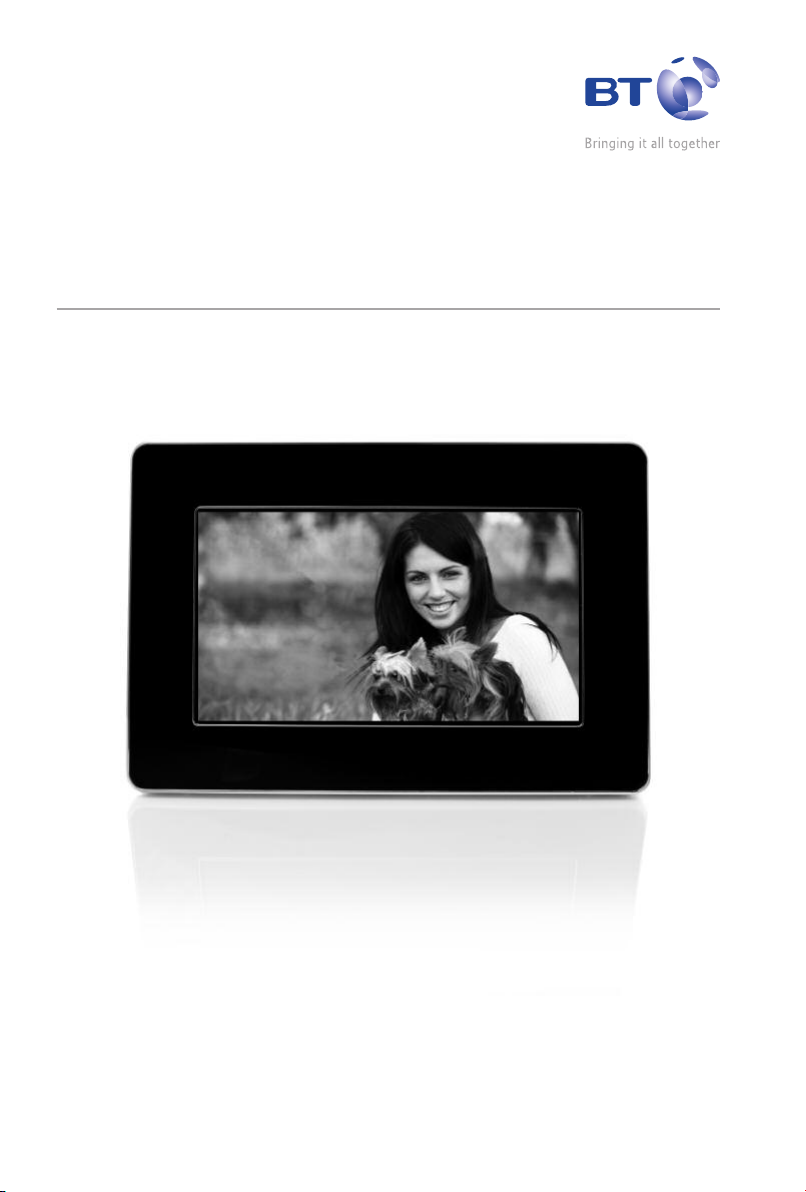
BT eFrame 200
7" MULTI MEDIA DIGITAL PHOTO FRAME
User Guide
Page 2
Welcome…
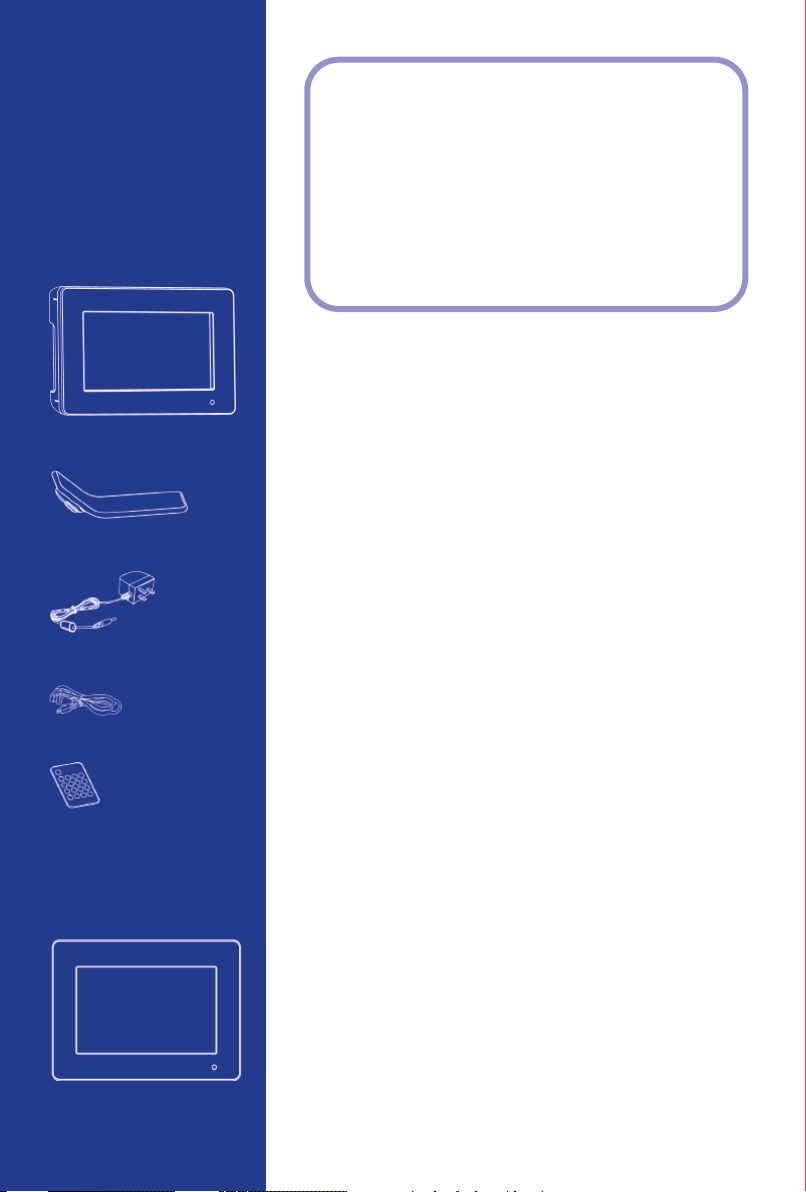
Got everything?
BT eFrame 200
•
Desktop stand
•
Mains power adaptor
•
USB cable
•
Remote control
•
Black plastic frame
•
(already fitted on frame)
Brushed aluminium frame
•
to your BT eFrame 200
Superb quality 7 inch display screen
•
Create a slide show of your favourite digital photos
•
Transfer photos straight from your memory card –
•
no PC required
Interchangeable frame
•
– black & brushed aluminium frames included
Multi-media functionality
•
– play Mp3s and Mjpeg videos
480 x 234 pixel screen resolution with 16m colour display
•
Compatible with most major memory cards: SD, MMC, MS
•
Pro, USB stick
JPEG, up to 26 Mega Pixels
•
Calendar and clock on display screen, plus alarm function
•
Remote control operation
•
Supports USB 2.0 High Speed memor
•
Wall mountable
•
128MB internal memory allows you to store photos
•
directly onto the frame
Load photos directly from your PC onto your frame via the
•
USB cable included
Built in speaker and headset jack
•
Auto turn on/off at your desired times
•
y stick
If you experience any problems, please call
the Helpline on 0808 100 9889*
Calls made from within the UK mainland network are free.
*
Mobile and International call costs may vary.
Page 3

In this guide
Getting to know your digital photo frame
Photo frame . . . . . . . . . . . . . . . . . . . . . . . . .4
Remote control . . . . . . . . . . . . . . . . . . . . . .5
Main menu display . . . . . . . . . . . . . . . . . . . .6
Setting up
Setting up the stand . . . . . . . . . . . . . . . . . .7
How to change between the black
and aluminuim frames . . . . . . . . . . . . . . . . .7
Using your eFrame 200
Switching the frame on . . . . . . . . . . . . . . . .9
Viewing images . . . . . . . . . . . . . . . . . . . . . .10
Slideshow . . . . . . . . . . . . . . . . . . . . . . . . . . .10
Stop viewing the Slideshow . . . . . . . . . . . .10
Photo rotation and Display rotation . . . . . .10
Playing video clips . . . . . . . . . . . . . . . . . . . .11
Clock mode . . . . . . . . . . . . . . . . . . . . . . . . . .12
MP3 mode . . . . . . . . . . . . . . . . . . . . . . . . . .12
Setup mode . . . . . . . . . . . . . . . . . . . . . . . . .13
Copying files . . . . . . . . . . . . . . . . . . . . . . . . .15
Mini USB device unplugging notice . . . . . .16
3
Help . . . . . . . . . . . . . . . . . . . . . . . . . . . . . . . .17
General information
Safety information . . . . . . . . . . . . . . . . . . . .18
Cleaning . . . . . . . . . . . . . . . . . . . . . . . . . . . .18
Product disposal instructions . . . . . . . . . . .18
Guarantee . . . . . . . . . . . . . . . . . . . . . . . . . . .18
Technical information . . . . . . . . . . . . . . . . .19
If you experience any problems, please call the Helpline on 0808 100 9889*
Page 4
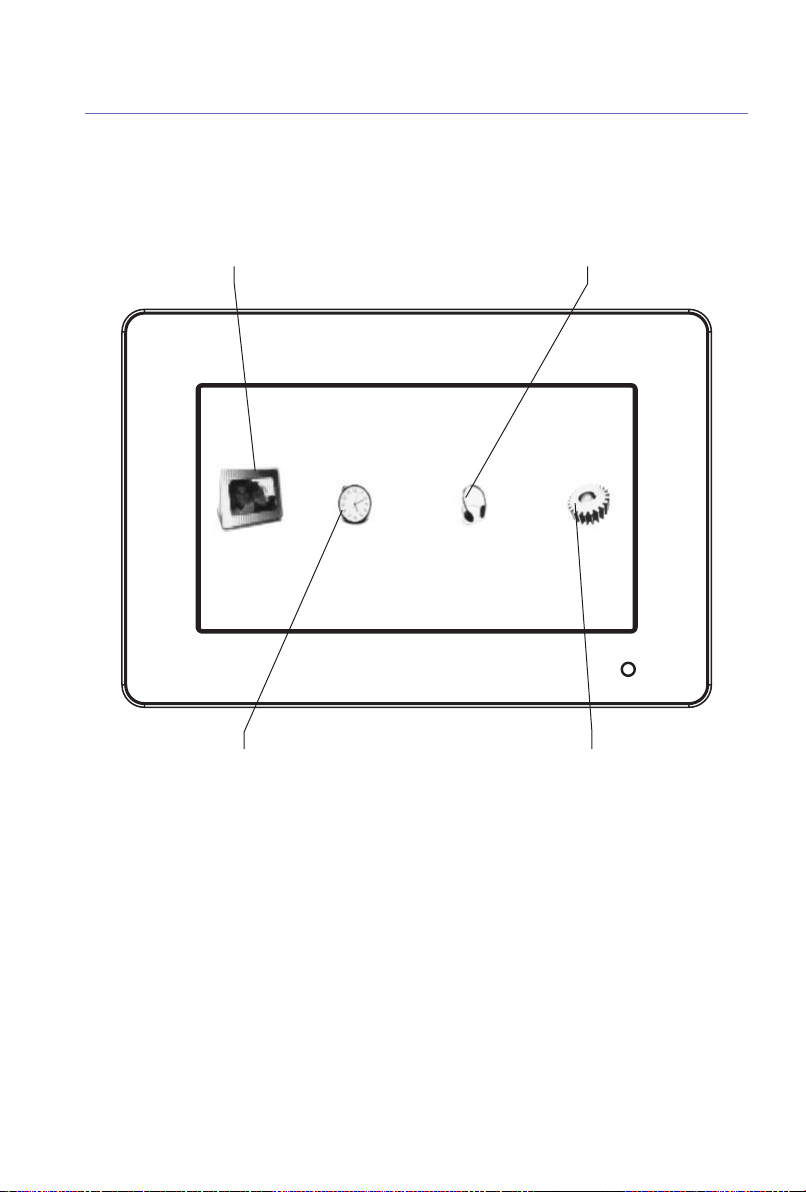
4
Getting to know your digital photo frame
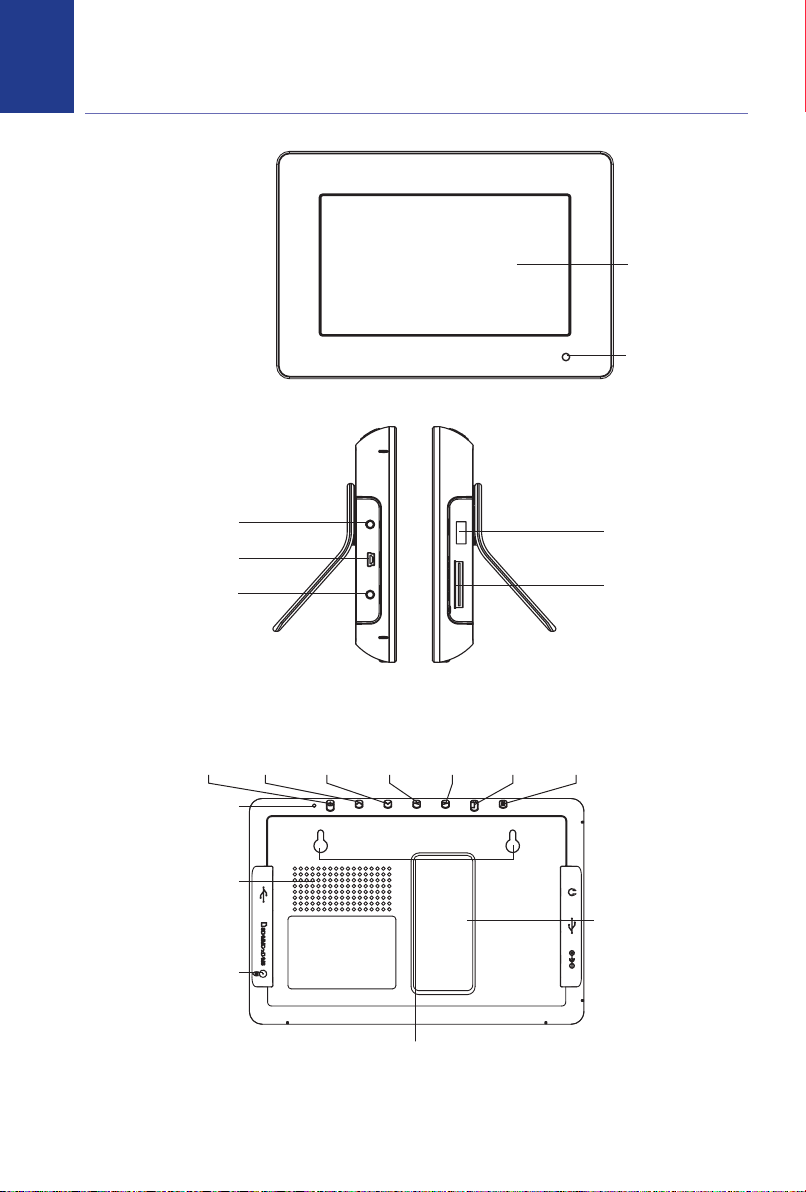
Photo frame
LC
D Panel
Remote control receiver
Earphone jack
Mini USB port
Power socket
Power
Power indicator
Speaker
o release the
Button t
coloured frame insert
Up Down Right Left Enter Esc
all mounting hooks
W
You can hang your photo frame on the
wall using the wall mounting hooks
(wall fixings are not provided).
USB port
Memory card port
Stand
If you experience any problems, please call the Helpline on 0808 100 9889*
Page 5
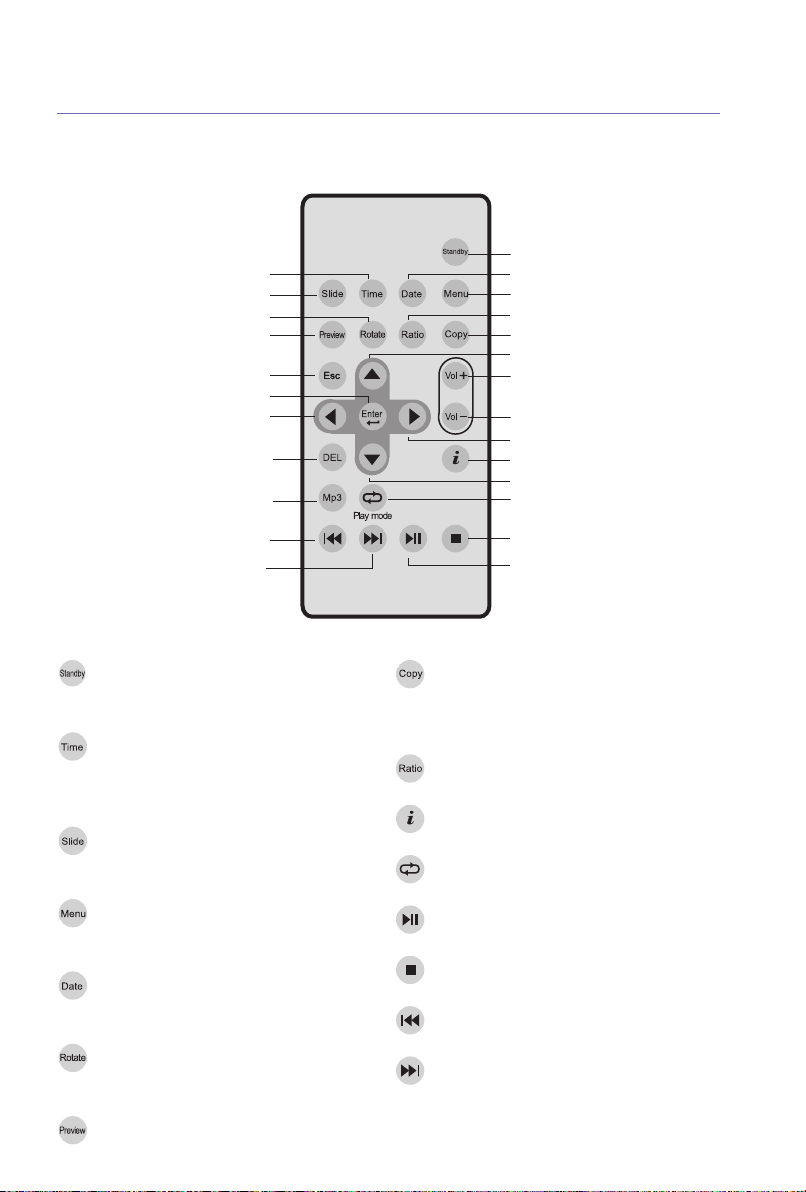
Remote Control
5Getting to know your digital photo frame
Time
Slide show
Rotate
Preview
ESC
Enter
Left
Delete
MP3
Previous song
Next song
Press standby button to turn
the backlight on/off.
Once set from the main menu, you can
toggle between off and two alternative
screen views of the clock.
Photos will be shown automatically one
by one in a slide show.
Standby
D
ate
Menu
Ratio
Copy
Up
Volume +
Volume Right
Information
Down
Play mode
Stop
Play / Pause
Files saved in a memory card can
be copied individually to the
internal memory.
Aspect 4:3, 16:9.
Show image’s resolution.
Music repeat playback.
Takes you back into the main menu and
into sub menus.
Once set fr
om the main menu it allows
you to show or hide the calendar.
Rotation of images can be activated only
when they are displayed in 4:3 mode.
View all image thumbnails in Reading
Photo mode.
If you experience any problems, please call the Helpline on 0808 100 9889*
Play / Pause.
Stop.
Previous song.
Next song.
Page 6
6 Getting to know your digital photo frame
Main menu display
Slide show mode / Thumbnail mode MP3 files
Clock mode Set-up
If you experience any problems, please call the Helpline on 0808 100 9889*
Page 7

Setting up
Follow the diagram below to set-up your frame
Setting up the stand
How to change between the black and aluminium frames
1. Press the EJECTION button to take out the existing frame.
7
If you experience any problems, please call the Helpline on 0808 100 9889*
Page 8

8
Setting up
2. Reassemble the new frame by fitting it on the middle cover (pay attention to the
mounting direction: the side with a remote control receiver hole).
If you experience any problems, please call the Helpline on 0808 100 9889*
Page 9

Using your BT eFrame 200
Switching the frame on
1. Plug the mains power adaptor into the side of the frame.
2. To read files from a memory card, insert an appropriate memory card into the side of the frame.
9
3. Press the
Select and press
4. The frame will automatically recognise image or video files saved in a memory card or in
the internal memory, and it will display all image or video thumbnails.
5. To start viewing images or playing video clips, see the “Viewing Images” or “Playing Video
Clips” section.
6. To return to the main menu, press the button or the button on the remote
control. To enter the thumbnail mode again. Select and press
7 To delete an image or video clip from thumb nail mode, press , , or to
select the image or video file that you want to delete. Press on the r
delete the current image or video file, press to confirm or to exit.
POWER button to activate. The main menu is displayed.
ENTER.
ENTER.
emote control to
ANT
T
IMPOR
When an external card is inserted, the frame will always default to look at the external
card first. To access the internal memory simply remove any external card.
If you experience any problems, please call the Helpline on 0808 100 9889*
Page 10

10
Using your BT eFrame 200
Viewing images
1. After entering the thumbnail mode, press the , , or button (the navigation
buttons on the remote control) to select the thumbnail to view. Press the button to
enlarge the image.
2. To view the previous image, press when an image is enlarged. Press to view the
next one.
Slideshow
This lets you show your pictures off as a continuous slideshow.
1. When in the thumbnail mode, press the button on the remote control,
2. When an image is enlarged, press either the button on the remote control or the
button to enter the slideshow mode.
Stop viewing the slideshow
1. Press to stop at the current full-sized image. To return to the thumbnail mode, press
or the button on the remote control.
Photo rotation & Display ratio:
1 When the display ratio is set to 4:3, an enlarged image can be r
on on the remote control. Press to rotate the current image
, or the
clockwise; press to rotate anti-clockwise.
2. To change the display ratio, press the button on the remote control when in the
Reading Photo mode. Or set the ratio in the setup mode. See “Setup Mode” section.
3. Press the button to return to the previous mode or press the button on the
remote control to return to the main menu.
butt
If you experience any problems, please call the Helpline on 0808 100 9889*
otated by pressing ,
Page 11

Using your BT eFrame 200
Note
If your pictures appear cropped or stretched you can reduce the aspect ratio to 4:3. It is
normal to have 2 black bars on either side of the photo in this mode.
Playing video clips
1. After entering the thumbnail mode, press , , or (the navigation buttons on
the remote control) to select the thumbnail to play.
2. Press to start playing a video clip.
3. Press again to pause. To continue playing, press .
11
4. Press once to return to the thumbnail mode. Press again to return to the
main menu.
Note
The Digital Photo Frame only supports MO
If you experience any problems, please call the Helpline on 0808 100 9889*
TION JPEG video format.
Page 12

12
Using your BT eFrame 200
Clock mode
In Clock mode, you can set the date, time and alarm. To conserve the power, the LCD display
Auto on/off time can also be set so your frame will come on and go off when you want.
1. Press or to select the icon in the main menu and then press to enter the
Clock mode.
2. Press or to select the item you want to change; press to confirm; Press or
to change the item press . Then move or to change the next part of the item.
3. Press or to change any further items or press to save the settings and then
press again to exit. See the “Show Time” and the “Show Calendar” sections in the
“Setup Mode.”
MP3 mode
1. Press the button on the remote contr
on the remote control to return to the main menu. Or press or to select the icon in
the main menu and then press to enter the MP3 Mode.
2. Press , , or to select MP3 files.
If you experience any problems, please call the Helpline on 0808 100 9889*
ol to enter the MP3 mode. Press the button
Page 13

Using your BT eFrame 200
3. Use the or button on the remote control to select the previous song or the next song.
4. Press the or button on the remote control to adjust the volume.
5. To delete an MP3 file, press , , or button to select the MP3 file that you
want to delete. Press button on the remote control to delete the current MP3 file,
press the to confirm or to exit.
6. Press (or the play button on the remote control) to play a song.
Press (or the pause button on the remote control) again to pause.
7. Press to stop and return to the main menu.
13
Setup mode
1. Press or to select the icon in the main menu.
Press to enter the setup mode.
2. Press , , or to select items. Press to change settings.
If you experience any problems, please call the Helpline on 0808 100 9889*
Page 14

14
Using your BT eFrame 200
3. Note the following details:
Slide Interval
5/10/30/60 seconds
Show Time
OFF/Center/Corner
When it is set to Center/Corner, the time will be displayed in playback mode accordingly.
It can also be switched to OFF/Center/Corner by pressing the
remote control.
Show Calendar
ON/OFF
When it is set to ON, the calendar and date that have been set in the Time Mode will be
displayed in the playback mode. It can also be switched to ON/OFF by pressing the
button on the remote control.
Music Repeat
ALL/ONE/NONE
Aspect
4:3/16:9
TIME button on the
DATE
Set the display ratio of images. See the “Photo Rotation & Display Ratio” section on page 10.
Volume
0~9
Language
English , French, German, Spanish, Italian , Dutch, Poland ,Czech ,Hungarian, Turkish,
Russian, Swedish, Greek, Por
tuguese.
Format storage
ernal photos?
e all int
Delet
Ye s
No
You can select Yes/No by pressing the or button on the remote control.
IMPORTANT
4. To complete Setup, please press to save the setting and exit.
If you experience any problems, please call the Helpline on 0808 100 9889*
Page 15

Using your BT eFrame 200
Copying Files
To copy files from an external memory card to the internal memory
You can transfer individual files from an external memory card to the internal memory on
the BT eFrame 200.
1. In Thumbnail mode, use the , , or buttons to select the file that you want
to copy and press on the remote control. An option will appear asking to Copy or Exit.
Choose the option required. The screen then displays Copy done once the file has been
copied. Press to go back to the Thumbnail mode.
2. Repeat this for all of the files that you want to copy and then press to go back to the
Thumbnail mode.
15
Note
If you try to transfer pictures to the internal memory when it is already full, the screen
will display an error message.
To copy files to and from a PC to the Internal Memory or an External Memory card
When connected to a PC via the USB cable (supplied), your BT eFrame 200 will act exactly
like a card reader. It can be accessed via any Windows user interface. Pictures, video clips and
MP3 files can be copied, moved or deleted in exactly the same way PC files are manipulated.
1. Plug the USB cable into your BT eFrame 200 and connect the other end to the USB port on the PC.
2. At your computer, click on
on your PC. Each card slot represents:
• Internal Memory
• External Memory card (e.g. SD / MS)
• USB 2.0 drive
If you experience any problems, please call the Helpline on 0808 100 9889*
Start and select My Computer. You will see 3 new drive letters
Page 16

16 Using your BT eFrame 200
3. Click on your required drive letter. Open the picture folder that you want to copy and
then drag and drop across.
4. Always ensure that you safely remove the USB cable once you have completed copying
files. (Follow your PC on screen prompts).
IMPORTANT
When an external card is inserted, the frame will always default to look at the external
card first. To access the internal memory simply remove any external card.
Mini USB device unplugging notice
To unplug the Digital Photo Frame from the computer, be sure to stop the device
beforehand. To stop the Digital Photo Frame, please follow the steps below:
Removing the Digital Photo Frame from a PC: (For Windows 2000/
1. Click on the device icon located on the taskbar. Select the device you want to stop
(e.g. Stop USB Mass Storage Device Drive (E:)).
2. Follow on-screen instructions to safely remove the Digital Photo Frame.
Note
The Digital Photo Frame with a SD/MMC/MS card acts exactly like a card reader (mass
storage device) by connecting the Digital Photo Frame to a computer via USB. (See “Card
Reader” section above.)
XP/VISTA)
If you experience any problems, please call the Helpline on 0808 100 9889*
Page 17

Help
No power supply
Please check that the power adaptor is plugged into the frame and the mains power is
switched on and working.
No display
Please check that you have inserted a memory card or a USB key properly into the
appropriate readers and that the latter contain files legible by the apparatus - only JPEG
and MJPEG (AVI) formats are supported.
The remote controller does not function
• The distance is too long or the angle exceeds 30 degrees.
• The battery of the remote controller is dead.
• The infrared sensor is in direct sunlight.
Your photo frame powers down or goes back to its welcome screen
This may be provoked by an electrostatic environment. Keep the frame away from the
source generating electrostatic problems (ESD).
17
It does not function with a PC
Check the USB connections with your PC and ensure your operating system is compatible
with the frame.
If you experience any problems, please call the Helpline on 0808 100 9889*
Page 18

18
General information
Safety information
• Handle your product with care.
void touching the LCD screen as skin oils can be
• A
difficult to remove.
lace your digital frame on a stable, level surface.
• P
• Do not expose to direct sunlight or high
temperatures.
• Do not submerge any part of your product in water
and do not use it in damp or humid conditions, such
as bathrooms.
Cleaning
• Clean the screen and frame with a soft, lint-free
cloth to remove dust.
• If the screen is still not clean, apply a small amount
of non-ammonia, non-alcohol based glass cleaner
using a soft lint-free cloth. Please note that using a
chemical/alcohol cleaner could damage the screen
and display case.
Product disposal instructions
The symbol shown here and on the product
means that the pr
Electrical or Electronic Equipment and
should not be disposed with other household or
commercial waste at the end of its working life.
The Waste of Electrical and Electronic Equipment
(WEEE) Directive (2002/96/EC) has been put in
place to recycle products using best available
recovery and recycling techniques to minimise the
impact on the environment, treat any hazardous
substances and avoid the increasing landfill.
Product disposal instructions for residential users
When you have no further use for it, please remove
any batteries and dispose of them and the product
as per your local authority’s recycling processes.
For more information please contact your local
authority or the retailer where the product was
purchased.
oduct is classed as
Guarantee
Your BT eFrame 200 is guaranteed for a period of 12
onths from the date of purchase.
m
Subject to the terms listed below, the guarantee will
provide for the repair of, or at BT’s or its agent’s
discretion, the option to replace the BT eFrame or
any component thereof, which is identified as faulty
or below standard, or as a result of inferior
workmanship or materials. Products over 28 days
old from the date of purchase may be replaced with
a refurbished or repaired product.
The conditions of this guarantee are:
• The guarantee shall only apply to defects that occur
within the 12 month guarantee period.
• Proof of purchase is provided.
• The equipment is returned to BT or its agent as
instructed.
• This guarantee does not cover any faults or defects
caused by accidents, misuse, fair wear and tear,
neglect, tampering with the equipment, or any
attempt at adjustment or repair other than through
approved agents.
• This guarantee does not affect your statutory rights.
Within the 12 month guarantee period:
Prior t
o returning your product, please read the
Help section beginning on page 17 or contact
the Helpdesk on 0808 100 9889* for assistance.
In the unlikely event of a defect occurring, please
follow the Helpdesk’s instructions for replacement
or repair.
Returning your product
If the Helpline is unable to remedy your problem
they will ask you to return the product. Where
possible, pack the product in its original packaging.
Please remember to include all parts, including the
power supply units and cables. Please note that we
cannot take responsibility for goods damaged in
transit. Please obtain and keep proof of posting
from the Post Office or other carrier.
Product disposal instructions for business users
Business users should contact their suppliers and
check the terms and conditions of the purchase
contract and ensure that this product is not mixed
with other commer
cial was
or disposal.
e f
t
If you experience any problems, please call the Helpline on 0808 100 9889*
Page 19

General information
19
Technical information
isplay
D
On-screen display language English , French,
File formats supported JPEG
Expansion slot SD/MMC/MS
Speaker Built-in Speaker and
Audio format MP3
Internal memory Nand Flash(128MB)
Interface USB2.0 High speed
Infrared IR Remote Control
Other functions Slide show with various
Standard accessories USB Cable
Dimension 209X141X25mm
Weight 460g ± 5g
Power source Input AC 100V-240V
Minimum system Pentium 166 MHz
requirements processor or higher
torage
Mass s
oper
ating sys
em
t
”TFT LCD
7
upports 16:9
S
nd 4:3 displays
a
German, Spanish,
Italian, Dutch, Polish,
Czech, Hungarian,
Turkish, Russian,
Swedish, Greek,
Portuguese.
(up to 26 Mega Pixels),
MJPEG (AVI), MP3
Card slot
Phone Jack
transition effects,
Photo rotation, Alarm
Clock & Calendar, USB
2.0 Host/ Device (Mass
Storage Device).
The LCD display Auto
on/off time can be set
Adaptor (100V-240V)
Instruction Manual,
Stand, Remote control
(L x W x H)
(stand not included)
(stand included)
Output DC 9V, 2A
Microsoft Windows
2000/XP/VISTA
Available USB port
Super VGA video card
and colour monit
Windows 2000, XP
A
VIST
or
,
For your records
ate of purchase:
D
Place of purchase:
erial number:
S
For guarantee purposes proof of purchase is
required so please keep your receipt.
If you experience any problems, please call the Helpline on 0808 100 9889*
Page 20

Offices worldwide
The services described in this publication are subject to availability
and may be modified from time to time. Ser
are provided subject to British Telecommunications plc’s respective
standard conditions of contract. Nothing in this publication forms
any part of any contract.
© British Telecommunications plc 2008.
Registered Office: 81 Newgate Street, London EC1A 7AJ.
Registered in England No. 1800000.
Designed and produced by The Art & Design Partnership Ltd.
Printed in China
BT eFrame 200 (10/08) Issue 2
vices and equipment
 Loading...