

Page 1

This equipment is not designed for making emergency telephone
calls when the power fails. Alternative arrangements should be
made for access to emergency services.
Diverse ISDN telephone system.
For cordless and corded communications DECT
User Guide
Instr uctions for using the Diverse ISDN.
Page 2

Please open this page for an 'at a glance'
guide to your Diverse ISDN.
Page 3
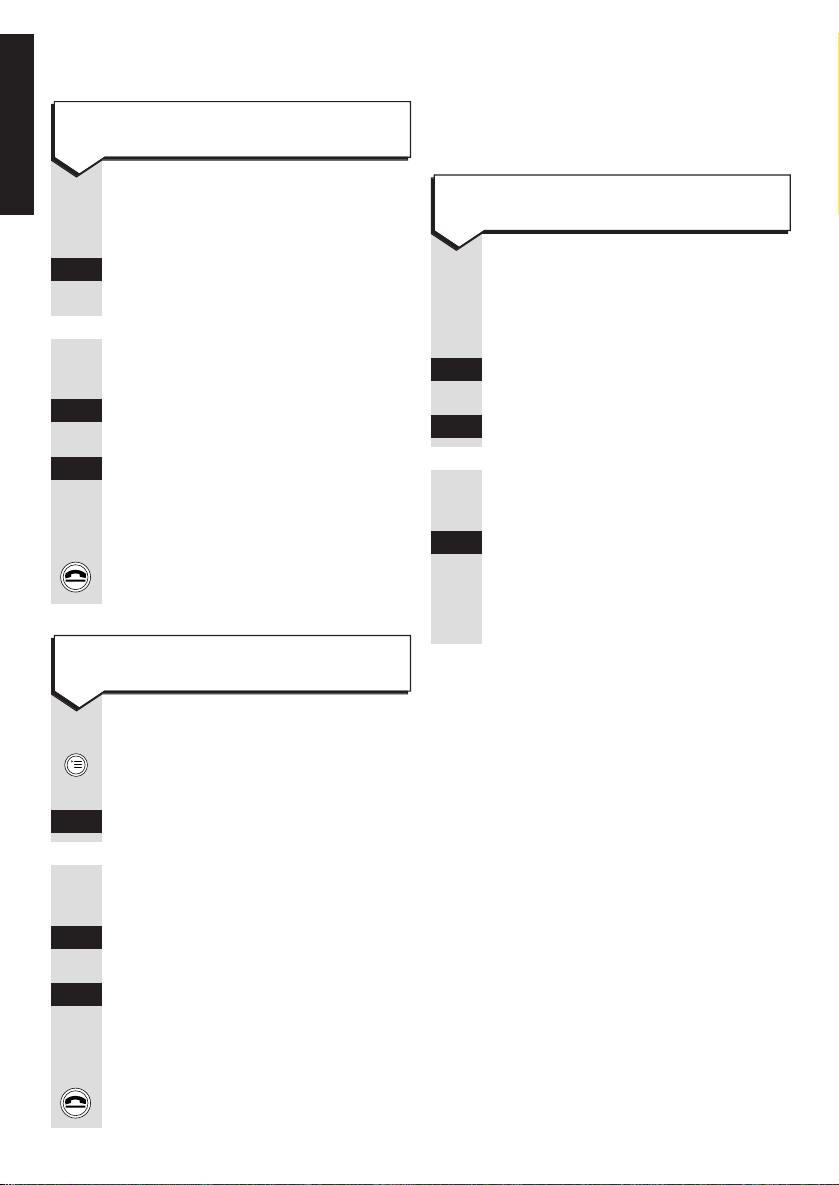
1
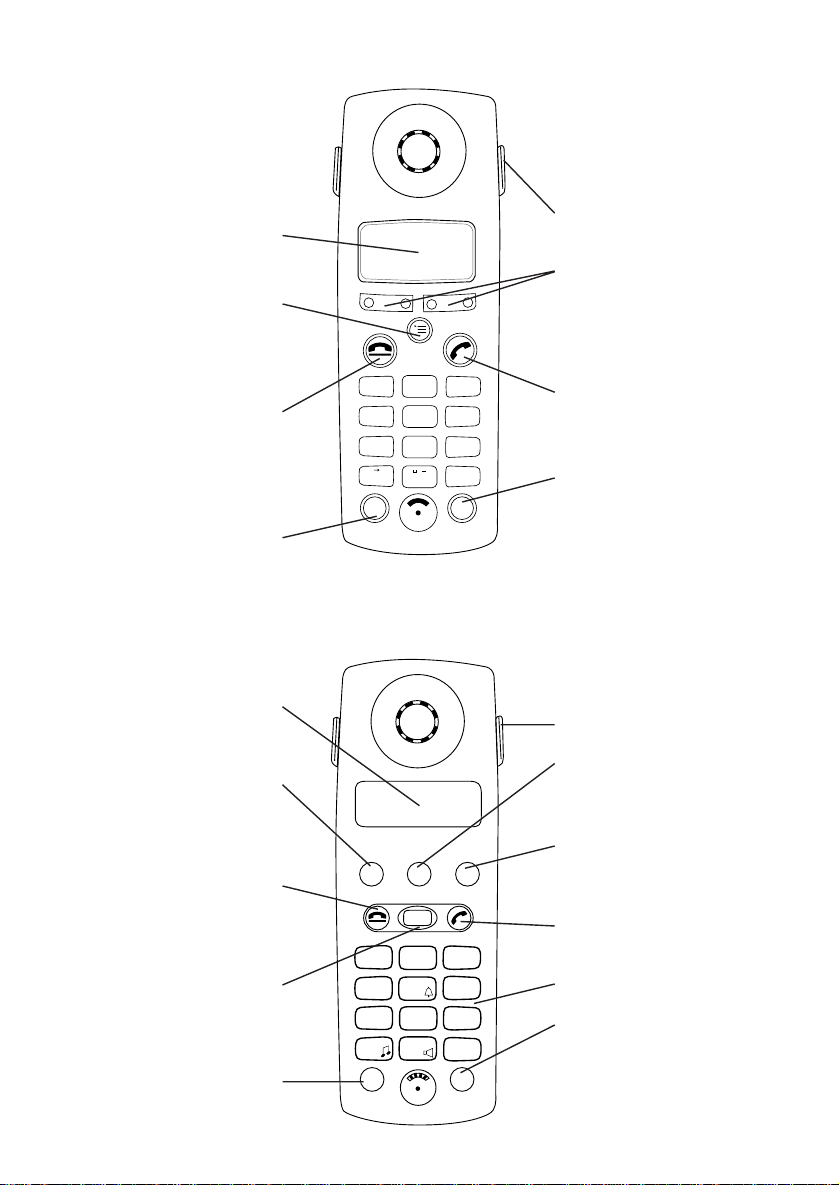
Display
Menu
Brings up the menu onto the
display.
End Call (red)
Used to end a call. Also allows
you to exit completely from the
menu at any time.
Recall
Carrying clip
Options
Lets you select from the menu
options on the display.
Phone (green)
Used to make and answer calls.
Power
For switching the handset ON
and OFF and to LOCK the
keypad.
Diverse 2000 Additional Handset
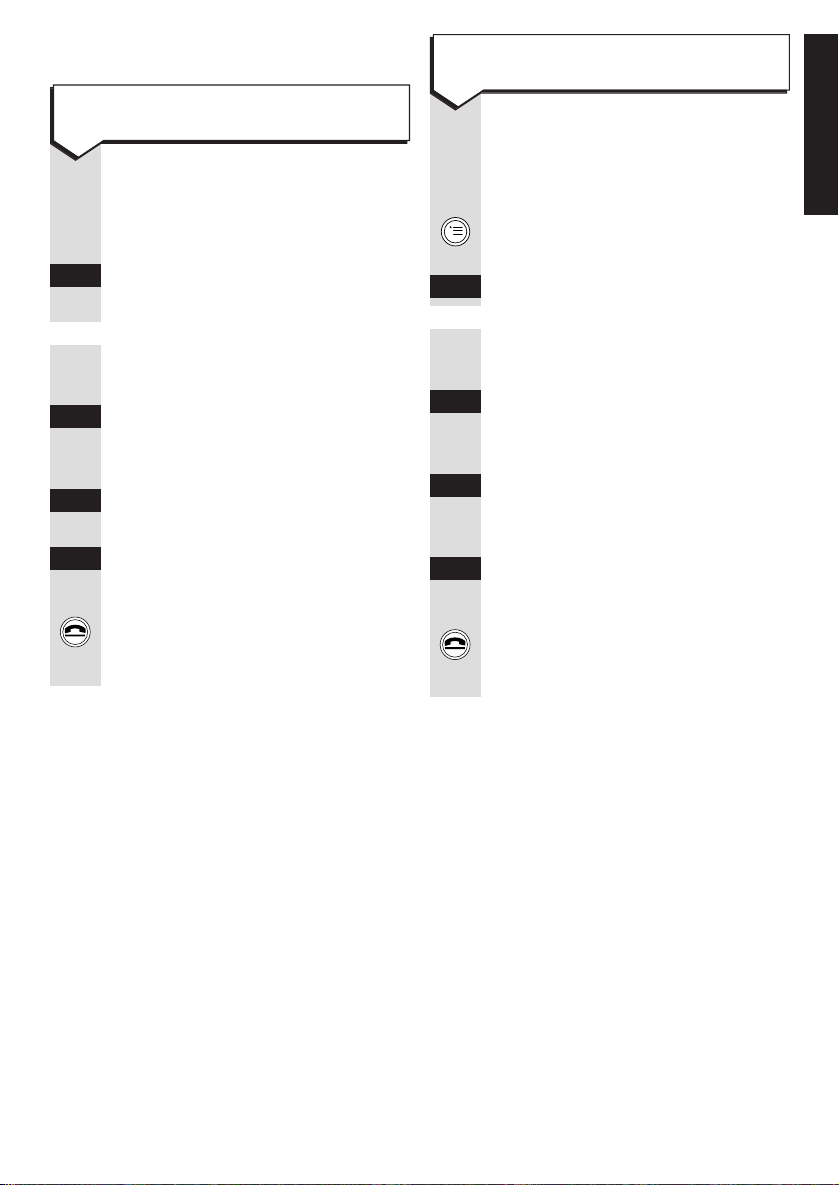
Display
Displays the status of
your handset.
Store
Lets you store numbers in
the memor y and access other
phone functions.
End call (red)
Used to end a call. Also allows
you to quit a procedure.
Intercom
Enables internal communication
and call transfer between
handsets.
Recall
Carrying clip
Memory speed dial
Enables quick dialling of 10
numbers stored in the memor y.
Last number redial
Lets you redial the last five
external numbers you called.
Phone (green)
For making and answering calls.
Keypad
Power
For switching the handset
ON and OFF and to LOCK
the keypad.
1
2
ABC
3
DEF
4
GHI
5
JKL6MNO
7
PQRS
8
TUV9WXYZ
#
✱
0
RCL
PWR
.
a A
INT
1
2
ABC
3
DEF
4
GHI
5
JKL6MNO
7
PQRS
8
TUV9WXYZ
#
✱
0
RCL
PWR
STO
MEM
LNR
At a glance: Diverse 2000 Executive Handset
Page 4

2
Page 5

3
In this guide
At a glance 1
Introduction 5
Diverse 2000 Executive Handset 6
Handset registration 6
Using your Executive Handset 6
Switching ON/OFF 7
Locking your handset keypad 7
Making and receiving calls 8
Missed calls list 10
Putting calls on hold and transferring calls 11
Switching between calls 13
Creating three-way conference calls 14
Parking a call 14
Call handover 15
Call waiting 16
Caller identity 16
Using the handset phonebook 16
Internal call forwarding 20
ISDN customer controlled call forwarding 21
Answering machine call pickup 23
Remotely accessing answering machines and services 23
Diverse 2000 Additional Handset 24
Handset registration 24
Switching ON/OFF 24
Locking your handset keypad 25
Making and receiving calls 25
Putting calls on hold and transferring calls 27
Switching between calls 28
Creating three-way conference calls 29
Call handover 31
Call waiting 31
Parking a call 32
Using the handset memory to store and dial numbers 32
Internal call forwarding 34
ISDN customer controlled call forwarding 35
Answering machine call pickup 36
Remotely accessing answering machines and services 36
Page 6

4
Using attached, corded telephones
and other equipment
37
Using the Diverse ISDN with a switchboard 42
Using the Diverse ISDN with
Diverse 1010 Handsets
44
Maintenance 45
Help 46
Index 50
Hints and tips boxes
In this user guide, we’ve included helpful tips and important information in boxes.
Page 7

5
The Diverse ISDN comes with a separate
System Set-Up Guide to assist you to set
up your system ready for use. This, the
standard user guide, takes you through
all the features and functions available
once your Diverse ISDN has been set up.
Please retain this user guide for future
reference, and if you need to set-up or
re-configure your system in the future,
please refer to the System Set-Up Guide,
which you should also retain.
This user guide applies to both single
and multiple handset systems. The
‘internal’ functions described in this
guide apply only to Diverse ISDN base
stations with more than one handset
connected.
Introduction your Diverse
ISDN is designed for ease of use
and made to the high standards set
by BT.
Page 8
6
Diverse 2000 Executive
Handset
Handset registration
Your Diverse 2000 Executive Handset
must be registered with the base station
before it can be used, see the System
Set-Up Guide for instructions.
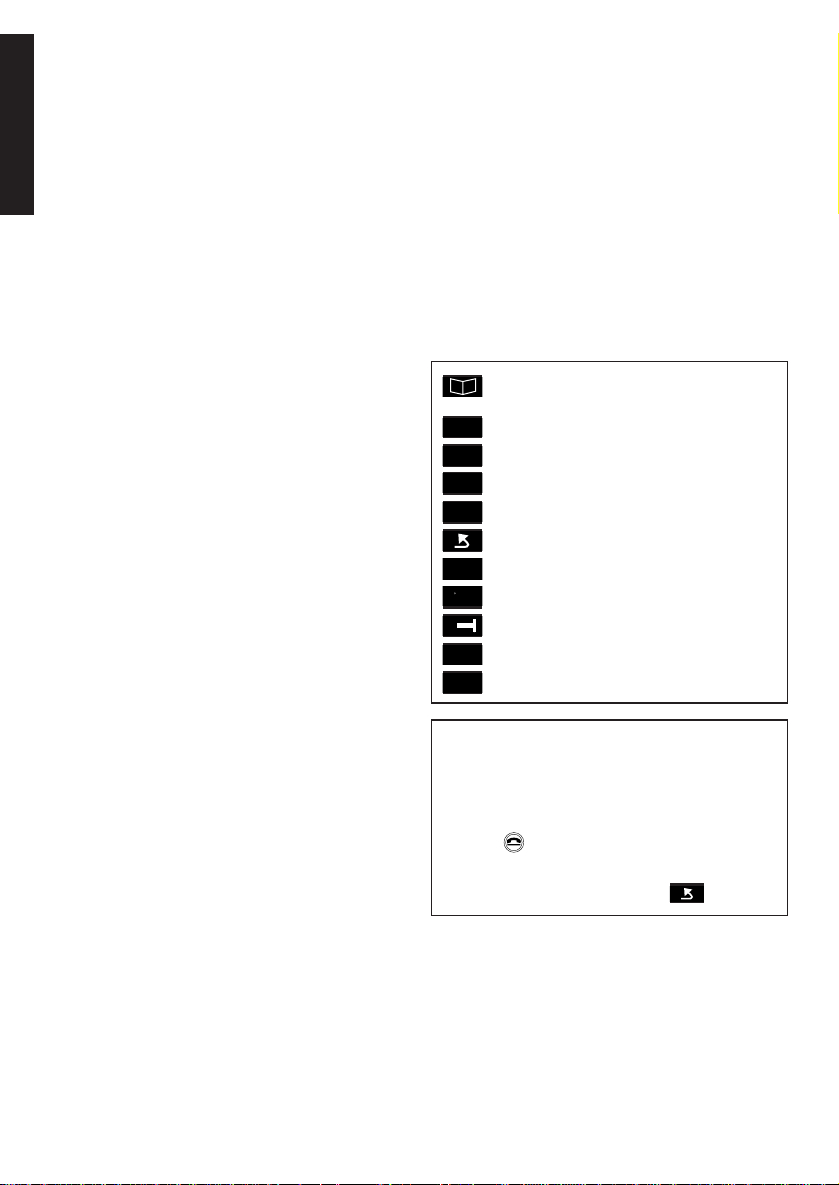
Using your Executive Handset
The options shown on the display are
indicated by symbols.
These symbols are as follows:
When moving through the Diverse
Executive Handset’s MENU options
remember, if you wish to escape the
MENU altogether, press the END
CALL button, or to move back
to the previous screen, select the
GO BACK option button .
PHONEBOOK, to enter use
and alter phonebook entries.
INTERNAL.
REDIAL.
Move UP through menu.
Move DOWN through menu.
GO BACK to previous menu.
OK.
ACTIVATE.
DELETE.
BACK.
FORWARD.
INT
EXECUTIVE HANDSET
➞➞
▲
▼
OK
-
–
-
–
–
–
–
➜
<
>
Page 9
Switching your handset
ON and OFF
Press and hold down the PWR
button until the display is
activated.
When the handset is switched ON
you can make and receive calls.
Press and hold down the PWR
button until the display goes blank.
Locking your handset keypad
When your handset is locked it prevents
accidental operation of the keypad when
you carry it around. You can still receive
calls.
When the handset is ON, press
and release the PWR button
quickly. The display will show
KEYPAD LOCKED.
Press the PWR button quickly.
PWR
PWR
PWR
PWR
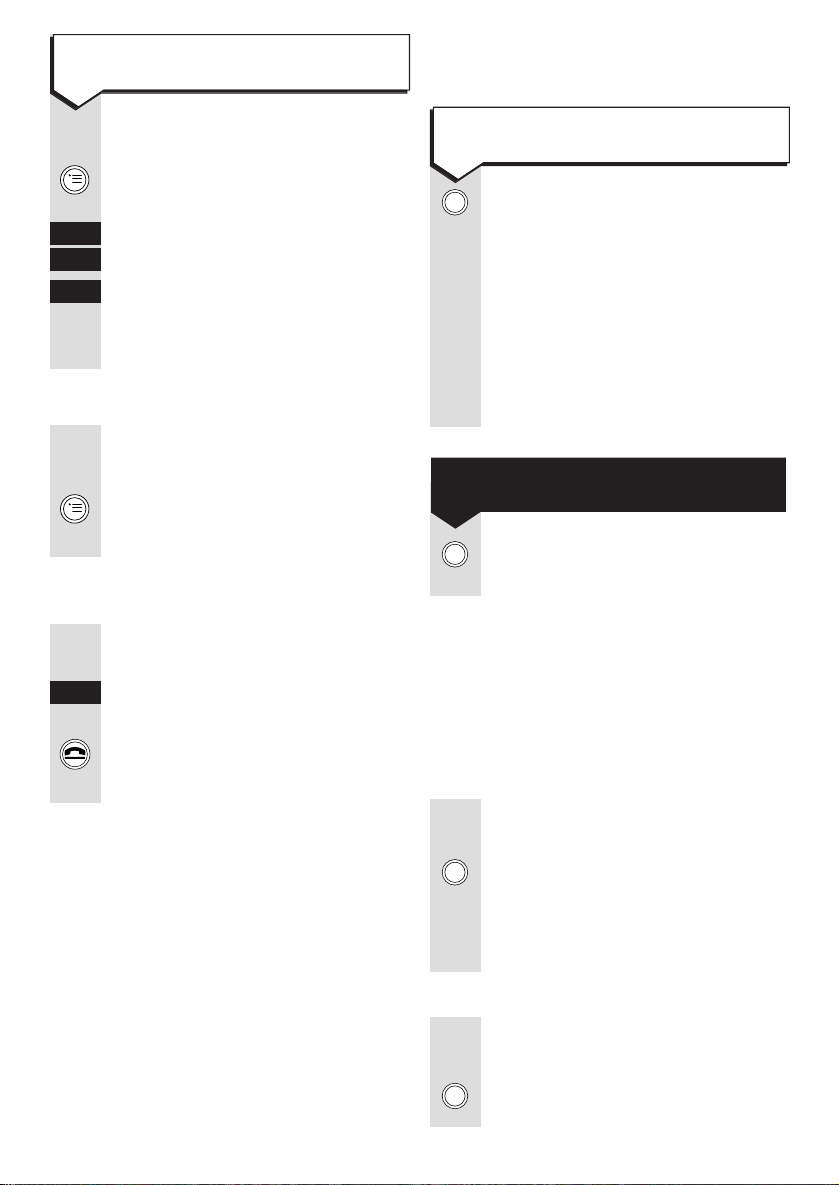
Press buttons in order shown
Press the MENU button to display
the menu.
▲
Press UP and DOWN to highlight
▼
the menu item required.
OK
Press OK to confirm the selected
item. The display then shows the
next menu level below.
Press the MENU button when in
a menu list.
INT
Press INT. The internal number
is displayed.
Press the END CALL button and
the handset returns to standby.
7
To select a menu option
To switch ON
Page 10
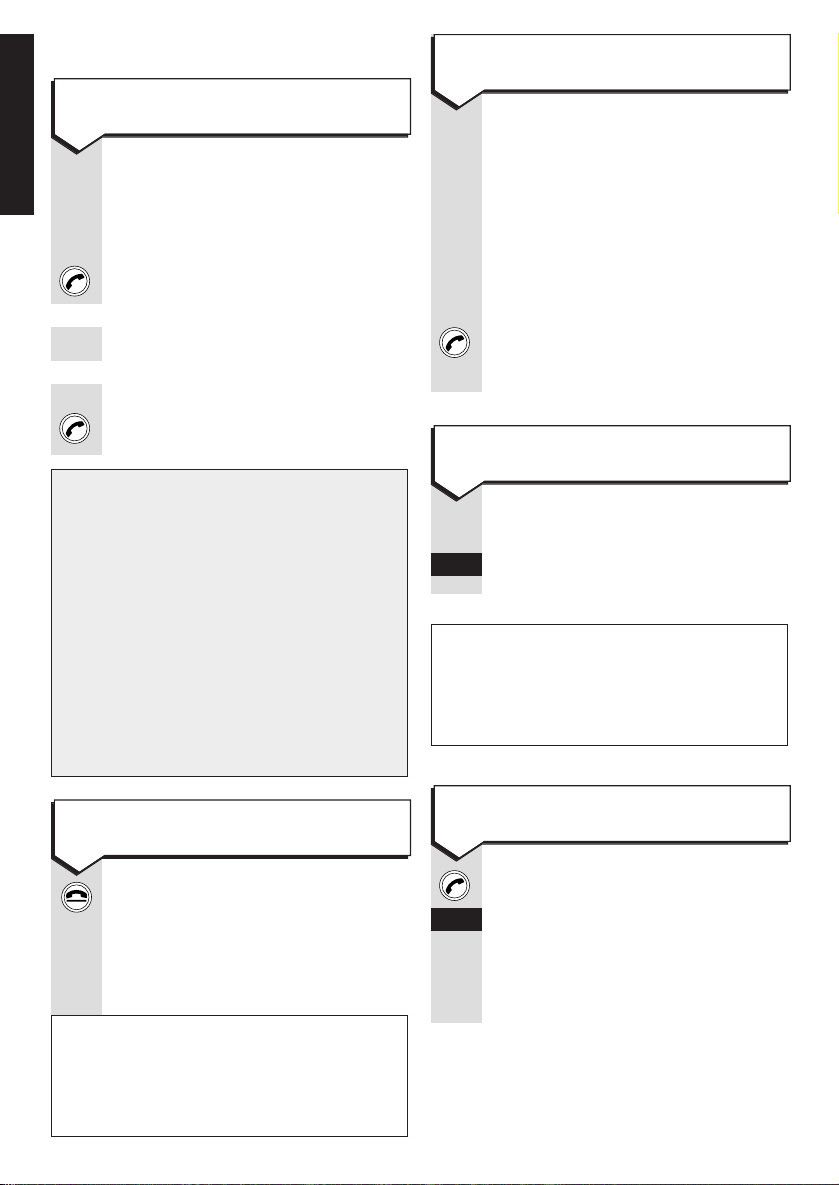
Making and receiving calls
Press buttons in order shown
Make sure the handset is
switched ON.
Press the PHONE button.
(KEYPAD)
Dial when you hear external dial
tone.
(KEYPAD)
Alternatively, you can key-in the
or
phone number you want, then
press the PHONE button to dial.
Press the END CALL button.
Or
Replace the handset on the
charger.
Press buttons in order shown
When the handset rings:
Pick up the handset from the
charger. Speak as normal.
Or, if the handset is not in the
charger
Press the PHONE button and
speak as normal.
When the phone rings.
REJECT
Press REJECT.
Press the PHONE button.
REDIAL
Press REDIAL.
The last external number called
will be dialled.
8
When 2 external calls are already in
progress and you try to make a call, you
will hear the busy tone and the display
shows EXTERNAL LINE BUSY.
IMPORTANT!
If you have switched off the
automatic external line and use the
first method then, after pressing the
PHONE button, you will need to
press either EXT of 0 then highlight
and OK the required MSN number
before dialling. The MSN number
you select will be your telephone
number for the call. The alternative
method is not affected.
If REJECT is pressed to reject a call
on a par ticular handset, other handsets
will continue to r ing if they have been
set up to do so.
To make an external call
To receive a call
To reject a call
To redial the last external number
To end a call
EXECUTIVE HANDSET
Page 11
Press buttons in order shown
INT
Press INT.
Enter the internal number you
want (0-9).
(This can also help you find
any handsets which have been
misplaced).
INT
Press INT.
Either press the ✱button, or
or
COLL.CALL
. All the registered
COLL.CALL
handsets within range will ring.
The first extension to answer will
take the call.
You can prevent your caller from
hearing you while your have a
conversation with another person.
You can still hear your callers
while the secrecy function is on.
During a call:
To switch secrecy on
Press the MENU button.
NEXT
Press NEXT to highlight MUTE.
OK
OK.
Your caller now cannot hear you.
✱
0-9
Press buttons in order shown
Press REDIAL. The last five
external numbers called are
displayed.
▲ Select the number you wish to
▼ redial using UP and DOWN.
Press the PHONE button.
The number is dialled.
If you have set group ringing
(see ‘Call Allocation’ in the System
Set-Up Guide) and your handset is
included in the second ringing
group, it is possible to pick up the
call before your handset rings.
When you know other handsets
are ringing:
Press the PHONE button. Display
shows EXTERNAL CALL.
ACCEPT
Press ACCEPT to answer the call.
or
Or, if you decide you do not want
EXT
to answer the call but make an
external call of your own, press
EXT.
IMPORTANT!
If your handset is not included
in either ringing group you cannot
pick up the call.
9
To redial one of the last 5 external
numbers
To pick up a call when your handset is
not ringing
To make an internal call to a specific
extension
To call all other extensions registered
with your Diverse ISDN
To use the secrecy function
EXECUTIVE HANDSET
➞➞
Page 12
Press buttons in order shown
The original setting is ON.
Press the MENU button.
▼ Press DOWN to highlight
SERVICE.
OK
Press OK.
NEXT
Press NEXT to highlight SYSTEM
SETTINGS.
OK
Press OK.
(CODE)
Enter your system code
(default 0000).
OK
Press OK.
NEXT
Press NEXT to highlight
EQUIPMENT DATA.
OK
Press OK.
NEXT
Press NEXT to highlight
DISP.CALL LIST.
OK
Press OK. Display shows if
Calls List display is on or of f.
ON
Press ON if it is of f,
or or OFF if it is on,
OFF
or OK if keeping it in the
or current state.
OK
To switch secrecy off
Press the MENU button.
NEXT
Press NEXT to highlight MICR.ON.
OK
Press OK.
You caller can hear you again.
Missed calls list
The Missed calls list contains the
numbers of the last 10 unanswered calls.
Press buttons in order shown
Press the MENU button.
▼ Press DOWN to highlight
SERVICE.
OK
Press OK.
NEXT
Press NEXT to highlight LIST
OF CALLS.
OK
Press OK. Select DISPLAY ENTRY.
OK
Press OK.
NEXT
Press NEXT to scroll through the
entries.
DIAL
Select DIAL to call the number
back.
10
IMPORTANT!
The list will not contain repeat
numbers and will not appear in
the menu unless it contains at least
one number. If the caller’s number
is not received, e.g. if the caller
has withheld it, then no entry will
appear in the list.
To view and dial numbers in the
missed calls list
To switch the calls list display on or off
EXECUTIVE HANDSET
Page 13
Putting calls on hold and
transferring calls
You can put an internal or exter nal call
on hold while you do something or talk
to someone else. Your caller will not be
able to hear you.
Press buttons in order shown
During your call:
Press the MENU button.
▼ Press DOWN to highlight
OK
INTERNAL CALL and press OK.
Your caller is placed on hold.
RESUME
Press RESUME to continue
your call.
During your call:
INT
Press INT. Your caller is placed
on hold (they will hear ‘music on
hold’).
RESUME
Either press RESUME, or the
or RCL button to continue your
call.
RCL
Press buttons in order shown
Press the MENU button.
▼ Press DOWN to highlight
SERVICE.
OK
Press OK.
NEXT
Press NEXT to highlight LIST
OF CALLS.
OK
Press OK.
NEXT
Press NEXT to highlight DELETE
ENTRY.
OK
Press OK.
NEXT
Use NEXT to scroll through each
entr y in the list, highlight the
numbers you wish to delete.
DELETE
Press DELETE.
Press the MENU button.
▼ Press DOWN to highlight
SERVICE.
OK
Press OK.
NEXT
Press NEXT to highlight LIST
OF CALLS.
OK
Press OK.
NEXT
Press NEXT to highlight
DELETE ALL.
OK
Press OK.
YES
Use YES to delete all entries, or
or
NO
to cancel.
NO
11
To delete individual numbers from the
calls list
To delete all the numbers in the
calls list
To put an internal call on hold
To put an external call on hold
EXECUTIVE HANDSET
Page 14
Press buttons in order shown
During an external call:
INT
Press INT. Your caller is put on
hold.
(KEYPAD)
Enter the internal number of the
extension you want to call. When
the phone answers, speak as
normal.
TOGGLE
Press TOGGLE to talk to your
first caller again.
CONF.
Press CONF. to speak to both
callers at once.
During your first external call:
Press the MENU button.
EXT. CONSULTAT’N is highlighted
OK
Press OK.
(KEYPAD)
Enter the new external phone
number you want.When the phone
is answered, speak as normal.
TOGGLE
Either, press TOGGLE to switch
or between callers, or press the
END CALL button to hang up on
the current call. When you hang
up on the current call your phone
will ring to re-connect you to the
call on hold. When this happens
press the PHONE button to speak
or to the other caller.
CONF.
Or press CONF. to speak to both
par ties.
12
To put an external call on hold while you
make and internal call
To transfer an external call to another
handset or telephone
To put an external call on hold while you
make a second external call
Press buttons in order shown
During a conversation with an
outside caller, you want to
transfer the call to another
handset.
INT
Press INT.
(KEYPAD)
Enter the internal number of the
extension you want to call.
When the extension answers,
transfer the call by pressing the
END CALL button.
Quick call transfer
When the called extension rings, you can
transfer the call immediately by pressing
the END CALL button, but if it is not
answered within 30 seconds it will be
returned by your extension.
EXECUTIVE HANDSET
Page 15
Press buttons in order shown
During your first external call:
Press the MENU button.
EXT. CONSULTAT’N is highlighted.
OK
Press OK.
(KEYPAD)
Enter the new phone number
you want. When the phone is
answered, speak as normal.
TOGGLE
Press TOGGLE. You can now
speak to your first caller while
your second call is on hold.
TOGGLE
Press TOGGLE to switch back
and for th between callers as
required.
RESUME
When the second external call is
terminated, press RESUME to
speak to the first caller. To end
the call press the END CALL
button.
Switching between calls
Press buttons in order shown
During an external call:
INT
Press INT. Your caller is put on
hold.
(KEYPAD)
Enter the internal number of the
extension you want. When the
phone answers, speak as normal.
TOGGLE
Press TOGGLE. You can now
speak to the external caller while
your internal call is on hold.
TOGGLE
Press TOGGLE to switch back and
for th between callers as requir ed.
RESUME
When the internal call is
terminated, press RESUME to
speak to the first caller. To end
the call press the END CALL
button.
13
To switch between one internal and one
external caller.
To switch between two external callers
EXECUTIVE HANDSET
Page 16
Creating three-way conference
calls
Press buttons in order shown
During an external call:
INT
Press INT. Your caller is put on
hold.
(KEYPAD)
Enter the internal number of the
extension you want. When the
phone answers, speak as normal
CONF
Press CONF to enable a
three-way conference.
CONF.END
Either press CONF.END button
to end the conference. You are
returned to your external caller.
or Or press the END CALL button to
hang up on both callers.
During your first external call:
Press the MENU button. EXT.
CONSULTAT’N is highlighted.
OK
Press OK.
(KEYPAD)
Enter the new phone number
you want. When the phone is
answered, speak as normal.
CONF
Press CONF to enable a
three-way conference.
CONF.END
Either press CONF.END button to
end the conference. You are
returned to your external caller.
or Or press the END CALL button to
hang up on both callers.
Parking a call
Parking a call enables you to put a call
on hold at one extension and pick it up
again from another.
Press buttons in order shown
During a call:
Press the MENU button.
NEXT
Press NEXT to highlight
CALL PARK.
OK
Press OK.
(CODE)
Enter a single digit security code
(to stop anybody else picking up
your call).
OK
Press OK. The call is now parked
and you have three minutes to
pick it up again before the call is
automatically ended.
14
To hold a three-way conference call with
one external and one inter nal call
To park a call
To hold a three-way conference with two
external calls
EXECUTIVE HANDSET
Page 17

Call handover
When you have a multibase system
(see your System Set-Up Guide), during
an external call you can wander out of
the range of one base station and into the
range of an adjacent one without losing
your call.
During an external call when you
are approaching the range limit
of the base station you are using
you will hear 4 beeps. At this
point to avoid losing the call you
must move nearer to the base
station. When using a multibase
multicell system an option to
change base stations becomes
available if the handset is within
range of two base stations it is
registered with. Remember to
warn the other person that there
will be a shor t break in the
conversation whilst you change
bases.
CHANGE
Press CHANGE. Resume the call.
IMPORTANT!
You can also park a call at one
base and unpark it at another base
which is part of a multibase
(multicell) system, however, this
operation is dependant on the
HOLD ISDN Supplementary service
being available. Please check with
your ISDN service provider whether
this service is available.
Press buttons in order shown
At any registered Executive
Handset:
Press the MENU button.
▼ Press DOWN to highlight
SERVICE.
OK
Press OK.
NEXT
Press NEXT to highlight CANCEL
CALL PARK.
OK
Press OK.
(CODE)
Enter your single digit security
code.
OK
Press OK. You can now resume
your conversation.
15
To pick up a parked call
To use call handover
EXECUTIVE HANDSET
Page 18

Call waiting
Press buttons in order shown
When on an internal or an
external call and an external caller
rings you will hear call waiting
tones and get a call waiting
message on the display if you are
in its call group.
You will now have 3 options.
1. Reject the call.
REJECT
Press REJECT. Other extensions
in the call group will still ring and
can answer the call.
2. Accept the call.
ACCEPT
Press ACCEPT. This will close
your current internal call or put on
hold your current external call.
You will now be able to speak to
the waiting call.
3. Close the current call.
Press END CALL. Your handset
will now ring provided another
extension has not answered the
waiting call.
Press PHONE to answer the
waiting call.
16
To answer a waiting external call whilst
on an internal or exter nal call
Caller identity
You will automatically see the number
of the person who’s calling you, unless
they have withheld their number or if
their network does not suppor t the caller
identity ser vice.
If the person you are calling also
subscribes to the CLIP ser vice then
your number will be presented to them.
You can stop your number from being
sent to the person you are calling each
time you call, by dialling 141 before the
number.
You can also ask BT to stop your
number from being sent on a permanent
basis. The name of this ser vice is CLIR.
(See your System Set-Up Guide.)
If you do this you can release your
number by dialling 1470 before the
number.
Using the handset phonebook
The Executive Handset’s phonebook will
store up to 100 names and telephone
numbers for easy reference and dialling
(actual number depends on the length of
the entries).
Names may be up to 16 characters and
numbers up to 22 digits long.
IMPORTANT!
You may need to subscribe to this
service, please consult your service
provider. Please see the System
Set-Up Guide for more information.
EXECUTIVE HANDSET
Page 19

Press buttons in order shown
Press PHONEBOOK then
ACTIVATE.
▼ Press DOWN to highlight
NEW ENTRY.
OK
Press OK. The display shows
<NAME> and <TEL. NUMBER> and
the curser flashes for you to input
the name first.
(KEYPAD)
Use the keypad to enter the name
by pressing the key repeatedly
until the desired letter appears on
the screen. If you make a mistake
you can use FORWARD and
BACK to move the cursor along
the name and DELETE to remove
characters to the left of the cursor.
When entering names, if you want
a capital letter press the ✱button
before entering the letter.
When you have finished writing
the name, press FORWARD.
The display will then ask you to
input the TEL.NUMBER.
(KEYPAD)
Use the keypad to input the
telephone number you wish to
store.
Press ACTIVATE, SAVE ENTRY will
be highlighted.
OK
Select OK to save the entr y.
The name and number has now
been stored in the phonebook,
and the display briefly shows
‘ENTRY STORED’.
✱
a A
17
Tip
To enter a blank space, full stop or a
dash, press the 0 button repeatedly until
the character you want is displayed.
INSERTING A PAUSE
To put a pause at some point in your
number move the cursor to where the
pause is to go (left of cursor) and do
the following.
Press ACTIVATE.
▼ Press DOWN to highlight
INSERT FUNCTION.
OK
Press OK. Menu will show
PAUSE highlighted.
OK
Press OK. A letter P (meaning
pause) will appear in the
number.
To add a name and number to the
phonebook
Tip
Phonebook entries are stored in
alphabetical order. You can create a
priority list of frequently used numbers
by prefixing their names with ✱or
#
.
The numbers will appear as the first in
the list.
EXECUTIVE HANDSET
-
–
-
–
–
–
–
>
<
➜
>
-
–
-
–
–
–
–
-
–
-
–
–
–
–
Page 20

Press buttons in order shown
Press PHONEBOOK.
▲ Use UP and DOWN to highlight
▼ the number/name you wish to
delete.
Press ACTIVATE.
▼ Press DOWN to highlight
DELETE ENTRY.
OK
Press OK.
The name and number have now
been deleted from the phonebook,
and the display briefly shows
‘ENTRY HAS BEEN DELETED’.
Press PHONEBOOK.
Press ACTIVATE.
▲ Use UP and DOWN to highlight
▼ DELETE DIRECTORY.
OK
Press OK. The display will ask
you to ENTER PIN.
(CODE)
Enter your 4 digit PIN
(default 0000).
OK
Press OK. The display will ask if
you wish to DELETE ALL ENTRIES?
Either
YES
Press YES to delete. The display
will briefly show ‘ALL ENTRIES
DELETED’.
or
NO
Press NO to abandon the deletion.
Press buttons in order shown
Press PHONEBOOK.
▲ Highlight the number/name you
▼ wish to change using UP and
DOWN.
Press ACTIVATE.
▼ Press DOWN to highlight
EDIT ENTRY.
OK
Press OK and the display takes
you to the name/number you wish
to change.
Use BACK, FORWARD and
DELETE and the keypad to edit
the entr y.
When you have finished press
ACTIVATE.
▲ Use UP and DOWN to highlight
▼ SAVE ENTRY or highlight CANCEL
to abandon the change.
OK
Press OK.
Your number has now been
changed and the display will
briefly show ‘ENTRY STORED’.
18
EXECUTIVE HANDSET
To change an entry To delete individual entries
To delete all phonebook entries
-
–
-
–
–
–
–
<
>
➜
-
–
-
–
–
–
–
-
–
-
–
–
–
–
-
–
-
–
–
–
–
Page 21

Press buttons in order shown
Press PHONEBOOK. The display
shows the names stored in the
phonebook.
▲ Use UP and DOWN to highlight
▼ the name of the person you wish
to call.
Press the PHONE button to dial.
Press buttons in order shown
When you have accessed the
phonebook it is possible to make
a quick search to a listed name.
Press PHONEBOOK.
(KEYPAD)
Press the key with the first letter
of the name you wish to call.
The display will now highlight the
first name in the address book
that star ts with that letter. If this
is the correct name pr ess PHONE
to dial.
or Or
▼ Press DOWN to move to the
correct name, then pr ess the
PHONE button.
19
EXECUTIVE HANDSET
Quick search for a phonebook name
To dial a number stored in the
phonebook
Press buttons in order shown
While the handset is switched ON:
Press REDIAL. The last five
numbers called are displayed.
▼ Press DOWN to highlight the
number you want.
Press ACTIVATE to choose the
number you want to store.
▼ Press DOWN to highlight COPY.
OK
Press OK. You can now add a
name to the number, using the
alphabet keypad to add a name
and BACK, FORWARD and
DELETE to edit.
Press ACTIVATE. SAVE ENTRY
will be highlighted.
OK
Press OK to store the entry in
your handset’s phonebook.
To add a number from the redial list to
your phonebook
➞➞
-
–
-
–
–
–
–
<
>
➜
-
–
-
–
–
–
–
Page 22

Press buttons in order shown
While the handset is switched ON:
Press PHONEBOOK.
Press ACTIVATE.
▼ Press DOWN to highlight COPY
DIRECTORY or COPY ENTRY.
OK
Press OK.
(KEYPAD)
You will be asked which handset
you wish to copy to. Enter the
handset number (1-8).
Press ACTIVATE. COPY is
highlighted.
OK
Press OK. The display of the
copying handset will show: COPY
DIRECTORY or COPY ENTRY-CALL
TO INTERNAL X (handset number).
The receiving handset will ring.
Press PHONE button on the
receiving handset. The receiving
handset will display: RECEIVING
MODE ENTER PIN:
(CODE)
Enter the handset PIN (default
0000) on the receiving handset.
OK
Press OK. The display will show
RECEIVING MODE IS ACTIVE. The
Phonebook entr y has now been
copied to another handset.
20
To copy the handset phonebook/
individual entries to another Executive
Handset
Internal call forwarding
You can for war d external calls from your
own extension to any other extension
which is registered to your Diverse ISDN
base station. To do this the extension to
which calls are to be forwarded must have
call forwarding switched OFF, (OFF is the
default setting).
Press buttons in order shown
Press the MENU button.
▼ Press DOWN to highlight
SERVICE.
OK
Press OK.
NEXT
Press NEXT to highlight CALL
FORWARD.ON.
OK
Press OK. Display shows menu
of the dif ferent types of call
for war ding available.
▼ Press DOWN to highlight
INTERNAL.
OK
Press OK. Display gives a list of
extensions (TO INTERNAL X where
X is the extension number) you
can for war d to.
IMPORTANT!
Internal call forwarding is a feature
of your Diverse ISDN base station
and must not be confused with Call
Forwarding ISDN Supplementary
Services which may be offered by
your service provider
To switch internal call forwarding on
EXECUTIVE HANDSET
Note
For more detailed information on how to
use the phonebook, please refer to the
Diverse Executive Handset user guide.
-
–
-
–
–
–
–
-
–
-
–
–
–
–
Page 23

NEXT
Press NEXT to highlight the
desired destination.
OK
Press OK. You now have to set
the number of ring cycles your
handset should receive before the
call gets forwarded. Display shows
a menu listing all possible settings
with ACT in front of the active
setting.
NEXT
Press NEXT to highlight the
desired setting.
SAVE
Press SAVE to confirm the
or change or OK if keeping the
OK
active setting.
Press buttons in order shown
Press the PHONE button. Display
will show FNCT.SET.ACT to indicate
at least one system function such
as call for war ding has been set.
Press the MENU button.
Menu item SYSTEMFUNCT.SET. is
highlighted.
OK
Press OK. Menu lists all functions
that have been set.
NEXT
Press NEXT to highlight INT.CALL
FORWARD.
OK
Press OK. Display shows where
internal call is set to forward to.
OFF
Press OFF to switch of f internal
call for war ding.
ISDN Customer Controlled
Call Forwarding
This enables you to for war d an external
call to another external number.
There are 3 types of exter nal call
for war ding:
– all calls
– on busy
– on no reply (after 5 rings).
These options work for both Point-toMultipoint and Point-to-Point connections.
When in Point-to-Multipoint mode
external call forwarding is not available
until MSNs have been set up.
21
To switch internal call forwarding off
EXECUTIVE HANDSET
IMPORTANT!
Please check with your ISDN service
provider if the Customer Controlled
External Call Forwarding
Supplementary Service is supported.
Please also check the cost of the
service and calls before using the
service.
Page 24

Press buttons in order shown
The handset must be switched
ON and not in use.
Press the MENU button.
▼ Press DOWN to highlight
SERVICE.
OK
Press OK. Highlight FORWARDING
ON.
OK
Press OK.
NEXT
Press NEXT to highlight one of
the following forms of exter nal
call for war ding. They will not be
present if your base station is set
for Point-to-Multipoint access and
MSNs have not been set up.
EXT./DIRECT – all calls.
EXT./BUSY – on busy.
EXT./TIMEOUT – on no reply.
OK
Press OK. If Diverse ISDN is
configured for Point-to-Multipoint
access, a list of MSN numbers
will be displayed.
▼ If MSN numbers are displayed
press DOWN to highlight the
MSN number to which call
for war ding will apply.
OK
Press OK.
(KEYPAD)
Enter the external phone number
to which you want the calls
for war ded.
OK
Press OK to confirm.
Press buttons in order shown
If you have a Point-to-Multipoint
access, call for war ding has to be
deactivated for each applicable
MSN. If you have a Point-to-Point
access, no list of MSNs is displayed.
Press the PHONE button.
The message FNCT. SET. ACT is
displayed, indicating that a
system function is set and active,
in this case, external call
for war ding.
Press the MENU button.
▼ Press DOWN to highlight SET.
SYS FUNCT.
OK
Press OK.
NEXT
Press NEXT to highlight EXT
FORWARDING.
OK
Press OK. If Diverse ISDN is
configured for Point-to-Multipoint
access, a list of MSN numbers
will be displayed.
▼ If MSN numbers are displayed
press DOWN to highlight the
MSN number to which call
for war ding will apply.
OK
Press OK.
NEXT
Press NEXT to highlight one of
the following forms of exter nal
call for war ding.
EXT./DIRECT – all calls.
EXT./BUSY – on busy.
EXT./TIMEOUT – on no reply.
OFF
Press OFF to switch of f the type
or of call forwar ding for the chosen
OK
MSN number or OK if you want
to confirm the existing setting.
22
To activate external call forwarding To deactivate external call forwarding
EXECUTIVE HANDSET
Page 25

Press buttons in order shown
This procedure is used to remove
both internal and all types of
external call forwarding in one go.
Press the MENU button.
▼ Press DOWN to select SERVICE.
OK
Press OK.
NEXT
Press NEXT to highlight CALL
FORWARD.OFF.
OK
Press OK. All call forwarding has
now been cancelled.
Answering machine call
pickup
When you have an answering machine
connected to either corded extension 0
or 9 then it is possible to intercept the
answering machine whilst the caller is
leaving a message.
Press the PHONE button.
PICKUP
Press PICKUP.
You will then be able to speak to
the caller and the answer machine
will stop recording the message.
Remotely accessing answering
machines and services
When you use your Diverse ISDN to
remotely access your answering
machine or voicemail system, you will
need to activate tone dialling.
Press buttons in order shown
Note that tone dialling can be
permanently activated, see
‘Activating permanent tone
dialling on call connection’ in the
System Set-Up Guide.
During the call to your answering
machine or voicemail system:-
Press the MENU button.
NEXT
Press NEXT to highlight
TEMP. TONE ON.
OK
Press OK. TEMP. TONE DIAL.
ACTIVATED will be momentarily
shown on the display.
(KEYPAD)
Using your handset keypad enter
the necessar y codes to use your
answering machine or voicemail
system features.
DTMF.OFF
When you have finished press
DTMF.OFF.
23
Activating tone dialling and accessing
answering machines and ser vices
To talk to a caller who is leaving an
answering machine message
IMPORTANT!
The internal tel no: to which the
answering machine is connected
must be configured as “REC. ANNOUNC.”,
see your System Set-Up Guide.
EXECUTIVE HANDSET
To switch all call forwarding off
Page 26

Switching your handset
ON and OFF
Press buttons in order shown
Press and hold down the PWR
button until the display is
activated.
When the handset is switched ON
you can make and receive calls.
Press and hold down the PWR
button until the display goes blank.
PWR
PWR
Handset registration
Your Diverse 2000 Additional Handset
must be registered with the base station
before it can be used. See the System
Set-Up Guide for instructions.
Press buttons in order shown
Press the INT button. Display
shows your internal number.
Press the END CALL button.
The handset returns to standby.
INT
24
Diverse 2000
Additional Handset
To check the internal number of your
handset
To switch ON
To switch OFF
ADDITIONAL HANDSET
Page 27

Press the END CALL button.
Or
Replace the handset on the
charger.
When the handset rings:
Pick up the handset from the
charger. Speak as normal.
Or, if the handset is not in the
charger
Press the PHONE button and
speak as normal.
Locking your handset keypad
When your handset is locked it prevents
accidental operation of the keypad when
you carry it around. You can still receive
calls.
Press buttons in order shown
When the handset is ON,
press and release the PWR
button quickly. The display will
show
—
—
—
—
—
—
—
—
—
—
—
—
.
Press the PWR button quickly.
Making and receiving calls
Make sure the handset is
switched ON.
Press the PHONE button.
(KEYPAD)
Dial the number you want.
or
(KEYPAD)
Alternatively you can key in the
phone number then press the
PHONE button to dial.
PWR
PWR
25
To lock the handset keypad
To end a call
To receive a call
To unlock the handset keypad
To make an external call
When 2 external calls are already in
progress and you try to make a call,
you will hear the busy tone.
IMPORTANT!
If you have switched off the
automatic external line you will
need to press 0 before dialling.
ADDITIONAL HANDSET
Page 28

Press buttons in order shown
Press the PHONE button.
Press the LNR button. The last
number you called will be
redialled automatically.
To end a call press END CALL,
or replace the handset in the
charger.
or Or
Press the LNR button. Display
shows the last number dialled.
To view other previously dialled
numbers (the last 5 numbers
dialled are stored) continue to
press LNR.
Press the PHONE button to dial,
or or END CALL not to dial.
Press the INT button.
(KEYPAD)
Enter the internal number you
want.
INT
LNR
LNR
LNR
Press buttons in order shown
(This can also help you find
any handsets which have been
misplaced).
Press the INT button.
Press the ✱button. All the
registered handsets within range
ring. The first handset to answer
will take the call.
To end the call either press the
END CALL button or replace the
handset on the charger.
If you have set group ringing
(see ‘Call Allocation’ in the System
Set-Up Guide), and your handset
is included in the second ringing
group it is possible to pick up the
call before your handset rings.
When you know other handsets
are ringing:
Press the PHONE button.
Press the STO button.
Press the RCL button.
RCL
STO
✱
INT
26
To redial the last number
To call all other extensions registered
with your Diverse ISDN
To pick up a call when your handset is
not ringing
To make an internal call to a specific
extension
IMPORTANT!
If your handset is not included
in either ringing group you cannot
pick up the call.
ADDITIONAL HANDSET
Page 29

Press buttons in order shown
During an external call;
Press the INT button. Your caller
is put on hold.
Enter the internal number of the
extension you want (0-9). When
the phone answers, speak as
normal
Press the RCL button to talk to
your first caller again.
During your first external call:
Press the RCL button. Your first
caller is put on hold and hears
‘music on hold’.
(KEYPAD)
Enter the new extension number
you want. When the extension is
answered, speak as normal.
Either, press the RCL button to
return to your first caller or pr ess
the END CALL button to hang up
on your current call, in which
case your handset will ring and
you can speak to the other caller
again by pressing the PHONE
button.
RCL
RCL
RCL
0-9
INT
Press buttons in order shown
You can prevent your caller from
hearing you while you have a
conversation with another person.
You can still hear your callers
while the secrecy function is on.
Switch on secrecy during a call:
Press the INT button if you are on
an external call, wait for 3 seconds
before you speak.
Your caller cannot hear you.
To switch off secrecy:
Press the RCL button.
Your caller can hear you again.
Putting calls on hold and
transferring calls
You can put an internal or exter nal call
on hold and have a conversation with
someone in the same room and your
caller will not be able to hear you.
During your call:
Press the INT button.
Press the RCL button to continue
your call.
RCL
INT
RCL
INT
27
To use the secrecy function.
To put an external call on hold while you
make an internal call
To put an external call on hold while you
make a second external call
To put an internal or external call on hold
ADDITIONAL HANDSET
Page 30

Press buttons in order shown
While you are already on an
internal call
Press the INT button then the
#
button. Your internal call is put
on hold and the other person
hears silence.
(KEYPAD)
Dial the external number you
want and speak as normal when
your call is answered.
Press the RCL button to end the
external (consultation) call and
return to your internal call.
During a conversation with an
outside caller, you want to transfer
the call to another extension.
Press the INT button.
Enter the internal number of the
extension you want to call (0-9).
Press the END CALL button to
hang up. The call is transferred.
0-9
INT
RCL
#
INT
Switching between calls
Press buttons in order shown
During your external call:
Press the INT button. Your caller
is put on hold.
Press #followed by the internal
number of the extension you want
to call. When the extension is
answered speak as normal.
Press the INT button followed the
#
button to switch between
callers.
Press the RCL button to end your
current call and r eturn to the
other caller.
RCL
#
INT
#
INT
28
To put an internal call on hold while you
make an external call
To transfer an external call to another
handset or telephone
To switch between one internal and one
external caller
Quick call transfer
When the called extension rings you
can transfer the call immediately by
pressing the END CALL button, but if
it is not answered within 30 seconds it
will be returned to your extension.
ADDITIONAL HANDSET
Page 31

Creating three-way conference
calls
Press buttons in order shown
While on an external call:
Press the INT button.Your external
call is put on hold.
Dial the internal number you want
(0-9) or press #to call all
internal numbers and speak as
normal when your call is answered.
Press the STO and RCL button to
begin the three-way call between
your internal and external calls.
Press the RCL button to end the
three-way call. Your internal call
is ended. You are still connected
to your external call.
RCL
RCL
STO
#
0-9
INT
29
Press buttons in order shown
During your first external call:
Press the INT button. Your caller
is put on hold.
Press the #button.
(KEYPAD)
Enter the external number you
want. When the call is answered,
speak as normal
Press the INT button then the
#
button to switch between callers.
Either press the
RCL button to
or return to your first caller or press
the END CALL button to hang up
on your current call, in which case
your handset will ring and you can
speak to the other caller again by
pressing the PHONE button.
RCL
#
INT
#
INT
To switch between two external callers
To hold a three-way conference call with
one external and one inter nal call
ADDITIONAL HANDSET
Page 32

Press buttons in order shown
While on an internal call:
Press the INT button. then the
#
button. Your first call is put on
hold.
(KEYPAD)
Dial the external number you
want and speak as normal when
your call is answered.
Press the STO button then the
RCL button to begin the
three-way call.
Press the RCL button to end the
three-way call. Your second call
will end but you will still be
connected to your first call.
Note: If you press the END CALL button
whilst in a three-way call, both calls will
be terminated.
RCL
RCL
STO
#
INT
Press buttons in order shown
When internal call is in progr ess:
Press the INT button then the
#
button. Your first call is put on
hold.
(KEYPAD)
Dial the second number and
speak as normal when your call
is answered.
Press the STO button then the
RCL button to begin the
three-way call.
Press the RCL button to end the
three-way call. Your second call
will end but you will still be
connected to your first call.
Note: If you press the END CALL button
whilst in a three-way call, both calls will
be terminated.
RCL
RCL
STO
#
INT
30
If you are already on an internal call and
want to make an external call to create a
three-way conference call
To put an internal call on hold while you
make an external call
ADDITIONAL HANDSET
Page 33

Call handover
When you have a multibase system (see
System Set-Up Guide) during an external
call you can wander out of the range of
one base station and into the range of an
adjacent one without losing your call.
When approaching the range
limit of the base station during an
external call you will hear 4 beeps.
When using a multibase multicell
system an option to change base
stations becomes available if the
handset is within range of two
base stations it is registered with.
Remember to warn the other
person that there will be a shor t
break in the conversation whilst
you change bases.
Press the #button.
Resume the call.
#
Call waiting
Press buttons in order shown
When on an internal or external
call and another external call
comes through, you will hear call
waiting tones and get a call
waiting message on the display if
you are in its call group.
You will now have 3 options.
1. Reject the call.
Press the STO button then the
#
button.
Press the 9 button then the
2 button.
Press the STO button. The call
has now been rejected. Other
extensions in the call group will
still ring and can answer the call.
2. Accept the call.
Press the STO button. This will
close your current internal call or
put on hold your current external
call. You will now be able to speak
to the waiting call.
3. Close the current call.
Press END CALL. Your handset
will now ring provided another
extension has not answered the
waiting call.
Press PHONE to answer the
waiting call.
STO
STO
2
ABC
9
WXYZ
#
STO
31
Handover operation depends on the
HOLD ISDN Supplementary Service,
please consult your service provider
regarding availability and cost.
To use call handover
To answer a waiting external call whilst on
an internal or exter nal call
ADDITIONAL HANDSET
Page 34

Press buttons in order shown
At any registered extension.
Press the STO button.
Press the #button.
Press the 4 button then the
3 button.
(CODE)
Enter your single digit security
code.
Press the STO button. You can
now resume your conversation.
Using the handset memory to
store and dial numbers
Each Additional Handset can store up to
10 phone numbers, each up to 22 digits
long, which can then be speed dialled.
Stored numbers can include the RCL,
✱,
#
and LNR (for pause) buttons.
Please note. If you deactivate the
automatic external line (see your System
Set-Up Guide), you will always have to
star t the stored number with a 0.
STO
3
DEF
4
GHI
#
STO
32
To pick up a parked call
ADDITIONAL HANDSET
Parking a call.
Parking a call enables you to put a call
on hold at one extension and pick it up
again from another extension.
Press buttons in order shown
During a call:
Press the STO button.
Press the #button.
Press the 4 button then the
2 button.
(CODE)
Enter a single digit security code
(so that nobody else can pick up
your call).
Press the STO button. The call is
now parked and you have three
minutes to pick it up again before
the call is automatically ended.
STO
2
ABC
4
GHI
#
STO
To park a call
Page 35

Press buttons in order shown
There are a number of ways you
can do this.
Either:
Press the PHONE button.
Press the MEM button once and
enter the memor y location (0-9)
you want. The number is dialled.
Or:
Press
MEM button repeatedly
until the number you want and its
memory location (0-9) is displayed.
Press the PHONE button. The
number is dialled.
or Or:
Press the MEM button once and
enter the memor y location (0-9)
you want.
Press the PHONE button. The
number is dialled.
0-9
MEM
MEM
0-9
MEM
33
Press buttons in order shown
The handset power must be ON.
Press the STO button.
Press the MEM button.
Press a digit from 0-9.This selects
the memor y location under which
the number is stored. The display
shows the memor y location you
have chosen.
Enter the number you want
(KEYPAD)
stored preceded by a 0 if you
have deactivated automatic
external line. The display shows
the number.
Press the STO button to confirm
the number.
STO
0
0-9
MEM
STO
To store a number
To speed dial a number stored in the
memor y
Storing a new number in the memory
automatically overwrites any previous
number stored in that location.
If the memory location is empty, the
display shows
—
—
—
. If there is another
number stored already, that number will
be displayed. If you do not want to change
it, press the STO button to conf irm the
number.
Speed dial numbers are not included in
the last number redial memory.
A memory can contain part of a
number, such as an international area
code, and you can dial the rest of the
number manually.
ADDITIONAL HANDSET
Page 36

Press buttons in order shown
Press the STO button.
Press the # button.
Press the 9 button.
Press the 1 button.
(KEYPAD)
Decide to which internal extension
you want your calls forwarded and
press the corr esponding button
on the keypad 0-9.
(KEYPAD)
Decide how many times you want
your handset to ring before the
call is for war ded and press the
corresponding button (0-9) on
the keypad, or press 0 if you want
your call for war ded without
ringing your handset first.
Press the STO button to confirm.
Press the STO button.
Press the #button.
Press the 9 button.
Press the 1 button.
Press the STO button.
STO
Page 37

ISDN Customer Controlled
Call Forwarding
This enables you to for war d an external
call to another external number. There
are 3 types of external call forwar ding:
– all calls
– on busy
– on no reply (after 5 rings).
These options work for both
Point-to-Multipoint and Point-to-Point
connections.
Press the STO button.
Press the #button.
Press the 4 button.
Press the 1 button.
Press the 1 button.
Press the LNR button.
(MSN)
Enter the MSN number from
which you want calls to be
for war ded. (Omit this step if you
have a Point-to-Point connection.)
(KEYPAD)
Enter the phone number
(preceded by the national and
area codes).
Press the STO button.
STO
LNR
1
1
4
GHI
#
STO
Press buttons in order shown
Press the STO button.
Press the #button.
Press the 4 button.
Press the 1 button.
Press the 2 button.
Press the LNR button.
(MSN)
Enter the MSN number from
which you want calls to be
for war ded. (Omit this step if you
have a Point-to-Point connection.)
(KEYPAD)
Enter the phone number
(preceded by the national and
area codes).
Press the STO button.
Press the STO button.
Press the # button.
Press the 4 button.
Press the 1 button.
Press the 3 button.
Press the LNR button.
(MSN)
Enter the MSN number from
which you want calls to be
for war ded. (Omit this step if you
have a Point-to-Point connection.)
(KEYPAD)
Enter the phone number
(preceded by the national and
area codes).
Press the STO button.
STO
LNR
3
DEF
1
4
GHI
#
STO
STO
LNR
2
ABC
1
4
GHI
#
STO
35
External call forwarding on busy
External call forwarding on no reply
To set external call forwarding for all calls
IMPORTANT!
Please check with your ISDN
service provider if the Customer
Controlled External Call
Forwarding Supplementary Service
is supported. Please also check
the cost of the service and calls
before using the service.
ADDITIONAL HANDSET
Page 38

36
Remotely accessing answering
machines and services
When you use your Diverse ISDN to
remotely access your answering
machine or voicemail system, you will
need to activate tone dialling to use the
answering machine or voicemail
features.
Press buttons in order shown
During the call to your answering
machine or voicemail system:-
Press the STO button.
Press the ✱button.
(KEYPAD)
Using your handset keypad enter
the necessar y codes to use your
answering machine or voicemail
system features.
Note that tone dialling can be
permanently activated, see
‘Activating permanent tone
dialling on call connection’ in the
System Set-Up Guide.
✱
STO
Activating tone dialling and accessing
answering machines and ser vices
ADDITIONAL HANDSET
Press buttons in order shown
Press the STO button.
Press the #button.
Press the 4 button.
Press the 0 button.
Press the 0 button.
Press the STO button.
Answering machine call pickup
When you have an answering machine
connected to corded extension 0 or 9,
then it is possible to intercept the
answering machine whilst the caller is
leaving a message.
Press the PHONE button.
Press the STO button.
Press the RECALL button.
You will then be able to speak to
the caller and the answering
machine will stop recording the
message.
RCL
STO
STO
0
0
4
GHI
#
STO
To cancel call forwarding
To talk to a caller who is leaving an
answering machine message
IMPORTANT!
The internal tel no. to which
the answering machine is
connected must be configured
as REC. ANNOUNC., see your
System Set-Up Guide.
Page 39

Press buttons in order shown
Lift the handset.
Press the 9 button.
(KEYPAD)
Press the button which
corresponds to the internal
number of the extension you want.
Lift the handset.
Press the 6 button. All extensions
will ring. The first extension to
answer will pick up your call.
9
W
X
Y
Z
Telephones and other machines that
have keypads can be used as described
below. Where the following procedures
say ‘Press the R button’, this means the
RECALL button. Some telephones may
be labelled dif ferently.
Note: Attached telephones must be on
timed break recall setting.
Press buttons in order shown
Lift the handset.
Press the 0 button for an
external line.
(KEYPAD)
Dial the number you want.
0
37
Using attached, corded
telephones and other
equipment
To set up corded telephones and other
equipment to your Diverse ISDN please
refer to your System Set-Up Guide.
To make an external call
To make an internal call to a specific
extension
To call all other extensions registered on
the Diverse ISDN base station
CORDED EQUIPMENT
Page 40

Press buttons in order shown
Lift the handset and speak.
Lift the handset.
Press the 7 button.
Press the 4 button.
Press the 6 button.
Press the 7 button.
Press the 0 button for an external
line and dial as usual.
When you hear the Call Waiting
tones, to accept the call:-
Press the R button.
Press the 7 button.
Press the 8 button.
You can now speak to the waiting
caller.
To return to the original exter nal
caller press R, then press 8 and
speak to the original caller.
8
T
U
V
Page 41

Press buttons in order shown
During your call:
Press the R button then the
9 button. Your caller is put on
hold and cannot hear you.
Press the R button then the
8 button to speak to your caller
again.
Press the R button then the
9 button to put your external
caller on hold.
Press the 9 button followed by
(KEYPAD)
the internal number you want.
To transfer the call, replace the
handset.
Quick Call Transfer
When the called extension rings, you
can transfer the call immediately by
replacing the handset on its cradle, but if
it is not answered within 30 seconds it
will be returned to your extension and
your telephone will ring.
Page 42

Press buttons in order shown
During an external call.
Press the R button, then the
9 button, then the 0 button. Your
caller will be put on hold.
(KEYPAD)
Dial the number of the person you
wish to consult. When they answer,
you can hold a conversation.
To resume your original call.
Press the R button and then the
8 button.
Or
To end both calls, replace the
handset in the cradle.
During a consultation call.
Press the
R button then the
5 button.
Press the R button to toggle back
to the consultation call.
Press the R button to toggle back
to the original caller and so on.
To disconnect from the
consultation call, place the handset
back in the cradle.
Your phone will ring. Pick up
the receiver and you will be
re-connected to your original call.
Page 43

Press buttons in order shown
You can ‘park’ a call using a single
digit security code. This allows
you to put your caller on hold (for
up to 3 minutes) whilst preventing
other users from picking up your
call.
Press the R button, then the
7 button, the 4 button and the
2 button.
(KEYPAD)
Use the keypad to enter a
one-digit security code.
Press the 7 button. Your call is
now ‘Parked’. Replace the handset.
A call can only be un-parked at
the Point-to-Multipoint access at
which it was originally parked.
Lift the handset.
Press the 7 button, then the 4
button then the 3 button.
(KEYPAD)
Enter your one digit security code.
Press the 7 button to un-park the
call. You can now resume your
conversation with the parked
caller.
7
P
Q
R
S
3
D
E
F
Page 44

Press buttons in order shown
If you are not curr ently in a call:
Press the MENU button.
▼ Press DOWN to highlight
SERVICE.
OK
Press OK.
NEXT
Press NEXT to highlight
KEYPAD ON.
OK
Press OK. KEYPAD INFO will now
be shown on the display.
(KEYPAD)
Using your handset keypad enter
the necessar y code to activate
your switchboard feature.
DIAL
Press DIAL to dial the digits you
have entered to activate your
switchboard feature.
KEYP.OFF
When you have finished, press
KEYP.OFF.
42
Using the Diverse ISDN
with a switchboard
Switchboard functions
You will need to dial certain codes fr om
your handset to use the switchboard
features, such as call transfer. These
codes will be shown in your switchboard
user guide. Note that this is not
possible using telephones attached to
internal tel no: 0 or 9.
To dial these codes you must activate the
keypad then dial the necessar y
switchboard code as described below.
To activate the keypad and dialling
switchboard codes using an Executive
Handset:-
SWITCHBOARDS
Page 45

During a call:
Press the MENU button.
NEXT
Press NEXT to highlight
KEYPAD ON.
OK
Press OK. KEYPAD INFO will now
be shown on the display.
(CODE)
Dial the necessar y code to
activate your switchboard feature.
KEYP.OFF
When you have finished, press
KEYP.OFF.
Note: These operations must be
repeated every time you use
switchboard feature codes.
Press buttons in order shown
If you are not curr ently in a call:
Press the STO button.
Press the #button.
Press the 9 button.
Press the 0 button.
Press the STO button.
(CODE)
Using your handset keypad
enter the necessar y code to
activate your switchboard feature
(see your switchboard user guide).
Press the PHONE button to dial
the digits you have entered to
activate your switchboard feature.
STO
0
9
WXYZ
#
STO
During a call:
Press the STO button.
Press the #button.
Press the 9 button.
Press the 0 button.
Press the STO button.
(KEYPAD)
Using your handset keypad
enter the necessar y code to
activate your switchboard feature
(see your switchboard user guide).
Note: These operations must be
repeated every time you use
switchboard feature codes.
STO
0
9
WXYZ
#
STO
43
To activate the keypad and dialling
switchboard codes using an Additional
Handset:
SWITCHBOARDS
Page 46

44
Differences between the keypads
EXECUTIVE HANDSET ADDITIONAL HANDSET
Diverse Diverse Diverse Diverse
1010 2000 1010 2000
Phone/end call Phone/end call Phone/end call Phone/end call
buttons buttons buttons buttons
or or
Menu Menu
button button
Internal call Inter nal call option
button (on display)
Using the Diverse ISDN
with Diverse 1010
Handsets
The Diverse ISDN functions are also
available with the Diverse 1010
Executive and Additional Handsets.
There are some dif fer ences between
the keypad layouts that you should bear
in mind, although these dif ferences
have no major ef fect on use:
1010 HANDSETS
F
INT
INT
Page 47

45
General
Simply clean the Diverse ISDN and all
handsets with a damp cloth (not wet) or
an antistatic wipe. Never use a dr y cloth
as this may cause a static shock.
Service
Within warranty
If you experience a problem with your
Diverse ISDN or handset you should
contact the Diverse Helpline on
0345 90 80 70. Calls are charged at local
call rates.
Some suppliers of fer extended war ranty
schemes for cover outside the initial 12month period. Please ask them for details.
Outside warranty
If your Diverse ISDN needs repair after
the warranty period has ended, it must be
repaired so as to remain compliant with
the approval requirements for connection
to the telephone network. We r ecommend
that you call the Diverse Helpline on
0345 90 80 70, and you will be advised of
our recommended repair agents.
Maintenance
If you should have to return your
Diverse ISDN
Pack the base station and handset
securely, preferably in the original
packaging (including all line cords,
adaptors and original batteries).
BT does not take responsibility for goods
damaged in transit.
MAINTENANCE
Page 48

46
Help
The Diverse Helpline is available to
assist you should you experience any
problems either setting up or operating
your phone system. However, some
problems have a simple solution and this
section outlines some of the most
common and how to solve them.
Replacing handset batteries
After a time, you may find that the handset
batteries are r unning out of charge more
quickly. This is an additional sign of wear
and the batteries will need replacing.
Use only AA size Nickel Cadmium
rechargeable batteries in the handset.
Any other types may cause irreparable
damage.
IMPORTANT!
The emergency services can be
contacted in the UK by dialling 999
or 112 which is valid in any country
that is a member of the European
community.
IMPORTANT!
If your Diverse ISDN is connected
to a switchboard, you may have to
dial an access number before 999
to contact the emergency services.
Some switchboards cannot dial out
during a power failure.
Do not immerse batteries in water or
throw them into fire, or dispose of them
with ordinary domestic refuse.
To charge the batteries, only use the
plug-in power supply unit provided.
Recommended batteries should have a
power rating of 600m Ah 1.2V. Batteries
are available from the Diverse Helpline
on 0345 90 80 70.
BT accepts no responsibility for damage
caused to your Diverse ISDN handset by
the use of non-NiCad batteries.
No display appears
The handset may not be switched on.
The batteries may be flat or dead.
Recharge or replace the battery.
Handset cannot connect to the base
This is usually indicated by a flashing
or the message BASE X flashes, where X
is the base number, and may be due to
any of the following:
HELP
Page 49

47
• Handset is no longer register ed with
the base station – someone may have
de-registered it. To register handsets
see your System Set-Up Guide.
• Handset may be out of range of the
base it is registered with. Move the
handset nearer the base.
• The base may be switched off or has
no power due to:
a) The mains power adaptor cable
may not be connected to the base.
b) the mains power adaptor may not
be plugged into the mains socket.
c) The mains power may not be
switched on.(However, an attached
telephone on 0 should still work)
• If the handset is register ed with more
than one base it may be set to manually
select a base which is not the one you
want it to connect to.
Please note.
If you go out of range of the Diverse
ISDN for a long time while your
handset is switched on, it may take
more than 20 minutes to ‘find’ it again
when you come back within range.
However, simp ly by switching the
handset OFF for a moment then ON
again, it will find the Diverse ISDN
within a few seconds.
Extension does not get external dial
tone
This could be due to any of the
following:
• The Diverse ISDN telephone line cor d
may not be plugged into the ISDN
socket.
• If the handset display shows EXTERNAL
LINE BUSY, all available external lines
are in use by other users. Wait until
the calls are finished and try again.
• Call r estrictions (bar ring) may have
been set at the base station to prevent
the extension from making calls to
cer tain, specified numbers see your
System Set-Up Guide.
• You may be pausing too long between
pressing the buttons. The system will
time out if you pause for more than a
few seconds.
• Automatic external line may be
switched of f for the extension and you
are forgetting to include the line
access code EXT or 0 when you dial
(see your System Set-Up Guide).
Handset display shows FAULT
This could be due to either of the
following:
• The ISDN cable may not be connected.
Check that the cable is plugged in
properly.
• The ISDN line may be defective and
you will have to ring your ISDN
ser vice pr ovider.
If you are still experiencing difficulty, call
the Diverse Helpline on 0345 90 80 70.
HELP
Page 50

48
Extensions cannot make external calls
but incoming calls and internal calls
are OK
This could be due to:
Base station may have Call Barring set
to stop outgoing calls. Up to three user
programmable ‘emergency’ numbers can
be set on the system. (999 and 112
emergency ser vice numbers cannot be
barred).
Extensions cannot make or receive
any external calls but internal calls
are OK
This could be due to either of the
following:
• External lines may not be connected.
• Call Barring may have been set to stop
all calls except internal calls, see your
System Set-Up Guide.
Can sometimes dial an internal
number but get the wrong person
This could be due to any of the
following:
• Users may have got their extensions
mixed up. Check that each user’s
extension is on the correct internal
number.
• Your extension or the extension you
are calling may be registered with
more than one base and is logged on
to the wrong one. Please check that
you are both registered to the same
base.
Extension does not ring with any call,
internal or external
This could be due to any of the
following:
• The extension ringer volume may be
set too low or switched of f. To adjust
the ringer volume at the handset, see
your Handset user guide. To adjust the
ringer volume at an attached telephone,
see you telephone user guide.
No dial tone
• Check that the Diverse ISDN is
plugged into the ISDN socket.
This would af fect all handsets and
telephones.
Handset does not ring with external
calls but rings with internal calls.
This could be due to any of the
following:
• The extension may not be included
in the call group for the external
phone numbers, see Call Allocation
in your System Set-Up Guide.
• The handset may have been set to
for ward calls without ringing, see
Call Forwarding on page 20, 21
(Executive Handset), or page 34, 35
(Additional Handset).
Cannot set Call Forward from an
extension
This could be due to:
• The destination handset or telephone
already has Call Forwarding set on it.
It is only possible to for war d a call to
one destination.
HELP
Page 51

49
After you hang up an extension, it rings
but there is nobody there
This could be due to any of the
following:
• An external call may have been put on
hold and the person on hold ended
the call before you hung up. The base
station would ring you back to allow
you to return to the call on hold, you
hear nothing as they have gone.
• You may have accessed an external
line which you then put on hold.
When you hang up, the system rings
you back.
Handset beeps
This could be due to any of the
following:
• The handset batteries may be low.
• You are getting out of range of the
base.
Buzzing noise on my radio or TV
This could be due to:
• Your Diverse ISDN base station or
handset may be sited too close to the
equipment. Ensure they are sited at
least one metre away.
The handset and battery charger does
not appear to be working.
This could be due to any of the
following:
• The power adaptor may not be properly
plugged into the charger.
• The handset may not be slotted
correctly into the charger.
• The batteries may be inserted the
wrong way around in the handset.
Check and correct if necessary.
• Spar e batteries may have been
inser ted the wrong way around in the
charger.
HELP
Page 52

50
Index
Note:
In this index, where two page numbers are given, First number = Executive Handset,
Second number = Additional Handset.
Additional Handset 1, 24
registration 24
Answering machine 23, 36
At a glance 1
Beeps 49
Batteries 46
Caller identity 16
Call handover 15, 31
Calls list 10
Call waiting 16, 31
Charger 49
Conference calls 14, 29
Corded telephones 37
Delete numbers 18, 34
Diverse 1010 44
Emergency calls 46
Ending calls 8, 25
Executive Handset 1, 6
registration 6
display 6
Fault 47
Flashing 46
Handset registration 6, 24
Help 46
Internal calls 9
Internal call forwarding 20, 34
Internal number 7
ISDN call for war ding 21, 35
Locking the keypad 7, 25
Maintenance 45
Making calls 8, 25
Memor y/phonebook numbers 16, 32
Menu 7
Missed calls 10
On hold 11, 27
ON/OFF (handset) 7, 24
Parking a call 14, 32
Phonebook/memor y 16, 32
add a name and number 17, 33
change an entr y 18
delete an entr y 18, 34
delete all entries 18, 34
dial an entr y 19
quick search 19
Receiving calls 8, 25
Redial 8, 26
Reject call 8
Secrecy 9, 27
Ser vice 45
Switchboards 42, 46
Switching between calls 13, 28
Three-way calls 14, 29
Transfer ring calls 12, 28
Warranty 45
Page 53

Offices in Europe, North America,
Japan and Asia Pacific.
The Telecommunications services described in this
publication are subject to availability and may be modified
from time to time. Services and equipment ar e provided
subject to British Telecommunications plc’s respective
standard conditions of contract. Nothing in this
publication forms any part of any contract.
Touchtone
TM
is a registered trade mark of
British Telecommunications plc in the UK.
© British Telecommunications plc 1997.
Registered Office: 81 Newgate Street, London EC1A 7AJ.
Registered in England No. 1800000.
Printed in Germany. Issue No.1 (7/98) 7.
Designed by The Art & Design Partnership Limited.
Siemens number: A30853 – X211 – M101 – 1 – 7619
CE compliant to 89/336/EEC
(EMC Directive) & 73/23/EEC (Low
Voltage Directive)
01 88
 Loading...