

Page 1
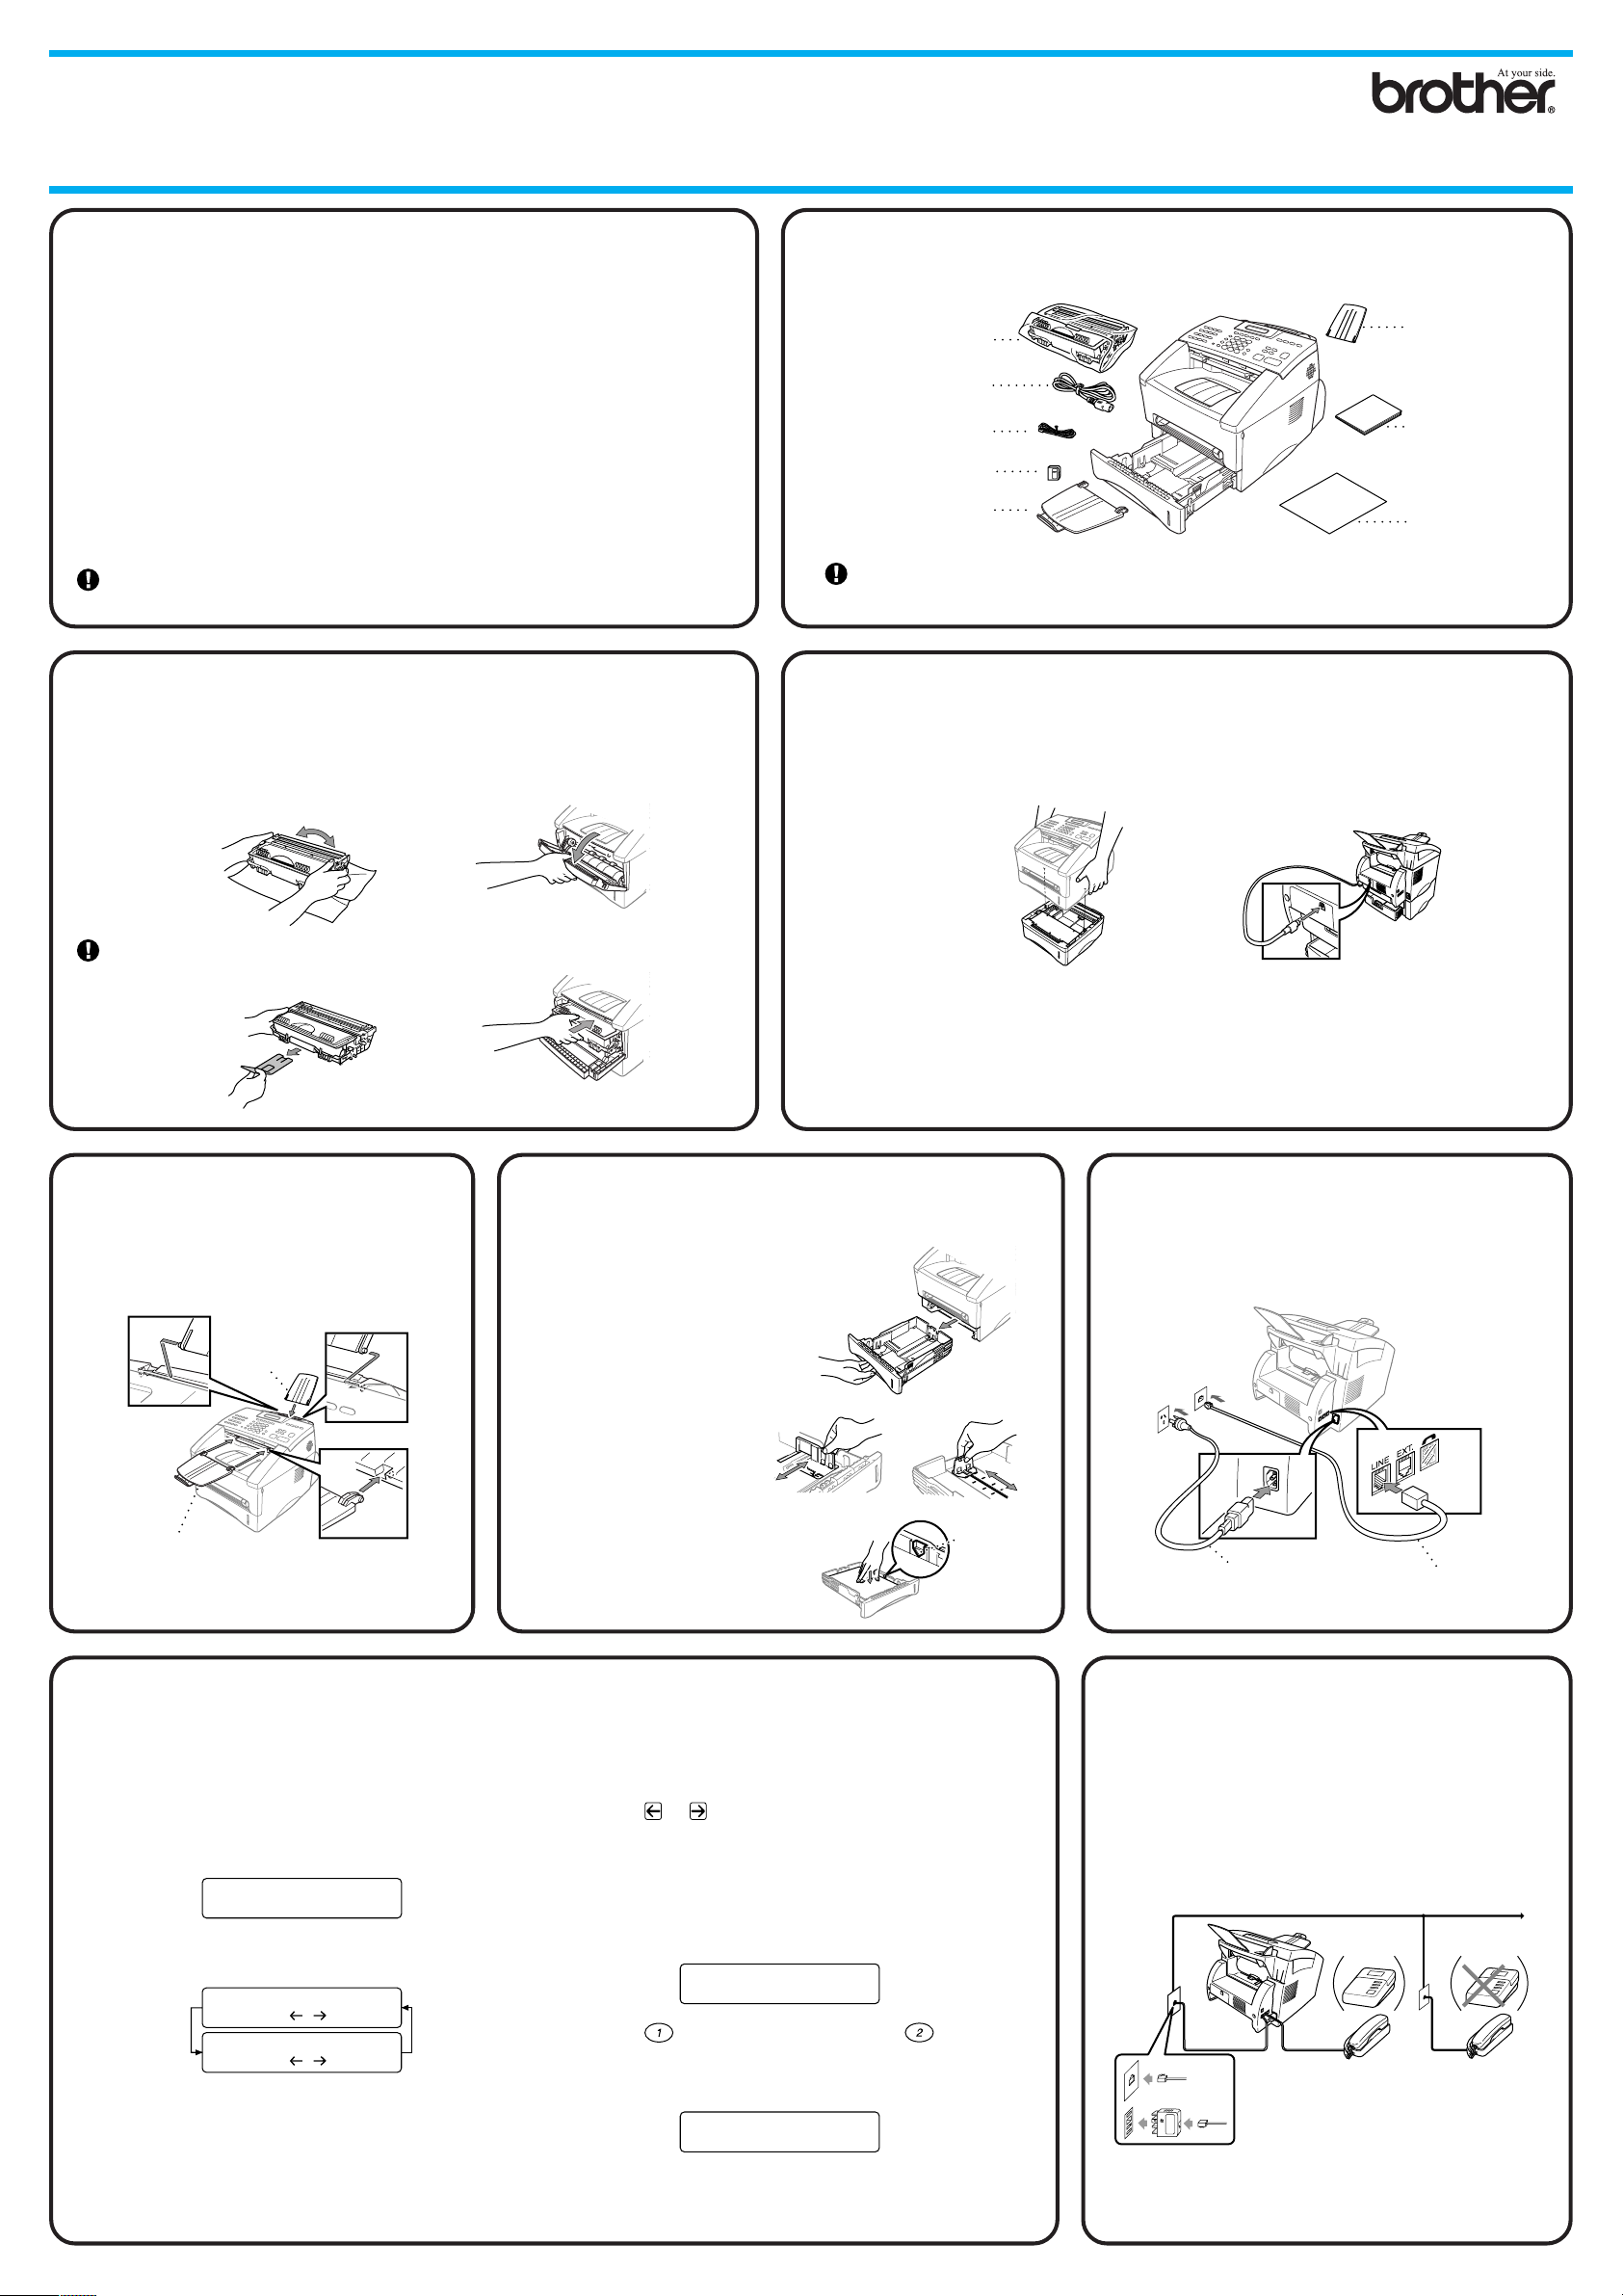
External
Telephone
Extension
Telephone
TAD
TAD
(Example for Australia)
FAX-8360P
Quick Setup Guide
THANK YOU!
… FOR PURCHASING YOUR BROTHER MACHINE.
WE ARE SURE YOU WILL BE IMPRESSED WITH THE CONVENIENT WAY THAT
YOUR NEW MACHINE PERFORMS SO MANY TASKS WITH GREAT RESULTS!
Follow these simple instructions in numerical order.
For greater detail, consult your Owner’s Manual.
Alternatively, if you cannot solve a problem:
Refer to Frequently Asked Questions (FAQ’s) on Brother Solutions Web Site:
URL: http://solutions.brother.com
For Australia/New Zealand
You must select the country where you use the machine after installing the
power code.
Install Drum Unit
2
A. Unpack the drum unit assembly,
and gently rock it from side to side
five or six times to distribute the
toner evenly
inside the
cartridge.
C. Open the front cover of the
machine.
Packing List
1
Drum Unit Assembly
(2 Main Power Cords for Asia Only)
(2 Telephone Line Cords for Australia
Telephone Line Cord
and New Zealand Only)
(For Australia Only)
Keep the packing materials for possible future transport. If you do not pack the machine
properly, it may void your warranty.
3
A. Carefully pick up the
machine and place it on
top of the Optional
Paper Tray (Lower
Tray).
(TN-6300)
Mains Power Cord
Adapter
Document Tray
with Extension
If you have Optional Paper Tray,
connect it (otherwise go to Step 4)
B. Plug the modular cable from the Lower
Tray into the modular socket on the
machine.
Document Support
Owner’s Manual
Quick Setup Guide
D. Insert the drum unit assembly into
To prevent damage to the drum,
do not expose it to light for longer
than a few minutes.
B. Remove the
protective part.
Attach Document
45
Tray/Support
Document
Support
Document Tray
with Extension
the machine.
E. Close the front cover.
Load Paper
A. Pull the paper cassette
completely out of the machine.
B. Adjust the paper guides at the
right and rear of the paper
cassette for the paper size you
want.
C. Load paper in the paper
cassette. Press down on
the paper to flatten it in all
four corners, keeping the
paper level below the
guide marks.
D. Slide the paper cassette into the
machine until it locks into place.
C. The optional paper cassette must be used in place of the upper paper cassette. See instructions
supplied with the Optional Paper Tray.
To select which tray will be used for faxes or for copies, see
Tray Only)
If you move the machine after connecting the Lower Tray, be sure to carefully lift the Lower
Tray with the machine because they are not fastened together.
.
Maximum
Paper
Height
Guide
Marks
6
Lower Tray (With Optional Paper
Install Mains Power
Cord and Telephone
Line Cord
Mains Power Cord Telephone Line Cord
You must set your country so that the machine works correctly.
A. Check that the power is turned on (by plugging
B. Press Set.
Set Your Country
(For Australia/New Zealand Customer Only)
C. Press or to select the country (AUSTRALIA or
in the power cord).
The LCD shows:
SET COUNTRY
PRESS SET KEY
The LCD shows:
AUSTRALIA
SELECT & SET
NEWZEALAND
SELECT & SET
NEWZEALAND).
(Be careful you set your country.)
D. Press Set when the LCD shows your country.
E. The LCD prompts you to make sure of the country
again.
AUSTRALIA
1.YES 2.NO
F. Press to go to Step G –OR– Press to go back
to Step A to select the country again.
G. After the LCD shows ACCEPTED for two seconds.
ACCEPTED
– 1 –
Telephone Answering
87
Device (TAD),
External/Extension
Telephone
LE8235001
Page 2
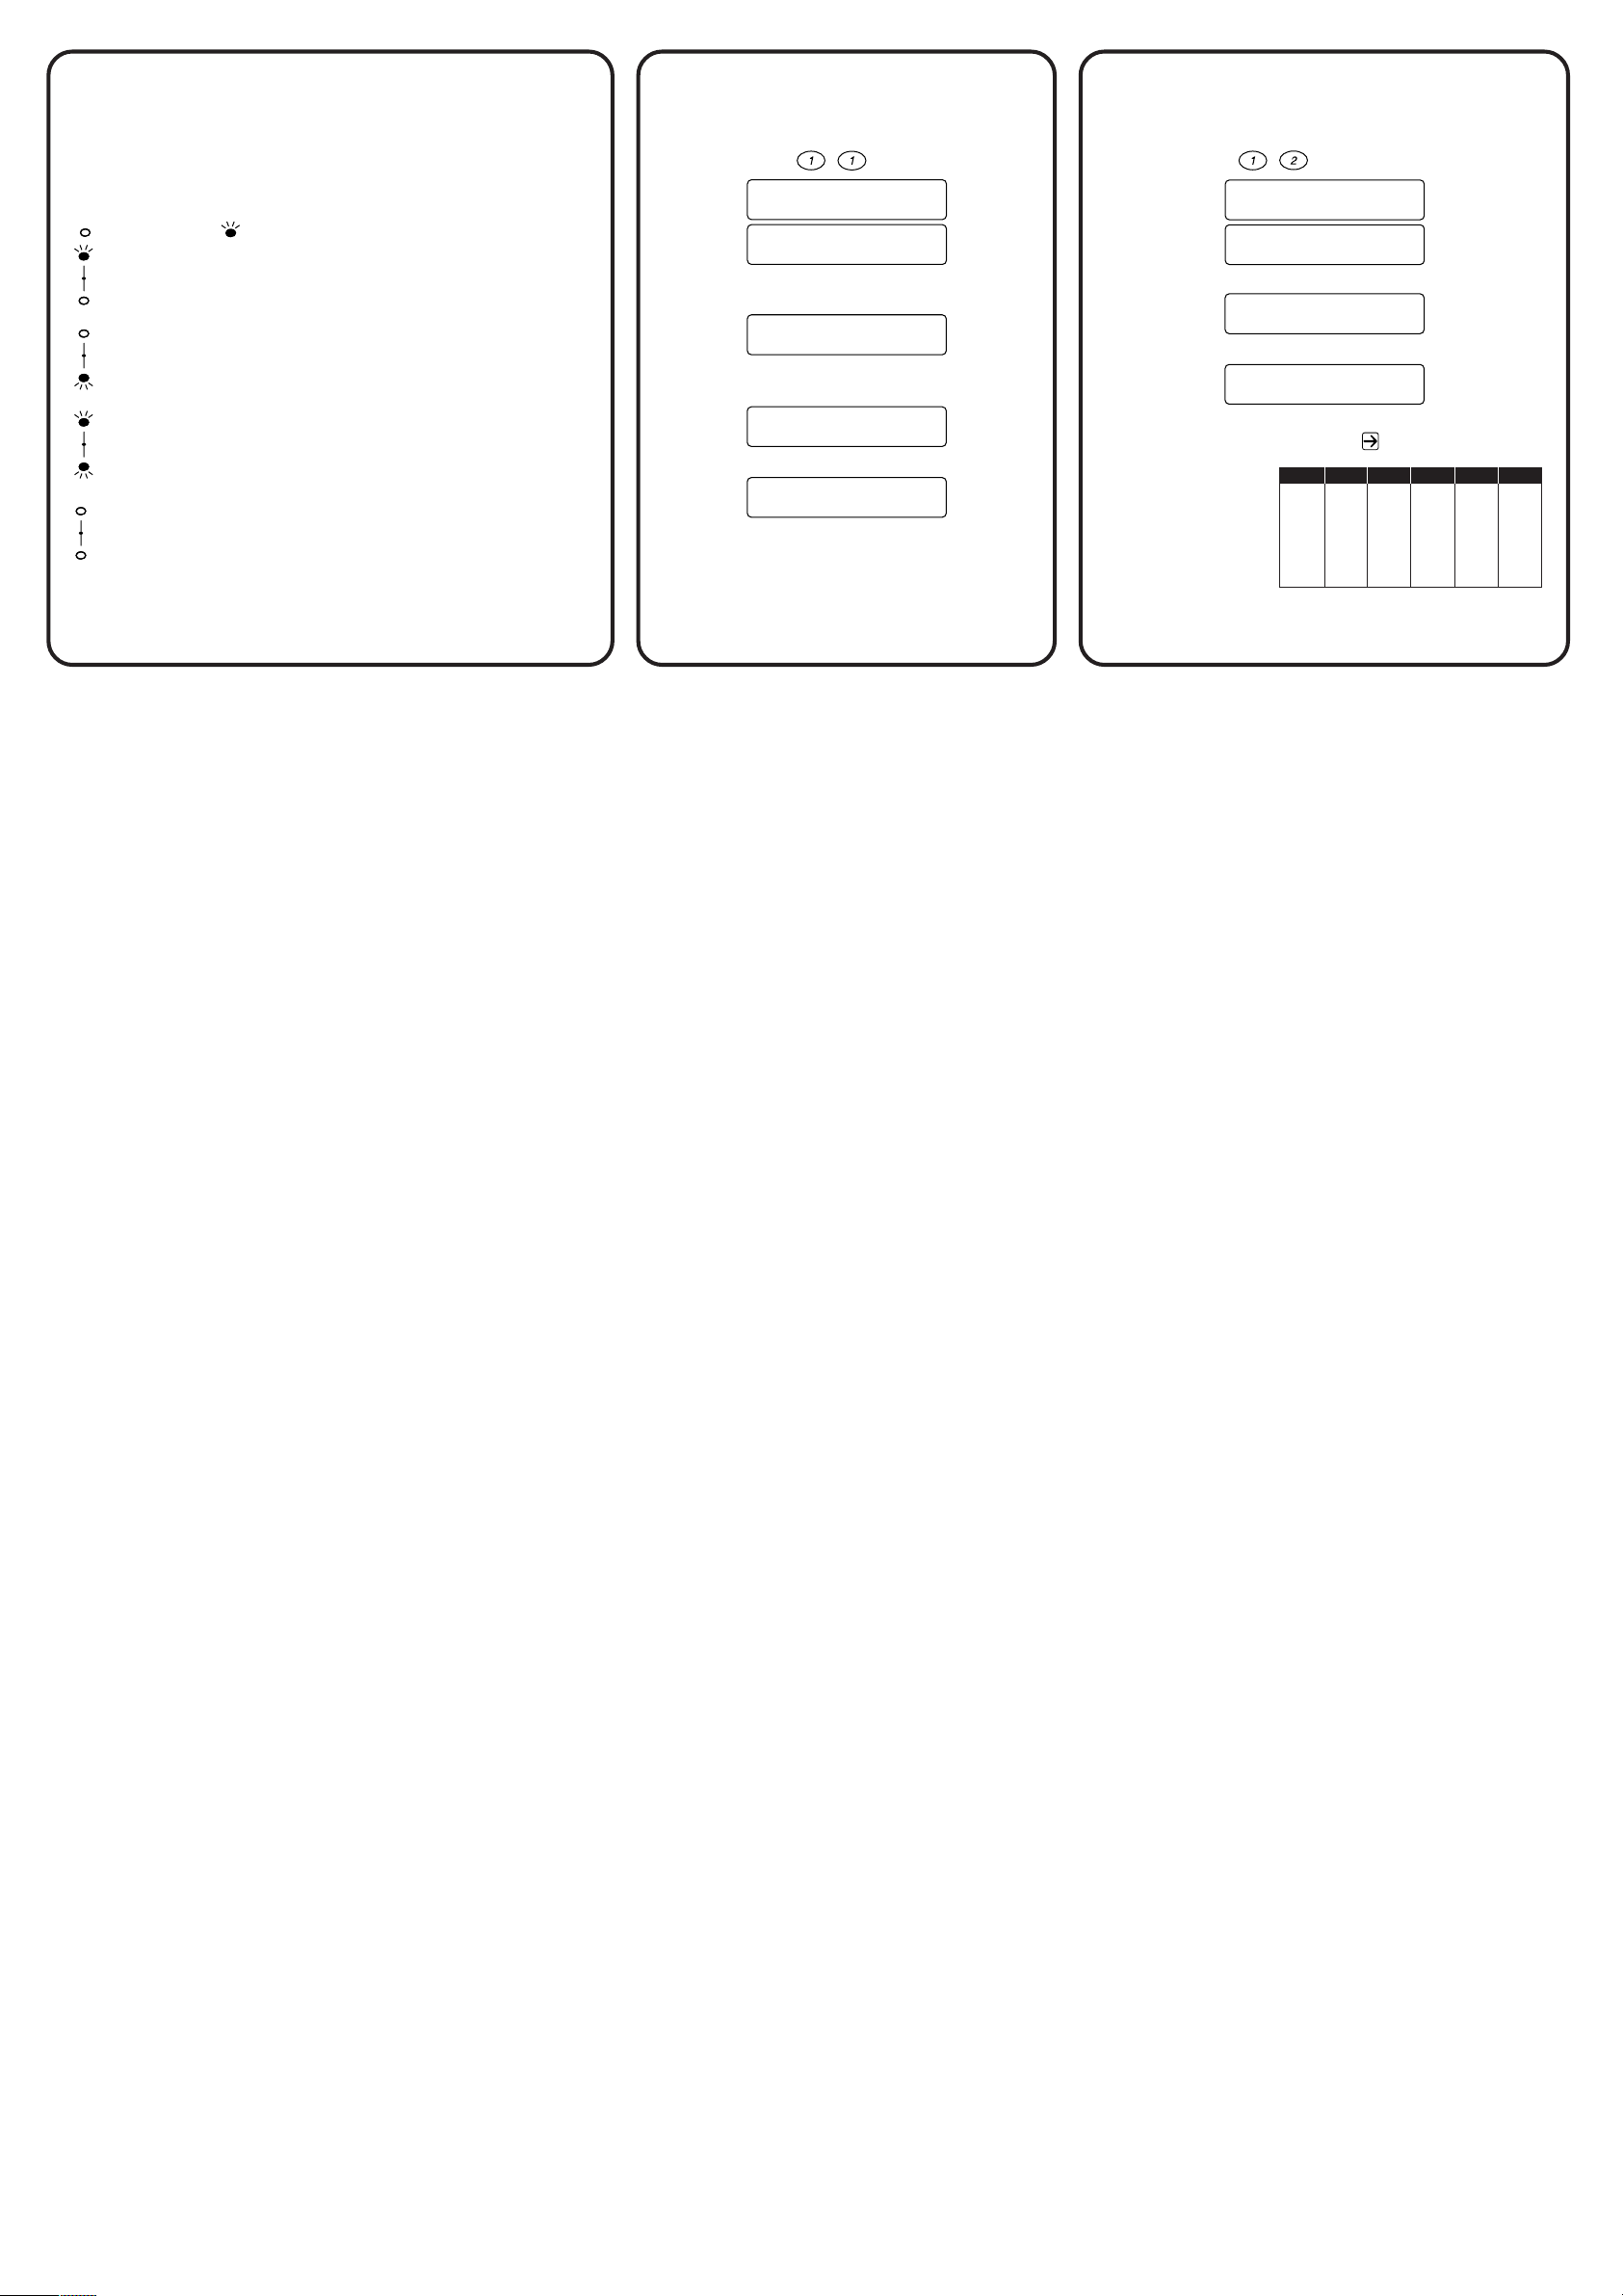
9
Selecting Receive Mode Set Station IDSet Date and
10 11
Time
Choose the mode that best suits your needs by pressing Mode
repeatedly until you have changed the Fax and F/T lights to the
setting you want to use.
means light off. means light on.)
(
Fax
For use with a dedicated fax line.
TAD
Every call is answered as a fax.
F/T
Fax
For receiving fax and voice calls on one line.
The machine answers every call automatically and
TAD
receives a fax or pseudo rings for you to pick up a voice
F/T
call on an extension/external telephone.
Fax
For use with an external answering device.
TAD
The TAD answers every call and stores voice messages.
Fax messages are printed.
F/T
Make sure that TAD is connected to the external socket.
Fax
For receiving fax and voice calls on one line.
TAD
You control the phone line and must answer every call
F/T
yourself on the machine or extension/external telephone.
For more details, see
Receive Mode Settings
in Owner’s Manual.
A. Press Menu, , .
1.DATE/TIME
YEAR:XX
ENTER & SET KEY
B. Enter the last two digits of the year and
press Set.
MONTH:XX
ENTER & SET KEY
C. Enter two digits for the month and press
Set.
DAY:XX
ENTER & SET KEY
D. Enter two digits for the day and press Set.
TIME:XX:XX
ENTER & SET KEY
E. Enter the time in 24-hour format and press
Set.
F. Press Stop/Exit.
Note: To cancel the setting and exit the menu
please press Stop/Exit.
A. Press Menu,
, .
2.STATION ID
FAX:
ENTER & SET KEY
B. Enter your fax number, then press Set.
TEL:
ENTER & SET KEY
C. Enter your telephone number, then press Set.
NAME:
ENTER & SET KEY
D. Enter your name using the dial pad and the chart
below, then press Set. Press
space.
Press Key
E. Press Stop/Exit.
For more details,
see
Entering Text
in
Owner’s Manual.
2
3
4
5
6
7
8
9
twice to enter a
once
twice
A
B
D
E
G
H
J
K
M
N
P
Q
T
U
W
X
three times
C
F
I
L
O
R
V
Y
four times
2
3
4
5
6
S
8
Z
five times
Note: To cancel the setting and exit the menu please
press Stop/Exit.
A
D
G
J
M
7
T
9
– 2 –
 Loading...