

Page 1

BR-Docs
Web Application Guide
Version 0
ENG
Page 2

Microsoft, Windows, Excel and PowerPoint are either registered trademarks or trademarks of
Microsoft Corporation in the United States and/or other countries.
i
Page 3

Table of Contents
1 User’s guide 1
Introduction ............................................................................................................ 1
Logging into BR-Docs............................................................................................ 1
Changing your password................................................................................. 2
Navigating through folders and files ...................................................................... 3
Navigating through folder trees and previewing a document .......................... 3
Navigation tips ................................................................................................. 4
Workspaces ........................................................................................................... 5
What is a Workspace?..................................................................................... 5
Accessing Workspaces from the Dashboard...................................................5
Creating a Workspace ..................................................................................... 6
Workspace icons ............................................................................................. 6
Searching for a Workspace ............................................................................. 7
Deleting a Workspace ..................................................................................... 7
Folder actions ........................................................................................................ 8
Adding a folder ................................................................................................ 8
Downloading a folder as a ZIP archive file ...................................................... 9
Viewing a folder's history ............................................................................... 10
Deleting a folder ............................................................................................11
Renaming a folder ......................................................................................... 12
Moving a folder .............................................................................................. 13
Sharing a folder .............................................................................................14
Submitting documents to another user for approval ...................................... 15
Commenting on a folder ................................................................................ 17
Document actions ................................................................................................ 18
Adding a document to a folder.......................................................................18
Filing a document .......................................................................................... 20
Downloading or printing a document ............................................................. 22
Editing a document's properties ....................................................................23
Deleting a document...................................................................................... 24
Moving a document .......................................................................................25
Submitting a document for approval..............................................................25
Sharing a document ...................................................................................... 27
Commenting on a document (discussion threads) ........................................ 28
Viewing versions of a document....................................................................29
Viewing the actions history of a document ....................................................30
Processing tasks.................................................................................................. 31
Searching for folders and documents .................................................................. 32
Help ..................................................................................................................... 33
Getting started ............................................................................................... 33
Online help ....................................................................................................33
2 Administrator’s guide 34
Managing users and groups ................................................................................ 34
Creating a group............................................................................................ 34
Creating a user .............................................................................................. 35
Adding a user to a group ............................................................................... 36
i
Page 4

Filing rules and groups ........................................................................................ 37
Creating a document type ............................................................................. 37
Creating metadata (index) fields....................................................................38
Creating a filing rule....................................................................................... 39
Editing or deleting a filing rule ....................................................................... 40
Managing permissions.........................................................................................41
Changing the background.................................................................................... 43
Deleted files ......................................................................................................... 44
License ................................................................................................................ 45
Frequently Asked Questions................................................................................ 46
ii
Page 5

1
NOTE
Forgotten password
Have you forgotten your password?
Click Forgotten your password?,
type your email address, and then
click the Validate button.
User’s guide 1
Introduction 1
BR-Docs is a web-based document management portal that requires authentication using a
username and a password.
Logging into BR-Docs 1
You must use a web browser to log in to BR-Docs.
Type the IP address or the URL of your BR-Docs account in your web browser, and then type
your Email and your password. Select the language you want to use, and then click the Login
button.
1
Once you are logged in, click Logout to close your session.
1
Page 6

Chapter 1
Changing your password 1
Once you are logged in, click
Manage users and
application settings in the
upper right menu.
Click the Password tab, type
your password information, and
click Save.
2
Page 7

User’s guide
CAUTION
Navigating through folders and files 1
You must be logged into BR-Docs to browse folders and documents. Only documents to which
you have access rights are displayed.
Navigating through folder trees and previewing a document 1
Click the Documents tab.
Click on a folder to view its content.
1
If the folder contains subfolders,
the subfolders will be displayed to
the right of the selected folder.
Click on each subfolder to view its
contents.
Click on a folder to preview its contents within the preview window on the right.
3
Page 8

Chapter 1
Folders are listed
alphabetically in the
folder tree on the left
side of the screen. If
there are many folders
in this folder tree, some
will be hidden. Click on
a letter to view only the
folders that begin with
that letter.
To reset the alphabetic
filter and refresh the
folder view, click .
Use the arrow
keys to scroll
through the
folders in the
folder tree.
Navigation tips 1
4
Page 9

User’s guide
NOTE
Workspaces 1
What is a Workspace? 1
A workspace is a collaborative storage space where multiple people can work on the same
document, sharing it, based on permissions. A workspace is similar to a document sharing folder;
it allows users to:
Make a document viewable, invisible, editable (or locked) to other users
Share a document with people who do not have a user account
Add a document quickly and easily
Create discussion threads
Search using a dedicated search engine
When a Workspace is created from the Dashboard, the folder that corresponds to the
workspace is automatically created in the Workspaces folder, located at the root. Example:
Workspaces\Workspace_Creator\Workspace_Name\
Accessing Workspaces from the Dashboard 1
The Dashboard appears once you log into BR-Docs. The Dashboard contains all the Workspaces
you can access, depending on whether you have created them or another user has invited you
into their Workspace.
1
5
Page 10

Chapter 1
Creating a Workspace 1
Click the Dashboard tab, and then click
Add a new Workspace.
Type a name and description for the
Workspace you want to create.
Invite existing BR-Docs users to join the
Workspace. You can also invite
external contacts by selecting the
check box at the bottom of the screen.
Add an image to represent your
Workspace in the Dashboard, if
needed, and then click Add a new
Workspace.
Your Workspace is created in the
Dashboard.
You can edit a document, add a
document, browse the folder, view
other users or track the latest activities,
such as comments and edits, for the
Workspace.
You can also moderate discussion
threads and manage access
permissions to the Workspace.
Workspace icons 1
Shortcuts Description
Displays the number of guests in the Workspace. Hover the mouse over the icon to
display the names and pictures of the Workspace guests.
Displays the number of documents in the Workspace. Click to view the Workspace
folder.
Displays the number of comments on the Workspace. Click to view the Workspace
discussion thread.
6
Page 11
User’s guide
NOTE
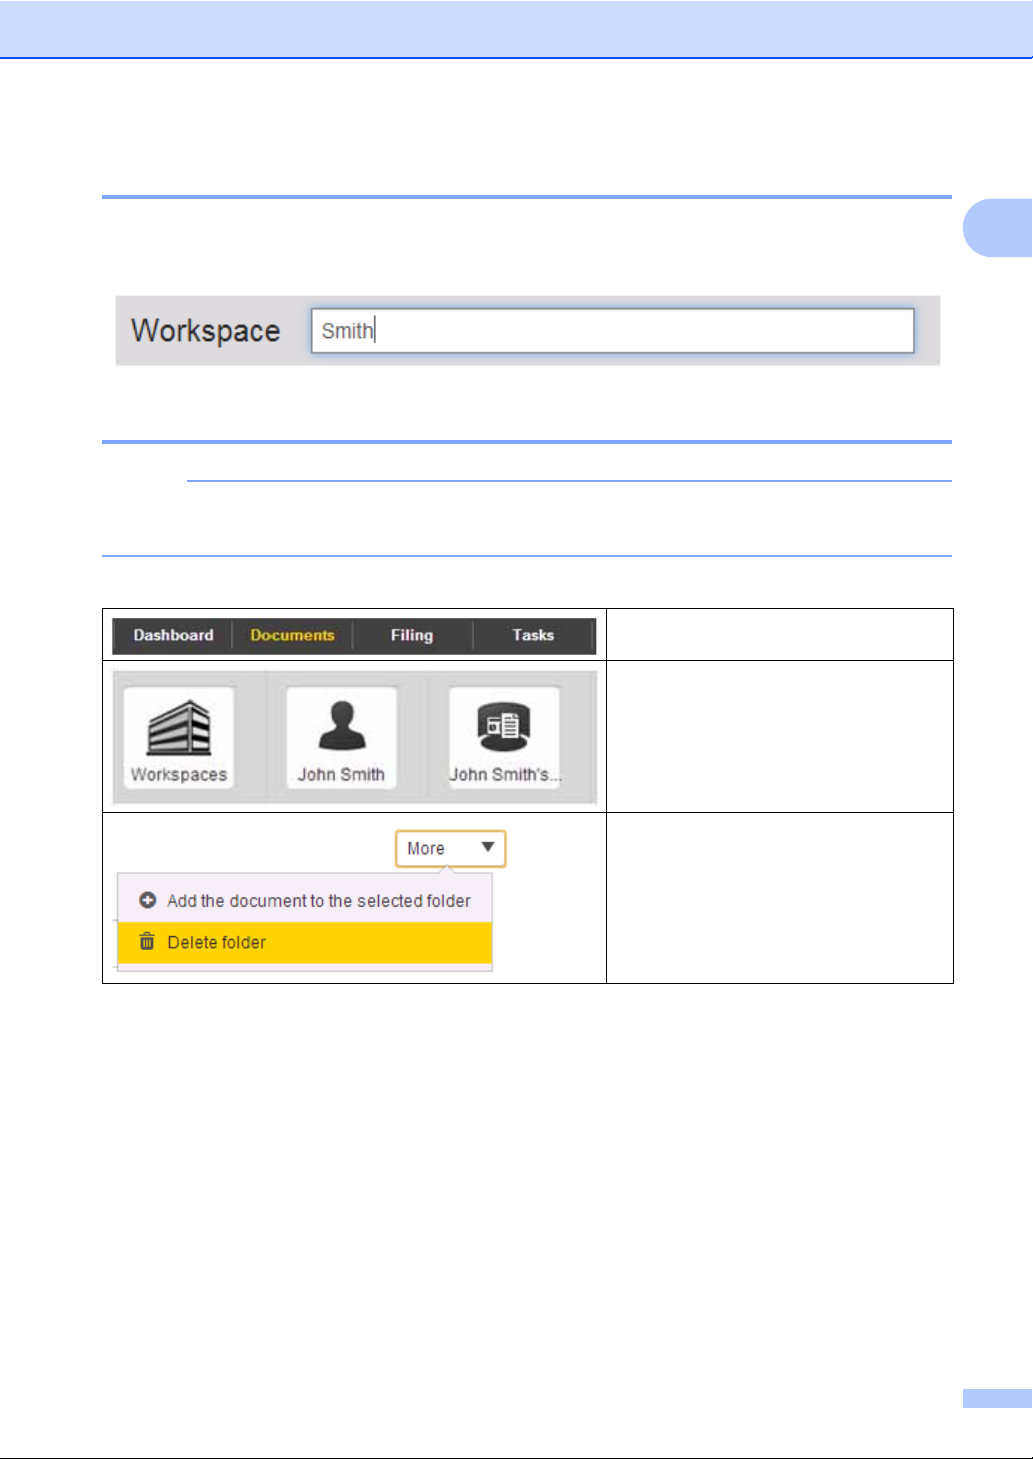
Searching for a Workspace 1
Search for Workspaces by typing the name or description in the search field located under the
Dashboard's menu bar.
Deleting a Workspace 1
If you accidentally delete a Workspace, please contact your system administrator who will be
able to restore deleted Workspaces from the Deleted files area.
Click the Documents tab.
Select the Workspaces folder, select
the owner of the Workspace you want
to delete, and select the Workspace
itself.
1
Click the More drop-down list, and
then select Delete folder.
7
Page 12

Chapter 1
NOTE
CAUTION
Folder actions 1
BR-Docs contains a default folder called Workspaces that you cannot delete. Its function is
detailed in the Workspaces
The permissions of the authenticated user's group determine whether they can perform these
actions or not (Managing permissions
Adding a folder 1
section.
).
Click the Documents tab.
Click the More drop-down list, and
then click Add folder.
Type the name of the folder and click
Submit.
To create a subfolder, select the
folder you have created and repeat
the steps above.
8
Page 13

User’s guide
CAUTION
Downloading a folder as a ZIP archive file 1
Click the Download icon to start the
download of the folder and all its
contents as a ZIP file.
Downloading large folders may take up large server resources and memory, and may not
complete successfully.
We do not recommend using the Download command for folders containing a high number of
very large documents.
1
9
Page 14

Chapter 1
Viewing a folder's history 1
Click the Documents tab.
Select the folder whose history you
want to view.
Click the More drop-down list, and
then select View folder version
history.
The folder history appears in a new
window.
You can print the folder history
information or can click Copy to
export it to another application.
10
Page 15
User’s guide
NOTE
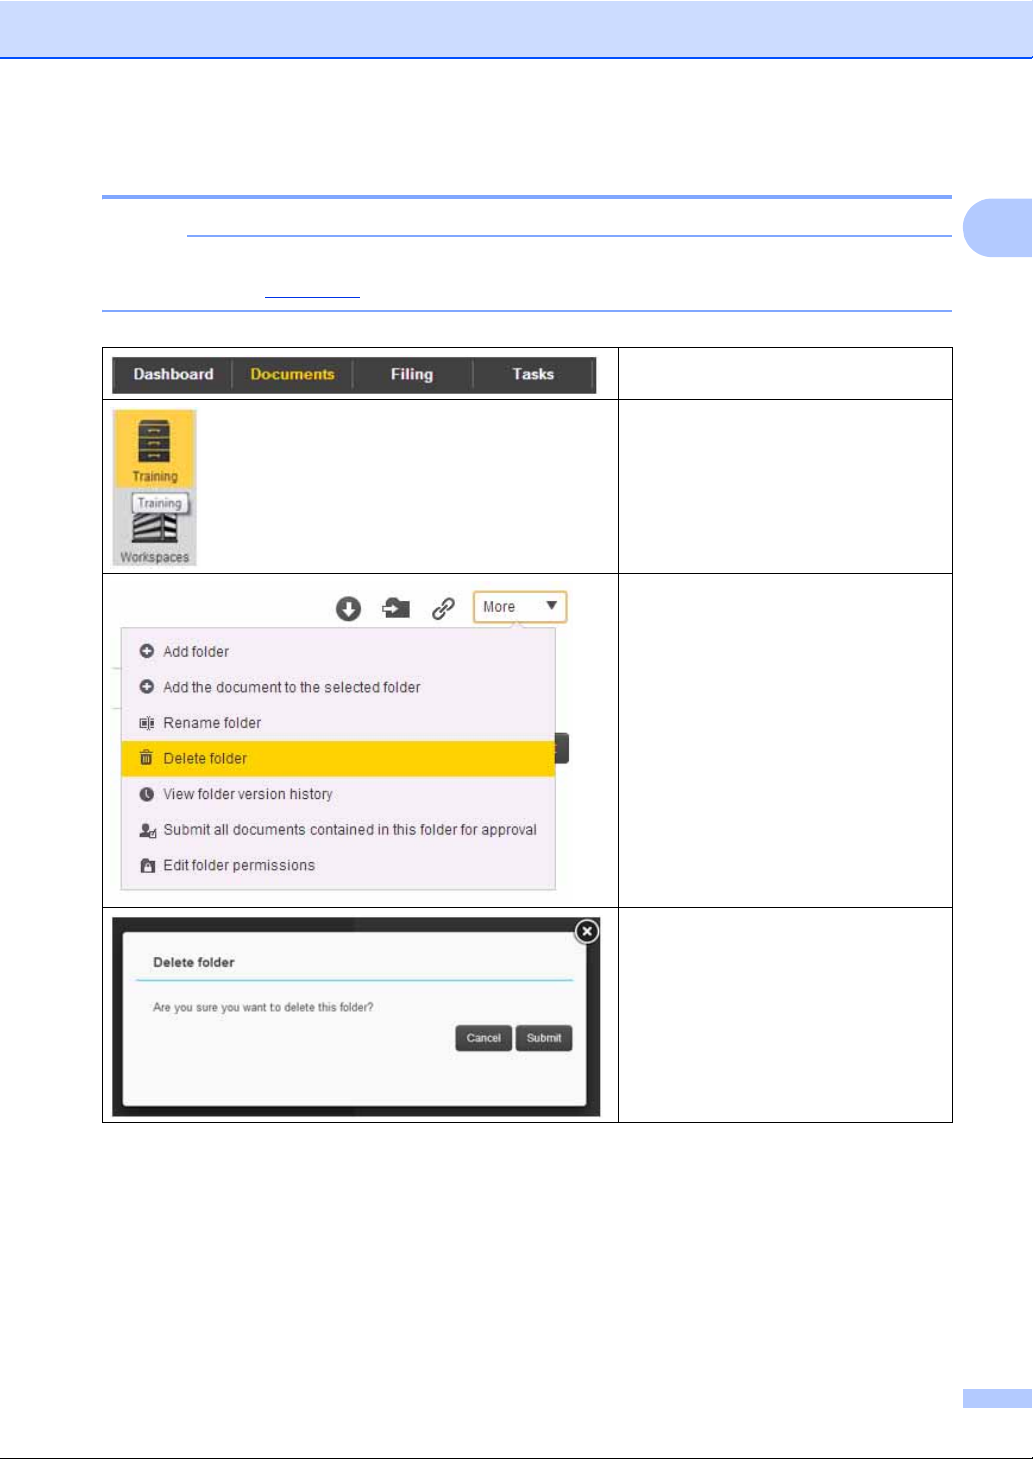
Deleting a folder 1
In case of accidental deletion, contact your system administrator, who will restore the deleted
folder from the recycle bin
.
Click the Documents tab.
Select the folder you want to delete.
Click the More drop-down list, and
select Delete folder.
1
To confirm that you want to delete
the folder, click Submit.
11
Page 16

Chapter 1
Renaming a folder 1
Click the Documents tab.
Select the folder you want to
rename.
Click the More drop-down list, and
select Rename folder.
Type the new name for the folder,
and then click Submit.
The folder's new name appears.
12
Page 17

User’s guide
Moving a folder 1
Click the Documents tab.
Select the folder you want to move.
Click the Move the folder icon.
Select the target folder from the list,
and then click Submit.
1
The folder moves to the target
destination.
13
Page 18

Chapter 1
CAUTION
Sharing a folder 1
Click the Documents tab.
Select the folder you want to share.
Click the Share folder with a link
icon.
Copy the link and send it to the
people you want to share the folder
or its content with, or select the
Send the link to an email address
option (to use this option, an SMTP
server must be configured).
To cancel any sharing permissions
you have given to other users, click
Cancel sharing.
Any shared folder, as well as its content, becomes available to all users (logged in or not) that
have the access link to the folder.
14
Page 19

User’s guide
NOTE
CAUTION
Submitting documents to another user for approval 1
If a shared BR-Docs document requires your approval, a task appears in the Tasks tab. When
you submit documents for approval, you ask an authenticated user to validate a document.
The document can then be signed from the mobile application. If the document does not have
a signature area, there is a default signature area located on the bottom left of the first page.
Note: Approval requests are assigned to only one user.
The signature function works for these document types: PDF A 1.4, text, image PDF 1.3, 1.4
and 1.7 documents. The signature function does not work for image PDF documents. In
text/image PDF versions 1.5 and 1.6, the signing area is pushed to the second page of the
document.
Click the Documents tab.
Click on the folder you want to be
approved.
1
Click the More drop-down list, and
then select Submit all documents
contained in this folder for
approval.
15
Page 20

Chapter 1
CAUTION
Click the Users drop-down menu
and select the user you want
approve the document.
Click Submit.
If you assign the folder to a new user after making an approval request, all previous approval
requests for the folder will be lost.
16
Page 21

User’s guide
CAUTION
Commenting on a folder 1
You must have permission to view the folder to which you want to add a comment. All users who
have access to a folder can view, edit, reply to, or add to the comment thread.
Click the Documents tab.
Select the folder to which you want
to add you comment.
Type your comment in the thread on
the folder field, located at the upper
right section.
Click Add comment.
Select any folder to view its discussion thread. Users can edit their own comments, reply to, or
add new comments.
1
When you delete a comment, all subsequent answers to that particular comment are also
deleted.
17
Page 22

Chapter 1
CAUTION
Document actions 1
The document actions described in this section will depend on the user's permissions. For more
information, see Managing permissions
Adding a document to a folder 1
.
Click the Documents tab.
Select the folder to which you want
to add a document.
Click the More drop-down list, and
then select Add the document to
the selected folder.
Click Browse to navigate to the
document you want to add or type
the name and a description of the
document you want to add.
Click the Type of document
drop-down list to file the document
according to its type (not required).
18
Page 23

User’s guide
If you want to file the document
according to its Type, select the
document type from the Type of
document drop-down list.
Type the document's information.
Click Submit.
The document is added to the
selected folder.
1
19
Page 24

Chapter 1
CAUTION
CAUTION
Filing a document 1
If you want a document to be available to other users, it must be filed in BR-Docs. Any
documents not filed can be viewed only outside the Filing section.
To add documents to a file, drag and
drop the documents in the Drop
Zone, or click on the Drop Zone to
select documents to add.
Click the Filing tab.
Preview your document in the main screen by clicking on it in the Documents to be filed list on
the left hand side of the screen.
The Preview feature works with PDF, JPEG, BMP, GIF and Microsoft® Office documents.
There are two ways to file your document in BR-Docs:
Default filing
Filing by document type
20
Page 25

User’s guide
NOTE
Default filing of a document 1
The following step assumes that a document pending filing has been selected in the Filing
section. See the Filing a document
section for more details.
In the File in section on the right side of the
window, click the Select a document type
drop-down list, and then select Default.
Type the Document name.
In the folder list, select the folder in which
you want to file the document. If the folder
has subfolders, they will appear.
Click to return to the parent folder.
Create a new folder by clicking .
When you have selected the default folder,
click File.
1
Filing by type 1
Select the filing rule
select a Document type from the
drop-down menu.
Type the document information needed for
the document type you have selected.
Click File.
The document will be filed according to
the filing rule set for the selected
document type.
See the Creating a filing rule
more information.
of your choice, then
section for
21
Page 26

Chapter 1
Downloading or printing a document 1
Click the Documents tab.
Select the folder that contains the
document you want to download.
When the folder opens, select the
document.
Click the Download a local copy
icon.
To print it, click Print .
22
Page 27

User’s guide
Editing a document's properties 1
Click the Documents tab.
Select the folder that contains the
document you want to edit. When
the folder opens, select the
document.
Click the More drop-down list, and
then select Editing document
properties.
Edit your document's properties as
needed.
Click Submit.
1
23
Page 28

Chapter 1
NOTE
Deleting a document 1
In case of accidental deletion, please contact your system administrator, who will restore the
deleted documents from the deleted items.
Click the Documents tab.
Select the folder that contains the
document you want to delete. When
the folder opens, select the
document.
Click the More drop-down list, and
then select Delete document.
Click Submit.
To cancel deletion, click Cancel.
24
Page 29

User’s guide
CAUTION
Moving a document 1
Click the Documents tab.
Select the folder that contains the
document you want to move. When
the folder opens, select the
document.
Click the Move the document icon.
Select the target folder, and then
click Submit.
The document has been moved.
1
Submitting a document for approval 1
When you assign the contents of a folder or document to a user, all previous approval requests
will be lost. Approval requests are assigned to only one user.
25
Page 30

Chapter 1
NOTE
CAUTION
When you submit documents for approval, you ask an authenticated user to validate a
document. Documents that require approval from another user appear in that user's tasks list
The document can be signed from the mobile application. If the document does not come
from ERP Manager or if it does not have a signature area, a default signature area located on
the bottom left of the fist page is then used.
The signature works for PDF/A 1.4, text/image PDF 1.3, 1.4 and 1.7 documents. It does not
work for image PDF documents. For text/image PDF versions 1.5 and 1.6, the signing area is
pushed to the second page of the document.
Click the Documents tab.
Select the folder or document that
you want approved. When the folder
opens, select the document.
.
Click the More drop-down list, and
then select Submit document for
approval.
Click the User drop-down list and
select the user you want to approve
the document.
Click Submit.
26
Page 31

User’s guide
CAUTION
Sharing a document 1
Any shared document becomes available to all users that have the access link to the document
(whether or not they are logged into BR-Docs).
Click the Documents tab.
Select the folder or document that
you want approved. When the folder
opens, select the document.
Click the Share the document with
a link icon.
1
Copy the link and send it to the
people you want to share the
document with, or select the Share
this document by email option (to
use this option, a SMTP server must
be configured).
You can cancel folder sharing by
clicking Cancel document sharing.
27
Page 32

Chapter 1
CAUTION
Commenting on a document (discussion threads) 1
Click the Documents tab.
Select the folder that contains the
document for which you want to start
a discussion thread. When the folder
opens, select the document.
Click the Read document threads
icon.
Type a comment in the field, and
then click Add comment.
All users with access rights to the
document can reply to the comment.
Comment authors can edit or delete
their own comments.
When you delete a comment, all subsequent answers to that particular comment are also
deleted.
28
Page 33

User’s guide
Viewing versions of a document 1
Click the Documents tab.
Select the folder that contains the
document for which you want to view
the history, and then select the
document itself.
Click the More drop-down list, and
then select View document
version history.
If several versions of the document
exist, all are displayed.
To add a new version of the
document, click the add icon: .
1
To delete a version of the document,
click the delete icon: .
To add a new version of the
document, type a document
description in the field, and then click
Browse. Navigate to the file in your
network.
When finished, click Submit.
To cancel, click Cancel.
29
Page 34

Chapter 1
Viewing the actions history of a document 1
Click the Documents tab.
Select the folder that contains the
document for which you want to view
the versions history. When the folder
opens, select the document.
Click the More drop-down list, and
then select View Document audit
trail.
To copy the document's history click
Copy.
To print the document's history, click
Print.
30
Page 35

User’s guide
NOTE
Processing tasks 1
When a document is submitted to a user for approval, it appears in the user's Tasks screen.
Click the Tasks tab.
When you have one or more
pending tasks, a tooltip will appear,
prompting you to address pending
tasks.
Select the document in your task list that you want to approve. A preview appears on the right
side of the screen. Click Approve.
1
Your BR-Docs Administrator is the only person who can see all users' tasks. The Administrator
can sort tasks by user or by status.
31
Page 36

Chapter 1
CAUTION
NOTE
Searching for folders and documents 1
To maximize the relevance of the Search results, search requests in BR-Docs must contain
more than three characters.
In the Search field above the
Dashboard tab, type a search
value:
- document name
- document content
- folder name
- metadata
Press the Enter key on your
keyboard.
The search result, folders and/or documents, appear in a list on the left side of your screen. Click
on a folder or a document to display a preview on the right side of your screen.
Use the " and * operators to narrow your search:
Search term The search returns documents and folders that contain
Industry The term Industry exactly.
Industr* A word that starts by Industr, like Industrial.
French industry Both the terms French AND industry.
"French industry" The exact string French industry.
32
Page 37

User’s guide
Help 1
Click the ? icon for help at any time.
Getting started 1
Click and select Getting started wizard from the drop-down list.
Online help 1
Click ? and select Read online help from the drop-down list.
1
33
Page 38

NOTE
Administrator’s guide 2
2
Managing users and groups 2
Creating a group 2
Click Manage users and application settings .
Click the Groups & Users tab, and then click the +
button to the right of the Groups heading.
Type a name for the group you want to create.
Click Submit.
The new group appears in the list.
To edit group properties, click the group name.
You can delete a group by clicking button. Deleting a group cannot be undone.
You cannot delete the default groups Users and Administrators.
34
Page 39

Administrator’s guide
NOTE
Creating a user 2
Click Manage users and application settings .
Click the Groups & Users tab, and then click the +
button to the right of the Users heading.
Type the user information for the user you want to create.
Click Submit.
2
Disable a user by clicking the button.
The new user appears in the list.
To edit user properties, click the user name.
35
Page 40

Chapter 2
Adding a user to a group 2
Click Manage users and application settings
.
Click the Groups & Users tab to view the Groups
and Users lists.
Click and drag a user into the group of your choice to add the user to that group.
36
Page 41

Administrator’s guide
NOTE
Filing rules and groups 2
Creating a document type 2
BR-Docs contains default document types. Adjust them by editing the indexing metadata and
the corresponding filing rule according to your needs. (See Editing or deleting a filing rule
Click Manage users and application settings .
Click the Filing categories tab, and then click the
+ button to the right of the Filing categories
heading.
Type a name for the document type you want to
create.
).
2
Click Submit.
You do not have to configure the filing rule
immediately. The rule will be created after the
indexing metadata
created.
for the document type is
37
Page 42

Chapter 2
Creating metadata (index) fields 2
Click Manage users and application settings .
Click the Filing categories tab and then select the
document type for which you want to create
metadata or index fields.
Click the + button on the right of the Metadata
heading.
Type the name of the index field you want to create,
and choose the index type from the types of
document drop-down list.
Select the Mandatory check box if you want to
require users to populate this index when filing a
document.
If the check box is clear, the index can be left blank
when a document is filed.
Repeat these steps for any other index you want to
create.
The index field names appear in the Metadata list
to the right of the Filing categories list on your
screen.
38
Page 43

Administrator’s guide
Creating a filing rule 2
Before creating a filing rule for a document type, create the document type and the corresponding
metadata
(index) field.
Click Manage users and application settings .
Click the Filing categories tab and then select the
document type for which you want to create metadata
or index fields.
Type the document name in the field, or click Browse
to navigate to the document type you want.
Select the check box to activate the filing rule.
Select the folder where you want to file all documents
of the type you chose in the previous step.
Click Submit.
2
By default, any previously-configured indexes appear
in a drop-down list when you click in the text boxes
used for filing and renaming.
Use this index to build your filing and renaming rules.
You can add fixed values (manual input) and then
confirm the action.
39
Page 44

Chapter 2
Editing or deleting a filing rule 2
Click Manage users and application settings .
Click the Filing categories tab and then select the
document type for which you want to create metadata
or index fields.
Edit the document name in the field, or select the check
box to activate/deactivate the filing rule.
Select the folder where you want to file all documents
of the type you chose in the previous step.
Click Submit.
40
To delete a filing rule, delete the document type the
filing rule is configured for using the icon, on the
right of the document type of your choice. All the
subsequent metadata will be automatically deleted.
Page 45

Administrator’s guide
Managing permissions 2
Manage access rights to folders by granting or blocking permissions for specific users and groups.
To manage permissions, you must have already created your users and groups.
Click the Documents tab.
Select the folder whose access rights you
want to manage.
Click the More drop-down list, and then
select Edit folder permissions.
Select a group’s check box to grant permission to the actions listed above each column. Clear
a group’s check box to restrict permission to the actions listed above each column.
2
When finished, click Submit. Permissions are active immediately.
41
Page 46

Chapter 2
CAUTION
• By default, subfolders in BR-Docs inherit the permissions of their parent folders. This link
with the parent folder is broken if subfolder permissions are changed.
• By default, Administrators group users have all permissions to all folders.
• Only BR-Docs Administrators or users who have Permissions rights can manage folders
permissions.
42
Page 47

Administrator’s guide
Changing the background 2
Click Manage users and application settings .
Click the Settings tab.
Click Modify image to choose your new background.
When finished, click Submit.
2
43
Page 48

Chapter 2
Deleted files 2
Click Manage users and application settings .
Click the Deleted files tab.
All deleted folders and documents appear here. Delete them permanently by clicking Empty
trash for all items. (Warning: this action cannot be undone).
Delete selected folders or documents by selecting the item and clicking Empty trash for
selected item(s).
Restore deleted items and make them available again to users by clicking Restore deleted
item(s).
44
Page 49

Administrator’s guide
License 2
Click Manage users and application settings .
Click the License tab.
The information concerning your BR-Docs license appears in this screen. You can view the
number of user accounts, the number of available accounts, check storage space, and view your
active options.
You can purchase new user licenses when needed by clicking Buy user license or purchase
additional storage space by clicking Buy storage.
2
45
Page 50

Chapter 2
Frequently Asked Questions 2
Welcome to the Frequently Asked Questions section of the User’s Guide.
All of these questions are from our users and are intended to help familiarize yourself with
BR-Docs products and find a solution.
Question Answer
I accidentally deleted a
file/folder from BR Docs,
is there a way to retrieve
it?
When you delete a file or a folder, it is not permanently erased from your
database.
To retrieve a deleted file or folder:
- Log in as an administrator
- Click the Administrator Menu icon, and then click the Deleted files tab.
My files are missing, how
do I get them back?
How does the simple
search engine work? How
can I find an exact word or
an exact expression?
- Find your deleted documents and folders and either restore them, or
permanently delete them.
- Click the Administrator Menu icon, and then click the Deleted files tab
- Search for your deleted documents and folders, and either restore them or
permanently delete them.
If you cannot find the files within this area, you may have been a member of a
shared folder/Workspace and have since been removed from it. Check with
you administrator for more information on how to re-join and locate your files.
By default, the search engine searches for the exact word you typed in.
If you search for more than one word, the result displays all documents
containing all of the words (but not necessarily in the order you typed them).
To search for words in a specific order, type the words or sentence in quotation
marks, for example: "Worldwide Technology Trade Shows".
To search for another form of a word, type an asterisk (*) at the end of the
word.
Content search results do not display words of three characters or less. A
search on the word "air" will not display the documents containing the word
"air". This limitation has been introduced to obtain more accurate results and
to improve the time of response.
46
Page 51

Question Answer
How can I modify the
name of a document or
amend the index of a
document archived in
BR-Docs?
I cannot access my BRDocs interface from my
PC/Mobile application
I filed a document in BRDocs but I cannot preview
this document in the
preview window.
I want to share a
document, but when I click
on the link to share it, the
message reads "The
document is not
accessible".
Amend information related to a document (name, index…) if you have the
appropriate permissions.
Search for the document whose properties you want to change and select it.
Click the More button above the document preview, and then select Editing
document properties.
Update the document properties as needed. See Editing a document's
properties.
Make sure that your internet connection is working properly. If you can access
other content on the Internet, it is possible the server on which BR-Docs is
installed may temporarily be down for maintenance.
The BR-Docs Preview function supports only certain types of file types,
including: PDF, JPG, PNG, GIF, and Microsoft
PowerPoint®).
If you are using a different file format, you cannot preview the document.
Open the document you want to share. Before clicking the Share icon, make
sure you click the Copy link to clipboard button. The link will not be activated
unless you click this icon.
Administrator’s guide
®
Office files (Word, Excel®,
2
See Sharing a document
for more information.
47
Page 52

Chapter 2
Question Answer
I dropped my documents
in the Drop Zone but I
cannot find them
anywhere.
I have no more available
space/when I add a
document, I see an error
message.
Before you can access your documents using the Document tab, you must
index and file them. Click on the Filing tab and make sure you have filed your
documents.
Make space available by deleting old documents.
OR
Purchase additional storage space for new documents. Click the
Administrator Menu icon, and then click the License tab.
I deleted a few documents
in order to free some
space, but I still do not
have enough space
available.
When I go to the filing
area, there are a lot of
document types that are
not related to my activity.
How can I remove them?
I would like to share a
document, but only with a
few other BR-Docs users.
When I use BR-Docs
Sync, I cannot find my
scanned paper
documents within the BRDocs interface.
If you have already deleted documents, but available space did not increase,
check to make sure that you deleted the documents.
Click the Administrator Menu icon, and then click the Deleted files tab.
To delete document types that you do not use, click the Administrator Menu
icon, and then click the Filing categories tab.
Remove the document types that you do not need.
Create a new Workspace and invite colleagues to this private space, where
only you and your invitees will be able to access those documents. See
Creating a Workspace.
When you use BR-Docs Sync to transfer your paper documents to BR-Docs,
they are not automatically filed under the Documents tab.
They are stored in the Filing tab, waiting for you or one of your colleagues to
file them in the appropriate folder.
48
Page 53

Question Answer
How can I remove a
Workspace?
Click the Edit Workspace button. In the bottom left corner the screen there is
a Delete Workspace link. Click the Delete Workspace link to permanently
delete the Workspace (see Deleting a Workspace).
Administrator’s guide
2
I am using the mobile app
in "Airplane" mode but I
cannot find all of my
documents.
The e-signature from the
task section is not
available for all the
documents, only for some.
Why?
I accidentally edited a
document from my sync
folder on my computer
and cannot access the
original document
When using "Airplane" mode, only the documents you have already opened at
least once in the mobile application are available on your mobile device. To
access other documents when travelling or lacking Internet connection, make
sure to open documents while you still have Internet access on your device.
The e-signature feature is available only for documents in PDF format. If the
documents are in a format other than PDF, they are not available for you to
sign from your mobile devices.
When you sync a document from your computer to BR-Docs, the previous
versions of that document are saved in BR-Docs as versions. Restore the
desired version of the document in BR-Docs, and then download it to your
computer.
49
Page 54

Chapter 2
Question Answer
When I use the alphabet
shortcut to find a
document name that
starts with "T," I can see
only folders that start with
"T." How do I return to the
normal preview with all my
folders?
When I upload a Word
document in DOCX format
that contains schemas
within the file, I am not
able to preview the
document within
BR-Docs.
To get back to the normal Folder preview screen, click the ABC icon above the
alphabet shortcut. You can then view and access all of your folders.
Some schemas within a DOCX-format document are not yet supported by BRDocs. Convert your document to the format DOC using the Save as…
command in MS Word and upload the new document to BR-Docs.
50
 Loading...