

Page 1
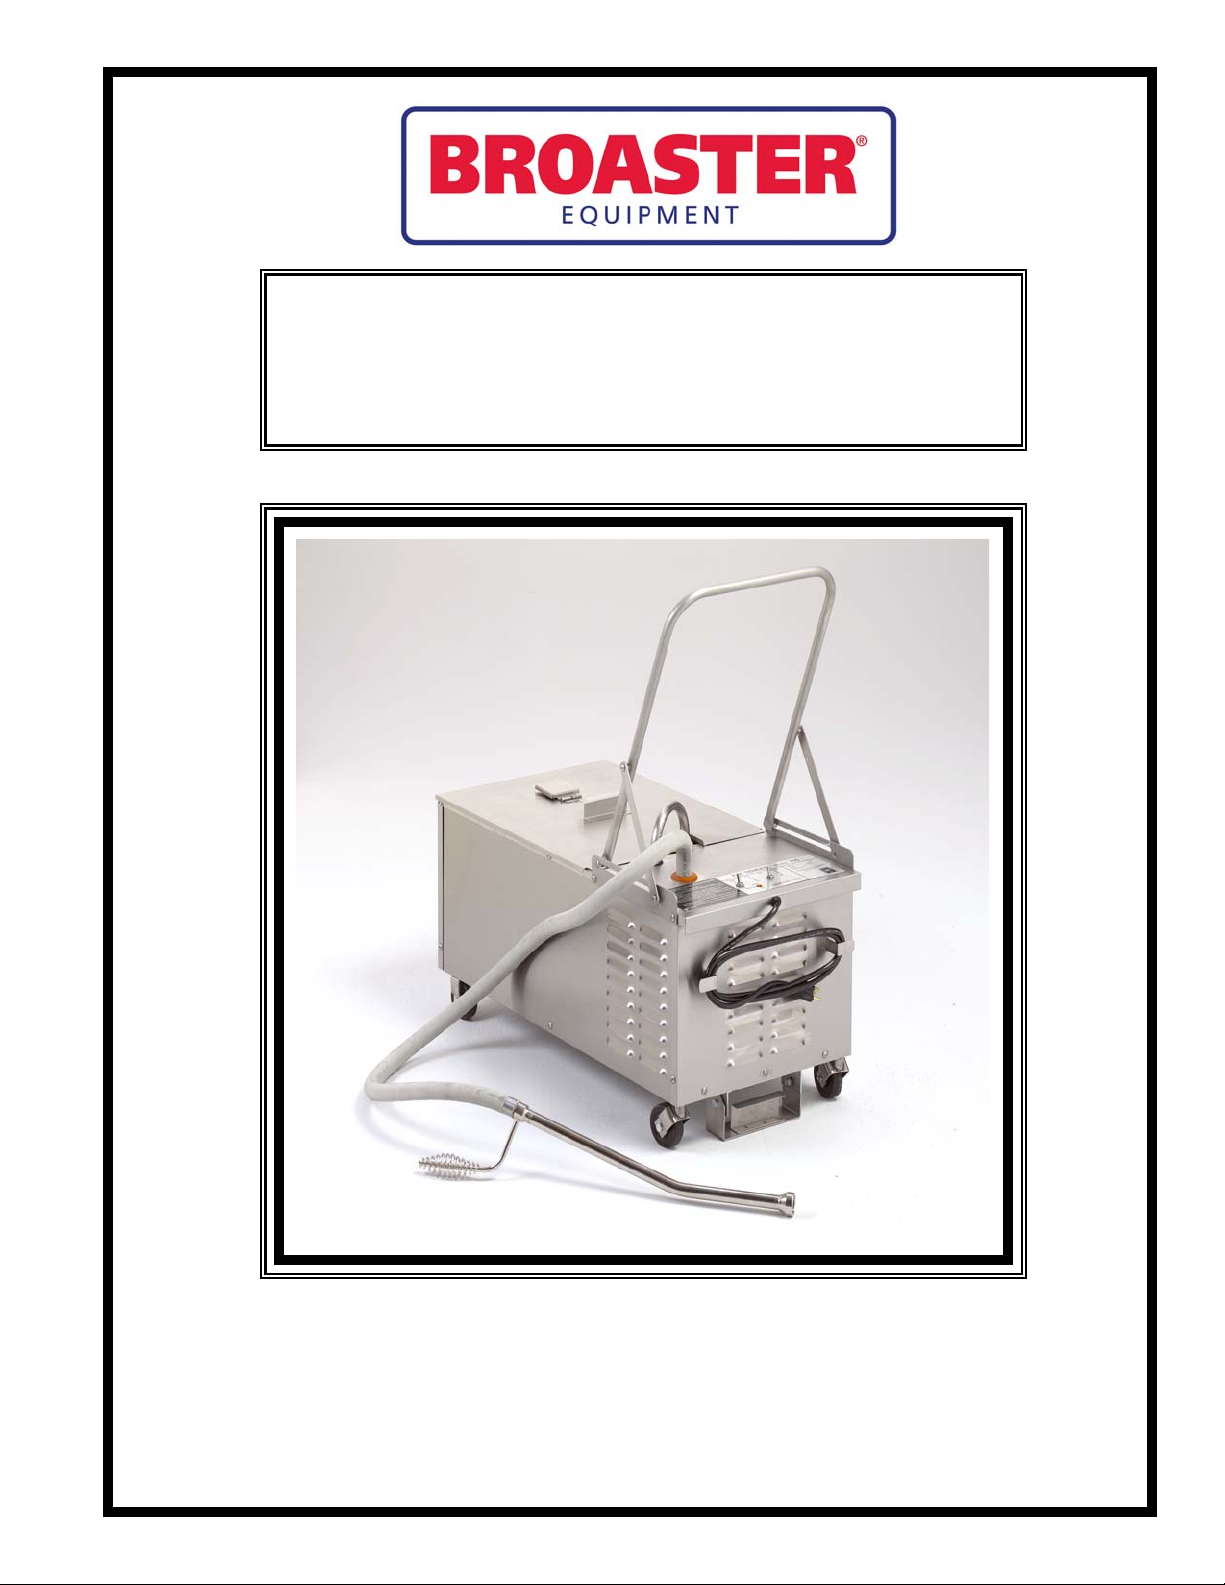
OPERATION, SERVICE &
PARTS MANUAL
BROASTER® 765XP
PORTABLE FILTER
Be sure ALL installers read, understand, and have access to this manual at all times.
Genuine Broaster Chicken®, Broasted®, Broaster Chicken®, Broaster Foods®. and Broasterie® are registered
trademarks. Usage is available only to licensed operators with written authorization from the Broaster Company.
The Broaster Company
2855 Cranston Road, Beloit, WI 53511-3991
608/365-0193 broaster.com
Manual #17143 1/12 Rev: 2/14
© 2014 the Broaster Company
Printed In U.S.A.
Page 2

Page 3
All adjustments and repairs shall be made
FOR YOUR SAFETY
Do not use or store gasoline or other flammable vapors
or liquids in the vicinity of this or any other appliance.
Improper installation, adjustments, alteration, service or maintenance can cause
property damage, injury or death. Read the installation, operating and maintenance instructions thoroughly before installing or servicing this equipment.
For the sake of safety and clarity, the following words used in this manual are defined as follows:
Indicates an imminently hazardous situation which, if not avoided, could
result in serious injury or death.
Indicates a potentially hazardous situation which, if not avoided, could
result in serious injury or death.
Indicates a potentially hazardous situation which, if not avoided, could
result in minor injury, property damage or both.
by an authorized Broaster Company representative.
If there is a power failure, turn POWER
switch OFF. DO NOT attempt to operate
unit during a power failure.
Failure to read and
understand this manual
completely could result in serious injury
or death. Be sure ALL operators read,
understand and have access to this
manual at all times.
Rags or paper containing
cooking oil can catch fire
if exposed to heat. Laundering will not
remove the oil. Dispose of all oil-soiled
papers and rags in a trash container that
is in a ventilated area away from all
cooking equipment or other heat
sources such as direct sunlight.
Use only the unit’s handle
for moving the unit.
Pulling the unit with the hose can cause
damage to the hose or fittings.
Use care when handling
splash causing serious burns.
hot oil. Hot oil could
broaster.com Manual #17143 1/12 Rev 2/14
Page 4

Page 5

TABLE OF CONTENTS
1 – LIMITED WARRANTY ..................................................................................................... 1-1
2 – INTRODUCTION ............................................................................................................. 2-1
3 – OPERATION .................................................................................................................... 3-1
INSTALLING FILTER PAPER ............................................................................................ 3-1
OPERATING INSTRUCTIONS .......................................................................................... 3-2
If Filter Unit fits under fryer for gravity drain ............................................................... 3-2
If Filter Unit does not fit under fryer ............................................................................ 3-3
4 – FILTERING TIPS .............................................................................................................. 4-1
5 – CLEANING INSTRUCTIONS ........................................................................................... 5-1
6 – ELECTRICAL WIRING DIAGRAMS ................................................................................ 6-1
ELECTRICAL CONNECTIONS ......................................................................................... 6-1
FILTER MODEL 765: 120V ............................................................................................... 6-2
FILTER MODEL 765: 220V ............................................................................................... 6-2
7 – TROUBLESHOOTING ..................................................................................................... 7-1
8 – PARTS .............................................................................................................................. 8-1
broaster.com Manual #17143 1/12 Rev: 2/14
i
Page 6

Page 7

1 – LIMITED WARRANTY
Subject to the terms and conditions of this warranty, The Broaster Company (Company) warrants that
all equipment and parts manufactured and sold by the Company and purchased new from an
authorized Broaster Distributor or Export Management Company are free from defects in material and
workmanship for a period of one year from date of installation if installation is made by a qualified
installer in accordance with applicable laws and regulations. Warranty coverage is extended to the
original purchaser only and is void if the equipment is resold. If an authorized Company Distributor or
Export Management Company notifies The Broaster Company Service Department of a warranty claim
during the warranty period, and there is a warranty registration on file with the matching serial number,
the Company will, upon receipt of the claim and clear photographs of the failed part, examine the
information and determine if the claim can be processed without the return of the part. If the claim is
deemed to be valid, the Company will then issue a credit for the price of a new part to the Distributor or
Export Management Company. In some cases, at the sole discretion of the Company, it will be
required that the part be returned before a claim can be processed. A claim will be considered invalid if
there is any evidence that the part had been subjected to abnormal usage, had not been installed,
operated or serviced in accordance with Company operating instructions, or if there is any evidence of
accident, alteration or abuse of the part or the use of unauthorized repair methods. All parts replaced
under this warranty carry only the unexpired term of the warranty.
This warranty covers parts only and does not cover labor charges, transportation charges or other
expenses in the connection with warranty service, which are the obligation of the owner unless
otherwise specified in the original sales contract between the purchaser and the authorized Company
Distributor or Export Management Company from which the equipment is purchased. Please refer to
that contract for coverage as to those charges.
This warranty does not apply to consumable items and supplies such as O-rings, brushes, food
baskets, bulbs, gaskets and lamps.
The foregoing warranty is made in lieu of all other warranties, expressed or implied, and the
Company specifically disclaims any implied warranties of merchantability or fitness for a
particular purpose. The company’s full obligation under this warranty, and the purchaser’s sole
remedy, shall be limited to credit for returned parts as specified above.
IN NO EVENT SHALL THE COMPANY BE LIABLE TO THE ORIGINAL OWNER OR ANY OTHER
PERSON FOR ANY INCIDENTAL, CONSEQUENTIAL OR SPECIAL DAMAGES RESULTING FROM THE
USE OR INABILITY TO USE THE EQUIPMENT COVERED HEREBY, WHETHER ARISING FROM
BREACH OF WARRANTY, STRICT LIABILITY OR OTHERWISE.
The Company reserves the right to change or improve its product in any way without obligation to alter
products previously manufactured.
Used Company equipment or Company equipment not purchased from an authorized source carries
no warranty, expressed or implied.
1–1
broaster.com Manual #17143 1/12 Rev 2/14
Page 8

Page 9

2 – INTRODUCTION
Your new 765 Portable Filter is designed to
filter particles of food from used cooking oil.
These particles, if not routinely removed,
will ultimately ruin shortening.
When filtering, Broaster® Bro-Clean or
Broaster® XL Filtering Compound must be
used as directed, so an adequate supply
must be kept in stock.
You can measurably extend the useful life of
cooking oil by the regular and proper use
of the 765XP Portable FIlter.
When the filter is operated in accordance
with the filtering instructions, it will remove
particles 10 microns and larger from the
shortening.
2–1
broaster.com Manual #17143 1/12 Rev 2/14
Page 10

Page 11
3 – OPERATION
INSTALLING FILTER PAPER
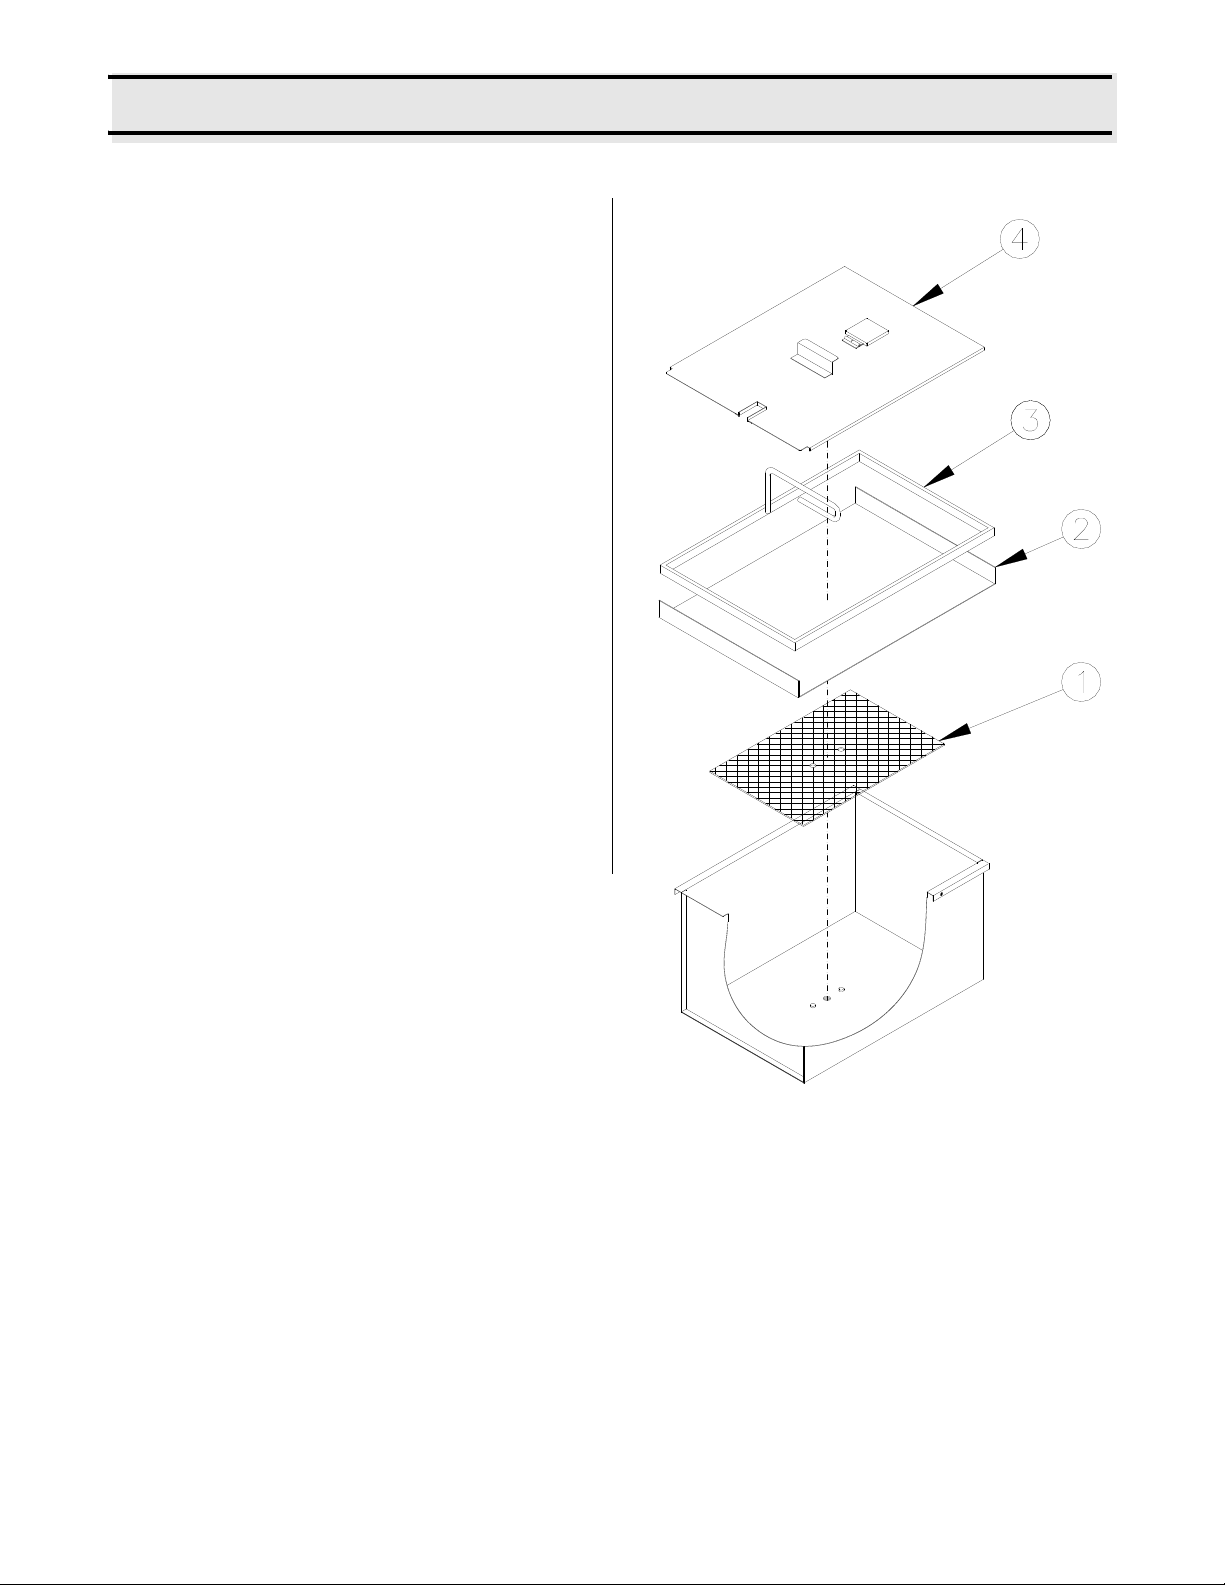
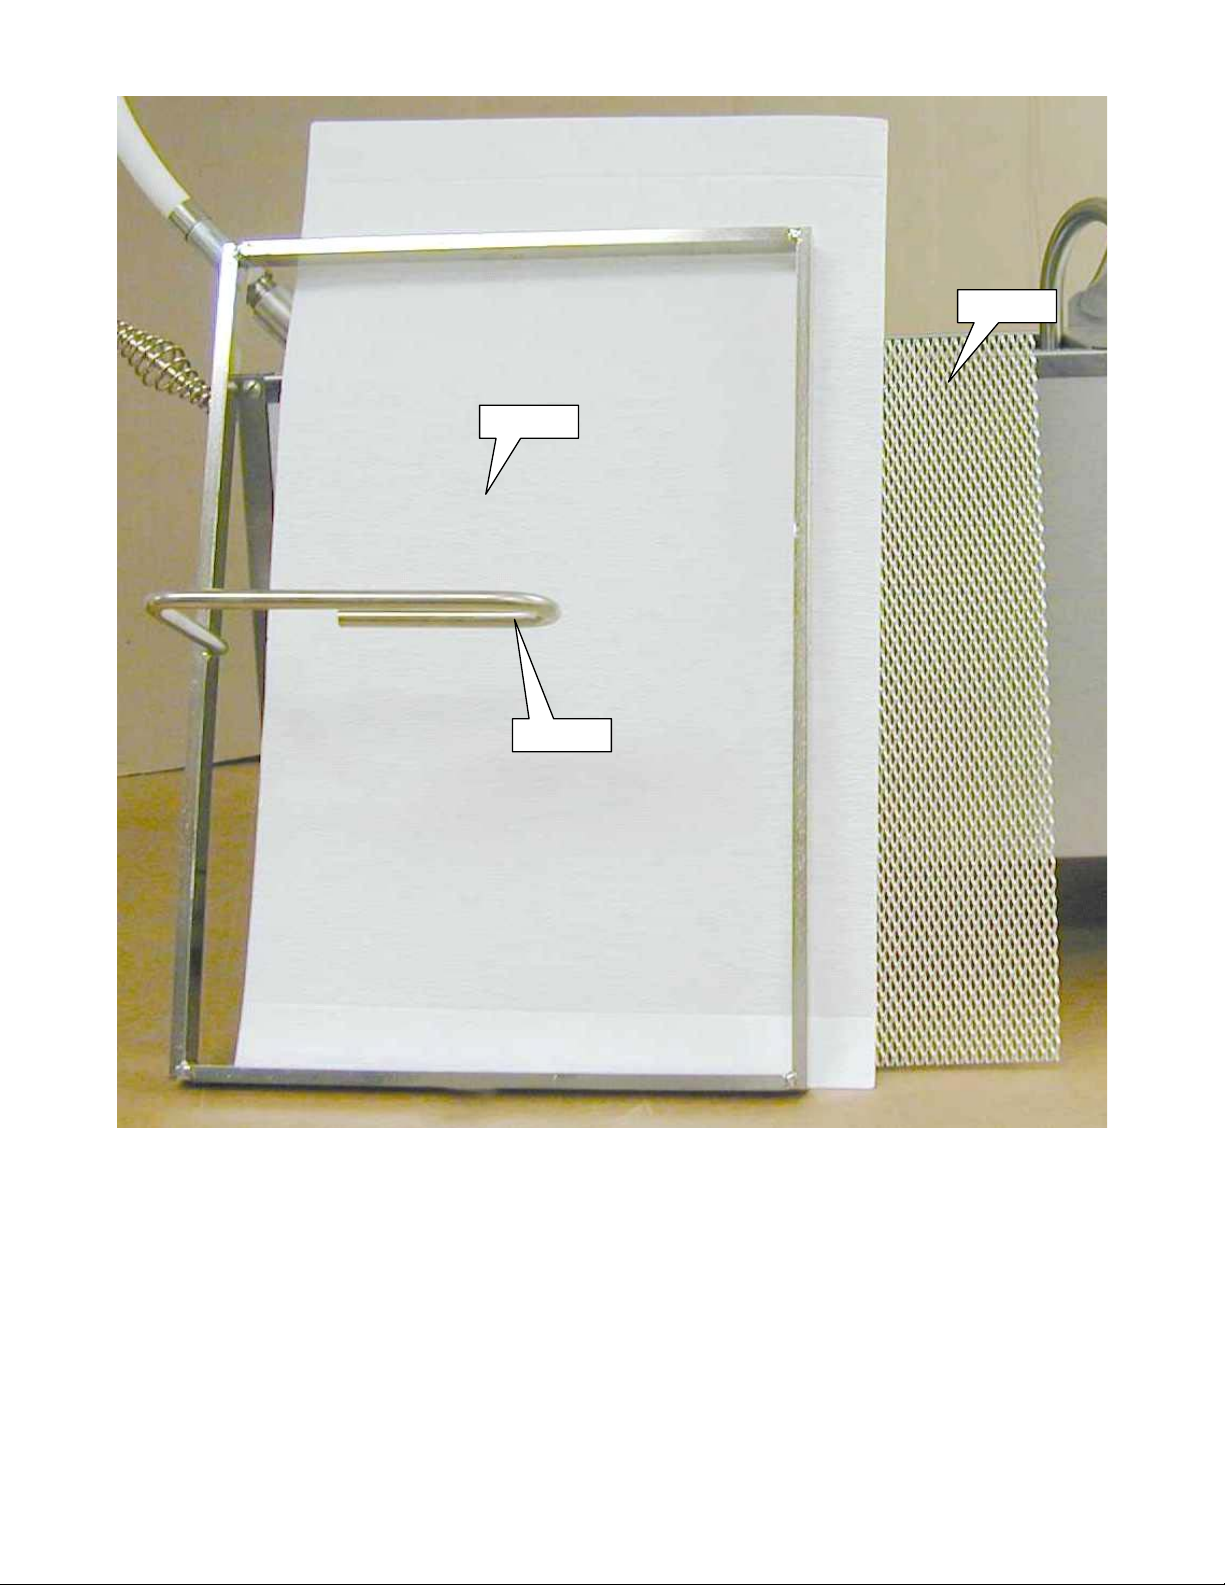
The filter assembly consists of a filter support screen (1), paper filter (2), and filter
hold-down ring (3).
The interior of the filter container must be
clean and free of particles which could keep
the filter paper from seating.
1. Place the filter support screen (1) over
the pins in the bottom of the filter container.
2. Place one paper filter (2) on top of the
filter screen (1) leaving a 1-1/2” tab on
each end.
3. Position the filter hold-down ring (3)
over the paper filter making sure the
tabs are outside the hold-down ring
and push both to the bottom of the
container and seat firmly. Making sure
tabs are outside hold-down ring.
4. Make sure the Filter Cover (4) is in
place.
broaster.com Manual #17143 1/12 Rev: 2/14
3–1
Page 12
OPERATING INSTRUCTIONS
Use care when handling
hot oil. Hot oil could
splash causing serious burns.
Use only the unit’s handle
for moving the unit.
Pulling the unit with the hose can cause
damage to the hose or fittings.
Maximum capacity of the
unit is 29.5 kg (65 lb).
Always allow pump to
completely stop before
reversing motor.
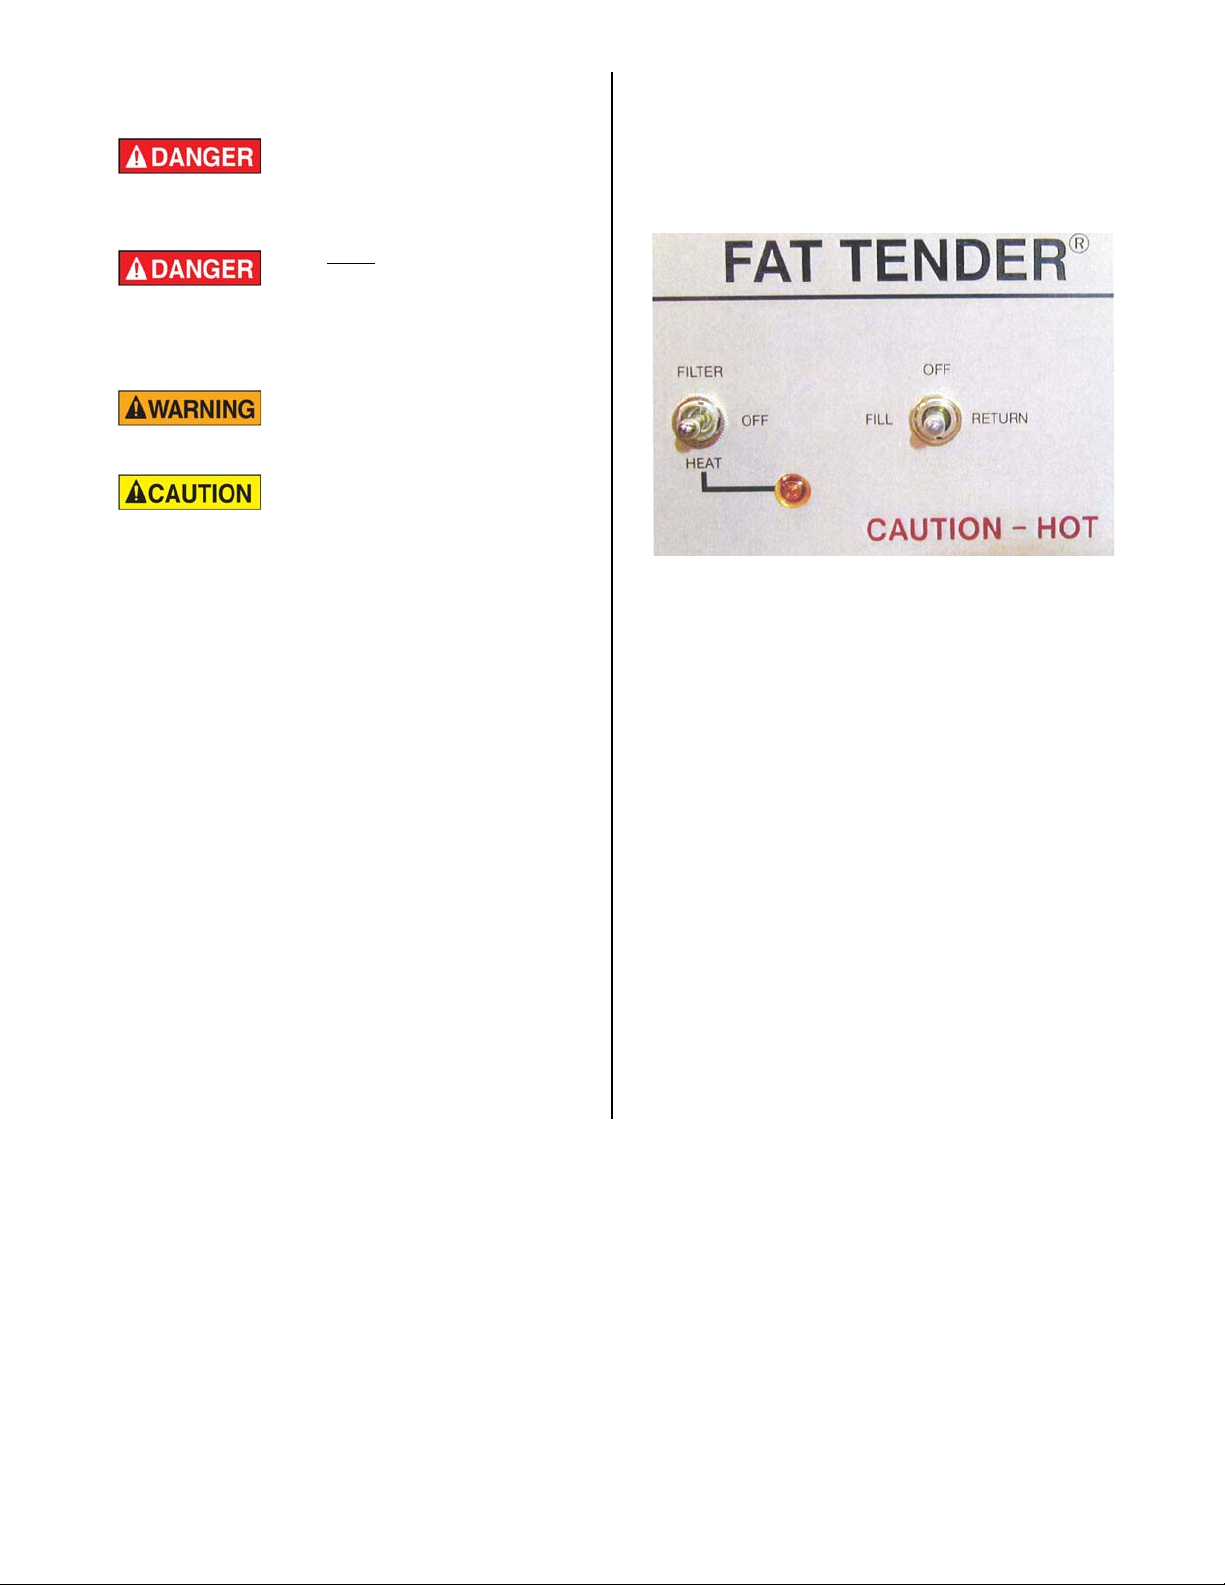
5. If solid shortening is being used, move
the LH switch on the filter unit to HEAT.
It will take 15-20 minutes for the unit to
melt the shortening that has collected
in the filter unit’s lines.
If Filter Unit fits under fryer for gravity
drain
1. Turn fryer off and clean the crumb line
with an appropriate brush.
2. Assemble the filtering components as
shown in See “INSTALLING FILTER
PAPER” on page 3-1. Leave the cover
off.
3. Put 8 ounces of Bro-Clean on the filter
paper and/or stir 5 ounces of XL Filtering Compound into the oil per
20 pounds of shortening.
4. Place the Filter Pan under the fryer
drain valve, set the brake and open the
drain valve. Stir the oil while draining
to remove crumbs.
6. Leave drain valve open and point the
nozzle into the cooking well. Move the
RH switch to RETURN and use clean
oil to rinse the remaining crumbs from
well. Allow it to run up to five minutes
to polish the oil.
7. Close the fryer drain valve and continue to pump the oil from the filter unit
back into the fryer. Turn RH switch to
off after all oil is returned to the cooking well.
8. Check the oil level and replenish any
lost oil before turning the power on to
the fryer.
9. When cool, see See “CLEANING
INSTRUCTIONS” on page 5-1.
broaster.com Manual #17143 1/12 Rev: 2/14
3–2
Page 13

If Filter Unit does not fit under fryer
1. Turn fryer off and clean the crumb line
with an appropriate brush.
2. Assemble the filtering components as
shown in See “INSTALLING FILTER
PAPER” on page 3-1. Reinstall the
cover.
3. Put 8 ounces of Bro-Clean and/or
5 ounces of XL Filtering Compound
per 20 pounds of shortening on the filter paper.
8. Point the nozzle into the fryer and
move the LH switch to FILTER and the
RH switch to RETURN. Use the oil to
rinse the remaining crumbs into the
metal pail. Be sure to shut the filter
off before the pail is overfilled.
9. Remove the pail and close the drain
valve.
10. Remove the cover from the filter unit
and dump the contents of the metal
pail into the filter pan.
4. Engage the filter unit’s brake, place the
tip of the nozzle just under the surface
of the oil and move the LH switch on
the filter unit to FILTER and the RH
switch to FILL.
5. Follow the oil level down, but do not
stick the nozzle into the crumbs in the
bottom of the fryer. Stop the filter unit
when there is about 1-2 inches of oil in
the bottom of the fryer.
6. If solid shortening is being used, move
the LH switch on the filter unit to HEAT.
It will take 15-20 minutes for the unit to
melt the shortening that has collected
in the filter unit’s lines.
7. Place a metal pail under the drain
valve of the fryer and open the drain
valve.
11. Replace the cover and point the nozzle
through the hole into the filter pan.
Move the RH switch to RETURN and
let the pump run for at least one minute to clear dirty oil from hose and
lines. Allow it to run up to five minutes
to polish the oil. Move the RH switch
to OFF.
12. Point the nozzle into the fryer. Move
the RH switch back to RETURN, pump
the oil back into the fryer.
13. Check the oil level and replenish any
lost oil before turning the power on to
the fryer.
14. When cool, see See “CLEANING
INSTRUCTIONS” on page 5-1.
broaster.com Manual #17143 1/12 Rev: 2/14
3–3
Page 14

Page 15

4 – FILTERING TIPS
1. Filter all shortening at least once per
day, or after cooking 0.68 kg (1.5 lb) of
product per pound of fryer shortening.
2. Use a new filter paper for each filtering
cycle of 11.36 kg (25 lb) to 29.5 kg
(65 lb) of shortening, or if filter has
been allowed to cool. If fryers contain
less than 11.36 kg (25 lb) shortening,
add Bro-Clean Compound as each
fryer is successively filtered until the
total shortening filtered with one filter
paper is 29.5 kg (65 lb) then use a new
filter paper.
3. If you use solid shortening, always
turn heater on 15-20 minutes before
operating the motor to melt the shortening in the check valves and pump
piping.
4. For maximum filtration, recycle your
shortening. After filling the unit, place
the nozzle into the unit and move
switch to RETURN.
5. Let the Portable FIlter run for 5 minutes. Recycling will add life to the
shortening.
While the shortening is still in liquid
form, it is possible to drain the bottom
filter line and the filter hose and nozzle.
This can be done by tipping the Portable Filter on end (pump and motor up
so lines can drain).
broaster.com Manual #17143 1/12 Rev: 2/14
4–1
Page 16

Page 17
5 – CLEANING INSTRUCTIONS
Be sure filter has cooled
down before attempting
to clean.
Never use soap or water
for cleaning the container.
Water will damage the pump and it will
have to be replaced.
Rags or paper containing
cooking oil can catch fire
if exposed to heat. Laundering will not
remove the oil. Dispose of all oil-soiled
papers and rags in a trash container that
is in a ventilated area away from all
cooking equipment or other heat
sources such as direct sunlight.
Use only the unit’s handle
for moving the unit.
Pulling the unit with the hose can cause
damage to the hose or fittings.
1. Remove the hold-down ring and wipe
clean.
2. Remove and discard the filter paper.
3. Remove the filter support screen and
wipe clean.
4. Wipe out the container. Wipe off exterior surfaces of the filter and cover.
5. To prepare the filter for the next use,
see See “INSTALLING FILTER PAPER”
on page 3-1.
broaster.com Manual #17143 1/12 Rev: 2/14
5–1
Page 18

Page 19
6 – ELECTRICAL WIRING DIAGRAMS
ELECTRICAL CONNECTIONS
Use input voltage as shown on rating plate.
Fat Tender current rating is 5 Amps @ 120V,
3 Amps @220V. Use a circuit with a fuse rating of at least 15 Amps.
For your safety, the wall
receptacle must be of the
grounding type, properly connected. This
type will accept the 3-prong plug
supplied with the Fat Tender. If a plug
adapter must be used, be sure that its
ground wire is grounded.
The Portable Filter can now be operated
with maximum safety because the safety
wire in the power cord is connected to a
true ground.
broaster.com Manual #17143 1/12 Rev: 2/14
6–1
Page 20
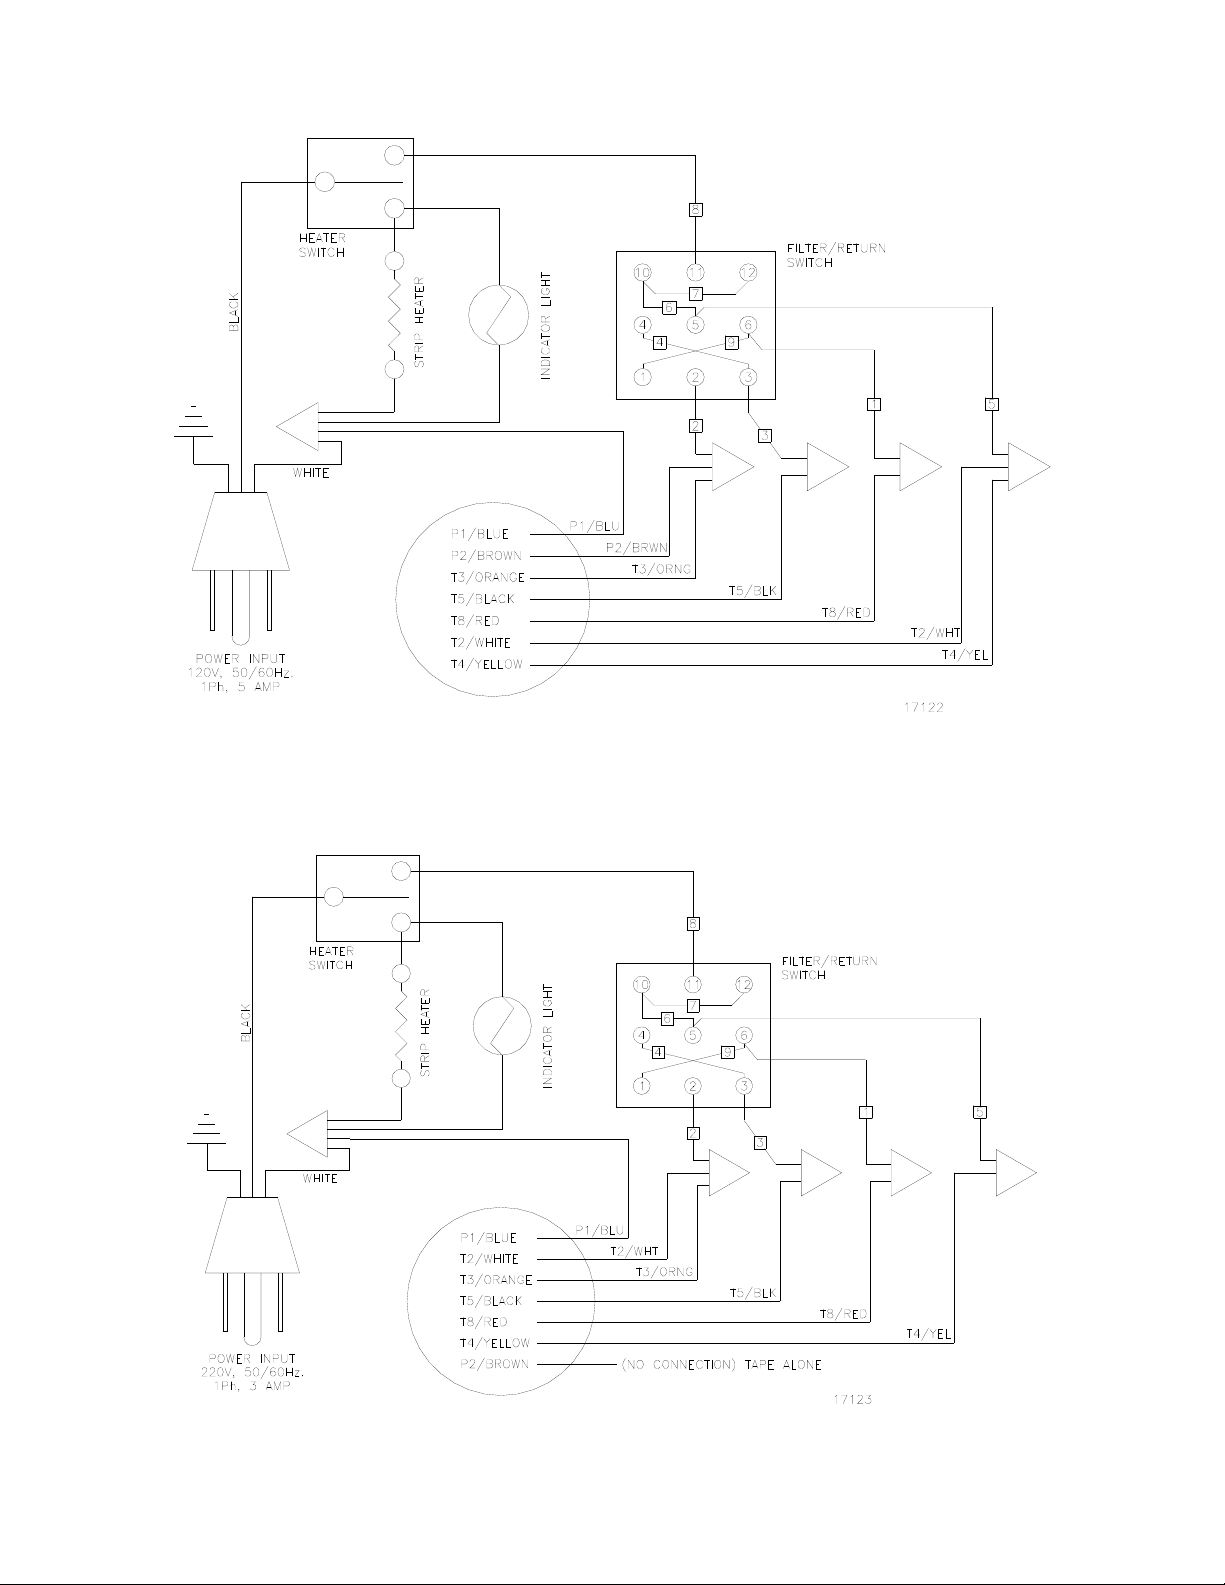
FILTER MODEL 765: 120V
FILTER MODEL 765: 220V
broaster.com Manual #17143 1/12 Rev: 2/14
6–2
Page 21
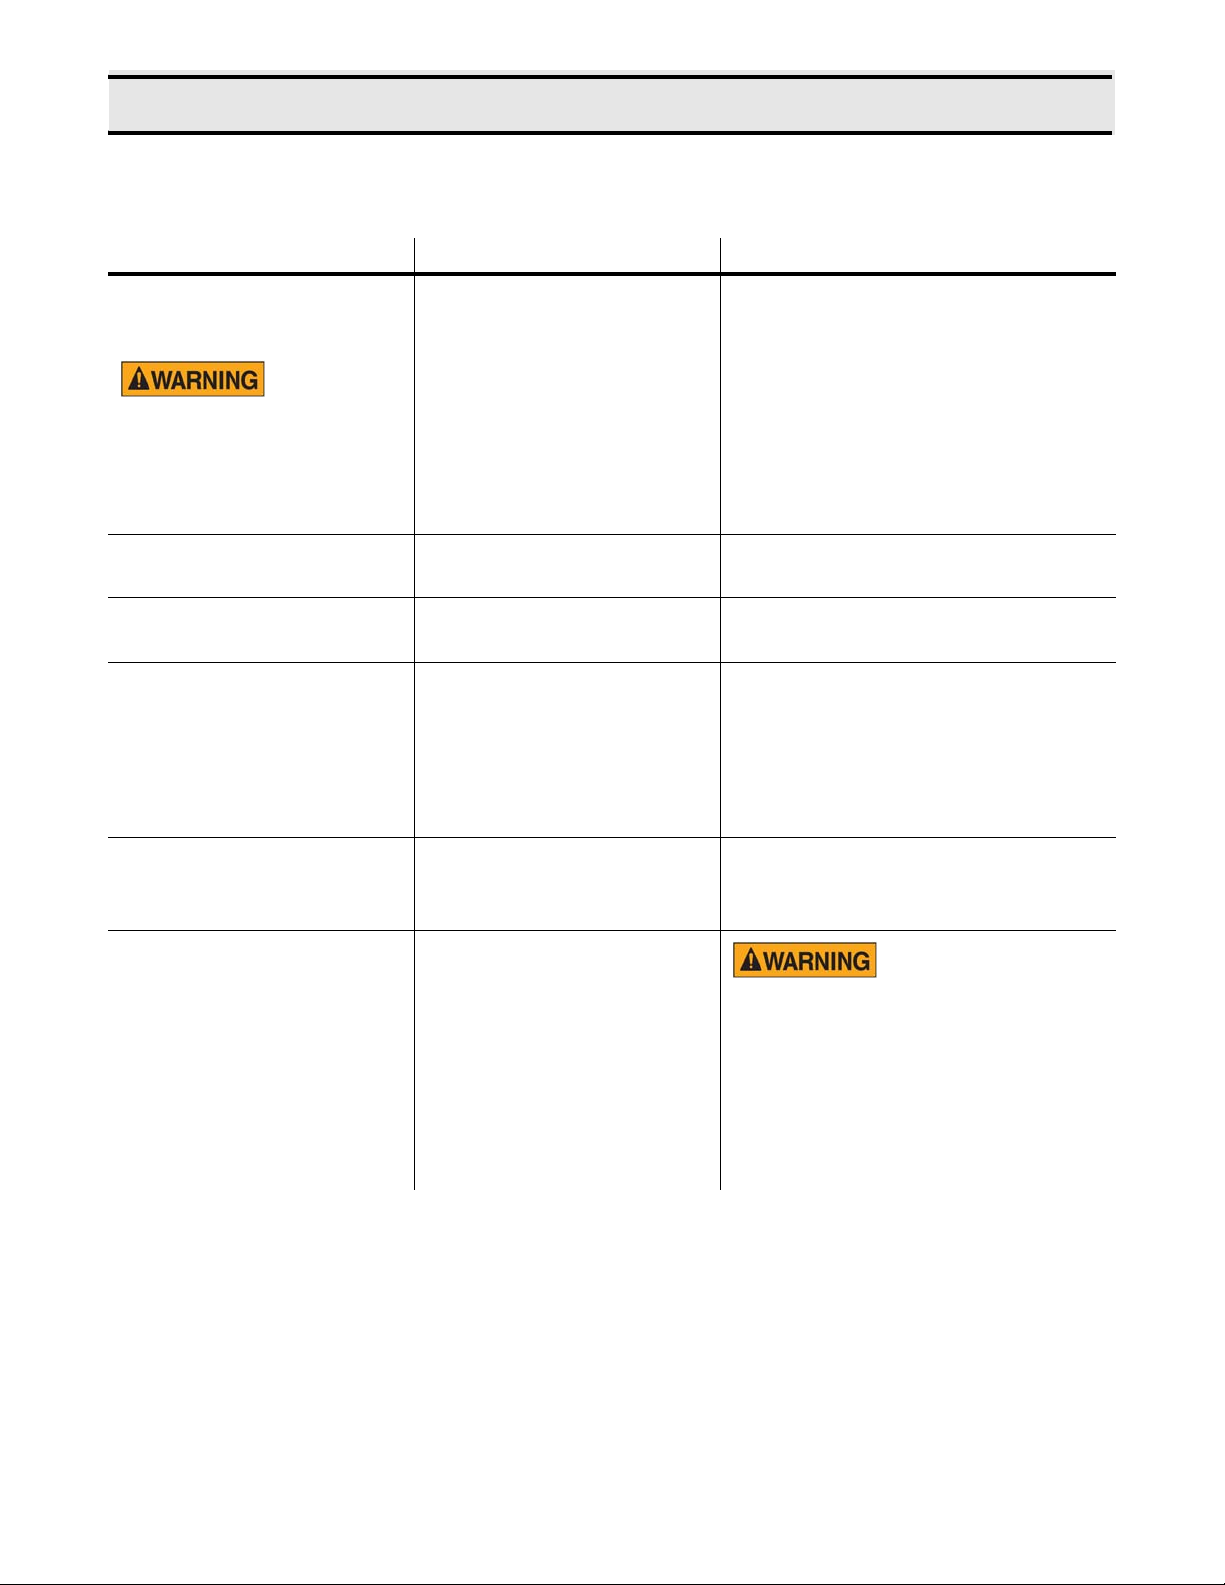
7 – TROUBLESHOOTING
COMPLAINT CAUSE REMEDY
Motor will not start
Turn filter/
return
switch to OFF position to
avoid splashing of oil when
motor protector reset
button is pushed.
Motor hums but will not
start
Motor starts but will not
pump in either direction
Motor starts but will not
pump or stops pumping in
“Fill” cycle.
Motor will not pump or
stops pump during
“Return” cycle.
1. Overload tripped
2. Power not connected.
3. Open or faulty wall
fuse or circuit breaker
1. Solidified shortening in
pump
1. Solidified shortening in
piping or container.
1. Plugged nozzle
screen.
2. Check valve in return
line not closed.
1. Check valve in fill line
not closed.
1. Wait for overload to cool. Push
“Reset” button to start again. If
motor does not start check all
causes as outlined below.
2. Connect power to filter
3. Check wall fuse or circuit
breaker
1. Turn heater on for 20 minutes,
then re-start motor.
1. Turn heater on for 20 minutes.
1. Reverse motor (“Return” cycle)
or remove debris from nozzle
screen.
2. Replace check valve.
1. Replace check valve.
Motor Starts but stops
pumping when oil is level
with top of hold-down
ring (Approx.1 inch of oil
in bottom).
1. Improperly installed filter: Filter “tab” or
crumbs under filter or
hold-down ring.
7–1
broaster.com Manual #17143 1/12 Rev: 2/14
Hold-down handle
will be hot.
1. Simultaneously push down and
slightly twist hold-down handle
while in “Return” cycle. See
“CLEANING INSTRUCTIONS”
on page 5-1 and “INSTALLING
FILTER PAPER” on page 3-1.
Page 22

Page 23
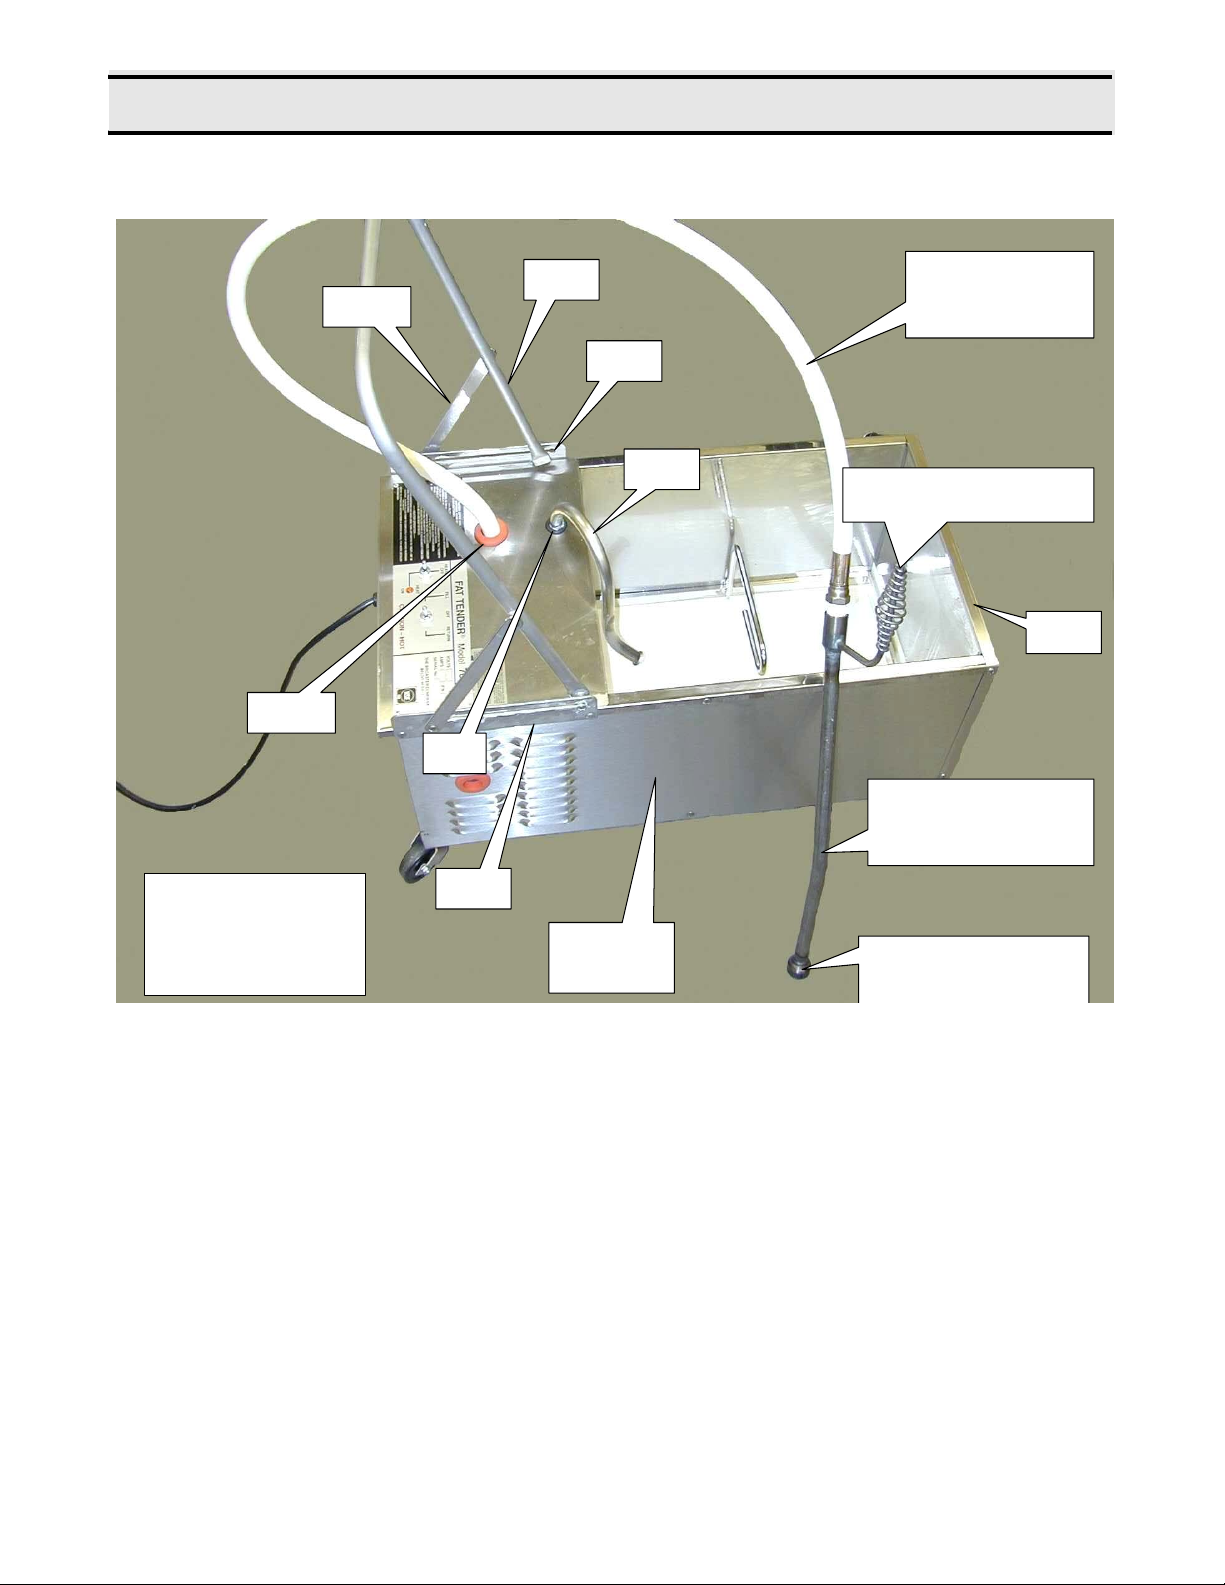
8 – PARTS
16708 – HOSE & NOZZLE ASSY
EFF: 765H70018
10862
10819
10827
10846 (2)
10049 (2)
10825
SIDE PANELS
10836 – RH
10834 – LH
10844
08409 – SCREEN*
08410 – RETAINING RING*
16706 – NOZZLE*
CAN ONLY BE CONNECTED
TO HOSE #16704
94947 – HOSE
16704 – HOSE *
EFF: 765H70018
NOTE:
ITEMS WITH AN * AFTER
THEM ARE INCLUDED WITH
HOSE & NOZZLE ASSEMBLY
16708
10829
8–1
broaster.com Manual #17143 1/12 Rev: 2/14
Page 24
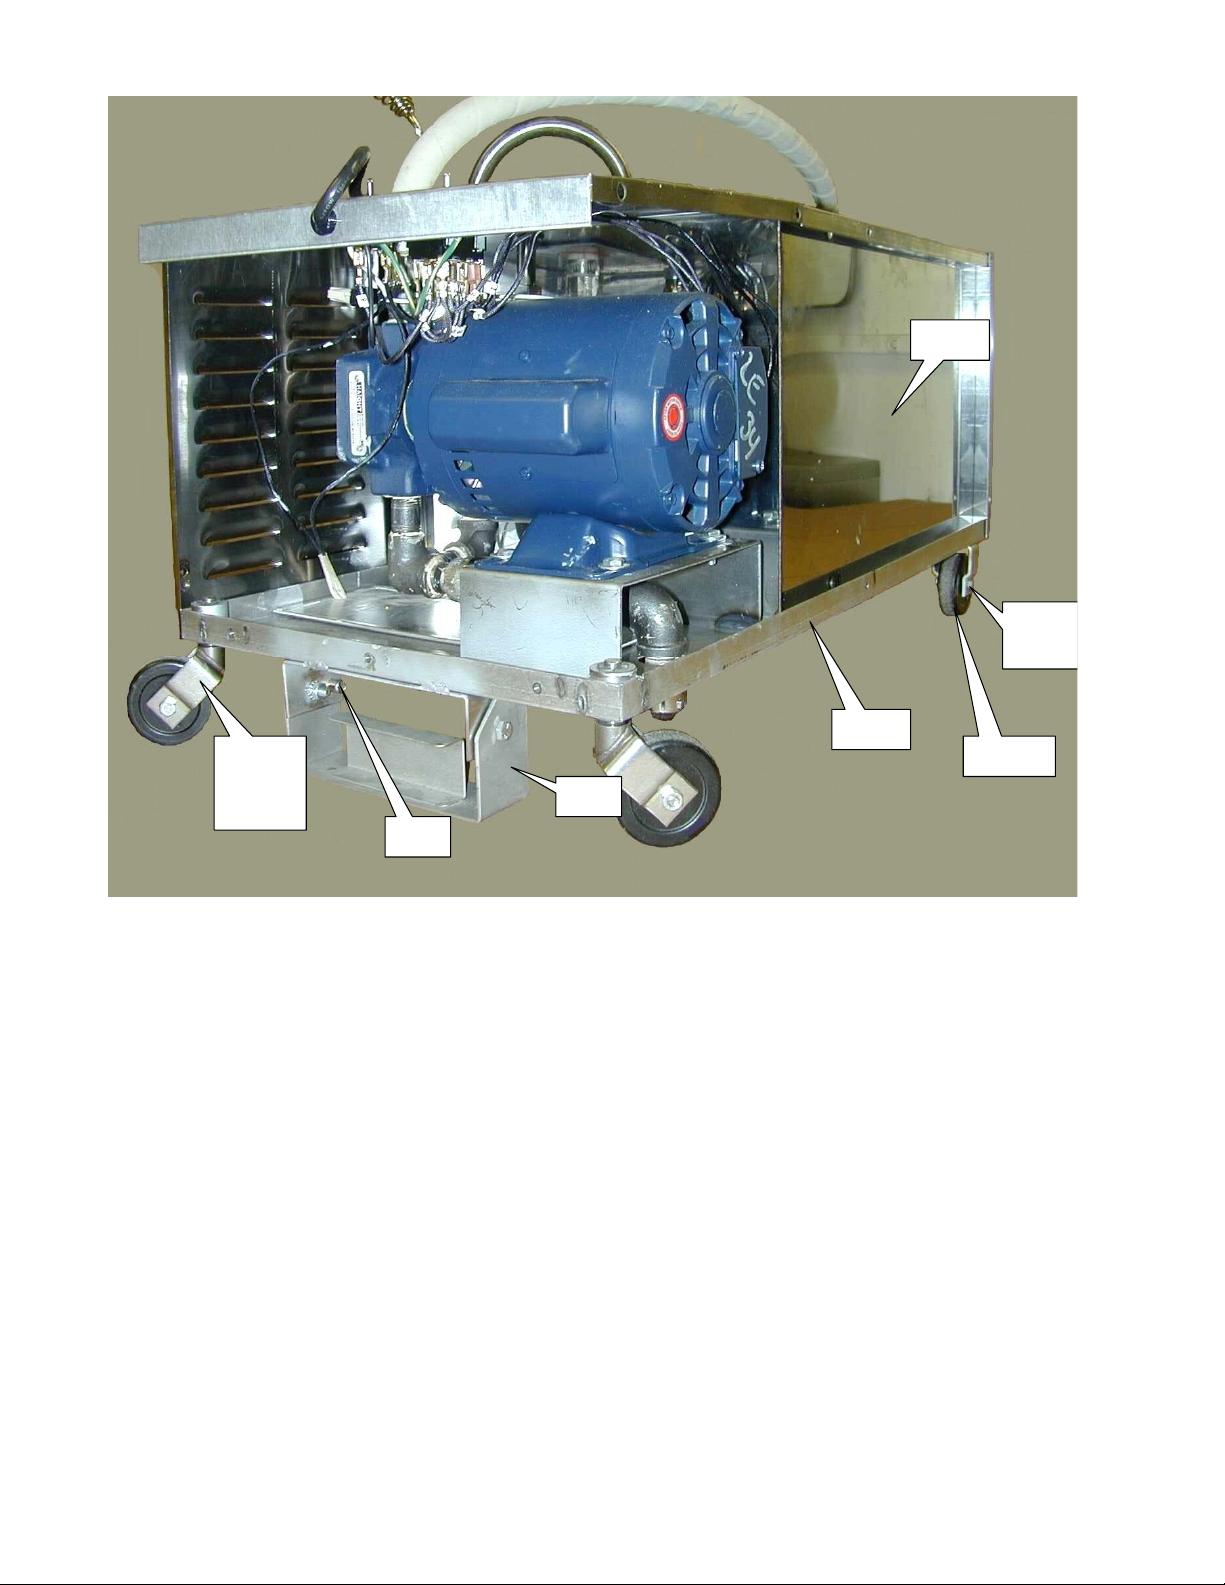
)
)
07572 (2)
10858 (2)
10853 (2)
10838
09205 (4
09206 (4
10848
07693
10841
09204 (4)
broaster.com Manual #17143 1/12 Rev: 2/14
8–2
Page 25
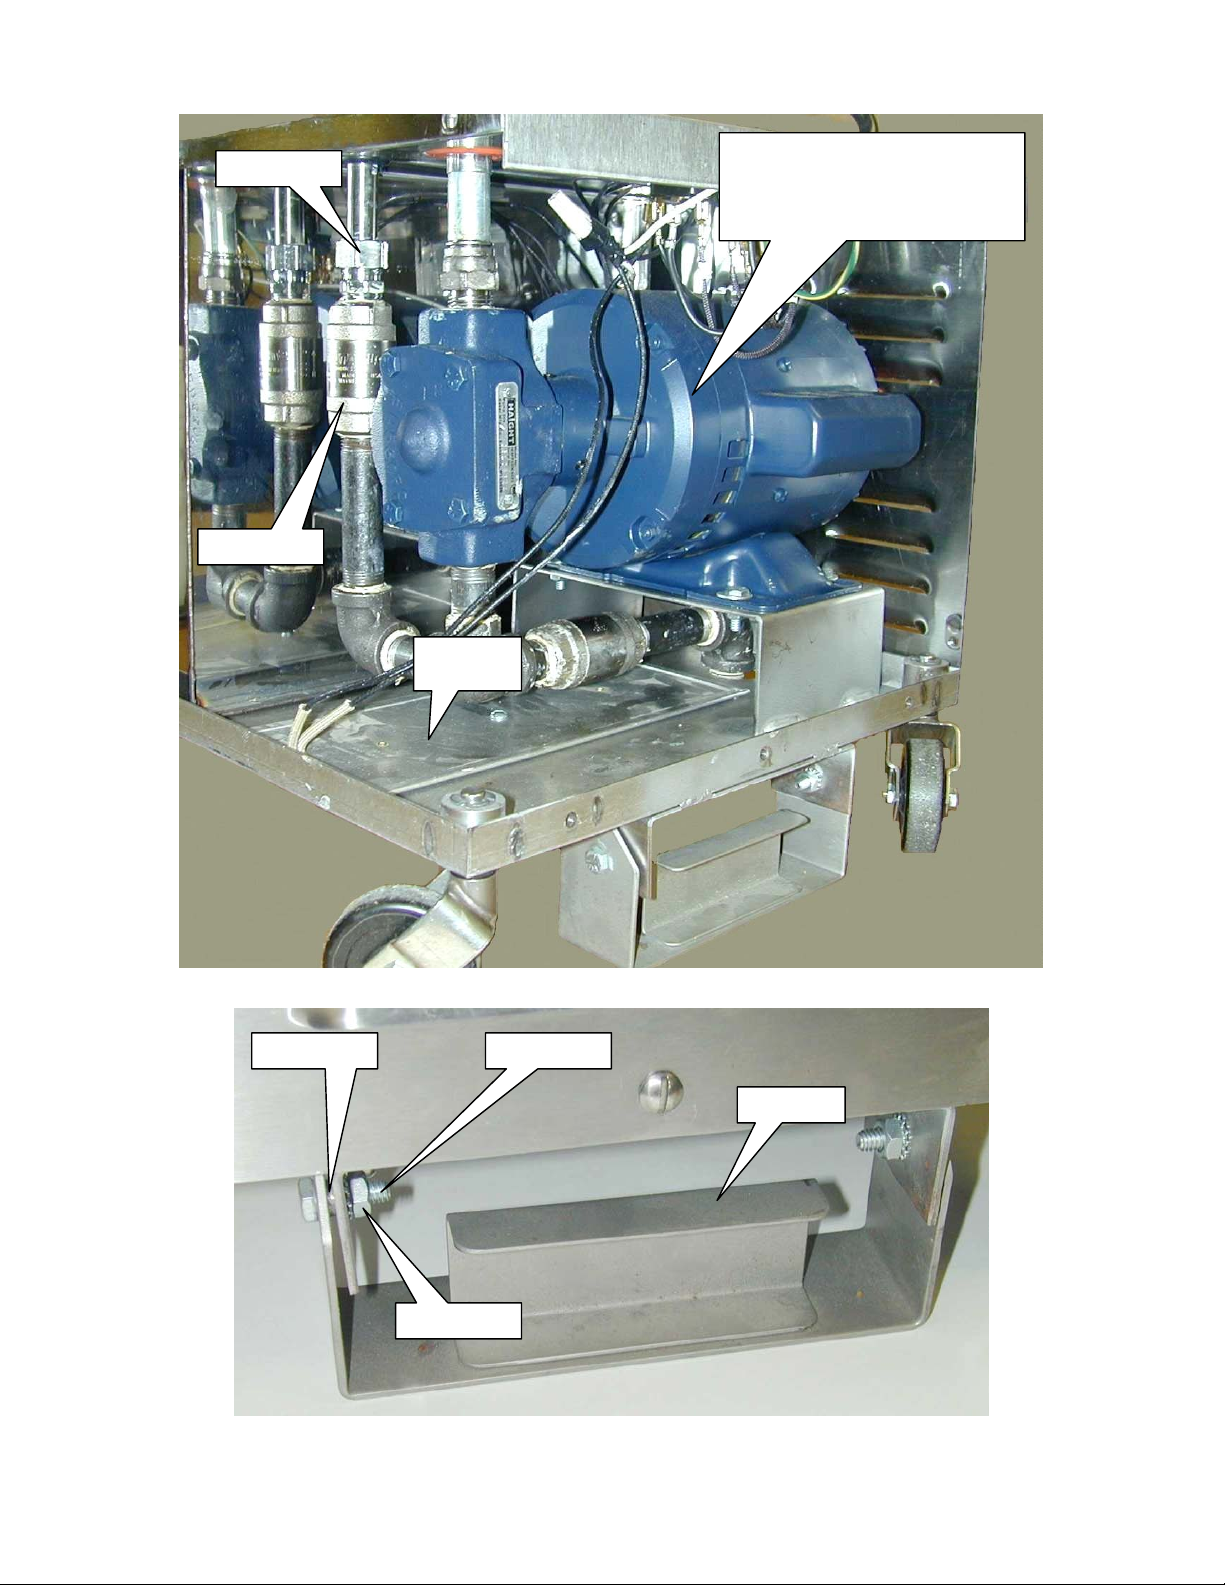
11211 (2)
10864
10800 – PUMP & MOTOR
09273 – PUMP
10883 - MOTOR
)
)
10854 (2) 01336 (2
10841
00552 (2
8–3
broaster.com Manual #17143 1/12 Rev: 2/14
Page 26
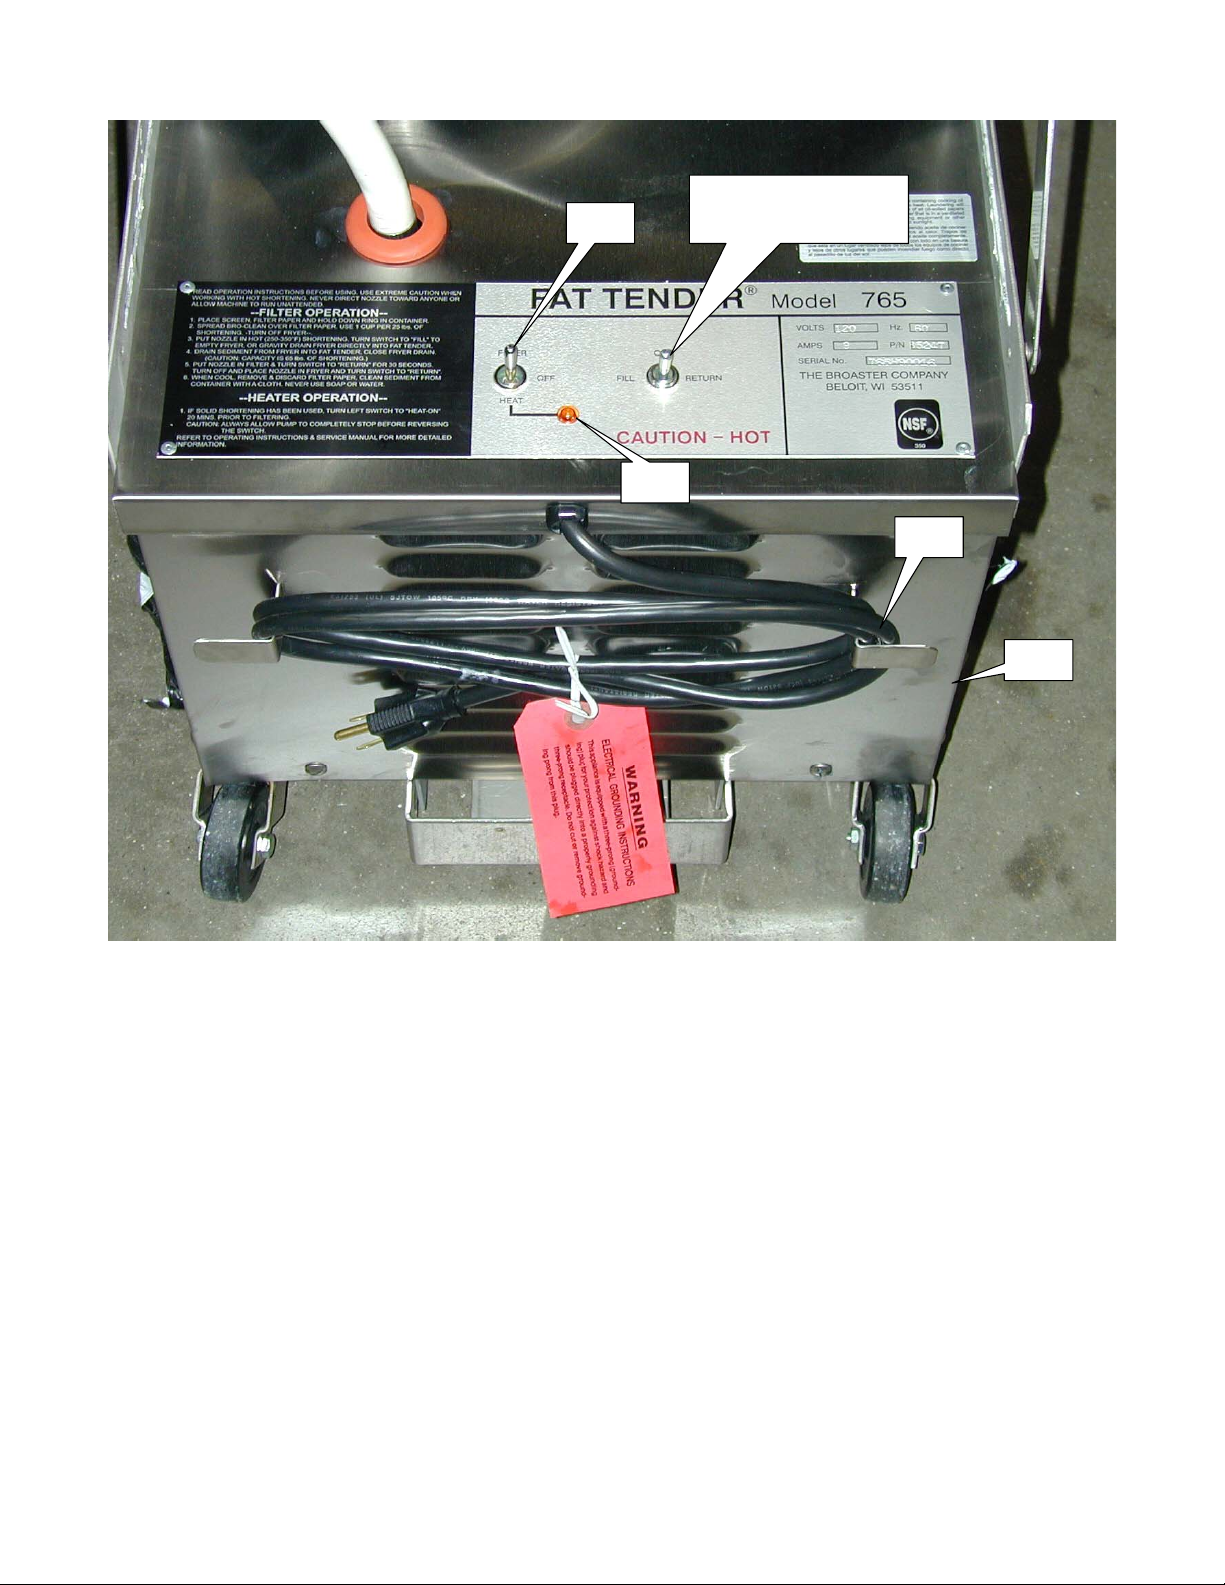
13457
11696 – EFF. 765E880087
11766
10354
70108
10830
broaster.com Manual #17143 1/12 Rev: 2/14
8–4
Page 27
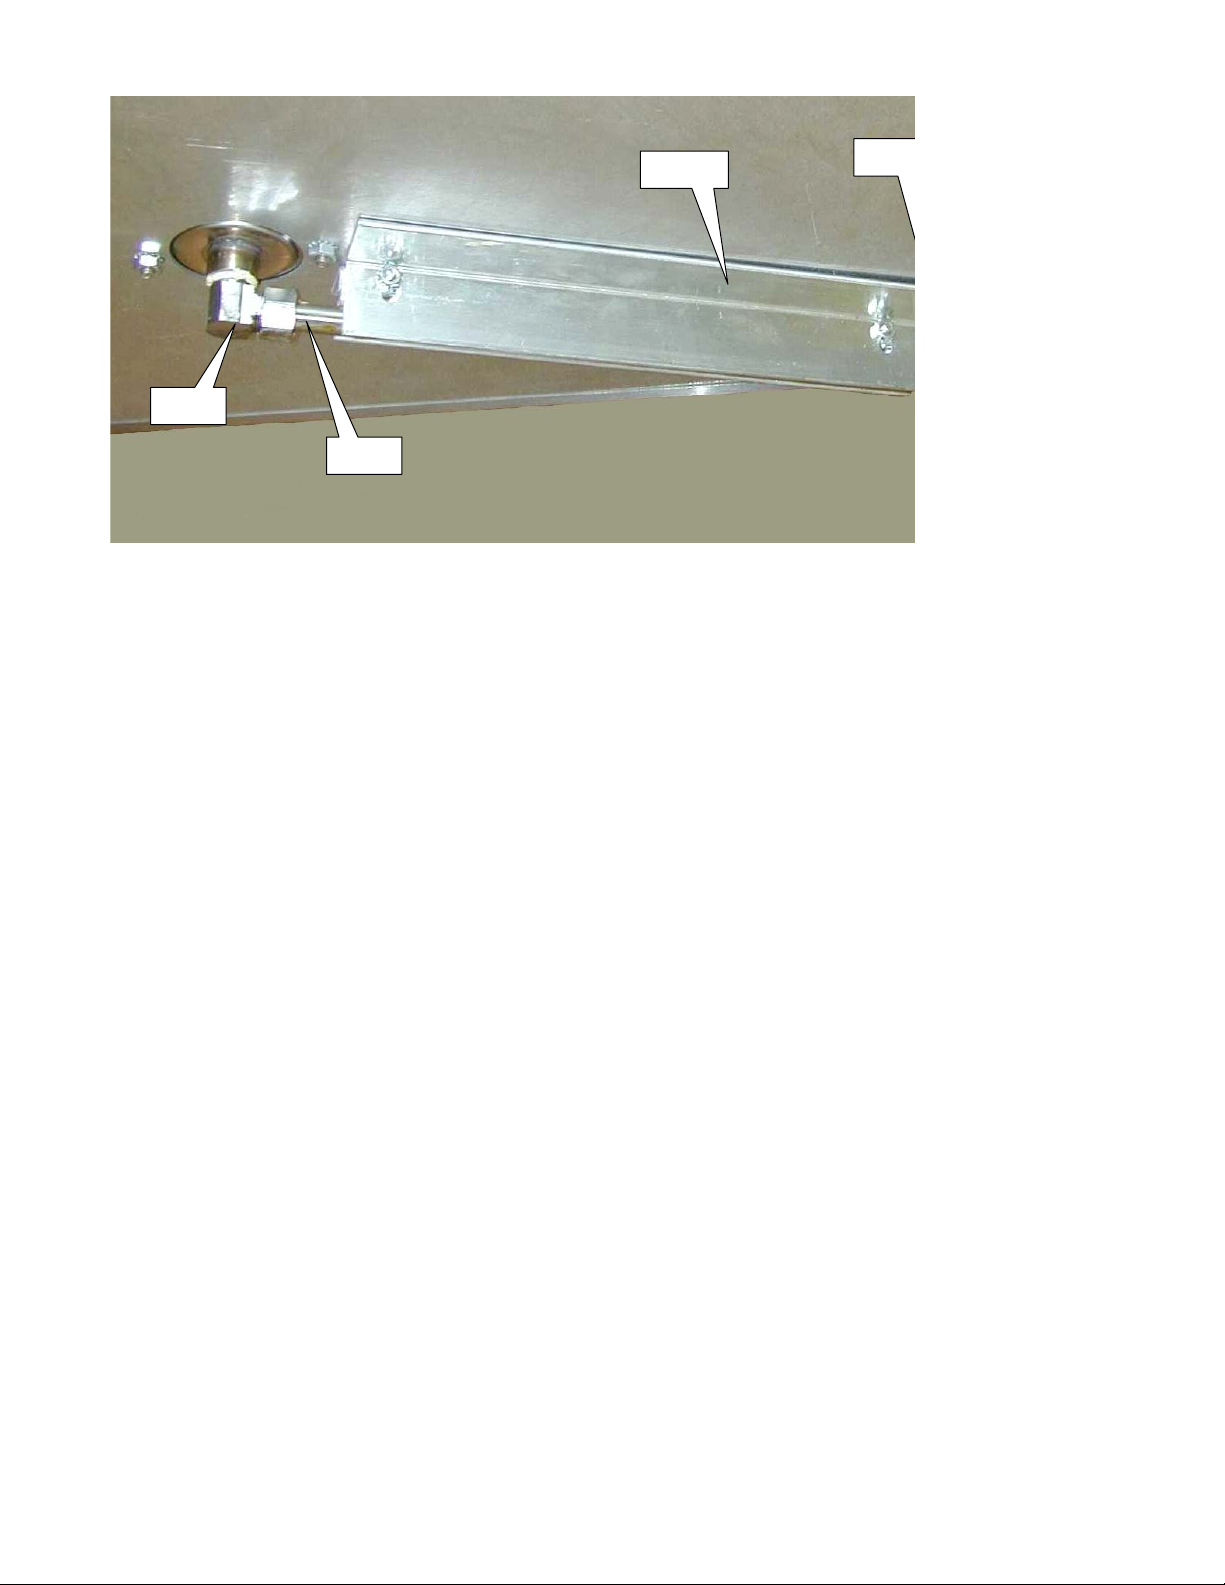
02053
10828
10917
10818
broaster.com Manual #17143 1/12 Rev: 2/14
8–5
Page 28
broaster.com Manual #17143 1/12 Rev: 2/14
8–6
Page 29

Page 30

The Broaster Company
2855 Cranston Road, Beloit, WI 53511-3991
608/365-0193
broaster.com
 Loading...