

Instruction Book - BWD600
the Sommelier
™
2

2 3
BREVILLE
RECOMMENDS
SAFETY FIRST
At Breville we are very safety
conscious. We design and
manufacture consumer
products with the safety of you,
our valued customer, foremost
in mind. In addition we ask
that you exercise a degree of
care when using any electrical
appliance and adhere to the
following precautions.
IMPORTANT
SAFEGUARDS
READ ALL
INSTRUCTIONS BEFORE
USE AND SAVE FOR
FUTURE REFERENCE
• Carefully read all
instructions before
operating the appliance and
save for future reference.
• Remove and safely discard
any packaging material,
plastic power plug cover,
and any removable labels
before using appliance.
• If the appliance is to be:
−left unattended
−cleaned
−moved
−assembled; or
−stored
unplug the unit from the
power outlet.
• Always operate the
appliance on a stable and
heat resistant surface.
• Always operate the
appliance in a clean, free
of dust, non-corrosive, and
non-toxic gas environment.
Make sure the bottom of
the appliance is properly
ventilated during operation.
• Do not place the appliance
on or near a hot gas burner,
electric element or where it
could touch a heated oven.
• Ensure the unit has at
least 4 inches (10cm) of
clearance from all side
panels.
• Some surfaces may be
hot, use caution when
touching or lifting the unit
or accessories.
• Do not use harsh or
abrasive materials when
cleaning any part of this
appliance such as steel
wool or scoring pads.
• Only use power cord and
accessories sold by Breville.
• Do not fill the glass carafe
above MAX line.
• Do not place any object on
top of the appliance.
• This appliance is mostly
designed to oxygenate wine.
In some cases, it can also be
used with liquor.
• The glass carafe is not
dishwasher safe.
• Do not use the glass carafe
if it is broken.
IMPORTANT
SAFEGUARDS FOR
ALL ELECTRICAL
APPLIANCES
• Fully unwind cord before
use.
• To protect against fire,
electric shock, and injury
to persons, do not immerse
cord, plug or appliance in
water or any other liquid.
• Do not let the cord hang
over the edge of a bench or
table, touch hot surfaces, or
become knotted.
• Do not leave the appliance
unattended when in use.
• Children should be
supervised to ensure
they do not play with the
appliance.
2 Breville recommends safety first
6 Components
7 Assembly
7 Functions
10 Oxygenating Time
Recommendation
11 Tips
12 Care & Cleaning
13 Troubleshooting
14 French
Contents

4 5
• This appliance is not
intended for use by persons
(including children) with
reduced physical, sensory
or mental capabilities, or
lack of experience and
knowledge, unless they have
been given supervision or
instruction concerning use
of the appliance by a person
responsible for their safety.
• Keep the appliance and its
cord out of reach of children
aged less than 8 years.
• Cleaning and user
maintenance shall not be
made by children unless
they are older than 8 and
supervised.
• This appliance is
recommended for
household use only. Do
not use this appliance for
anything other than its
intended use. Do not use in
moving vehicles or boats.
• It is recommended to
regularly inspect the
appliance. Do not use the
appliance if the power
supply cord, power plug,
or appliance becomes
damaged in anyway.
Immediately stop using
the unit and call Breville
Consumer Support.
• Close supervision is
necessary when the
appliance is used by or
near children.
SHORT CORD
INSTRUCTIONS
Your Breville appliance is
fitted with a short power
cord to reduce the risk of
personal injury or property
damage resulting from
pulling, tripping or becoming
entangled with a longer cord.
Longer detachable power
cords or extension cords are
available and may be used
if care is exercised. If an
extension cord is used,
(1) the marked electrical
rating of the cord set or
extension cord should be at
least as great as the electrical
rating of the appliance,
(2) the cord should be
arranged so that it will not
drape over the counter-top
or table where it can be
pulled on by children or
tripped over unintentionally
and (3) the extension cord
must include a 3-prong
grounding plug.
NOTE
This appliance has a three
wire grounded plug. To
reduce the risk of electric
shock, this plug will fit in
a polarized outlet only
one way. If the plug does
not fit properly into the
outlet, contact a qualified
electrician.
Do not use an adaptor or
modify the plug in any
way. Do not connect the
appliance to an external
switch or device (such as
a timer, monitor or remote
circuit) that can be switched
on and off.
CALIFORNIA
PROPOSITION 65:
(Applicable to California
residents only).
This product contains
chemicals known to the
State of California to cause
cancer, birth defects or other
reproductive harm.
FOR HOUSEHOLD USE ONLY
SAVE THESE INSTRUCTIONS

6 7
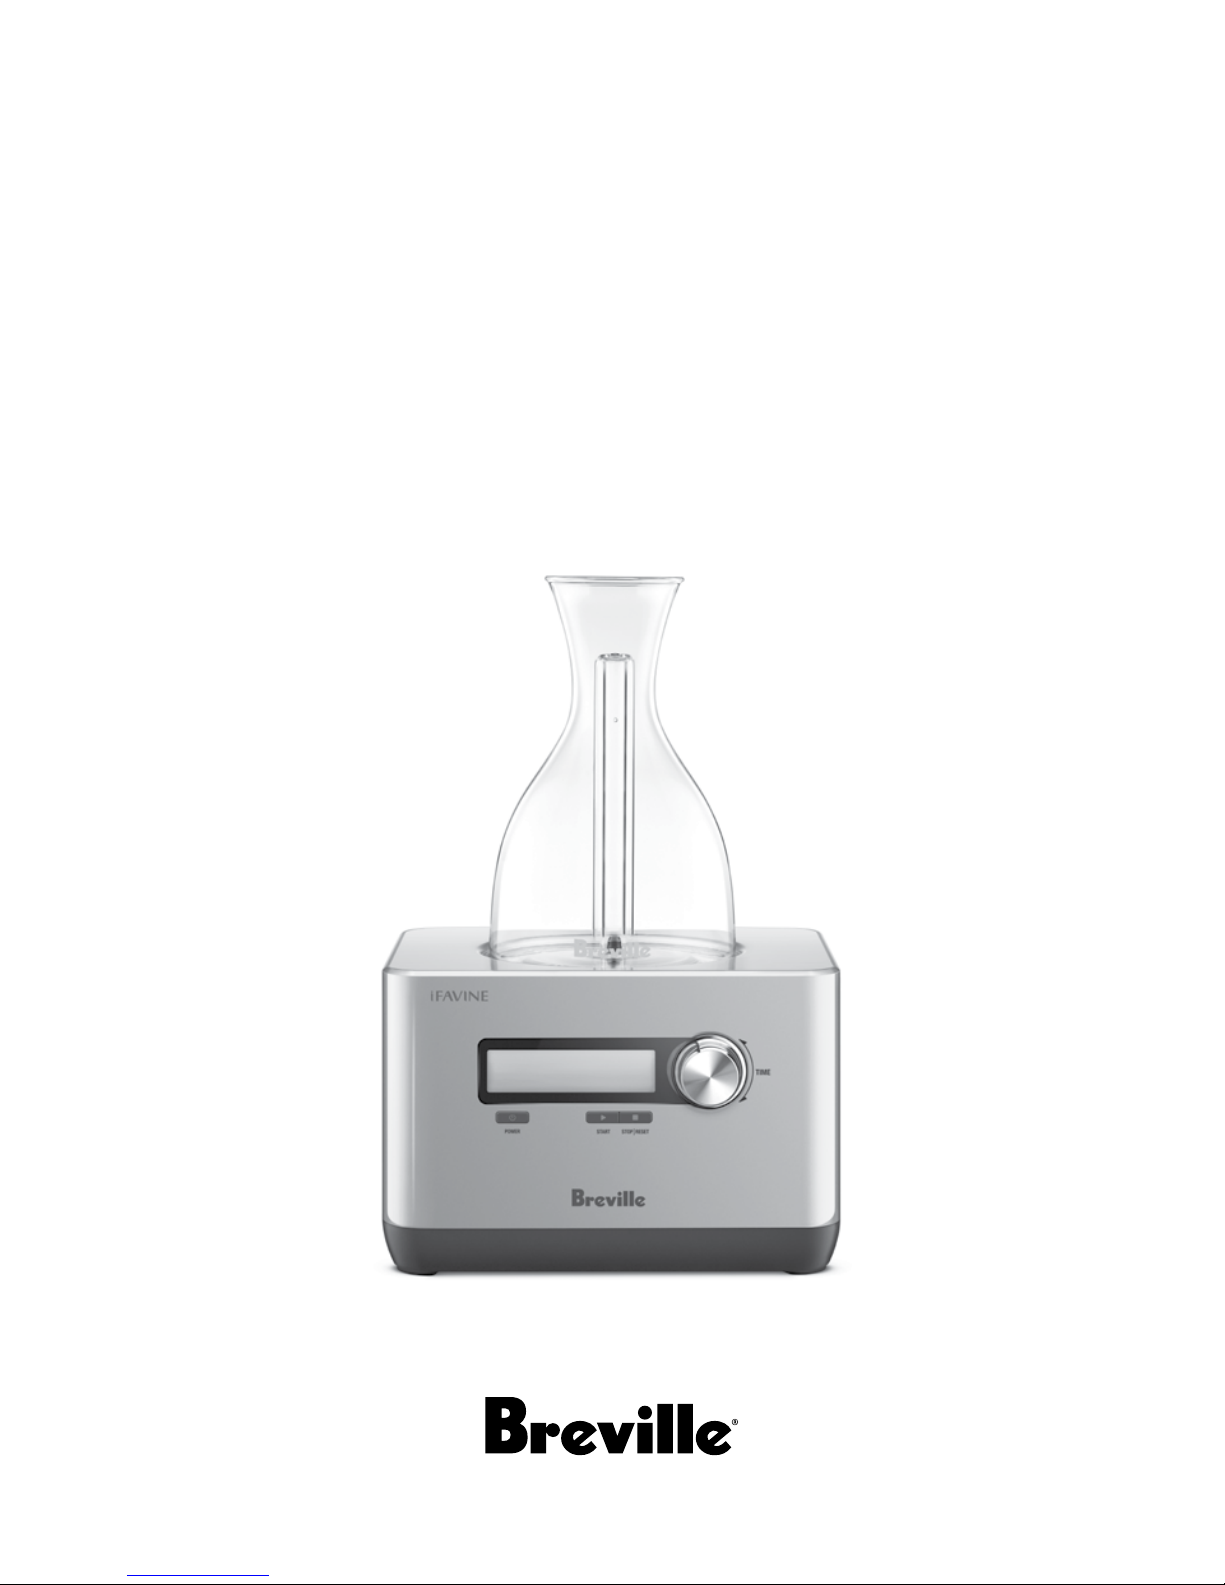
Components
A. 750ml / 25fl.oz glass carafe
B. Main unit
C. LCD display
D. TIME dial
E. POWER button
F. STOP / RESET button
G. START button
H. Air filter mesh (underneath)
I. Power cord (not shown)
J. Spare air filter mesh (not shown)
A
B
C
E
H
D
F
G
Assembly
BEFORE FIRST USE
Unpack all parts and accessories before
removing and safely discarding all packaging
material and promotional labels. Ensure the
power cord is unplugged from the power outlet.
Wipe the exterior housing with a soft, damp
cloth. Do not use abrasive cleansers, pads or
cloths which can scratch the surface. Rinse and
dry thoroughly.
Rinse the glass carafe with warm water and let
dry.
CAUTION
The glass carafe is fragile. Use caution
especially for the thin part that connects carafe
bottom and central pole.
Functions
FIRST USE
1. Fill the glass carafe with wine above MIN
line and below MAX line.
NOTE
The carafe is not calibrated for commercial or
scientific use. Height may vary +/- 0.08 inch
(2mm).
2. Place the carafe on the main unit.
3. Press POWER button to turn the
So
2
mmelier on.
4. The LCD will prompt you to set time.
Traditional
decanting time
(Hrs / Mins)
The So2mmelier
oxygenating time
(Mins / Secs)
5. Rotate TIME dial to set the time.
Oxygenating time is the actual duration for
the So
2
mmelier. You can refer to decanting
time if you want to compare with traditional
decanting time recommendation.
NOTE
See ‘Oxygenating time recommendation’ on
page 9 or download 'iFAVINE mini' app
from iOS App Store or Google Play Store
for recommended duration.

8 9
6. Press START to start oxygenating process.
START
STOP RESET
7. ‘READY IN’ label next to oxygenating time
will flash and the timer will start counting
down toward 0.
NOTE
During oxygenating process, decanting time
will stay static.
NOTE
You can pause the process by pressing
STOP/RESET button. Resume by pressing
START button, or reset the timer by pressing
STOP/RESET button once again.
8. When the process is done, the LCD will
show ‘READY’. Your wine is ready now.
NOTE
The So2mmelier will turn off when it has not
been used for 30 minutes.
REPEATING THE PREVIOUS CYCLE
1. Press START button to reset the time to
the previous oxygenating cycle.
2. Press START button once again to start
the process.
RESET
Press STOP/RESET button to set the timer
to default.
OXYGENATING TIME
RECOMMENDATION
COUNTRY VARIETIES
RECOMMENDED TIME (MINS
:
SECS*)
France
Cabernet Sauvignon 1:15 0:45 0:15
Merlot 0:45 0:30 0:15
Syrah 1:15 0:45 0:15
Bordeaux Blend 1:30 0:45 0:15
Pinot Noir 1:00 0:30 0:15
Australia
Shiraz 1:30 0:45 0:15
Cabernet Sauvignon 1:30 0:45 0:15
Pinot Noir 1:15 0:45 0:15
Bordeaux Blend 1:45 1:00 0:15
GSM 2:00 1:00 0:30
United States
Zinfandel 1:15 0:45 0:15
Cabernet Sauvignon 1:30 0:45 0:15
Merlot 1:00 0:30 0:15
Pinot Noir 1:15 0:45 0:15
Norton 1:15 0:45 0:15
Frontenac 1:30 0:45 0:15
Bordeaux Blend 1:45 1:00 0:15
Italy
Sangiovese 2:15 1:15 0:30
Barbera 1:45 1:00 0:15
Nebbiolo 2:00 1:00 0:30
Nero d'Avola 2:00 1:00 0:30
Cabernet Sauvignon 1:30 0:45 0:15
Merlot 1:00 0:30 0:15
Bordeaux Blend 2:00 1:00 0:30
*Mins:Secs for the So
2
mmelier oxygenating, Hrs:Mins for traditional decanting
5 Years 10 Years 15 Years
 Loading...