

Page 1
INSTRUCTIONS FOR USE
AND RECIPE BOOK
Gourmet Rice Duo™6
®
Model RC16XL
®
PACKAGING CODE - AM
PRINTED ON
RECYCLED PAPER
© Copyright. Breville Pty. Ltd. 2005
Due to continual improvements in design or otherwise,
the product you purchase may differ slightly from
the one illustrated in this booklet.
© 2005, Breville Pty. Ltd.
Este manual esta registrado. Cualquier uso de los gráficos
o fotografías se considera una violación a los derechos de
Breville Pty. y se actuará conforme a la ley.
Debido a los continuas modificaciones en el diseño
y otros elementos, el producto que aparece en este
follete puede ser ligeramente diferente.
IMPRESO EN PAPEL
RECICLADO
Model RC16XL
Issue 1/05
Breville is a registered trademark of Breville Pty. Ltd.
Breville es una marca registrada de Breville Pty. Ltd.
Breville Customer Service
Breville Centro de Servicio al Cliente
US Customers - Para Clientes en Estados Unidos
✉
2851 E. Las Hermanas Street
Rancho Dominguez
CA 90221-5507
☎
Centro de Servicio al Cliente: 1 (866) BREVILLE
Email askus@brevilleUSA.com
Canada Customers - Para Clientes en Canada
✉
Anglo Canadian
2555, avenue Aviation
Pointe-Claire (Montréal) Québec
H9P 2Z2
☎
Centro de Servicio al Cliente: 1 (866) BREVILLE
Fax
(514) 683-5554
Email askus@breville.ca
www.breville.com
BR6484 RC16XL Book_AM 17/2/06 12:50 PM Page A
Page 2

Page
Introduction 3
Breville recommends safety first 4
Know your Breville Rice Duo 6 6
Operating your Breville Rice Duo 6 7
Cooking rice 9
Steaming foods 11
Care and cleaning 15
Recipes 16
Steamed recipes 21
Warranty 24
Spanish instructions 25
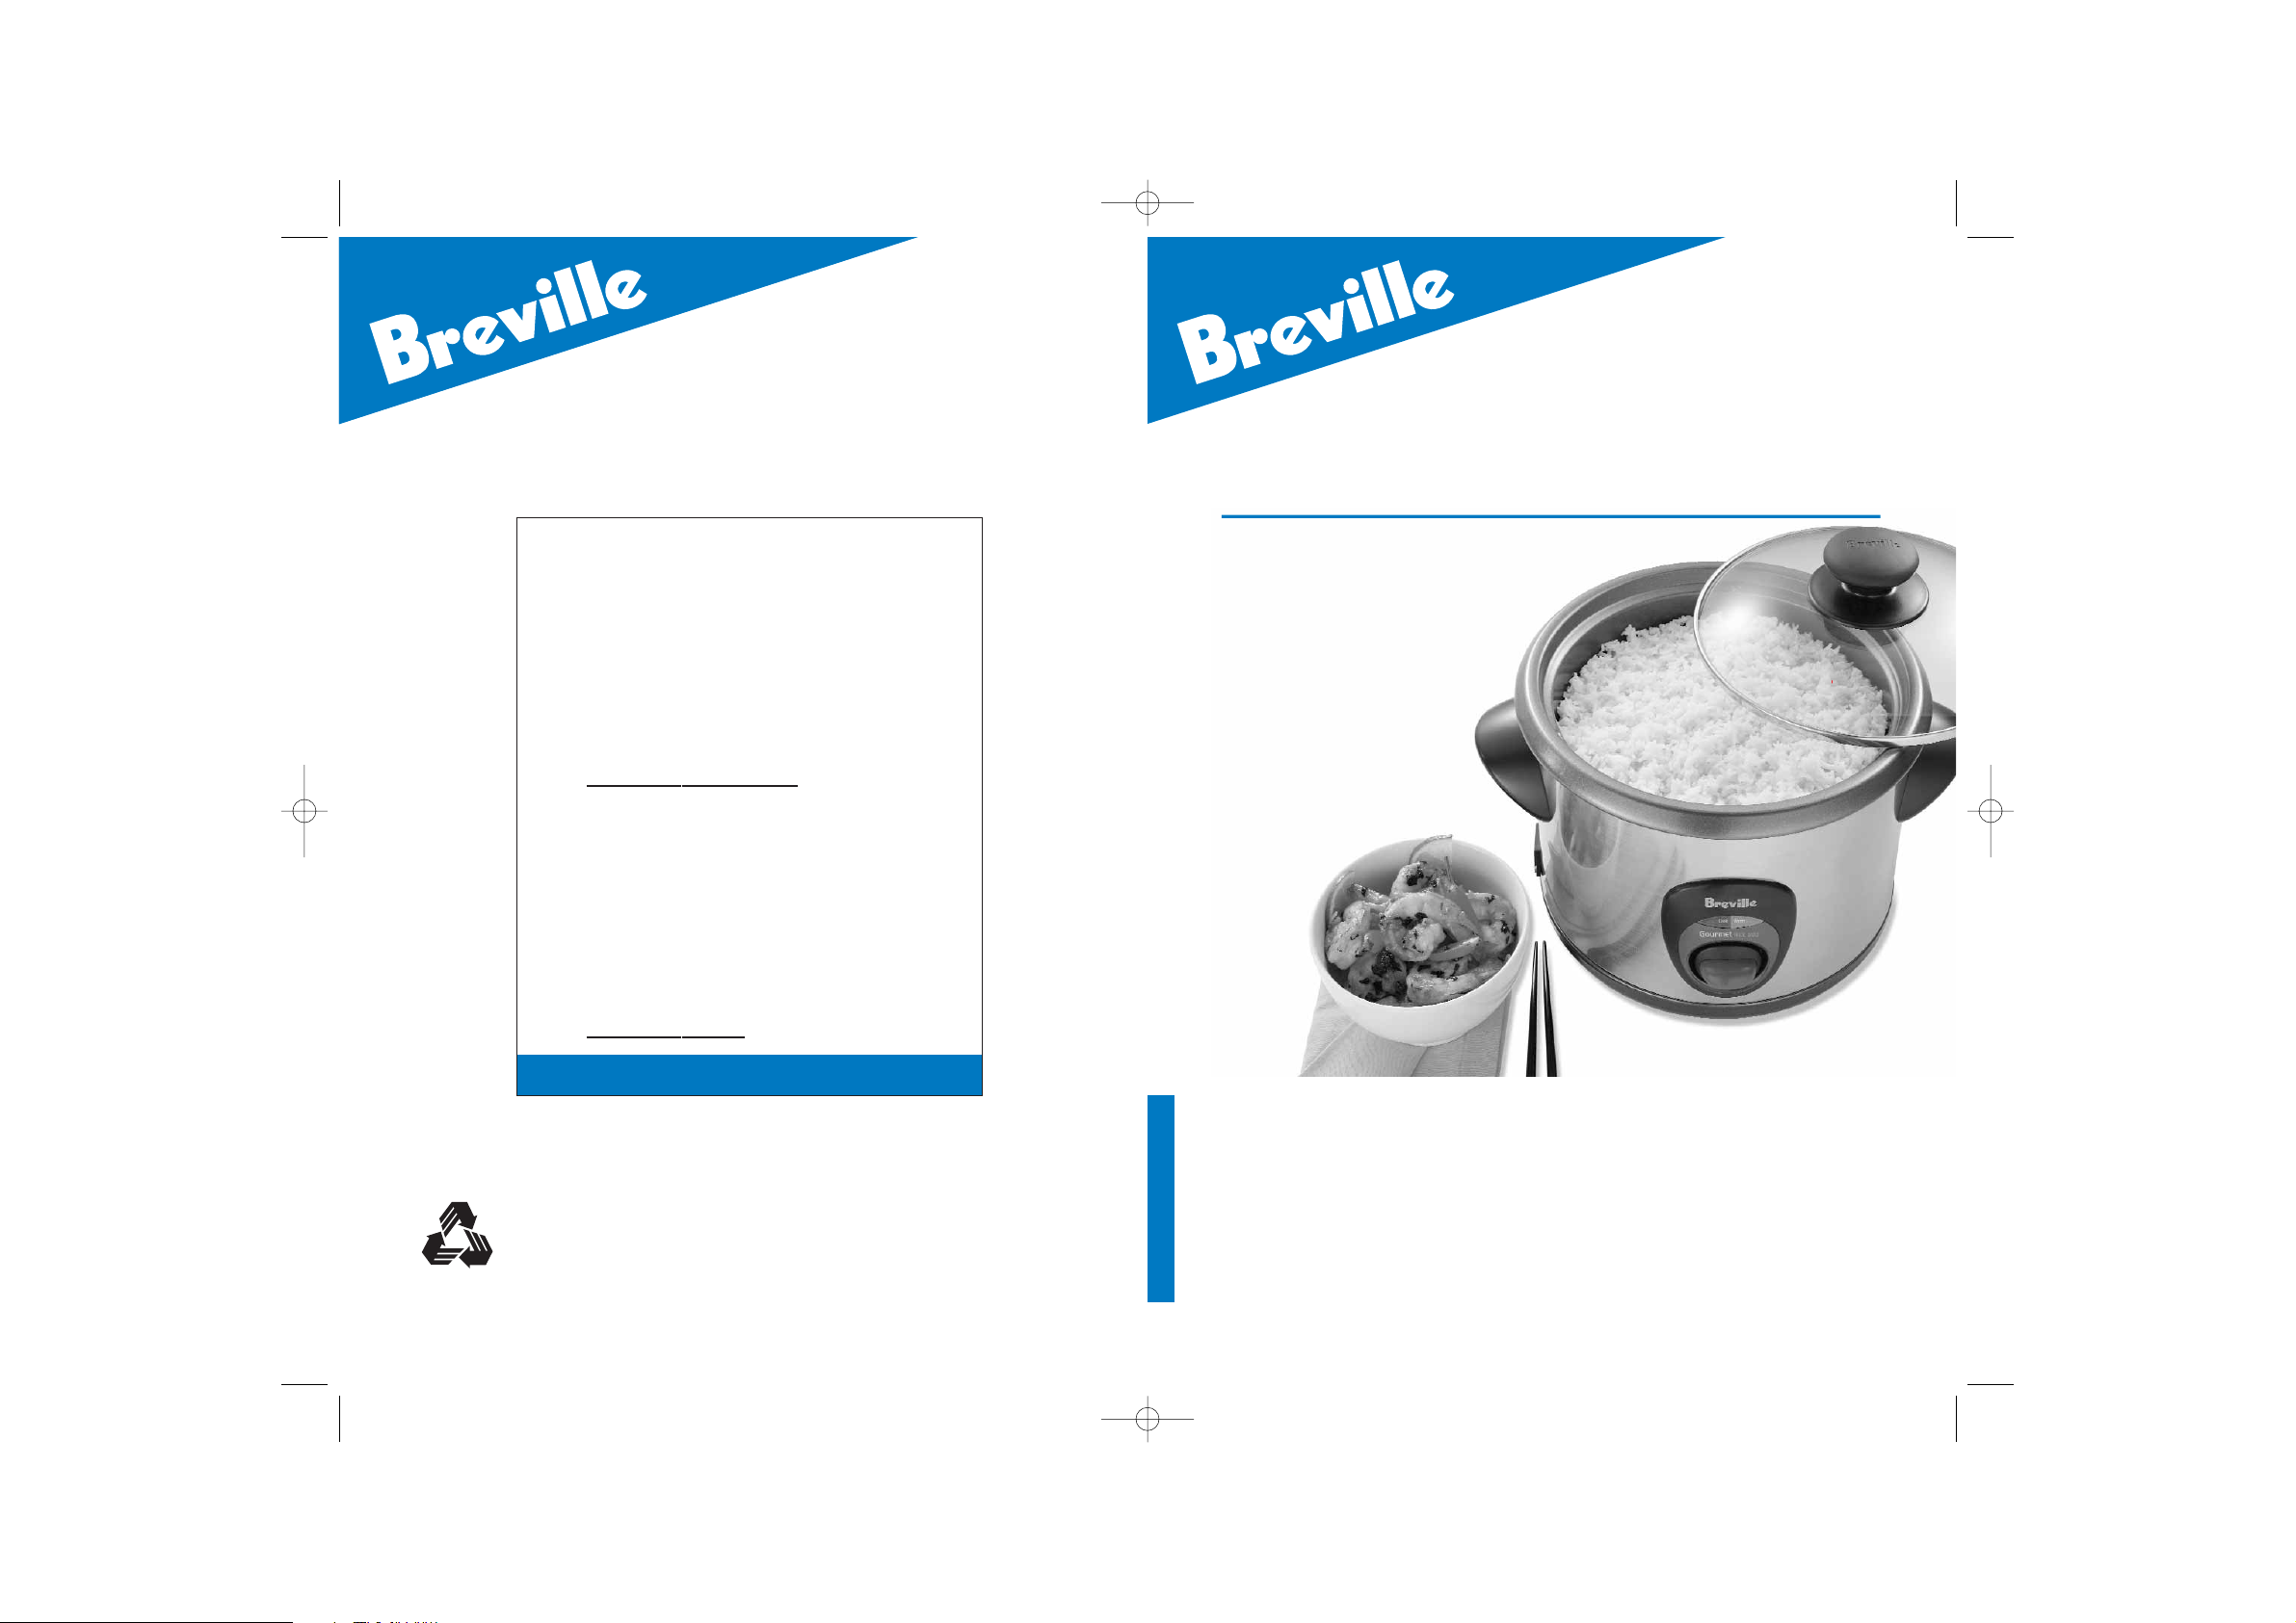
Gourmet Rice Duo™6
CONTENTS
Congratulations
on your purchase of a new Breville Gourmet Rice Duo 6
2
BR6484 RC16XL Book_AM 17/2/06 12:50 PM Page 2
Page 3

BREVILLE RECOMMENDS SAFETY FIRST cont’d
••
Regularly inspect the supply cord, plug
and actual appliance for any damage.
If found damaged in anyway, immediately
cease use of the appliance and call
Breville Customer Service on
1-866-BREVILLE.
••
This appliance is for household use only.
Do not use this appliance for anything
other than its intended use. Do not
use outdoors.
••
This appliance has a polarized plug (one
blade is wider than the other). To reduce
the risk of electric shock, this plug is
intended to fit into a polarized outlet only
one way. If the plug does not fit, contact a
qualified electrician. Do not attempt to
modify the plug in any way.
ELECTRIC CORD STATEMENT
Your rice cooker has a short cord as a safety
precaution to prevent personal injury or
property damage resulting from pulling,
tripping or becoming entangled with the
cord. Do not allow children to be near or use
this appliance without close adult
supervision. If you must use a longer power
cord or an extension cord when using the
appliance, the cord must be arranged so it
will not drape or hang over the edge of a
countertop, tabletop or surface area where it
can be pulled on by children or tripped over.
To prevent electric shock, personal injury or
fire, the electrical rating of the extension
cord you use must be the same or more than
the wattage of the appliance (wattage is
marked on the underside of the appliance).
5
4
••
Carefully read all instructions before
operating and save for future reference.
••
To protect against fire, electrical shock
and injury to persons do not immerse the
appliance, cord, plug or stainless steel
housing in water or any other liquid.
••
Always use the appliance on a dry,
level surface.
••
Always attach the connector to the
appliance first, before connecting the plug
into the power outlet.
••
To disconnect remove the plug from the
power outlet.
••
Do not touch hot surfaces; use handles,
knobs and potholders to remove the
removable cooking bowl and
steaming tray.
••
Never plug in or switch on the Rice
Duo 6 without having the removable
cooking bowl placed inside the stainless
steel housing.
••
Do not put liquid into the stainless steel
housing. Only the removable cooking bowl
is designed to contain liquid.
••
Lift and remove the glass lid carefully and
angled away from yourself to avoid
scalding from escaping steam. Do not
allow water from the lid to drip into the
stainless steel housing, only into the
removable cooking bowl.
••
Do not use a damaged or dented
removable cooking bowl. Replace
before using.
••
The use of accessory attachments not
recommended by Breville may cause a
risk of injury to persons, fire or
electric shock.
••
Unplug from the power outlet when
finished and when not in use. Allow all
parts to cool before assembling or
disassembling and before cleaning.
••
Do not let the cord hang over the edge of
a table or counter, or touch hot surfaces
or become knotted.
••
Do not place this appliance on or near a
hot gas burner, an electric element or a
heated oven.
••
Do not leave the appliance unattended
when in use.
••
Extreme caution must be used when
moving an appliance with hot oil, food or
other hot liquids.
••
This appliance is not intended for use
near or by young children or infirm
persons without supervision.
••
Young children should be supervised
to ensure that they do not play with
the appliance.
BREVILLE RECOMMENDS SAFETY FIRST
IMPORTANT SAFEGUARDS
We at Breville are very safety conscious. We design and manufacture consumer products with
the safety of you, our valued customer foremost in mind. In addition we ask that you exercise a
degree of care when using any electrical appliance and adhere to the following precautions:
READ ALL INSTRUCTIONS
Your Breville appliance comes
with the unique Assist Plug™,
conveniently designed with a
finger hole in the power plug,
for easy and safe removal
from the outlet. For safety
reasons it is recommended
you plug your Breville
appliance directly into the
power outlet. DO not use in
conjunction with a power strip
or extension cord.
SAVE THESE INSTRUCTIONS
FOR HOUSEHOLD USE ONLY
UNPLUG FROM OUTLET WHEN NOT IN USE AND BEFORE
CLEANING. ALLOW TO COOL BEFORE PUTTING ON OR TAKING OFF
PARTS, AND BEFORE CLEANING THE APPLIANCE.
THE USE OF ACCESSORY ATTACHMENTS NOT RECOMMENDED BY
THE APPLIANCE MANUFACTURER MAY CAUSE INJURIES.
BR6484 RC16XL Book_AM 17/2/06 12:50 PM Page 4
Page 4
6
7
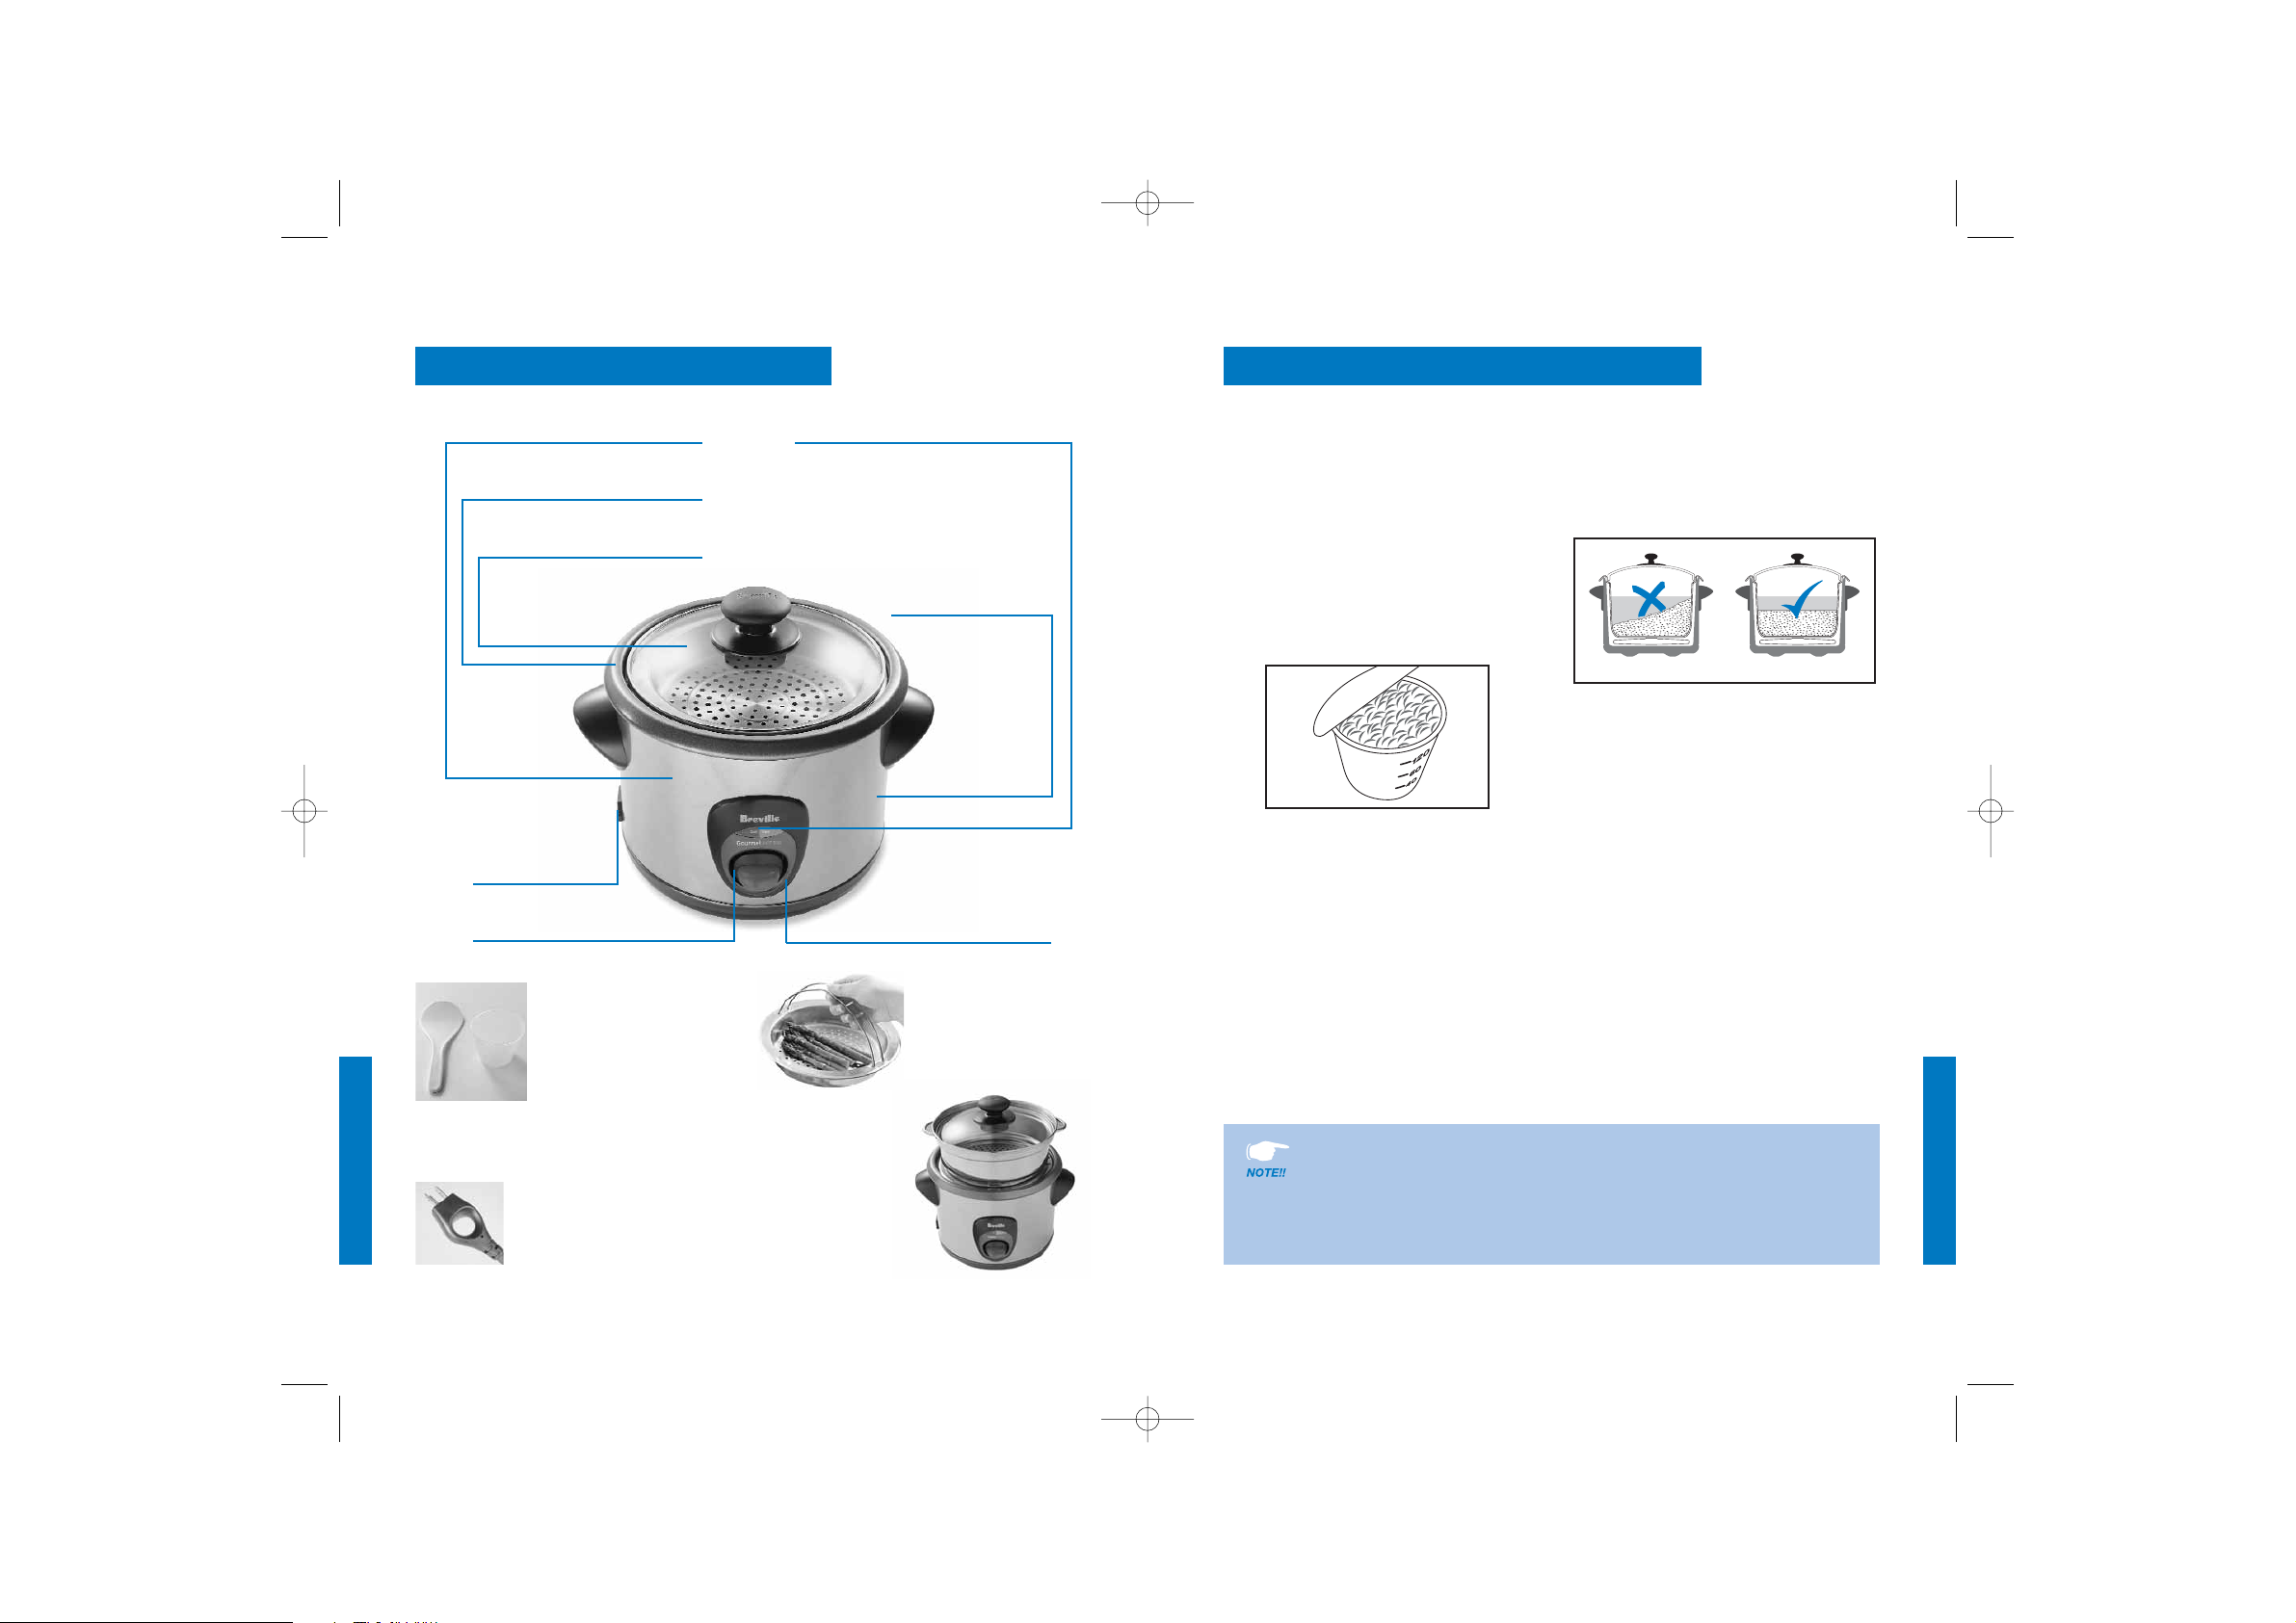
KNOW YOUR BREVILLE RICE DUO 6
Large 6 cup capacity cooks up to 12
cups of cooked rice.
Non-stick removable cooking bowl
prevents rice from sticking.
Tempered, Cook ‘n’ Look glass lid.
Removable cord
for serving at the table.
Selector control with automatic
‘Cook’ and ‘Keep Warm’ settings.
Cook and Warm lights -
Red ‘Cook’ light indicates that the
Rice Duo 6 is in the ‘Cook’ setting.
Amber ‘Warm’ light indicates that the
Rice Duo 6 is turned ON and has switched
automatically to the ‘Keep Warm’ setting.
Stainless steel housing.
Ready bell will sound when
the ‘Cook’ setting has finished
and the ‘Keep Warm’ setting starts.
Measuring cup and
serving spoon.
Stainless steel steaming
tray – ideal for vegetables,
seafood and poultry.
Large stackable
stainless steel steaming tray
- ideal for larger vegetables,
seafood and poultry.
Both steaming trays can be
stacked or used separately.
Before first use, remove all promotional labels
and wash the non-stick removable cooking
bowl, stainless steel steaming tray and glass
lid in hot soapy water, rinse and dry thoroughly.
HOW TO COOK RICE
1. Use the Rice Duo 6 measuring cup provided
to measure the required quantity of rice
(refer to cooking tables - page 9). Always
measure level cups, not heaped (see fig 1).
2. Place the rice into a separate bowl and
wash with cold water to remove any excess
starch. The rice is ready for cooking when
water runs clear from the rice.
3. Ensure the exterior of the removable
cooking bowl is clean and dry before
placing it in the stainless steel housing,
this will ensure proper contact with the
inner cooking surface.
4. Making sure the bowl is sitting flat in the
housing, add the washed rice to the
removable cooking bowl, ensuring rice is
spread evenly across the bottom of the
bowl and not heaped to one side (see fig 2).
5. Add water using the following ratios:
White Rice = 1 cup water: 1 cup rice
Brown Rice = 11⁄2cups water: 1 cup rice
6. Place the glass lid into position.
7. Plug into a 120 volt power outlet. The
amber ‘Warm’ light will illuminate.
8. To commence cooking, depress the
selector control. The red ‘Cook’ light will
illuminate.
9. When cooking is complete, the ready bell
will sound and the Rice Duo 6 will
automatically switch to the ‘Keep Warm’
setting. The amber light will illuminate.
10. Open the lid and turn the rice over with
the serving spoon provided. Replace the
lid and allow the rice to stand for 10-15
minutes before serving. This allows any
excess moisture to be absorbed,
resulting in a fluffier rice texture.
1 level Rice Duo 6 measuring cup = 41/2oz (140 grams) uncooked rice or 6 fl oz
(180ml) of water.
1 level Rice Duo 6 cup uncooked rice = 2 Rice Duo 6 cups cooked rice (approx.)
The maximum quantity of uncooked white rice to be cooked = 6 Rice Duo 6 cups
The minimum quantity of uncooked white rice to be cooked = 2 Rice Duo 6 cups
OPERATING YOUR BREVILLE RICE DUO 6
fig 2
fig 1
Features the unique
Breville Assist Plug™.
Easier to insert, easier
to remove.
Registered design.
BR6484 RC16XL Book_AM 17/2/06 12:50 PM Page 6
Page 5

8
IMPORTANT
••
Always place liquid into the removable
cooking bowl, or be ready to add oil,
butter or margarine, before depressing
the selector control to the ‘Cook’ setting.
••
Never try to force the selector control to
stay in the ‘Cook’ setting after it has
automatically switched to the ‘Keep
Warm’ setting.
••
Do not interfere with the automatic
selector control during operation.
••
To prevent scratching the non-stick
surface of the removable cooking bowl,
always use wooden or plastic utensils.
OPERATING YOUR BREVILLE RICE DUO 6 cont’d
9
Rice can be kept in the
automatic ‘Keep Warm’
setting for up to 5 hours.
Do not remove the glass lid
until ready to serve (except
for when turning over rice
after cooking is complete or
as suggested in the recipes).
To stop the ‘Keep Warm’
setting, unplug from the
power outlet.
ALWAYS LIFT AND REMOVE THE LID CAREFULLY, ANGLING IT AWAY
FROM YOURSELF TO AVOID SCALDING FROM ESCAPING STEAM.
The rice measuring cup provided with your Breville Rice Duo 6 is used in the following tables.
COOKING RICE
The Rice Duo 6 measuring cup is not a standard imperial/metric measuring cup.
1 Rice Duo 6 measuring cup is equal to 41/2oz (140g) of uncooked rice and
6 fl oz (180ml) of water.
If your Rice Duo 6 measuring cup is lost or misplaced, use another cup but
maintain the same cooking ratios and ensure you do not exceed the 6 cup
maximum line in the removable cooking bowl:
White Rice = 1 cup water : 1 cup rice
Brown Rice = 11/2cups water : 1 cup rice
WHITE RICE
Uncooked White Rice Cold tap water Cooked rice Cooking time
(Rice Duo 6 cups) (Rice Duo 6 cups) (approximate) (approximate)
(Rice Duo 6 cups) (minutes)
2 2 4 15
4 4 8 18
6 6 12 22
BROWN RICE
Uncooked Brown Rice Cold tap water Cooked rice Cooking time
(Rice Duo 6 cups) (Rice Duo 6cups) (approximate) (approximate)
(Rice Duo 6 cups) (minutes)
2 3 5 25-30
4 6 10 35-40
BR6484 RC16XL Book_AM 17/2/06 12:50 PM Page 8
Page 6

TIPS
••
Add a little extra water for fluffier rice and
a little less water for firmer rice.
••
Some rice varieties may require more
water for cooking, such as wild rice
blends, Arborio rice or short grain rice.
Follow the directions on the packet or use
the brown rice cooking table.
••
Due to the additional water needed to
cook brown rice, some starchy water
bubbles may rise to the lid while cooking.
For best results, wash rice before cooking
and keep warm for 20 minutes after
cooking to absorb the remaining moisture.
RICE VARIATIONS
Savory Rice
Prepare the rice in the Rice Duo 6 as
specified, substituting all the water with the
same quantity of chicken, beef, fish, or
vegetable stock. Apple juice, orange juice or
pineapple juice may be substituted for half of
the water quantity.
Sweet Rice
Prepare the rice in the Rice Duo 6 as
specified substituting half the water with
apple juice, orange juice or pineapple juice.
Cooking rice with milk or cream is not
recommended as it will burn onto the
bottom of the removable cooking bowl.
Saffron Rice
Add 1⁄4teaspoon of saffron powder or 2
saffron threads to every 2 cups of water. Use
the white rice cooking tables. Mix well.
Arborio Rice
Arborio rice is short round-grained pearly
rice often used for Italian risotto cooking.
Use the brown rice cooking tables.
Jasmine Rice
Jasmine rice is fragrant long grain rice. Use
the white rice cooking tables.
Basmati Rice
Basmati rice is an aromatic long grain rice.
Use the white rice cooking tables.
Wild Rice
It is not recommended to cook wild rice alone
in the Rice Duo 6 as it requires a substantial
amount of water. It is possible to cook wild
rice as a blend with white or brown rice.
11
10
Steamed foods retain most of their
nutritional value when cooked in the Rice
Duo 6. Foods may be steamed by placing
food in the stainless steel steaming tray over
stock or water and covering with the glass
lid. Keep the glass lid on while steaming
food unless the recipe or chart specifically
states to remove the lid. By removing the lid
unnecessarily steam is lost and the cooking
time will be extended.
1. Measure 3 Rice Duo 6 cups or more of
water or stock into the removable cooking
bowl. Use up to a maximum of 6 Rice Duo 6
cups of water.
2. Place food to be steamed directly onto the
stainless steel steaming trays and insert
into the removable cooking bowl. (Refer to
the steaming charts on pages 12-14 for
approximate cooking times).
3. Place the removable cooking bowl with
the steaming trays into the stainless steel
housing and cover with the glass lid.
4. Plug into a 120 volt power outlet, the
amber ‘Warm’ light will illuminate.
5. Push the selector control down to
begin cooking. The red ‘Cook’ light
will illuminate.
6. When steaming is complete, the bell will
sound and the amber “Warm” light will
illuminate. Remove foods from the Rice
Duo 6. If further steaming is required
ensure sufficient water is in the
removable cooking bowl. If not add more
hot water or stock.
7. Turn the Rice Duo 6 off by unplugging
from the power outlet. Allow to cool
before cleaning.
HINTS AND TIPS FOR
STEAMING VEGETABLES
••
Smaller pieces will steam faster than
larger pieces.
••
Try to keep vegetables to a standard size
to ensure even cooking.
••
Fresh or frozen vegetables may be steamed.
••
If steaming frozen vegetables, do not thaw.
••
The size and shape of vegetables, as well
as personal taste, may call for
adjustments to the cooking time. If softer
vegetables are required, allow extra
cooking time.
••
Do not allow water or stock to reach the
stainless steel tray. The steaming will not
be effective.
STEAMING FOODS
Do not let the removable
cooking bowl boil dry
during steaming.
Hot liquid can be added
during the steaming process.
Both steaming trays can be
stacked or used separately.
ALWAYS LIFT AND REMOVE THE LID CAREFULLY, ANGLING IT AWAY
FROM YOURSELF TO AVOID SCALDING FROM ESCAPING STEAM.
COOKING RICE cont’d
BR6484 RC16XL Book_AM 17/2/06 12:50 PM Page 10
Page 7

STEAMING FOODS cont’d
13
12
Vegetables Preparation & Tips Quantity Cooking Time
(minutes)
Artichoke remove the hard 2 medium 30-35
outer leaves and stalk
Asparagus trim, leave as spears 2 bunches 12-14
Beans (green) top and tail, leave whole 8 oz (250g) 13-15
Beet trim, do not break skin 10 oz (300g) 12-13
small-medium
Broccoli cut into florets 8 oz (250g) 8-10
Brussels Sprouts cut a cross in the base 12 oz (375g) 17-19
Cabbage large pieces 1 pound (500g) 10-12
Carrots cut into strips 3 medium 14-16
Bell peppers cut into strips 3 medium 14-16
Cauliflower cut into florets 12 oz (375g) 17-19
Celery slice into strips 3 stalk 5-6
Garbanzo beans soak for 12 hours 1 cup dried 40-45
Corn whole corn cobs 2 small cobs 20-22
Mushrooms whole, unwashed 10 oz (300g) 8-10
Onions (pickling) peeled, leave whole 6 medium 20-25
Peas fresh, peeled 8 oz (250g) 8-10
frozen 8 oz (250g) 4-5
Potatoes all purpose, whole 4 (5 – 6 oz/ 35-40
150-180g each)
Potatoes new, whole 6 (4 oz/125g each) 25-30
Sweet Potato cut into pieces 1 pound (500g) 20-25
Snow pea topped and tailed 8 oz (250g) 4-5
Butternut squash cut into pieces 1 pound (500g) 20-25
Spinach leaves and
1
⁄2bunch 5
stems cleaned
Squash (baby) topped and tailed 12 oz (350g) 8
Turnips peeled, sliced and 12 oz (350g) 15-17
cut to 50g (2 oz) pieces
Zucchini sliced 12 oz (350g) 6
HINTS AND TIPS FOR
STEAMING FISH AND SEAFOOD
••
Season fish with fresh herbs, onions,
lemon etc. before cooking.
••
Ensure fish fillets are in a single layer and
do not overlap.
••
Fish is cooked when it flakes easily with a
fork and is opaque in color.
STEAMING FOODS cont’d
Type Cooking Time Suggestions and Tips
(minutes)
Fish - Filets 8-10 Steam until opaque and easy to flake.
- Whole 15-20 A steak is cooked when the center
- Steak 12-14 bone is able to be easily removed.
Lobster - tails 18-20 Remove underside of shell
Mussels - in shell 12-14 Steam until well open
Clams and Cockles 8-10 Steam until just opened
Shrimp - in shell 8-10 Steam until pink
Scallops 4-6 Steam until opaque
Oysters - unopened 10-12 Steam until the top shell starts to open.
If the top shell does not completely open, it
will need to be opened with a knife.
BR6484 RC16XL Book_AM 17/2/06 12:50 PM Page 12
Page 8

HINTS AND TIPS FOR
STEAMING DUMPLINGS
••
Fresh or frozen dumplings and savory
buns can be steamed.
••
Place small pieces of parchment paper,
or cabbage or lettuce leaves, under the
dumplings to avoid sticking to the
steaming tray.
STEAMING FOODS cont’d
15
HINTS AND TIPS FOR
STEAMING POULTRY
••
Select similar sized pieces of poultry for
even cooking.
••
For even cooking results arrange poultry
in a single layer.
••
Remove visible fat and skin.
••
To obtain a browned appearance, sear the
chicken before steaming.
••
Check poultry is cooked by piercing the
thickest part. The poultry is cooked when
the juices run clear.
14
Type Suggestions and Tips Cooking Time
(minutes)
Breast (boneless) Place skin side up 20-25
Drumstick Place thickest part to outside of 30-35
stainless steel steaming tray
Thigh (boneless) Place thickest part to outside of 18-20
stainless steel steaming tray
Type Suggestions and Tips Cooking Time
(minutes)
BBQ pork or Cook from frozen 10-12
chicken buns
Dumplings - frozen Separate before cooking 8-10
Dumplings - fresh 5-6
Switch off the Rice Duo 6 by unplugging
from the power outlet.
Allow all parts to cool before removing
the removable cooking bowl. Wash the
removable cooking bowl, stainless steel
steaming tray and glass lid in hot, soapy
water, rinse and dry thoroughly.
Breville does not recommend that any
parts of your Rice Duo 6 are washed in a
dishwasher as harsh detergents and hot
water temperatures may stain or distort the
removable cooking bowl and accessories.
Do not use abrasive cleaners, steel wool,
or metal scouring pads as these can damage
the non-stick surface.
The stainless steel housing can be
wiped over with a damp cloth and then
dried thoroughly.
CARE AND CLEANING
If rice has cooked onto the
bottom of the removable
cooking bowl, fill the bowl
with hot, soapy water and
leave to stand for
approximately 10 minutes
before cleaning.
DO NOT IMMERSE STAINLESS STEEL HOUSING, POWER CORD
OR PLUG IN WATER OR ANY OTHER LIQUID AS THIS MAY CAUSE
ELECTROCUTION.
BR6484 RC16XL Book_AM 17/2/06 12:50 PM Page 14
Page 9

16
RECIPES
17
CHICKEN & BASIL RISOTTO
Serves 4
2 tablespoons olive oil
2 tablespoons butter
1 clove garlic, crushed
1 red onion, finely chopped
2 Rice Duo 6 cups Arborio rice
3 cups chicken stock
2 x 5 oz (150g) boneless chicken breasts,
steamed, then thinly sliced
2 tomatoes, diced
1
⁄2cup grated Parmesan cheese
2 tablespoons finely sliced fresh basil leaves
freshly ground black pepper
1. Place oil and butter into the removable
cooking bowl. Press selector control to
‘Cook’. Heat for 1 minute, add onion.
Cook for 2 minutes, stirring constantly.
Add rice, stir to coat with oil.
3. Add the stock, cover with lid and cook
until selector control switches to ‘Warm’.
Stir once during cooking.
4. Stir rice and fold through chicken,
tomatoes, cheese, basil and pepper.
Replace lid and stand for 10 minutes on
‘Warm’ before serving.
TOMATO & ZUCCHINI RISOTTO
Serves 4-6
2 tablespoons olive oil
1 small leek, washed, trimmed
and thinly sliced
2 cloves garlic, crushed
11⁄2Rice Duo 6 cups Arborio rice
14 oz (420g) can diced tomatoes
1
⁄2cup dry white wine
3 cups chicken stock
1
⁄2cup grated Parmesan cheese
1 cup grated zucchini
2 tablespoons toasted pine nuts
1. Place the oil into the removable cooking
bowl. Press selector control down to
‘Cook’. Heat for 1 minute, add leek and
garlic. Cook for 2 minutes, stirring
constantly. Add rice, stir to coat with oil.
2. Add tomatoes, wine and stock.
Cover with lid and cook until selector
control switches to ‘Warm’. Stir once
during cooking.
3. Stir rice and fold in cheese, zucchini,
and pine nuts. Replace lid and stand
for 10 minutes on ‘Warm’ before serving.
Measurements used are
standard cups and spoons
except where measuring
with Rice Duo 6 cups
is specified.
MUSHROOM RISOTTO
Serves 4-6
2 tablespoons olive oil
2 tablespoons butter
1 brown onion, finely diced
5 oz (150g) button mushrooms, sliced
21⁄2Rice Duo 6 cups Arborio rice
3 cups chicken stock
1
⁄4cup grated Parmesan cheese
1 tablespoon chopped flat leaf
(Italian) parsley
1. Place butter and oil into the removable
cooking bowl. Press selector control to
‘Cook’. Heat for 1 minute, add onion and
mushrooms. Cook for 5 minutes or until
the mushrooms are soft, stirring
constantly. Add rice, stir to coat with oil.
2. Add stock. Cover with lid and cook until
selector control switches to ‘Warm’.
Stir once during cooking.
3. Stir rice and fold through cheese
and parsley. Replace lid and stand for
10 minutes on ‘Warm’ before serving.
SEAFOOD PAELLA
Serves 4-6
1
⁄4cup olive oil
1 red onion, diced
3 cloves garlic, crushed
1 teaspoon freshly grated ginger
11⁄2Rice Duo 6 cups long grain rice, washed
4 cups seafood or chicken stock
1lb (500g) mixed seafood (shrimp, calamari,
octopus, mussel meat, white fish fillet)
1
⁄2cup roasted red pepper, peeled
and chopped
1 tablespoon fresh lime juice
2 tomatoes, diced
1
⁄4teaspoon chili powder
2 tablespoons chopped fresh cilantro
1. Place oil into the removable cooking
bowl. Press selector control to ‘Cook’.
Heat for 1 minute, add onion, garlic and
ginger. Cook for 2 minutes, stirring
constantly. Add rice, stir to coat with oil.
2. Add stock. Cover with lid and cook for
10 minutes. Stir in seafood, pepper and
lime juice. Replace lid and cook until
selector control switches to ‘Warm’.
3. Stir rice mixture and fold through
tomatoes, chili and cilantro. Replace lid
and stand for 10 minutes on ‘Warm’
before serving.
RECIPES cont’d
BR6484 RC16XL Book_AM 17/2/06 12:50 PM Page 16
Page 10

18
SUSHI RICE
4 Rice Duo 6 cups short grain white
rice, washed
4 cups water
2 tablespoons rice vinegar
2 tablespoons sugar
1
⁄2teaspoon salt
1 tablespoon rice vinegar, extra
1. Place washed rice and water into
removable cooking bowl. Press the
selector control down to ‘Cook’.
2. Cover with lid and cook until selector
control switches to ‘Warm’.
3. Stir rice, replace lid and stand for 10
minutes on ‘Warm’.
4. Transfer rice to a large, shallow dish.
5. Heat vinegar, sugar and salt in a small
saucepan over a low heat until sugar
dissolves. Sprinkle vinegar mixture over
rice, mix well.
6. Use immediately as required in
Sushi recipes.
TIP: Some Sushi recipes require the rice
to be shaped by hand. To do this, combine
1 tablespoon rice vinegar with
1
⁄4cup water.
Use this mixture to keep hands wet while
shaping rice.
TIP: Any leftover Sushi Rice can be frozen.
Recommended Usage Seaweed Rolls
6 sheets Nori seaweed
Sushi Rice
Wasabi paste, to taste
Add any combination of filings such as:
Smoked salmon, thinly sliced
Japanese pickled ginger and vegetables
Finely sliced cucumber
Sashimi salmon or tuna
Avocado
Cooked asparagus
Fresh crab
Finely shredded lettuce
Mayonnaise
1. Place a sheet of seaweed, shiny side
down on a sheet of parchment paper or a
bamboo rolling mat.
2. Spread a portion of the rice over a third
of the Nori sheet, leaving a border.
3. Spread a very thin layer of wasabi paste
in a narrow line down the center of the
rice. Top with a selection of fillings.
4. Using the paper or mat as a guide, roll
up the Nori sheet to enclose the filling.
Press to seal the edges.
5. Use a very sharp knife to cut the roll
neatly into small portions.
6. Repeat with remaining Nori sheets and
filling. Chill until ready to serve.
RECIPES cont’d
19
PEPPER AND RICE SALAD
Serves 4-6
1 Rice Duo 6 cup white rice, washed
1 Rice Duo 6 cup brown rice, washed
1 Rice Duo 6cup wild rice mix, washed
5 cups chicken stock
121⁄2oz (375g) marinated roasted red pepper,
finely sliced
4 oz (120g) feta cheese, diced
5 oz (150g) pitted black Kalamata olives
2 tablespoons basil pesto
3
⁄4cup Caesar salad dressing, prepared
1
⁄2cup Italian salad dressing, prepared
2 tablespoons sweet Thai Chili sauce
1. Place washed rice and stock into the
removable cooking bowl. Press selector
control to ‘Cook’.
2. Cover with lid and cook until selector
control switches to ‘Warm’. Stir once
during cooking.
3. Allow rice to stand, covered with lid, for
10 minutes on ‘Warm’.
4. Transfer rice to a large, shallow
dish to cool. This helps to keep rice
grains separate.
5. In a large serving bowl, toss cooled rice
with pepper, feta cheese and olives.
6. Combine pesto, salad dressings and chili
sauce in a screw top jar. Shake well and
toss through rice salad just before
serving. Serve chilled.
ORIENTAL WILD RICE SALAD
Serves 4-6
2 tablespoons oil
2 cloves garlic, crushed
4 shallots, thinly sliced
21⁄4Rice Duo 6 cups wild rice mix, washed
4 cups chicken stock
7 oz (200g) snow peas, blanched
1
⁄4cup smoked almonds, halved
2 tablespoons balsamic vinegar
3 teaspoons soy sauce
1 teaspoon sesame oil
2 tablespoon sweet Thai chili sauce
2 tablespoons rice wine vinegar
1. Place oil into the removable cooking
bowl. Press selector control to ‘Cook’.
Heat for 1 minute, add garlic and
shallots. Cook for 2 minutes, stirring
constantly. Add rice, stir to coat with oil.
2. Add stock, cover with lid and cook until
selector control switches to ‘Warm’.
Stir once during cooking.
3. Allow rice to stand, covered with lid, for
10 minutes on ‘Warm’.
4. Transfer rice to serving dish. Stir in snow
peas and almonds.
5. Combine vinegar, soy sauce, sesame oil,
chili sauce and vinegar in a screw top jar
and shake well. Toss through salad to
serve. Serve warm.
RECIPES cont’d
BR6484 RC16XL Book_AM 17/2/06 12:50 PM Page 18
Page 11

20
MANGO TROPICAL
RICE PUDDING
Serves 4-6
13⁄4Rice Duo 6 cups short grain white
rice, washed
1 cup mango nectar
1 cup water
15 oz (450g) can sliced peaches, drained,
juice reserved
2 teaspoons lime zest
1
⁄2cup coconut cream
1
⁄4cup passionfruit pulp (can be found frozen
in Asian markets)
1 tablespoon cinnamon sugar
1. Place rice, mango nectar, water, and
reserved peach juice into the removable
cooking bowl and stir to combine.
Cover with lid and press selector control
to ‘Cook’.
2. Cook until selector control switches to
‘Warm’. Stir once during cooking.
3. Stir rice mixture and fold through lime
zest, coconut cream and passionfruit
pulp. Replace lid and stand for
10 minutes on ‘Warm’.
4. Serve warm with peaches and dusted
with cinnamon sugar.
WILD BERRY RICE PUDDING
Serves 4-6
11⁄2Rice Duo 6 cups short grain white
rice, washed
2 cups water
1
⁄4cup warmed honey
2 tablespoons butter, melted
1 cup cream
1
⁄2cup fresh or frozen blueberries
1
⁄2cup fresh or frozen raspberries
1
⁄2cup fresh or frozen blackberries
1
⁄2cup fresh or frozen strawberries
1
⁄4cup confectioners’ sugar
1
⁄4cup water
2 tablespoons port
1. Place rice and water into the removable
cooking bowl. Cover with lid and press
selector control to ‘Cook’.
2. Cook until selector control switches to
‘Warm’. Stir once during cooking.
3. Stir rice and fold in honey, butter,
and cream. Replace lid and stand for
10 minutes on ‘Warm’.
4. Place blueberries, raspberries,
blackberries, strawberries, confectioners'
sugar, water and port into the bowl of a
food processor or blender and process
until smooth.
5. Fold berry mixture through rice mixture
then transfer to serving glasses.
6. Serve topped with extra berries and
cream if desired.
21
RECIPES cont’d
STEAMED WHOLE FISH WITH
GINGER AND SHALLOT
1 x 12-13 oz (300-400g) whole snapper
or flounder, cleaned and scaled
1
⁄2bunch cilantro
2 tablespoons soy sauce
1 tablespoon peanut oil
3
⁄4" (2cm) piece fresh ginger,
cut into matchsticks
3 scallions, finely sliced
1 lime, sliced
1. Wash and dry the fish. Cut 2 slits at a 45°
angle through each side of the fish. Into
each slit, place some ginger and a slice
of lime.
2. Place half of the cilantro into the cavity
of the fish. Place the fish into the
steaming tray.
3. Pour 3 Rice Duo 6 cups water into the
removable cooking bowl. Cover with lid
and press the selector control to ‘Cook’.
When the water is boiling, place the
steaming tray into removable cooking
bowl, replace lid and steam fish for
15 minutes or until cooked when tested.
4. Remove fish and place onto a
serving platter.
5. Combine soy, oil and shallots, pour
over the fish. Serve immediately with
jasmine rice.
STEAMED SALMON FILLETS
WITH A TOMATO AND
BASIL SALSA
Serves 4
1 tablespoon olive oil
2 shallots, diced
1
⁄4cup white wine vinegar
2 ripe tomatoes, diced
10 basil leaves, finely sliced
1 tablespoon balsamic vinegar
2 tablespoons olive oil
2 x 5 oz (150g) salmon fillets
salt and pepper, if desired
3 Rice Duo 6 cups fish stock
1. Heat a frypan on medium heat, add the
oil and diced shallots cook for a minute
to soften the shallots, add the vinegar
and let the mixture reduce by half. Add
the tomatoes and bring the mixture to
the boil, then remove from heat. Cool the
salsa mixture then add basil, balsamic
vinegar, and oil.
2. Place salmon fillets into the steaming
tray and sprinkle with salt and pepper.
3. Place the stock into the removable
cooking bowl. Cover with lid and press
the selector control to ‘Cook’. When the
stock is boiling, place the steaming tray
into removable cooking bowl, replace lid
and cook for 6-8 minutes for medium or
10 minutes for well done.
4. Remove salmon. Serve hot with Tomato
and Basil Salsa and mixed salad leaves.
STEAMED RECIPES
BR6484 RC16XL Book_AM 17/2/06 12:50 PM Page 20
Page 12

STEAMED VEGETABLES
(WARM GADO GADO)
1 bunch baby bok choy, trimmed and sliced
1 small head broccoli, cut into florets
10 snow peas
1 carrot, peeled and thinly sliced
10 oz (300g) firm tofu, cubed
1 cup (250ml) Peanut Sauce (recipe below)
1. Place the vegetables and tofu into
steaming tray. Place 3 Rice Duo 6 cups
water into the removable cooking bowl.
Cover with lid and press the selector
control to ‘Cook’. When the stock is
boiling, place the steaming tray into
removable cooking bowl, replace lid and
cook for 5-7 minutes.
2. Place the vegetables and tofu onto a
serving platter and drizzle with warm
Peanut Sauce.
PEANUT SAUCE
1 onion, chopped
1 clove garlic
3
⁄4" (2cm) piece fresh ginger, chopped
1 tablespoon oil
1 teaspoon curry powder
1 tablespoon soy sauce
1
⁄4cup crunchy peanut butter
1 teaspoon chili paste
2 teaspoons brown sugar
1 cup coconut milk
1. Place the onion, ginger and garlic into
a food processor and process until fine.
2. Heat oil in a saucepan over medium
heat. Add onion mixture and gently fry
for 3-4 minutes.
3. Add curry powder and soy sauce. Stir
well before adding peanut butter, sugar,
and chili paste.
4. Add the coconut milk and stir thoroughly
until the sauce is smooth. Increase the
heat then cook for 5 minutes.
23
22
STEAMED RECIPES cont’d
MEXICAN MARINATED
CHICKEN BREASTS
Serves 4
4-5 oz (120g-150g) boneless chicken breasts
(supremes) or boneless thighs
1
⁄2small onion, roughly chopped
4 garlic cloves, smashed
1
⁄2teaspoon cumin seeds
1
⁄2teaspoon dried thyme
1
⁄2teaspoon dried oregano
1
⁄2teaspoon red pepper flakes
1
⁄2teaspoon salt
1 bay leaf broken
1 cup orange juice, preferably
freshly squeezed
1. Combine onion, garlic, herbs, spices
and orange juice in a shallow, non-metal
container. Add chicken pieces in a
single layer, cover and marinate at least
4 hours or for as long as overnight in
the refrigerator, turning chicken
several times.
2. Place the marinated chicken into
steaming tray.
3. Place 3 Rice Duo 6 cups water into the
removable cooking bowl. Cover with lid
and press the selector control to ‘Cook’.
When the water is boiling, place the
steaming tray into the removable cooking
bowl, replace the lid and cook for 20–25
minutes or until cooked when tested.
Remove chicken and slice thinly.
4. Serve on top of rice pilaf with fresh
tomato or mango salsa.
STEAMED RECIPES cont’d
BR6484 RC16XL Book_AM 17/2/06 12:50 PM Page 22
Page 13

MANUAL DE INSTRUCCIONES
Y RECETARIO
Gourmet Rice Duo™6
®
Modelo RC16XL
24
Breville®* warrants this Breville® appliance
against defects that are due to faulty
material or workmanship for a period of one
(1) year from the date of original consumer
purchase. This warranty does not cover
damage from abuse, neglect, use for
commercial purposes, or any other use not
found in the printed “Instructions for use”
booklet. There is no warranty for glass parts,
glass containers, filter basket, blades and
agitators. HWI Breville® expressly disclaim
all responsibility for consequential damages
for incidental losses caused by use of this
appliance. Some states or provinces do not
allow this exclusion or limitation for
incidental or consequential losses, so the
foregoing disclaimer may not apply to you.
ANY WARRANTY OF MERCHANTABILITY OR
FITNESS WITH RESPECT TO THIS PRODUCT
IS ALSO LIMITED TO THE ONE YEAR
LIMITED WARRANTY PERIOD. Some states
or provinces do not allow disclaimer of the
implied warranty with respect to consumer
goods, so the foregoing disclaimer may not
apply to you.
This warranty gives you specific legal rights
and you may also have other legal rights
which vary from state to state or province
to province.
If the appliance should become defective
within the warranty period, do not return the
appliance to the store. Please contact our
Customer Service Center.
Toll free phone number:
1-866-BREVILLE (1-866-273-8455)
Internet email:
AskUs@BrevilleUSA.com
AskUs@Breville.ca (in Canada)
*HWI Breville® products are distributed in
Canada by Anglo Canadian Housewares,
L.P. and in USA by Metro/Thebe Inc.
ONE YEAR LIMITED WARRANTY
BR6484 RC16XL Book_AM 17/2/06 12:50 PM Page 24
Page 14

26
Página
Introducción 27
Recomendaciones básicas de seguridad 28
Componentes y características 30
Modo de empleo 31
Cocinar arroz 33
Comidas al vapor 35
Cuidado y limpieza 39
Recetas 40
Recetas al vapor 44
Garantía 48
Gourmet Rice Duo™6
CONTENIDO
Felicidades
en la compra de su Gourmet Rice Duo 6
BR6484 RC16XL Book_AM 17/2/06 12:50 PM Page 26
Page 15

29
28
RECOMENDACIONES BASICAS DE SEGURIDAD cont
••
Este electrodoméstico es para uso
doméstico solamente. No use este
electrodoméstico para otra cosa que no
sea su función específica. No lo use en
el exterior.
••
Este electrodoméstico tiene una clavija
polarizada (una hoja más gruesa que la
otra). Para reducir el riego de descarga
eléctrica, esta clavija se puede conectar
en toma corriente polarizado. Si la clavija
no cabe, hable a un electricista. No
modifique de ninguna manera la clavija.
INFORMACIÓN DEL CABLE ELÉCTRICO
Su Arrocera tiene un cable corto como
medida de precaución para prevenir
lesiones personales o daño a la propiedad al
jalar, tropezar o enredarse con el cable. No
permita que los niños se acerquen o utilicen
el electrodoméstico sin una supervisión
adecuada. Si necesita un cable o una
extensión más grande, el cable deberá
arreglarse de manera que no cuelgue de la
superficie donde se utilizará para que no se
tropiecen los niños. Para prevenir descarga
eléctrica, lesión personal, o fuego, la
extensión deberá ser del mismo voltaje del
aparato (el voltaje se encuentra marcado en
la parte de abajo del aparato).
••
Lea todas las instrucciones antes de
utilizar su electrodoméstico y guárdelas
para referencias futuras.
••
Para protegerse del fuego, una descarga
eléctrica o lesiones, nunca sumerja el
electrodoméstico, el cordón, el enchufe o
la extensión de acero inoxidable en agua
u otro líquido.
••
Siempre utilice el electrodoméstico en
una superficie seca y nivelada.
••
Siempre conecte el accesorio al
electrodoméstico primero, antes de
conectar a la pared.
••
Para desconectar quite el cable de
la pared.
••
No toque las superficies calientes; use
las asas, perillas para remover la
cacerola y la charola del vapor.
••
Nunca conecte o prenda la arrocera sin
colocar la cacerola en su lugar.
••
Nunca vierta agua en la base de acero
inoxidable. Solamente en la cacerola que
esta diseñada para líquidos.
••
Levante y quite la tapadera de cristal con
cuidado haciéndola para un lado para no
quemarse con el vapor. No permita que
el agua de la tapadera caiga en la base
de acero inoxidable, solamente dentro
de la cacerola.
••
No utilice la cacerola dañada o aboyada.
Cámbiela antes de usarla.
••
El uso de accesorios no recomendados
por Breville puede causar riesgo de
lesiones, fuego o descarga eléctrica.
••
Desconecte de la pared cuando no este
utilizando. Permita que todas las partes
se enfríen antes de armar, desarmar o
antes de limpiar.
••
No permita que el cable cuelgue, toque
superficies calientes o se haga nudo.
••
No ponga este electrodoméstico en o cerca
de una estufa caliente, un elemento
eléctrico o un horno caliente.
••
No deje este electrodoméstico sin
atención cuando lo este utilizando.
••
Extreme cuidados al mover un
electrodoméstico con aceite caliente,
comida u otros líquidos calientes.
••
Este electrodoméstico no debe usarse
cerca o por niños pequeños o personas
no aptas sin supervisión.
••
Los niños pequeños deberán ser
supervisados para asegurarse de que no
juegan con el electrodoméstico.
••
Inspeccione regularmente el cable,
conexión y el electrodoméstico por
cualquier daño. Si encuentra daño alguno,
deje de utilizarlo inmediatamente y hable
al Centro de Servicio al Cliente Breville al
1-866-BREVILLE.
RECOMENDACIONES BASICAS DE SEGURIDAD
IMPORTANTES MEDIDAS DE SEGURIDAD
En Breville diseñamos y fabricamos productos para el consumidor, teniendo en mente a
nuestros valiosos clientes que son ustedes. Además le pedimos, que por favor tenga cuidado
al usar cualquier electrodoméstico y tome en cuenta las siguientes recomendaciones:
LEA TODAS LAS INSTRUCCIONES
Su electrodoméstico Breville
viene con un sistema único de
Enchufe (Assist Plug™),
diseñado convenientemente,
con un hueco que permite al
dedo apalancarse para
desconectar fácilmente.
Por razones de seguridad
conecte su electrodoméstico
Breville directamente a la
pared. No conecte a ninguna
extensión.
GUARDE ESTAS INSTRUCCIONES
PARA EL USO DOMESTICO SOLAMENTE
DESCONECTE EL APARATO CUANDO NO LO ESTE USANDO O ANTES
DE LIMPIARLO. PERMITA QUE SE ENFRIE ANTES DE PONER O
QUITAR PARTES, Y ANTES DE LIMPIARLO.
EL USO DE ACCESORIOS NO RECOMENDADOS POR EL FABRICANTE
DEL APARATO PUEDE CAUSAR DANOS.
BR6484 RC16XL Book_AM 17/2/06 12:50 PM Page 28
Page 16

31
30
COMPONENTES Y CARACTERÍSTICAS
Selector de control automático
con selección de "Cocinado" Cook
y "Mantiene Tibio" Keep Warm
Cable removible
para servir en la mesa
Tapadera de cristal templado, le
permite ver mientras se esta cocinando
Cacerola removible grande de 6
tazas con capacidad de 12 tazas de
arroz cocido, previene que el arroz
no se pegue
Base de acero inoxidable
La campana sonará cuando
la selección "Cocinado" termine y
la selección "Mantiene Tibio" empieza
Cacerola de vapor de acero
inoxidable – ideal para
vegetales, mariscos y pollo
Charola de vapor de acero
inoxidable grande extra para
empotrar-ideal para vegetales,
mariscos y pollo. Las dos
charolas pueden utilizarse
empotrándolas o por separado
Antes de usarla por primera vez, quite todas
las etiquetas y lave la cacerola anti-adherente,
la charola de vapor de acero inoxidable y la
tapadera de cristal en agua caliente jabonosa,
enjuague y seque completamente.
COMO COCINAR AL VAPOR
1. Usa la taza de medir que se provee para
las cantidades requeridas de arroz (ver las
tablas de cocinar - página 35). Siempre
mida el nivel de las tazas, nunca las sobre
llene (ver fig 1).
2. Coloque el arroz en un tazón por separado
y lave con agua fría para remover el exceso
de almidón. El arroz esta listo para cocinar
cuando al enjuagarlo el agua salga limpia.
3. Asegúrese que el exterior del tazón
removible este limpio y seco antes de
colocarlo en el contenedor de acero
inoxidable, esto hará que tenga el
contacto apropiado con el fondo de
el arrocero.
4. Cerciórese que el tazón removible
este sentando completamente en la
base del arrocero agregue el arroz lavado
al tazón removible, asegurándose que el
arroz quede uniformemente a través del
fondo de el contenedor y no hacia los
lados (ver fig 2).
5.
Agregue agua usando las siguientes medidas:
Arroz Blanco = 1 taza de agua: 1 taza de arroz
Arroz Moreno = 11⁄2 tazas de agua: 1 taza
dearroz
6. Coloque la tapadera de cristal.
7. Conecte si el voltaje es de 120 voltios.
La luz ámbar "Warm" se iluminara.
8. Para empezar a cocinar, baje el selector
de control. La luz roja "Cook" se prenderá.
9. Cuando se acabe de cocinar, la campana
sonara y la arrocera automáticamente
cambiara a "Keep Warm". La luz ámbar
se prenderá.
10. Destape y voltee el arroz con la cuchara
que se provee. Tape y deje el arroz de
10 a 15 minutos antes de servir.
Esto permitirá que el exceso de
humedad sea absorbido, dando una
textura más esponjosa.
1 taza de medir de la arrocera = 41/2(140 gramos) de arroz no cocido o 6 onzas
(180ml) de agua.
1 taza de arroz no cocido = 2 tazas de arroz cocido (aproximadamente)
El máximo de cantidad de arroz blanco no cocido para cocer = 6 tazas
El mínimo de cantidad de arroz blanco no cocido para cocer = 2 tazas
MODO DE EMPLEO
fig 2
fig 1
Luces de Cocinado y Tibio –
La luz roja indica que su arrocera esta
en la selección "Cocinado".
La luz ámbar indica que su arrocera esta
encendida y cambiará automáticamente
a la selección de "Mantiene Tibio"
Taza de medir y
cuchara para servir
Presentando el neuvo enchufé
Breville Assist Plug™.
Fácil de conectar, fácil
para desconectar.
Diseño registrado
.
BR6484 RC16XL Book_AM 17/2/06 12:50 PM Page 30
Page 17

33
32
IMPORTANTE
••
Siempre vierta el líquido en la cacerola
removible, o agregue aceite, mantequilla
o margarina, antes de bajar el selector de
control a "Cook".
••
Nunca trate de mantener a la fuerza el
selector de control en "Cook" si ya
cambio automáticamente a "Keep Warm".
••
No interfiera el selector automático
cuando este en operación.
••
Para prevenir rayar la superficie antiadherente de la cacerola removible,
siempre utilice utensilios de plástico
o madera.
MODO DE EMPLEO cont
El arroz se puede mantener
en selección automática
"Keep Warm" hasta por
5 horas.
No quite la tapadera de
cristal hasta que sirva
(excepto cuando voltee el
arroz o este listo o según se
sugiere en las recetas).
Para quitar la selección
"Keep Warm", desconecte
la arrocera de la pared.
SIEMPRE QUITE Y REMUEVA LA TAPADERA CUIDADOSAMENTE,
INCLINÁNDOLA PARA QUE NO LE QUEME EL VAPOR QUE ESCAPA
AL DESTAPAR.
La taza de arroz que se provee con su arrocera Breville se puede usar con las siguientes tablas.
COCINAR ARROZ
La taza de su arrocera no es de medida imperial/métrica estándar.
1 taza es igual a 41/2onzas (140 gramos) de arroz no cocido y 6 onzas
(180ml) de agua.
Si se ha perdido la taza de su arrocera o no sabe donde la dejo, use otra taza
pero mantenga las mismas cantidades y asegúrese de no excederse de la
línea máxima de 6 tazas en la charola removible:
Arroz Blanco = 1 taza de agua : 1 taza de arroz
Arroz Moreno = 11/2tazas de agua : 1 taza de arroz
ARROZ BLANCO
Arroz Blanco No Cocido Agua Arroz Cocido Tiempo de
(tazas de la arrocera) (tazas de la arrocera) (tazas aprox) Cocimiento
(minutos aprox)
2 2 4 15
4 4 8 18
6 6 12 22
ARROZ MORENO
Arroz Moreno No Cocido
Agua Arroz Cocido Tiempo de
(tazas de la arrocera) (tazas de la arrocera) (tazas aprox) Cocimiento
(minutos aprox)
2 3 5 25-30
4 6 10 35-40
BR6484 RC16XL Book_AM 17/2/06 12:50 PM Page 32
Page 18

35
34
SUGERENCIAS
••
Agregue agua extra para un arroz más
esponjoso y menos agua para un arroz
más firme.
••
Algunas variedades de arroz requerirán
más agua para cocimiento, como mezclas
de arroz salvaje, arroz Arborio o arroz de
grano pequeño. Siga las instrucciones en
el paquete o siga la tabla del cocimiento
del arroz moreno.
••
Debido a el agua adicional que se
necesita para cocinar el arroz moreno,
algunas burbujas de almidón se elevaran
a la tapadera mientas se este cociendo.
Para mejores resultados, lave el arroz
antes de cocinar y mantener tibio por 20
minutos después de cocinar para que
absorba la humedad restante.
VARIACIONES DE ARROZ
Arroz Apetitoso
Prepare el arroz en la arrocera según se
especifica, substituyendo toda el agua con la
misma cantidad de caldo de pollo, carne,
pescado o vegetales. Jugo de manzana,
naranja, o piña se puede substituir por la
mitad del agua.
Arroz Dulce
Prepare el arroz en la arrocera según se
especifica, substituyendo la mitad del agua
con jugo de manzana, naranja o piña. Cocinar
el arroz con leche o crema no se recomienda
ya que se quemara en el fondo de la charola.
Arroz con Azafrán
Agregue 1⁄4de cucharadita de polvo de
azafrán o 2 hebras por cada 2 tazas de agua.
Use la tabla de cocimiento de arroz blanco.
Mezcle bien.
Arroz Arborio
El arroz Arborio es un grano redondo
pequeño aperlado que casi siempre se usa
para cocinar el risotto Italiano. Use la tabla
de cocimiento de arroz moreno.
Arroz Jazmín
El arroz jazmín es de grano grande y oloroso.
Use las tablas de cocimiento de arroz blanco.
Arroz Basmati
El arroz basmati es aromático y de grano
grande. Use las tablas de cocimiento de
arroz blanco.
Arroz Salvaje
No se recomienda que se cocine el arroz
salvaje solo en la arrocera ya que requiere
mucha agua. Es posible cocer el arroz salvaje
con una mezcla de arroz blanco o moreno.
Las comidas al vapor retienen muchos de
sus valores nutricionales cuando se cocinan
en la arrocera. Las comidas se pueden cocer
al vapor colocando en la charola de acero
inoxidable sobre agua o pollo y cubriendo con
la tapadera de cristal. Mantenga la tapadera
de cristal mientras este cociendo al vapor al
menos que la guía de recetas especifique lo
contrario. Al quitar la tapadera el vapor se
pierde y el tiempo de cocimiento se extiende.
1. Mida 3 tazas o más de agua o caldo de
pollo en la charola removible. Use hasta
un máximo de 6 tazas de agua.
2. Coloque el alimento que se cocinara al
vapor en el segundo contenedor con
hoyos sobre el primer contenedor de
acero (consulte la tabla de tiempo
recomendado para cocer al vapor en
la Pág. 36-37).
3. Coloque el tazón removible junto con el
tazón de cocinar al vapor en el arrocero
y cúbralos con la tapadera de vidrio.
4. Conecte si el voltaje es de 120 voltios, la
luz ámbar se prenderá "Warm".
5. Empuje el selector de control hacia abajo
para empezar a cocinar. La luz roja
"Cook" se prenderá.
6. Cuando el arrocero haya terminado de
cocer al vapor, la campana sonara y la luz
roja que indica "caliente" se iluminara.
Quite los alimentos de la arrocera con
cuidado, el contenedor estará caliente.
Si necesita seguir cocinando un poco más
al vapor asegúrese que haya todavía
suficiente agua esta en el contenedor
removible. Si no agregue más agua
caliente o mas caldo.
7. Apague la arrocera y desconecte de
la pared. Permita que se enfríe antes
de limpiar.
SUGERENCIAS Y CONSEJOS
PARA VEGETALES AL VAPOR
••
Piezas pequeñas se cocinan al vapor más
pronto que las piezas grandes.
••
Trate de mantener los vegetales en
medida estándar para asegurar un
cocimiento uniforme.
••
Vegetales frescos o congelados se pueden
cocer al vapor.
••
Si va a cocer vegetales congelados,
no descongele.
••
La medida y forma de los vegetales, al
igual que el gusto personal, tendrá algunos
ajustes en el tiempo de cocimiento. Si es
necesario tener vegetales más suaves
permita más tiempo de cocimiento.
••
No permita que el caldo o agua llegue a
la charola de acero inoxidable. El vapor no
será efectivo.
COMIDAS AL VAPOR
No permita que la charola
removible se seque al cocinar
al vapor.
Líquido caliente puede
agregarse durante el proceso
de cocimiento al vapor.
Ambos contenedores pueden
utilizarse por separado o juntos.
SIEMPRE QUITE Y REMUEVA LA TAPADERA CUIDADOSAMENTE,
INCLINÁNDOLA PARA QUE NO LE QUEME EL VAPOR QUE ESCAPA AL
DESTAPAR.
COCINAR ARROZ cont
BR6484 RC16XL Book_AM 17/2/06 12:51 PM Page 34
Page 19

37
36
COMIDAS AL VAPOR cont
Vegetales Preparación y Cantidad Tiempo de
Sugerencias Cocimiento
(minutos)
Alcachofa quite las hojas más 2 medianas 30-35
duras y el tallo
Espárragos corte, y deje con tallo 2 manojos 12-14
Ejotes déjelos enteros 8 onzas (250grms) 13-15
Betabeles corte, no quite la cáscara 10 onzas 12-13
pequeño o mediano (300grms)
Brócoli corte en racimos 8 onzas (250grms) 8-10
Coles de Bruselas corte en medio de la base
12 onzas (375grms)
17-19
Repollo pedazos grandes 1 libra (500grms) 10-12
Zanahorias cortar en tiras 3 medianas 14-16
Pimientos Morrones
cortar en tiras 3 medianos 14-16
Coliflor cortar en racimos
12 onzas (375grms)
17-19
Apio cortar en tiras 3 tallos 5-6
Garbanzos remoje por 12 horas 1 taza/secos 40-45
Maíz todo el elote 2 elotes pequeños 20-22
Champiñones todo, sin lavar
10 onzas (300grms)
8-10
Cebollas sin cáscara, enteras 6 medianas 20-25
Chícharos frescos y sin cáscara 8 onzas (250grms) 8-10
congelados 8 onzas (250grms) 4-5
Papas para cualquier uso,
4 (5 ó 6 onzas/150-
35-40
completas
180grms cada una)
Papas enteras
6 (4 onzas/125grms)
25-30
Papas dulces cortar en pedazos 1 libra (500 grms) 20-25
Guisante completos 8 onzas (250grms) 4-5
Calabaza blanca cortar en pedazos 1 libra (500grms) 20-25
Espinaca tallo y hojas limpias
1
⁄2manojo 5
Calabaza (tierna) completa
12 onzas (350grms)
8
Nabos sin cáscara, en rodajas
12 onzas (350grms)
15-17
y cortados en piezas
Zucchini (calabaza) rebanada
12 onzas (350grms)
6
SUGERENCIAS Y CONSEJOS
PARA COCINAR AL VAPOR
PESCADO Y MARISCOS
••
Sazone el pescado con hierbas frescas,
cebollas, limón, etc. antes de cocinar.
••
Asegúrese de que los filetes de pescado
no esten encima uno de otro.
••
El pescado esta cocido cuando al enterrar
el tenedor esta blando y el color es opaco.
COMIDAS AL VAPOR cont
Tipo Tiempo de Sugerencias y Consejos
Cocimiento
(minutos)
Pescado - Filetes 8-10 Al vapor y hasta que este opaco y blando.
Pescado - Entero 15-20 El bistec esta cocido cuando el centro se
Pescado - Bistec 12-14 remueve fácilmente.
Langosta - colas 18-20 Remueva debajo de la concha
Mejillones - en su 12-14 Al vapor hasta que se abran
concha
Almejas y Moluscos 8-10 Al vapor hasta que se abran
Camarón - con cáscara
8-10 Al vapor hasta que esten rosa
Ostras 4-6 Al vapor hasta que esten opacas
Ostiones - sin abrir 10-12 Al vapor hasta que la concha de arriba
empiece abrirse. Si la concha de arriba no
empieza abrirse abra con un cuchillo.
BR6484 RC16XL Book_AM 17/2/06 12:51 PM Page 36
Page 20

39
38
SUGERENCIAS Y CONSEJOS PARA
COCINAR EMPANADAS AL VAPOR
••
Empanadas frescas o congeladas y
panecillos pueden cocinarse al vapor.
••
Coloque pequeños pedazos de papel
pergamino, u hojas de repollo o lechuga,
debajo de las empanadas para evitar que
se peguen en la charola del vapor.
COMIDAS AL VAPOR cont
SUGERENCIAS Y CONSEJOS
PARA COCINAR POLLO AL VAPOR
••
Seleccione pollo en piezas similares para
un cocimiento uniforme.
••
Para un cocimiento uniforme coloque el
pollo en capa simple.
••
Remueva la grasa y piel visible.
••
Para obtener una apariencia café, dore el
pollo antes de cocer al vapor.
••
Asegúrese que el ave que este cocinando
este suficientemente cocinado perforando
la parte mas gruesa. El ave estará
suficientemente cocinada cuando no jugo
o liquido salga de la carne.
Tipo Sugerencias y Consejos Tiempo de
Cocimiento (minutos)
Pechuga (sin hueso)
Ponga el pellejo hacia arriba 20-25
Piernas Ponga la parte más dura hacia fuera de 30-35
la canastilla de vapor de acero inoxidable
Muslos (sin hueso) Ponga la parte más dura hacia fuera de 18-20
la canastilla de vapor de acero inoxidable
Tipo Sugerencias y Consejos Tiempo de
Cocimiento (minutos)
Panecillos de pollo Cocinar/congelado 10-12
o de barbacoa
Empanadas - congeladas Separar antes de cocer 8-10
Empanadas - frescas 5-6
Desconecte la arrocera de la pared.
Permita que todas las partes se enfríen
antes de quitar la cacerola. Lave la cacerola
removible, la charola de vapor de acero
inoxidable y la tapadera de cristal en agua
jabonosa caliente, enjuague y seque
completamente.
Breville no le recomienda que las
partes de la arrocera se laven en el
lavaplatos con detergentes ásperos
y temperaturas calientes del agua
pueden manchar o distorsionar la
cacerola removible y los accesorios.
No utilice limpiadores abrasivos, jergas de
metal, o almohadillas de metal ya que estas
pueden dañar la superficie anti-adherente.
La base de acero inoxidable se puede
limpiar con una toalla húmeda y después
limpiarla completamente.
CUIDADO Y LIMPIEZA
Si quedó arroz asentado
en la cacerola, llene la
cacerola con agua jabonosa
caliente y deje remojar por
aproximadamente 10
minutos antes de limpiar.
NO SUMERJA LA BASE DE ACERO INOXIDABLE, EL CABLE O EL
ENCHUFE EN AGUA O CUALQUIER OTRO LÍQUIDO YA QUE ESTO
CAUSARA DESCARGA ELÉCTRICA.
BR6484 RC16XL Book_AM 17/2/06 12:51 PM Page 38
Page 21

41
40
RECETAS
POLLO Y ALBAHACA RISOTTO
Sirve 4
2 cucharadas de aceite de olivo
2 cucharadas de mantequilla
1 diente de ajo, machacado
1 cebolla roja, finamente picada
2 tazas (Rice Duo 6 cups) de arroz Arborio
3 tazas de caldo de pollo
2 piezas de 5 onzas (150grms) de pechugas
de pollo sin hueso, al vapor y en
rebanadas delgadas
2 tomates cortados en cubos
1
⁄2taza de queso Parmesano rallado
2 cucharadas de hojas de albahaca fresca
finamente rebanadas
Pimienta negra fresca molida
1. Vierta aceite y mantequilla en la cacerola
removible. Presione el selector de control
a "Cook". Caliente por 1 minuto, agregue
la cebolla. Cocine por 2 minutos, mueva
constantemente. Agregue el arroz,
mueva hasta tapar con el aceite.
3. Agregue el caldo, cubra con la tapadera
y cocine hasta que el selector cambie a
"Warm". Mueva una sola vez al cocinar.
4. Mueva el arroz y envuelva al pollo,
tomates, queso, albahaca y pimienta.
Tape de nuevo y deje por 10 minutos en
"Warm" antes de servir.
RISOTTO DE ZUCCHINI Y TOMATE
Sirve 4-6
2 cucharadas de aceite de olivo
1 puerros pequeños, lavados, en rebanadas
delgadas
2 dientes de ajo, machacados
11⁄2tazas (Rice Duo 6 cups) de arroz Arborio
14 onzas (420grms) de tomates de lata
cortados en cubos
1
⁄2taza de vino blanco seco
3 tazas de caldo de pollo
1
⁄2taza de queso Parmesano rallado
1 taza de zucchini rallada
2 cucharadas de piñones tostados
1. Vierta el aceite en la cacerola removible.
Presione el selector de control hacia
abajo en "Cook". Caliente por 1 minuto,
agregue el puerro y el ajo. Cocine por 2
minutos, mueva constantemente.
Agregue el arroz, mueva hasta tapar con
el aceite.
2. Agregue los tomates, vino y caldo. Cubra
con la tapadera y cocine hasta que el
selector de control cambie a "Warm".
Mueva una vez durante el cocimiento.
3. Mueva el arroz y envuelva el queso,
zucchini, y los piñones. Cubra nuevamente
con la tapadera y deje por 10 minutos en
"Warm" antes de servir.
Las medidas usadas son
tazas y cucharas estándar
excepto cuando las medidas
con la taza arrocera (Rice
Duo 6 cups) se especifiquen.
RISSOTO DE CHAMPIÑÓN
Sirve 4-6
2 cucharadas de aceite de olivo
2 cucharadas de mantequilla
1 cebolla morena, finamente picada
5 onzas (150grms) de botones de champiñón,
rebanados
21⁄2tazas (Rice Duo 6 ) de arroz Arborio
3 tazas de caldo de pollo
1
⁄4taza de queso rallado Parmesano
1 cucharada de perejíl (italiano) picado
1. Vierta la mantequilla y aceite en la
cacerola removible. Empuje el selector de
control a "Cook". Caliente por 1 minuto,
agregue la cebolla y champiñones. Cocine
por 5 minutos o hasta que los
champiñones esten blandos, mueva
constantemente. Agregue el arroz, mueva
y cubra con el aceite.
2. Agregue el caldo. Cubra con la tapadera
y cocine hasta que el selector de control
cambie a "Warm". Mueva una vez
durante el cocimiento.
3. Mueva el arroz y envuelva con los quesos
y perejíl. Cubra nuevamente y deje por
10 minutos en "Warm" antes de servir.
PAELLA DE MARISCOS
Sirve 4-6
1
⁄4taza de aceite de olivo
1 cebolla roja, en cubos
3 dientes de ajo, machacados
1 cucharadita de jengibre fresco rallado
11⁄2taza (Rice Duo 6 ) de arroz de grano largo,
lavado
4 tazas de caldo de mariscos o pollo
1lb. (500grms) de mariscos mixtos (camarón,
calamar, pulpo, molusco, filete de
pescado blanco)
1
⁄2taza de pimiento rojo tostado sin cáscara y
picado
1 cucharada de jugo de lima fresco
2 tomates en cubos
1
⁄4cucharadita de polvo de chile
2 cucharadas de cilantro fresco picado
1. Vierta el aceite en la cacerola removible.
Presione el selector de control a "Cook".
Caliente por 1 minuto, agregue la cebolla,
ajo y jengibre. Cocine por 2 minutos,
mueva constantemente. Agregue el arroz,
mueva y cubra con el aceite.
2. Agregue el caldo. Cubra con la tapadera y
cocine por 10 minutos. Agregue y mezcle
los mariscos, pimienta y jugo de lima.
Cubra nuevamente y cocine hasta que el
selector de control cambie a "Warm".
3. Mueva la mezcla del arroz y envuelva con
los tomates, chile y cilantro. Cubra
y deje por 10 minutos en "Warm" antes
de servir.
RECETAS cont
BR6484 RC16XL Book_AM 17/2/06 12:51 PM Page 40
Page 22

43
42
ARROZ SUSHI
4 tazas (Rice Duo 6 ) de arroz blanco de
grano chico, lavado
4 tazas de agua
2 cucharadas de vinagre de arroz
2 cucharadas de azúcar
1
⁄2cucharaditas de sal
1 cucharada de vinagre de arroz, extra
1. Vierta el arroz lavado y agua en la
cacerola removible. Presione el selector
de control hacia abajo a "Cook".
2. Cubra con la tapadera y cocine hasta que
el selector de control cambie a "Warm".
3. Mueva el arroz, cubra con la tapadera y
deje por 10 minutos en "Warm".
4. Cambie el arroz a un plato hondo grande
5. Caliente el vinagre, azúcar y sal en un
sartén pequeño a fuego lento hasta que
la azúcar se disuelva. Rocíe la mezcla
del vinagre sobre el arroz, mezcle bien.
6. Use inmediatamente como se requiere
en las recetas de Sushi.
SUGERENCIA: Algunas recetas de Sushi
requieren que el arroz se forme con la
mano. Al hacer esto, combine 1 cucharada
de arroz de vinagre con
1
⁄4taza de agua. Use
esta mezcla para mantener las manos
mojadas al formar el arroz.
SUGERENCIA: El arroz sobrante de Sushi
puede congelarse.
Uso Recomendado Rollos de Sushi
6 hojas de algas marinas Nori
Arroz Sushi
Pasta Wasabi, al gusto
Agregue cualquiera de estas combinaciones
como relleno:
Salmón ahumado, rebanadas delgadas
Jengibre Japonés y vegetales
Pepino finamente rebanado
Salmón Sashimi o atún
Aguacate
Espárragos cocidos
Cangrejo fresco
Lechuga finamente rallada
Mayonesa
1. Coloque una hoja de algas marinas, el
lado brilloso hacia abajo en un pliego de
papel pergamino o un mantel individual
de bambú.
2. Unte una porción de arroz sobre
1
⁄3de la
hoja de Nori, dejando un bordo.
3. Unte una capa de pasta de wasabi
delgada en una línea ancha al centro
del arroz. Rellene con la selección
de combinaciones.
4. Usando el papel o el mantel como
guía, enruede la hoja de Nori para cerrar
con el relleno. Presione en las orillas
para cerrar.
5. Use un cuchillo filoso para corta los
rollos en porciones pequeñas.
6. Repita el procedimiento con las hojas de
Nori y relleno restante. Enfríe hasta que
este listo para servir.
RECETAS cont
ENSALADA DE ARROZ Y PIMIENTA
Sirve 4-6
1 taza (Rice Duo 6 ) de arroz blanco, lavado
1 taza (Rice Duo 6 de arroz moreno, lavado
1 taza (Rice Duo 6 ) de mezcla de arroz
salvaje, lavado
5 tazas de caldo de pollo
121⁄2onzas (375grms) de pimiento rojo
marinado, finamente picado
4 onzas (120grms) de queso feta, en cubos
5 onzas (150grms) de aceitunas negras
Kalamata con hueso
2 cucharadas de albahaca pesto
3
⁄4taza de aderezo ensalada César, preparado
1
⁄2taza de aderezo de ensalada Italiana,
preparado
2
cucharadas de salsa dulce de chile Tailandés
1. Vierta el arroz lavado y el caldo en la
cacerola removible. Presione el selector
de control a "Cook".
2. Cubra con la tapadera y cocine hasta que
el selector cambie a "Warm". Mueva una
vez durante el cocimiento.
3. Deje el arroz, cubra con la tapadera por
10 minutos en "Warm".
4. Sirva el arroz en un plato hondo grande
para que enfríe. Esto permite que los
granos de arroz esten separados.
5. En una cacerola grande, mezcle el arroz
frío con la pimienta, el queso feta y
aceitunas.
6. Combine con el pesto, los aderezos de
ensalada y la salsa de chile en un
recipiente con rosca. Agite bien y sirva
sobre la ensalada del arroz antes de
servir. Sirva frío.
ENSALADA DE ARROZ SALVAJE
ORIENTAL
Sirve 4-6
2 cucharadas de aceite
2 dientes de ajo, machacados
4 chalotes, rebanadas delgadas
21⁄4taza (Rice Duo 6 ) de mezcla de arroz
salvaje, lavado
4 tazas de caldo de pollo
7 onzas (200grms) de chícharos,
blanqueados
1
⁄4taza de almendras ahumadas en mitades
2 cucharadas de vinagre de bálsamo
3 cucharaditas de salsa soya
1 cucharada de aceite de ajonjolí
2
cucharadas de salsa de chile dulce Tailandés
2 cucharadas de vinagre de arroz
1. Vierta el aceite en la charola removible.
Presione el selector de control a "Cook".
Caliente por 1 minuto, agregue ajo y
chalotes. Cocine por 2 minutos, mueva
constantemente. Agregue el arroz,
mueva para cubrir con el aceite.
2. Agregue el caldo, cubra con la tapadera
y cocine hasta que el selector de control
cambie a "Warm". Mueva una vez
mientras se cocina.
3. Deje el arroz, cubra con la tapadera por
10 minutos en "Warm".
4. Sirva el arroz en un plato. Agregue los
chícharos y almendras.
5. Combine el vinagre, salsa soya, aceite de
ajonjolí, salsa de chile y vinagre en un
recipiente con rosca y agite bien. Rocíe a
la ensalada al servir. Sirva tibio.
RECETAS cont
BR6484 RC16XL Book_AM 17/2/06 12:51 PM Page 42
Page 23

45
44
PUDÍN DE ARROZ Y MANGO
TROPICAL
Sirve 4-6
13⁄4taza (Rice Duo 6 ) de arroz blanco de
grano chico, lavado
1 taza de néctar de mango
1 taza de agua
15 onzas (450grms) de duraznos enlatados
en rebanadas, sin líquido, guarde el jugo
2 cucharaditas de sabor lima
1
⁄2taza de crema de coco
1
⁄4taza de pulpa de fruta de la pasión
(puede encontrarse congelada en
Mercados Asiáticos)
1 cucharada de azúcar de canela
1. Vierta el arroz, néctar de mango, agua,
y el jugo de durazno en la charola
removible y mueva hasta mezclar. Cubra
con la tapadera y presione el selector de
control a "Cook".
2. Cubra hasta que el selector de control
cambie a "Warm". Mueva una vez durante
el cocimiento.
3. Mueva la mezcla del arroz y envuelva con
la lima, crema de coco y pulpa de fruta de
la pasión. Cubra nuevamente y deje por
10 minutos en "Warm".
4. Sirva tibio con duraznos y espolvoree con
azúcar de canela.
PUDÍN DE ARROZ Y ARÁNDANO
SALVAJE
Sirve 4-6
11⁄2taza (Rice Duo 6 ) de arroz blanco de
grano chico, lavado
2 tazas de agua
1
⁄4taza de miel tibia
2 cucharadas de mantequilla, derretida
1 taza de crema
1
⁄2taza de mirtilos congelados o frescos
1
⁄2taza de frambuesas congeladas o frescas
1
⁄2taza de zarzamoras congeladas o frescas
1
⁄2taza de fresas congeladas o frescas
1
⁄4de taza de azúcar de repostería
1
⁄4de taza de agua
2 cucharadas de Oporto
1. Vierta el arroz y agua en la charola
removible. Cubra con la tapadera y
presione el selector de control a "Cook".
2. Cocine hasta que el selector de control
cambie a "Warm". Mueva una vez durante
el cocimiento.
3. Mueva el arroz y envuelva con la miel,
mantequilla y crema. Cubra nuevamente
y deje por 10 minutos en "Warm".
4. Vierta los mirtilos, frambuesas,
zarzamoras, fresas, azúcar, agua y
Oporto en el procesador de comida o
licuadora hasta que espese.
5. Cubra la mezcla de arándanos en el arroz
y sirva en vasos.
6. Sirva con arándanos y crema si desea.
RECETAS AL VAPOR
PESCADO ENTERO AL VAPOR
CON JENGIBRE Y CHALOTES
1 filete de 12-13 onzas (300-400grms) de
pescado snapper o flounder, limpio y sin
escamas
1
⁄2manojo de cilantro
2 cucharadas de salsa soya
1 cucharada de aceite de cacahuate
3
⁄4" (2cms) de jengibre fresco, cortar en tiras
iguales
3 chalotes, finamente rebanados
1 lima, rebanada
1. Lave y seque el pescado. Corte 2
hendiduras en un ángulo de 45º al filete.
En cada hendidura, rellene con jengibre y
una rebanada de lima.
2. Vierta la mitad del manojo del cilantro en
la hendidura del pescado. Coloque el
filete en la charola del vapor.
3. Vierta 3 tazas (Rice Duo 6) de agua en la
cacerola removible. Cubra con la
tapadera y presione el selector de control
a "Cook". Cuando el agua este hirviendo,
coloque la charola del vapor en la
cacerola removible, cubra nuevamente y
deje el pescado al vapor por 15 minutos o
hasta que este cocido cuando lo revise.
4. Sirva el pescado en un plato.
5. Combine la salsa soya, aceite y chalotes,
vierta en el pescado. Sirva
inmediatamente con arroz jazmín.
FILETES DE SALMÓN AL VAPOR
CON SALSA DE TOMATE Y
ALBAHACA
Sirve 4
1 cucharada de aceite de olivo
2 chalotes, en cubos
1
⁄4taza de vinagre de vino blanco
2 tomates maduros, en cubos
10 hojas de albahaca, finamente rebanadas
1 cucharada de vinagre de bálsamo
2 cucharadas de aceite de olivo
2 filetes de 5 onzas (150grms) de salmón
sal y pimienta, si se desea
3 tazas (Rice Duo 6 ) de caldo de pescado
1. Caliente un sartén a fuego medio,
agregue el aceite y chalotes en cubos,
cocine por un minuto o hasta que los
chalotes esten blandos, agregue el
vinagre y deje que la mezcla se reduzca a
la mitad. Agregue los tomates y hierva la
mezcla, quite del fuego. Enfríe la mezcla
de la salsa y agregue la albahaca, vinagre
de bálsamo, y aceite.
2. Coloque los filetes de salmón en la charola
del vapor y espolvoree con sal y pimienta.
3. Coloque el caldo en la charola removible.
Cubra y presione el selector de control a
"Cook". Cuando el caldo este hirviendo,
coloque la charola del vapor en la
cacerola removible, cubra y cocine de 6-8
minutos para término medio o 10
minutos para bien cocido.
4. Sirva el salmón con la salsa de tomate y
albahaca caliente y ensalada de hojas
mixtas.
RECETAS AL VAPOR cont
BR6484 RC16XL Book_AM 17/2/06 12:51 PM Page 44
Page 24

47
46
VEGETALES AL VAPOR (GADO
GADO TIBIO)
1 manojo de bok choy, en tiras y rebanados
1 cabeza pequeña de brócoli, cortar en racimos
10 chícharos
1 zanahoria, sin cáscara y rebanadas delgadas
10 onzas (300grms) de tofú en cubos
1 taza (250ml) de Salsa de Cacahuate
(ver receta)
1. Vierta los vegetales y el tofú en la charola
del vapor. Vierta 3 tazas de agua (Rice
Duo 6 ) en la charola removible. Cubra
con la tapadera, coloque la charola del
vapor en la charola removible, tape y
cocine de 5 a 7 minutos.
2. Vierta los vegetales y el tofú en un plato y
rocíe con Salsa de Cacahuate tibia.
SALSA DE CACAHUATE
1 cebolla machacada
1 diente de ajo
3
⁄4" (2cms) de jengibre fresco machacado
1 cucharada de aceite
1 cucharada de polvo curry
1 cucharada de salsa soya
1
⁄4taza de mantequilla de cacahuate crujiente
1 cucharadita de pasta de chile
2 cucharaditas de azúcar morena
1 cucharada de leche de coco
1. Vierta la cebolla, jengibre y ajo en el
procesador de comida hasta que quede
finamente picado.
2. Caliente el aceite en un sartén a fuego
medio. Agregue la mezcla de la cebolla y
fría de 3 a 4 minutos.
3. Agregue el polvo curry y salsa soya.
Mezcle bien antes de agregar la
mantequilla de cacahuate, azúcar, pasta
de chile.
4. Agregue la leche de coco y revuelva hasta
que la salsa este espesa. Aumente el
fuego y cocine por 5 minutos.
RECETAS AL VAPOR cont
PECHUGAS DE POLLO
MEXICANAS MARINADAS
Sirve 4
4 pechugas de 5 onzas (120-150grms)
supremas de pollo sin hueso o muslos
sin hueso
1
⁄2cebolla mediana, picada
4 dientes de ajo, machacados
1
⁄2cucharadita de semillas de comino
1
⁄2cucharadita de tomillo seco
1
⁄2cucharadita de orégano seco
1
⁄2cucharadita de hojuelas de pimiento rojo
1
⁄2cucharadita de sal
1 hoja de laurel
1 taza de jugo de naranja, preferentemente
recién hecho
1. Combine la cebolla, ajo, hierbas, especias
y jugo de naranja en un contenedor
hondo que no sea de metal. Agregue
los pedazos de pollo en una sola capa,
cubra y marine hasta 4 horas o por la
noche en el refrigerador, volteando el
pollo varias veces.
2. Vierta el pollo marinado en la charola
del vapor.
3. Vierta 3 tazas de agua (Rice Duo 6 ) en la
charola removible. Cubra con la tapadera
y presione el selector de control en
"Cook". Cuando el agua este hirviendo,
coloque la charola del vapor en la
cacerola removible, cubra nuevamente y
cocine de 20 a 25 minutos o hasta que
este cocido cuando lo revise. Rebane el
pollo en tiras delgadas.
4. Sirva con arroz montado y salsa de
tomate o mango.
RECETAS AL VAPOR cont
BR6484 RC16XL Book_AM 17/2/06 12:51 PM Page 46
Page 25

49
48
HWI/Breville® le garantizá que esté
producto se encuentrá libre de cualquier
defecto en el material y mano de obra por
un período de (1) año a partir de la compra
original, excepto como se hace notar. No hay
garantía con respecto a lo siguiente, que se
puede adquirir con esté aparato: partes de
cristal, recipientes de cristal, filtros de
canasta, cuchillas y/o agitadores. Está
garantía se extiende solamente al
comprador original y no cubre los siguientes
daños, por abuso negligencia, uso comercial,
y cualquier otro uso que no se encuentre en
las instrucciones. HWI/Metro-Thebe, INC.
NO TIENE RESPONSABILIDAD POR EL USO
INDEBIDO O ACCIDENTES CAUSADOS POR
ESTE APARATO. Algunos estados o
provincias no permiten está exclusión o
limitación de incidentes o consecuencias de
perdidas, así que está explicación no aplica.
Si usted tiene alguna queja bajo esta
garantía, NO REGRESE ESTE APARATO A LA
TIENDA!! Por favor hable al SERVICIO AL
CLIENTE (Para un servicio más rápido tenga
a la mano el modelo y número de serie al
hablar con la operadora.)
NUMERO DE SERVICIO AL CLIENTE
1-866-BREVILLE (1-866-273-8455)
GUARDE ESTE NUMERO PARA
REFERENCIAS FUTURAS!!!
Está garantía le da derechos especifícos
legales, y usted podrá tener algunos
otros derechos que varían del estado o
provincia en que usted vive.
SERVICIO AL CLIENTE UN AÑO DE GARANTIA LIMITADA
_ _ _ _ _ _ _ _ _ _ _ _ _ _ _ _ _ _ _ _ _ _ _ _ _ _ _ _ _ _ _ _ _ _ _ _ _ _ _ _ _ _ _ _ _ _ _ _ _ _ _ _ _ _ _ _ _ _ _ _ _ _ _ _ _ _ _ _ _ _ _ _ _ _ _ _ _ _ _ _ _ _ _ _ _ _ _ _ _ _ _ _ _ _ _ _ _ _ _ _ _ _ _ _ _ _ _
_ _ _ _ _ _ _ _ _ _ _ _ _ _ _ _ _ _ _ _ _ _ _ _ _ _ _ _ _ _ _ _ _ _ _ _ _ _ _ _ _ _ _ _ _
_ _ _ _ _ _ _ _ _ _ _ _ _ _ _ _ _ _ _ _ _ _ _ _ _ _ _ _ _ _ _ _ _ _ _ _ _ _ _ _ _ _ _ _ _ _ _ _ _ _ _ _ _ _ _ _ _ _ _ _ _ _
_ _ _ _ _ _ _ _ _ _ _ _ _ _ _ _ _ _ _ _ _ _ _ _ _ _ _ _ _ _ _ _ _ _ _ _ _ _ _
_ _ _ _ _ _ _ _ _ _ _ _ _ _ _ _ _ _ _ _ _ _ _ _ _ _ _ _ _ _ _ _ _ _ _ _ _ _ _ _ _ _ _ _ _ _ _ _ _ _ _ _ _ _ _ _ _ _ _ _ _ _ _ _ _ _ _ _
_ _ _ _ _ _ _ _ _ _ _ _ _ _ _ _ _ _ _ _ _ _ _ _ _ _ _ _ _ _ _ _ _
_ _ _ _ _ _ _ _ _ _ _ _ _ _ _ _ _ _ _ _ _ _ _ _ _ _ _ _ _ _ _ _ _ _ _ _ _ _ _ _ _ _ _ _ _ _ _ _ _ _ _ _ _ _ _ _ _ _ _ _ _ _ _ _ _ _ _ _ _ _ _ _ _ _
_ _ _ _ _ _ _ _ _ _ _ _ _ _ _ _ _ _ _ _ _ _ _ _ _ _ _
_ _ _ _ _ _ _ _ _ _ _ _ _ _ _ _ _ _ _ _ _ _ _ _ _ _ _ _ _ _ _ _ _ _ _ _ _ _ _ _ _ _ _ _ _ _ _ _ _ _ _ _ _ _ _ _ _ _ _ _ _ _ _ _ _ _ _ _ _ _ _ _ _ _ _ _ _ _ _ _
_ _ _ _ _ _ _ _ _ _ _ _ _ _ _ _ _ _ _ _ _
_ _ _ _ _ _ _ _ _ _ _ _ _ _ _ _ _ _ _ _ _ _ _ _ _ _ _ _ _ _ _ _ _ _ _ _ _ _ _ _ _ _ _ _ _ _ _ _ _ _ _ _ _ _ _ _ _ _ _ _ _ _ _ _ _ _ _ _ _ _ _ _ _ _ _ _ _ _ _ _ _ _ _ _ _ _
_ _ _ _ _ _ _ _ _ _ _ _ _ _ _
_ _ _ _ _ _ _ _ _ _ _ _ _ _ _ _ _ _ _ _ _ _ _ _ _ _ _ _ _ _ _ _ _ _ _ _ _ _ _ _ _ _ _ _ _ _ _ _ _ _ _ _ _ _ _ _ _ _ _ _ _ _ _ _ _ _ _ _ _ _ _ _ _ _ _ _ _ _ _ _ _ _ _ _ _ _ _ _ _ _ _ _
_ _ _ _ _ _ _ _ _
_ _ _ _ _ _ _ _ _ _ _ _ _ _ _ _ _ _ _ _ _ _ _ _ _ _ _ _ _ _ _ _ _ _ _ _ _ _ _ _ _ _ _ _ _ _ _ _ _ _ _ _ _ _ _ _ _ _ _ _ _ _ _ _ _ _ _ _ _ _ _ _ _ _ _ _ _ _ _ _ _ _ _ _ _ _ _ _ _ _ _ _ _ _ _ _ _ _
_ _ _
_ _ _ _ _ _ _ _ _ _ _ _ _ _ _ _ _ _ _ _ _ _ _ _ _ _ _ _ _ _ _ _ _ _ _ _ _ _ _ _ _ _ _ _ _ _ _ _ _ _ _ _ _ _ _ _ _ _ _ _ _ _ _ _ _ _ _ _ _ _ _ _ _ _ _ _ _ _ _ _ _ _ _ _ _ _ _ _ _ _ _ _ _ _ _ _ _ _ _ _ _ _ _ _
_ _ _ _ _ _ _ _ _ _ _ _ _ _ _ _ _ _ _ _ _ _ _ _ _ _ _ _ _ _ _ _ _ _ _ _ _ _ _ _ _ _ _ _ _ _ _
_ _ _ _ _ _ _ _ _ _ _ _ _ _ _ _ _ _ _ _ _ _ _ _ _ _ _ _ _ _ _ _ _ _ _ _ _ _ _ _ _ _ _ _ _ _ _ _ _ _ _ _ _ _ _ _ _ _ _ _
_ _ _ _ _ _ _ _ _ _ _ _ _ _ _ _ _ _ _ _ _ _ _ _ _ _ _ _ _ _ _ _ _ _ _ _ _ _ _ _ _
_ _ _ _ _ _ _ _ _ _ _ _ _ _ _ _ _ _ _ _ _ _ _ _ _ _ _ _ _ _ _ _ _ _ _ _ _ _ _ _ _ _ _ _ _ _ _ _ _ _ _ _ _ _ _ _ _ _ _ _ _ _ _ _ _ _
_ _ _ _ _ _ _ _ _ _ _ _ _ _ _ _ _ _ _ _ _ _ _ _ _ _ _ _ _ _ _ _ _ _ _
_ _ _ _ _ _ _ _ _ _ _ _ _ _ _ _ _ _ _ _ _ _ _ _ _ _ _ _ _ _ _ _ _ _ _ _ _ _ _ _ _ _ _ _ _ _ _ _ _ _ _ _ _ _ _ _ _ _ _ _ _ _ _ _ _ _ _ _ _ _ _ _
_ _ _ _ _ _ _ _ _ _ _ _ _ _ _ _ _ _ _ _ _ _ _ _ _ _ _ _ _
_ _ _ _ _ _ _ _ _ _ _ _ _ _ _ _ _ _ _ _ _ _ _ _ _ _ _ _ _ _ _ _ _ _ _ _ _ _ _ _ _ _ _ _ _ _ _ _ _ _ _ _ _ _ _ _ _ _ _ _ _ _ _ _ _ _ _ _ _ _ _ _ _ _ _ _ _ _
_ _ _ _ _ _ _ _ _ _ _ _ _ _ _ _ _ _ _ _ _ _ _
_ _ _ _ _ _ _ _ _ _ _ _ _ _ _ _ _ _ _ _ _ _ _ _ _ _ _ _ _ _ _ _ _ _ _ _ _ _ _ _ _ _ _ _ _ _ _ _ _ _ _ _ _ _ _ _ _ _ _ _ _ _ _ _ _ _ _ _ _ _ _ _ _ _ _ _ _ _ _ _ _ _ _ _
_ _ _ _ _ _ _ _ _ _ _ _ _ _ _ _ _
_ _ _ _ _ _ _ _ _ _ _ _ _ _ _ _ _ _ _ _ _ _ _ _ _ _ _ _ _ _ _ _ _ _ _ _ _ _ _ _ _ _ _ _ _ _ _ _ _ _ _ _ _ _ _ _ _ _ _ _ _ _ _ _ _ _ _ _ _ _ _ _ _ _ _ _ _ _ _ _ _ _ _ _ _ _ _ _ _ _
_ _ _ _ _ _ _ _ _ _ _
_ _ _ _ _ _ _ _ _ _ _ _ _ _ _ _ _ _ _ _ _ _ _ _ _ _ _ _ _ _ _ _ _ _ _ _ _ _ _ _ _ _ _ _ _ _ _ _ _ _ _ _ _ _ _ _ _ _ _ _ _ _ _ _ _ _ _ _ _ _ _ _ _ _ _ _ _ _ _ _ _ _ _ _ _ _ _ _ _ _ _ _ _ _ _ _
_ _ _ _ _
_ _ _ _ _ _ _ _ _ _ _ _ _ _ _ _ _ _ _ _ _ _ _ _ _ _ _ _ _ _ _ _ _ _ _ _ _ _ _ _ _ _ _ _ _ _ _ _ _ _ _ _ _ _ _ _ _ _ _ _ _ _ _ _ _ _ _ _ _ _ _ _ _ _ _ _ _ _ _ _ _ _ _ _ _ _ _ _ _ _ _ _ _ _ _ _ _ _ _ _ _ _
_ _ _ _ _ _ _ _ _ _ _ _ _ _ _ _ _ _ _ _ _ _ _ _ _ _ _ _ _ _ _ _ _ _ _ _ _ _ _ _ _ _ _ _ _ _ _ _ _ _
_ _ _ _ _ _ _ _ _ _ _ _ _ _ _ _ _ _ _ _ _ _ _ _ _ _ _ _ _ _ _ _ _ _ _ _ _ _ _ _ _ _ _ _ _ _ _ _ _ _ _ _ _ _ _ _ _
NOTAS
BR6484 RC16XL Book_AM 17/2/06 12:51 PM Page 48
Page 26

50
51
_ _ _ _ _ _ _ _ _ _ _ _ _ _ _ _ _ _ _ _ _ _ _ _ _ _ _ _ _ _ _ _ _ _ _ _ _ _ _ _ _ _ _ _ _ _ _ _ _ _ _ _ _ _ _ _ _ _ _ _ _ _ _ _ _ _ _ _ _ _ _ _ _ _ _ _ _ _ _ _ _ _ _ _ _ _ _ _ _ _ _ _ _ _ _ _ _ _ _ _ _ _ _ _ _ _ _
_ _ _ _ _ _ _ _ _ _ _ _ _ _ _ _ _ _ _ _ _ _ _ _ _ _ _ _ _ _ _ _ _ _ _ _ _ _ _ _ _ _ _ _ _
_ _ _ _ _ _ _ _ _ _ _ _ _ _ _ _ _ _ _ _ _ _ _ _ _ _ _ _ _ _ _ _ _ _ _ _ _ _ _ _ _ _ _ _ _ _ _ _ _ _ _ _ _ _ _ _ _ _ _ _ _ _
_ _ _ _ _ _ _ _ _ _ _ _ _ _ _ _ _ _ _ _ _ _ _ _ _ _ _ _ _ _ _ _ _ _ _ _ _ _ _
_ _ _ _ _ _ _ _ _ _ _ _ _ _ _ _ _ _ _ _ _ _ _ _ _ _ _ _ _ _ _ _ _ _ _ _ _ _ _ _ _ _ _ _ _ _ _ _ _ _ _ _ _ _ _ _ _ _ _ _ _ _ _ _ _ _ _ _
_ _ _ _ _ _ _ _ _ _ _ _ _ _ _ _ _ _ _ _ _ _ _ _ _ _ _ _ _ _ _ _ _
_ _ _ _ _ _ _ _ _ _ _ _ _ _ _ _ _ _ _ _ _ _ _ _ _ _ _ _ _ _ _ _ _ _ _ _ _ _ _ _ _ _ _ _ _ _ _ _ _ _ _ _ _ _ _ _ _ _ _ _ _ _ _ _ _ _ _ _ _ _ _ _ _ _
_ _ _ _ _ _ _ _ _ _ _ _ _ _ _ _ _ _ _ _ _ _ _ _ _ _ _
_ _ _ _ _ _ _ _ _ _ _ _ _ _ _ _ _ _ _ _ _ _ _ _ _ _ _ _ _ _ _ _ _ _ _ _ _ _ _ _ _ _ _ _ _ _ _ _ _ _ _ _ _ _ _ _ _ _ _ _ _ _ _ _ _ _ _ _ _ _ _ _ _ _ _ _ _ _ _ _
_ _ _ _ _ _ _ _ _ _ _ _ _ _ _ _ _ _ _ _ _
_ _ _ _ _ _ _ _ _ _ _ _ _ _ _ _ _ _ _ _ _ _ _ _ _ _ _ _ _ _ _ _ _ _ _ _ _ _ _ _ _ _ _ _ _ _ _ _ _ _ _ _ _ _ _ _ _ _ _ _ _ _ _ _ _ _ _ _ _ _ _ _ _ _ _ _ _ _ _ _ _ _ _ _ _ _
_ _ _ _ _ _ _ _ _ _ _ _ _ _ _
_ _ _ _ _ _ _ _ _ _ _ _ _ _ _ _ _ _ _ _ _ _ _ _ _ _ _ _ _ _ _ _ _ _ _ _ _ _ _ _ _ _ _ _ _ _ _ _ _ _ _ _ _ _ _ _ _ _ _ _ _ _ _ _ _ _ _ _ _ _ _ _ _ _ _ _ _ _ _ _ _ _ _ _ _ _ _ _ _ _ _ _
_ _ _ _ _ _ _ _ _
_ _ _ _ _ _ _ _ _ _ _ _ _ _ _ _ _ _ _ _ _ _ _ _ _ _ _ _ _ _ _ _ _ _ _ _ _ _ _ _ _ _ _ _ _ _ _ _ _ _ _ _ _ _ _ _ _ _ _ _ _ _ _ _ _ _ _ _ _ _ _ _ _ _ _ _ _ _ _ _ _ _ _ _ _ _ _ _ _ _ _ _ _ _ _ _ _ _
_ _ _
_ _ _ _ _ _ _ _ _ _ _ _ _ _ _ _ _ _ _ _ _ _ _ _ _ _ _ _ _ _ _ _ _ _ _ _ _ _ _ _ _ _ _ _ _ _ _ _ _ _ _ _ _ _ _ _ _ _ _ _ _ _ _ _ _ _ _ _ _ _ _ _ _ _ _ _ _ _ _ _ _ _ _ _ _ _ _ _ _ _ _ _ _ _ _ _ _ _ _ _ _ _ _ _
_ _ _ _ _ _ _ _ _ _ _ _ _ _ _ _ _ _ _ _ _ _ _ _ _ _ _ _ _ _ _ _ _ _ _ _ _ _ _ _ _ _ _ _ _ _ _
_ _ _ _ _ _ _ _ _ _ _ _ _ _ _ _ _ _ _ _ _ _ _ _ _ _ _ _ _ _ _ _ _ _ _ _ _ _ _ _ _ _ _ _ _ _ _ _ _ _ _ _ _ _ _ _ _ _ _ _
_ _ _ _ _ _ _ _ _ _ _ _ _ _ _ _ _ _ _ _ _ _ _ _ _ _ _ _ _ _ _ _ _ _ _ _ _ _ _ _ _
_ _ _ _ _ _ _ _ _ _ _ _ _ _ _ _ _ _ _ _ _ _ _ _ _ _ _ _ _ _ _ _ _ _ _ _ _ _ _ _ _ _ _ _ _ _ _ _ _ _ _ _ _ _ _ _ _ _ _ _ _ _ _ _ _ _
_ _ _ _ _ _ _ _ _ _ _ _ _ _ _ _ _ _ _ _ _ _ _ _ _ _ _ _ _ _ _ _ _ _ _
_ _ _ _ _ _ _ _ _ _ _ _ _ _ _ _ _ _ _ _ _ _ _ _ _ _ _ _ _ _ _ _ _ _ _ _ _ _ _ _ _ _ _ _ _ _ _ _ _ _ _ _ _ _ _ _ _ _ _ _ _ _ _ _ _ _ _ _ _ _ _ _
_ _ _ _ _ _ _ _ _ _ _ _ _ _ _ _ _ _ _ _ _ _ _ _ _ _ _ _ _
_ _ _ _ _ _ _ _ _ _ _ _ _ _ _ _ _ _ _ _ _ _ _ _ _ _ _ _ _ _ _ _ _ _ _ _ _ _ _ _ _ _ _ _ _ _ _ _ _ _ _ _ _ _ _ _ _ _ _ _ _ _ _ _ _ _ _ _ _ _ _ _ _ _ _ _ _ _
_ _ _ _ _ _ _ _ _ _ _ _ _ _ _ _ _ _ _ _ _ _ _
_ _ _ _ _ _ _ _ _ _ _ _ _ _ _ _ _ _ _ _ _ _ _ _ _ _ _ _ _ _ _ _ _ _ _ _ _ _ _ _ _ _ _ _ _ _ _ _ _ _ _ _ _ _ _ _ _ _ _ _ _ _ _ _ _ _ _ _ _ _ _ _ _ _ _ _ _ _ _ _ _ _ _ _
_ _ _ _ _ _ _ _ _ _ _ _ _ _ _ _ _
_ _ _ _ _ _ _ _ _ _ _ _ _ _ _ _ _ _ _ _ _ _ _ _ _ _ _ _ _ _ _ _ _ _ _ _ _ _ _ _ _ _ _ _ _ _ _ _ _ _ _ _ _ _ _ _ _ _ _ _ _ _ _ _ _ _ _ _ _ _ _ _ _ _ _ _ _ _ _ _ _ _ _ _ _ _ _ _ _ _
_ _ _ _ _ _ _ _ _ _ _
_ _ _ _ _ _ _ _ _ _ _ _ _ _ _ _ _ _ _ _ _ _ _ _ _ _ _ _ _ _ _ _ _ _ _ _ _ _ _ _ _ _ _ _ _ _ _ _ _ _ _ _ _ _ _ _ _ _ _ _ _ _ _ _ _ _ _ _ _ _ _ _ _ _ _ _ _ _ _ _ _ _ _ _ _ _ _ _ _ _ _ _ _ _ _ _
_ _ _ _ _
_ _ _ _ _ _ _ _ _ _ _ _ _ _ _ _ _ _ _ _ _ _ _ _ _ _ _ _ _ _ _ _ _ _ _ _ _ _ _ _ _ _ _ _ _ _ _ _ _ _ _ _ _ _ _ _ _ _ _ _ _ _ _ _ _ _ _ _ _ _ _ _ _ _ _ _ _ _ _ _ _ _ _ _ _ _ _ _ _ _ _ _ _ _ _ _ _ _ _ _ _ _
_ _ _ _ _ _ _ _ _ _ _ _ _ _ _ _ _ _ _ _ _ _ _ _ _ _ _ _ _ _ _ _ _ _ _ _ _ _ _ _ _ _ _ _ _ _ _ _ _ _
_ _ _ _ _ _ _ _ _ _ _ _ _ _ _ _ _ _ _ _ _ _ _ _ _ _ _ _ _ _ _ _ _ _ _ _ _ _ _ _ _ _ _ _ _ _ _ _ _ _ _ _ _ _ _ _ _
NOTAS
BR6484 RC16XL Book_AM 17/2/06 12:51 PM Page 50
 Loading...