

Braun TexStyle 3 Series, TexStyle TS 320 C, TexStyle TS 330 C, TexStyle TS 340 C User Manual
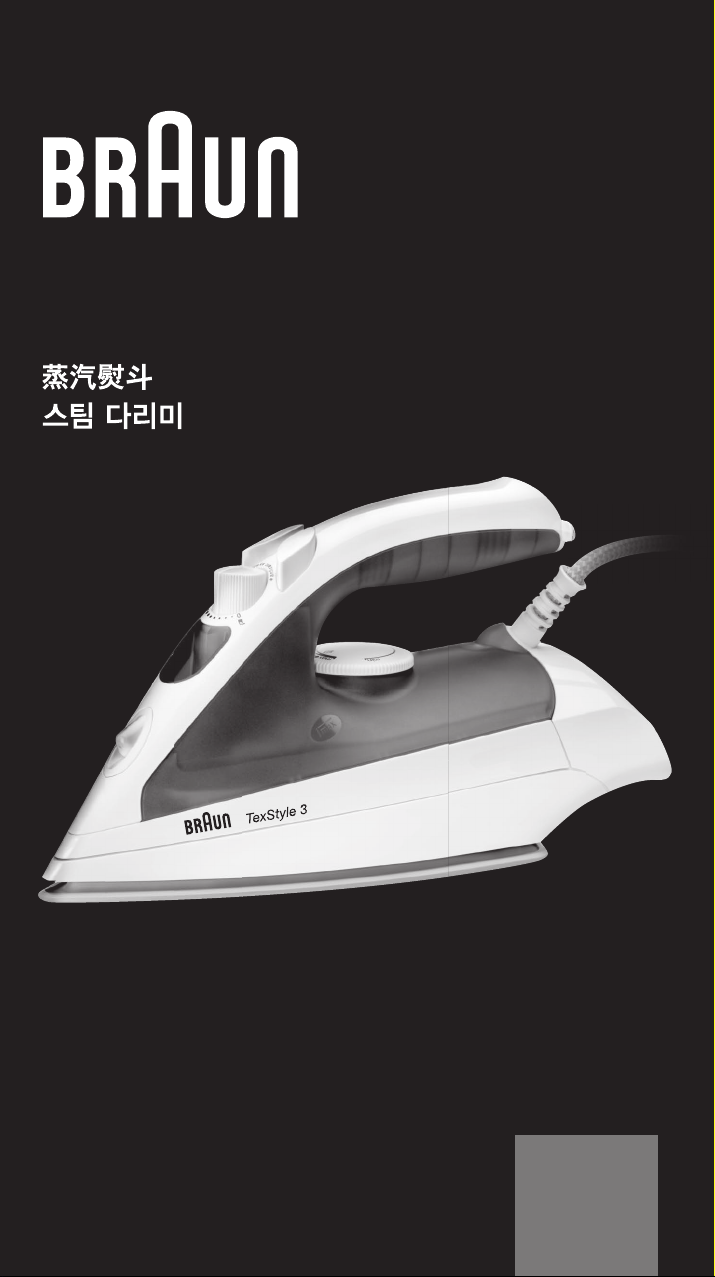
TexStyle 3
Steam Iron
Type 3670
www.braunhousehold.com
TS 320 C
TS 330 C
TS 340 C
English 4
6
9
11
De’Longhi Braun Household GmbH
Carl-Ulrich-Straße 4
63263 Neu-Isenburg/Germany
5712710314/03.16
UK/CN/KR/Arab
A
7
3
2
45
1
a
B
n
i
m
m
a
x
a
x
m
n
i
m
C
max
vario
1
steam
shot
a
x
m
n
i
m
x
a
m
n
i
m
6
8
x
a
m
n
i
m
bc
x
a
m
n
i
m
x
a
m
n
i
m
0
x
a
m
n
i
m
2
spray
a
x
m
n
i
m
3
dry
m
a
x
a
x
m
n
i
m
n
i
m
4

D
57
13
E
chemicals
Cleaning the anti-calc valve
F
2
4
vinegar or
lemon juice
Anticalc system
G
6
12 34 5
n
i
m
m
a
x
n
i
m
11
max
6
789
12
max
x
a
m
10
!
100C
13
14
4x

English
Before using the iron, read the use instructions
completely. Keep the use instructions during the
entire life of the appliance.
Important Safeguards
•
Make sure your voltage corresponds to the voltage printed on the
iron.
•
Caution: Due to the high power of
this steam iron please make sure
thatyourmainssupplyissucient.
Please contact your local electric
power company to make sure that
the so called mains impedance is
not higher than 0.42 Ohm.
•
This appliance can be used by
children aged from 8 years and
above and persons with reduced
physical, sensory or mental capabilities or lack of experience and
knowledge if they have been given
supervision or instruction concer
ning use of the appliance in a safe
way and understand the hazards
involved. Children shall not play
with the appliance. Cleaning and
user maintenance shall not be
made by children unless they are
older than 8 years and supervised.
•
During operation and cool-down,
the appliance and its mains cord
shall be kept out of reach of children under 8 years.
•
Caution: Hot surfaces! Elec-
tric irons combine high temperatures and hot steam that could
lead to burns.
•
Alwaysunplugtheironbeforelling
with water and make sure the
steam button is in its lower position
(steamo).Alwayspulltheplug,
not the cord. The cord should never
come in contact with hot objects or
with the hot sole plate.
•
Neverpulloutthesteambutton(3)
during ironing.
•
Never immerse the iron in water or
other liquids.
•
The iron must be used and rested
on a stable surface.
•
During ironing pauses, always
place the iron upright on its heel
-
rest and ensure that the heel rest
is placed on a stable surface.
•
The iron must not be left unattended while it is connected to the
mains supply.
•
The iron is not to be used if it has
dropped, if there are visible signs of
damage or if it is leaking. Regularly
check the cord for damage.
•
Iftheappliance(includingcord)
shows any defect, stop using it and
take it to a Braun Service Centre for
repair.Faultyorunqualiedrepair
work may cause accidents or injury
to the user. Braun electric applian
ces meet applicable safety standards.
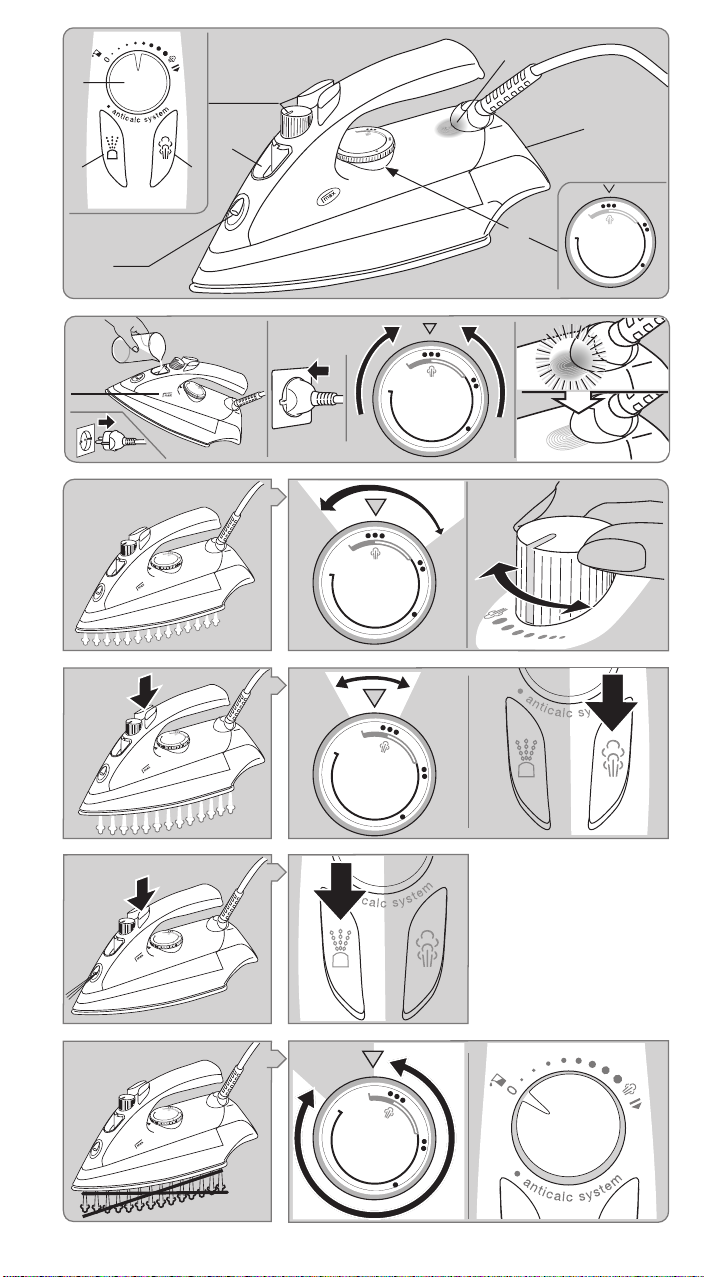
A Description
1 Spray nozzle
2 Water tank opening
3 Steam regulator
4 Spray button
5 Steam shot button
6 Temperature selector
7 Pilot light
8 Heel rest
B Before starting off
This iron is designed for tap water. If you have
extremely hard water, we recommend that you
use a mixture of 50 % tap water and 50 %
distilled water. Fill the water tank to «max»
marking. Never use distilled water exclusively.
Do not add any additives (e.g. starch). Do not
use condensation water from a tumble dryer.
• Before filling with water, turn off the steam
regulator («0» = steam off).
• Holding the iron slightly inclined (as shown in
B), fill the water tank up to the «max» marking.
• Place the iron upright on its heel rest and
connect it to the mains.
Select the temperature according to the
ironing guide on the heel rest of the iron or on
the label in your garments.
The pilot light (7) goes off when the desired
temperature is reached (after approx. 1 1/2
min.).
C Ironing
1 Vario steam
You can select the steam quantity using the
steam regulator (3)
(0= no steam,
Notice: While ironing, do not turn the steam
regulator beyond
The temperature selector (6) has to be set
between «••» and «max».
Preconditioning
Steam also develops horizontally at the front
area of the sole plate. This preconditions the
textiles by «pre-steaming», thus making
ironing easier.
Be careful – steam comes out laterally.
= maximum steam).
.
4
2 Steam shot
Prior to use, press the steam shot button (5)
3 to 4 times to activate it.
Press the steam shot button in intervals of at
least 5 seconds.
Steam shot can be activated when dry ironing.
The temperature selector has to be set
between «•••» and «max».
The steam shot function can also be used in the
vertical position for steaming hanging clothes.
3 Spray function
Press the spray button (4).
4 Dry ironing
Set the steam regulator (3) on position «0»
(= steam off).
D After ironing
Unplug the iron and turn the steam regulator to
position «0». To prolong the life of the iron,
empty the water tank. Store the cool iron in a
dry place always standing on its heel rest.
E Maintenance and cleaning
To prevent damaging the sole plate, do not iron
over metal buttons or zippers. Clean the sole
plate regularly with a damp cloth. To remove
mineral/starch residues, use a vinegar/water
mixture in the ratio of 1
wool, abrasive scouring pads, powders or other
chemicals to clean the sole plate.
:
2. Never use steel
F Cleaning the anticalc valve
The anticalc valve located on the lower end of the
steam regulator (3) has to be decalcified
regularly (e.g. whenever steam development is
insufficient). For this, the water tank has to be
empty.
Removing the steam regulator with the anticalc
valve:
Turn the steam regulator clockwise towards
Keep on turning firmly beyond the resistance
until the steam regulator is lifted. When
positioned at «•» (anticalc system), pull it out
vertically. Do not touch the anticalc valve at its
lower end. Immerse the anticalc valve in vinegar
(not vinegar essence) or lemon juice for a
minimum of 30 minutes. Brush off remaining
residues and rinse under running water
(fig. F 1–5).
Re-inserting the steam regulator:
When re-inserting the steam regulator, make
sure the steam regulator base still points on
setting «•» (anticalc system) (fig. F 6). When
firmly pushing down the steam regulator, it
turns back to
Notice: The iron must never be used without
steam regulator.
(fig. F 7) where it catches.
Trouble-shooting guide
Problem Remedy
Drops coming out of
the steam vents
Less steam develops
or no steam at all
Calcium particles
coming through
the steam vents
Subject to change without notice.
Please do not dispose of the product in the
household waste at the end of its useful
life. Disposal can take place at a Braun
Service Centre or at appropriate collection
points provided in your country.
.
Turn the steam regulator
anti-clockwise to reduce
the steam or turn it off.
Take longer intervals
when pressing the steam
shot button.
Select a higher temperature setting.
Check water level. Clean
the anticalc valve.
Decalcify the steam
chamber.
G Decalcifying / anticalc system
In order to clean the steam chamber from
residues, decalcify it as shown in picture
section G 1–11.
Caution: Hot water and steam will come out
from the sole plate when the steam regulator is
turned clockwise beyond
Wait for the sole plate to cool down, then clean
it as described above.
Then refill the tank with water, heat up the iron
and press the steam shot button four times to
rinse the iron before ironing (fig. G 12–14).
Do not use commercial decalcifiers, they may
damage the iron.
.
5
 Loading...